HOLIDAY DONATION DRIVE - SUPPORT MSW - DO YOUR PART TO KEEP THIS GREAT FORUM GOING! (89 donations so far out of 49,000 members - C'mon guys!)
×

GTM
-
Posts
249 -
Joined
Content Type
Profiles
Forums
Gallery
Events
Everything posted by GTM
-
 Yes !! That's the spirit !!! but i suppose you will finish the Berlin first ?
 -
Hej Ferit, According to wikipedia the WvH was 40 meters in length http://de.wikipedia.org/wiki/Wapen_von_Hamburg_(1669) When taking this in mind and look at Corels length of the model (1,1 meter or 43” ) I think the scale is not that dramatically far off .. It is app: 1:36 ..
-
Hej Ferit, An great update !! Nice to see you are back on track I find it also interesting to see the tools you are using ..
-
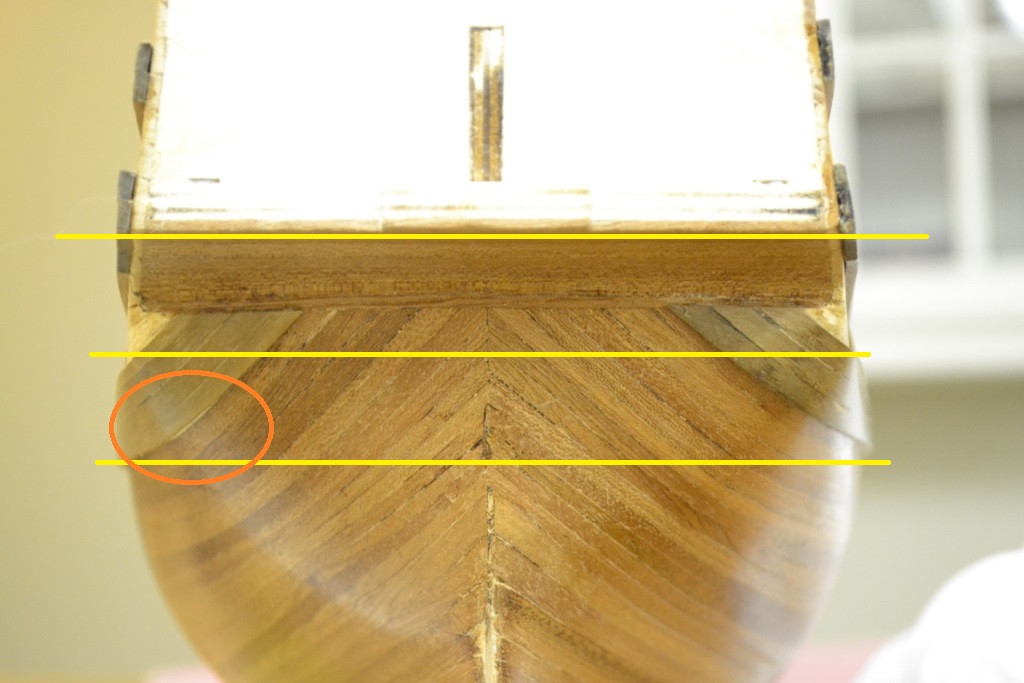
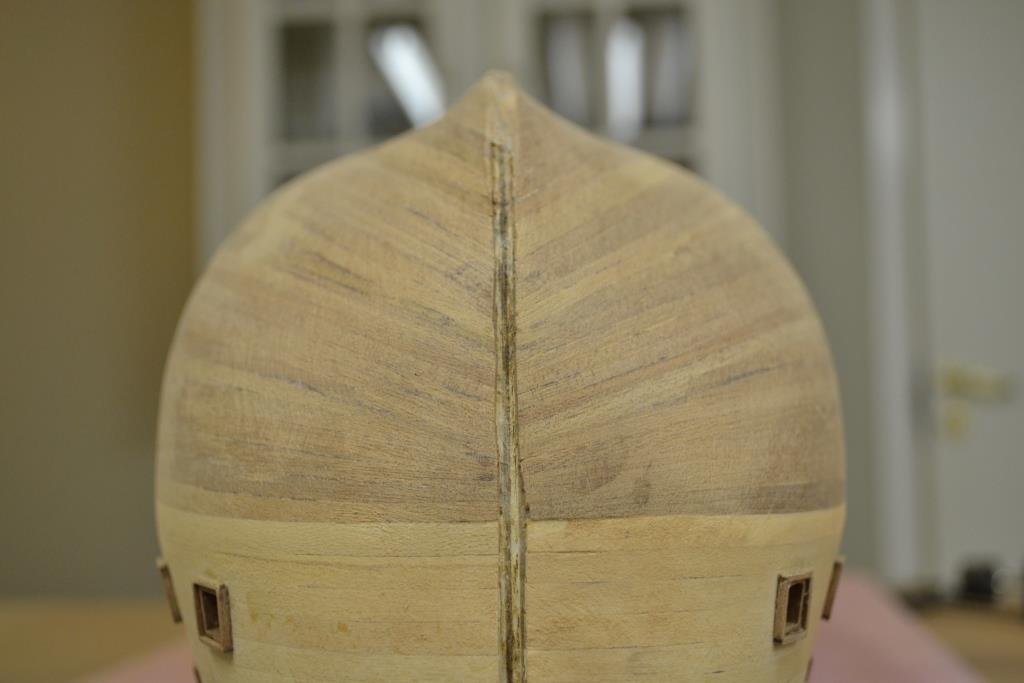
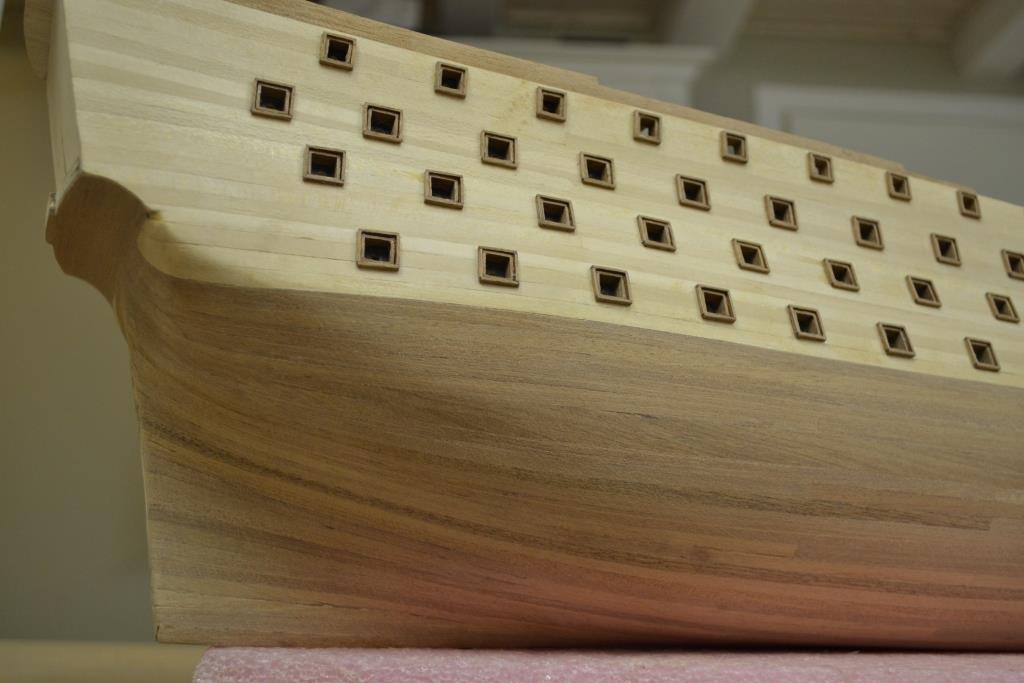
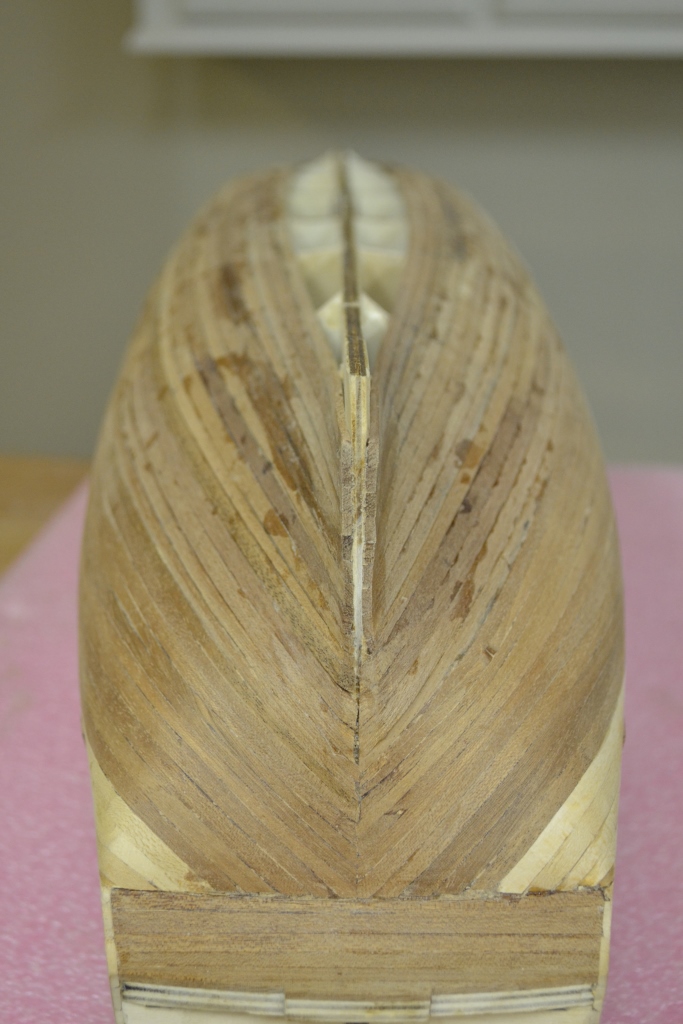
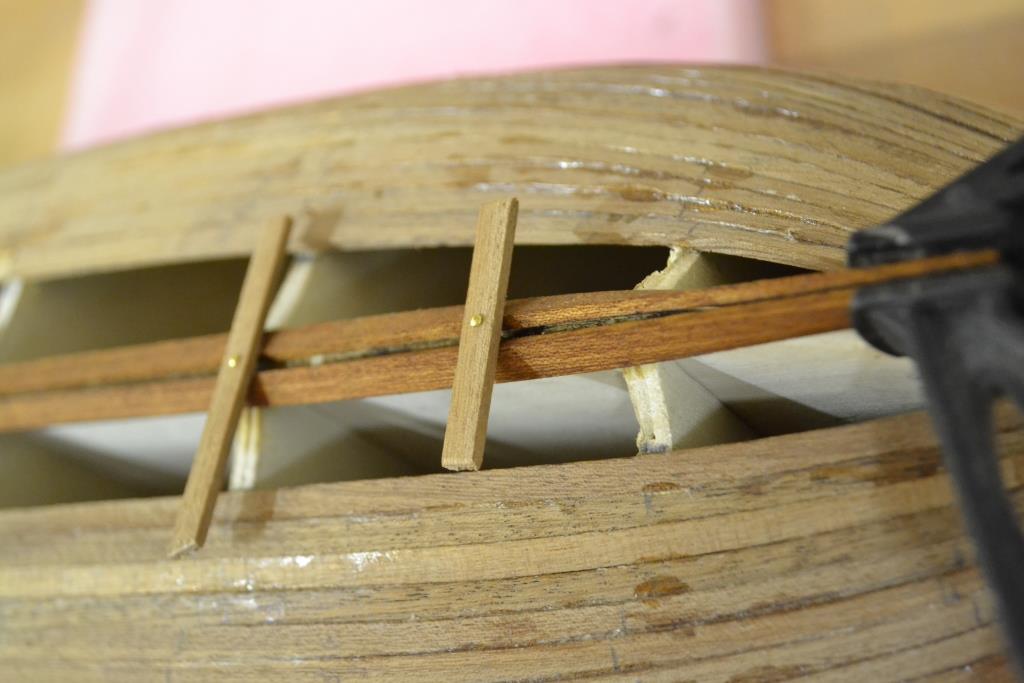
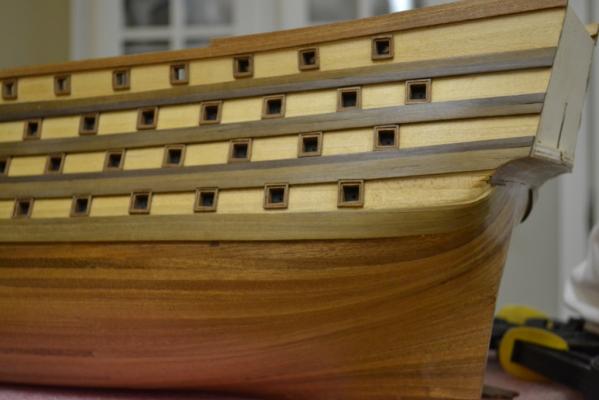
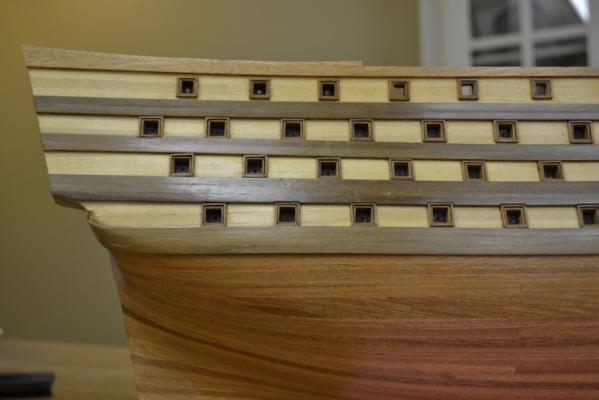
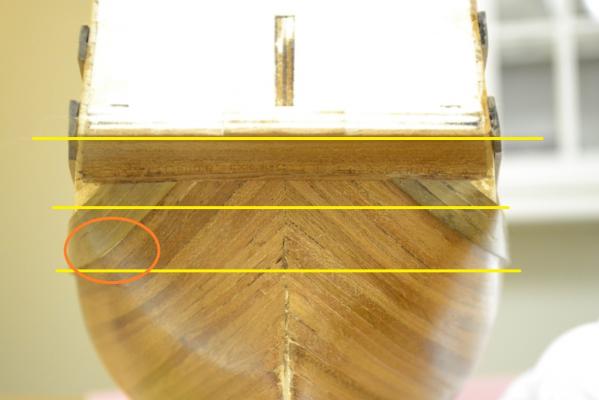
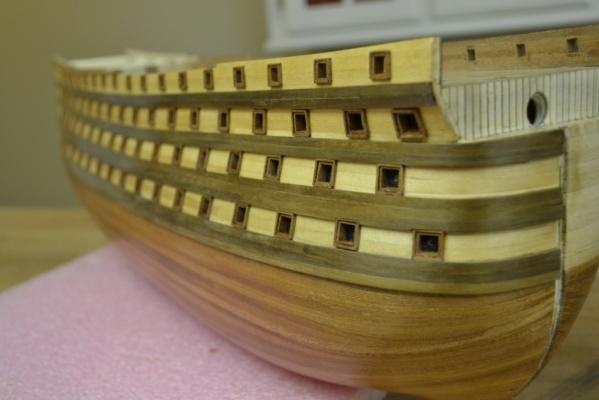
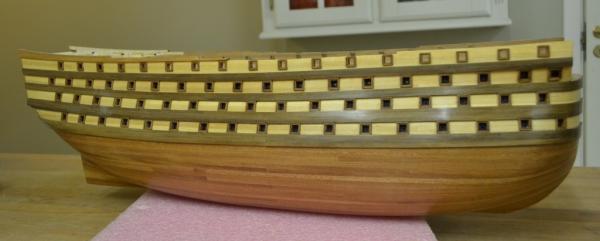
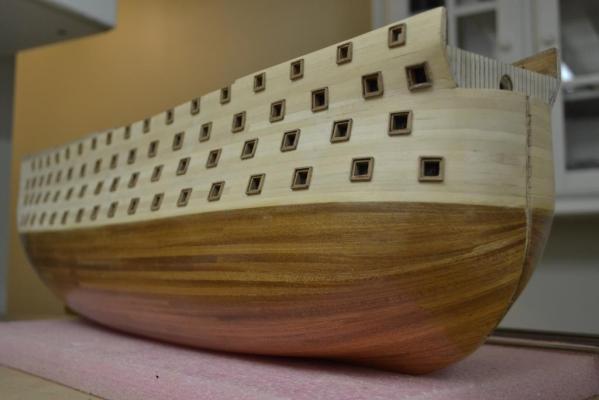
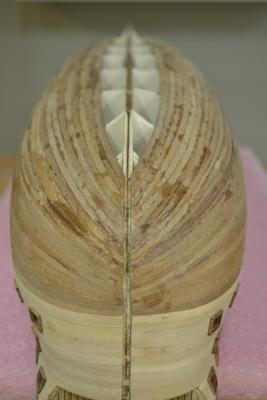
At last all the rubbing strakes/wales are in place and i can finally continue with the Keel I have to mention that somehow the gun ports on both sides are not lined up equally. As I found out earlier in the build: the first layer of plywood gun-port strips didn’t really seemed to fit that well and this is probably the end result of it. Having this in mind, ..learning by doing.. , next time I will spend more time on gluing and lining up the first layer and checking both sides before applying the second planking.. When looking from the stern and draw some straight (yellow) lines you can also see the next "not so easy to solve" problem.. Lifting the strakes on the port side will be no solution as the white planks already starts to show underneath the strakes (see orange circle)
-
Hej Mick, You are absolutely right and I was thinking the same. ..Now I have to adjust the diameter of the recoil rope to keep everything in the correct scale.. luckily this will be easier, quicker and cheaper to adjust than the block size
-
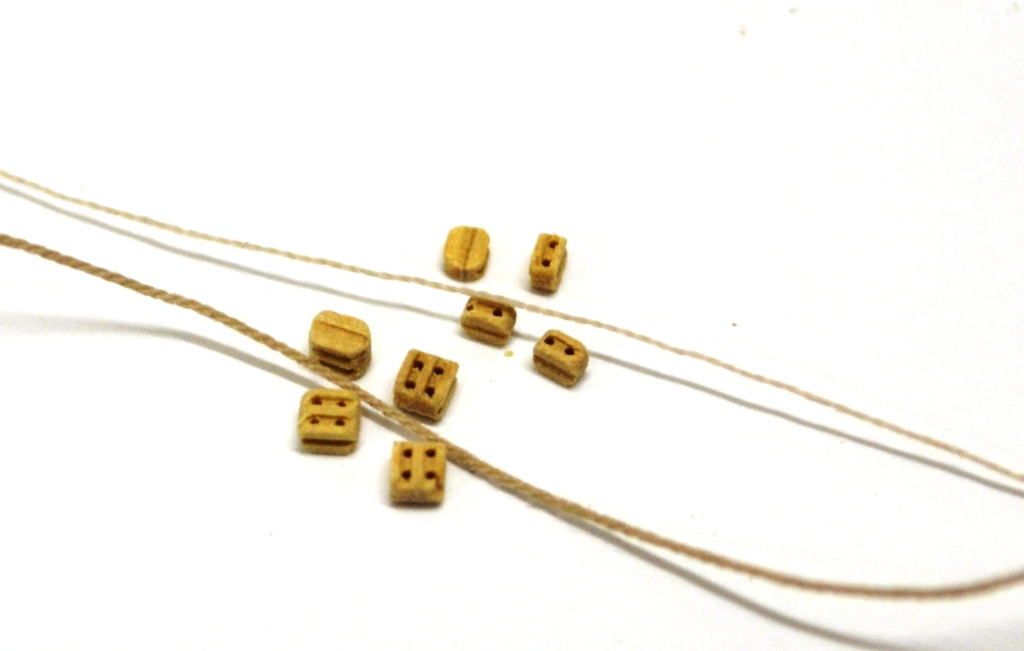
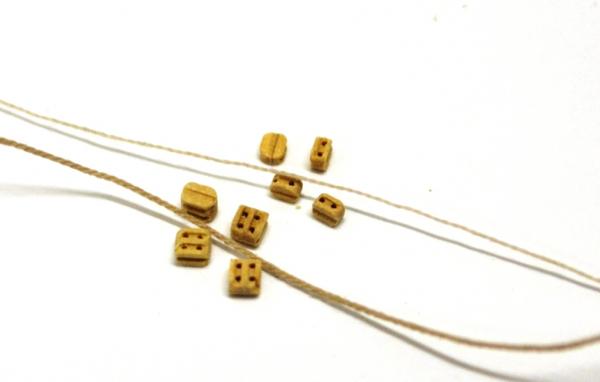
..Thanks Mick.., Yeah, at least I seem to have manufactured enough cannon ports .. The postman brought already my ordered blocks !! So I can show again some cannons pictures Very, very tiny blocks, and still with a lot of detail, this is not really possible for me to build with the current tools I have. If something bad can be said about these blocks, Then I would like to point out that the drilled holes are too small and besides this I need a new magnifier or a pair of glasses.. The thinnest rope I can manufacture (on my homebuild ropewalk) is with a 3x1 sewing thread and in these blocks I can barely use 1 single sewing thread which unfortunately not really looks like a rope in this scale. Otherwise I must admit the scale of the blocks are just perfect, when comparing it with the ones I made earlier .. I wonder how it will look when I have coiled up the thread..

-
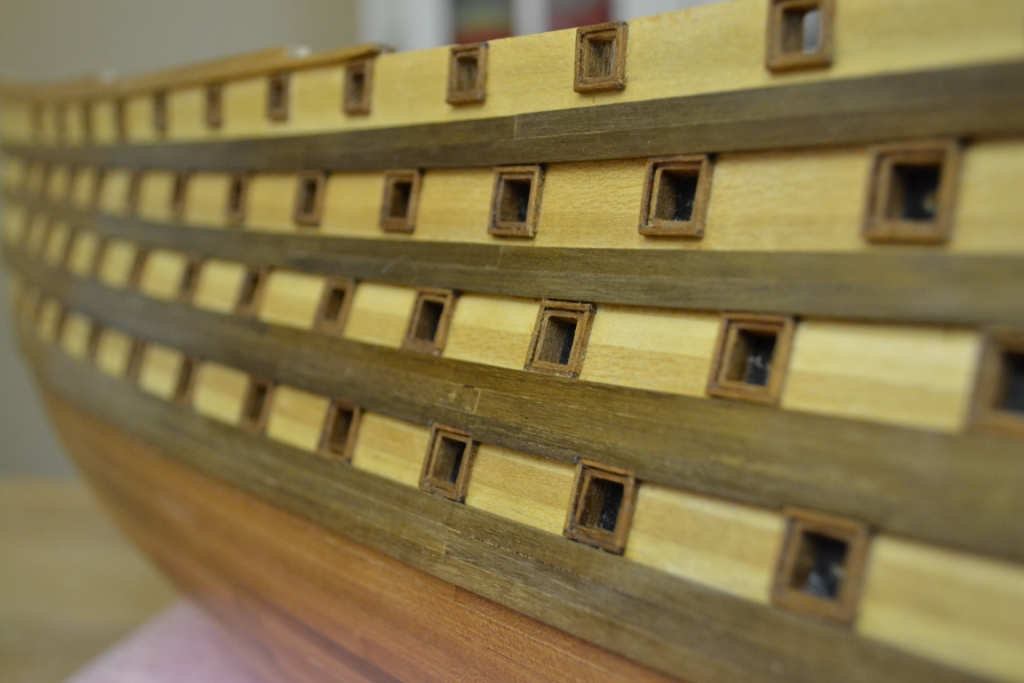
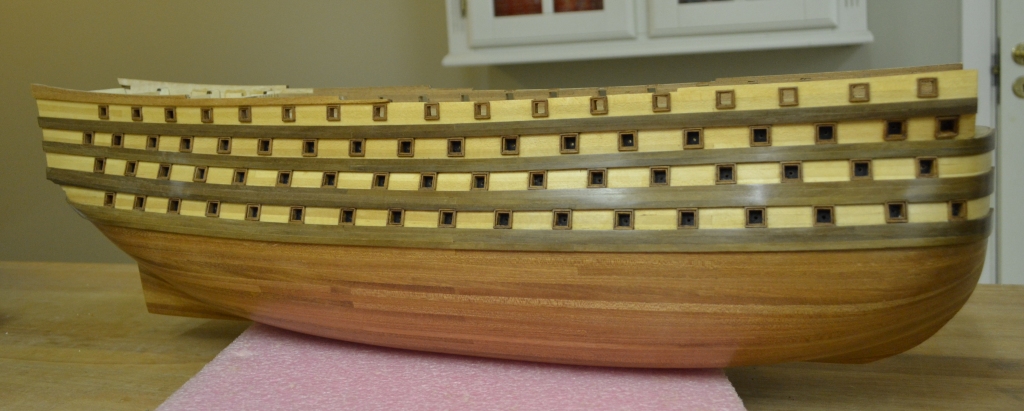
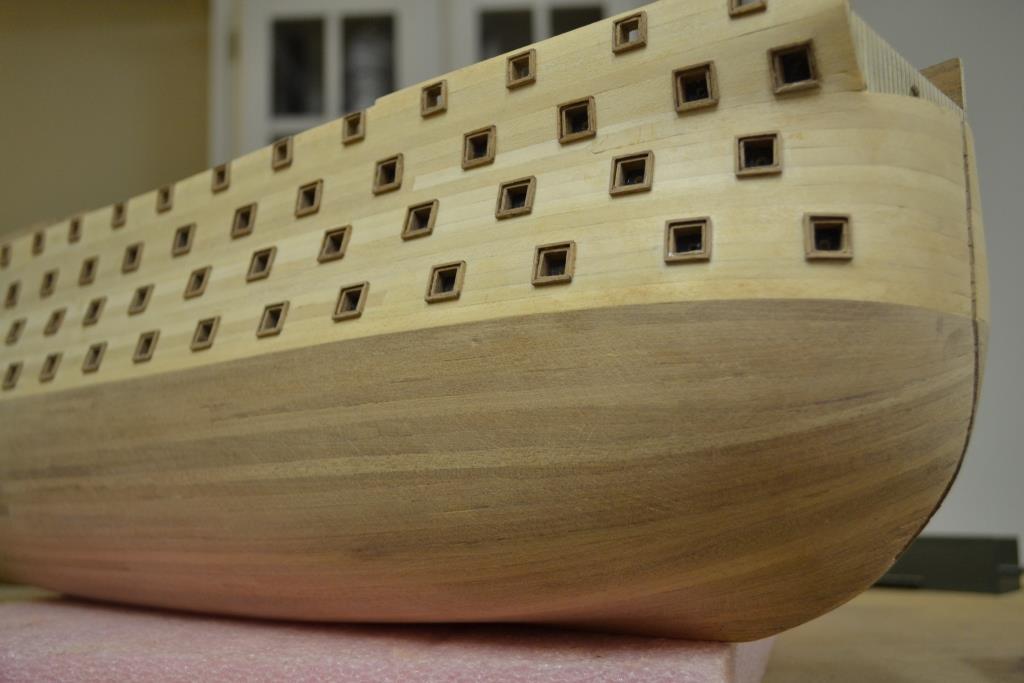
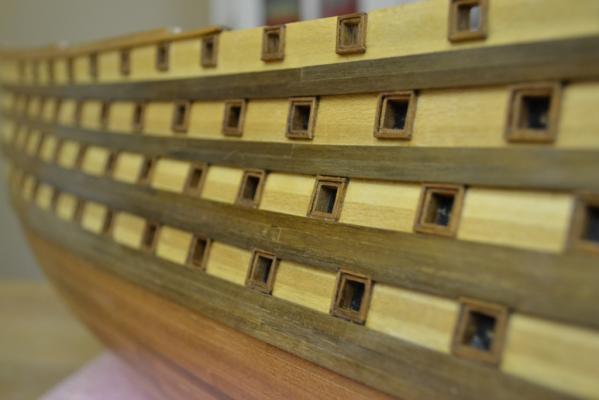
An minor update.., I placed the rubbing strakes/wales on one side of the hull and gave the whole side beeswax. .. There’s something funny.. I can only place 2 planks in between cannon deck 1 & 2 instead of 3 as shown on the drawings.. ..Maybe my cannon frames are not exactly sized as the supplied ones..
-
Thanks for the tip Randy.. I found the site you are referring to and the boxwood blocks on this website look very detailed & complete.. So I decided to give it a try and placed an order for the 2mm single & double sheave rigging blocks and will see if they can be used instead.
-
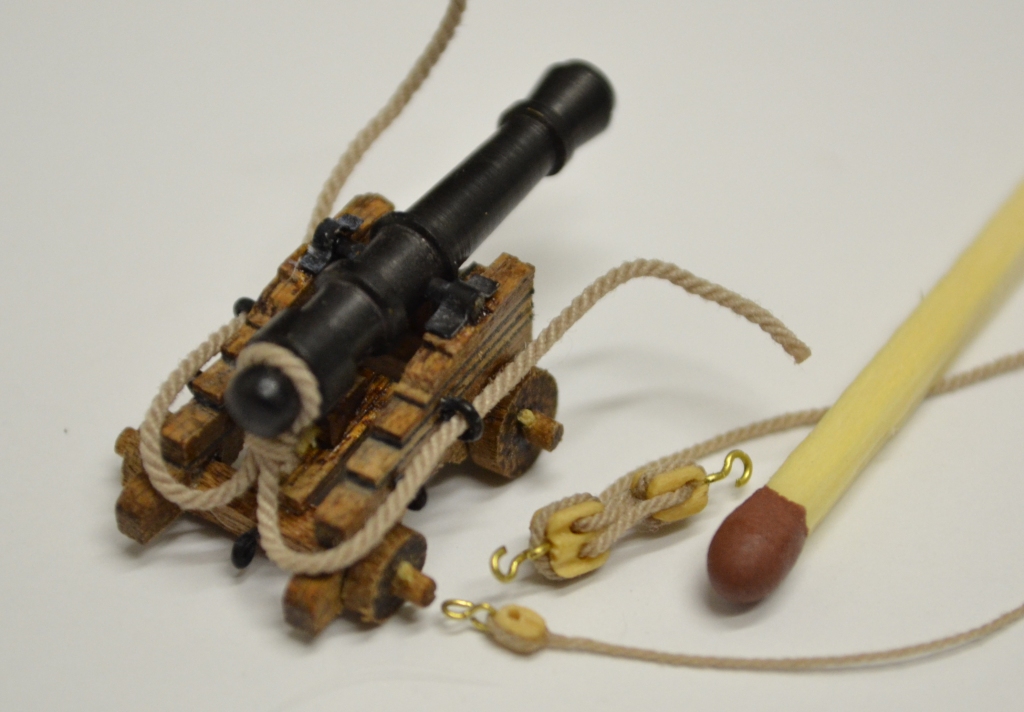
No need to apologize Ferit, In the mean time did some research on the web and found out that the size of the blocks needs to be in relation to the rope diameter. In my case I assume that a rope with 16 mm of diameter would be acceptable.. In 1:90 scale the rope would be app. 0,18 mm and according to a table I found on the web the block sizes should be app. 2,0 x 1,5 x 1,0 and 2,0 x 1,5 x 1,4 mm.. Just to show the correct scale of the blocks I managed to manufacture the "simple" 1 sheave version, but as you will see the blocks are not the only thing what needs to be in scale. Also the eyes & rope needs to be much smaller which makes things even more complicated and also more time consuming due to the needed quantity.. I still will consider but most likely I will settle with the “over-dimensioned” blocks .. Underneath the result including a match for comparison reason her you might also notice that the "hook & eye" i made is almost as big as the block it self..

-
I really appreciate your input Ferit. I will brainstorm a bit more about a possible production line to minimize the blocks before I decide.. Like you said it would be nice to have the correct size for the cannon rigging blocks As a reference I now measured the blocks included with the kit.. I’m not sure but to me all of them seem huge.. 1) 2,7 x 3,4 x 4,5 mm -> becomes 24,3 x 30,6 x 40,5 cm in real life 2) 2,0 x 3,3 x 4,5 mm -> becomes 18,0 x 29,7 x 40,5 cm in real life 3) 2,3 x 3,6 x 5,5 mm -> becomes 20,7 x 32,4 x 49,5 cm in real life Right now I start to dislike the used scale of the project..
-
Thank you all for your quick input & compliments Thanks Ferit for your comment, I’m very aware of what you are saying.. I started with creating blocks with a size of 1,3x1x1 and 1,3x1,5x1 mm which I thought was acceptable for the scale But my main problem with this size is the minimum drill size (Ø0.6mm) I can handle and the needed overall accuracy for “mass produce” these block-sizes. So either I need better tools, find some pre-produced “mini blocks” on the web (if existing) or just have to settle with my “over-dimensioned block –sizes”… I will see what i will choose when I’m actually start to install & rig the cannons.. In the meantime i will continue with the hull..
-
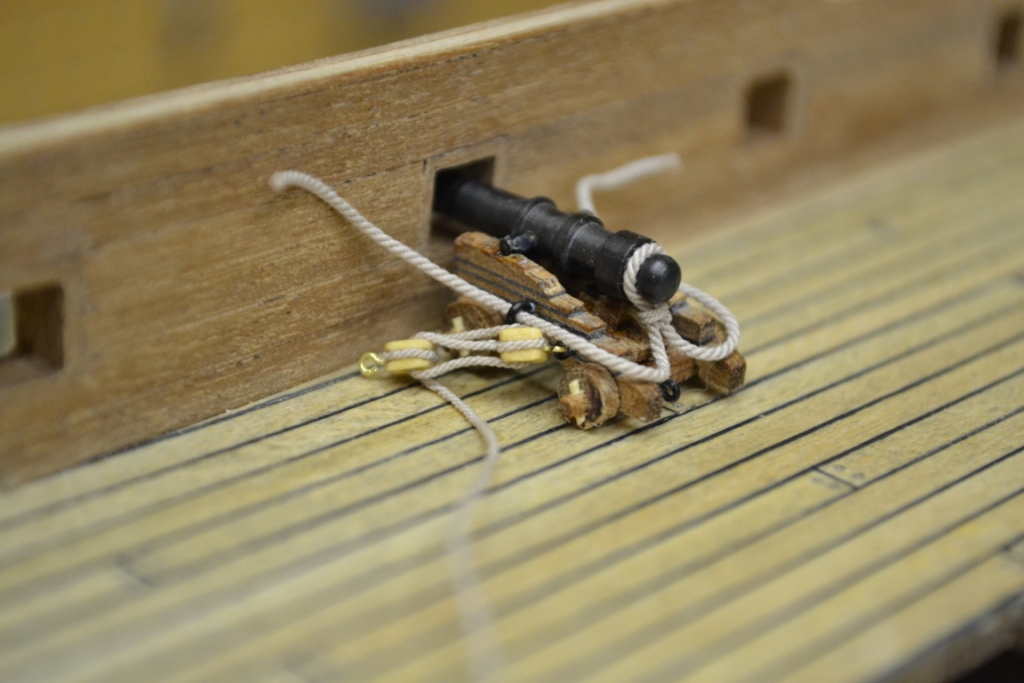
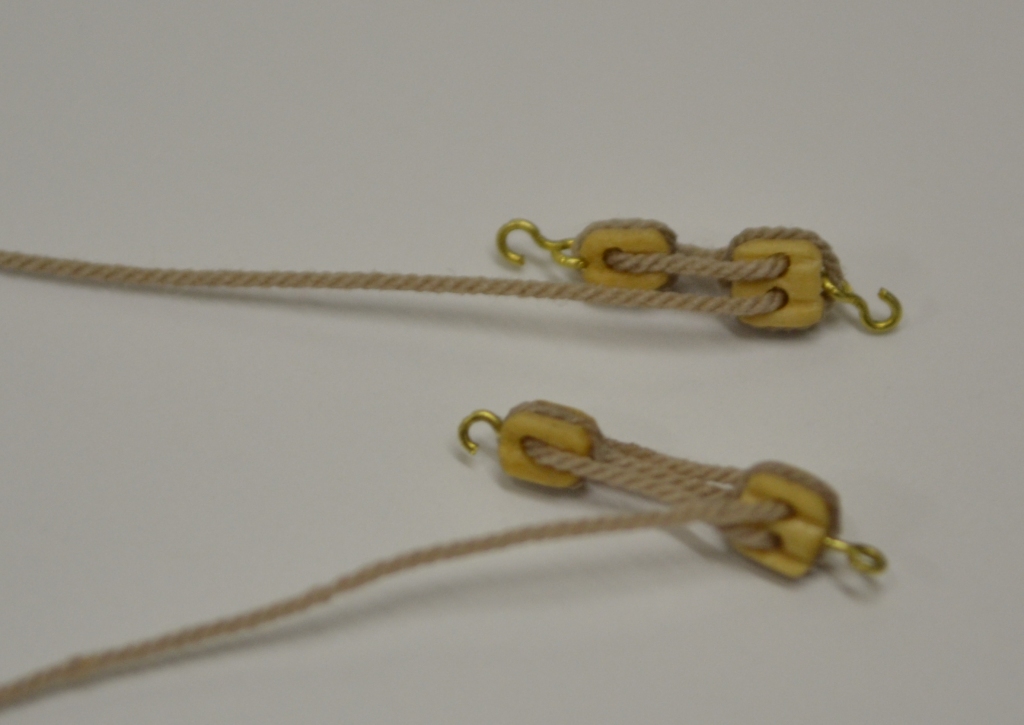
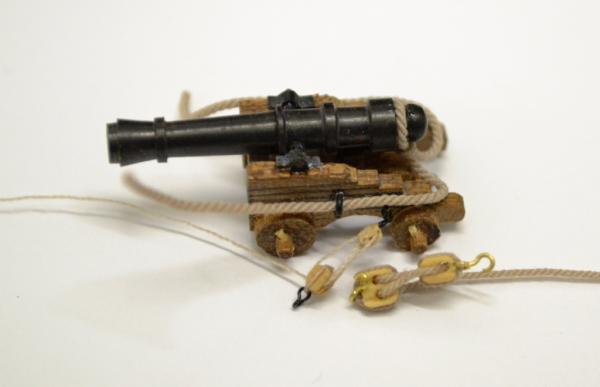
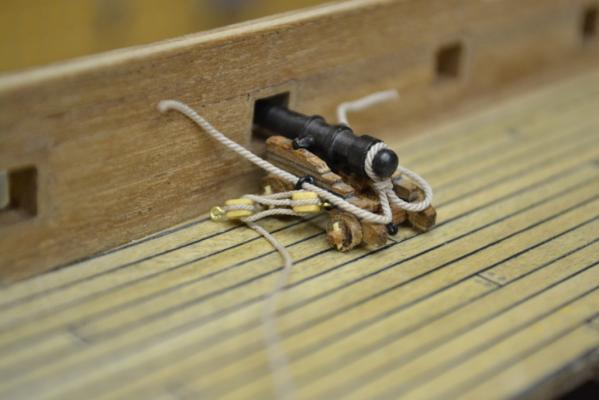
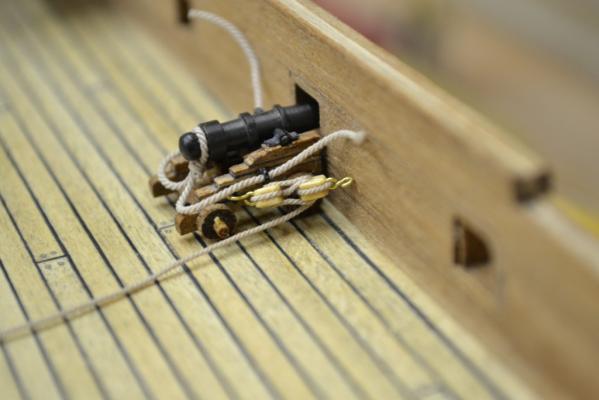
Thank you all for the compliments, they are very motivating for me. So.., "back again" after some relaxing weeks on sunny beaches Before I continue with the hull, I decided to find out how to rig the cannons. The blocks needed for the cannon rigging are not provided by the kit so after a few tries I ended up with block-sizes of 2x2x3 and 2x3x3 mm. ..these are the smallest I can manufacture without too much trouble.. The next challenge was to shape/create the “hooks” (I tried 2 versions) I really like the hooks in the top of the picture. But the “eye” & “hook” concept is a long solution with the result that the blocks are very close to each other. So to avoid this I made an “only 1 hook” version and glued these into the top of the blocks. Underneath some pictures where both type of rigging is attached to a canon. In my opinion the blocks are to big for this scale but I'm afraid I have to settle with them …

-
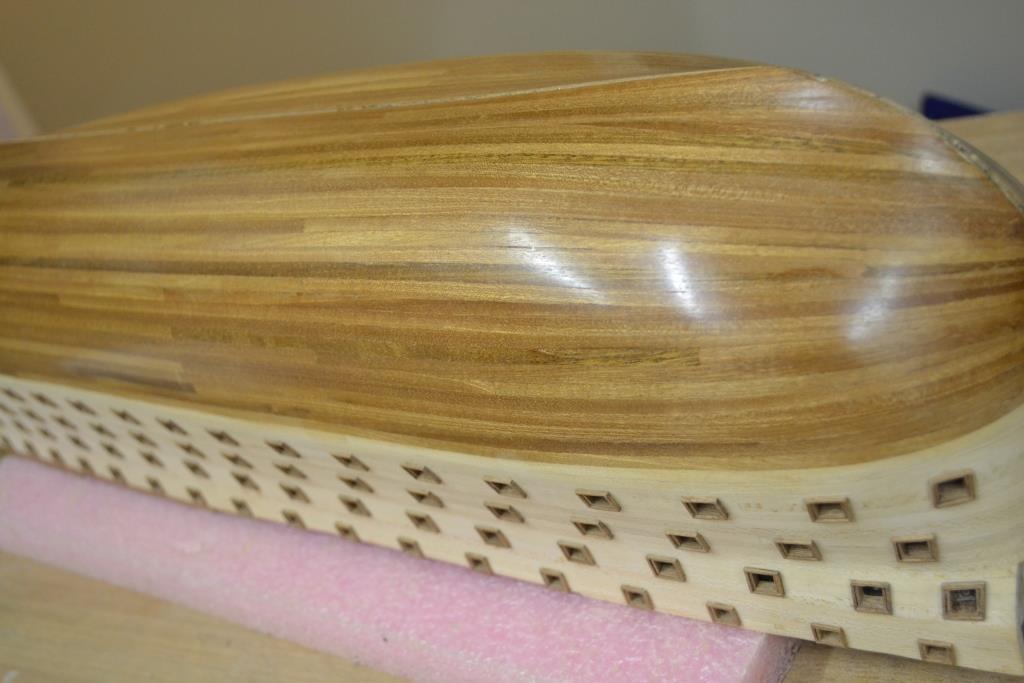
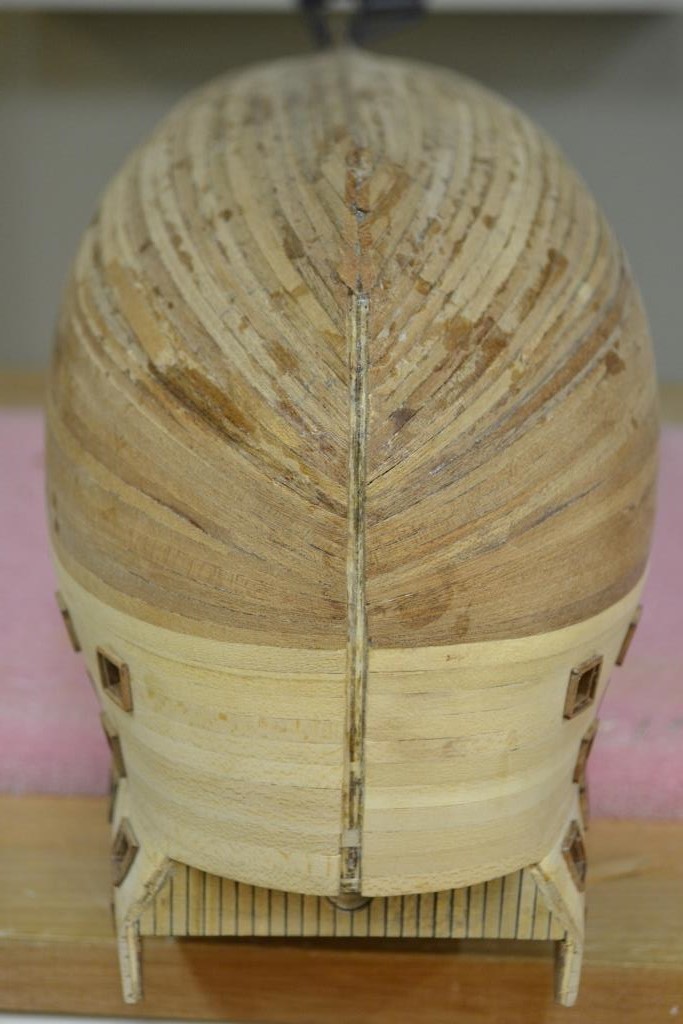
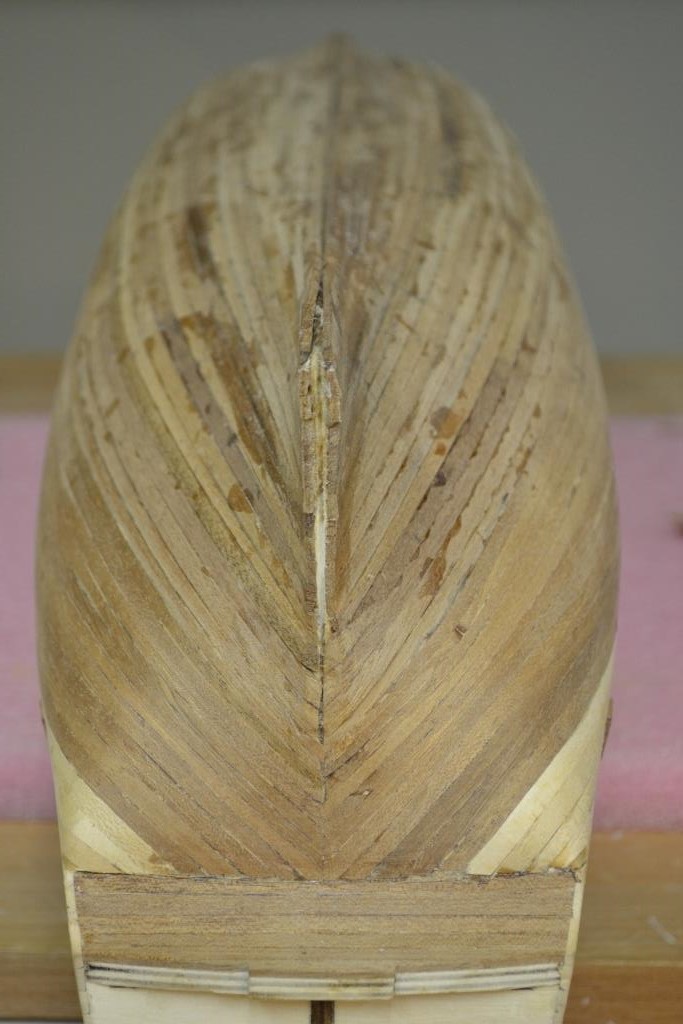
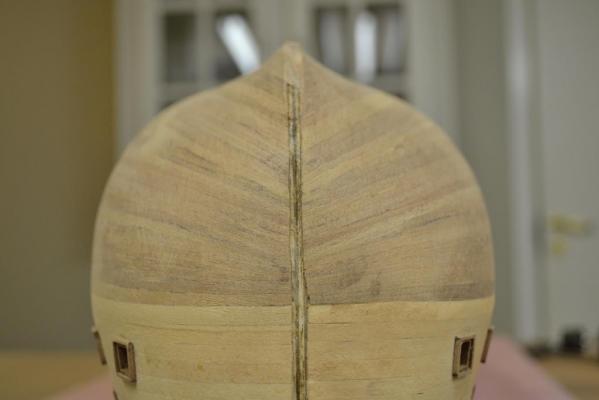
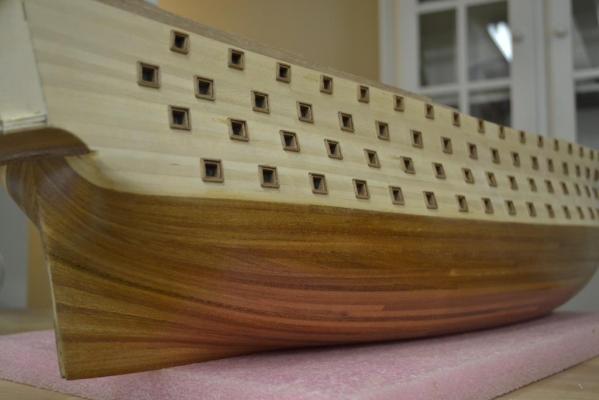
Progress !! I started roughly shaping the hull with grid 60 After this I started using grid 100, grid 150, grid 240 and finished the hull with grid 400. On the pictures down below I gave ½ the hull bees wax (color “blonde”) and on these you will notice immediately the warm glow of Sapelli wood taking over the picture So this is the current state. I must admit that it is not perfect and i have learned during the whole progress, but in general i'm very pleased with the result..


-
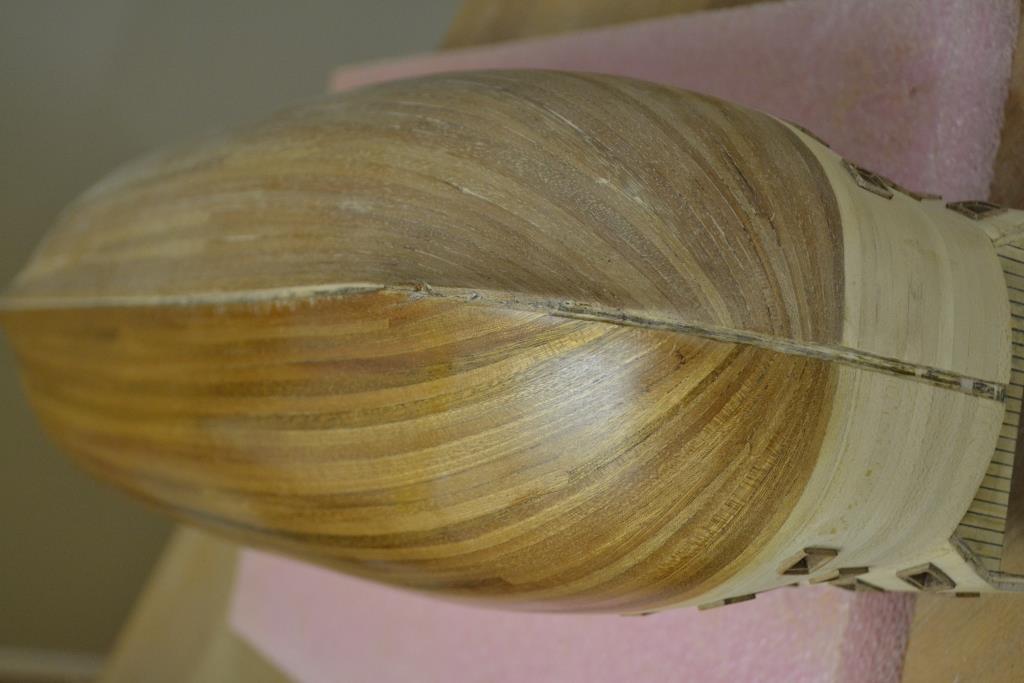
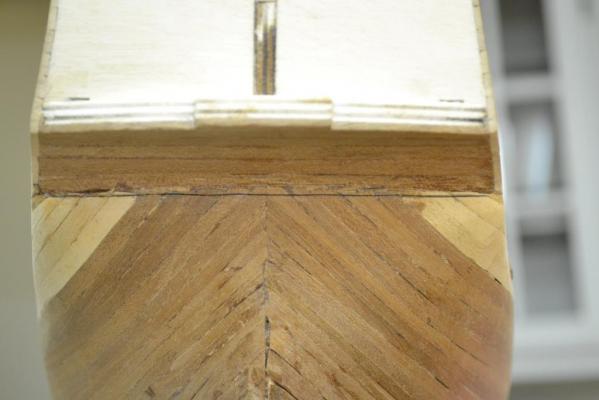
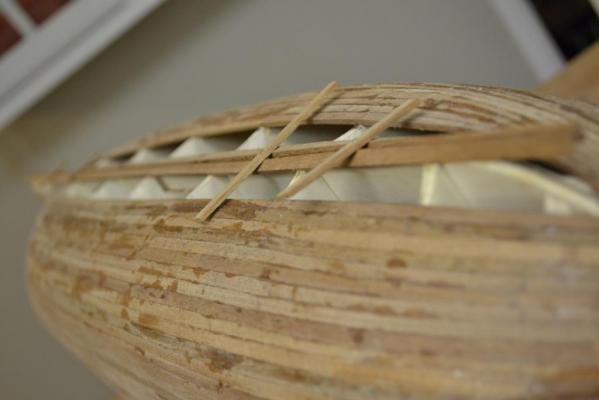
Thank you very much Sjors, It is nice having closed the hull, at least I can start to concentrate a bit more on other parts of the build.. Before sanding the hull, I decided to improve the wide tolerances I created on the stern and hull planking. I started with cutting a (straight) line in the planking at the stern And removed the wood carefully so I could insert a new strip of sapelli After sanding, visually less tolerances


-
Hej Michael, Fantastic, Great work, just everything about your build looks great !!. It is a real inspiration source.. It must be a tough in a way to build a ship where the original is still around for comparison
-
Thank you Ferit for your compliment. I’m honored, especially when it comes from an non compromise scratch build artist like yourself.
-
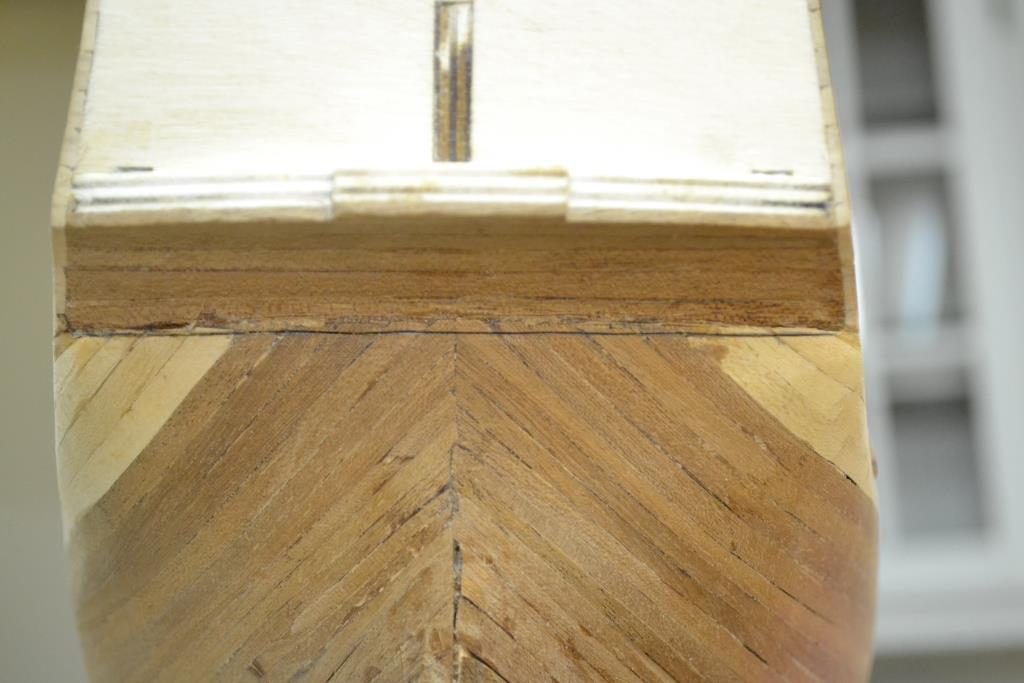
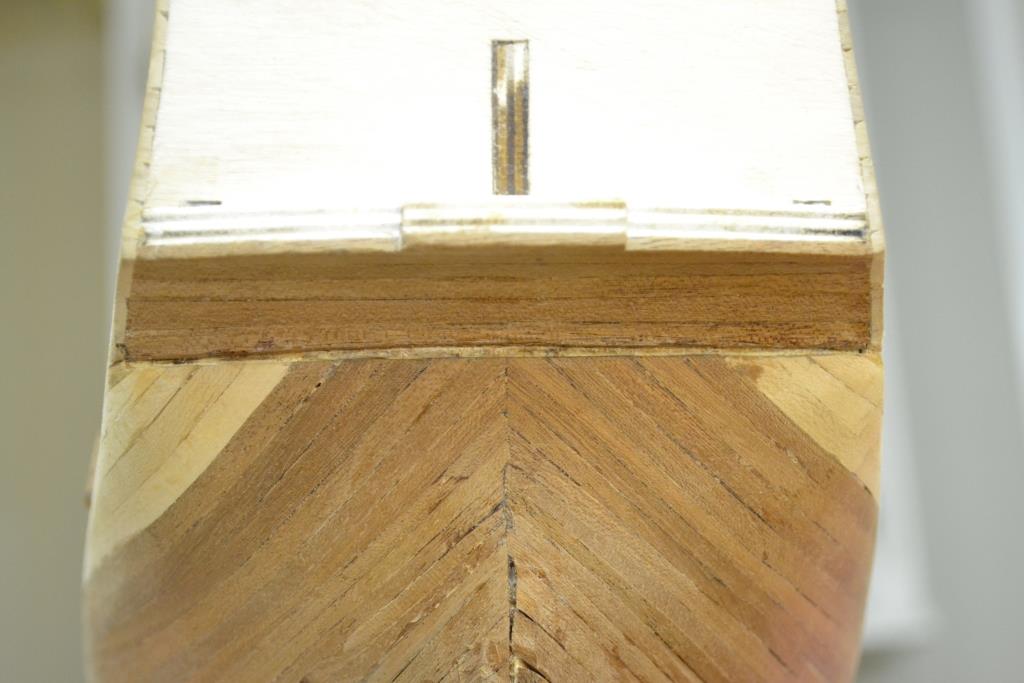
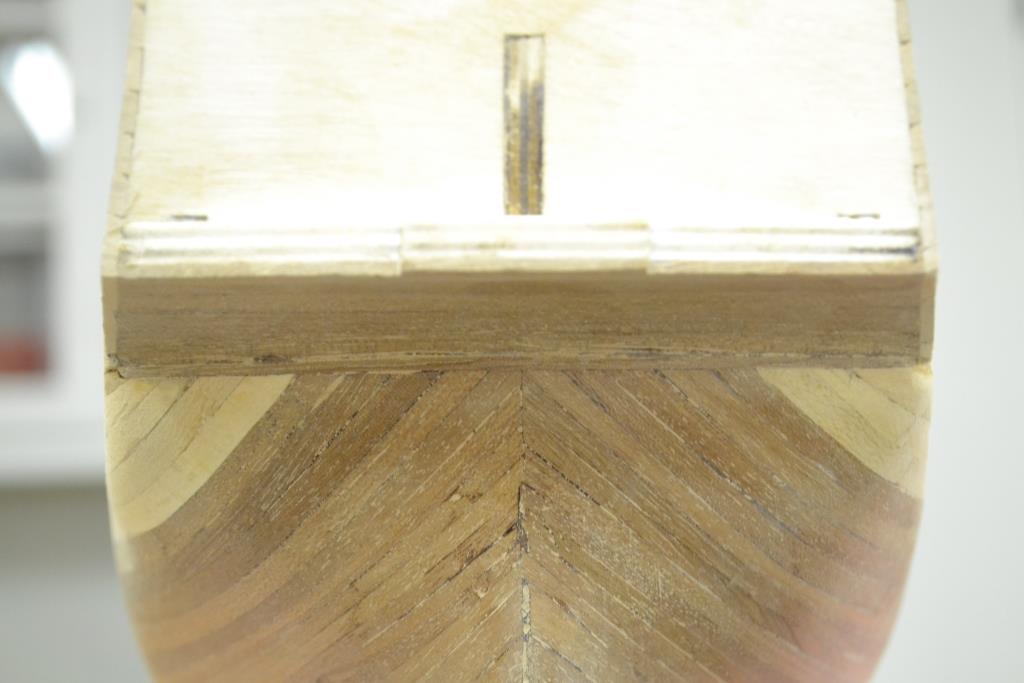
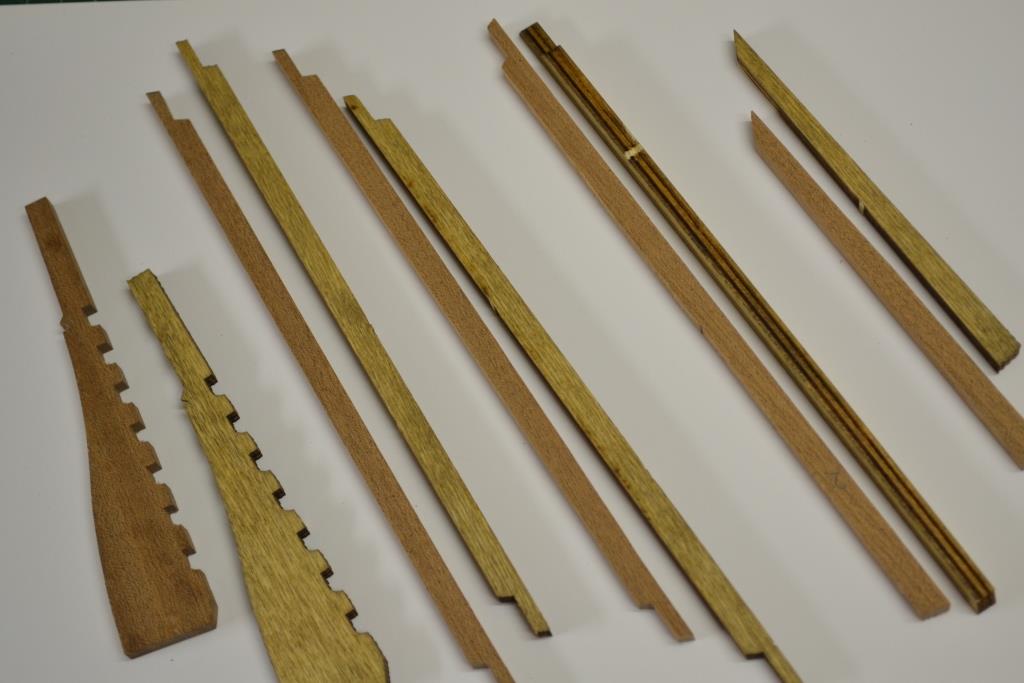
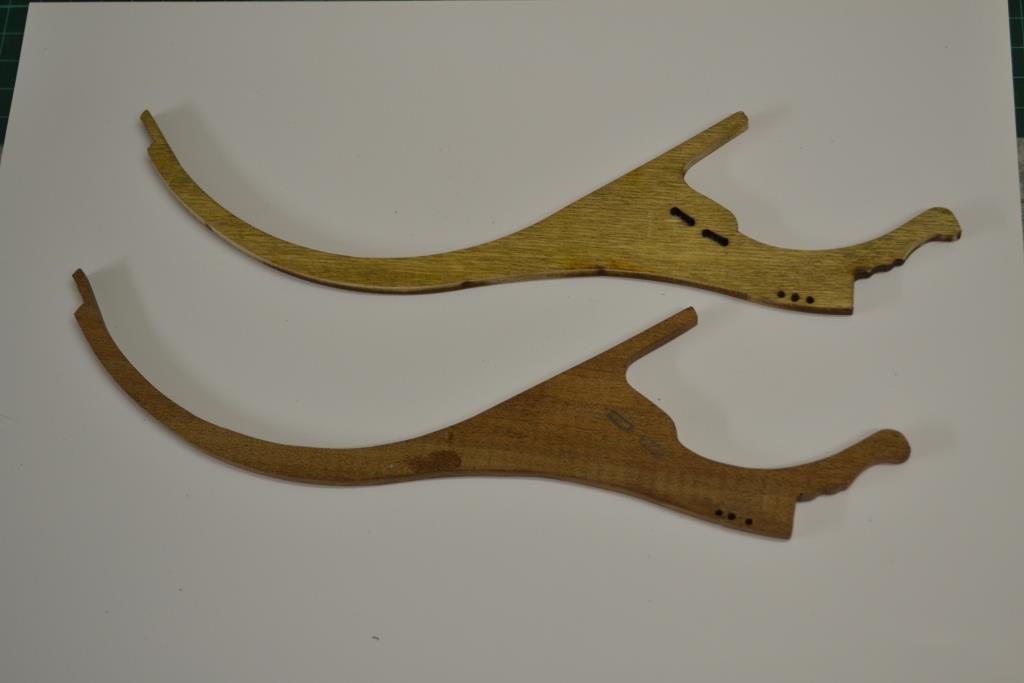
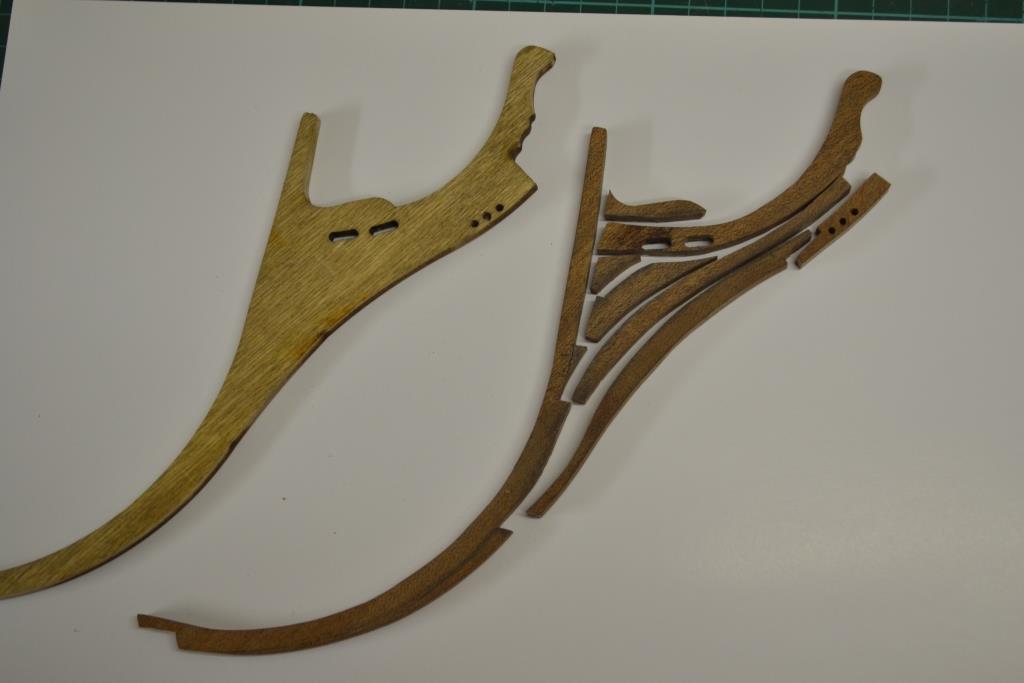
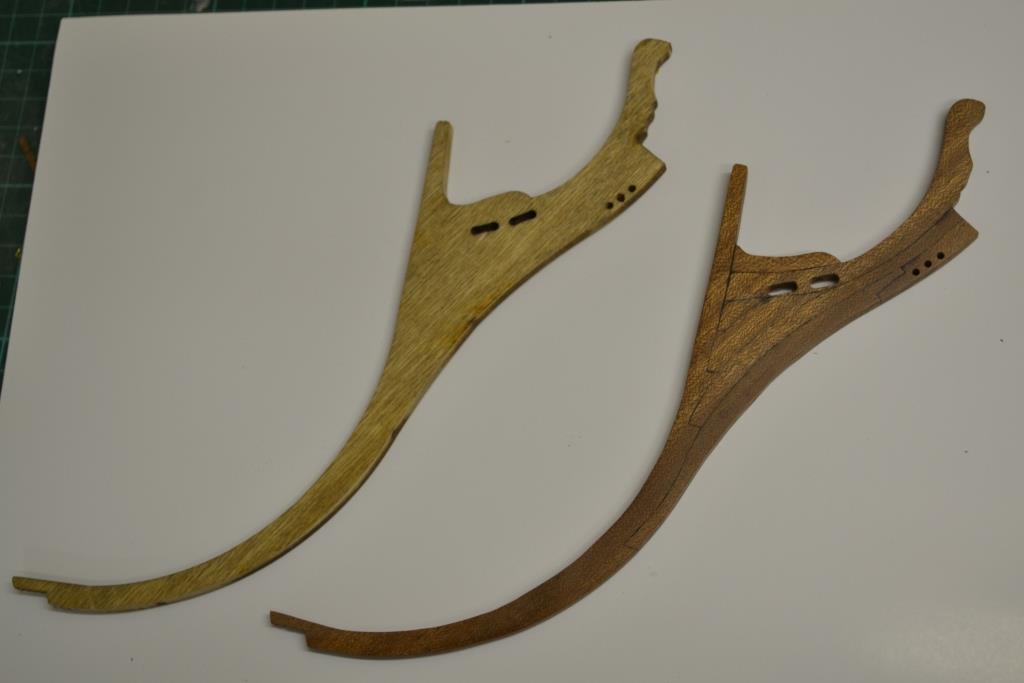
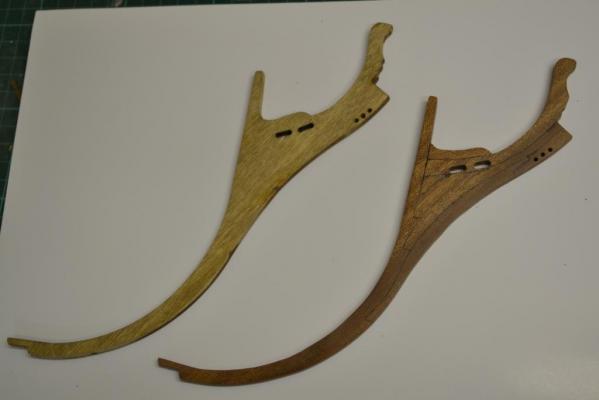
Thanks Mick, I’m looking forward to that myself In the meantime I found out that the provided keel in the kit was cut in plywood and additionaly had an “funny” color. I think it is a shame to use it side by side with the sapelli covered hull and decided to scratch build them from a 5mm Mahogany sheet. After having cutout the bow section of the keel, I made an mistake during drilling of the holes . As you might notice the holes are not equally spaced.. Instead of starting all over again, I decided to be a bit creative and break-up the bow section in separate parts. After this I could easily replace the section with the wrongly cut holes Here's the end-result


-
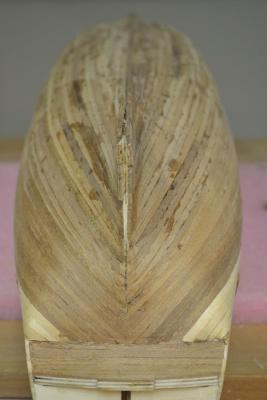
Guess what !! I’m finished with planking the hull.. So this will be the last update showing the planking progress. The only thing remaining is sanding it.. So I will probably also post pictures of the sanding progress. I closed the sections on the hull until app. 4 planks on each side where remaining After this i started with a reference plank on each side of the false keel and here's the result !! so far a perfectly closed hull


-
Hej Sjors, Please don’t even consider running away, ..you know.. the guns are not even loaded,, (yet) Hej Mick, I don’t paint the cannons (or any brass/copper parts I use ) What I use is some sort of an acid solution which I found on the internet locally in denmark . Unfortunately they don’t mention what exactly is in it, but here’s the link to the website & product .. So basically what i do is dropping the parts in this solution for a couple of hours and they will magically end up as “aged metal”..
-
It just looks great mick!! keep it going, .. even i consider threat next time .. As for the question of the day... can I convince you to use ..beeswax.. as the final touch ??
-
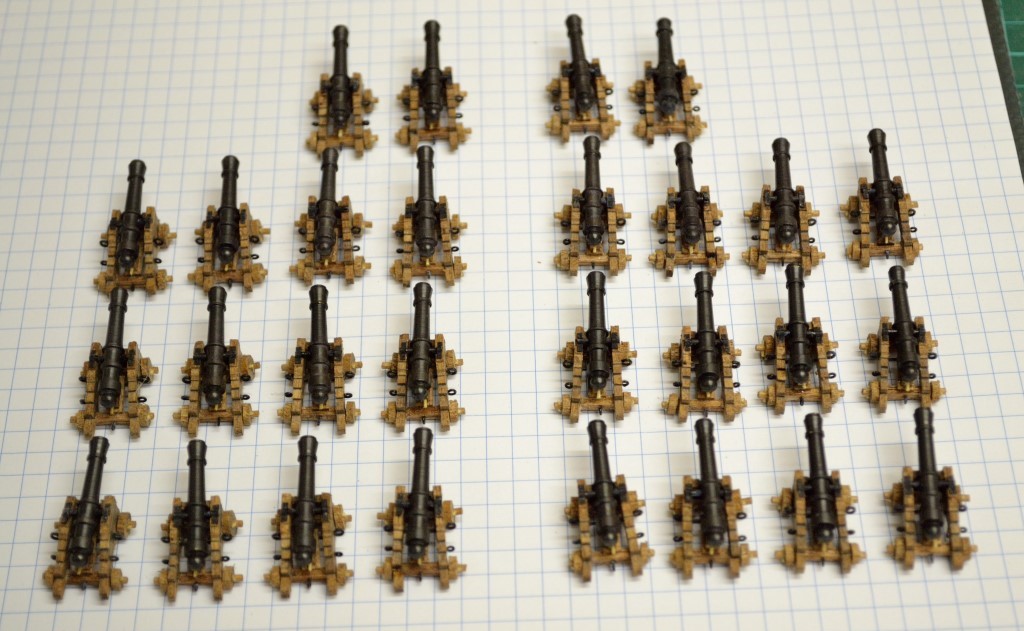
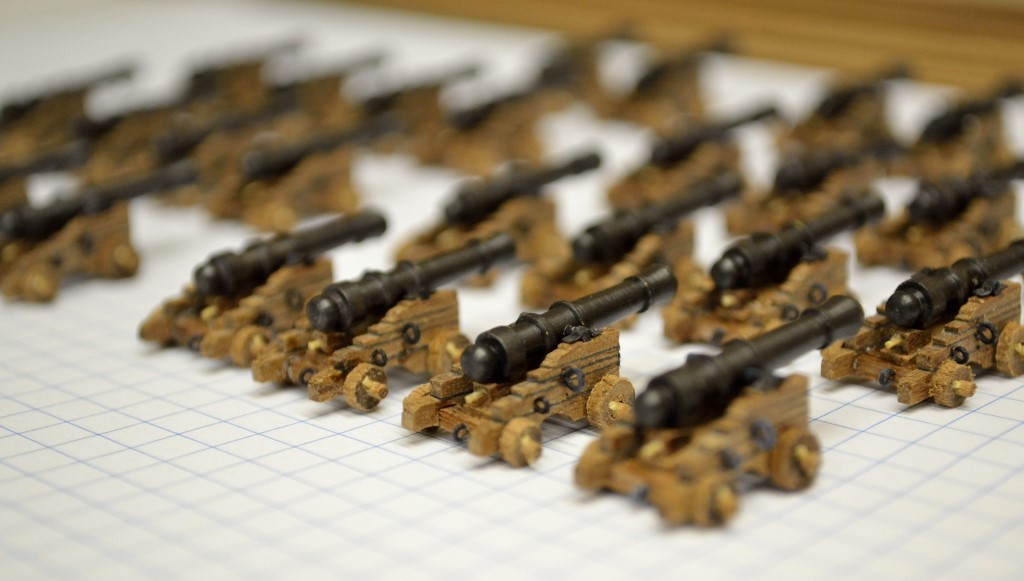
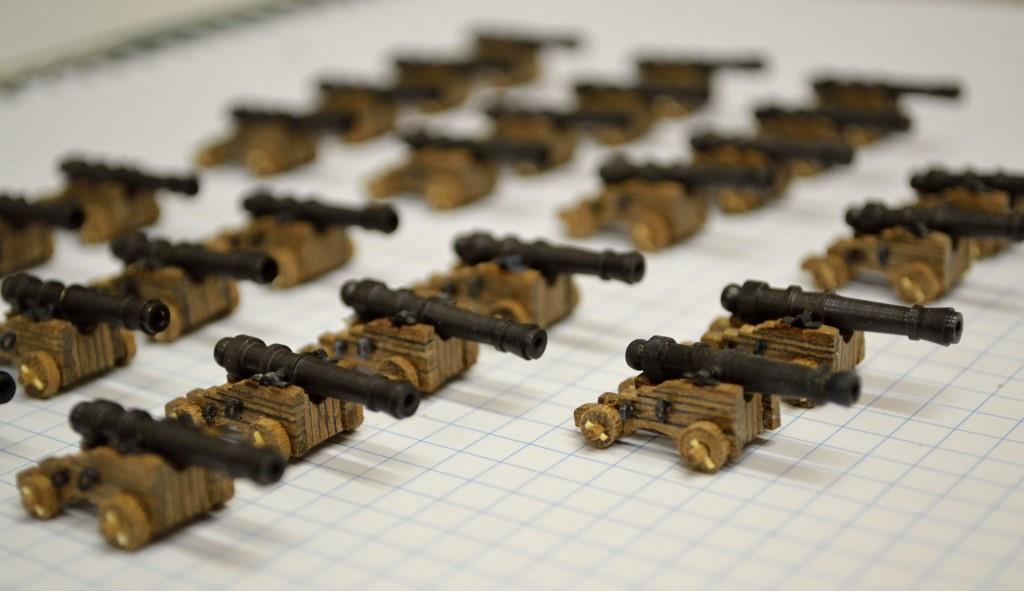
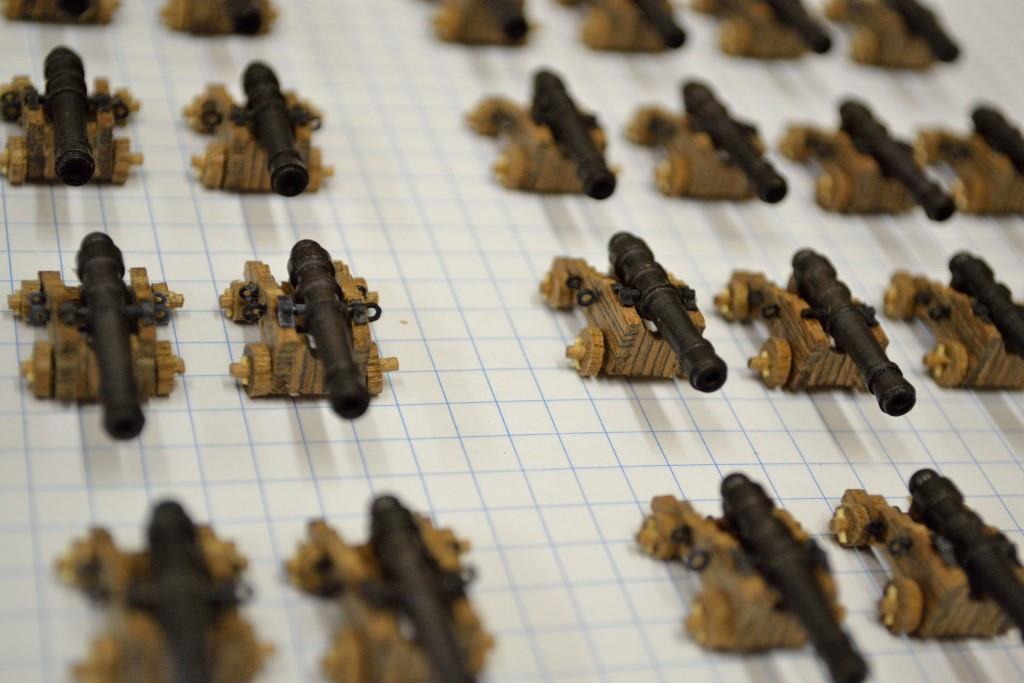
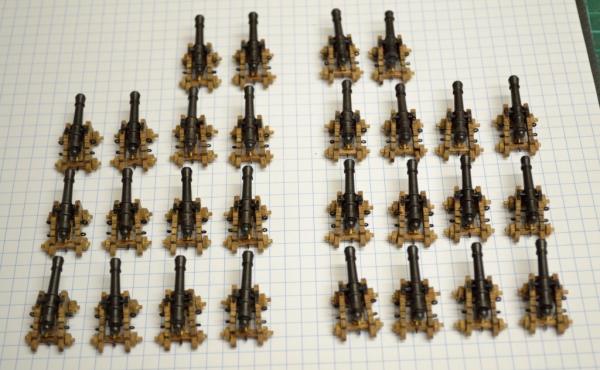
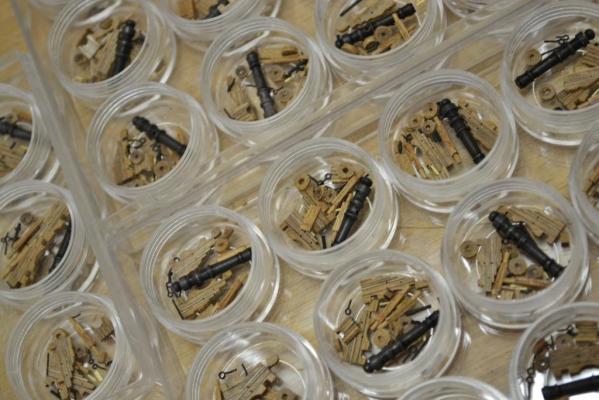
Thank you all for your kind words, It is really appreciated & is encouraging me in a way that i'm not longer try to settle with any compromise I know that this might seem like a small update, but it took me some time to produce all the 28 carriages. So here’s the pictures where all 28 are nicely lined up ..i can barely wait to put them in line on the ST..


-
Hej Mick, I know your ship is in a much bigger scale as mine, but as you might noticed I used “thin paper” on the Sanisima Trinidad for caulking, Maybe you can give it a try with “thick cardboard” or “glue” it on both sides of the planks instead ? It might look complex to use paper or cardboard but actually (maybe after a few tries) it will probably surprise you how easy it is.. And you can sand it down as much as you want afterwards
-
Hej MIck, Nice size & choice of ship, The kit seems very complete.. i'm looking forward to see and follow your progress. (Take your time .. )
-
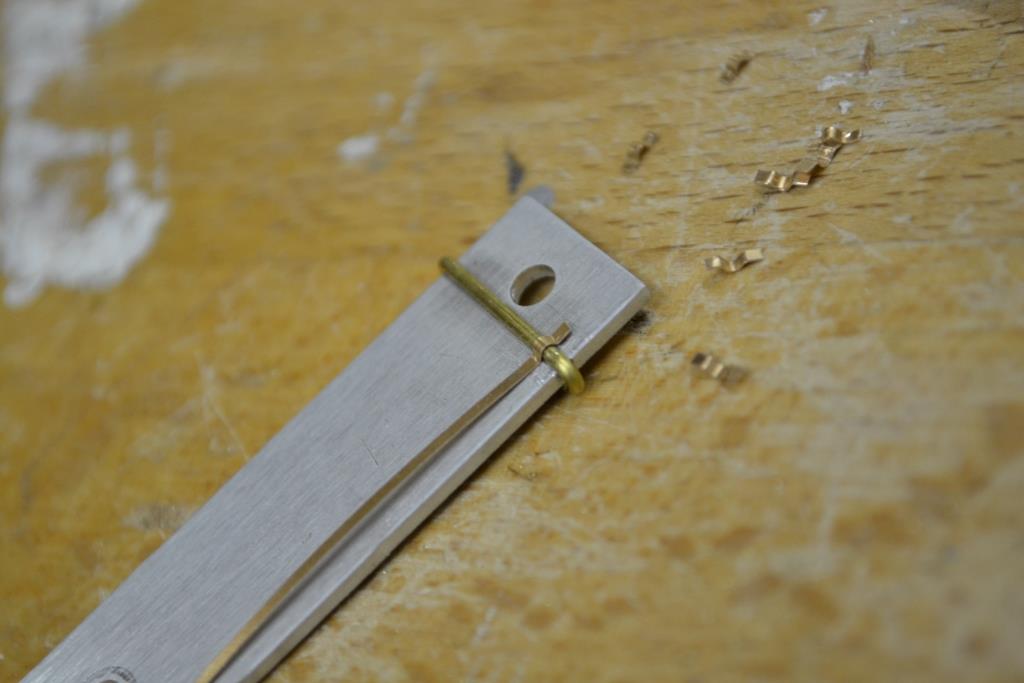
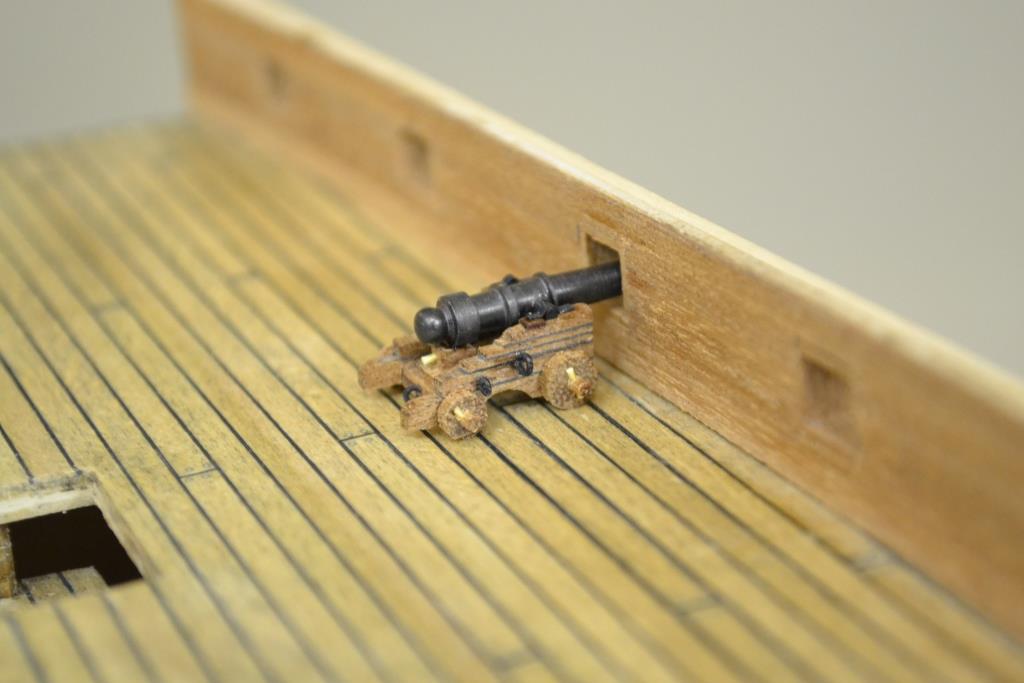
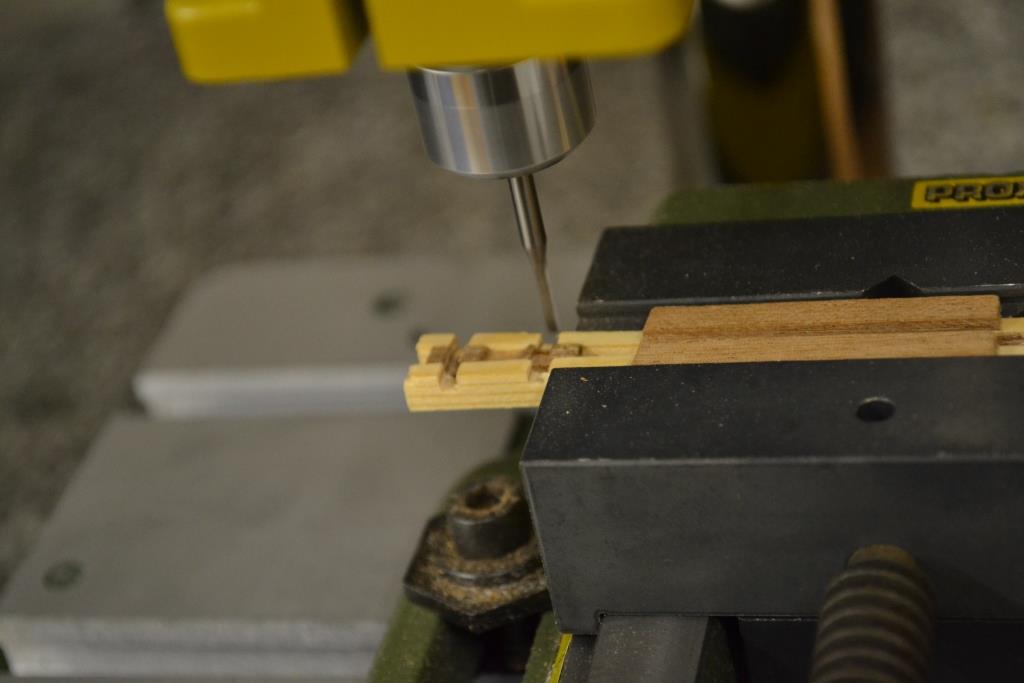
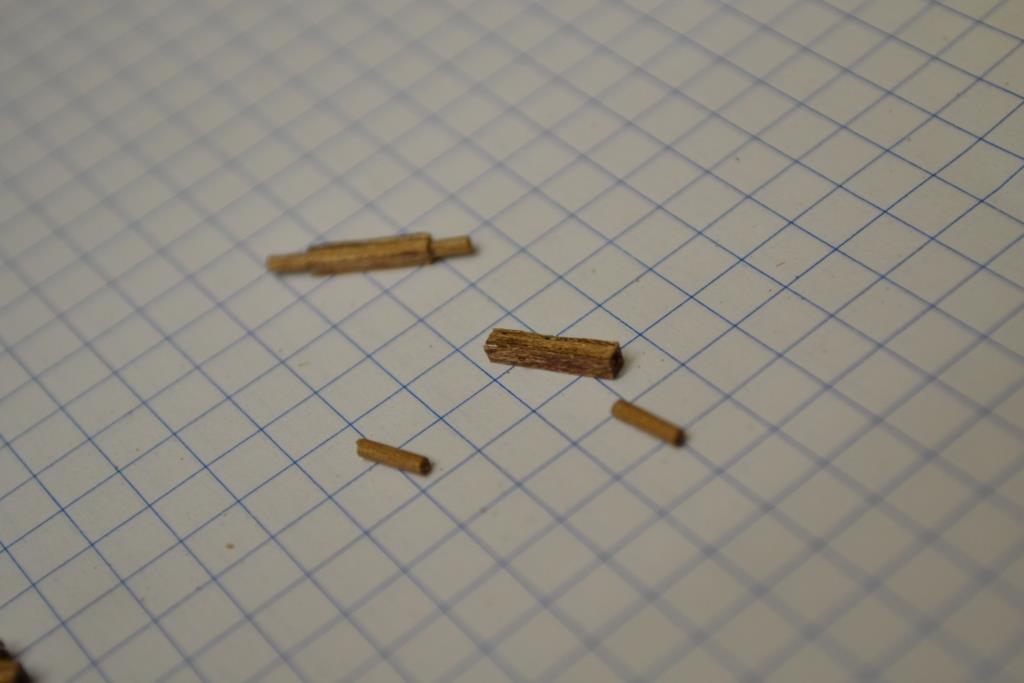
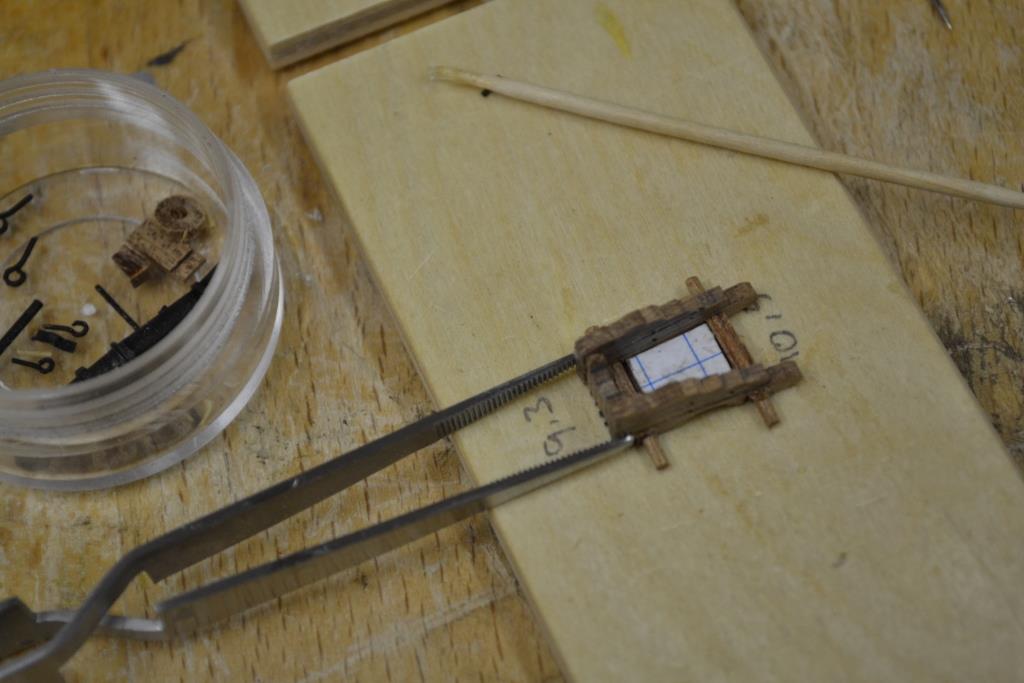
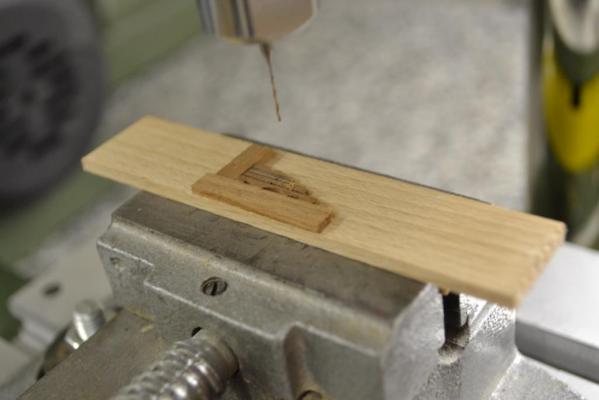
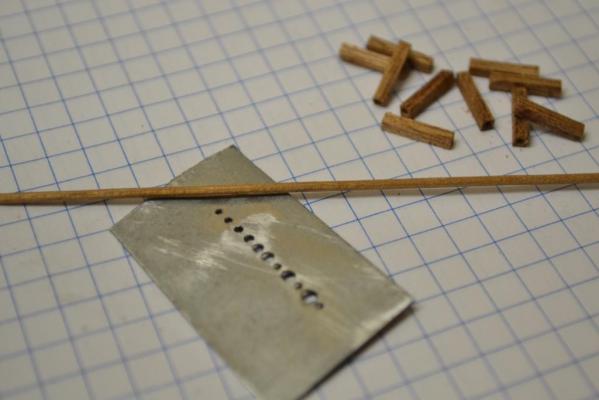
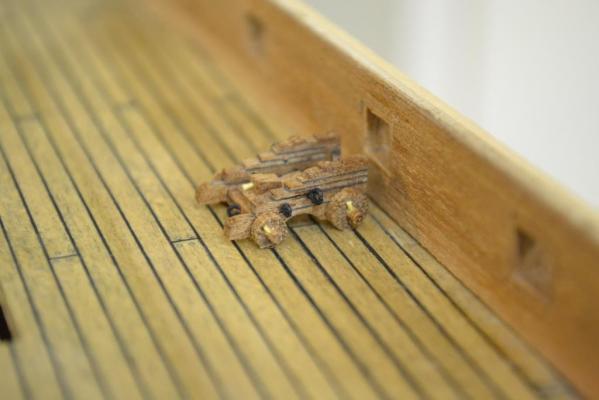
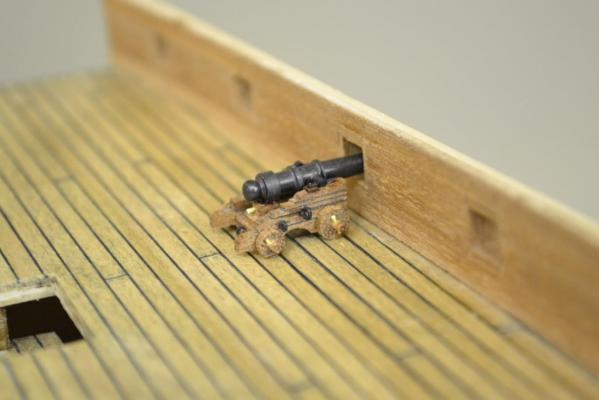
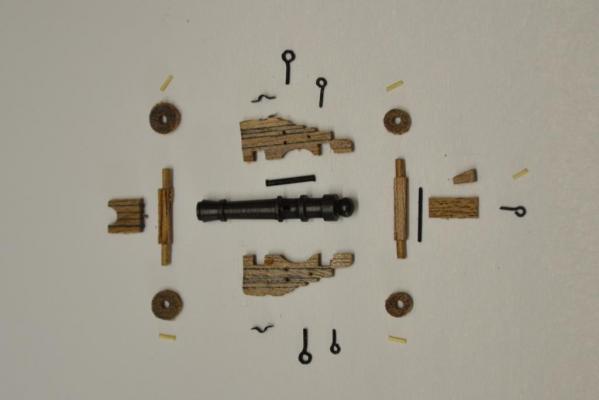
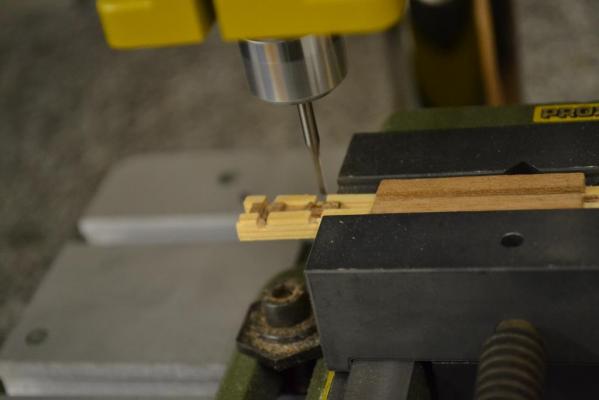
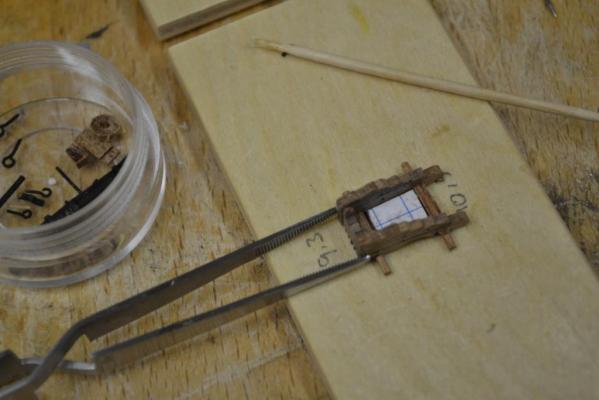
Thank you Mick, somewhere deep inside me I know you are so right, but still it takes ages.. So to see something more visual and besides planking & waiting, I started to prepare the individual parts for the gun carriages. I made some minor modifications, but in general they are a copy of the prototype I made earlier. With the technique i came up with earlier and shown in a previous post I created all the sides (and fronts) for all 28 carriages. The next thing was drilling 3 holes in each for the eyebolts and support I also had to adjust the height of the carriages as the prototype was a bit too high, I decided for adjusting the cutouts for the wheel shafts as the best solution (without starting all over again..) As for the Wheel shafts I adjusted the "production line" as i found the technique I previously used was to complex, time consuming and not accurate enough. I now have created each shaft from 3 individual made parts .. - the square part of the shaft i cut in length on the FET table saw and I drilled holes on both sides - I made a round stick in the correct diameter by using a homemade drawplate and cut them in small sections - all parts where glued together Underneath the visual explanation: Manufacturing Jig for the gun barrel brackets. As for creating the wheels: Instead of using a lathe, I used the Proxxon FET table saw to cut Ø4mm and Ø5 mm sticks into 1,5 mm thick round slices.. And a Special Thanks to “mtayler” (Mark) for notifying me that the iron band around the wheels on my prototype is not very common (as they will destroy the wooden decks ..) Including the Eyebolts and the "tiny bamboo sticks" (to fix the wheels onto the shafts) each gun carriage contains now 30 individual parts.. Used assembly jig for the carriage Underneath some pictures of the very first gun carriage from my production line (with & without gun barrel) on deck of the ST Here’s another picture with a ruler (just for size comparison.)


-
Thank you ”loyal followers” for the encouraging words, it is needed at this stage.. It is a slow process and at the same time the end result is difficult to see. So yes !! I would be very happy to finish this part of the build and to start sanding.