DONATION DRIVE - SUPPORT MSW - DO YOUR PART TO KEEP THIS GREAT FORUM GOING!
×


GTM
-
Posts
249 -
Joined
Content Type
Profiles
Forums
Gallery
Events
Everything posted by GTM
-
 .. As expected, the planking of the hull is a time consuming task .. Hereby the latest status of the process.. But as you might notice, the end is near !!, "only" 8-9 planks to go on both sides
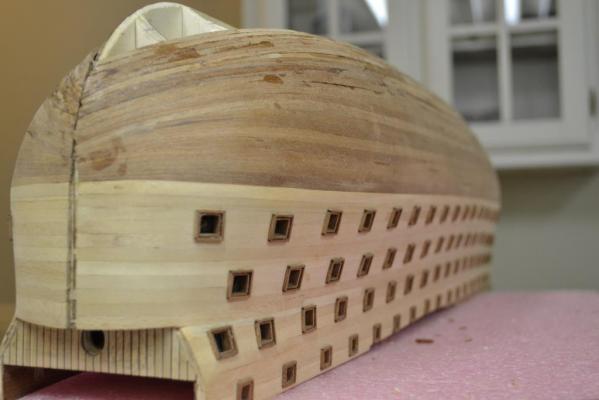


-
Hej demonborger.. I'm currently building the ST from Occre and I can recommend it .. even dough I find the fittings basic, just take a look at the log and you will see what I mean .. the link to the build is my credentials underneath..
-
@ Anja, Thank you for the link, interesting fixes !!, I might have an idea now of how to fix it (.. time will tell ..) @ Mick, No.. no copper finish for the ST, so it better has to be perfect the first time @ Randy, Thank you for your kind words, and please follow along, I can only recommend the ST for your next build.. ... I'm able to present an update soon with some pictures …
-
thanks Sjors, unfortunately the ST is not double planked, so i have to do it right first time. and at this stage i did not use any filler ...
-
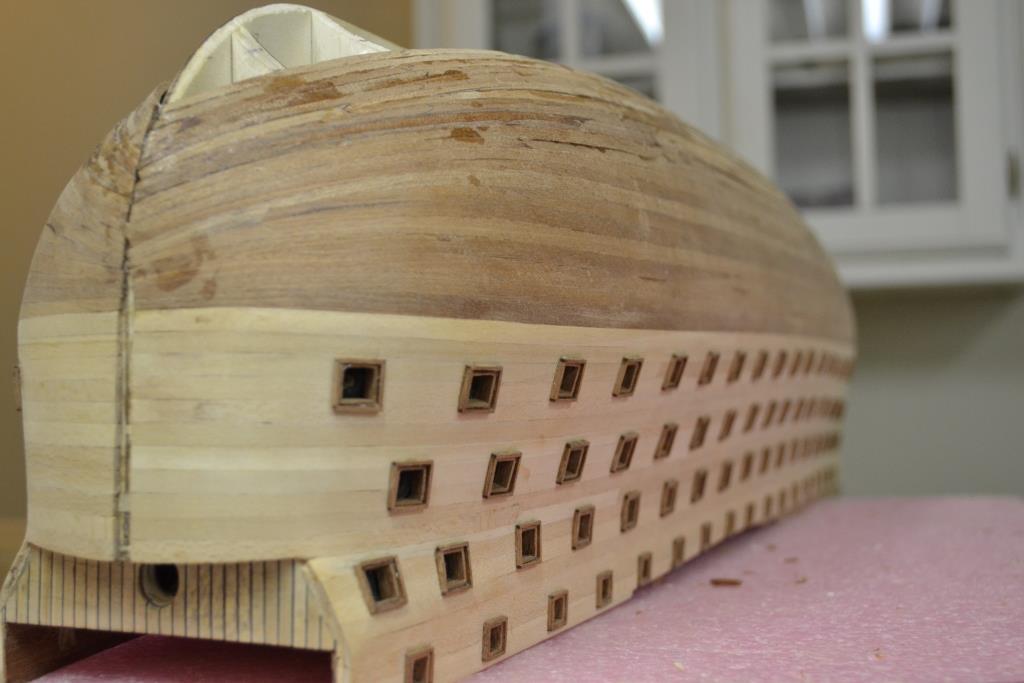
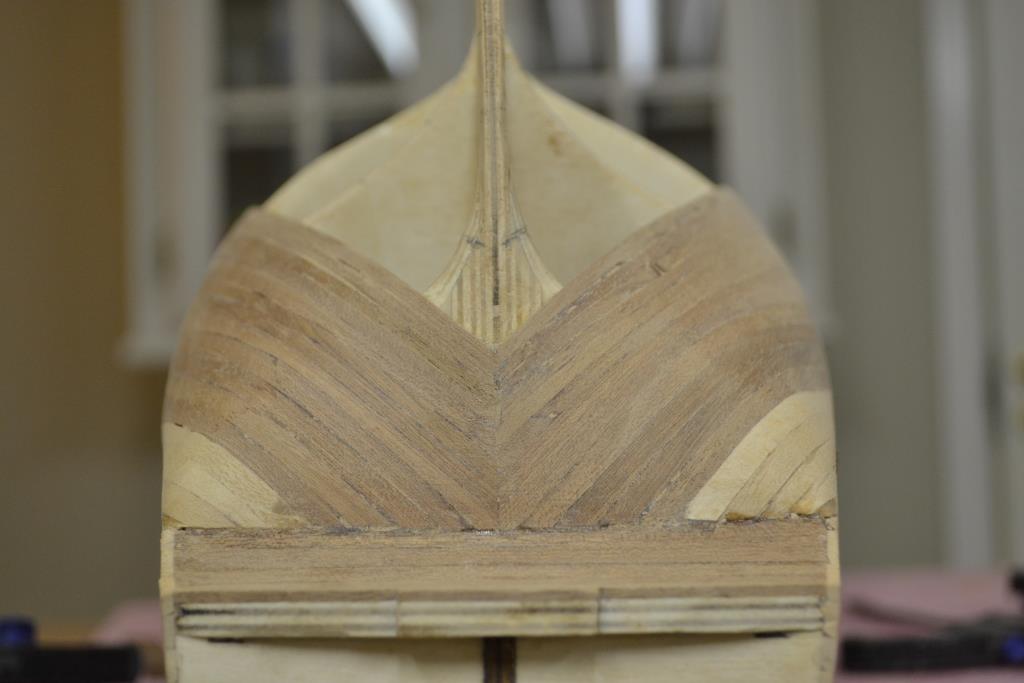
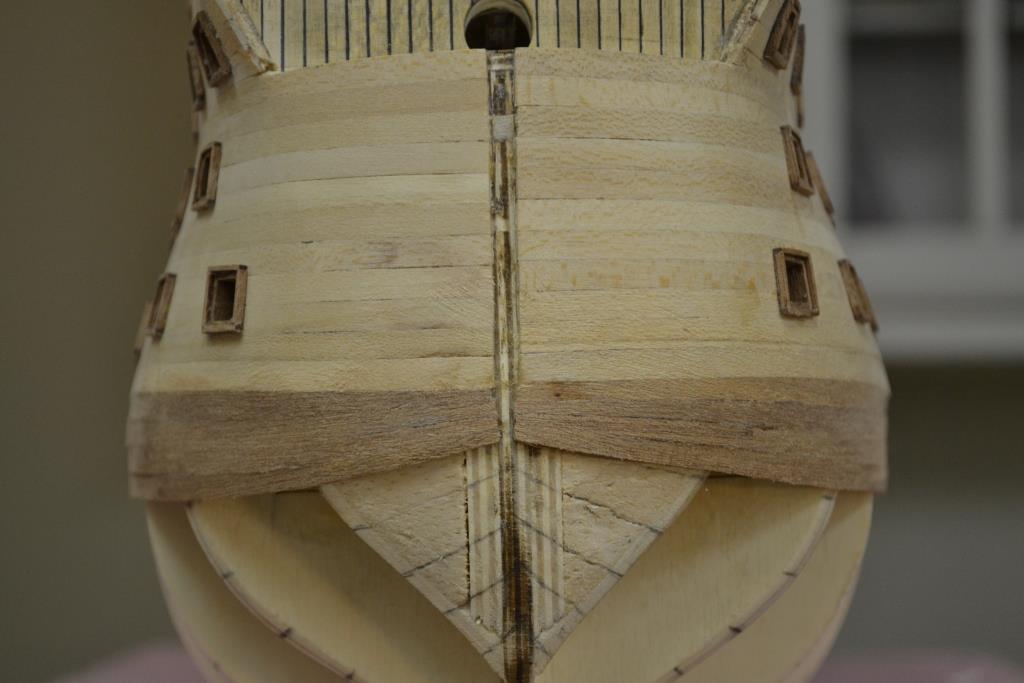
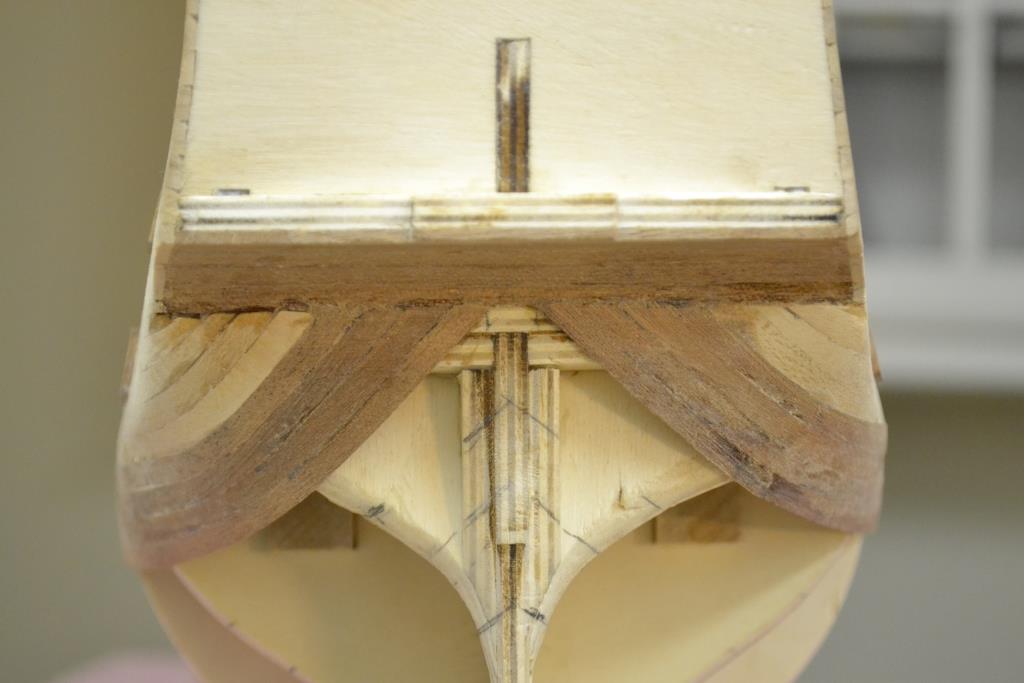
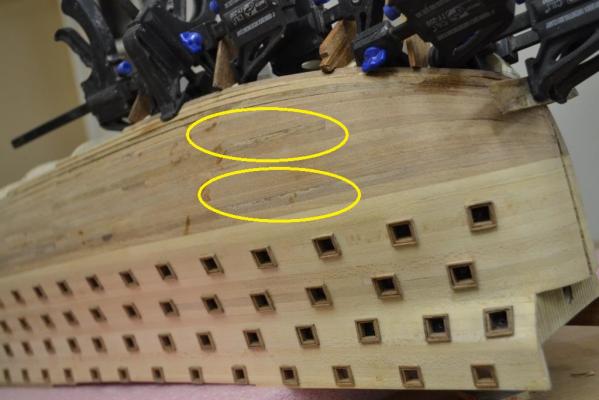
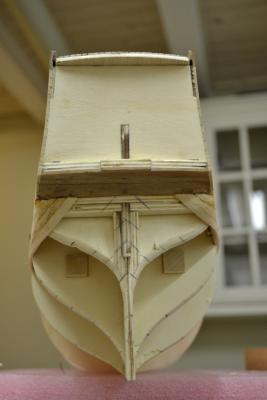
A minor update just showing that i’m still working on the ST .. Unfortunately for me the “building season” comes to an end (and the ST will get lower priority) as there’s no such thing as 48 hours in the sommer season.. As you might notice, I roughly sanded the hull to see how the end result will be. This is the current state: I have to think a bit about how to fix the marked areas of the hull as I don’t want to sand down too much, I will see how it goes when I completed the planking

-
Hej Ferit, Nice of you to drop by Tell me about it I just started the production line for the carriages and guess what.. next in line "the lids", so i know for sure what i will be doing the next couple of months .. Thanks Kevin.
-
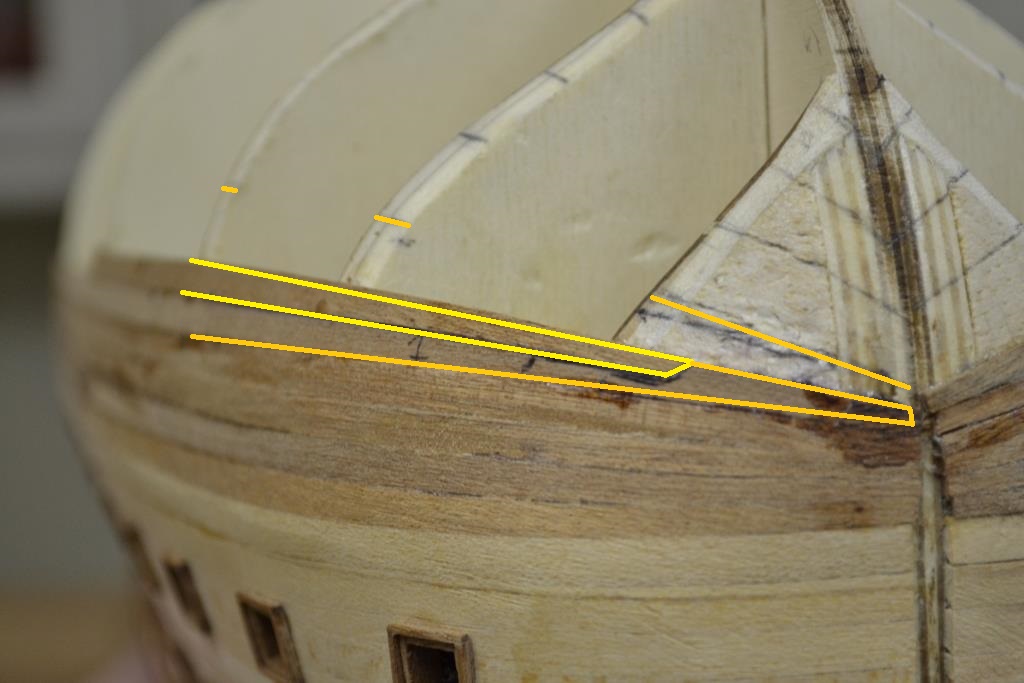
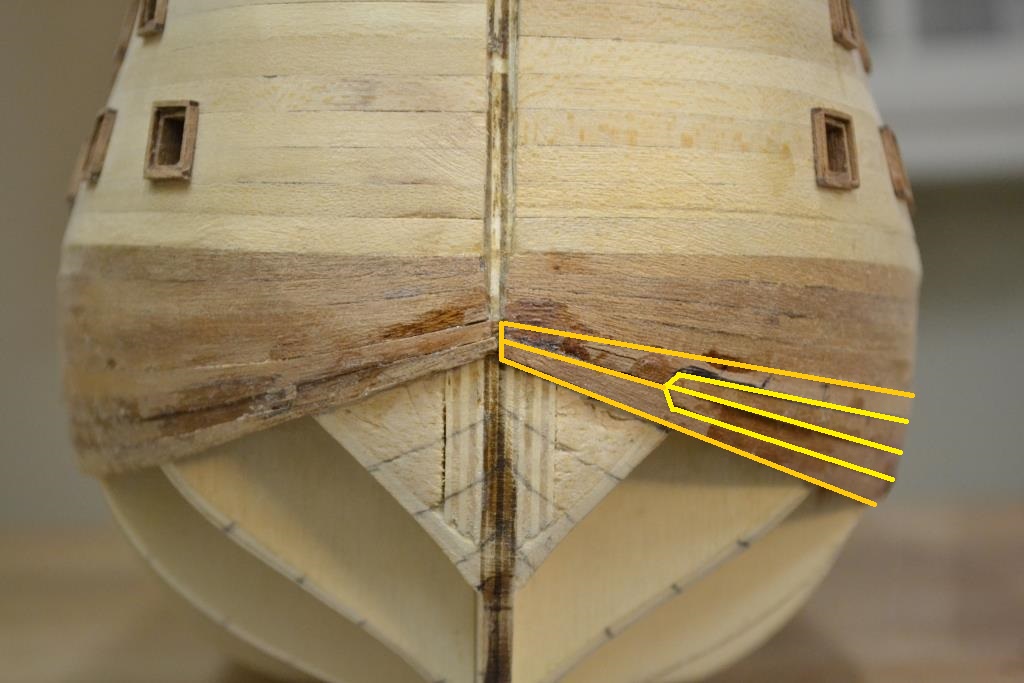
Hej Sjors,Mick … I will try to explain, basically a ”half stealer” or ”full stealer” is a planking technique to fill out a “section” .. In my case I “created” 20mm sections on the middle bulkheads of the Santisima Trinidad. "I choose 20mm" as the planks provided with the kit are app. 5 mm wide, so theoretically I can/should use 4 planks to fill out the middle sections. But as the planks should bend “straight” and in a natural way, these sections become usually smaller or bigger on the bow & stern, you can see the sections I created in an earlier post. Another burden is a “rule” saying that planks should not be tapered more than ½ it’s wide. In my case this means that each plank when tappering should not be smaller than 2,5 mm at the ends. As the end of the bow section in this example didn’t measured more than 5 mm, I could not use 4 planks in this bow section. In fact I only could use 2 planks (2x 2,5mm=5mm).. The first bulkhead from the bow didn’t measured more than 10mm, so in this case I could use 4 planks tapered to 2,5 mm in width (4x 2,5mm=10mm) So I was more or less “forced” to start using a so called “half stealer” , starting at the first bulkhead… As pictures normally make more sense I draw a few lines on the previous posted pictures, i hope it makes more sense now and that it will clear up the fog a little.. the yellow lines marks the "half stealer" .. i guess you could say that these 2 "half stealers" (marked in yellow) form a "drop plank"


-
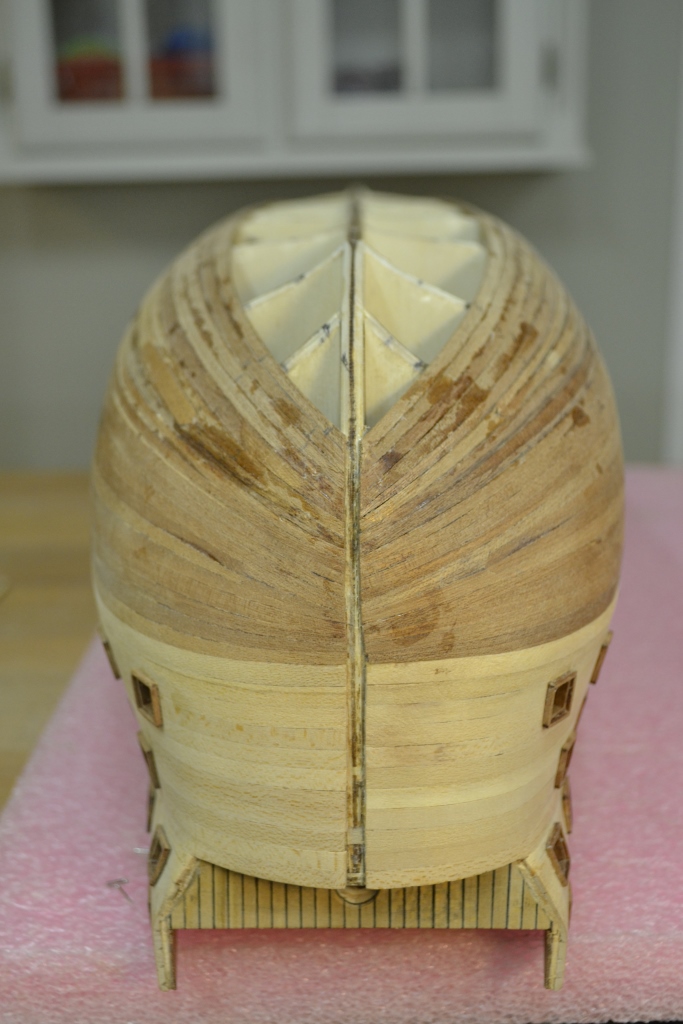
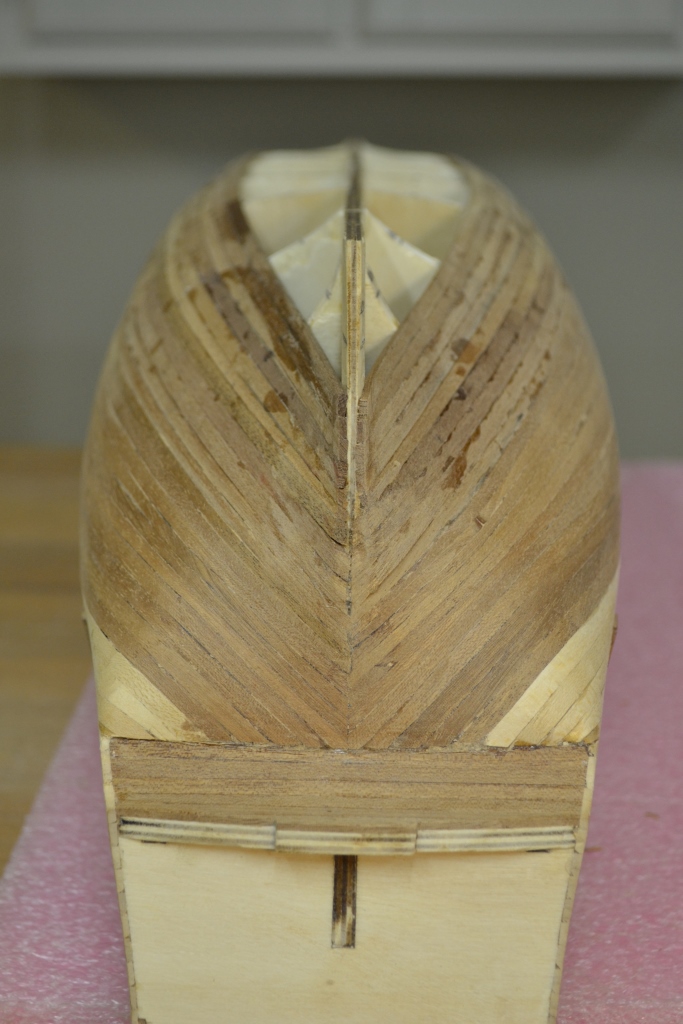
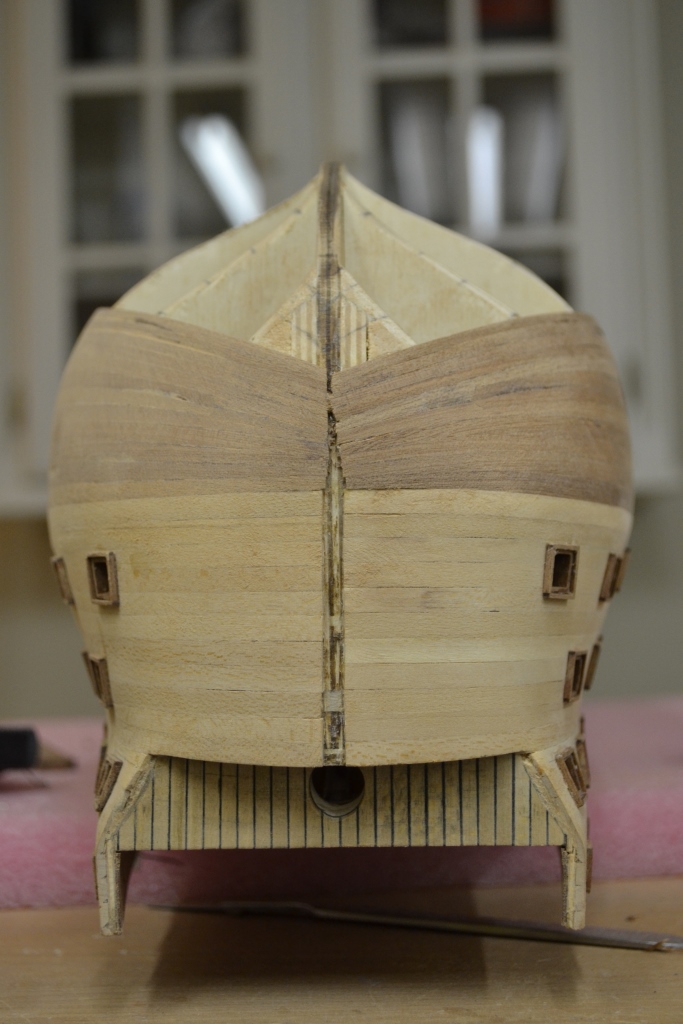
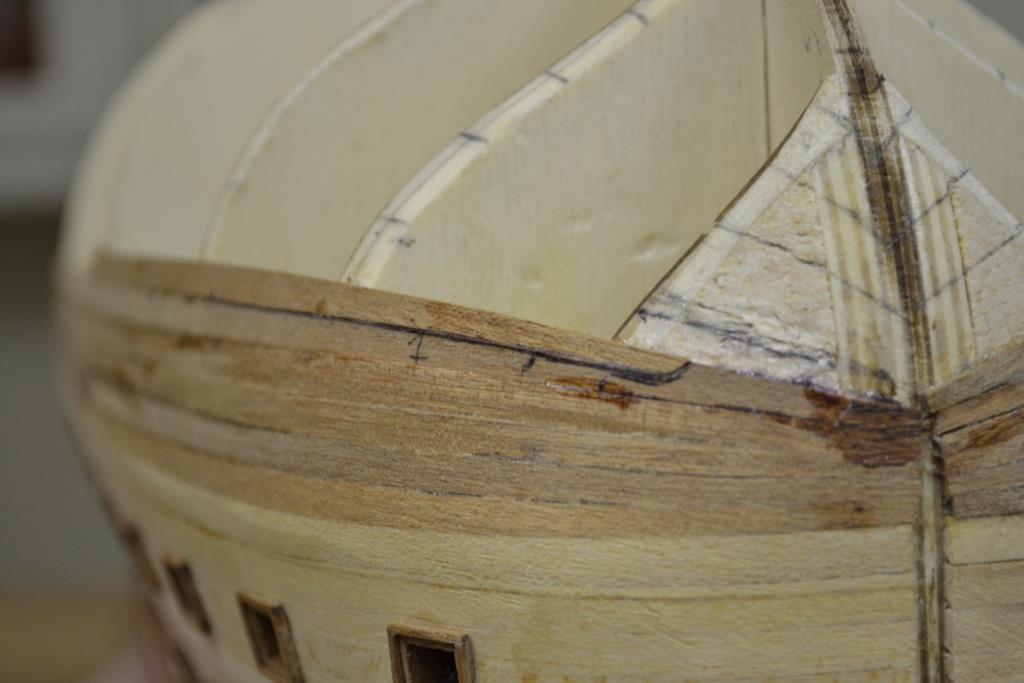
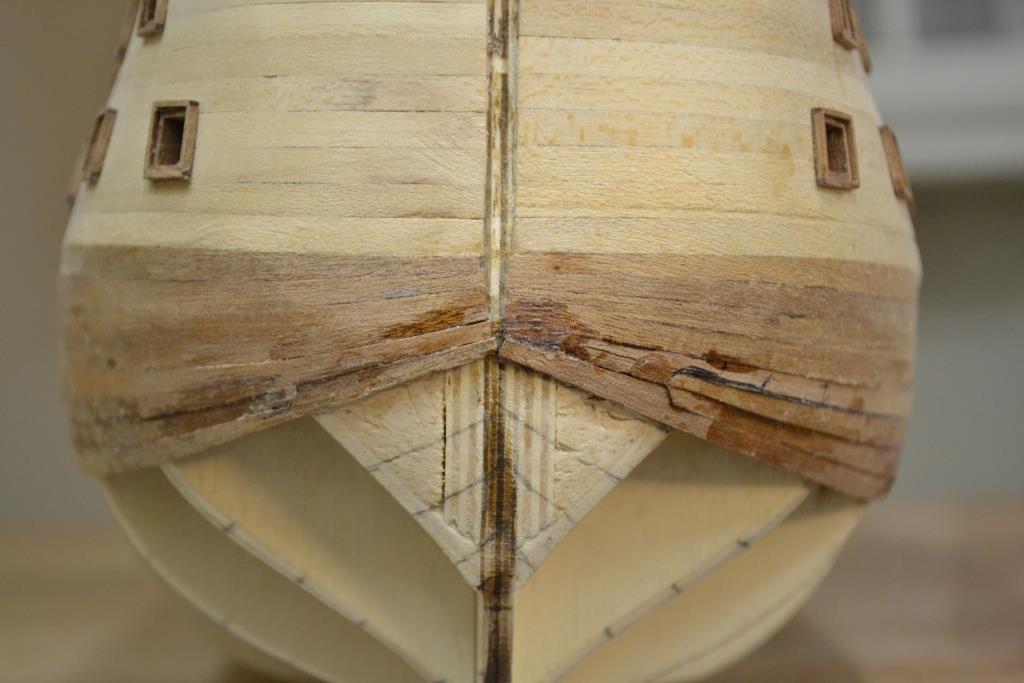
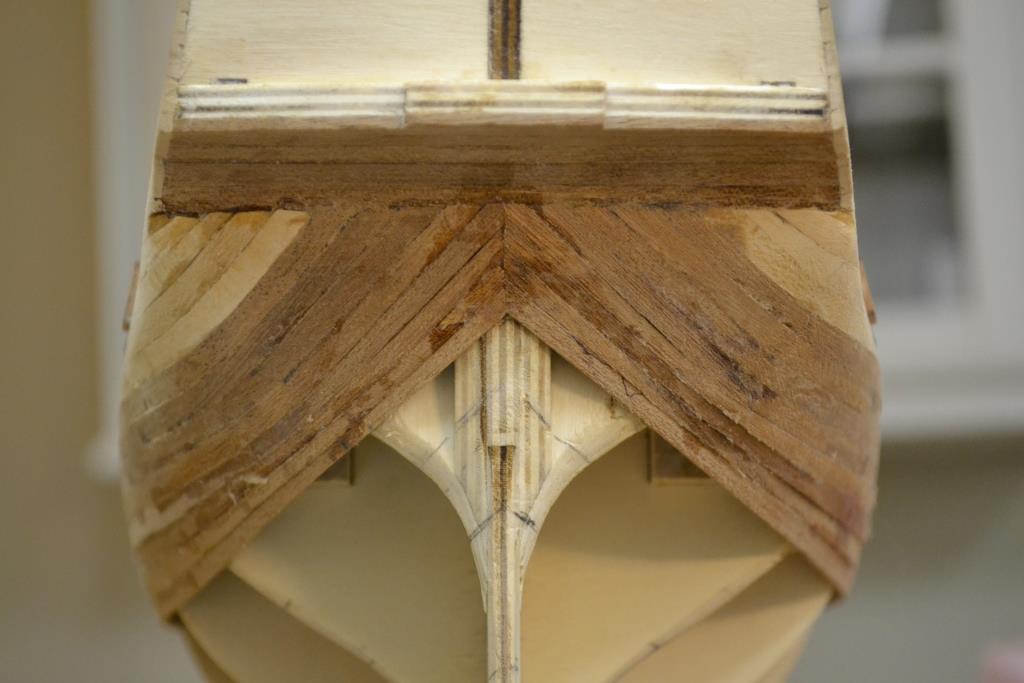
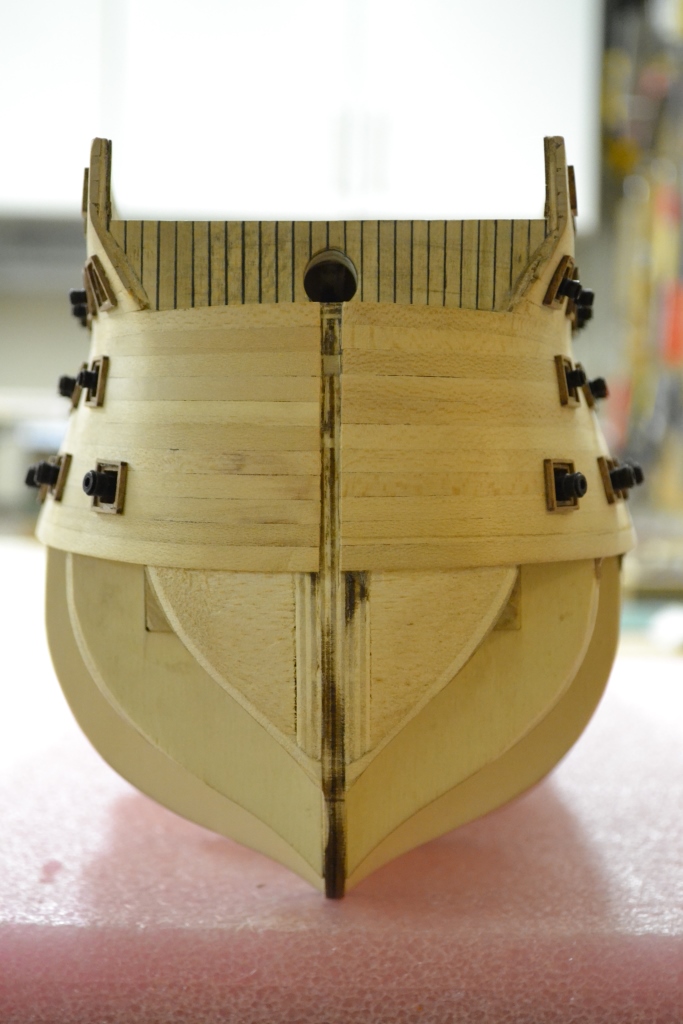
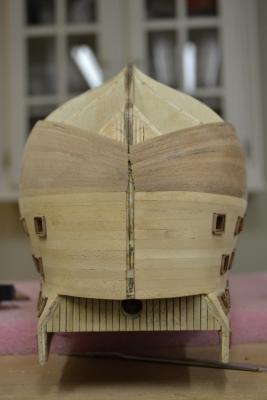
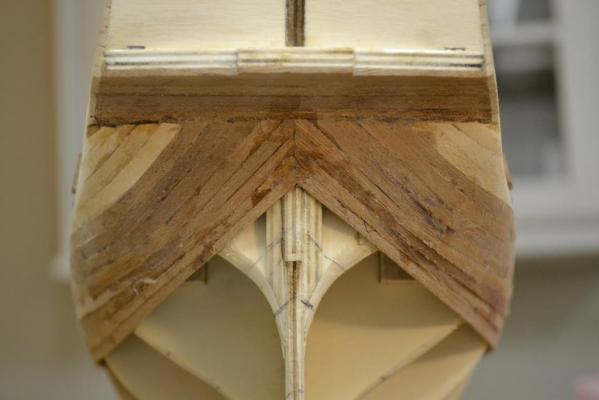
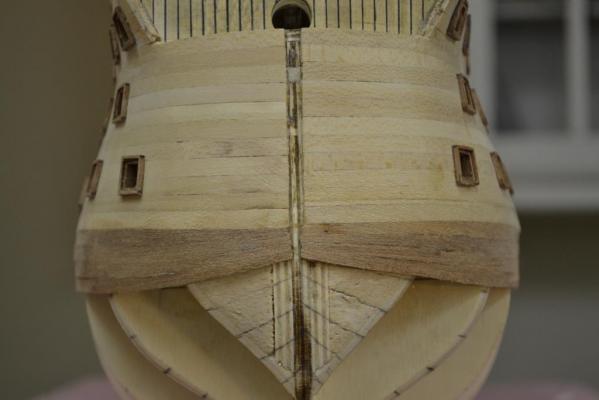
Hej Nick Sjors, …, Thank you for the encouraging words, i need it at this stage It is not going so fast as I had hoped for at all and the planking is quite tricky (being a planking amateur) Nick you’re right, I mounted the extra false decks to prevent looking at a big hole, but some of the false decks are also needed for mounting stairs further ahead in the build. Besides this I used them to practice the caulking, nail & wax technique. So not a lot of new things happened in the build, but Finally.., I finished with the second planking section on both sides.. To obey the planking rule of not to taper a plank more than half of its original thickness, I had to be a bit creative on the bow section and used the stealer technique. This is the stern & bow so far without any sanding I hope that sanding is enough to give me the finish I’m hoping for. But I will wait to find out for now..


-
Thank you David & Runner63 for the compliments, you’re more than welcome to follow along and learn from my mistakes Not a lot of process this week as work keeps me quite busy at the moment. Here are a few pictures of what I have been doing so far. I managed to cover the first section on both sides, I only roughly sanded it and will wait with a finer grid until the hull is fully planked. With my curent workload this could take some months before i'm done !!

-
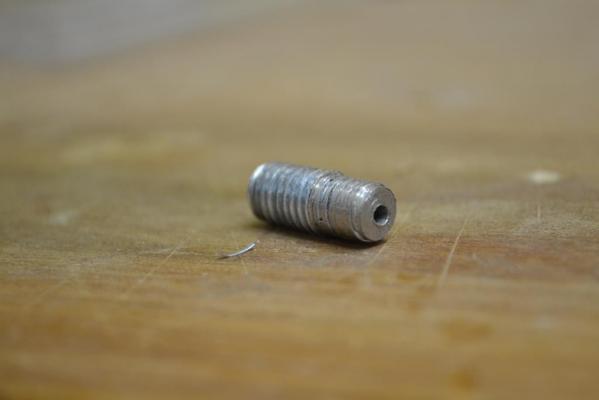
Hej Rob, I just found your log, and i certainly will follow your build with interest. Very Inspiring, a good source for inspiration !! It looks like your way to drilling the holes for the dummy cannons works well, but I found another trick which worked fine for me. I found an screw which fitted (after minor modification) in the gun ports, and drilled an hole through the middle of it and used this as drill jig. See the attached pictures for more details..

-
Wasa by Andre - FINISHED - Corel - 1:75
GTM replied to Andre's topic in - Kit build logs for subjects built from 1501 - 1750
a nice restoration and a great paint job, keep it going.. -
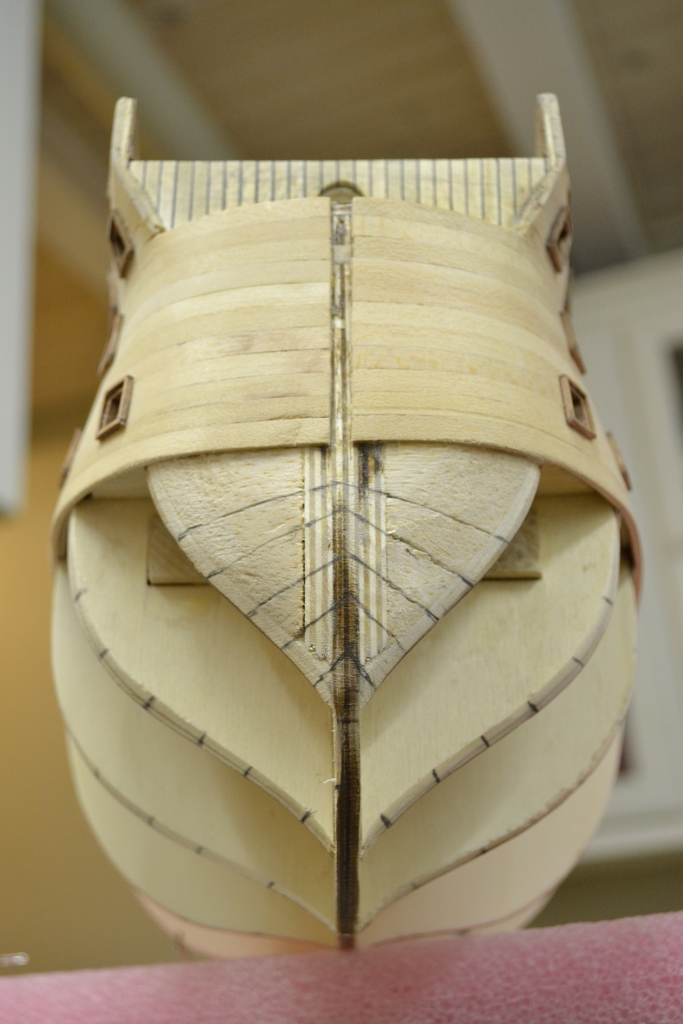
Enough about cannons for a while, i started preparations for the hull planking.. I started to divide the hull on 3 of the middle frames into 20mm sections where app. 4 “full” planks should be fitted After this I used a 1mm thick flexible lath and pinned it onto the 3 marked frames and bend the lath in a natural but “straight” line towards the bow & stern and marked the position. After done all positions on both sides and some minor adjustments, the sections on the bow and stern looks as follows: The idea is to equally tapper 4 planks in such a way that they will fill out an marked section. When needed i will use drop planks and stealers to achieve the best result


-
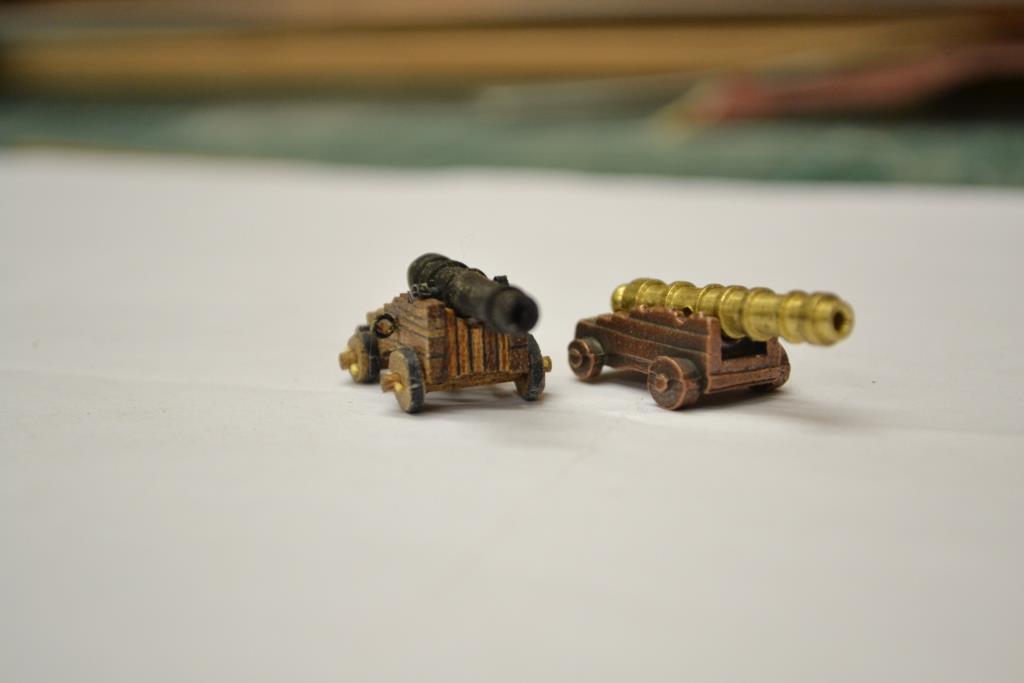
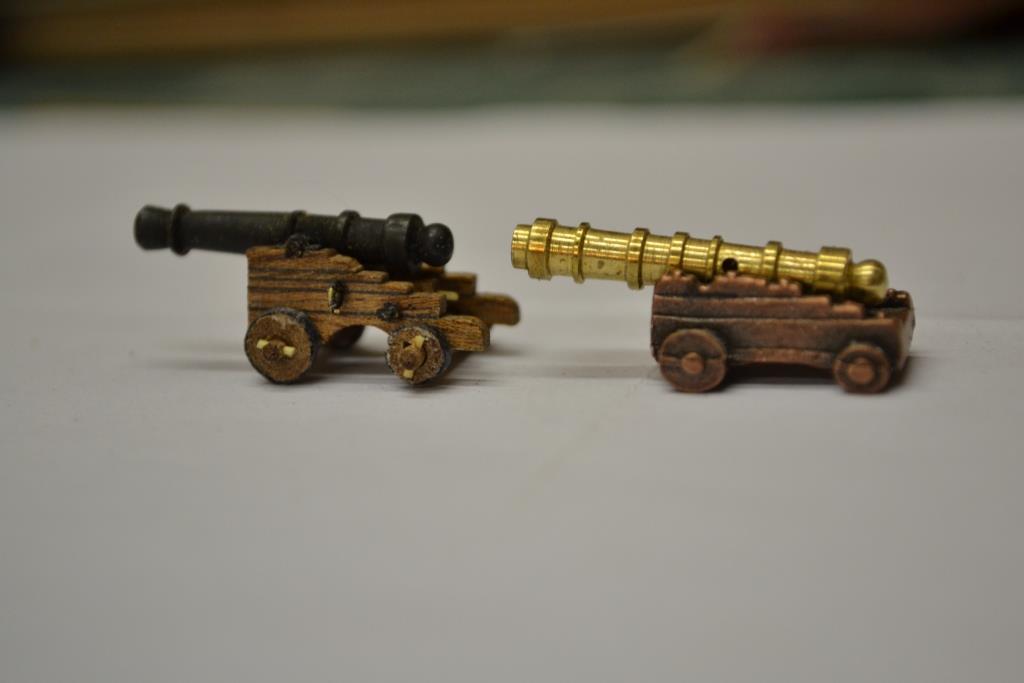
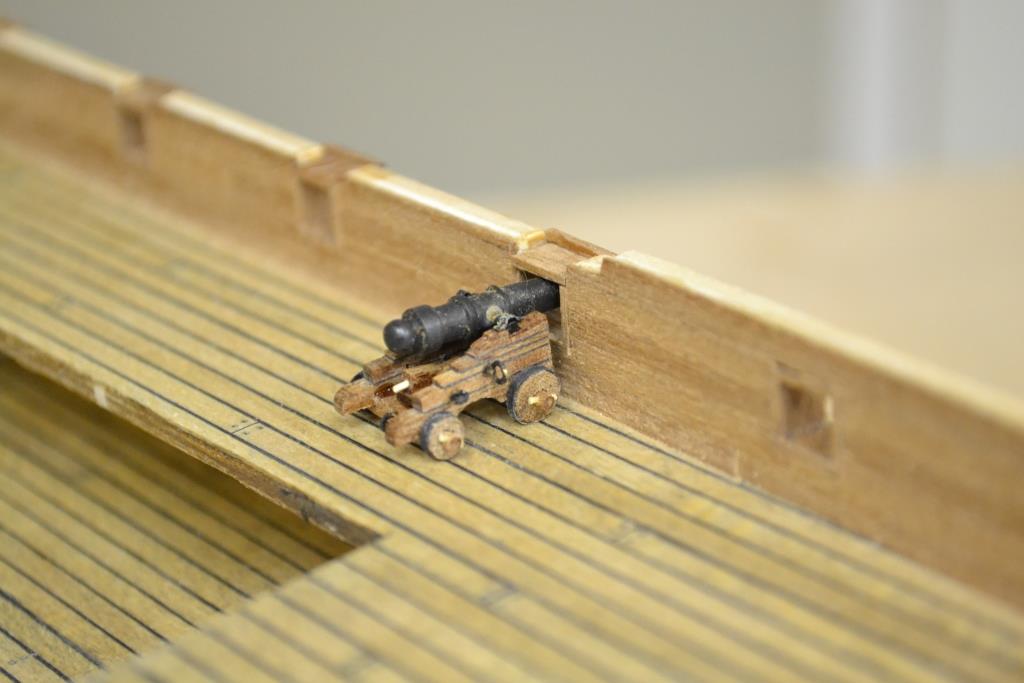
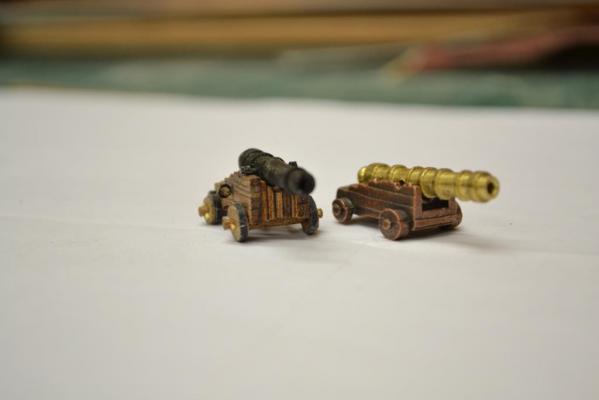
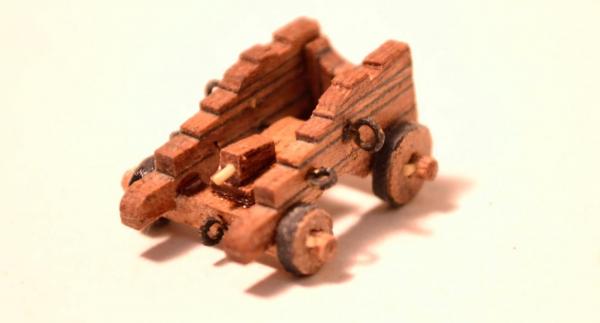
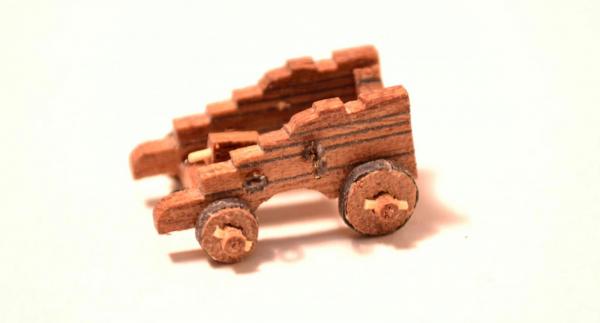
Aargghh .. After going through the published build log, I realized that there’s no pictures of how the original carriages and gun barrels provided by the kit looks like. So here are some pictures of the original supplied and the prototype.. as you will see i have to adjust the hight of the carriages ..maybe changing the size of the wheels could do the trick..

-
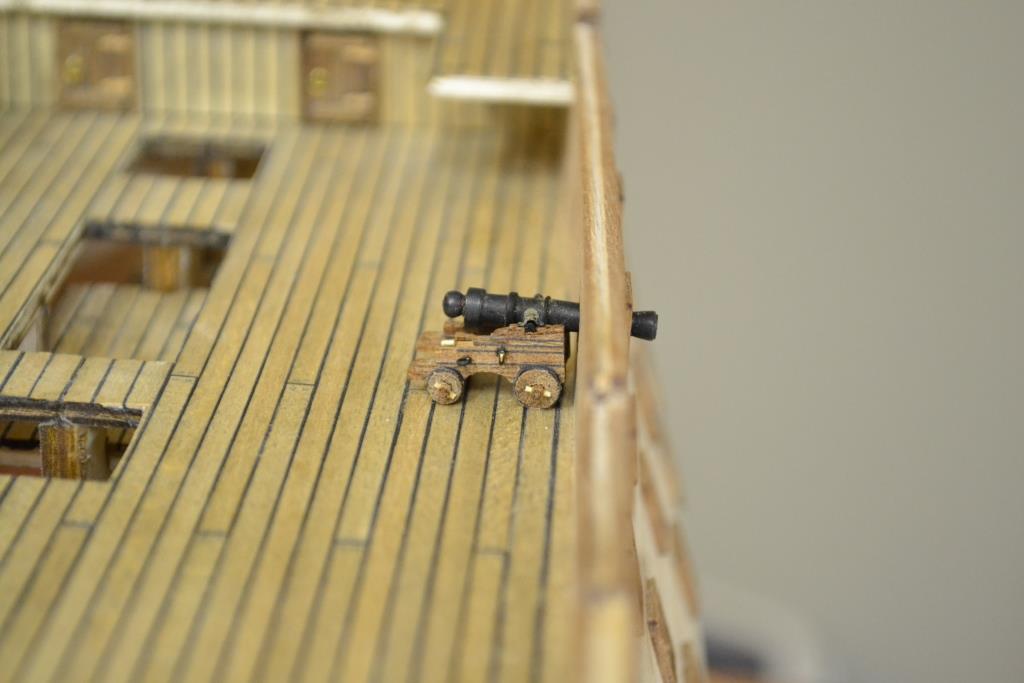
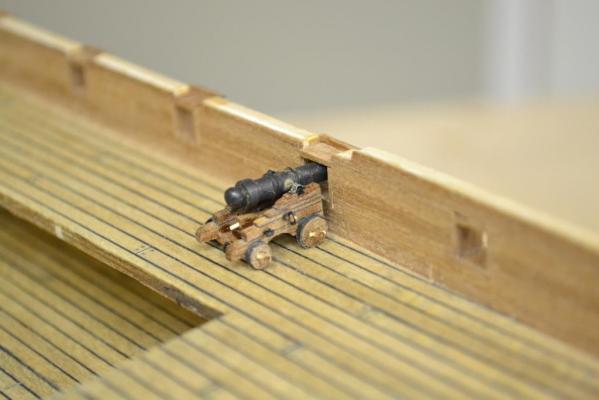
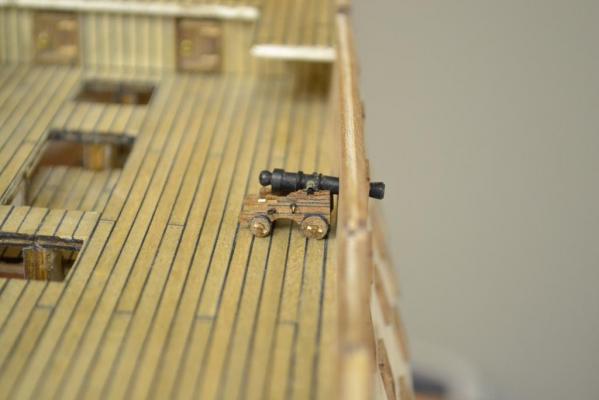
I did some adjustments on the provided gun barrels, Luckily i have some good connections to a lathe, the prototype is now a much better match when comparing them with the gun barrels on the lower decks.. But during positioning of the gun carriage I found out that I have made the gun carriage slightly too high. underneath some pictures of the gun carriage in position .. Unfortunatly i have mass produced these sides so i'm not sure yet if i want to adjust them at this point, Maybe i feel more like it when i'm further in the build
-
Thanks Sjors it is appreciated, Yeah i must admit it is starting to get quite a bit darker over here i Blame it on OcCre and their provided cast metal parts. I noticed that your Le Mirage has gun port hatches made of wood so i guess you don't have to move to the dark side Anyway it keeps me busy and off the street
-
Instead of starting to continue to plank the hull, I spend some time on developing an different technique to create a gun carriage. This is the prototype I came up with.. The provided gun barrels which are included with the kit, are not matching the gun barrels on the lower deck, I'm not completely sure yet why they are so different ..


-
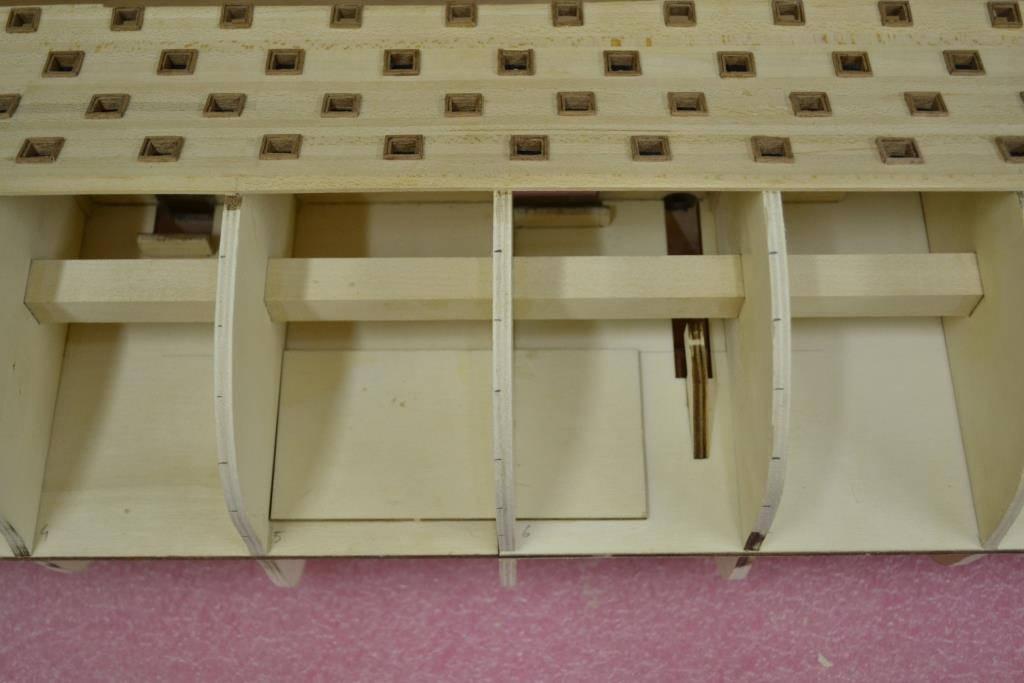
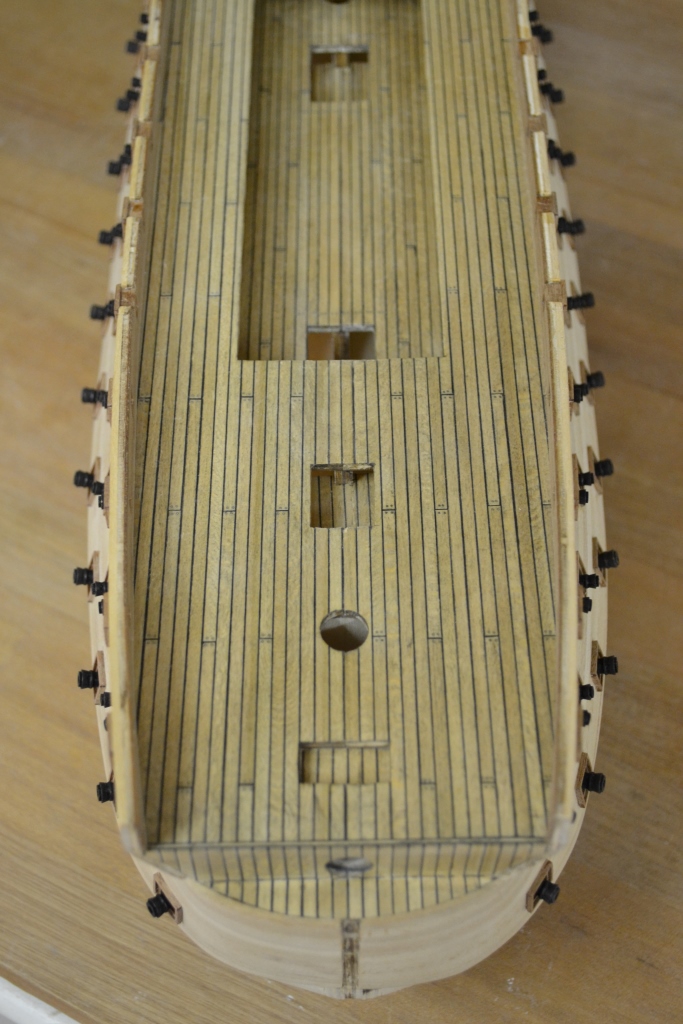
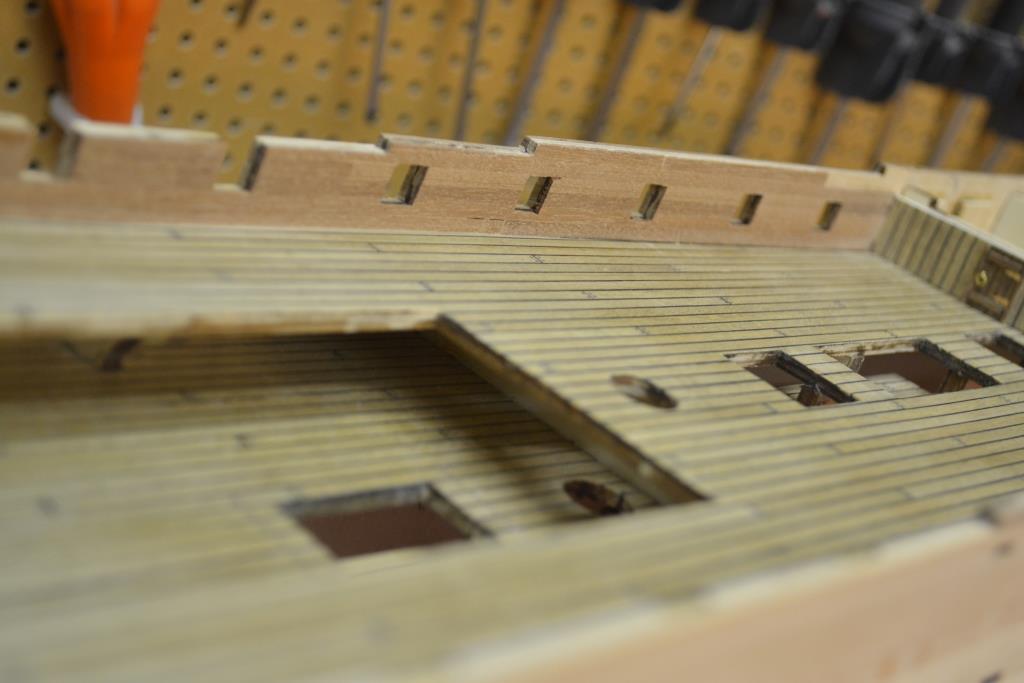
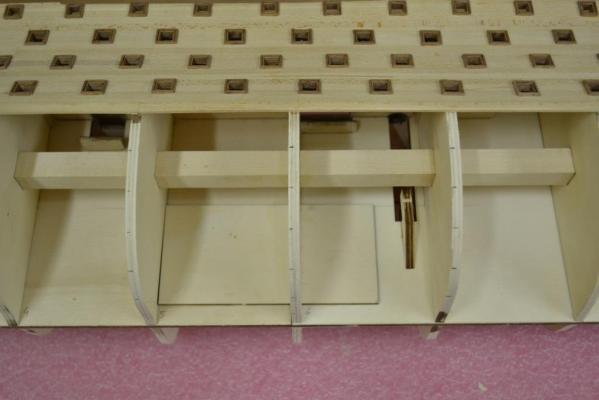
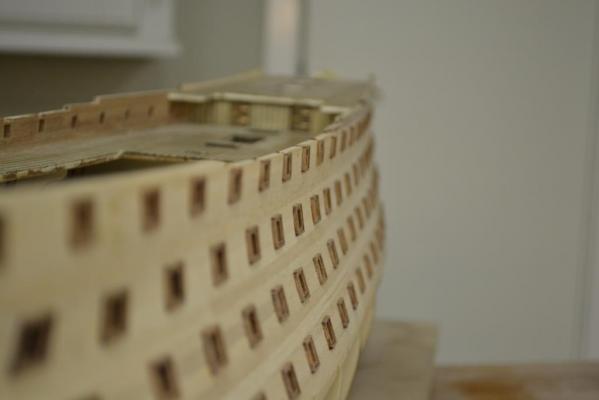
At last .. progress.. I have been busy with a lot of things, but finally I’m done with the frames on starboard side Off course an minor thing is still missing: "all the hatches" underneath a few pictures ..the canons are dry fitted..


-
I just read the latest news.. Gefeliciteerd met je nieuwe baan !!
-
Just looked at your SOS and must say: incredible, just unbelievable fine and realistic detail. You are truly an great artist, and you discovered your talent just by starting to carve ornaments for the SOS ? Thanks for sharing your experience at least it encourages me to give it a try myself when the time is near
-
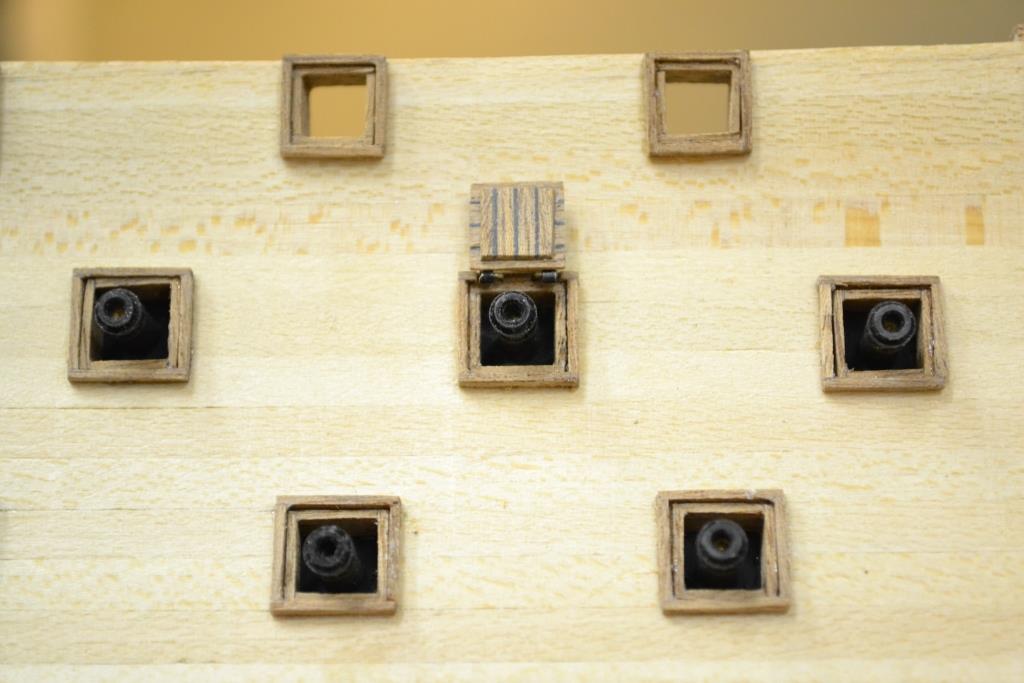
Thank you very much "commander” Sjors Yes, i must admit I used my only one prototype gun-port lid for very good reasons as you might have guessed.. and I will wait with gluing the canons until i'm really finished with the hull planking, this was just a peek of what is going to happen in the very near future (i hope..)
-
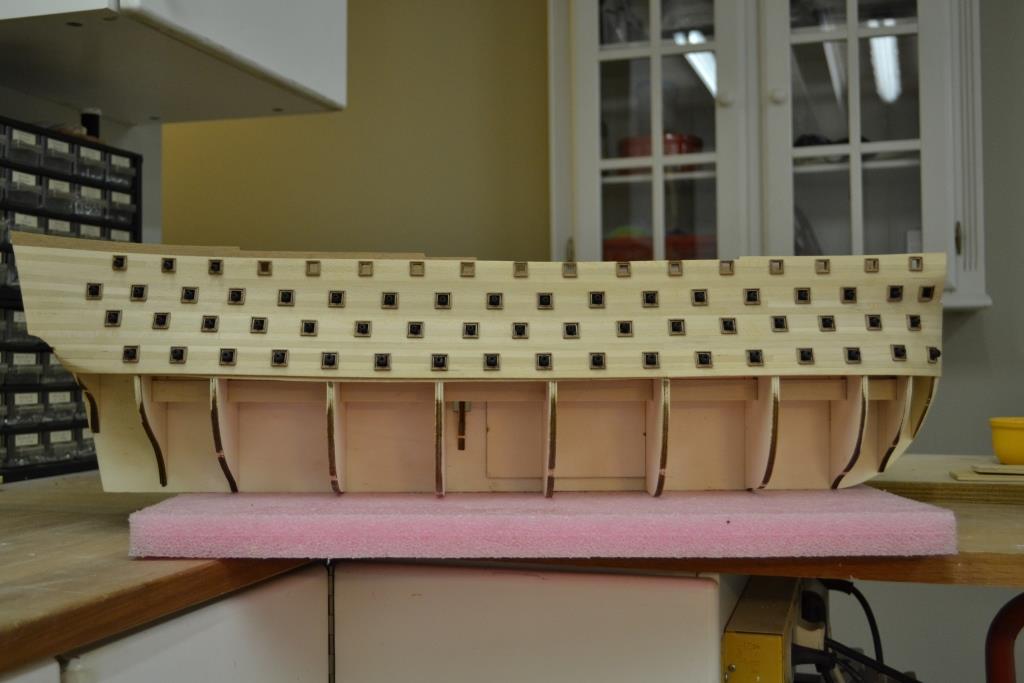
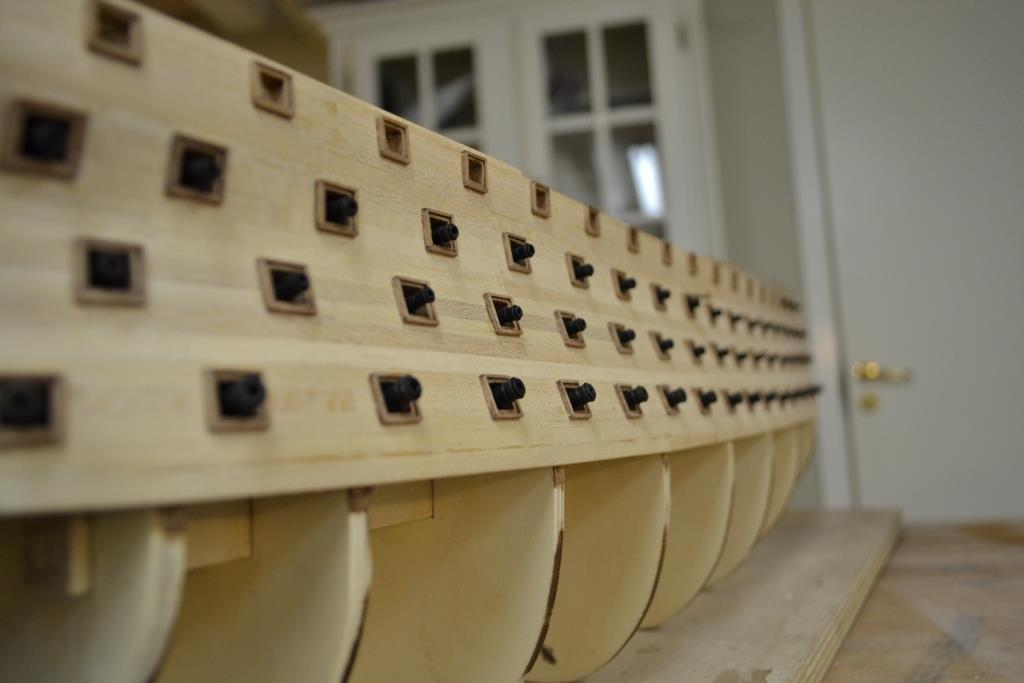
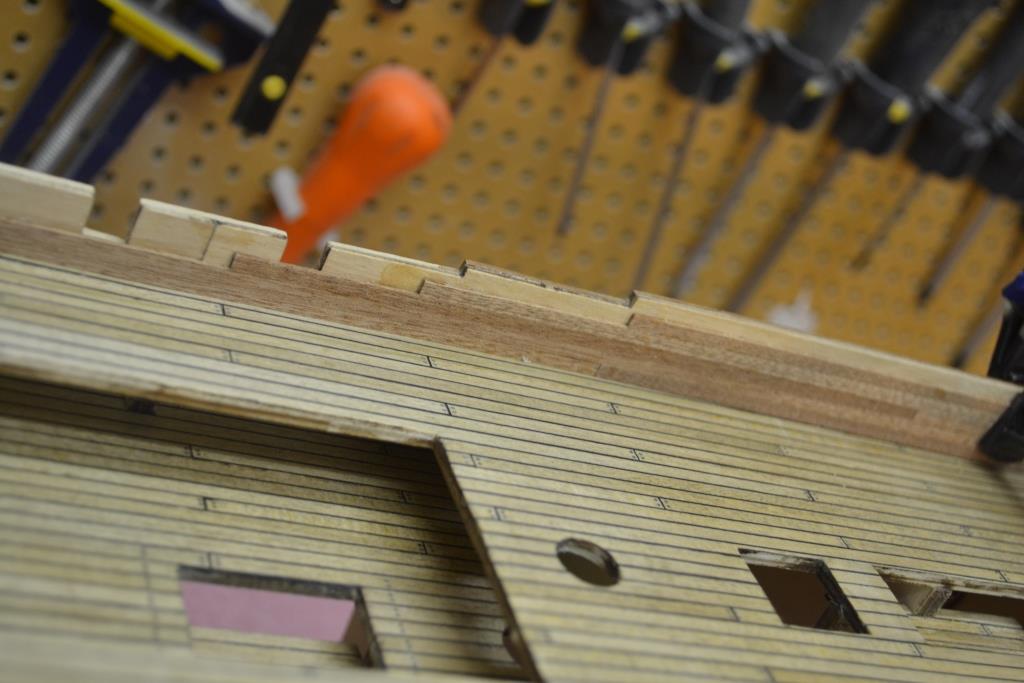
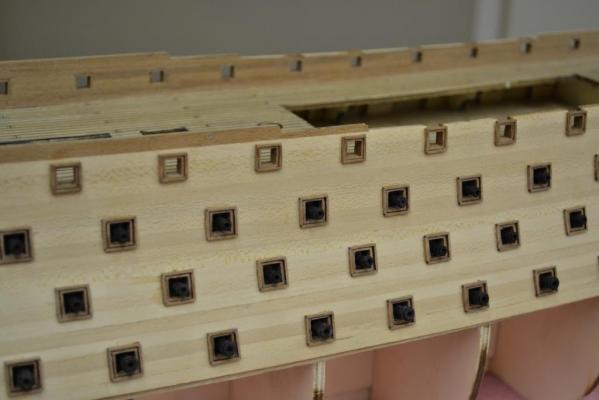
Hej Garward, Thank you for the link, very inspiring movie to watch. "Finally,." Status Quo.. This is the stage where i'm at this very moment in the build project . All the frames on one side are mounted and only one more side to go i couldn't resist to take a few pictures at this stage and to post them. "i just had to drill the holes" and dry-fit all the canons. ...quite impressive... i guess she was very dangerous in her times .


-
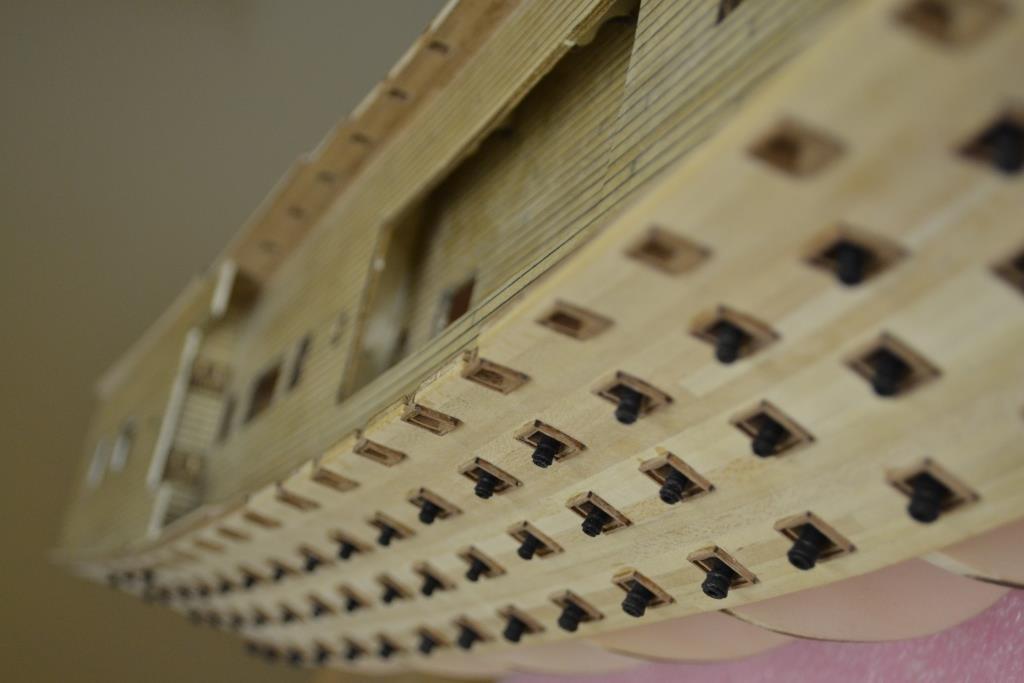
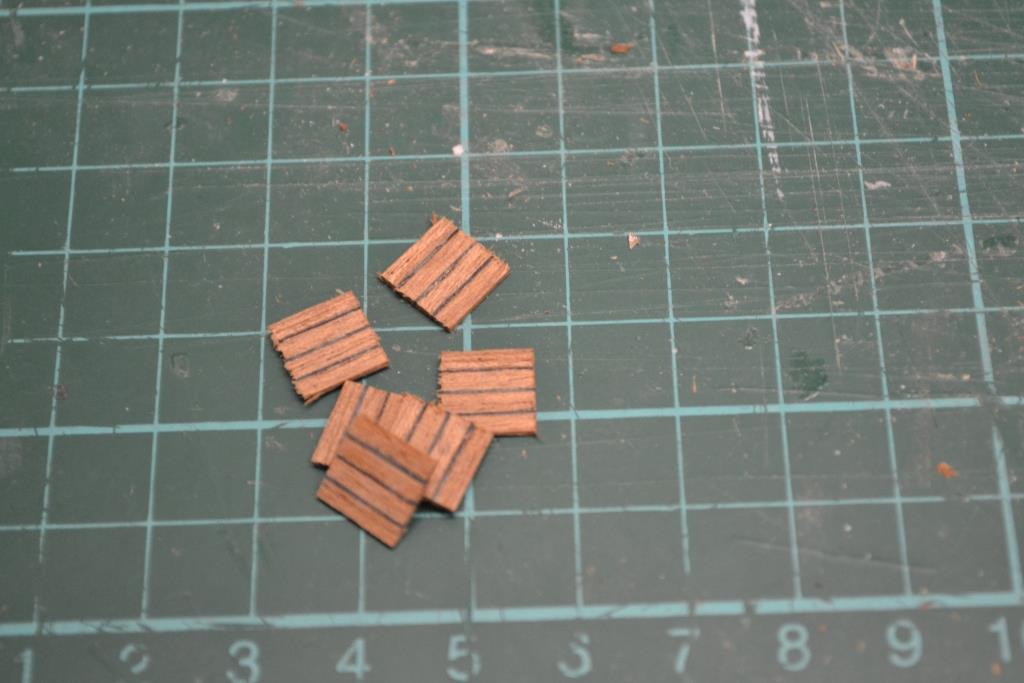
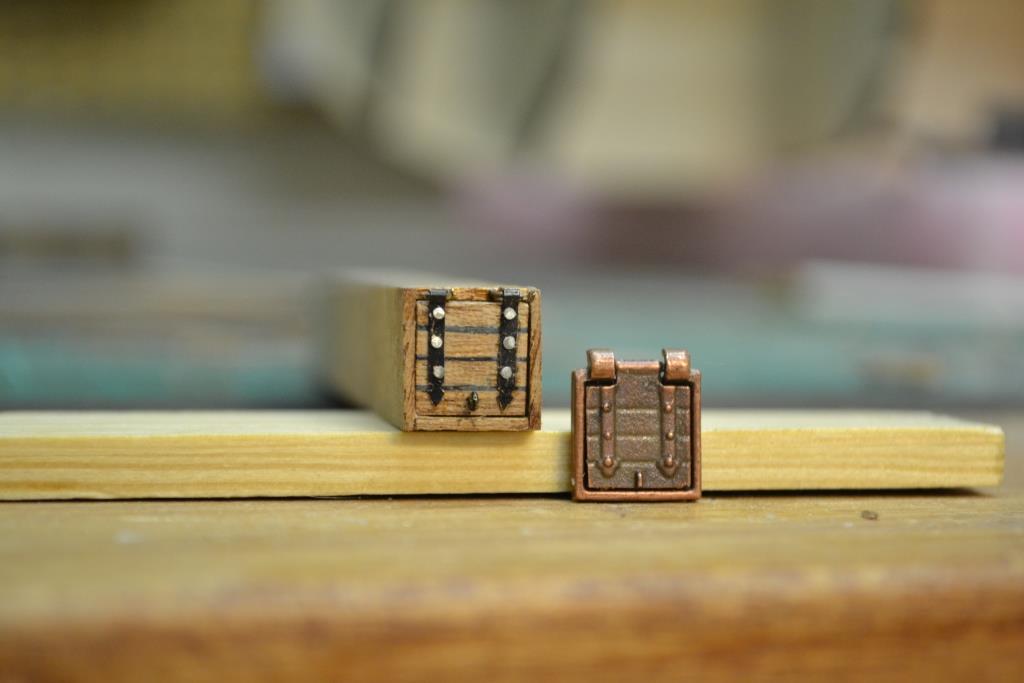
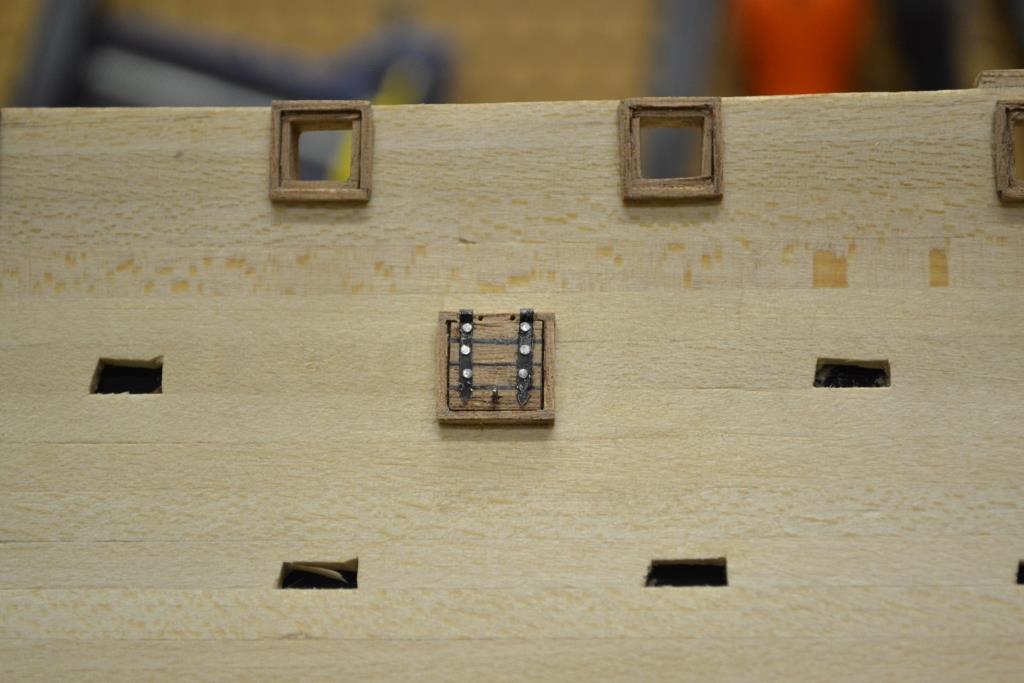
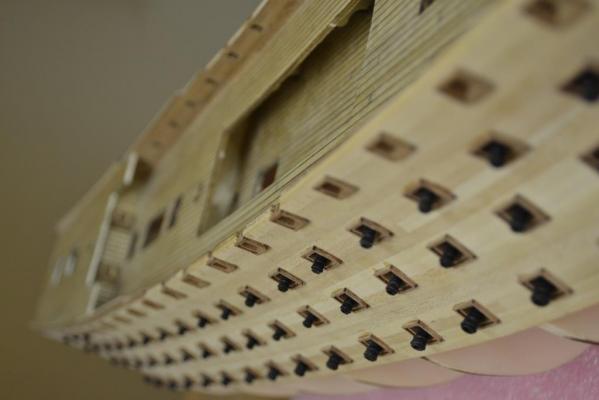
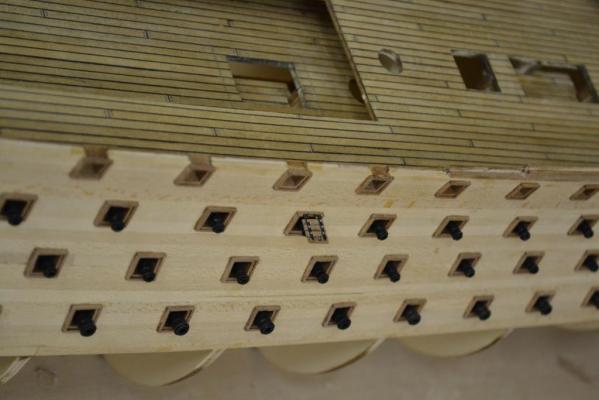
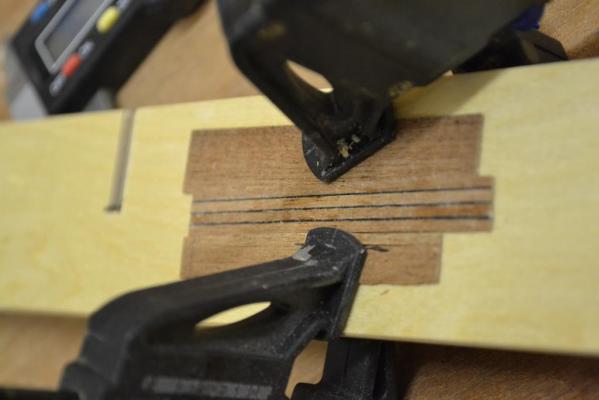
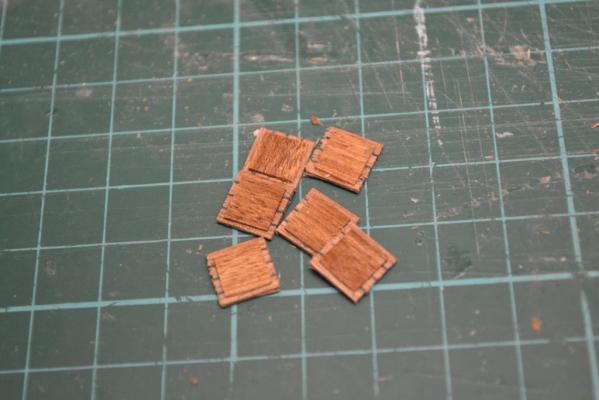
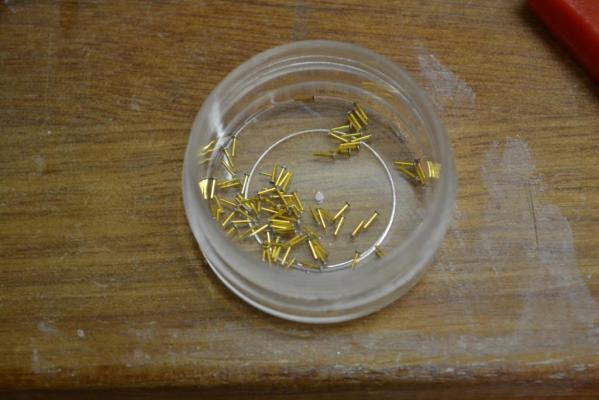
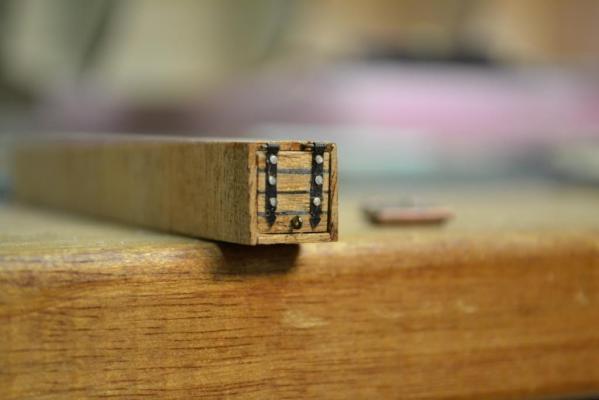
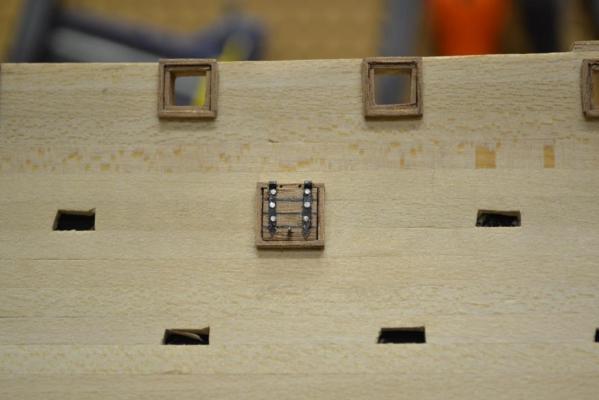
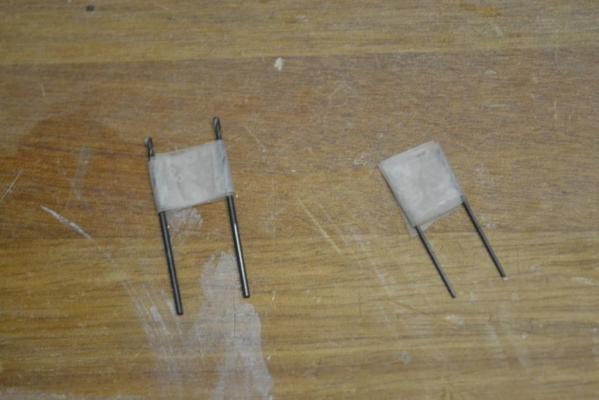
Hej Kevin, Sjors I'm aware that 104 is a "nice" number, unfortunately I have made an calculation error, the actual number is 138.., so right now I wished that the Santisima Trinidad only had 38 canons I Never thought about putting the drill-bit trick in the jigs topic I might consider doing so. Continuing: After “A” comes “B”…, Port frames is one thing, the other thing is the gun port lids (correct number -> 104 in total !!). After my decision to scratch build the gun port frames, the next necessary step was to find an “easy” way to manufacturer the gun port lids which again ideally should be able to open and close.. The once I have in mind are pretty basic but it will again be a time consuming task. So I will build these besides and/or during the waiting times of some other time consuming build tasks Here’s the prototype production line I came up with, but I still need to make some adjustments when I start with the real line. I started to glue strips and cardboard into planks, cut them in length and glued 0,5 thin plank on the back of it. As for the hinges I used 1mm copper strips cut from a copper sheet and bend the turning-point of the hinge by using a 0,8mm drill-bit and a pair of pliers. After this I cut/filed the strips in length and glued them in position with CA glue, drilled 0,6 mm holes and used the pins of a Pentium III processor to simulate nails on this prototype. The result is very good but unfortunately when producing over 100 of them I would need at least 600 of these Pentium processor nails. As I only have 1 Processor and this one doesn’t have 600 pins, I need to find an alternative for the nails for the hinges So if anyone has/have found copper nails with a head diameter of 0,8mm, please don’t hesitate and spread the news a few more creative pictures....


-
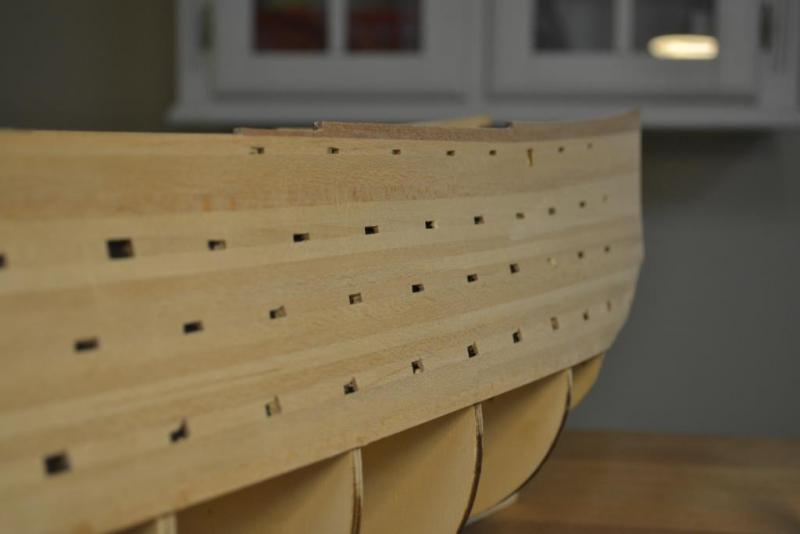
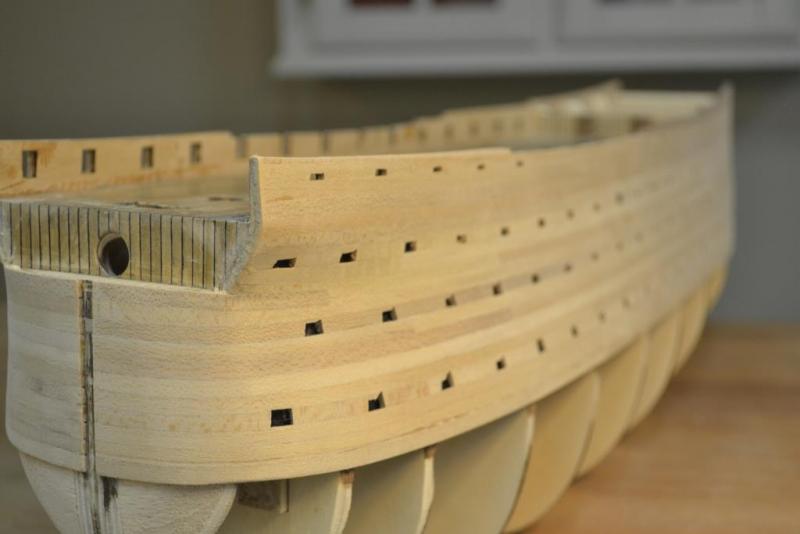
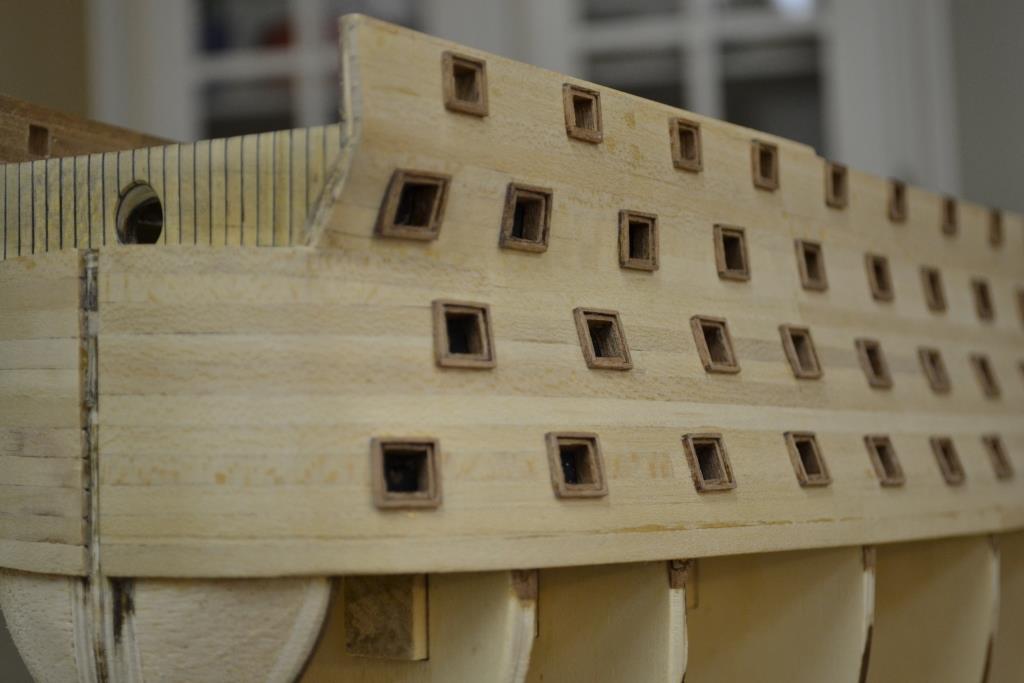
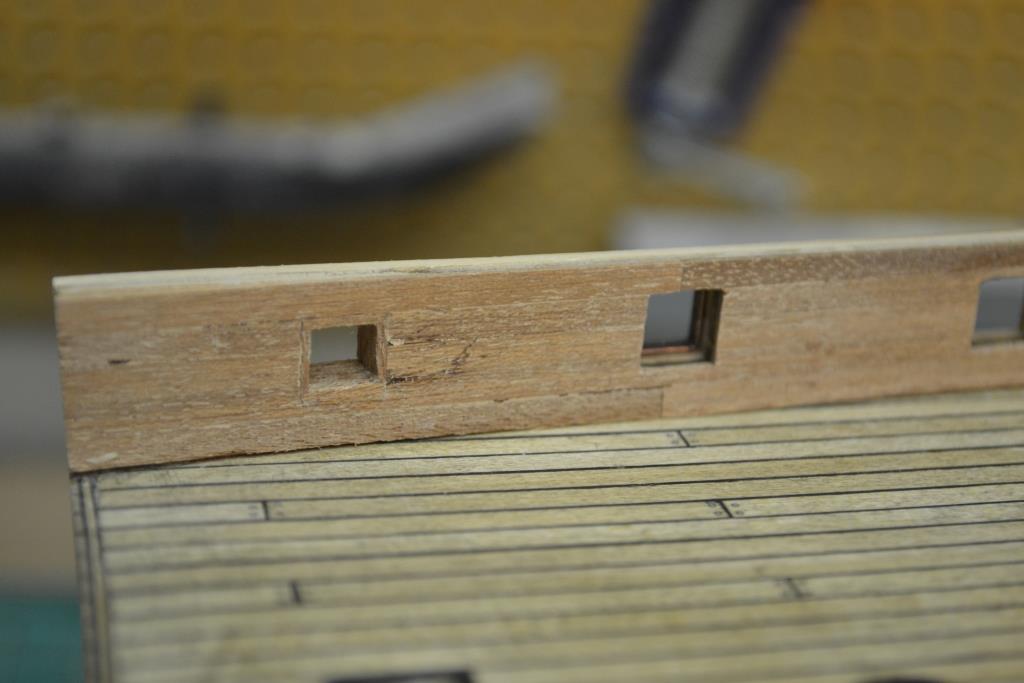
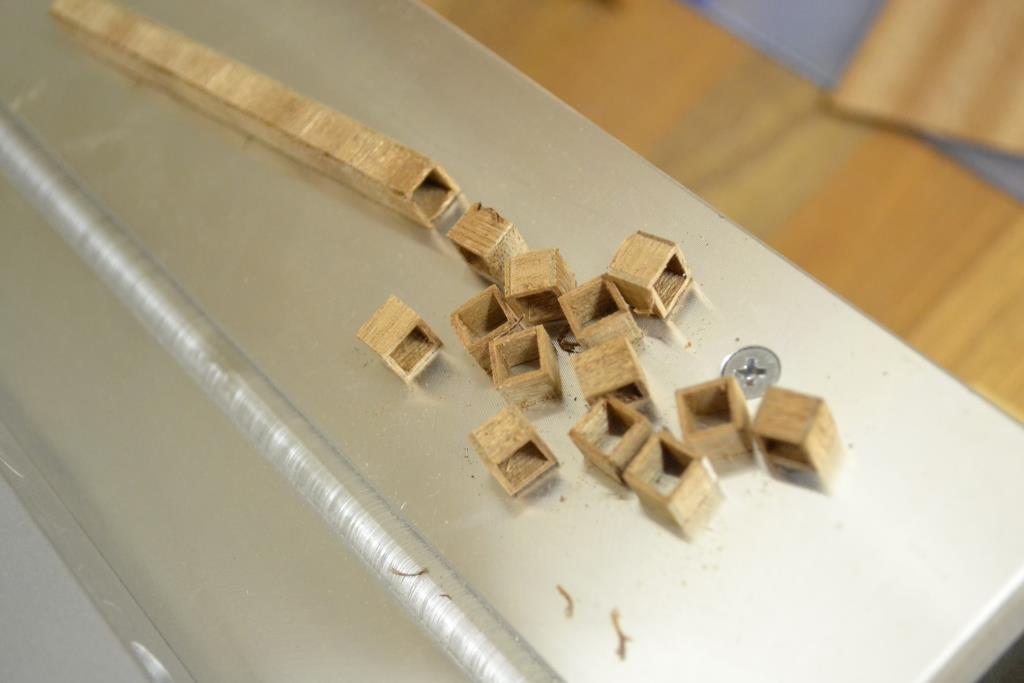
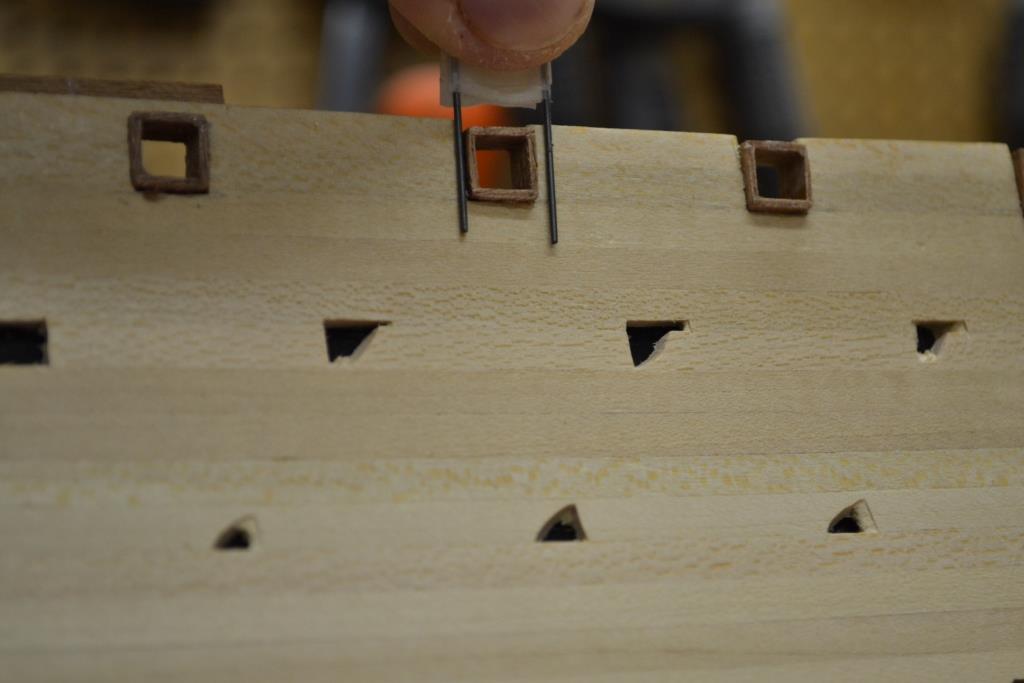
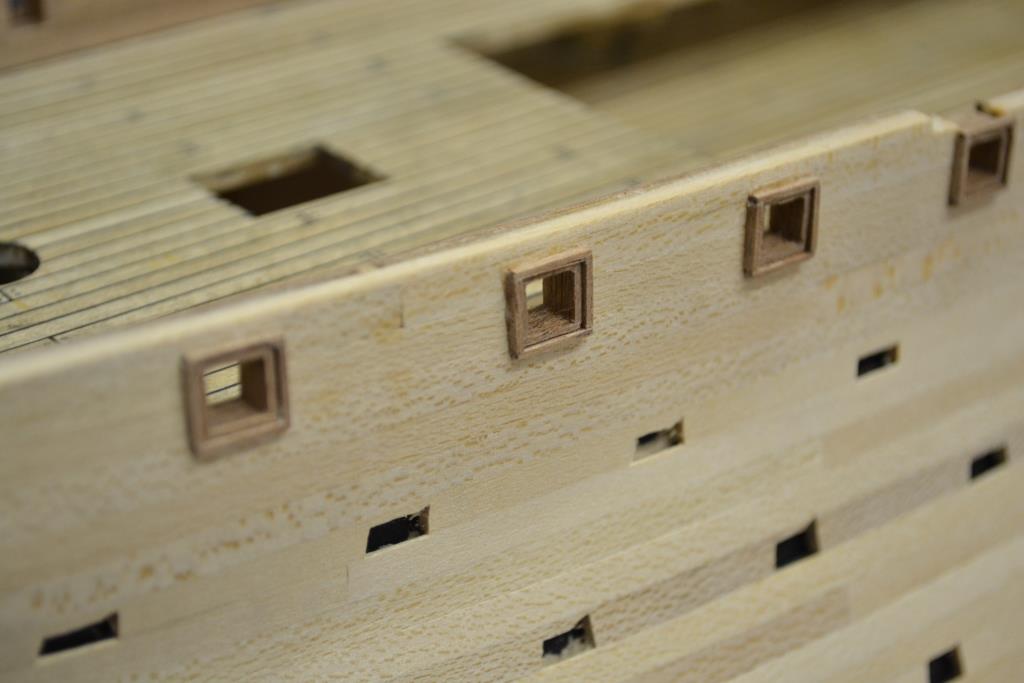
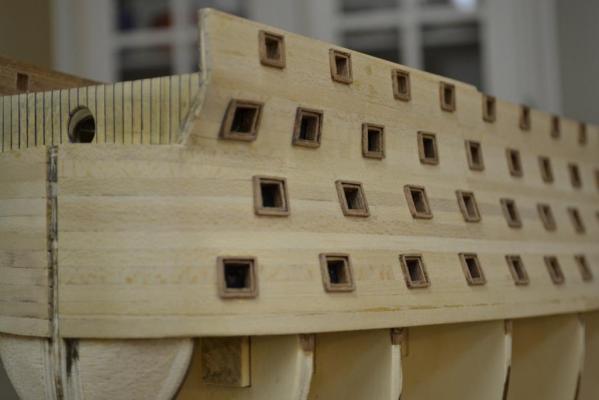
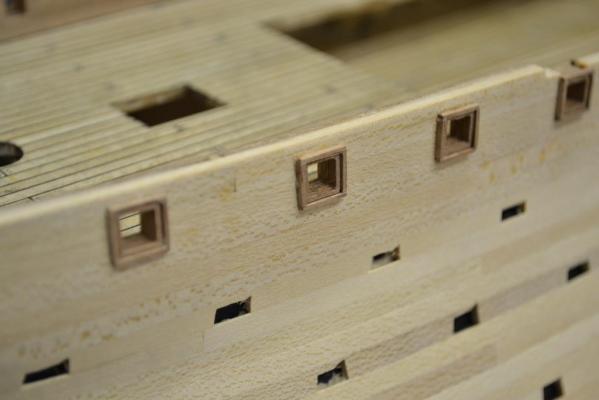
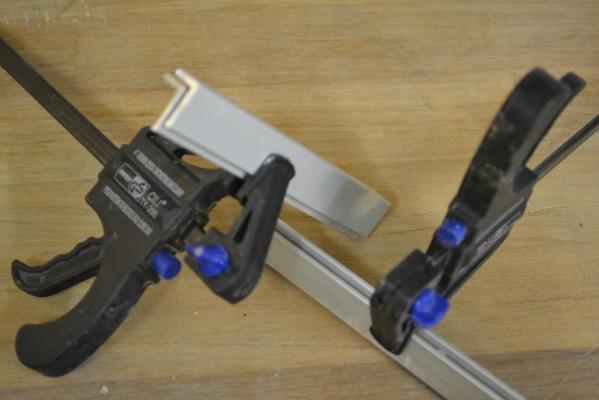
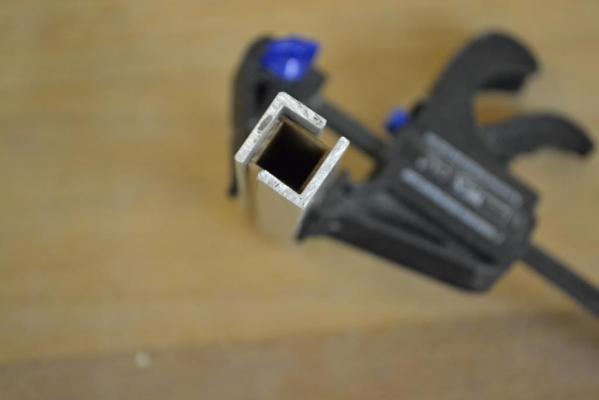
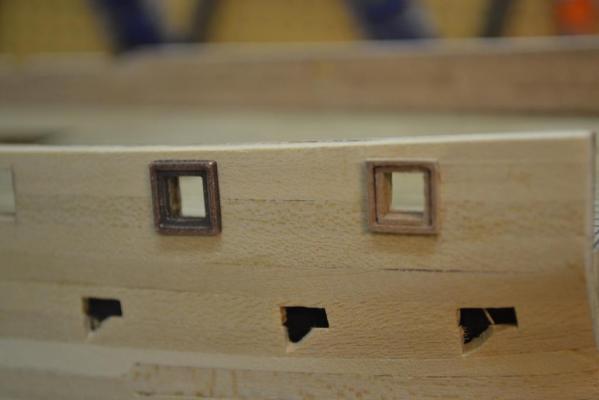
Hej Sjors, thanks for your kind words, and yes the FET table-saw can also cut plexiglass, but in this case you need to change the current blade to an more suitable blade made for cutting plexiglass, Right now i use a blade which has very small teeth this for making sure it doesn't destroy the thin wood during cutting .… Again thoughts popped up during the planking of the bulwarks, instead of using the provided metal gun-port frames I wanted to give it a try to scratch build these as well. After thinking about an easy production line, I started to saw the strips in the needed lengths. By using several “L” shaped aluminum profiles I made sure to glue the strips in 90 degrees angles After this I used the “L” profiles again to create the perfect square tube I strengthened the corners on the tube with thin CA glue and could cut them more or less easily in the needed lengths without breaking them during this progress Here some pictures with the first prototype of a gun-port frame glued in place. I taped 2 pcs. of 0.8mm and 2 pcs. of 1,5mm drills together with some tape and used this as a tool to sand down the individual ports in the appropriate thickness Here are some more pictures of the progress, “I’m pleased with the result” however the only minor detail is the needed quantity : 108 portframes in total …


-
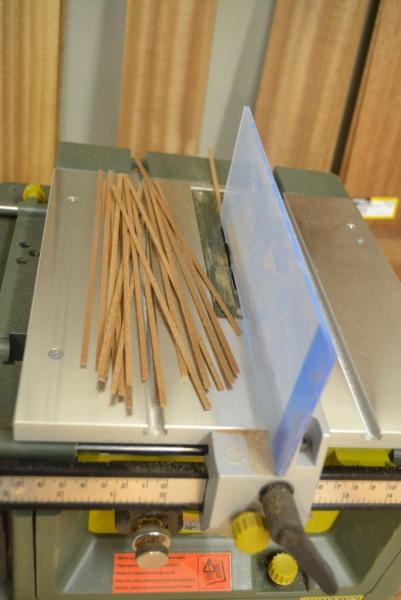
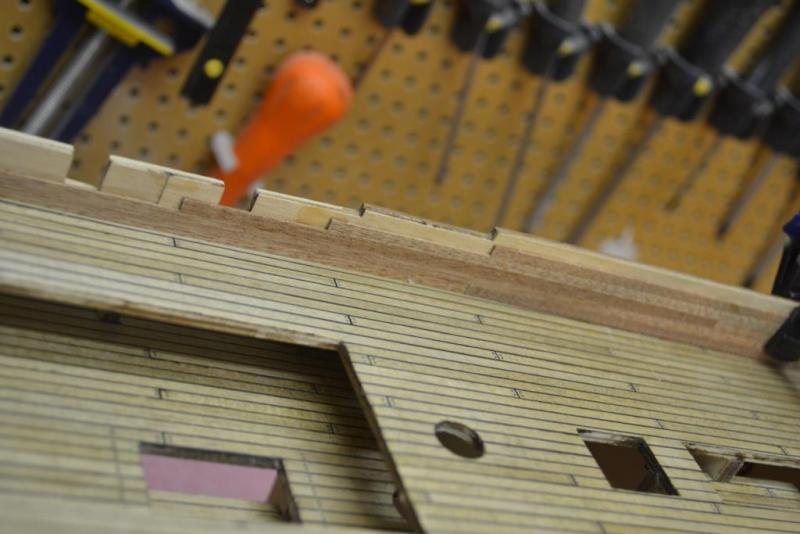
The first part of the upper planking on both sides is finished, basically what I did is the same as on the other side and included the stealers after plank no.7 During the planking, my mind was already focused on the next step. Included in the kit are Ramin strips for planking of the Bulwarks, but I decided to change these strips for wood of a reddish color, and to limit the amount of different sorts of wood and for availability reasons, I ended up with 1 mm Mahogany sheets. Again a perfect excuse to use the table saw, i'm very pleased with this tool. I found out that a piece of 3mm thick Plexiglas was so smooth that the blade wouldn’t grab it and it keeps the strips down on the table without losing any fingers Here’s some pictures of the progress