HOLIDAY DONATION DRIVE - SUPPORT MSW - DO YOUR PART TO KEEP THIS GREAT FORUM GOING! (89 donations so far out of 49,000 members - C'mon guys!)
×

GTM
-
Posts
249 -
Joined
Content Type
Profiles
Forums
Gallery
Events
Everything posted by GTM
-
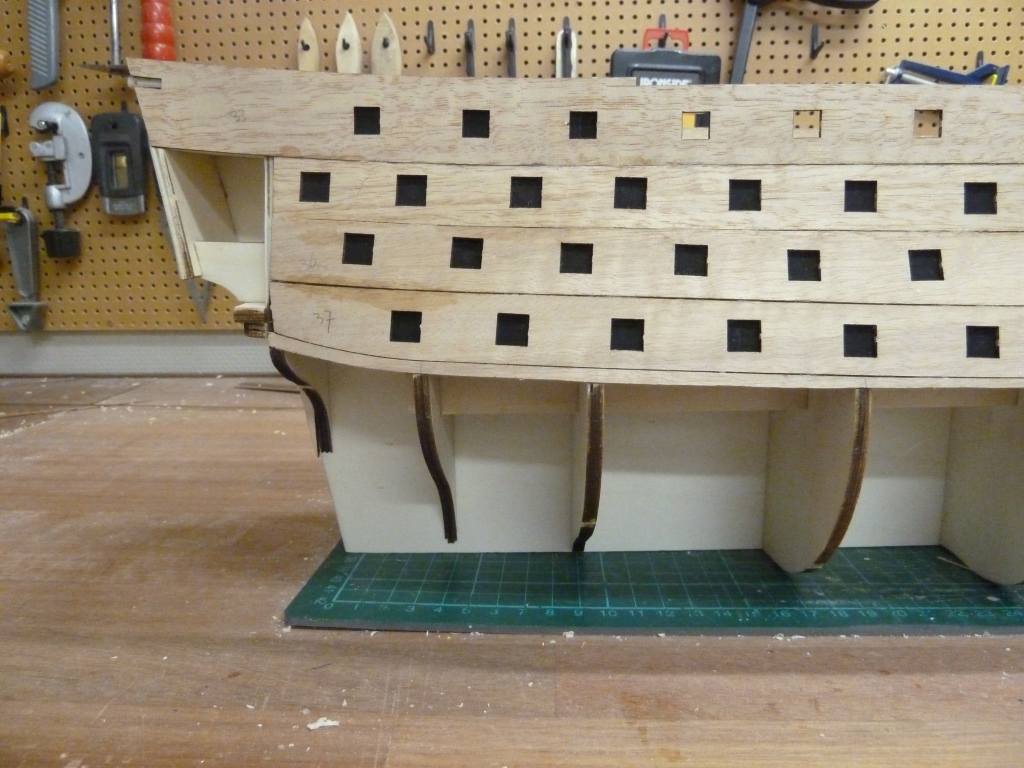
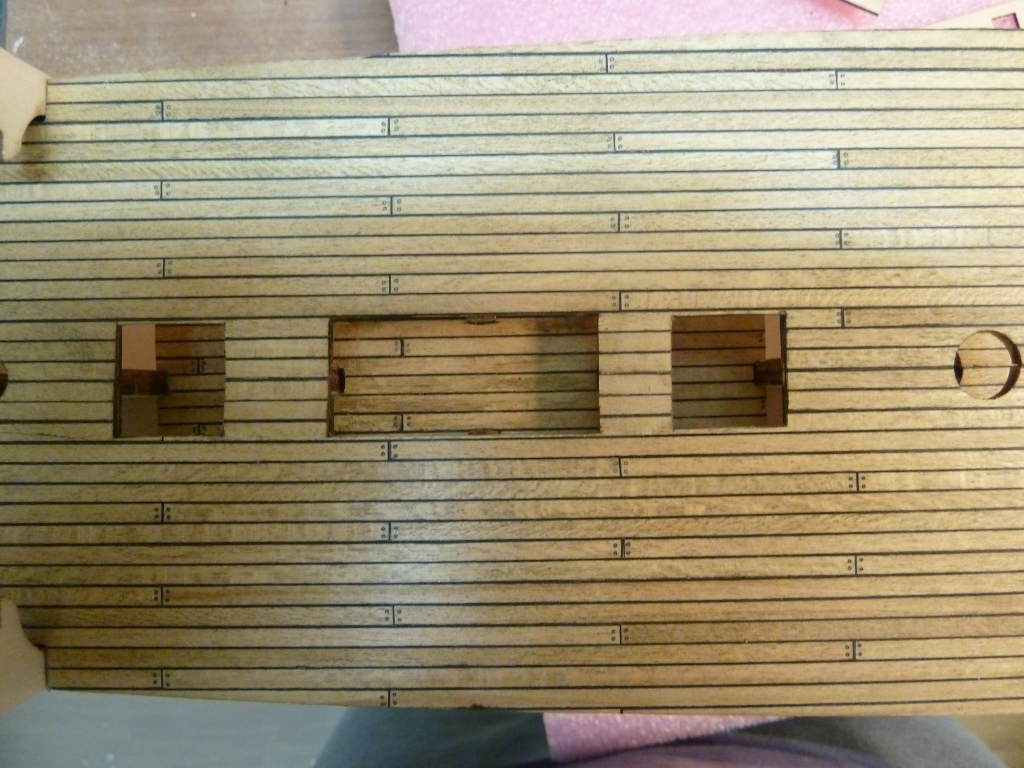
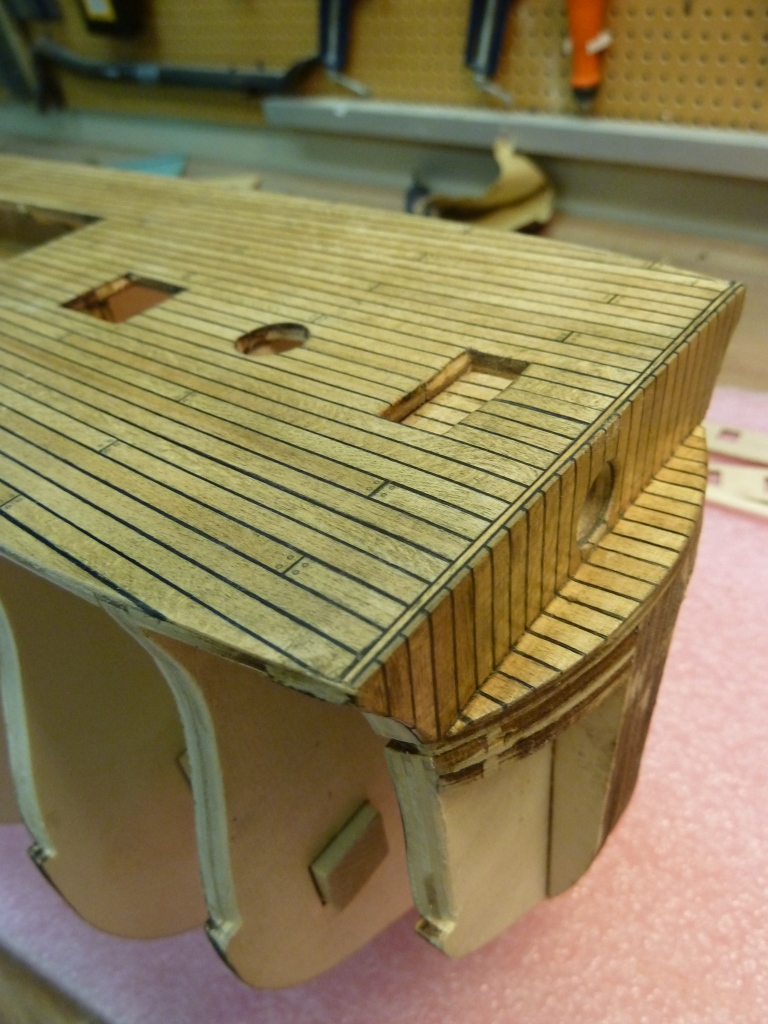
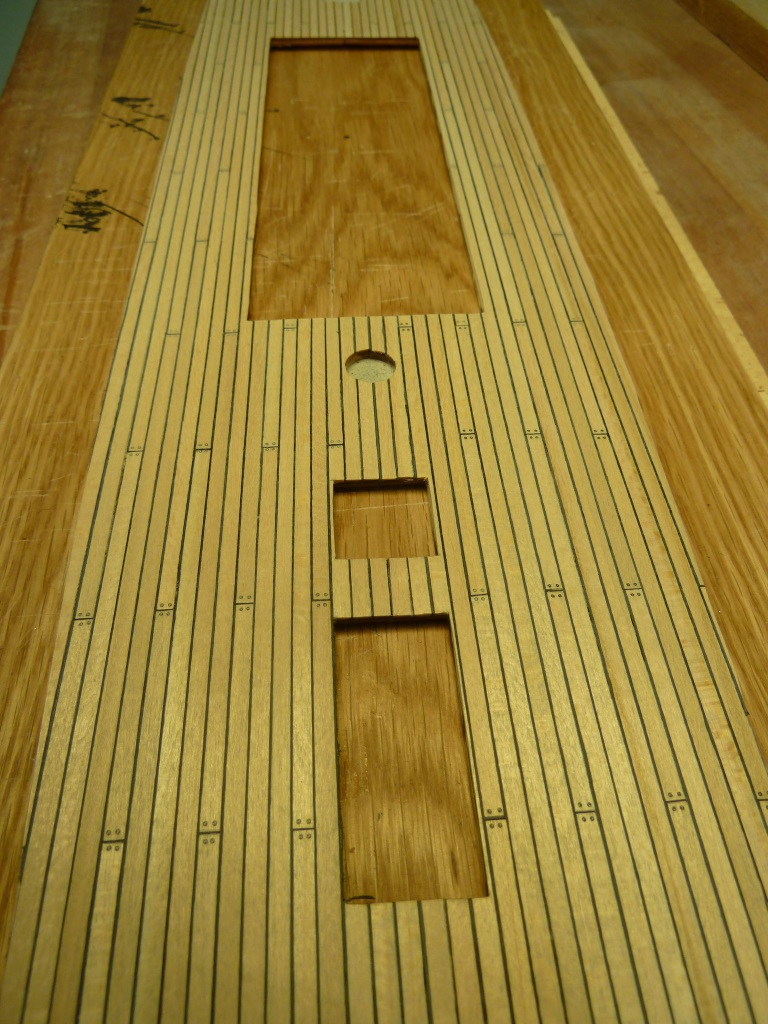
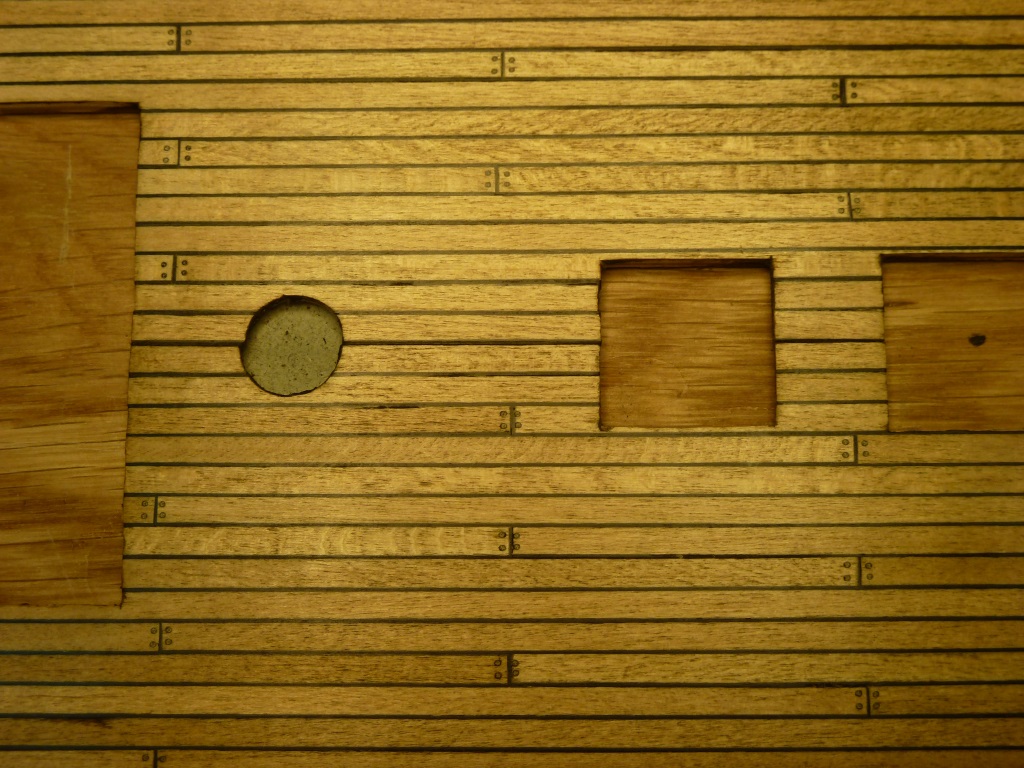
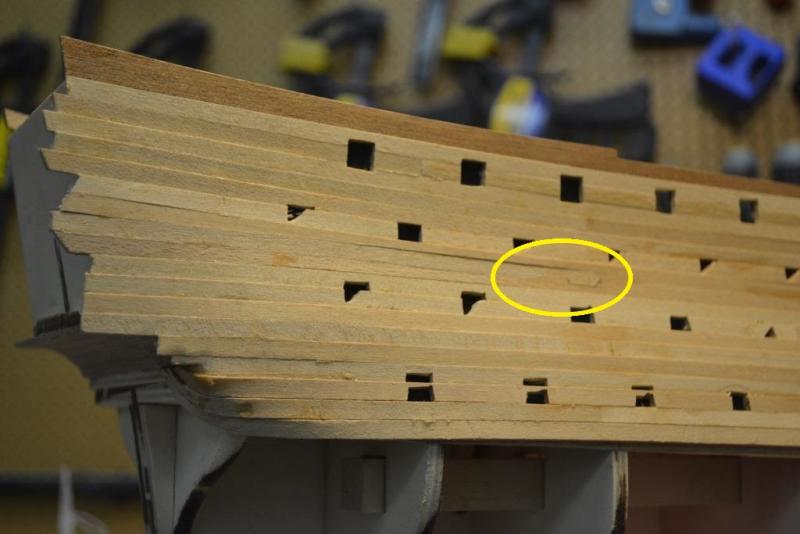
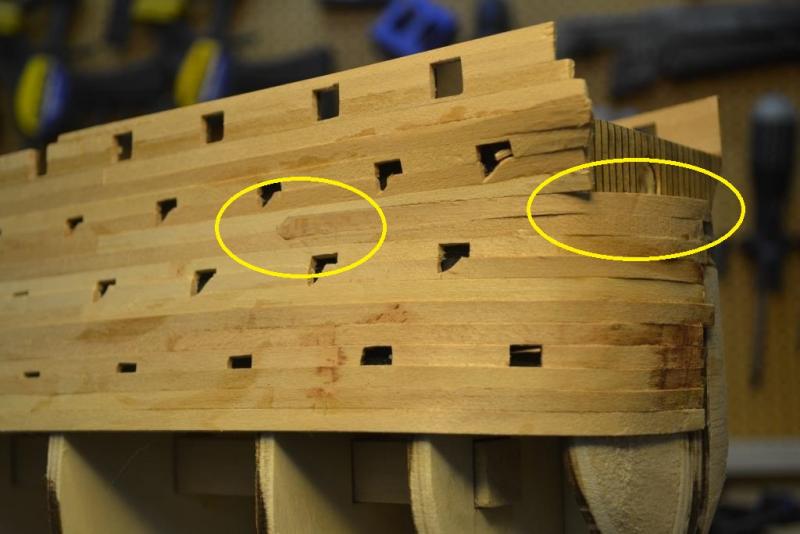
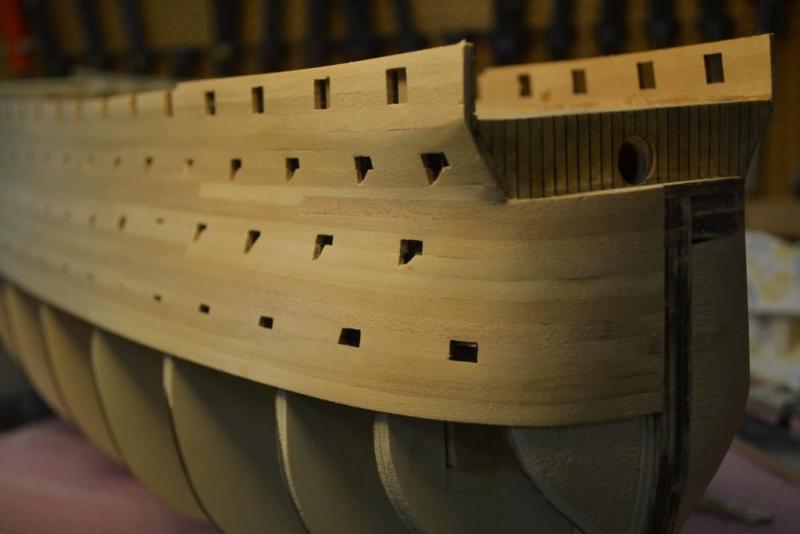
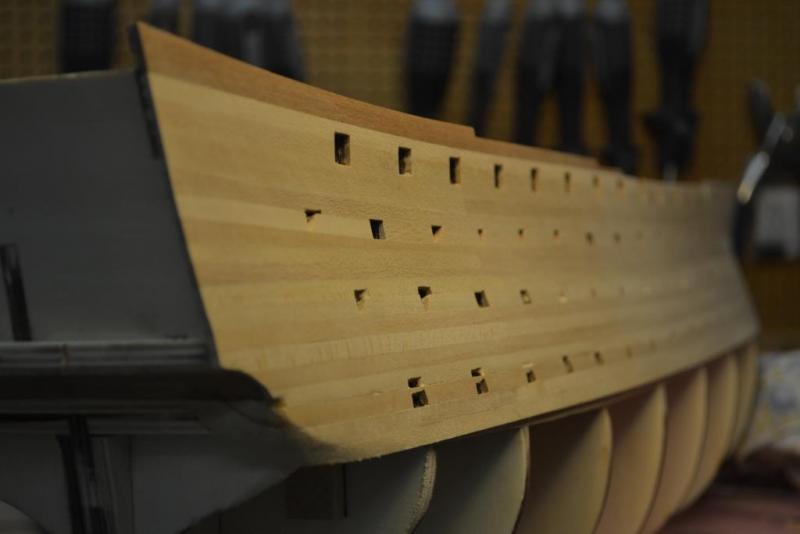
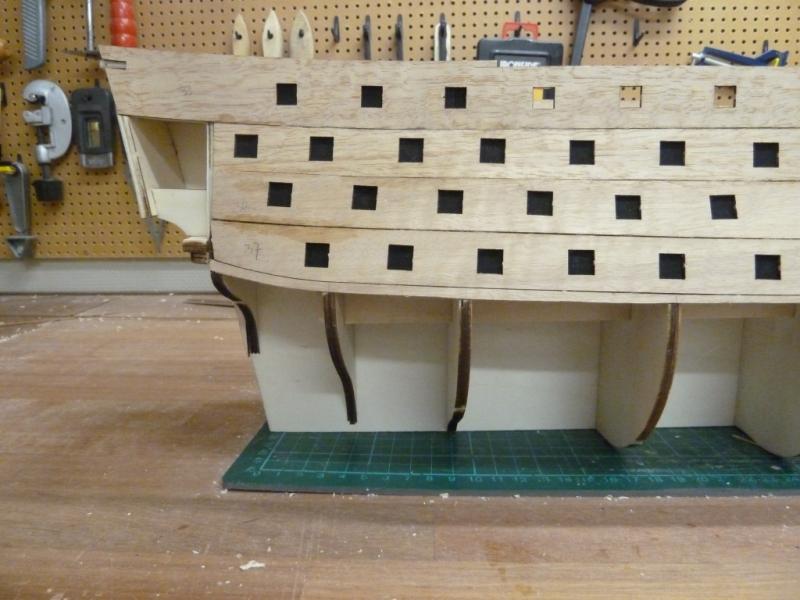
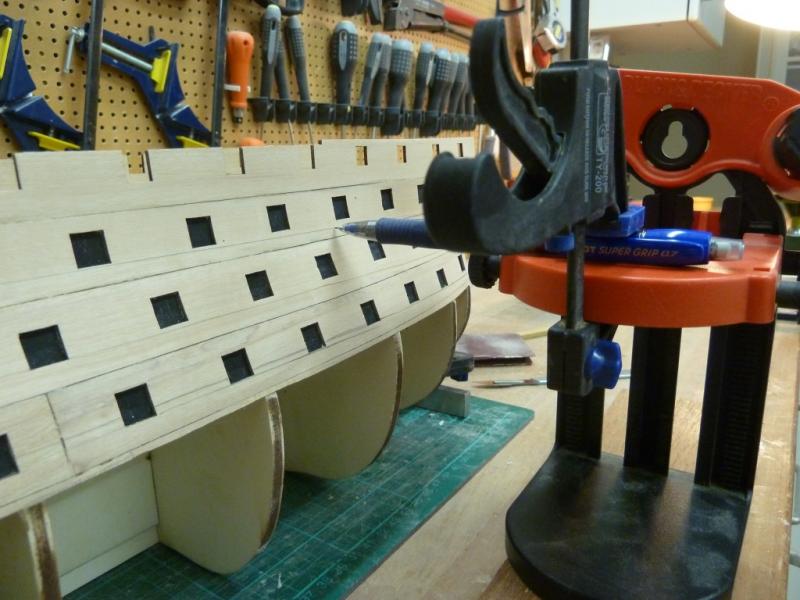
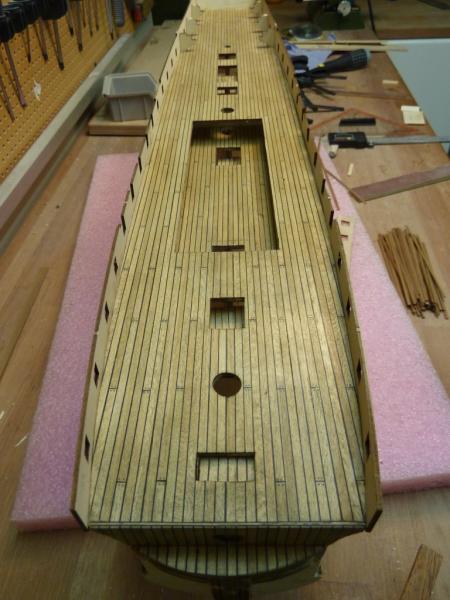
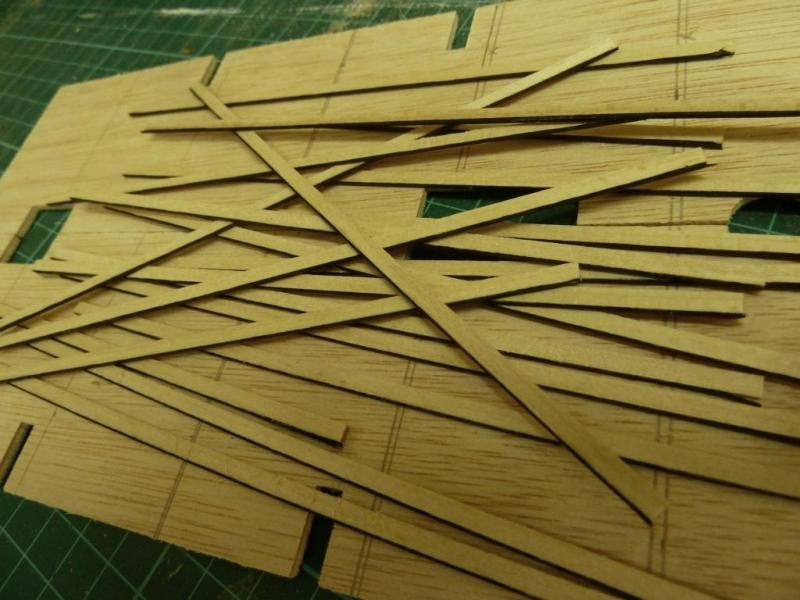
 An major step in the build project, I finished the upper planking on one side of the ship and wanted to save you all for a lot of pictures during this fase so here's the result. I only slightly have opened op for the gun ports, I will open them completely after having made sure that they are aligned properly. After plank 7 I inserted an full stealer on the bow and stern to compensate for the upwards going curves and to align it perfectly with the front deck. Here are some pictures after roughly sanding, I did not sanded the bottom planks too much, this is to prevent rounding edges as they are very vulnerable at his stage. As I’m not intending to paint the model, I can’t cover up the holes made by nails/pins and needles so easily. So I hold the planks in place by clamps and pieces of scrap-wood as an additional tool to hold the planks into place during drying and gluing.
-
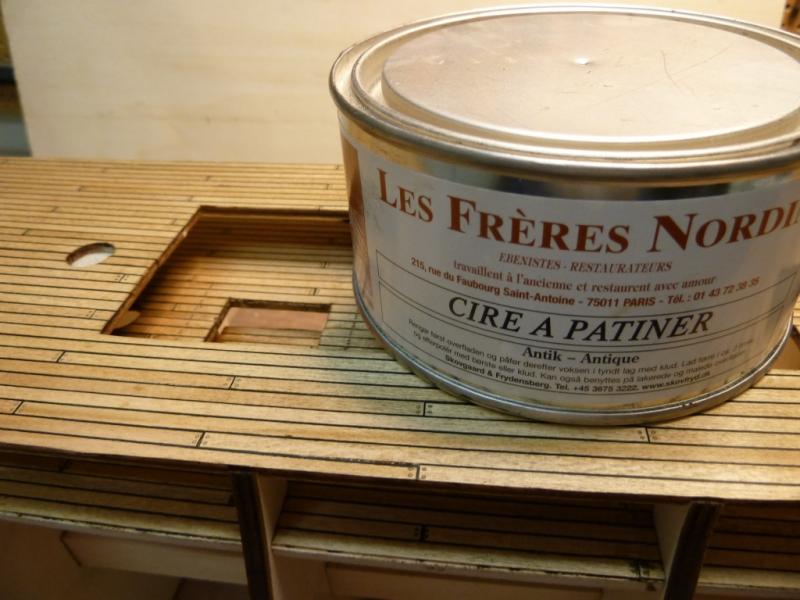
Thank you all for the encouraging reactions Rick, down below a picture of the bee-wax i used (something french) and it has an antique tint I found it on the internet, but i'm sure you can use any furniture bee-wax available to you, Here's the (danish website) link where i found it ..
-
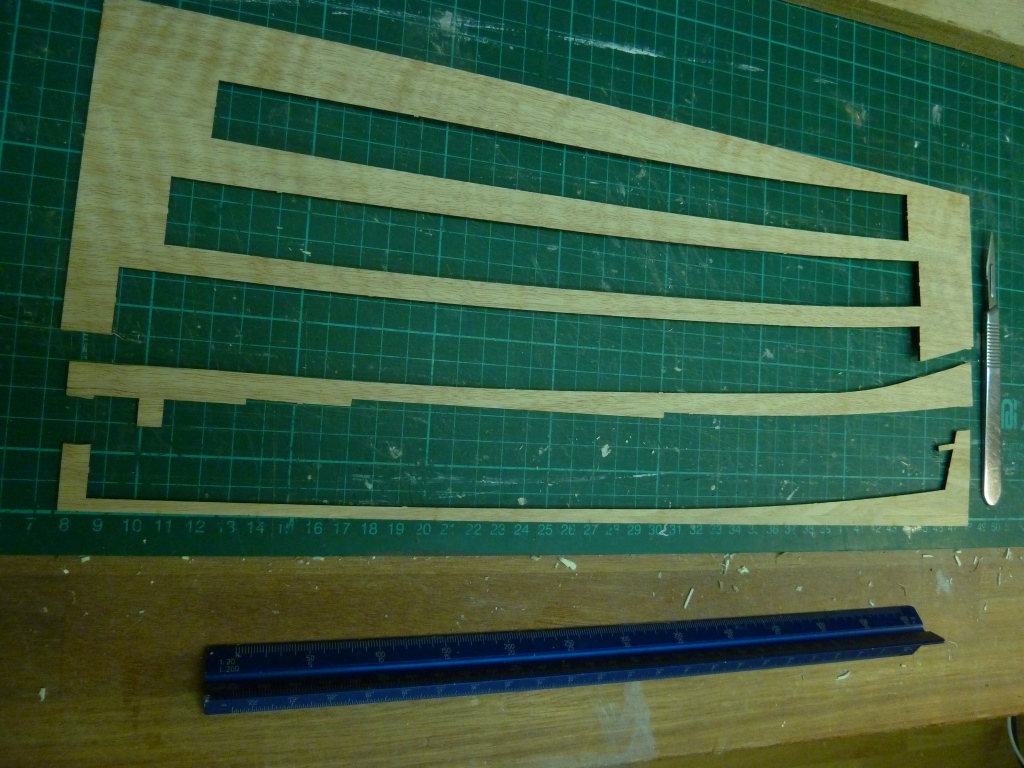
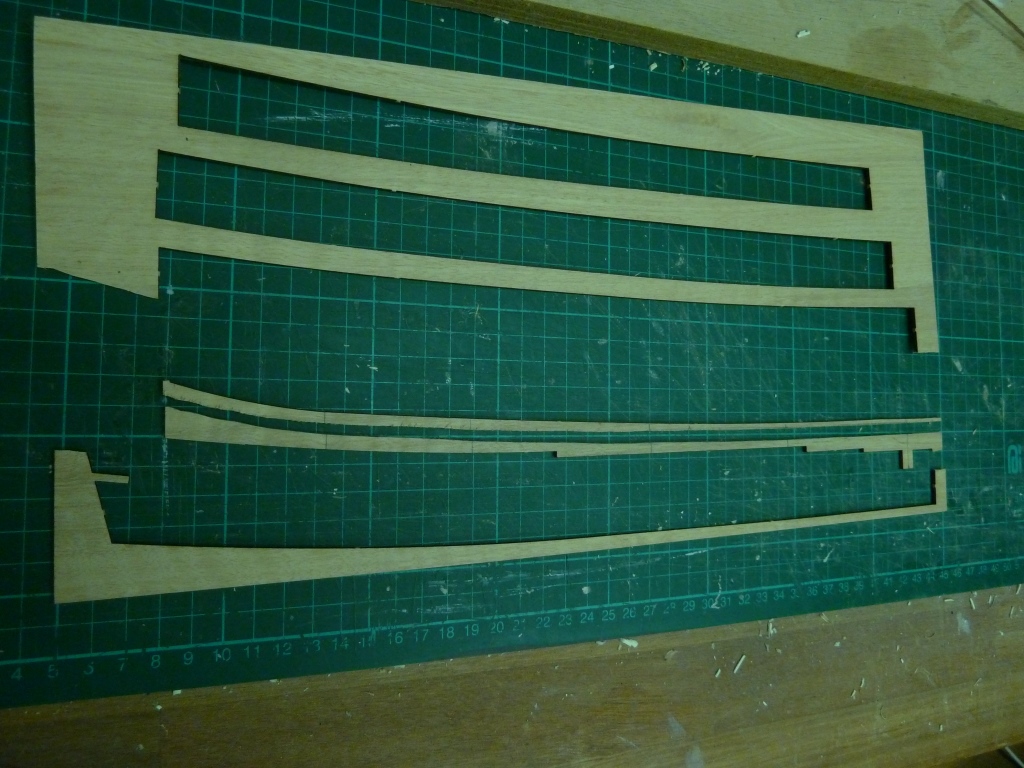
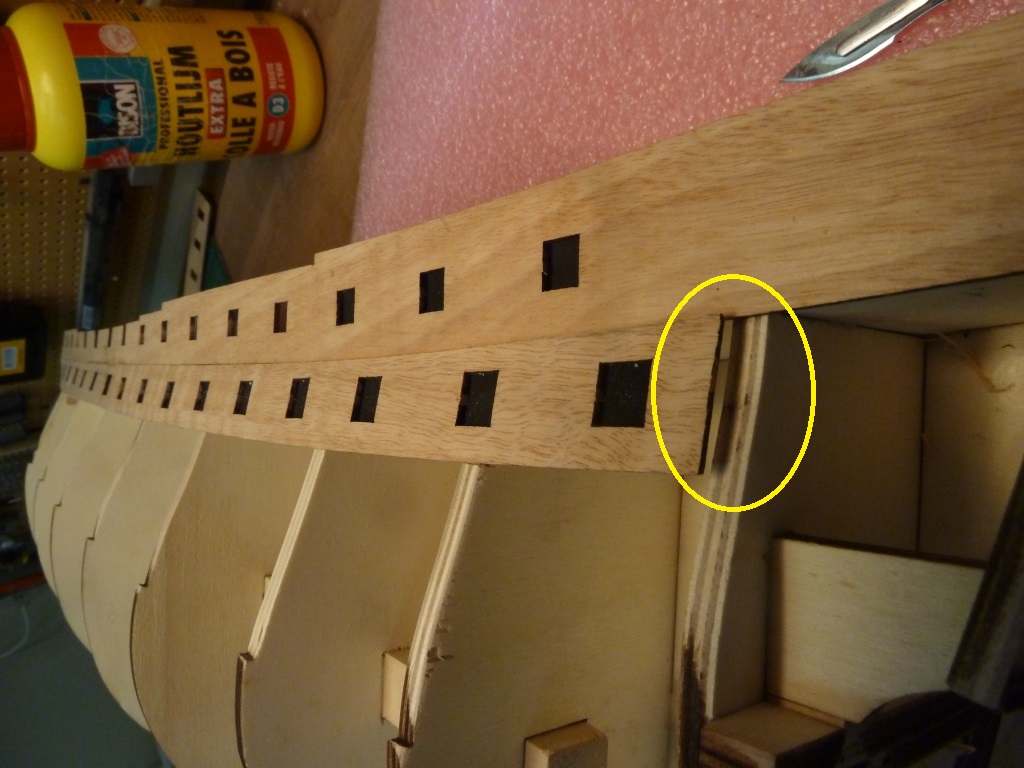
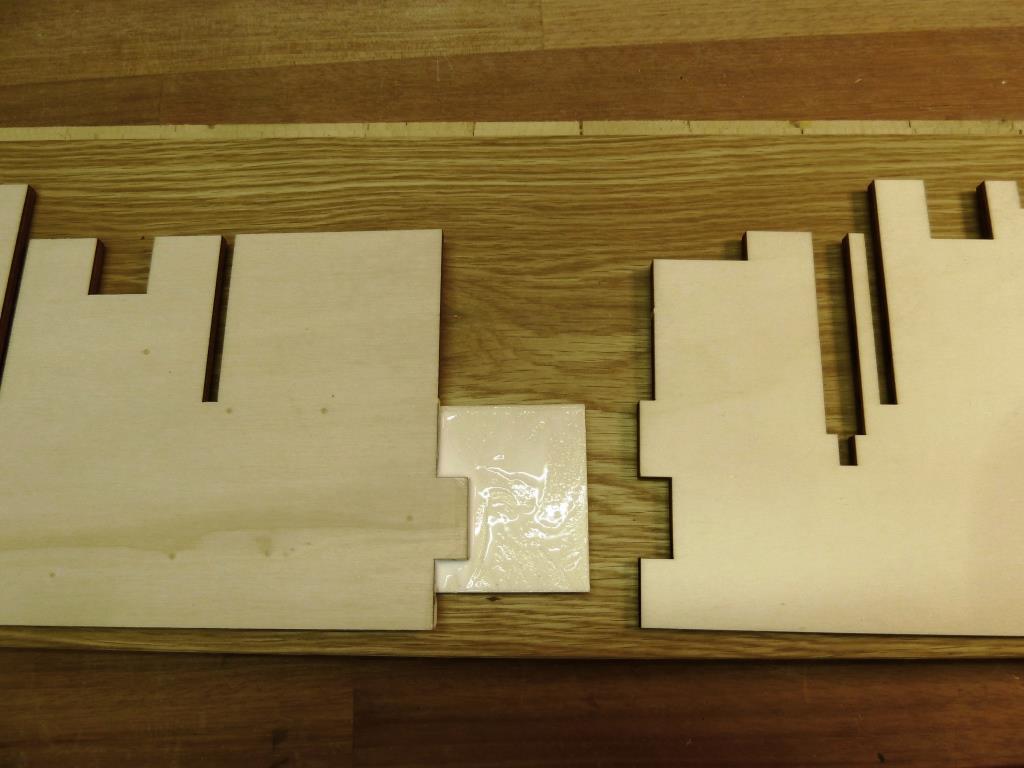
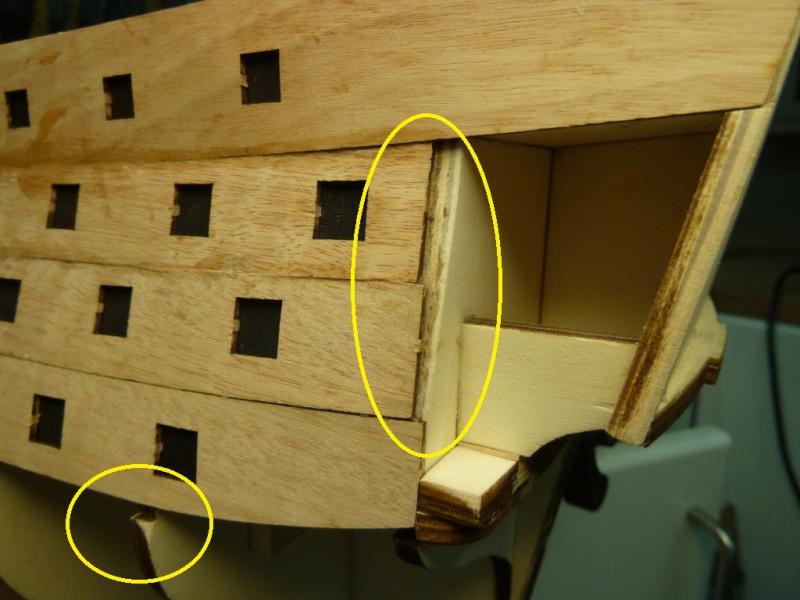
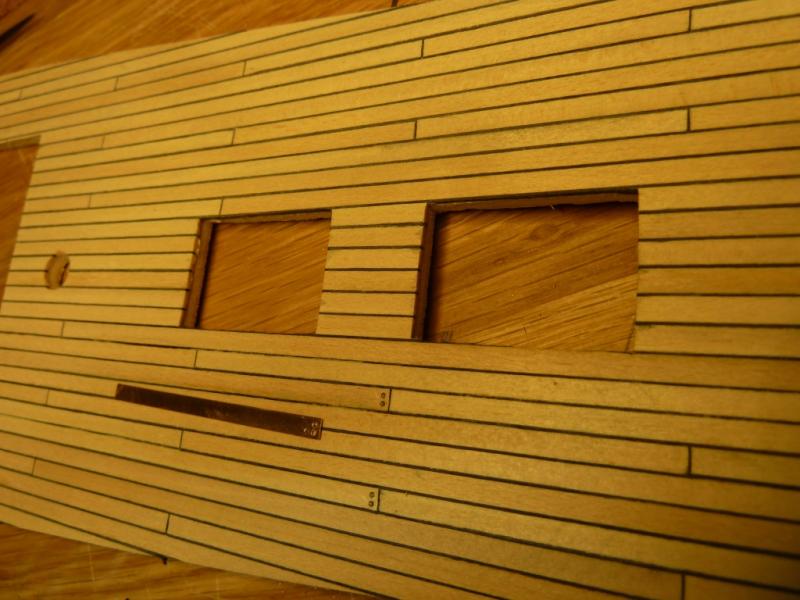
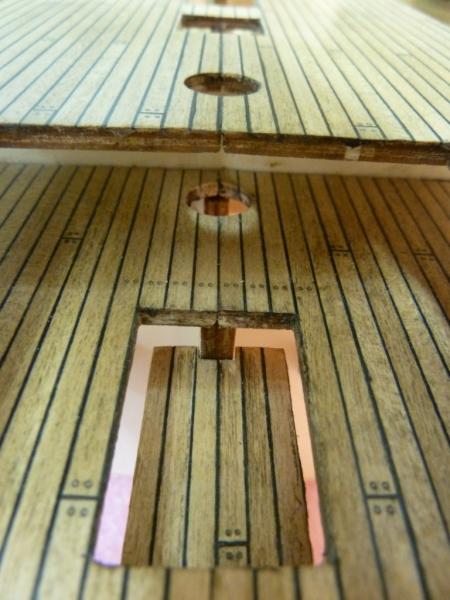
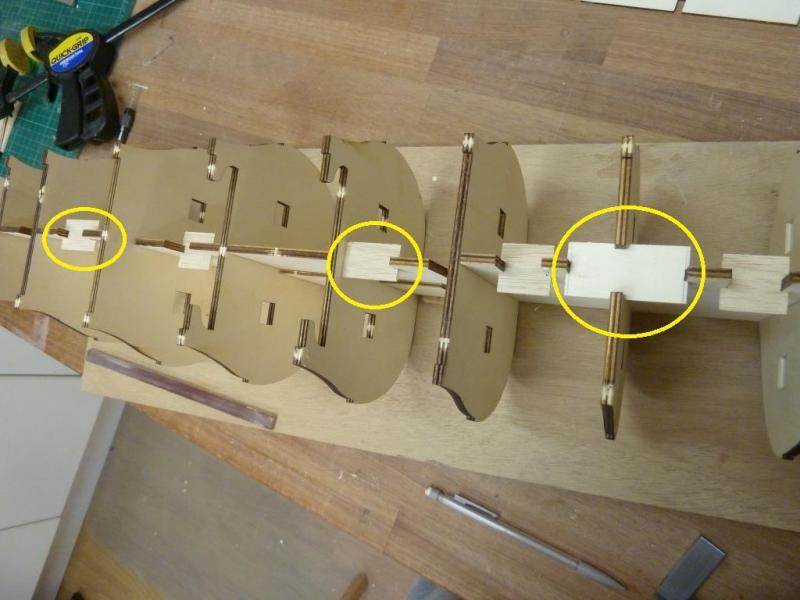
Thank you loyal followers for the comments! all dough I’m not sure that "moving to the dark side" is a good thing to do ? Well, after this minor side-step, back to the gundeck strips. I have glued all of them in place and I must say that these are not a perfect fit as you will see on the picture down below. The gap between the bottom of the lowest gun strip and the cut-out of the frames is my biggest concern. To cover this gap I re-used the scrap wood of the gun strips and it helped me to create the perfect “eliminate-gap-planks” And here it is glued in place I also noticed that most likely some additionally "re"-alignment is needed for some of the gun-ports..

-
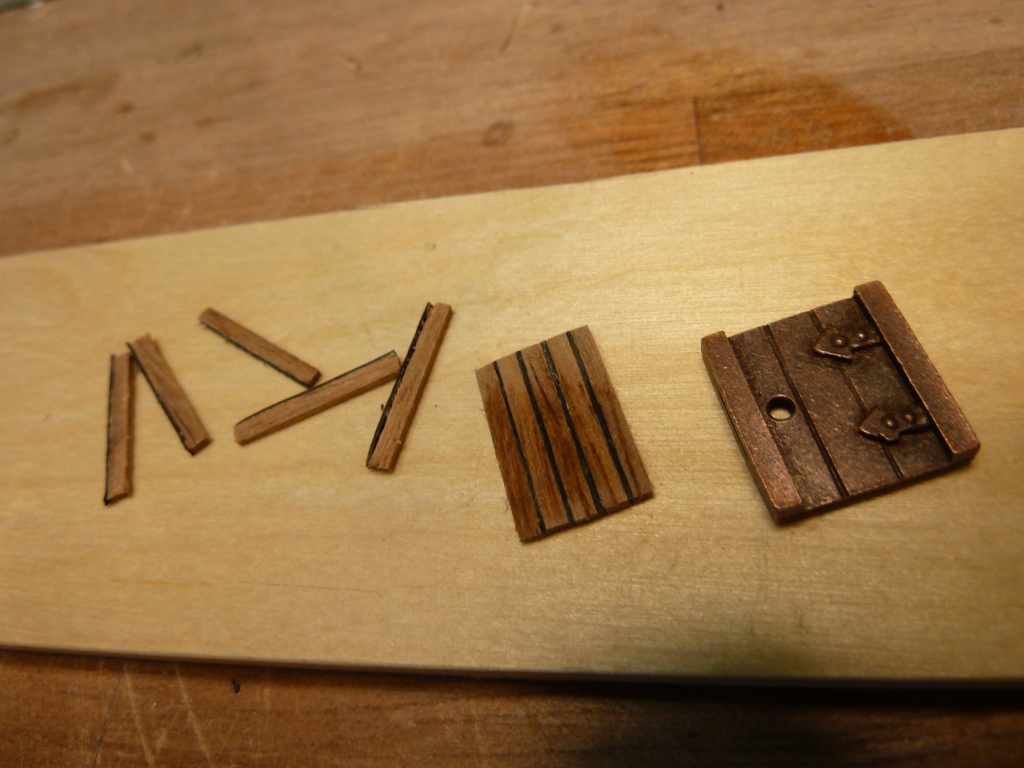
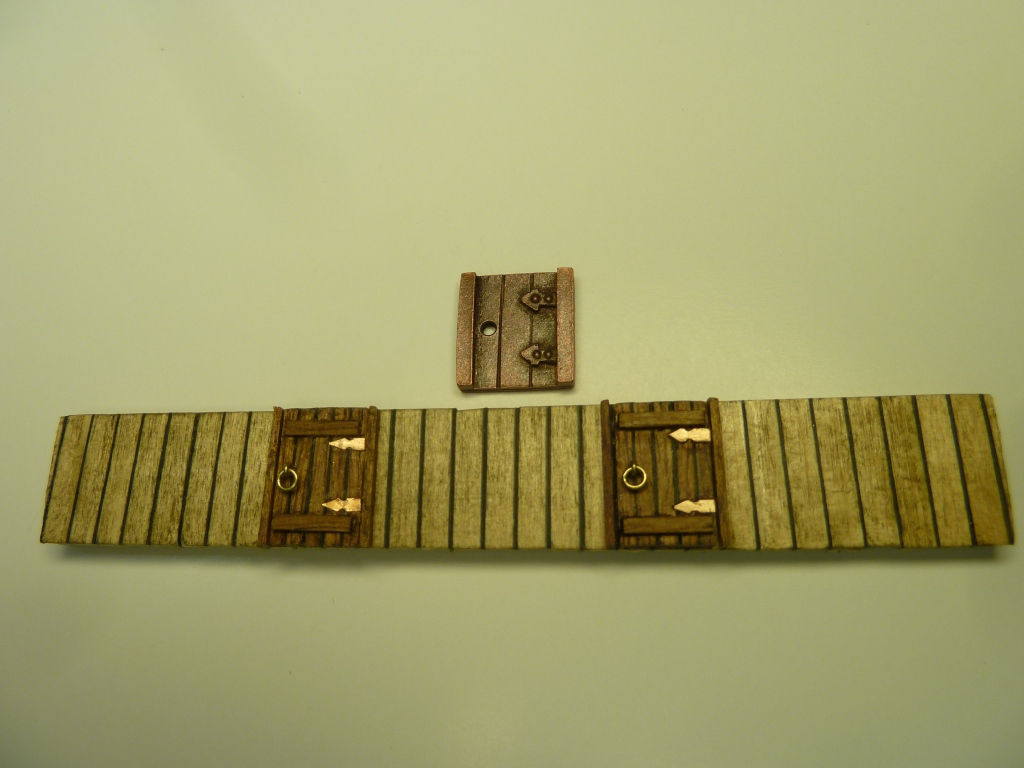
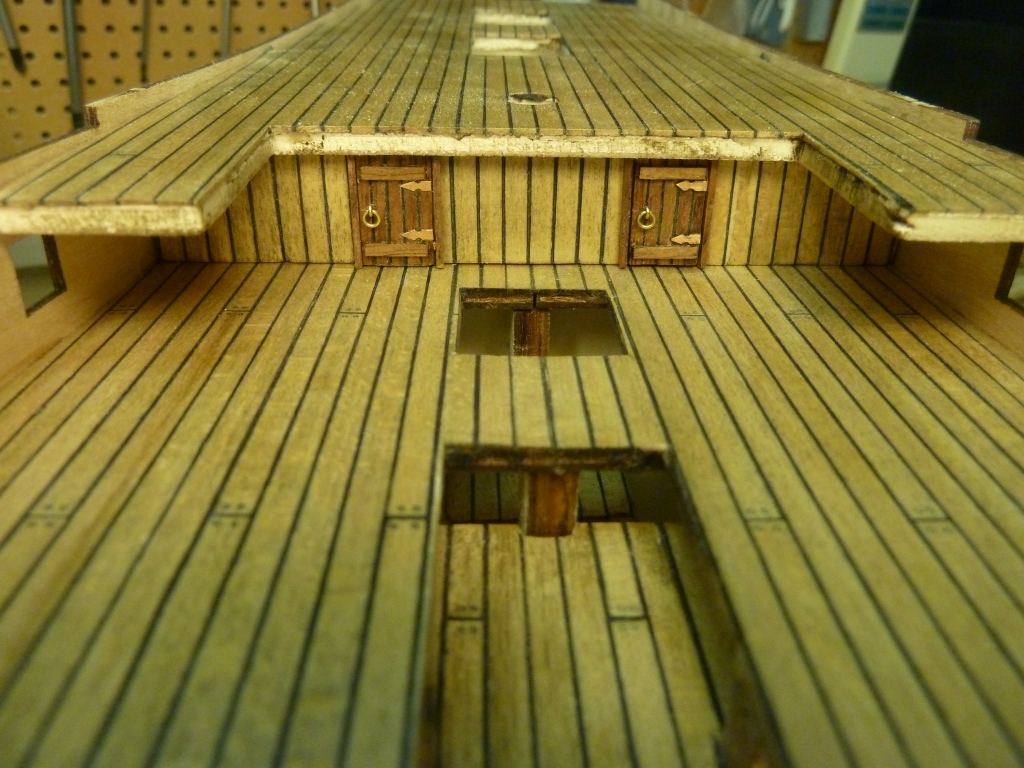
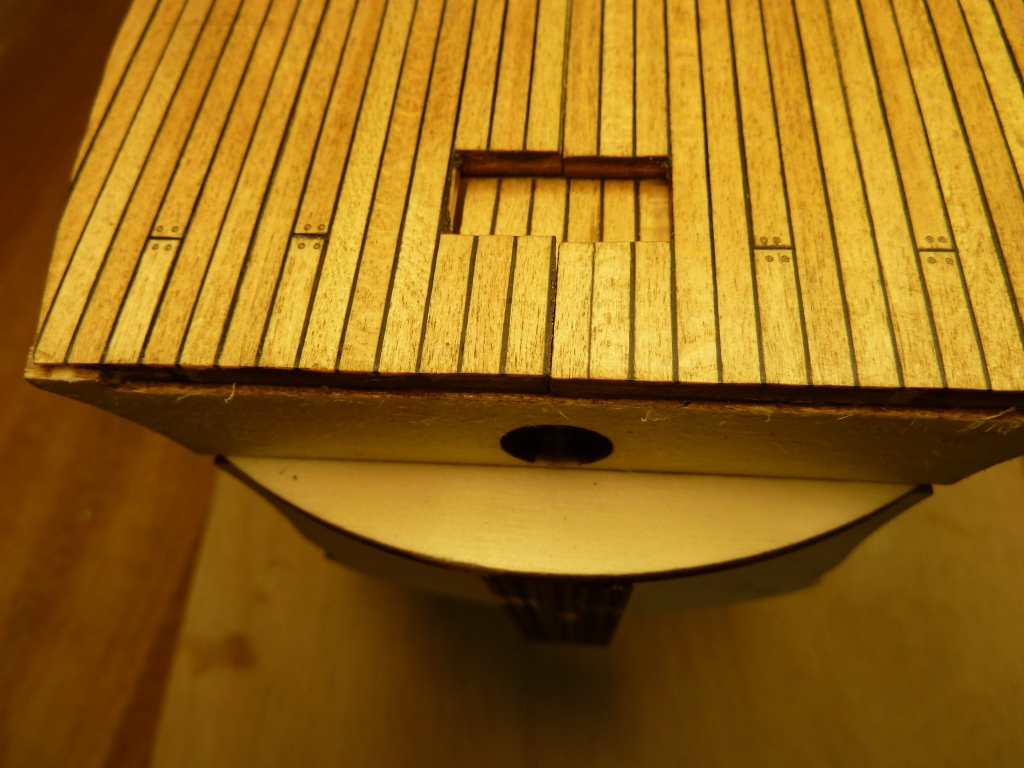
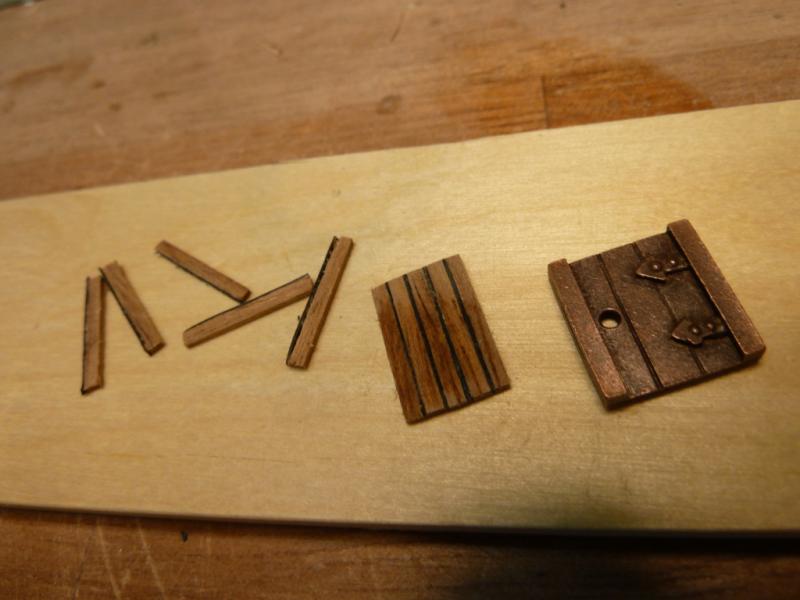
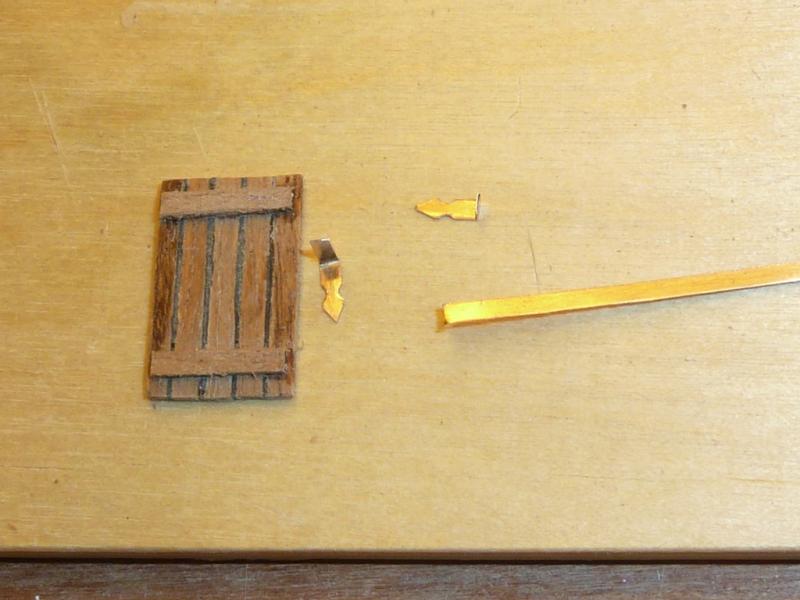
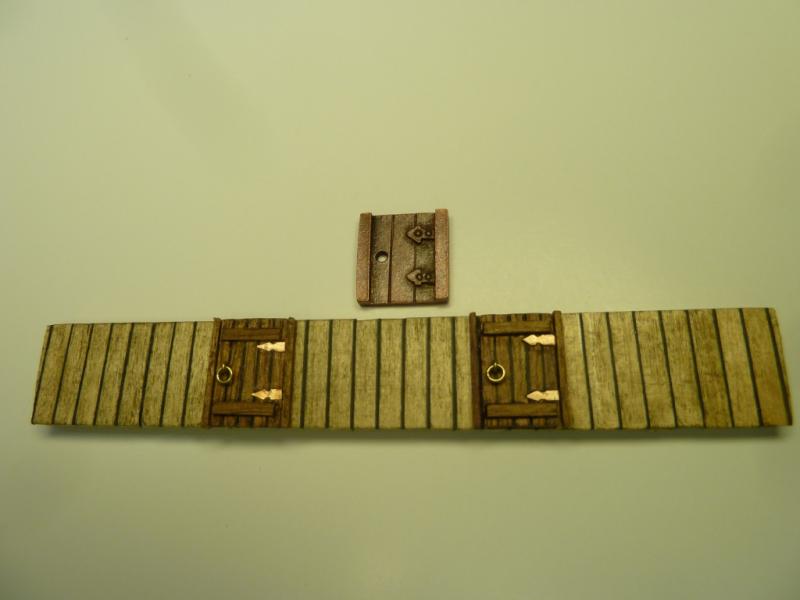
Wetting and drying of the gun strips take quite some time, so I planked the quaterdeck in the meantime. and tried to be a bit more carefully when drilling the holes for the treenails. I think the doors supplied with the kit are a bit too bulky and out of scale so as an excuse and to try out the capabilities of the FET table saw I made 1mmx2mm strips from scrap wood and i glued cardboard on one side. Glued together and with cardboard in between the planks gives the door a slimmer look To give it even more details I have added an (in scale) door handle and hinges an Preview look...

-
wow!, wel done, i really like your build project so far! i think i will need to copy some of the techniques you used for the ship's boat
-
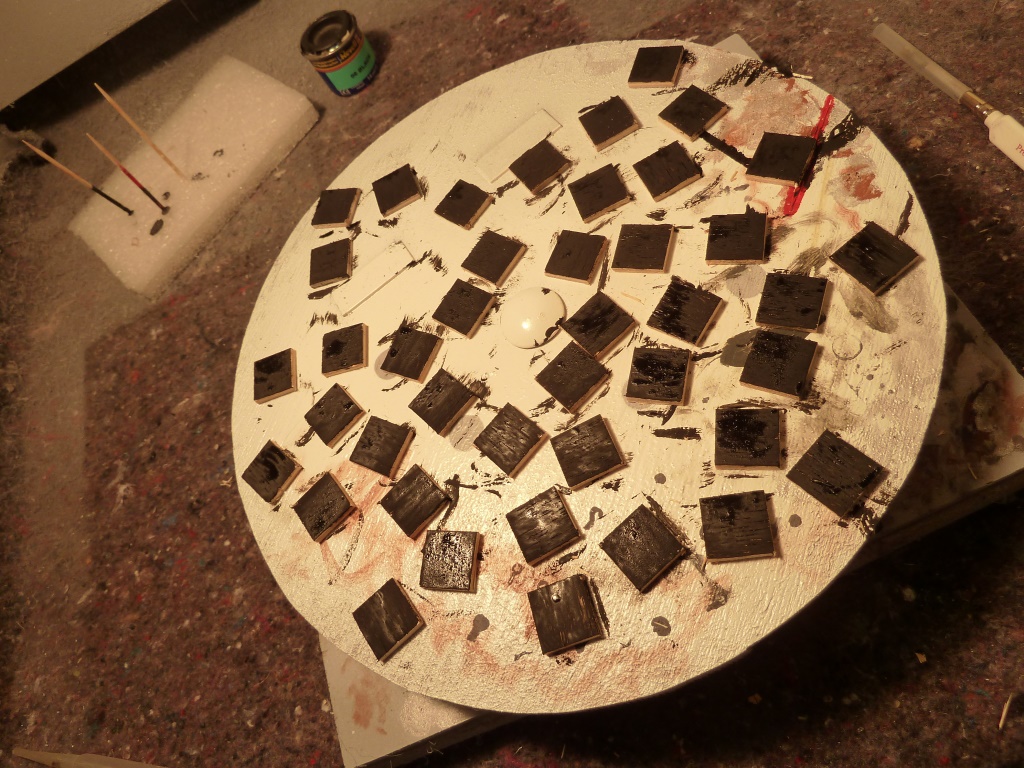
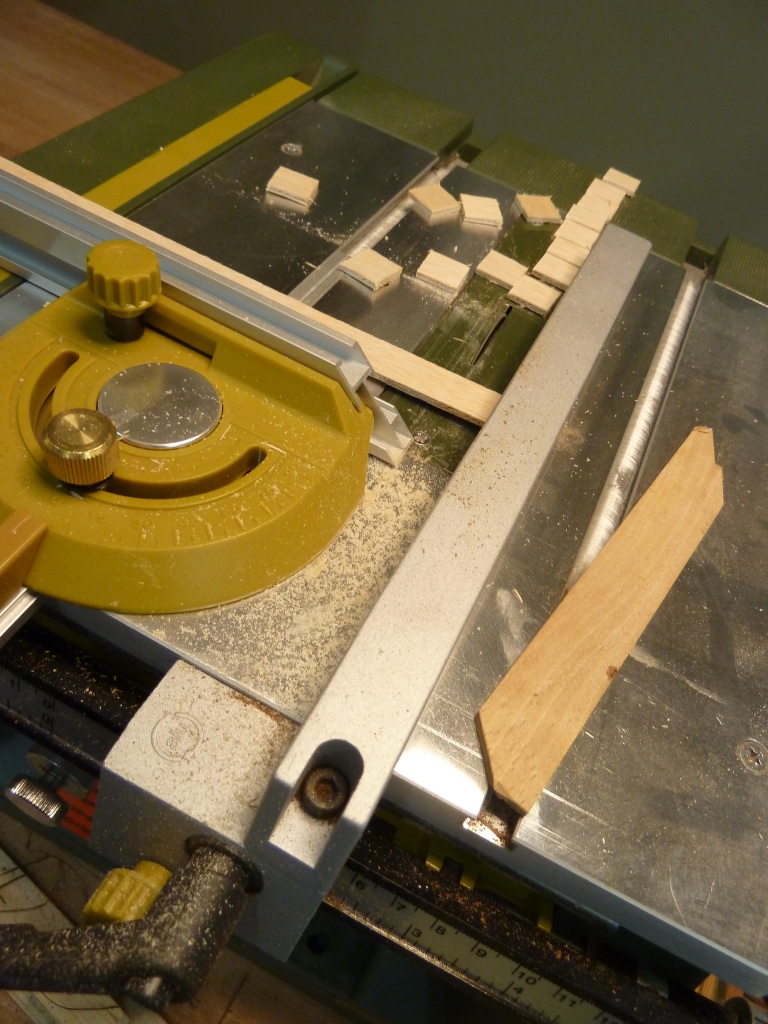
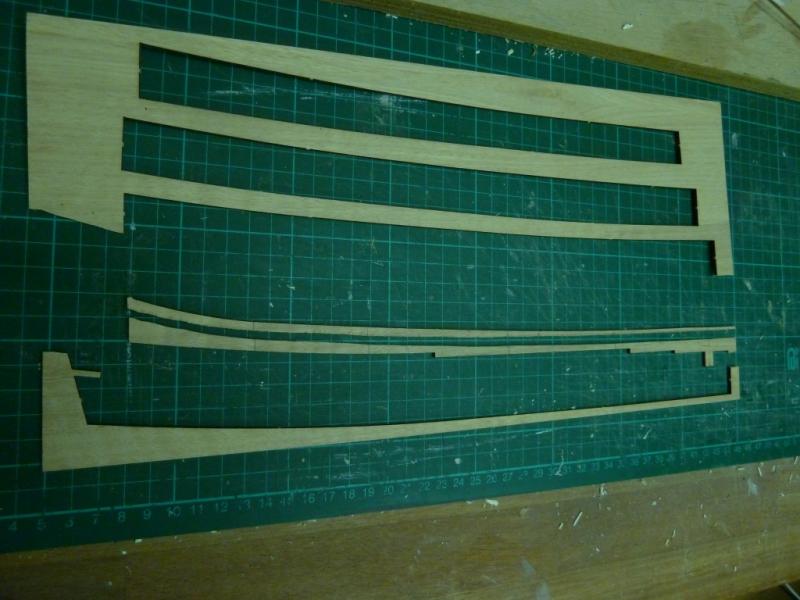
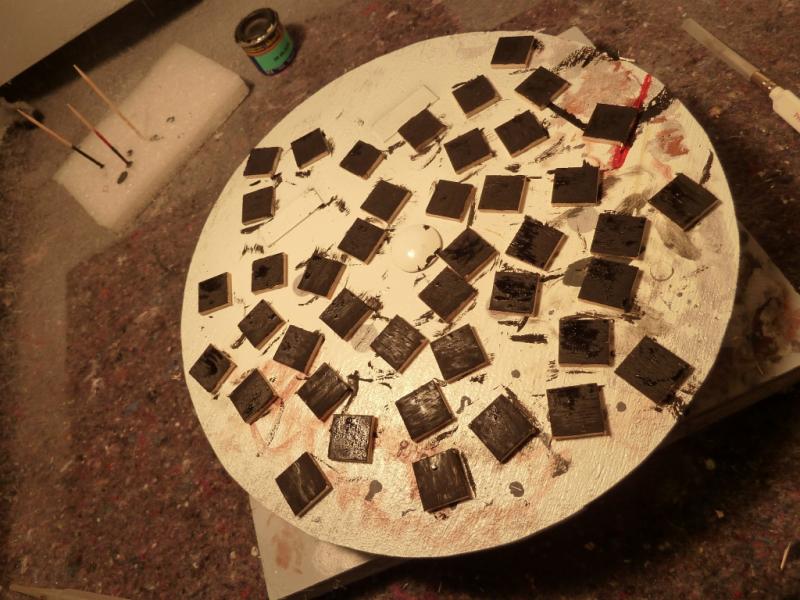
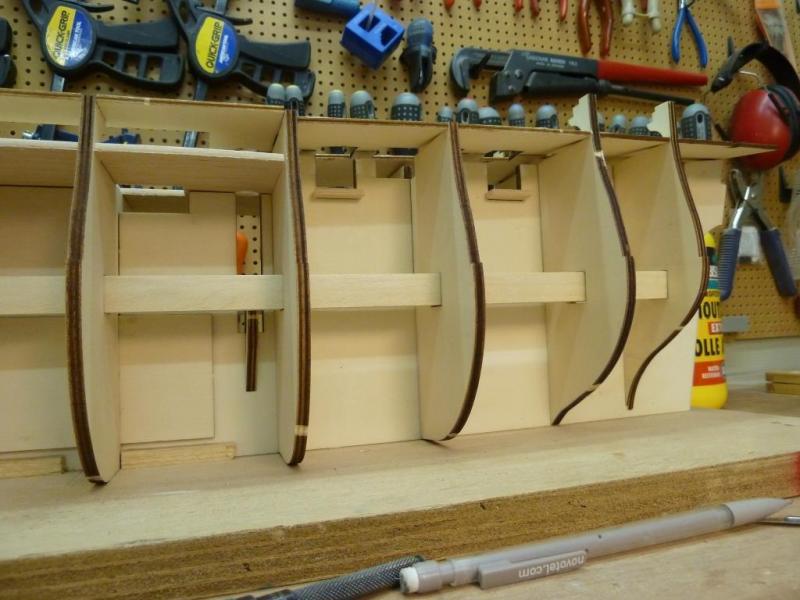
Thank you Garward for the ammonia tip i will certainly keep that in mind (i guess i better have to try this with all the windows open or outdoors ) Just about here in the build project my new tool arrived : a table saw FET (37070) from the manufacturer proxxon It was a good opportunity to try it out by cutting the gun bases.. I decided (in deep contrast with my previous build the “Smit Rotterdam”) that I’m not going to use any paint on this model, so I hope that this is the only exception.. To fit these gun base strips with their bases I needed to modify quite a lot of bulkheads as you will see on the picture I discovered that at least some of the gun base strips are too short, according to the instructions/drawing it should also have covered the last bulkhead.


-
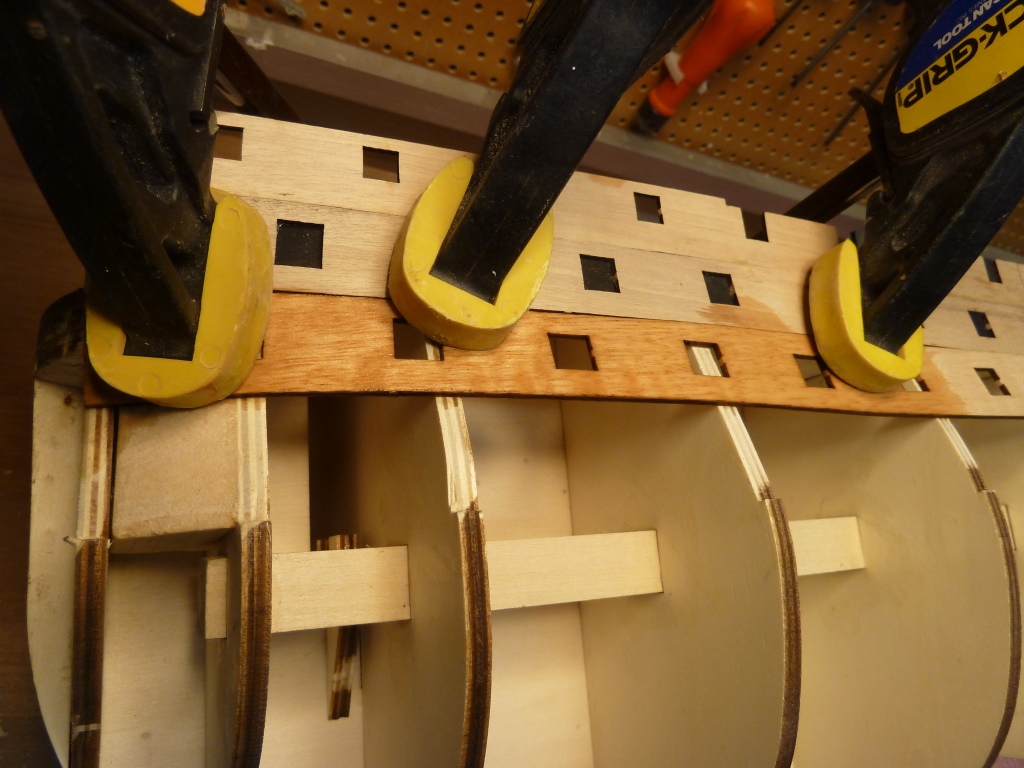
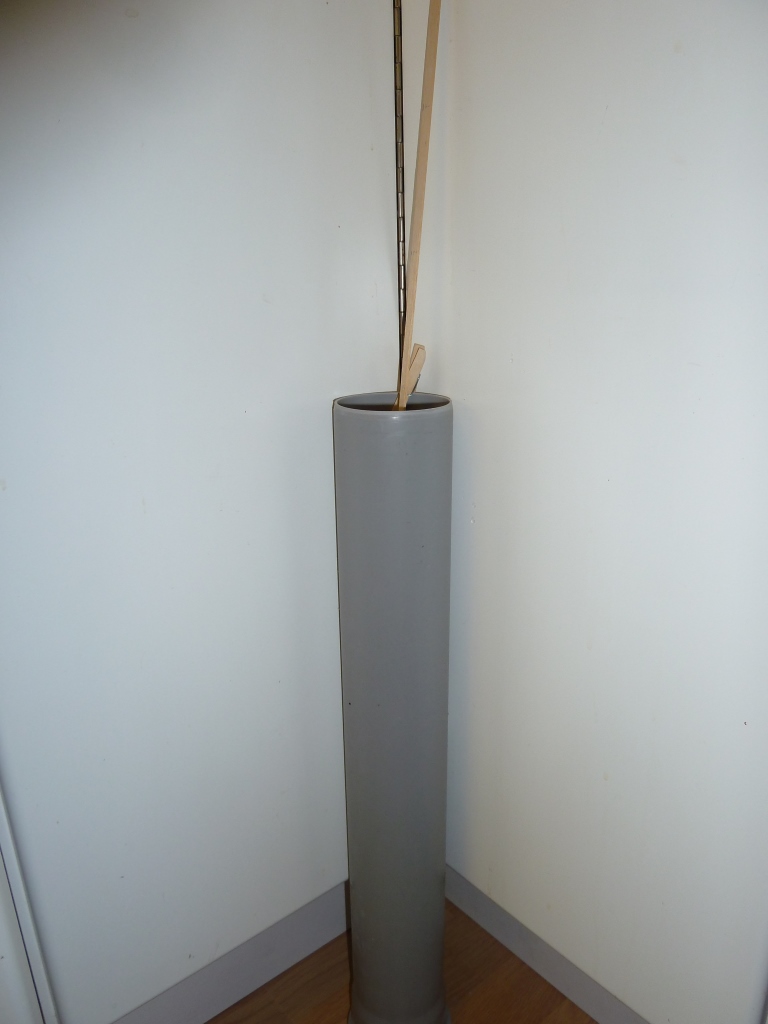
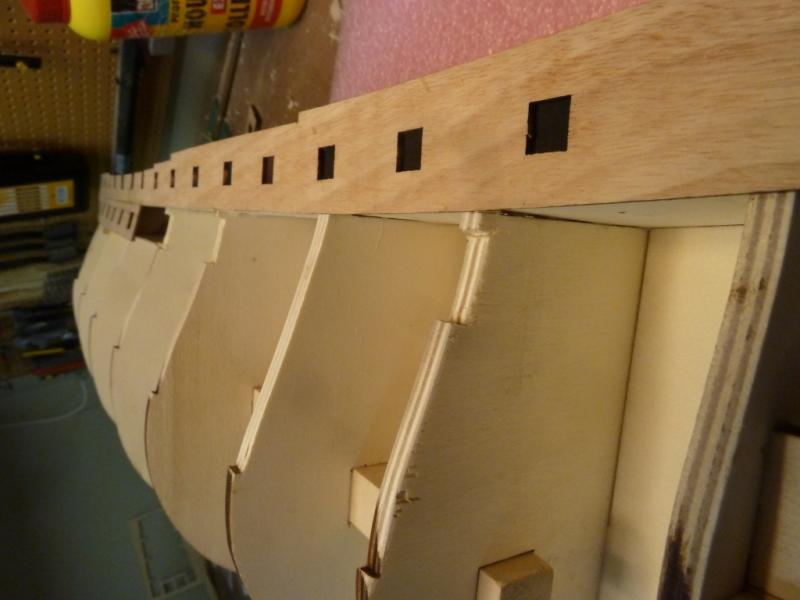
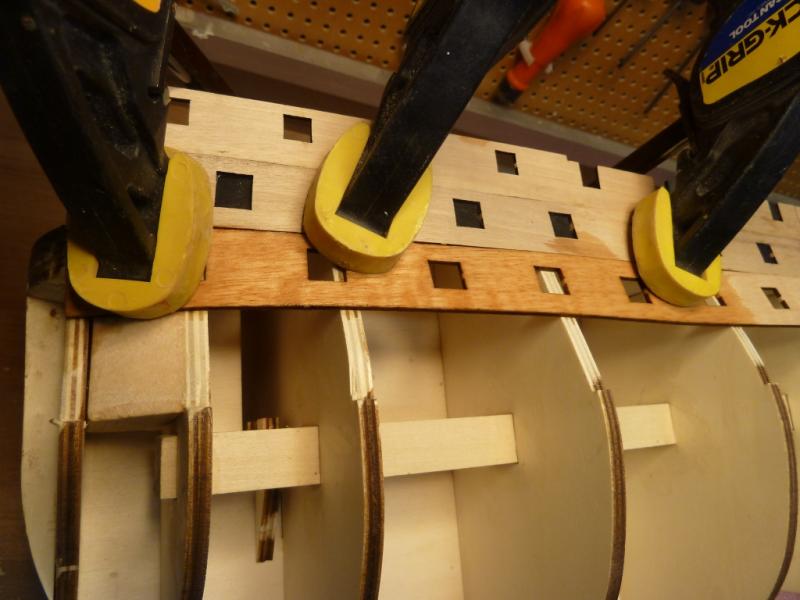
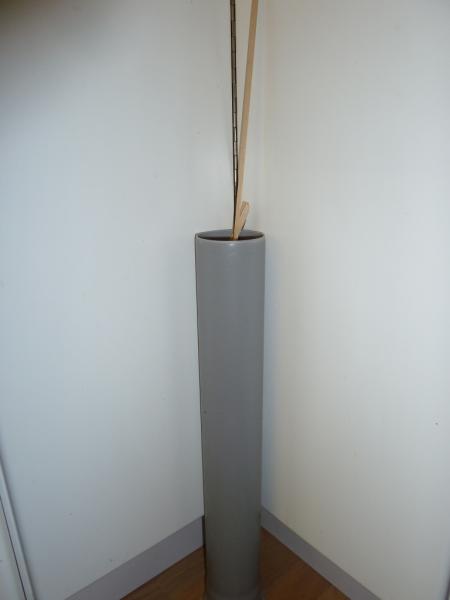
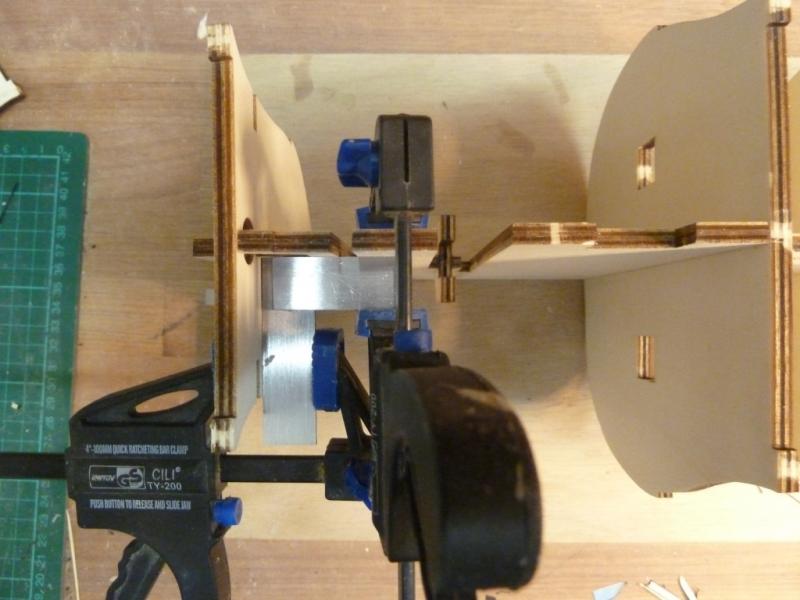
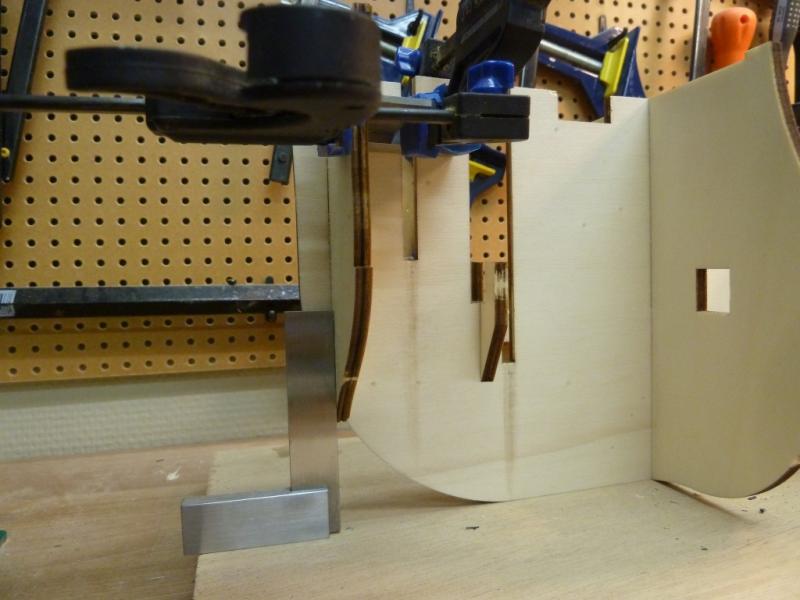
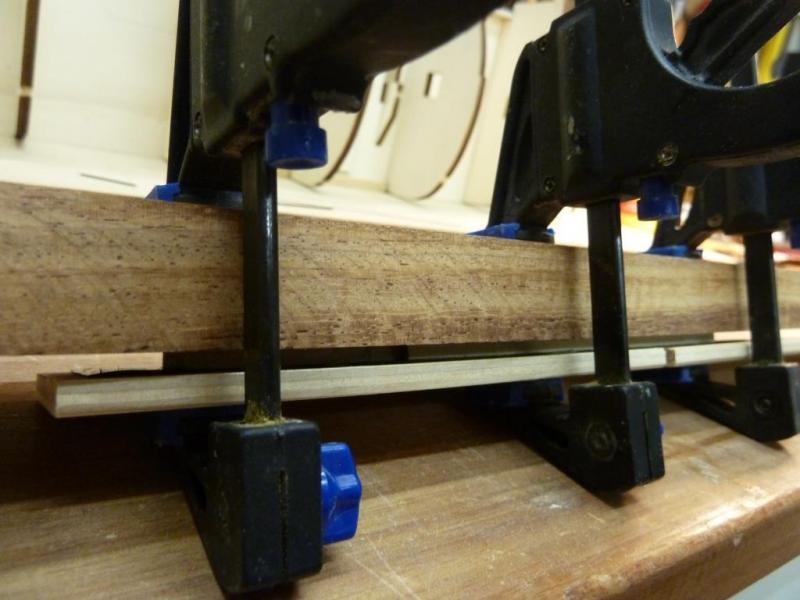
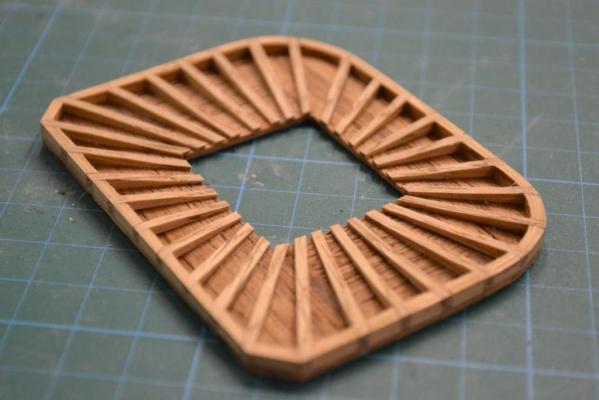
Next step: (You might call it cheating) but I’m gluing balsa blocks in some of the bow sections to make sure the planks get a nice curve and to avoid critical bending/stress points for them, It is probably nothing new for most of you builders on MSW .. . I started to glue the plywood gun-port strips These strips are not very flexible.., to make them fit without breaking them I have to soak them with water and clamp them into position and let them dry So Instead of occupying the family bad-tub for this task, I got the idea to use an app. 75 cm long pvc-tube with an waterproof bottom plug found in my local construction market

-
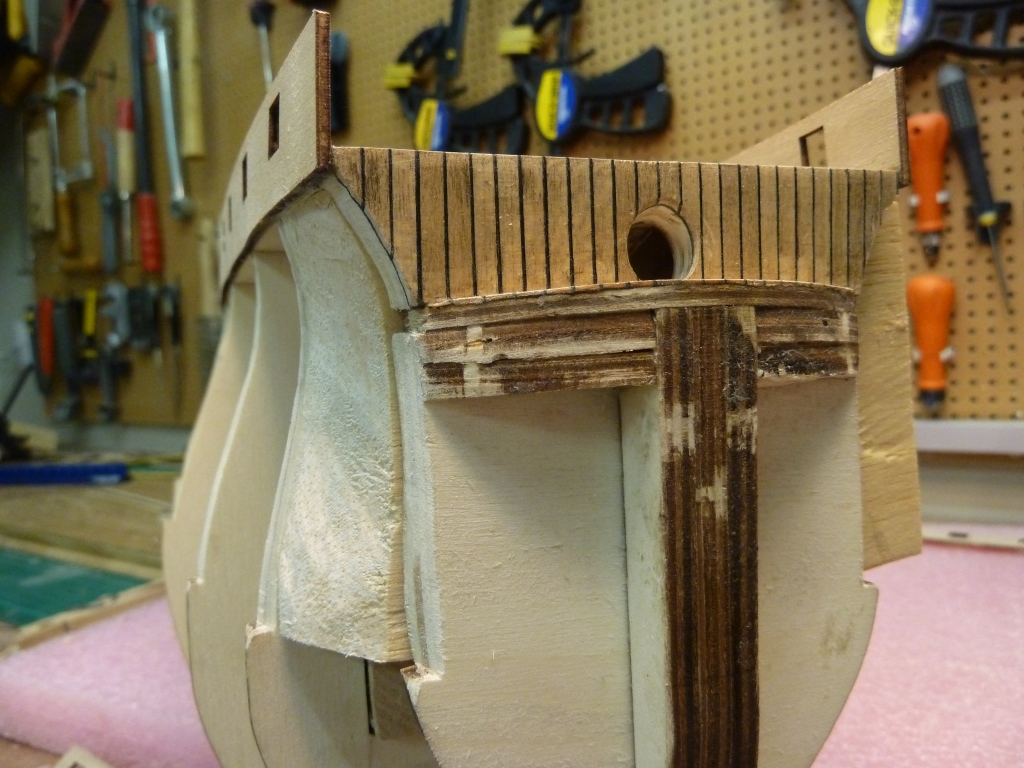
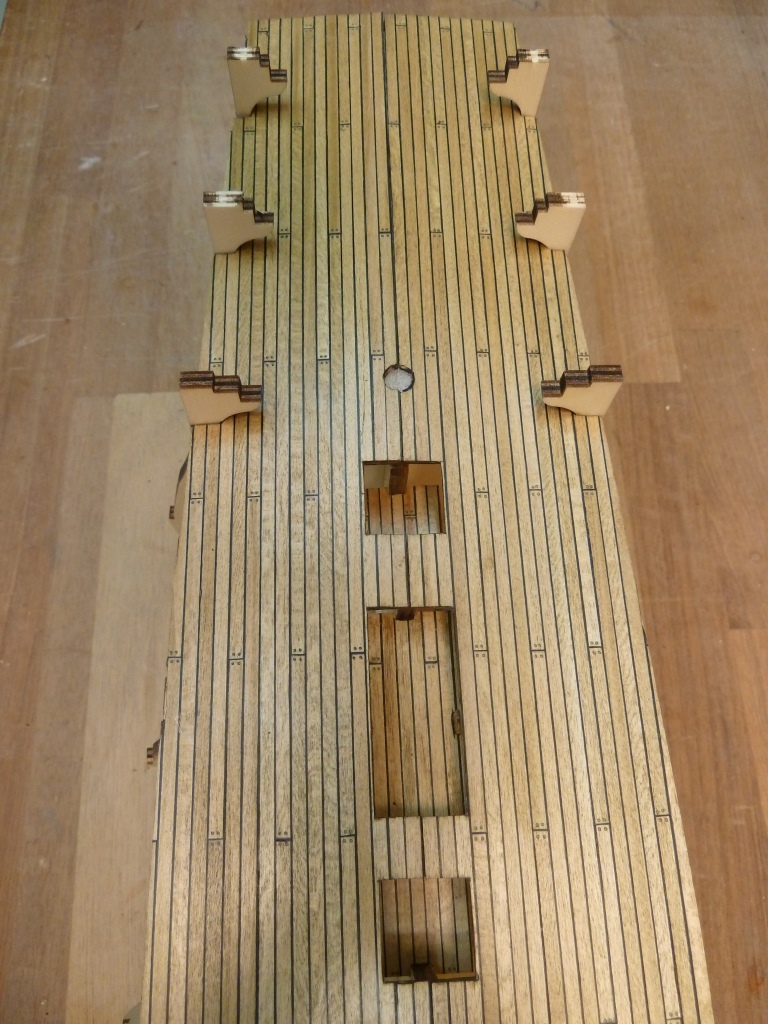
Yes Kevin I think you’re right, everything else seems to fit perfect, learned a lesson: next time I will double check. I planked most of the decks, the only deck remaining is the quarterdeck some creative pictures.. Again, but now with installed bulwarks


-
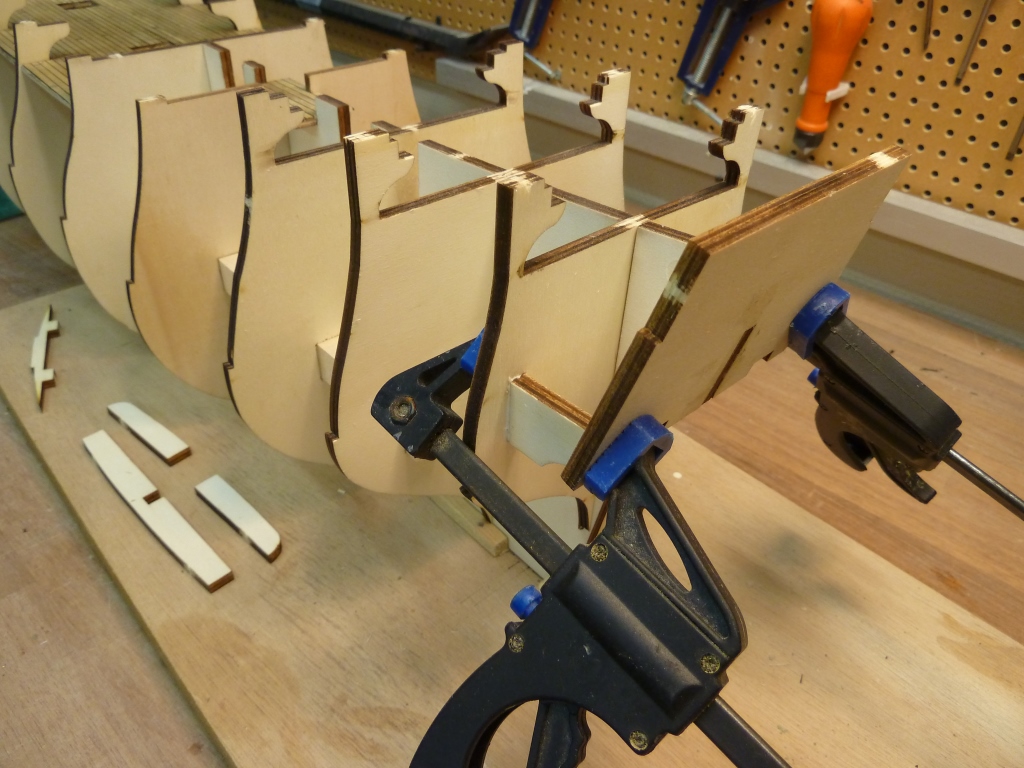
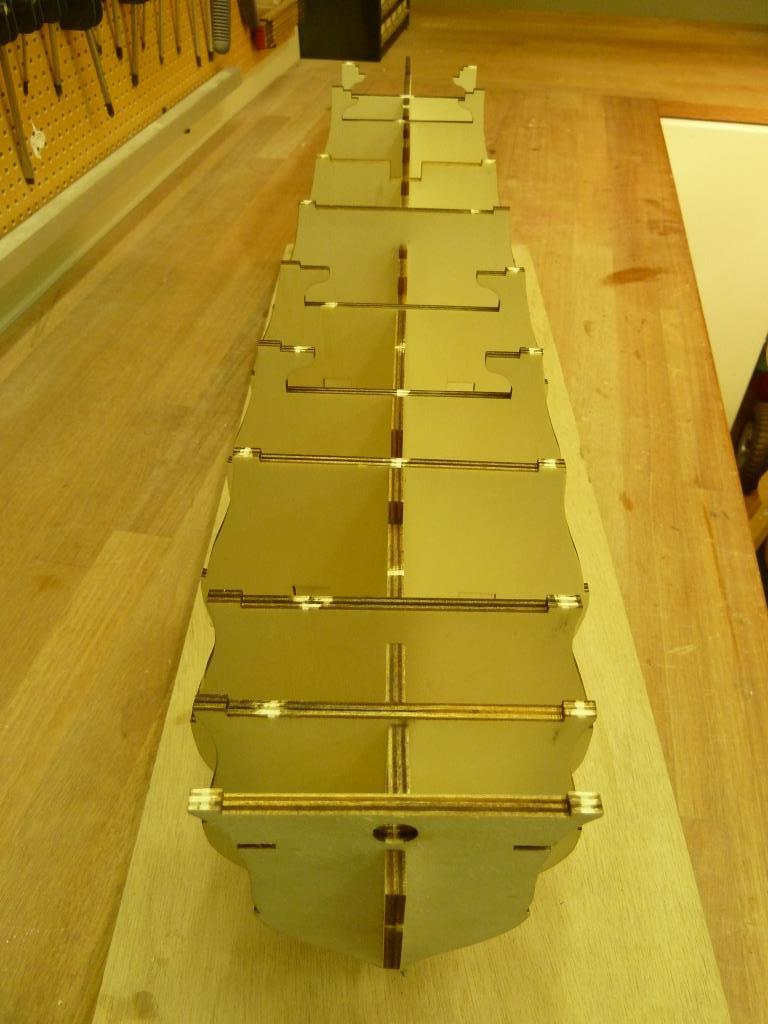
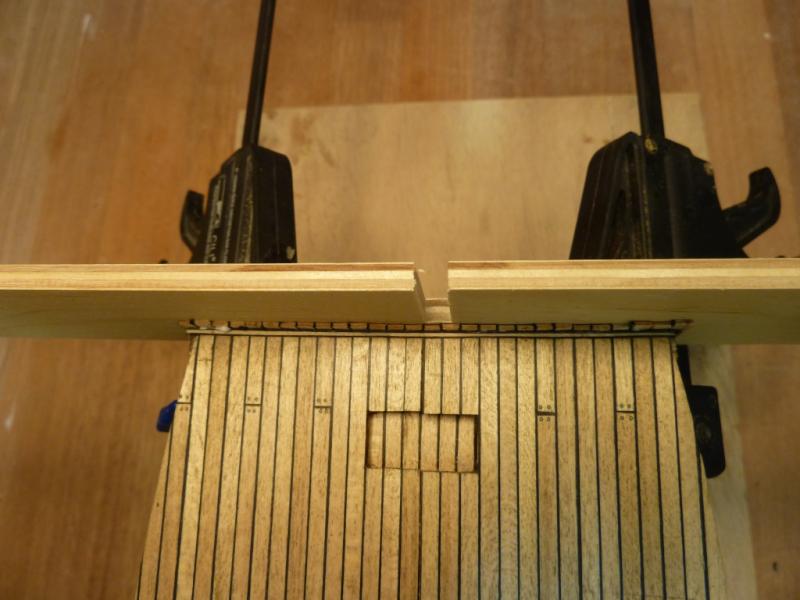
Thanks Sjors and Hello to you Anja, please join and follow the build Enough about planking and treenails and dry fitting for a while. I started to glue the bulkheads and made very sure that everything is glued square After the bulkheads it’s the turn for the stern support And the decks Somehow I managed to create a gap between the main deck and the first frame, I’m not sure how and when it happened After some consideration I decided to bridge this gap with an extra plank and some cardboard to give it some extra contrast Looking ahead in the instructions I found out that all this will be covered Well anyway, visible or not it looks much better until it actually gets covered ..


-
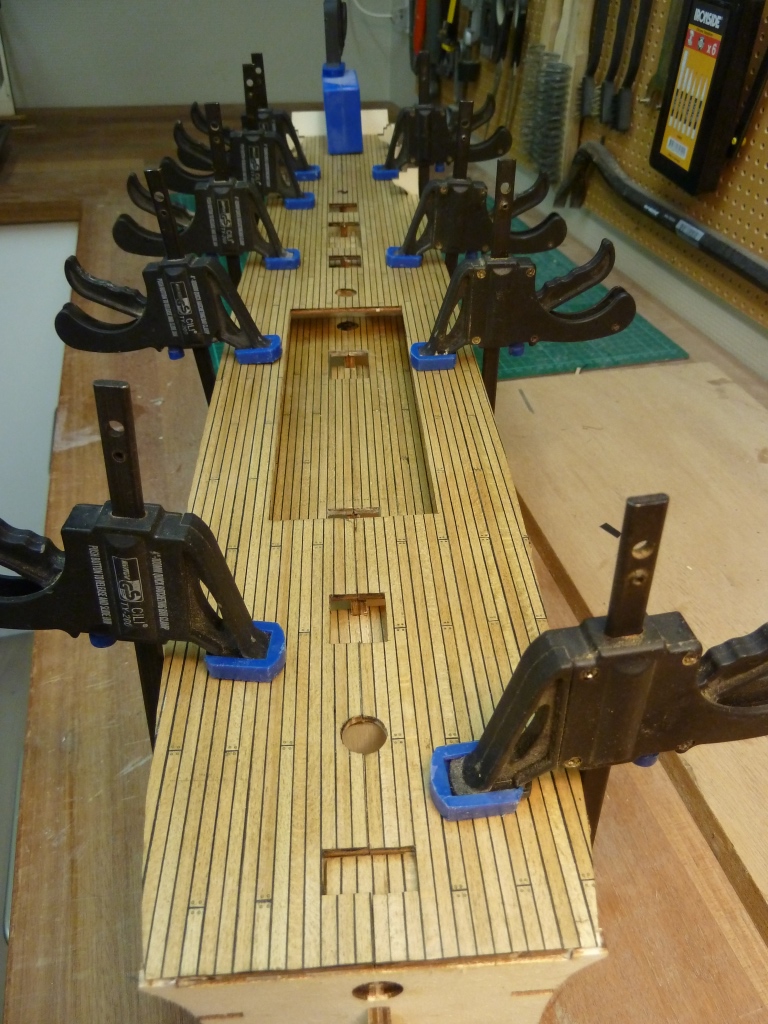
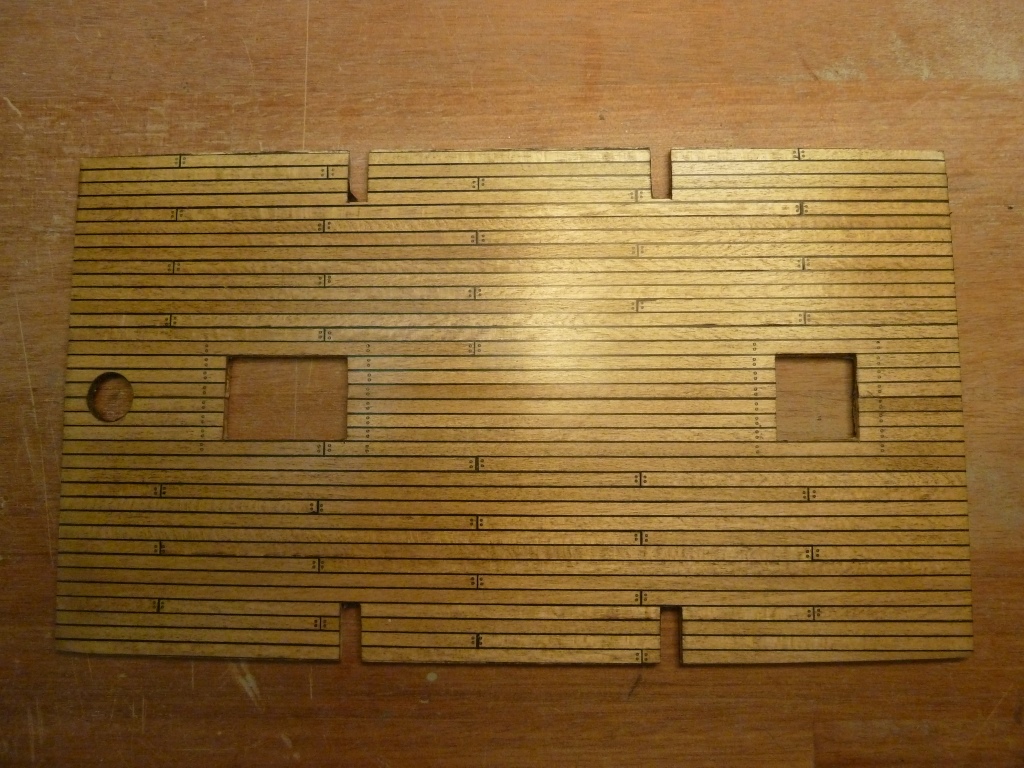
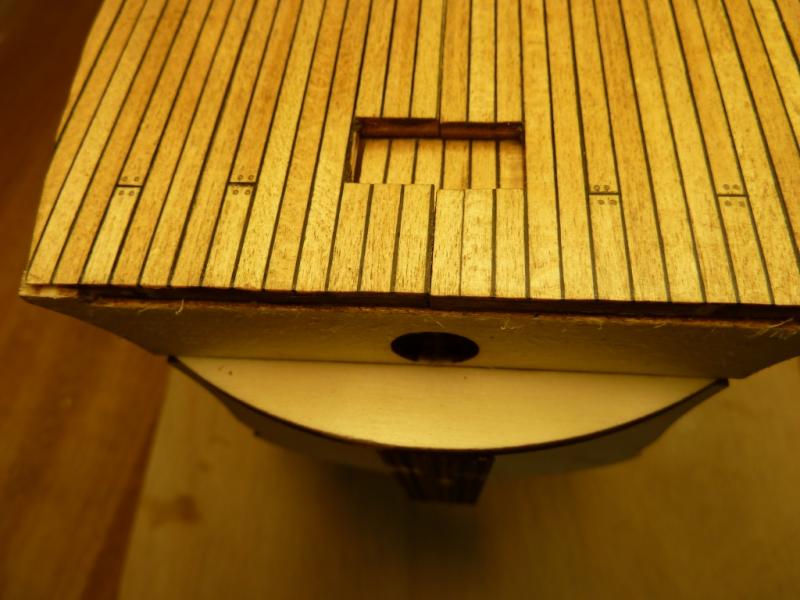
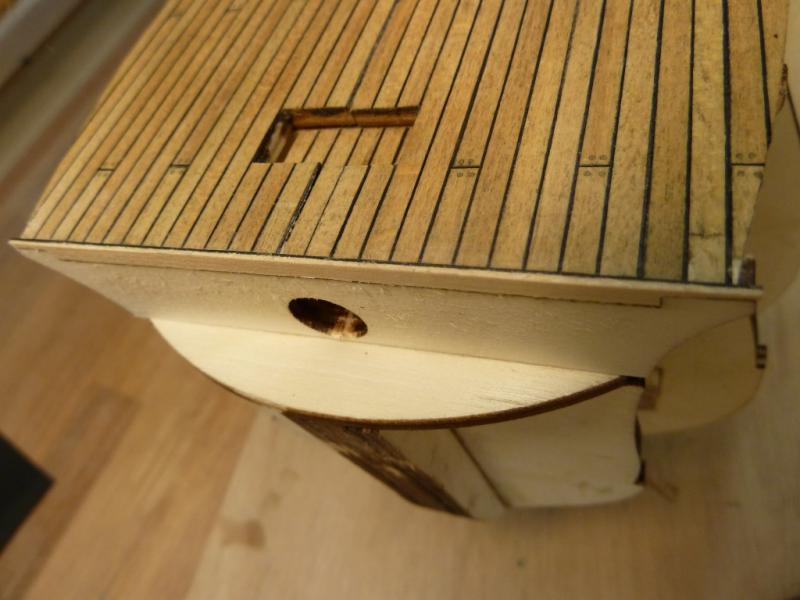
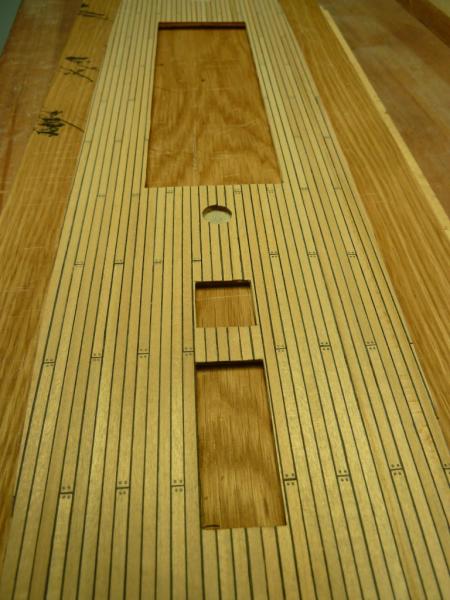
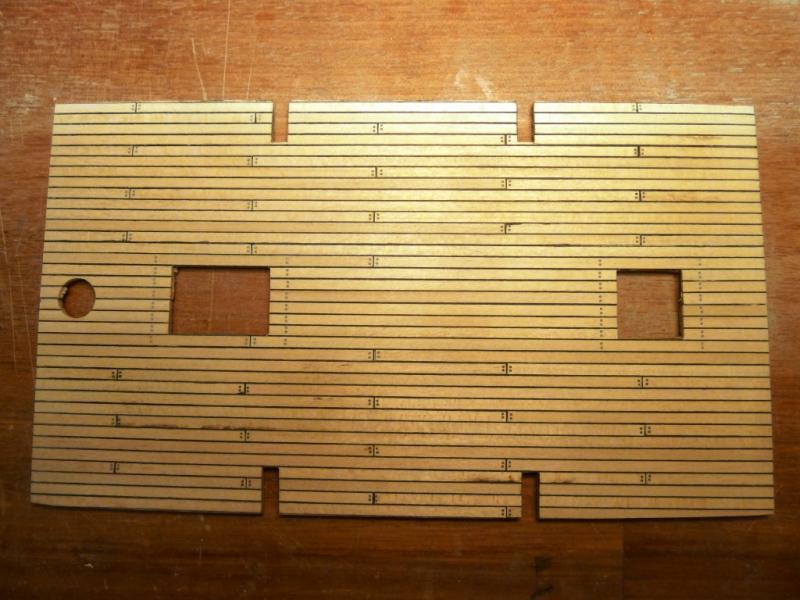
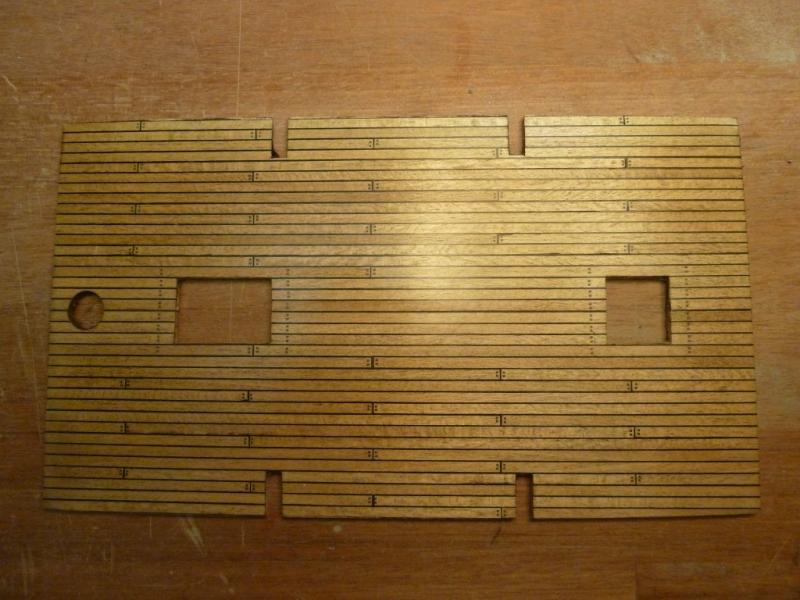
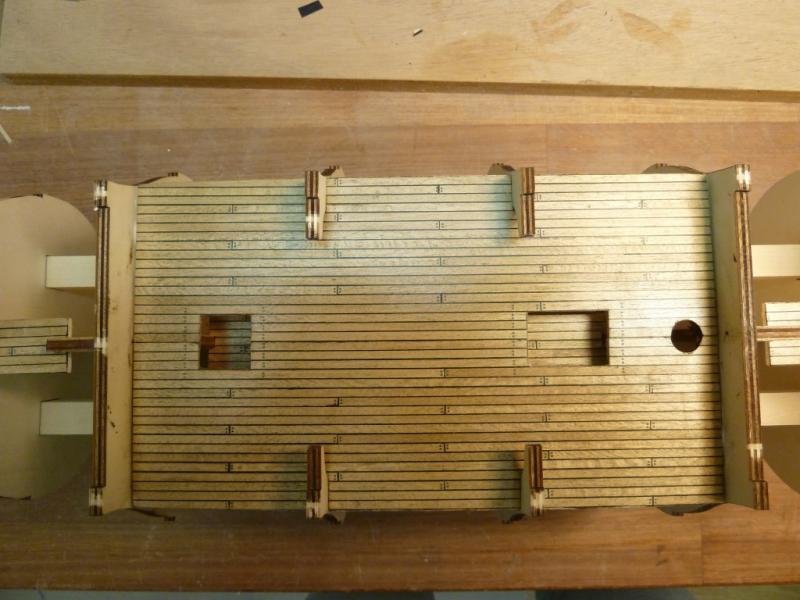
Thank you all for the encouraging reactions, i will continue with posting the main deck assembling and planking I drilled the holes in the deck just slightly bigger than the treenail stick itself, pushed it all the way down and cut them in length. I didn’t even used glue to keep the treenails in place Here’s the complete result sanded and ready for some wax. Here a close up picture where wax is applied Still dry fitting so you have an impression of how it will look after this stage. I even used a drill template for the treenail holes however not all of them are perfectly positioned, if I could change something at this stage I would have found an even more accurate methode for drilling these holes..


-
So after the cheating decks I gave it a try on the second gun deck Next thing on the list is the finish.. I decided for an “antique” bee-wax polish, it is easy to apply and it gives it an realistic & aged patina look. But as it turns out, it is not that easy to catch the effect on the camera Still a few things I could pay more attention to, but I’m pleased with the result Note: at this stage I still haven’t glued the bulkheads in place.
-
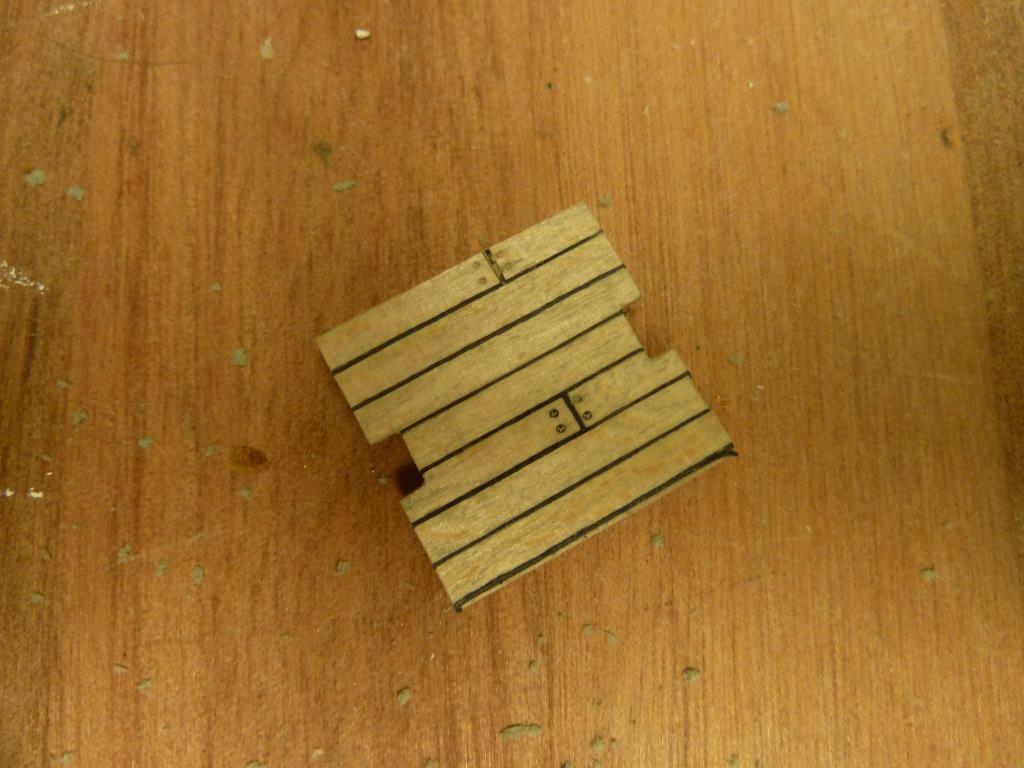
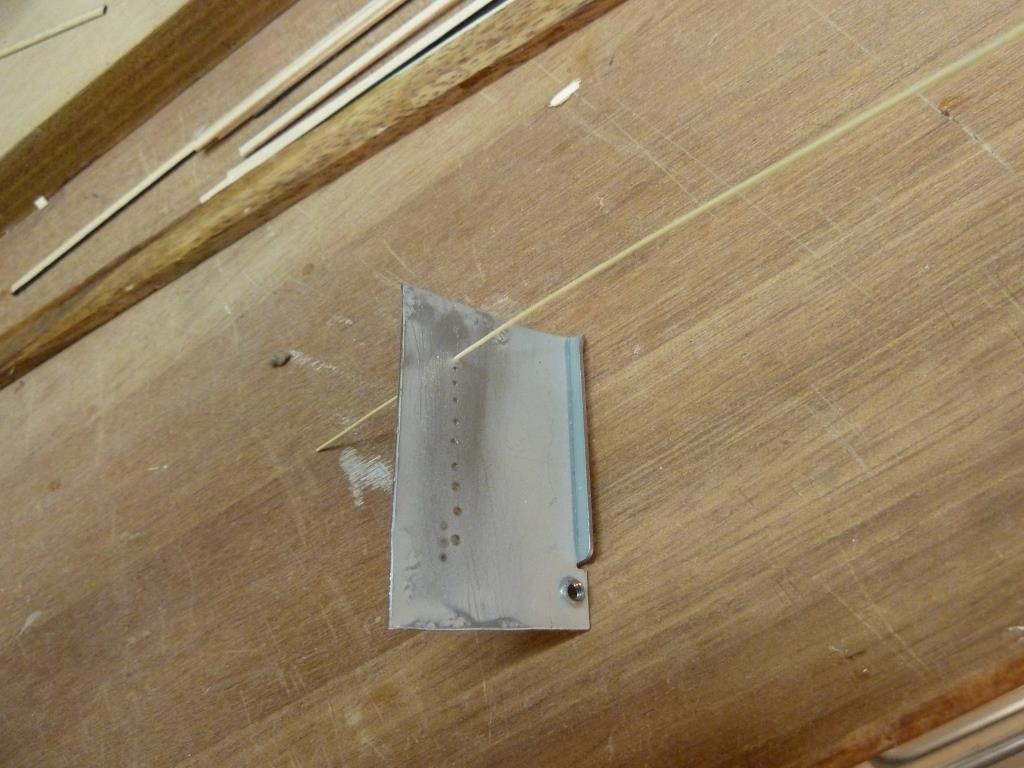
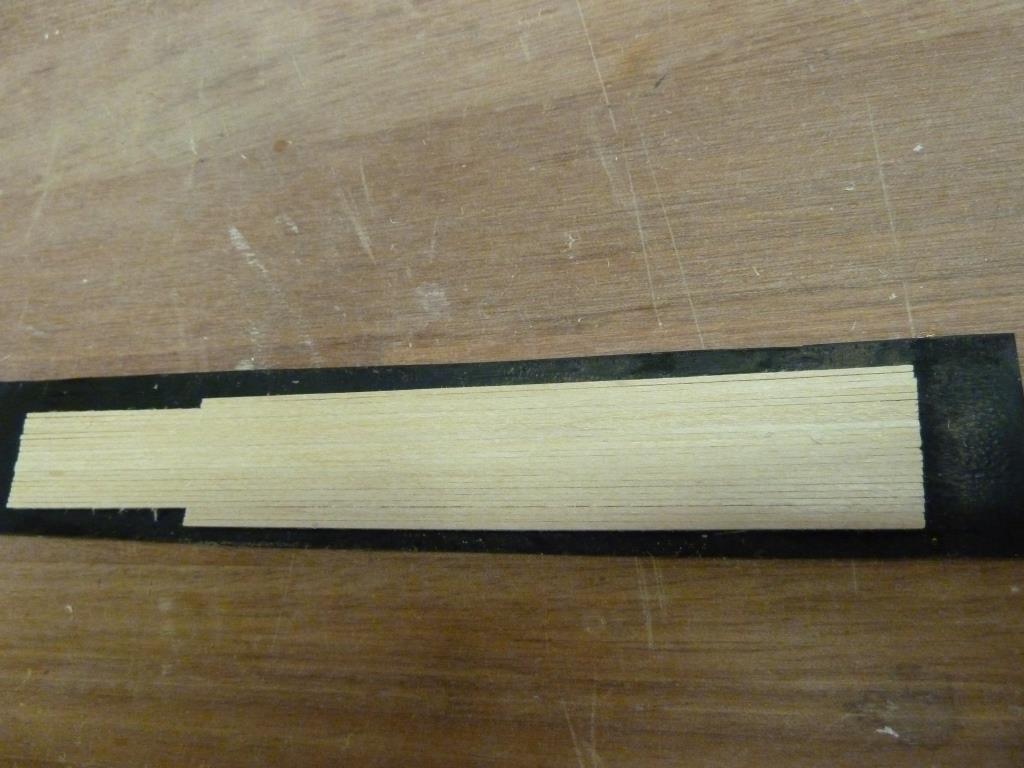
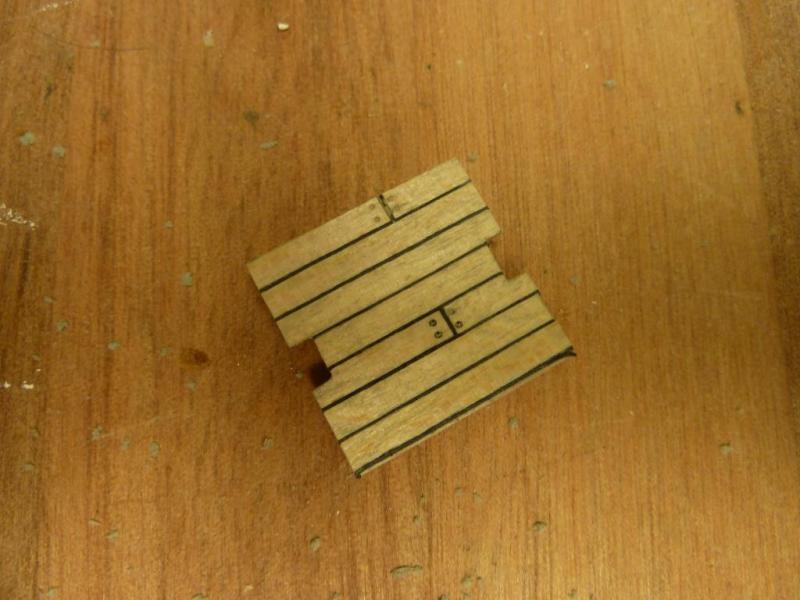
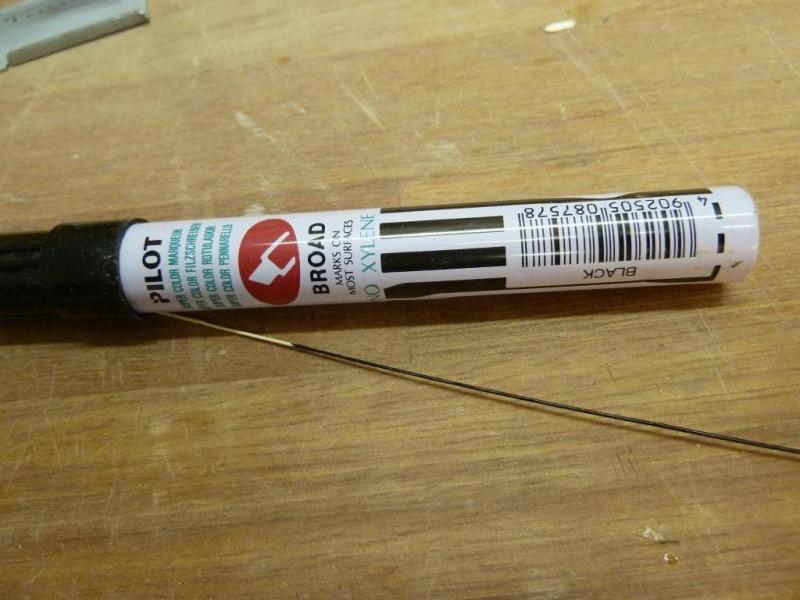
So next thing is treenails, i decided to try-out a drawplate for creating these. But for some reason they are not so easy to find in Denmark, so I started to try to make my own. I used a piece of scrap metal from an old car radiocover and drilled holes from 1,5 mm to 0.6 mm and sanded the holes with grit 600. I used bamboo skewers as material for the treenails itself, I cut them in as thin stripes as possible with a sharp scalpel blade. Next I selected the finest ones and pulled/pushed them through the drawplate until I reached my goal (0.6mm) Actually this was not as bad as I thought it would be, a bought drawplate might even be better, but this one works as well. After fitting the first nails I was disappointed because the nails were difficult to see as they were almost the same color as the plank itself. After some brainstorming I decided to try to give the bamboo a coating with a black marker, this gives a nice contrast with the surrounding wood. Underneath again my cheating deck but now with some treenails samples in it, some of the bottom ones have the black coating as you might be able to se

-
Hej Sjors, Yes most of the time I’m (at least) trying to be in a hurry, but this time I have cheated and I actually started the build the end of last year, so I’m actually app. 2 month behind with my posting I also tried with a pen and pencil and indeed the results are also very good ,the main reason I choose for cardboard was the consistence of the sharp edges it produces
-
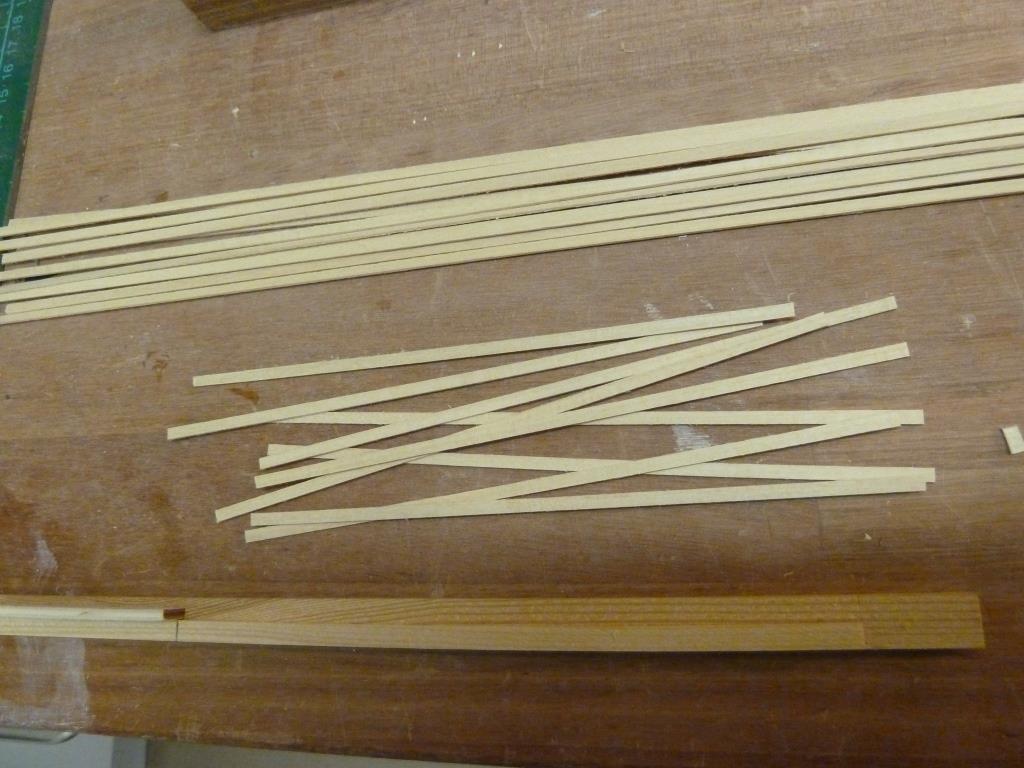
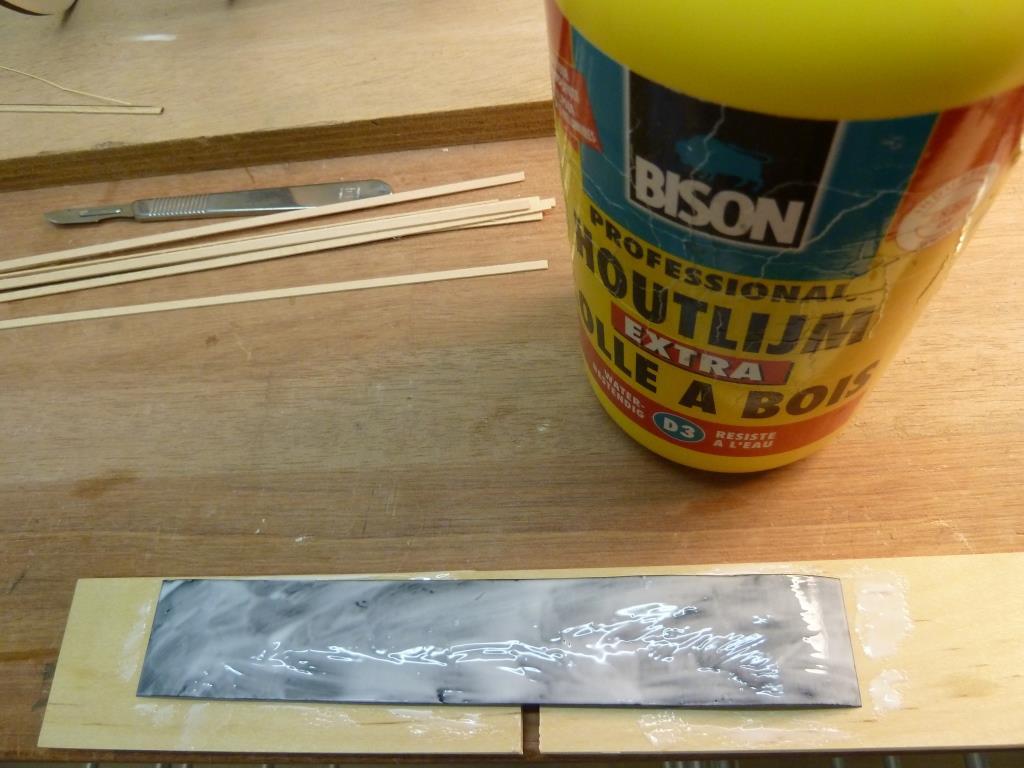
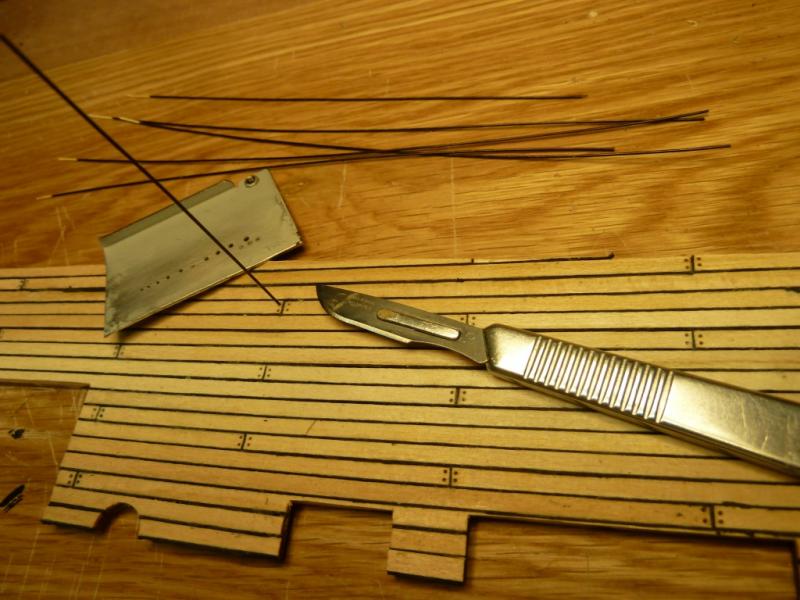
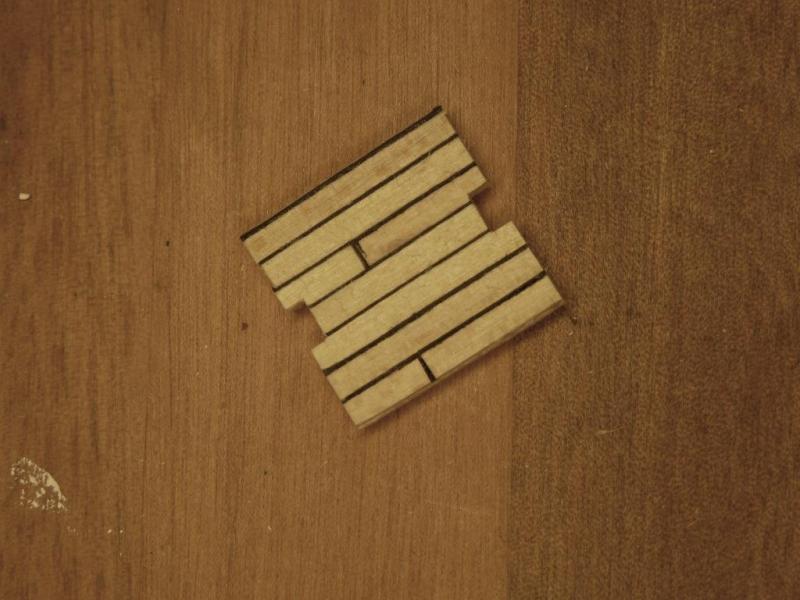
I tried some different techniques, to simulate caulking, but decided in the end to use black cardboard (0,2 mm thick, as this was available to me…) I must admit, it is not the easiest way to simulate caulking, but I think it is worth the trouble. I used one of the "cheating" decks as my first prototype and at this stage it is "as build", no sanding or anything like that has been done yet, further down below a visualization of the production line. Cutting deck planks in the appropriate length I used white carpenter glue as it will give me enough time to place the planks Positioning of the pre-cut planks, make sure they are placed side by side but without moving them around too much Apply some (not too much) pressure until the glue has dried By using a thin/sharp scalpel blade it is not that difficult to cut through the cardboard between the planks This will be the result For gluing the cardboard on the end of the planks I found it the easiest to push a plank (with glue on the end) firmly down on a small piece of cardboard and cut away the cardboard around the plank with a sharp scalpel.


-
Hej Cristikc, I like your creativity of reusing data, maybe you can suggest this to MSW and it might give their old MSW-1 Backup HD a new task in life
-
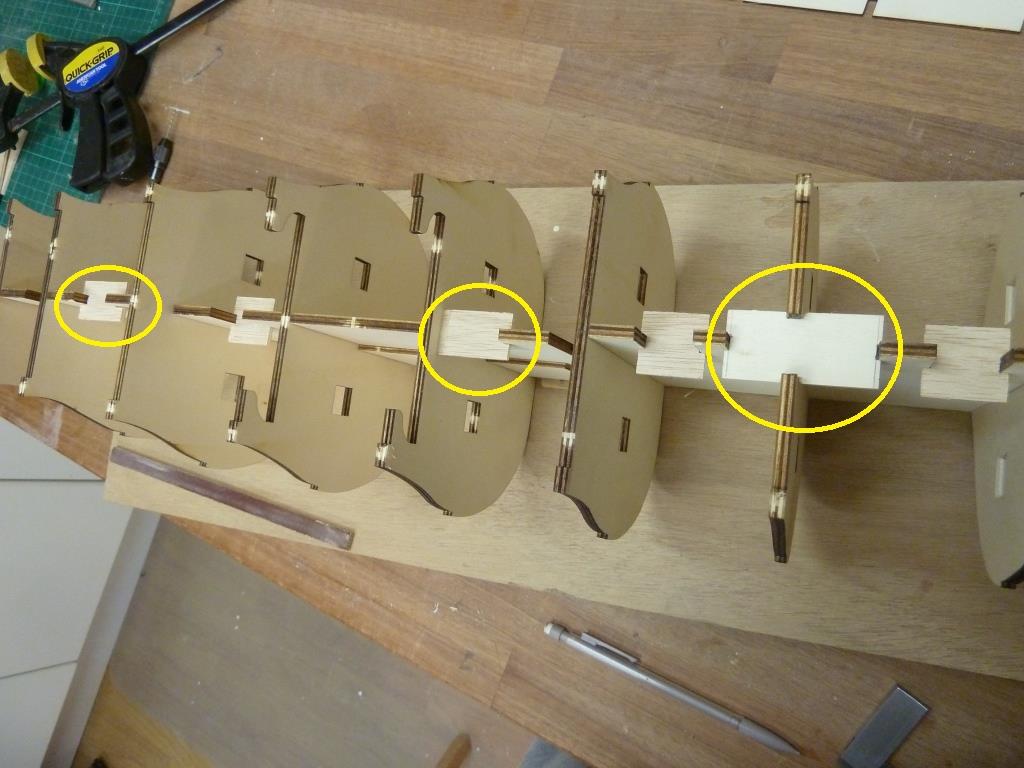
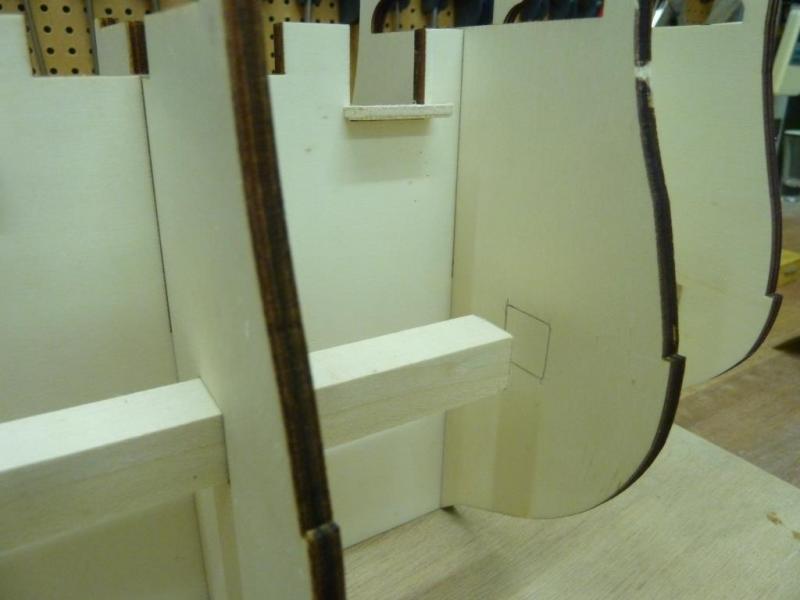
Thanks Kevin I couldn’t believe it either but after double checking and fitting the decks (see underneath) it must be true.. Before gluing the bulkheads in place, i wanted to make sure that all the decks or bulkheads didn’t needed any additional adjustments. Everything is a perfect match so far, and I’m very pleased at this stage In the lower and main deck are some cutouts, 3 small “cheating decks” have to place underneath these cutouts. However there are more than 3 cutouts, so visible later on or not, decided to use some scrap wood and created 3 more cheating decks”

-
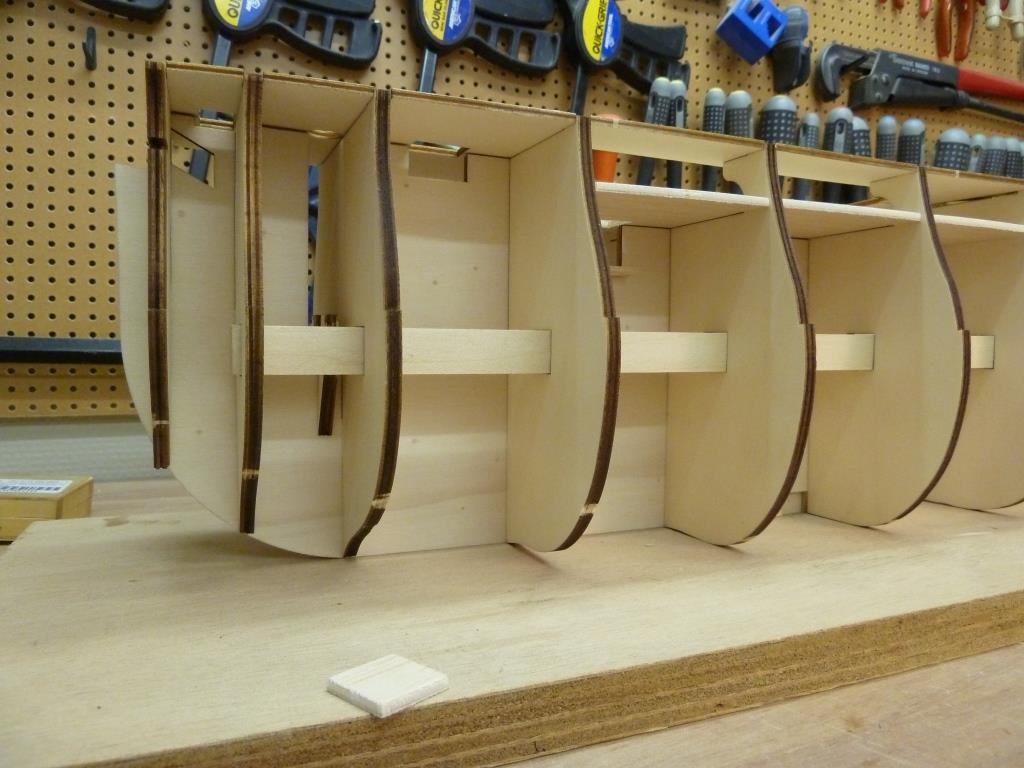
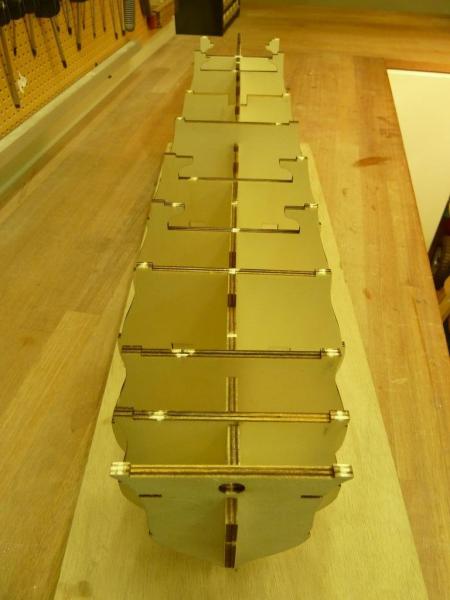
So here it is the very beginning of the project,.. Starting simple with assembling the false keel, I used as suggested by the instructions white carpenter glue Next was dry fitting the bulkheads and only minor sanding was needed to have them fit perfectly During dry fitting of the crossbeams I discovered an production error, in one of the bulkheads the holes for the crossbeams was forgotten

-
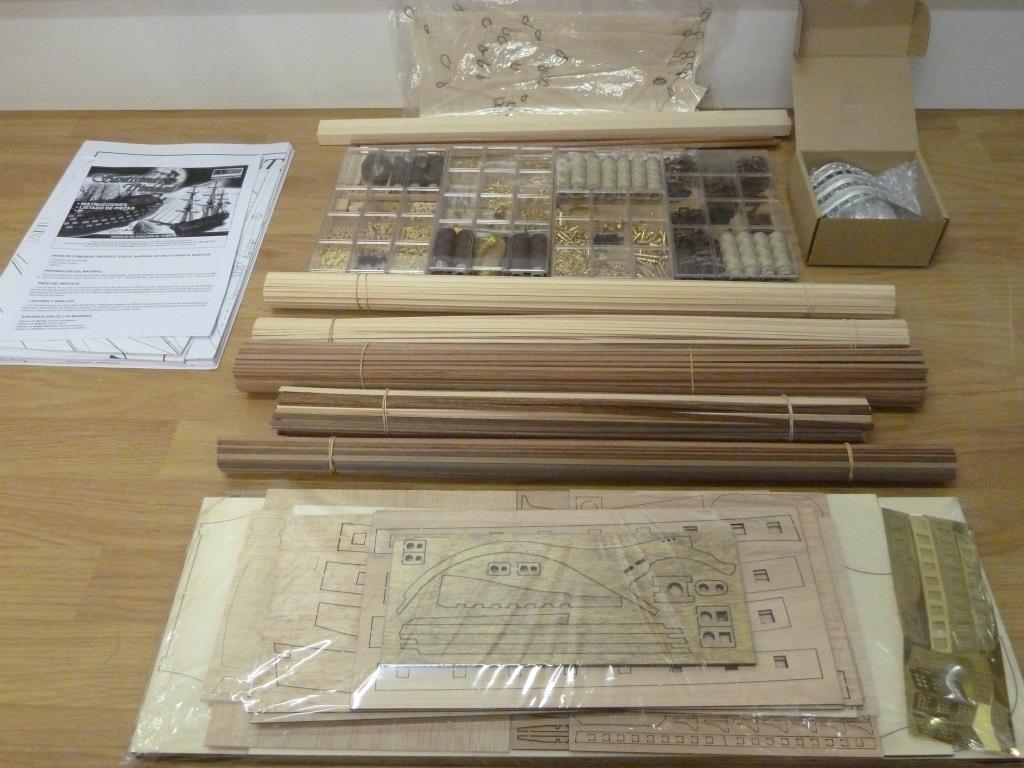
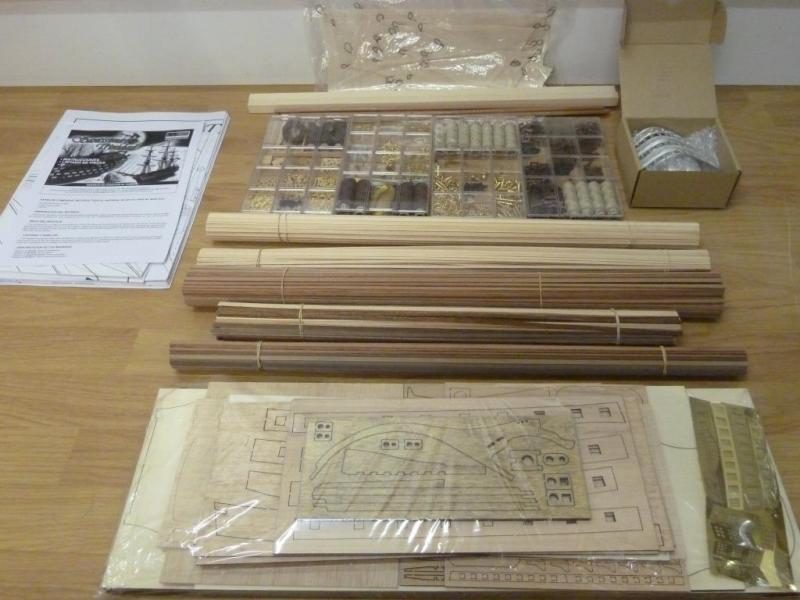
Thank you for the kind words and the warm welcome on MSW. Before I start posting the actual build log I think that it is nice to show some pictures of what is actually included. I ordered this kit in 2012 on a Spanish web-site. Everything went very smoothly and after app. 1 week I already received the kit The only “issue” worth mentioning was the included instructions: they were in Spanish only .. After contacting OcCre support, they send me the English instructions without any delay and wished me luck on the build

-
I decided to add 2 things to my buildlog. An updated "picture & Link" in the #1 post of the build log (so everybody can have an immediate peek and go to the current state of the build) An "Link Index" so visiters can quickly go to the different stages of the project without browsing through the complete log Enjoy!! The Current status of the build and the link to the Last post of the buildlog is right here Link Index: Kit contents Keel & Frames Deck Planking, caulking, tree nailing & installing Gunport strips & planking Gunport frames & Hatches Gunport Hatches production & Install Gun carriages prototype Gun carriages production Gun carriages install considerations Hull Planking Hull Planking “finishing touch” False Keel & Stem Rubbing Stakes / wales Bow section Bow Frame install Bow Samson Posts Bow section fine tuning Fenders Rudder Ladder Gratings Stairs Bell Tower Fife rails Chimney Upper Deck Cannon Install Stern Galleries Pin racks Channels Poop lantern Ship Boat(s) Anchors Bowsprit Tops Start of the original Post #1 : ”After some considerations” I decided to start publishing my current build of the Santisima Trinidad on MSW. (Thanks Sjors !! for the motivation ) It’s not difficult for me to understand that MSW has been accidently “erased” after an recent update and it has lost a lot of valuable information without any chance of recovery. As I have not seen MSW before this “update” I don’t have any idea about the value of the contribution of my build log.. I hope I can and will contribute positive to MSW and get responds/advice from the followers, The Santisima Trinidad is my second build and I’m open for any suggiestions/improvements Unfortunately, My current job (and other duties) doesn’t allow me "the time" I would like to spend on the hobby. Be patient with me on the updates
-
Hej Sjors, Thank you for your kind words, I wasn't aware of the fact that you have build her as well As for the Santisima Trinidad, I'm actually considering to start a build log for her in parallel on MSW but first i need to figure out how MSW works. I started with an album for the Smit Rotterdam but still find it a bit tricky/messy/complex compared to "blogspot"..
-
Hi Sjors, By “accident” I found “MSW”’ and I’m still exploring the value of it I stumbled over (both) your builds logs and I must say “IMPRESSIVE” !!, very nice build(s) so far Looking forward to your future updates
-
MONTANES by Garward - OcCre
GTM replied to Garward's topic in - Kit build logs for subjects built from 1751 - 1800
Hello Garward, Just one word "Wow". Your dedication to all the tiny details contributes and inspire all us to push the limits of perfection even more, I’m really looking forward to see the latest Montanes updates -
Another Rope Walk
GTM replied to michael mott's topic in Rope Making/Ropewalks's Rope Materials and parts resources
That's strange why your virus scanner doesn't like this site .. As i know there shouldn't be anything suspicious with it, It is a "normal" blog with pictures and some text created with Google’s blogger App.. It might be that Google is adding "Malicious" stuff into it ? Is anyone else having the same problem ? -
Another Rope Walk
GTM replied to michael mott's topic in Rope Making/Ropewalks's Rope Materials and parts resources
Here's my version of a scratch build ropewalk (motorized) with some pictures and explanation . Take a look, maybe this will help to understand the concept ? http://gtm-ropewalk.blogspot.dk/