HOLIDAY DONATION DRIVE - SUPPORT MSW - DO YOUR PART TO KEEP THIS GREAT FORUM GOING! (89 donations so far out of 49,000 members - C'mon guys!)
×


Bedford
-
Posts
1,297 -
Joined
-
Last visited
Content Type
Profiles
Forums
Gallery
Events
Everything posted by Bedford
-
 Thanks Keith, I'll have to have a good look through that lot Trevor, you've got me further ahead then I was, thanks.
- 33 replies
-
- 3
-

-
- gaff sloop
- restoration
- (and 1 more)
-
This might be a long shot but I'm trying to find info on how to design the rig and sails if I go RC and all I keep getting is how to make the sails or very class specific info. Does anyone here know how to design a sail plan or know who does?
- 33 replies
-
- 1
-
-
- gaff sloop
- restoration
- (and 1 more)
-
Yeah, we in Aus tend to shorten names but Oregon Pine aka Douglas Fir or as our Irish shipwright calls it, Irish Pine - O'regon
- 33 replies
-
- 2
-
-
- gaff sloop
- restoration
- (and 1 more)
-
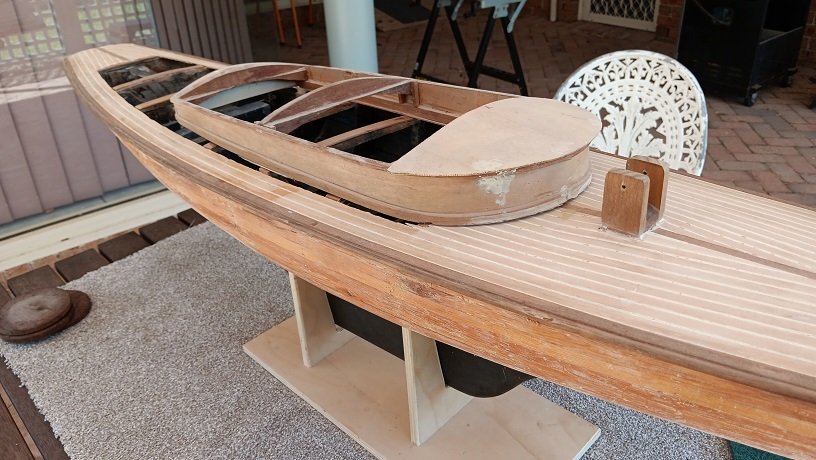
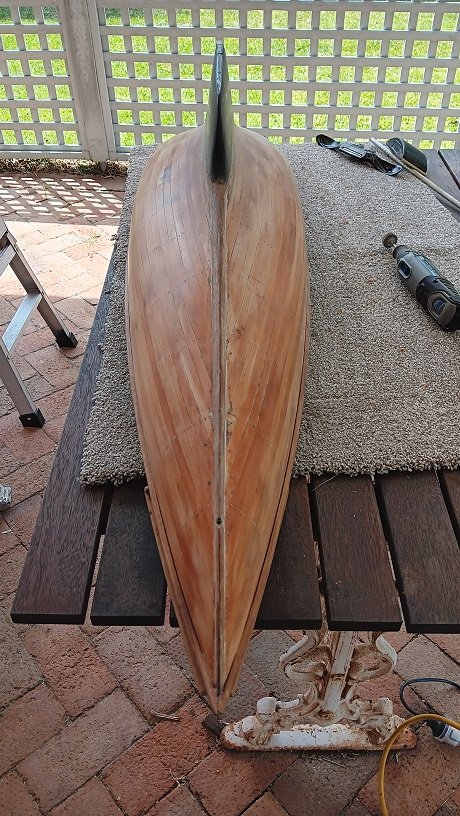
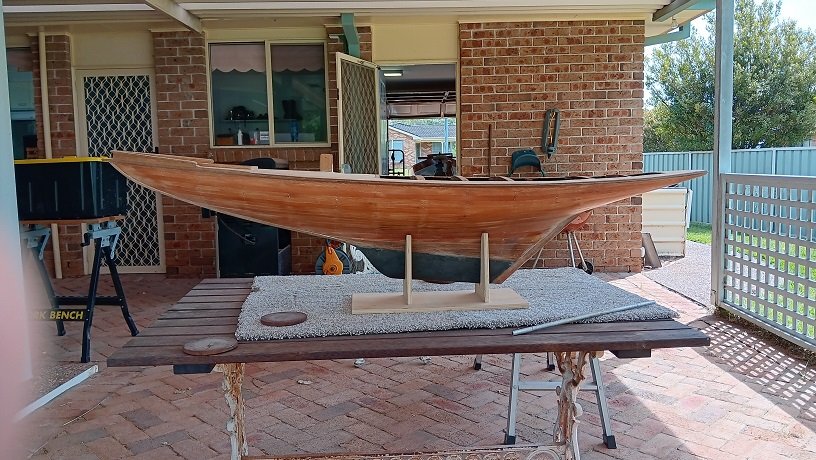
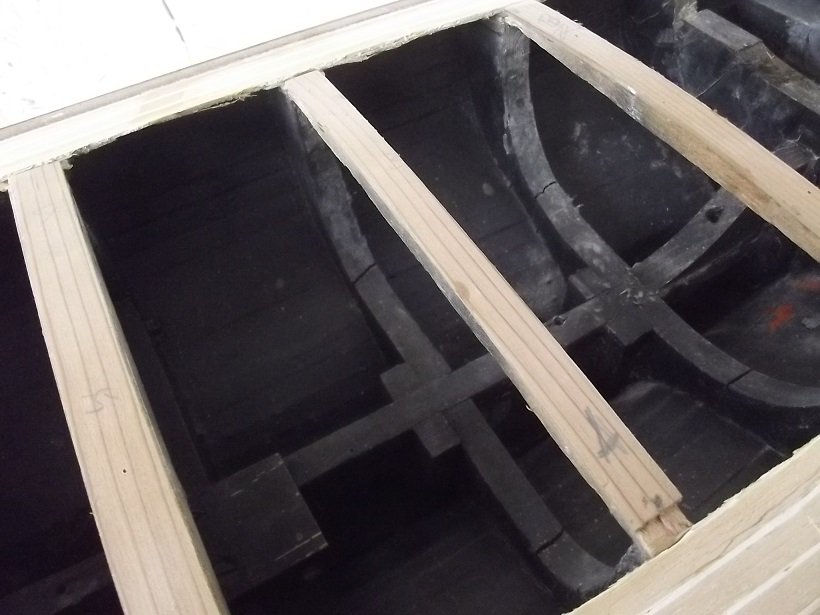
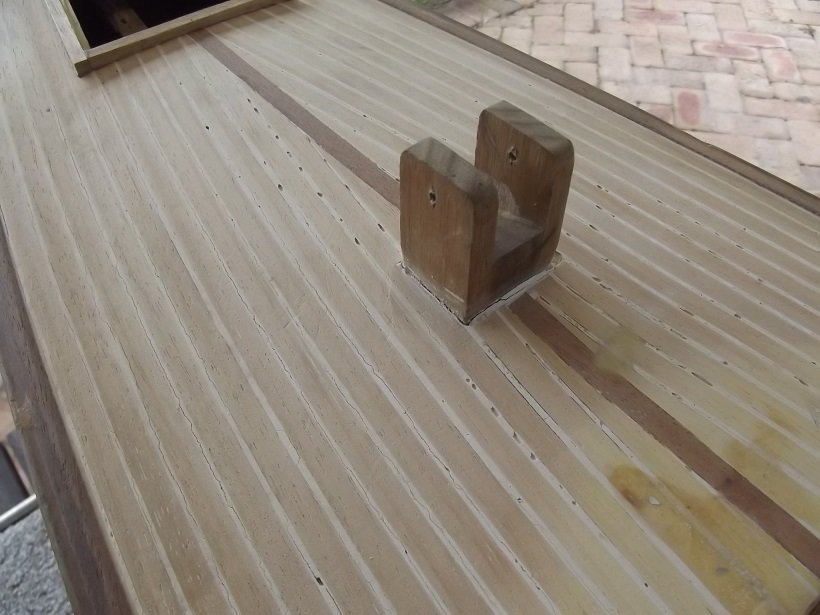
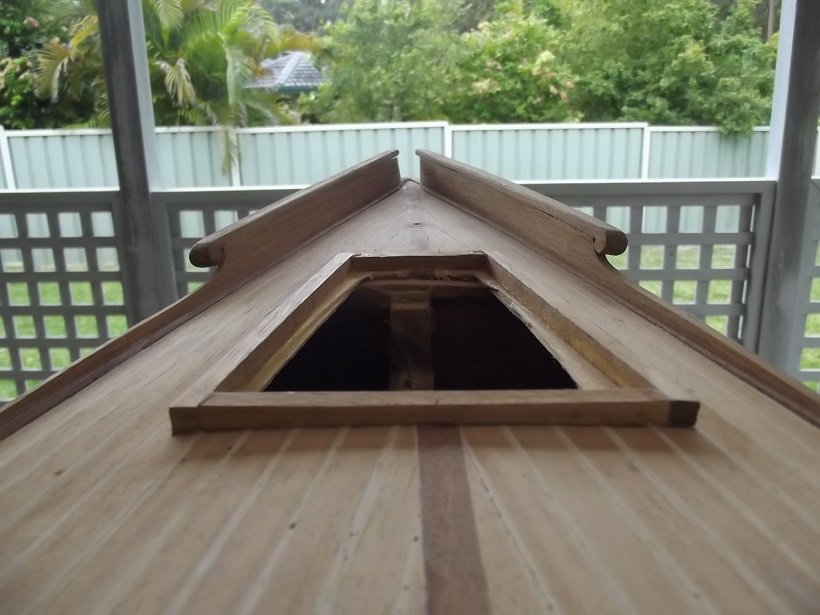
Well, this is my second restoration of a model donated to the Lake Macquarie Classic Boatshed. This has been sitting on the Mezzanine for a few years and the lines are just so beautiful I couldn't leave her to be eventually discarded. Did I need another model project at this point, not really but here it is. We have no idea what she is modeled after but it's in the style of the Fife sloops of the early 1900's and since it has a bowsprit I'm thinking gaff rigged so I'm taking very loose inspiration from the William Fife III designed "Mariska" It will be "stand off scale" as we used to say n the aero-modelling field. as it may end up with radio control added but let's not get ahead of ourselves. The hull is 1460 long, so quite large and planked in Oregon which was varnished in what appears to be the old Estapol, that had to go so a hot air gun and scrapers got most of that off with the rest removed by scraping and sanding. This process revealed the truth about her beauty, it's very much skin deep. Some of the planks have been sanded to within 0.02mm of their lives in order to achieve fair lines, you can see light through them! What this means is that whether or not I add RC she's going to have to be fibregassed so I've ordered some 30gsm cloth. Hopefully I can get a good enough finish to allow varnishing over the 'glass but I may need to paint below the waterline anyway to cover water damage and poor fairing of strakes at the stern post. I can't reinforce the strakes internally as it's quite roughly finished and I'd have to sand back a thick layer of black paint which is over varnish, I'm not prepared for that debarkle and chances are I'd go through the thin strakes anyway. The internal framing is quite substantial and, in places, broken so I'll have to do something to stabilise that and possibly create the room for auxilliary drive should she become an RC sail boat. Anyway, on to the pics. Oh, and the tabernacle is decidedly agricultural for a model with some beautiful features so it's going.

- 33 replies
-
- 7
-
-
- gaff sloop
- restoration
- (and 1 more)
-
Happy to help Mark, and yes they look much better with than without
-
Beautiful, as usual. The brass rings are on the way
-
Best wishes John
-
Mate, I can handle that. Send me a drawing
-
Mark, beautiful work as usual, if the winch bases are just circular I can run them up on the lathe for you so you can tin the lot properly.
-
Mate, she's beautiful. Great details!
-
Absolutely beautiful workmanship
-
You've brought her such a long way John, she'll wait, enjoy the break and I'm hoping all goes well with the treatment.
-
Yeah, it's all just opportunities to learn isn't it? Love the lines of old tugs and I'm interested to see what this new build of which you speak will entail.
-
Magnificent work Mark
-
Eberhard, while I have no knowledge of the vessel type you're building I have sailed on Bark Endeavour which has a skylight in the deck just forward of the wheel and while it doesn't interfere with the operation of the wheel it does have a wooden grate over it. I know a lot of ships had wooden grates for the helmsman to stand on to give better grip on a drier surface so maybe that's the answer.
-
I hear you John but as I often say, "It's not the mistake that matters, it's how you deal with it" On my Royal Caroline build I swung around with the vacuum cleaner and broke the shrouds away from 2 dead eyes on the port mizzen shrouds. Walked away for over a year while I built my full size sail boat but recently decided the best fix was to completely remake that whole shroud assembly.
-
This might be useless info in this case since you don't want to buy new stock but something to keep in mind. When I made the 1:8 scale Tammie Norrie I used 0.8mm birch ply for the strakes. You can cut it with a decent pair of scissors and get perfect edges. That model suffered a warped backbone too but it's the fix that matters.
-
Another beautiful Ranger there Mark, she's coming together very nicely, but then I've seen your other one so no surprises there!
-
Ah yes, the mindless tedium of ratlines! She's coming up very nicely John
-
I think a lot of us have been brought undone by the water content of PVA, I know I have, had to pull the bottom off my mahogany runabout model and redo from scratch! These things keep our minds active, figuring out solutions is an important skill.
-
Another master class, and she looks like an interesting ship to model
-
Always a joy to see how you bring these tiny masterpieces together and I'm pleased to know I'm not the only one with a black hole around my work table, I've got a tiled floor and small pieces still disappear!
-
That's the beauty of being a volunteer John, they can't really push you either way and they sure can't sack you. Do it in your time mate!
-
Poetic licence my friend, yes they are on her in the period you are modelling but they weren't original. Only you and a handful of us will know. I can see why they were added though, she would have been a bit roly poly I imagine.