Bedford
-
Posts
1,299 -
Joined
-
Last visited
Content Type
Profiles
Forums
Gallery
Events
Everything posted by Bedford
-

15' Dinghy by Bedford - FINISHED - 1:1 scale
Bedford replied to Bedford's topic in Non-ship/categorised builds
Thanks guys -
15' Dinghy by Bedford - FINISHED - 1:1 scale
Bedford replied to Bedford's topic in Non-ship/categorised builds
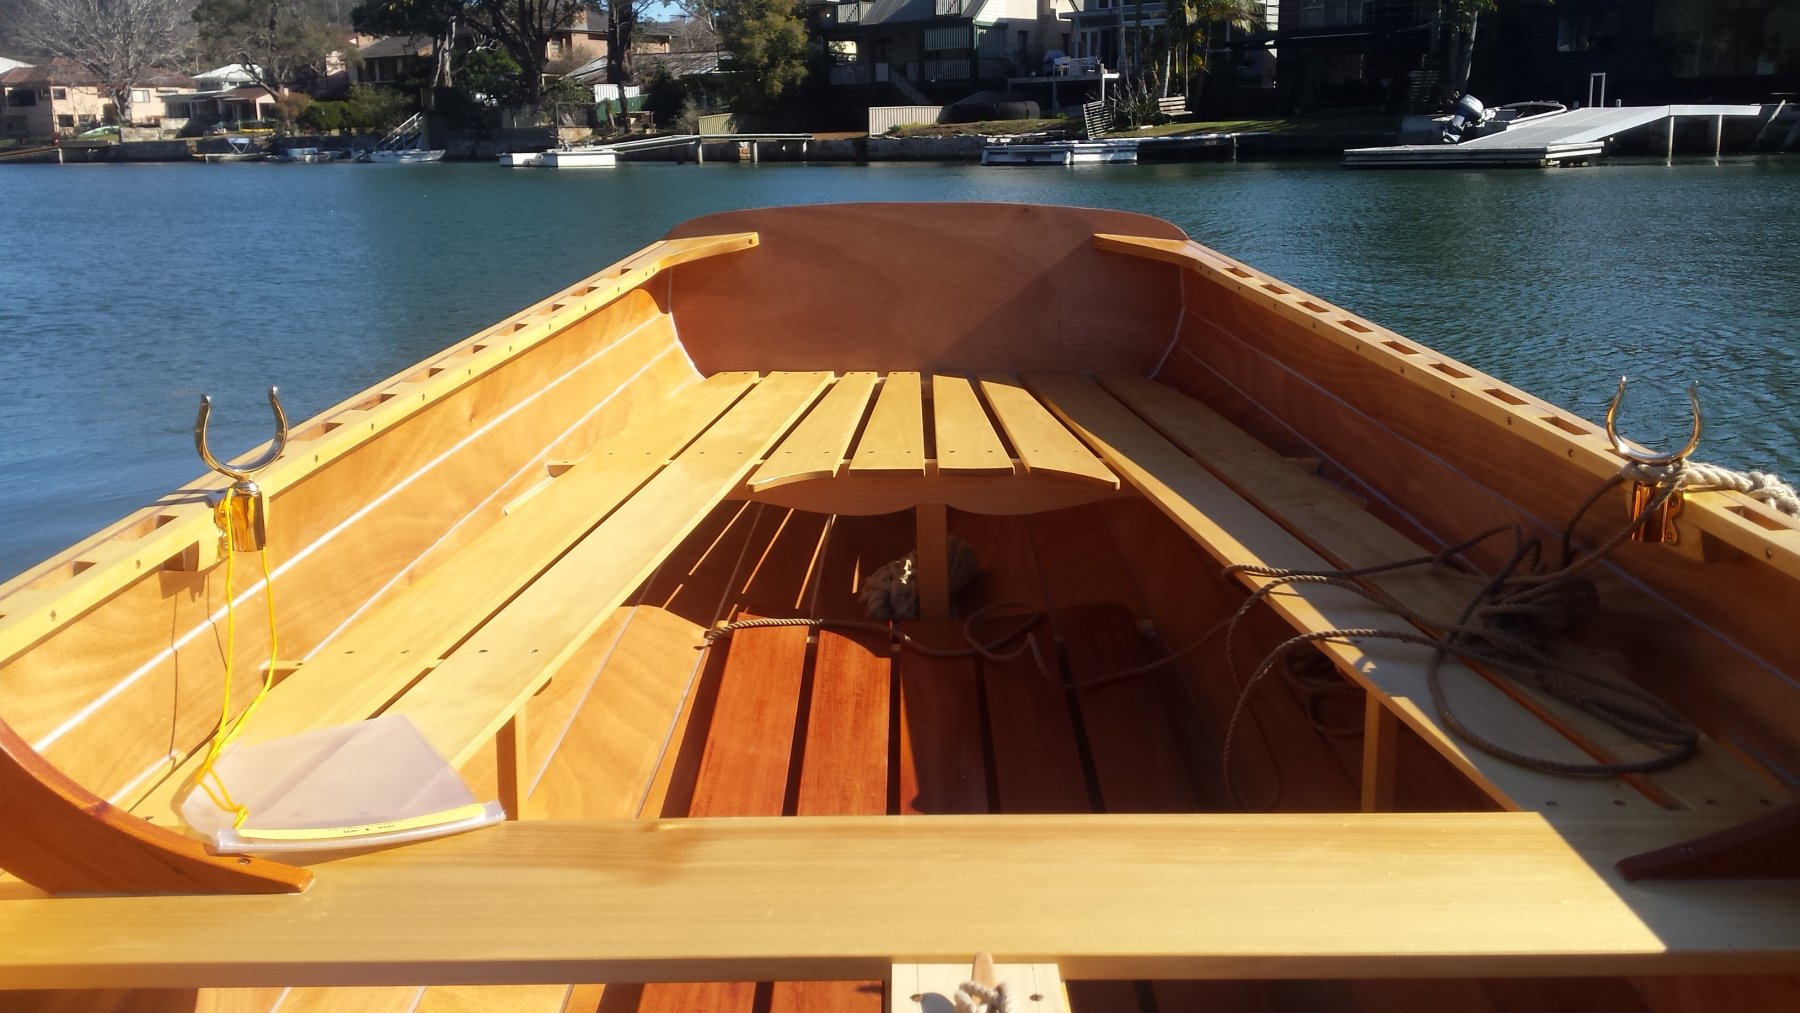
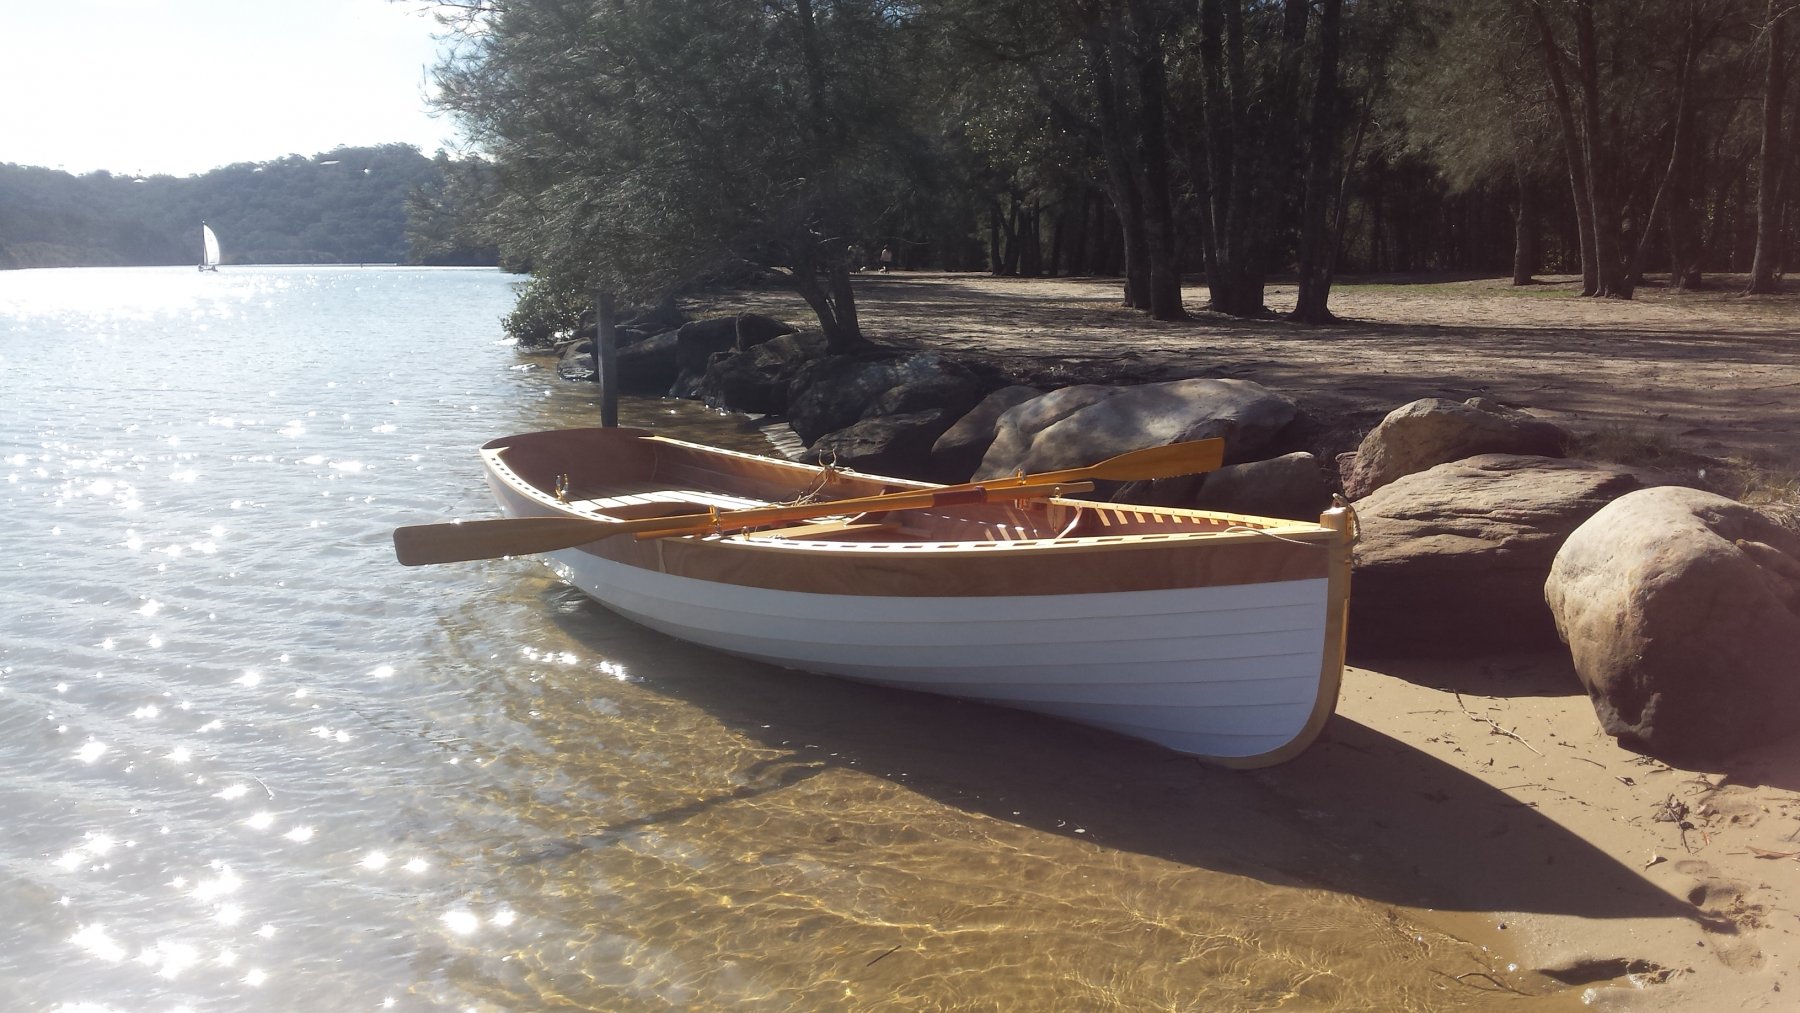
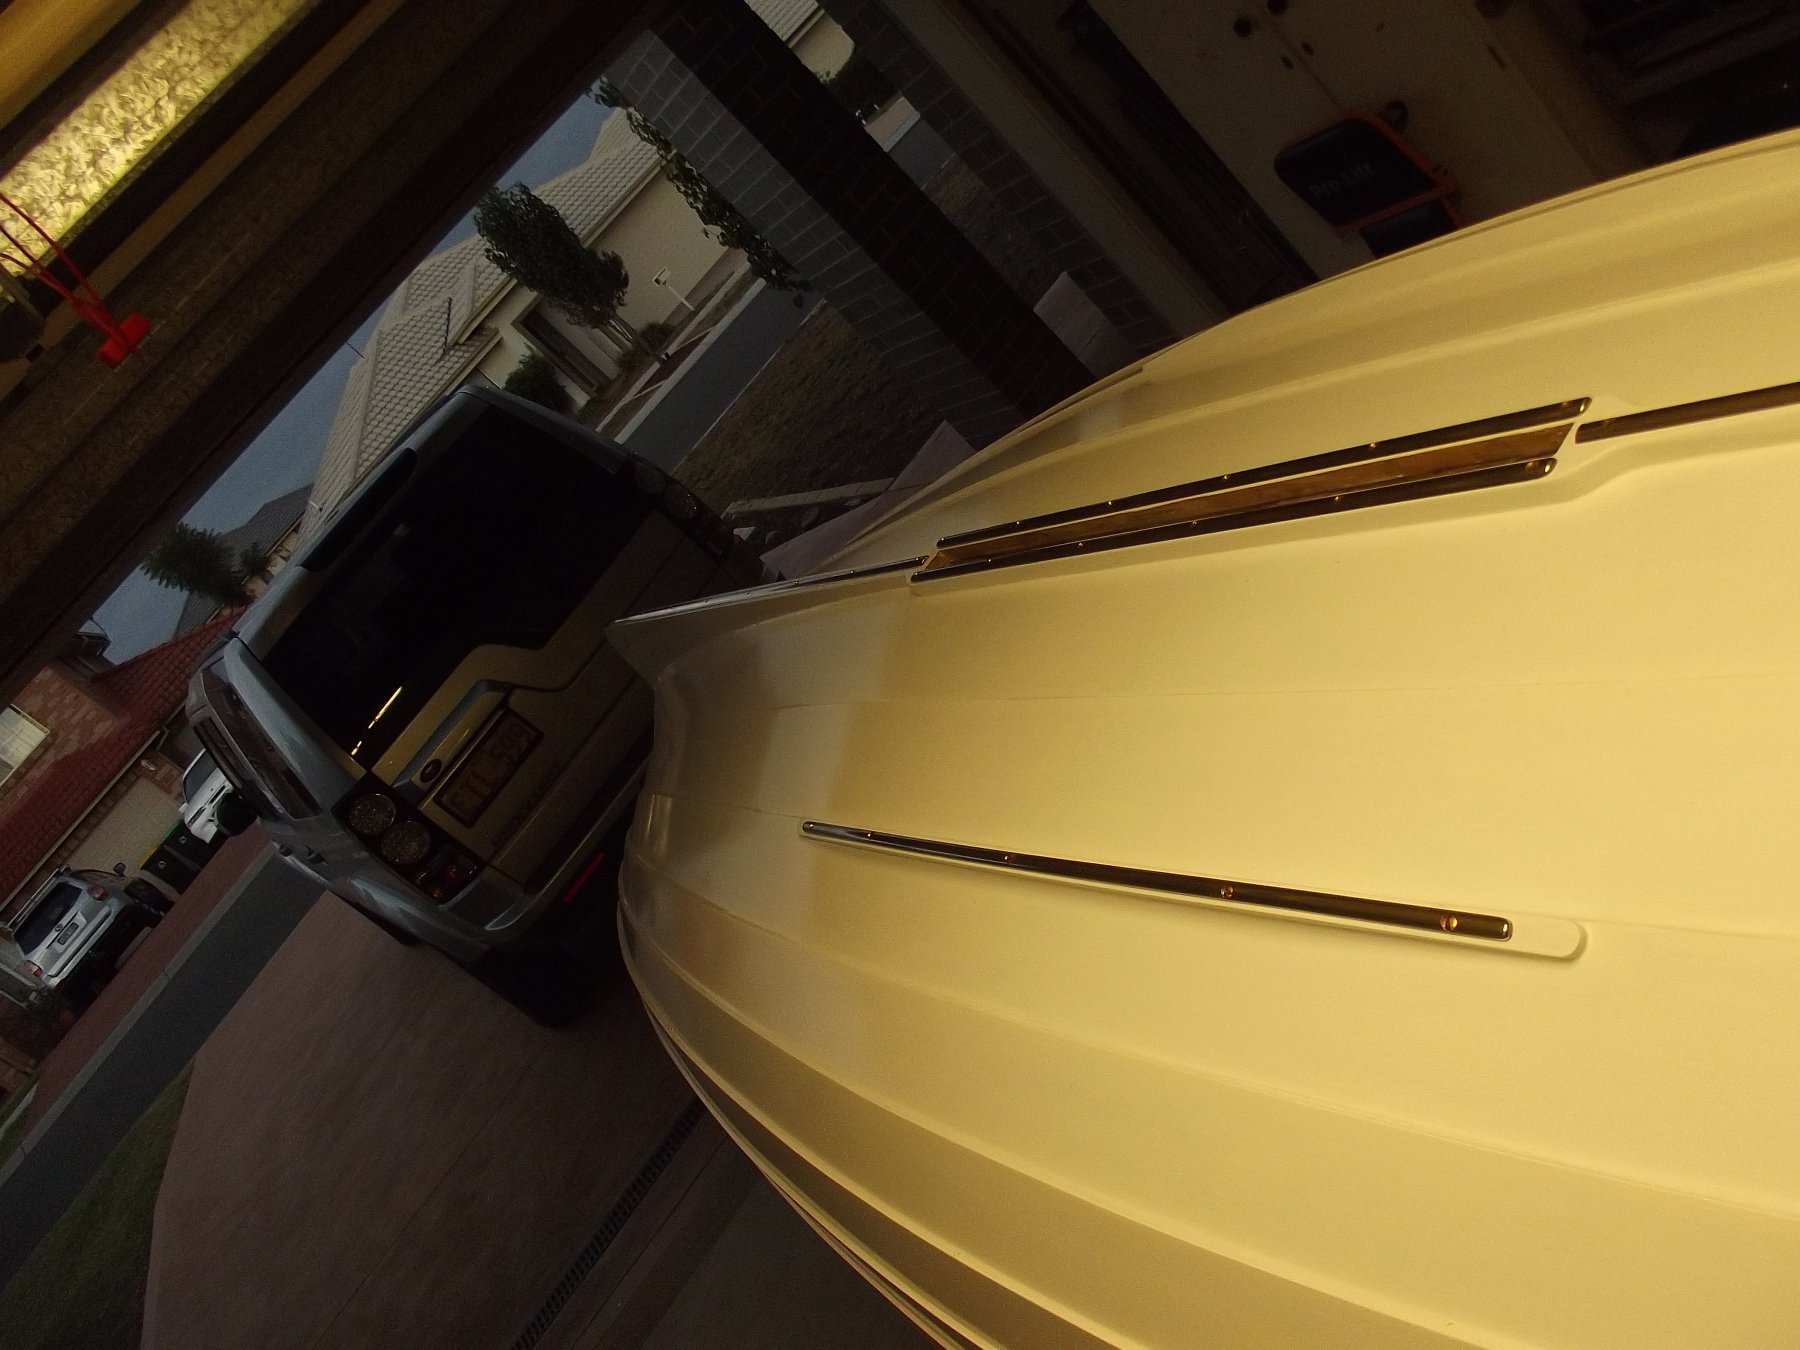
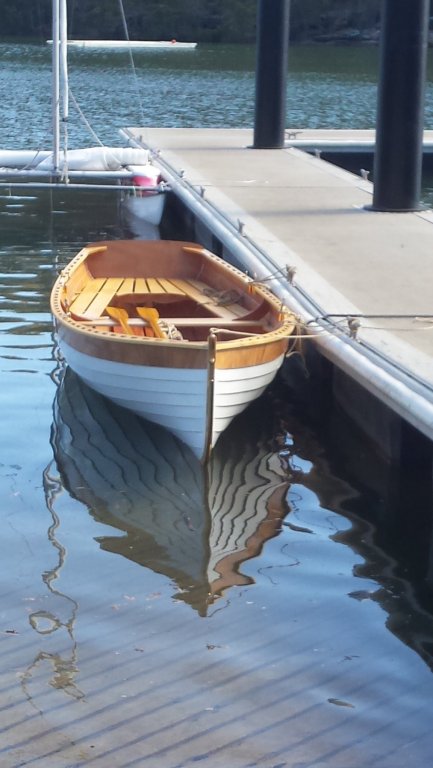
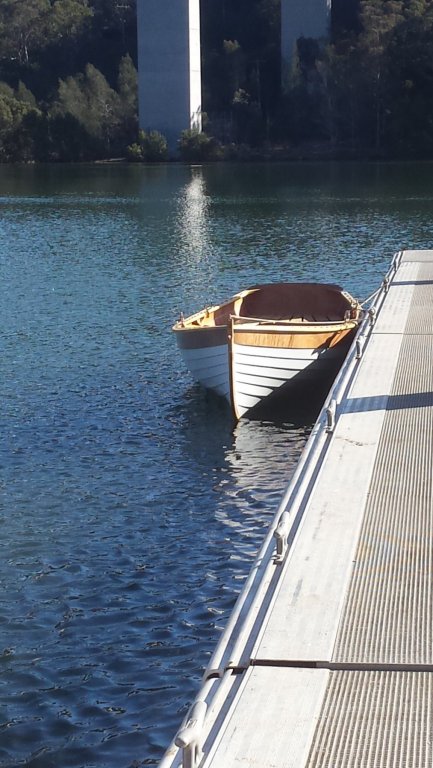
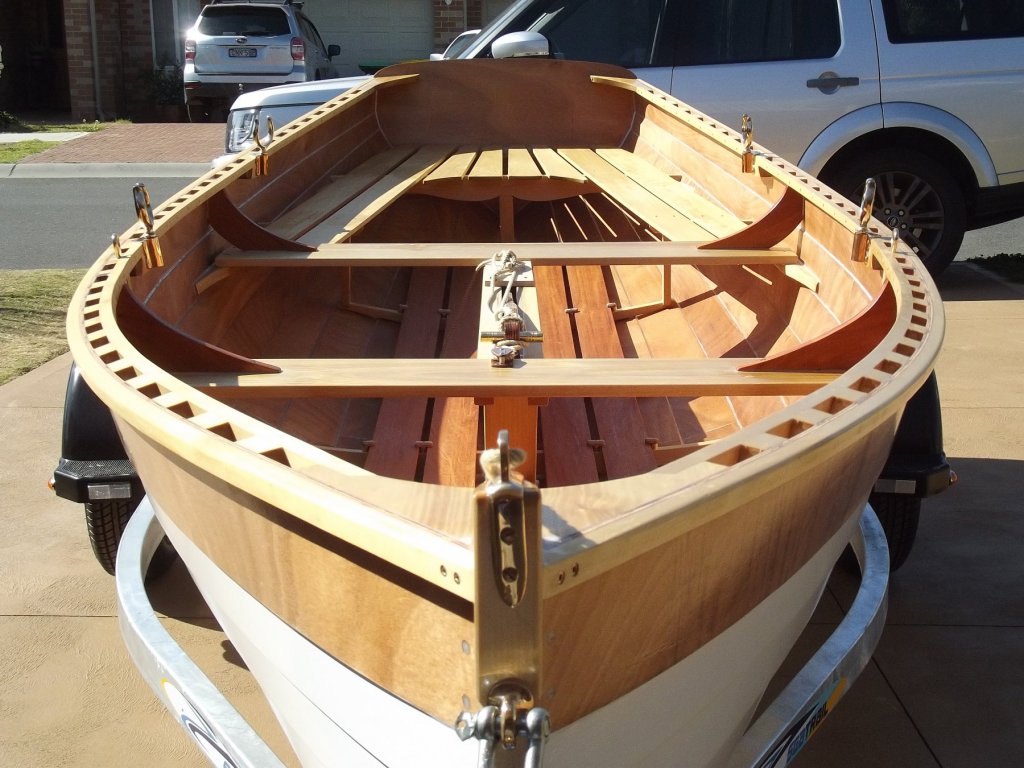
Today she quietly slipped down the ramp and into the water, she drew a few onlookers and thankfully didn't let me down. She's light and easy to handle although the centre board was handy when the wind picked up. She looks right in the water and more importantly she didn't leak even so much as a drop!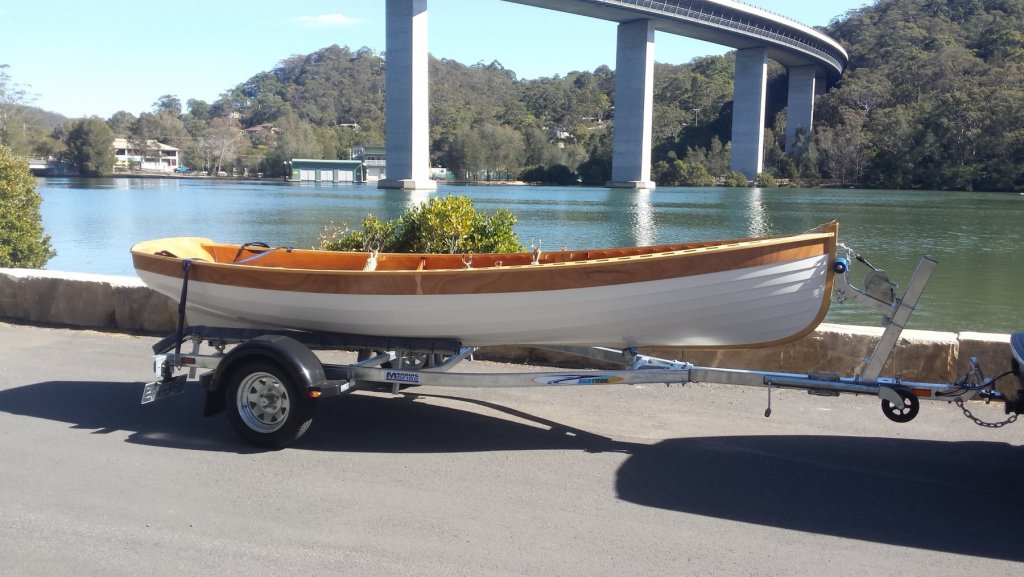


- 109 replies
-
- 25
-

-
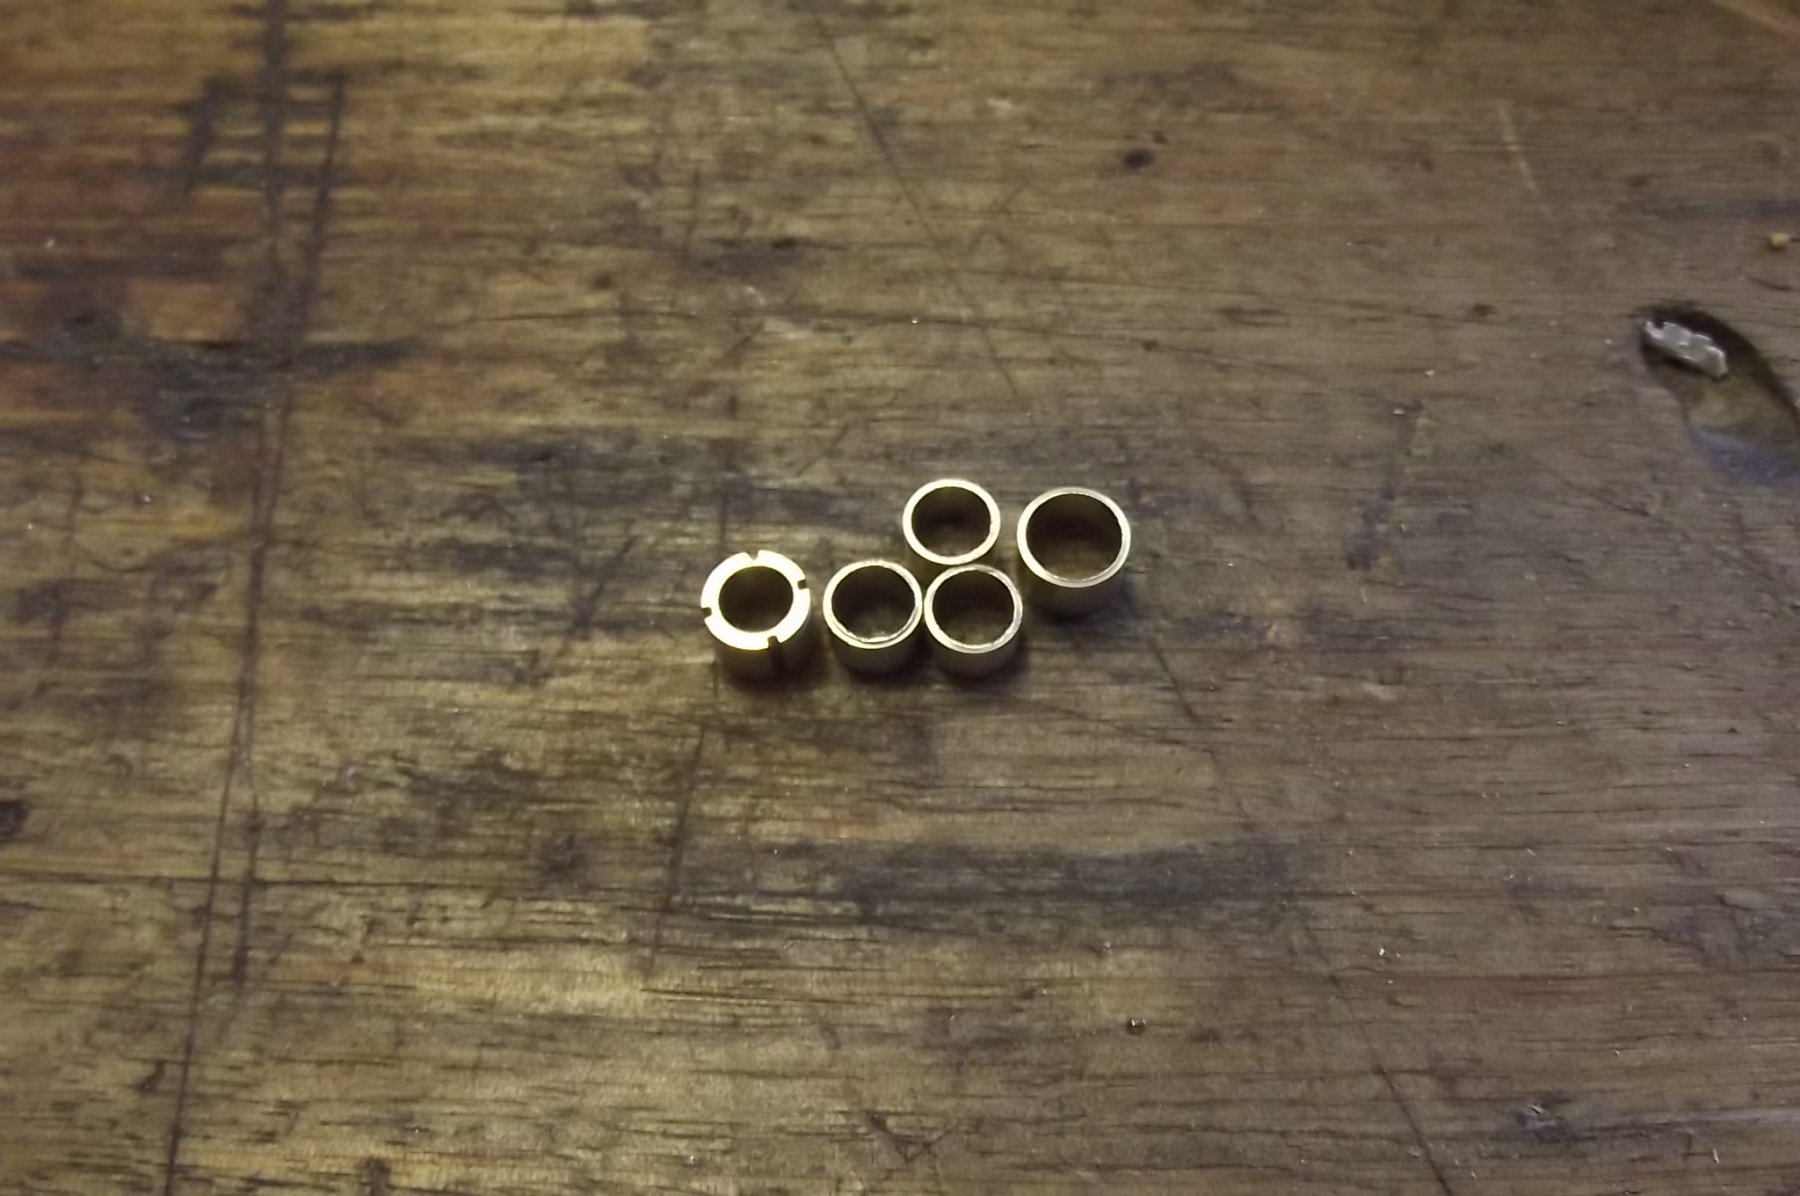
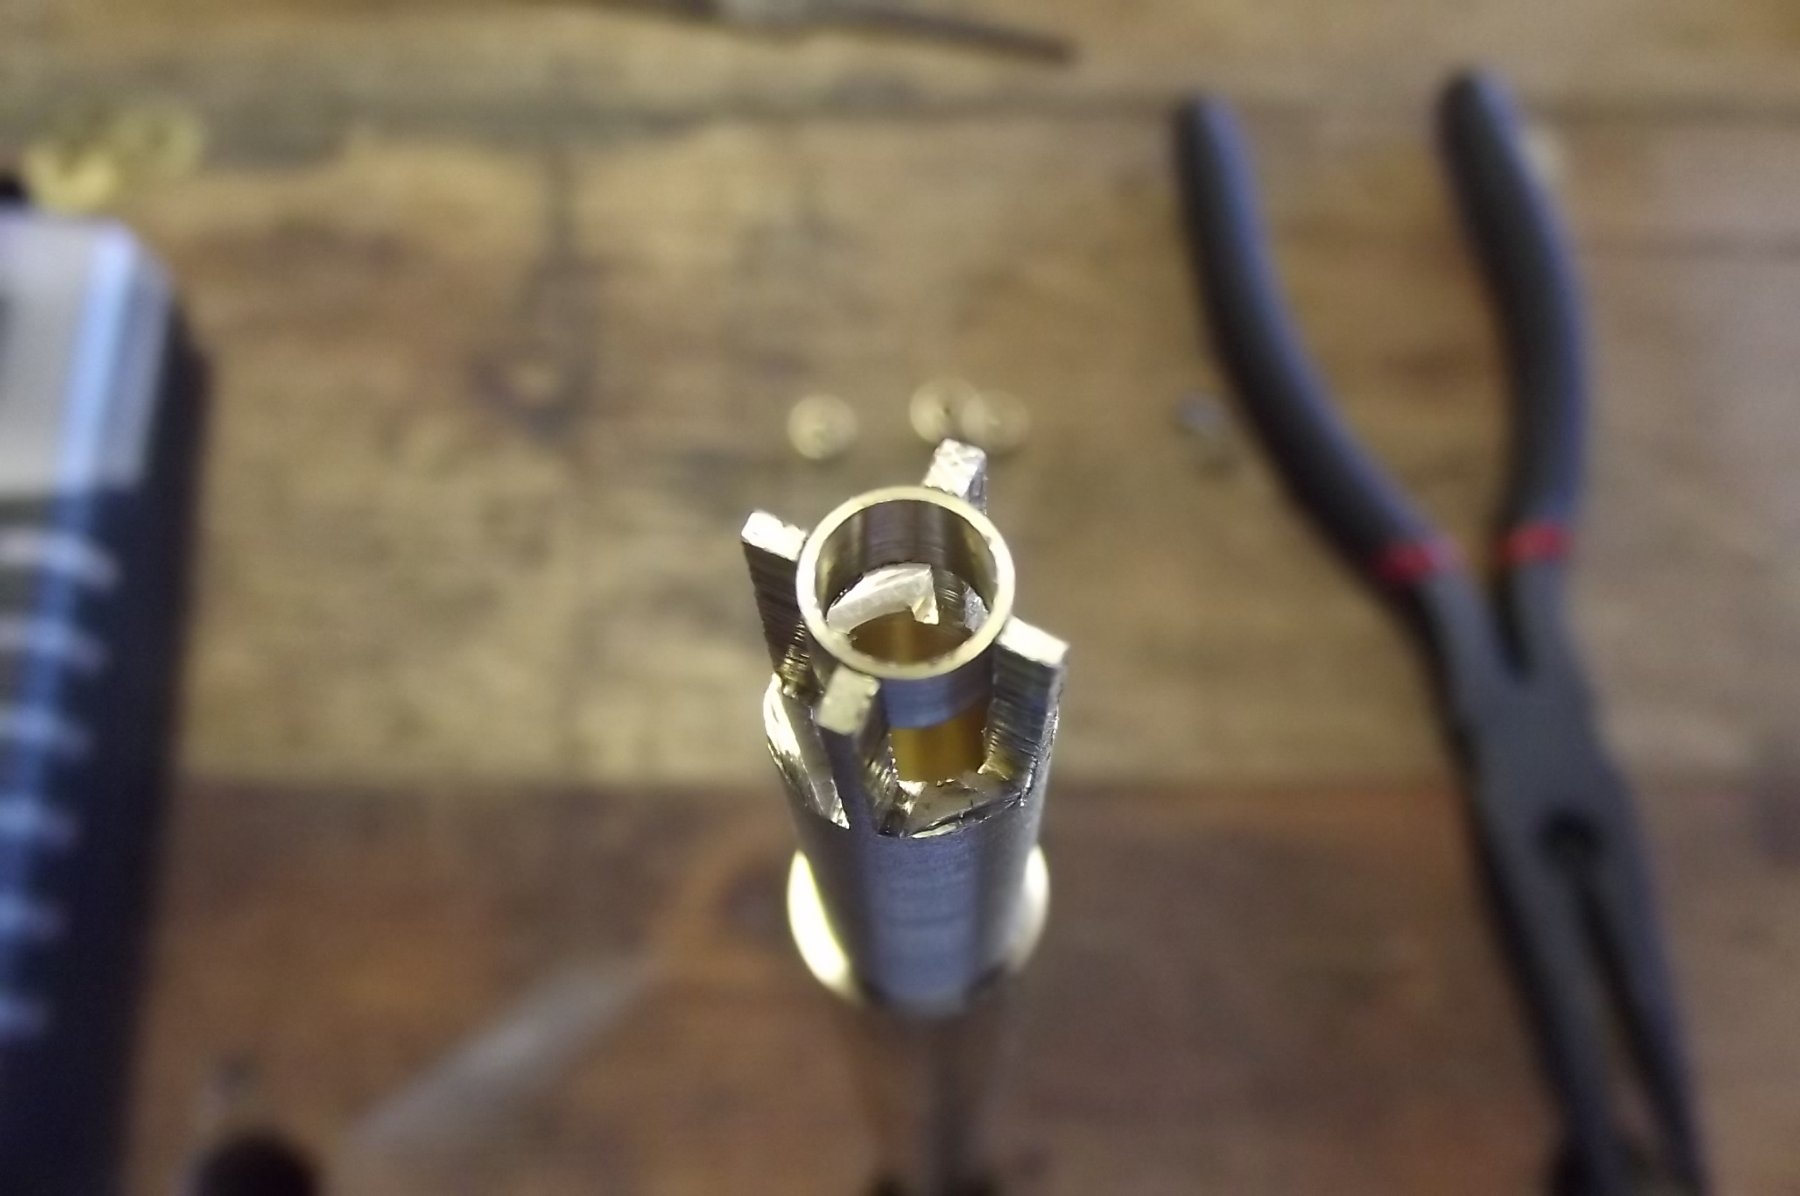
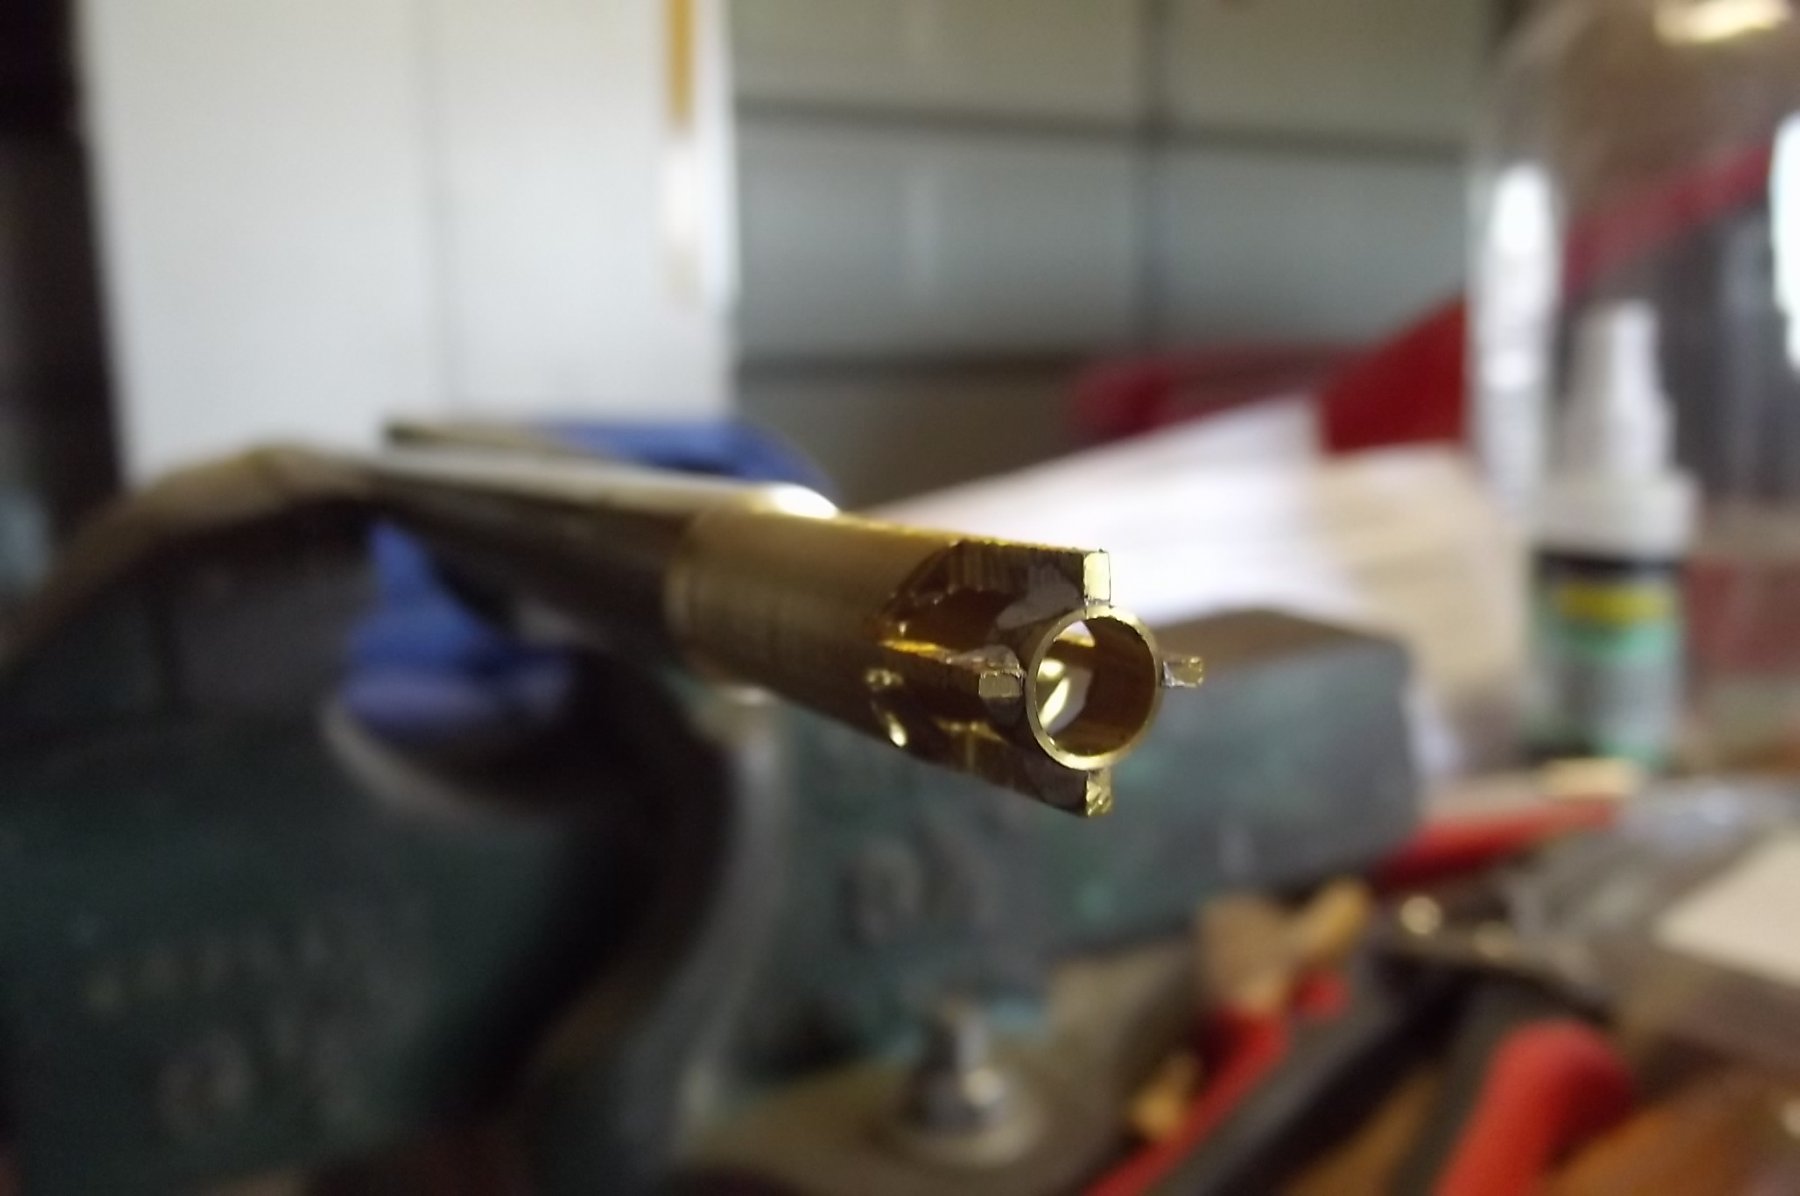
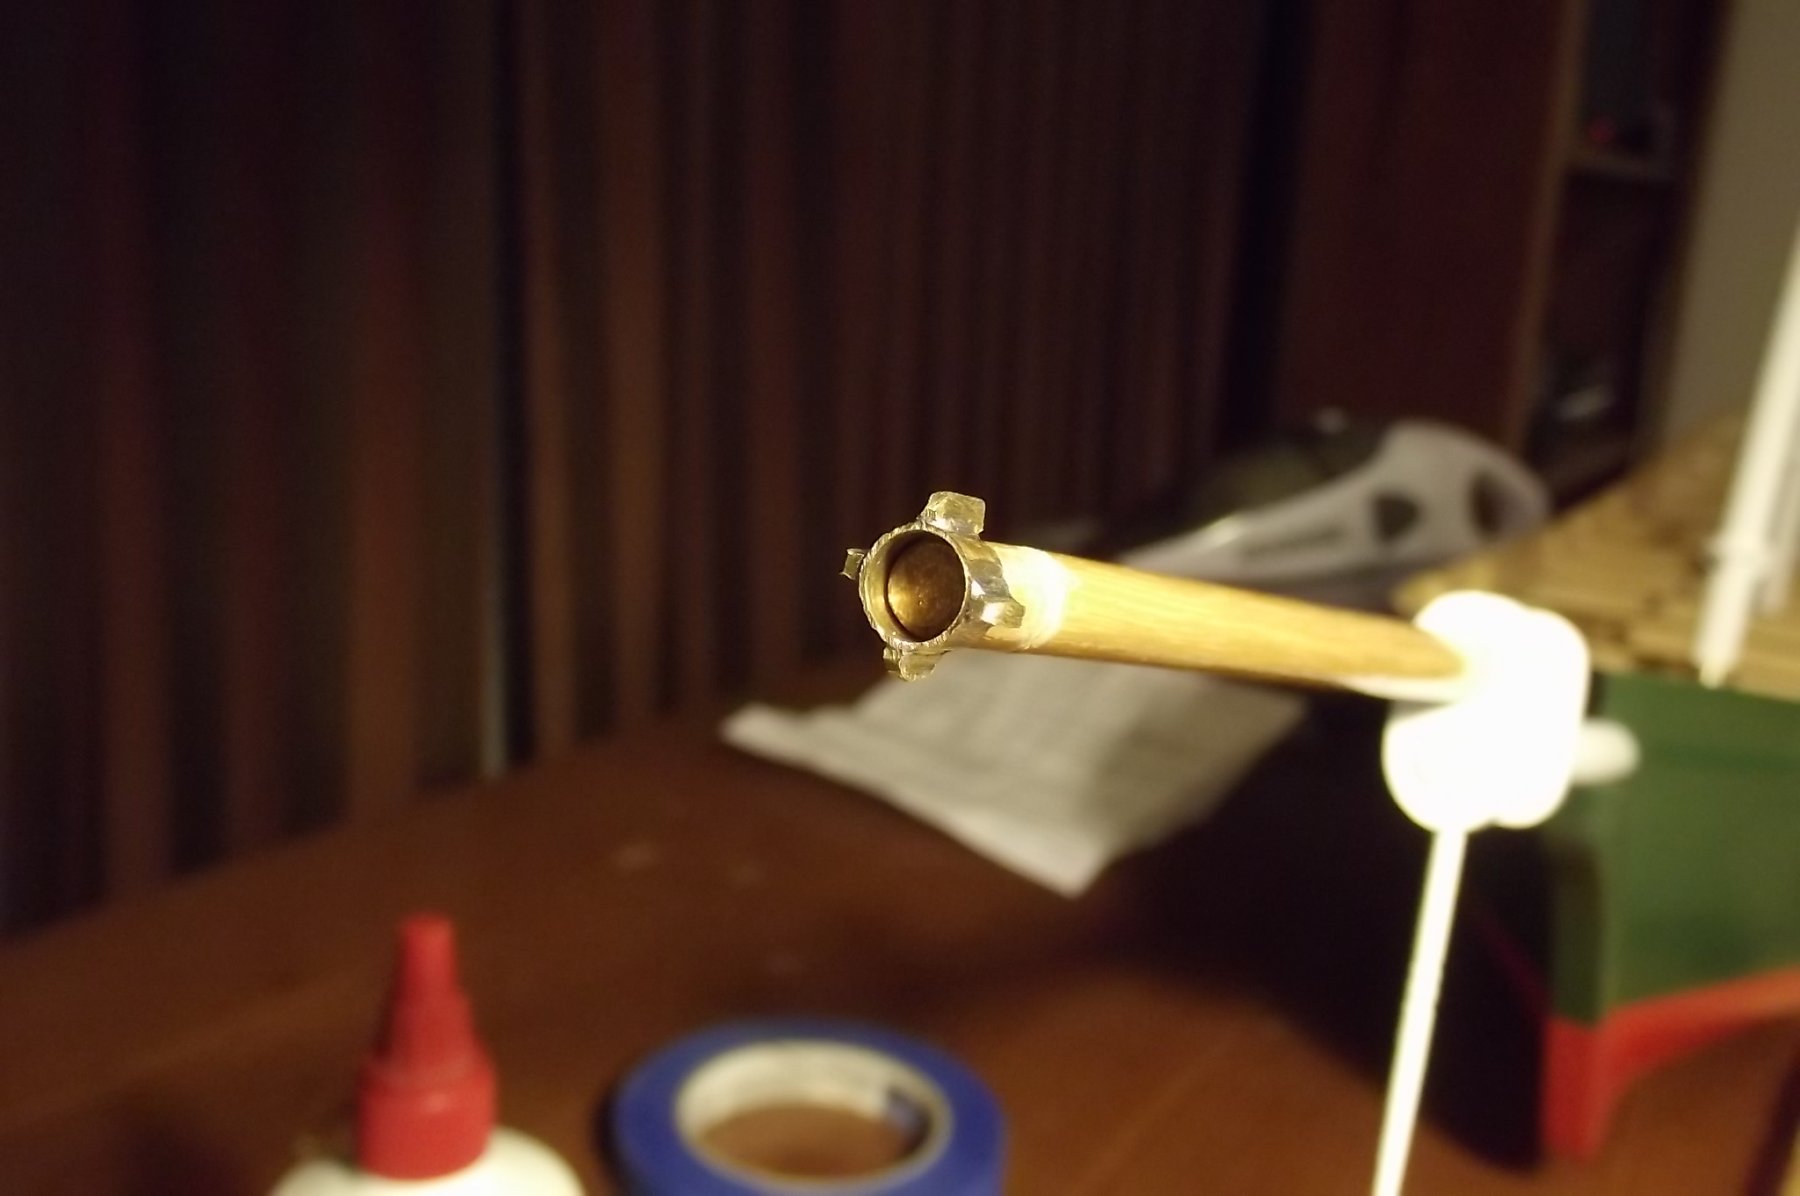
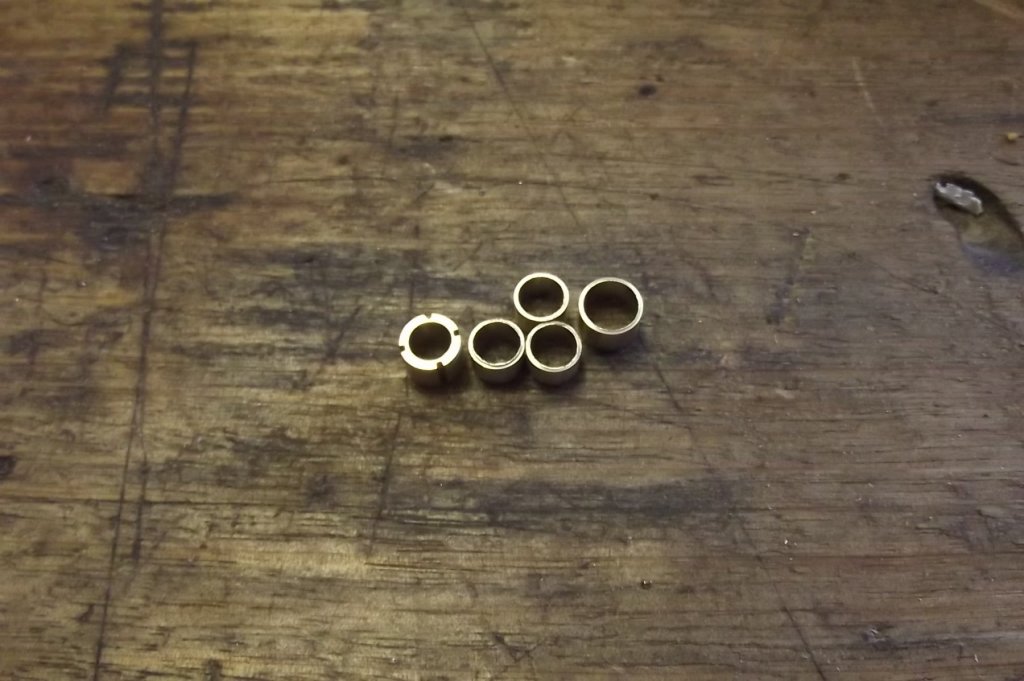
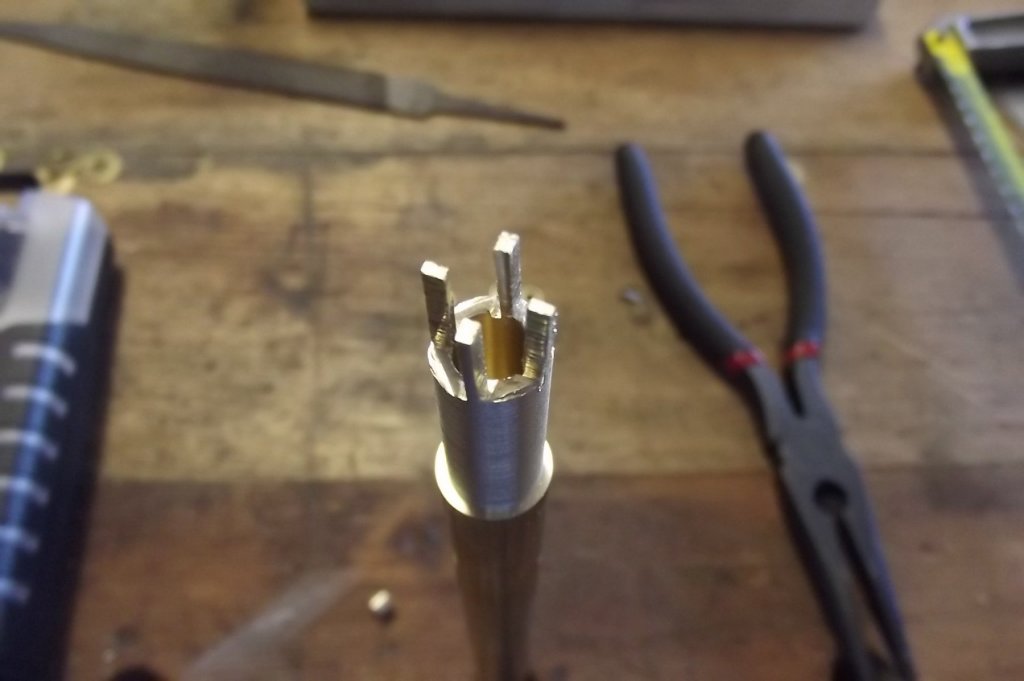
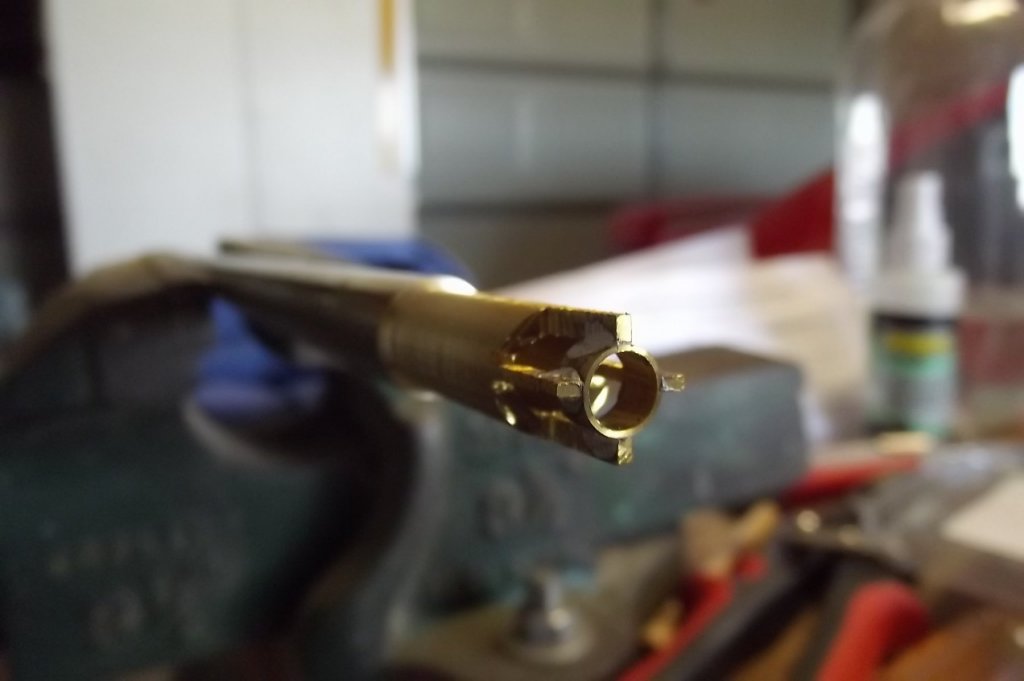
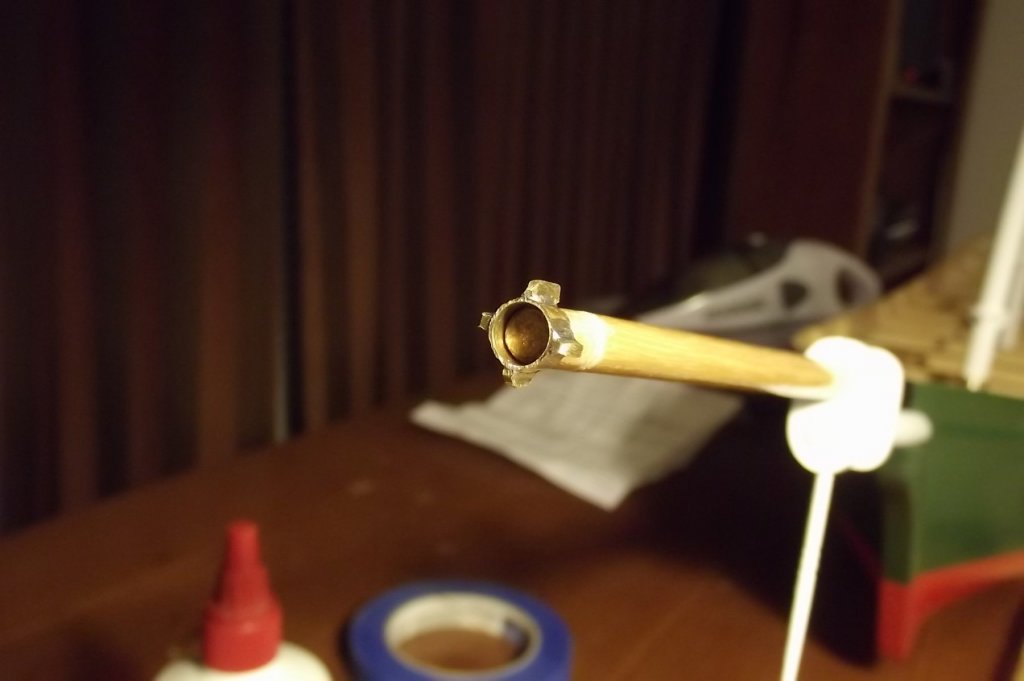
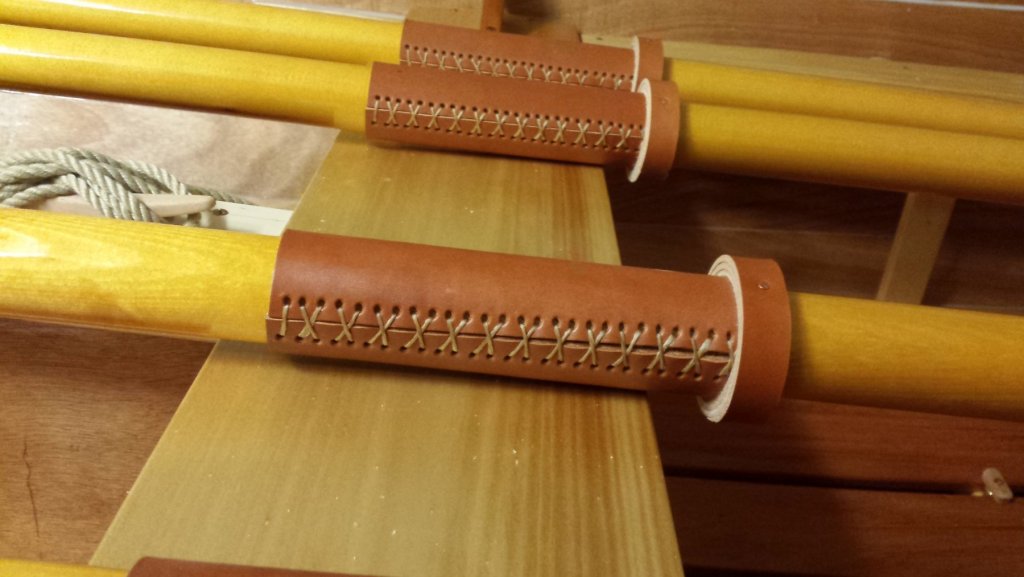
Back in February 2014 I posted this in my "schooner" build, found it yesterday and thought it might be worth sharing. To make the bands I drilled out the centre of the brass stock on the lathe to fit the mast, then turned it down until I had approx. 1mm wall thickness (this was set by the available drill sizes I had for the next step) then parted the bands off. Then in the lathe drill a centre hole in the stock the same size as the outside diameter of the collars just made and turn down the exterior to just above the finished dimension of the band with tabs, the length of this machining needs to be longer than the length of the band, this will soon become clear. First pic shows a failed first attempt on the left and the new bands turned and parted off. Second pic shows the second turning removed from the lathe and the tabs revealed by removing the excess brass, you could make it a single tab by only soldering one, you can make it a triple or a quad as I have. Third pic shows the band fitted into the tabs, you'll note there are gaps between the band and the stock, this is so you don't lose all your heat into the stock while trying to solder it. The beautiful thing here is that the contact surfaces on the tabs are perfectly curved to match the band Fourth pic shows soldering the tabs, now guys, SOLDERING IS NOT THE DEMON EVERYONE SEEMS TO THINK IT IS! CLEAN is the secret, these parts are fresh off the lathe, no coolant was used in machining them and I have handled them very sparingly using long nose pliers to place the band in the tabs. I only use 60/40 resin cored solder and it works beautifully. The BIG thing is NEVER touch the flame and solder to the job at the same time! Heat from one side of the tab knowing that the hottest part of the flame is the tip of the blue centre flame, just hold that on the job for a little while then remove it then touch the solder to the opposite side of the tab, if it doesn't melt remove it and heat a bit more. keep going until you get the solder melting then remove the solder wire and reapply heat to the opposite side. This will draw the solder through the joint and you'll see it happen. Continue around all the tabs one at a time. Once they are all soldered simply heat the whole thing up and using a paint brush quickly brush away the excess solder remembering it is molten metal and will spatter and burn. Fifth pic, soldered Sixth pic, cut off and fitted to the jib boom, more filing to be done but you get the idea.


-
- 7
-
-
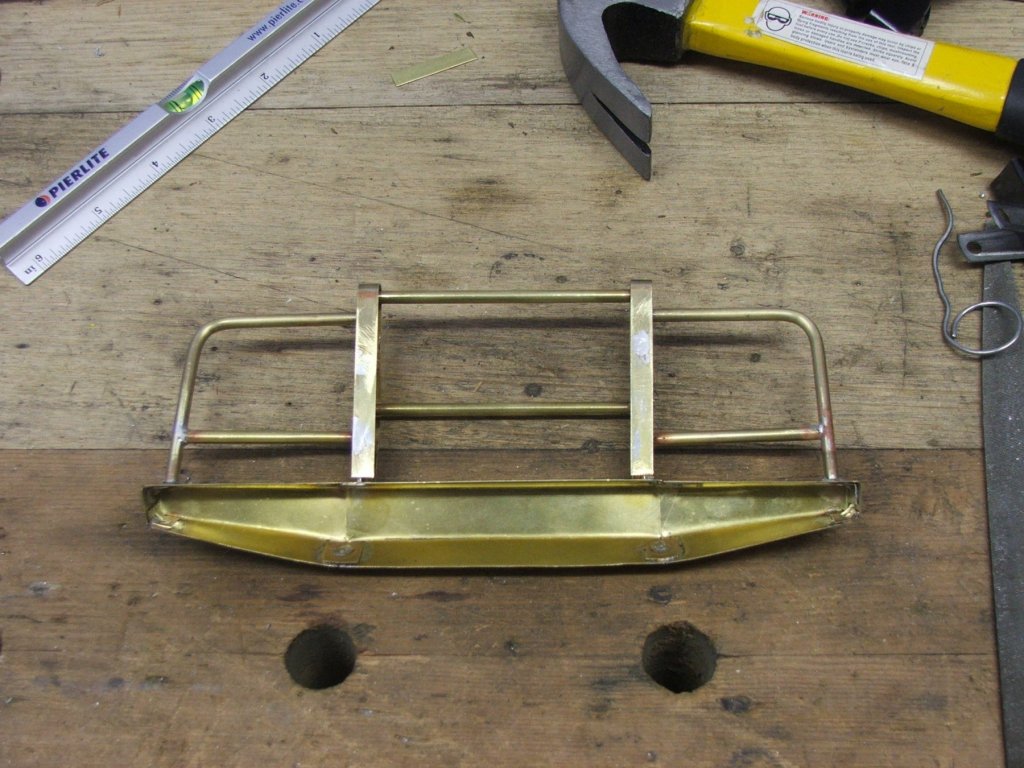
Why does soldering strike fear into men? It's dead simple, I have soldered everything from a single wire on a small switch to a 120mmsq cable in a motor connection. For what we are doing I only ever use resin cored solder, 60/40 or slightly stronger higher melt point 40/60. The process is so simple:- 1: CLEAN the job, I find a light sand with dry wet&dry 600 grit does a nice job, if it's been oily wash it with alcohol first 2: NEVER touch a flame to the job while touching the solder to it. The flame burns the resin and the job is then dirty, no hope at all of getting it to work 3: Once you have some solder on the job heat from the opposite side of the join as this keeps the flame off the solder and resin residue AND solder flows to heat. I made the brass bullbar for the model pictured using this method and 60/40 resin cored solder, the model weighs 3.5Kg and can be picked up by the bullbar

- 4 replies
-
- 10
-
-
Take it from an old armature winder, burn it off. On small wires like that a simple cigarette lighter will do the job nicely.
-
There's always a master class in your builds Michael, never get tired of learning from you.
-
15' Dinghy by Bedford - FINISHED - 1:1 scale
Bedford replied to Bedford's topic in Non-ship/categorised builds
That's a thing of beauty you built too! Mine is yet to be launched due to curing time of the interior finish but it will be soon, mind you it's winter here! I saw a similar but smaller boat at the wooden boat festival in Sydney earlier this year and it was finished better than any furniture piece you'd buy today, it kind of left me deflated thinking mine will never look that good but as I walked away I realised that if mine did look that good I'd want to lock it inside the house and never let any water, or worse, SAND get near it. mine is a nicely finished usable boat -
15' Dinghy by Bedford - FINISHED - 1:1 scale
Bedford replied to Bedford's topic in Non-ship/categorised builds
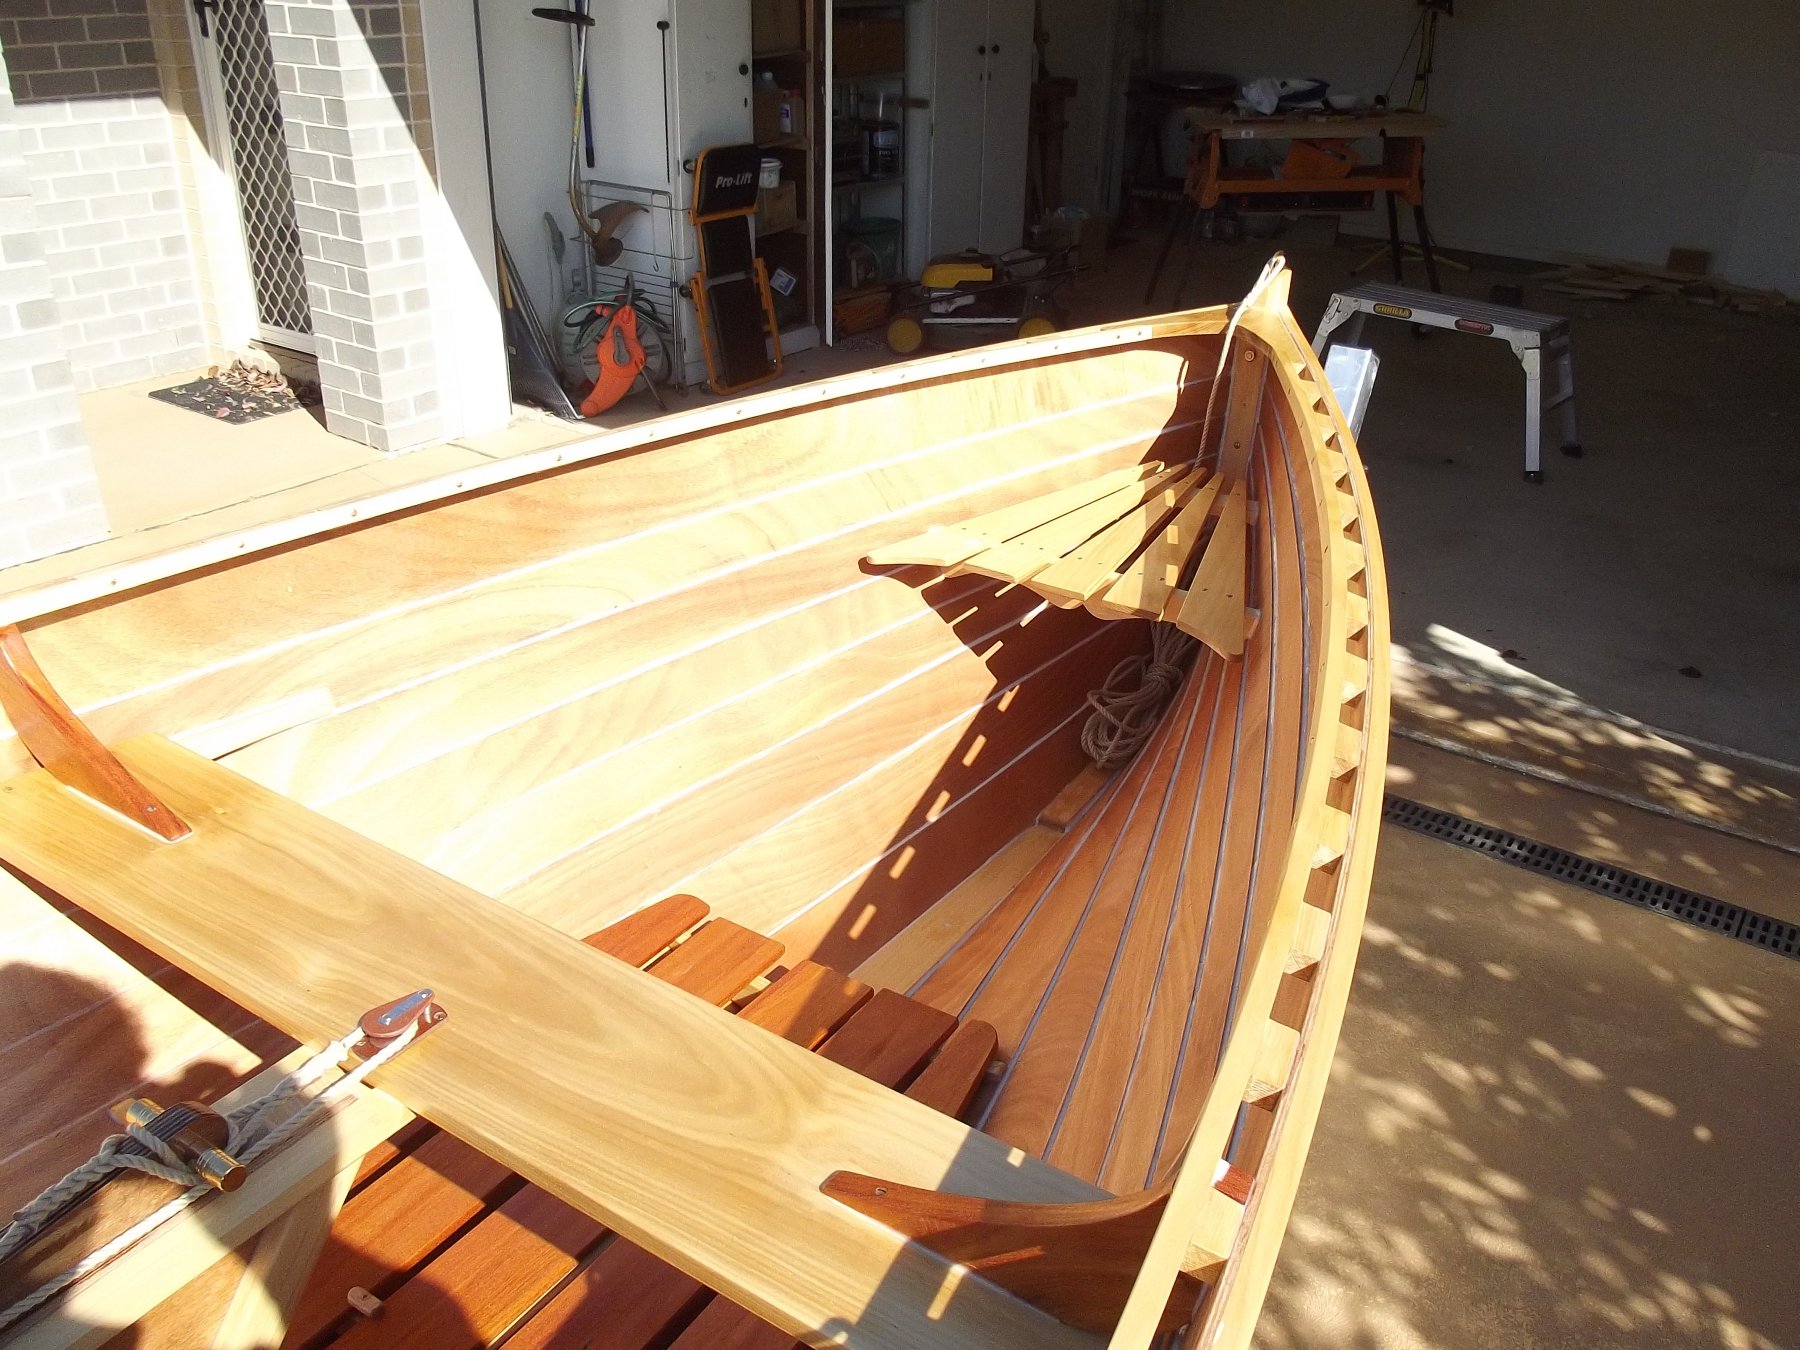
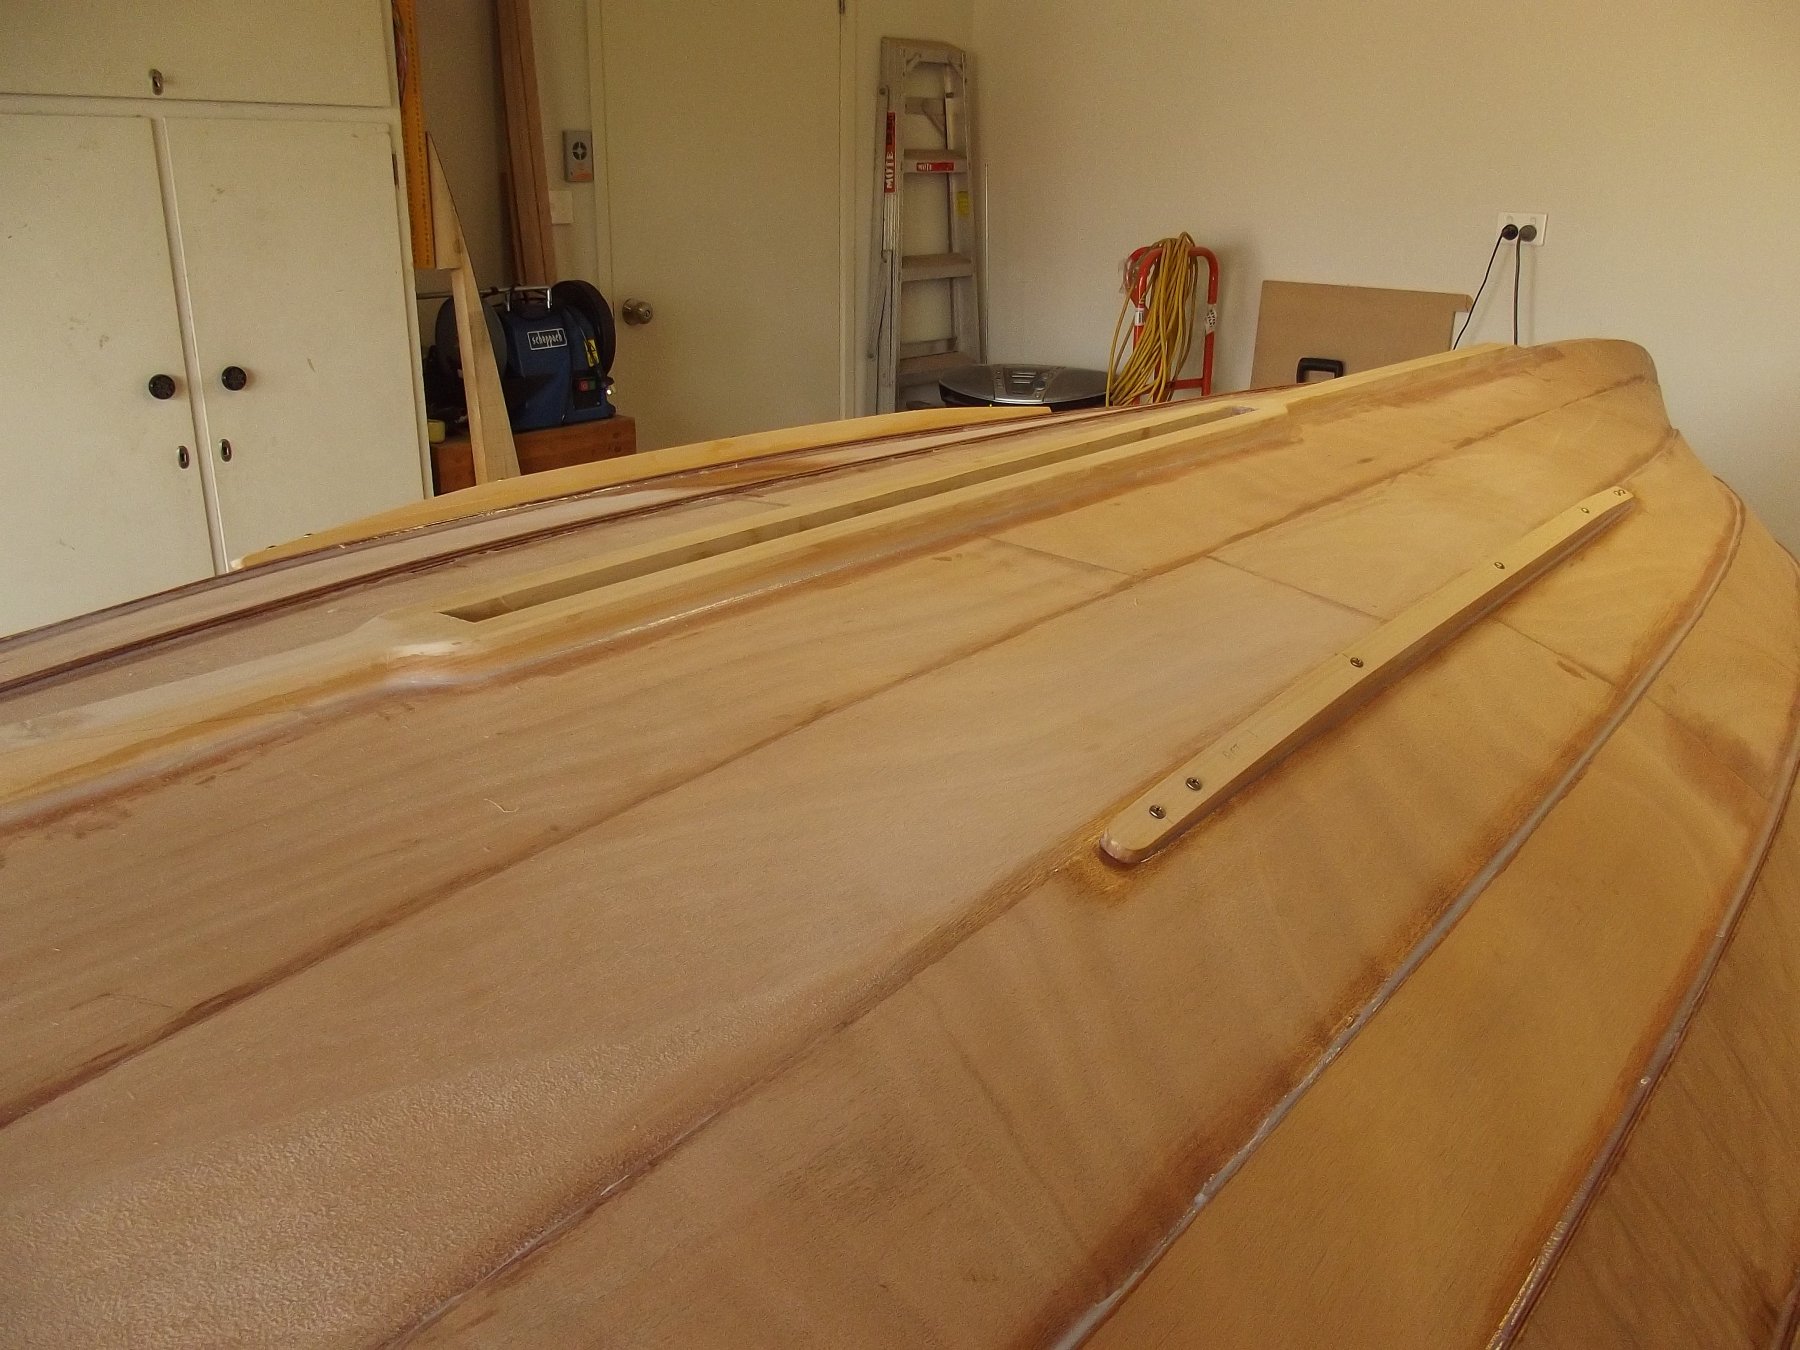
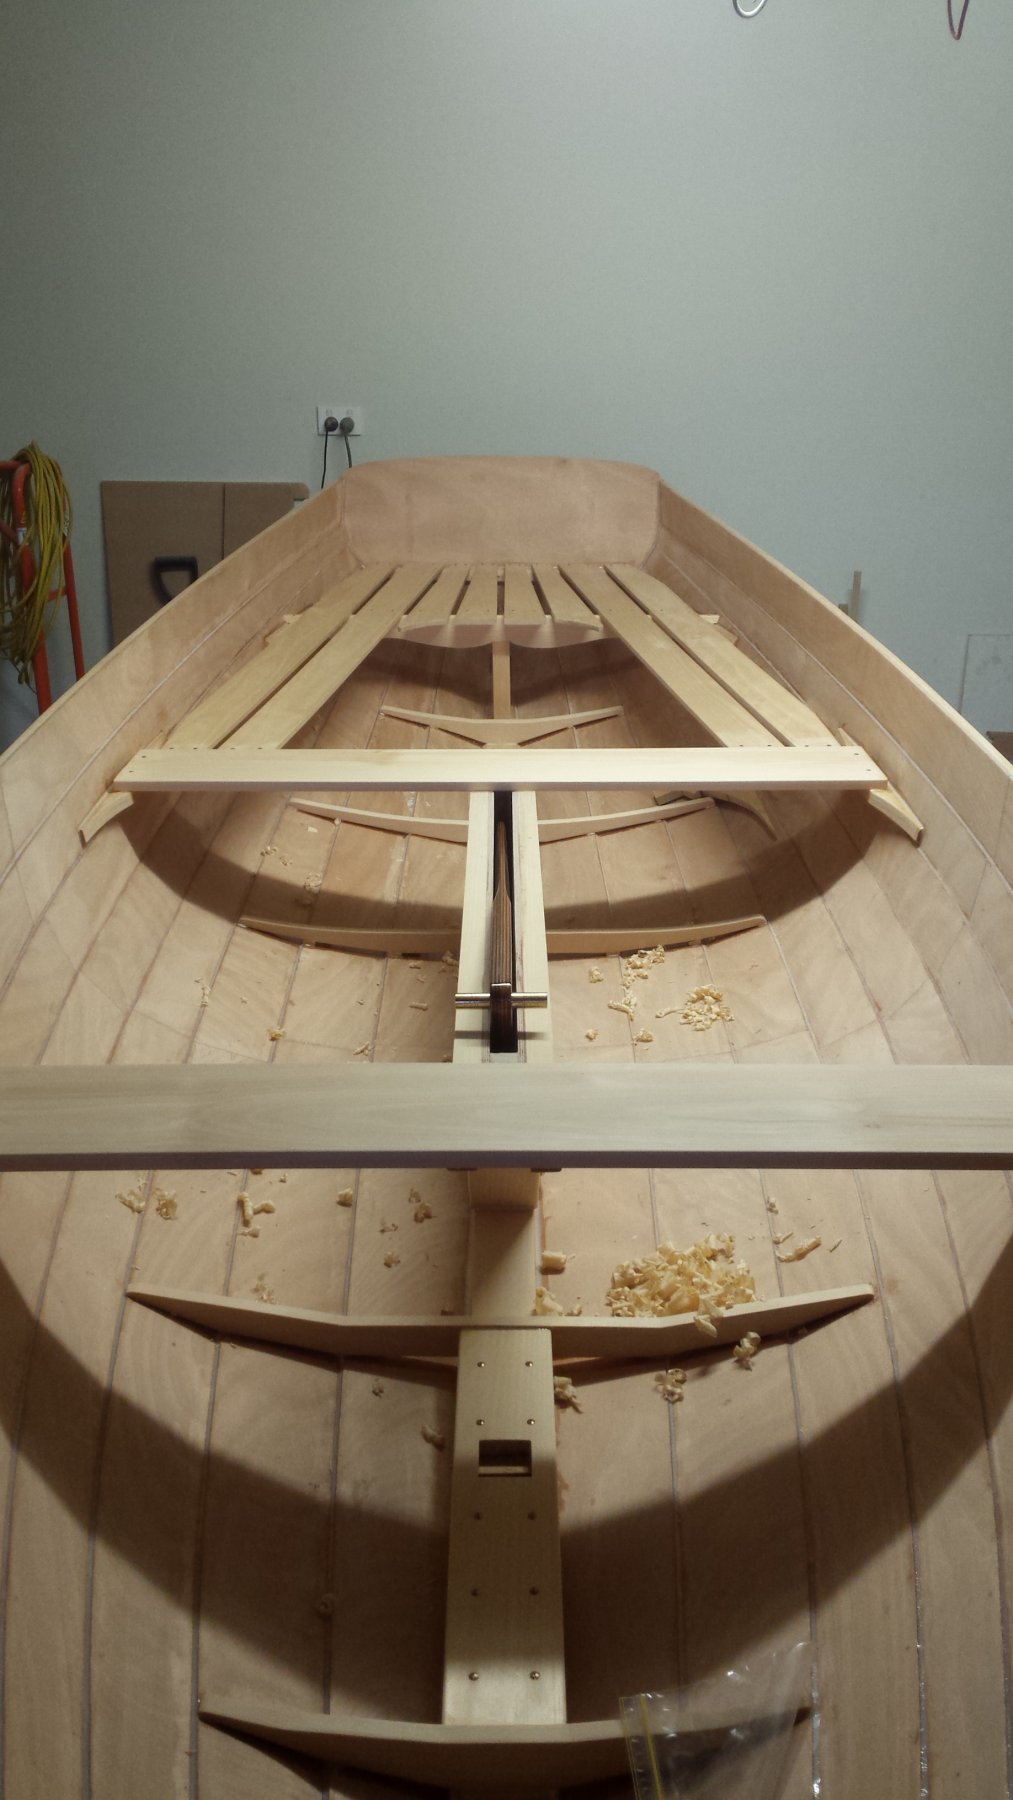
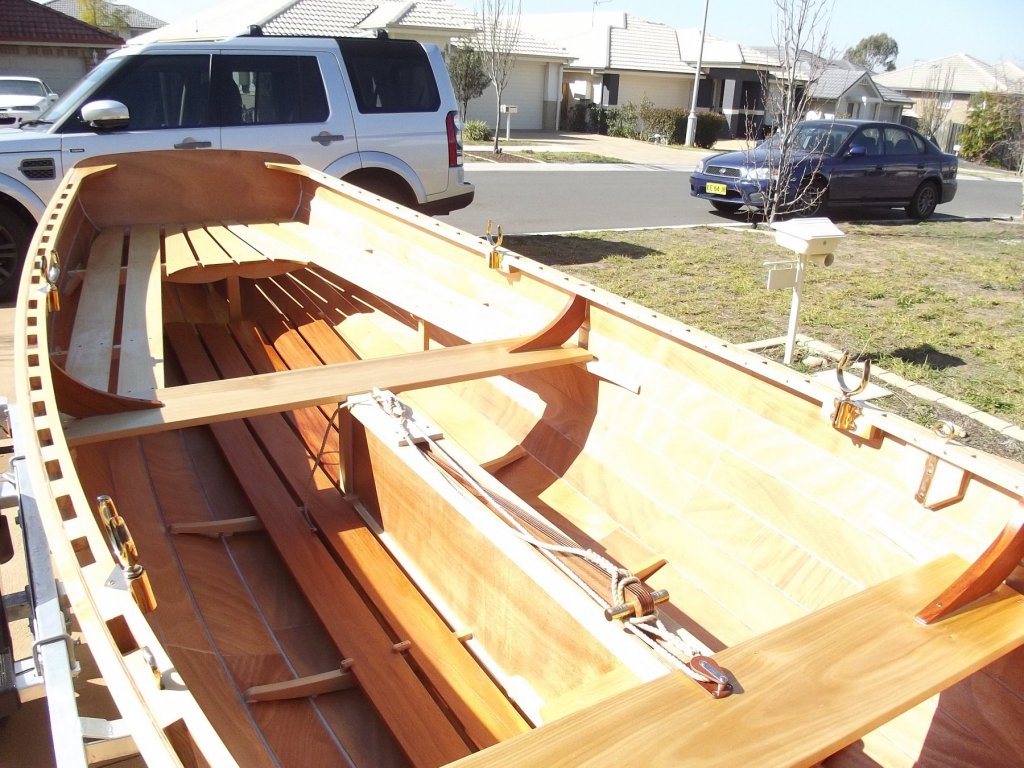
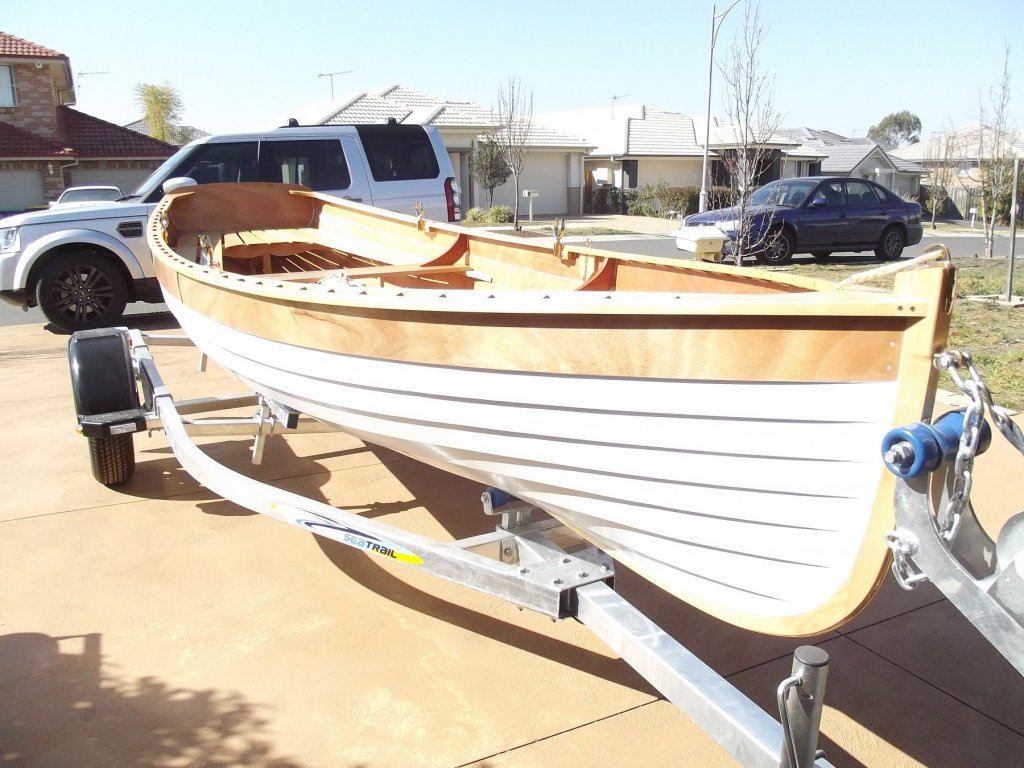
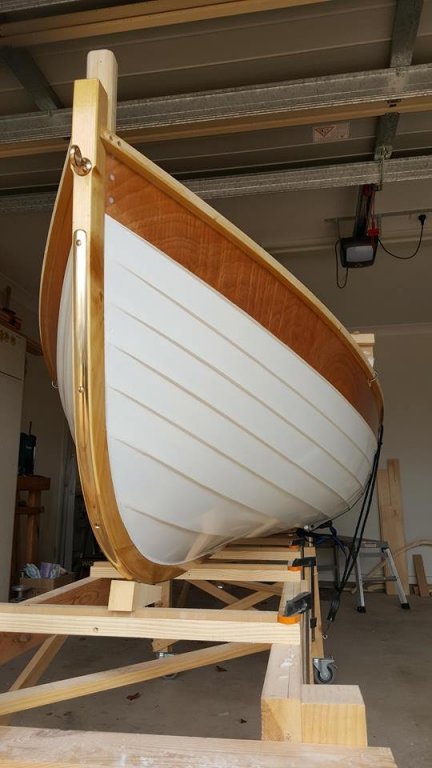
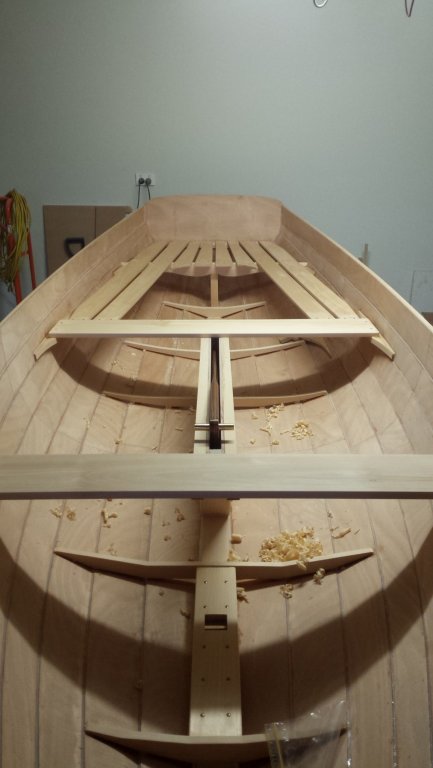
She's finished (to row boat status), some will notice the chain plates aft of the forward thwart. The bow pic suggests the stem head is out of plumb, that's what you get for doing that kind of work at night with uneven lighting in the workshop. Mind you it's nowhere near as bad as it looks, there's an optical illusion going on because of the bright multi curved profile. I think I'll have no problem doweling the screw holes and re-drilling them.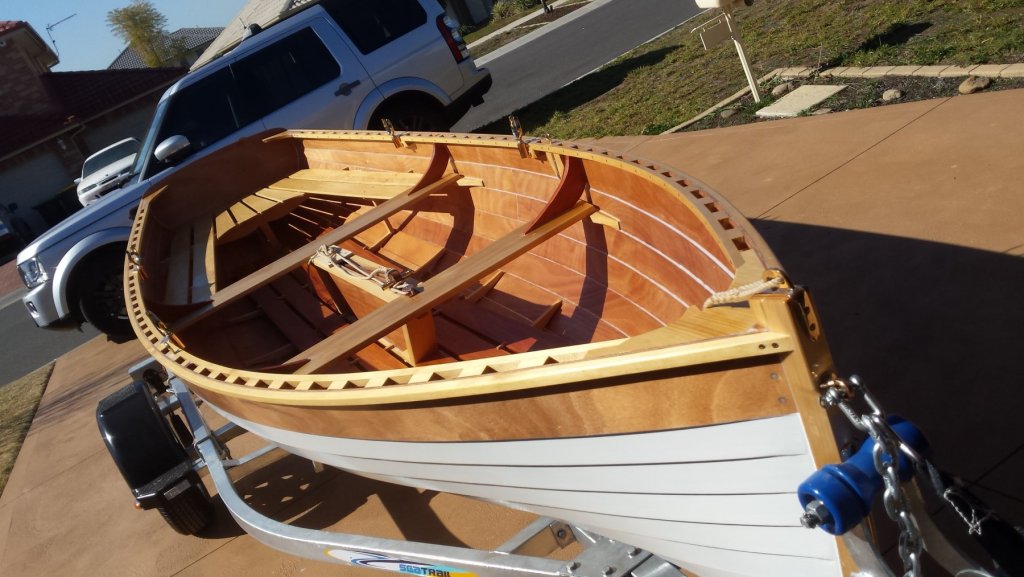
- 109 replies
-
- 18
-
-
15' Dinghy by Bedford - FINISHED - 1:1 scale
Bedford replied to Bedford's topic in Non-ship/categorised builds
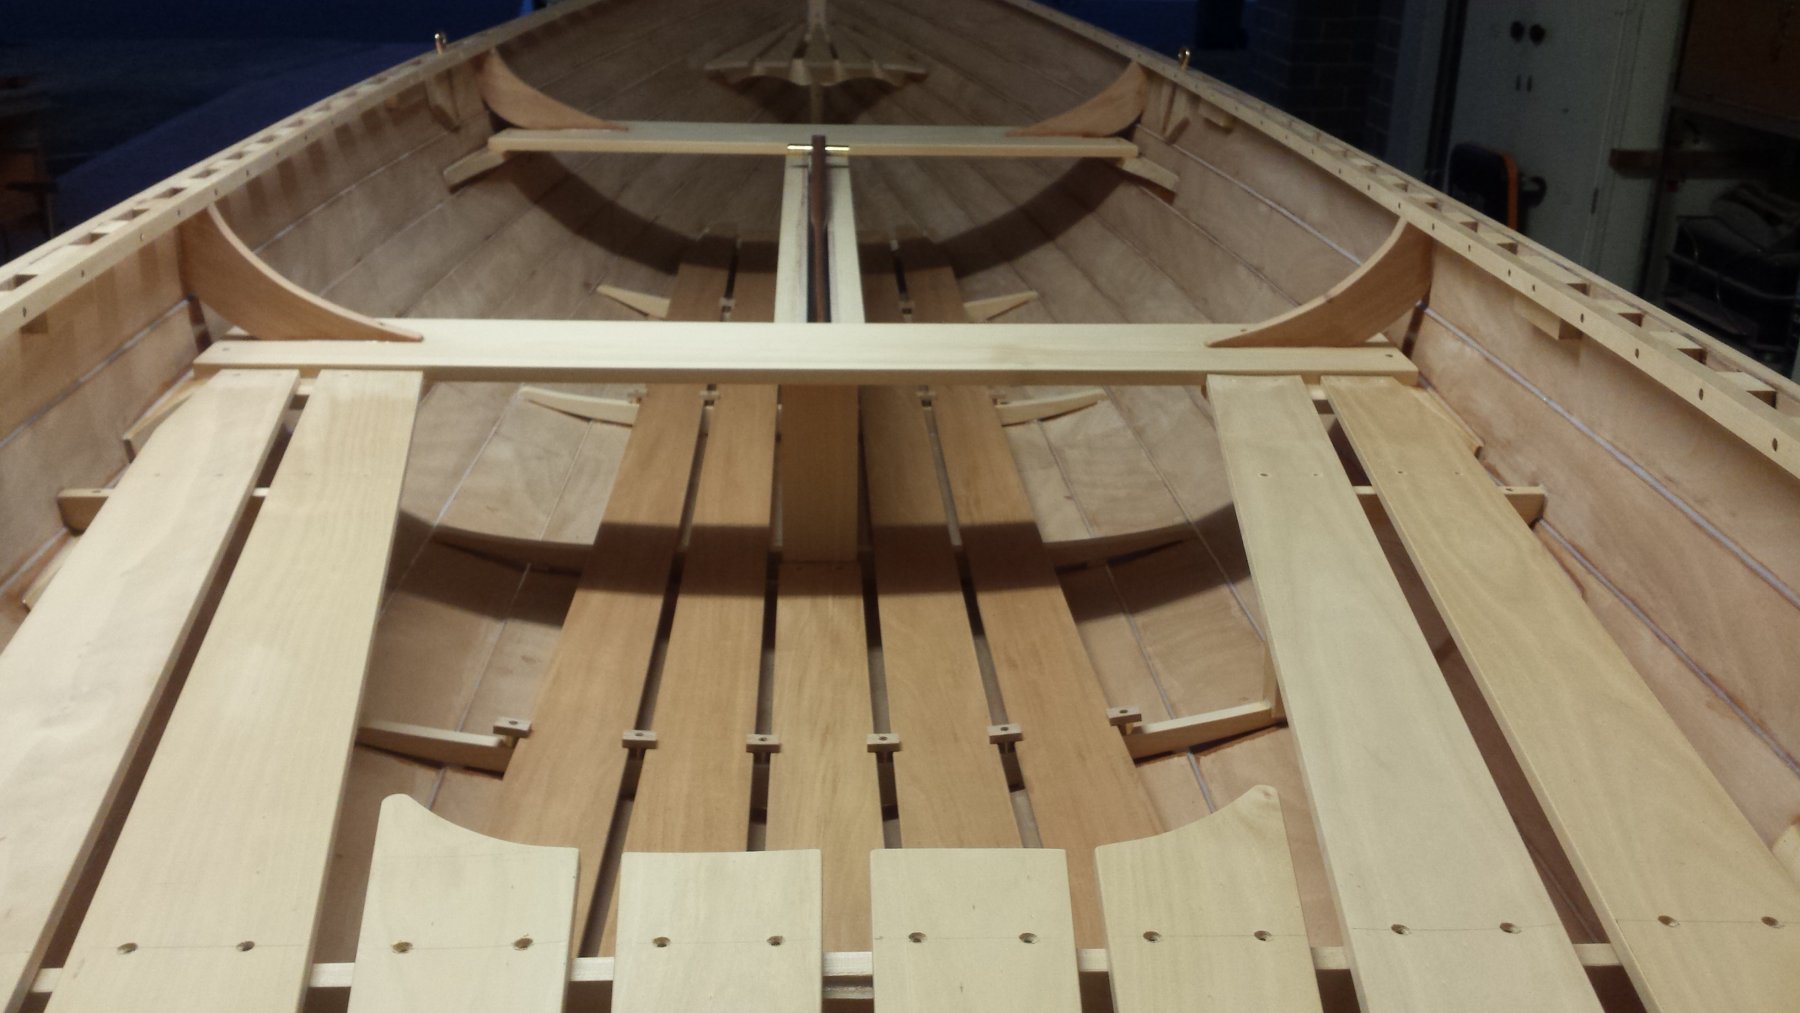
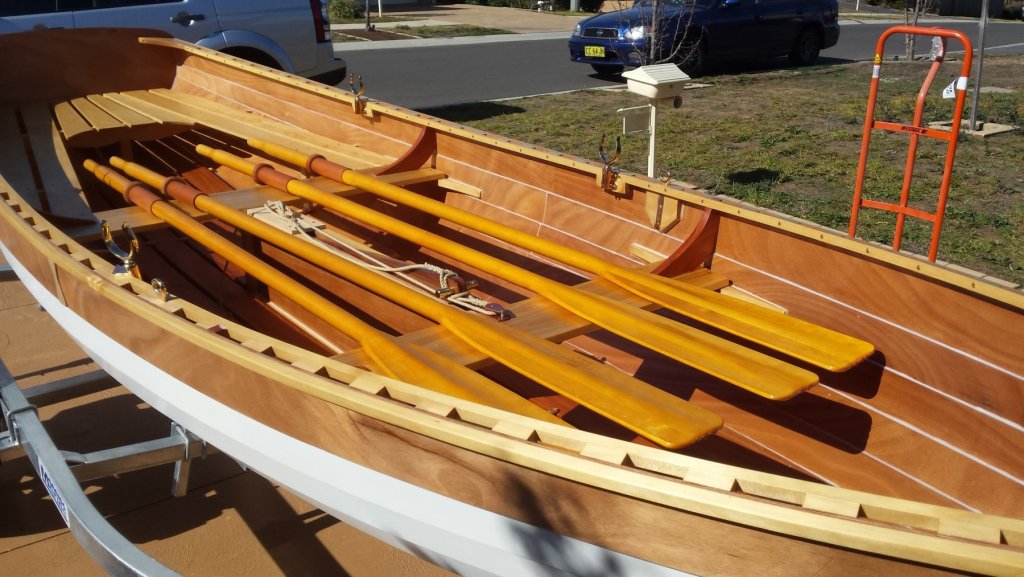
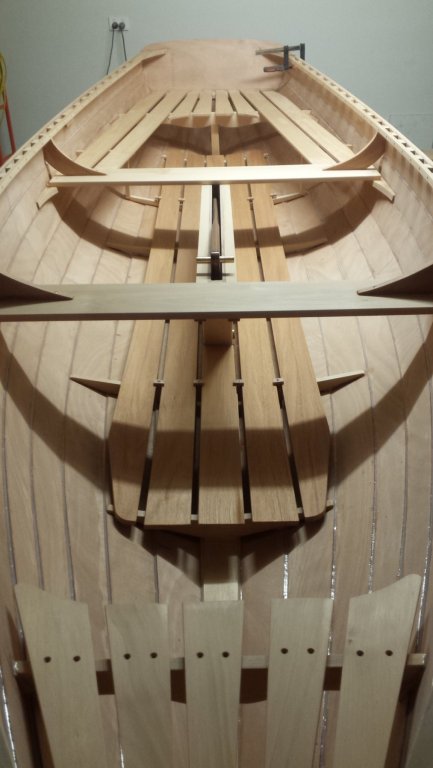
Thanks Michael, I've just finished oiling the interior and will be able to refit the stern and bow sheets tomorrow once the oil has properly cured. Currently fitting her out with rowlocks, stem head etc. I'll post more pics when she's done -
15' Dinghy by Bedford - FINISHED - 1:1 scale
Bedford replied to Bedford's topic in Non-ship/categorised builds
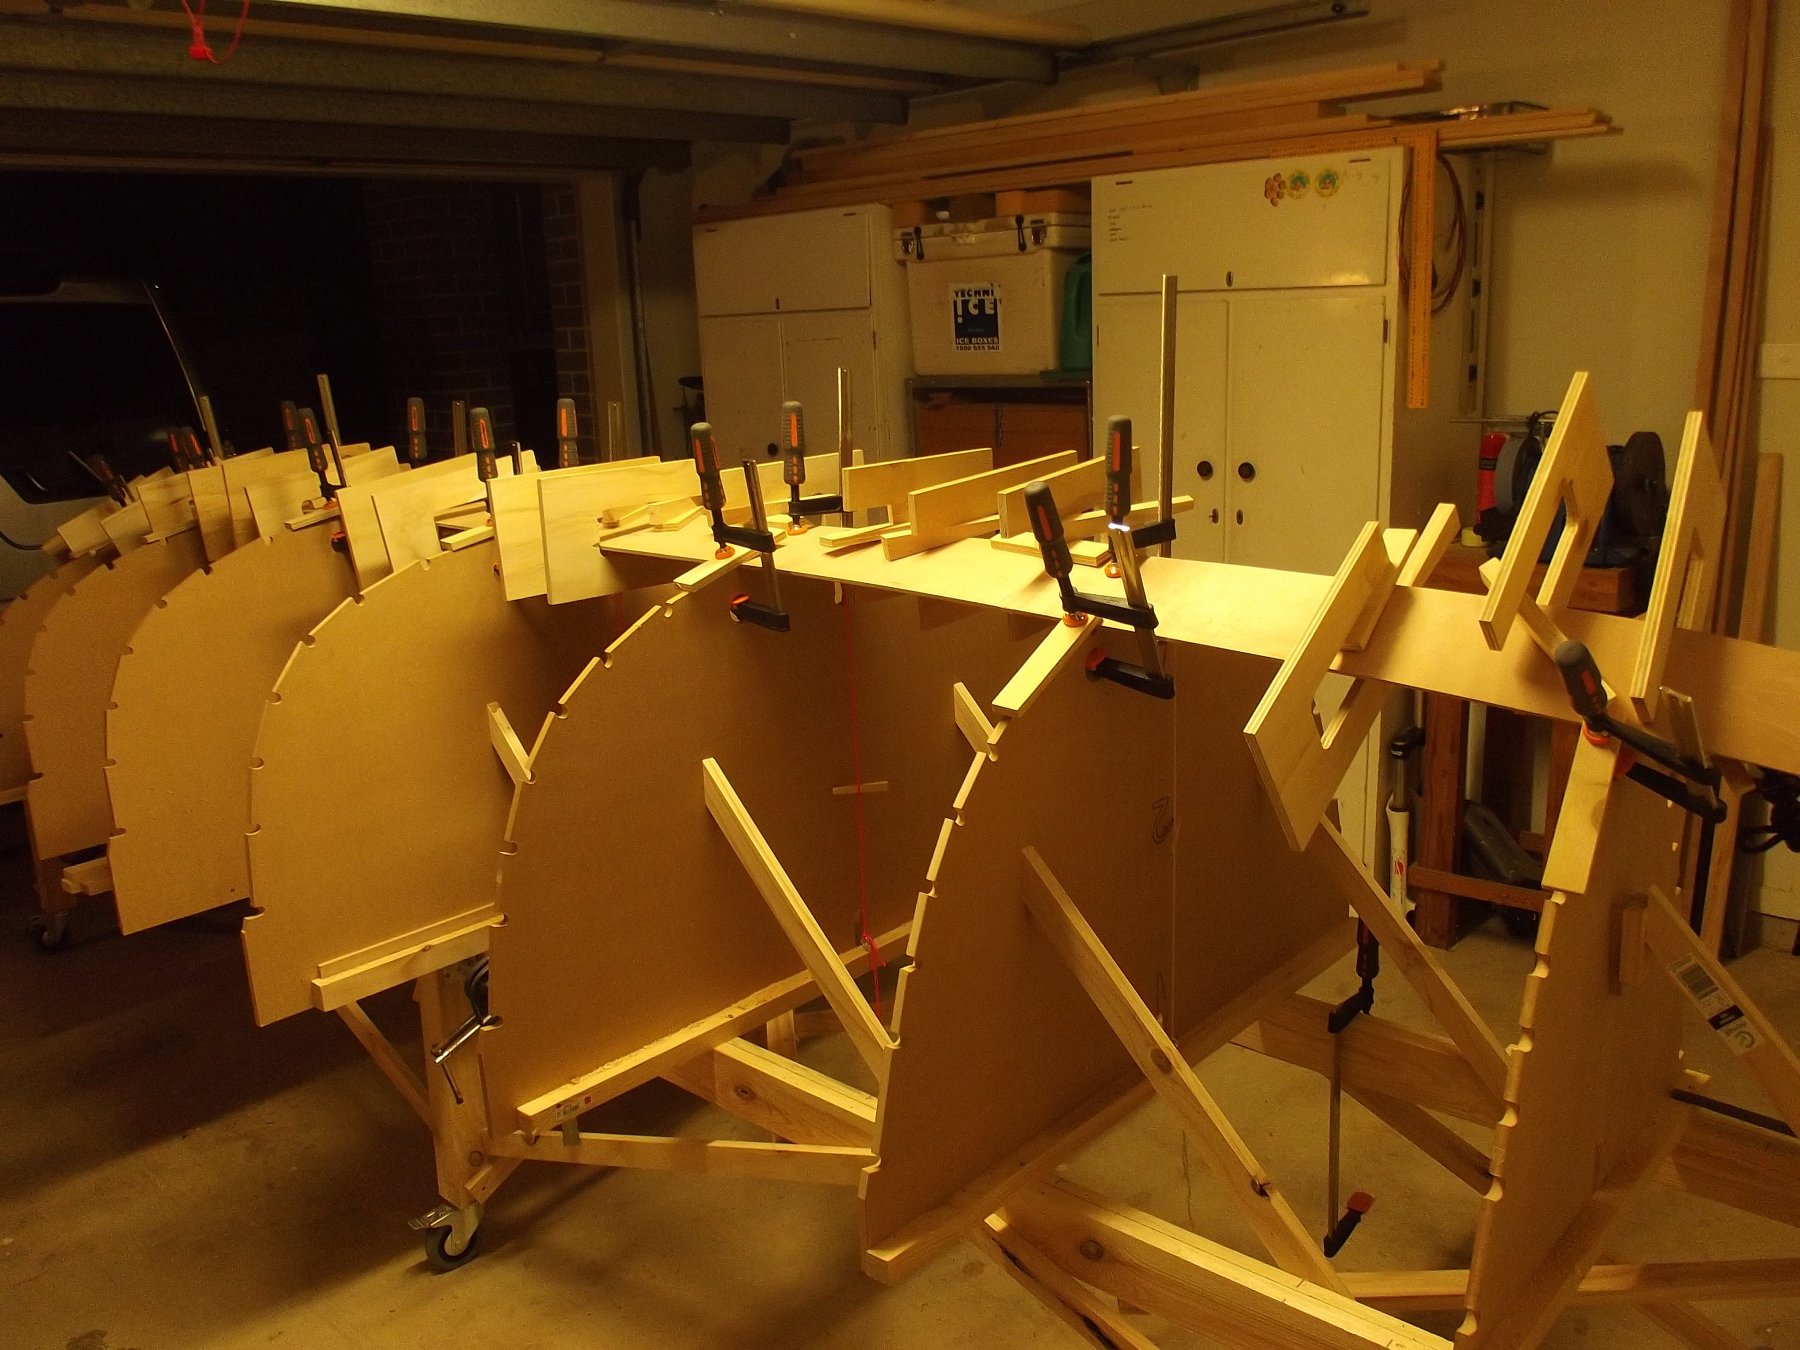
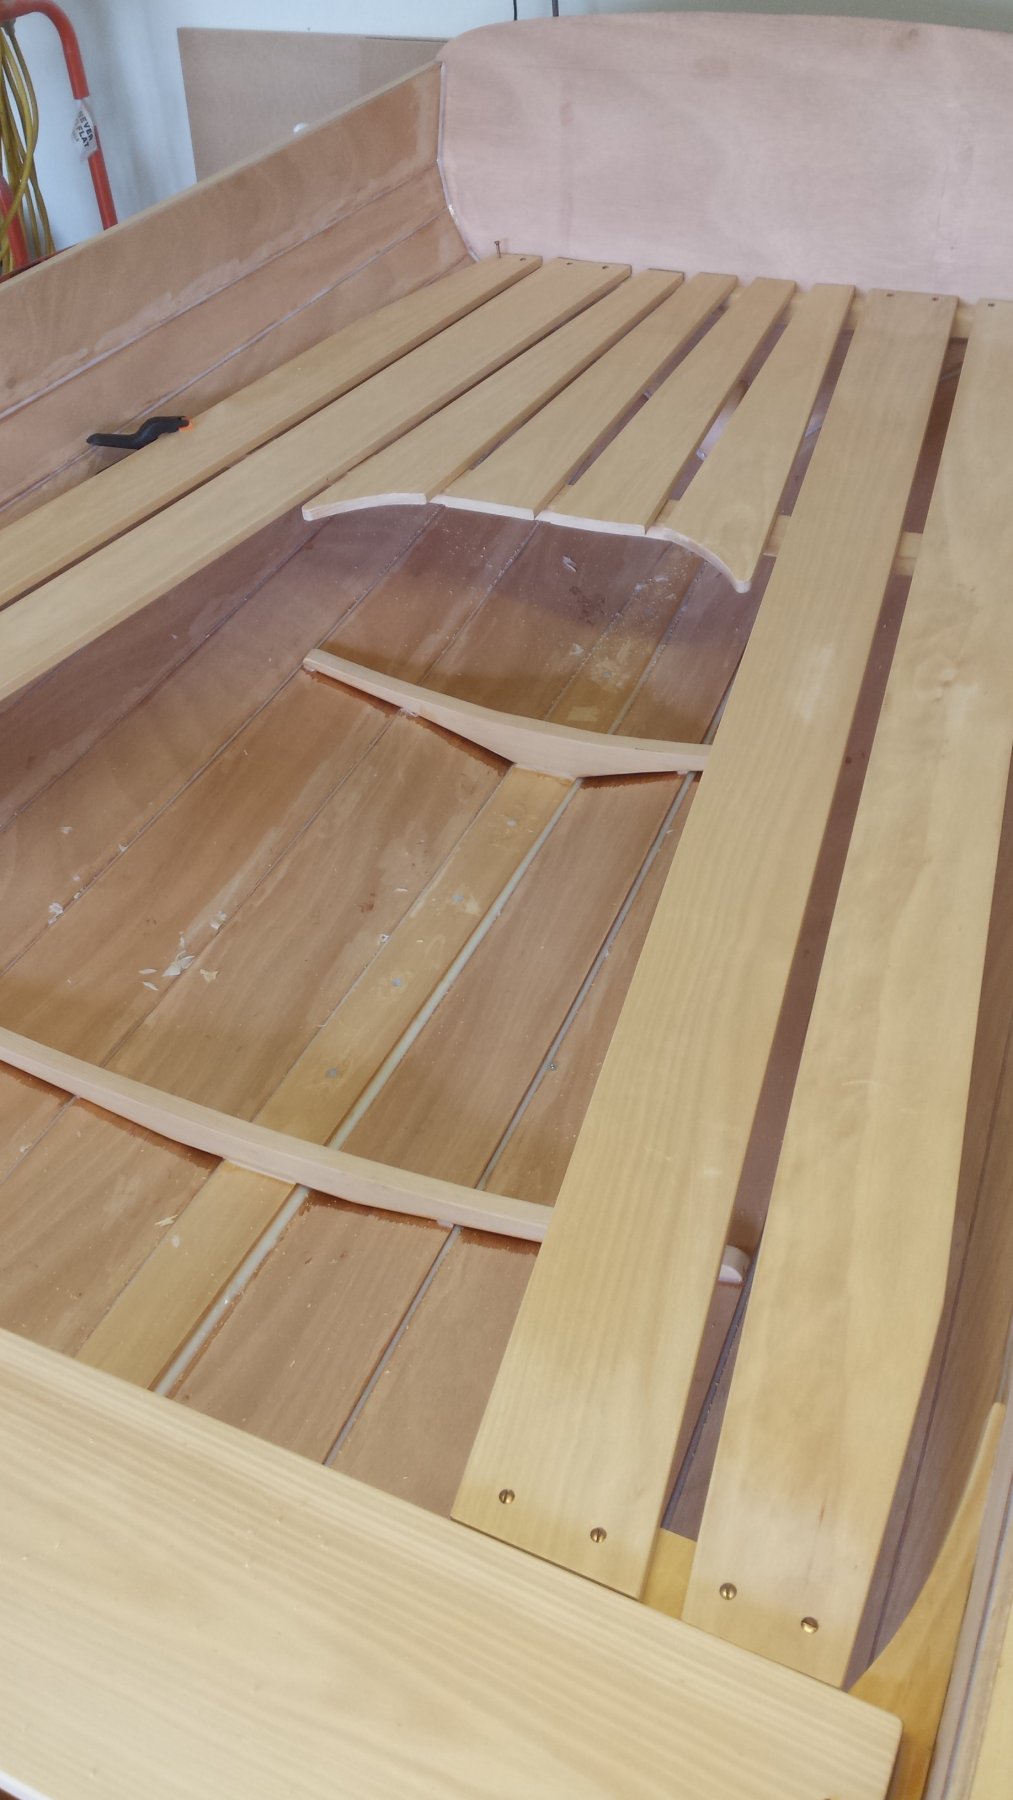
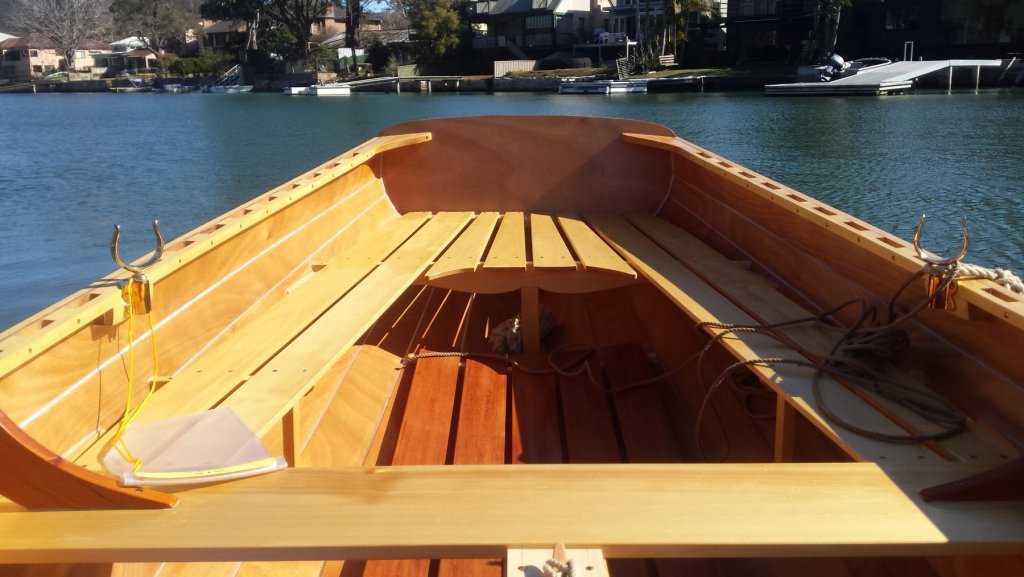
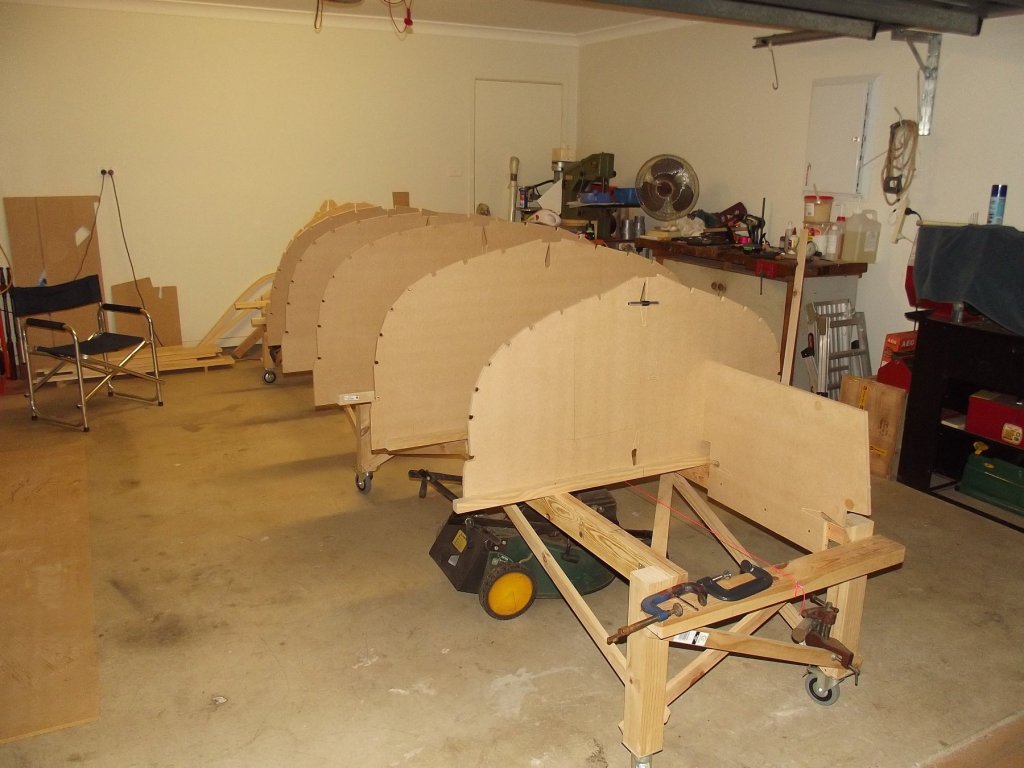
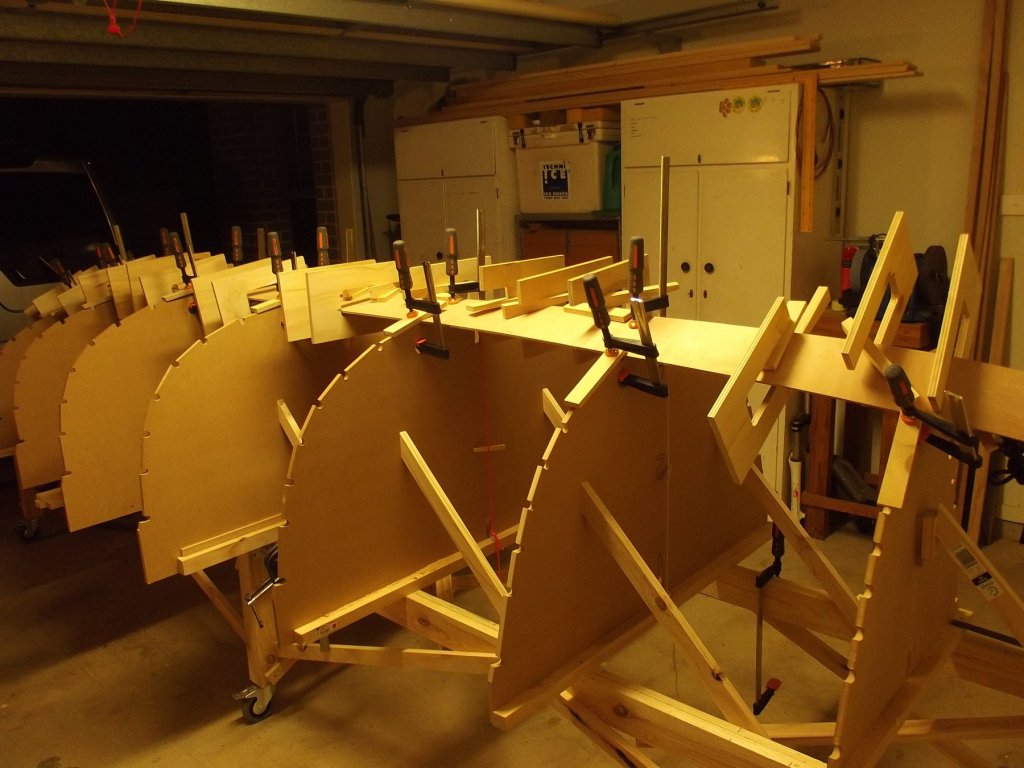
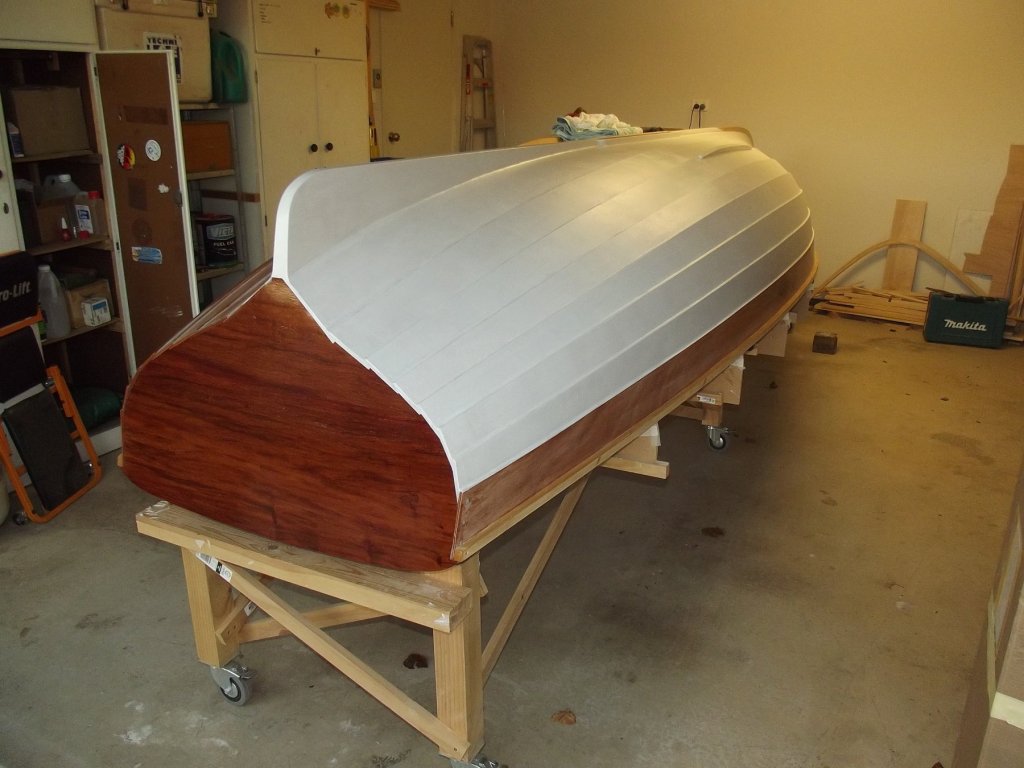
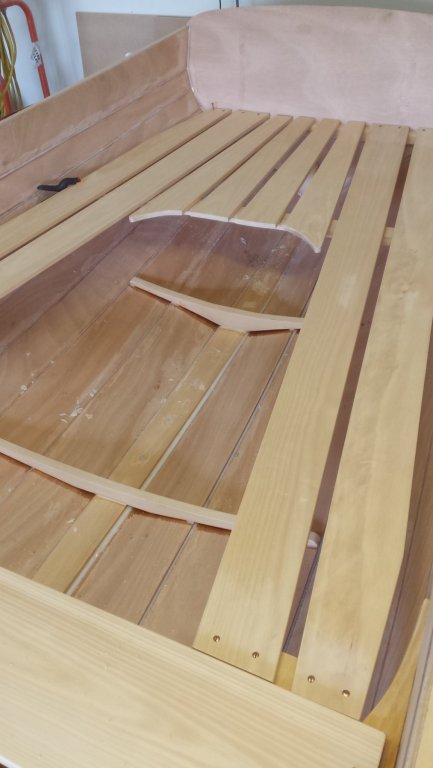
Thanks guys, I'm well pleased with it. She is built from a kit but that's not even the same as a model kit. The profile stations (molds) were cnc routed in mdf and the planks were cnc routed in ply but they had to be aligned and joined to make the length. The rest was just a bunch of hoop pine and I bought mahogany for the thwart knees and floor boards just to add some variety. I thought about just buying the plan but it would have been much more labour intensive to source the timbers required and probably cost more in the long run as well as the planks follow different curves which would have taken extra weeks to work out one plank at a time as you build.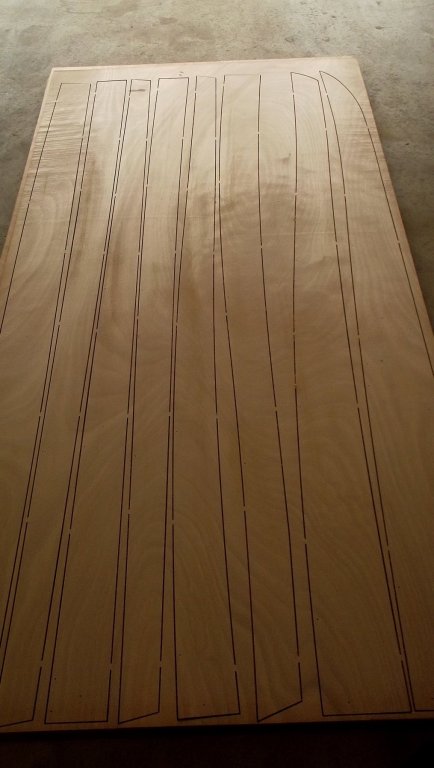
- 109 replies
-
- 11
-
-
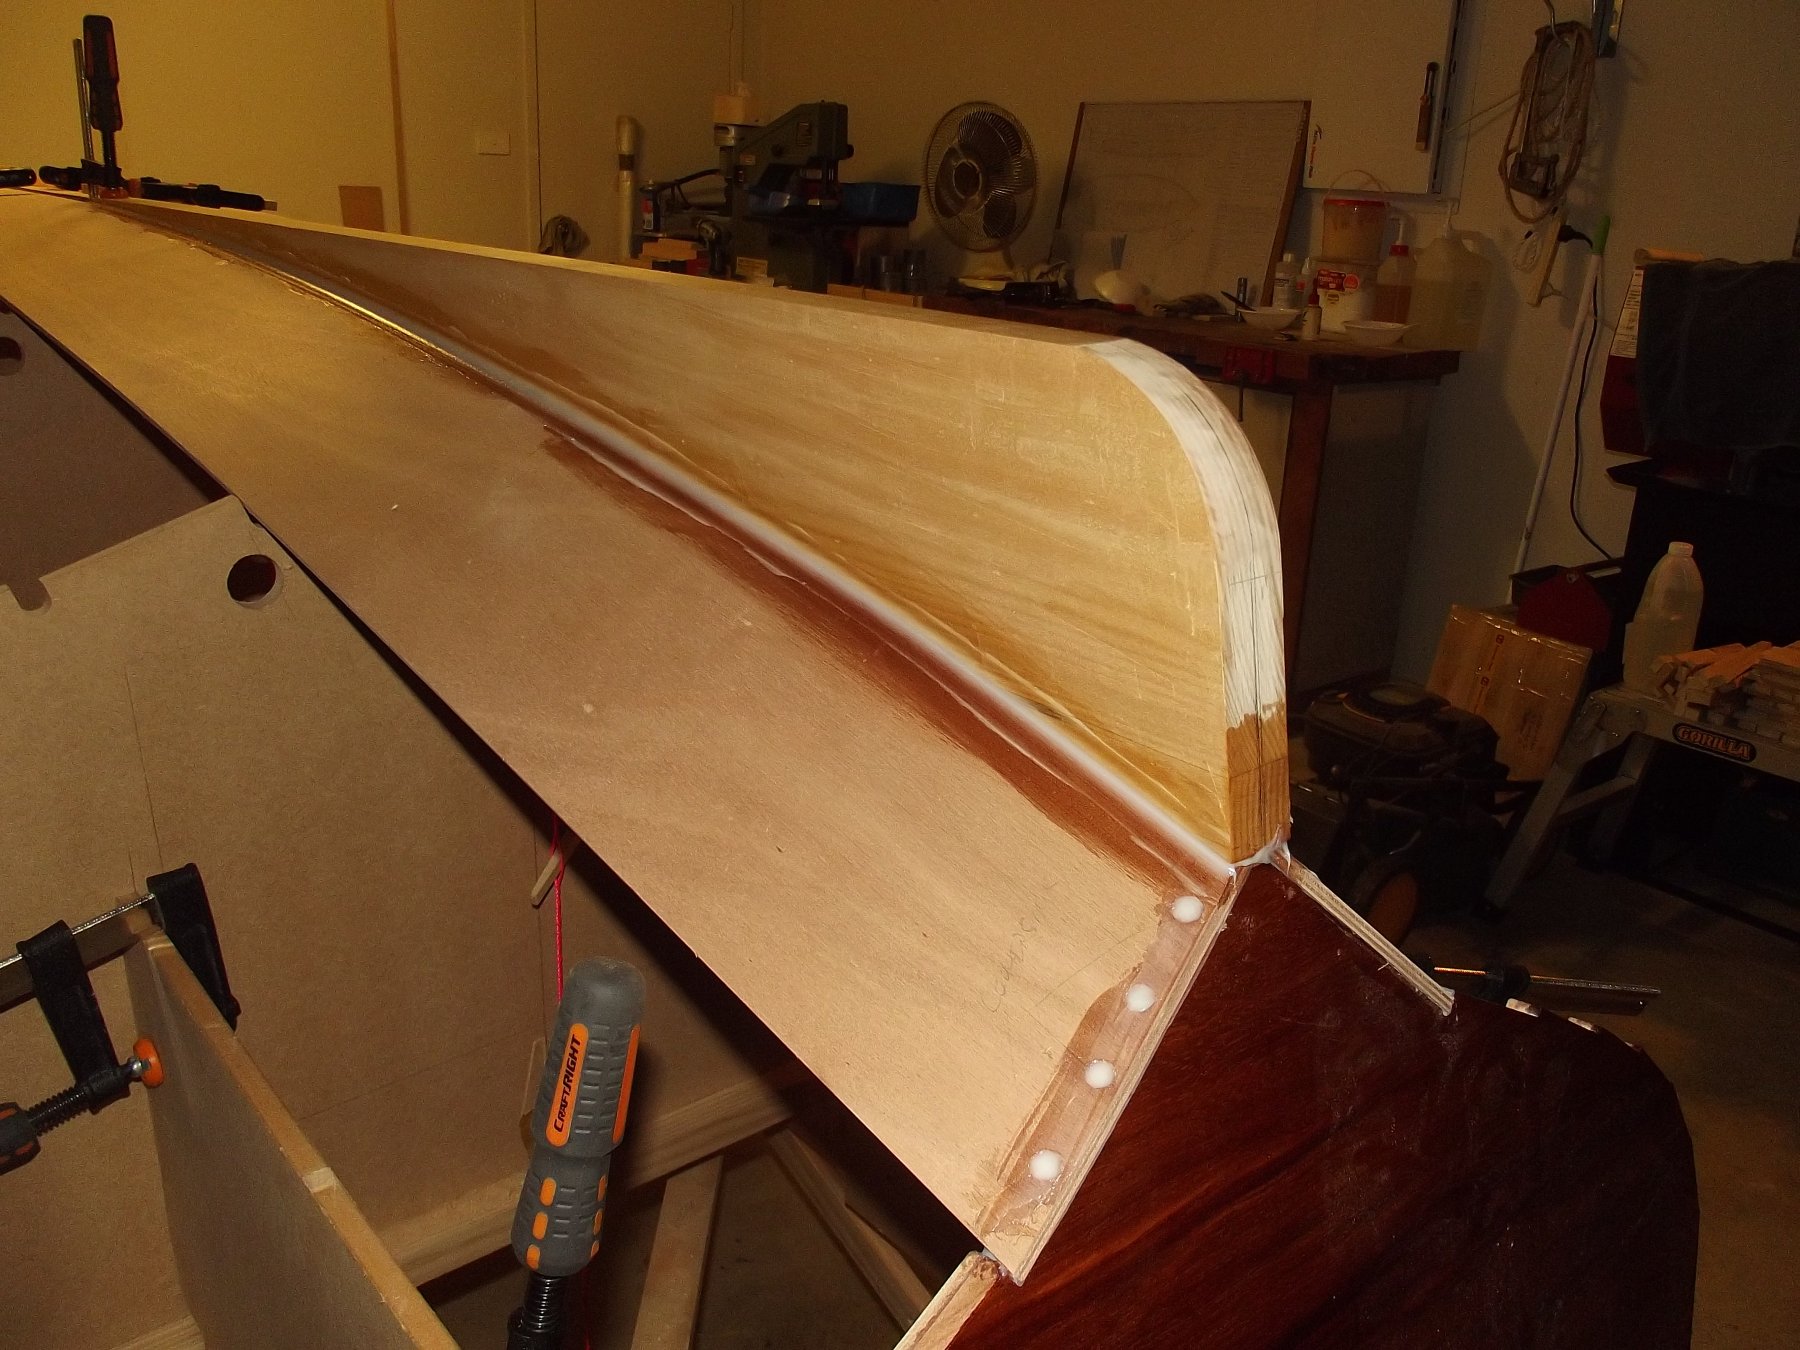
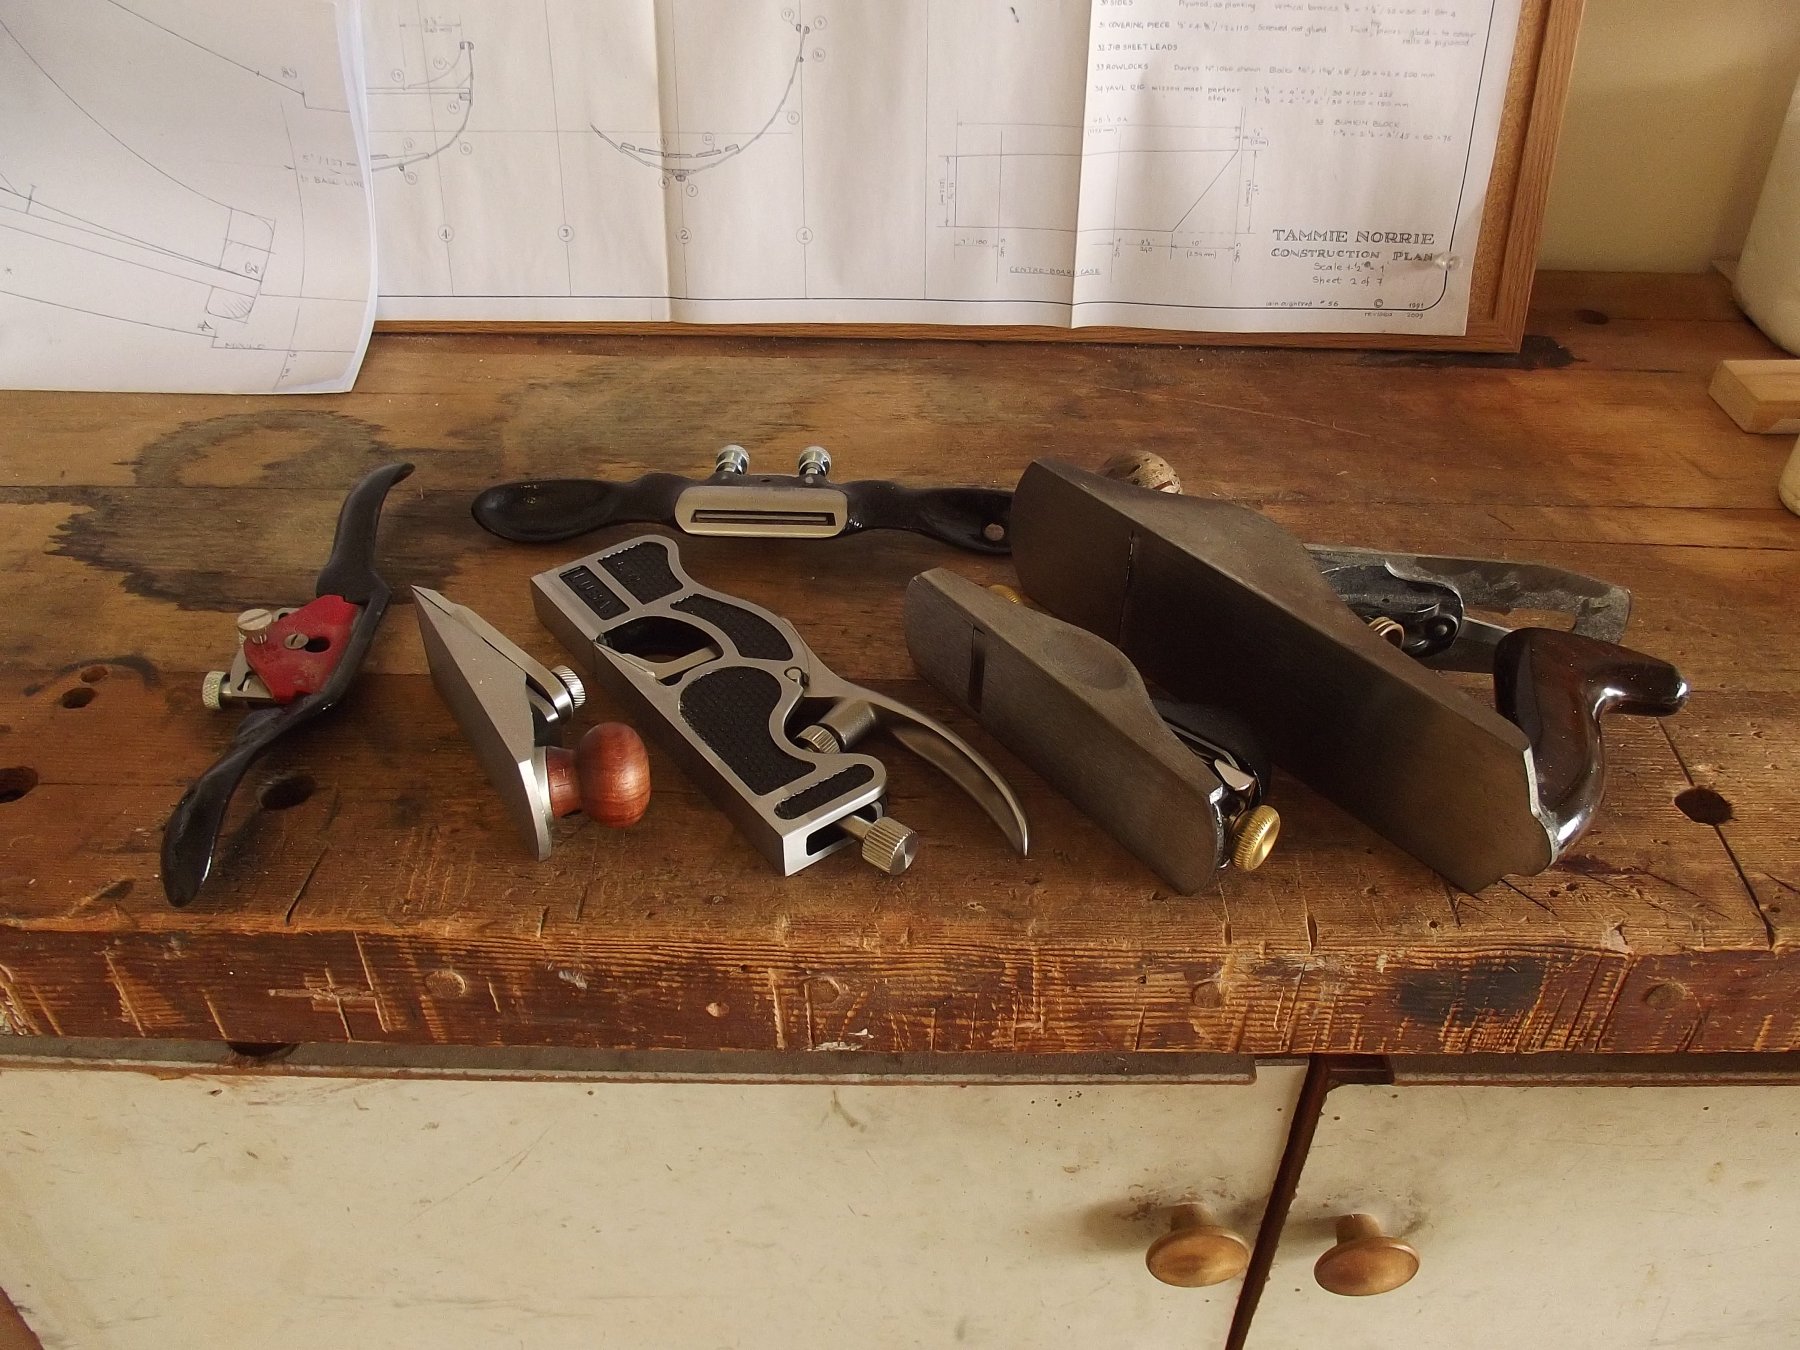
I said I had a different project in mind and here it is
-
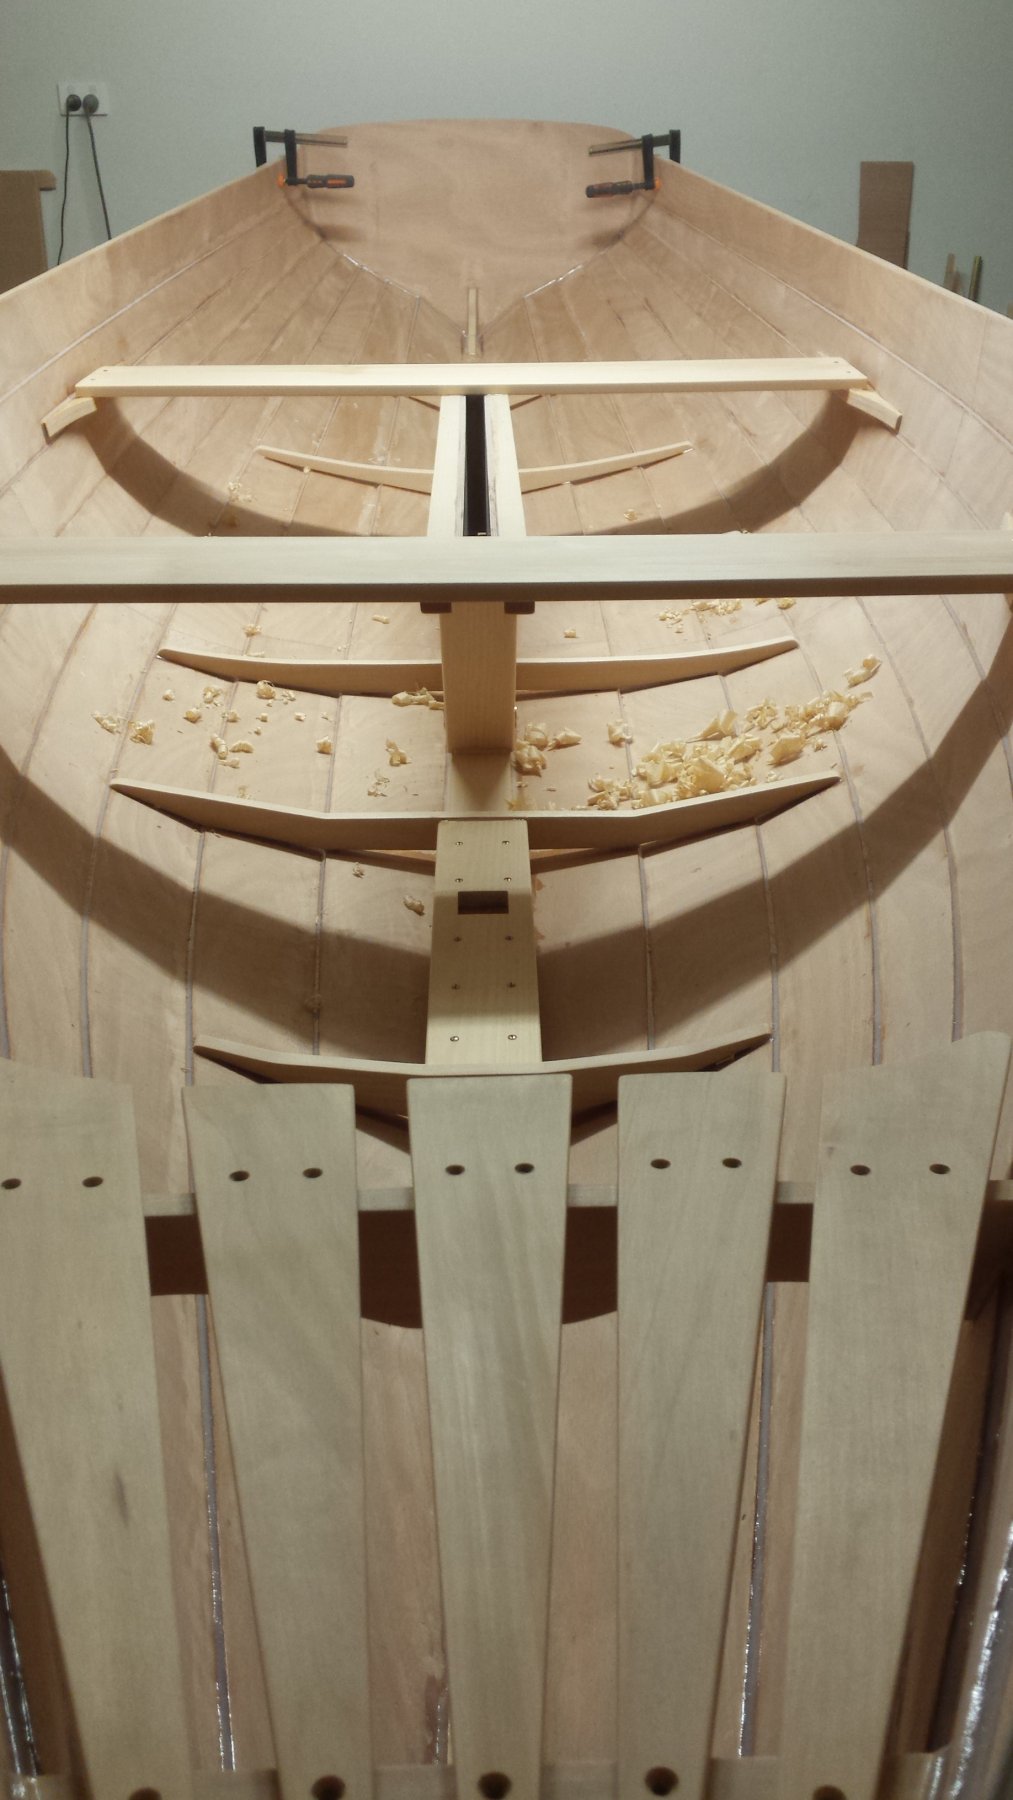
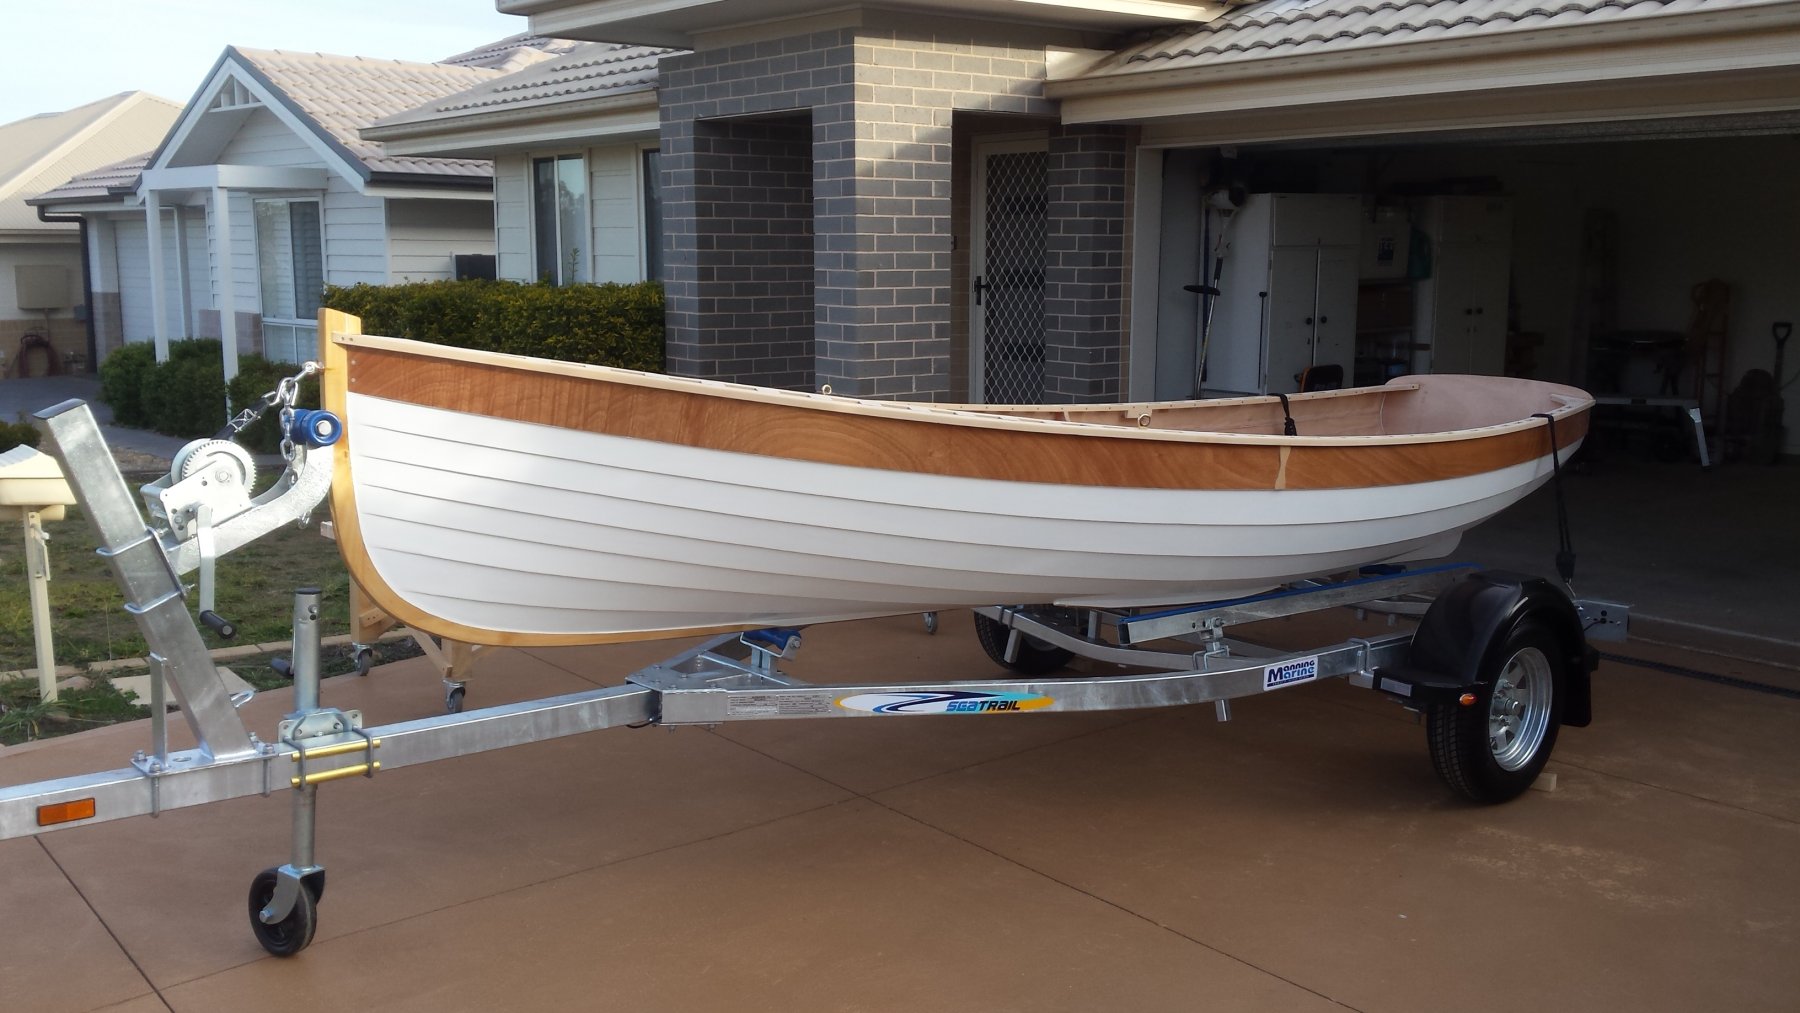
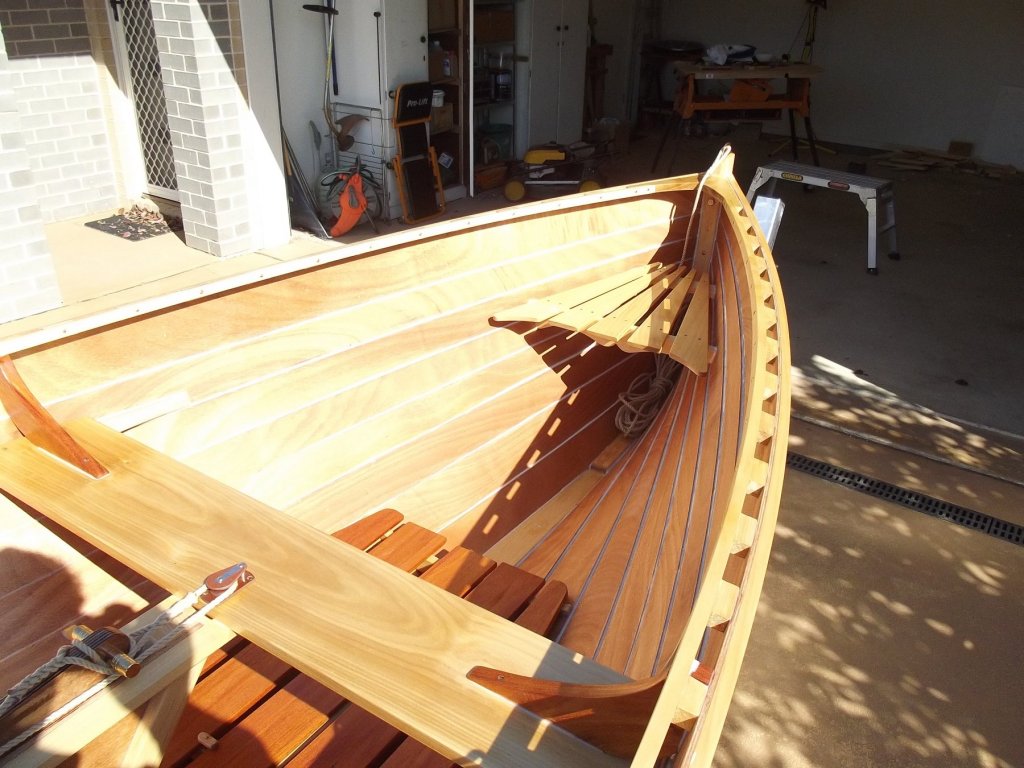
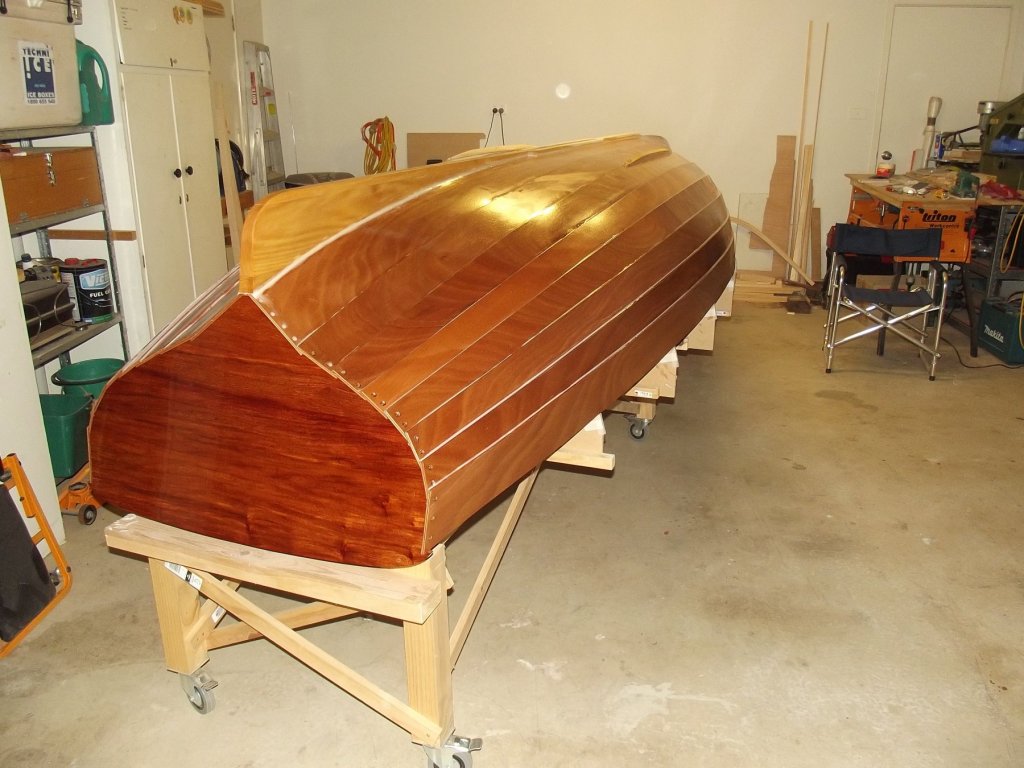
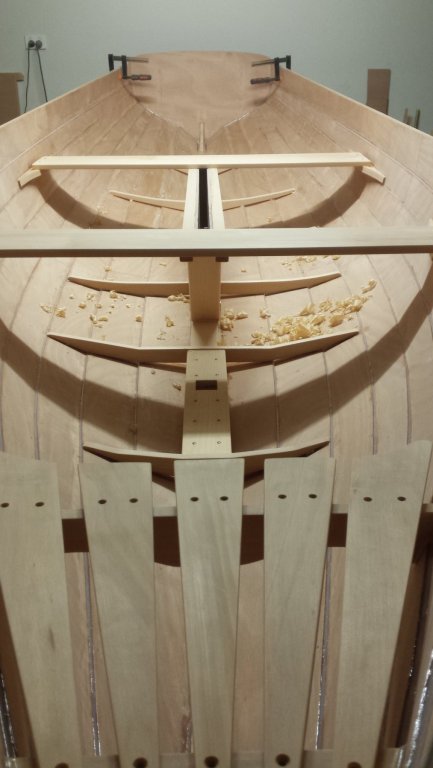
I have been working on a little project lately, something I've wanted to do for years, making my own boat. It's an Iain Oughtred design, Tammie Norrie, a 4.5mtr (15 foot) clinker sailing dinghy. I'm really enjoying using full sized hand tools, especially the planes but the lessons learned in ship modelling have been a huge help.


- 109 replies
-
- 36
-
-
Well the lengths one has to go to in order to find a new build. I went into the museum today, no model stand, wander around, find new little corner and what do you know, there's a lovely bit of framing of the Meteor with your name on it. I thought she looks a bit different from your other models so I'll be very interested in this one. And now I learn I'll have to be patient, shall do, all the best John.
-
Mate I love the couta boats but the rangers leave them for dead, they're just gorgeous. I must admit it was nice, thanks to your build, to be able to identify them to the ships master who agreed with how beautiful they are.
-
I was out on Sydney Harbour at the wheel of the 1902 stem tug Waratah on Sunday and we came across a small fleet of these up near Rose Bay from memory. They truly are beautiful boats!
-
Keith, I've been fearing the withdrawal since you finished so thanks for giving me hope! Mighty decent of your wife to hold off on the injury til you had it done!
-
Just SUPERB, well done. As for the prop I know what you mean about prop walk, the 1902 tug I crew always had the tow rope on the port bollard (plane to see by the wear) and that's because it counters the prop walk. I also think wintergreen might be right in that it would have been too hard to install a centre prop or perhaps even the stern post doesn't allow enough room to do so.
-
Oh mate, I can relate to that! The build has had such great direction from the get go, it would be a shame for it to be without direction now
-
Well Keith when you build the white one I'll store this one for you and keep it out of the way.
-
Not sure if this is of assistance but it's how they tack the stays'ls on the James Craig. Splice the two clews together with a yolk and let the wind carry the sail across the stay.

-
Mark, I just use 60/40 resin cored solder or if you want a bit more strength you can use 40/60 but it has a higher meting point, I think 240 degC as opposed to 180. I'd imagine you had problems getting it to take to the ring because it is heavier and takes longer to heat up. The metal heat sink (clamp) won't help either. I'd use a small gas torch and heat it up focusing more on the ring than the rest then pull the flame away and touch the solder to the job to see if it melts and apply heat to the opposite side to draw the solder through. Always have the brass very clean and never touch flame and solder at the same time as the flux burns and nothing will stick.