Bedford
-
Posts
1,299 -
Joined
-
Last visited
Content Type
Profiles
Forums
Gallery
Events
Everything posted by Bedford
-
 I love this hull, it's just beautiful and the white just adds to the whole effect. Well done as usual.
 -
Sounds just like Orange in winter! I now live in the outskirts of Sydney and we are having 40 plus. It's killing me. But once in a while someone makes a simple sly Monty Python reference and I see more beautiful progress on a stunning model and it eases the pain!
-
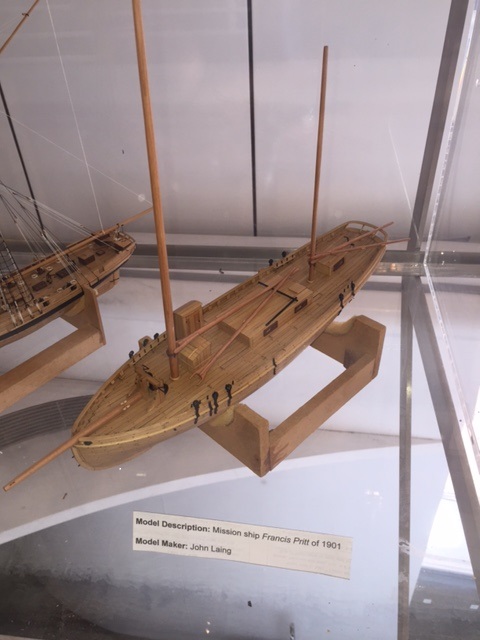
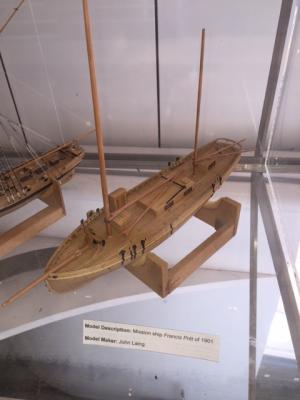
Hi John, I was in on Thursday after sailing on James Craig to welcome the Chilean sail training ship Esmeralda into Sydney. I never go to that part of town without calling in to the Museum and checking out the "Pritt" She is just beautiful! Steve
- 745 replies
-
- 2
-

-
- francis pritt
- mission ship
- (and 1 more)
-
If you find out let me know because I hear you! How much polishing and what did you use, to get the foot to that finish?
-
Ah that would do it! You've got to keep the beasties out of the shipyard
-
How on earth do you run out of deck planks? You're not laying them on their sides are you!
-
Hey John, guess where I was last weekend?? She really looks beautiful. I did say I was going to have to come see it. The Shackleton exhibition was just a sideline reason for going.
- 745 replies
-
- 10
-
-
- francis pritt
- mission ship
- (and 1 more)
-
Indeed Michael, there is always something to learn and not only have we learned how hard it can be to unsolder, we've also learned an easy way to "bronze"
-
Michael I agree with the bronze look but if I wanted to keep the bright brass look I would have turned a tip for my soldering iron to slide snugly into the round stock and inserted it with a touch of solder to aid the heat transfer. That way as soon as the solder lets go you can pull the whole thing away from the goose neck before it gets too much heat into it
-
Omega, me too! It's like the sculptor releasing the piece from the block and i never get sick of it
-
I always love following your metal work
-
Nice work Robbyn, I've never done coppering so you're better at it than I am!!
-
I have noticed that some types of timber seem to make the varnish take longer to dry. On a side note, I varnish my decks too but in reality we should leave them bare if we want to be accurate.
-
Beautiful John, especially knowing how small it is, must come and have another look in person!
- 745 replies
-
- 4
-
-
- francis pritt
- mission ship
- (and 1 more)
-
I don't know what to say to that, I came to a grinding halt on my schooner when I sailed on endeavour, I guess the real thing made the model seem redundant but I will finish her one day. Meanwhile I'm loving your build and have a set of plans for her as an rc model so you never know....
-
Beautiful as always Michael, lovely subject