HOLIDAY DONATION DRIVE - SUPPORT MSW - DO YOUR PART TO KEEP THIS GREAT FORUM GOING! (89 donations so far out of 49,000 members - C'mon guys!)
×


Bedford
-
Posts
1,297 -
Joined
-
Last visited
Content Type
Profiles
Forums
Gallery
Events
Everything posted by Bedford
-
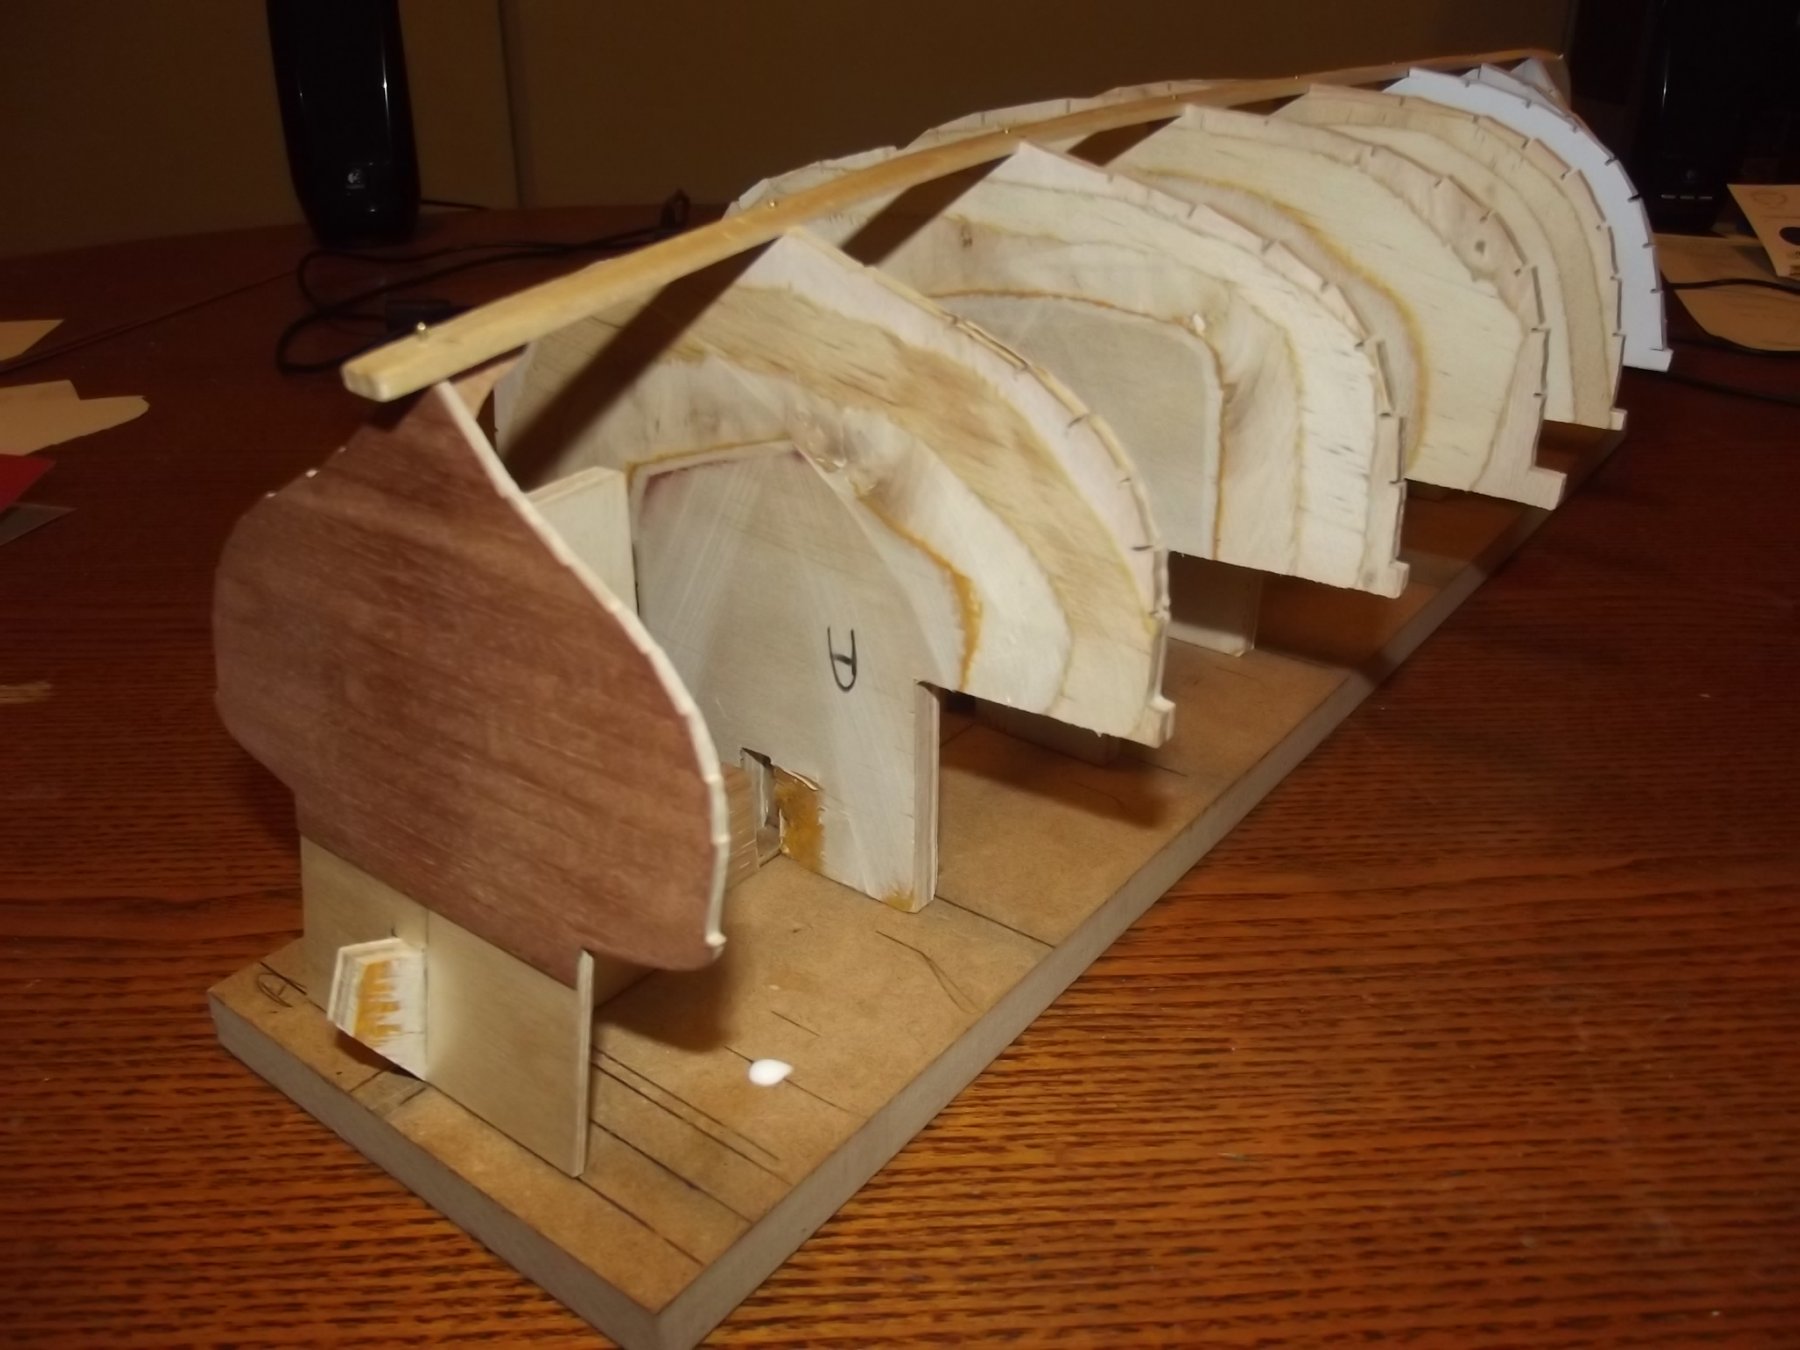
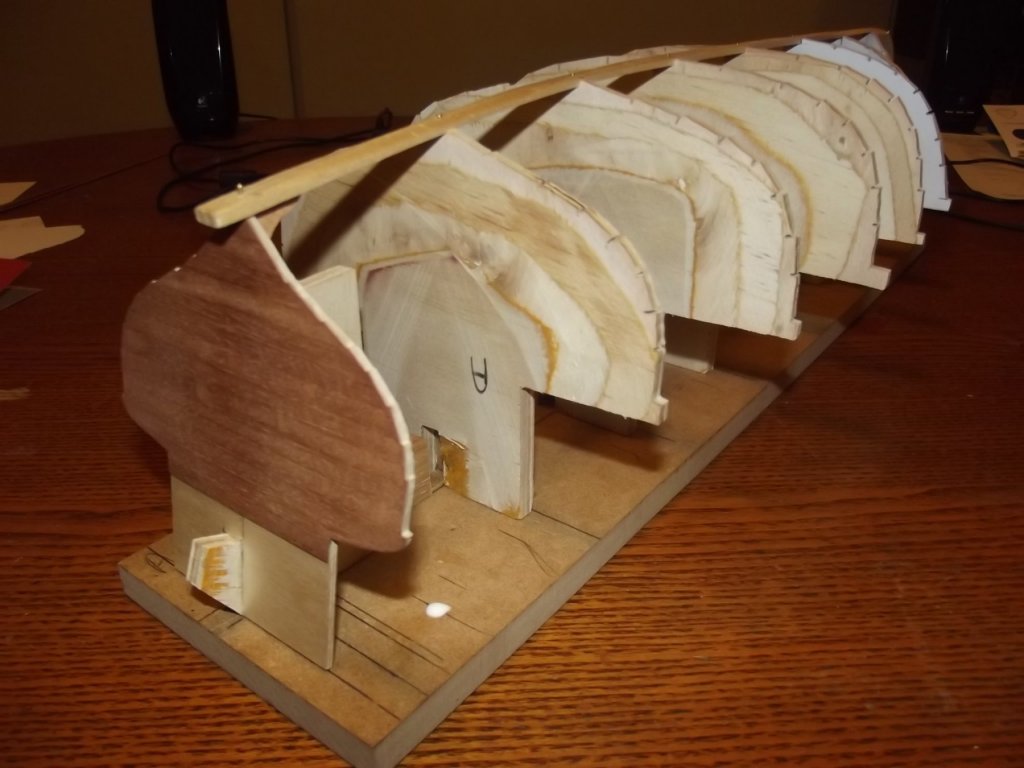
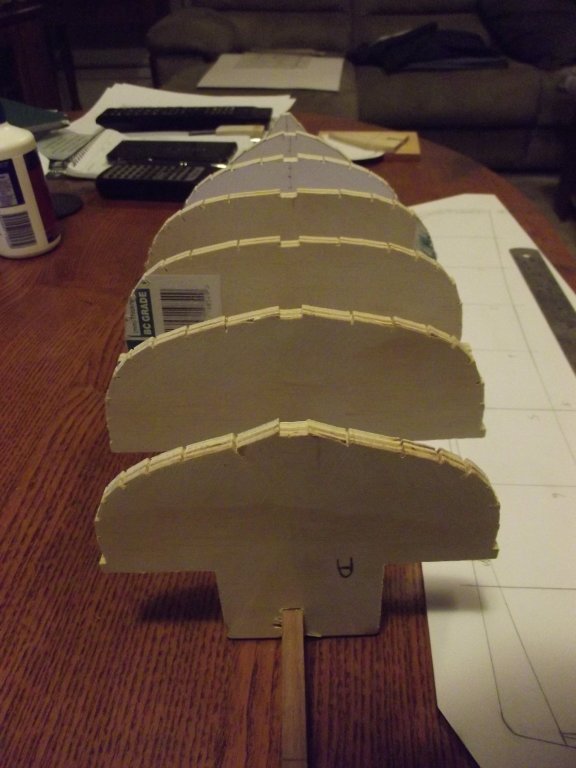
 Now that I have the molds sorted I've been able to attach the transom and the keelson is now glued to the transom with the same strengthening knee I decided to add to the full size boat.
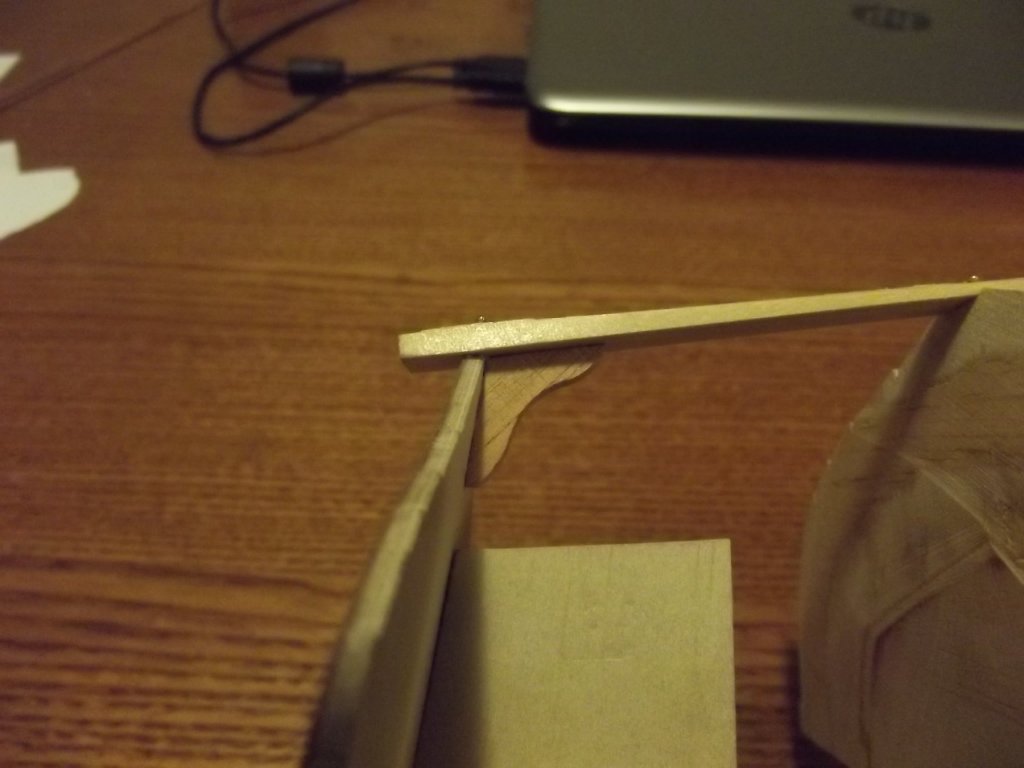
-
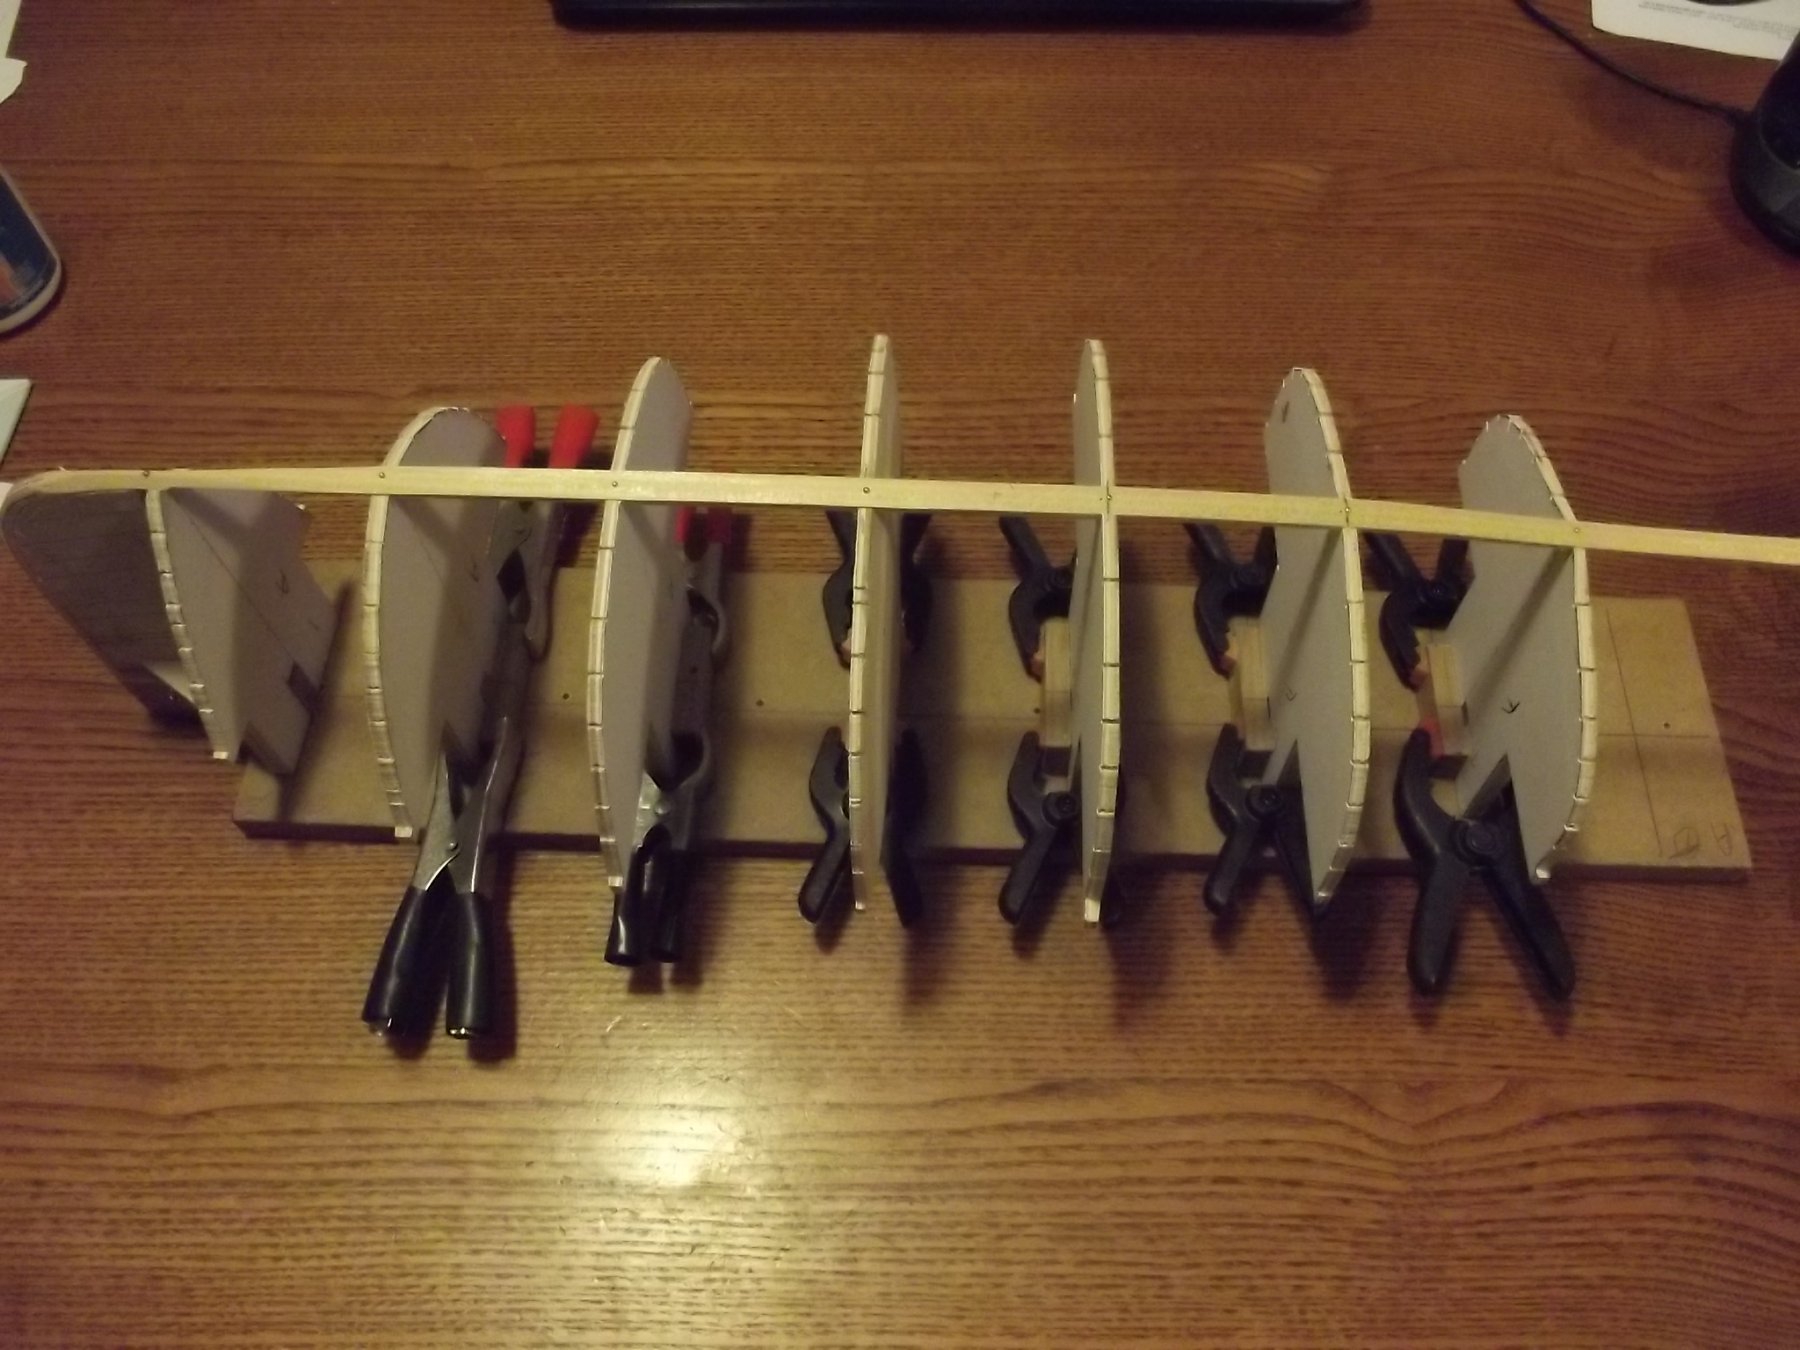
I had a set back with this project. I'm guessing that the heating inside caused the building "spine" to warp a bit so everything went out of whack. I walked away from it for a while! Hopefully the problem is now solved by using different materials and approach. Everything is now clamped and aligned very nicely.. Rather than removing the molds to add glue and re-position them I will cut several small blocks and just glue them into the right angles in the jig so it all stays aligned.


-
Quite appropriate John On that, when Neil Armstrong died I worked for a car dealer, in the workshop. In the lunch room I saw the headline on the paper and said "I saw that man walk on the moon" crickets, tumbleweeds. I was the only one old enough to have seen it 😕
-
A little more done, this time I steam bent the apron while the original is laminated. I've joined the keelson to the apron and started fairing the keelson to accept the garboards but here I have to stop because I'm waiting on a sheet of 0.8mm plywood from which I'll laminate 2 layers and then a layer of mahogany to make the transom before I can finish fitting and fairing the keelson in preparation for the planking which will be done with the 0.8mm plywood.

-
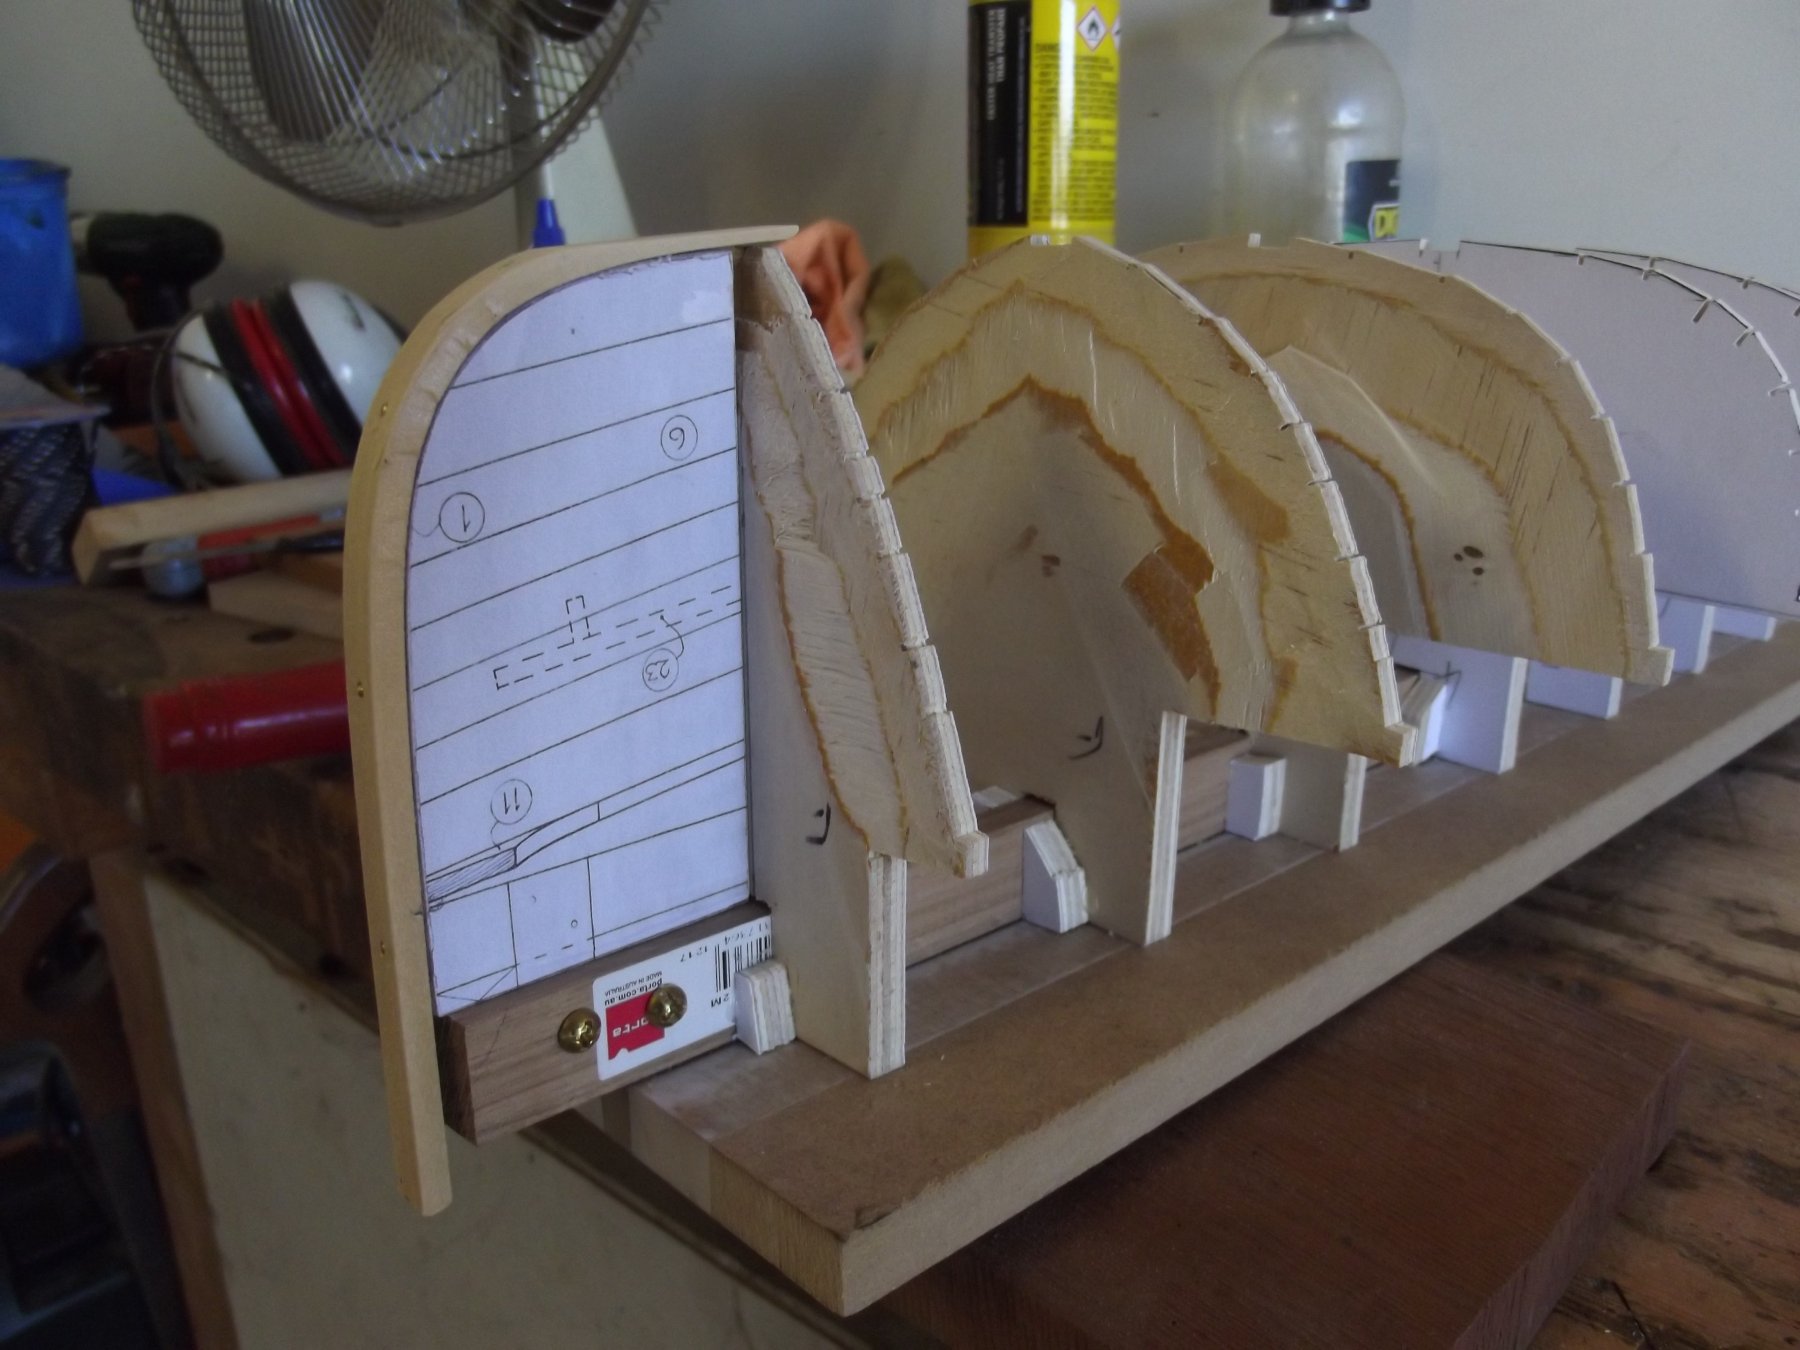
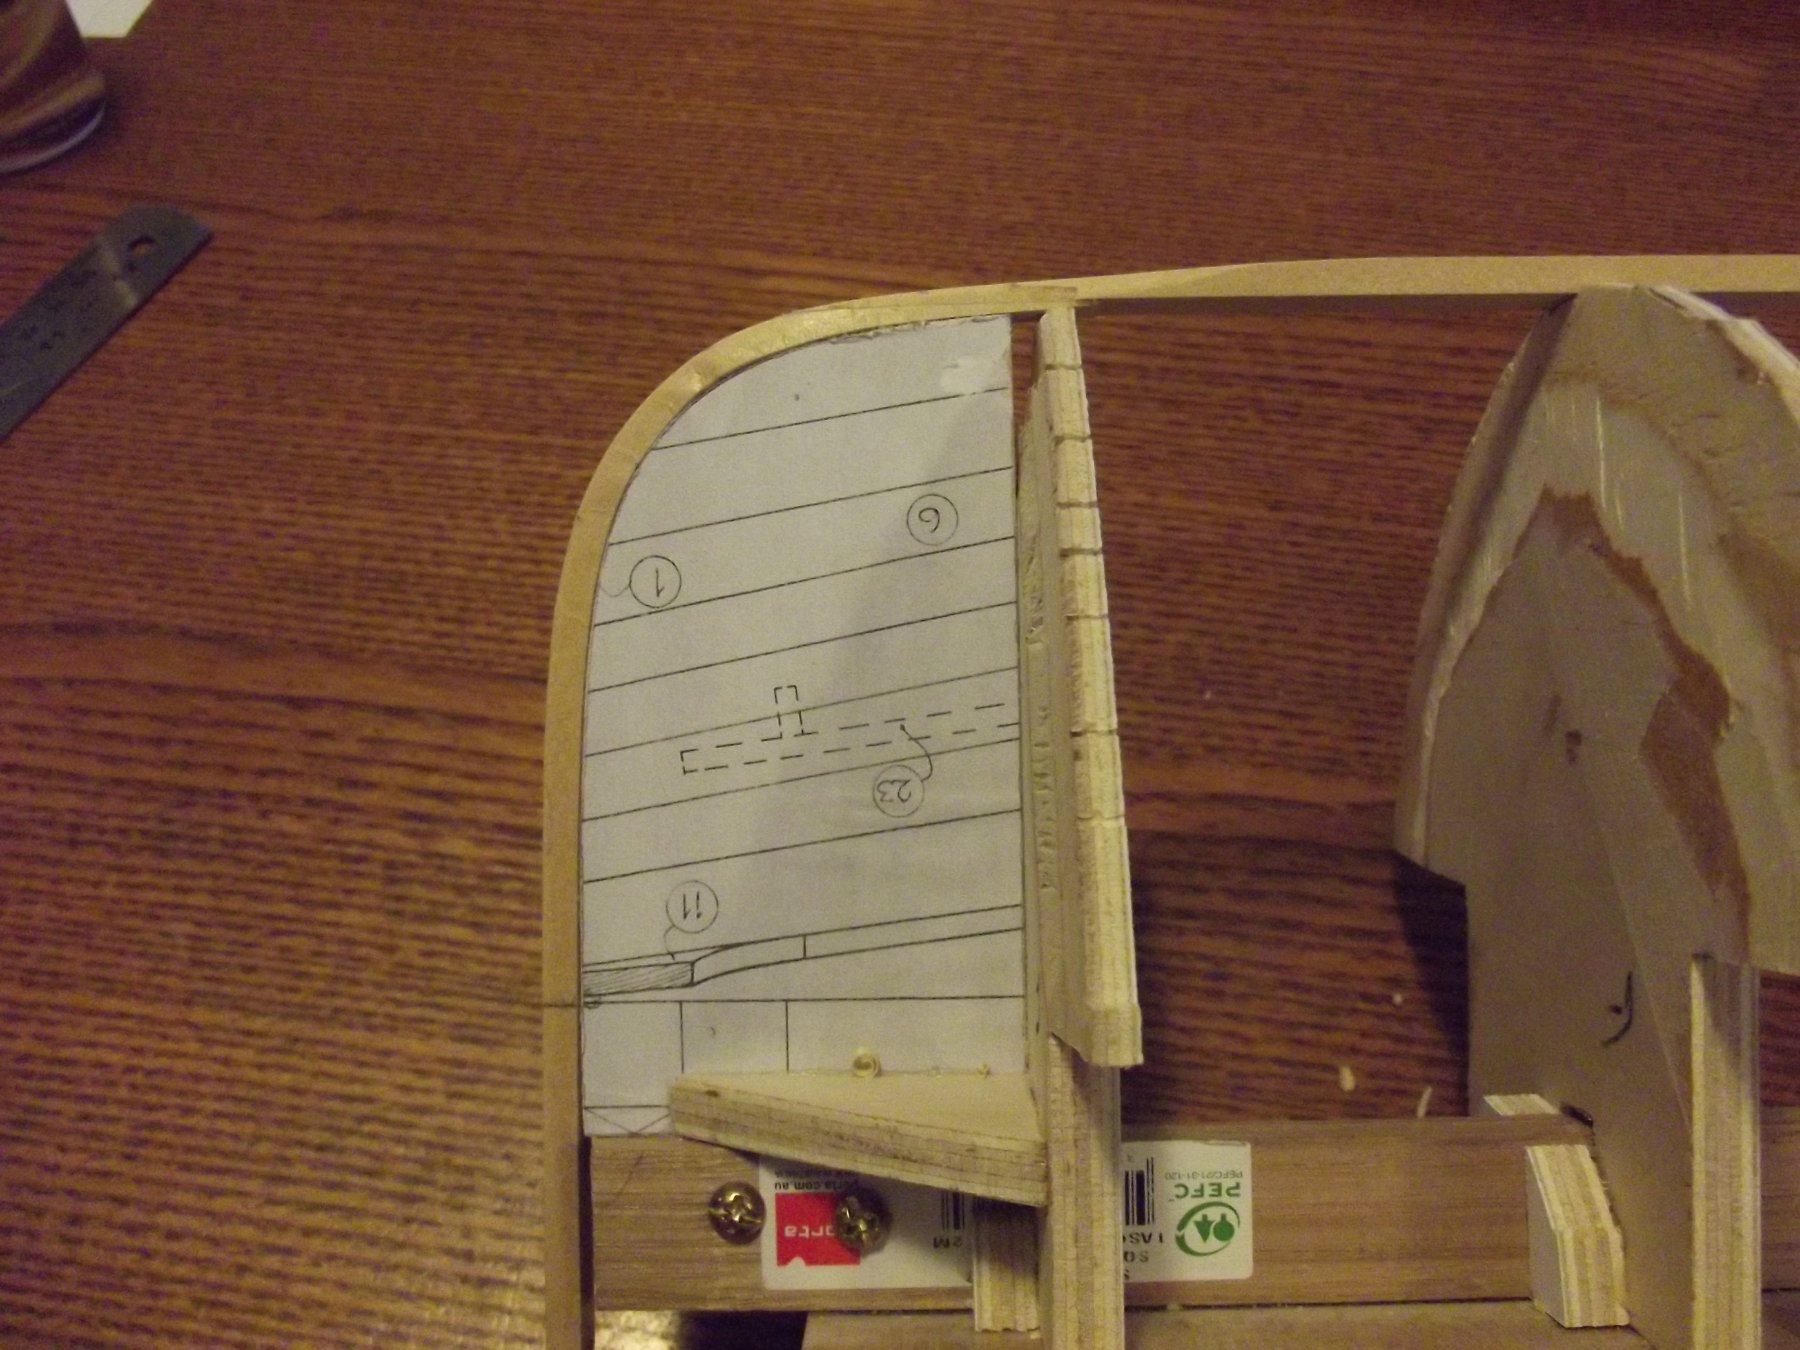
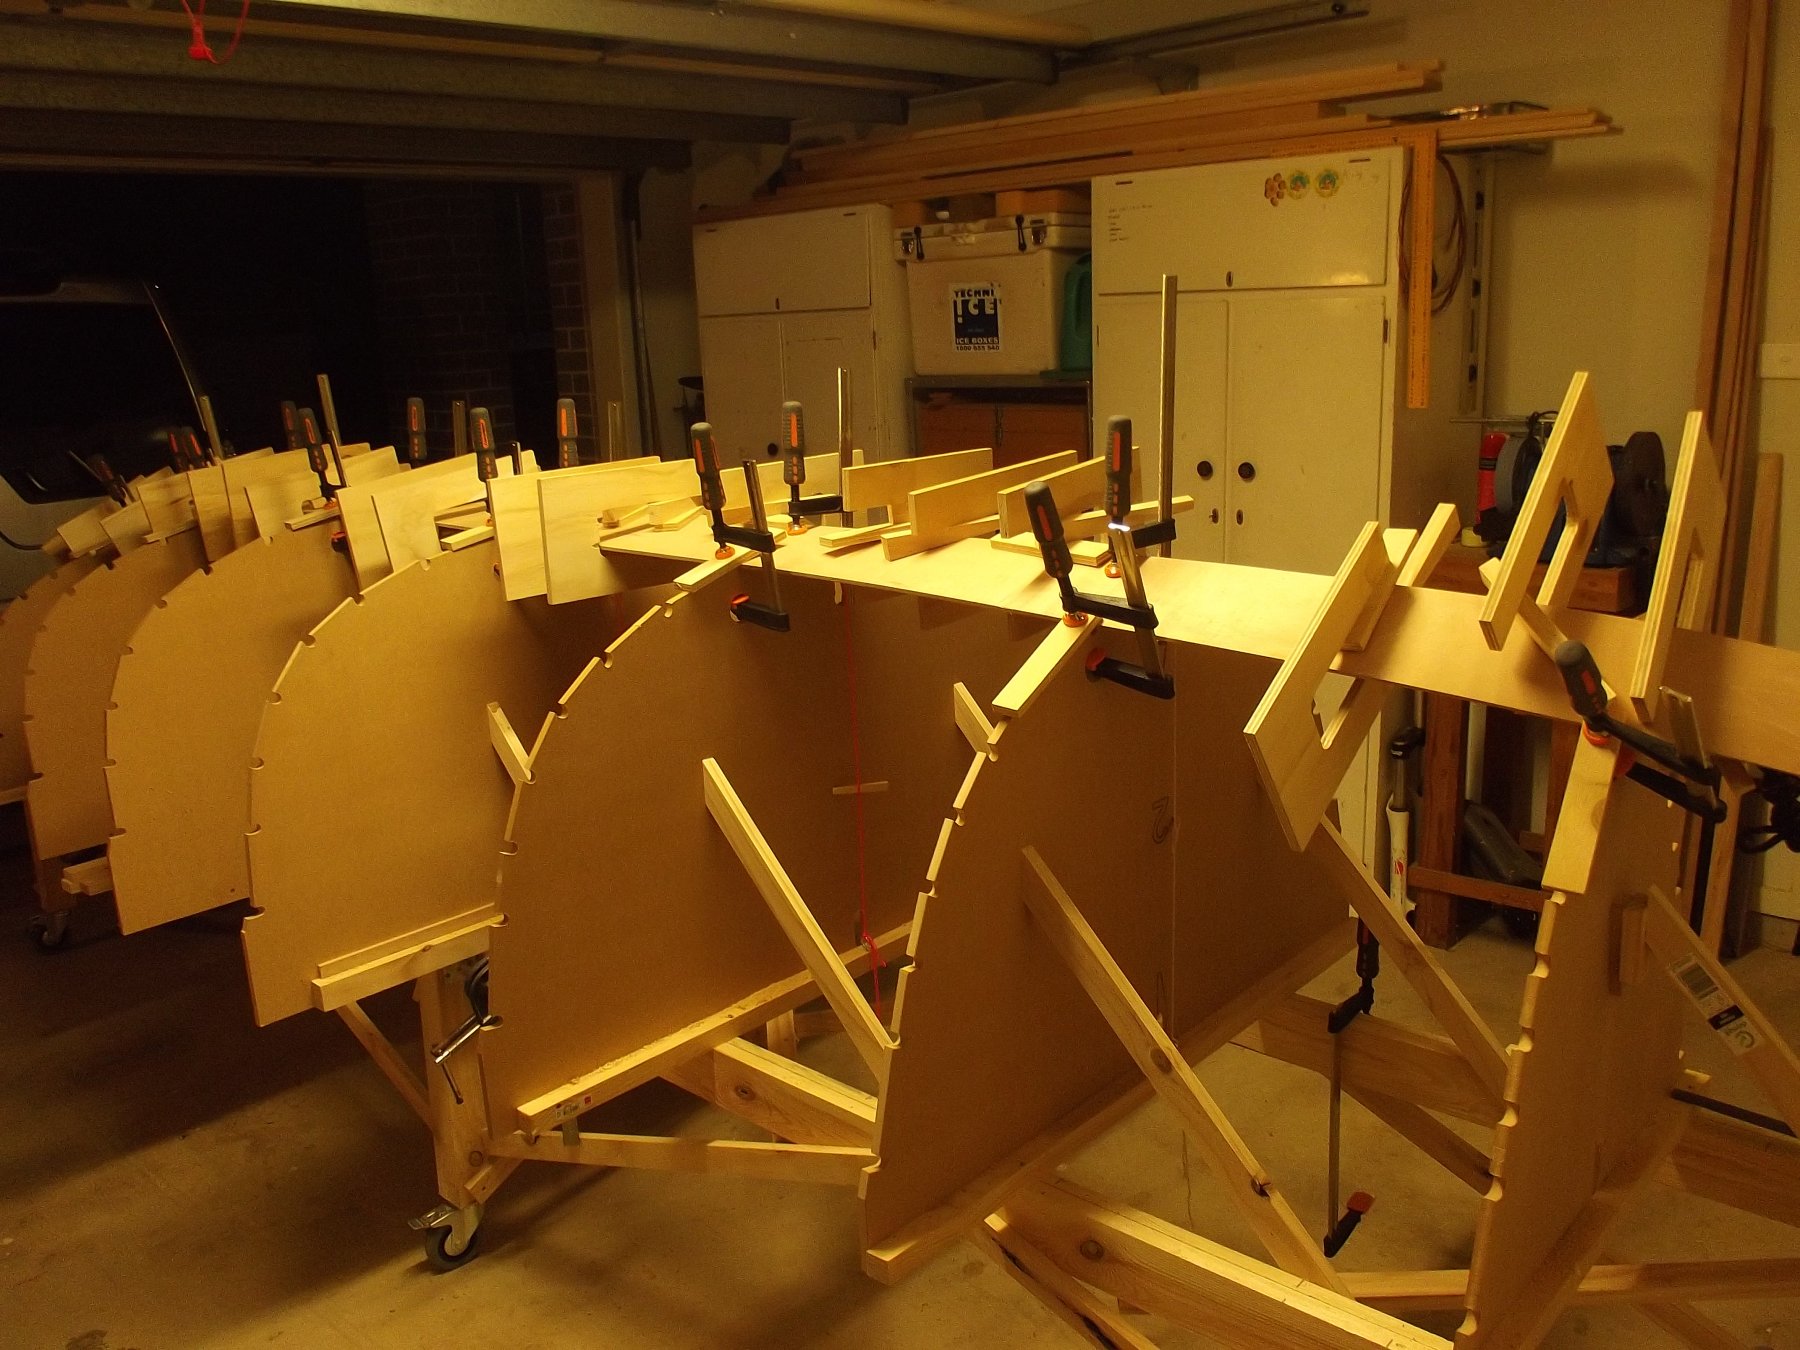
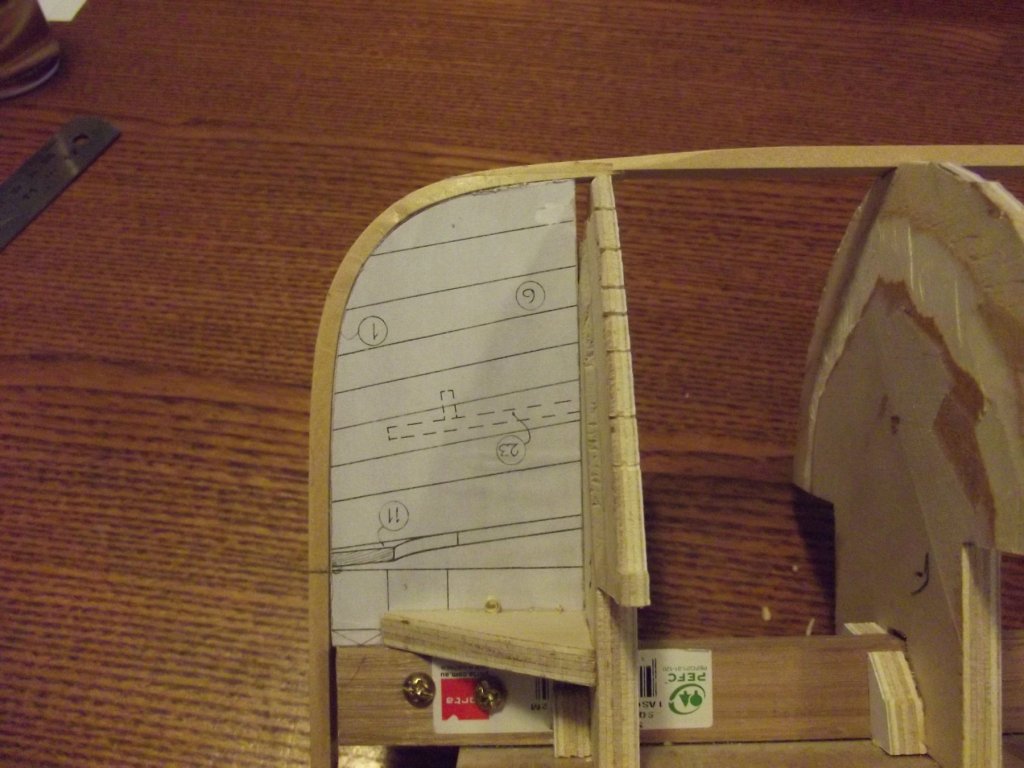
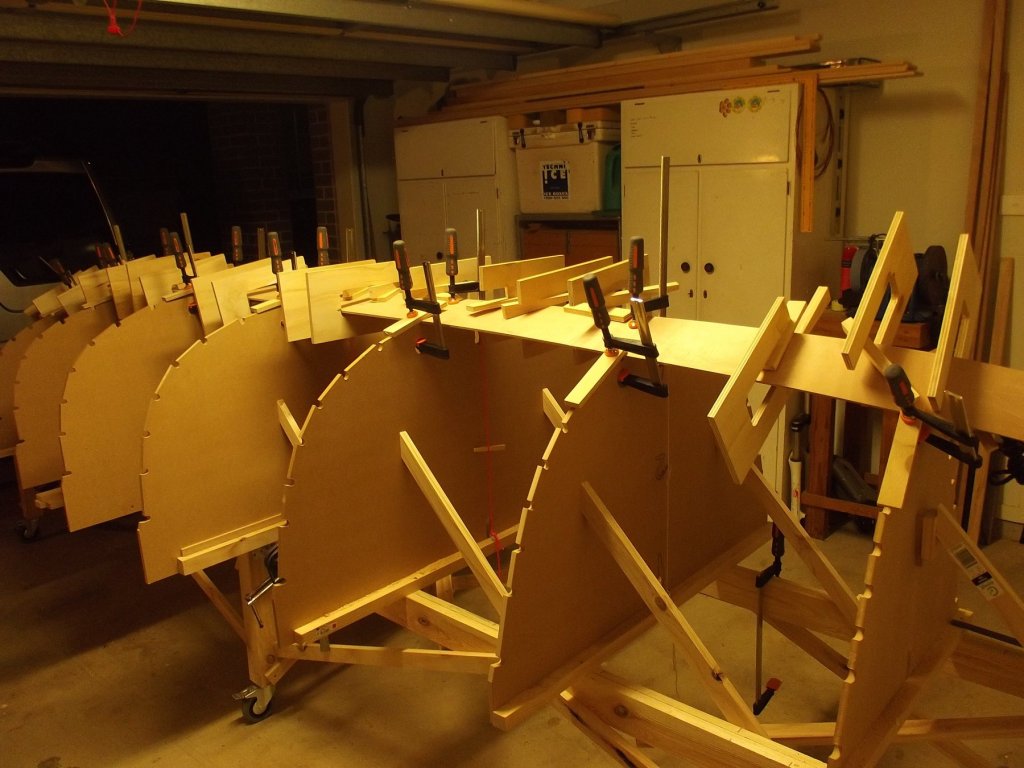
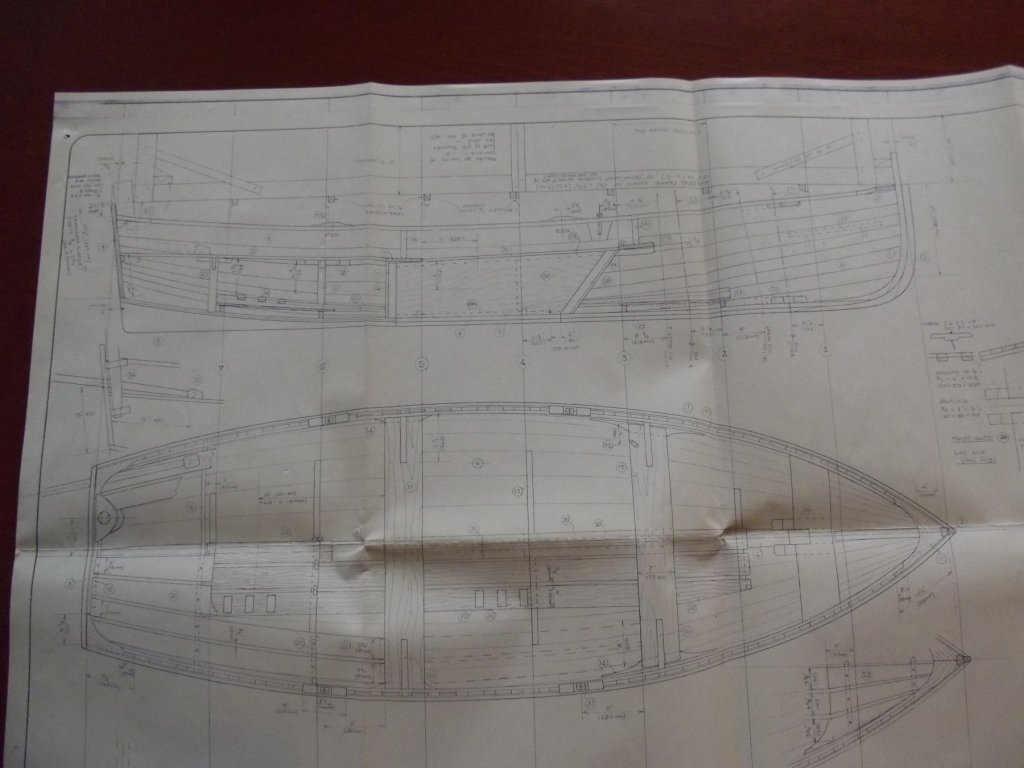
Popeye, thanks for the compliment. I am building her again exactly (almost) the way I built the original. The building form shown is a 1/8th scale representation of the original and will be scrapped once the hull is finished and righted for fit out. Each individual plank land is cut into the molds to aid correct fitment. I even have a sheet of 0.8mm plywood on order for the planks.
-
Thanks Jim, I'm sure it will and at the scale of 1:8 detail should be easier than normal. She'll be one of very few models with sitka spruce spars I'd imagine. The planking will be interesting because the full size model had them cnc router cut to shape but I'm going to have to take the lines from the hull as I go in this case and they are some interesting shapes!
-
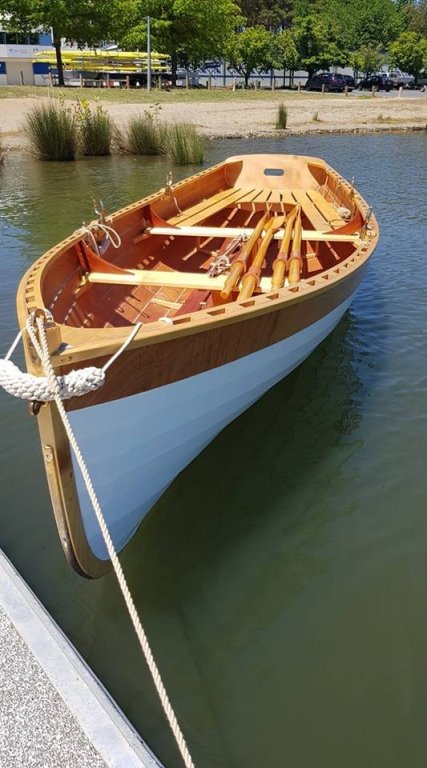
15' Dinghy by Bedford - FINISHED - 1:1 scale
Bedford replied to Bedford's topic in Non-ship/categorised builds
When I met Mark Pearse recently I mentioned that I might do this as a model, he was pretty keen that I should so here it is -
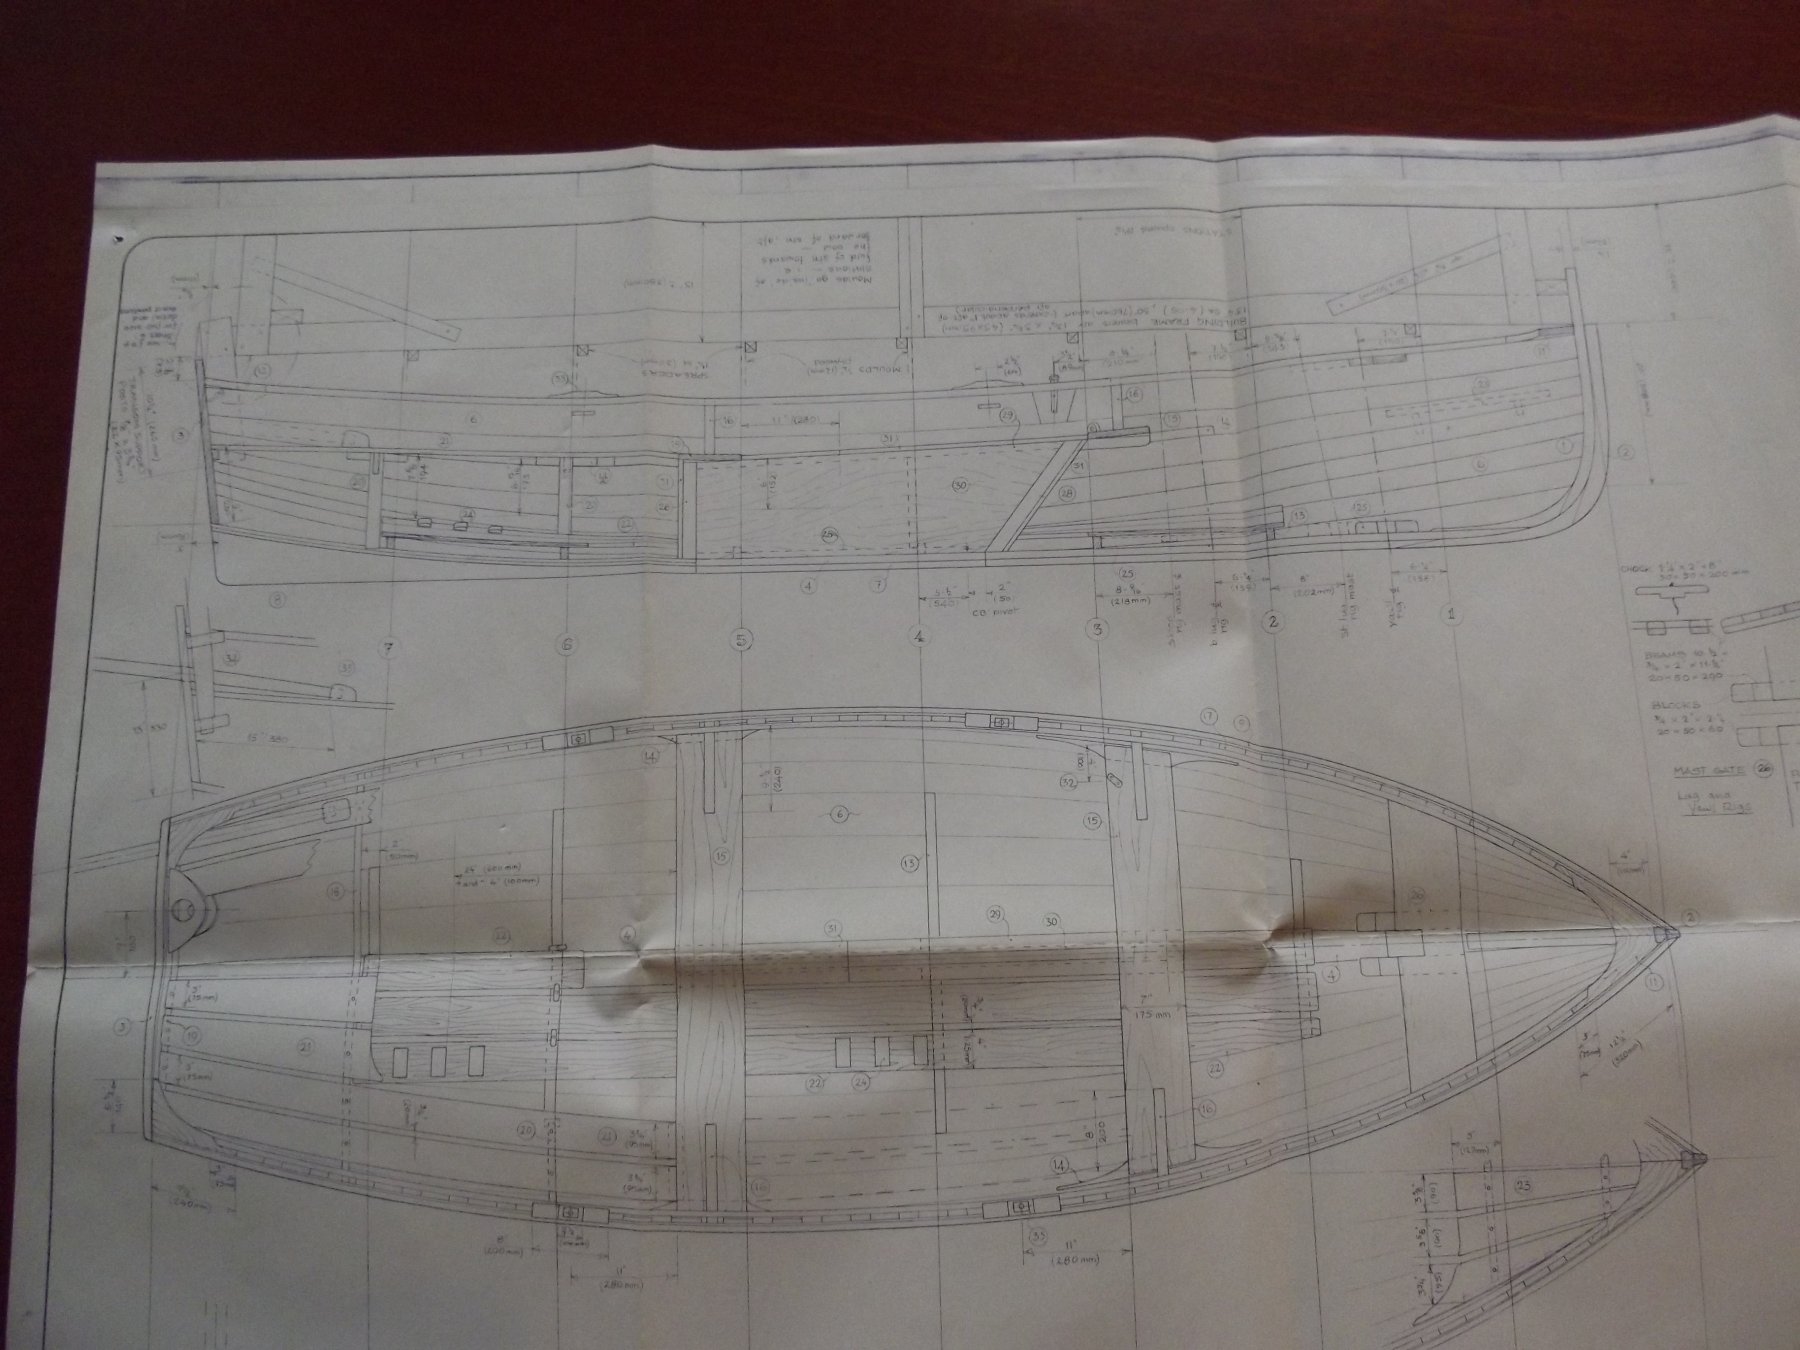
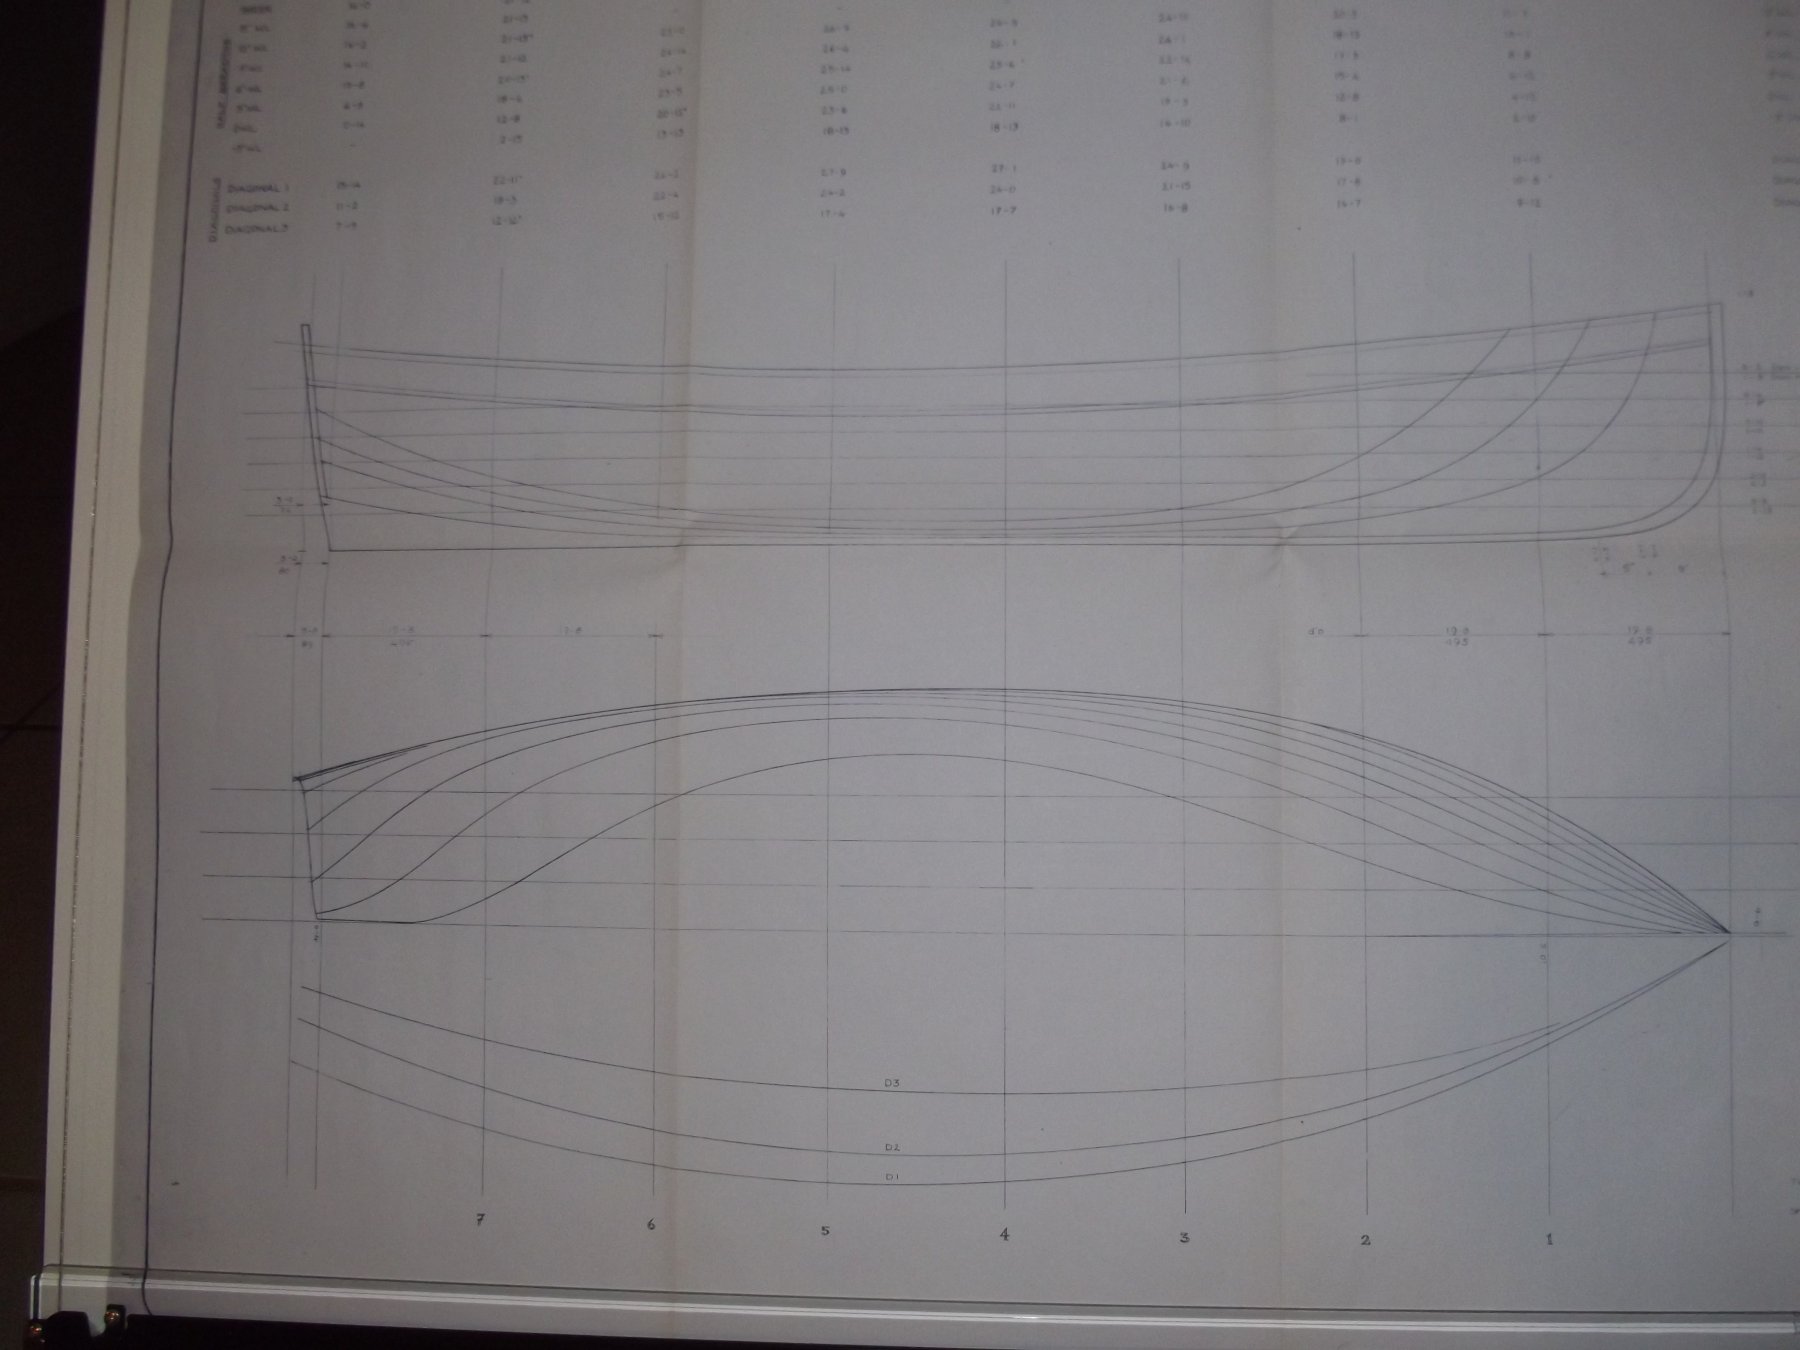
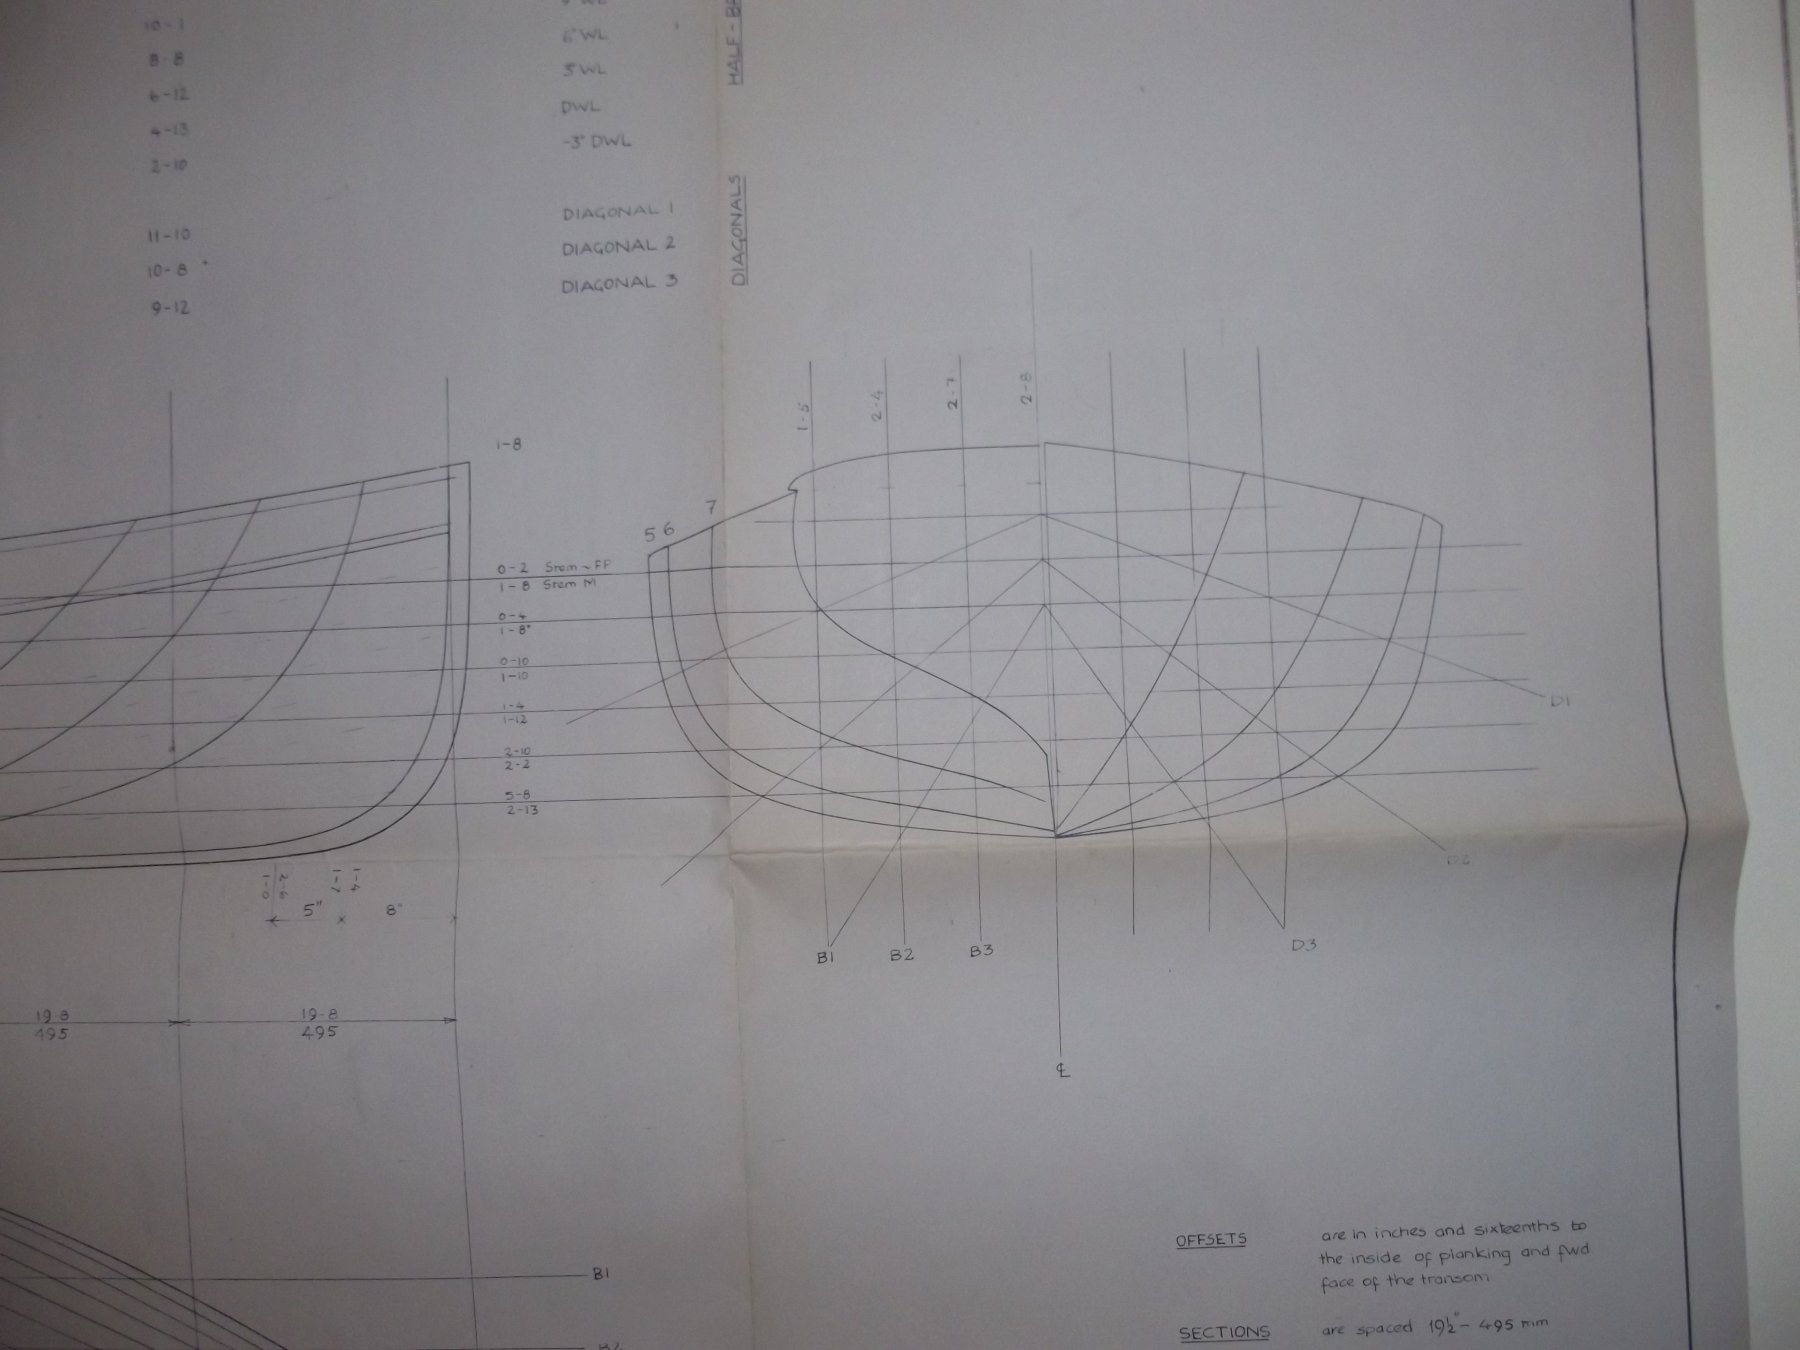
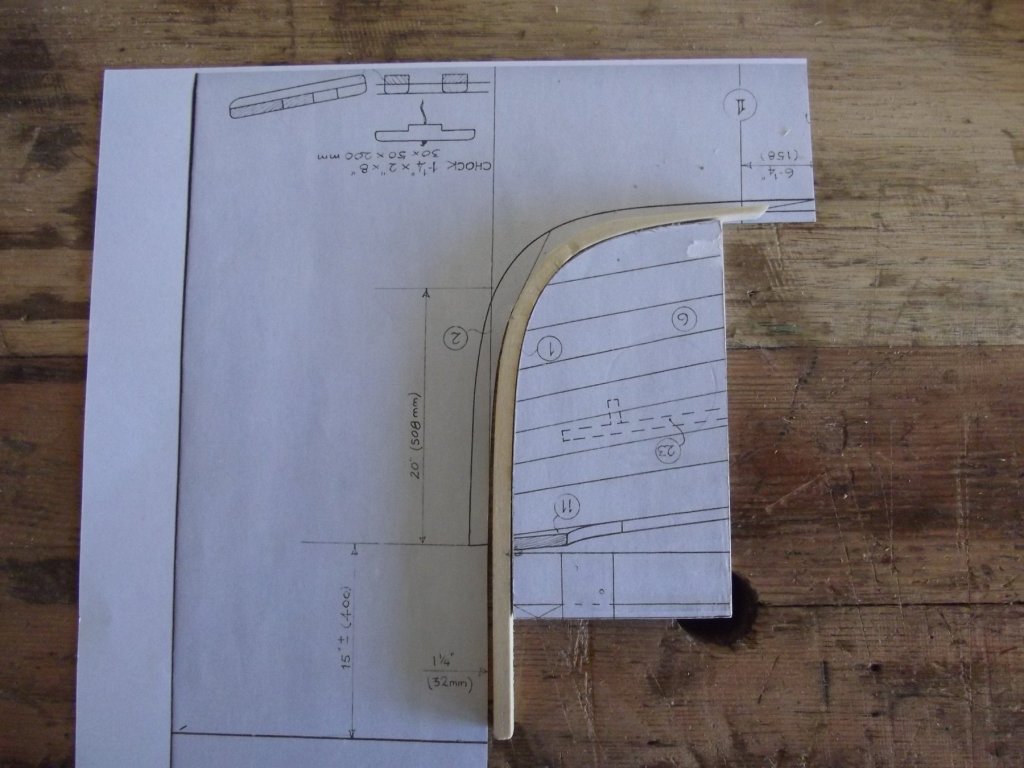
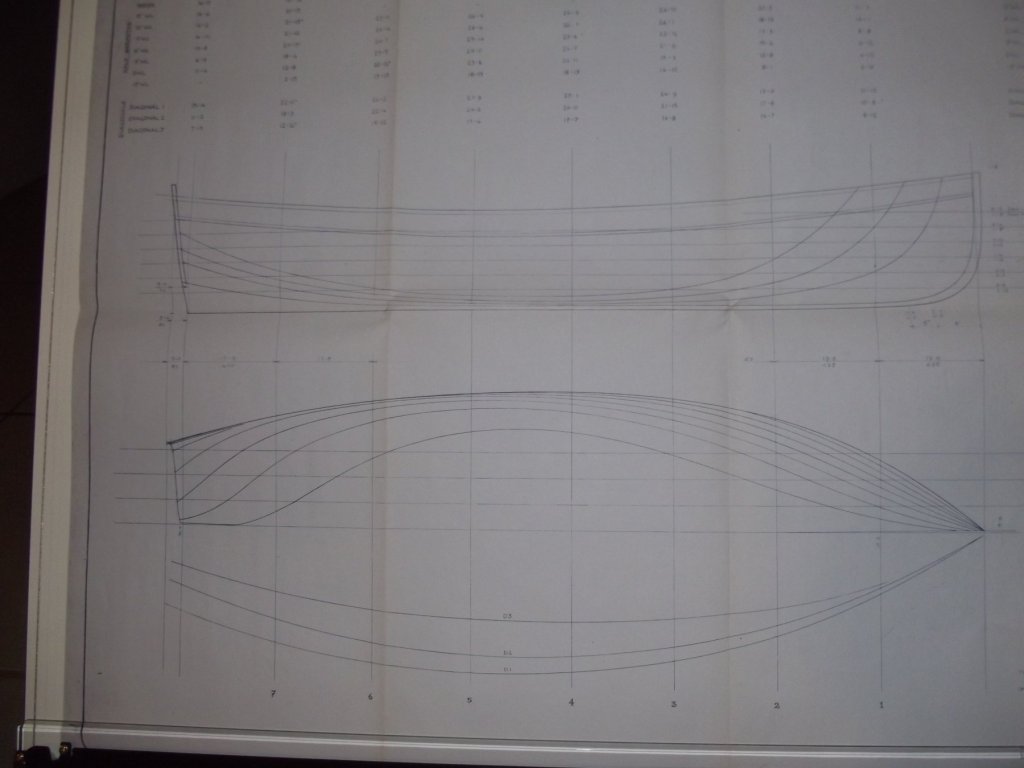
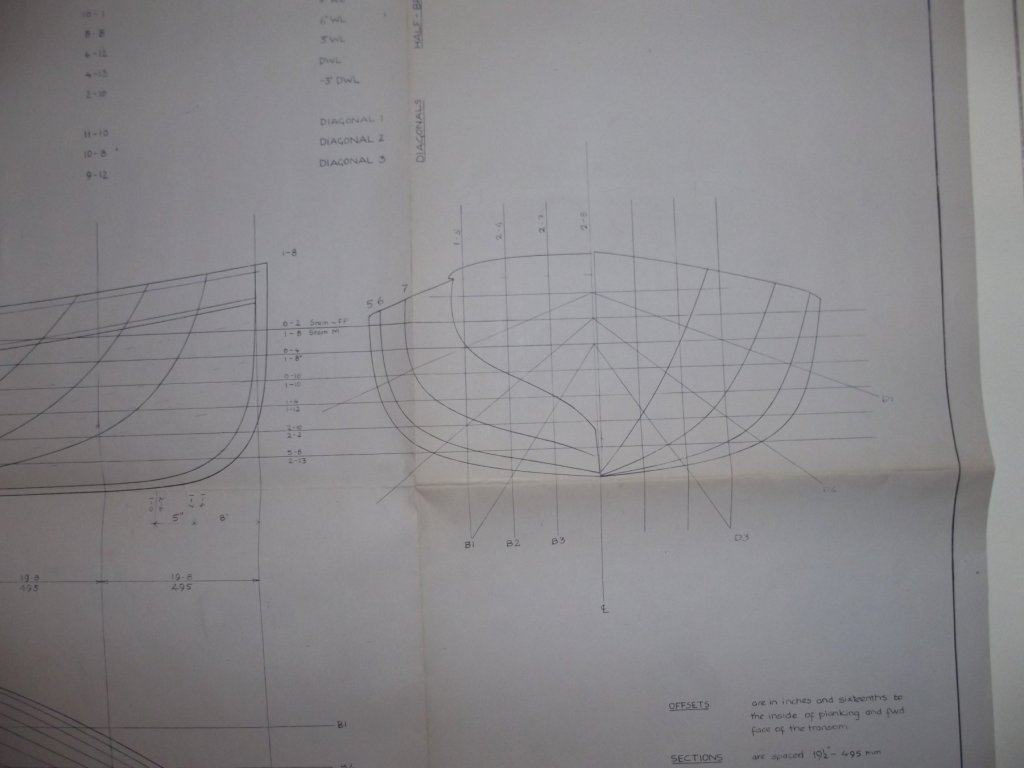
Well I have finished building the 1:1 boat so now I'm doing the model. The plans are drawn at 1:8 scale so I'm going 1 to 1 off them which is very convenient. I aim to make it as much as the original is made as is practical, including using the same timbers from left overs. The exception to this is the transom because the original is rosewood but the grain is so open it was barely usable at 1:1 so I'm going to use mahogany instead. When I met Mark Pearse a while back I mentioned that I might do this and he was very keen that I should so here you are Mark. The plans have all the lines I need so it was pretty easy to draw it up plus the understanding of having already built it goes a long way.

-
Thanks for the invite to the "Cliff Gale's Legacy" talk tonight, it was very informative. Cliff was a great designer. I stood and looked at the model from several different angles and the hull just looks right, no matter where you view it from. The model is larger than I thought and I'd have to call it museum quality, just beautiful and it was good to meet her builder.
-
Mate that's going to look great and you won't have any trouble with months attacking the sails
-
I put it to you that the item forward of the engine is in fact a gen set therefore the plumbing to the stern is its exhaust.
-
You can't have exhaust below the water line therefore you can't have cooling system pick up beside exhaust.
-
My father once asked me where I got my skills from because they didn't come from him, I think I said something like life
-
Jim, the model makers bench is one of the first places I go when I visit, I'm thinking i'm due for another visit soon too
-
Keith, I was thinking french polish when you mentioned the cloth, wadding etc. It's the way they do it but I have no idea where the pumice stone comes into it.
-
If you look at the pic showing the dial faces you'll see one side is speed and the other is "ahead or astern" the gear lever if you will
-
I think I'd be looking at laminating them fore and aft or shaping the inboard face to match the angle on the form, laying the rib flat to the exterior then re-sanding the fair them if that makes sense
-
The hard earned lessons are the best ones, we don't forget them easily.
-
To quote the "taunting french man", "It's vewy narce" That's a good effort for two days Kieth