


maggsl_01
-
Posts
767 -
Joined
-
Last visited
Content Type
Profiles
Forums
Gallery
Events
Posts posted by maggsl_01
-
-
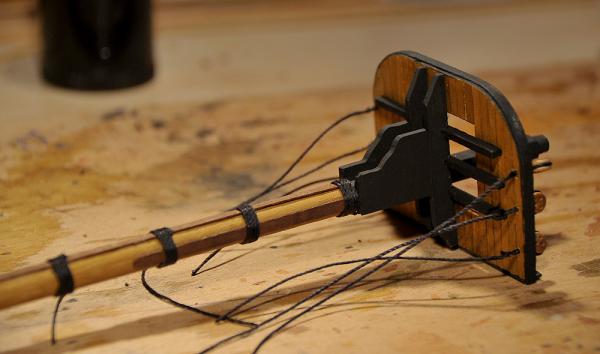
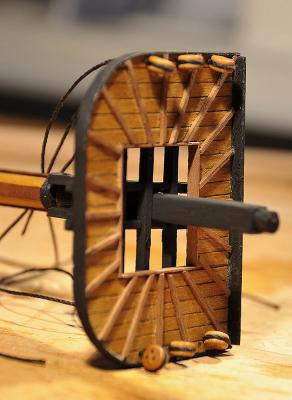
Hello again...
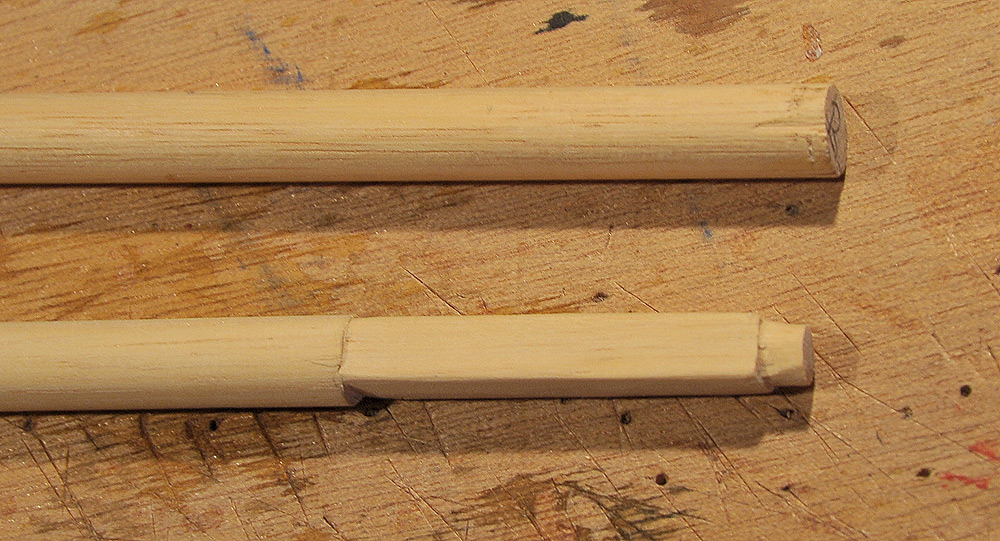
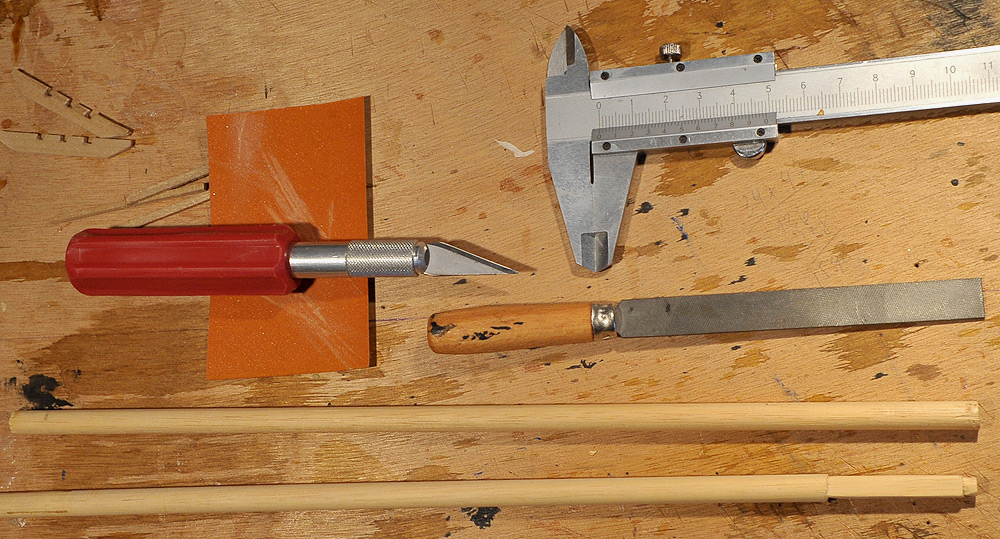
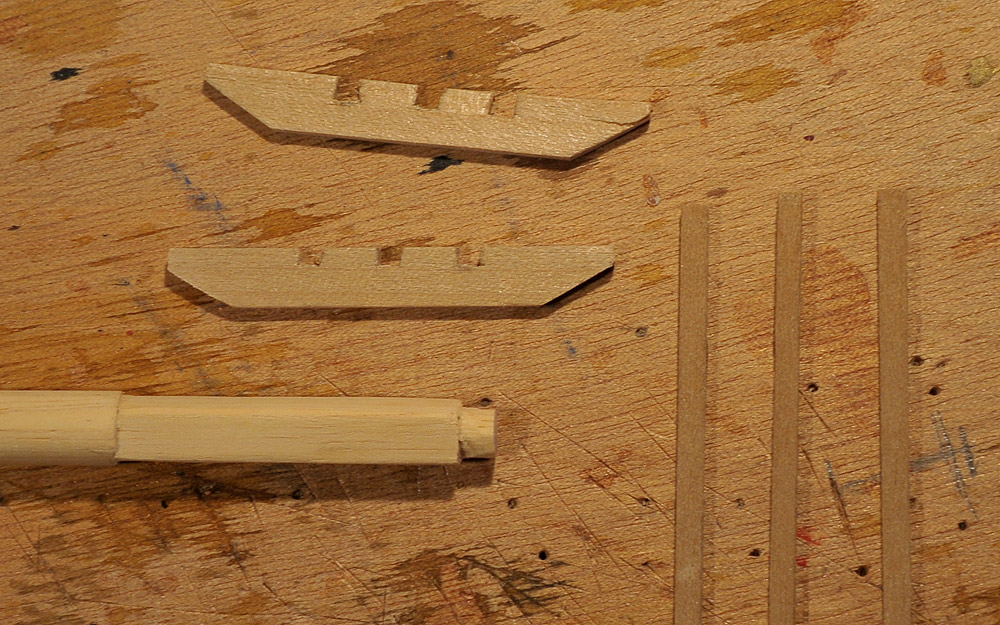
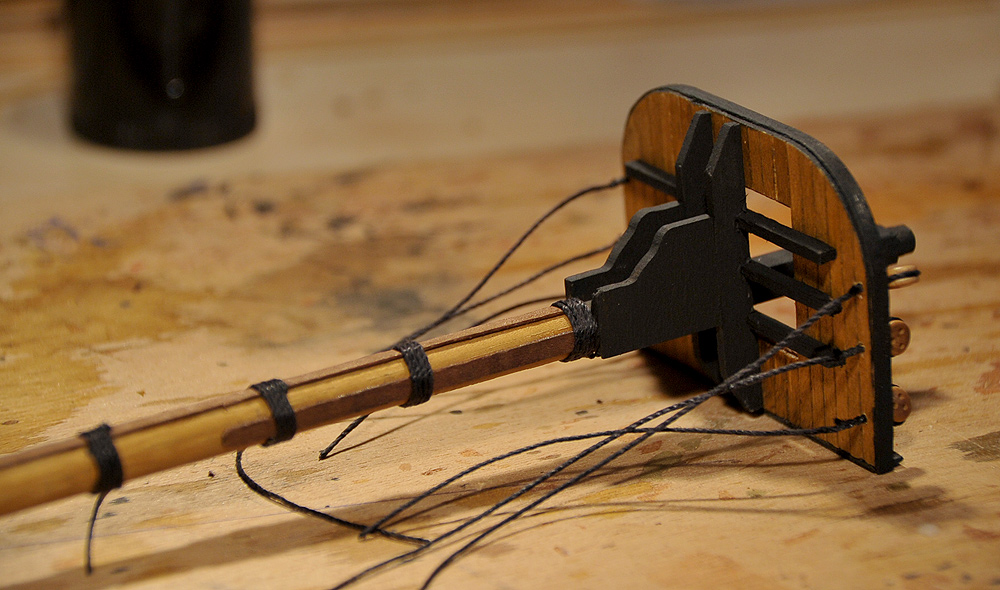
the work on the foremast goes very satisfying. I am ready with the first, the lower, part. Next will be the upper part of the mast. Now, that I do this masting this way I understand how the process works best. My problem with my first build, the Half Moon, - or better with the instructions by Corel - was that there was hardly no space between the crows nest and the mast itself for the shrouds. It was very tricky to fasten them. But here with the Caroline there is more to see and understand how the shrouds thing will work. Thus I do...
 (As my father told me: You will never ever stop to learn... what a wise guy he is) And now I can see how it is to be done to create the masts step by step and to fix the shrouds. I like it really
 But pls see the pics and dont hesitate to comment if you ever want. In Germany it is winter time now, and in the region I live in winter means cold, fog, snow and a lot of time in the shipyard (as I have always my four-week-vacation from mid Dec to mid Jan because of the dogs. Its more easy to take a walk as long as it is light and in the winter evenings fall fast). So I will be able to have a lot of rigging work in my vacation.
Cheerio and best wishes to you all
Max


- schnu, jwvolz, Shipyard sid and 5 others
-
 8
8
-
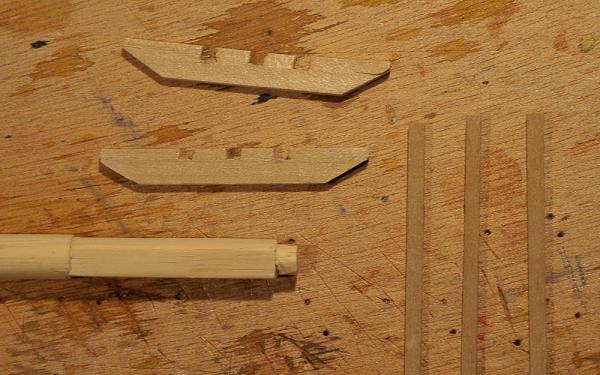
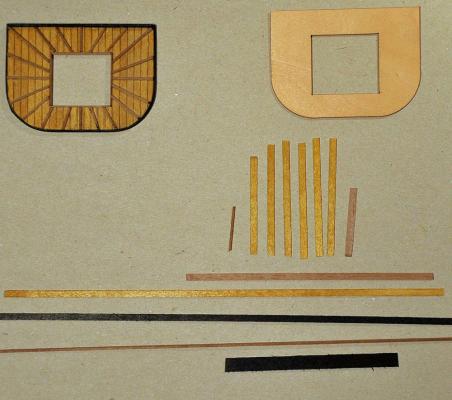
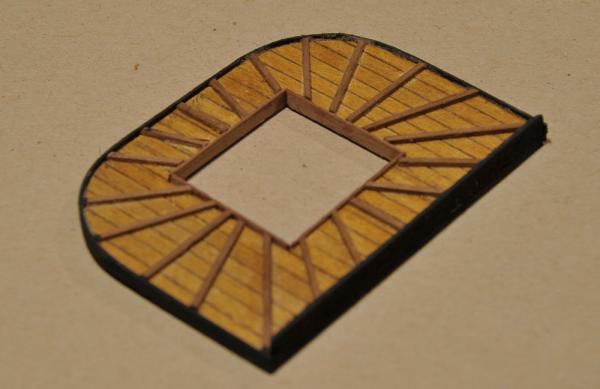
Hi all, it's me again
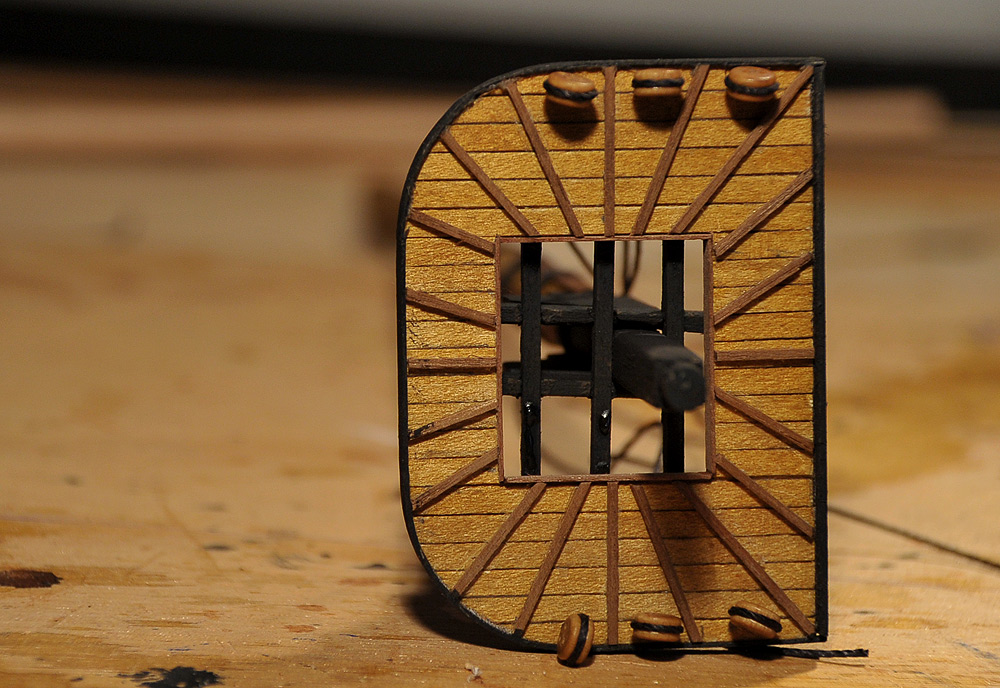
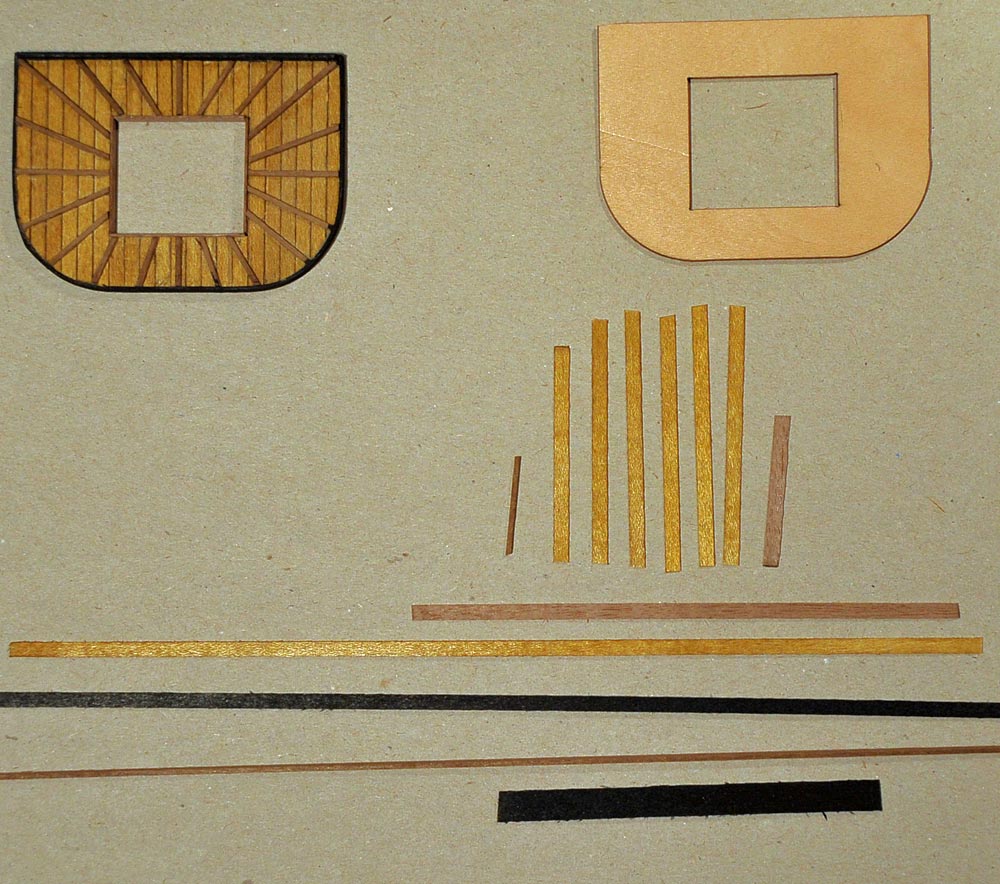
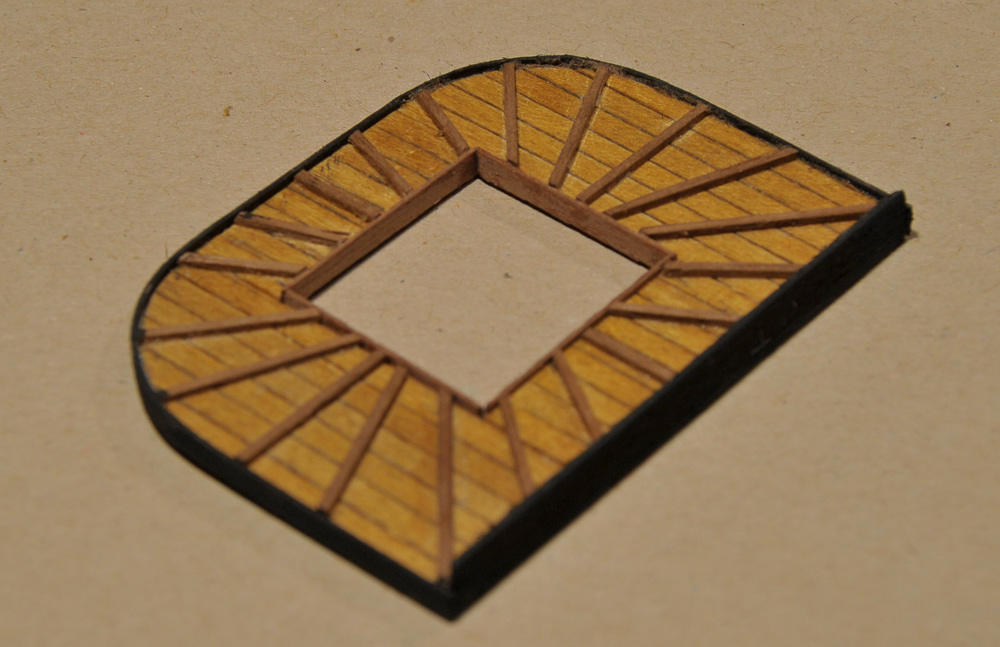
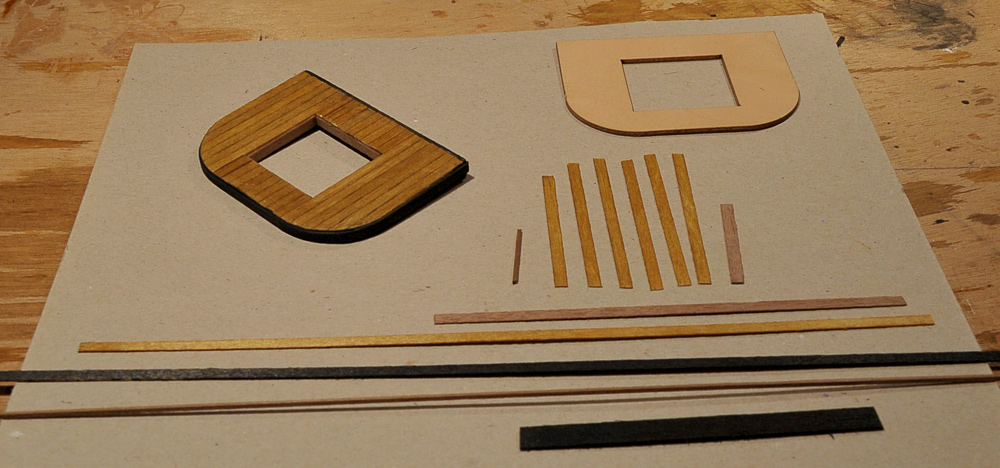
I startet to build the masts and tops now. The precut parts have to be planked, I stained the strips with a mix of teak and oak, the transoms (?) are walnut, I stained the edging black and assambled all togehter. I Comes out nice I think. Next will be the salings.
Thx for your attention
Cheerio
Max


- Landlubber Mike, yvesvidal, Harvey and 3 others
-
6
-
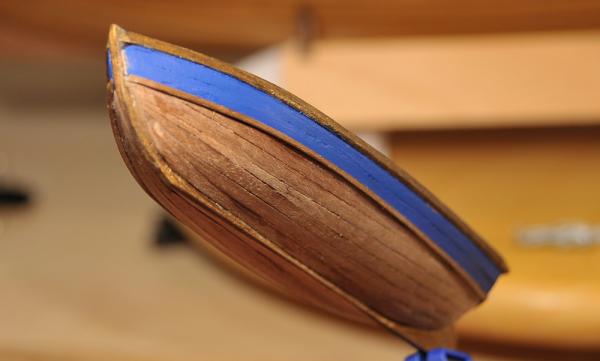
Hi together
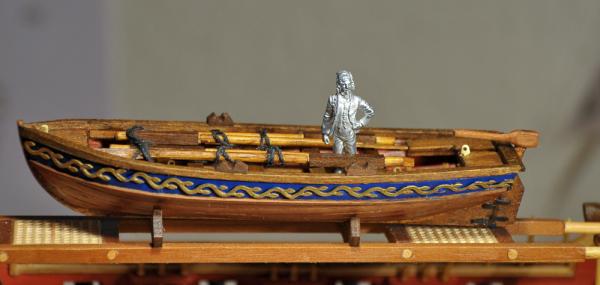
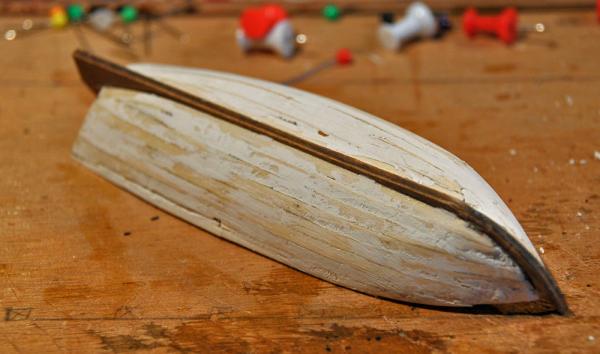
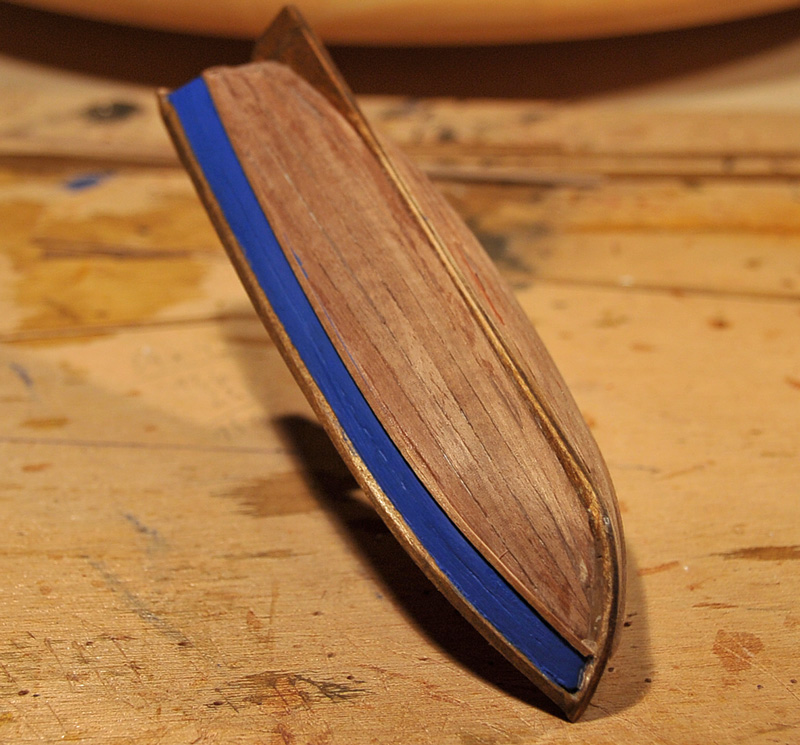
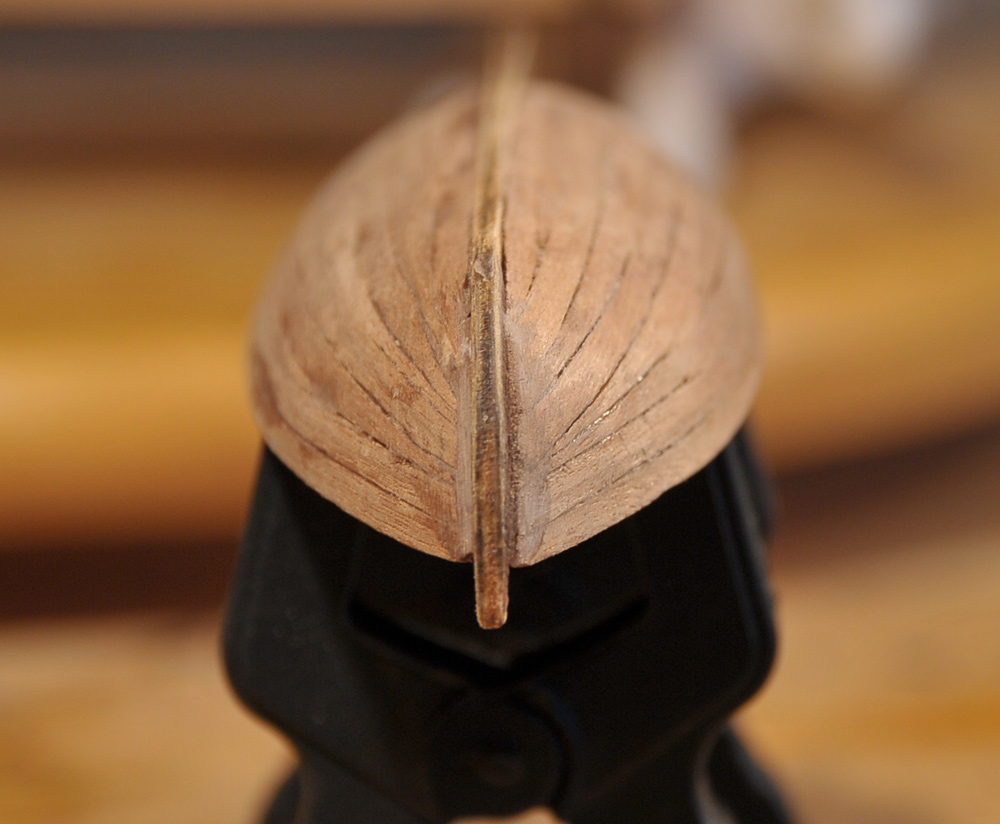
Well, I am through with my boat earlier than I thought... At least: Now
:DI have atached some pics (as usual) to show the result of an almost one-week-Job. I had a lot of fun although I thought at the start it will NEVER be something similar to a boat. But I admit - indeed it a boat.
Thx for your attention and interest
Cheerio
Max


-
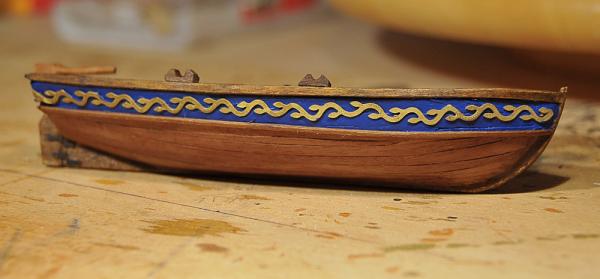
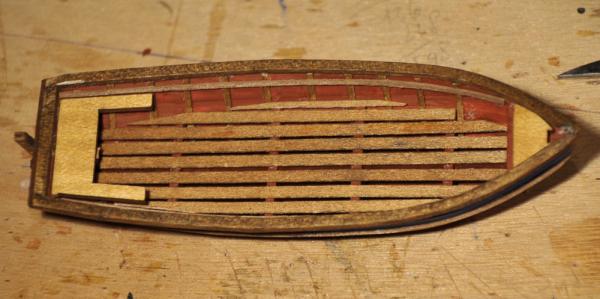
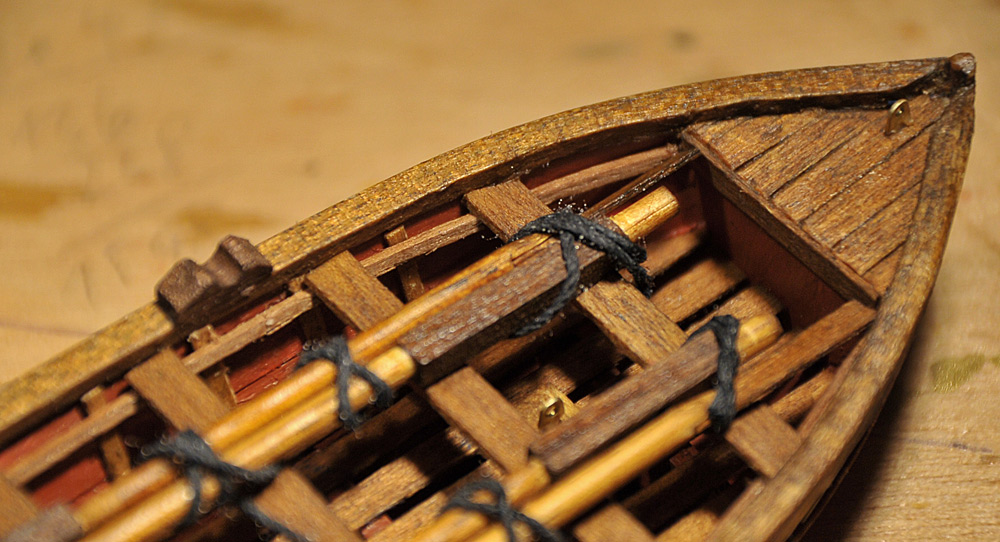
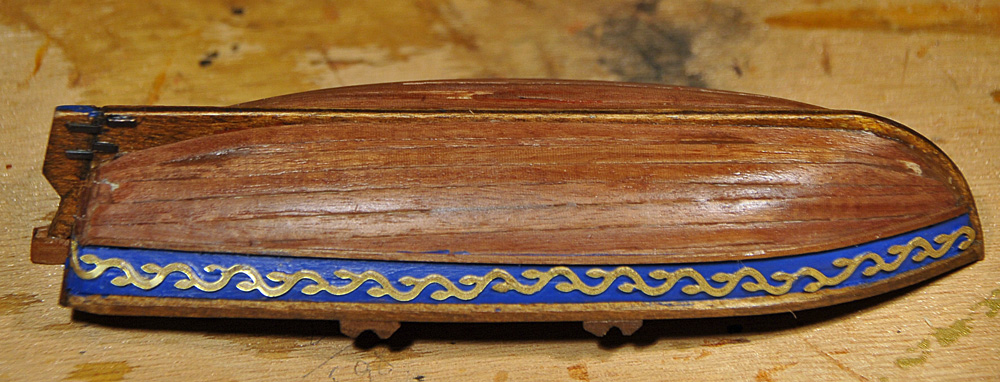
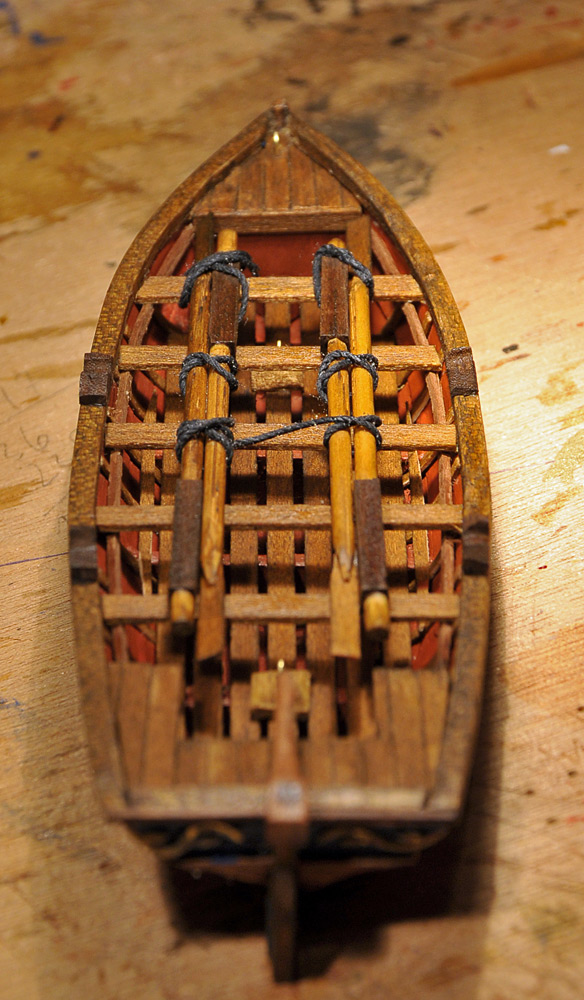
Hi my friends
thx a lot for your compliments... It makes a lot of fun to do this boat. It is like the little sister of my Caroline

Still have to make the oars and the decorations (there is a photo-etched sinus-line within the kit).
Think I will finish the boat up to the weekend. Then the first construction phase will be done and the masts can be build.
Cheerio
Max
-
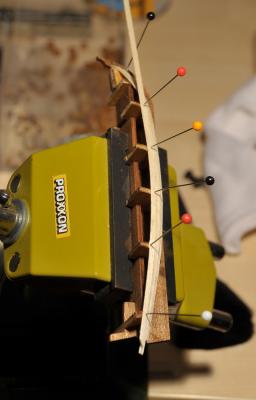
Hi schnu,
thx... yes, the boat Comes quite nice
The Proxxon tool is a vice (Schraubstock)
Cheerio
Max
-
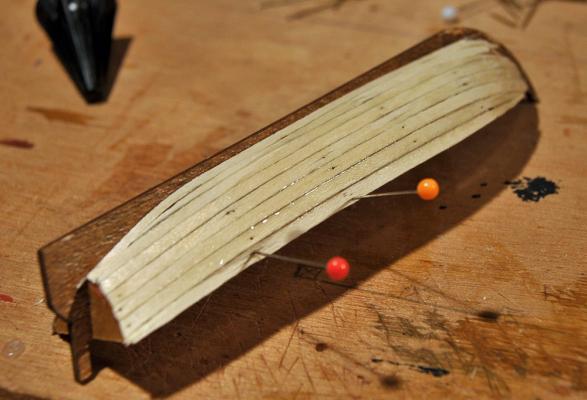
Hello all my friends
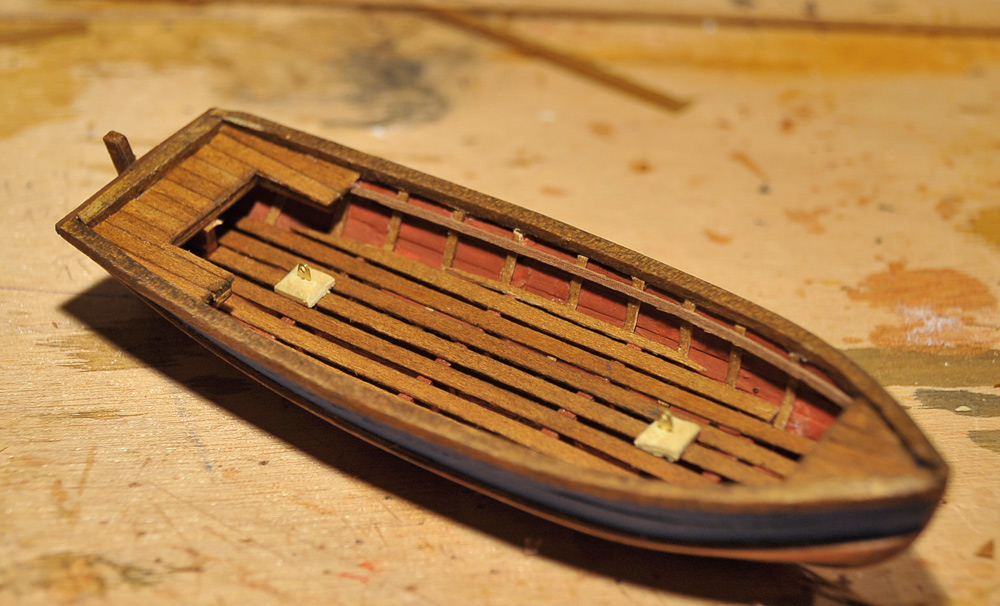
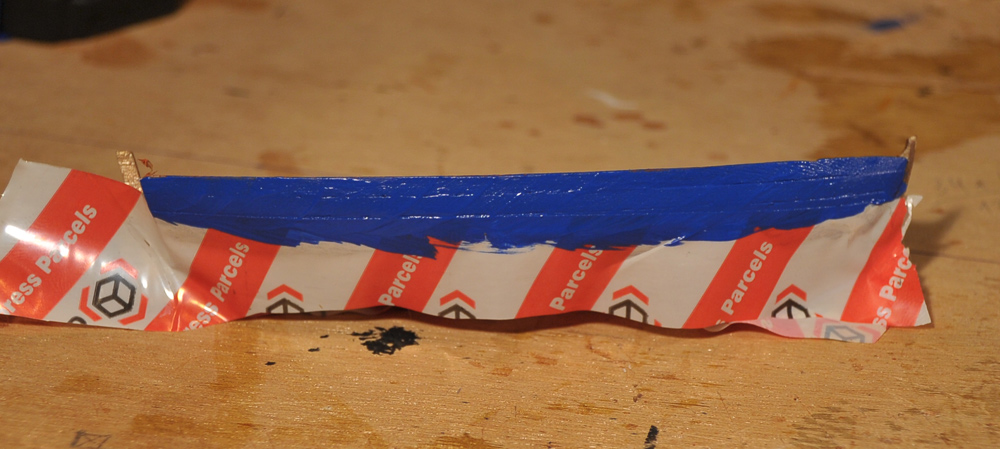
my boat grows up every hour
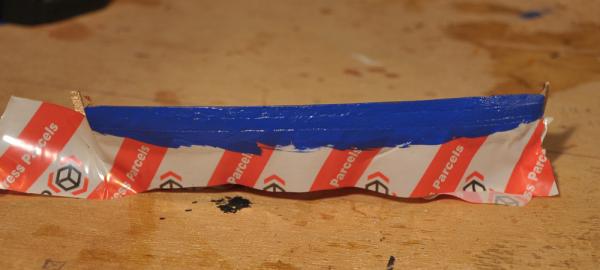
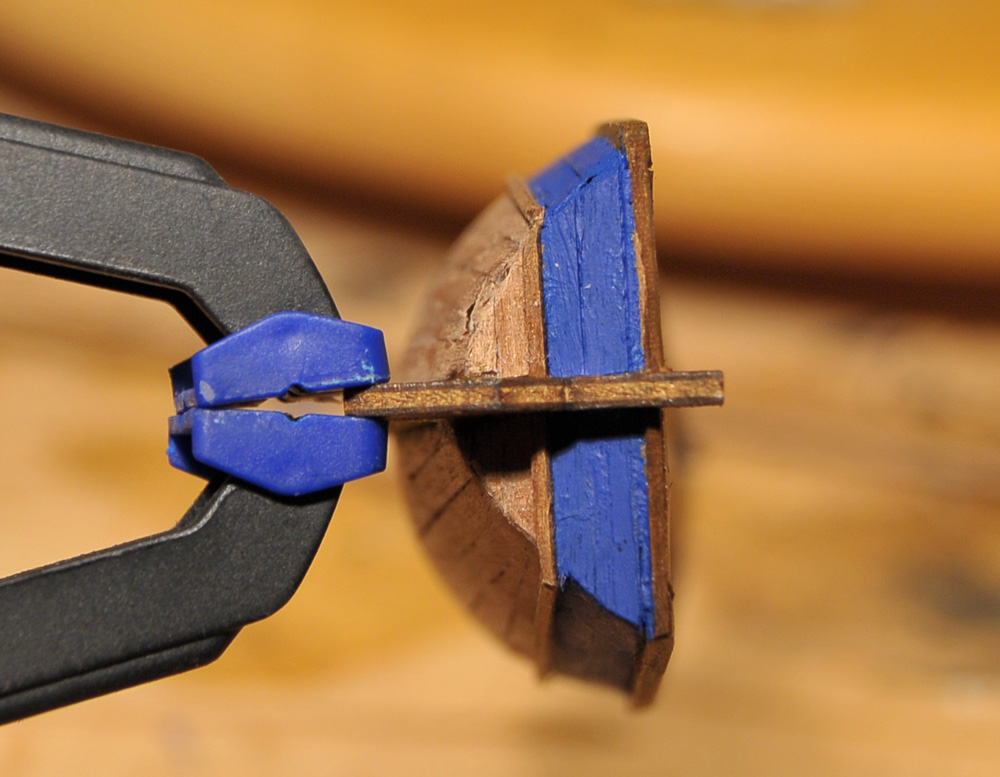
Just a Little update to Show you the Progress. The first pic Shows my way to bend the railings.I think tomorrow I can end the boat-building era
Cheerio
Max


-
Thx Tom...
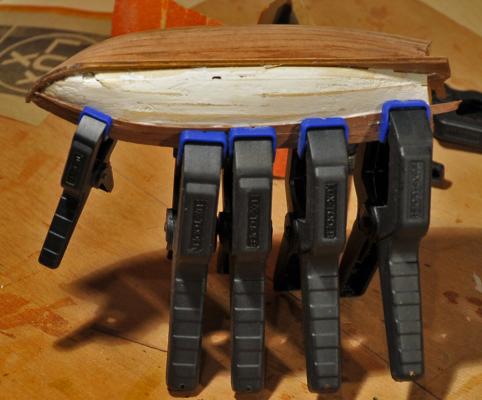
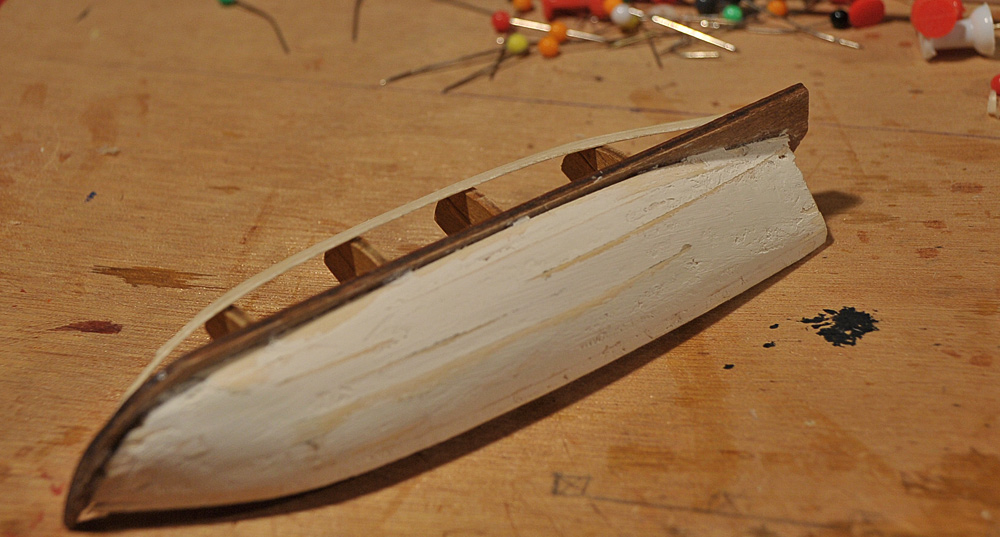
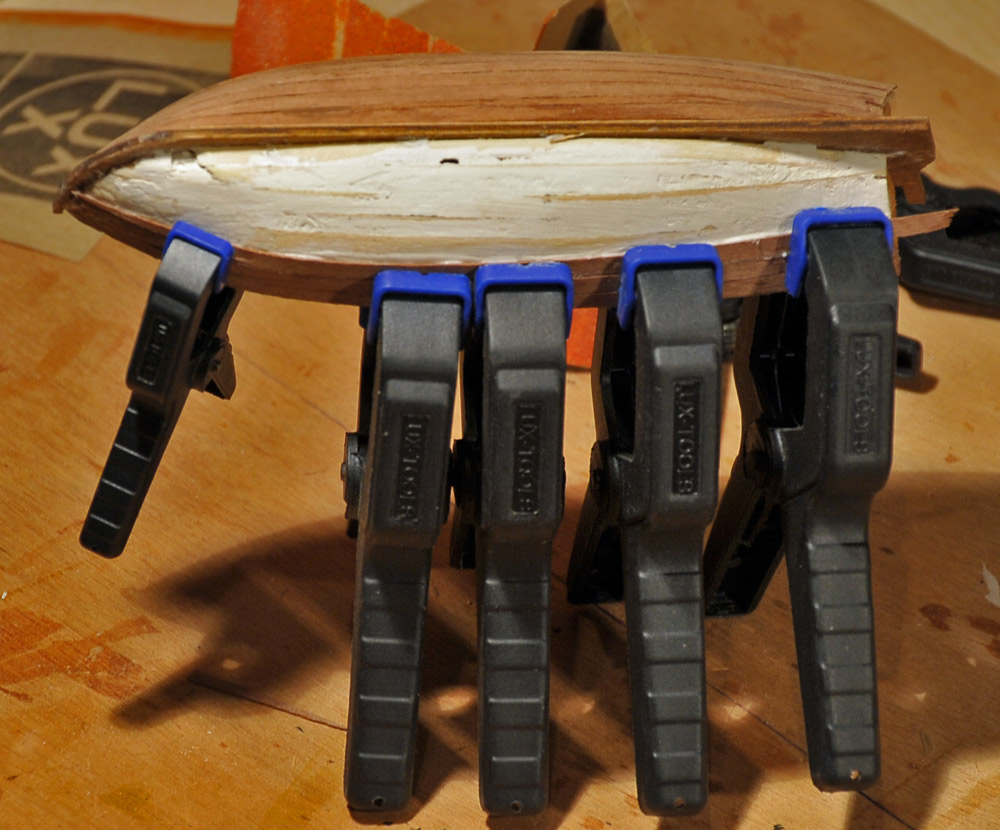
yes, it is tricky to get all done and in the right shape. But it makes fun too. I never thought that a BOAT can be double-planked...but it works. I use the 0.5mm thin strips from the kit for the first planking and a 0.5mm thin nut-strip from the after-sales-market. Its better than the strips featured with the kit. At least when the semigloss colorless varnish is on the surface it will give a very warm and natural impression. BTW - all the building is pure fun and relaxation.
Cheerio my friend
Max
-
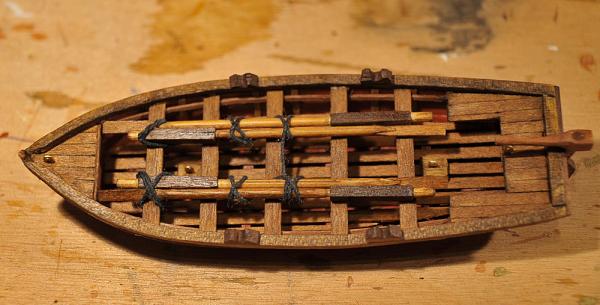
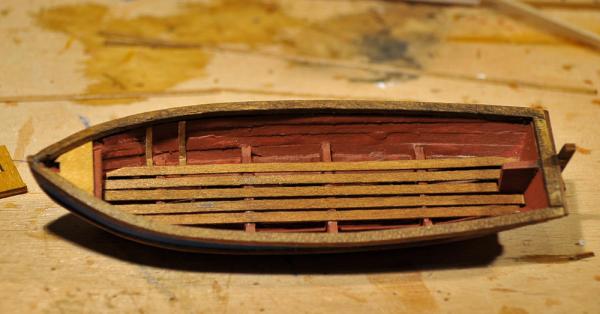
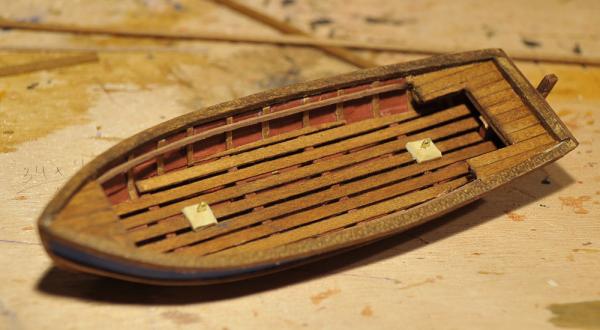
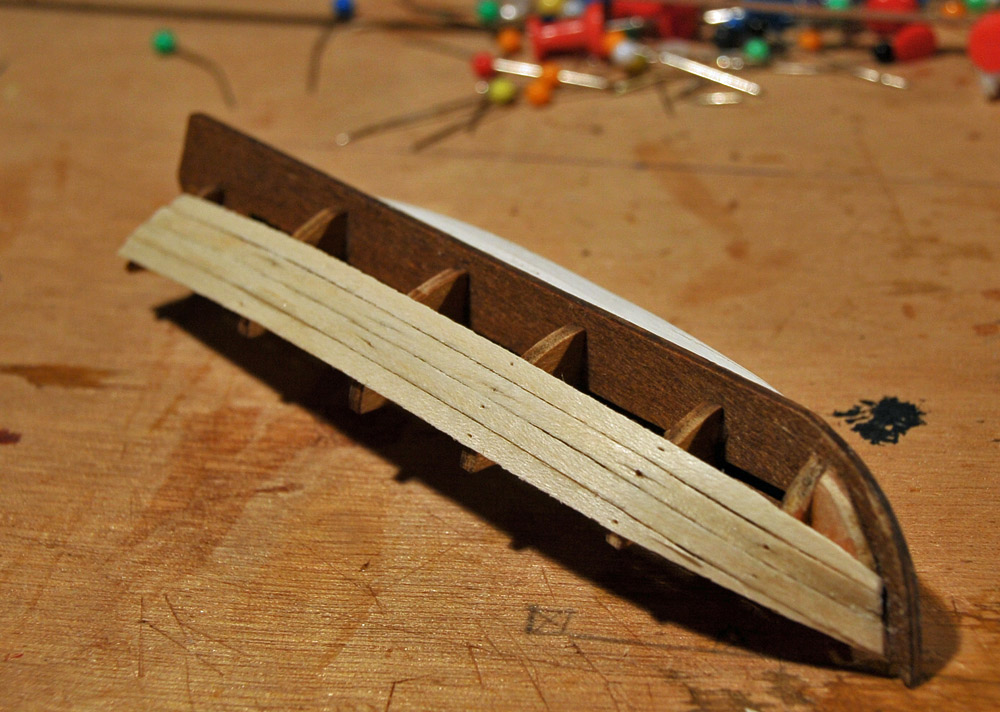
Hi ffolks...
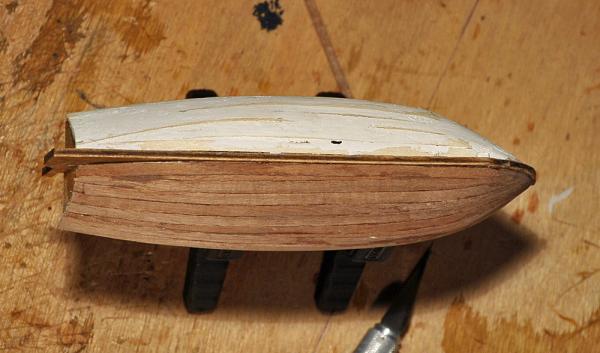
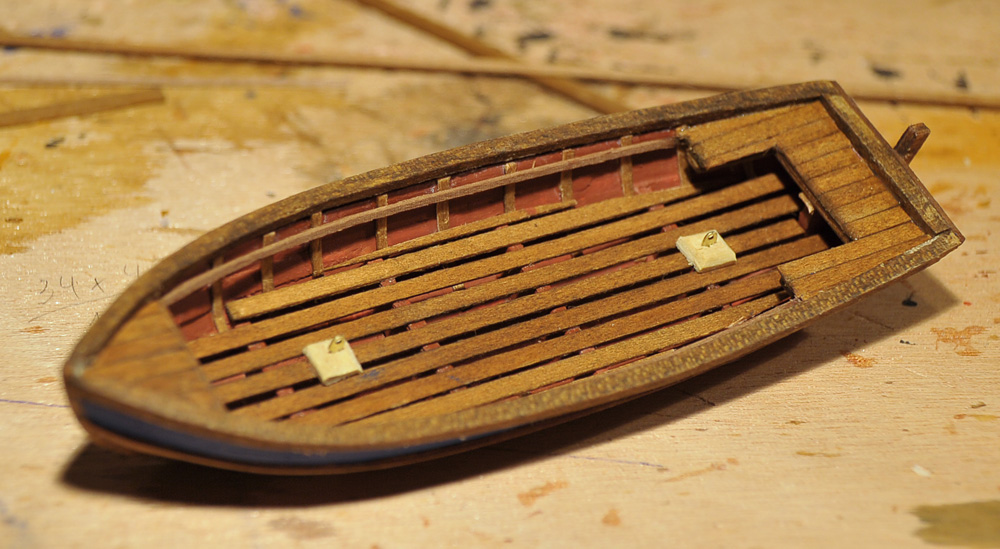
back from vacation I started to continue the work on the boat. It is a double-planked POB-boat, about 13 centimeters Long.
I attached some pics to Show the Progress and the Status at the Moment. Still a lot to do, but it becomes ist shape more and more.
Thank you for your Attention
Cheerio
Max


- Shipyard sid, schnu, Pete_P and 5 others
-
8
-
-
-
Hello my friends,
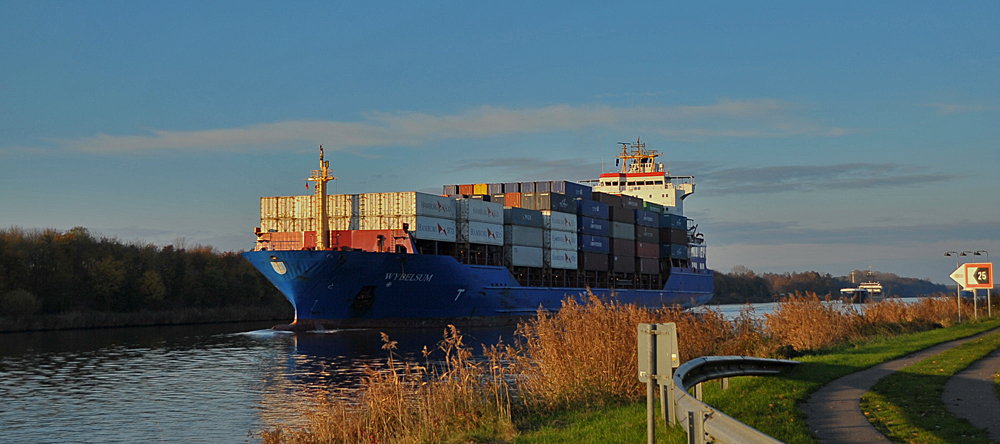
I am in vacation again - so there is no update for my Royal Caroline. We stay at the region between Hamburg and Cuxhaven - close to the river Elbe, where all the big vessels roll on to Hamburg port. So you can imagine where I am most of the time
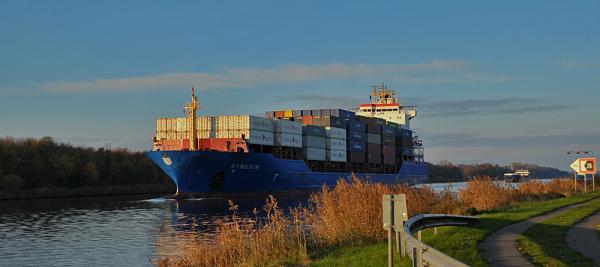
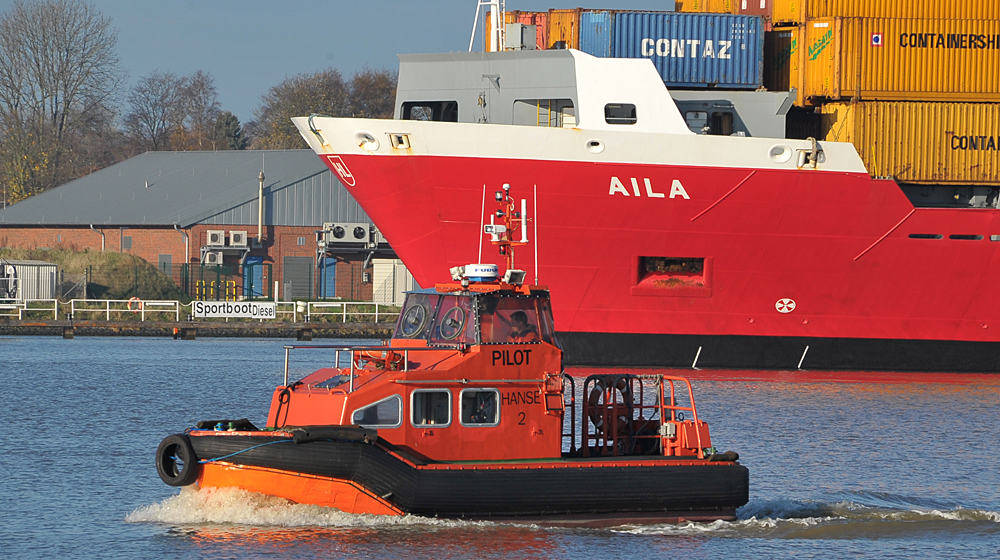
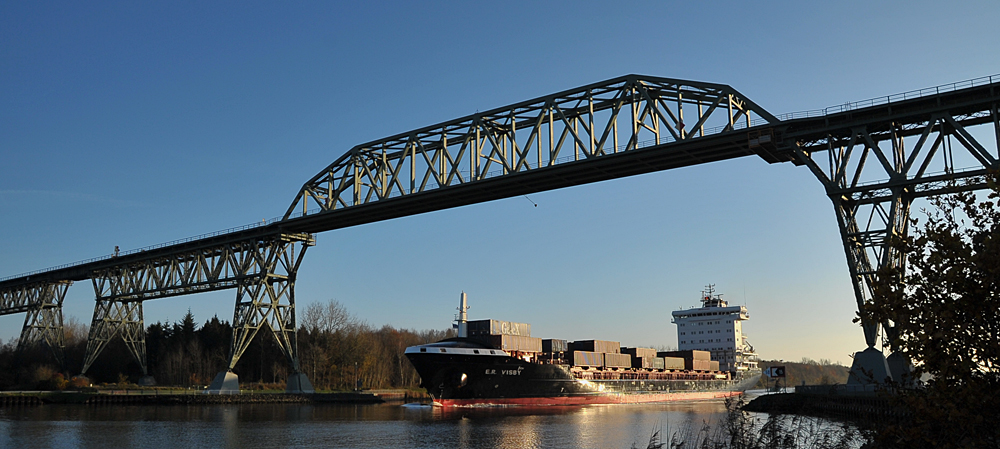
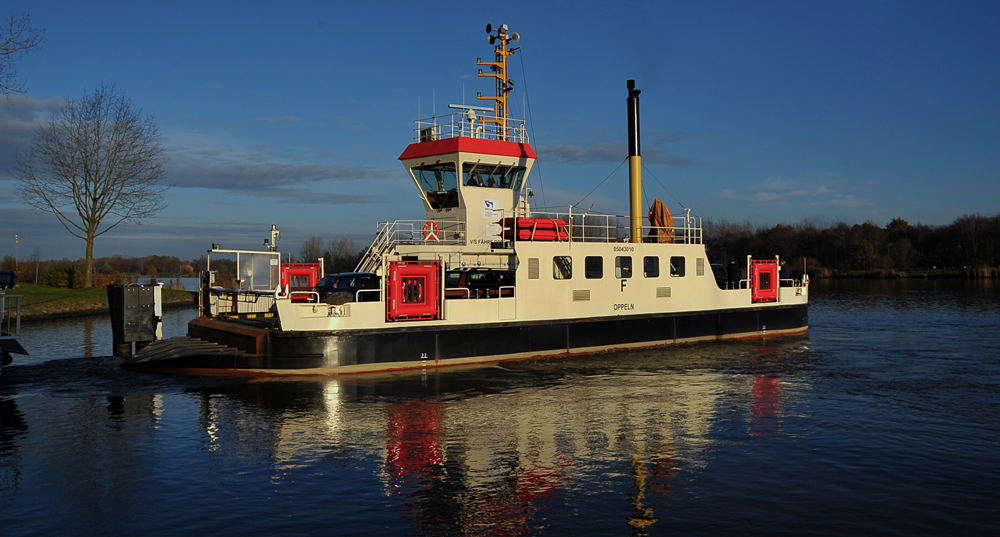
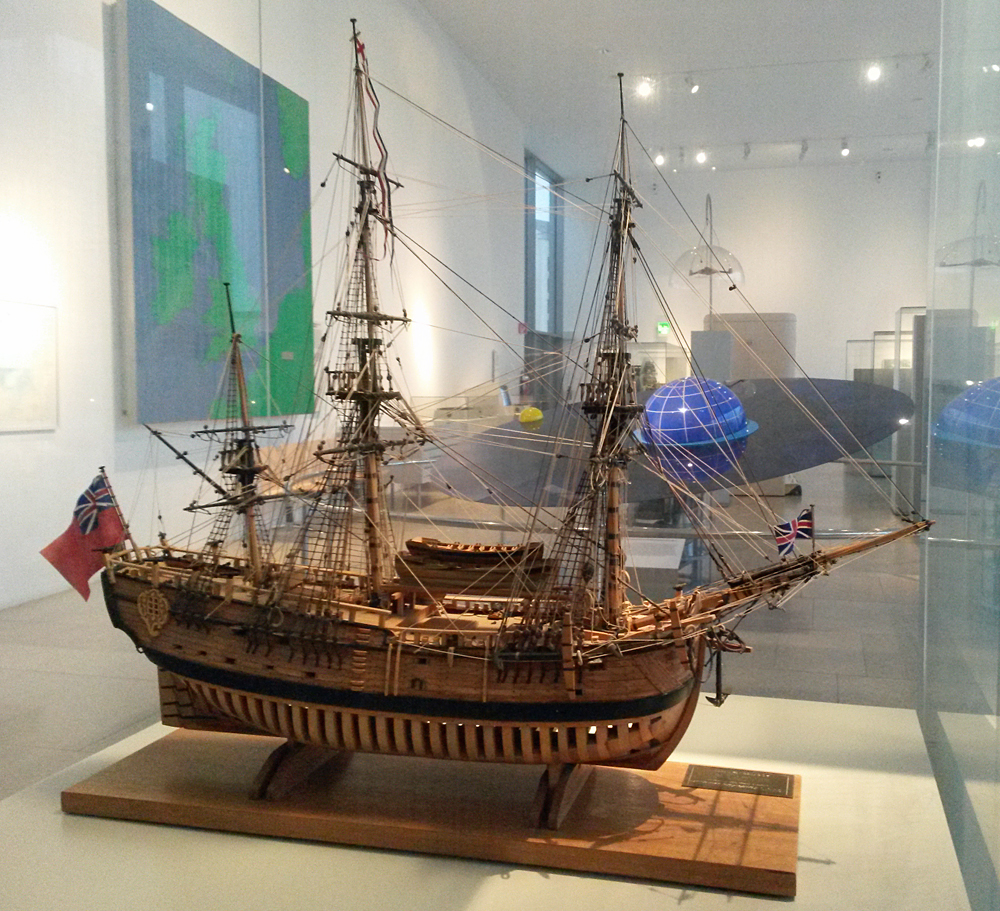
Its a very nice time although the weather is not to bright - but its november... so what? I went along to the Nord-Ostsee-Kanal, a canal about 100 yrs old that connects the North Sea near Cuxhaven with the Baltic Sea near Kiel. It is a important water traffic route with a lot of photographic motives. I attached a few pics. And I visited the Germann Naval Museum in Bremerhaven... WOW... I knew about the qualitiy of museum models... But when you see them... well... respect.The work on my Royal Caroline will go on next week...
Wish you all the very best
Cheerio
Max
-
Hey Joe
you are doing a beautiful and perfect work on your model. I think it is a challenge - but satisfying - when you got the AOTS and then you want to come as close as possible. I bought me the AOTS Endeavour and will try to improve my build. It is not yet time for the bark as I am still thinking about what kit to buy. At the moment the Caldercraft kit is my favorite. EDndeavour could be the next or the following project. Depends if I get a Derfflinger...
Best wishes and compliments to you
Cheerio
Max
-
-
Hi David
very very well done build on the Victory. And I like the case too... I got one just with acrylic glass and no wooden bars. I admit that your case looks very much better. For my Caroline I think I will also look for this kind of case...
Cheerio my friend
Max
-
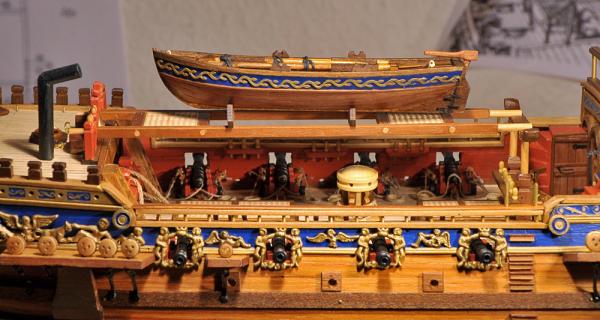
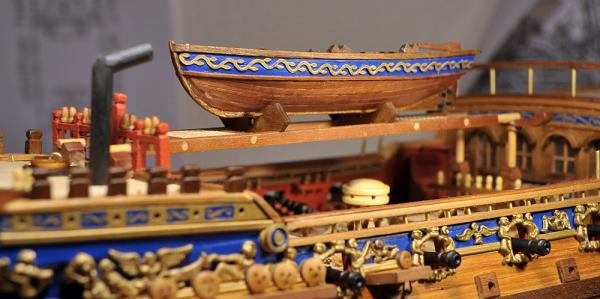
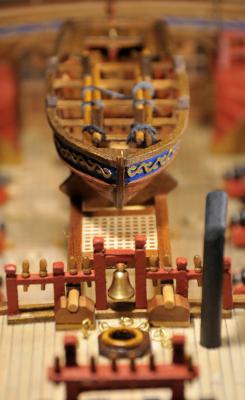
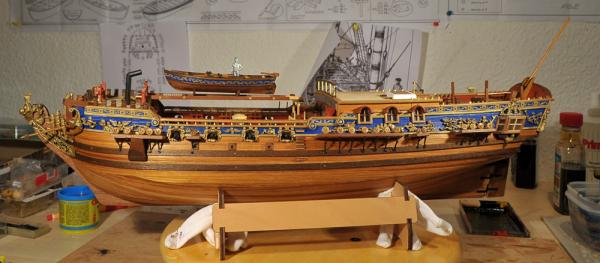
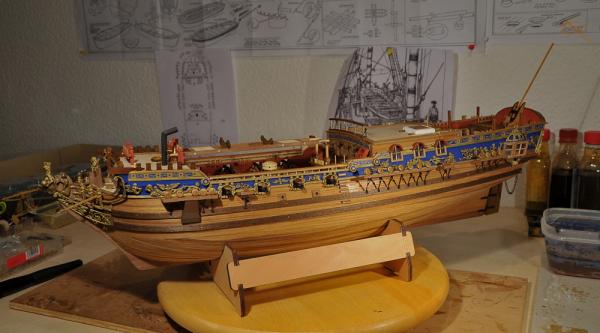
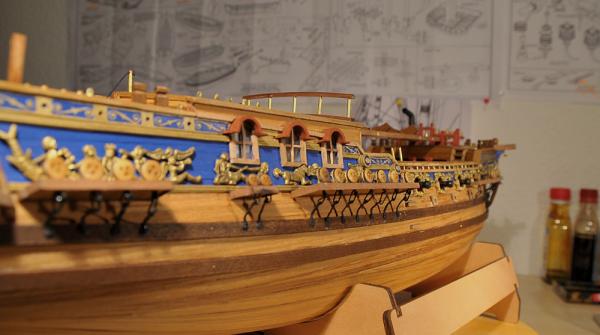
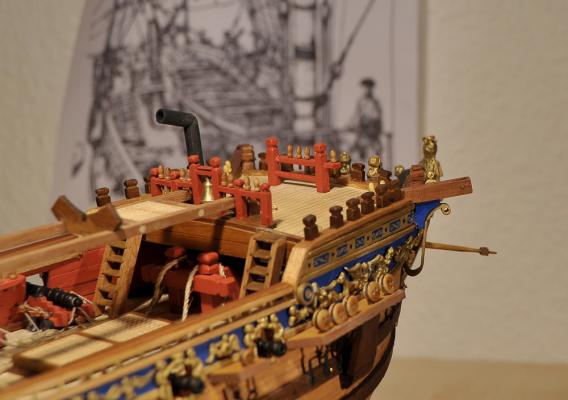
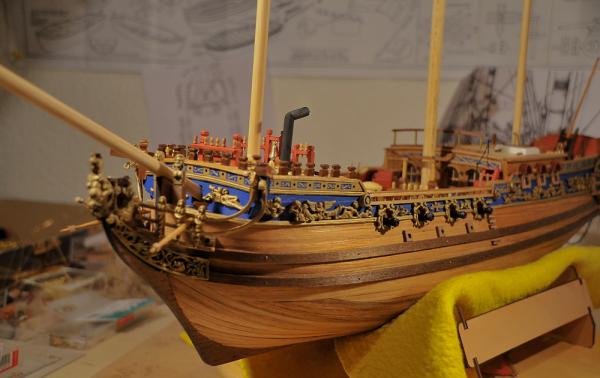
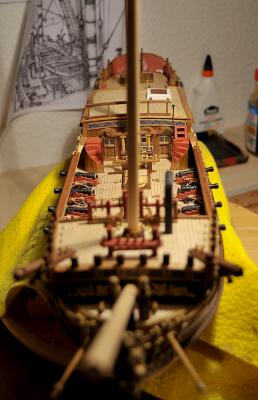
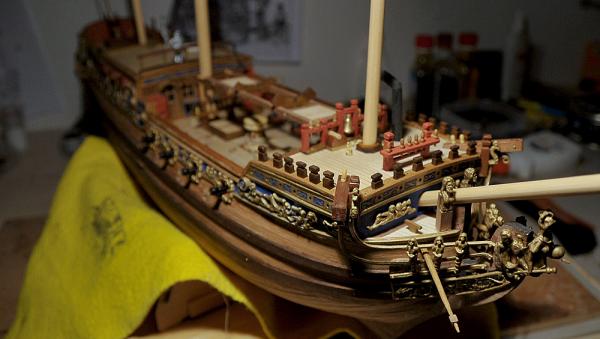
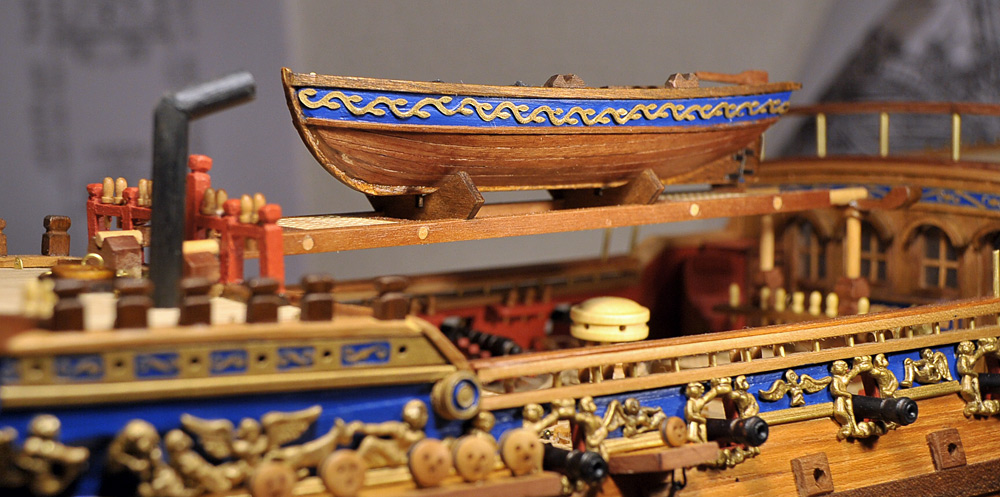
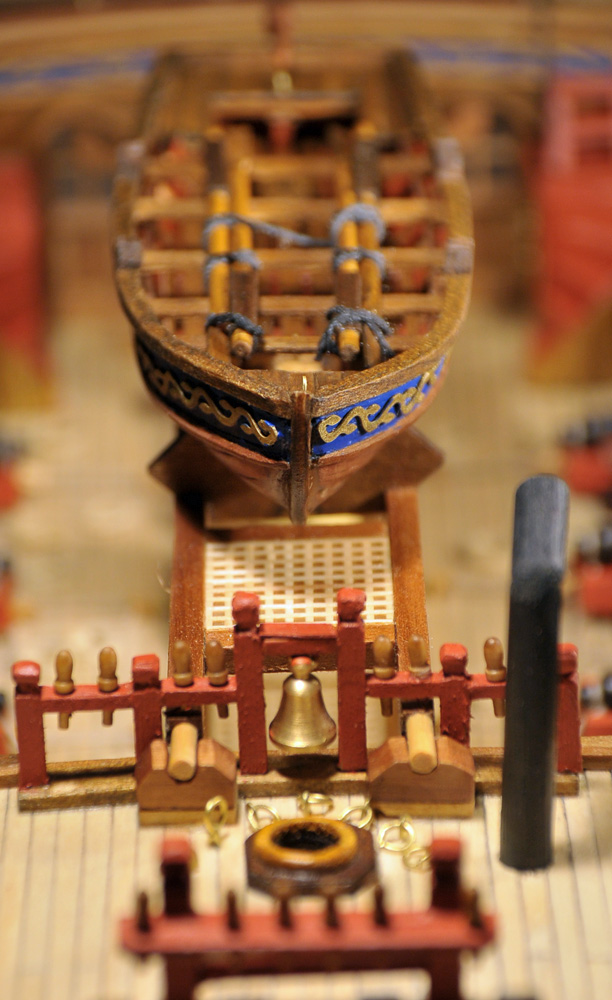
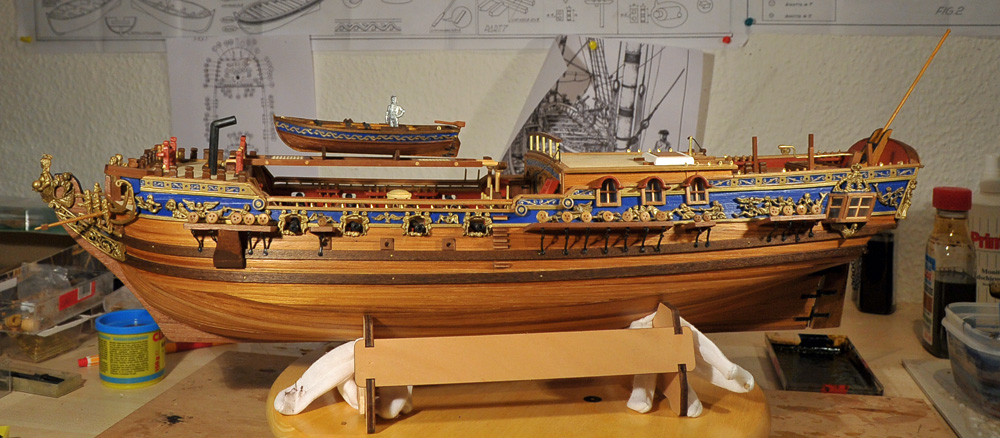
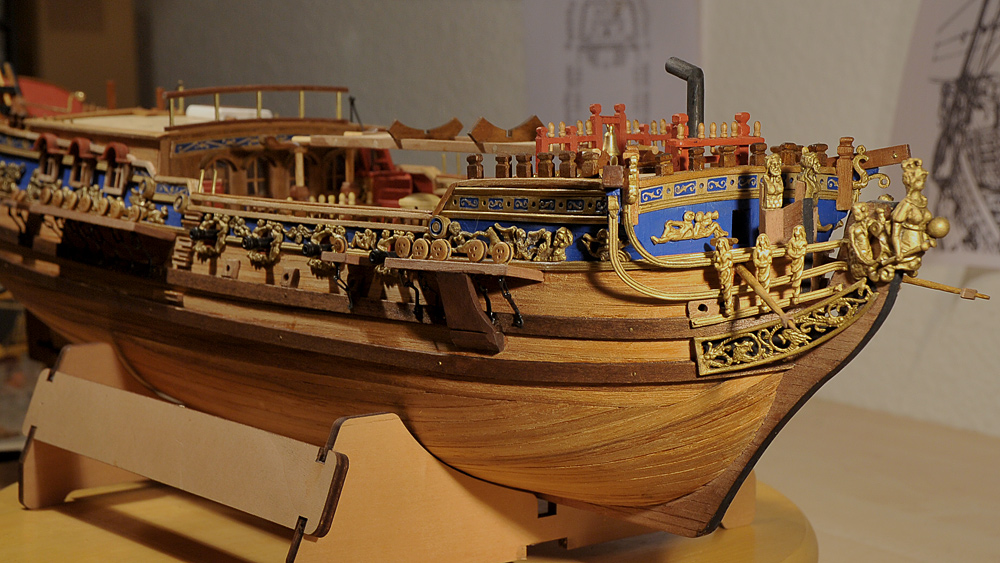
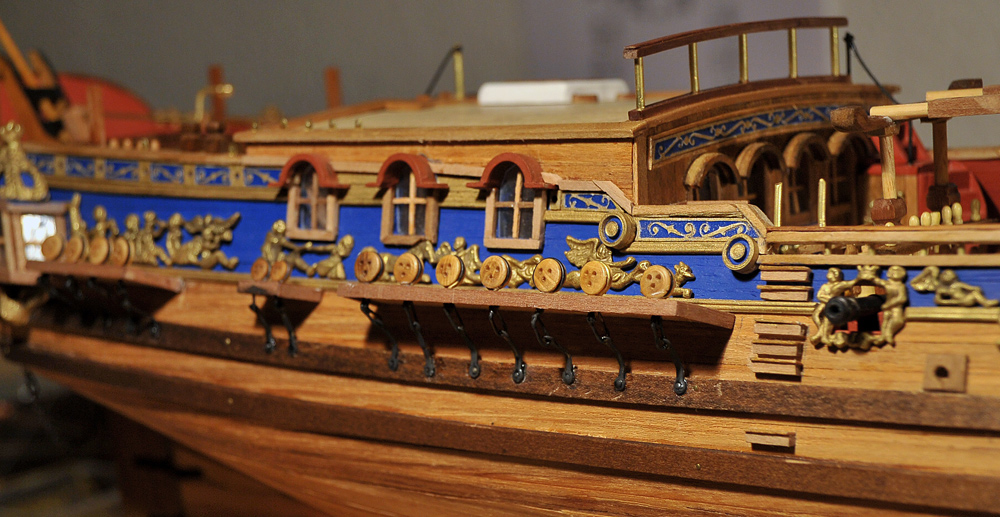
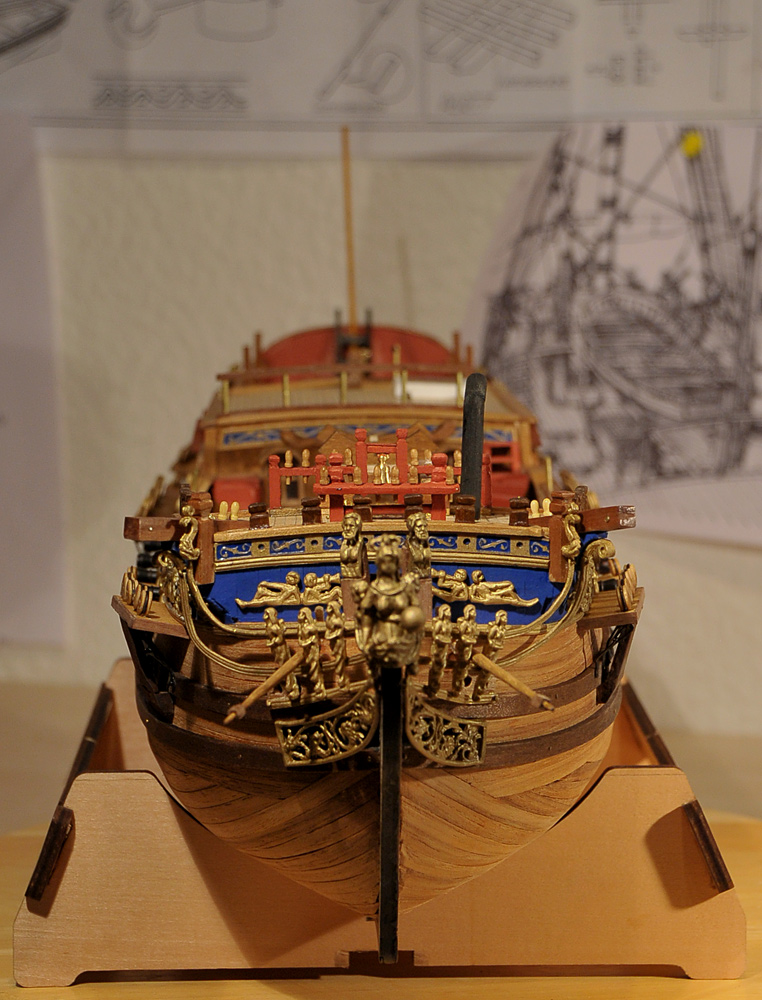
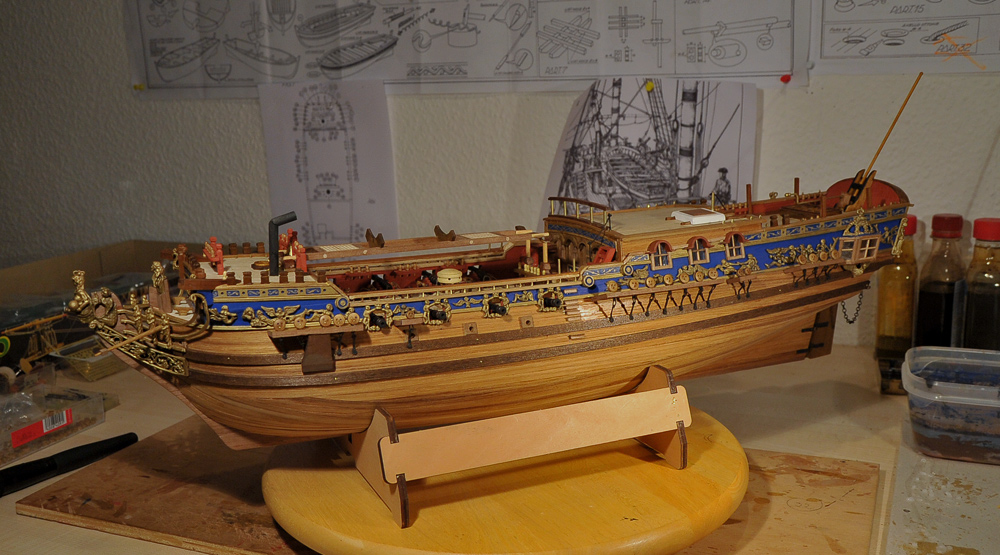
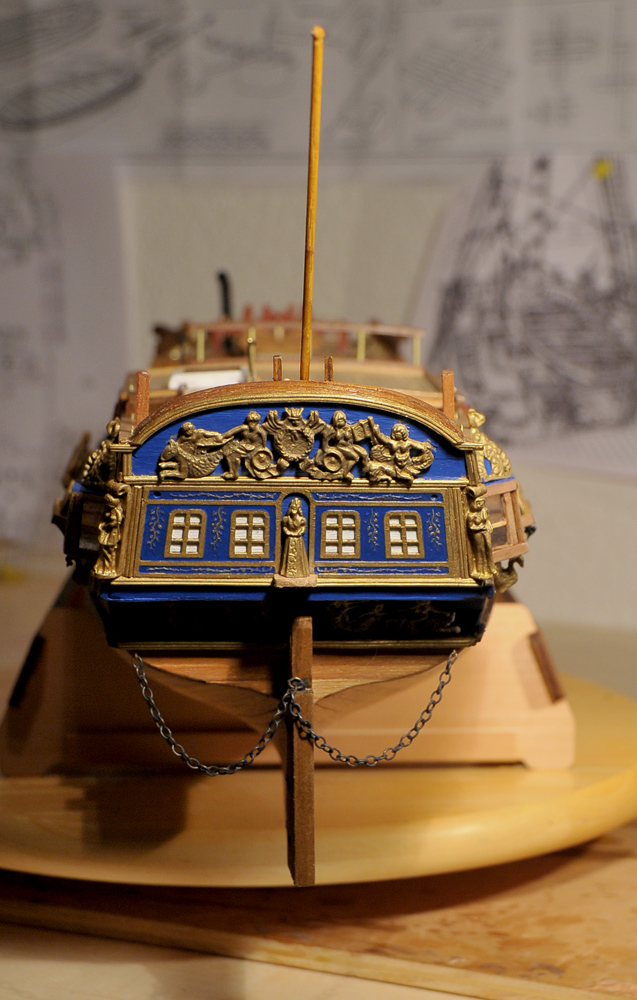
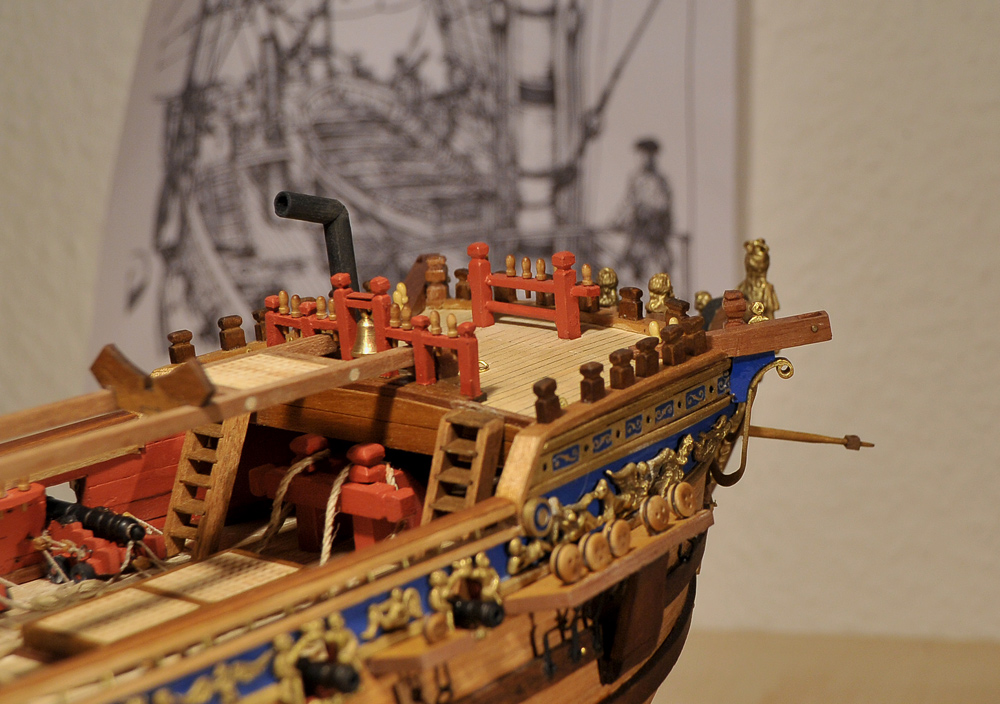
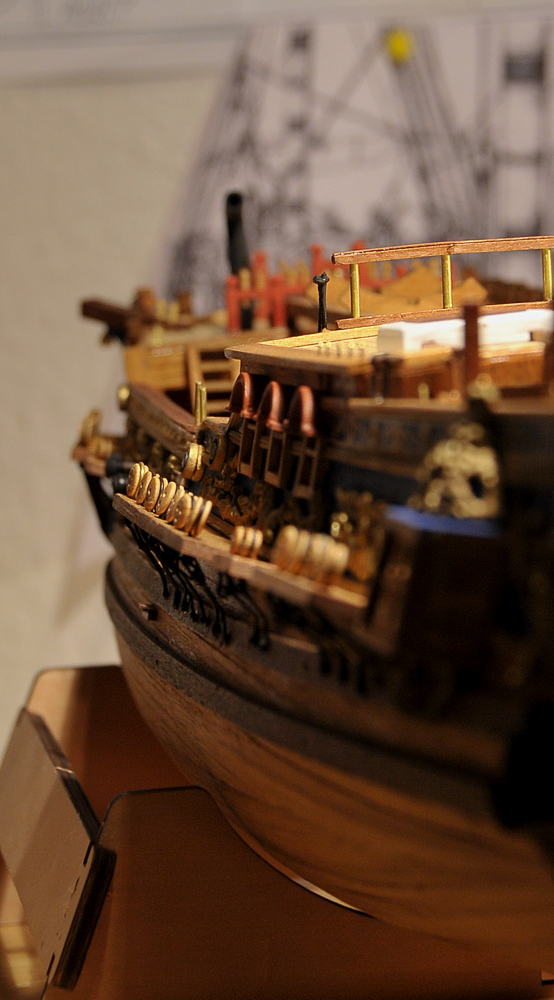
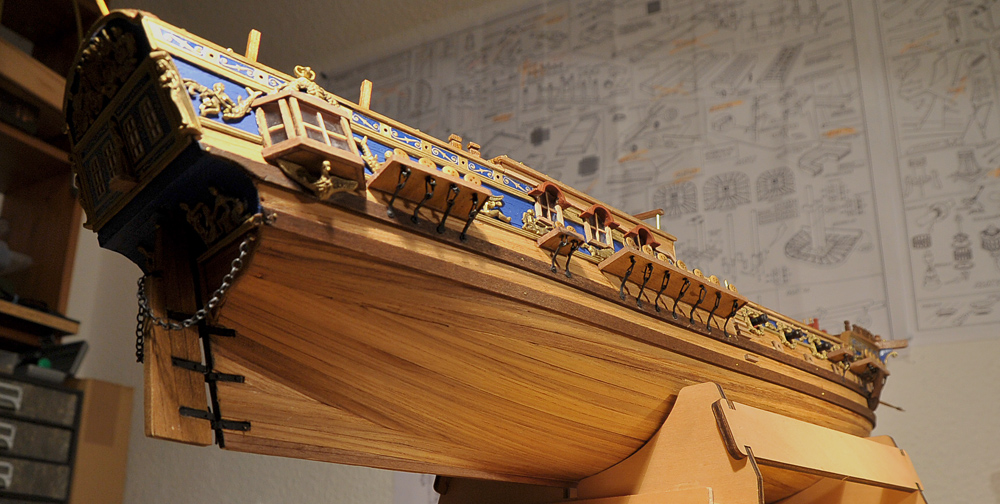
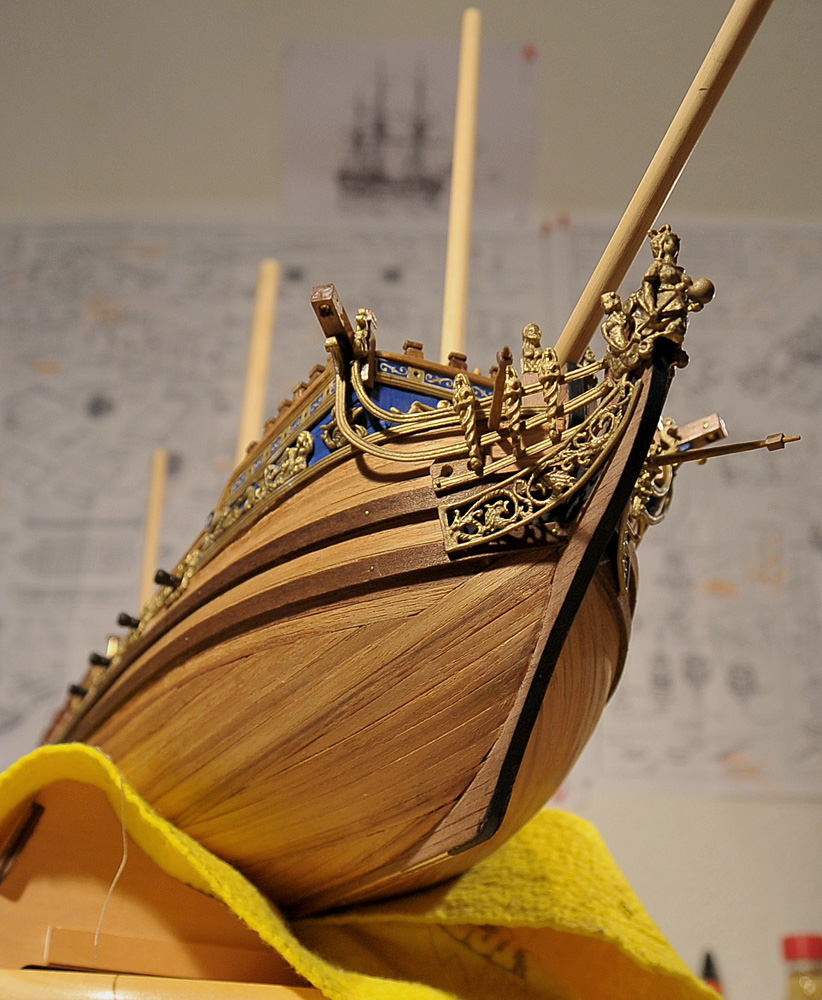
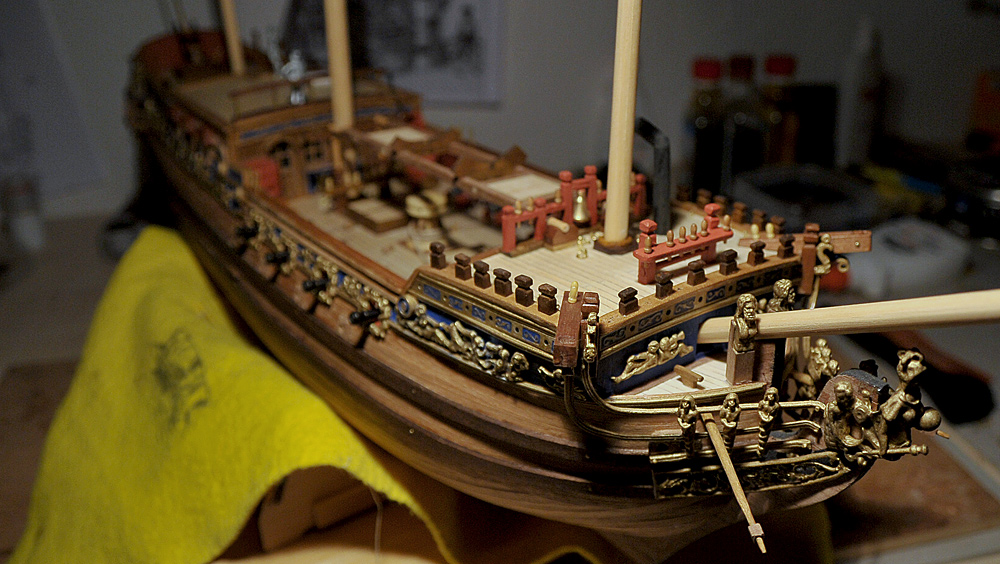
Cheerio mates and friends and modellers
today it is time for a update with some pics. At least I have finished the hull right now. I have to spray some colorless semigloss varnish onto the surface, but this is a work to be done soon. You will probably miss the anchors and the lamps - but both are to be installed to the very end of the build - before the flags
The boat and the masts are now to be done.
I started this log almost six month ago - and I really spent a lot of time in my shipyard (you can ask the Admiral
). But there was not one single minute of boredom around. I love the ship and I love to improve my techniques and to increase my expierence.So please enjoy the pics and dont hesitate to comment what you see.
Cheerio
Max


- Landlubber Mike, jwvolz, janos and 13 others
-
16
-
Hi Andy
great idea with the windows - really. Seems to have a very close to the reality-Impression. Looking forward to see the windows installed.
Cheerio
Max
-
Hi Chris,
welcome aboard
The Half Moon was my first build too. I enjoyed the about 5 mths to build her up.Cheerio
Max
-
Hi all...
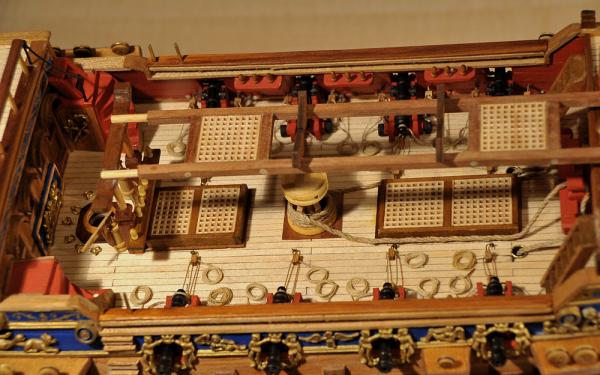
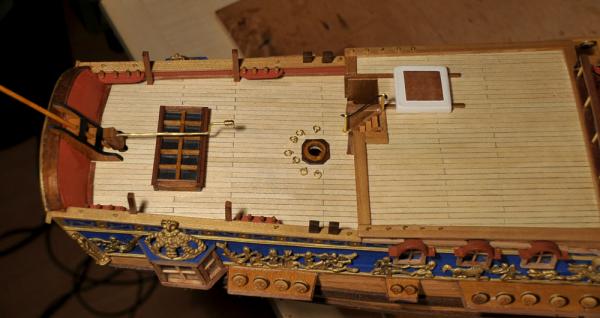
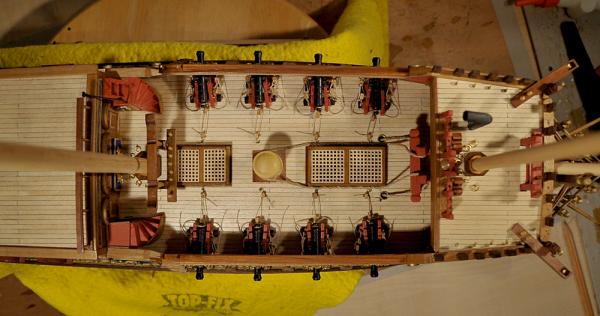
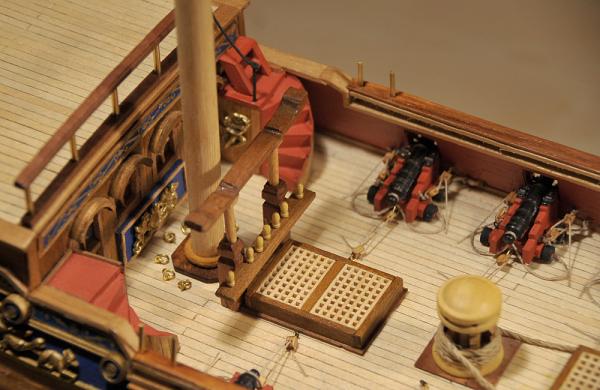
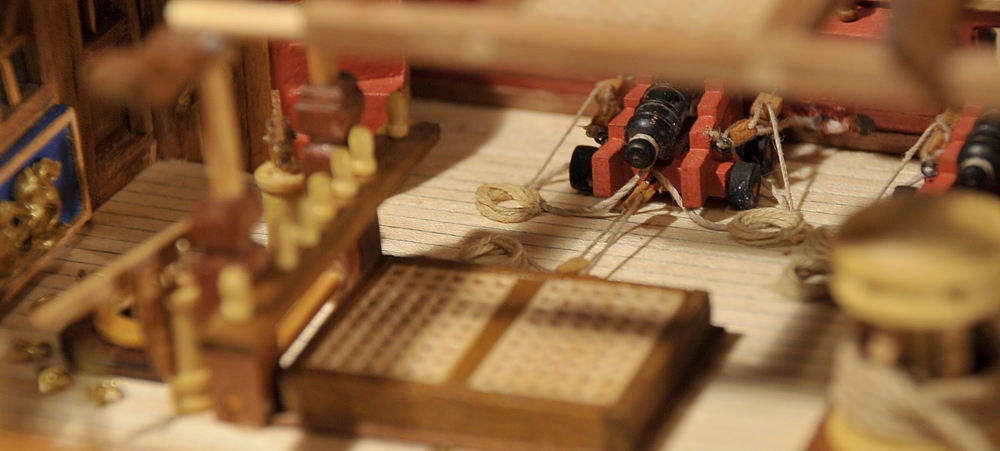
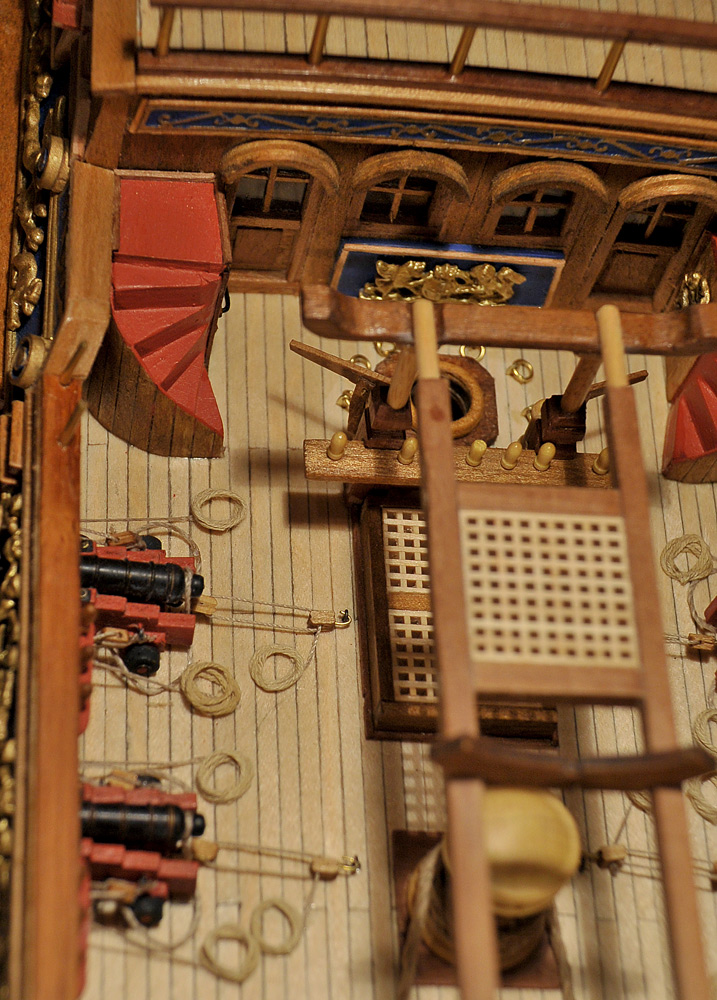
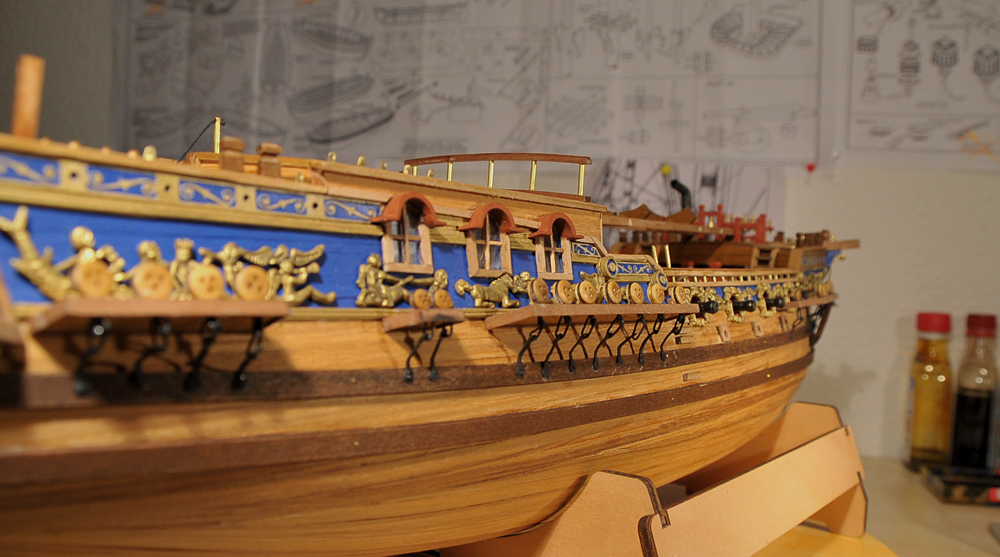
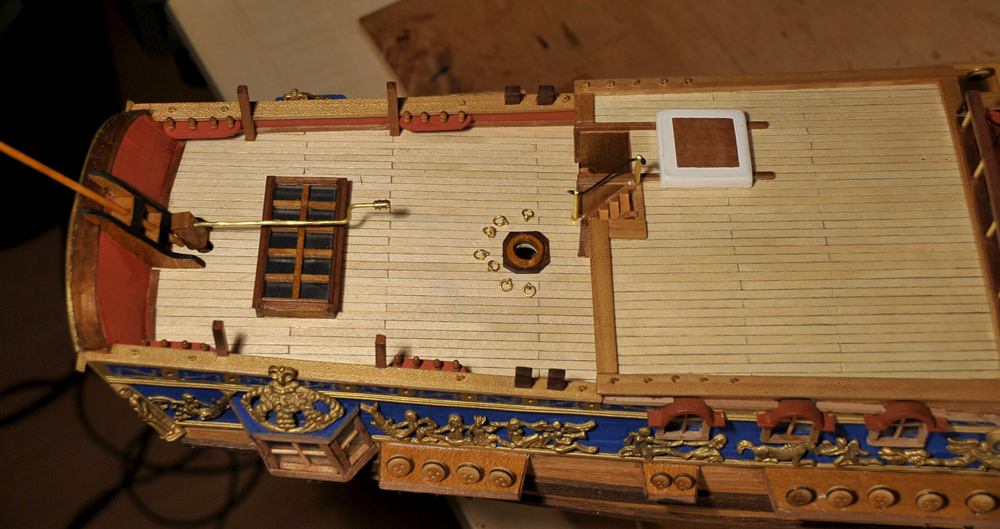
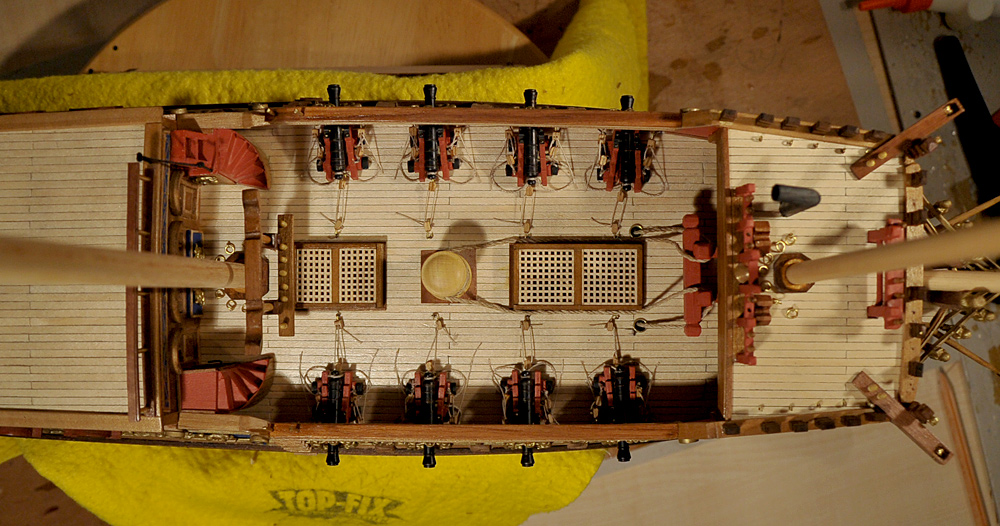
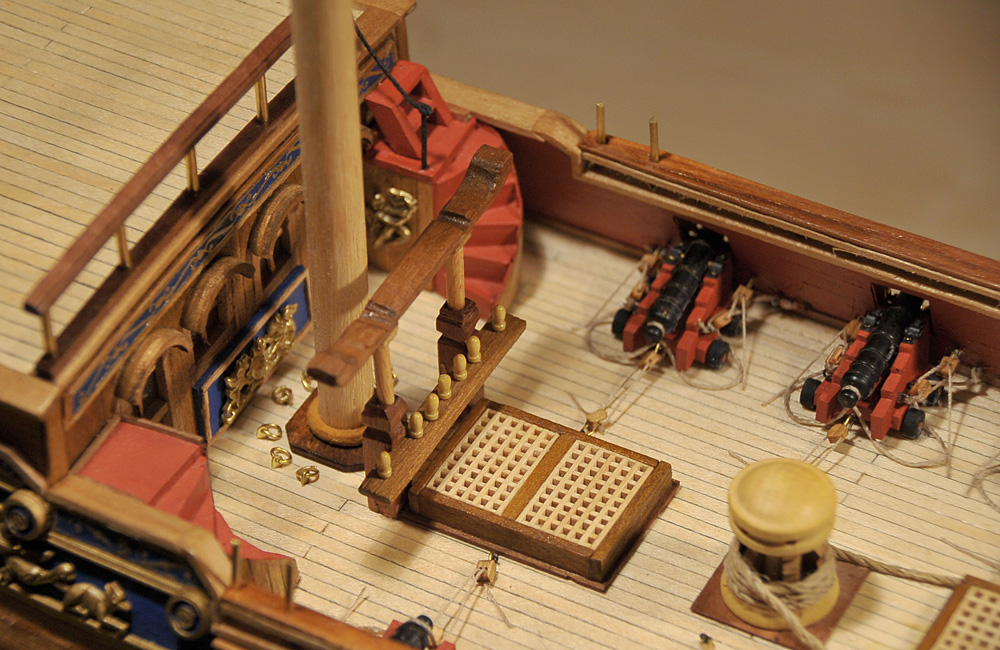
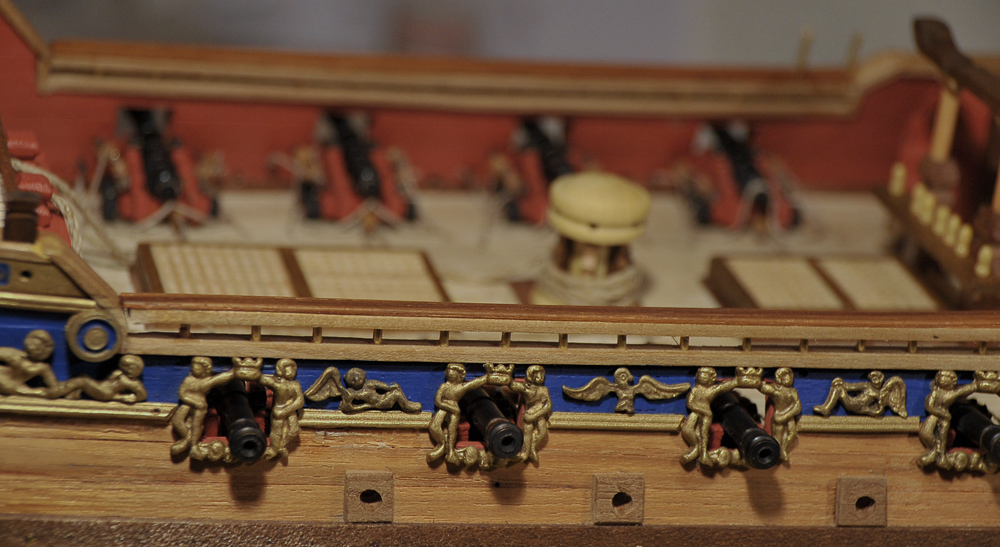
thx my friends for your likes and your kind comments. Indeed I myself am quite pleased with the result so far. Today I have re-done some of the guns rigging as I was not satisfied with it - it was for three cannons. Now they all look quite good. I am grateful for all the hints I found on MSW forums to create a correct rigging as Panart does not provide a rigging plan for the cannons. But I had to do it as in a scale of 1:47 there HAS TO BE a rinning. Now that I am ready I think I should have used 2mm-blocks instead of 3mm (as I did). But there are no 2mm-double-hole-blocks. Its a compromise, but I think it is ok.
Now the next steps are the rest of all the decks furniture as stairways, belaying pin-boards etc. Then I will try to find a way to fit the chainplates and teh dead-eyes. When this all is finished I will cover the entire hull and deck with semigloss lacquer.
Then I have to build the boat, and after this the work with masts, yards and rigging will start.
CU soon, pics will follow when I have done the chainplates
Cheerio
Max
-
-
-
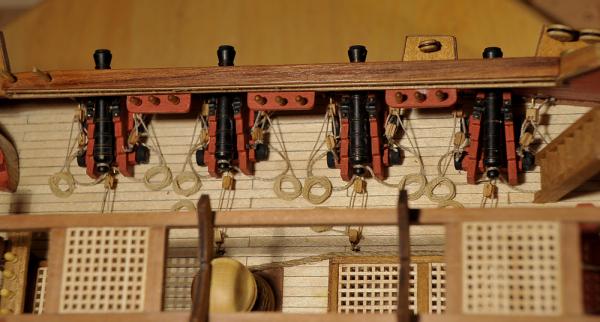
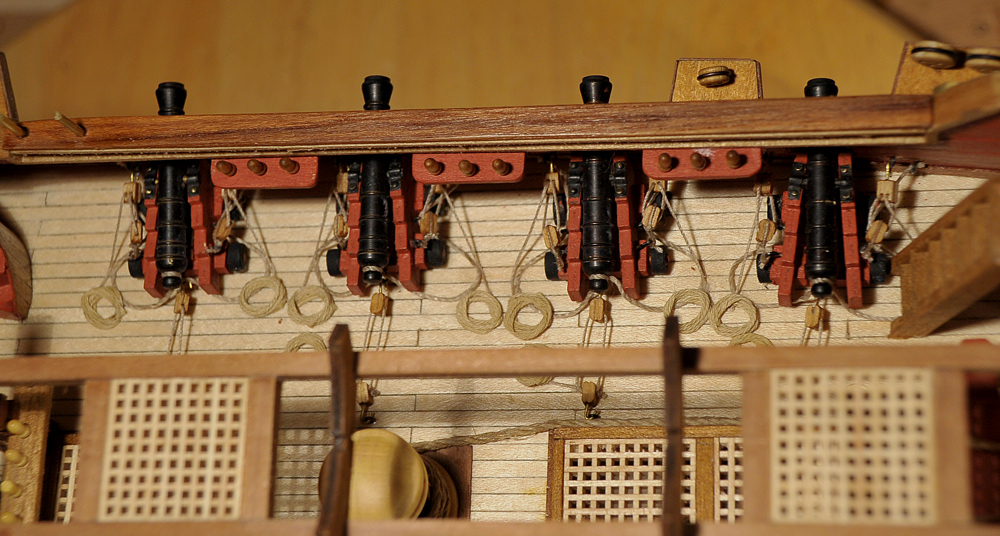
Hi all my mates and friends
Ist time for a update. I did the cannon rigging completely, but I think I will have to redo some of them guns. I am not satisfied with all rigging so perhaps two or three ropes well be renewed. But all in all I say - for the first time with no instructions within the instruction sheet in the kit it Looks quite good. Thew next time I have some expierence and can avoid mistakes that happend now.
Next will be to install the stairs to the foredeck, the pumps and to cover the hull with semi-gloss lacquer. With my first build, the Half Moon, I use ordinary stuff from the DIY-market and was very very satisfied. So I will not Change the procedure for the Caroline. This I will do agftere the Weekend ( I will spend my weekend with my father in Switzerland).
CU all - and as always: Comments are welcome.
Thx to all for all the fantastic "likes" I get
:D Cheerio
Max


- edmay, popeye the sailor, jwvolz and 9 others
-
12
-
-
Hi Denis,
this tool-Thing sounds quite perfect. Do you have any link to the machine? I dont know if in Germany any similar tool can be found, bit with a Picture or description I can perhaps find a way. I am always a Little bit angry when the cuts dont get into a real perfect shape...
Thx
Cheerio
Max
-
Very nice work Mike - Chapeau.
You should spend her a case to prevent the beauty from dirty old ugly dust
Cheerio
Max
- Mike Dowling and Eddie
-
2


HMY Royal Caroline by maggsl_01 - FINISHED - Panart - 1:47
in - Kit build logs for subjects built from 1501 - 1750
Posted
Hi my friends
thx for your words ... I do appriciate this :D
:D
@schnu - they do so much by Proxxon, make sure to visit their online-catalogue... Its a treasure for every modeller
Cheerio
Max