HOLIDAY DONATION DRIVE - SUPPORT MSW - DO YOUR PART TO KEEP THIS GREAT FORUM GOING! (Only 13 donations so far - C'mon guys!)
×


pete48
-
Posts
2,132 -
Joined
-
Last visited
Content Type
Profiles
Forums
Gallery
Events
Everything posted by pete48
-
 I had not worked on this one for a while, so I thought I would set up to do the Hull graphics, and realized that I had some small gaps primarily where the Hull and Deck come together and mostly where the planks converge at the Transom. So I made up some filler, using sawdust and titebond 3, I then applied it on the gaps, Sandedup to 600 grit (once dried) and applied another coat of Flat white , Now I can set up for the Hull graphics . Here are the results


- 147 replies
-
- 13
-

-
I would like to thank everyone for all the likes , Thank you Mark, The Teak was something that I have wanted to add to my builds , and it set her off rather nicely Thank you Piet, A 1:1 build would be nice , I have not done a 1:1 build in quite some time , hopefully in the future I will be able to do one Thanks Patrick,, The teak definitely made the Cockpit pop , Herreshoff designs ( I am not telling you anything new) just have that beauty thats all their own , I still have to tune up the bottom paint. Best Regards, Pete
- 77 replies
-
- 3
-
-
- alerion
- herreshoff
- (and 1 more)
-
First off, I would like to thank Michael Mott, for the Teak that he had sent me, I started by using the teak for making the Cockpit seats ( you can't beat Teak ) I then turned my attention to the Toe rails and rub rails. once installed I stained them a cherry red along with the Cabin top . Next will be to start making the Spars and fittings , Almost on the Downwind leg on this build. Here are the results
- 77 replies
-
- 11
-
-
- alerion
- herreshoff
- (and 1 more)
-
Thank you Mark, I greatly appreciate it , she has been a pleasure to build thus far Best Regards, Pete
- 77 replies
-
- 1
-
-
- alerion
- herreshoff
- (and 1 more)
-
Thank you Ben, there is plenty of this build left, so go ahead and pull up a chair Best Regards, Pete
- 77 replies
-
- 2
-
-
- alerion
- herreshoff
- (and 1 more)
-
Thank you John, I was hoping to capture that elegance/grace that makes these boats so beautiful Best Regards, Pete
- 77 replies
-
- 3
-
-
- alerion
- herreshoff
- (and 1 more)
-
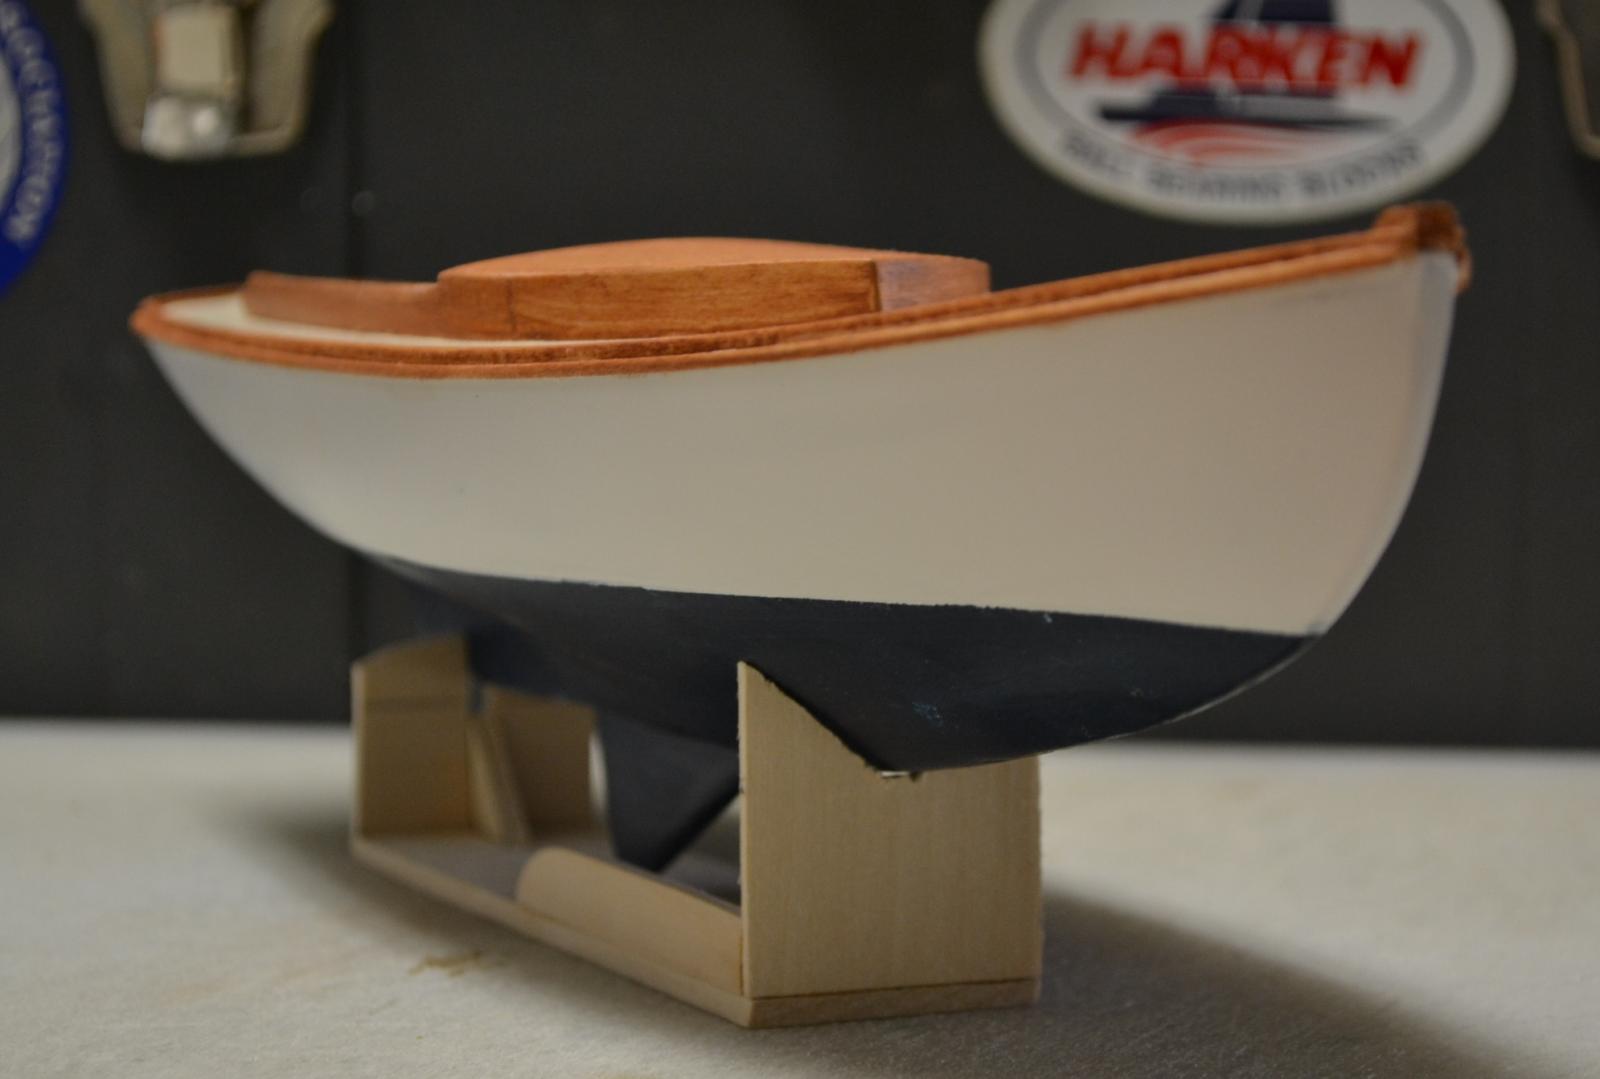
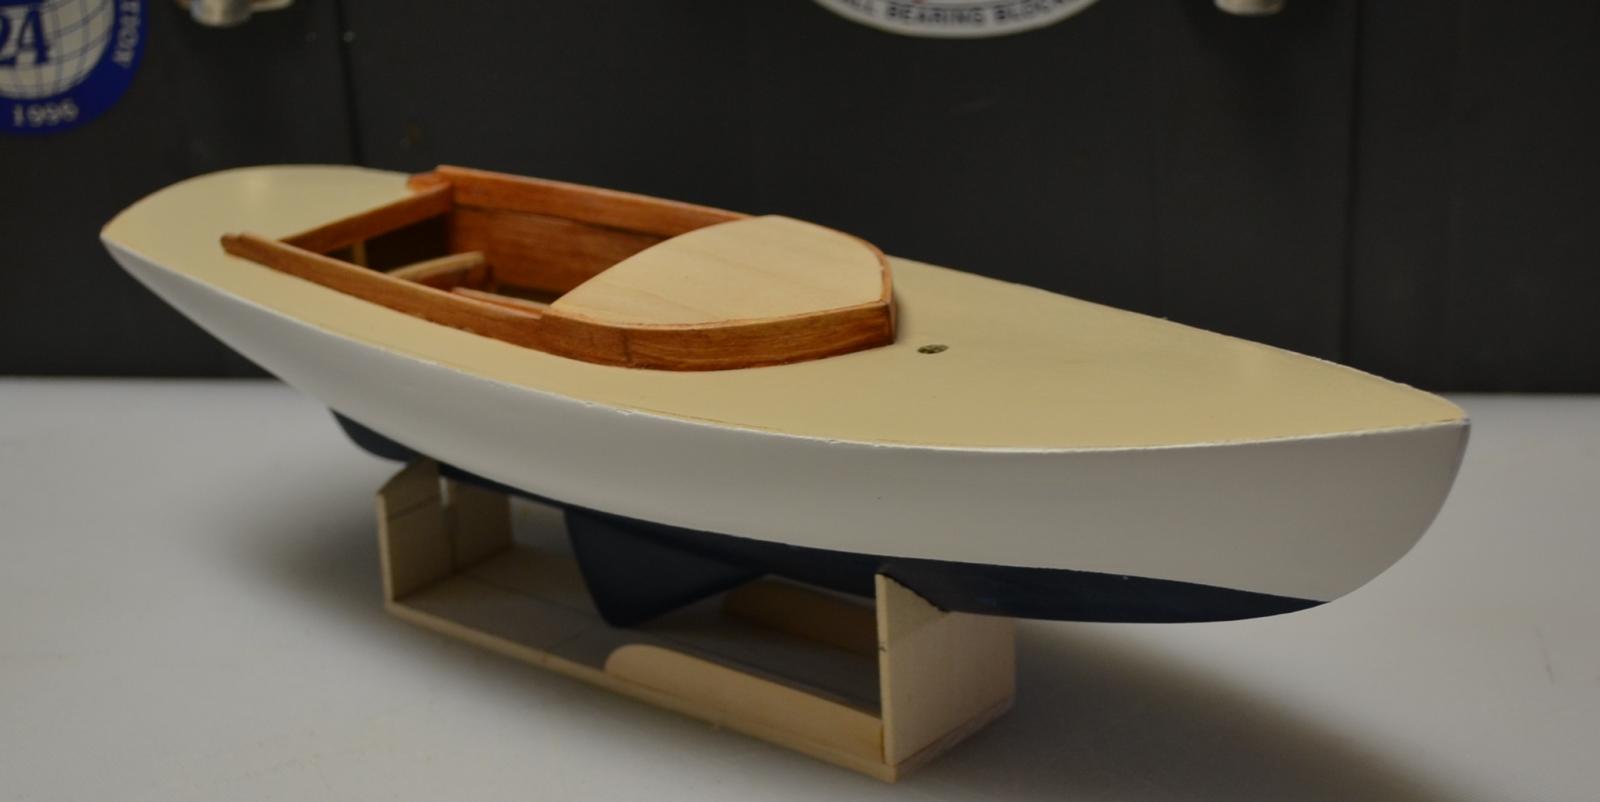
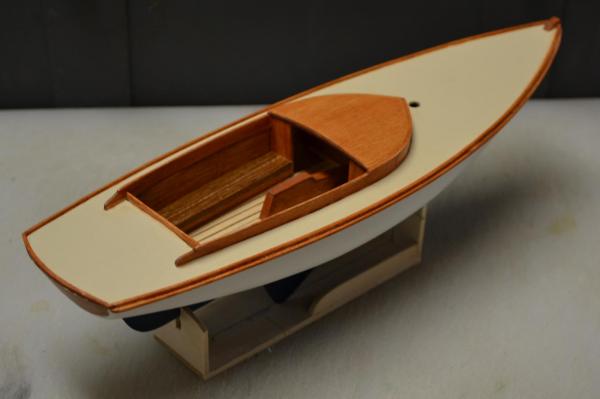
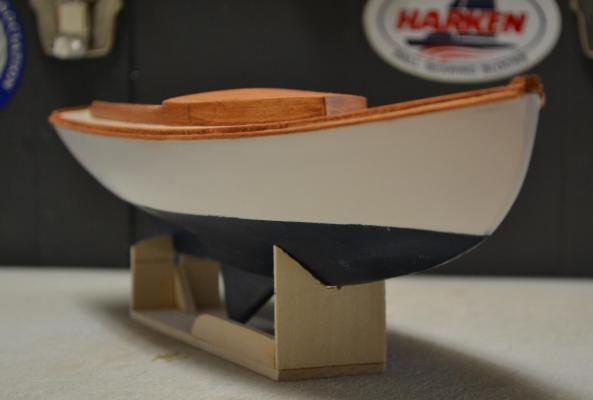
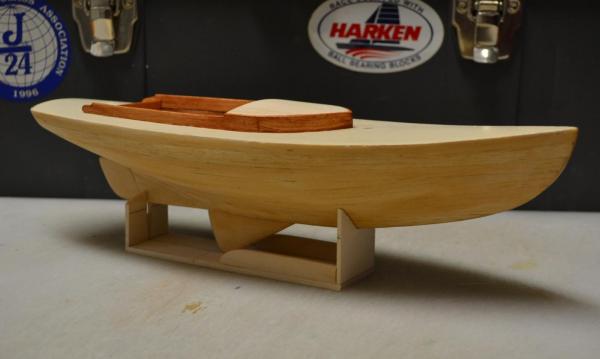
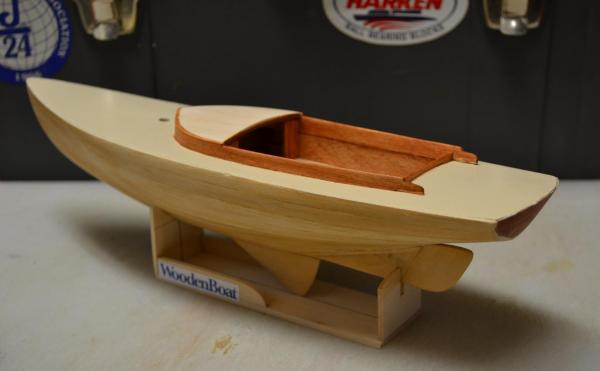
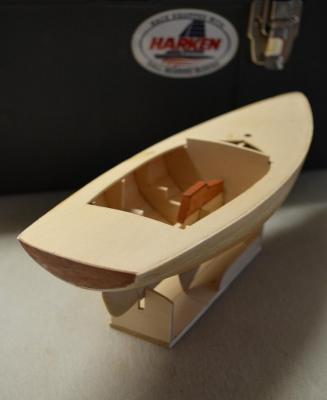
Today, I was able to complete the Hull Painting , It took 2 coats of flat white, with a base coat.( 3 total ) I will need to touch up the Bottom ( Anti-fouling) Paint. I just unmasked her and here are the results


- 77 replies
-
- 12
-
-
- alerion
- herreshoff
- (and 1 more)
-
Hi Igor, Nice work on the sails , they look great Best Regards, Pete
- 154 replies
-
- 1
-
-
- colin archer
- lifeboat
- (and 2 more)
-
Nice work Nils, Shes looking really good Best Regards, Pete
- 2,625 replies
-
- 1
-
-
- kaiser wilhelm der grosse
- passenger steamer
- (and 1 more)
-
Thanks Jay, I found that the longer that I let the pieces soak ( wood that needs to be bent) The easier it is to bend Thanks Patrick, I am pleased with how she is turning out Best Regards, Pete
- 77 replies
-
- 2
-
-
- alerion
- herreshoff
- (and 1 more)
-
Thanks Jay, I generally like to let the wood soak 3 hours and then I start bending ( Bent Coamings can be tricky so the longer I let them soak the easier they bend ) Best Regards, Pete
- 77 replies
-
- 1
-
-
- alerion
- herreshoff
- (and 1 more)
-
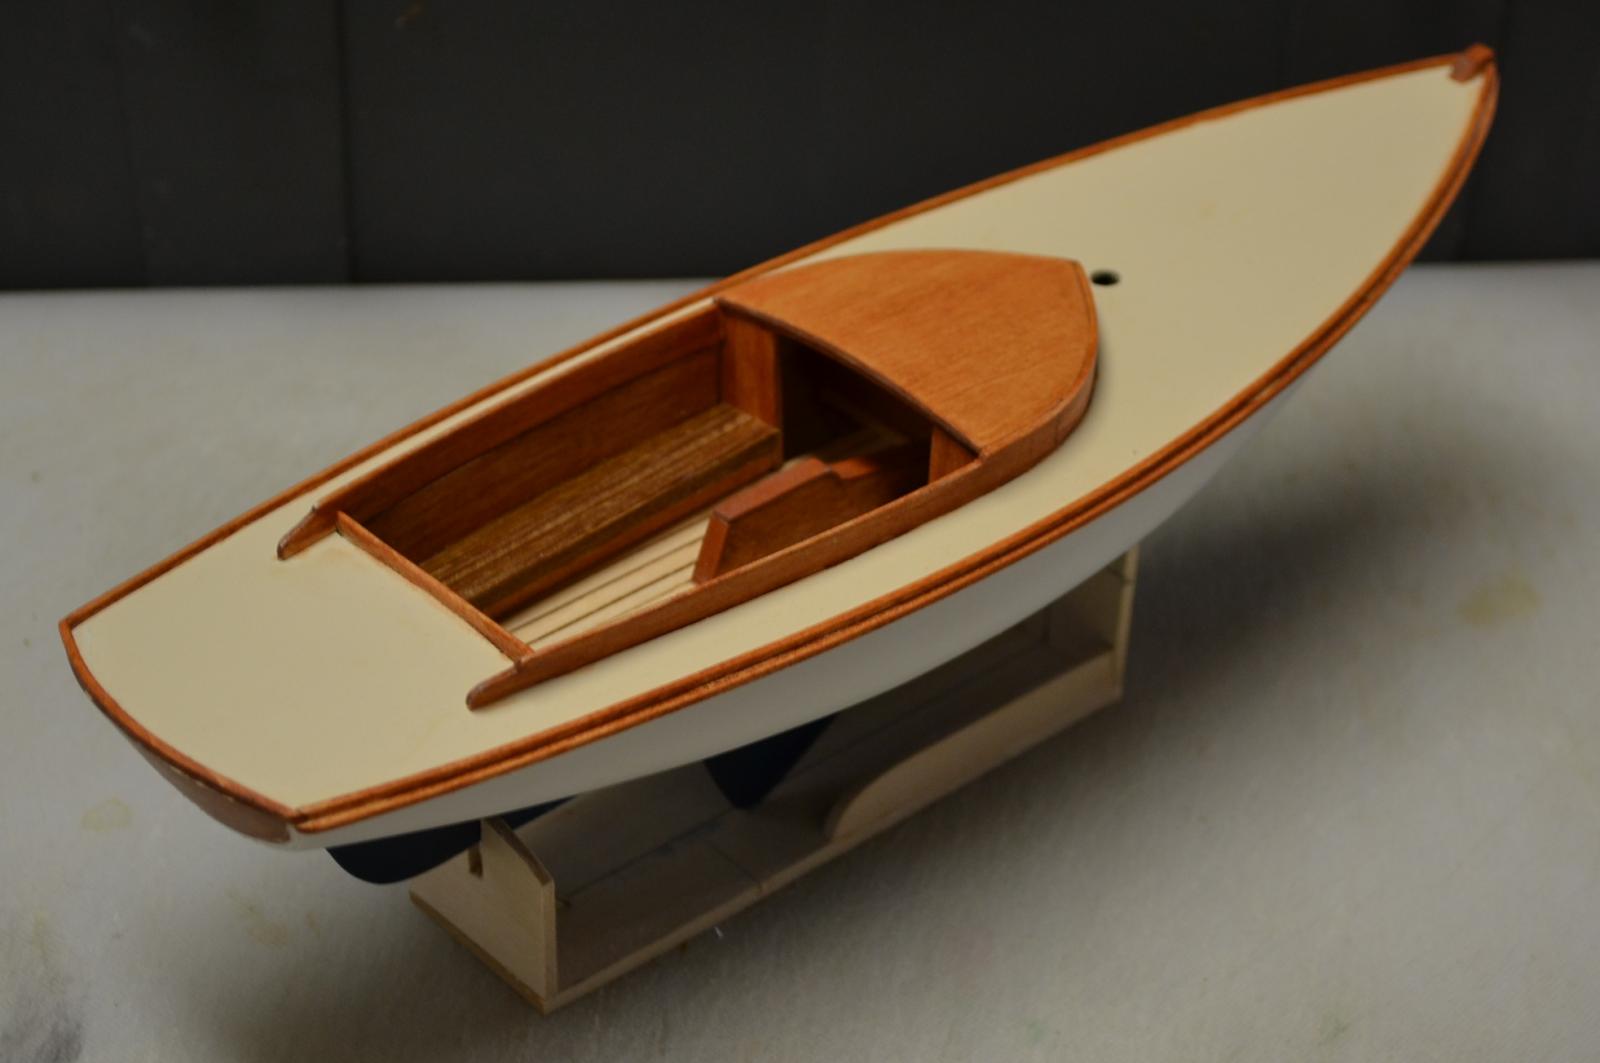
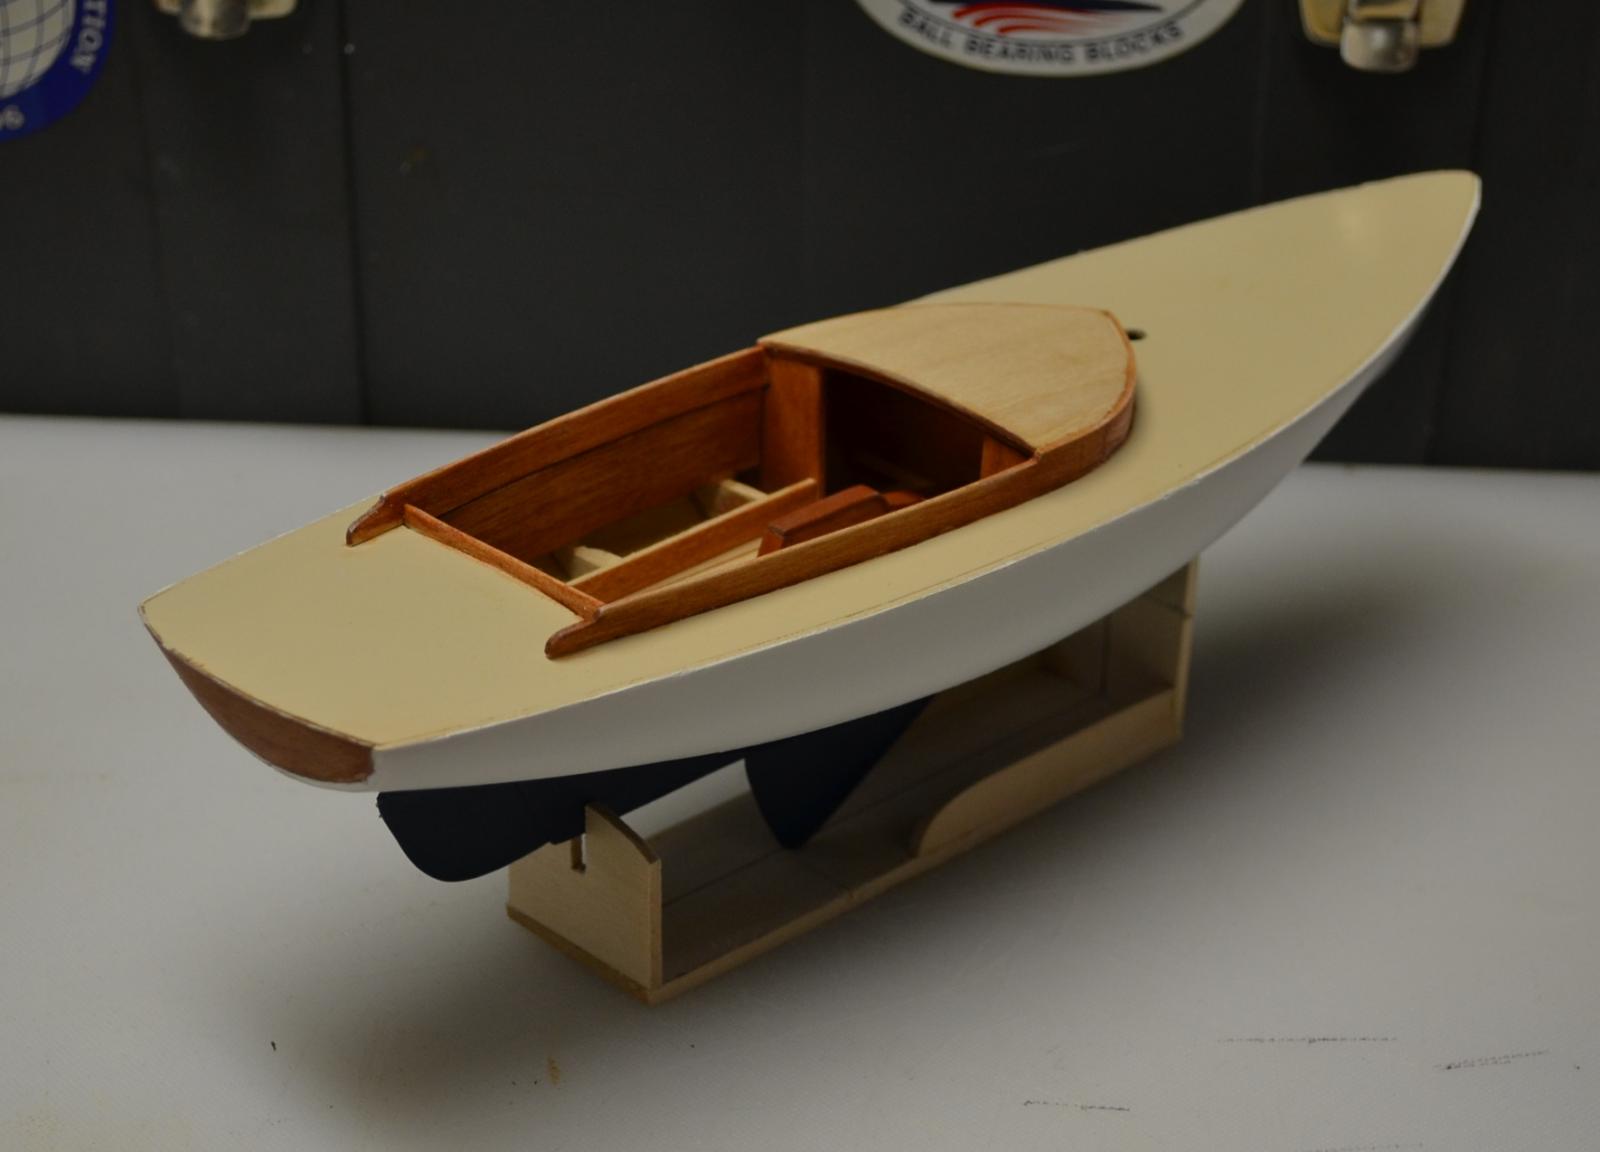
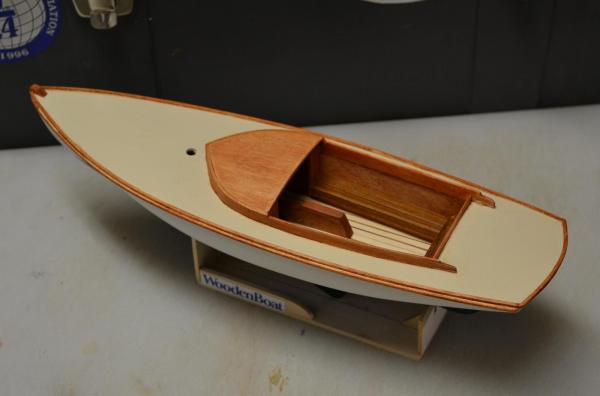
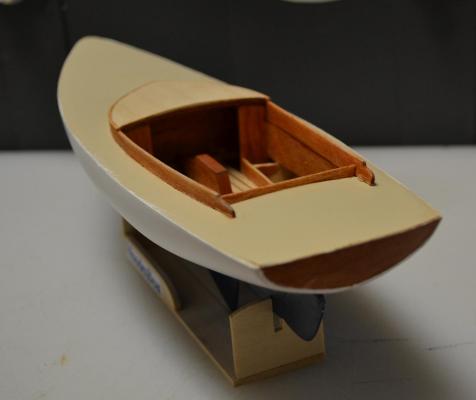
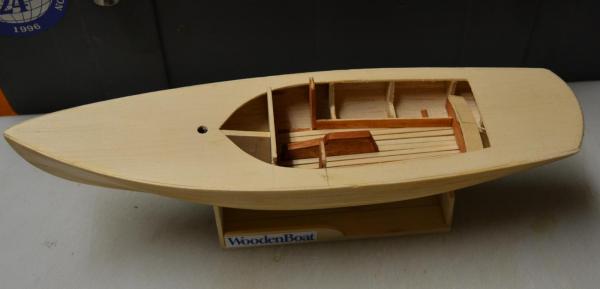
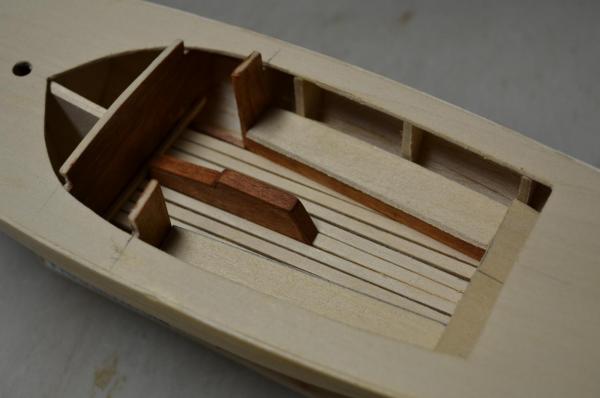
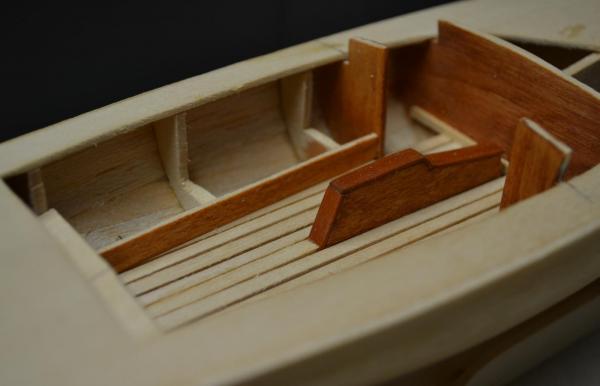
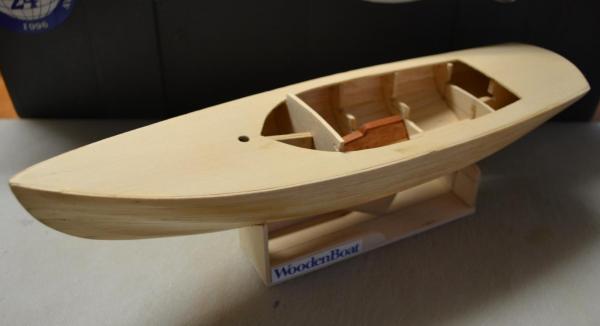
A busy day today, I started by making the seat backs ,and installed them. I then cut out the Cockpit coamings and put them in rubbing alcohol. I then painted the Deck a sand color, next (after roughly 3 hours ) I bent the Coamings . I then sanded them to 600 grit and installed them. I then made the Cabin top sanded and installed it. I then made the aft cockpit coaming sanded and installed. I finished up by staining the coamings and seat backs a cherry red. The seats have not been glued in yet ( I have not decided weather to paint them white or stain them ) Next will be to get the Hull painted ( white with blue antifouling paint ) Here are the results
- 77 replies
-
- 7
-
-
- alerion
- herreshoff
- (and 1 more)
-
Thank you Nils, I appreciate the vote of Confidence , I currently have 8 boats ( models ) I have been selling them on Ebay, so that I can build more, there are quite a few Boats that I would like to build . Best Regards, Pete
- 77 replies
-
- 1
-
-
- alerion
- herreshoff
- (and 1 more)
-
Thank you John, I am happy with how the stain turned out Thanks Patrick, She's going together rather smoothly, this has been one of those builds that just fall into place Thanks Cap'n'Bob, she's getting there , I am pleased with how the Cockpit is turning out Best Regards, Pete
- 77 replies
-
- 1
-
-
- alerion
- herreshoff
- (and 1 more)
-
She's looking good Patrick, I have had similar problems with flat paints . I have had to sand them back down and start over. Nice job on the oval cabin ( they can be tricky ) Best Regards, Pete
-
Hello Bob, I concur with everyone else , Glad to see you back at it and she's looking Good Best Regards, Pete
-
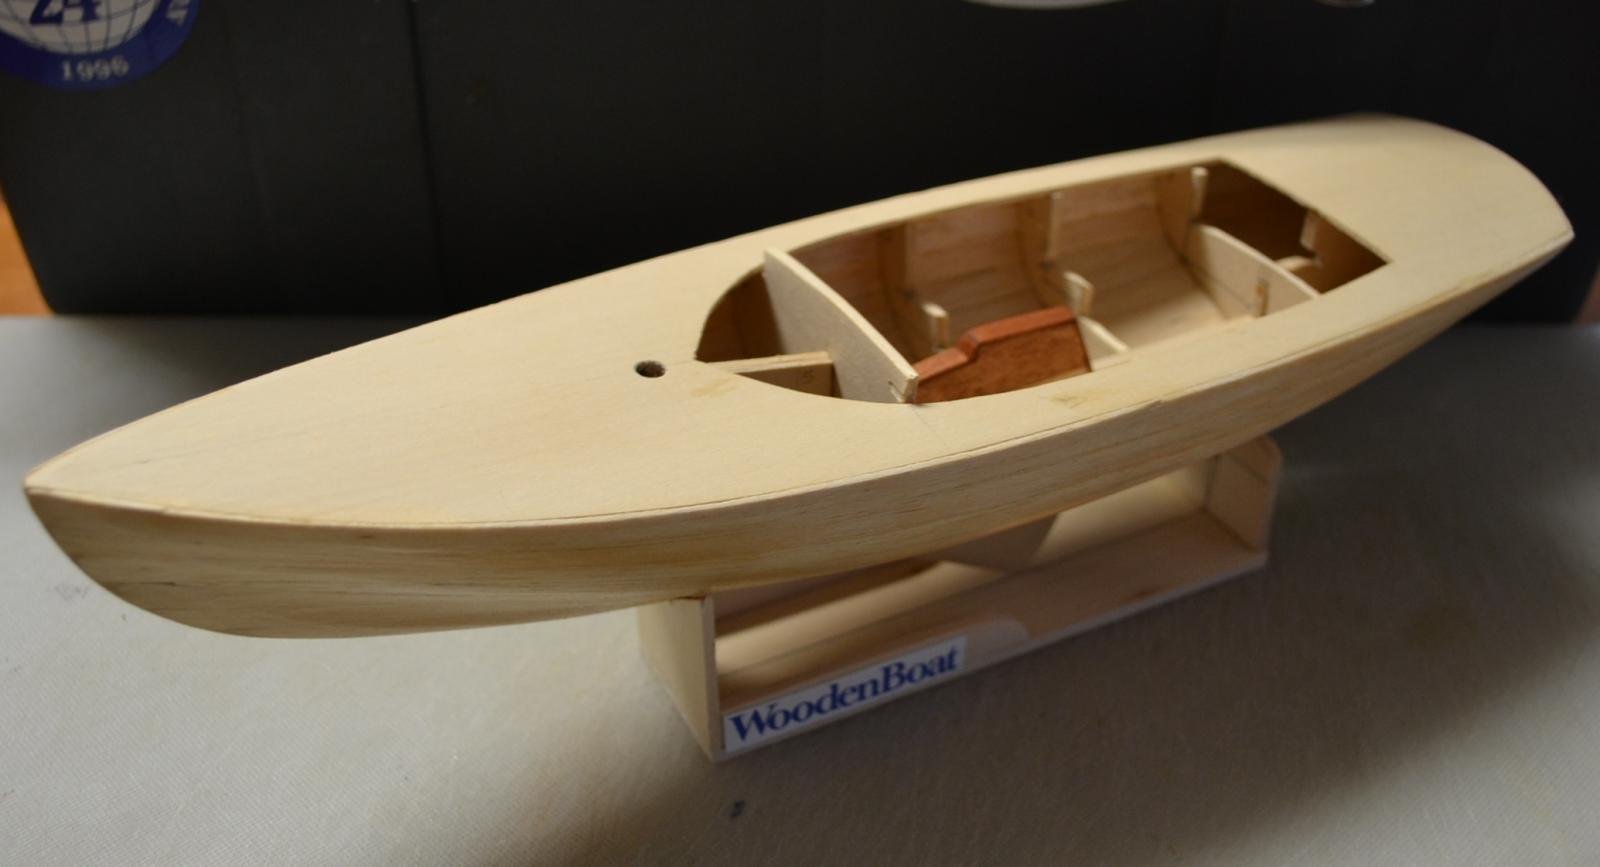
Today, (with the bad weather we currently have ) I concentrated on getting the Cockpit put together. I started by cutting strips for the Cockpit Floor. I then cut them to length and sanded them to 400 grit ( I will put a coat of varnish on them ) I then made the bulkhead sides that make up the face of the Cuddy cabin. I sanded them to 400 grit and stained them Cherry red along with the seat bases and aft cockpit bulkhead. ( wich has a piece of Birch ply on it ) Once the parts were made up I started by gluing the Cabin bulkheads in followed by the Cockpit Floor. I cut out the cockpit seats ( they have not been glued in at this point) Next will be to make up the seat backs and Cockpit coamings . Here are the results

- 77 replies
-
- 8
-
-
- alerion
- herreshoff
- (and 1 more)
-
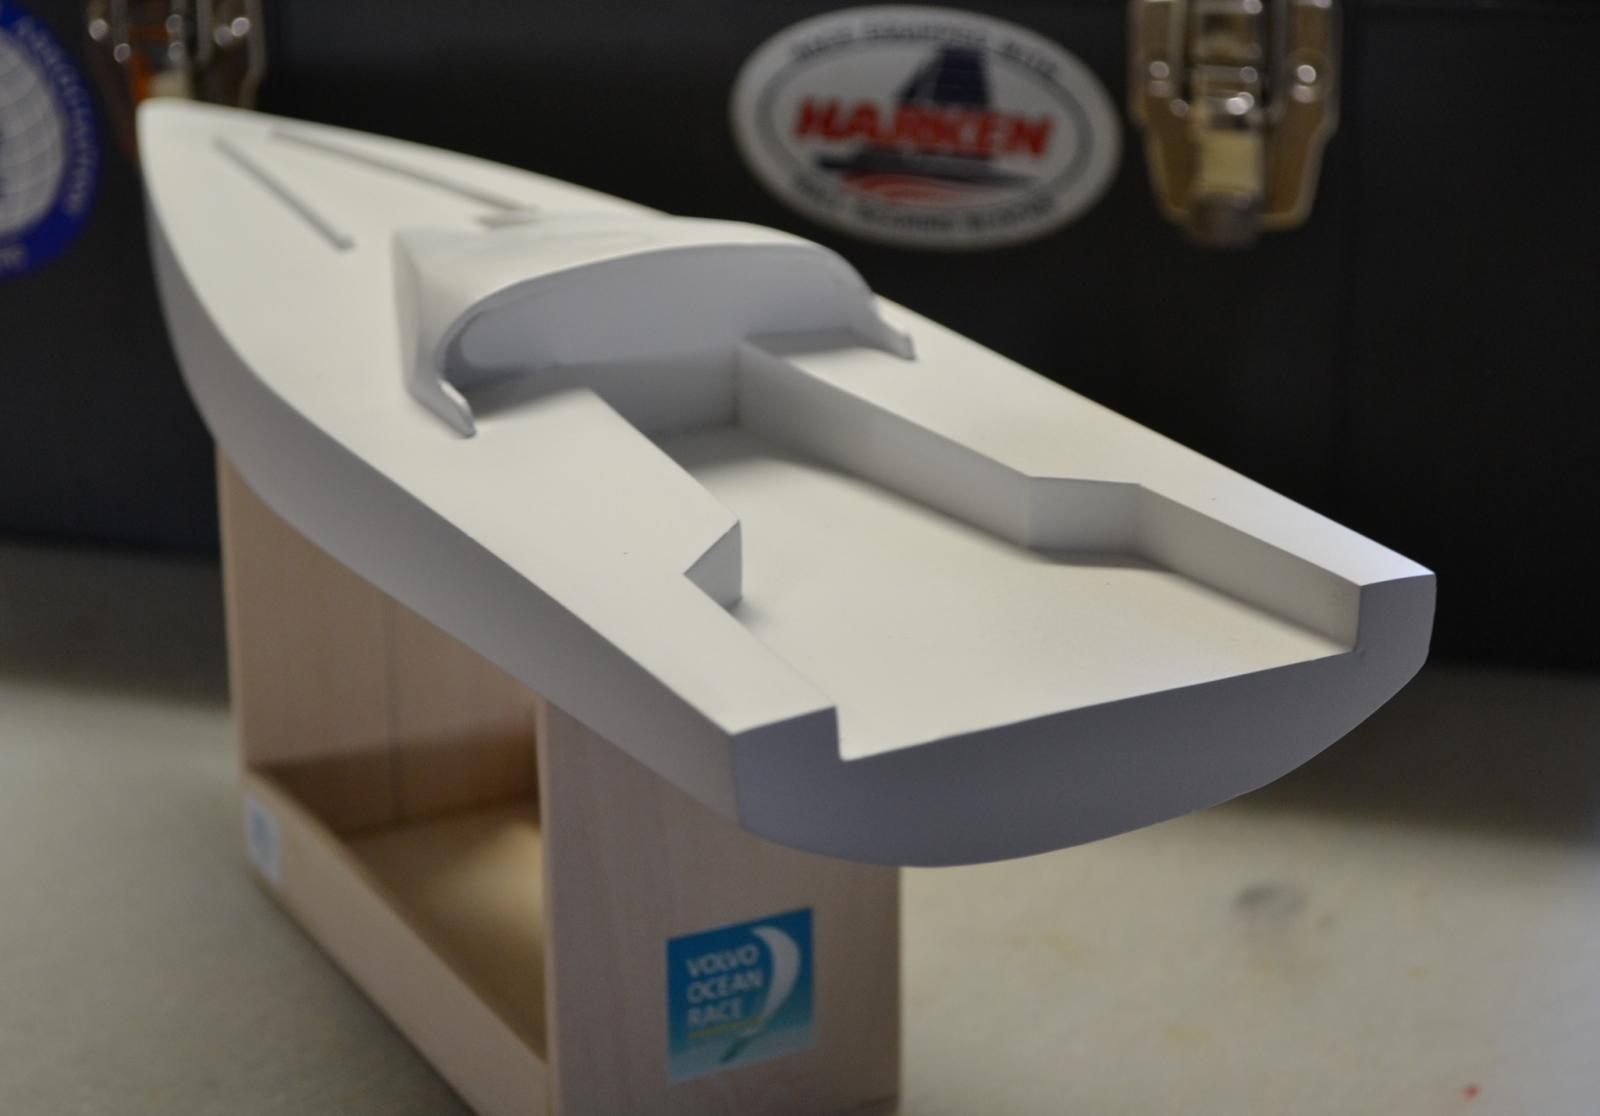
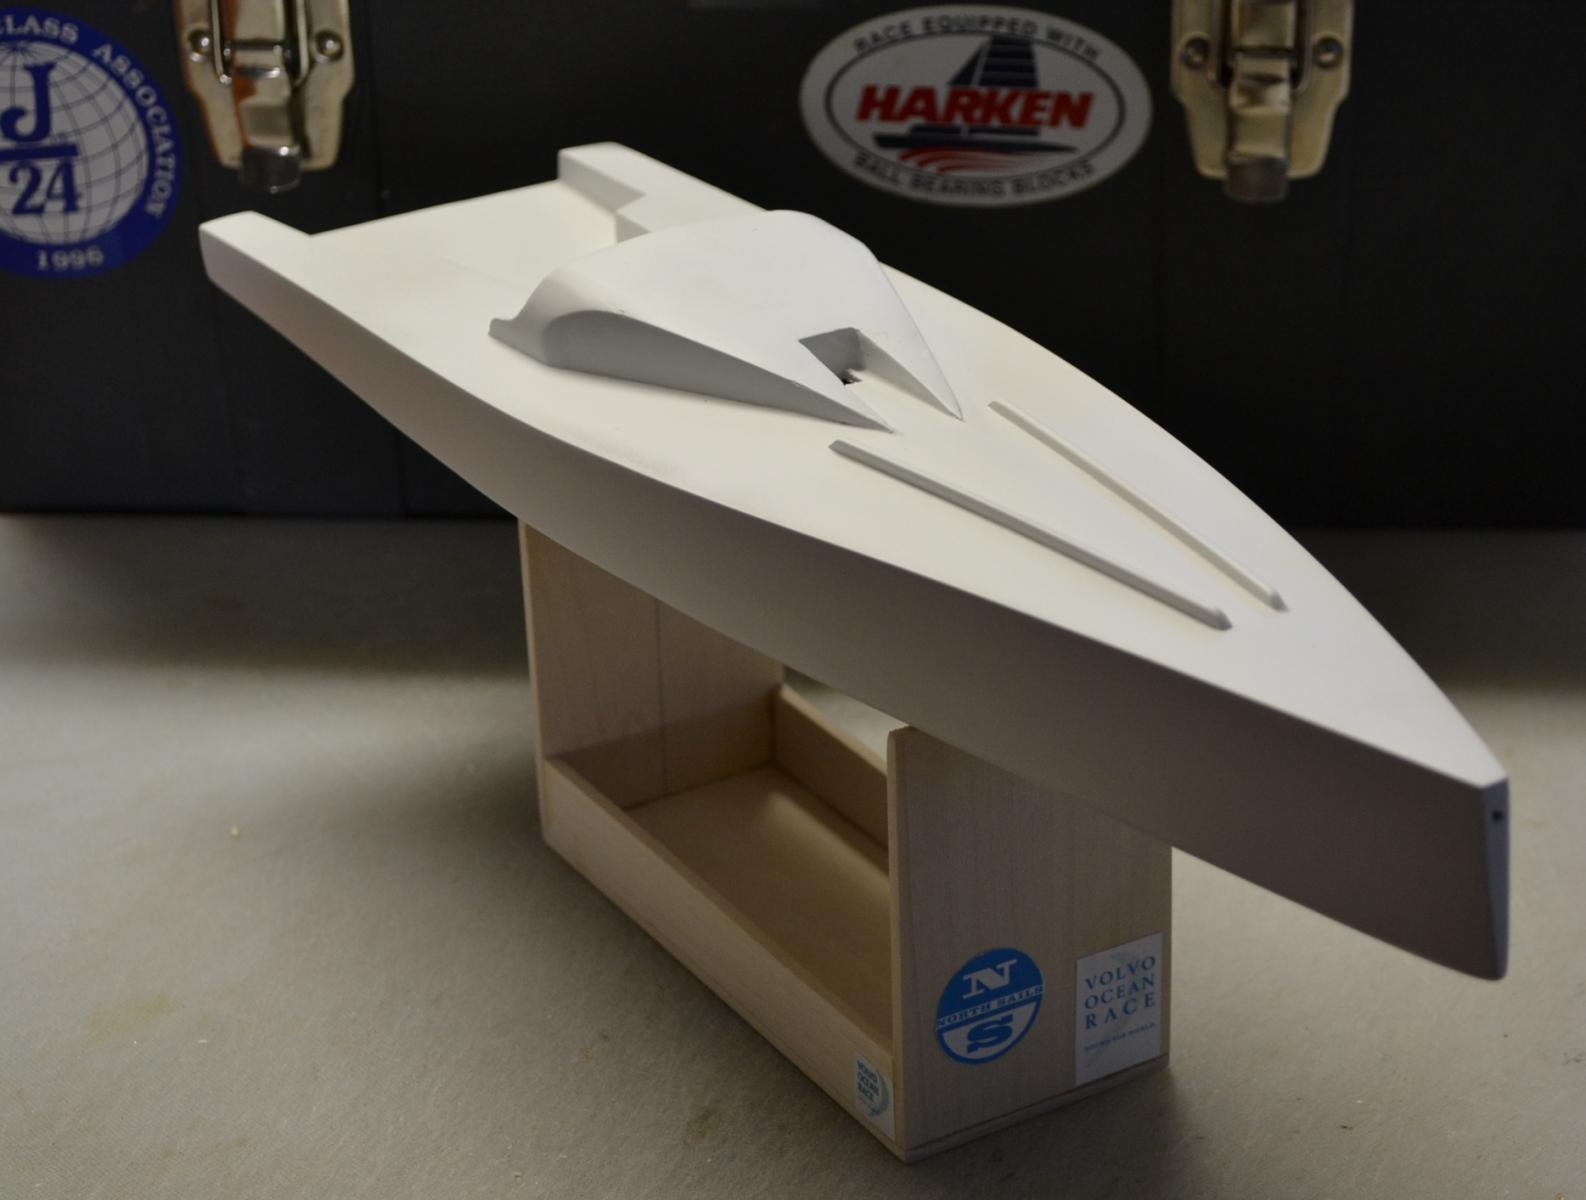
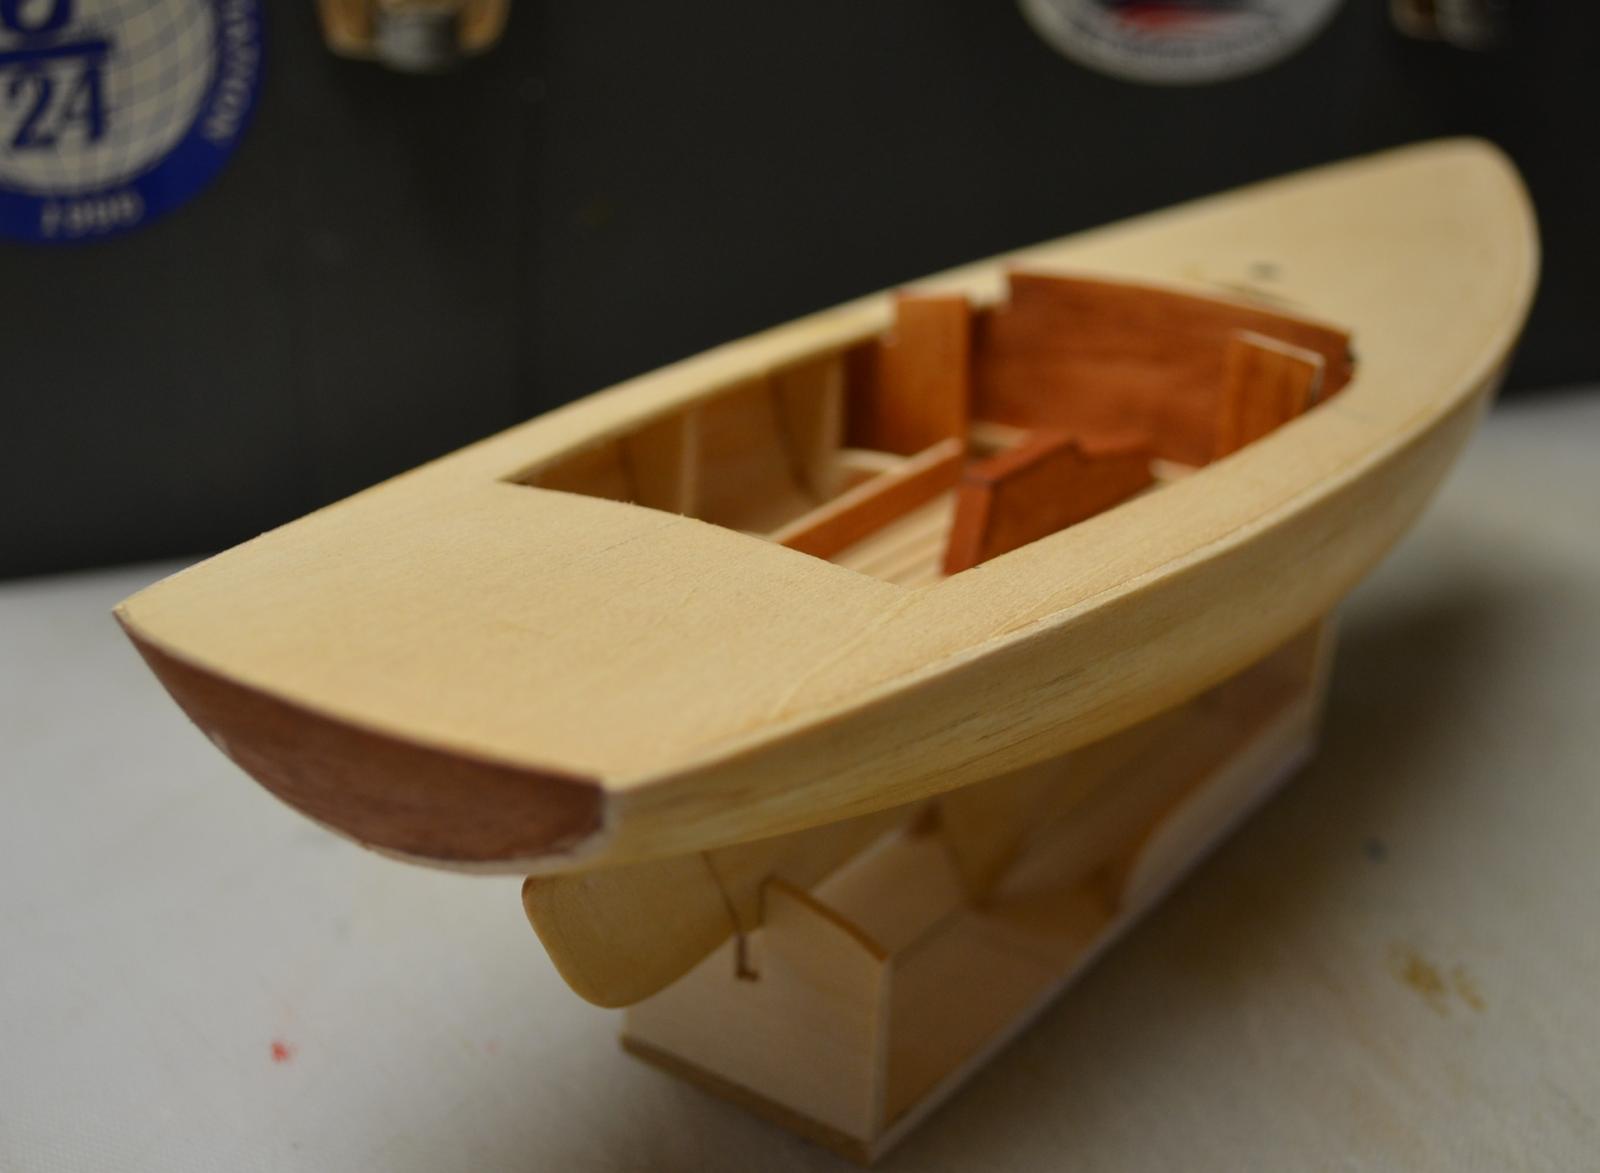
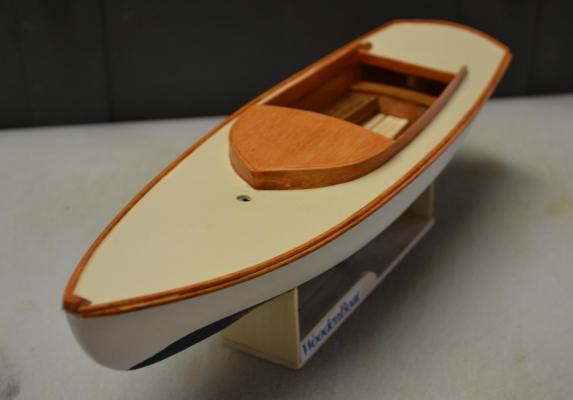
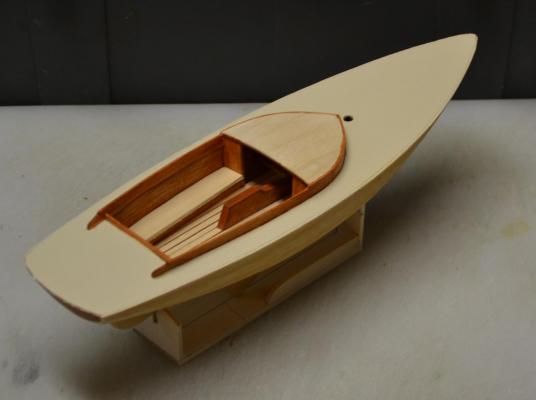
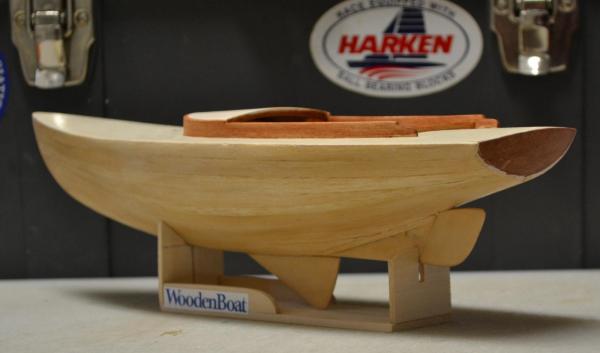
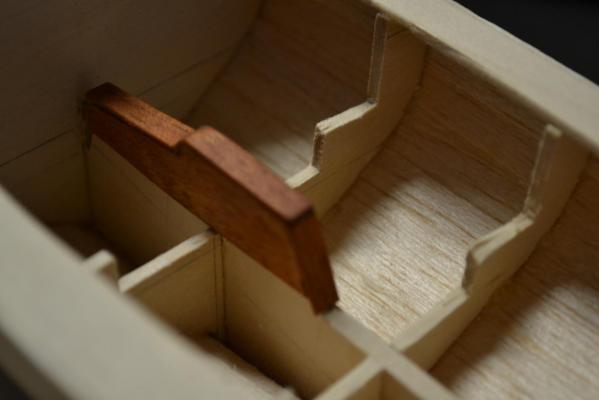
After taking a day to work on my full size Boat ( M-15 ) I started by making the Keel ( center Board ) and Rudder. First I laid them out as per plan and I then cut them out , Next I shaped them to the desired shape , then sanded them up to 600 grit sandpaper. Next I installed them on the Hull . I then turned my attention to the inside of the Cockpit, I started by cutting out some Mahogany and a piece of Birch ply for the sides , I then installed the parts, and Stained the completed center board box and Transom a Cherry Red. I then brushed a coat of Titebond 3 to the entire outside of the Hull. Next will be to sand the Hull up to 600 grit and get her ready for paint. Here are the results

- 77 replies
-
- 8
-
-
- alerion
- herreshoff
- (and 1 more)
-
Hi Nils, Very nice , the set up looks great , beautiful work , she looks to be right on the money Best Regards, Pete
- 2,625 replies
-
- 2
-
-
- kaiser wilhelm der grosse
- passenger steamer
- (and 1 more)
-
Thank you David B. , I am thinking of a white Hull , Sea Blue ( flat ) Bottom Paint , Sand Color for the Deck , and trimmed out in a Cherry Red stained wood ( It give's it a Teak look ) Thank you Michael, You hit the Nail right on the Head, I could not say it any better myself Best Regards, Pete
- 77 replies
-
- 1
-
-
- alerion
- herreshoff
- (and 1 more)
-
Thank you Christian, If I am not mistaken Herreshoff designed more America's cup winners than any other designer, and some of the most beautiful pleasure Boats that I have ever seen Best Regards, Pete
-
Wow Nils, Looks like shes going together pretty fast . Fantastic work Best Regards, Pete
- 2,625 replies
-
- 3
-
-
- kaiser wilhelm der grosse
- passenger steamer
- (and 1 more)