HOLIDAY DONATION DRIVE - SUPPORT MSW - DO YOUR PART TO KEEP THIS GREAT FORUM GOING! (Only 13 donations so far - C'mon guys!)
×

UdoK
-
Posts
174 -
Joined
-
Last visited
Content Type
Profiles
Forums
Gallery
Events
Everything posted by UdoK
-
 Hallo Daniel, just found your build log, beautiful build and Details! Happy birthday to you!!
 -
Hello Vince, I have never seen a euromodel kit in real, but from what I have seen in other european model Forums the plans and Quality of their kits are not bad. A preview of their Royal William plans are displayed on the Website. http://www.euromodel-ship.com/eng/royal-william-1.html#axzz2i8ee7IPE
-
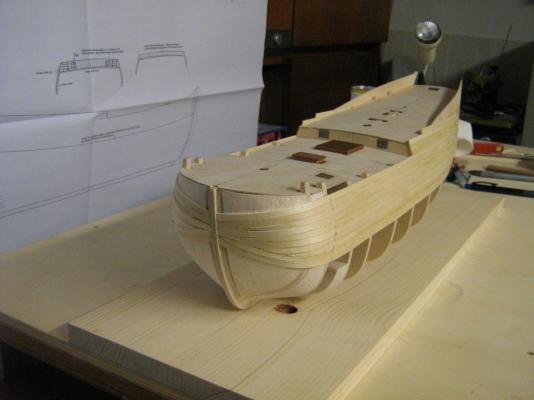
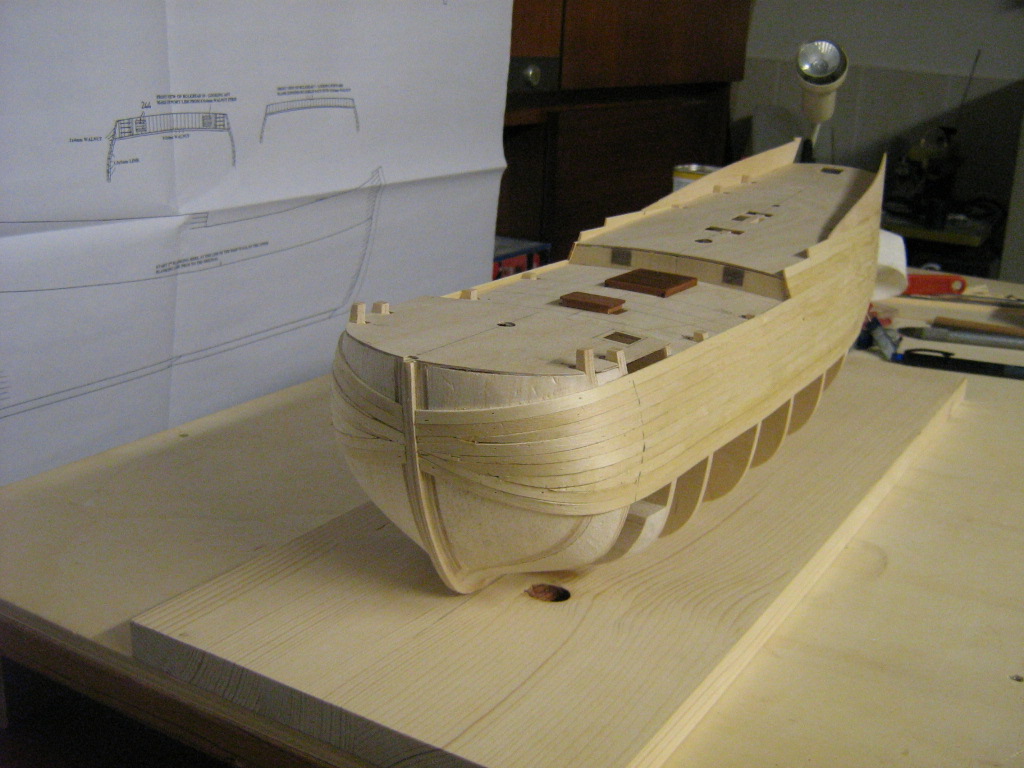
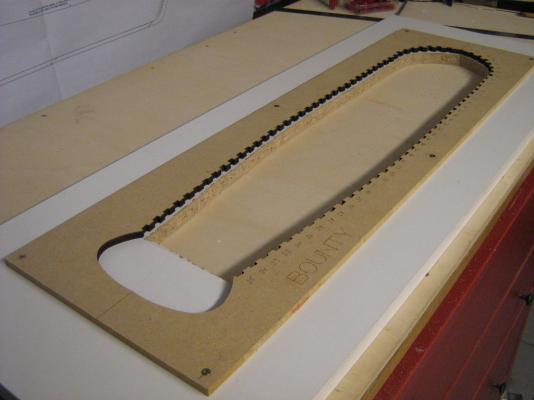
Hi all, most of the sawing Job is done, the whole Frames are cut out now. Next is to sand them to final shape, I will leave a few 1/10mm on for fairing after construction of the hull has been completed.

-
HMB Endeavour by mikec - Eaglemoss
UdoK replied to mikec's topic in - Kit build logs for subjects built from 1751 - 1800
Hi Mike, great work on your Endeavour and all her Details! Happy Birthday to you!!! -
Hello Antony, Great work and Happy Birthday to you!!
-
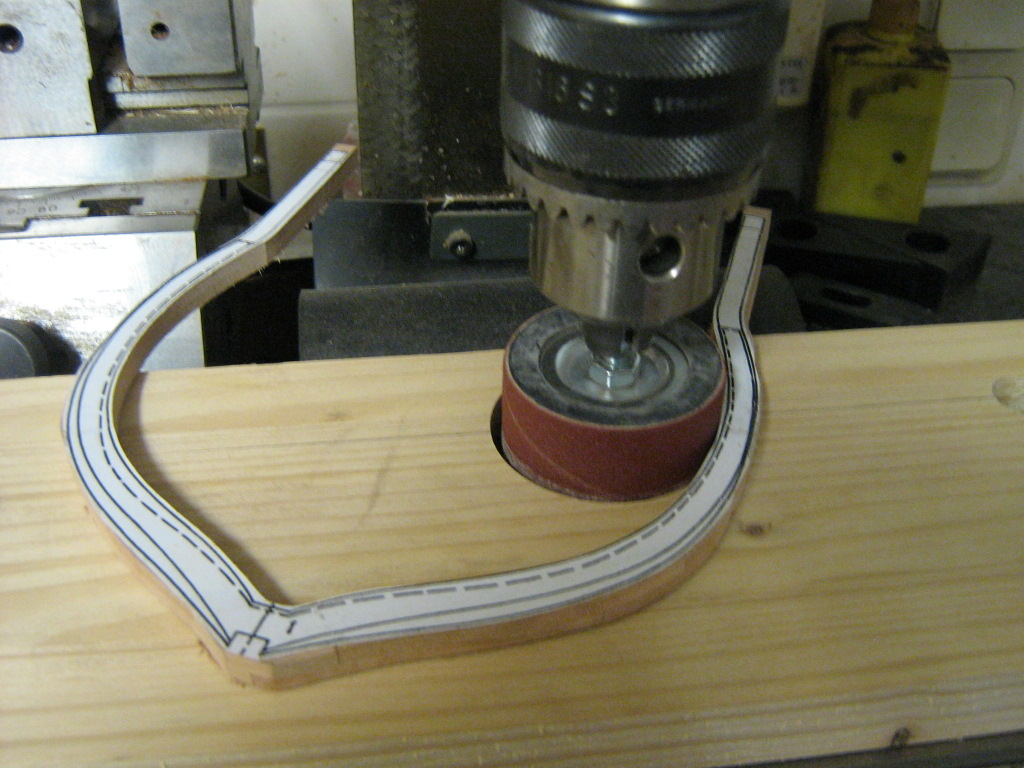
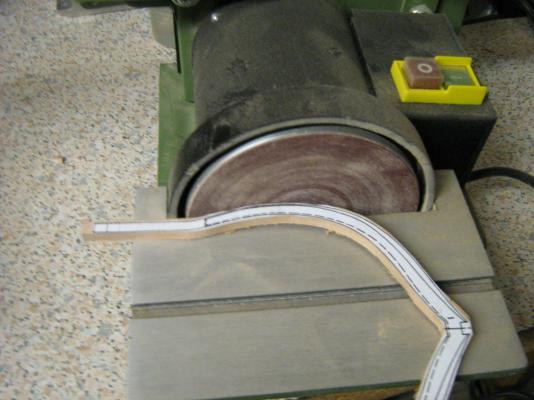
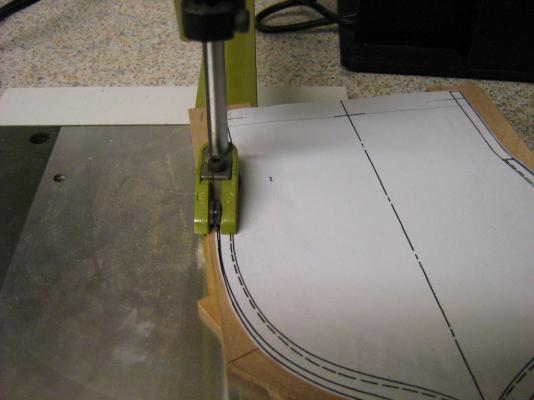
If I see it correctly, your are using a scrollsaw in the last picture? If so, are these some sort of guide brackets (if that is the correct name) Anja My scroll saw is a 230DS/E out of box. The bracket you see got a small roller in the front to guide the saw plate and is height adjustable to hold the material on the table.
-
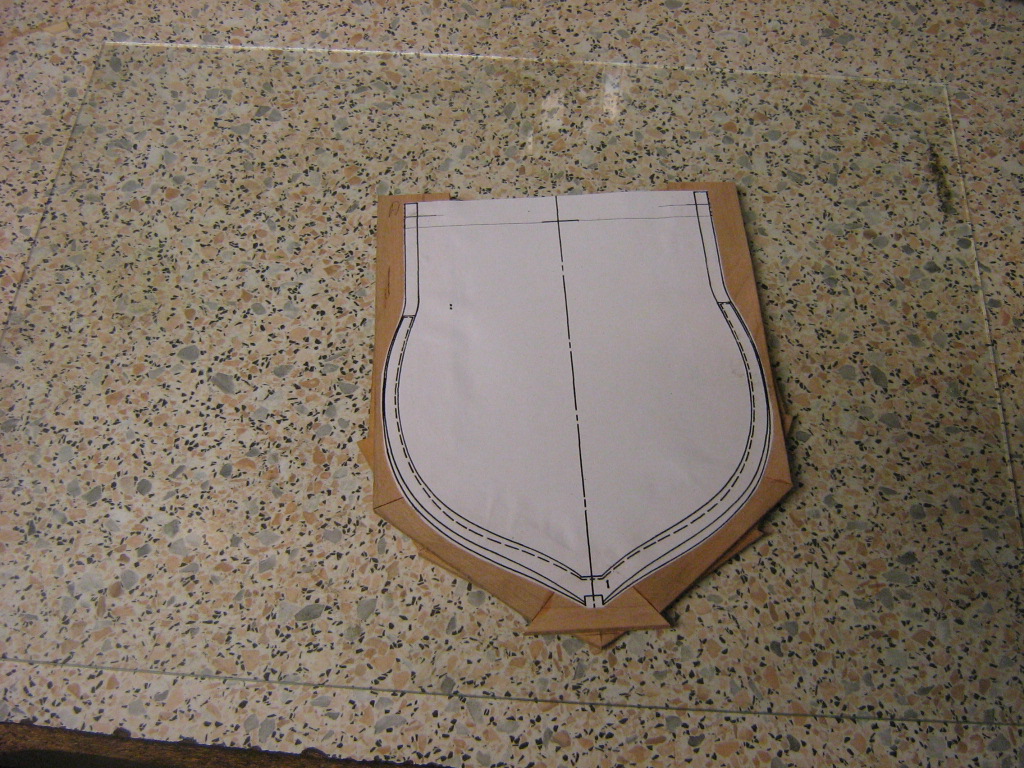
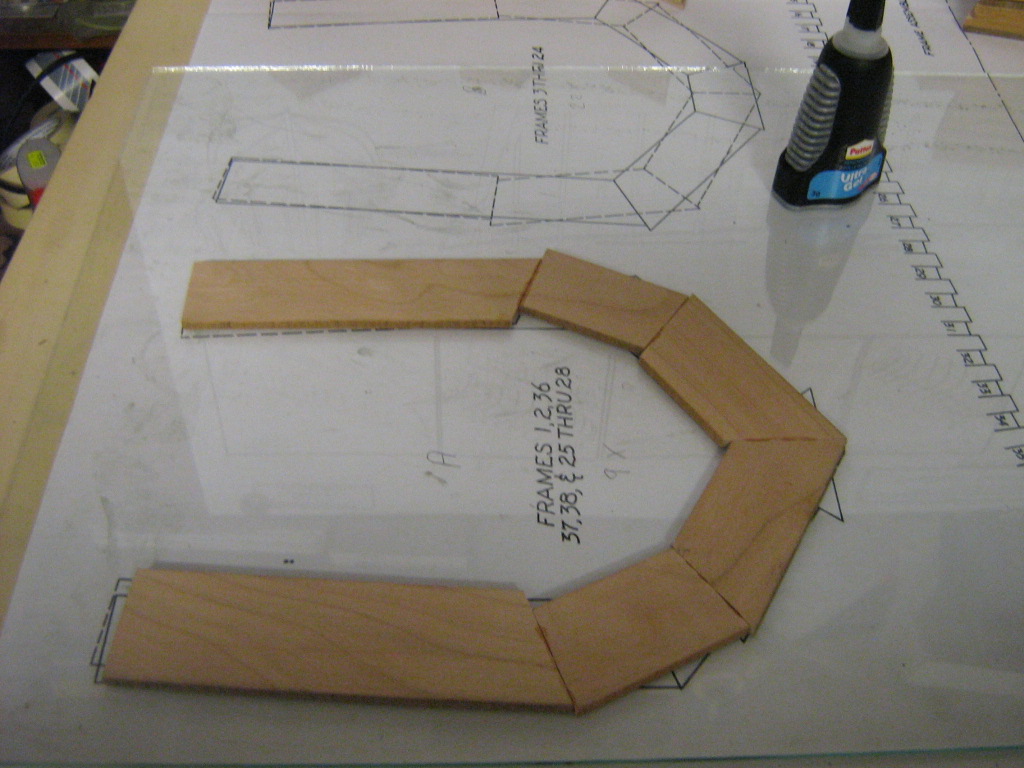
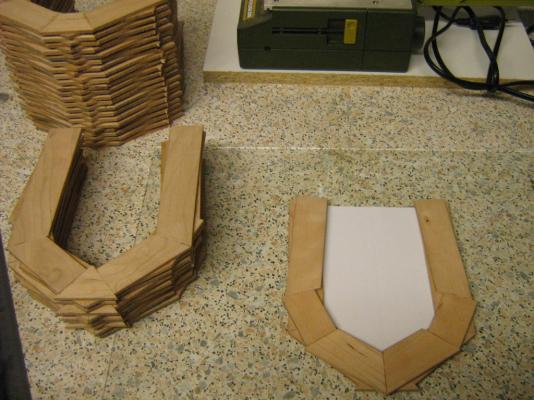
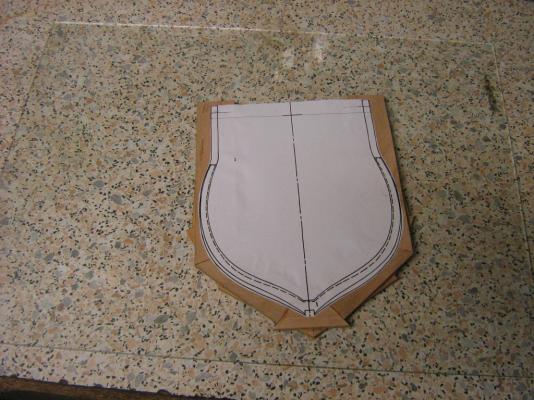
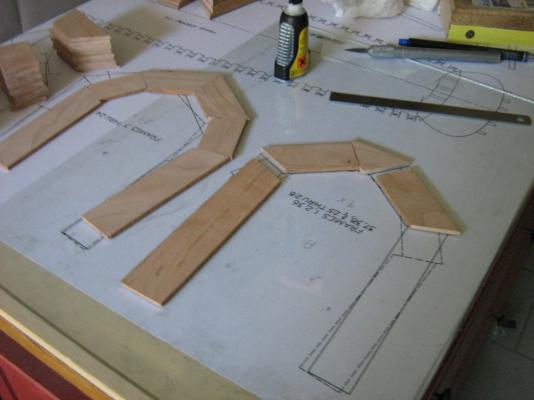
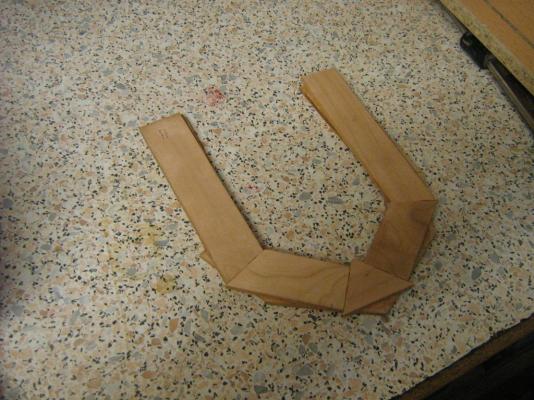
Paddy, thank you for stopping by! Time for the next update, the Patterns for all of the whole frames 1 to 28 are ready. As I said, my intention was to run them trough the thickness sander after laminating together, but the patterns became to wide!!! It is not much but it simply doesn't fit yet, got to wait after the frames are cut out. One more time this gave proof to follow the rule „think twice before glueing parts together“. I'll start now to copy the single frames from the drawings and laminate them to the patterns by using a simple paper gluestick, stolen from my daughter. To prevent distortion due to warped paper I don't cut along the inside lines of the drawings, place it on the glass sheet and put the frame on.
-
Thank you very much Anja! I had a quiet public Holiday day yesterday (the Holiday is not because of my birthday ). I even could manage to laminate some more Frame Patterns and prepare the building board.
-
HM Bark Endeavour by UdoK - Caldercraft
UdoK replied to UdoK's topic in - Kit build logs for subjects built from 1751 - 1800
Hallo Max, welcome and thank you for stopping by. My thoughts are the same as yours on the quality of the kits, there is always plenty of room for improvement on every kit. Personally, I like the CC kits very much as the research on their models seem to be excellent. I do hope you will make a decision and start a buildlog pretty soon. -
Hello Mick, I'am very excited to watch how you want to make the guitar swim???
-
Thank you Rob and Mark! @Anja, you, and of course all others, are always welcome for questions and advises.
-
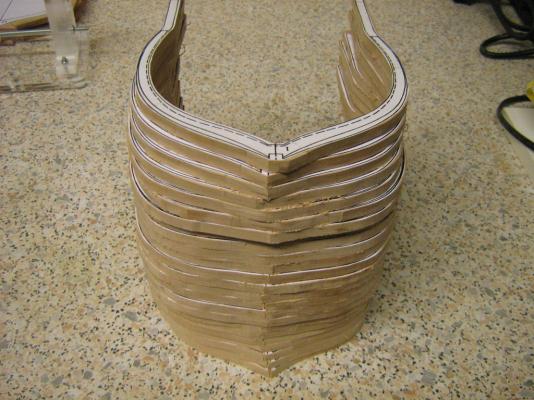
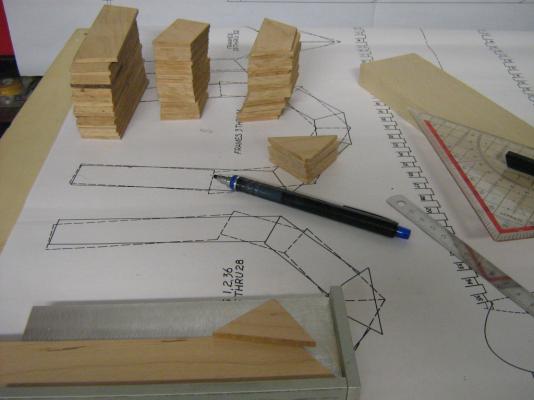
Thank you redbeard! Back on my workbench after being away for work all week. Here are some details of making frame patterns as requested by Anja. - cutting the woodstrips into required lenght and angle to fit the drawings. The strips supplied in my kit are lightly wider than 1", but it is no Problem as it gives a bit more room for inaccurate cutting of the strips. - glueing the pieces of the Patterns (two halves for each Frame) together by using CA on a glass sheet placed on the drawing. - sand the Joints smooth and laminate the halves together by using wood glue. I place the Pattern on my workbench and clamp it with a flat wood piece on top (front of a old cabinet drawer) until dried. The Patterns than are ready for the thickness sander as the strips vary in thickness lightly as well..
-
Thank you Mark and Anja for stopping by. It is my Intention to show Details of the build as I'am always happy by myself to see details of other fellow modelbuilders. So I will try to do my very best, if not please feel free to ask questions!
-
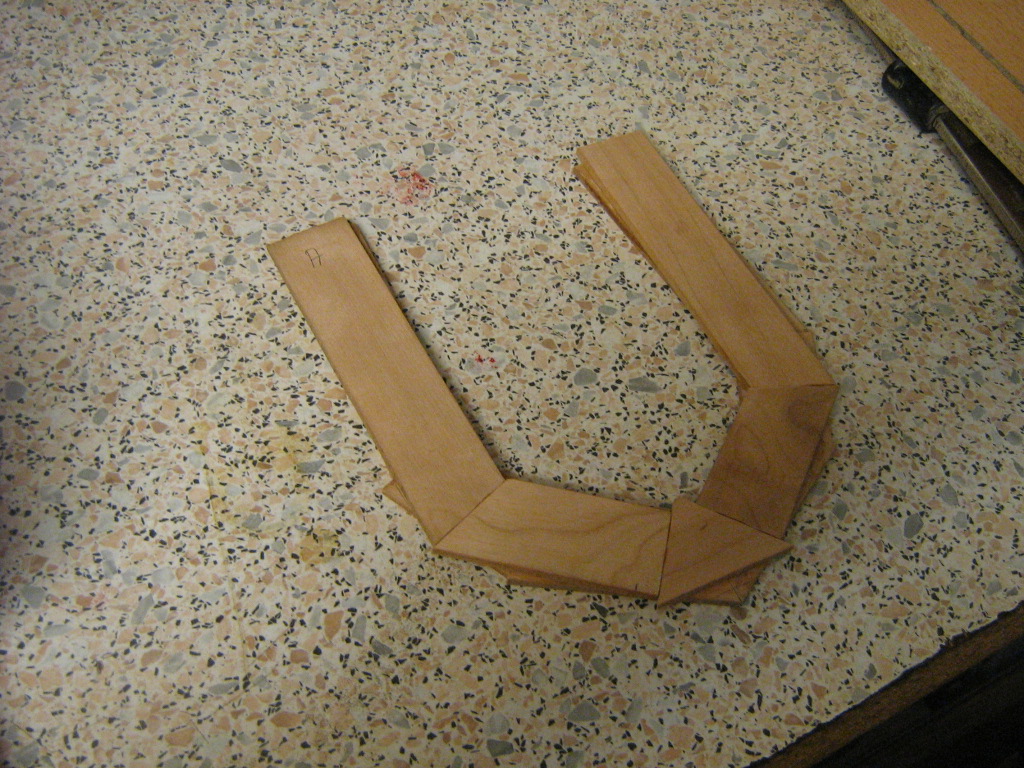
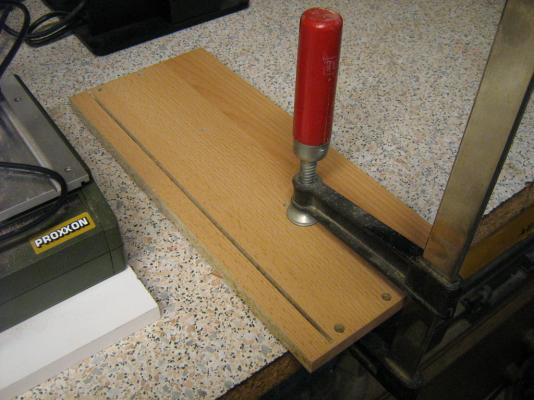
After making sawdust all afternoon the first Patterns are glued and laminated together. for the single pieces I have used CA, laminating together with PVA Wood glue. 41 Patterns more to go !!
-
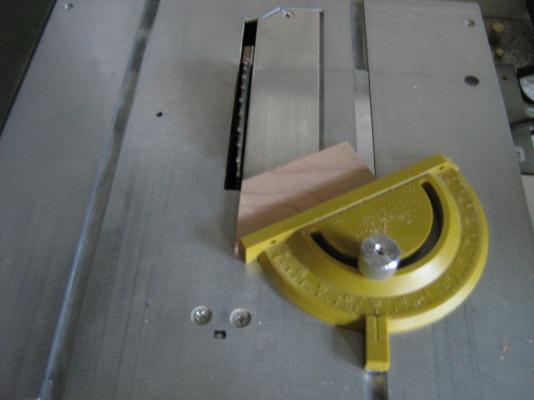
Aye Aye Sir, here we go! First pieces for the Frame Patterns have been cut. I already felt in love with the smell of the cherry timber when cutting.
-
HM Bark Endeavour by UdoK - Caldercraft
UdoK replied to UdoK's topic in - Kit build logs for subjects built from 1751 - 1800
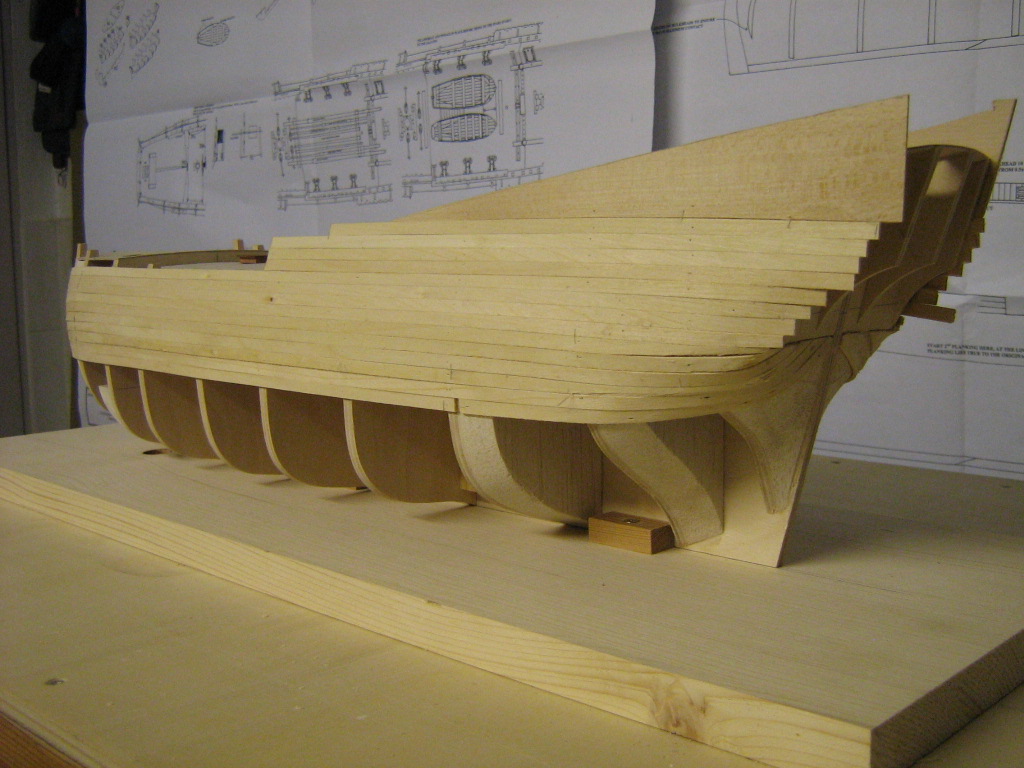
Thanks John and Mick, meantime most of the first Planks are laid, I will post Pictures when done! -
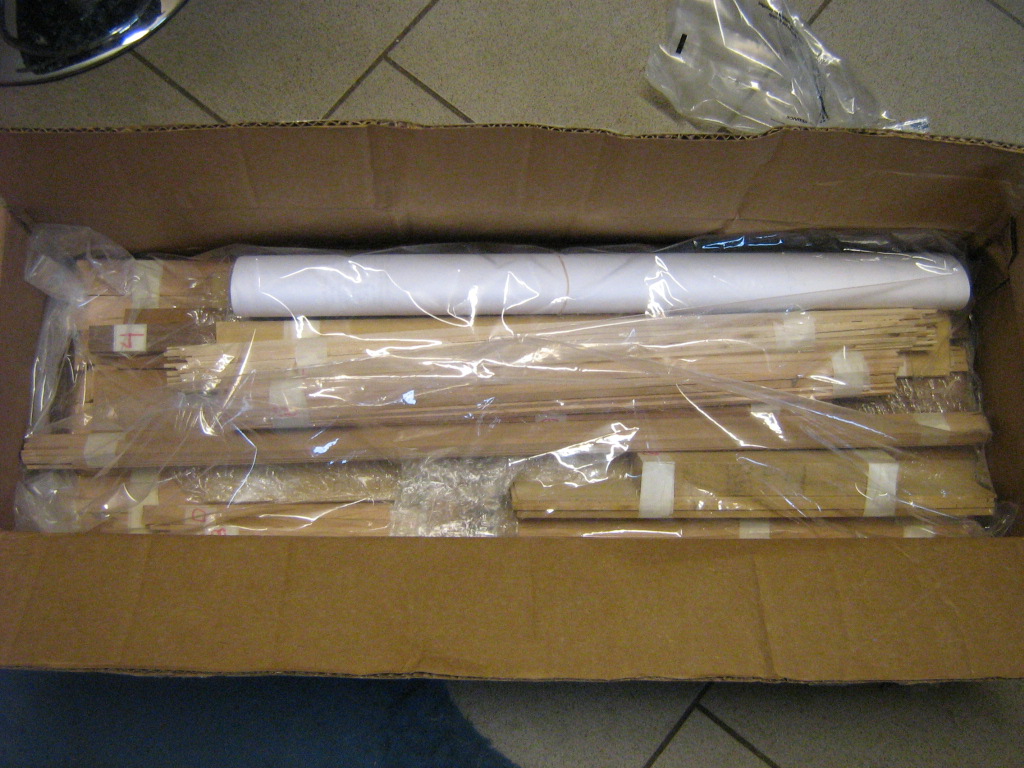
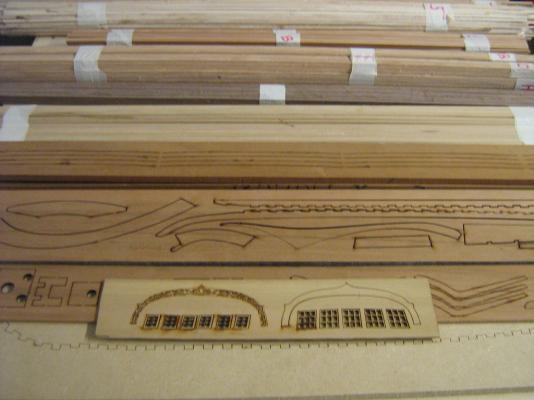
Finally, Here it IS !!! After long weeks of waiting I just picked it up from customs Office this morning. 12 Pounds of finest timber like cherry, swiss pear, silver maple, boxwood and walnut, perfectly packed and well wrapped with plastic foil.

-
Hi Mick, congratulations for your new Kit, she makes a nice model. As viewing the Pictures of the parts it seems that the hull gets made up of two halves. If so, I think it makes it much easier to errect the bulkheads nice and square. Enjoy the build of this beautiful model, I will follow!
- 170 replies
-
- 1
-

-
- thames barge
- billing boats
- (and 1 more)
-
Hi Alexandru, this is a quite different construction to what I'am and probably most of us are used to, very impressive, even your speed of building is outstanding. Looking forward to follow your excellent build!
-
Good Job Mick, Looks great!
-
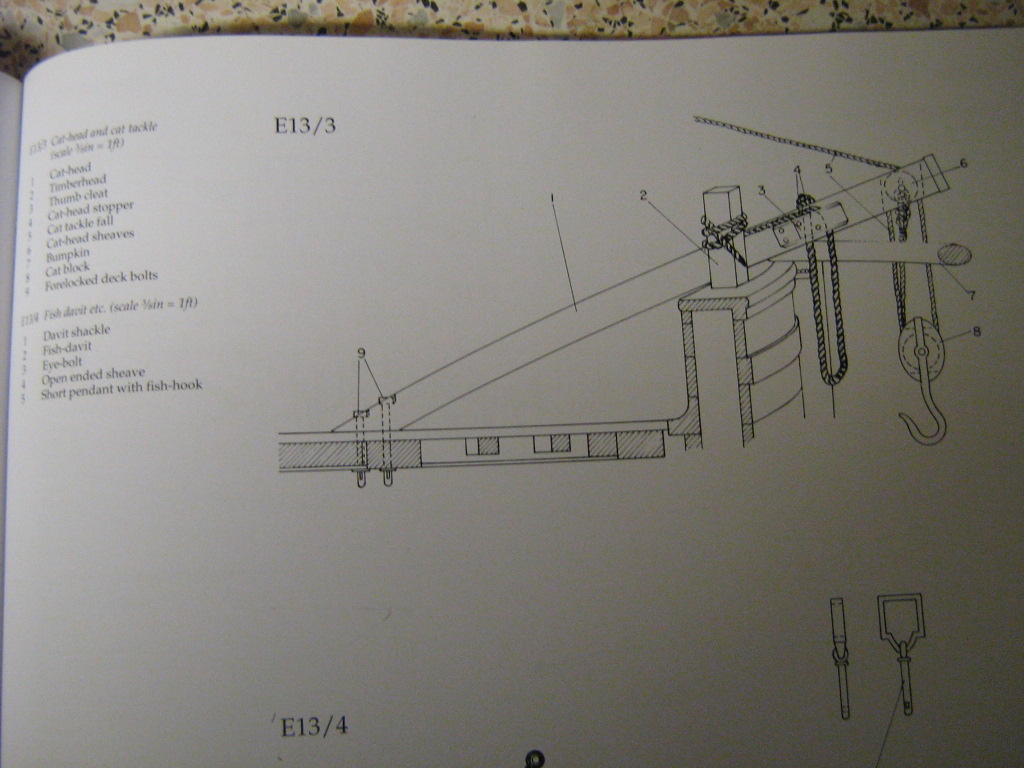
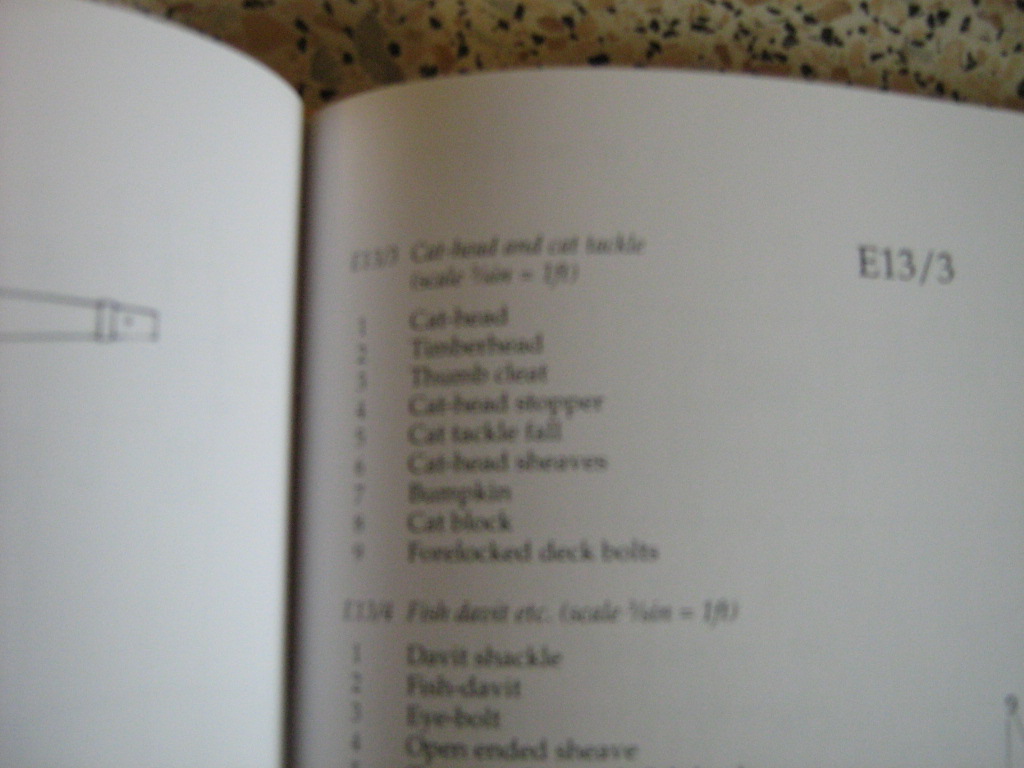
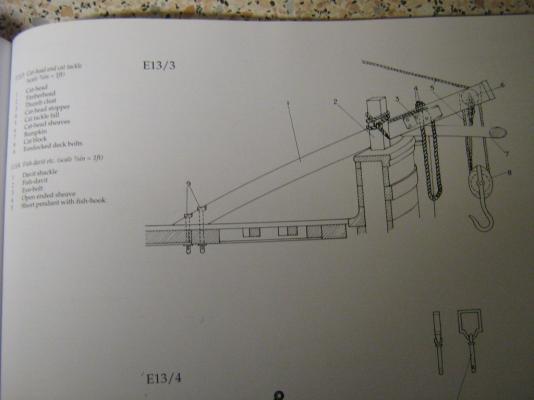
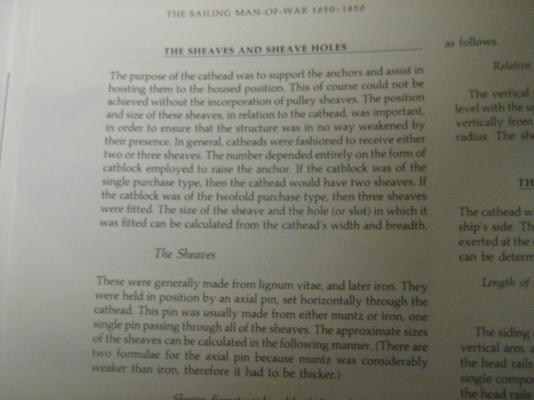
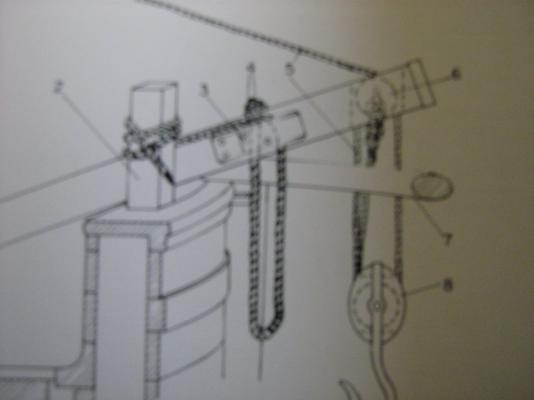
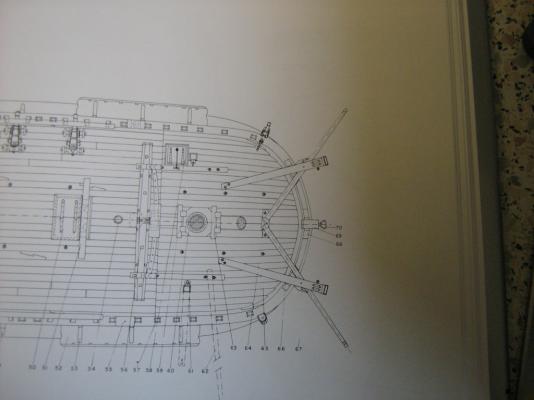
Hello Mick, that's excactly the configuratuin as per the AotS. The eyebolt (marked with B in your instructions) at the cathead side goes right trough and serves the pulleys as the axle. The part without pulley is called thumb cleat and is supposed to guide the rope securing the anchor. You did a great Job on painting the hulls, clean and even lines!
-
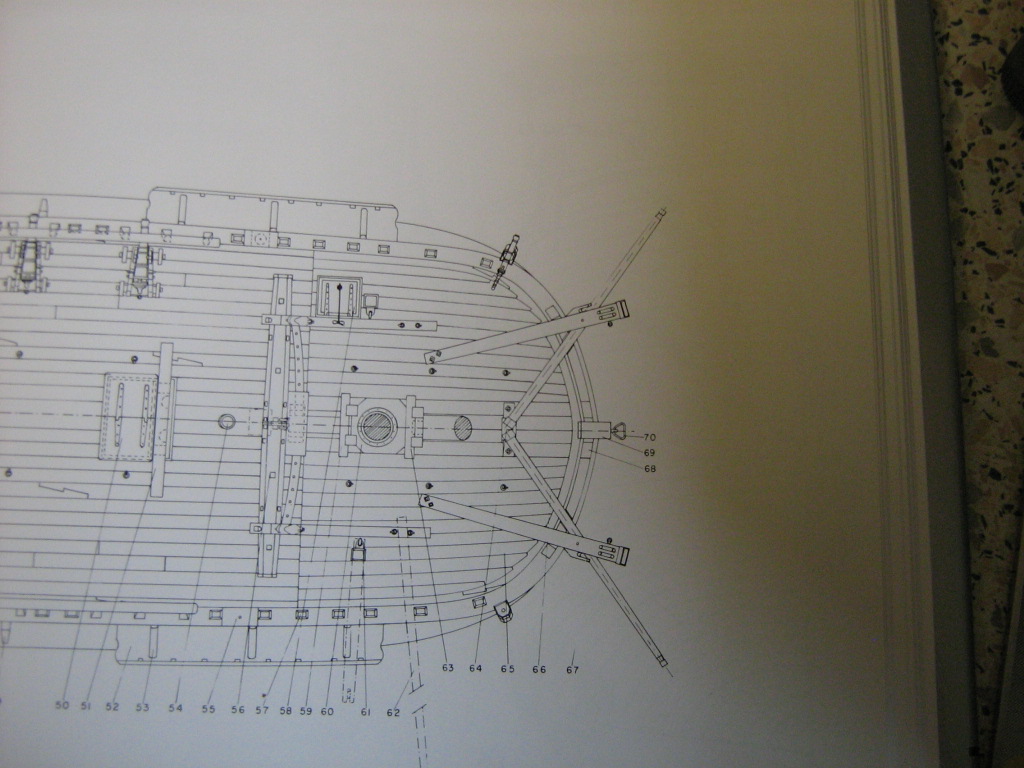
Hi Mick, I have attached again the first Picture of my previous post in a better Quality. I understand both of the cathead slots are equiped with pulleys, but no pulley on the thumb cleat as per your instructions. The second Picture is the corresponding part of the 'English man of war'.
-
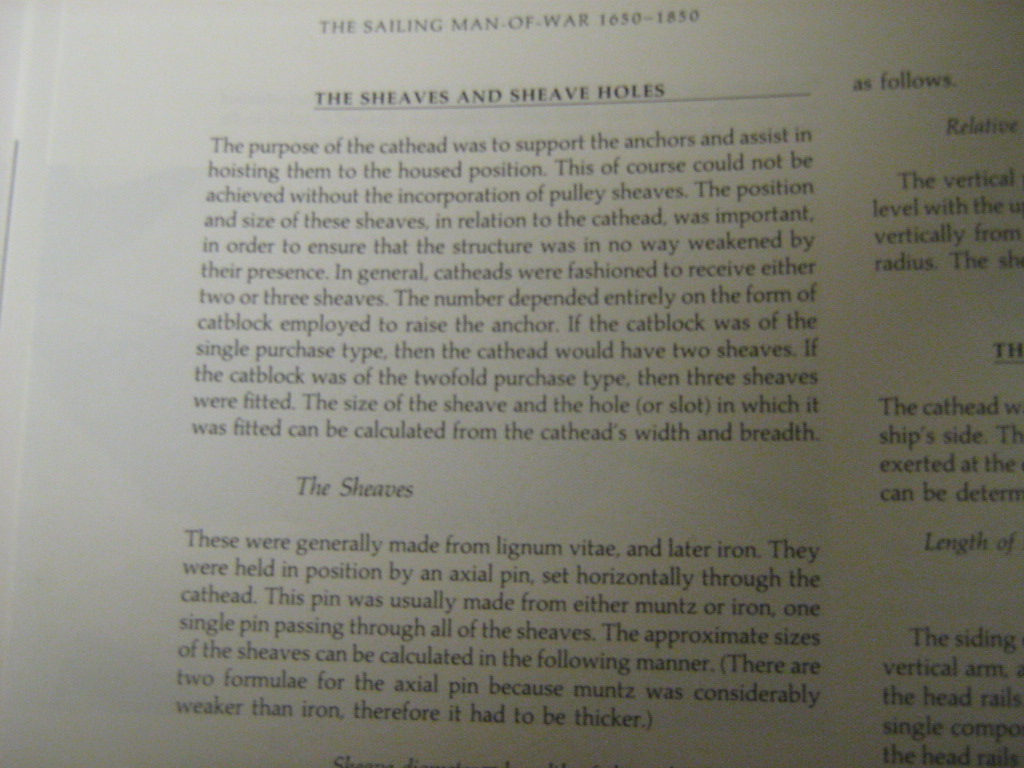
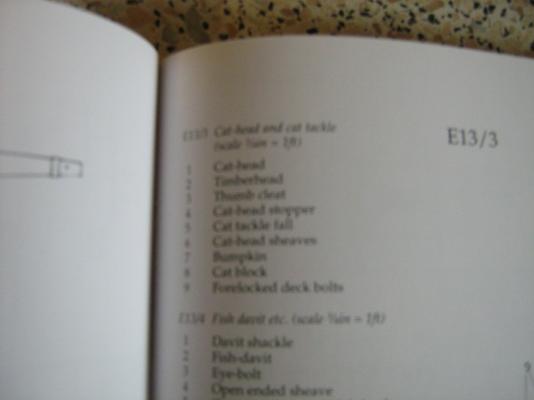
Hello Mick, the CC drawings are showing four holes only. Attached the drawings from my AotS book, actually the Slots are the cat head sheaves. the pulley diameter, measured on the drawing (scale 3/8in = 1ft) is 8mm, width of the Slot 10mm. I don't have no idea how to convert this scale into something metric. I have noticed your instructions asking to install a pulley (155) on the thumb cleat. This is not shown in my book. have a look, if you need more Information just let me know!
-
HM Bark Endeavour by UdoK - Caldercraft
UdoK replied to UdoK's topic in - Kit build logs for subjects built from 1751 - 1800
A Update on the first planking, slowly but steady.