HOLIDAY DONATION DRIVE - SUPPORT MSW - DO YOUR PART TO KEEP THIS GREAT FORUM GOING! (Only 20 donations so far - C'mon guys!)
×

UdoK
-
Posts
174 -
Joined
-
Last visited
Content Type
Profiles
Forums
Gallery
Events
Everything posted by UdoK
-
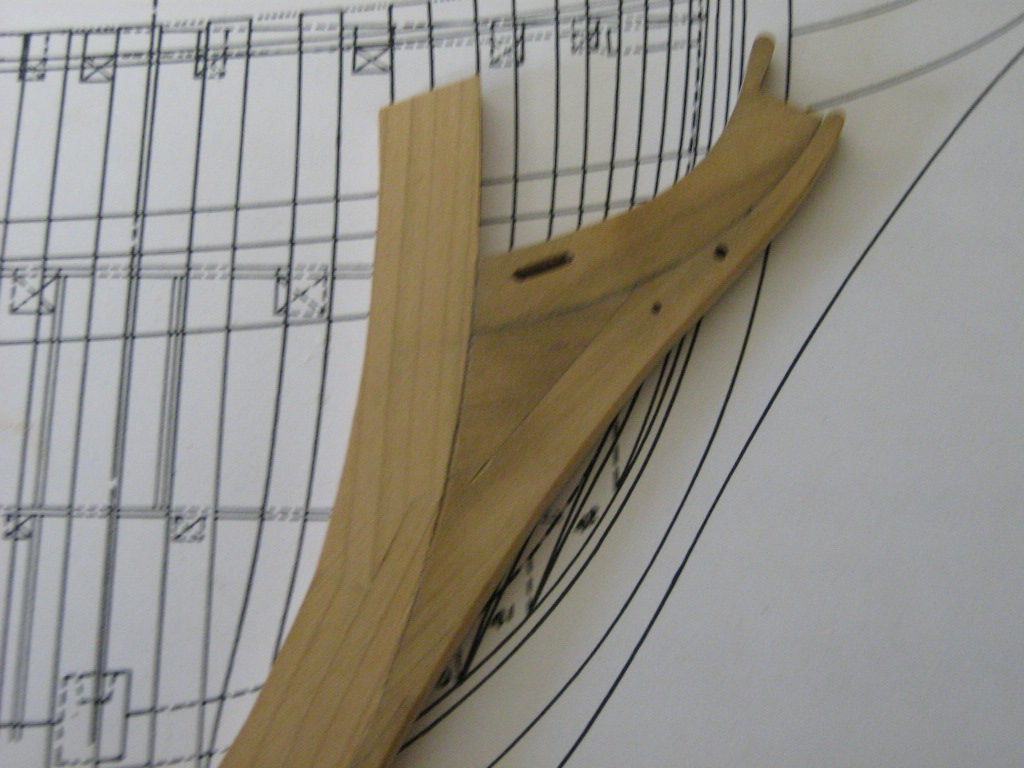
Mark, thank you for your reply. of course I will go on with the Hahn plans, if not means to dump the whole structure build so far. To explain my issue here is a link to a beautiful Bounty build strictly according the Hahn plans. Pictures always work better than text. http://guzmanshipmodels.com/page6.html My Problem is the area of the rear deadwood and transom where the Planks run into the keel and sternpost. As per the Pictures the drawings don't give room for Planking, Hahn let the Frames run into the keel and sternpost which certainly differs from the real ship. To create a run of the Planks to meet the real ship Body lines the Frames require a Modification. Second issue are the Transom wings, Hahn draw only two instead of seven on the real ship. I hope it is clear what I mean, I'am open for any Suggestions or Solutions.
-
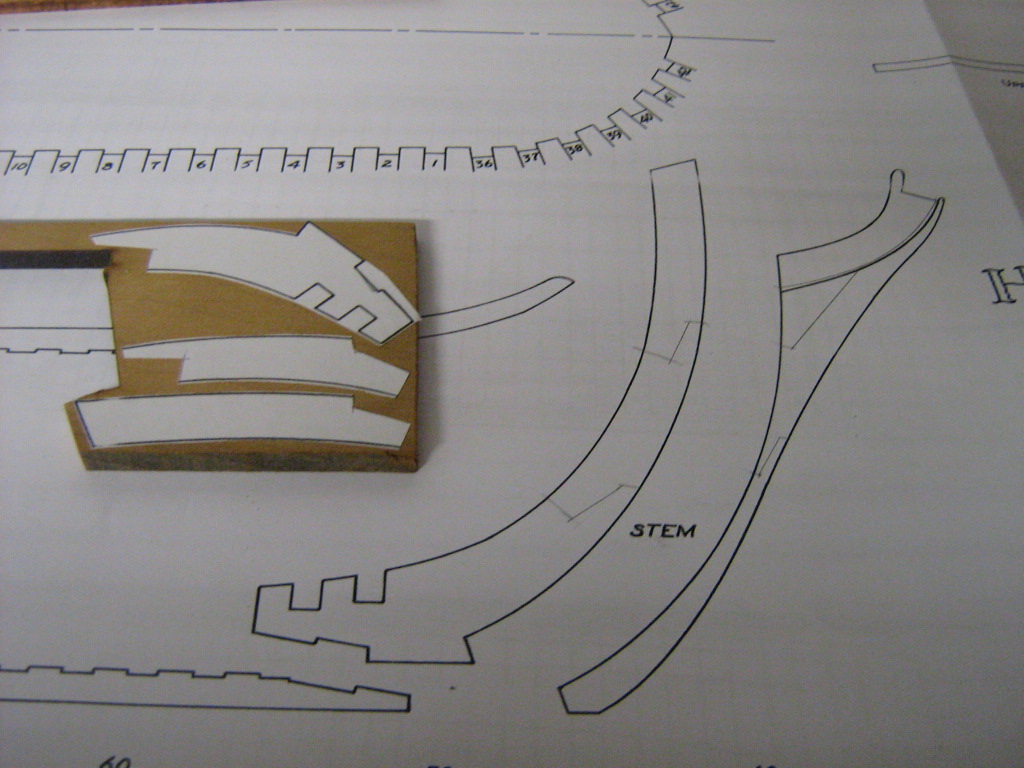
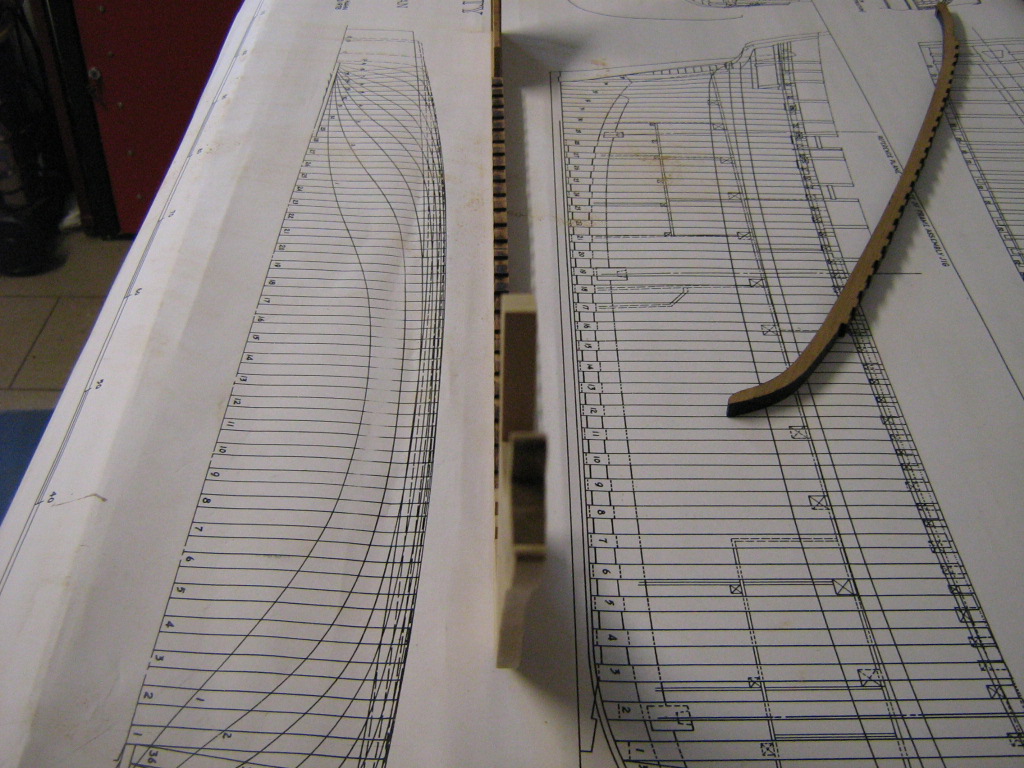
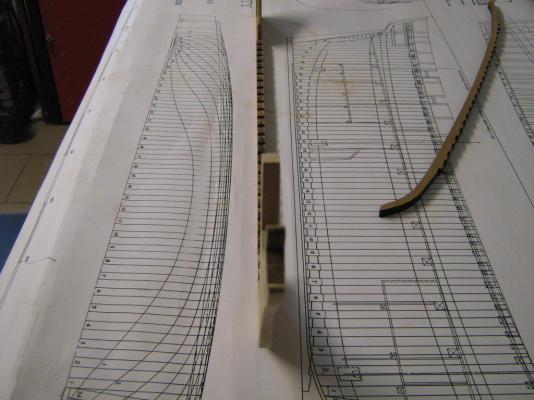
Hi all, unfortunately not much Progress to Report. After manufacture of the new keel parts I have discovered the next Problem. Due to the Hahn plans, which doesn't accept a planking of the hull below the waterline, a modification of the Stern Frames is required. My first idea how to achieve this, simply doesn't work and need some more Research and Thinking. As it seems now the only way is to adapt the rear structure from the AotS drawings to receive a true and original run of the Planks. Next is to copy the AotS drawings to scale and see what it takes to modify the Frames accordingly. Will be back as soon as I have figured out a acceptable Solution.
-
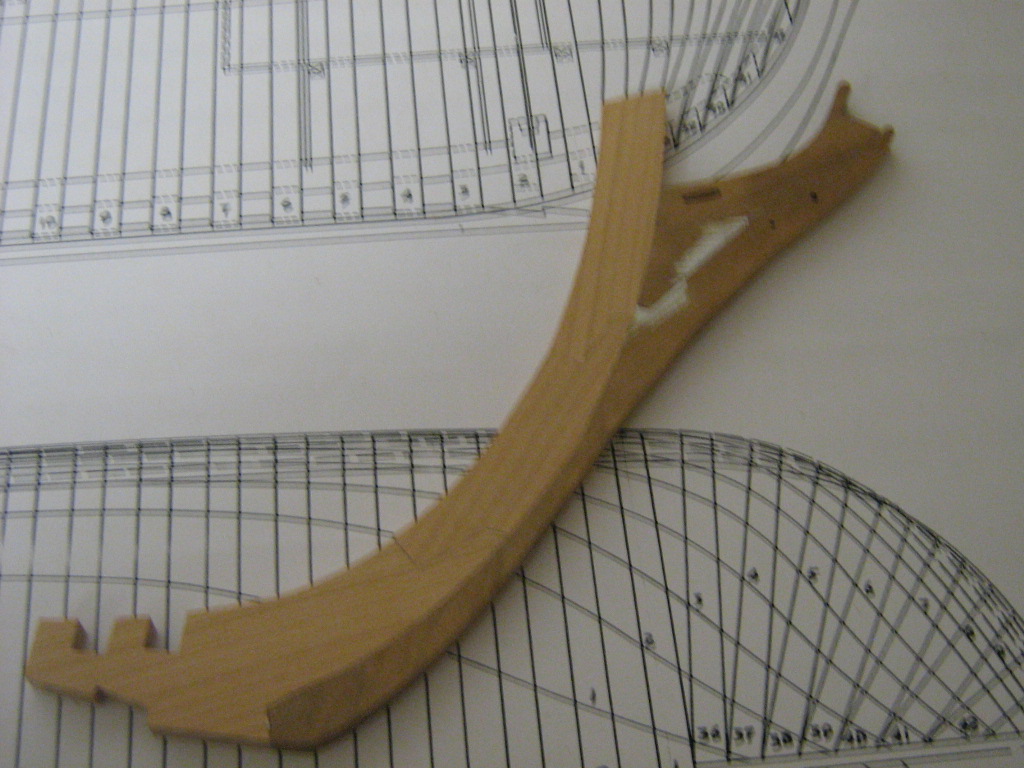
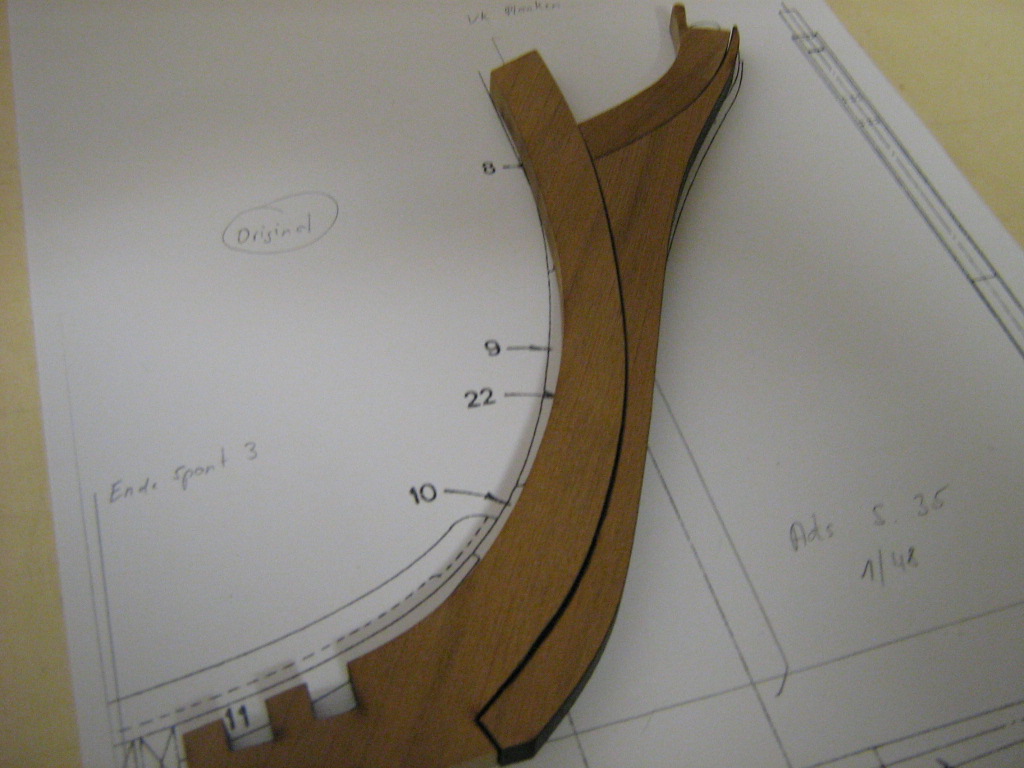
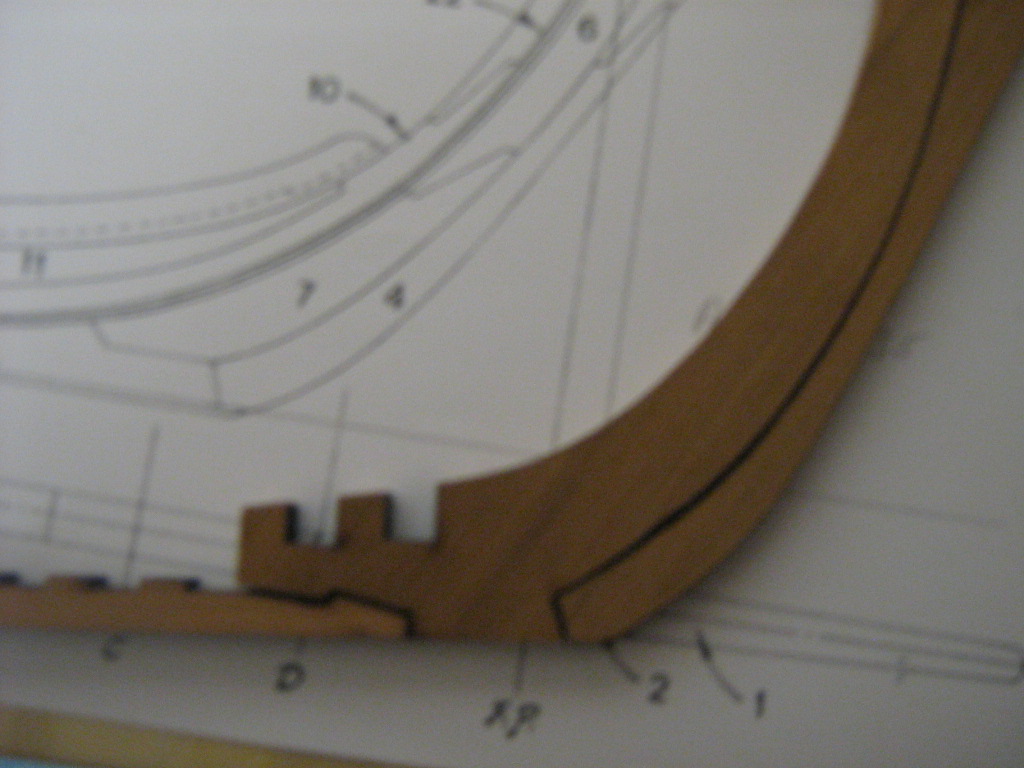
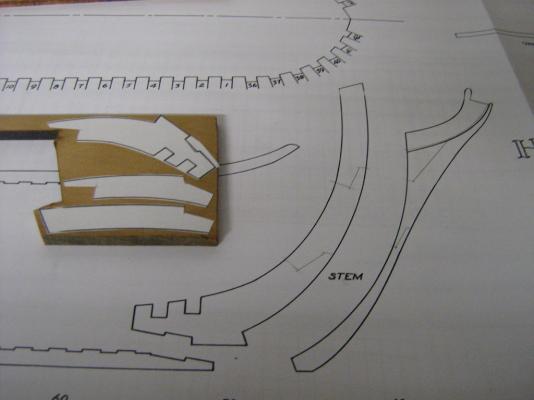
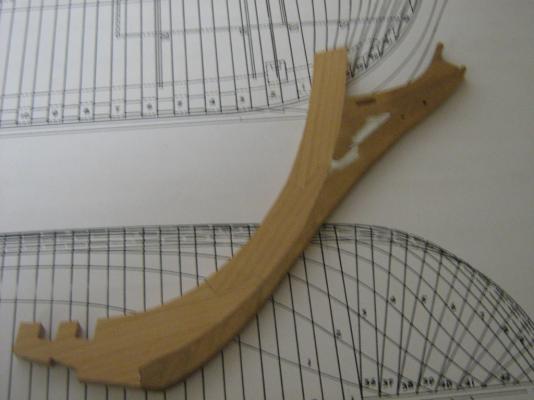
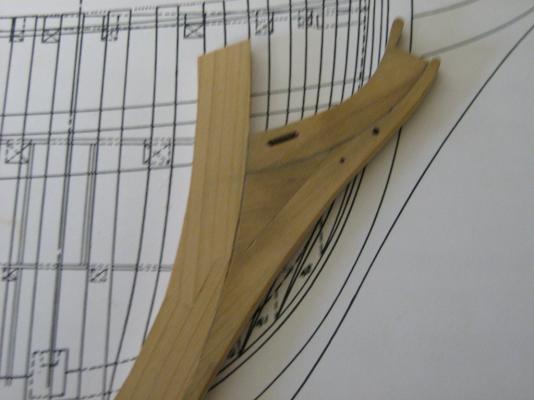
Hi all, after a break due to several different reason the new Stem and head of the knee from pear is ready. To simulate the caulking I did some Research on different sorts of black paper. Finally I ended up with the black paper supplied in the Caldercraft kit of my Endeavour. I find it the best result for the strenght of the Joints and thickness. The paper is 0.18mm thick, converted to real size it makes a caulking of 9mm (11/32") between the Joints what I think is very realistic.
-
Michael, thank you for your encouragement! After a short time of being disapointed I have started on the first pieces of a totally new Backbone. I take the opportunity to make it scratch from pear Wood, only the false keel will be cherry.
-
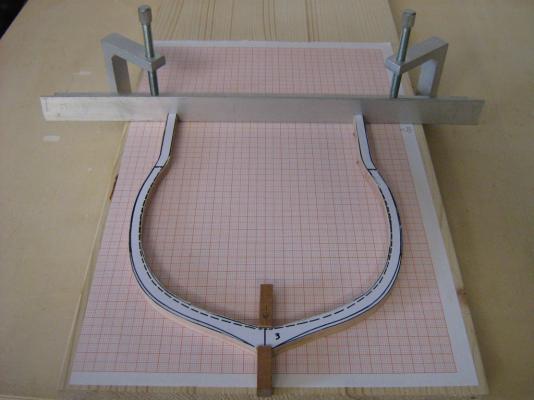
Hi all, Thank you Anja for your compliments. I had a sad time this morning already, discovered some bad things. The drawing for the single pieces of the Stem, Keel and Stern plus the lasercut parts doesn't match at all with the Master Frame plan. While transferring the rabbet lines to the keel and a closer inspection gave proof to it. The keel construction differs in lenght, and even more critical, in height and shape from the Master Frame plan. I suppose this happend, beside a unsufficient measuring from my side, due to a distortion of the paper and lasercut. Anyway. I have decided not to go on with the Backbone and all of the lasercut parts supplied in the timberset. The solution will be to do it again by concentrating on the Master Frame plan. I will check out if I can keep at least some single pieces. Just one of those days!!!
-
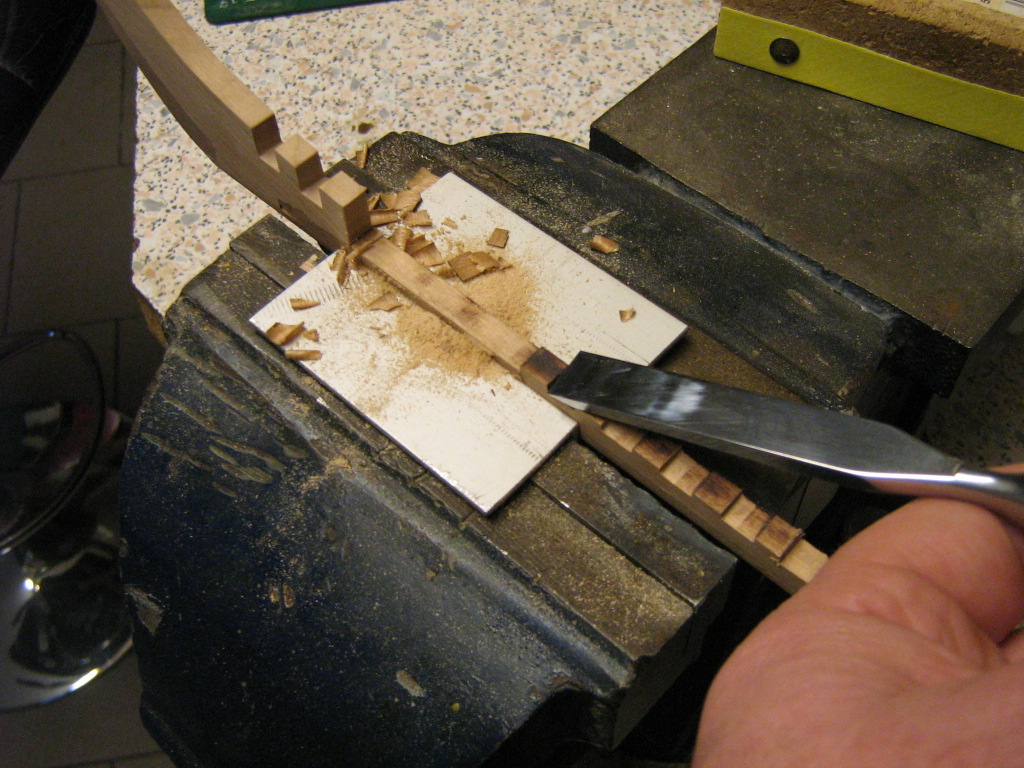
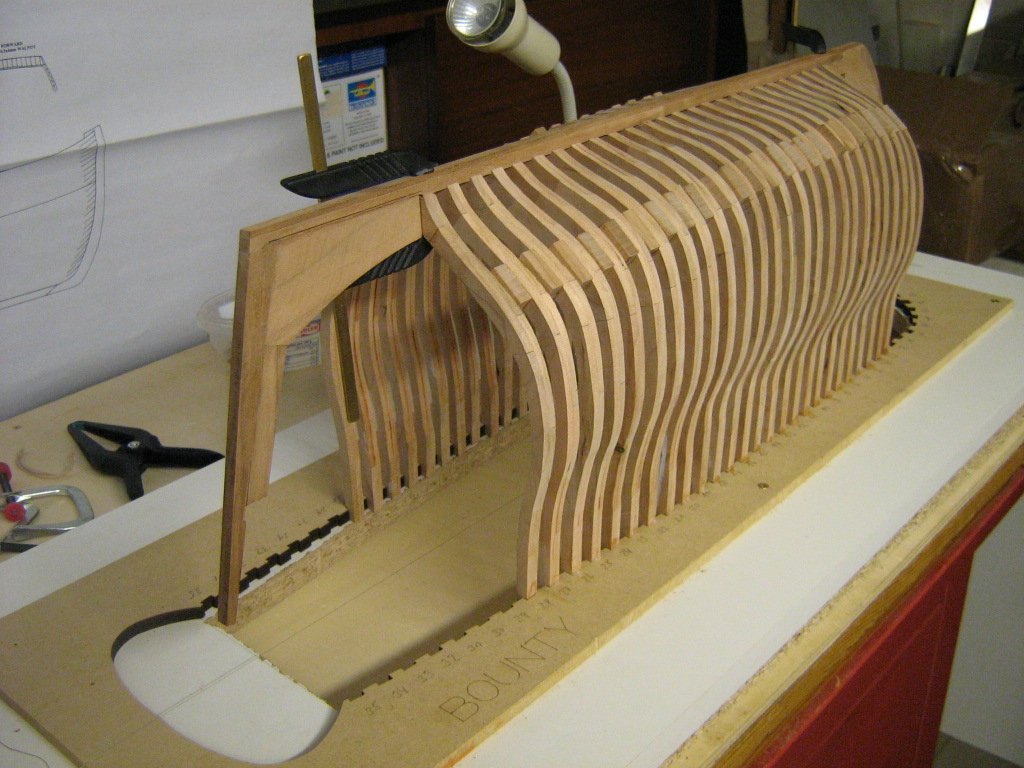
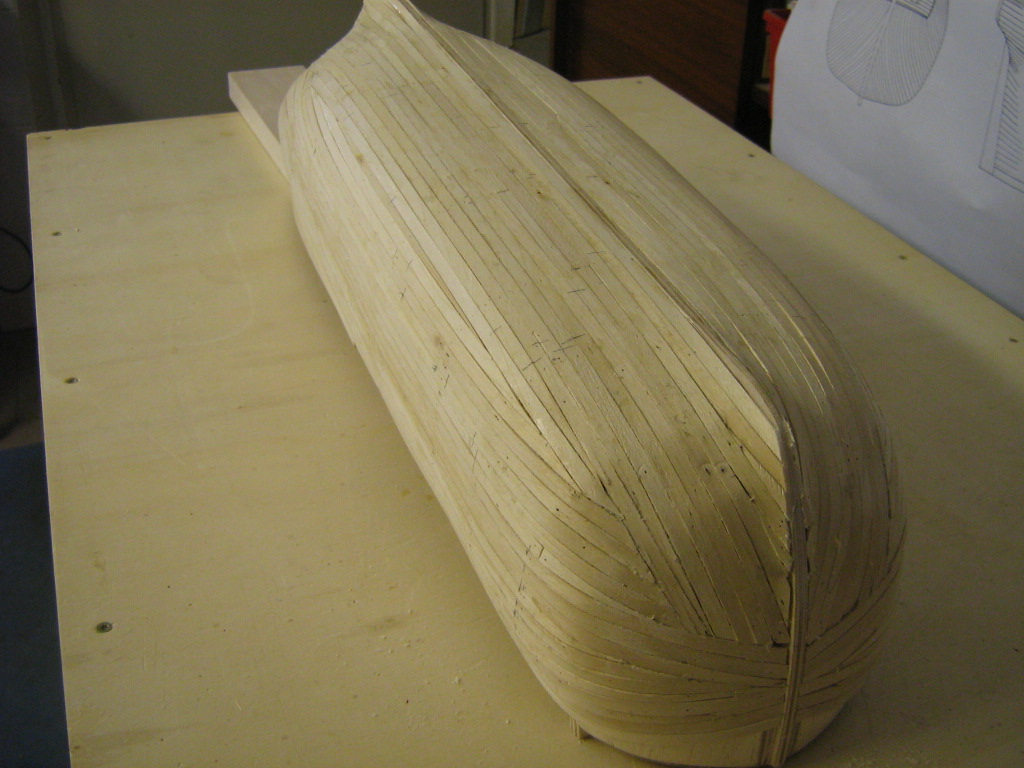
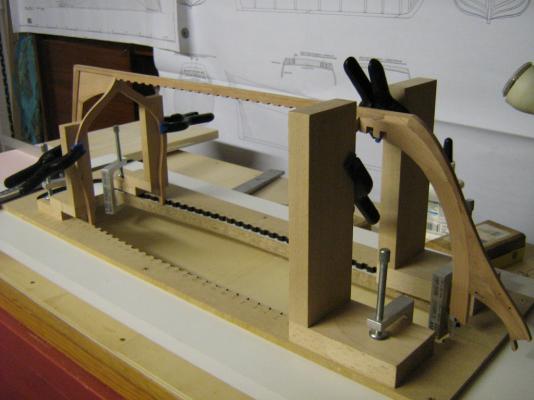
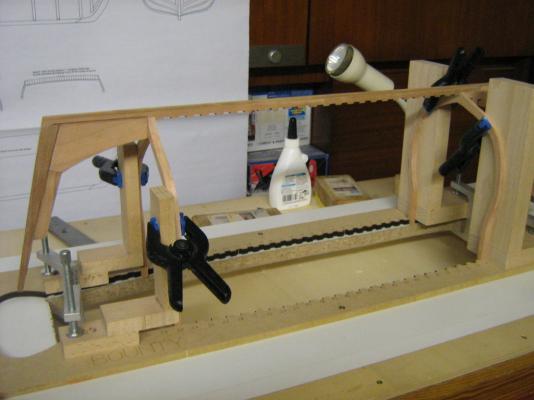
The whole Frames are adjusted and glued on now. The keel is still only dry fitted to the construction as I have to cut the rabbet before glueing. To make the keel fit, I chiseled off the spacers between the Frames as again the lasercut was not very accurate. Anyway, due to the use of the scrap wood spacers the structure is solid enough without this. It is good to see the hull slowly taking shape! Next is to prepare the rest of the half Frame Patterns, same way as before.


- 76 replies
-
- 12
-

-
 Hi Slog, sorry to see this. I would go for Option 4, as it was pretty common on most of the ships to shape the top of the stem post to accept the BS.
 -
Hello Candice, first of all welcome to the Bounty builders in the Forum, I will follow! I wll try to answer your questions as good as possible. as far as I know the kit is supplied with copper plates for hull coppering, if so, and if you intend to use them the method with the mixture of diluted Wood glue and sawdust should be OK. If you want to show the hull without copper plating you have to sand the keel parts to a proper fit. When not working think about doing them again from scratch. For bulkhead 6 check the outside of the bulkheads as well as the deck area for a proper line by using a Wood Strip and than decide where to remove material, either on the bulkhead sides or deck area. I guess you talk about the first planking of the model, if so, the CC method as mentioned in the instructions is fine as it takes a lot of sanding and filling anyway after the Planks have been laid. Dividing the hull in bands for the planking make sense for the second planking or if only one layer of Planks gets applied to the hull. I do hope it will help you a bit.
-
Hello Kevin, your PE parts are really looking good. may I ask you what sort of glue you are using to put them together?
-
Hi Mick, although the only Musical Instrument I know is the Radio in my work shop I would say this Thing just looks great, very well done mate!
-
Hi Kimberley, refering to your Color question, Heller is using the same Color range and numbering system as Humbrol does. I have attached a link to a conversion Chart containing Humbrol and most of other suppliers. http://www.creativemodels.co.uk/paint_conversion.php/manufacturers_id/12/page/2
-
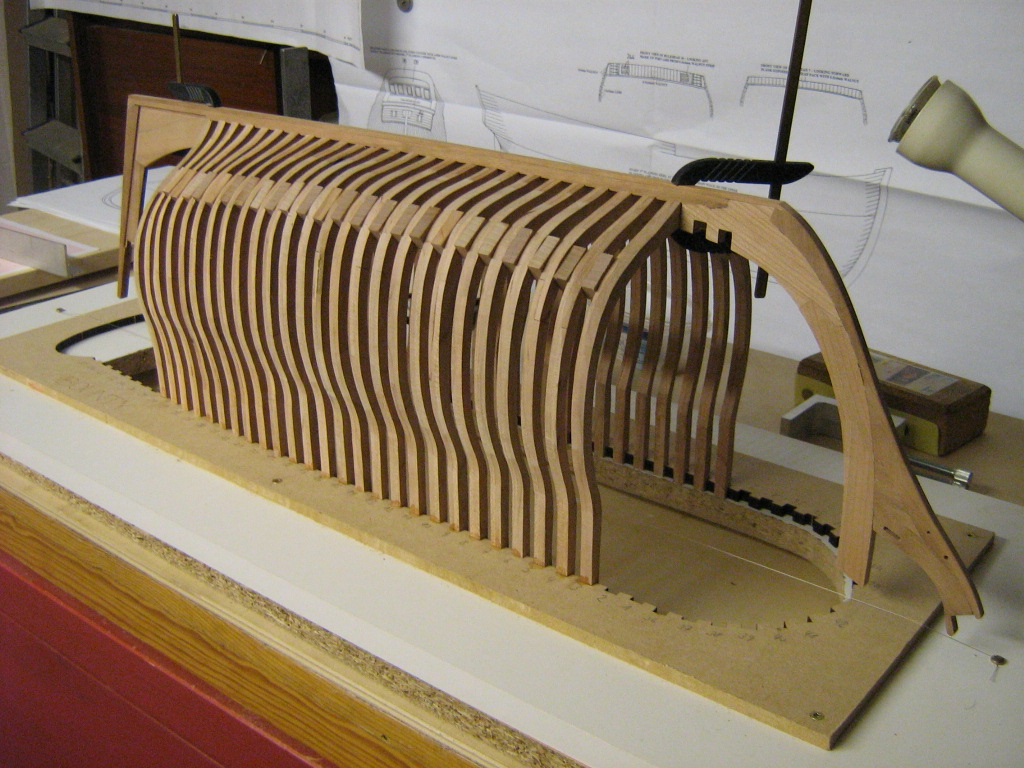
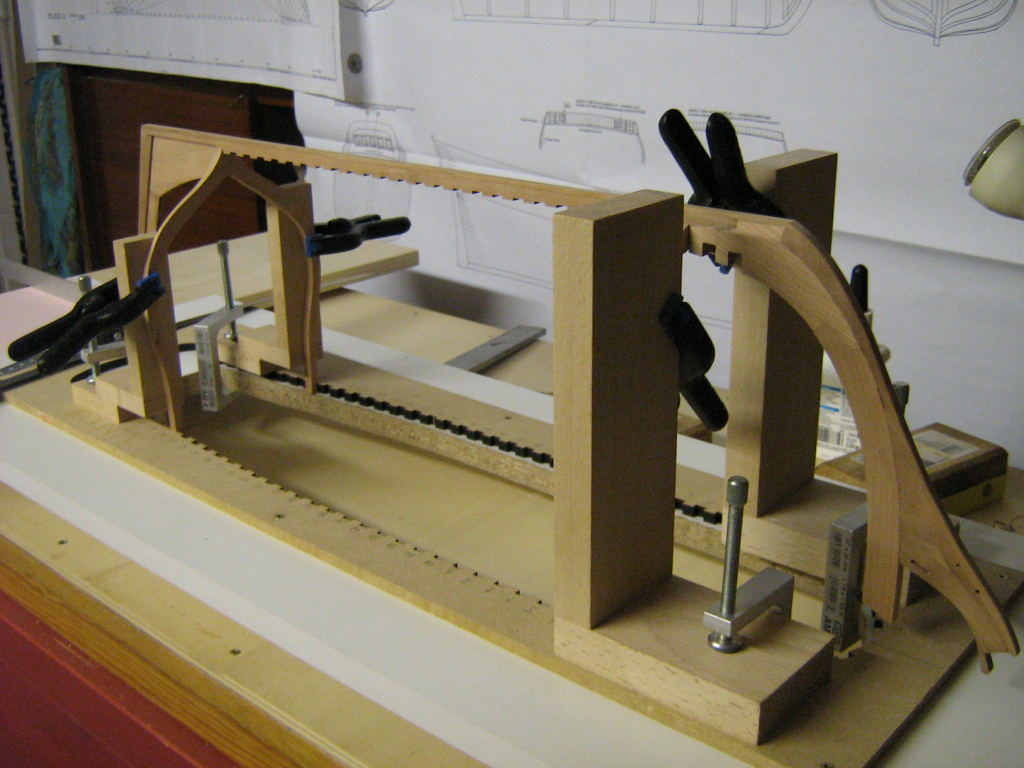
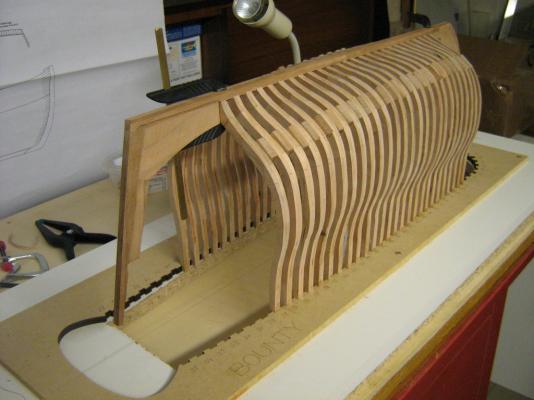
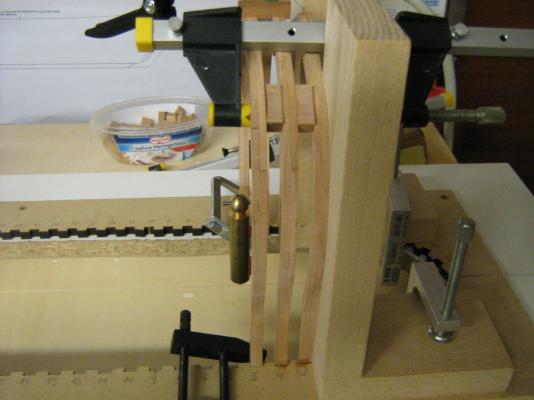
Most of the whole Frames are sanded and prepared. I started to errect and glue them to the building board. To receive a nice and strait construction I'am using a very thin string line running down the Center of the building jig with a plumb line fixed temporalily to the Center of each keel Slot in the Frames when glueing. To have more rigidity in the structure I'am adding some scrap pieces between the Frames.

-
Head up Kimberley, it's just one of this days happens to all of us once in a while. As Russ said, get replacement thread and fix it !
-
Thanks David for stopping by and your interest in my build, you did a great job on your Bounty to improve details and rigging. I have still not decided how to do the hull, interior, rigging, etc.and looking left and right for inspirations. My favorites right now are a both sided closed hull with copper sheating and fully rigged. I take in consideration to build the lower deck with all the details and remove some of the upper deck planking to expose the lower deck, but I may change my mind. I'am looking for authenticity as much as possible, same you did.
-
Hello Pavel, you did a nice looking hull, I like the treenailing you did. Although I haven't reached the Point yet I have started to think about doing it on my Bounty. If you don't mind I will take your Bounty as a Inspiration.
-
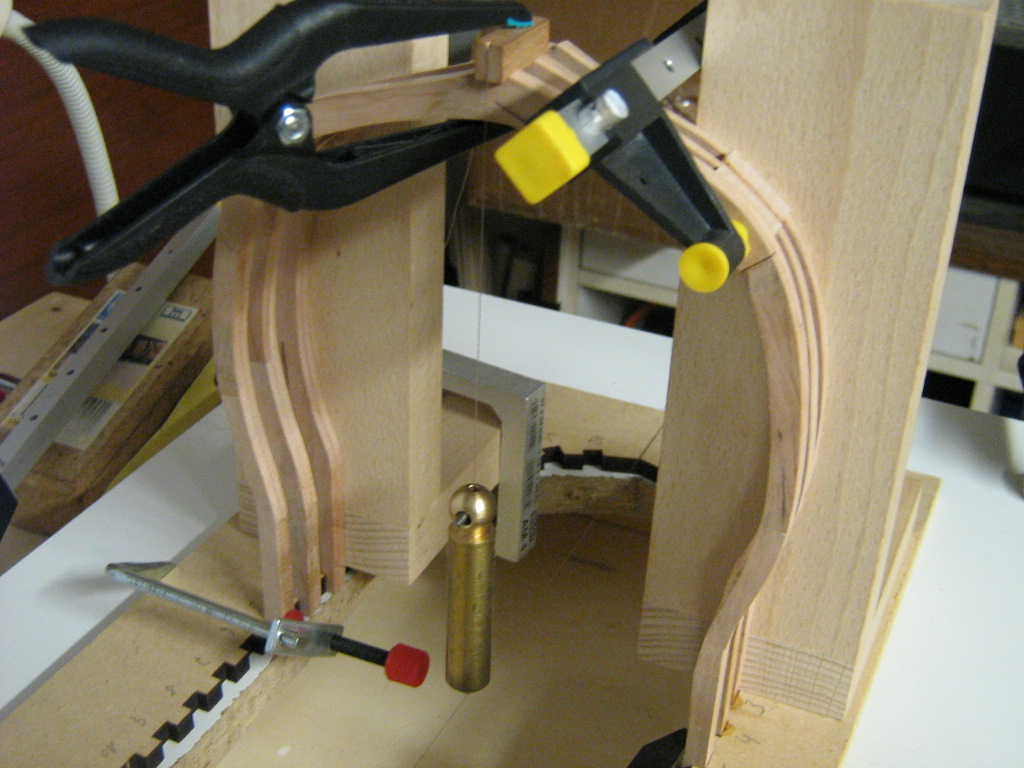
I'am pretty busy today! First two of the whole Frames are up, dry fitted to the building board.
-
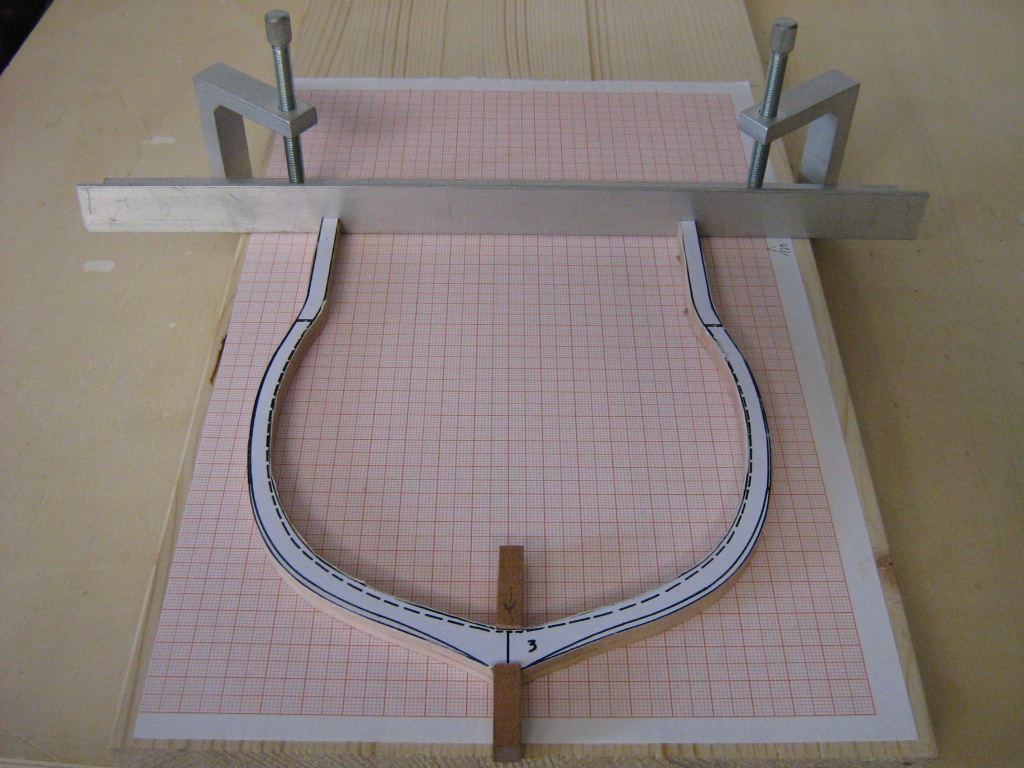
Thanks Pavel, the building method is different to a POB kit indeed but I enjoy it very much to build a ship this way. In order to center and align the Frames later on in the building board I made myself a "adjustable" jig with keel and keelson. I find it easier to sand the frames to lenght and make sure the keel fit in properly instead doing it with the drawings only.
-
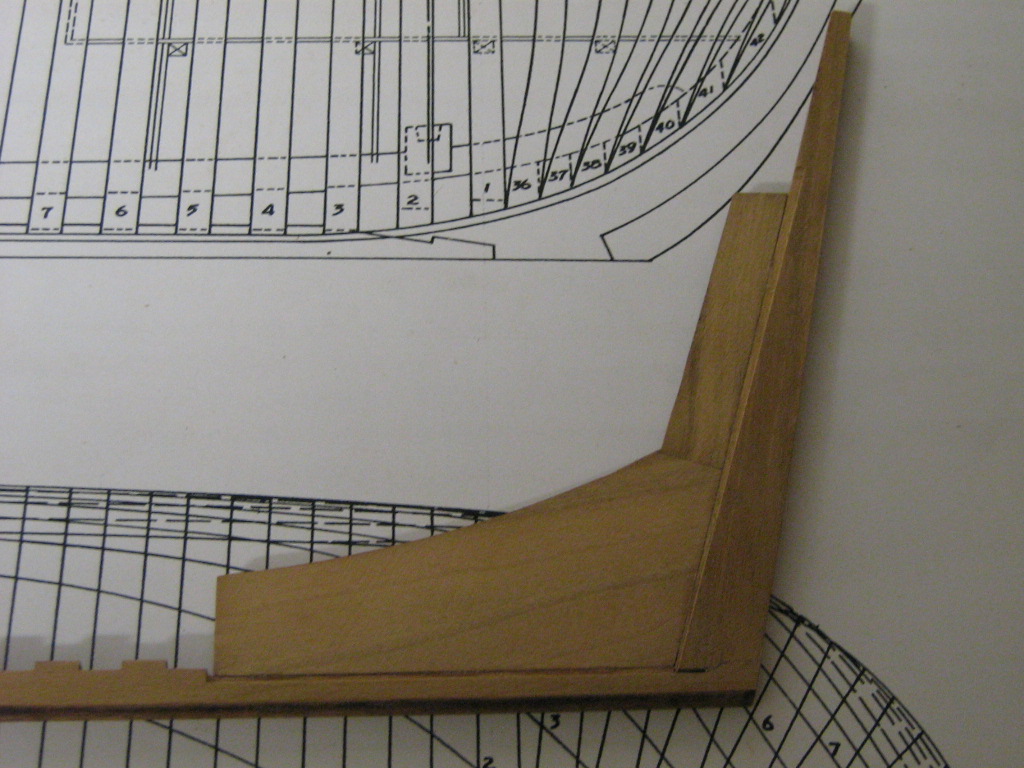
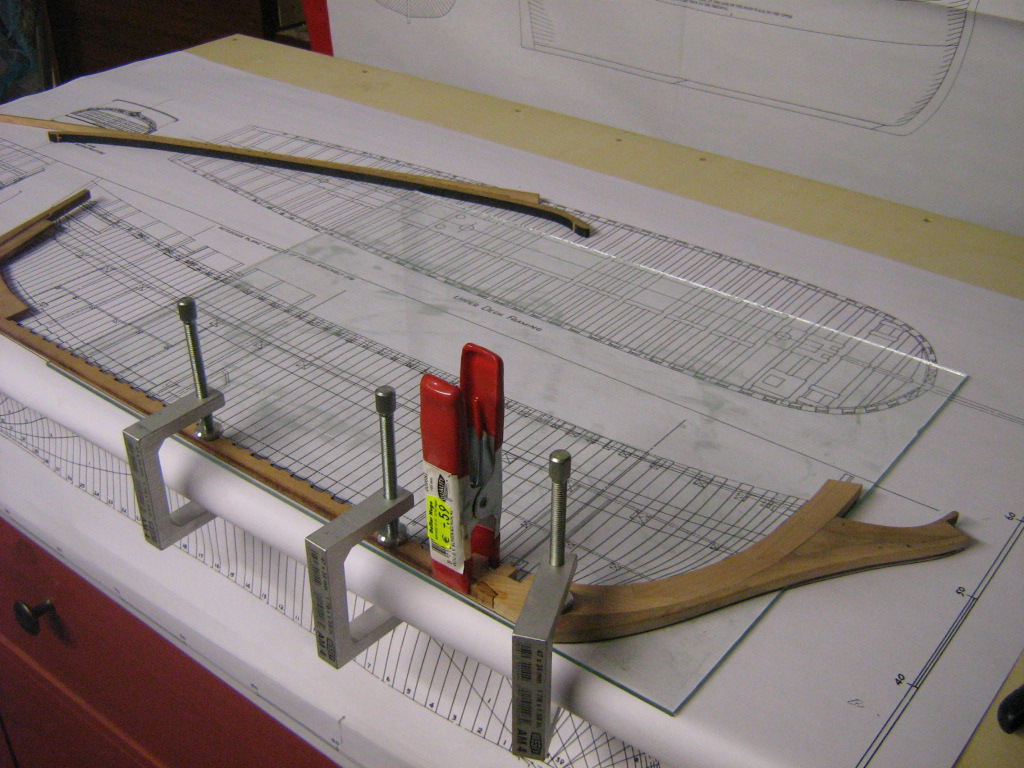
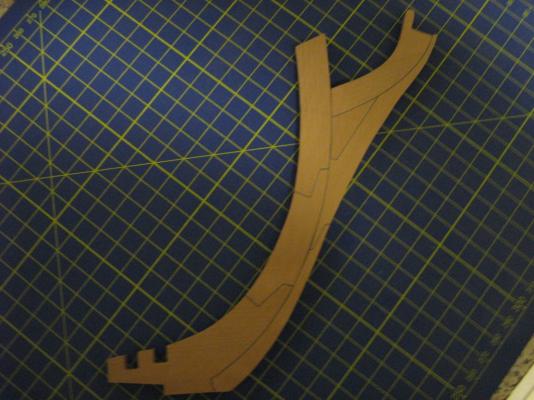
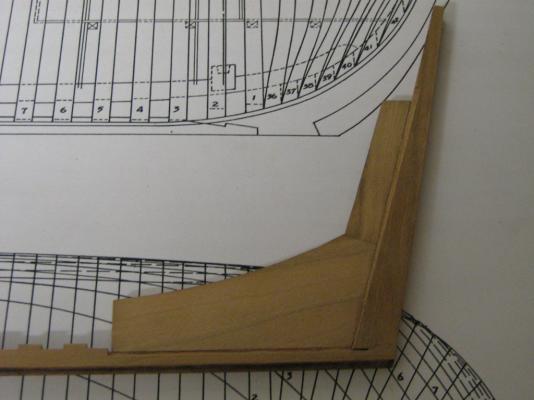
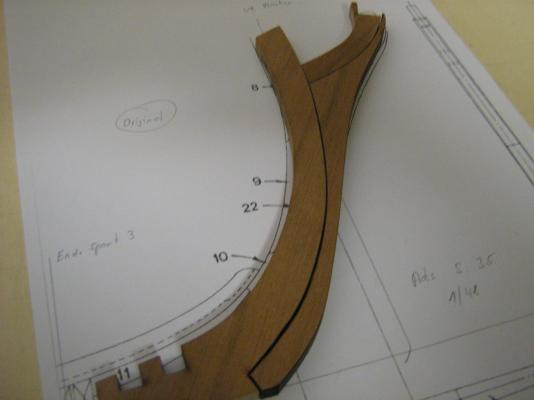
Hi all, finally I got the Backbone done. At the first attempt of making new stem parts I did a mistake on cutting the Joints due to be in a rush. No good, I couldn't use the parts anymore. I had to order some cherry wood to start the second try, that worked well. Here is the result with Joints and false keel as per the Aots drawings.


-
Hi Mick, Happy birthday to you!!
-
Kimberley, to hold pieces together you can use masking tape like the Tamiya tape available in different width.

- 94 replies
-
- 1
-
-
- santa maria
- revell
- (and 1 more)
-
Hello Kimberley although I never did a plastic ship kit by myself I wish you all the best for your build and will follow. In the Background of your Picture I can see you have a bunch of Vallejo model Colors. I used to work with them on my RC boats for weathering,always very happy with the result.
- 94 replies
-
- 1
-
-
- santa maria
- revell
- (and 1 more)
-
Hello Elmir, a neat build of a nice ship! Happy birthday to you!
-
Thanks Ian! I have planned to work on the Backbone today, but after a close inspection of the lasercut parts I'am not happy at all with their fit. It is hard to see in the Pictures but in some spots are gaps appearing of more than 1mm. After cleaning and sanding of the parts it will be even more. As my Intention is to go with the AotS book I have decieded to use the supplied keel and lower part of the stempost only and do the other parts from scratch. For that I will use the scrap pieces of the timber set to stay with the same sort of Wood and Color. By the way, next week I will buy a better camera!!

-
HM Bark Endeavour by UdoK - Caldercraft
UdoK replied to UdoK's topic in - Kit build logs for subjects built from 1751 - 1800
Hi Slog, it is not supplied with the kit, I took the 1,5mm basswood Piece from my stock. I find it easier and more solid this way, will do the same on the fore bulwark planking. You are right, I will trim it to the height of the bulkhead tops after sanding. -
HM Bark Endeavour by UdoK - Caldercraft
UdoK replied to UdoK's topic in - Kit build logs for subjects built from 1751 - 1800
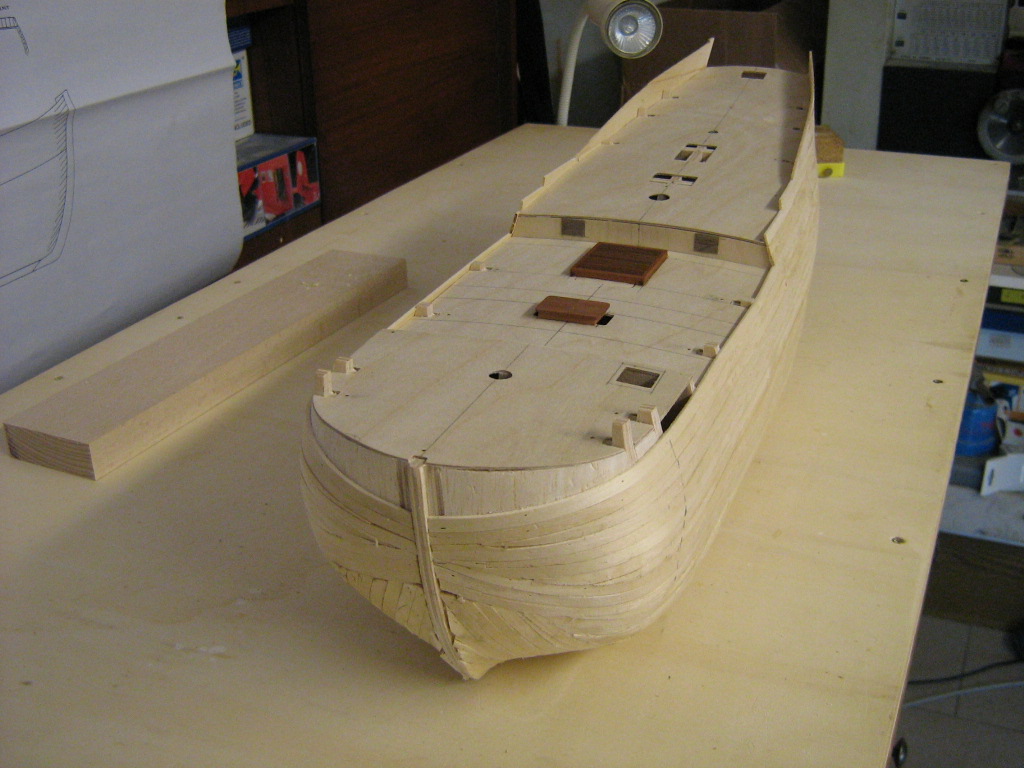
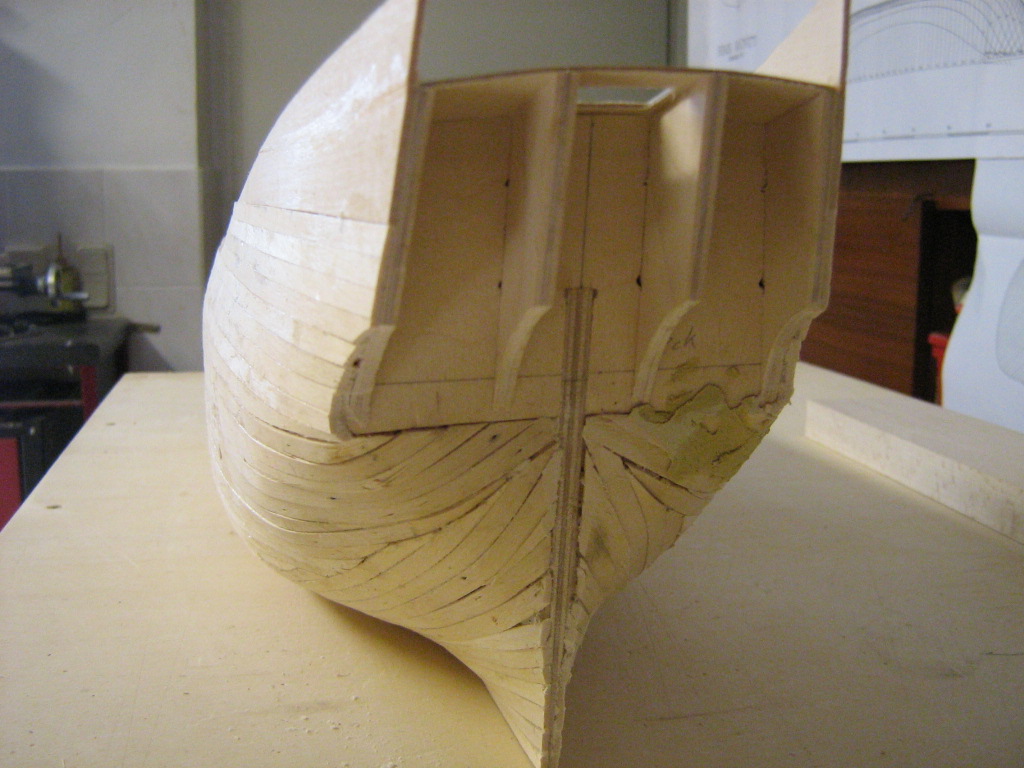
First planking completed! It looks (it is) a bit rough on the Bow and Stern but filler and sanding will do the Job. The missing fore bulwarks will be added after sanding to prevent damage on it. Will start sanding pretty soon