Geoff Matson
-
Posts
720 -
Joined
-
Last visited
Content Type
Profiles
Forums
Gallery
Events
Everything posted by Geoff Matson
-
 J I use a Byrnes rope walk
 -
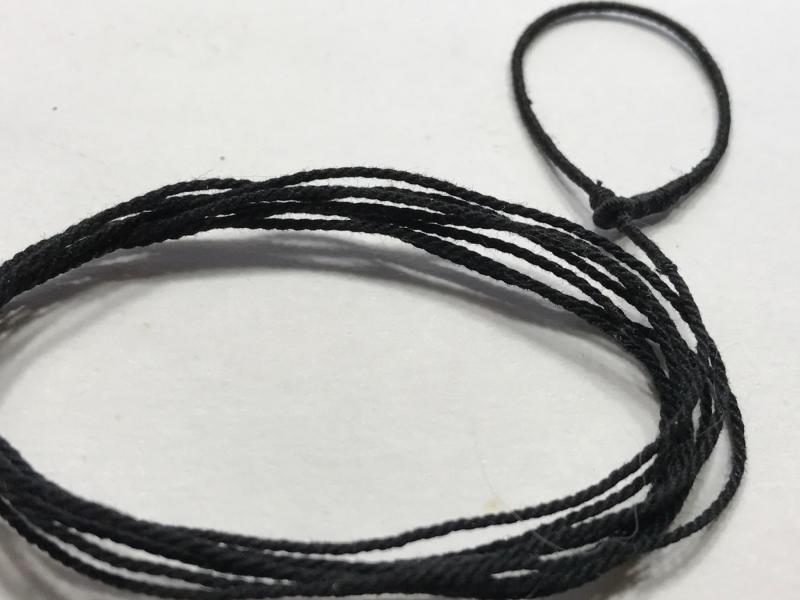
I have been busy making line for my running rigging.
-
Nice to see you back to work. I look forward to another great build
-
Dave I enjoy watching you turn problems into fixes. You are doing a great job and when you are finished you will have a great model.
- 742 replies
-
- 4
-

-
- constitution
- frigate
- (and 1 more)
-
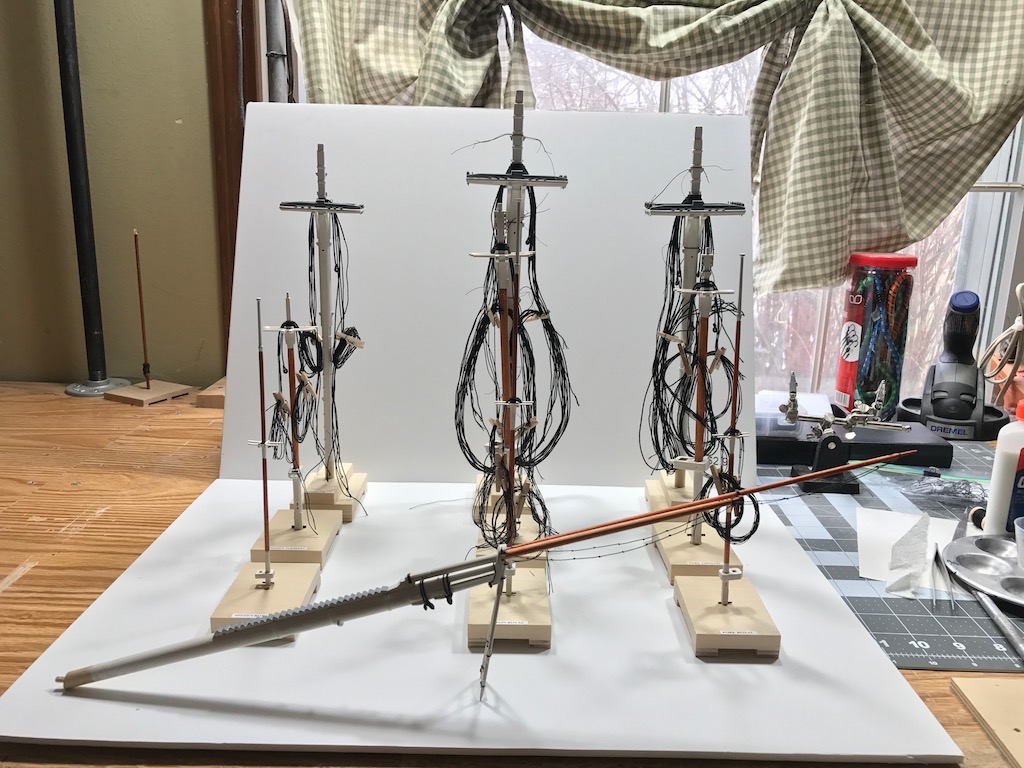
I have everything pre rigged on my foremast lower yard. I am sure glad I did this off the mast. There was a lot of fiddling and adjustments to be made and I know it would have been a real pain to do on the mast. Everything is a learning curve. I hope rigging the main mast yard will go a little easier. Now I have to make up some more line so I will be making rope for a while.


-
I also agree to do the shrouds and then attach the yard. I always put a pin in the yard and a hole in the mast where it will go, the way The yard will stay in play while you rig it yo the mast. I step the mast from the deck up. I also found it very good idea to rig much of the yard while off the mast before you install.
-
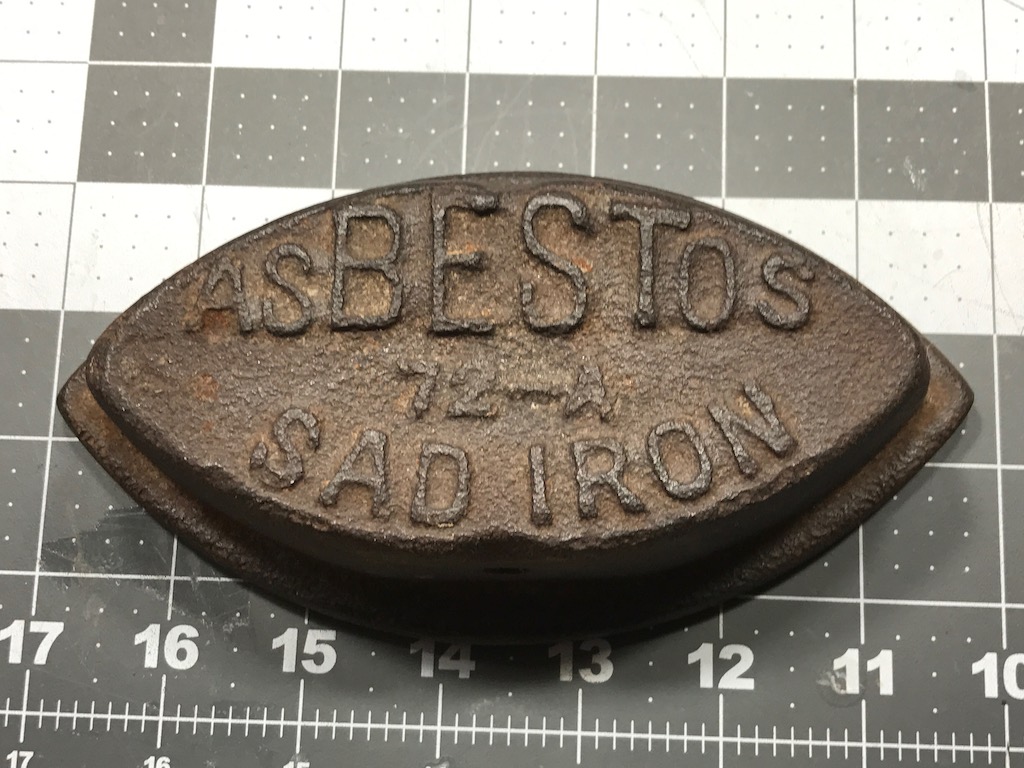
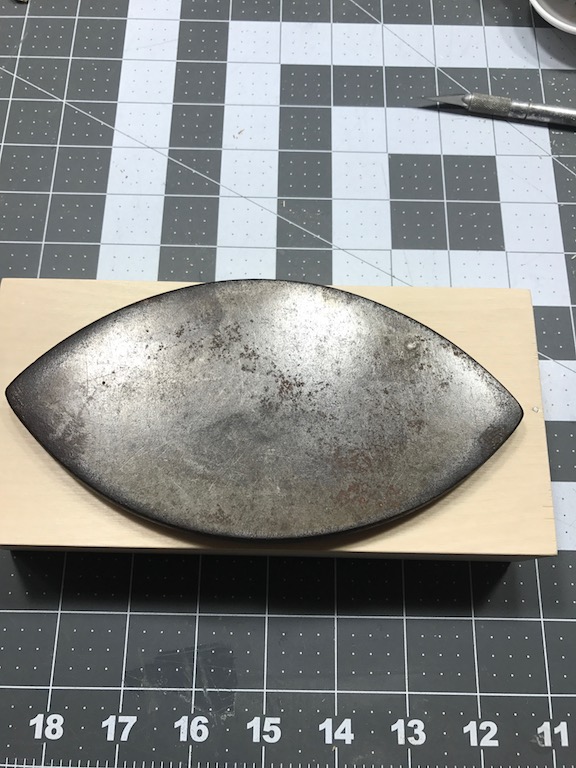
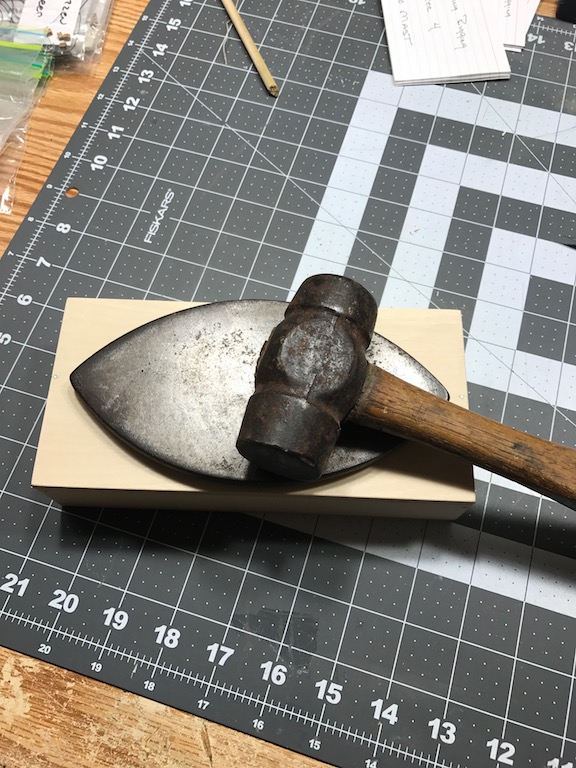
I am a retired Horseshoer/Blacksmith and got tired of using my 100LB anvil to make and level my small metal parts. I was at a flea market and picked up an old iron that they used before they had electricity for $5. I thought it would be a great mini anvil. It worked so well I finally made a small box to hold it out of some scrap wood. You can also use the iron as a weight to help glue flat pieces of wood together. Now all I need is a smaller hammer!


-
I am a retired Horseshoer/ Blacksmith and finally got tired of using my 100 LB. anvil to make my small metal parts. I was at a flea market and picked up an old iron that they used before electricity. It looked perfect to use as a mini anvil to help make my small metal parts. I picked it up for $5. I even constructed a small wooden box for it and it has worked quite well. You can even take it out of the box and use it as a weight when you glue to parts together. Now all I need is a little smaller hammer.

-
- 11
-
-
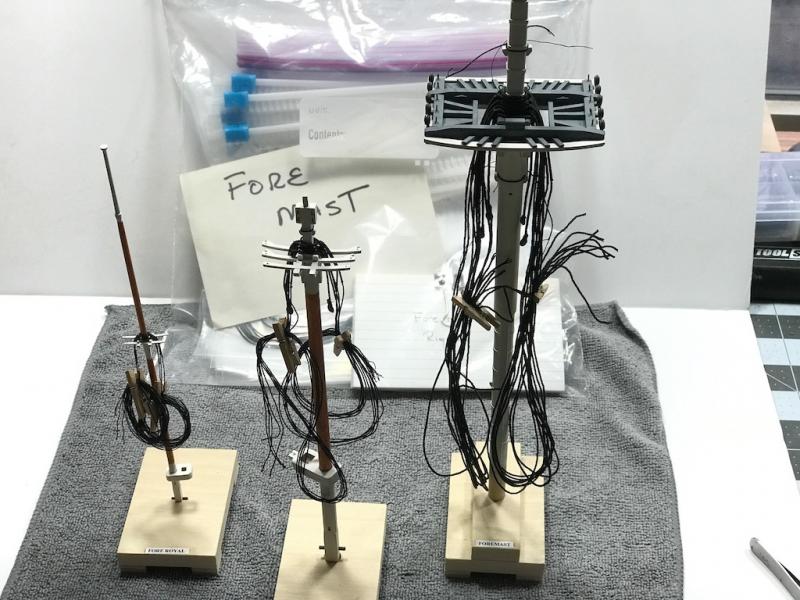
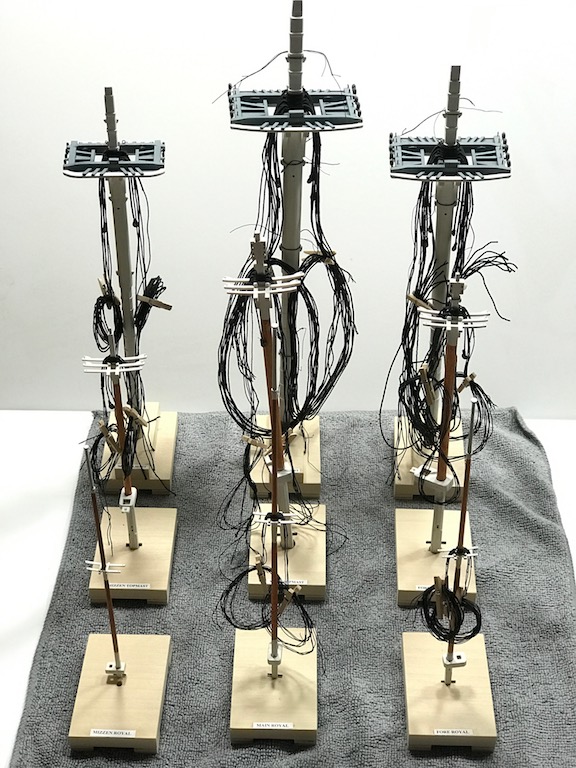
I not only like to rig my ships, but I also enjoy making my line. I am presently working on Model Shipways Constitution. I have pre hung as much of the rigging as I could before installing the masts.

-
I often wondered why some modelers just do Admiralty style models. Now I know. They don't have to RIG them. Maybe my next model will be admiralty style. I have been working on attaching the sling and jeer blocks on the foremast yard. All these procedures will be the same for the main mast yards. I leave some long tails on the rigging parts so I can adjust them into position. I have big hands and no fingernails so the tails really aid in adjusting the parts. The long tails are the reason I make my own line. I am not worried about waste, I can can always make more line. Once I have them in place I set the part with diluted white glue, let it dry and then trim the tails off. Here are the results: There are a lot of adjustments to getting the blocks just right.
-
Tom: One of the guys I'm my model club turned me on to the color. He used Burnt Sienna oil paint. I bought a small tube at Hobby Lobby and it turned out be just what I was looking for. I just rubbed it on and let it dry. I can always touch it up if it needs it
-
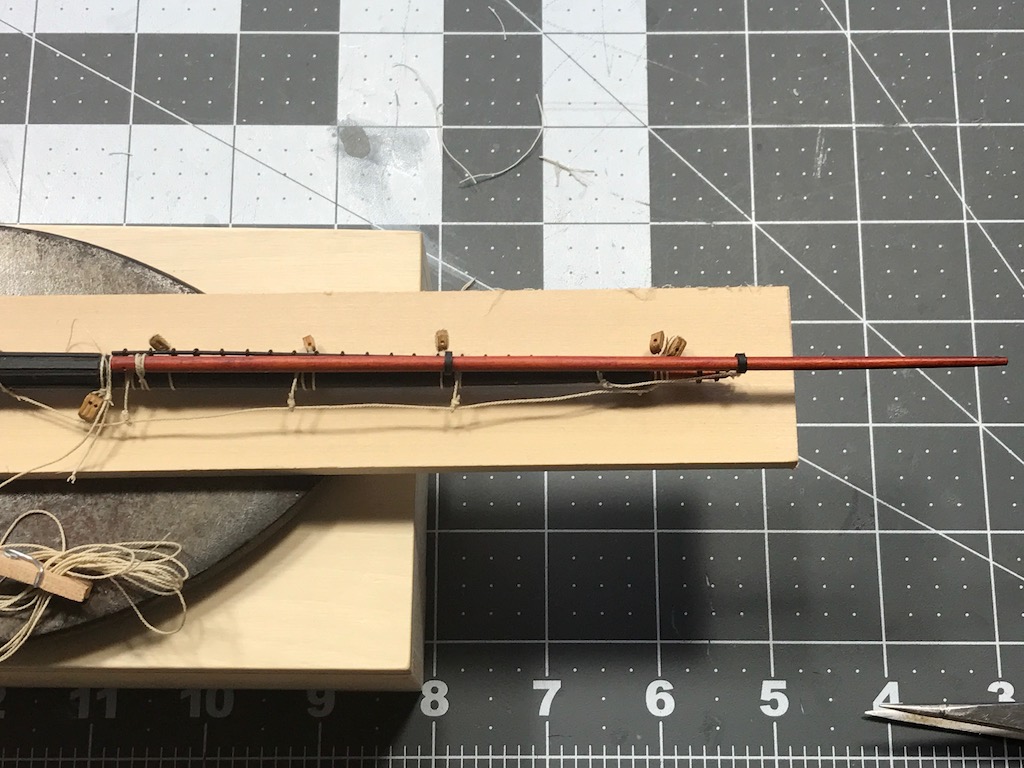
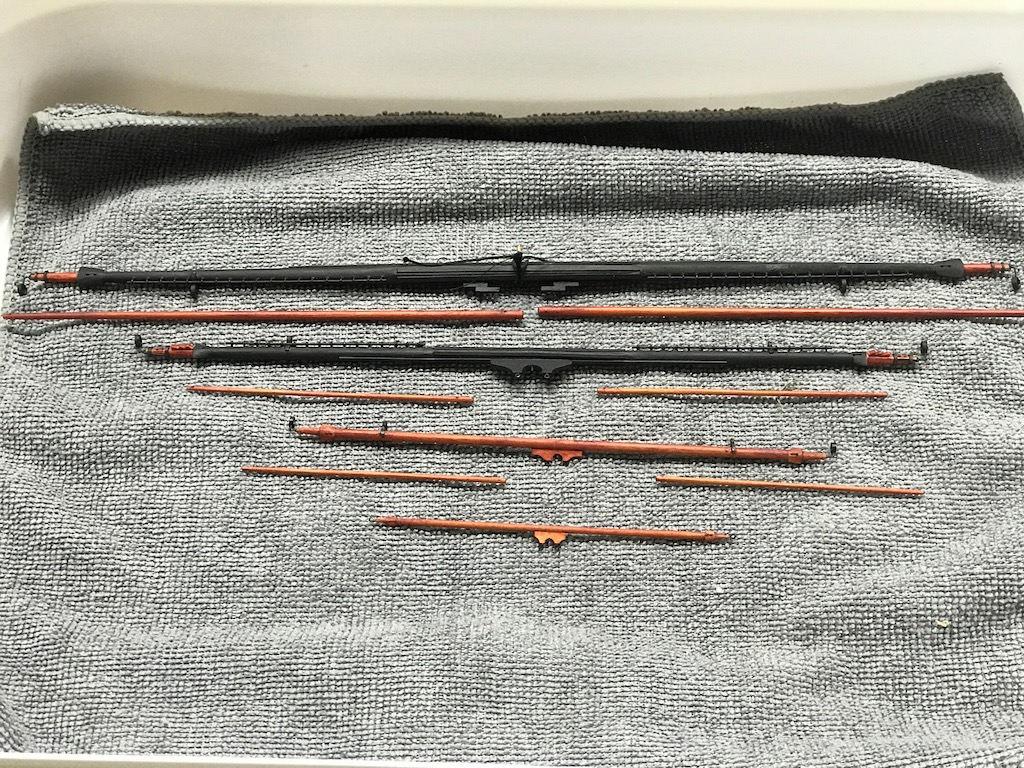
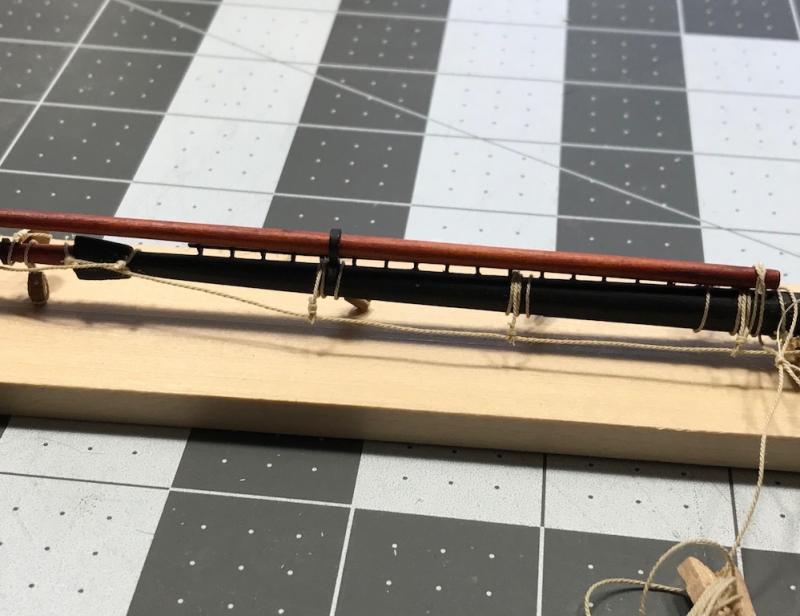
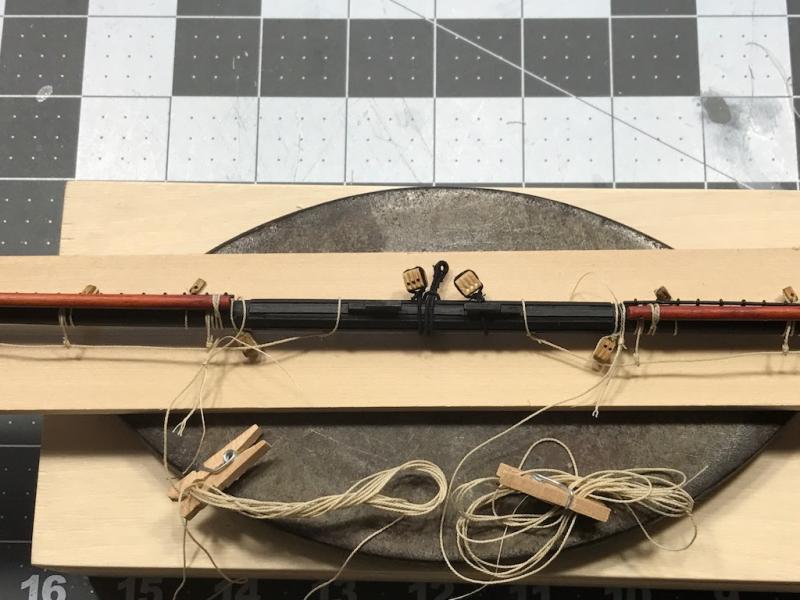
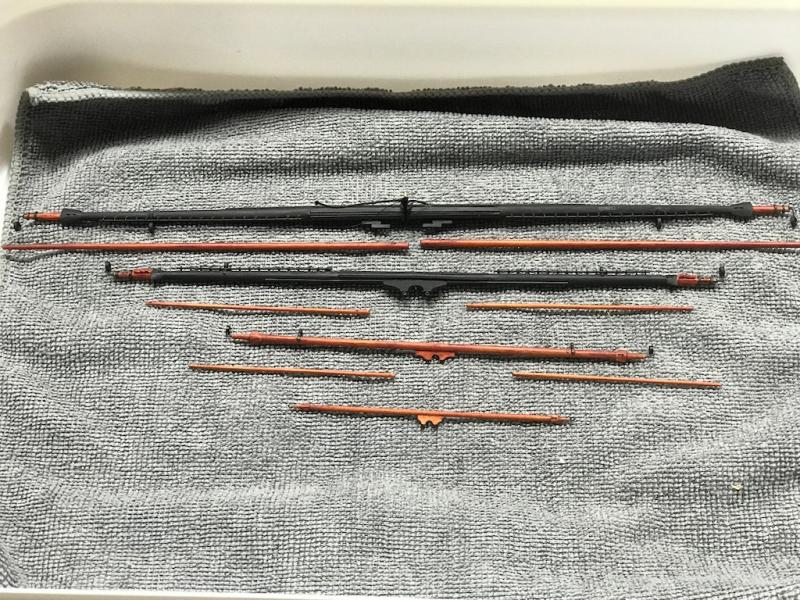
These are my foremast yards all ready to put the rigging on. I have the sling temporarily on the lower yard and am working on the rest of the rigging. Lots of knots, serving, and seizing going on. I want to install as much as I can before it must the yards to the masts. I have small pins in the yards to help hold them on the masts. These pins are just for alignment and will NOT BE GLUED. That way if my big hands get in the way and break something I won't have unglue them.
-
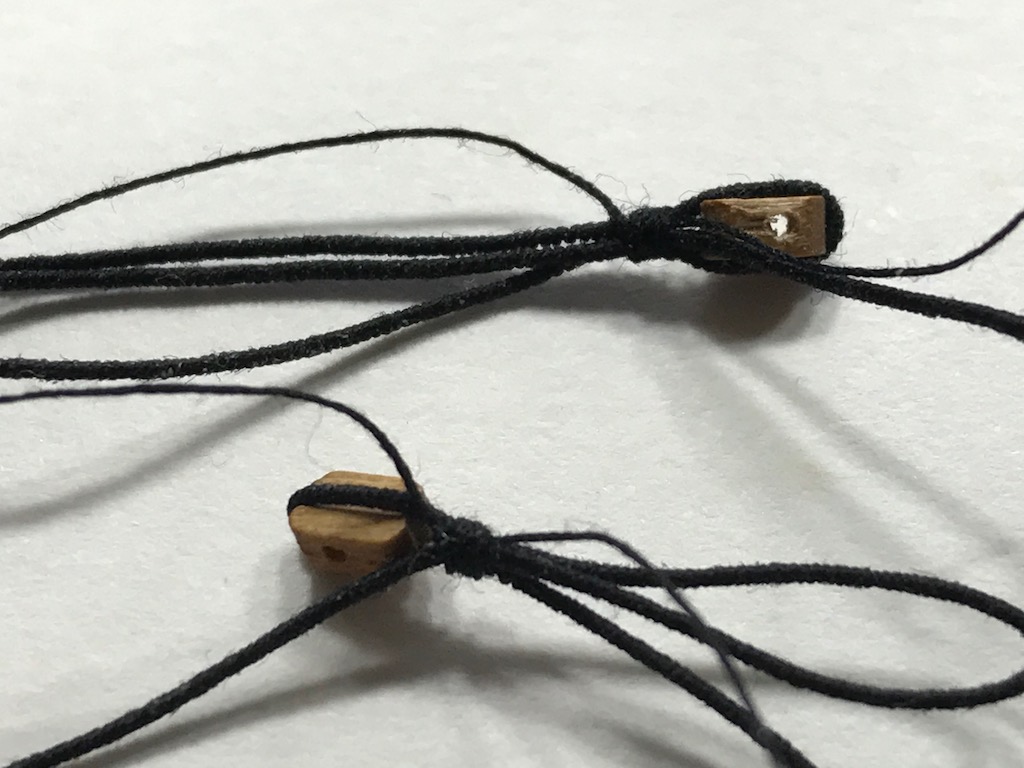
Here is a picture of the foremast sling test fitted on the foremast Yard. The whiskers will be trimmed of and set with diluted white glue. Here is a picture of the upper foremast sling that will be attached to the mast. They two parts of the sling will be attached by a lashing to thimbles.
-
Thanks Elijah. I am making all the rigging line for my Constitution with the Byrnes Ropewalk. The scale is 1/87 and I can get much more realistic rope that way
-
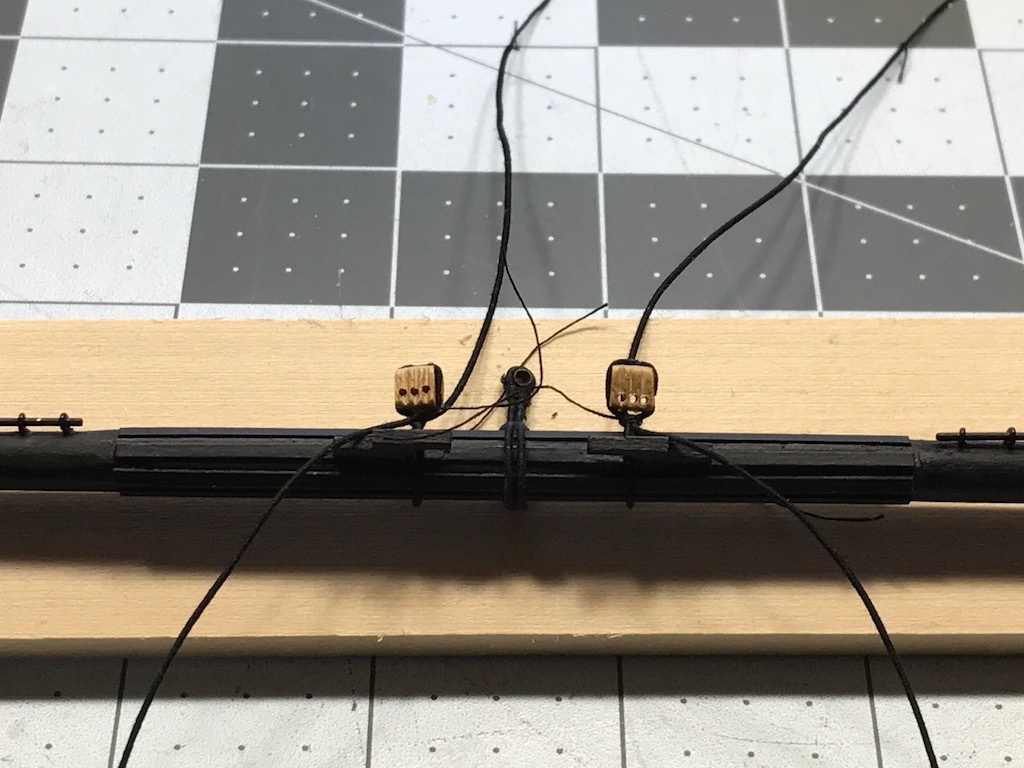
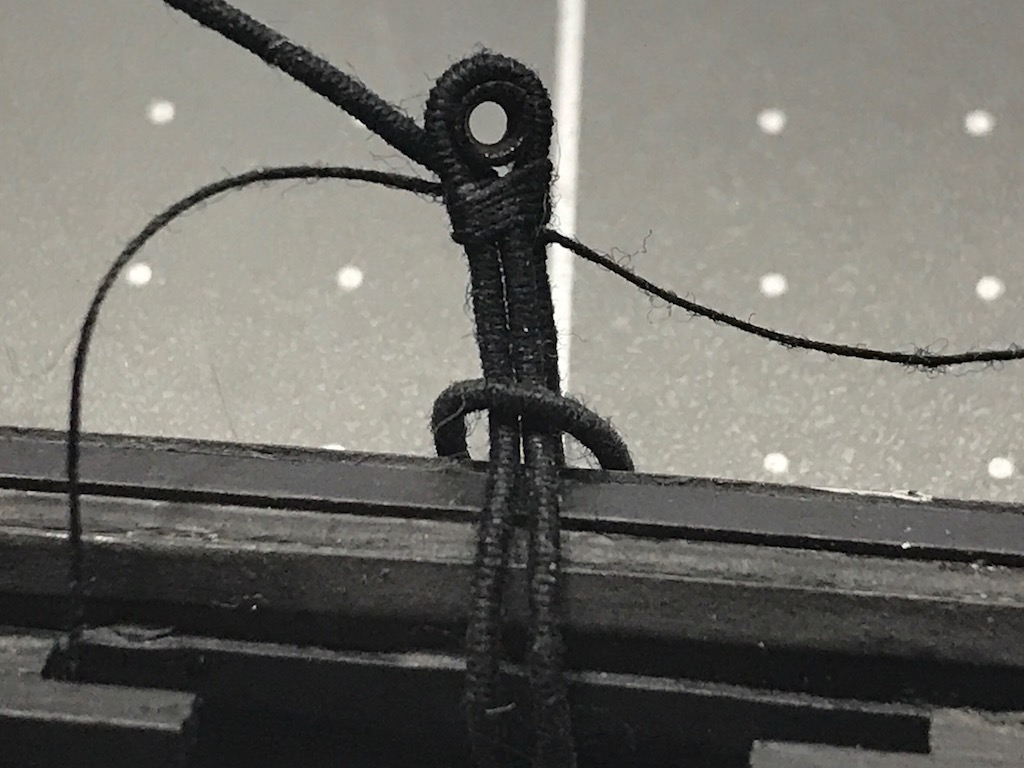
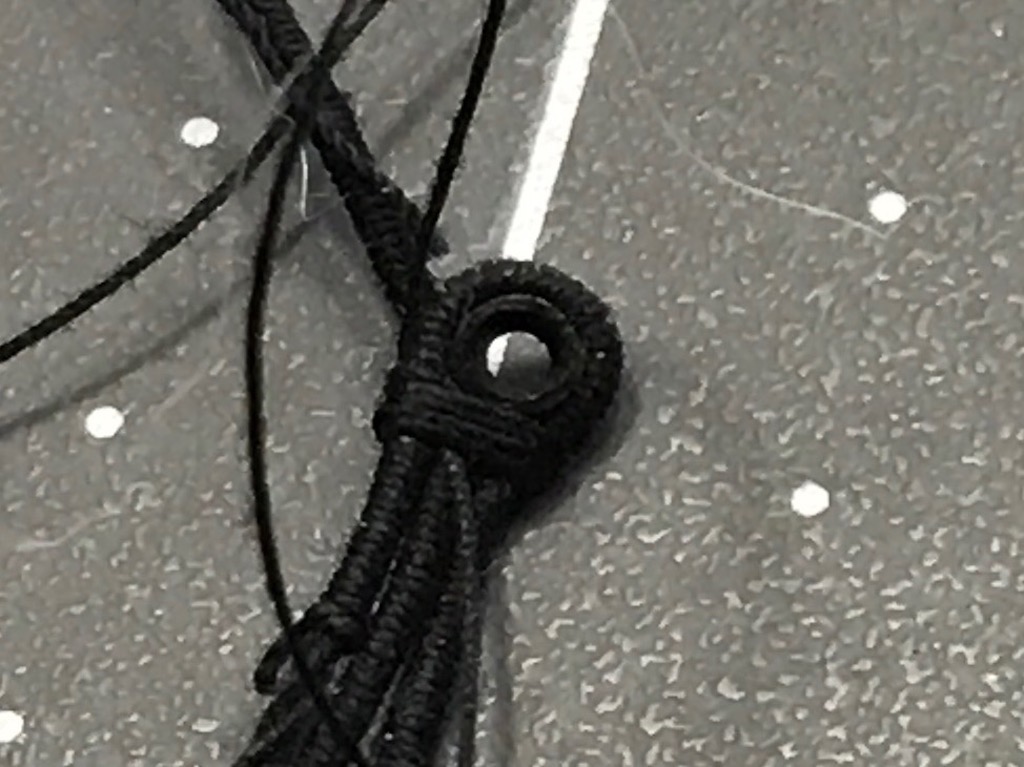
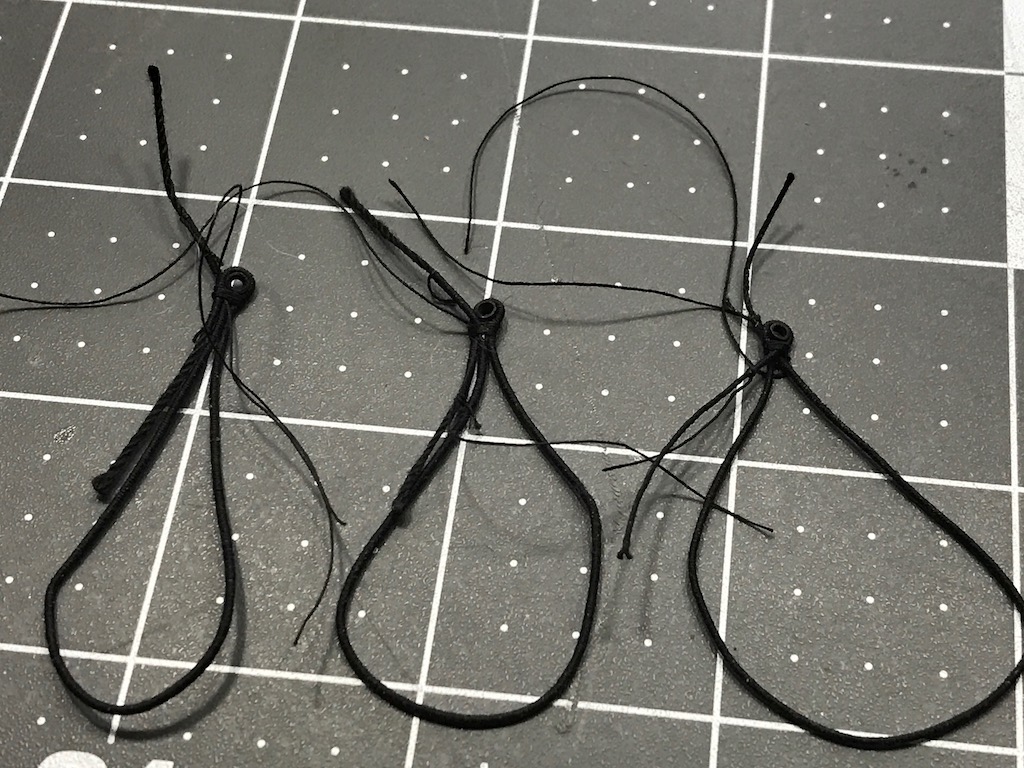
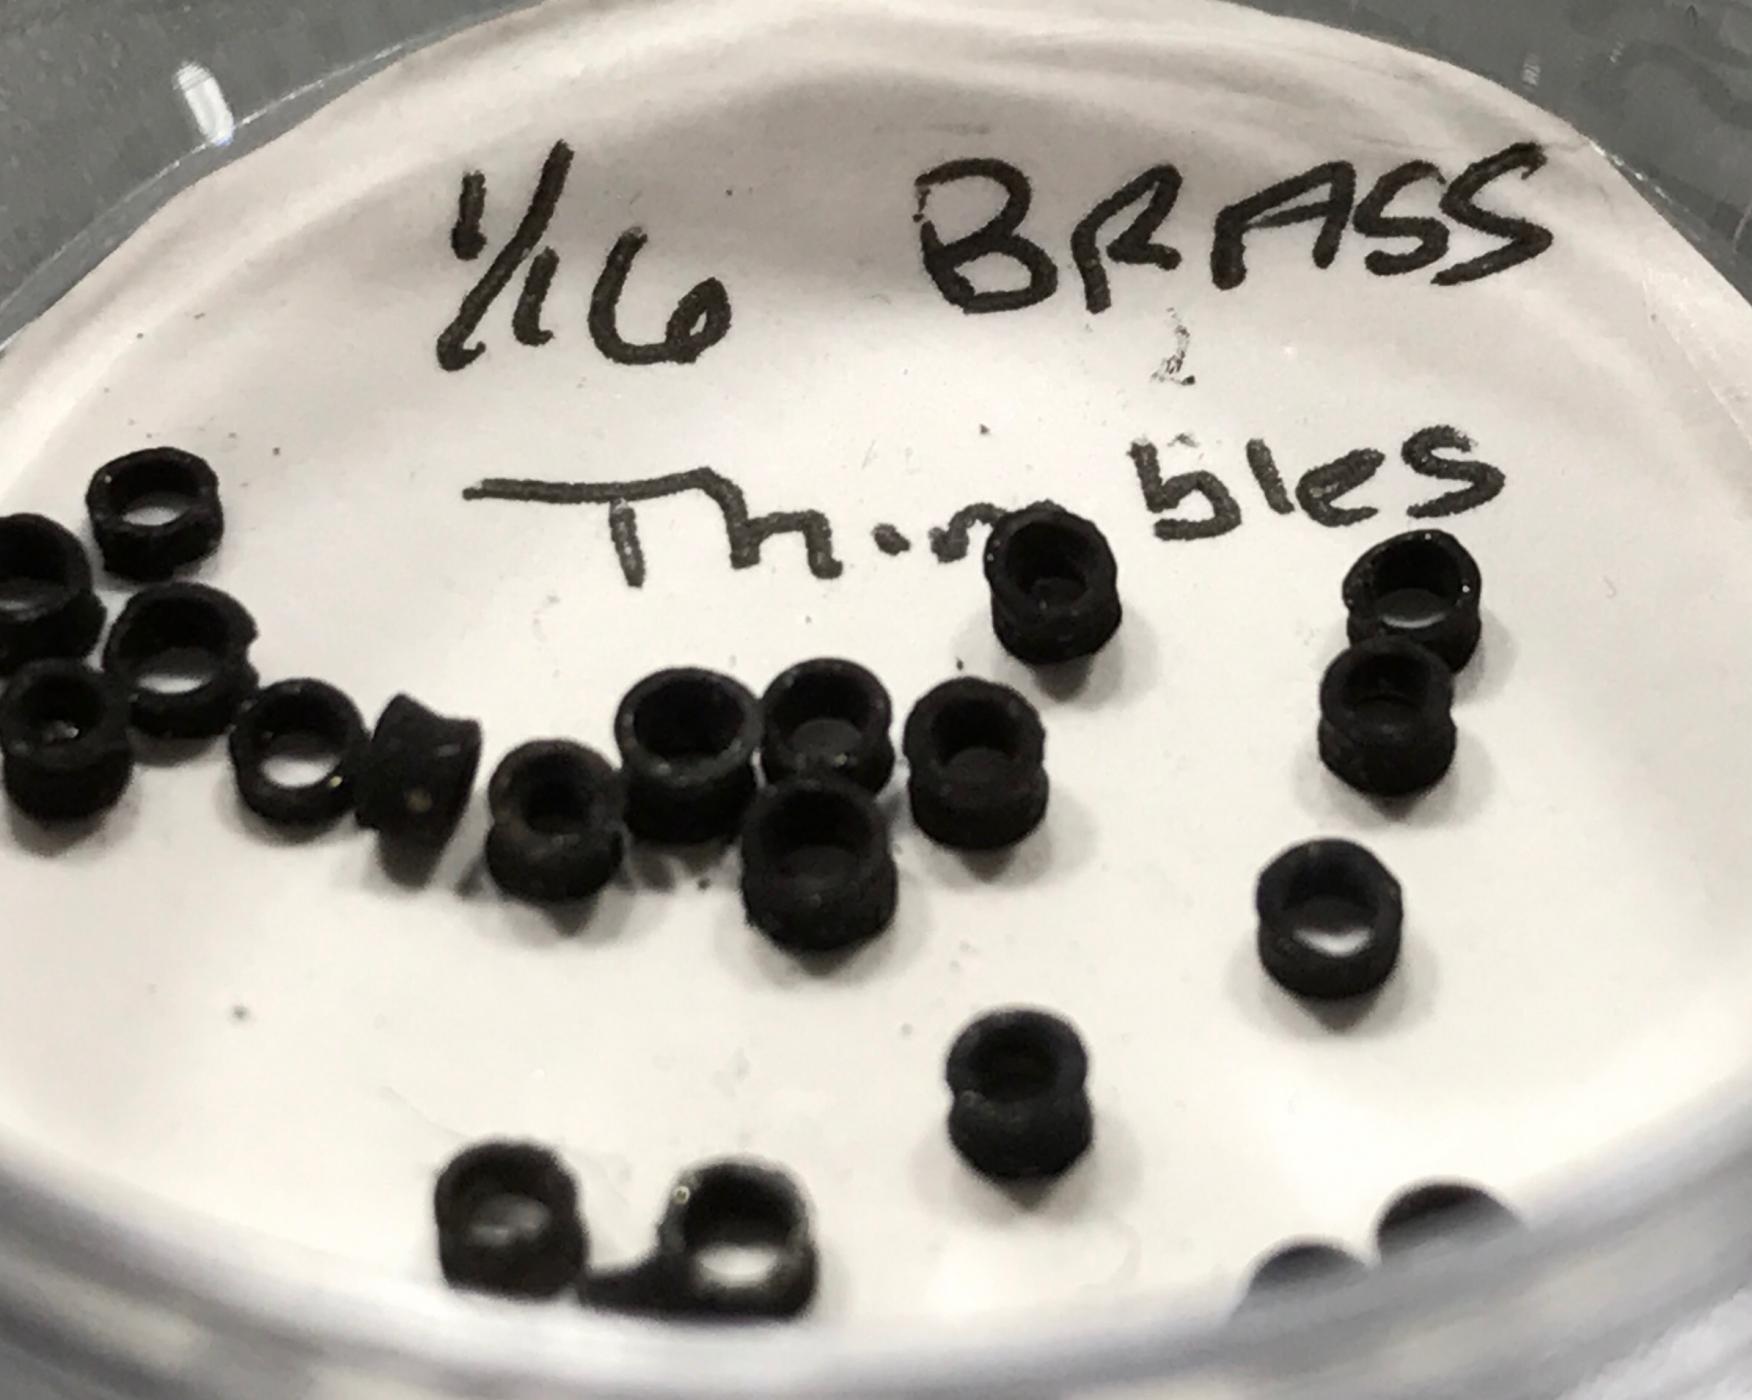
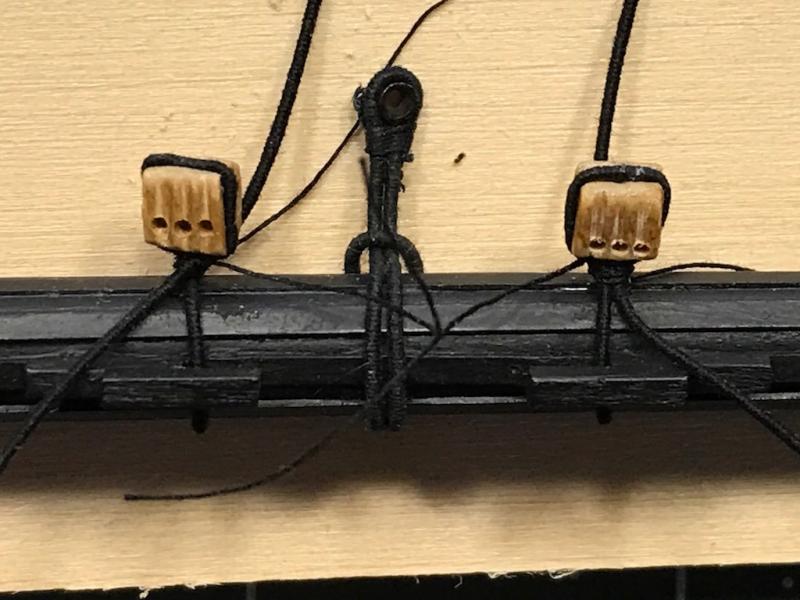
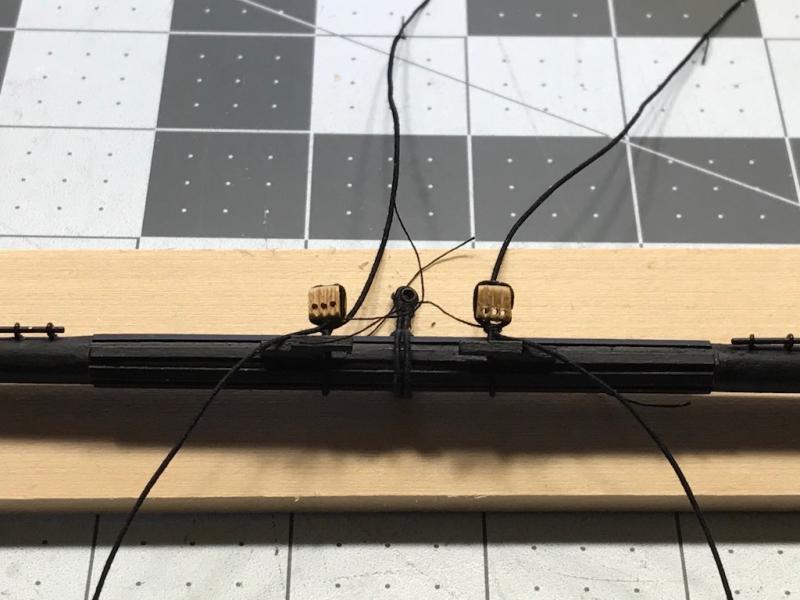
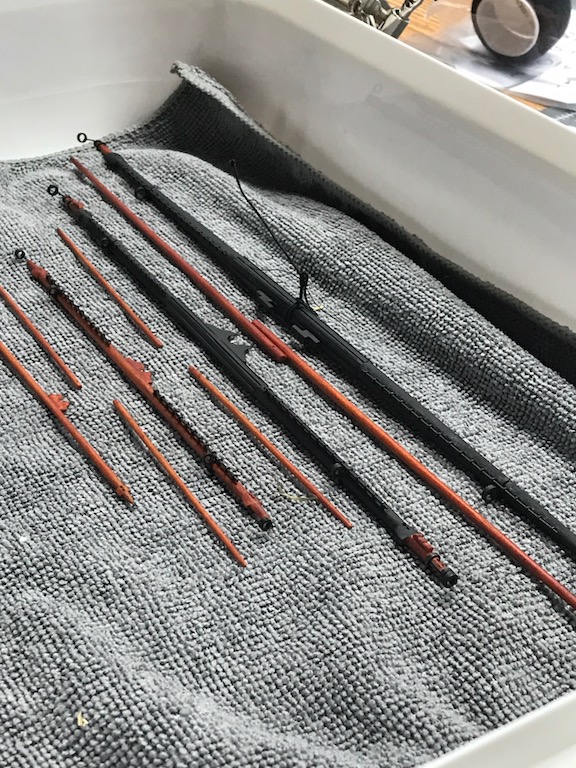
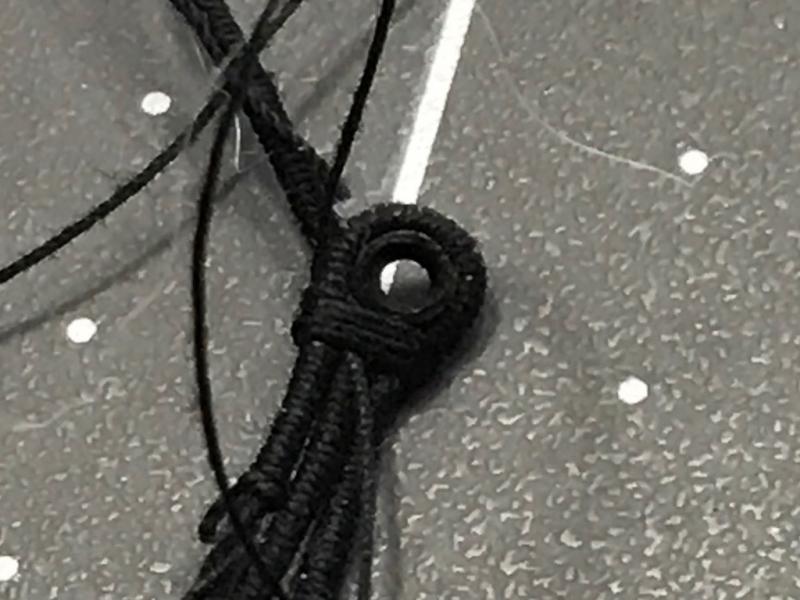
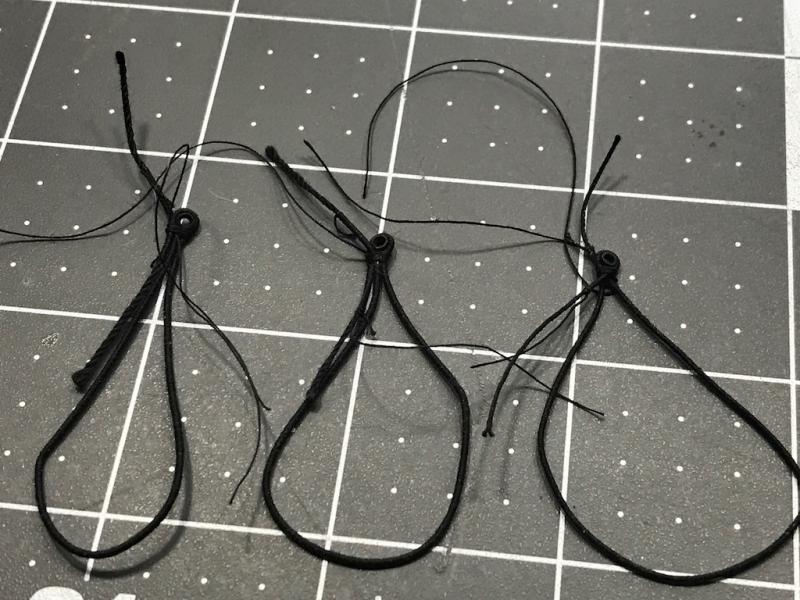
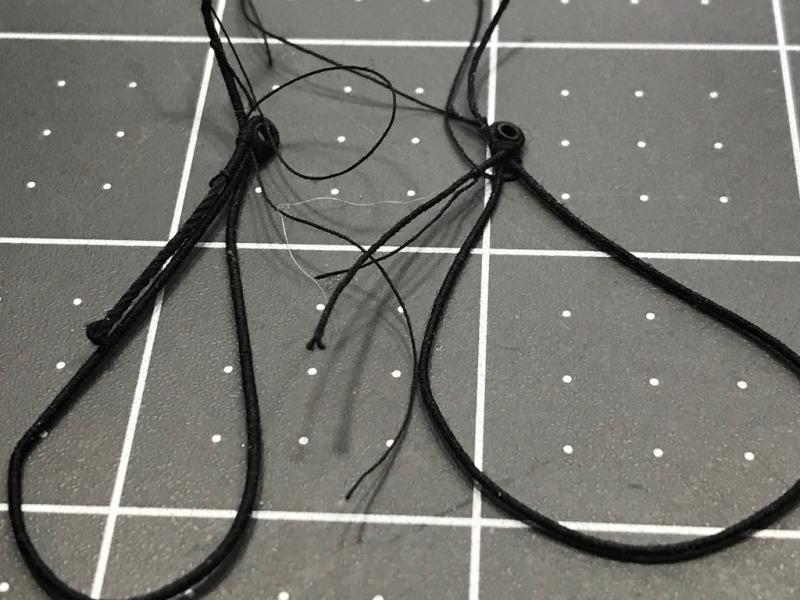
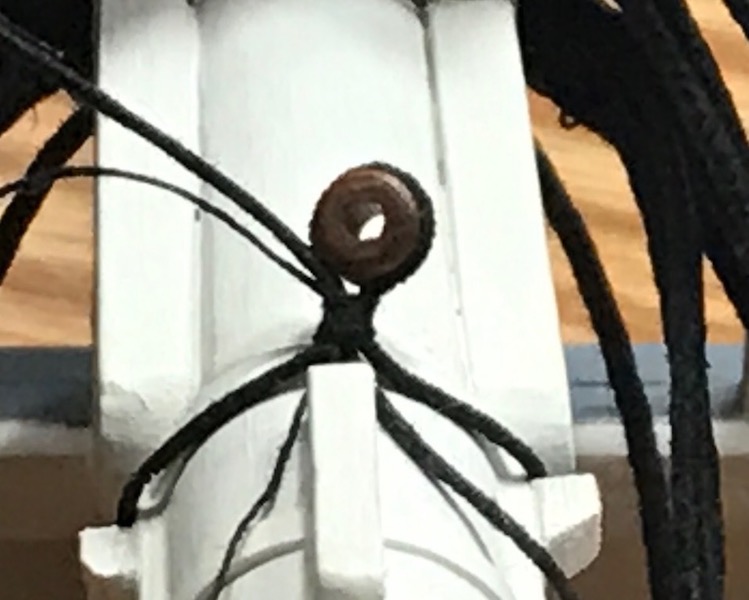
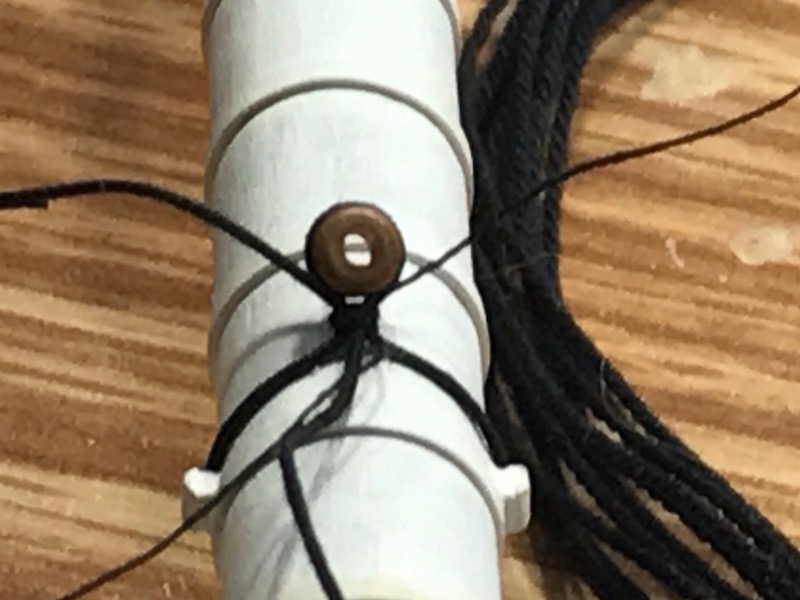
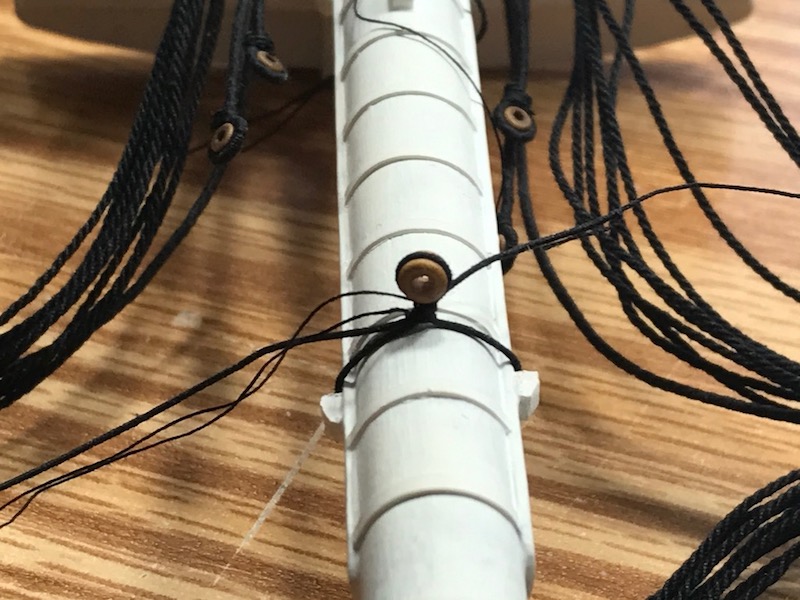
Here are some pictures of my thimbles on my mast slings. They are just on and waiting to get installed before I trim the whiskers and dog hairs that always seem to get caught. The third picture shows the mast sling for the main and fore mast. The third sling is for the mizzen mast and a little smaller. I like using my Byrnes Ropewalk so I make different line sizes to show the difference in size

-
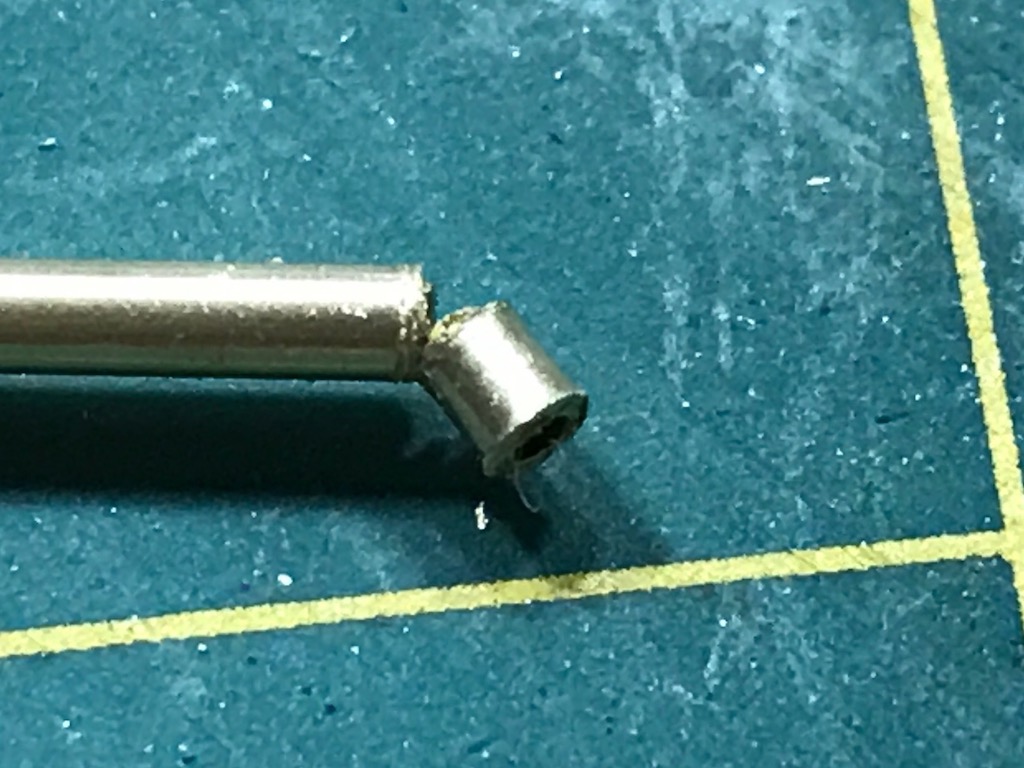
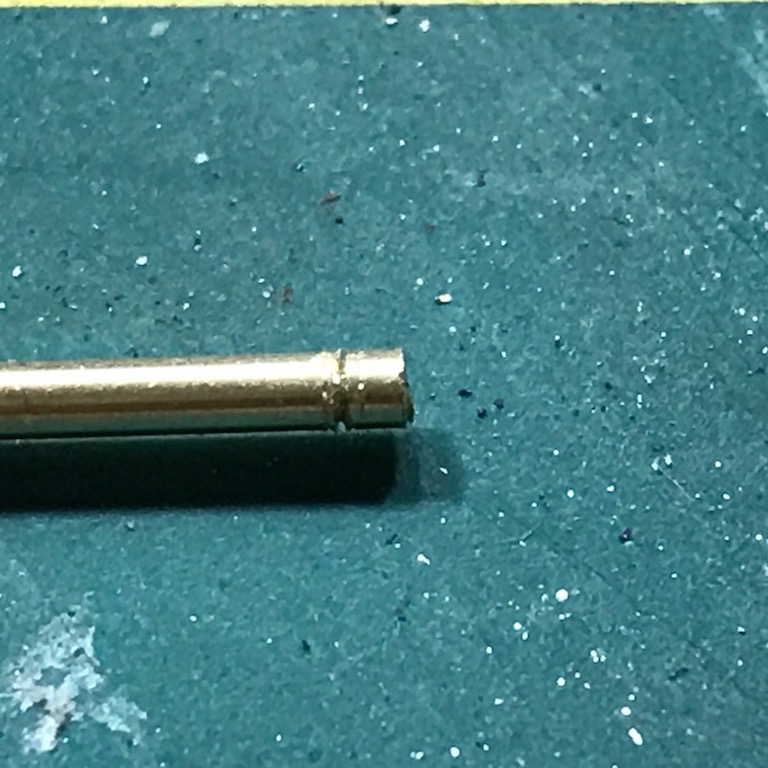
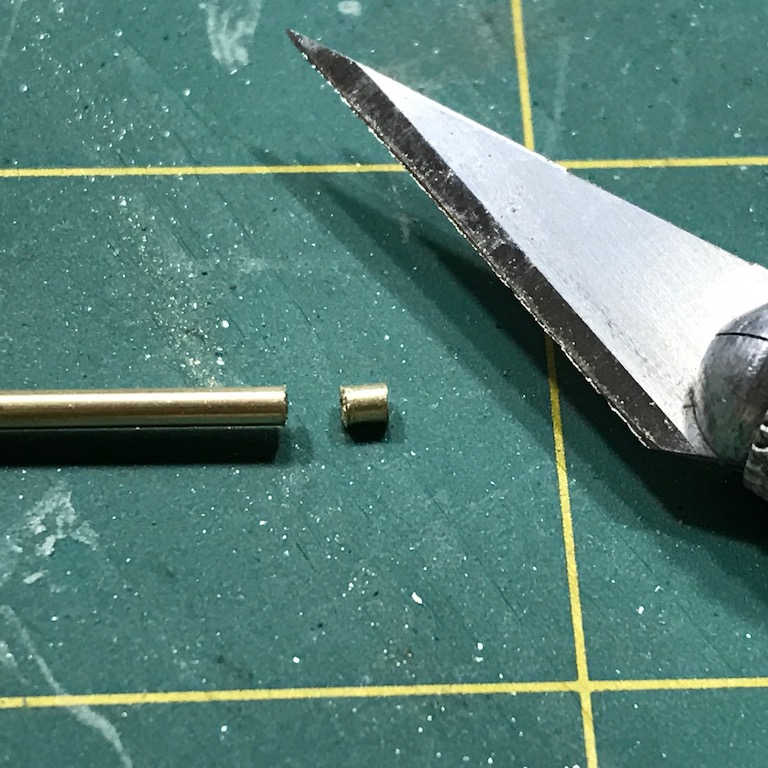
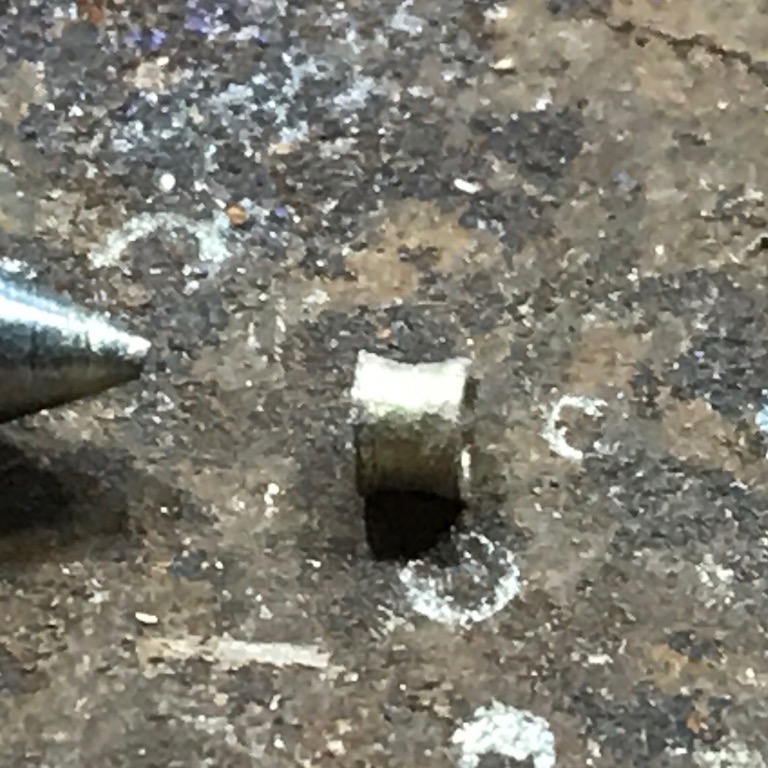
I needed to make some thimbles for my mast slings. I remembered Chuck showed how to do it in one of build logs. His way made making them simple. I used 16th inch K&S brass tubing. It was scored with the #11 x-acto knife and simply rolled back and forth with the x-acto knife, until it cut through the tubing. It sounds too simple, but it worked without much of a learning curve. Once cut, I used a punch made from an old nail and flared both ends. The flares will allow the line to be wrapped around the thimble and keep the line in grove created by the flare. After making a bunch they were blacked using Birchwood Casey Brass Black (available at most gun stores). Here are a few pictures:


-
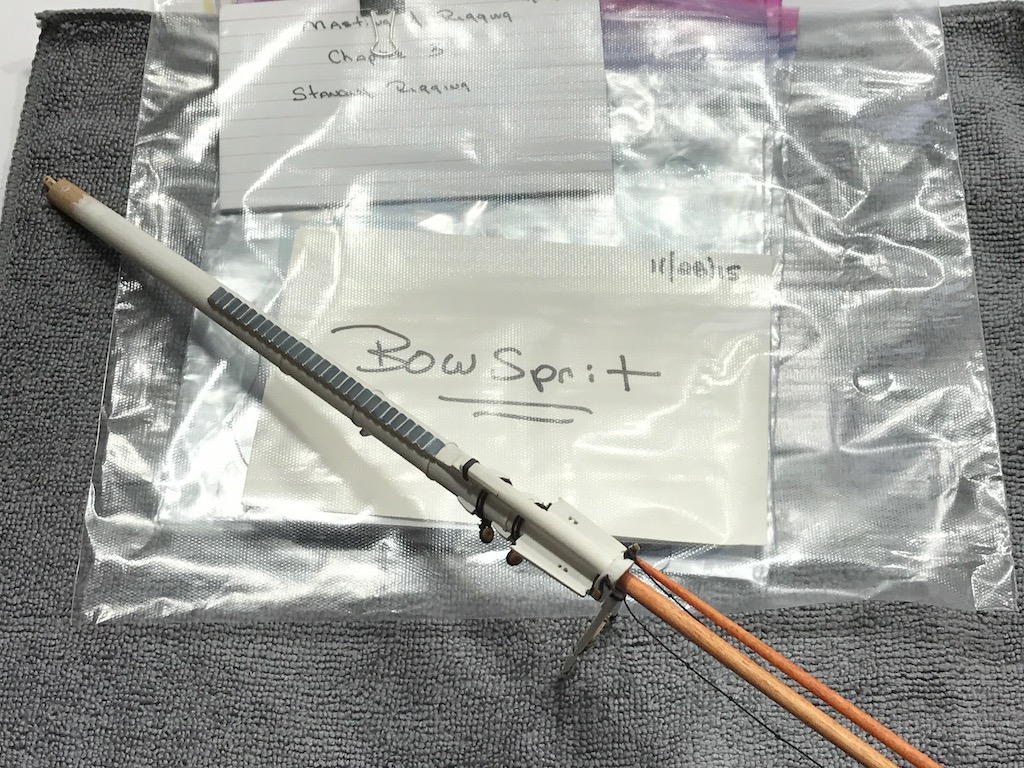
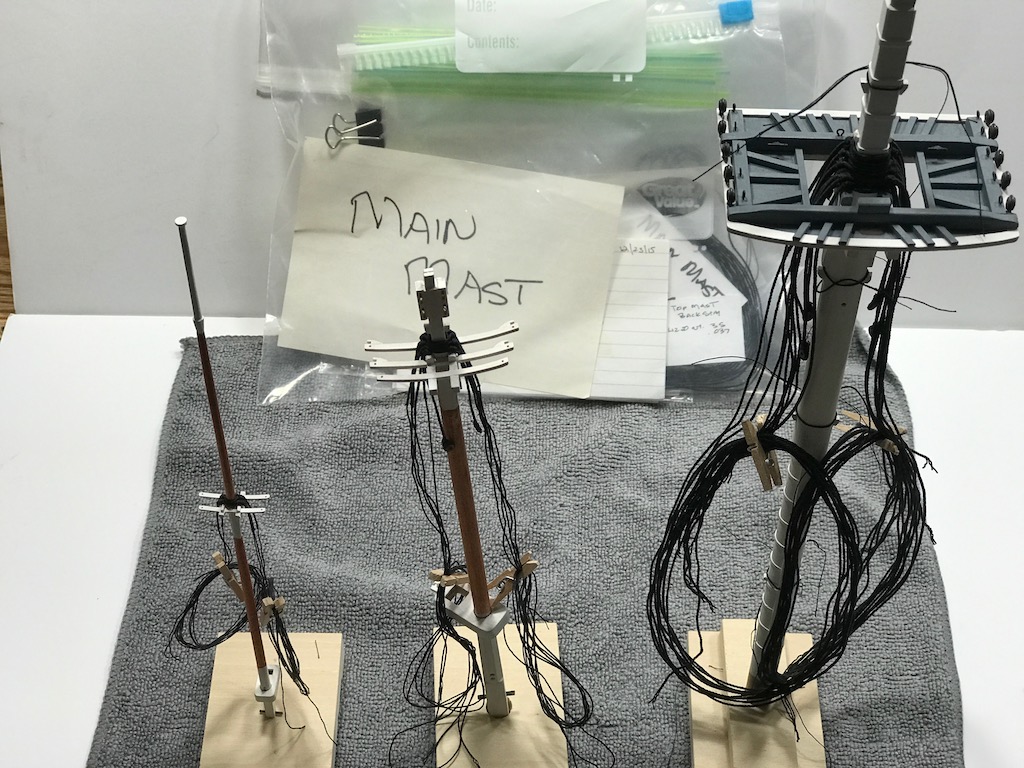
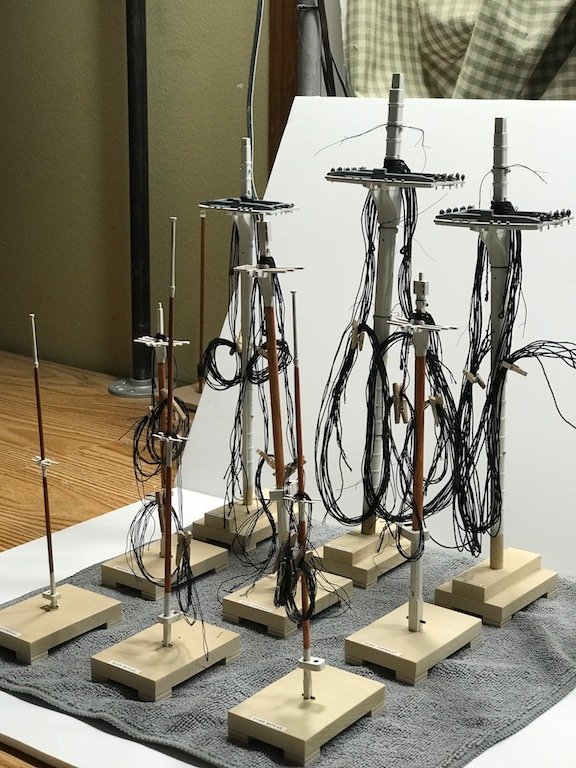
I have finished most of my lines for the standing rigging and have them on the bowsprit and masts. The rest of the lines are in zip bags with all the information I need when when I begin installing them on the model. This completes most of the standing rigging. Here are a few pictures of the completed process: I will now begin all the lines for the standing rigging. I will pre install everything I can on the yards off the model to make it easier, I hope!


-
Hello Dave; I may be able to help you. Here is a picture from my build. The stern counter block is very important to get right. A lot of the future build depends on getting this right. I also am building the Conny with help from Bob Hunt's practicum. The top of the counter is wider than the bottom The hole is for the rudder to go through The shape of the counter gave me lots of trouble but I worked it out. Hope this helps

- 742 replies
-
- 13
-
-
- constitution
- frigate
- (and 1 more)
-
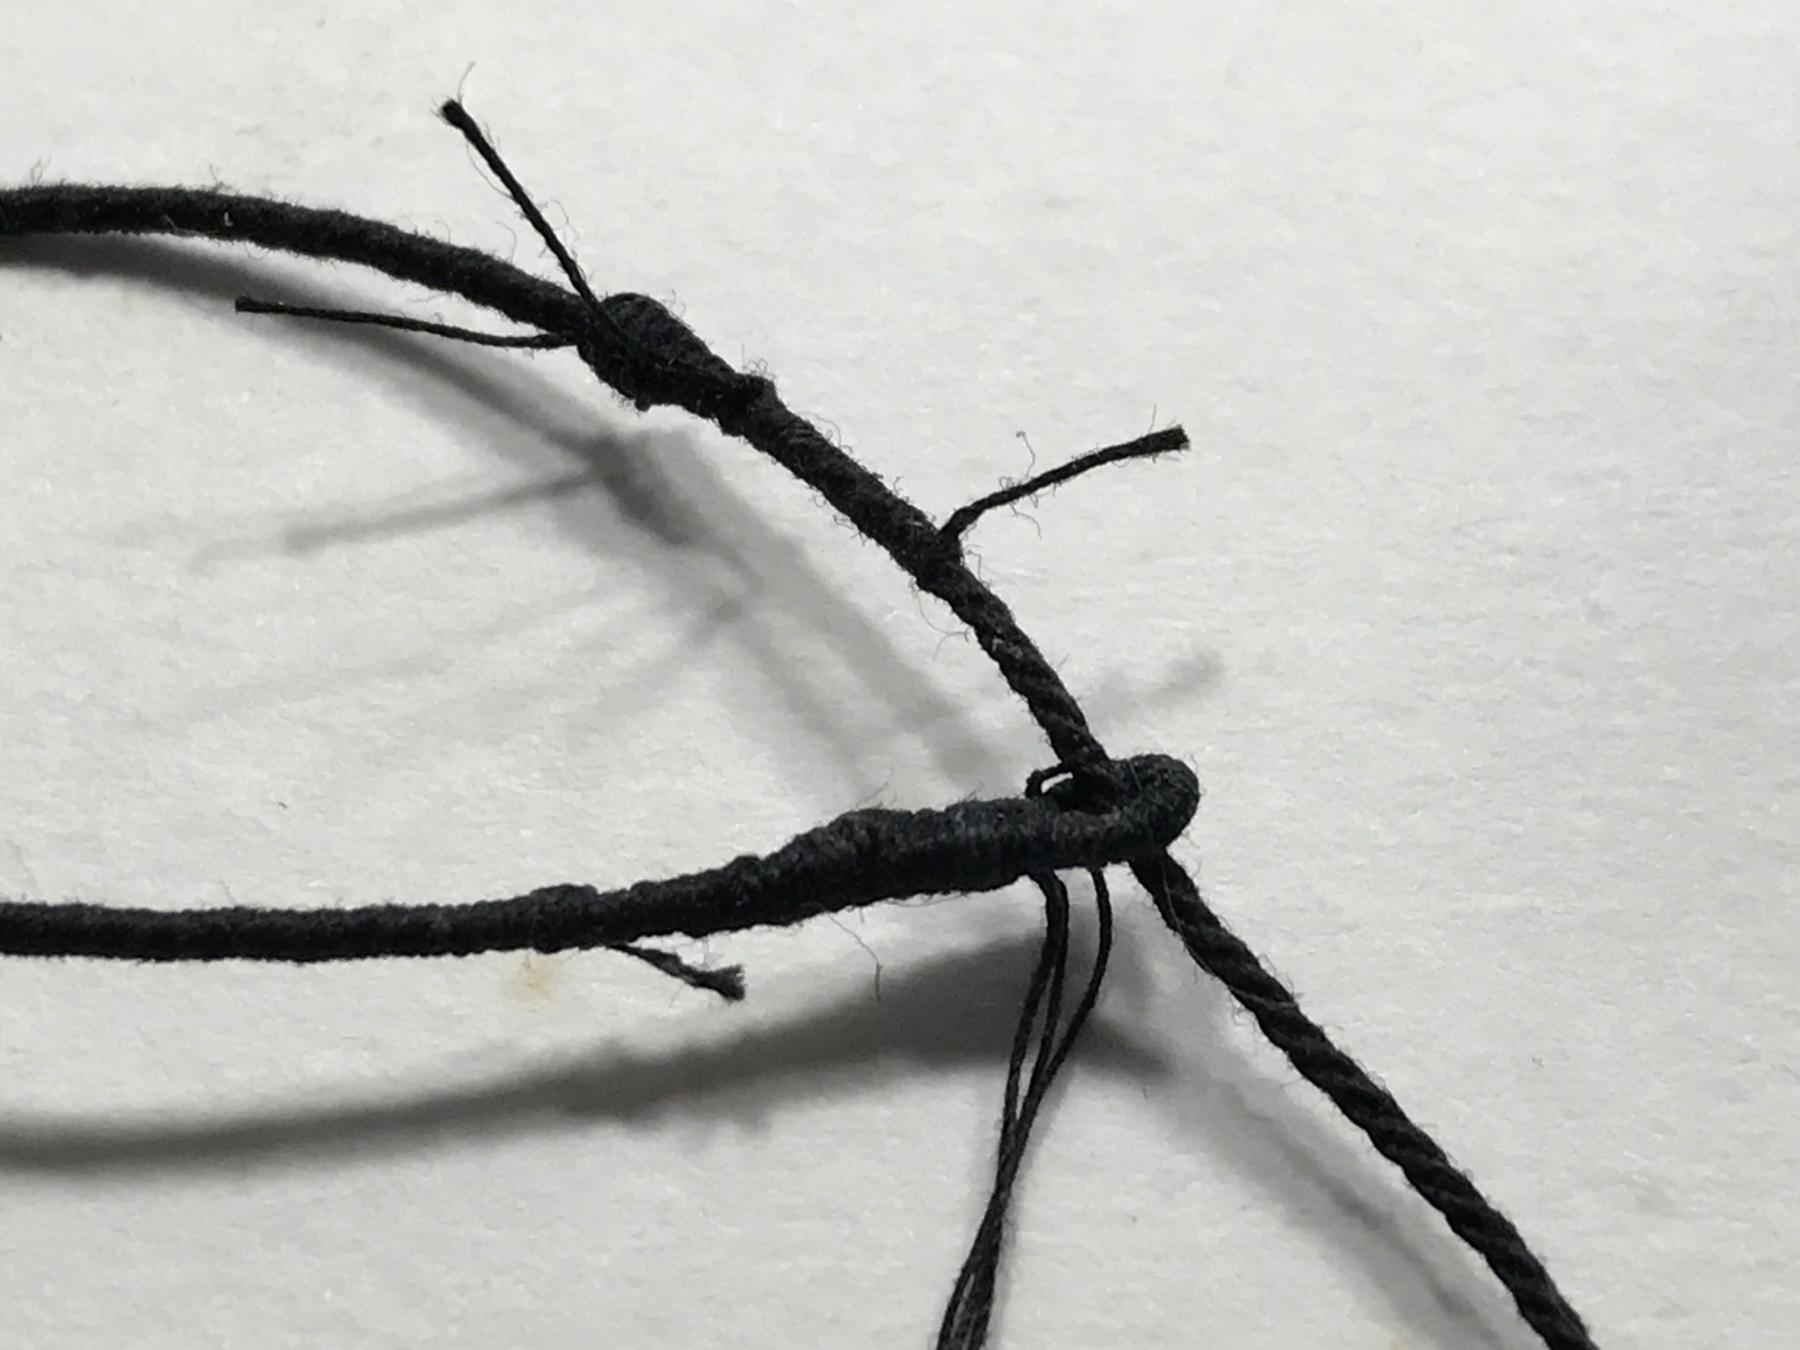
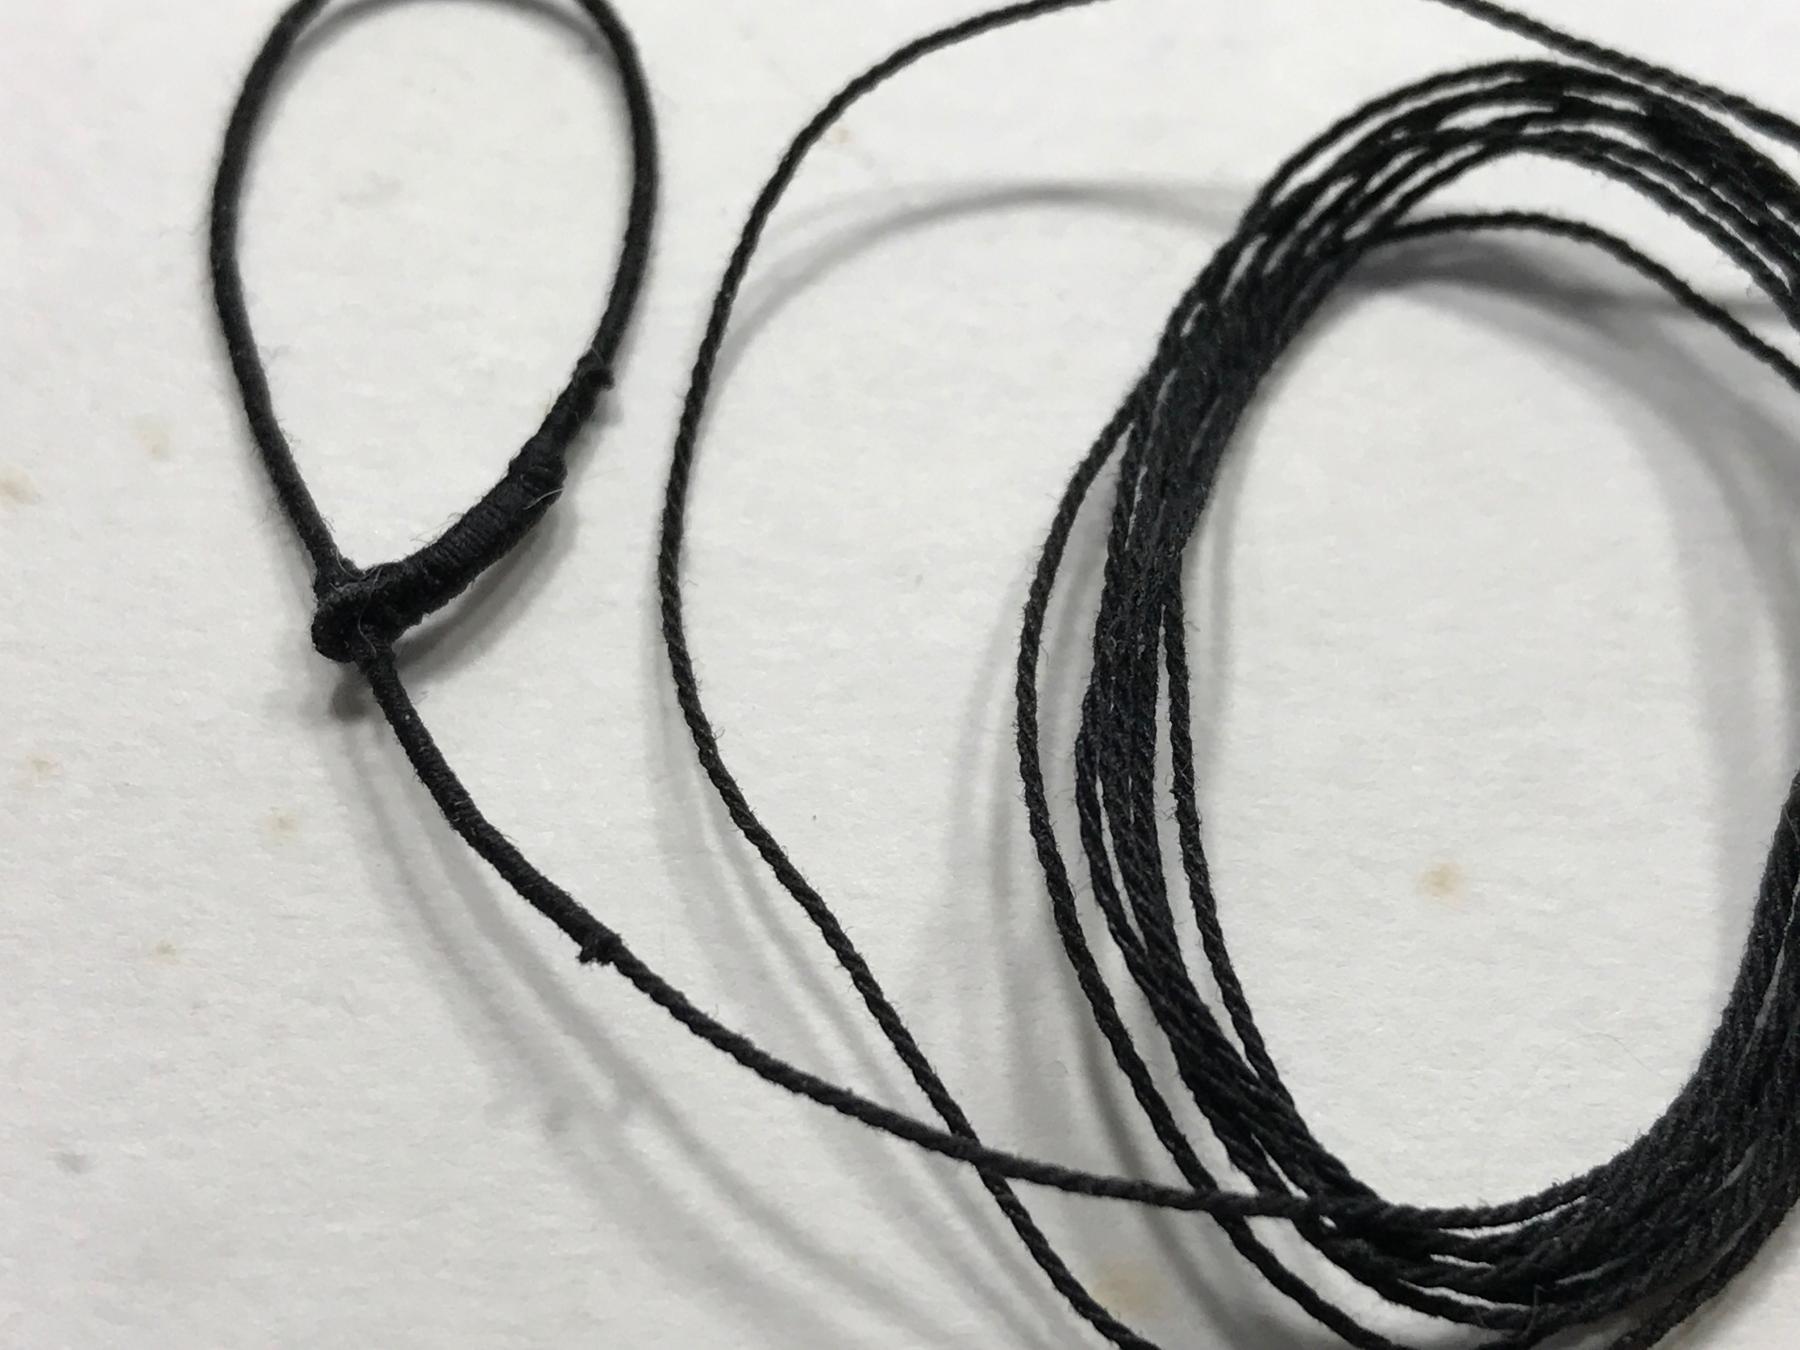
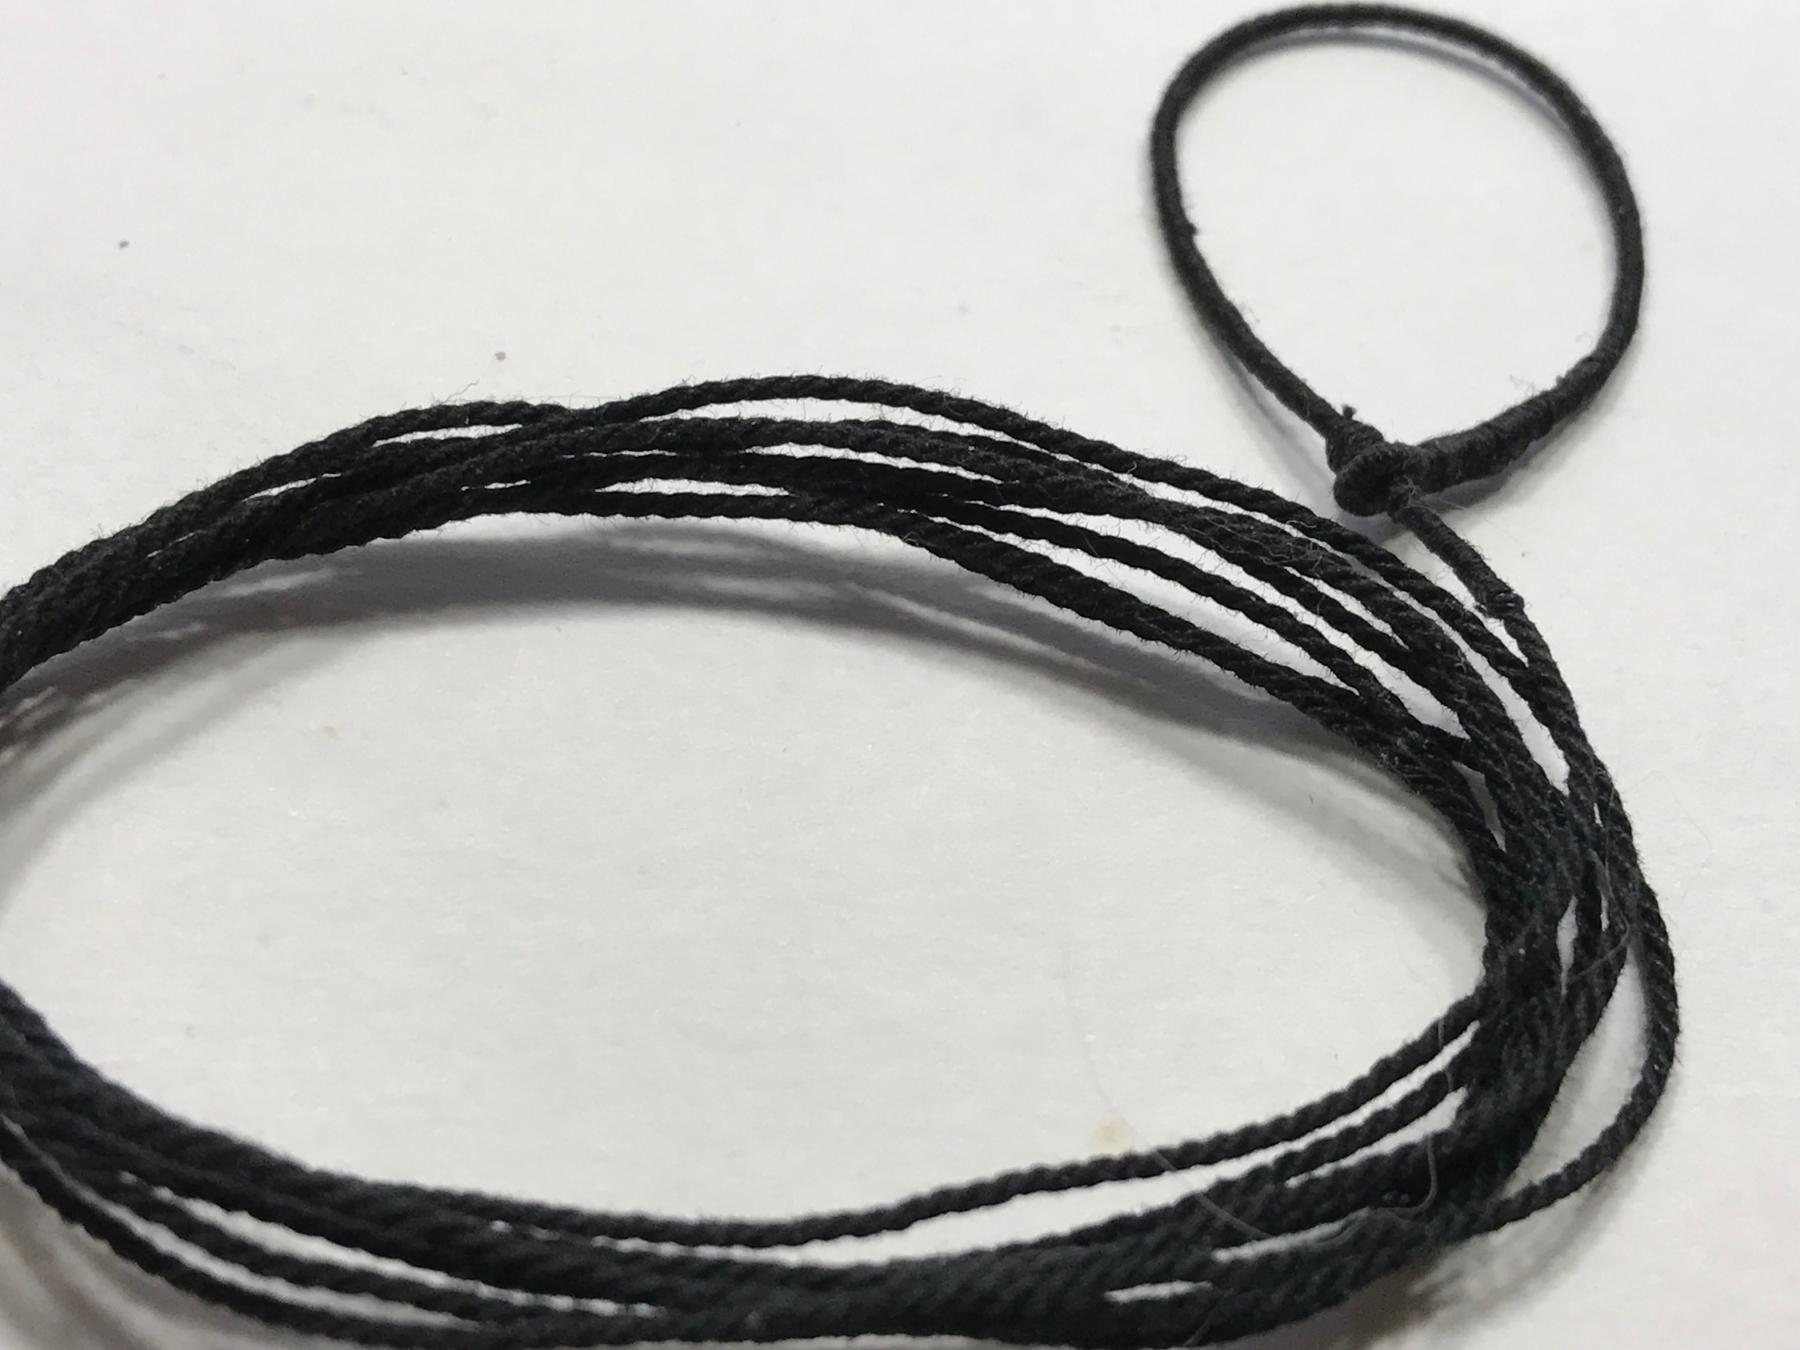
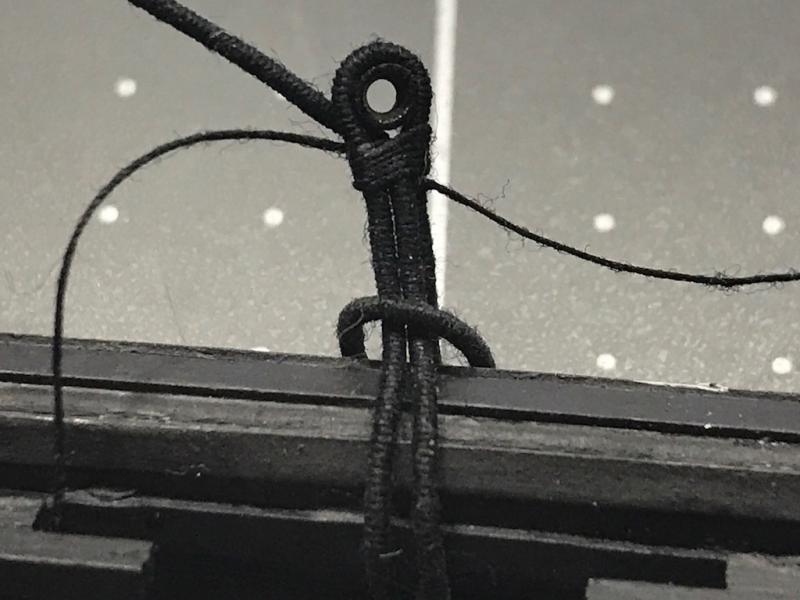
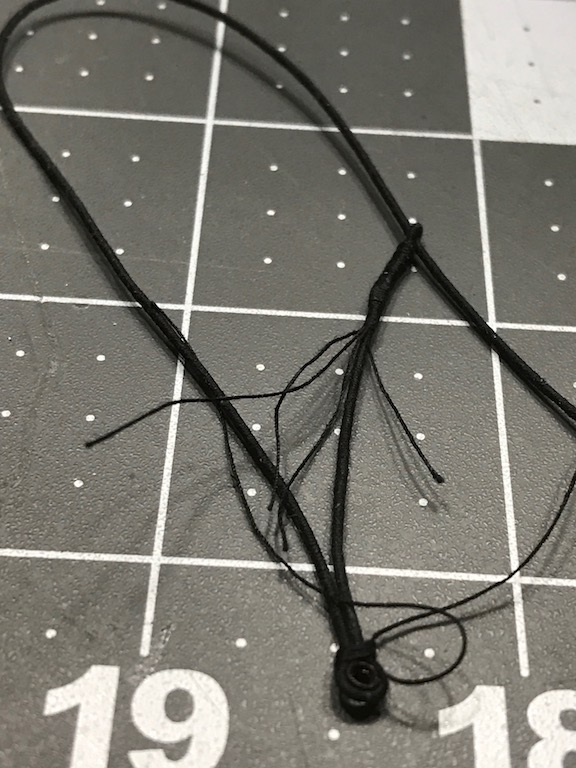
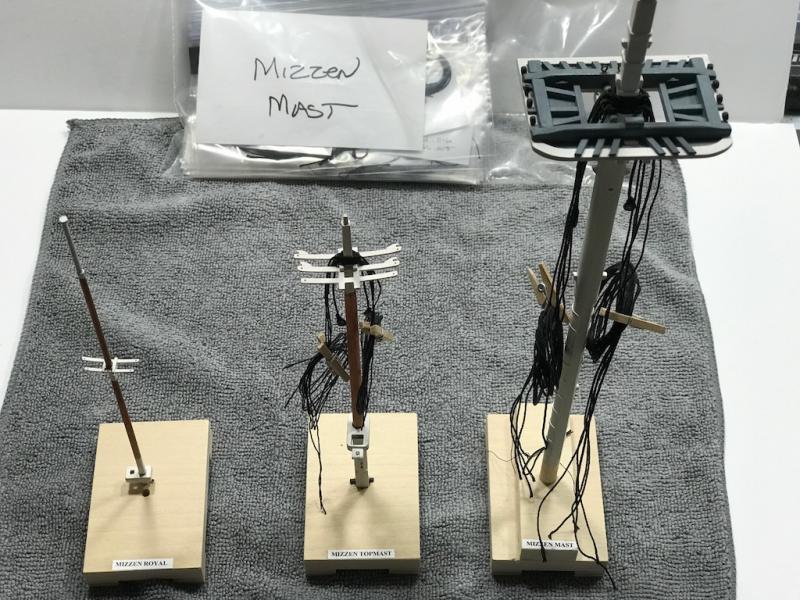
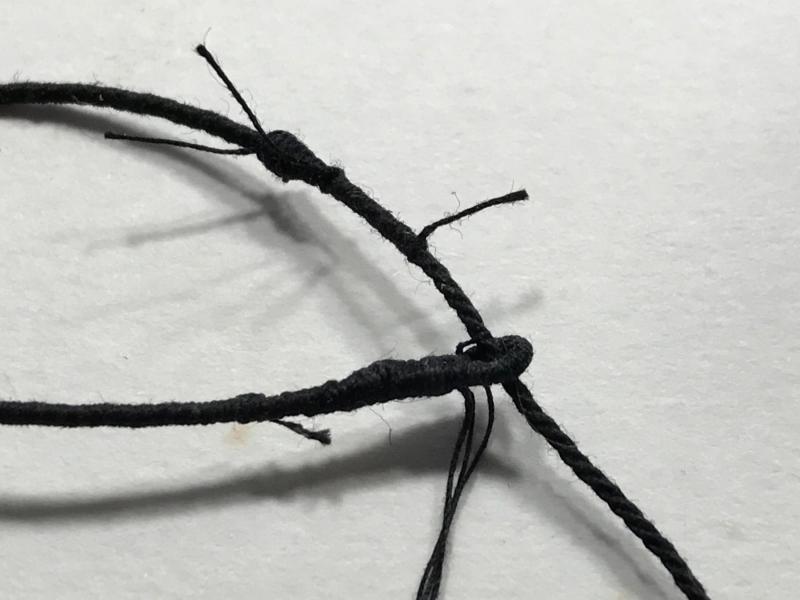
I am working the Mizzen mast stays and making the mouse for the stay. I used my serving machine and after I had the lines made I added the mouse to the lines by twisting it around the line until it looked ok. The first picture shows the line with whiskers still on it. I then cleaned them up and here are a few pictures. I am finishing up on the rest of the mizzen mast rigging
-
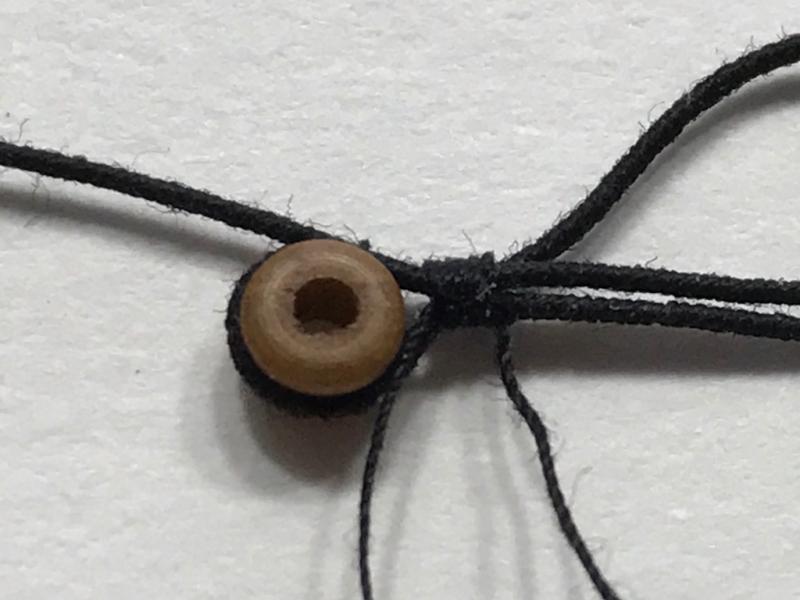
Here are few pictures of the bullseye on the mast. When I start the rigging I will permanently install them. I use the threads to make the final adjustments.
-
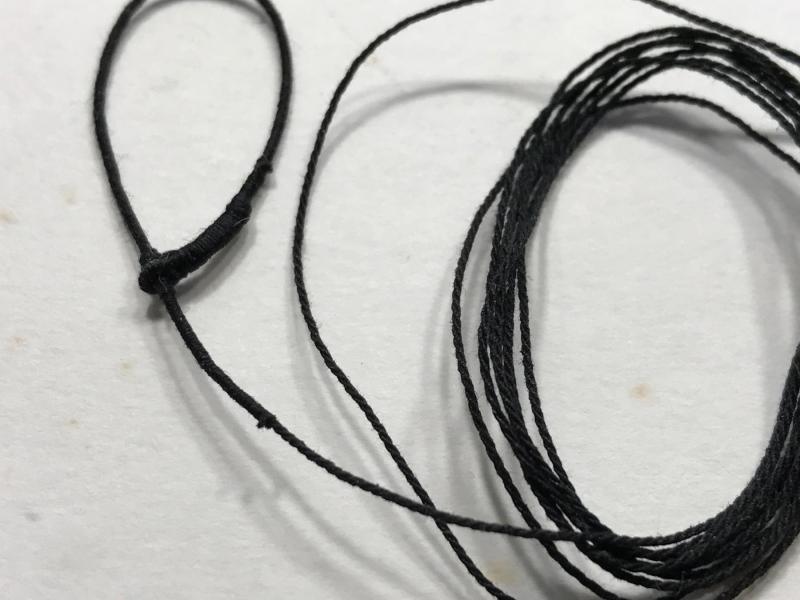
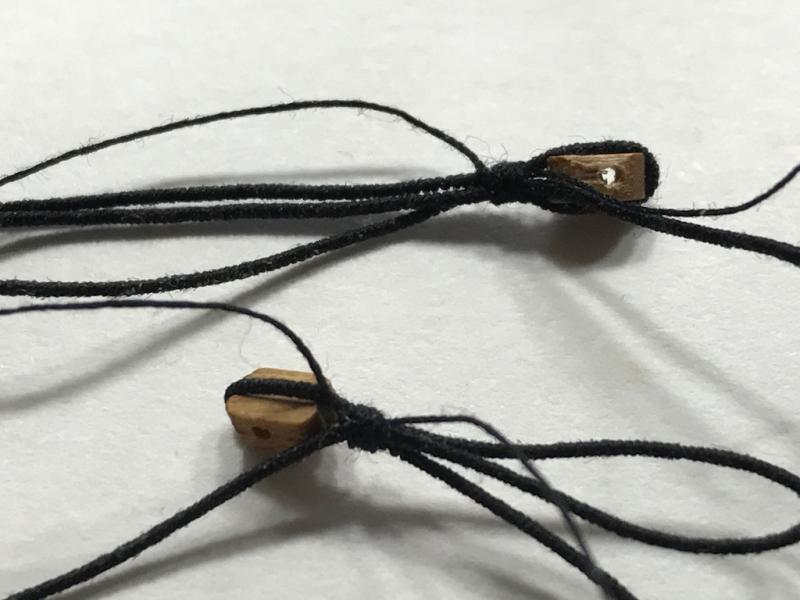
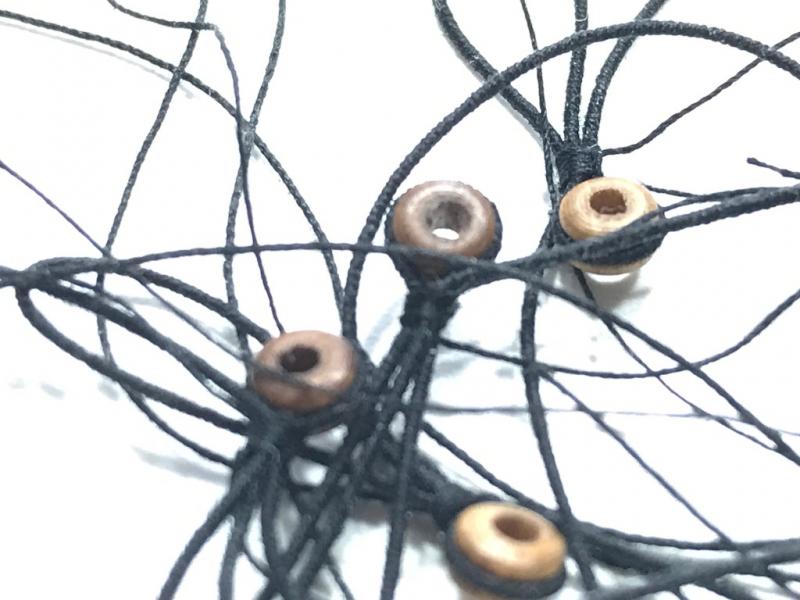
I have been working on the bullseye and blocks for the main and fore masts The pictures show how I make the rigging attachments. The lines are served and all ready to be installed on the masts There is a loupe o n the other ends of the bullseyes and block that will slip over the mast and be installed.

-
Jim Byrnes Thickness Sander
Geoff Matson replied to Landlocked123's topic in Modeling tools and Workshop Equipment
You can go to any Menards and go to the shop vac section. They will have a reducer that will work. It is a one piece unit that you adjust to the size you need -
Great buy Dave. Looking forward to your progress.
-
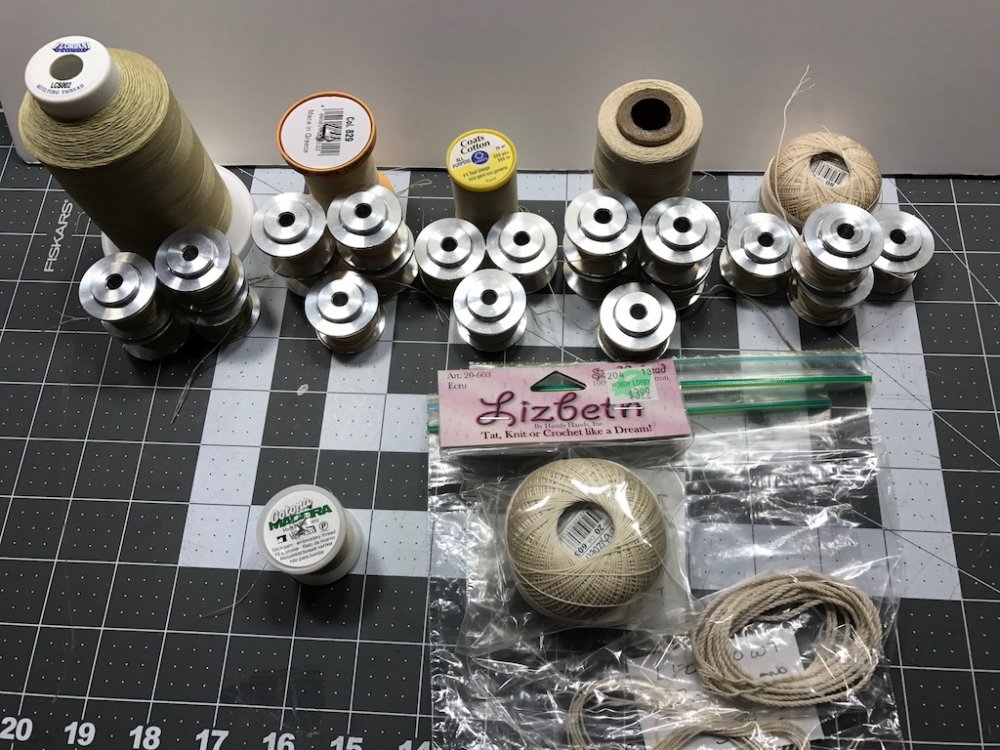
Hello Harvey I use 13 sizes of cotton thread: Madeiria 80 wt cotton Presencia 60wt cotton Gutermann 50wt cotton Coats and Clark 35wt cotton Floriani 40wt cotton Coats and Clark 30wt cotton DMC #12 cotton Lizabeth 80wt cotton DMC #8 cotton Lizabeth 20 wt cotton DMC #5 cotton Aunt Lydia's #10 cotton Aunt Lydia's #3 cotton All are purchased on the internet, Hobby Lobby, or sewing stores. This way I get 13 sizes of single strand, 13 sizes of three strand, and 13 sizes of 9 strand or 39 sizes of cotton rope. Most of the sizes fit the plan size. If I am within .001" that is close enough for me. My main thought was you will be able to notice a slight size difference in the ropes. As your shroud go higher they get thinner in rope diameter. The shrouds and stays seem to be the thickest. With the Byrnes Ropewalk i make all the three stand rope and nine strand rope on spools for future use. This way I cut the rope lengths longer than I need and don not feel bad about wasting a little. Hope this answers your questions.
-
Hello Harvey, thanks for your interest. I use 13 sizes of cotton thread: Madeiria 80 wt Presencia