Geoff Matson
-
Posts
720 -
Joined
-
Last visited
Content Type
Profiles
Forums
Gallery
Events
Everything posted by Geoff Matson
-
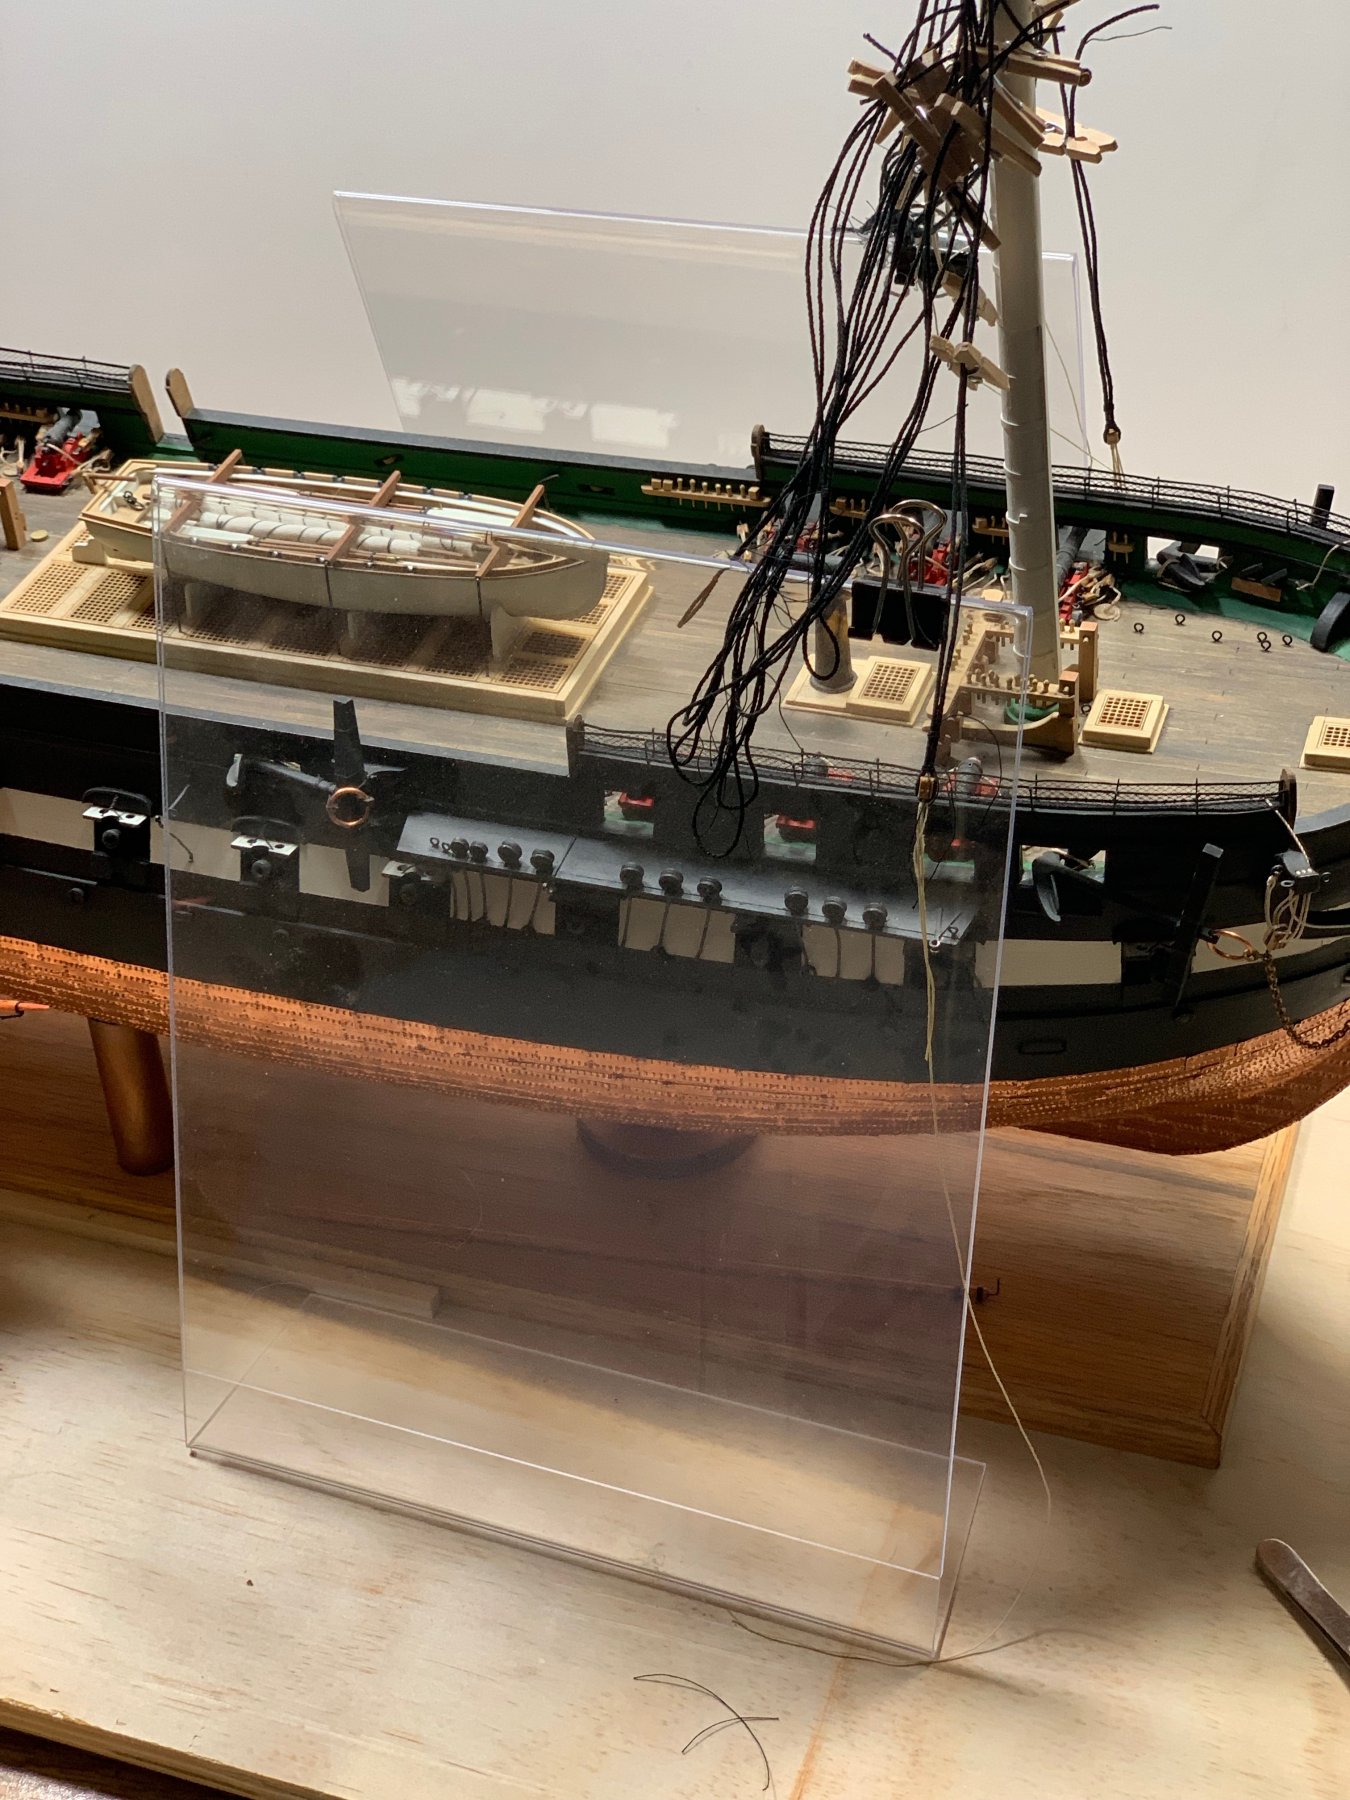
 I made a little progress today. I have the swifter lines on the foremast roughed in. I rigged as much of the foremast off the ship to make it as easy as I could. When I did this I needed a way to hold the rat nest of lines off the model and not get snagged on anything. I picked up a couple of those plexiglass picture frames that you stick the pictures it. They work great keeping the lines from getting caught on the model.
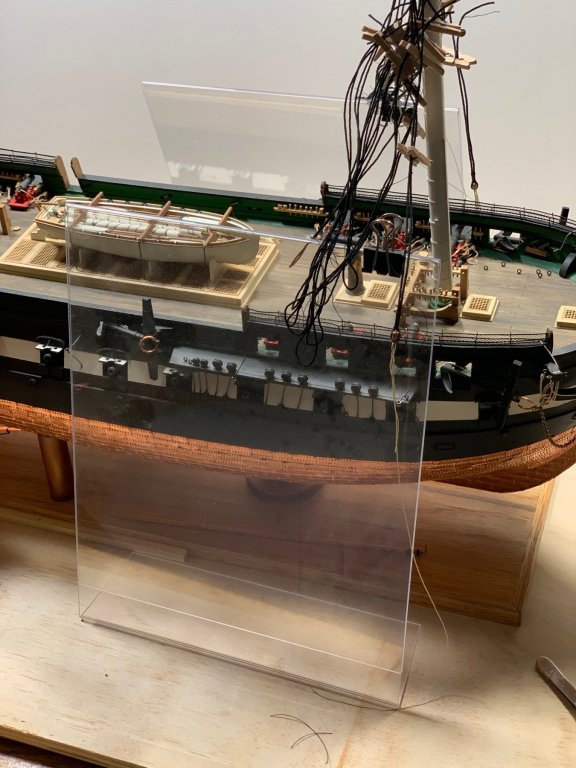
-
New way to mount your mast
Geoff Matson replied to Geoff Matson's topic in Masting, rigging and sails
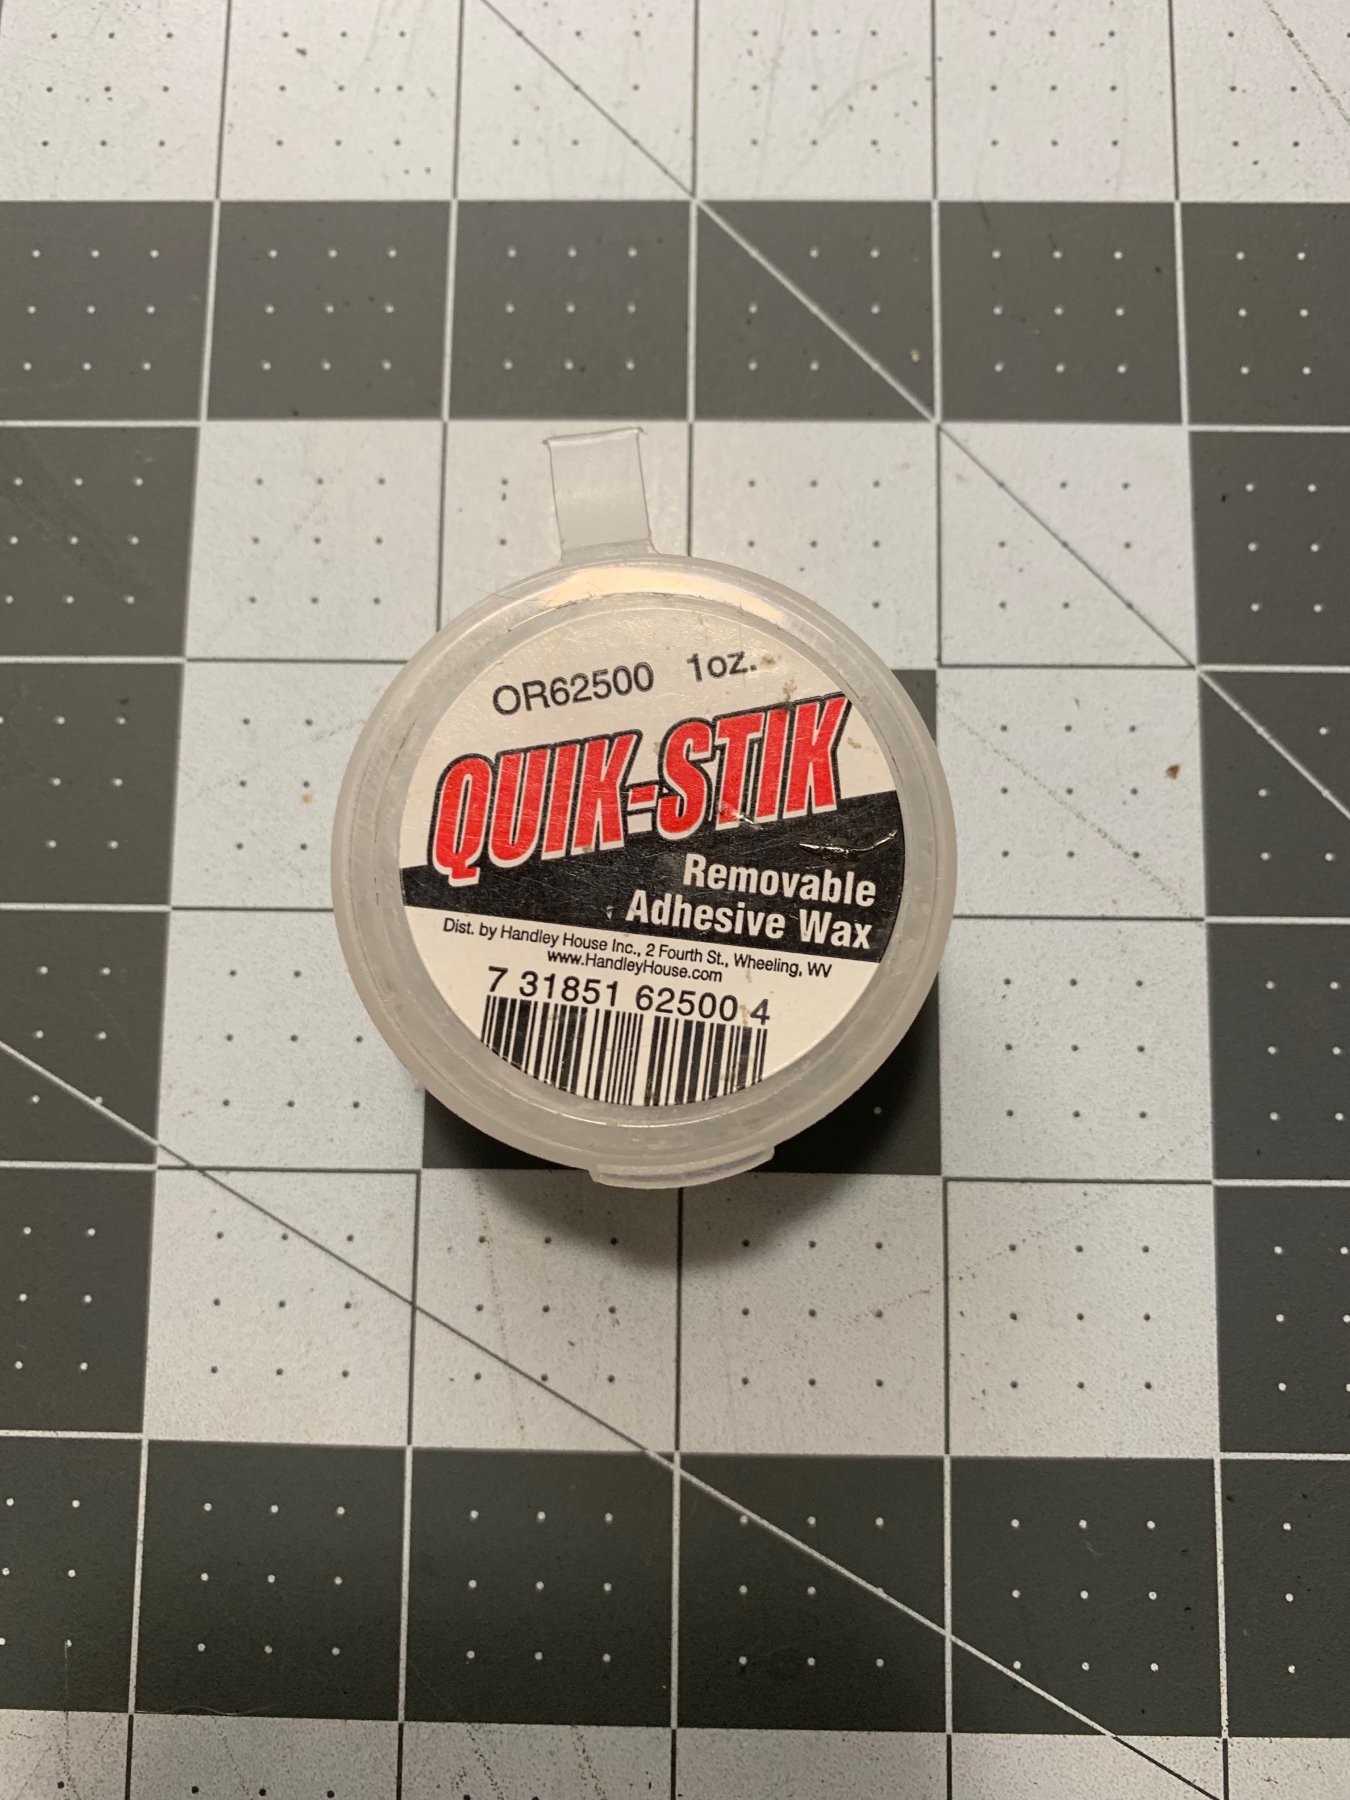
Some times the wording is tricky. Here is the link https://www.amazon.com/s/?keywords=quick Stick Holding Wax Remember just experiment with it. It works for me and I like it. -
Try this https://www.amazon.com/s/?keywords=quick Stick Holding Wax The name may be confusing. Hope this helps>
-
New way to mount your mast
Geoff Matson replied to Geoff Matson's topic in Masting, rigging and sails
jct, I think you will like it. The price is right. The doll house people use it to mount doll house pictures on the wall andset furniture in place. It is great to mount you masts, and then if you need a tweak, just turn it a bit. -
I am getting close to installing the foremast. I was often confused about whether to clue it or leave it loose and let the rigging keep it in place. I know if I glue it, I will break it and be screwed. If I just set it in the mast hole and let the rigging hold it in place, it will twist, and I will be screwed. I came upon another method that I am going to use. It is a product called Quick-Stix remove-able wax. I purchased it on Amazon for $5.00 .My wife has a friend who builds miniature doll houses and uses it all the time. It is a soft wax that sticks to what it is applied too. It holds the item firm in place. If you need to remove it, ok. If you need to tweak it, ok. I feel it will be great on the masts and bowsprit. Just put a little ball of the wax on the bottom of the mast and stick it in place. It will hold them in place, while the rigging is done. If you have an accident, you can remove it. You could use it in many instances while modeling.

- 6 replies
-
- 11
-

-
I am getting close to installing the foremast. I was often confused about whether to clue it or leave it loose and let the rigging keep it in place. I know if I glue it, I will break it and be screwed. If I just set it in the mast hole and let the rigging hold it in place, it will twist, and I will be screwed. I came upon another method that I am going to use. It is a product called Quick-Stix remove-able wax. I purchased it on Amazon for $5.00 .My wife has a friend who builds miniature doll houses and uses it all the time. It is a soft wax that sticks to what it is applied too. It holds the item firm in place. If you need to remove it, ok. If you need to tweak it, ok. I feel it will be great on the masts and bowsprit. Just put a little ball of the wax on the bottom of the mast and stick it in place. It will hold them in place, while the rigging is done. If you have an accident, you can remove it. You could use it in many instances while modeling.

-
How to sharpen a file.
Geoff Matson replied to dgbot's topic in Metal Work, Soldering and Metal Fittings
I was a horseshoer for 40 years. I used files and rasps to work on horses feet. I would use it first to trim and level the hoof. When the file or rasp got tired of that job I would use it finish the horse's foot. Doing this job was half going over the hoof wall and half going over the nails and edge of the shoe. Kind of half hoof and half metal. When the rasp or file got tired of that job I used it on metal when making horseshoes. When it got tired of that job I used the old rasp or file to make things out of like knives. I got a lot of use out of one file that way. For modeling I would use the file first for wood. Then went it got tired of that I would use it on metal. After that you are pretty much done with it. Remember a new sharp file will do the job right. Once it is dull all you are doing if buffing the wood. Hope this helps. -
I just found your build. It is nice to see how the Bluejacket kit comes together. You did a great job on fairing the hull and shaping the bulwarks. I will be looking forward to following the rest of build.
- 104 replies
-
- 3
-
-
- constitution
- BlueJacket Shipcrafters
- (and 1 more)
-
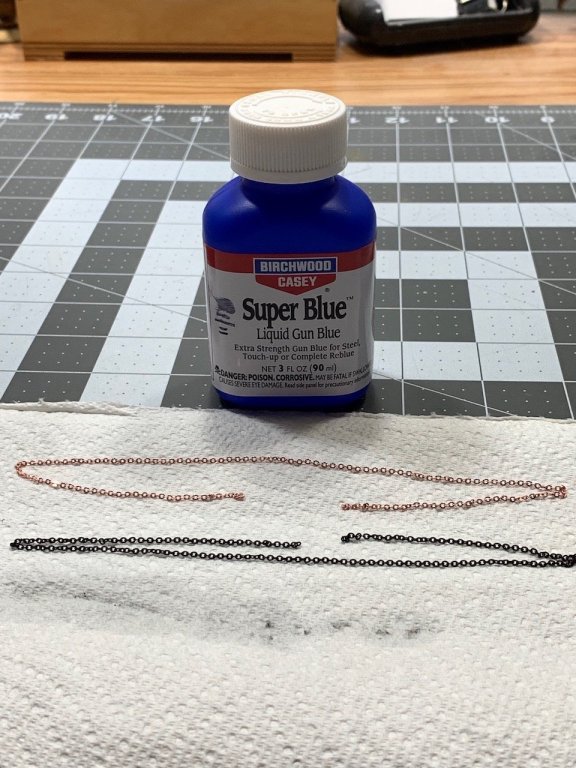
I have used both on guns as well as the chain. This is just a little stronger medium. I got his one from the gun area at Walmart. Another benefit of living in the country. It looks good and I find it easier than painting. When I mount the bow sprit I will post a picture. I am holding off on the bowsprit for as long as I can. I am afraid I will break something. Once I get to the stays I will have to mount it.
-
I blackened my gammoning chain with Birchwood Casey which can be purchased at any gun store. I cleaned the chain in white vinegar and then dipped it in cold water. This chain will be used on the bowsprit. The chain is the 21 links to an inch chain that came with the kit.
-
KHauptfuehrer, I used the square wood strips for my masts and spars. I sanded them to to size. I used a metal drill guide to help me get the proper diameter. The metal drill guide acted as a draw plate.

-
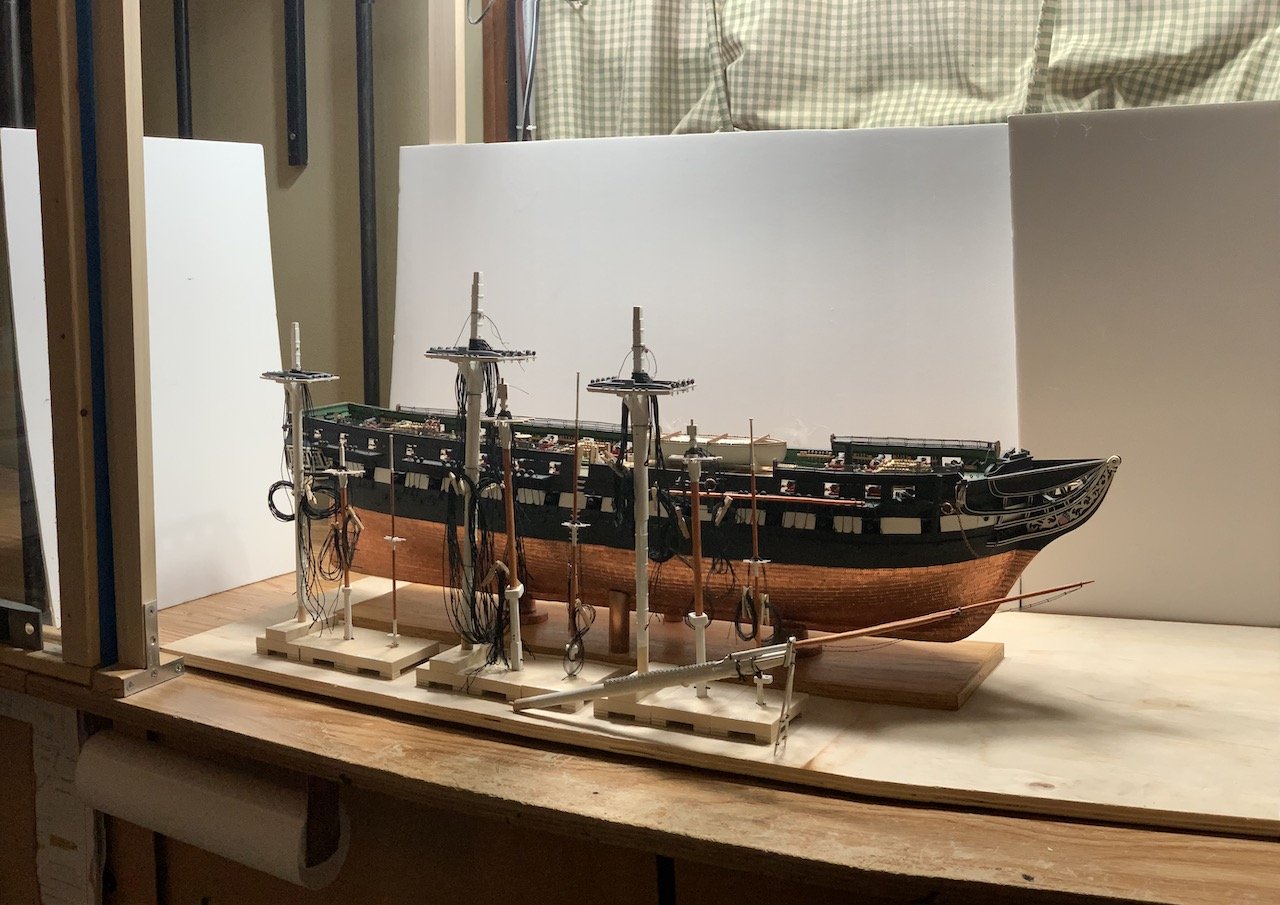
Fall is here and I am all ready to bring my Conny out of dry dock and back into production. I have taken time off to get other things done and get my interest back into the labor of love. I am getting ready to set the foremast and begin my rigging process.

-
I know just how you feel. I am at the rigging point in my build and I have taken about 9 months off. In that time I have accomplished a lot of other things that needed m y attention. I am now excited to get back at it. For me the late fall and winter are the best times for modeling. I am now in the process of cleaning my work area and looking forward to getting back at it. A word of advice for anyone attempting to build the Constitution. It is a daunting project. It is a large model, with a ton of rigging. I now know why a lot of modelers build Admiralty style models. I am now on my sixth year of building the Constitution. I am now retired and try to keep my modeling sessions down to about an hour at a time, then take a break. Right now I am working an hour in the morning, an hour in the afternoon, and an hour after dinner. I am determined to finish this labor of love. Dave, if you feel you need a break, by all means take it. I have followed your progress and you doing a great job. Just remember, the Conny will be there when you are ready to get back at it. Happy modeling
- 742 replies
-
- 5
-
-
- constitution
- frigate
- (and 1 more)
-
Sorry to hear of decision to move on to a new build. I have enjoyed watching your progress and will surely follow your next build. I know how you feel, I too have had my hang ups with the Conny build. Life seems to throw many challenges at us all at one time. This summer has been really busy for me with all my other projects, I am looking to forward to winter when I can move inside and work on my Conny. Just remember all you learned building your Conny and apply it to which ship comes next.
-
If you are using cotton rigging line, you might want to give acrylic paints a try. Just do some experimenting and dilute the paint for the desired result.
-
Great tip
-
Nice recovery on the steps. I found out, if something bothered me and I did not fix it, every time I looked at my model it would be the first thing I would see. Once fixed, I was able to move on. You are making great progress. Nice job.
- 742 replies
-
- 5
-
-
- constitution
- frigate
- (and 1 more)
-
You are doing great. The bow timbers were a real learning experience for me. I am looking forward to seeing more.
-
Welcome to the group. Great model and looking forward to your next project. Hope you start a build log.
-
Welcome, looking forward to having you aboard
-
Welcome, Glad to have yu
-
New member here from Puerto Rico
Geoff Matson replied to Jorge Hedges's topic in New member Introductions
Welcome, looking forward to following your build -
Welcome, you will enjoy the sight. Lots of information and help.