Geoff Matson
-
Posts
720 -
Joined
-
Last visited
Content Type
Profiles
Forums
Gallery
Events
Everything posted by Geoff Matson
-
 Hey Brian, I want you to understand that this Constitution kit is a very hard build. If the kit instructions are all you have, I can see why you are asking the question. The Anatomy of the ships books are out of print and usually are quite expensive. Keep checking and sometimes you get lucky. I am building my model with the help of Bob Hunt's practicum. I don't think he sells them anymore. I found his practicum very helpful. I did make many of my own changes, but he has the basic's down. One great thing about MSW is all the build logs this sight has on the Constitution. These build logs can become your BEST friend. If you have any questions, please ask and I know the guys and gals will help you as much as they can. Ken's log is a wealth of knowledge, and will really help you out. I found the kit plan sheets were my best friend. I feel they are top notch and very helpful. But, remember they are plans for the Constitution as she sits in Boston today. So that is what the kit gives you. One book I found quite helpful was Rigging Period Ship Models by Lennarth Peterson. The book gives many examples of rigging and it works. I would recommend this book to you. As you begin your build review the build logs and see how other members did their construction. Try to under stand what they did and how they did it. Take your time and have fun. A lot of my build was done before I joined MSW, but I do have some photos of how I did things. If I can help in any way, just give me a shout and I will try to get you going in the right direction.
 -
Bryan, Good to have you and good luck on build.
-
John, Thinking about you during this difficult time. You have my thoughts and prayers.
-
Thanks for checking my build log and for the tip Ken. I am following your build and still marvel at the details you apply at such a small scale.
-
Your build is really great. I have slowed down on my build so I can watch your progress and make my build easier . Your solutions to the problems on this build are truly inspiring. I look forward to more progress. Thanks.
-
Those boats are looking pretty sharp. They are neat little kits in themselves and were unto build. Looking forward to more progress
-
Good luck and be patient. This build will be quite an undertaking. Have fun and go make some sawdust.
-
Lots of the same stuff. I finished the Main Mast Yards. Not much different from the fore Mast Yards. I have everything on the yards that I want prior to hanging them on the mast. Now onto the Mizzen Mast
-
Looking great. I am interested in seeing when you install the bowsprit. Once it is installed it will make for a really long model.
-
Ed, Your process of the serving and deadeyes is great. I am heavily into the rigging of my Constitution, and am amazed at the detail you develop. I will definitely give this this way of serving a go on my next model.
- 3,618 replies
-
- 3
-

-
- young america
- clipper
- (and 1 more)
-
Thanks Bill Any questions I can help you with, just ask, and I will do my best.
-
Glad to have you back and making sawdust Danny
-
Hello Marc I am presently working the Constitution. I am assembling my masts, yards, and rigging the way you are suggesting. The Constitution has three masts, some gaffs, and the bowsprit. I have install as much of the rigging as I can off the model. I have a great deal of blocks, eyebolts, bullseyes, and thimbles to rig. Off the mast assembly seems to work for me. I just can't imagine trying to to it all on the model. For my rigging I am using all cotton line made on the Byrnes ropewalk. My line is glued with diluted white glue. That way if a make a mistakes, all I have to do is wet, and untie the knots. Feel free to check out my build log. Xken is also rigging his Constitution the same way. Hope this helps.
-
The only place I grow hair now is in my nose or ears. If you glue styrene to styrene, I have better results with the glue made for the styrene. It seems to weld the pieces together. For the styrene to wood the CA seems to work best
-
Jim The use of a heat gun or hair dryer can really help in getting the styrene to bend. I found it really helpful with the styrene chaffing pieces on the masts. On my boats, a couple of passes with the heat gun helped my ribs fit snug to the boat. Things are looking great. Keep up the good work.
-
Thanks for the rigging tips. I will be using them when when I get to that part.
-
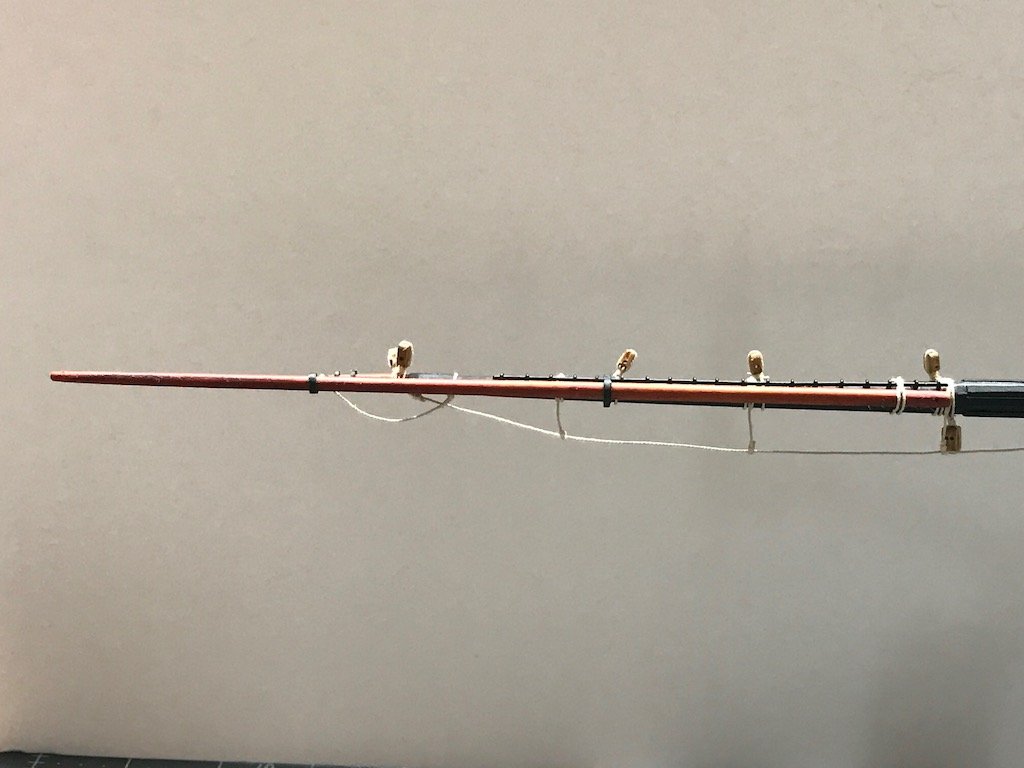
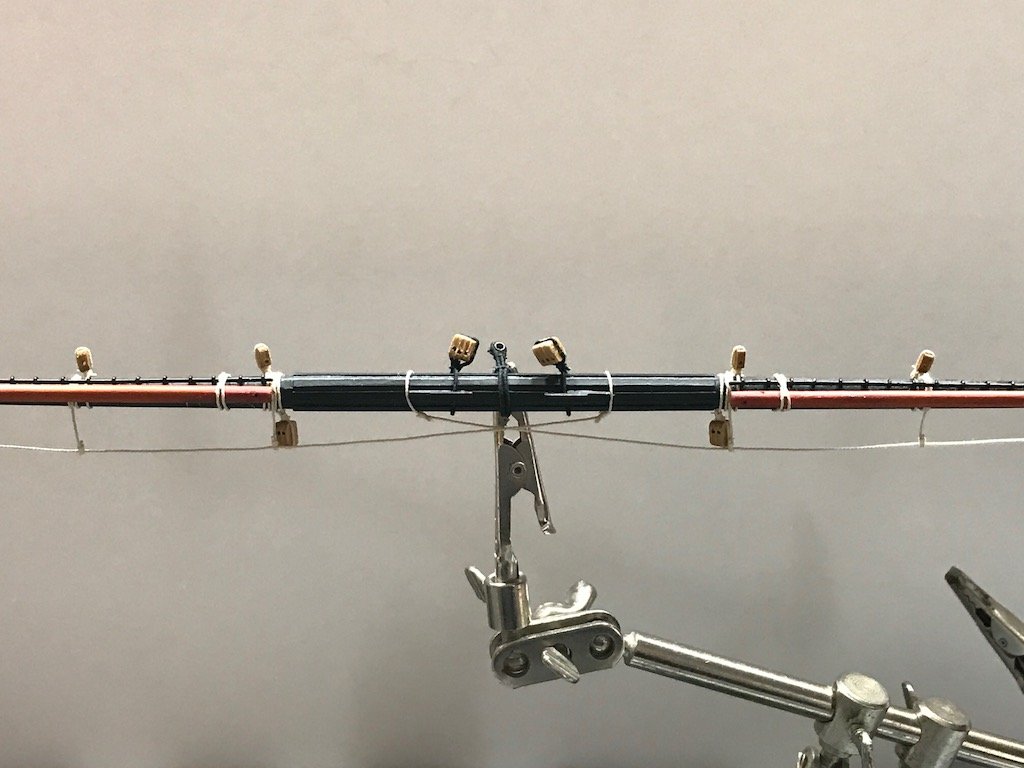
Tom I did just that. Small eye bolts with a thin brass rod through them. The one draw back to the jackstays is when you rig the yard you have to pass the line under the back stays. It makes it a little harder but I like the results. Your Conny is looking great.
-
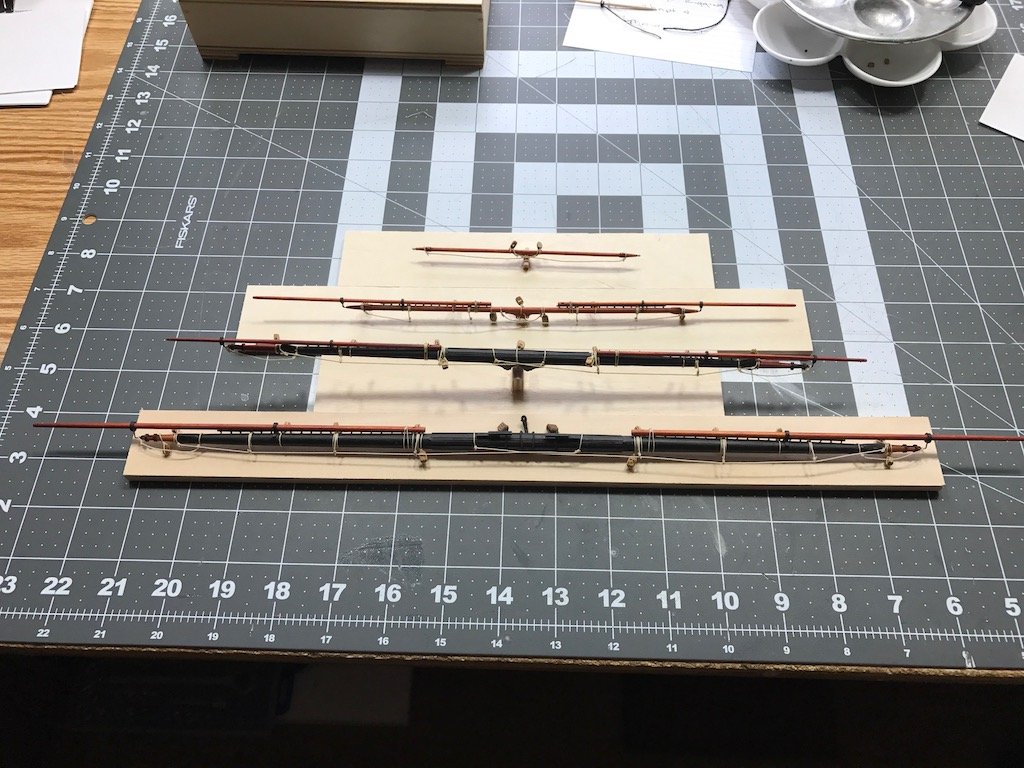
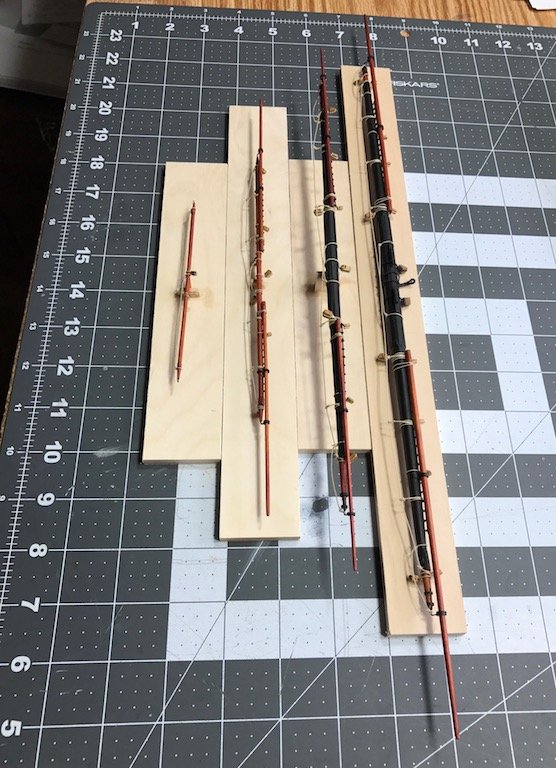
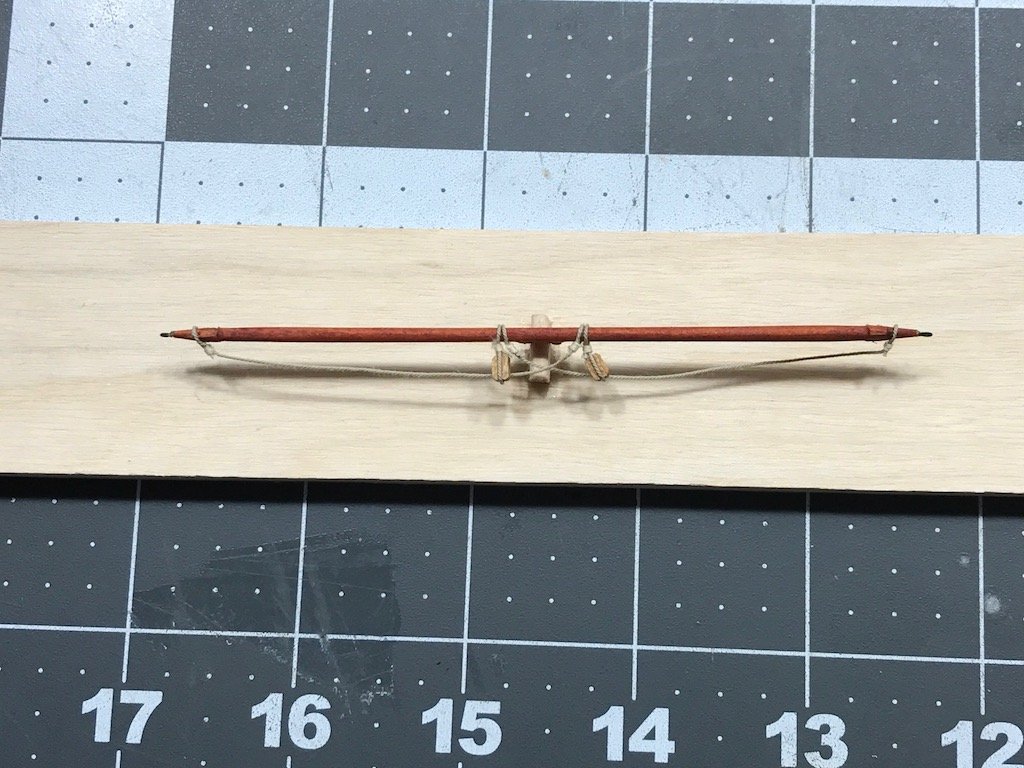
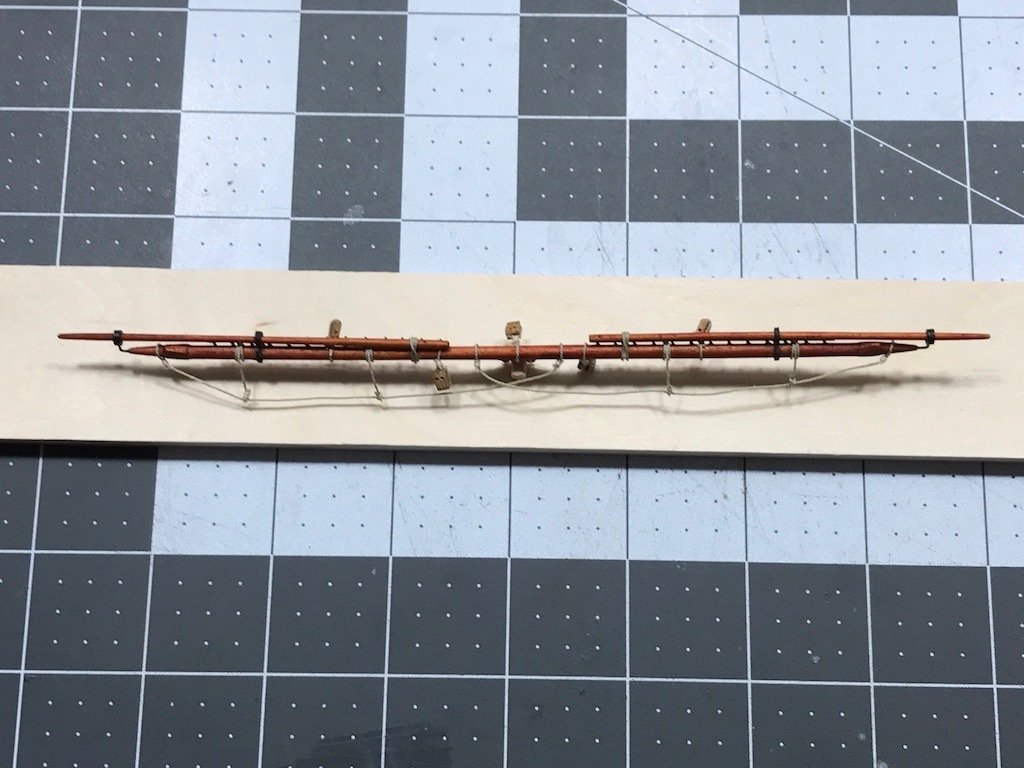
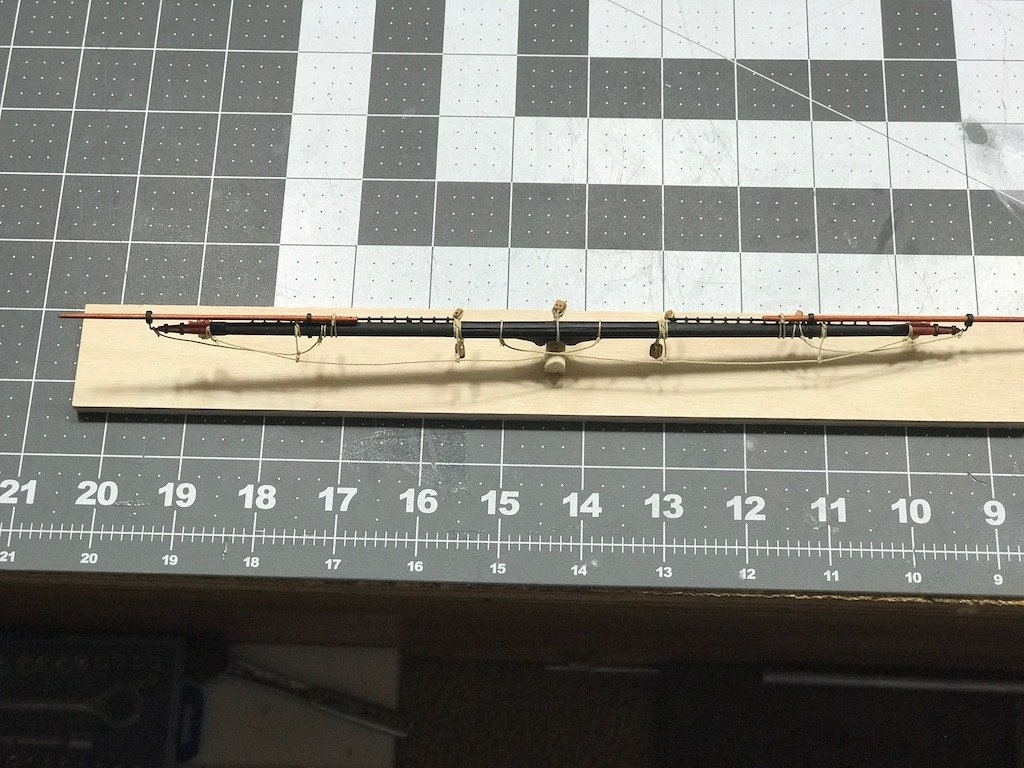
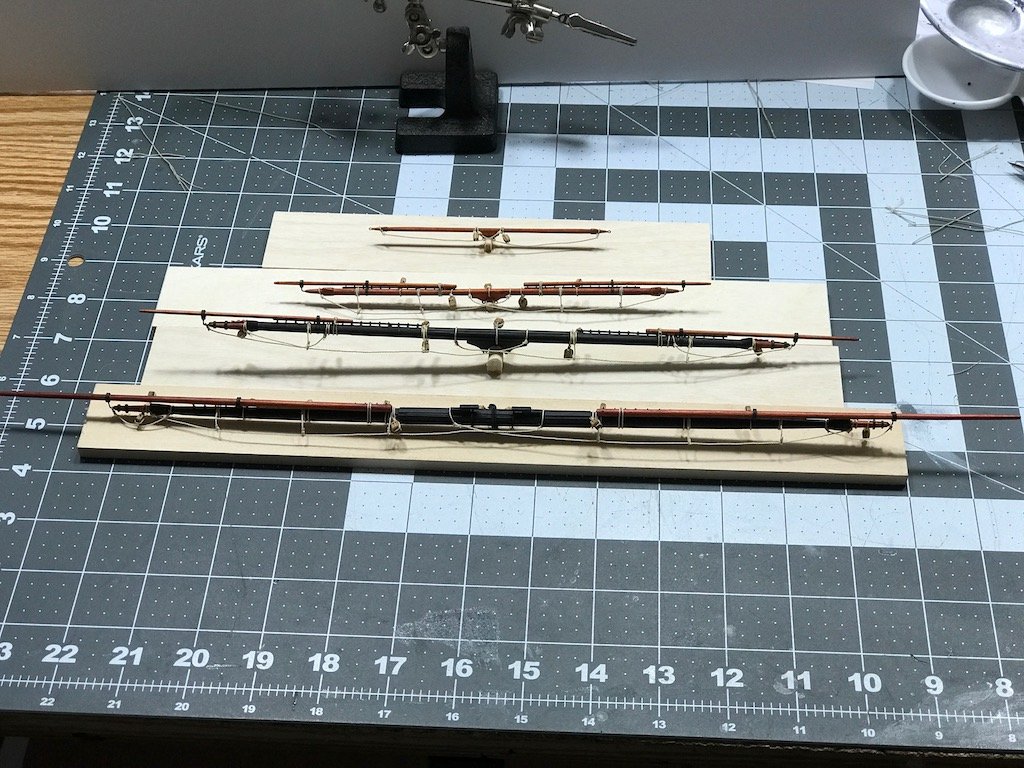
I finished working on the pre rigging of my foremast yards. The royal yard The top gallant yard The topsail yard The main yard All four foremast yards
-
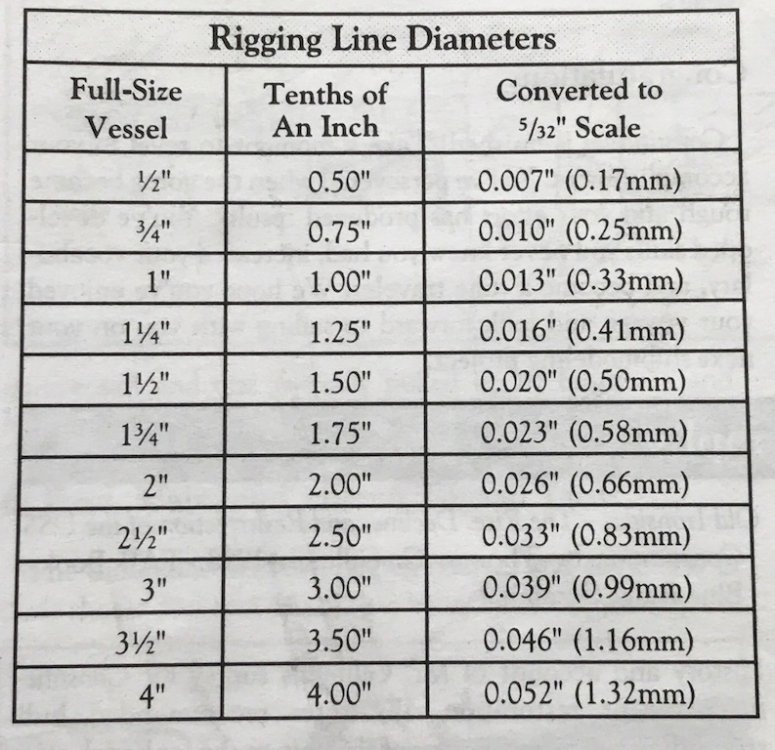
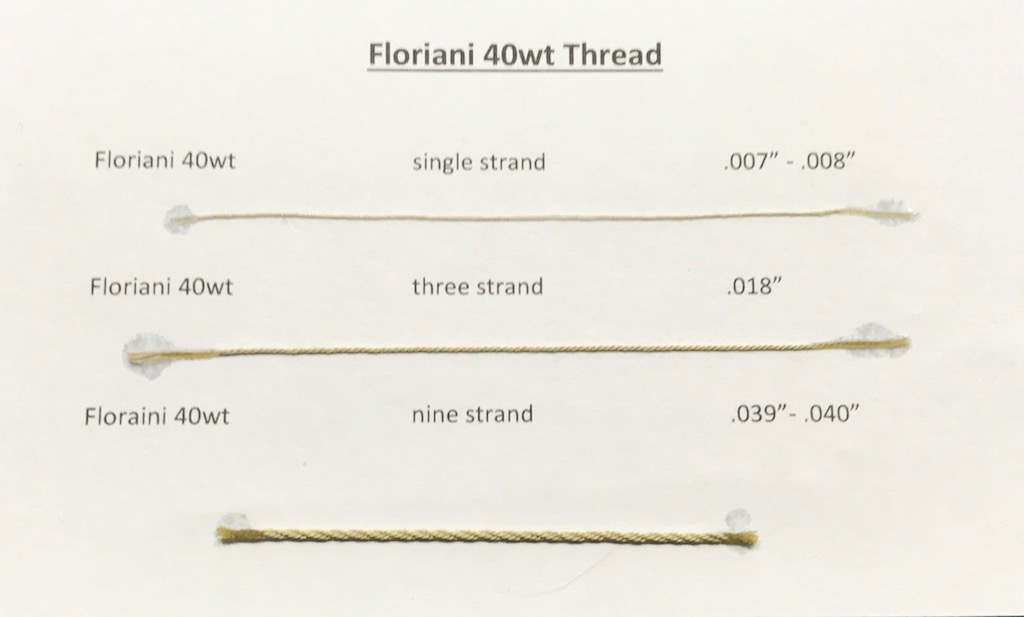
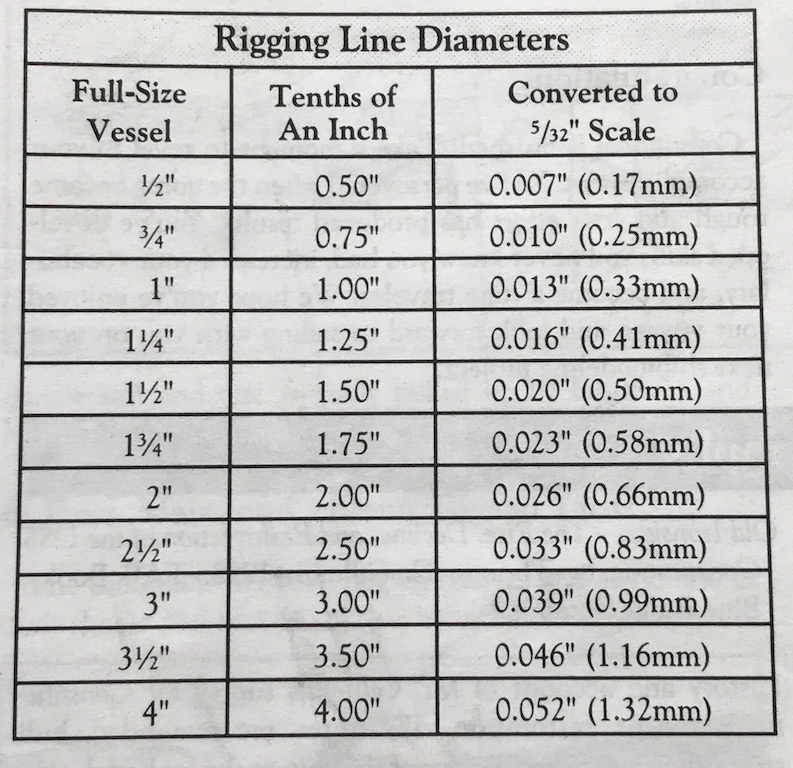
Submarineman, A little off topic, but I was Mineman in the Navy 67-71. Now back on topic. I have have found the best sources for thread to be Hobby Lobby, Joanne Fabric, Handcock Fabric, and the internet. The best thing to do is shop around and then make some test runs with your ropewalk to see if you are getting the desired result needed. Then when decide on a model, make a scale chart, (see previous post), so you can see the relationship of real size line to your scale size line. You will not need many sizes. Anything from 1/2 inch to about three inch will do fine. A hand crank serving machine will help out a lot, see xken Constitution build for his serving machine. Ken is a great builder and I wish I had his talents, and also a third hand to hold things. I try to rig as much off the model as I can trying to keep the rigging under control. Hope this helps and I am looking forward to your build.
-
I make my own line and can twist it pretty tight. So far no problems with it stretching. When I am ready to use the line I give the piece of line a few tugs to help set it a little.
-
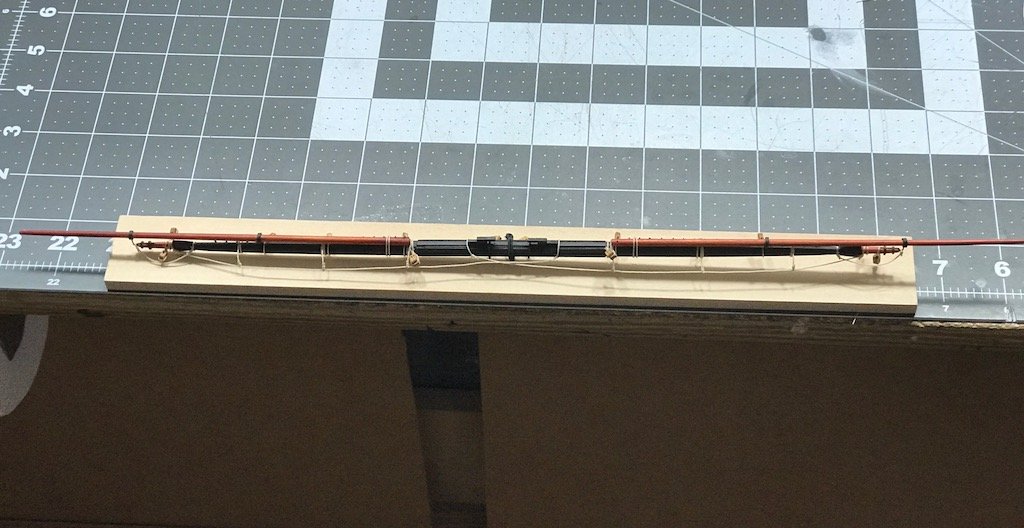
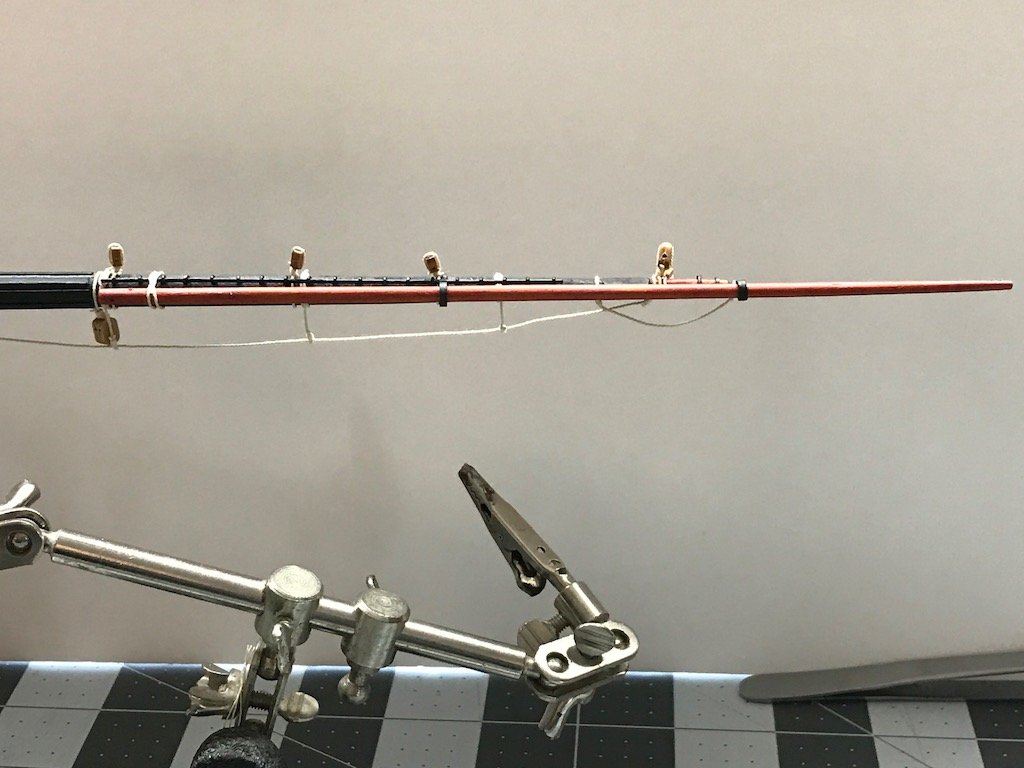
I wasn't happy with the way my first attempt at rigging the foremast yard. I knew it would bother me too much, so I decided to redo it. Here are my results. I am very happy the way the foot ropes turned out. Overall, things just look better.

-
Harvey Thanks for interest. I really like the index cards and often refer to them during the build. They are also a great asset when you need to reference how you rigged a previous line. The niece thing about the rigging line chart is that it gives you the true perspective of what the actual line would look like.
-
For each size of line I use I make a 3x5 card for reference. Each card shows the single strand, three strand and nine strand. I then use the ships rigging plan and scale conversion chart to match the size of line I need to the size of line I use The scale conversion chart is a great key to have.