Glenn-UK
-
Posts
3,175 -
Joined
-
Last visited
Content Type
Profiles
Forums
Gallery
Events
Everything posted by Glenn-UK
-
 I was not very happy with the how the stern/quarter galleries (v1) were looking. This was due to a build error on my part and I could not see a way to correct. Therefore I decided to buy a 2nd kit and start again (v2) and I was pleased with the end result.
- 476 replies
-
- 1
-

-
- sphinx
- vanguard models
- (and 1 more)
-
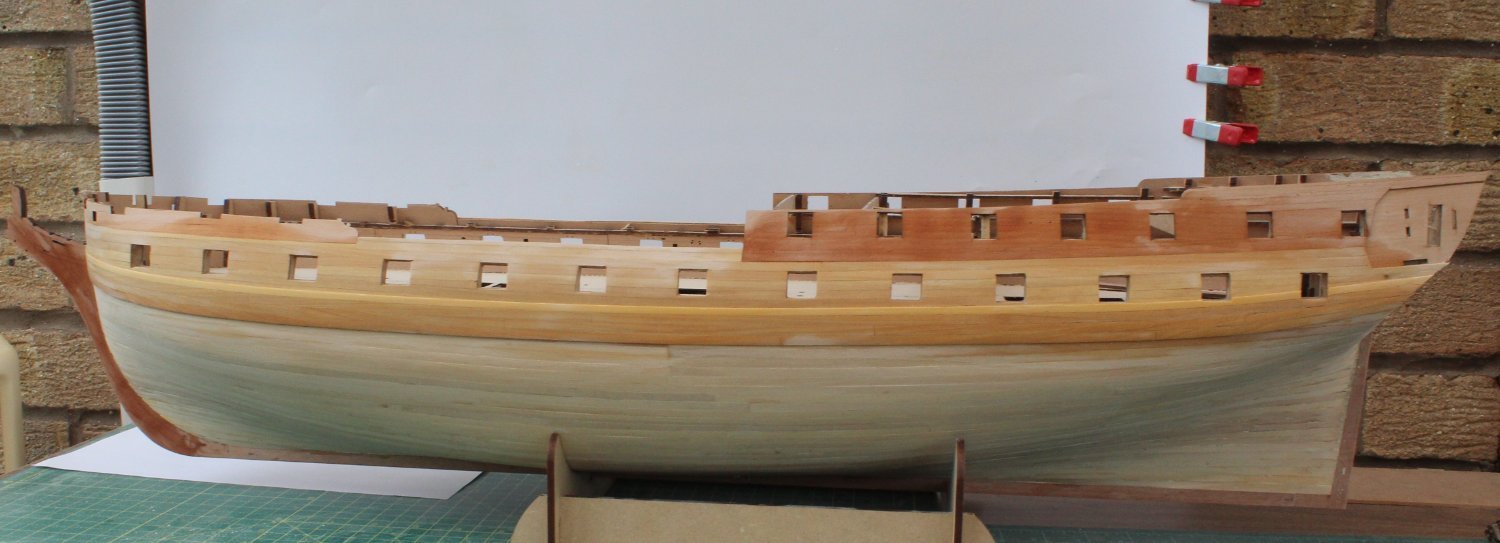
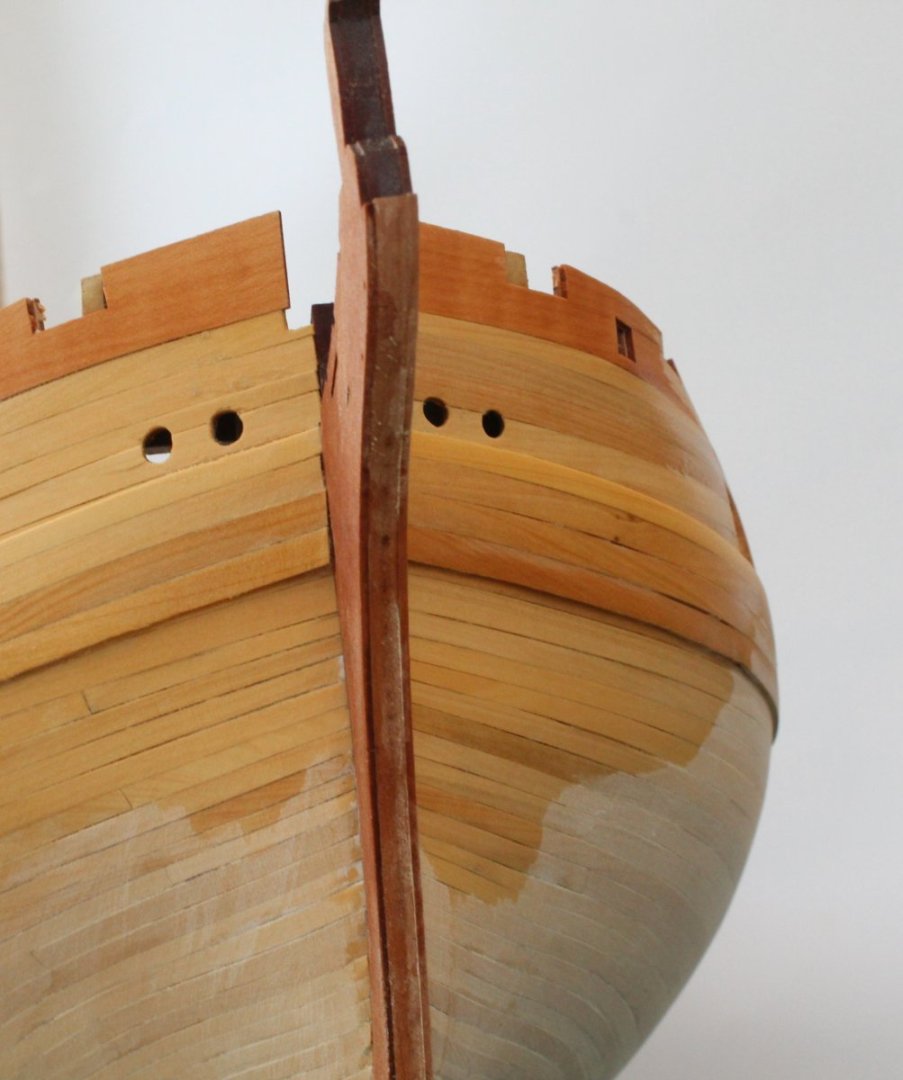
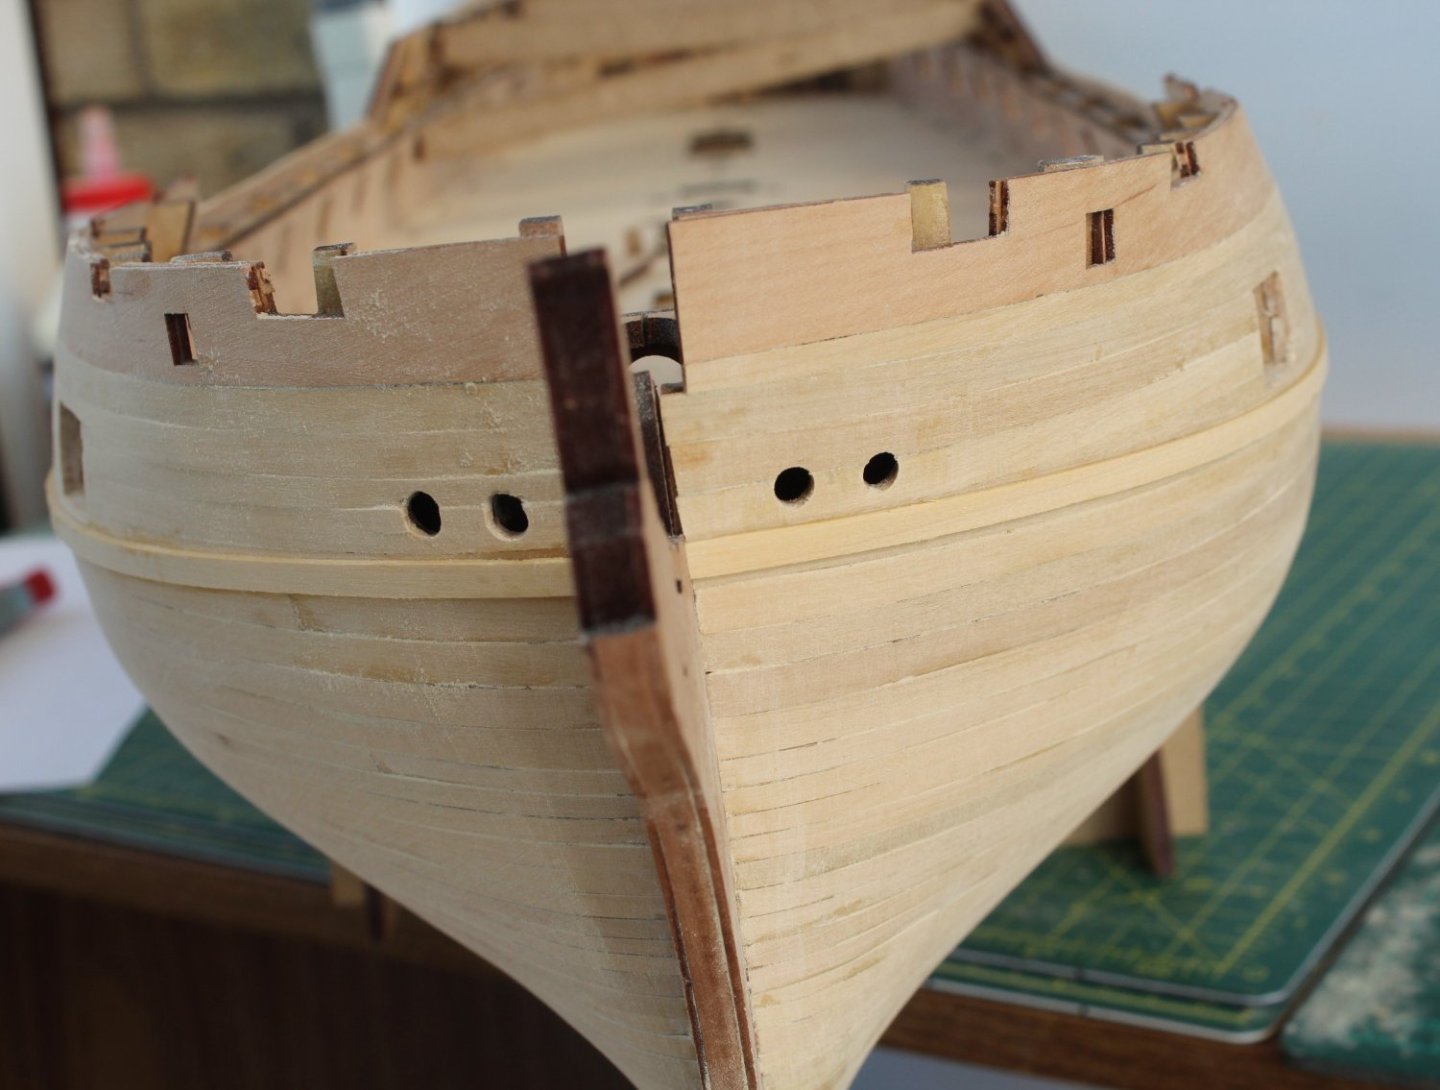
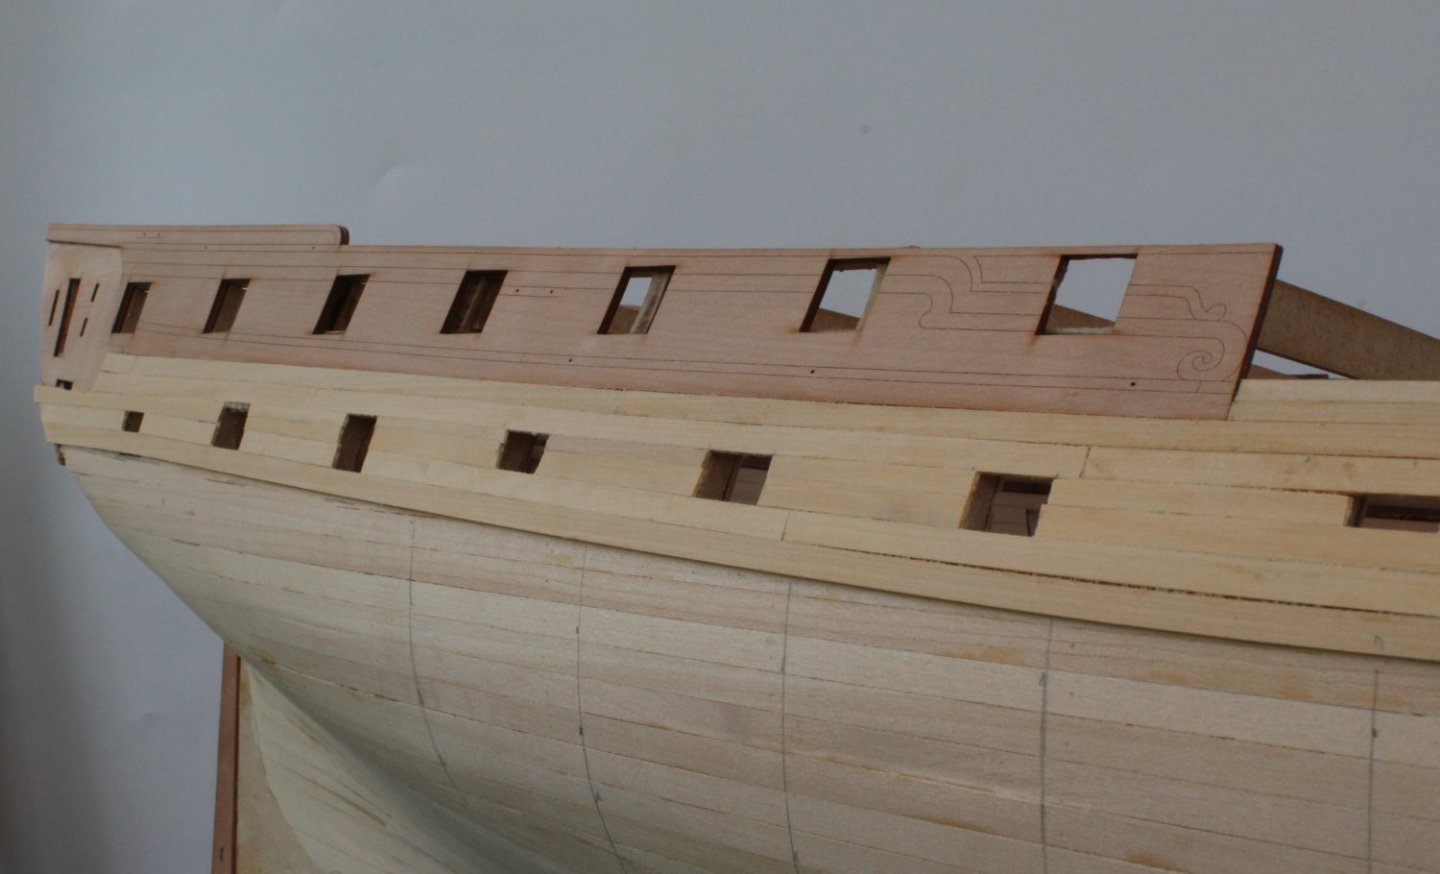
Wales – Completed Blue Ensign did suggest that I should consider using a top and butt interlocking planking arrangement below the first wale. This would require 2 pairs of strakes to implement the interlocking pattern, 4 planks in total per side. I calculated that it would be necessary to taper the planks down to 10mm overall for a good fit around the stern area. After careful consideration I decided it would not be practical to implement the top and butt interlocking planking arrangement as I would have to taper the 4 planks down to the required 10mm. I therefore decided to add 3 x 5mm planks as per the build manual requirements. I used a simple 3 butt shift arrangement when adding the wales. Each wale full plank was 192mmL which equates to 12m planks when scaled up to full size. After giving the completed wales a light sand, I brushed the excess sawdust away with a damp brush before taking the attached photo’s.


- 587 replies
-
- 13
-
-
- Indefatigable
- Vanguard Models
- (and 1 more)
-
Many thanks Maurice I am not sure what you mean by the top and butt planking. According to the build instructions I still have to add 3 x 5mm planks below the top 4mmW wale (which is the one I have added.). I suspect you are referring to the patterned wale planking which I have just found on one of your build logs. Click on link
- 587 replies
-
- 3
-
-
- Indefatigable
- Vanguard Models
- (and 1 more)
-
I am pleased with the Indy now the second planking is complete. The Royal Yacht was a nice distraction but certainly not suitable for me.
- 587 replies
-
- 3
-
-
- Indefatigable
- Vanguard Models
- (and 1 more)
-
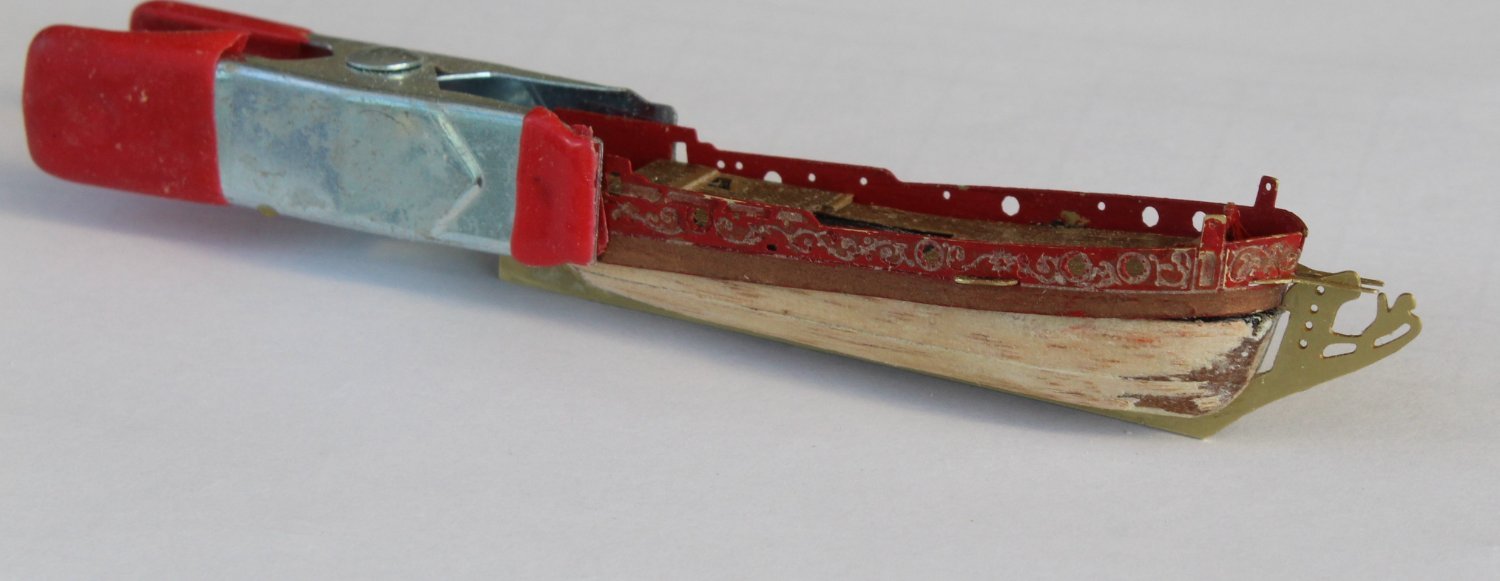
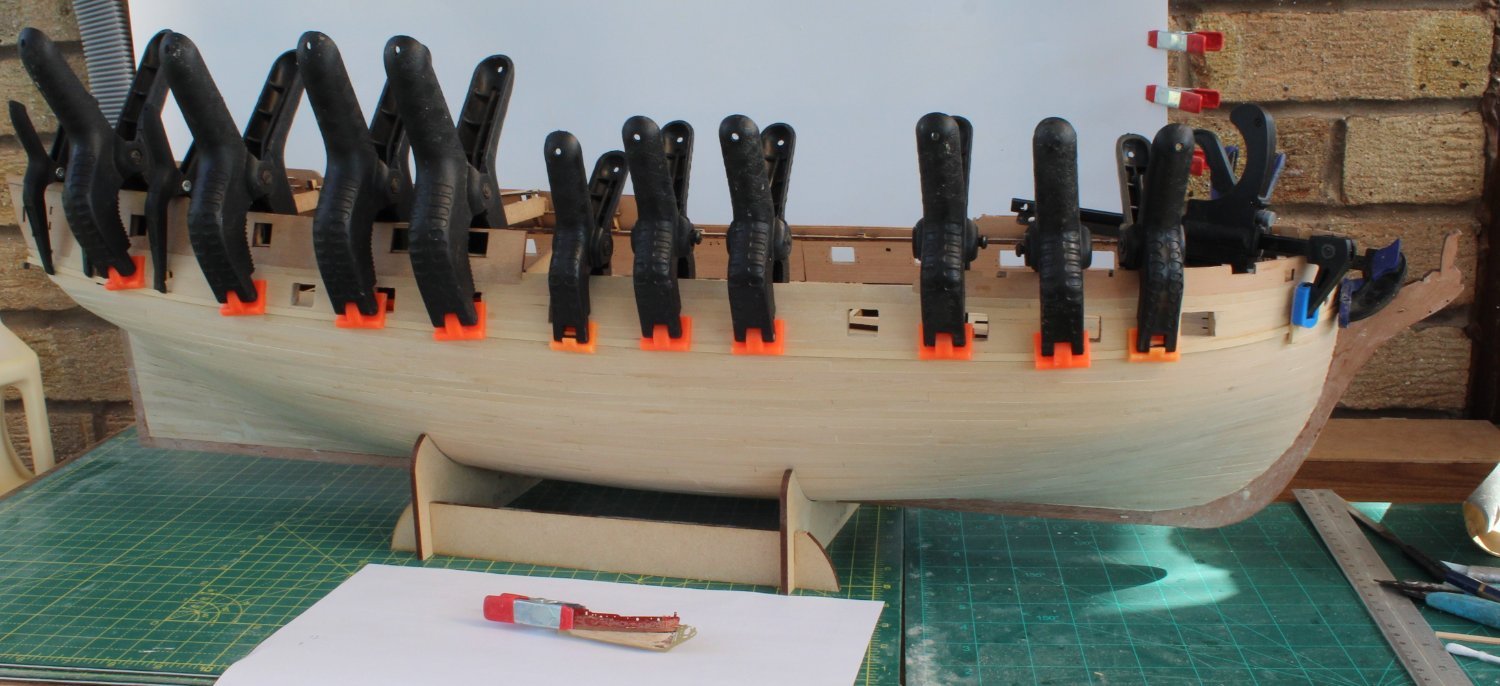
Wales – Work In Progress Over the last few days, I have been working on a birthday gift from my wife, which was Amati’s Royal Yacht (in a bottle). I managed to construct and shape the hull and to then paint and fit the deck and bulwarks. The problem came when I started to fit the deck items. I really struggled to located and secure the parts. After failing to fit the fore bitts and windlass assembly I decided to abandon this project as I do not have the requisite tools or eyesight (even with my magnifying glasses) as the ship is too small for me. It was a nice gift to receive, and I am glad I tried to build it but unfortunately, in my opinion, it is a very poor-quality kit and very badly presented instructions. You can see the difference in size in the photo below. I have given the Indy hull good sand and it does look and feel reasonably smooth. I have also sanded the gun port openings. I am still debating if I should just add a varnish finish or if I should paint and copper the hull. I have started to add the wales. The first wale is a length of 4mmW boxwood. I was able to use Titebond and clamps when adding the top wale. I suspect I will have to revert to CA clue for the remaining 3 x 5mm wale planks.

- 587 replies
-
- 13
-
-
- Indefatigable
- Vanguard Models
- (and 1 more)
-
Despite my best efforts this kit is way to small for me to complete. I managed to shape the hull and to then paint and fit the deck and bulwarks. The problem came when I started to fitted the deck items. I really struggled to located and secure the parts as required. After failing to fit the fore bitts and windlass assembly I decided to abandon this project as I do not have the requisite tools or eyesight (even with my magnifying glasses). It was a nice gift to receive and I am glad I tried to build it but unfortunately, in my opinion, it was a very poor quality kit.
- 2 replies
-
- 1
-
-
- Golden Yacht
- amati
- (and 1 more)
-
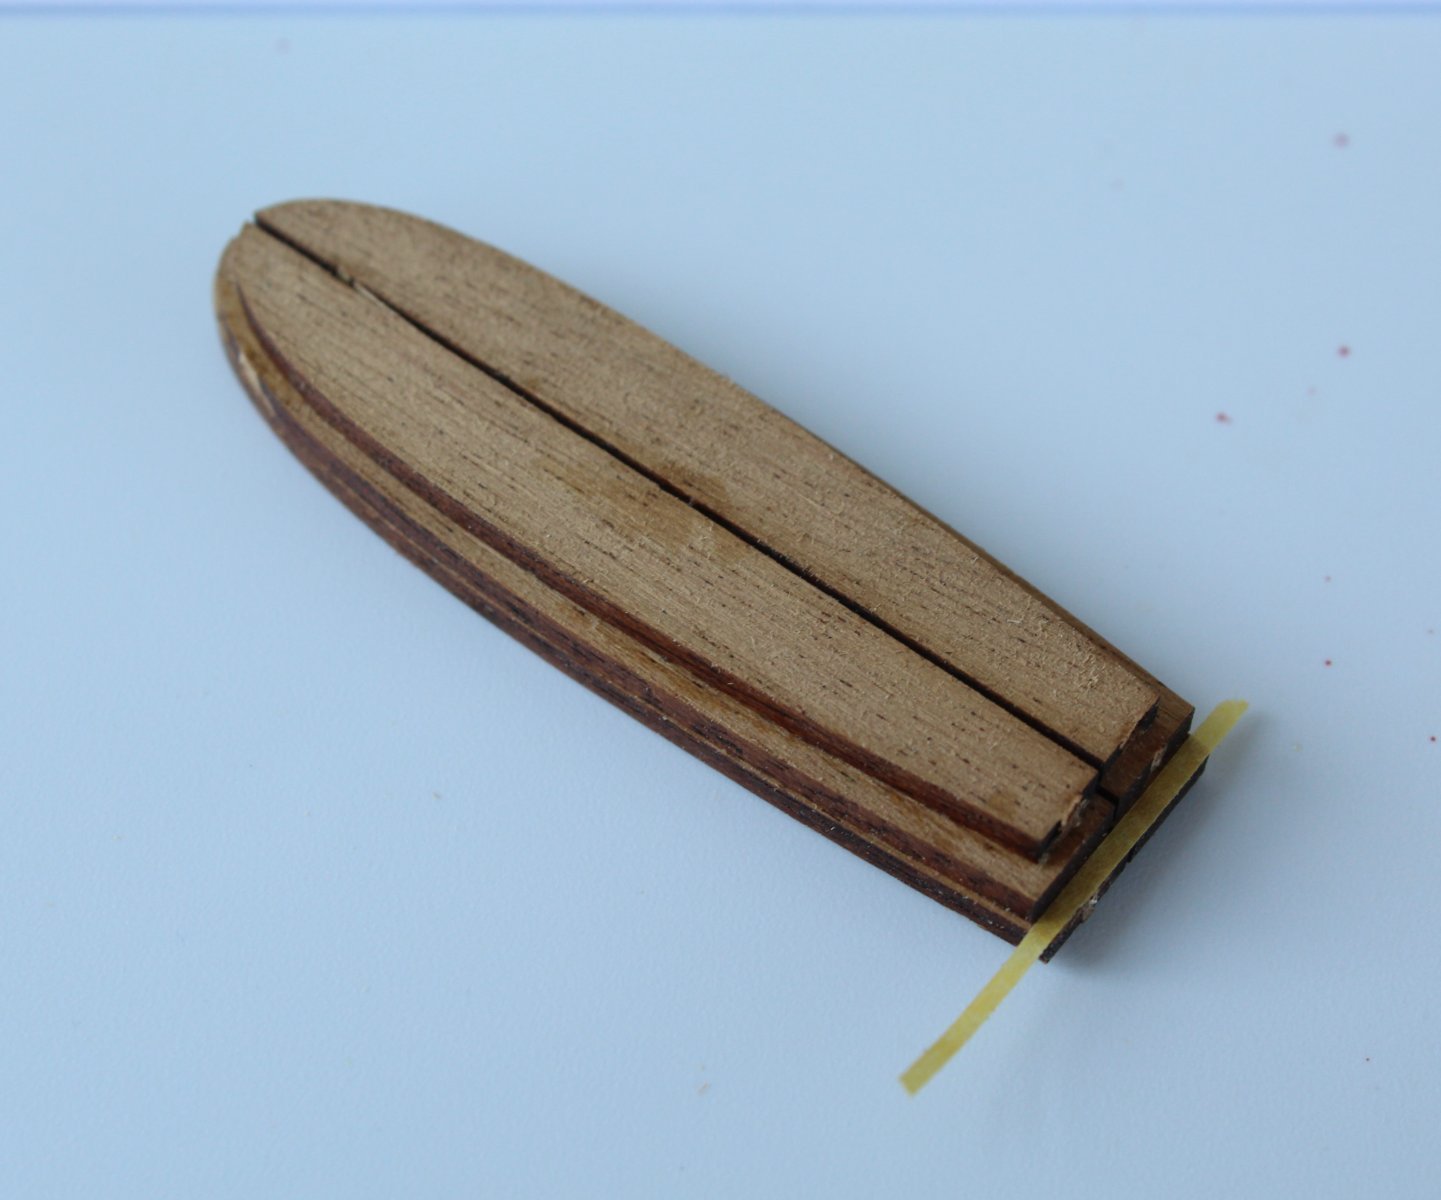
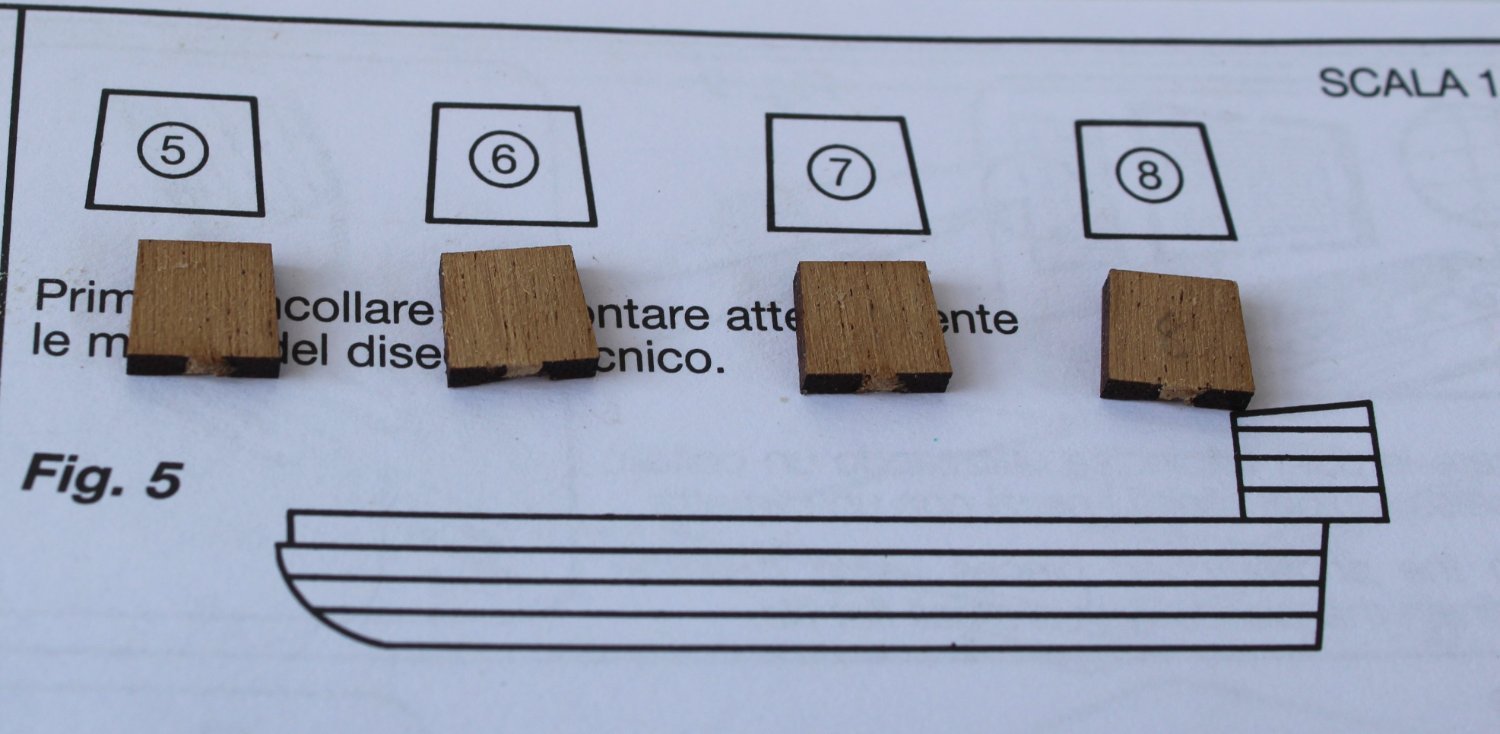
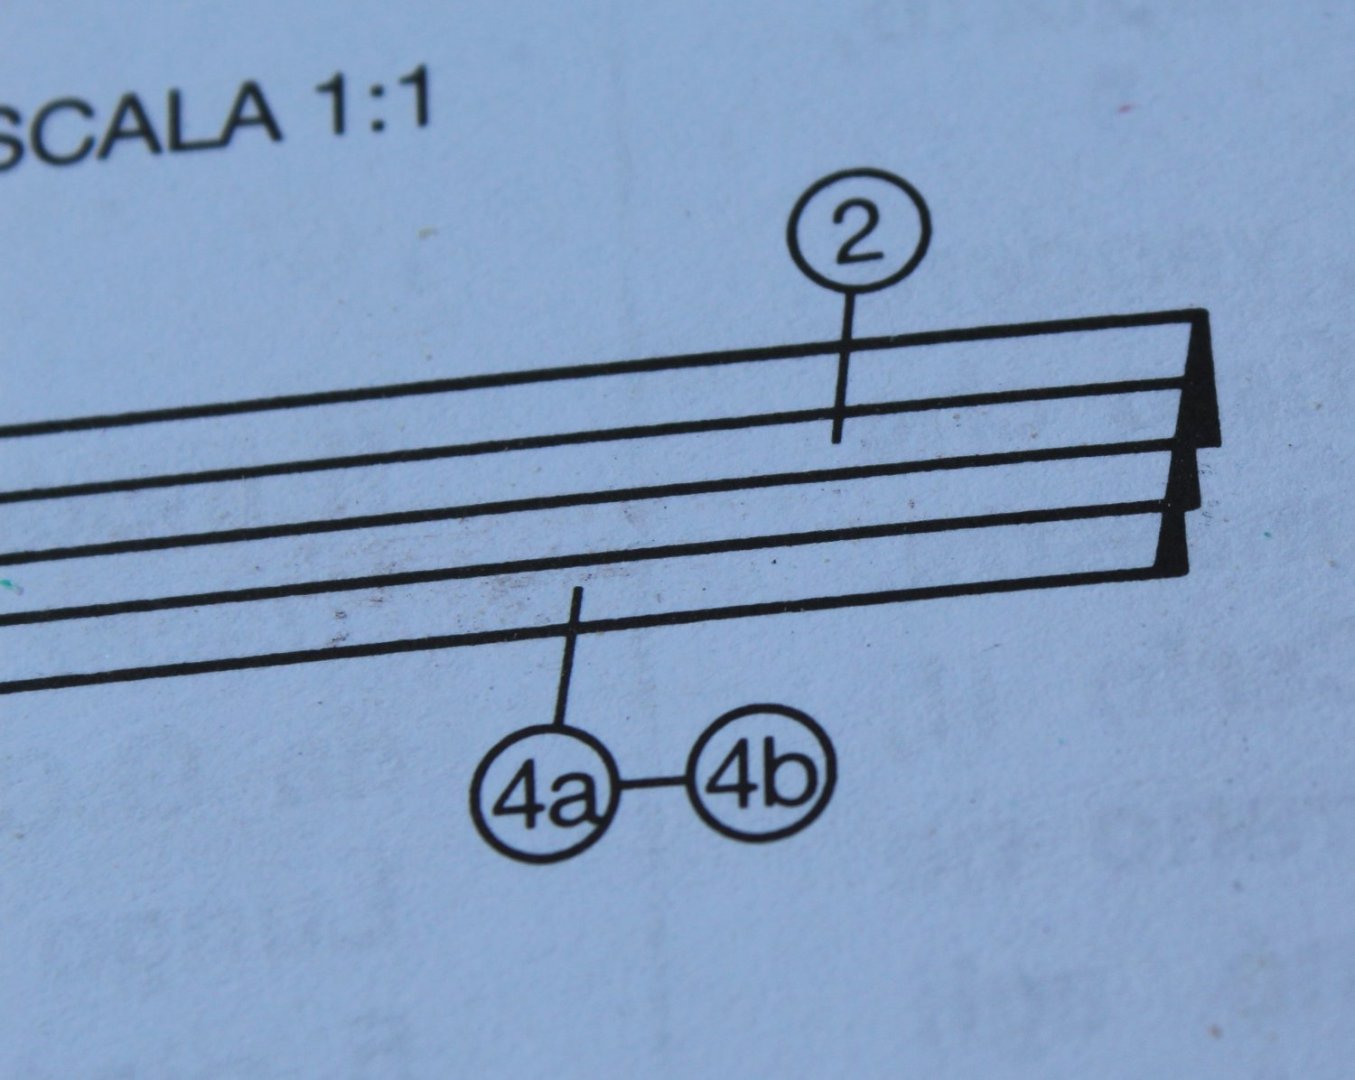
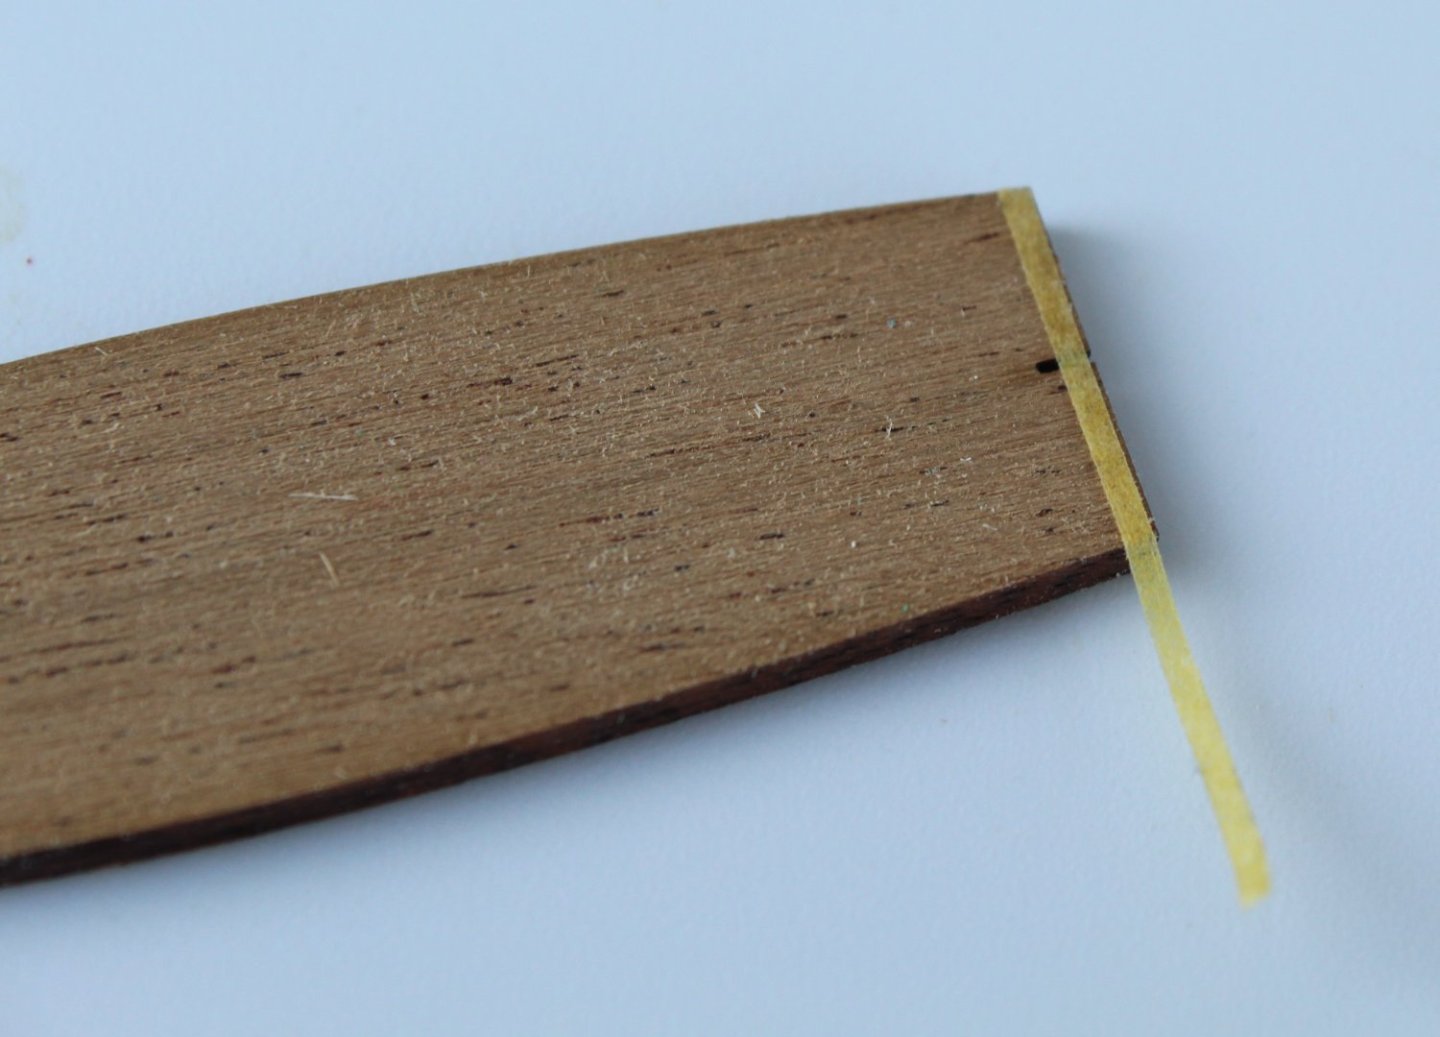
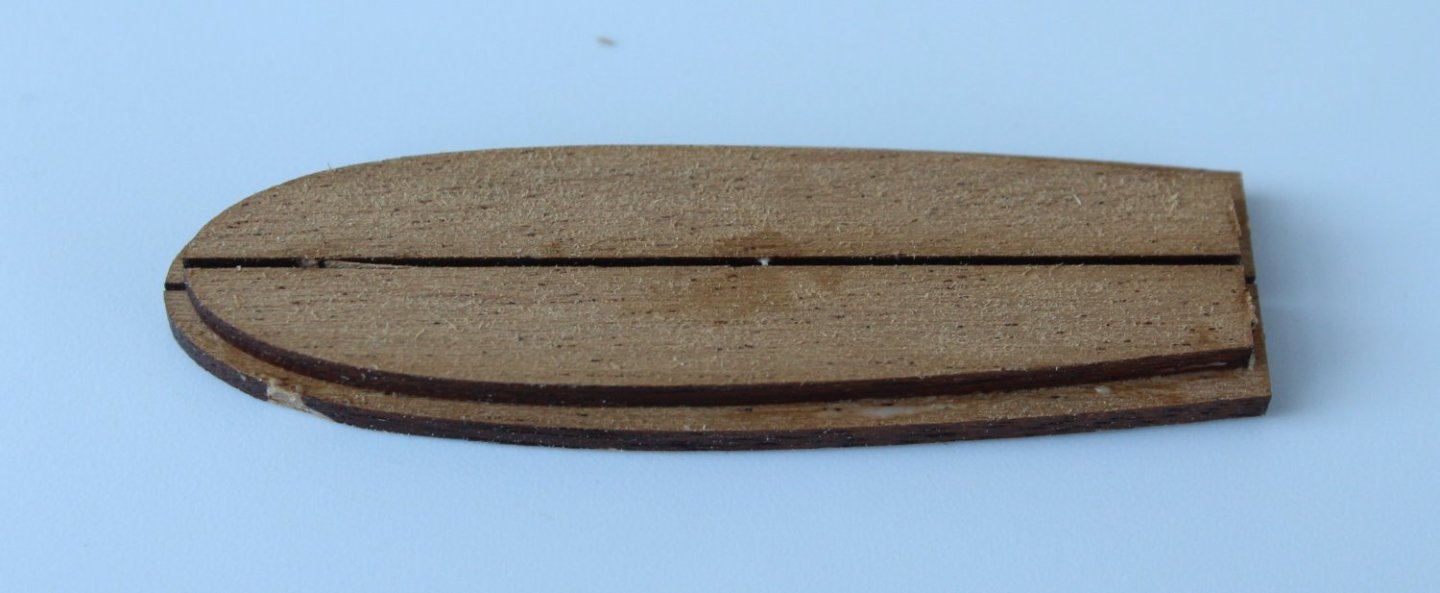
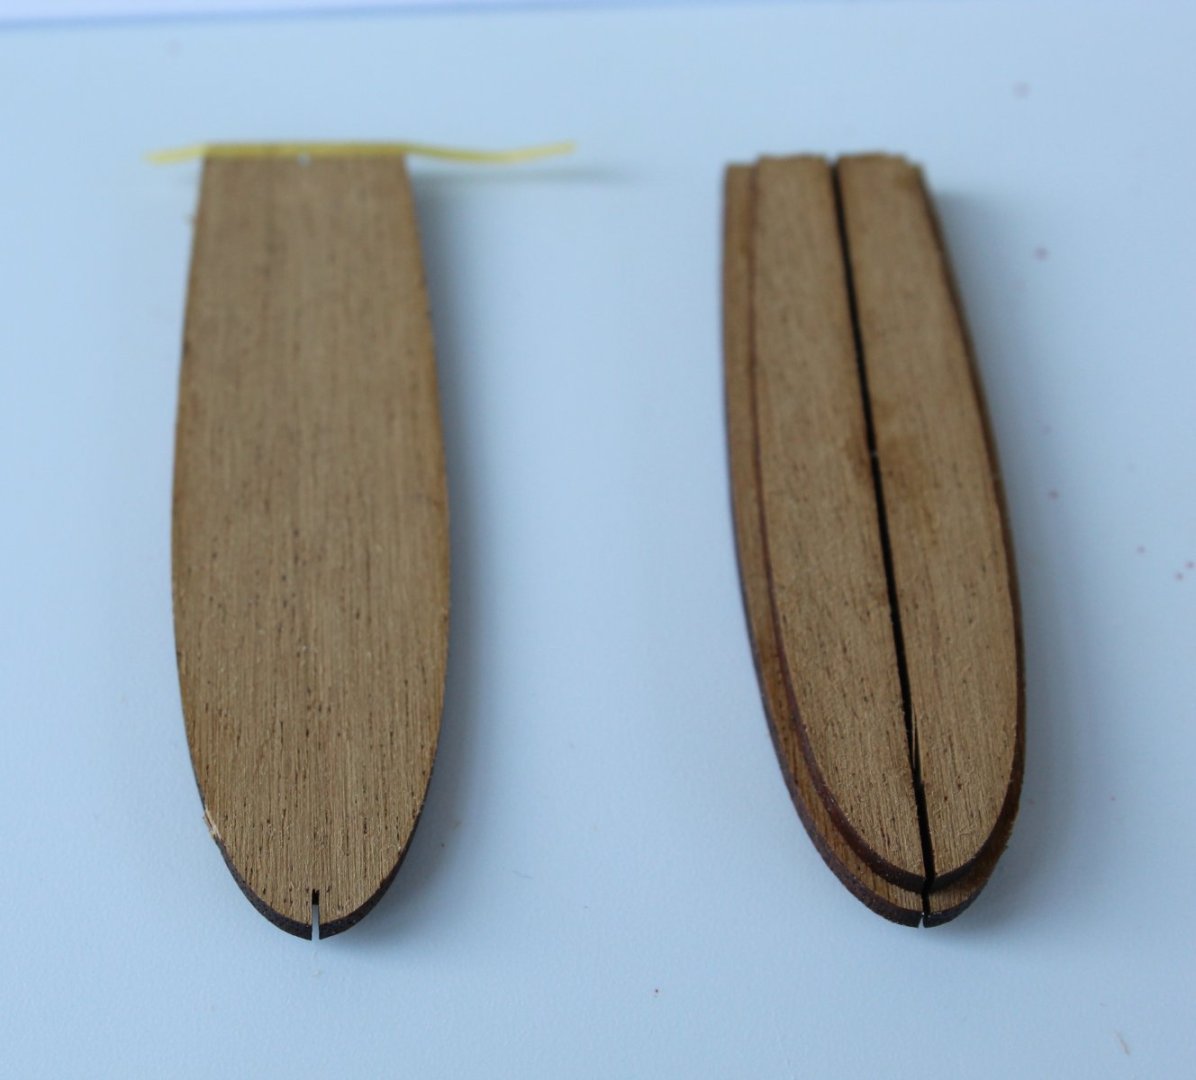
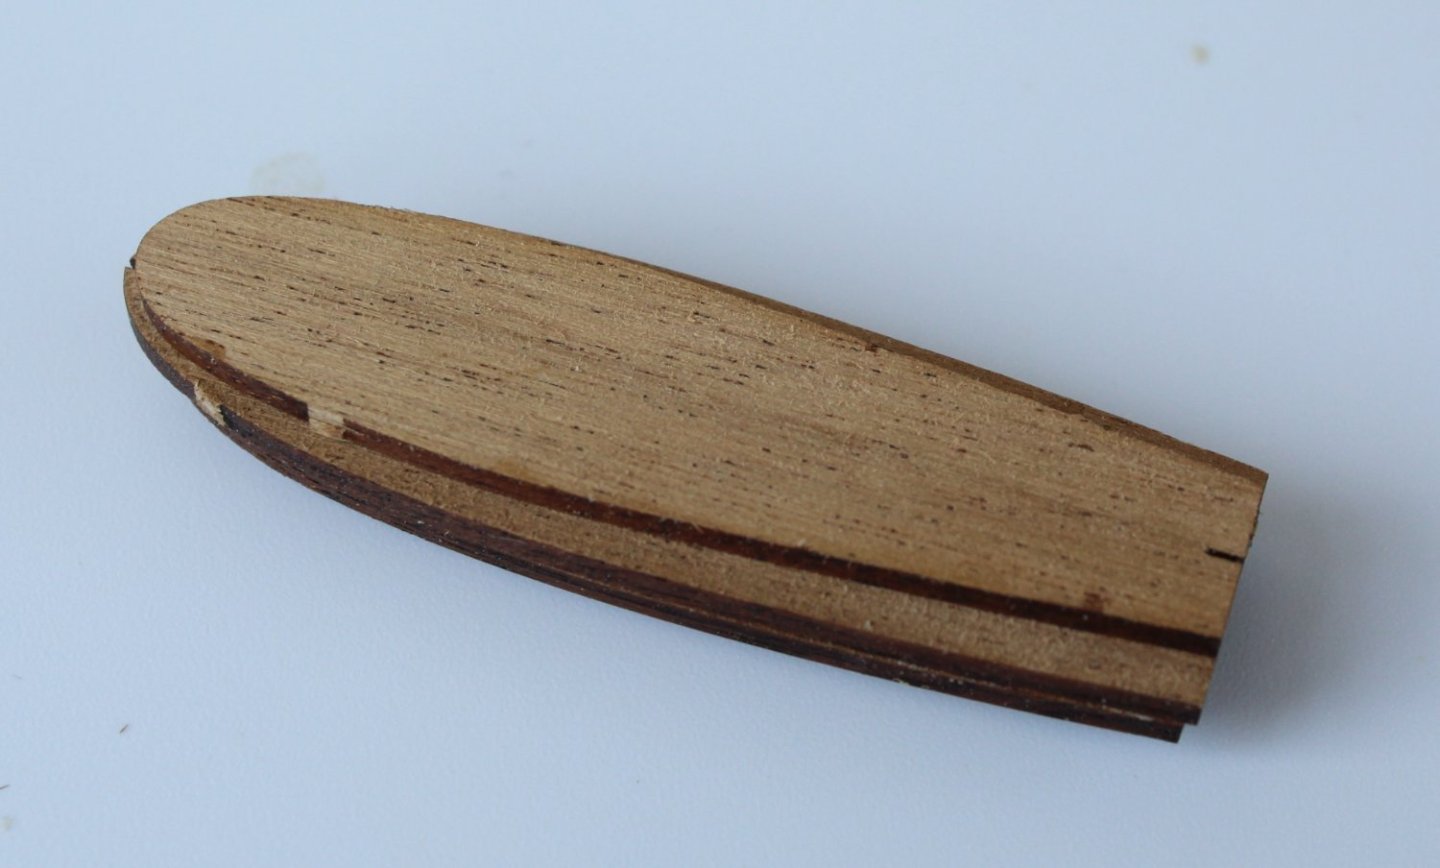
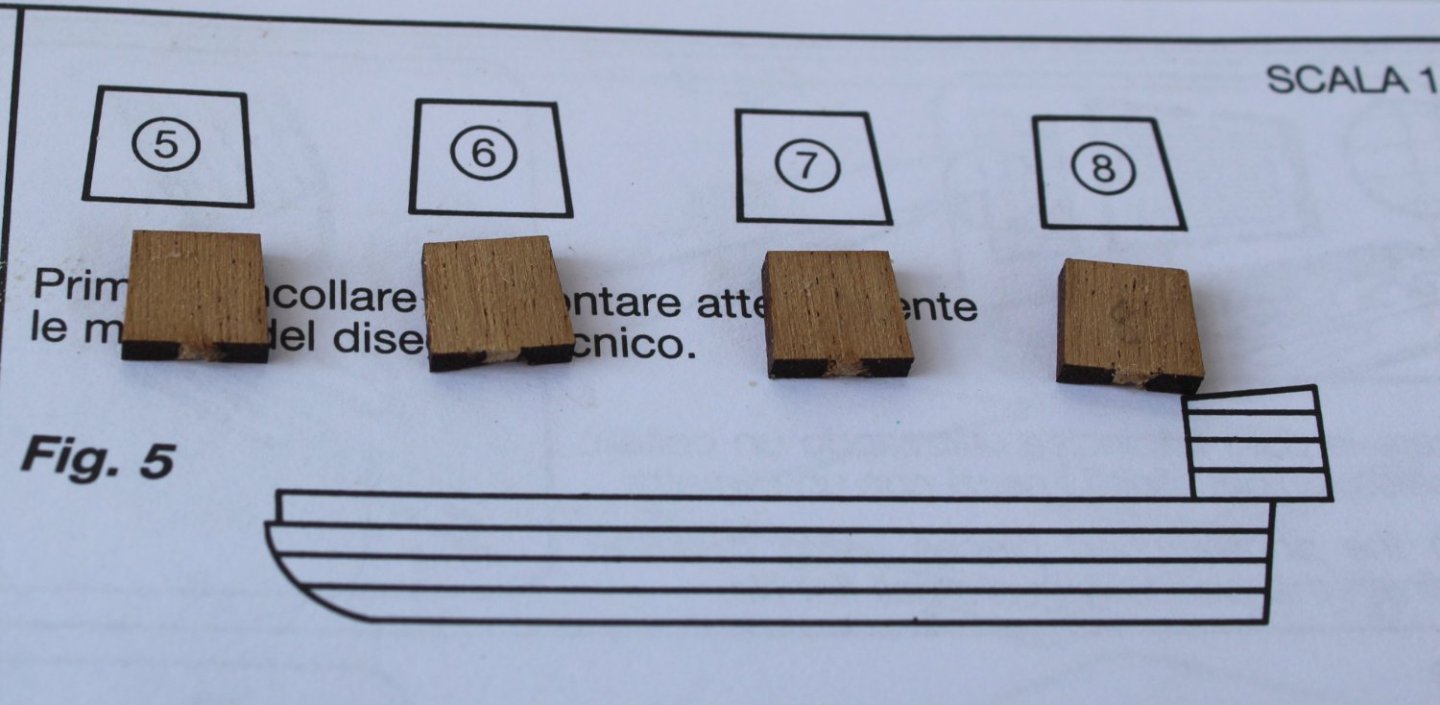
I thought I would make a start on this build. The hull construction is very different to any of my other previous builds. As can be seen in the picture below the hull is made up of 5 differently shaped sheets which are glued together in a staggered manner. The picture shown in the build instructions is drawn at a scale of 1:1. After a taken a measurement the required stagger is 1mm. I added a strip of 1mm tape to help me align the parts. I continued with the checking the stagger, using tape to help with the alignment as the remaining parts were glued in place. The next task is to sand the hull to get the required curved shape. The kit has provided a series of templates to aid this shaping process. The quarter gallery comprises 4 parts which are stacked on top of each other. According to the build manual the 4 parts are different sizes but in reality the parts were all the small size. hjh


- 2 replies
-
- 4
-
-
- Golden Yacht
- amati
- (and 1 more)
-
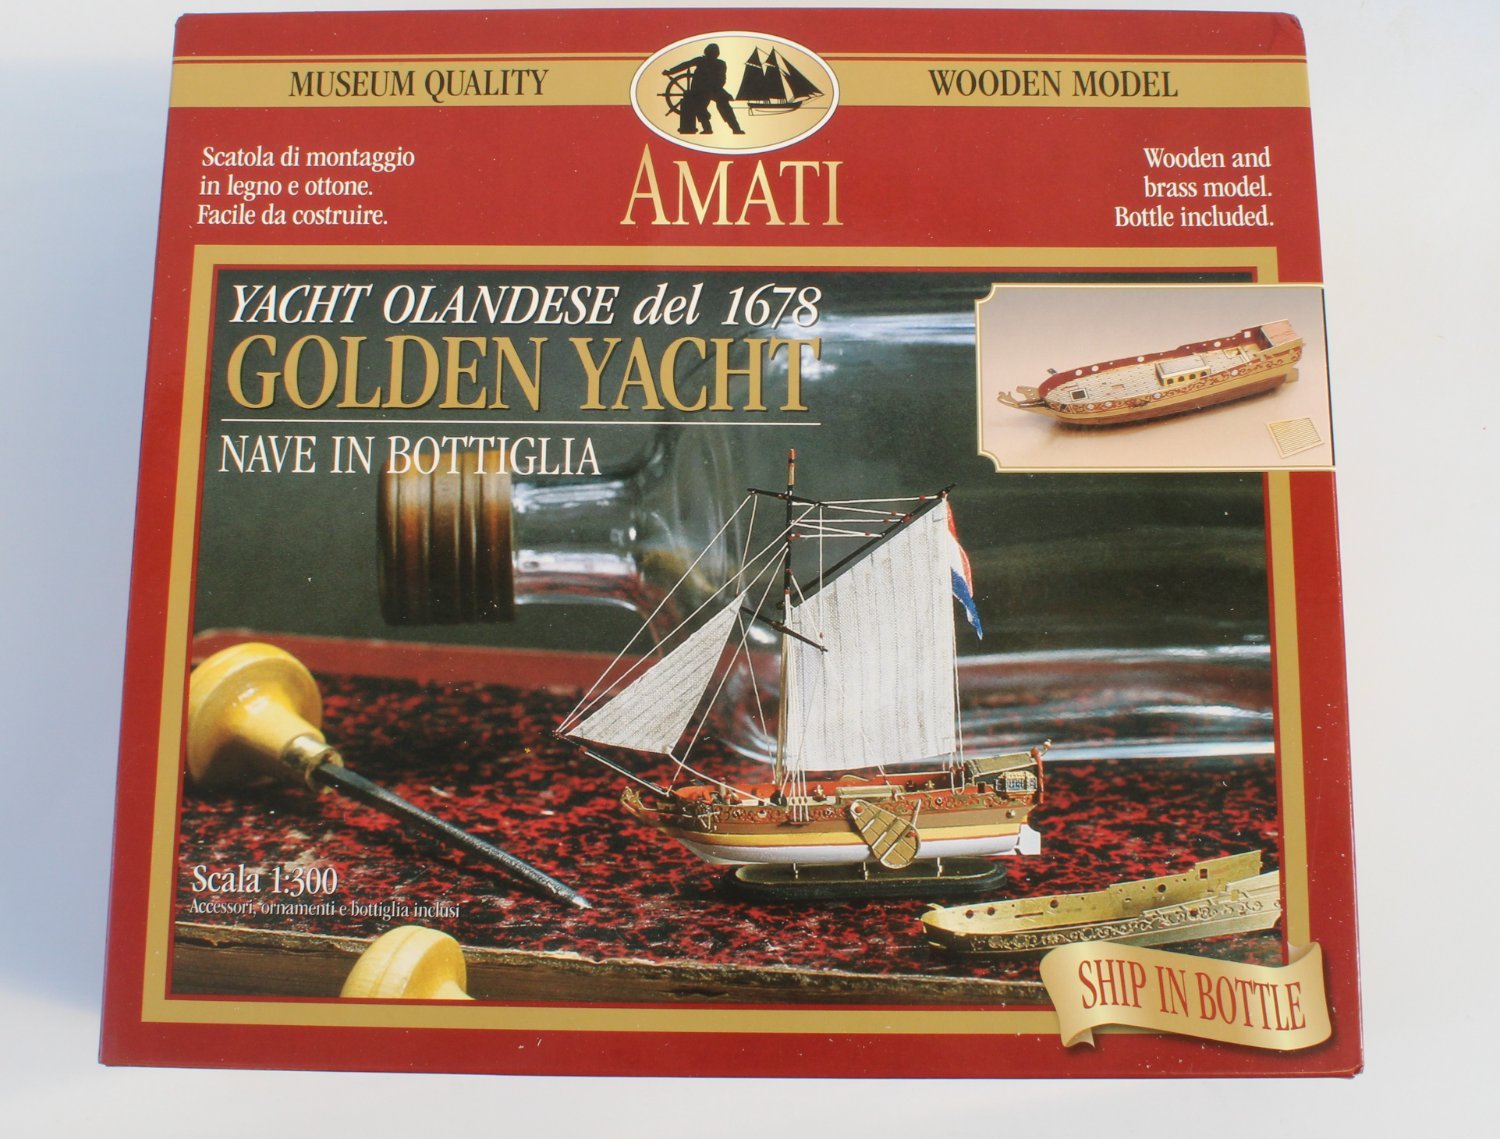
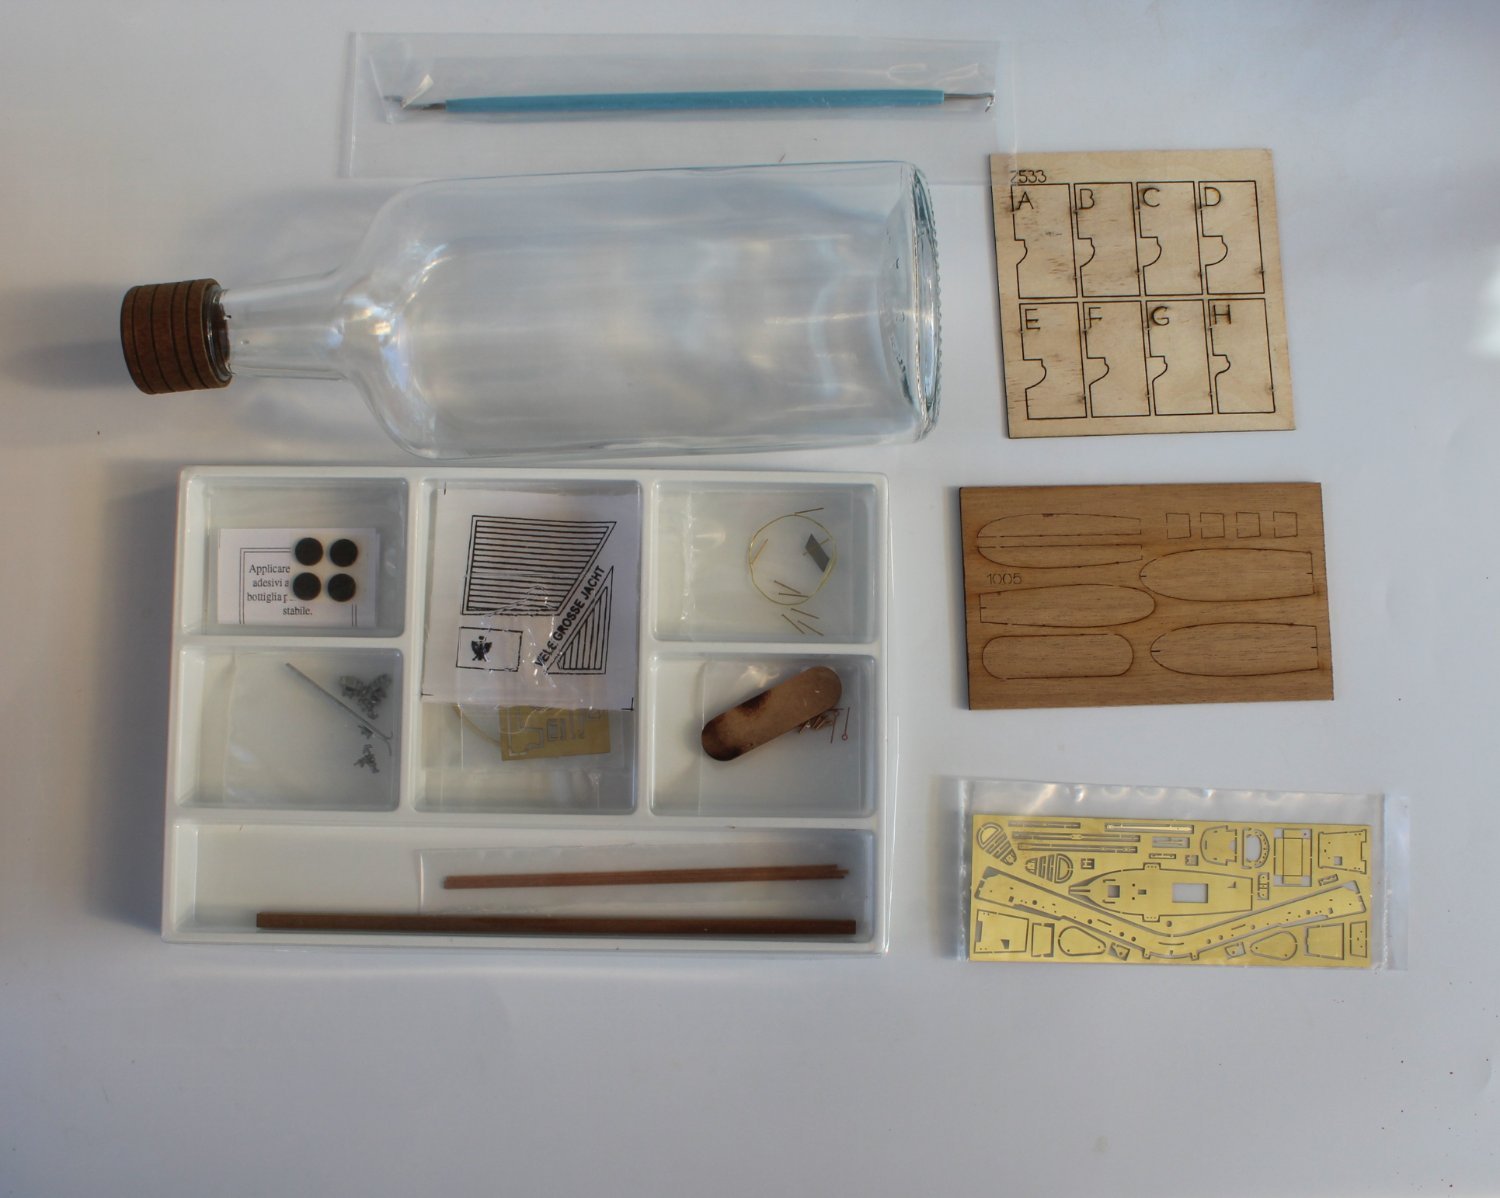
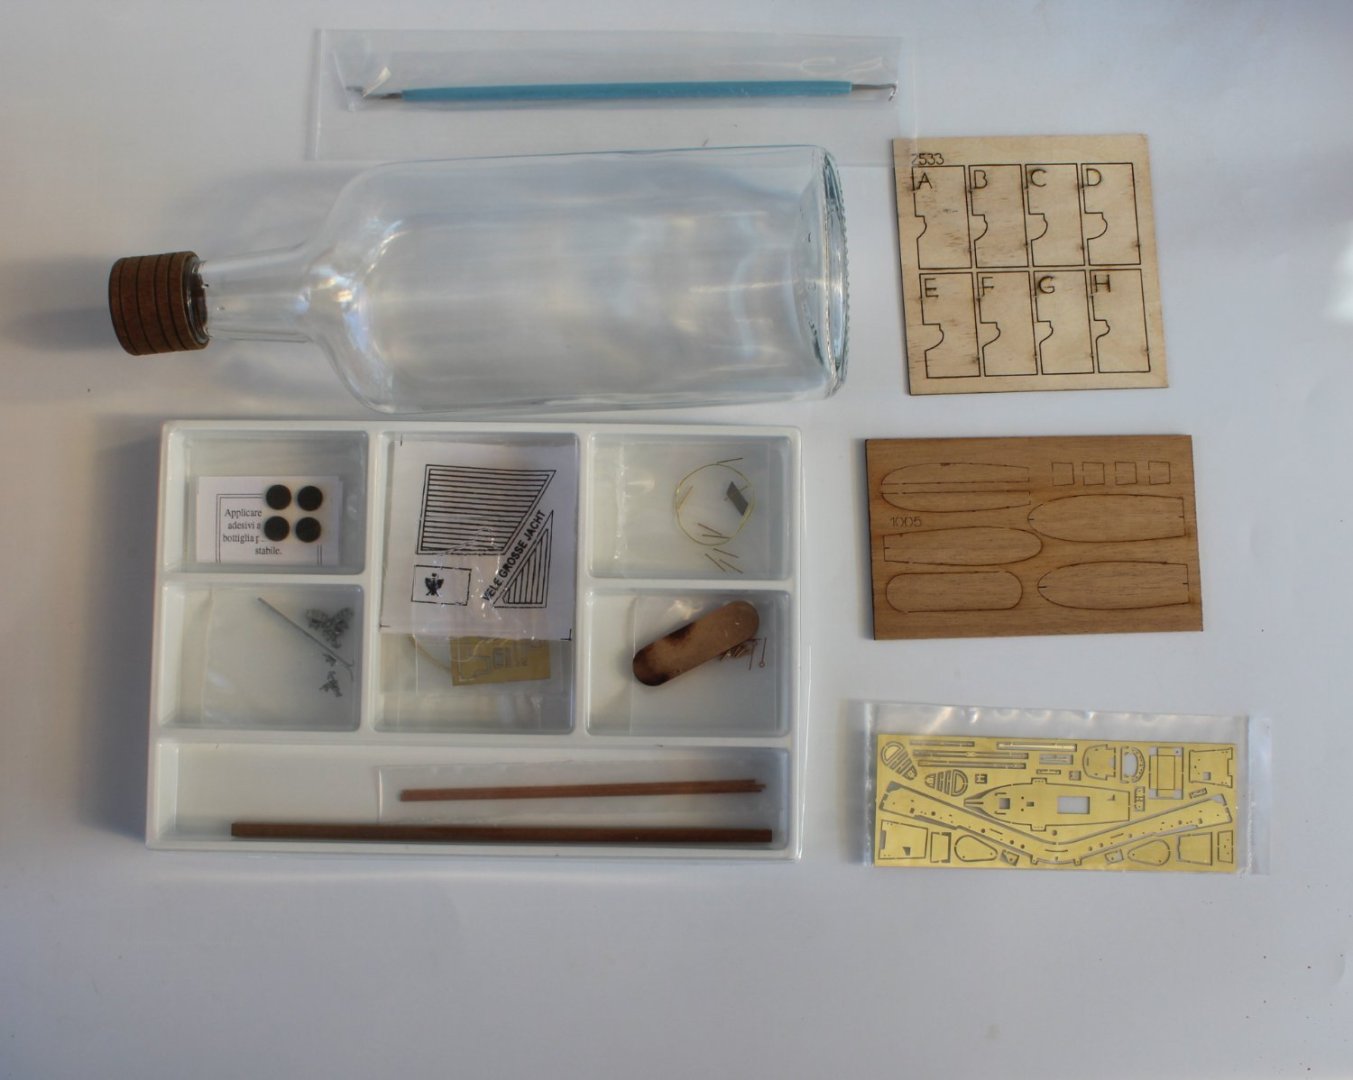
As a birthday present I received the Amati kit for the Golden Yacht (in a bottle) which was a total surprise. The box states this will be a Museum quality wooden model. I will be very surprised if I can build any wooden model to be suitable for display in a museum. Once I have completed sanding the Indy hull I will take a short break to have a look at start building this kit, which will become a side project. Having opened the box the parts all look very small. Having been spoilt for high quality pictures and instructions with the various Vanguard Model kits I have built the Amati instructions seem a little bit threadbare in comparison.


- 2 replies
-
- 6
-
-
- Golden Yacht
- amati
- (and 1 more)
-
I will probably buy this kit as a side project at some point later in the year. I was given the Royal Yacht in bottle kit as a gift today which will be also be a side project.
- 80 replies
-
- 5
-
-
- Grecian
- Vanguard Models
- (and 3 more)
-
Many thanks your comments and sound advice Maurice. I have a long weekend away in the Lake District so I will be making plenty of sawdust filler on my return early next week.
- 587 replies
-
- 2
-
-
- Indefatigable
- Vanguard Models
- (and 1 more)
-
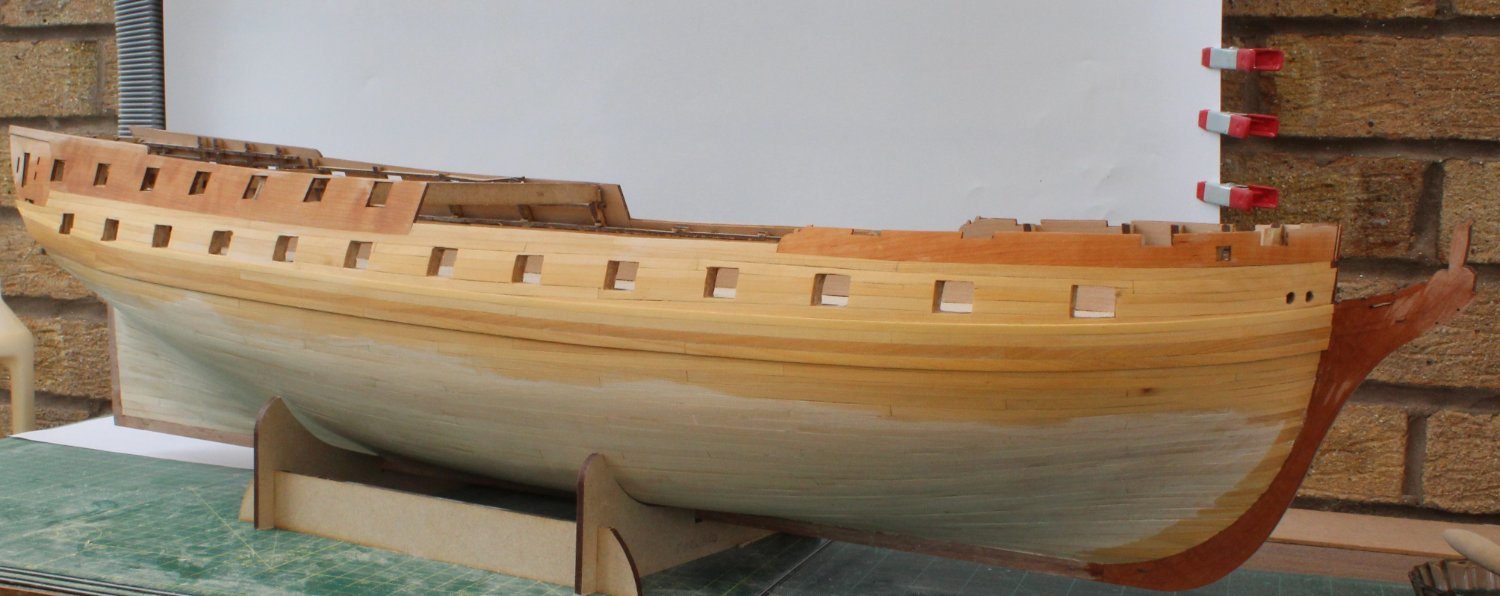
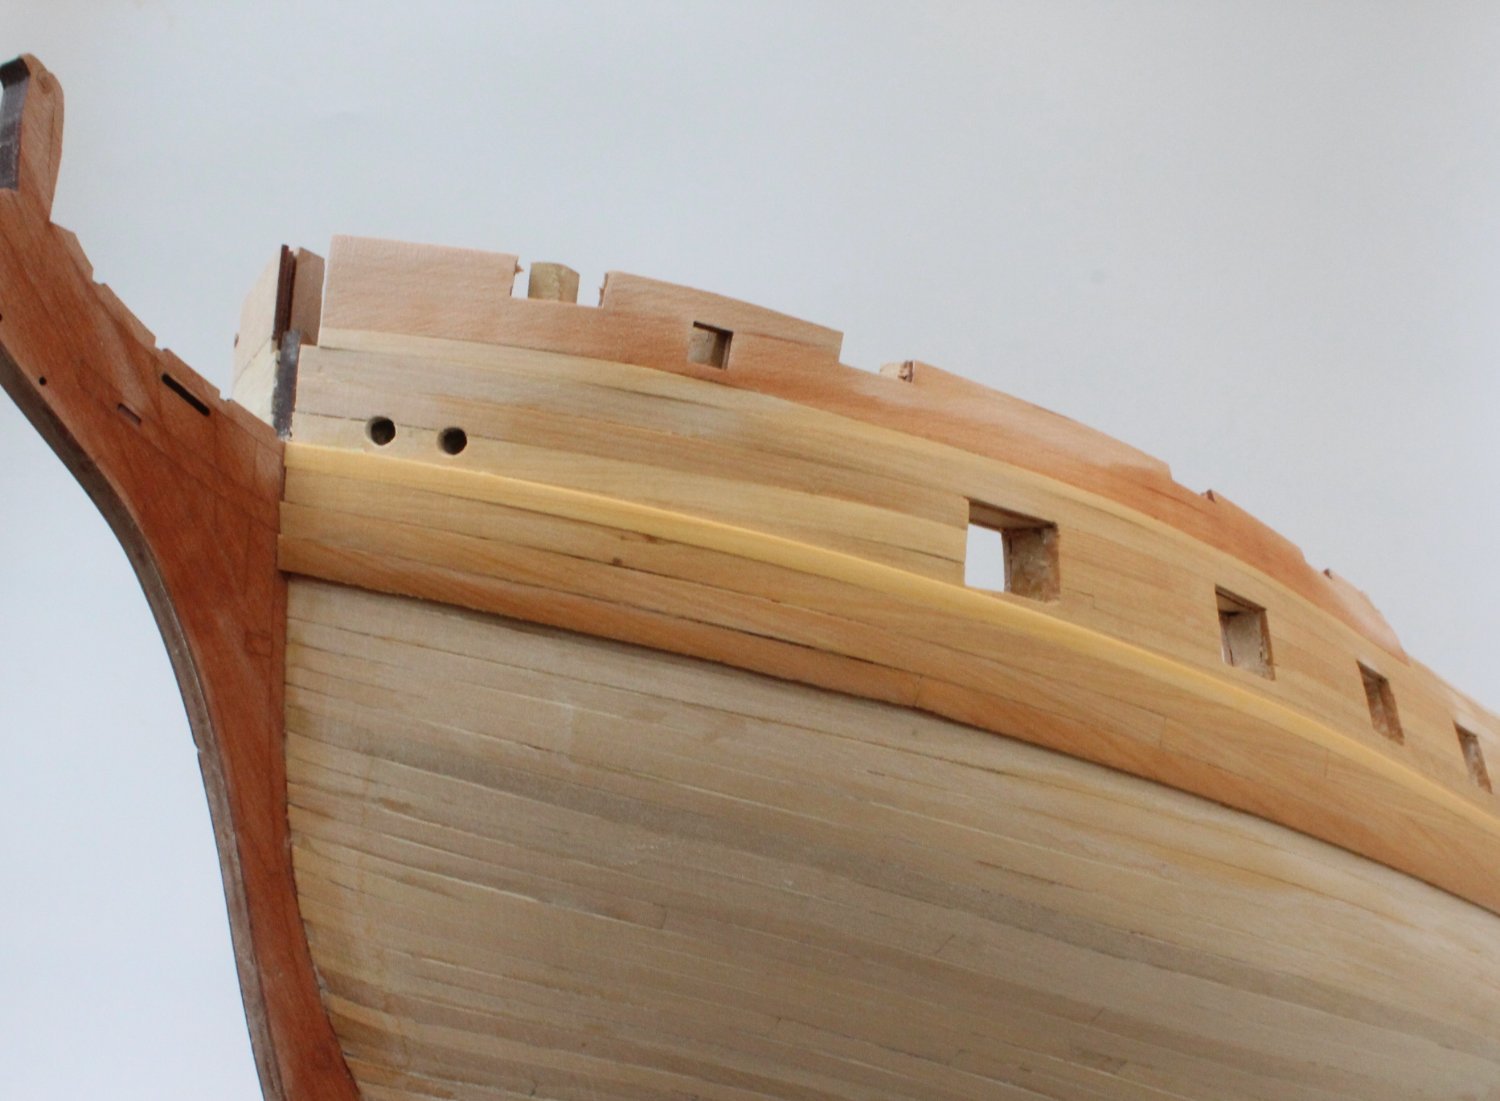
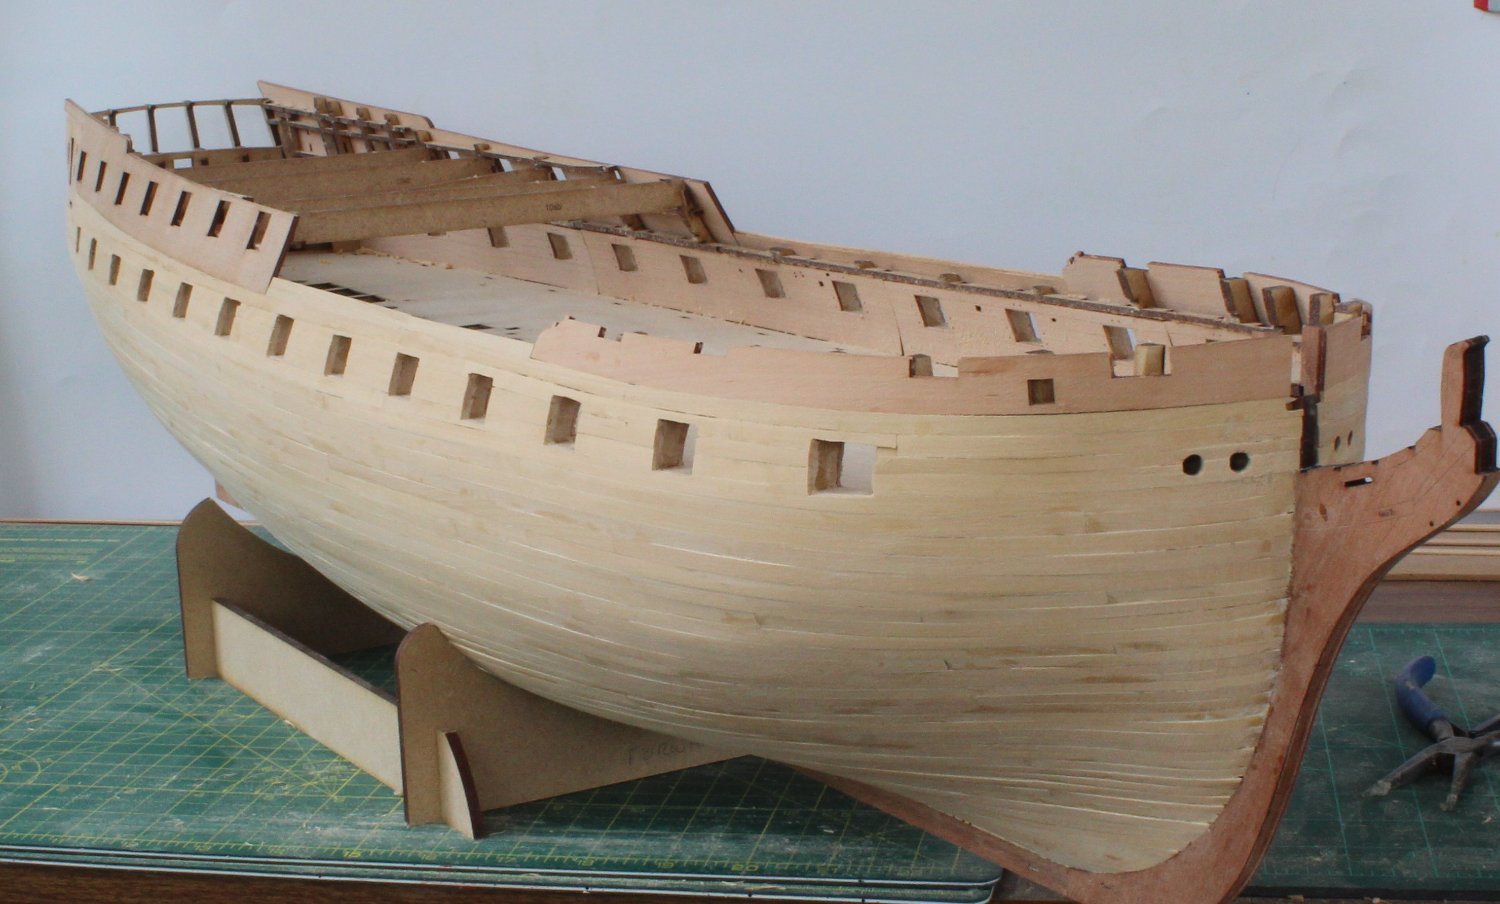
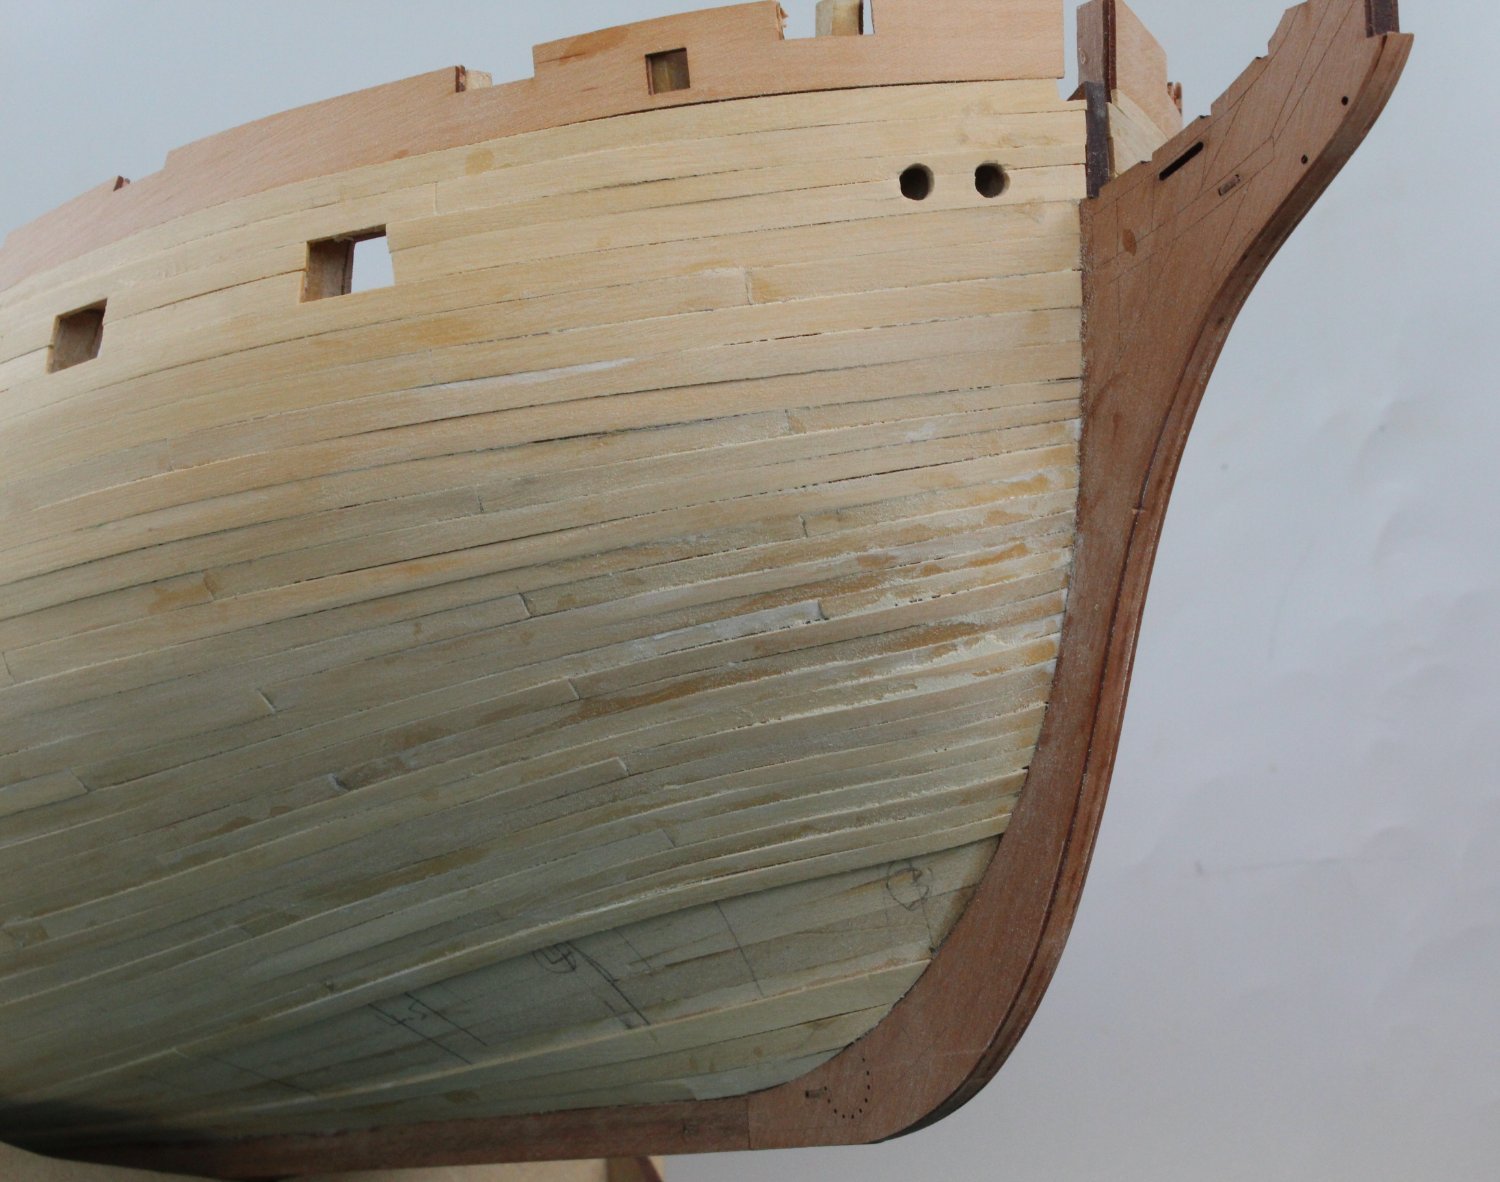
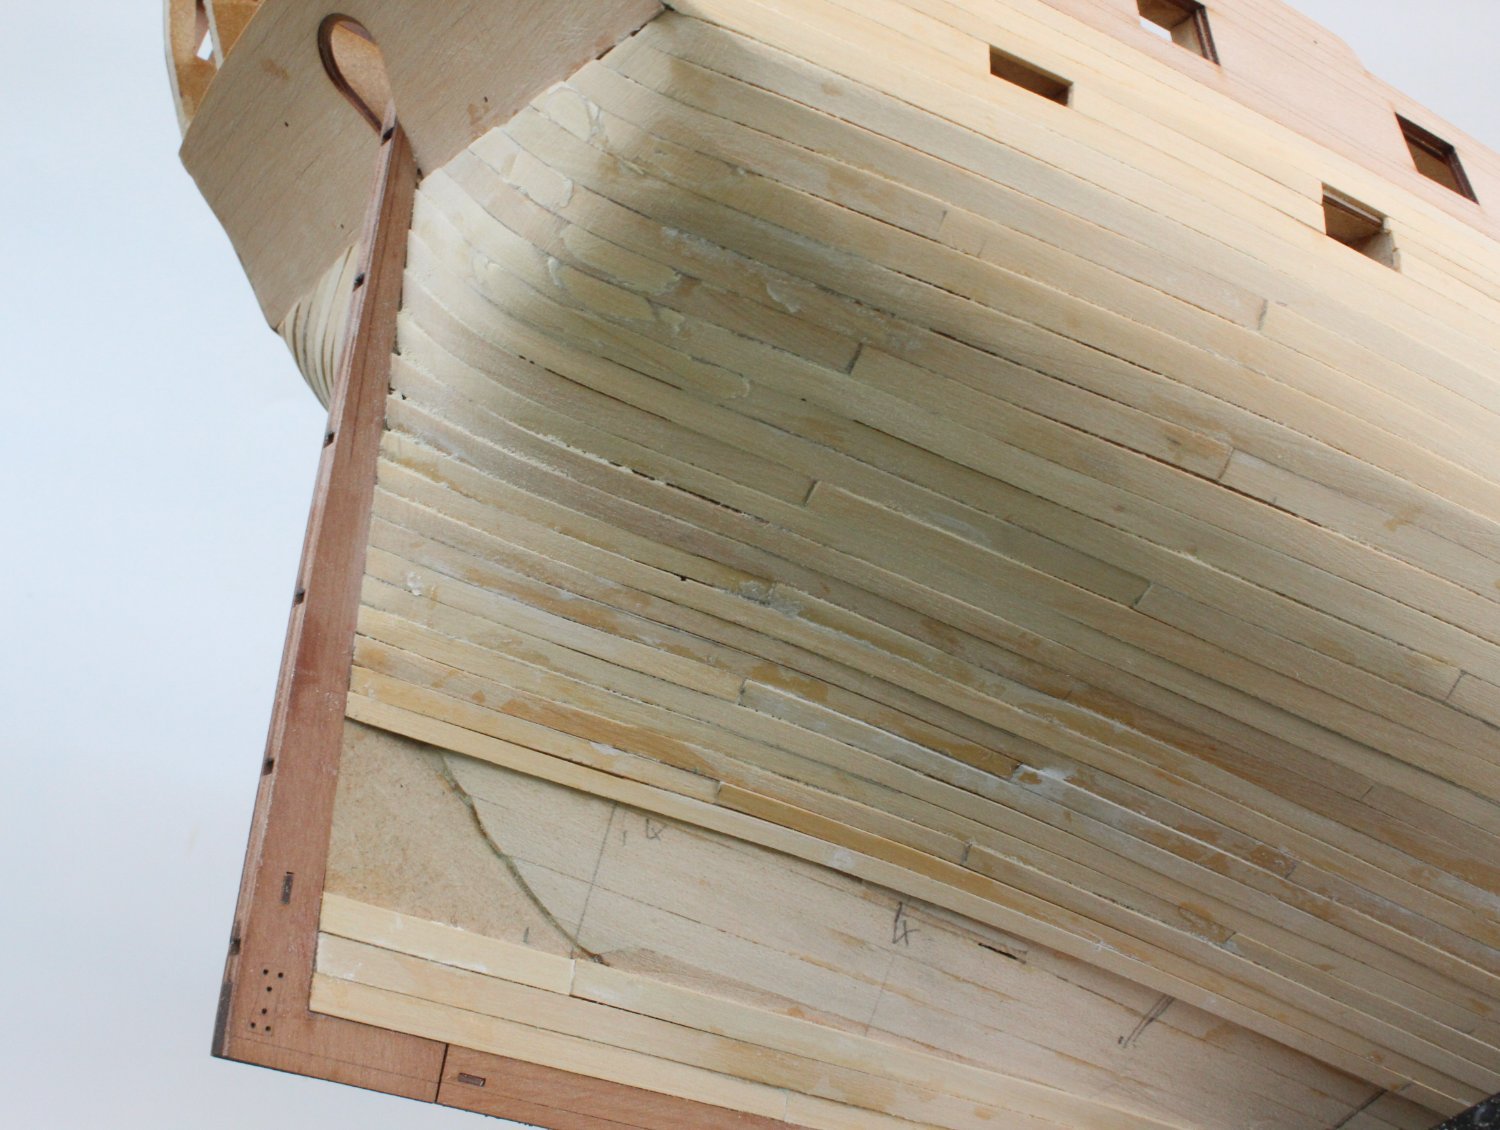
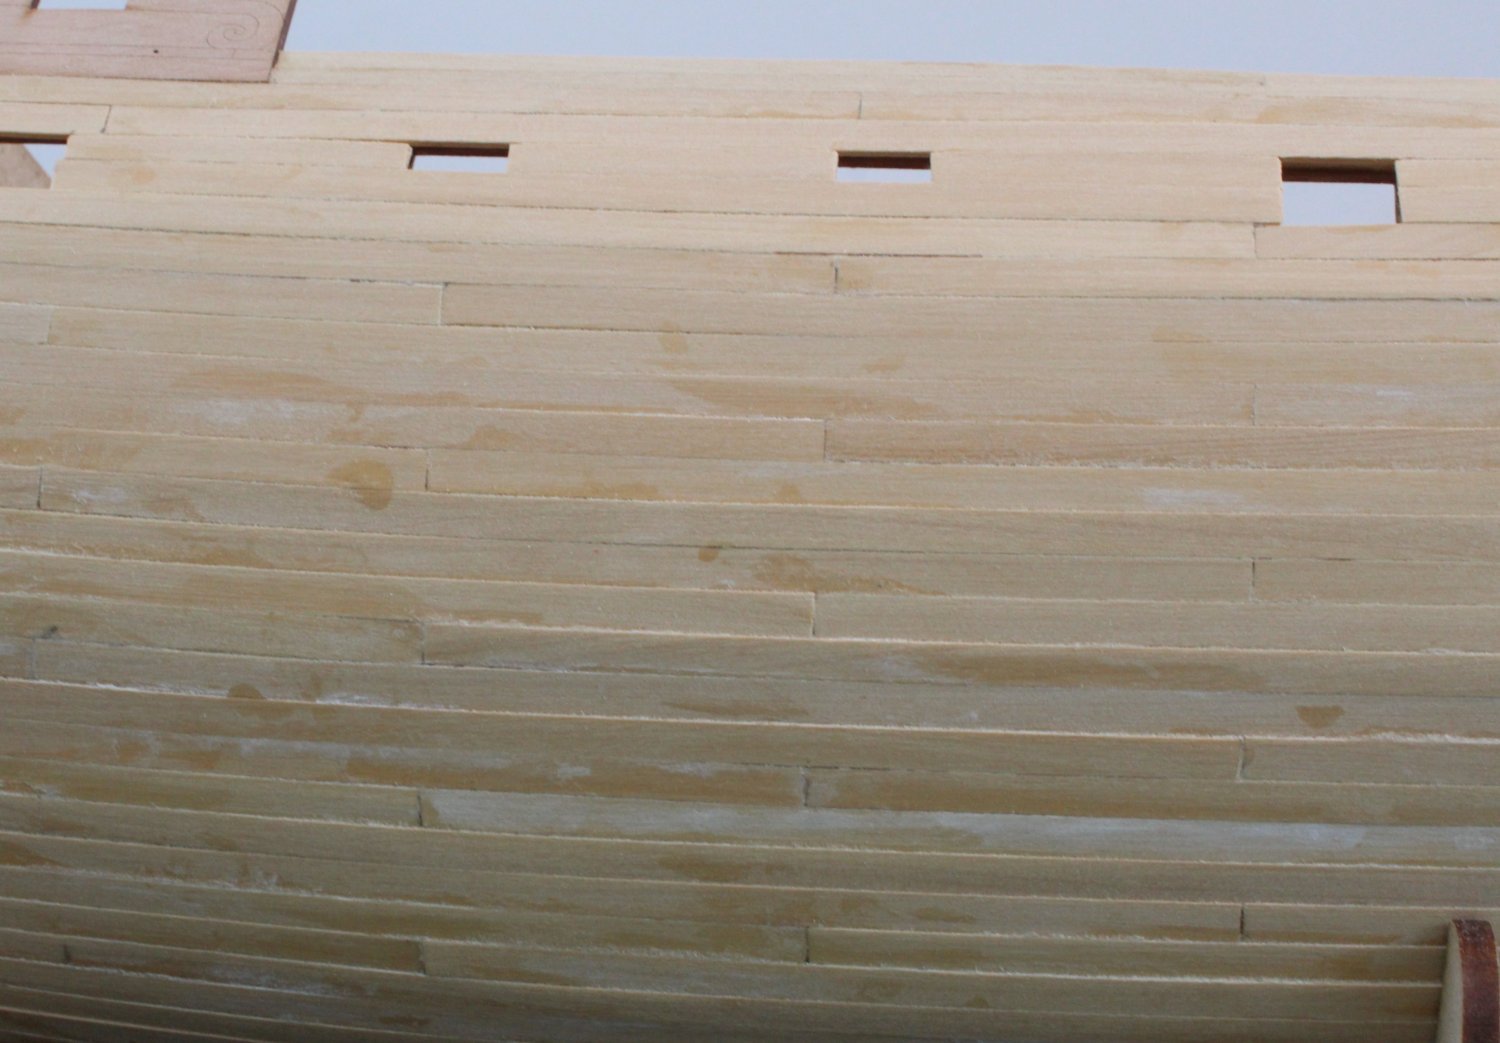
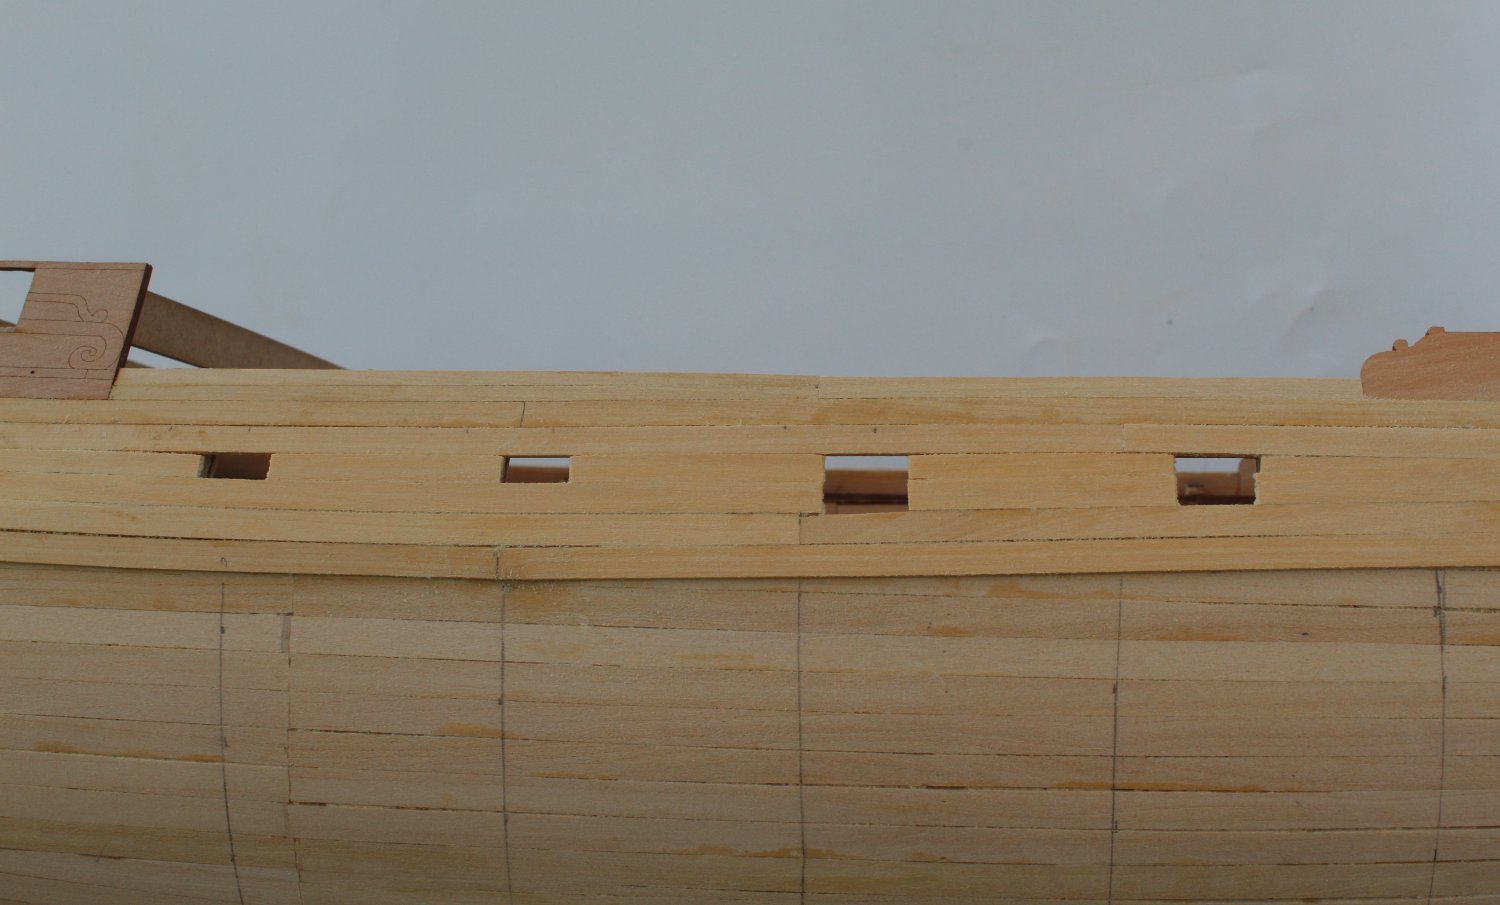
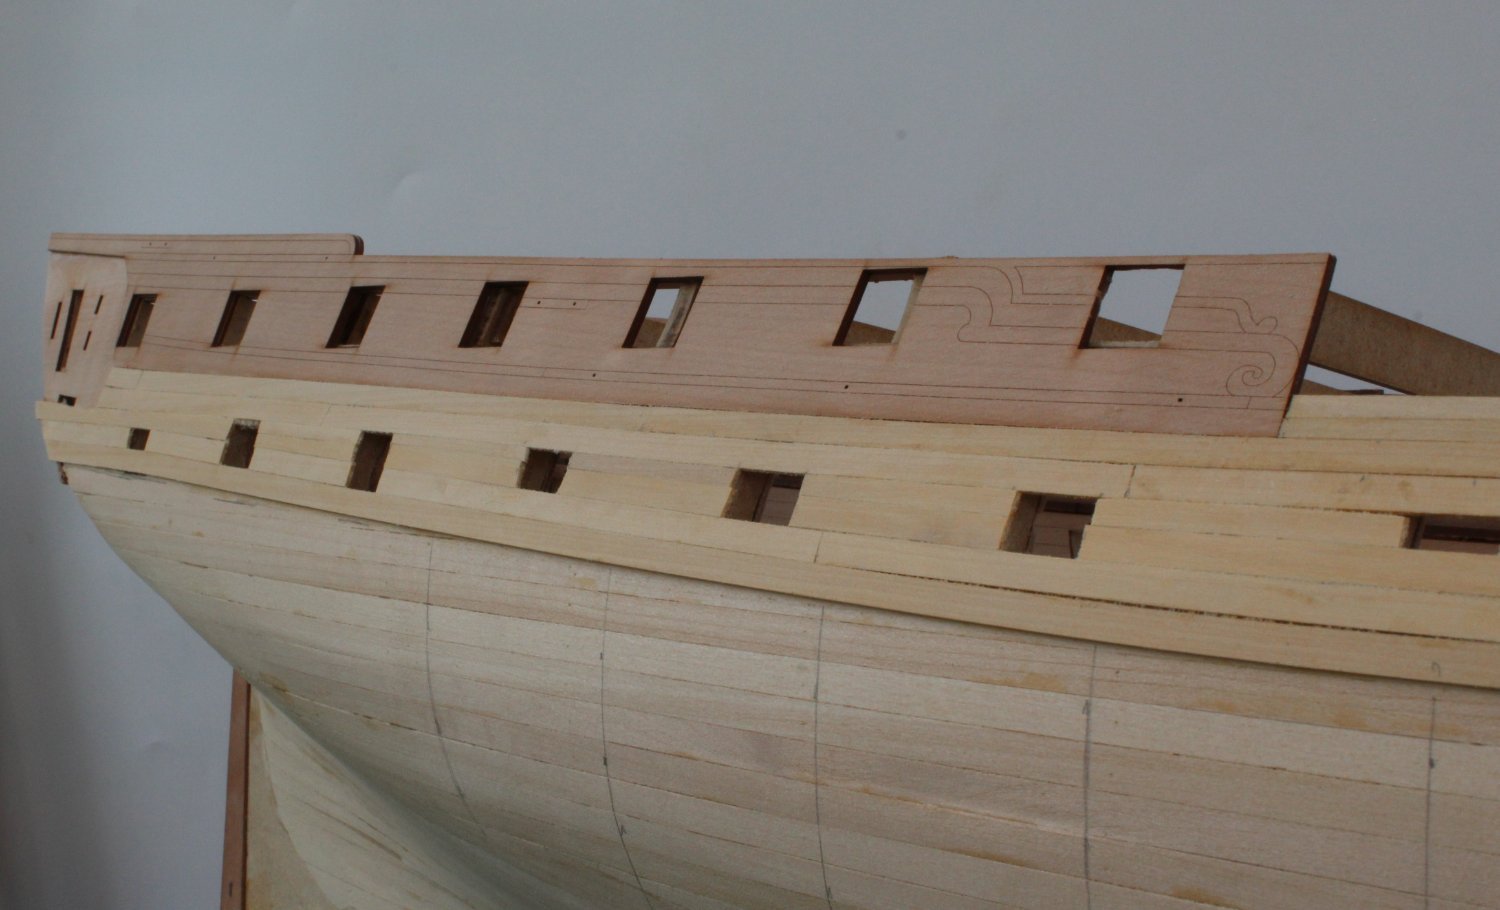
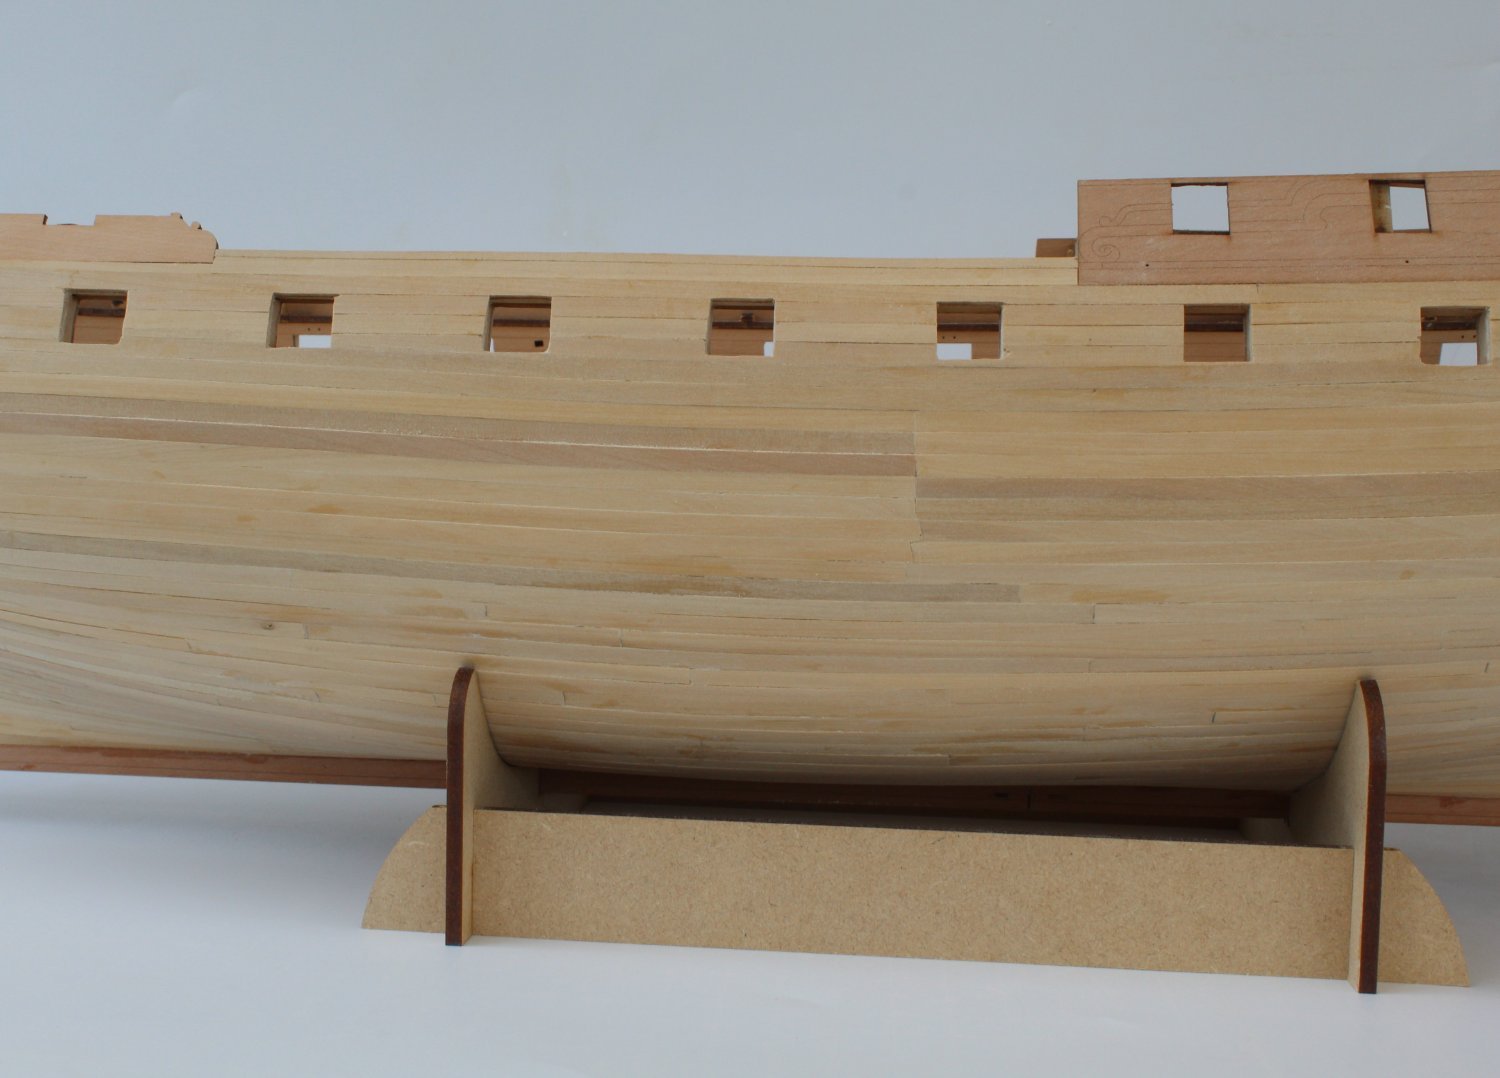
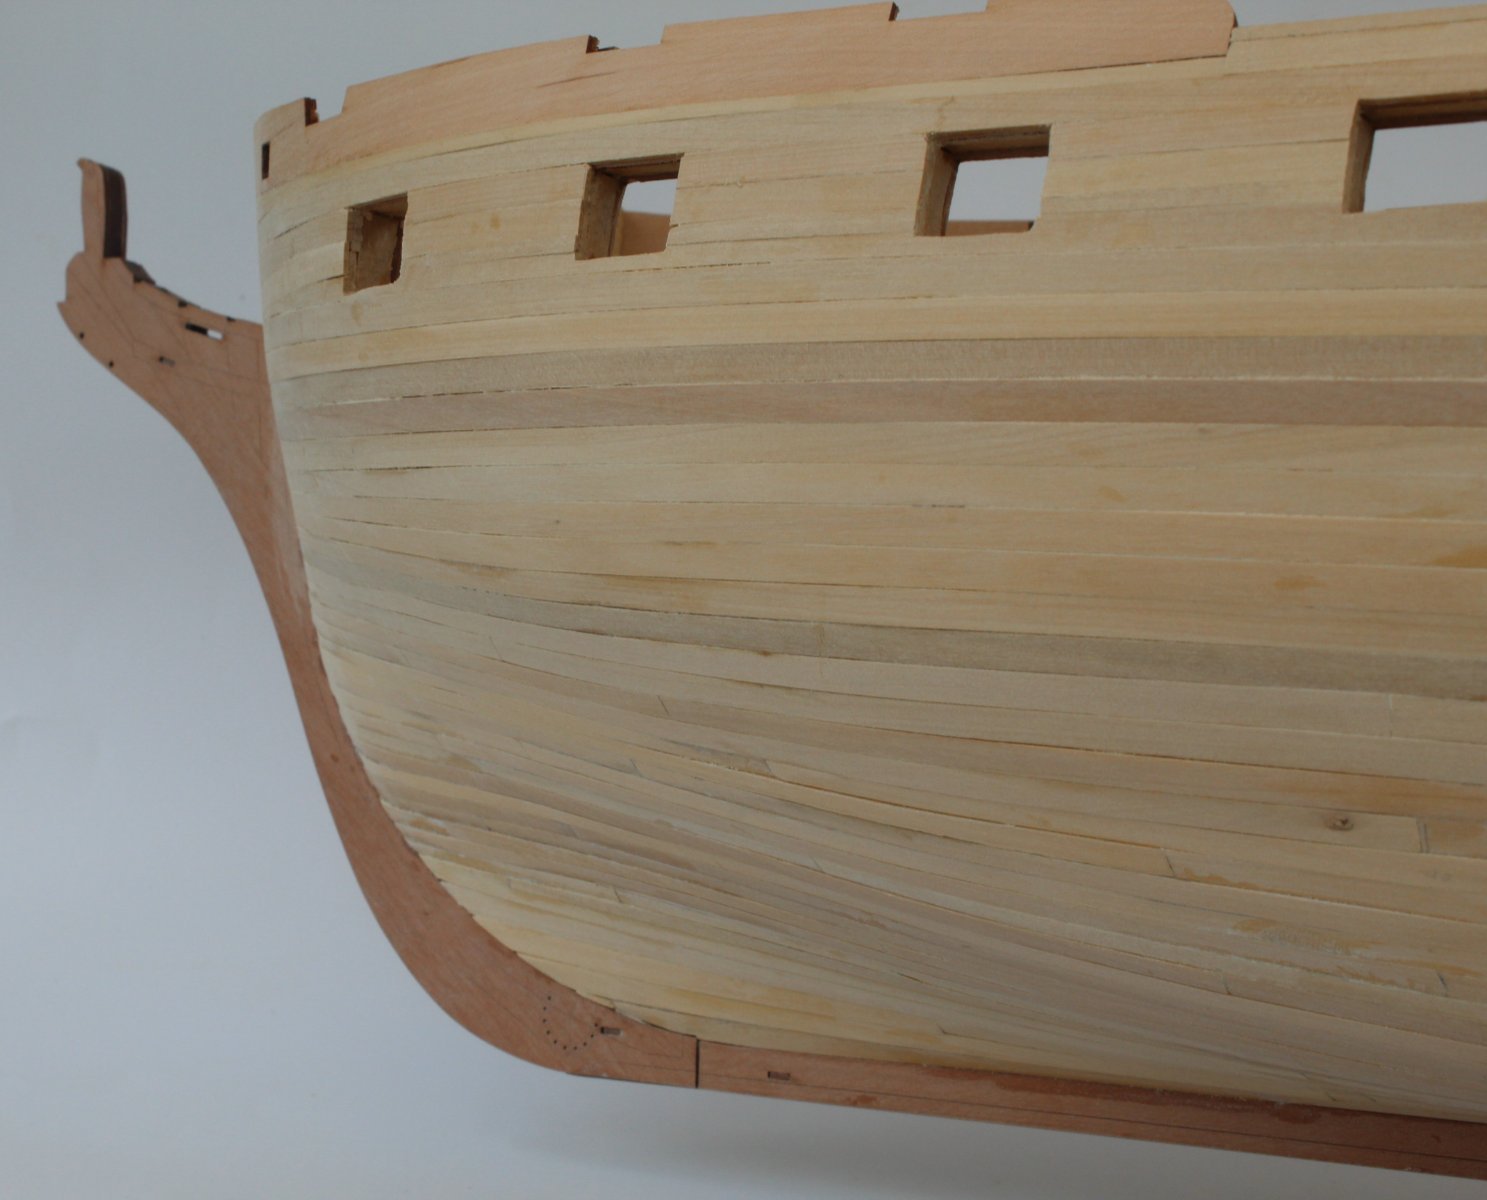
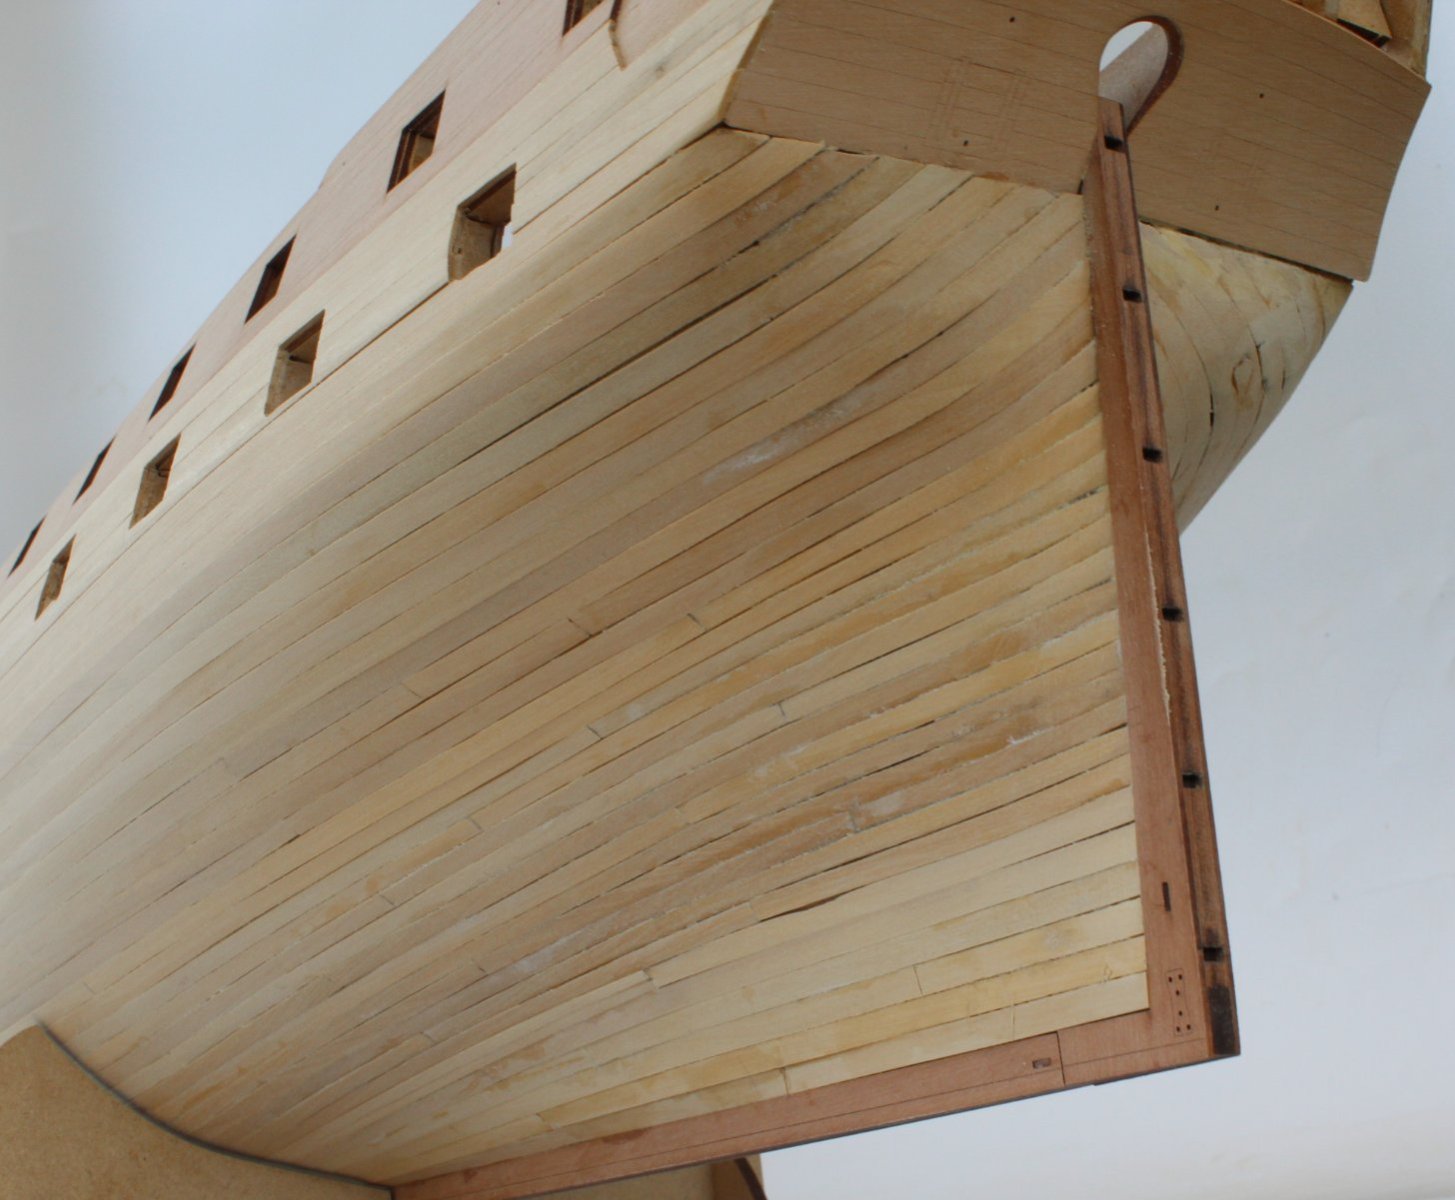
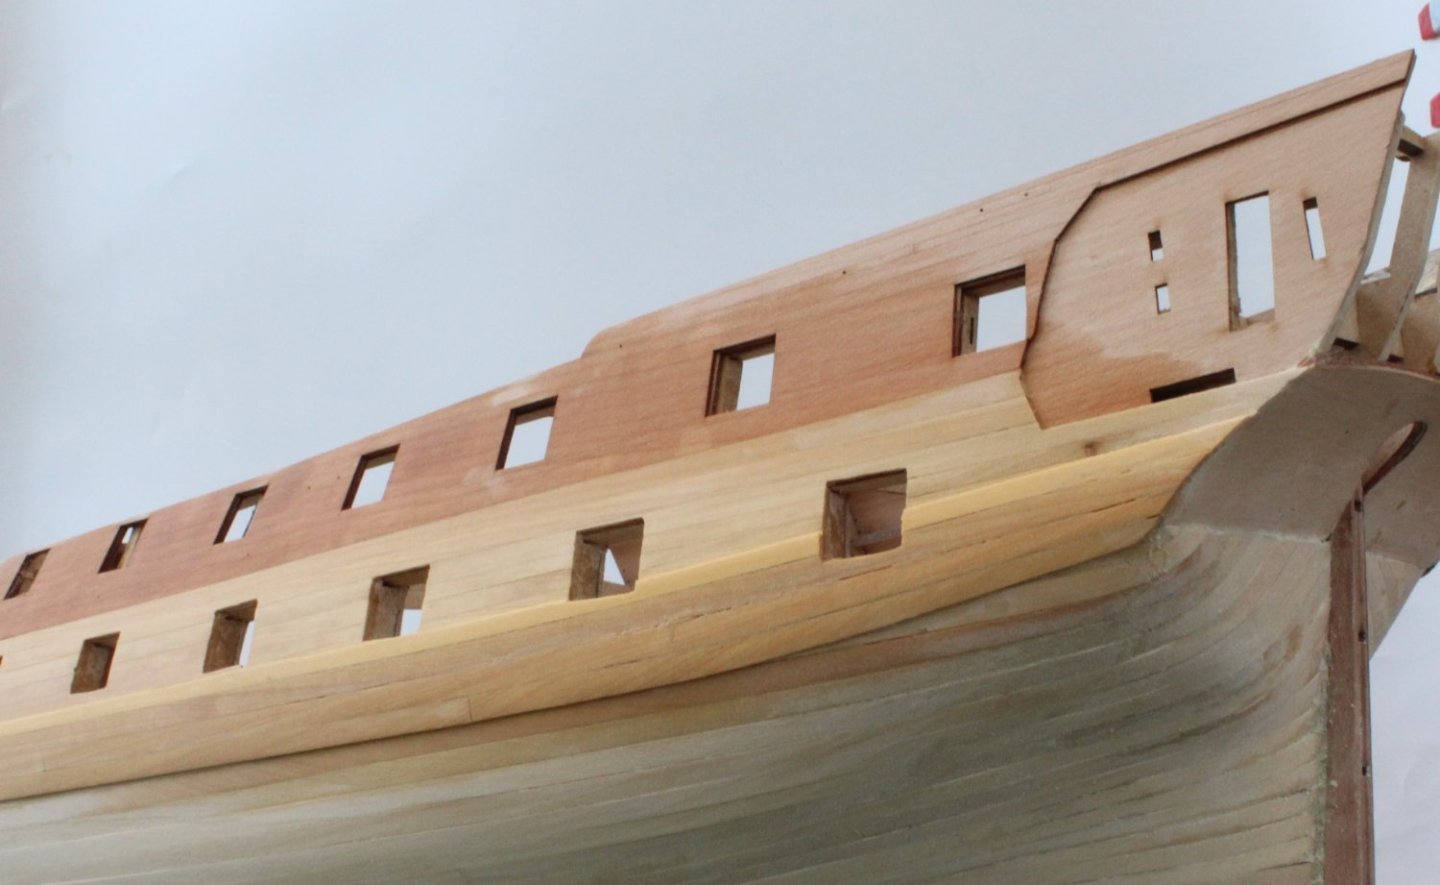
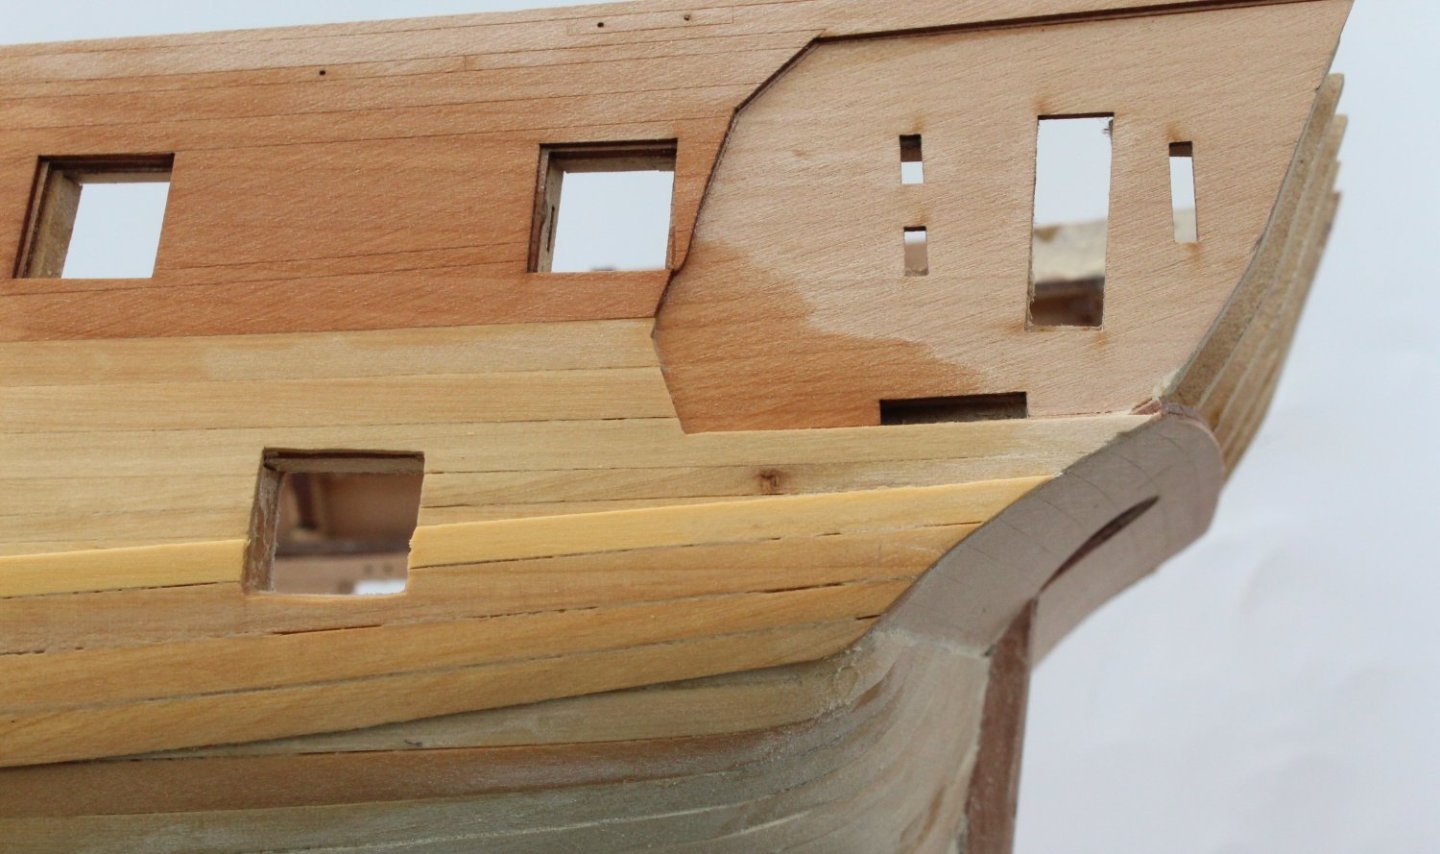
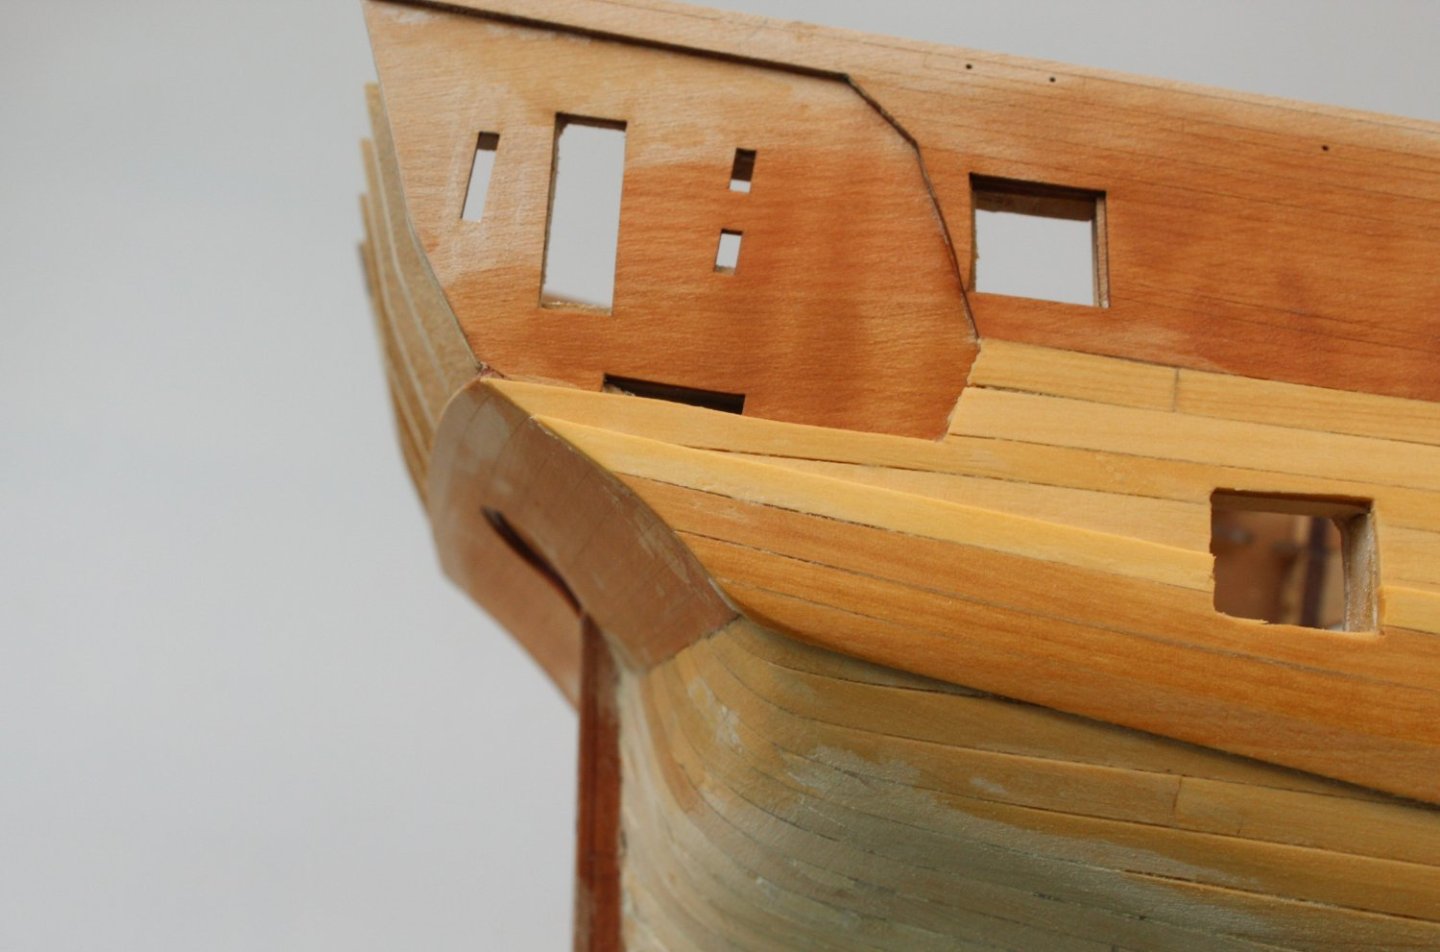
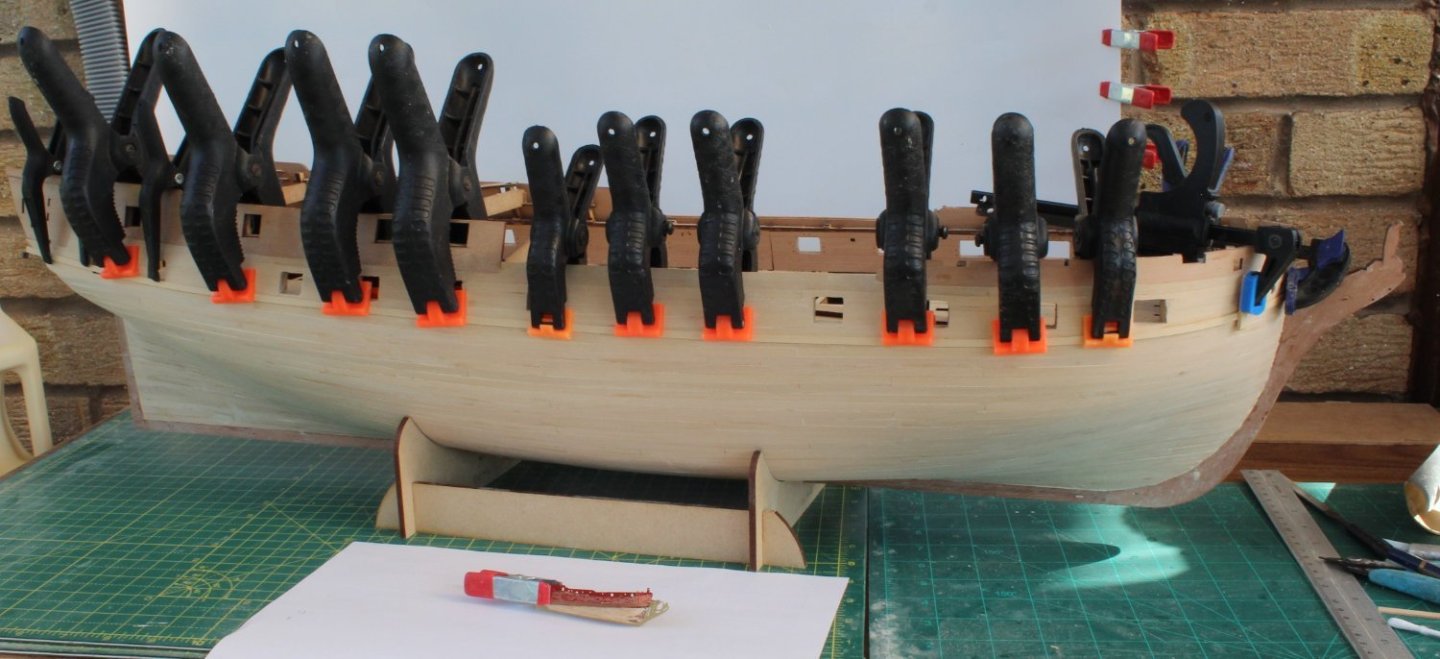
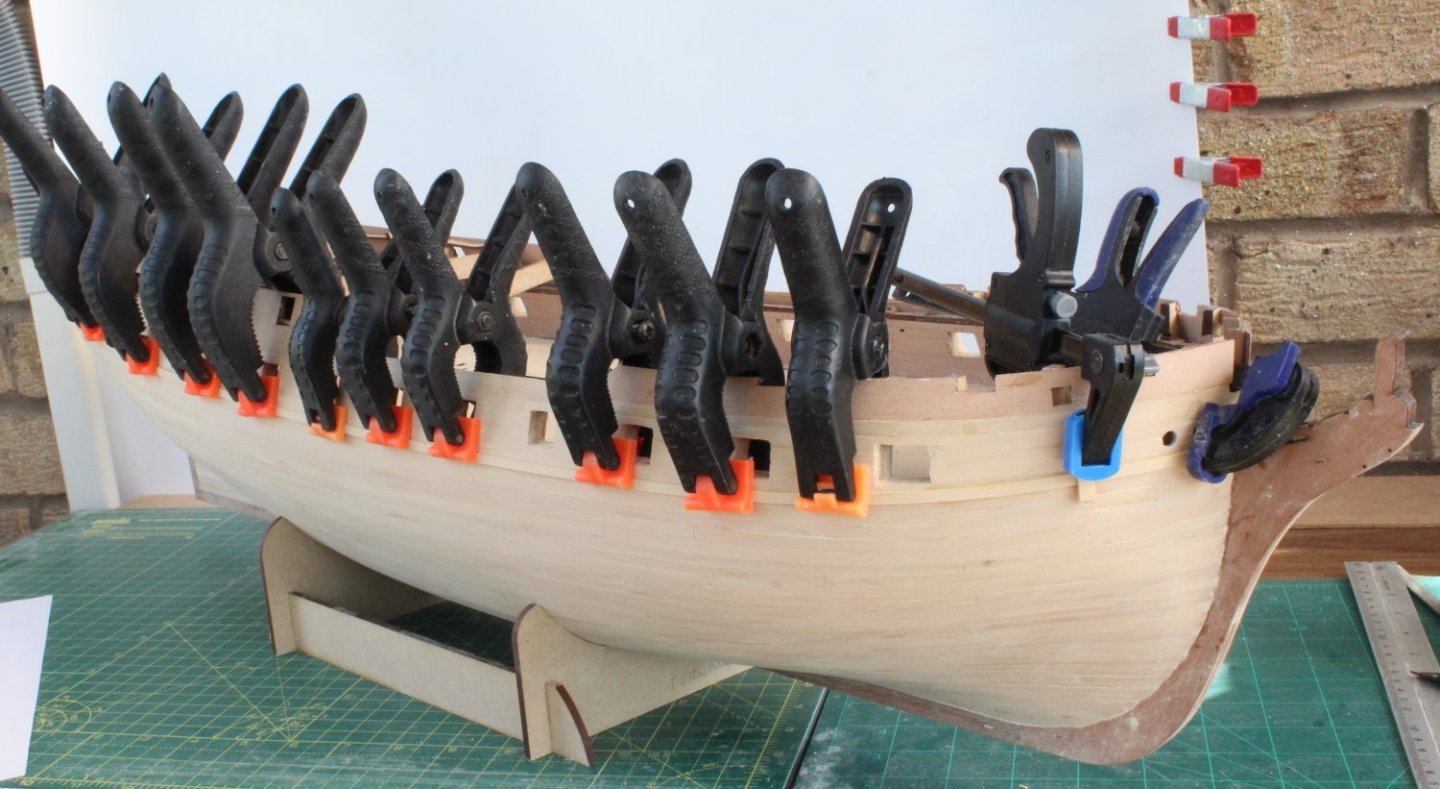
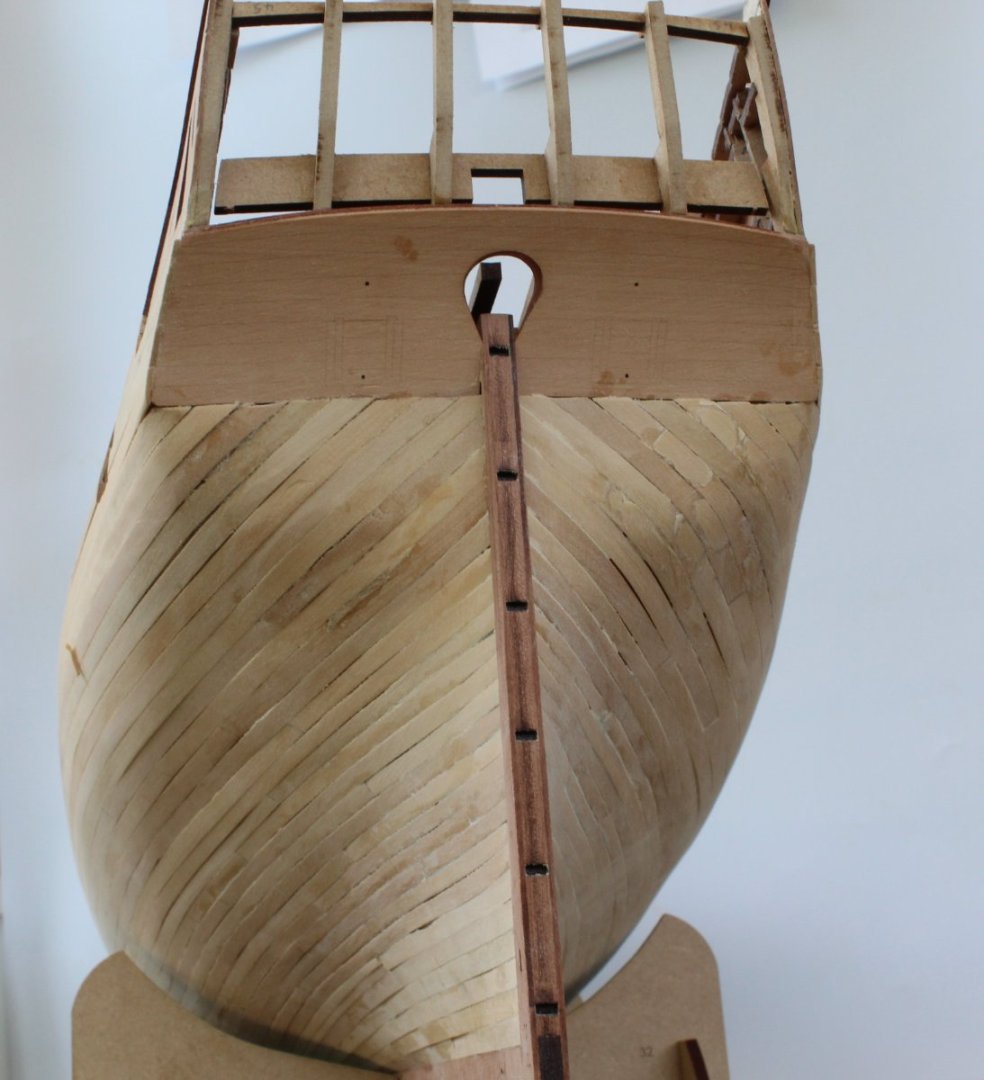
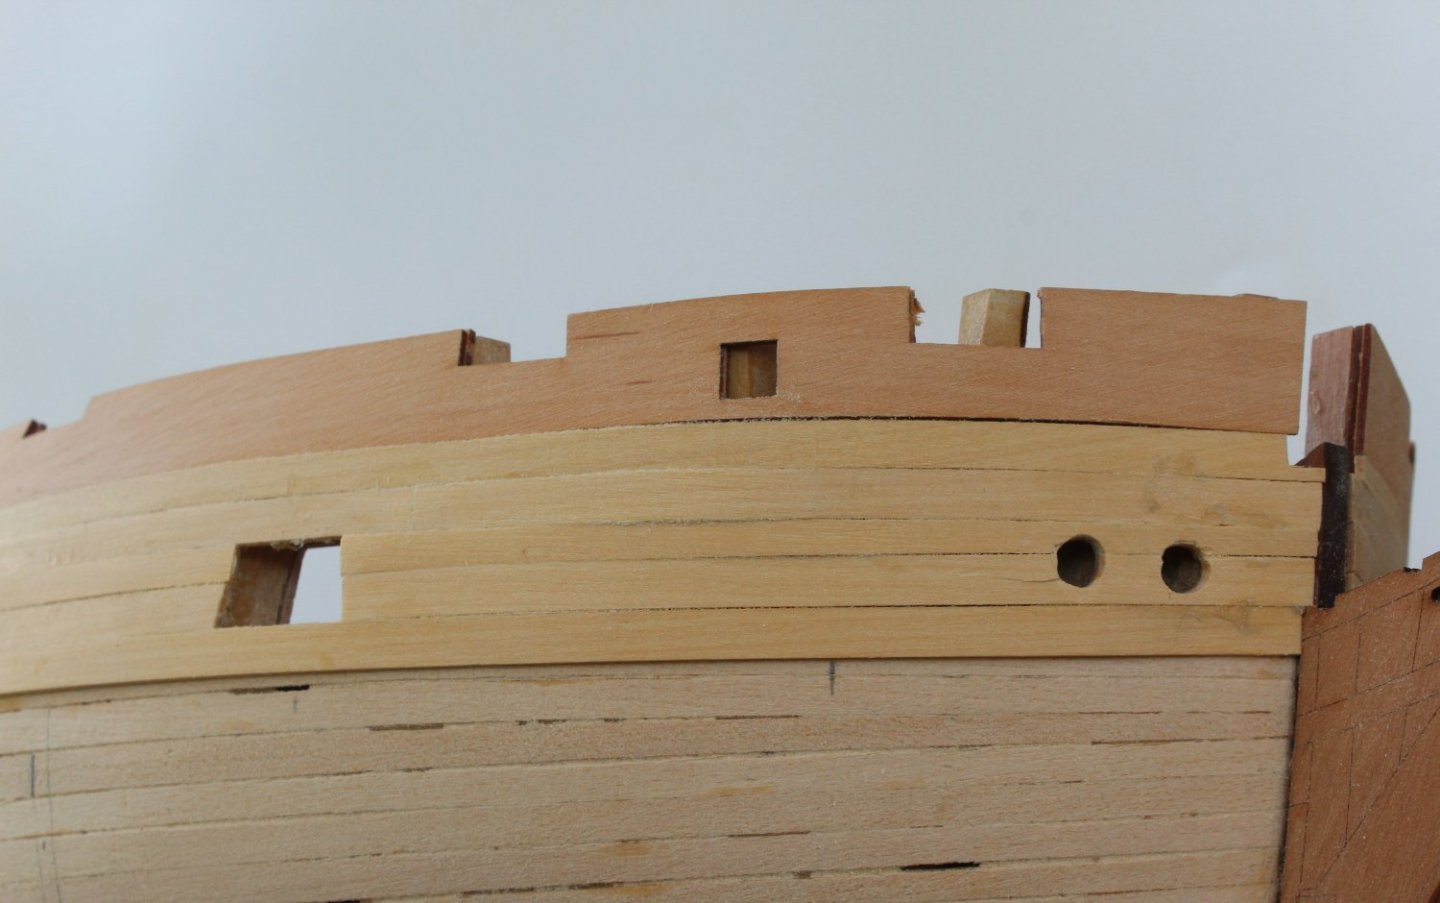
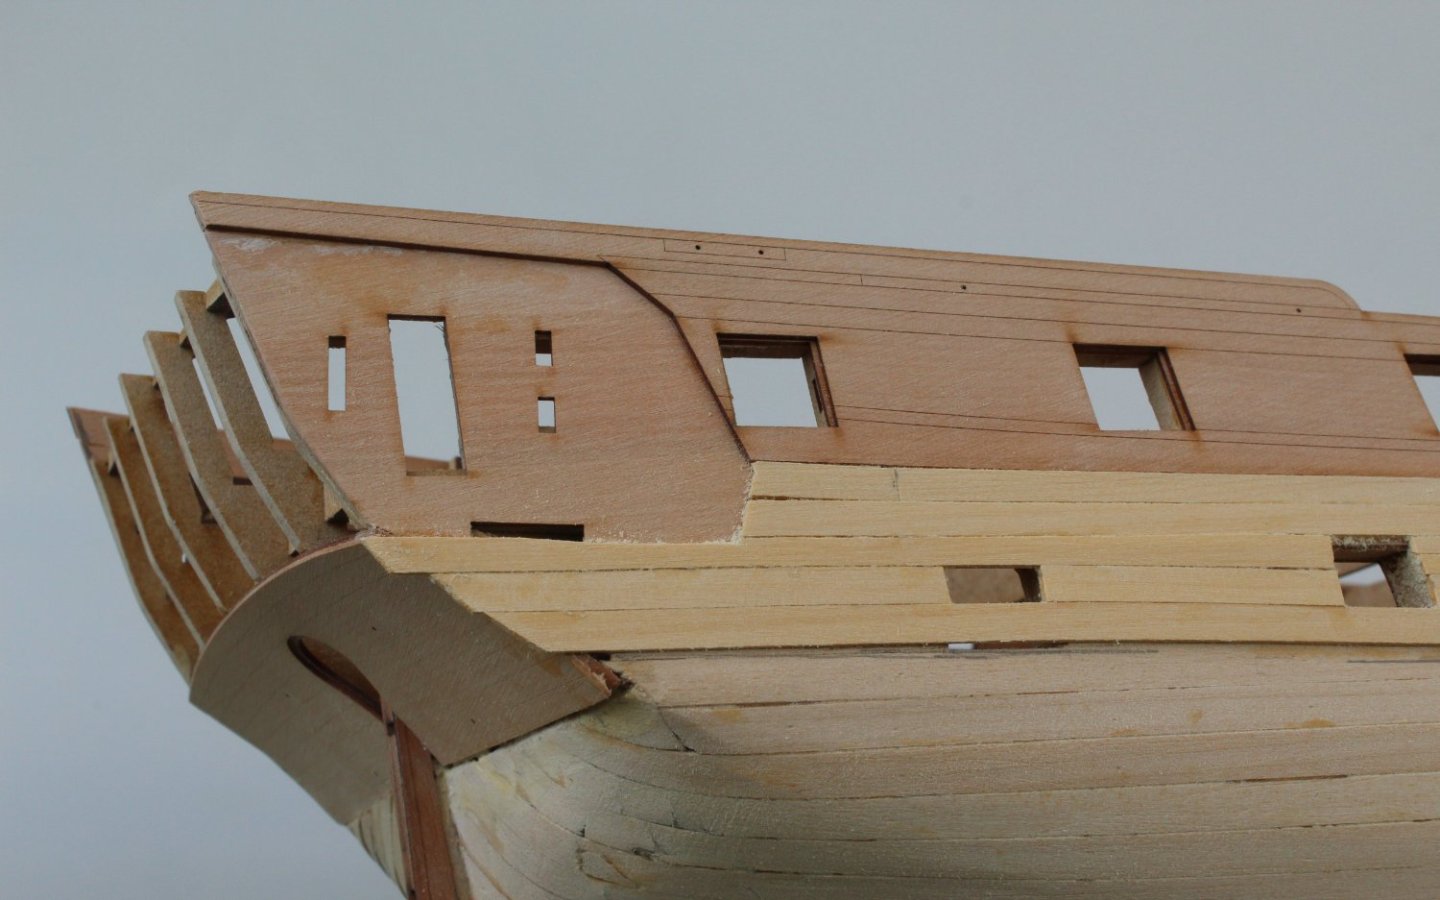
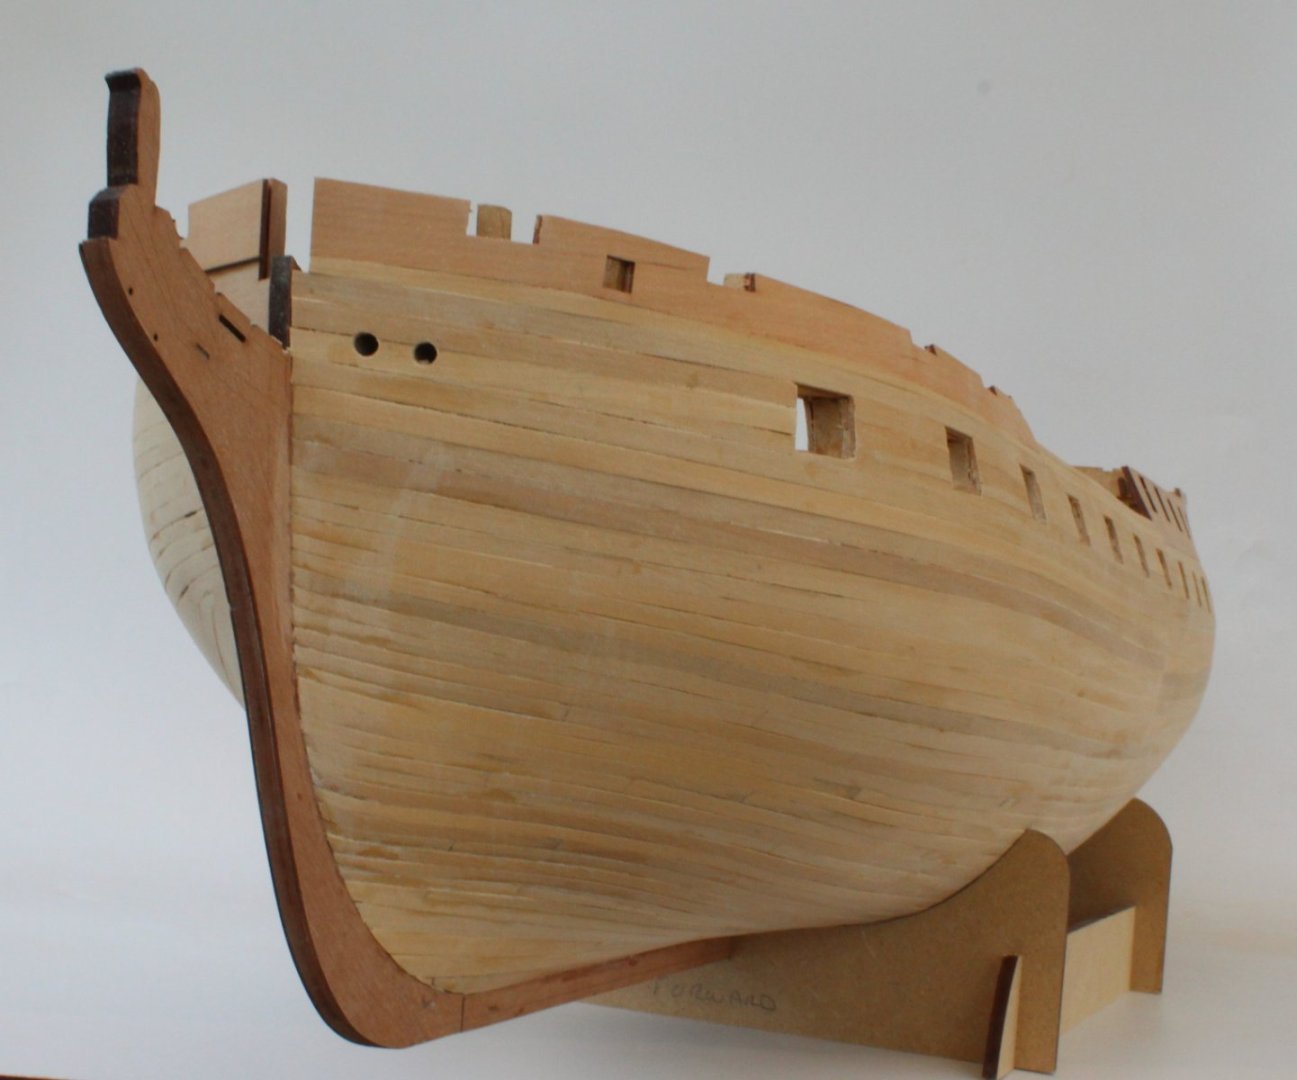
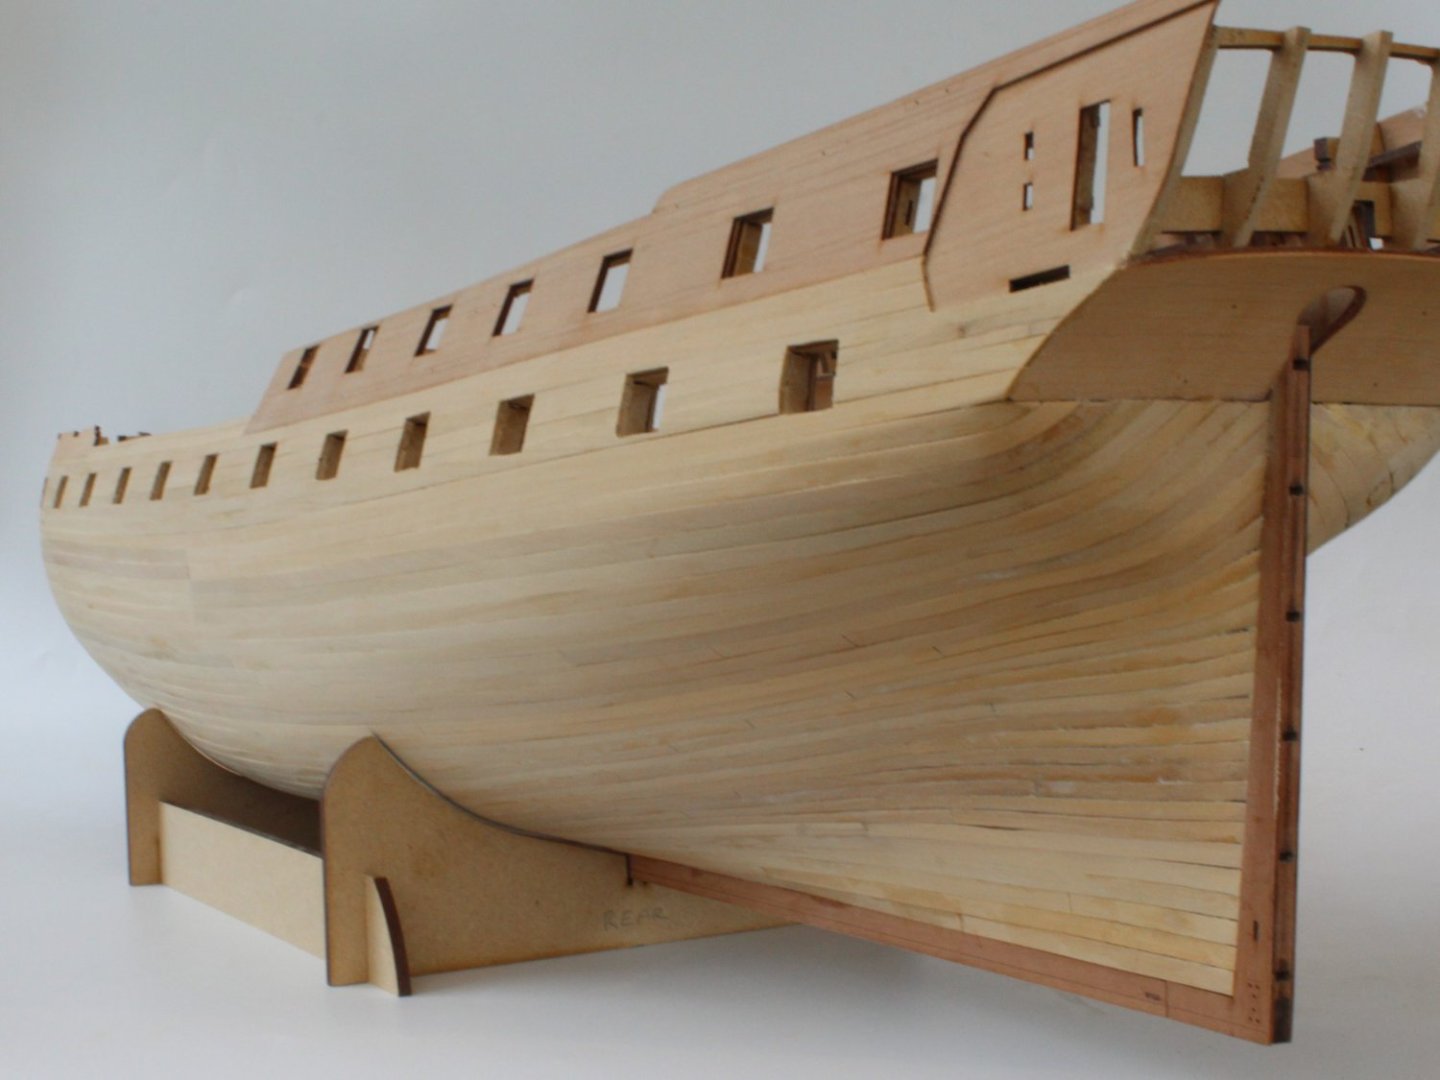
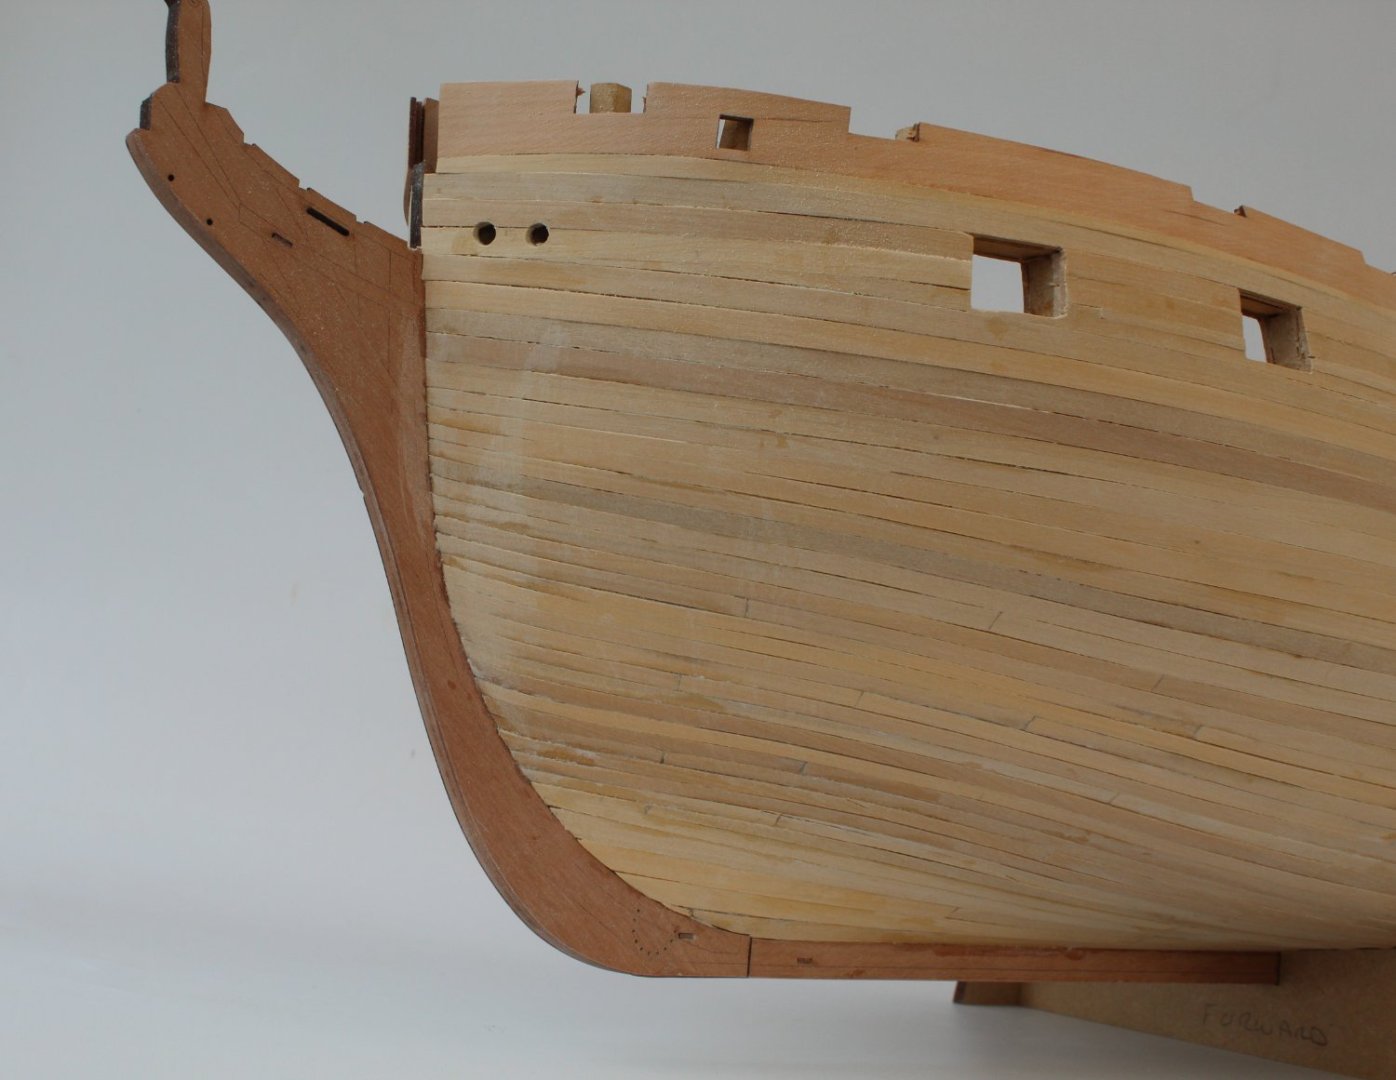
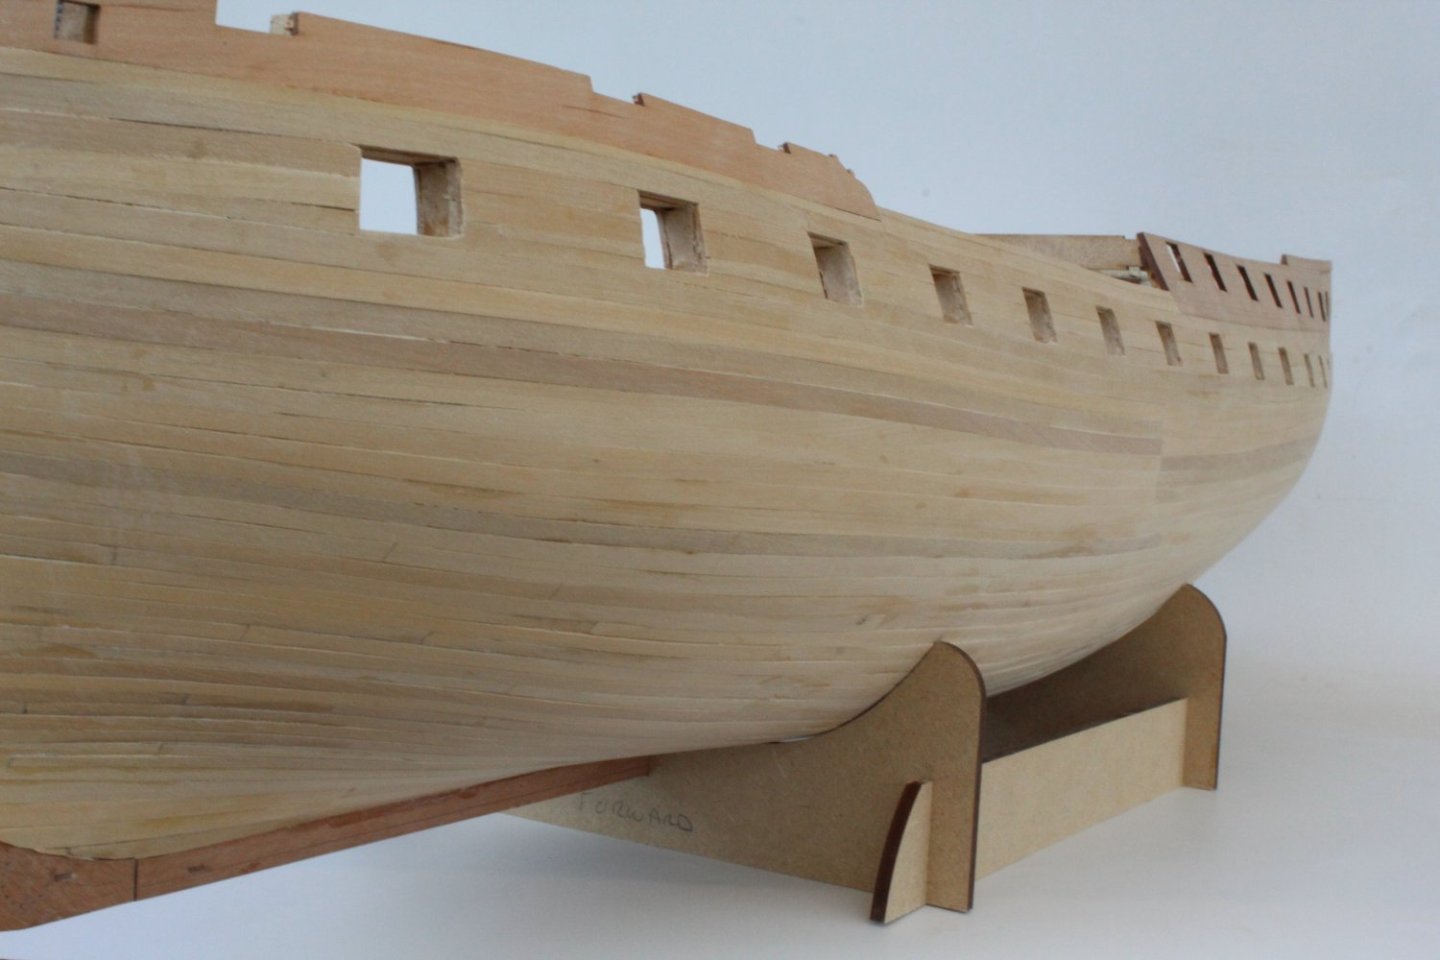
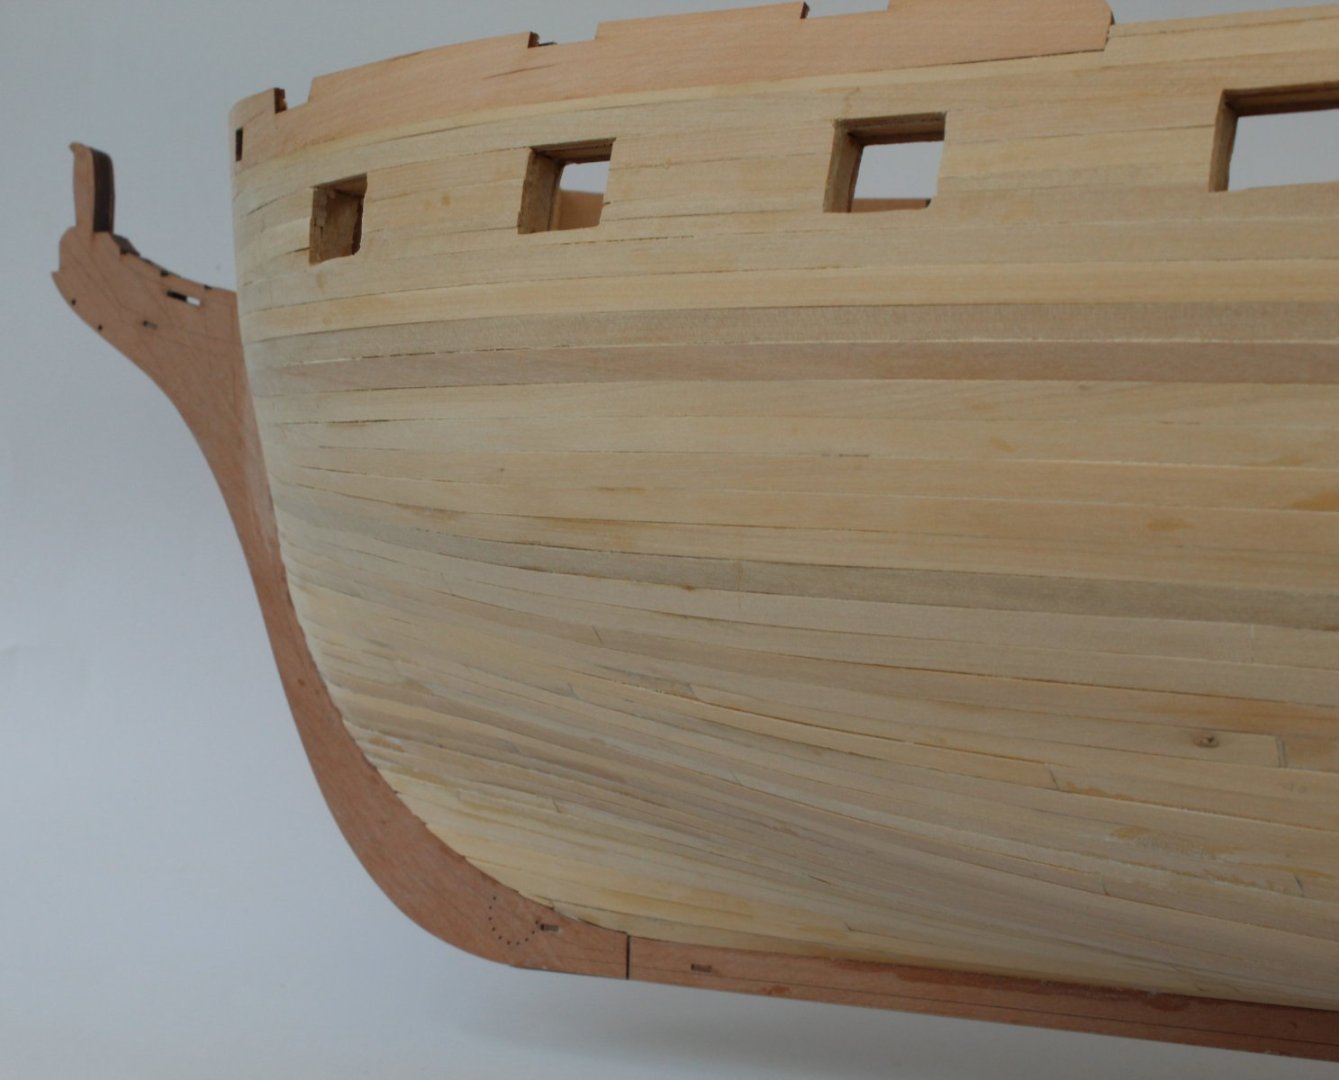
Second Planking – Right-Hand Side Second Planking Completed The work on completing the second planking on the right-hand side is now complete. This completed planking represents a big improvement on my skills in this area and I am very pleased with how much ability to plank has developed with this build, especially with the use of lateral plank bending. The correct tapering of the bow and stern planks meant I did not have to add any stealers. My hull fairing skills, particularly around the transom, still requires much more work however. I opted to use boxwood for the second planking with the idea that I could leave the completed planking in their natural state with a nice, varnished finish. On reflection this was perhaps bit optimistic on my part as my completed planking is not as clean and neat I was would have liked. Once I have inspected the completed hull, I will fill in some of the small gaps, either with filler or thin slivers of off-cuts and then I will give the hull a good sand. Once that is done, I will be better placed to make a final decision on weather to paint and copper or to simply varnish the boxwood. I have attached a few photos of the completed planking.

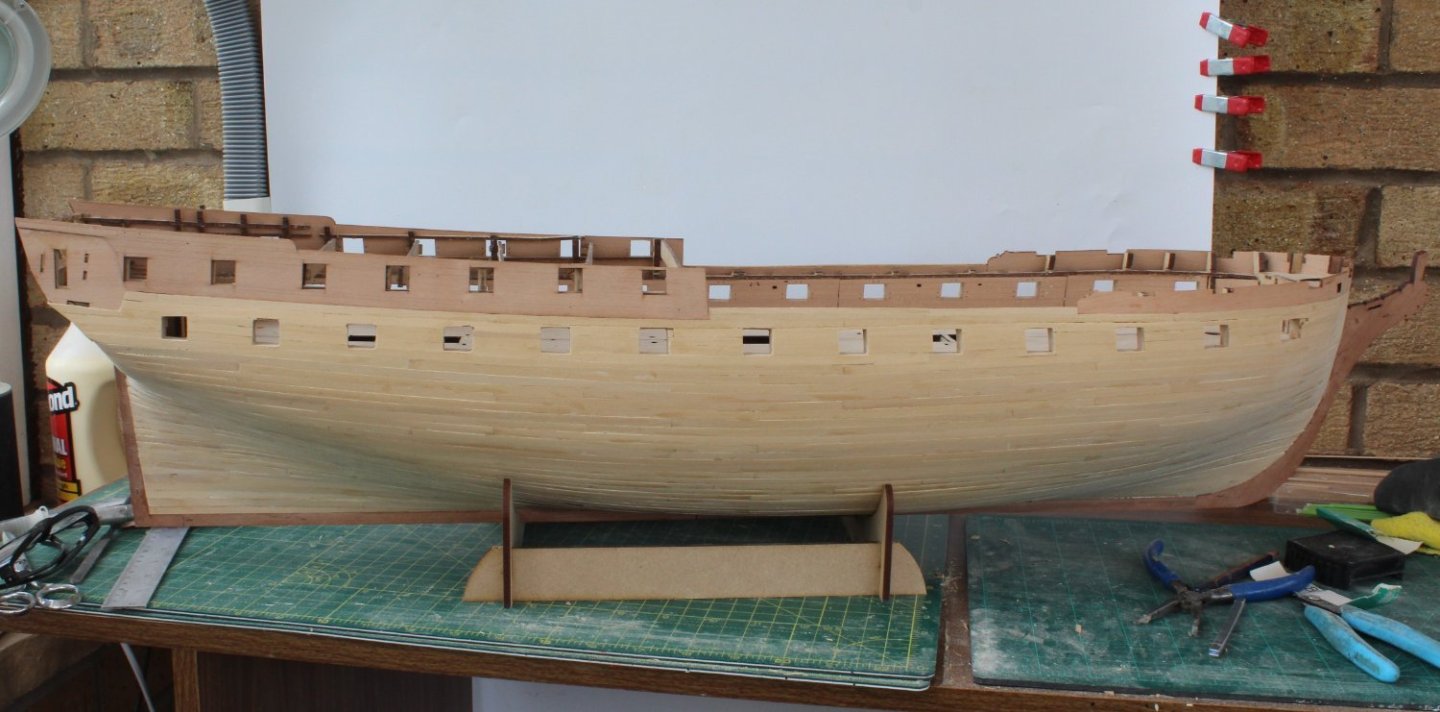


- 587 replies
-
- 13
-
-

-
- Indefatigable
- Vanguard Models
- (and 1 more)
-
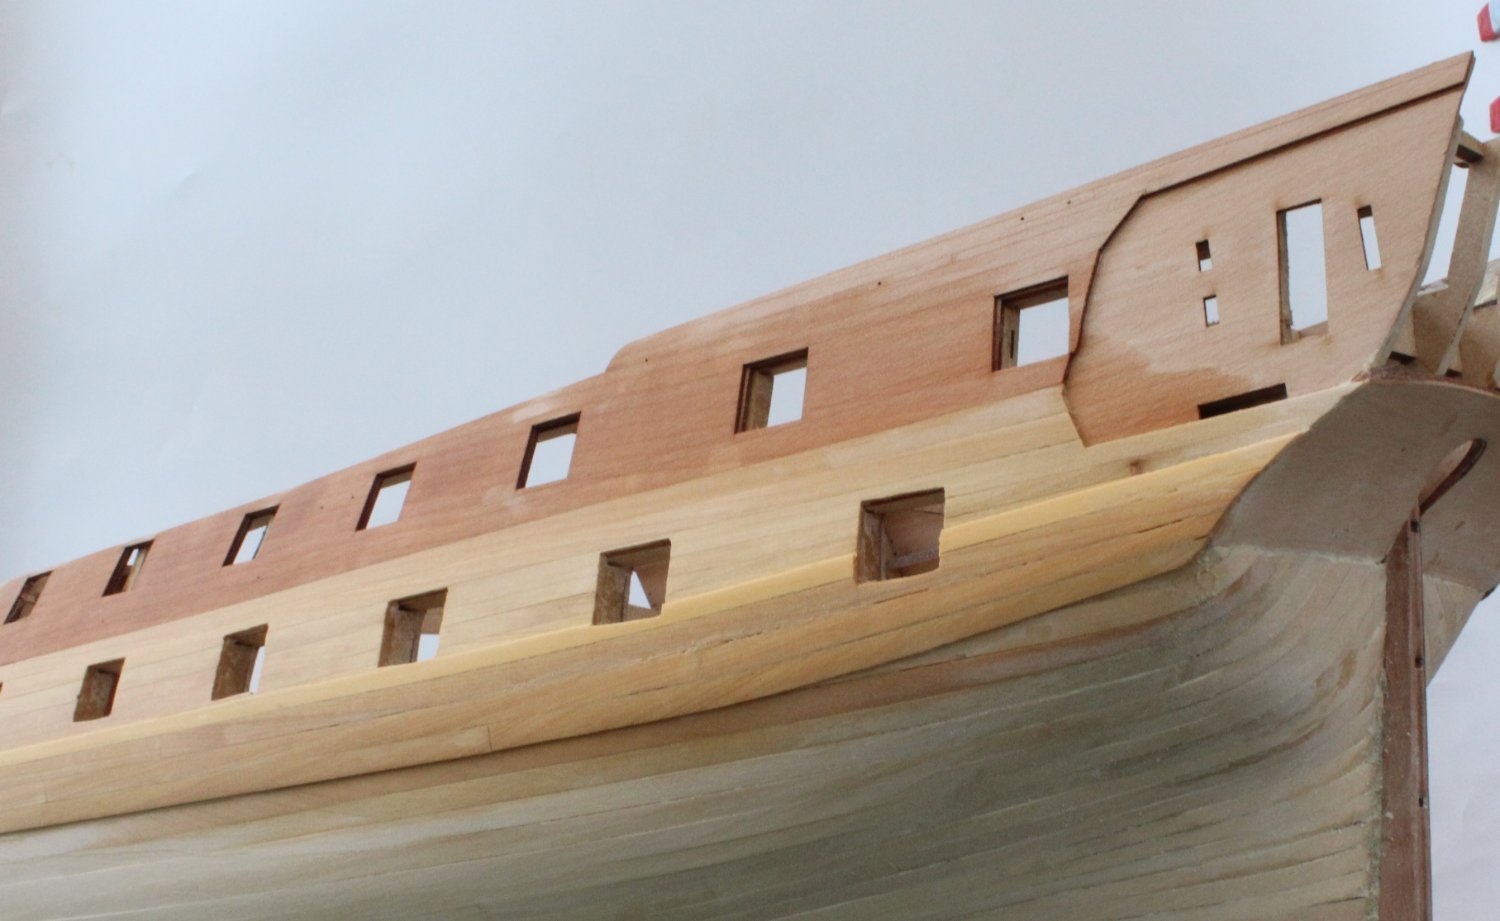
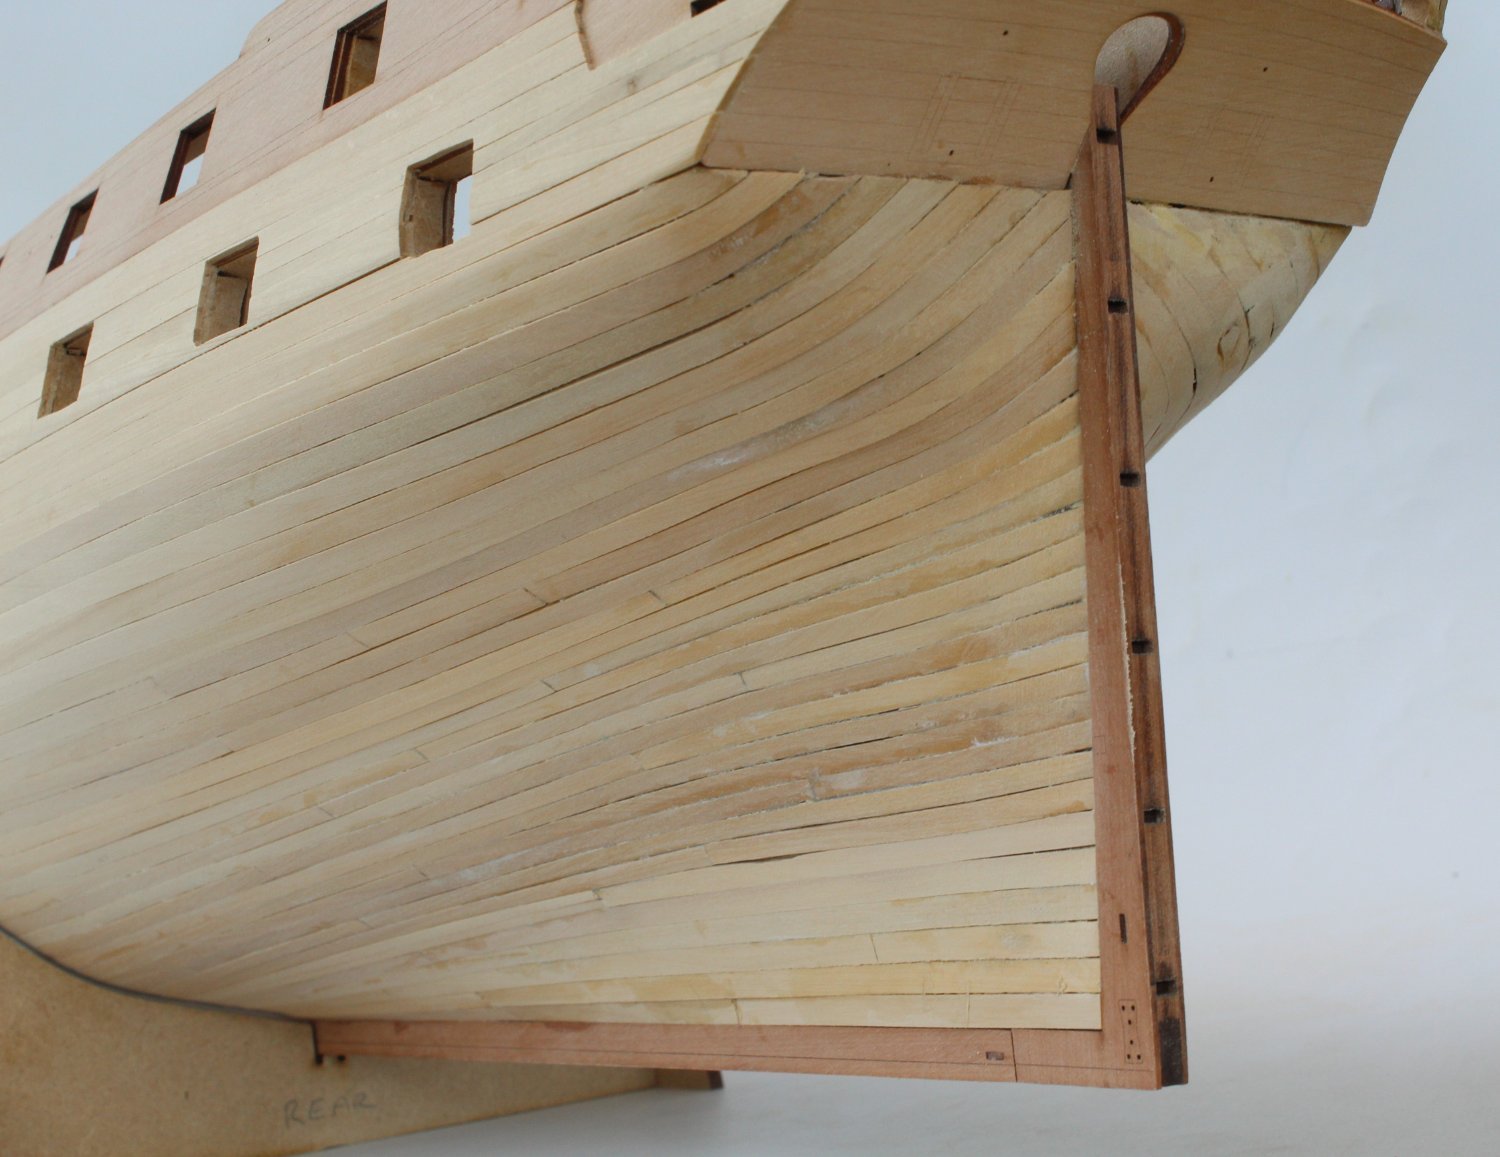
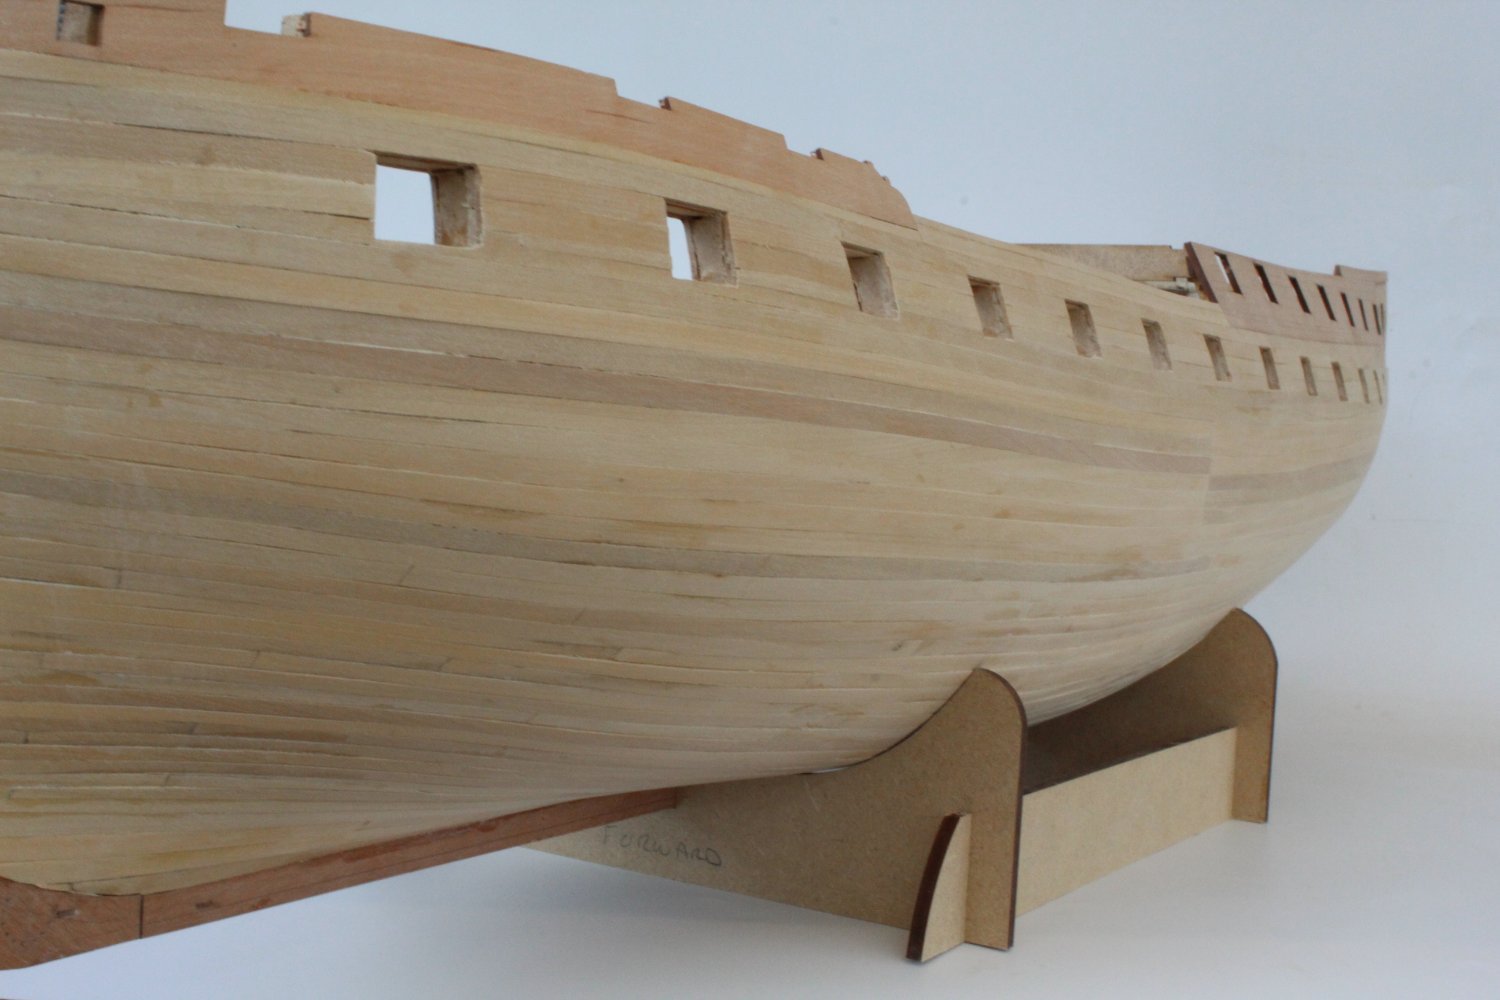
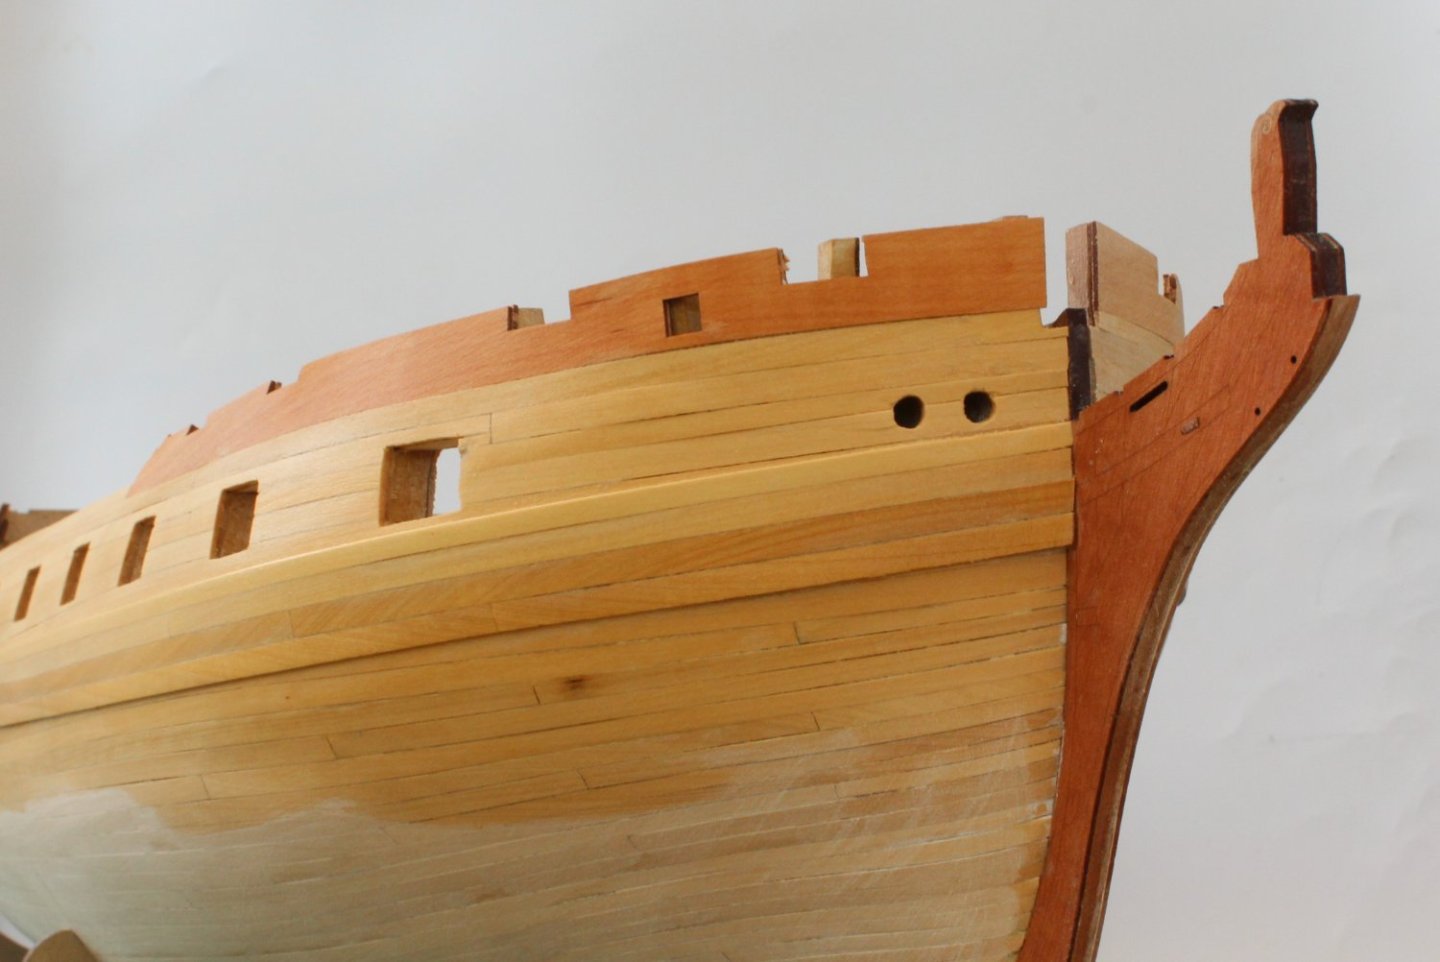
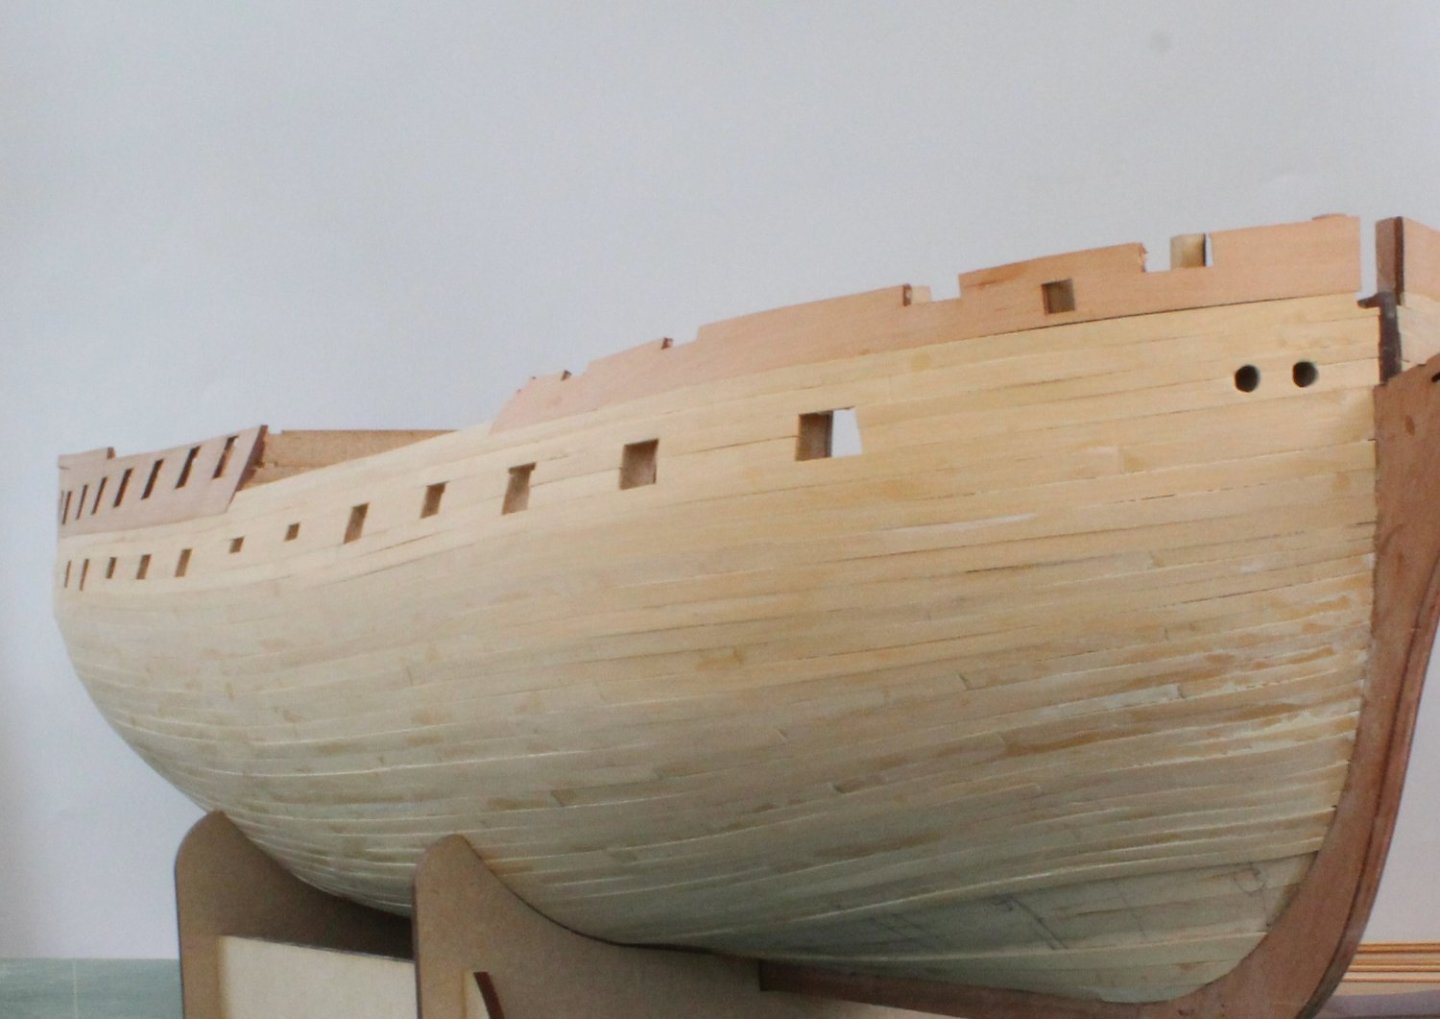
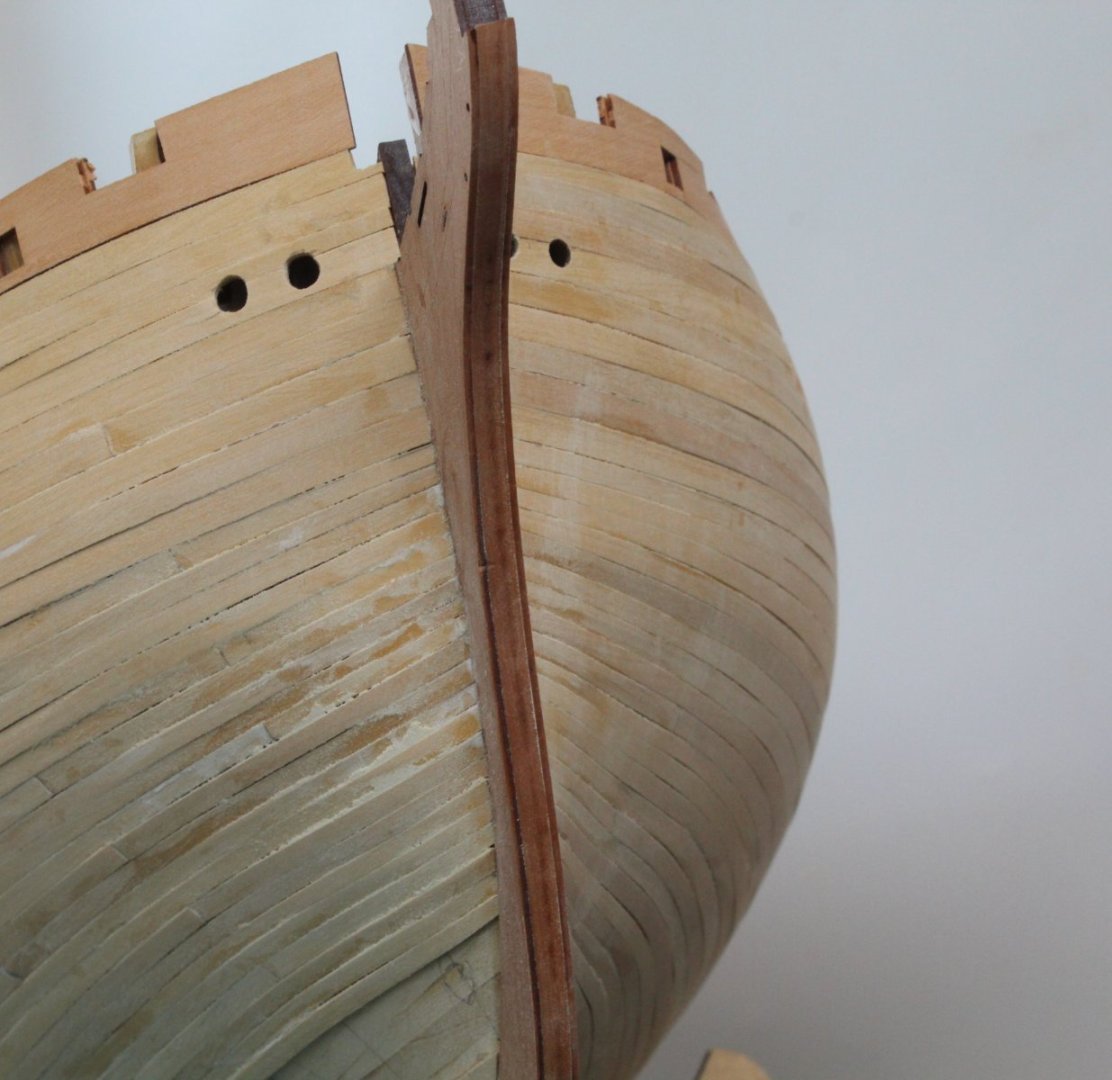
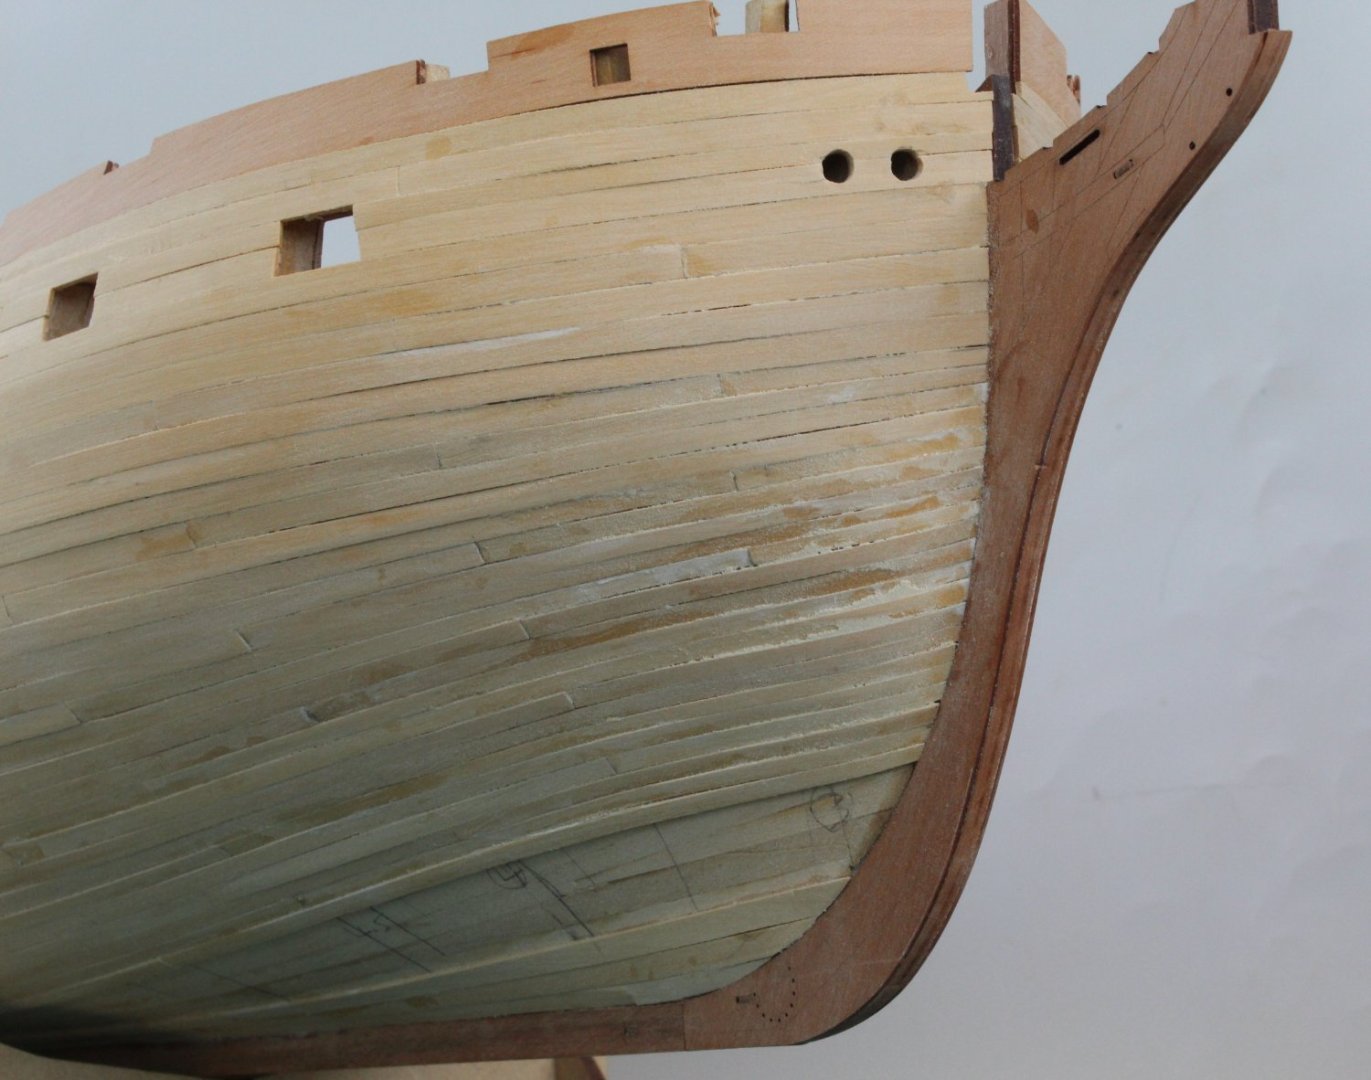
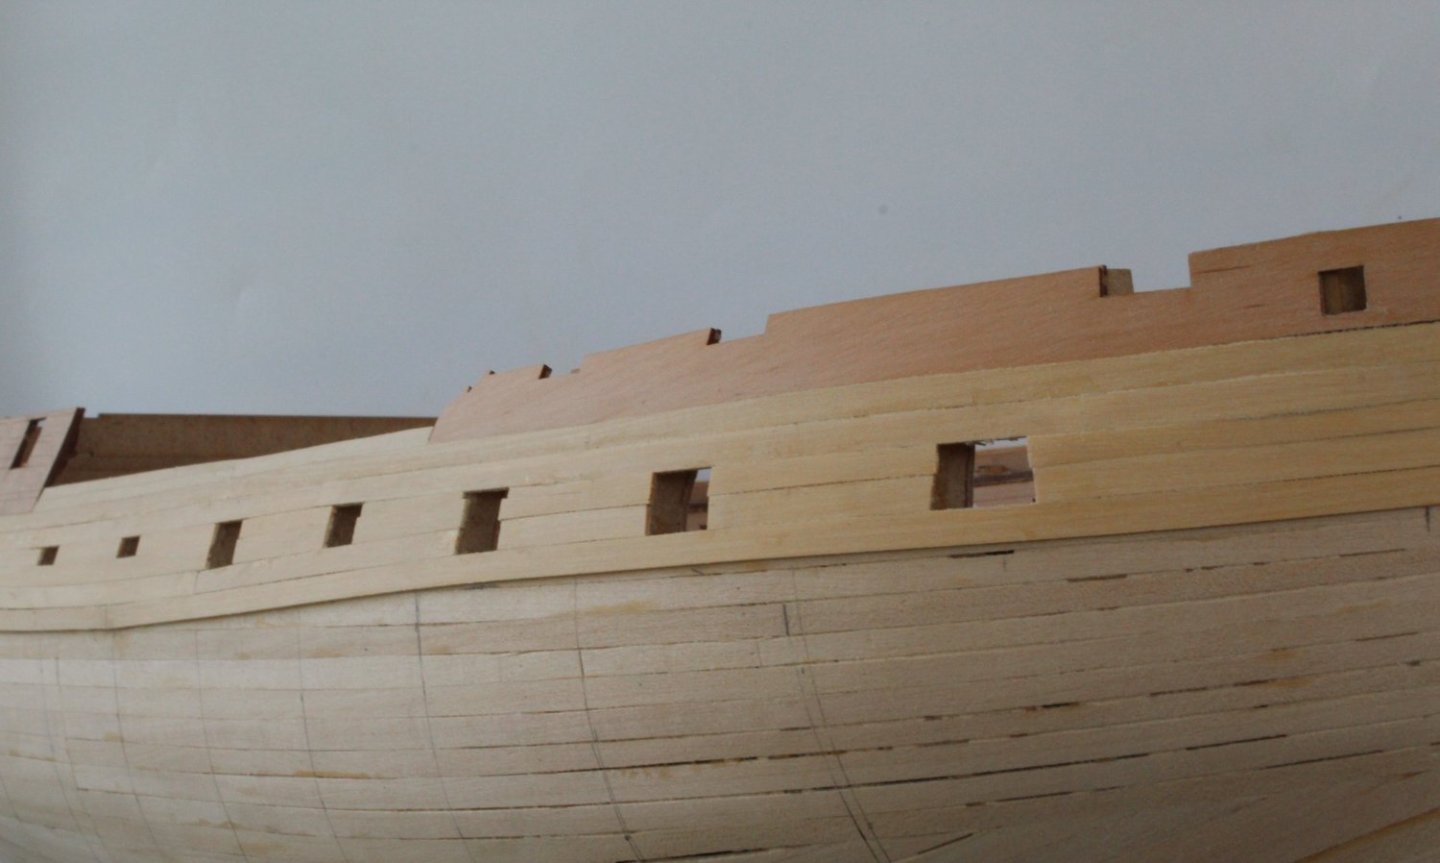
Second Planking – Right-Hand Side Second Planking Progress The work on completing the second planking on the right hand side is progressing well. I only have 5 strakes left to fit. I have used a butt shift pattern and this has made fitting the planks so much easier. As with the left and side I fitted 192mmL planks, noting 96mmL and 64th scale planks would be more representative of the actual ships 6m planks. Around the bow area I have used the lateral bend method to ensure I have a good fit, and I now fully understand why Chuck's method works so well. After completing the planking under the transom, I started to taper the stern planks which require a double taper. From the midships they are tapered down to 4mm at the narrowest point. From there a reverse taper is applied up to 4.5mm where the plank sits against the stern post. By keeping the faith the tapering (at bow and stern), and regularly checking the taper points, no stealers will be required. The planks, in the attached photo’s, look a bit messy, but once the planking is complete and they have been sanded smooth it will look much better.


- 587 replies
-
- 18
-
-
- Indefatigable
- Vanguard Models
- (and 1 more)
-
Second Planking – Right-Hand Side Second Planking Started I have started the second planking on the right-hand side. I have completed the section down to where the main wale will be fitted. I still need to clear all the gun ports. I will be using a butt shift pattern for fitting the remaining planks down to the keel. I will also be adding the lateral bend for planks fitted around the bow area. I will taper the stern planks once I have planks under the transom. If all goes to plan,a s with the right-hand side, there should be no need to fit any steelers.

- 587 replies
-
- 7
-
-
- Indefatigable
- Vanguard Models
- (and 1 more)
-
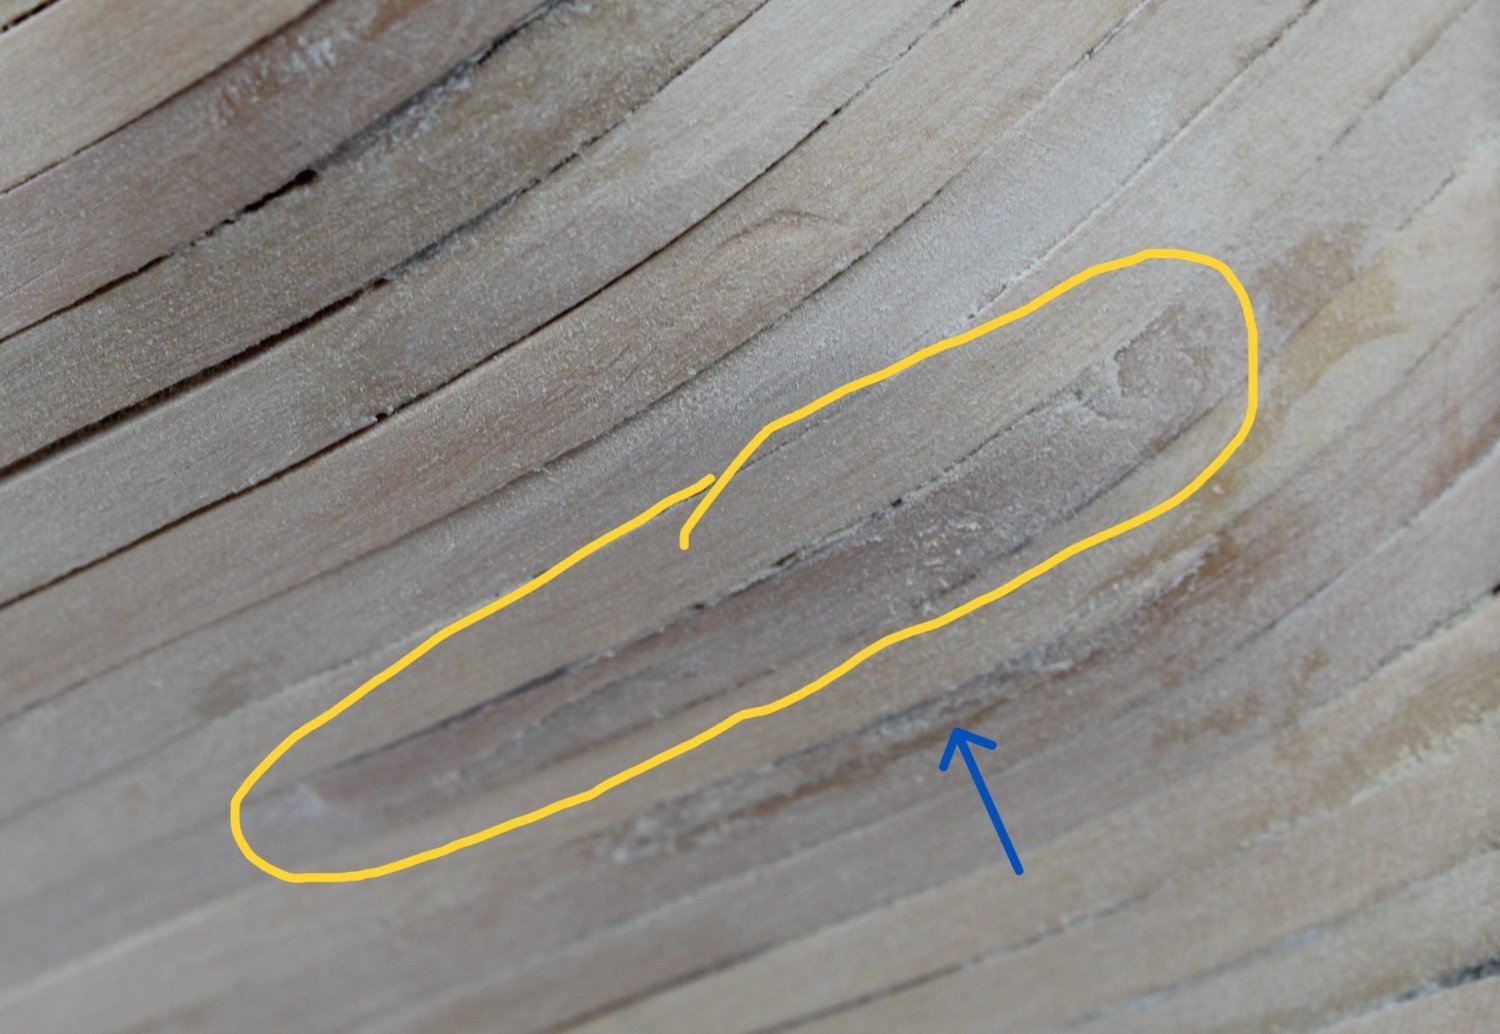
I have now added a filler bit (Yellow circle) which sorted out the troublesome plank. I also added a smaller filler shim (blue arrow).

- 587 replies
-
- 5
-
-
- Indefatigable
- Vanguard Models
- (and 1 more)
-
Thank you. I'm planning on adding a shaped filler plank to correct the fault with the troublesome plank. The lateral bending certainly was the way to go as was the 4 butt shift pattern, albeit I went for simulated 12m long planks rather than 6m long planks.
- 587 replies
-
- 4
-
-
- Indefatigable
- Vanguard Models
- (and 1 more)
-
Than you, I am pleased with the outcome and hopefully, the RHS will even better.
- 587 replies
-
- 3
-
-
- Indefatigable
- Vanguard Models
- (and 1 more)
-
Thank you. I kept the checking the gap measurements when working out the tapering requirements and I was really pleased everything worked out.
- 587 replies
-
- 2
-
-
- Indefatigable
- Vanguard Models
- (and 1 more)
-
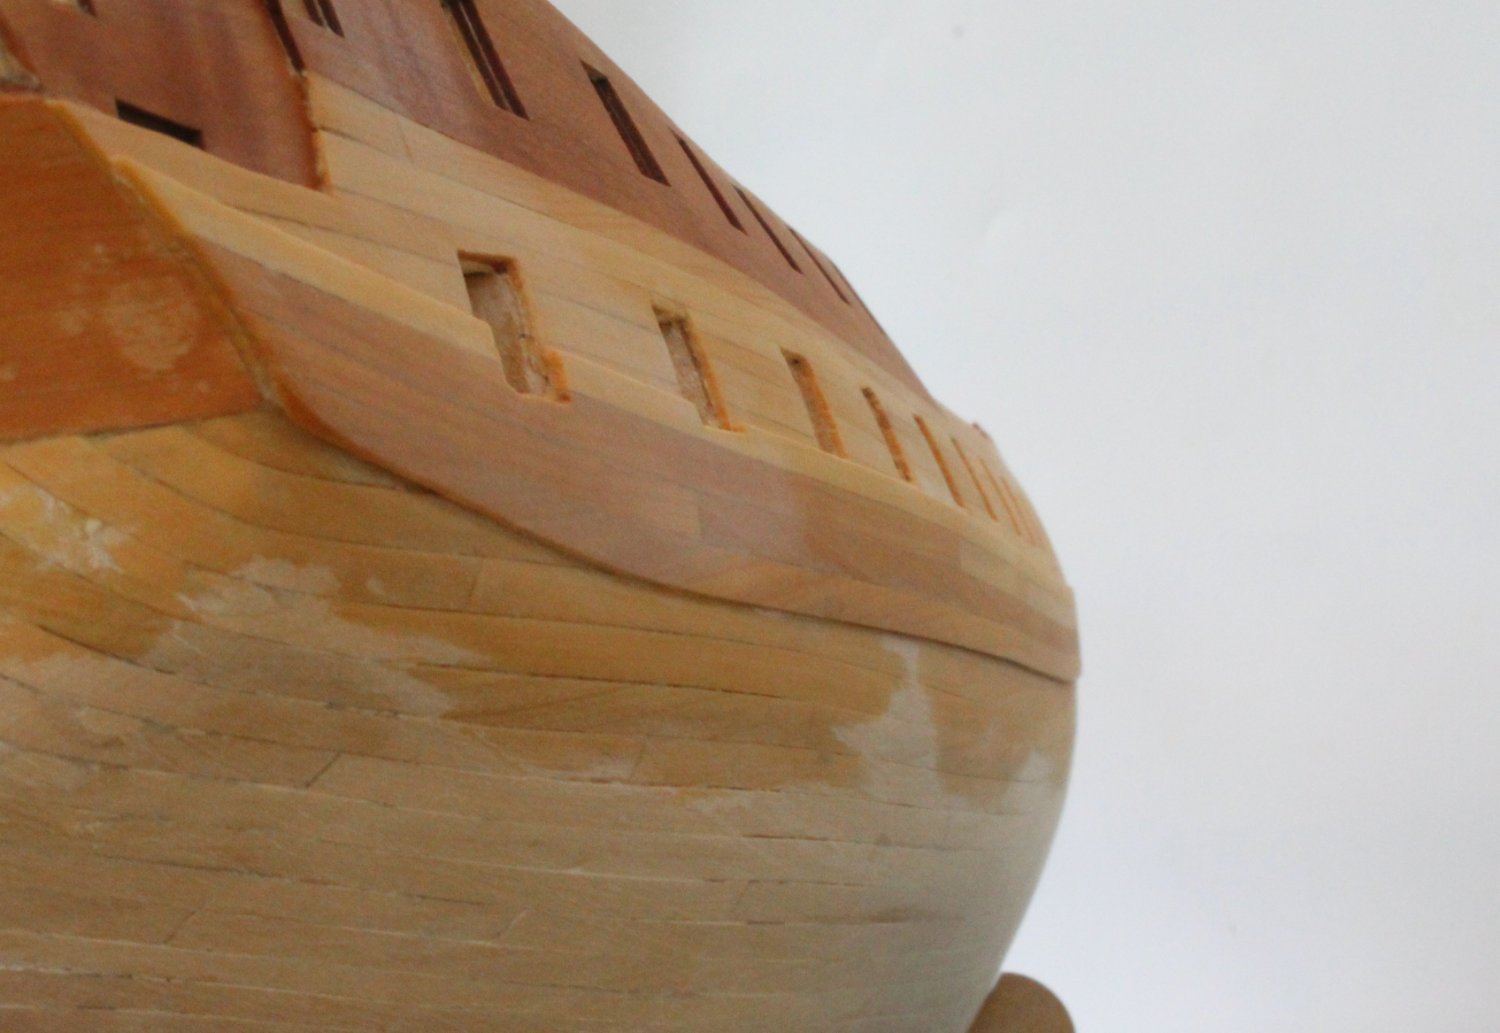
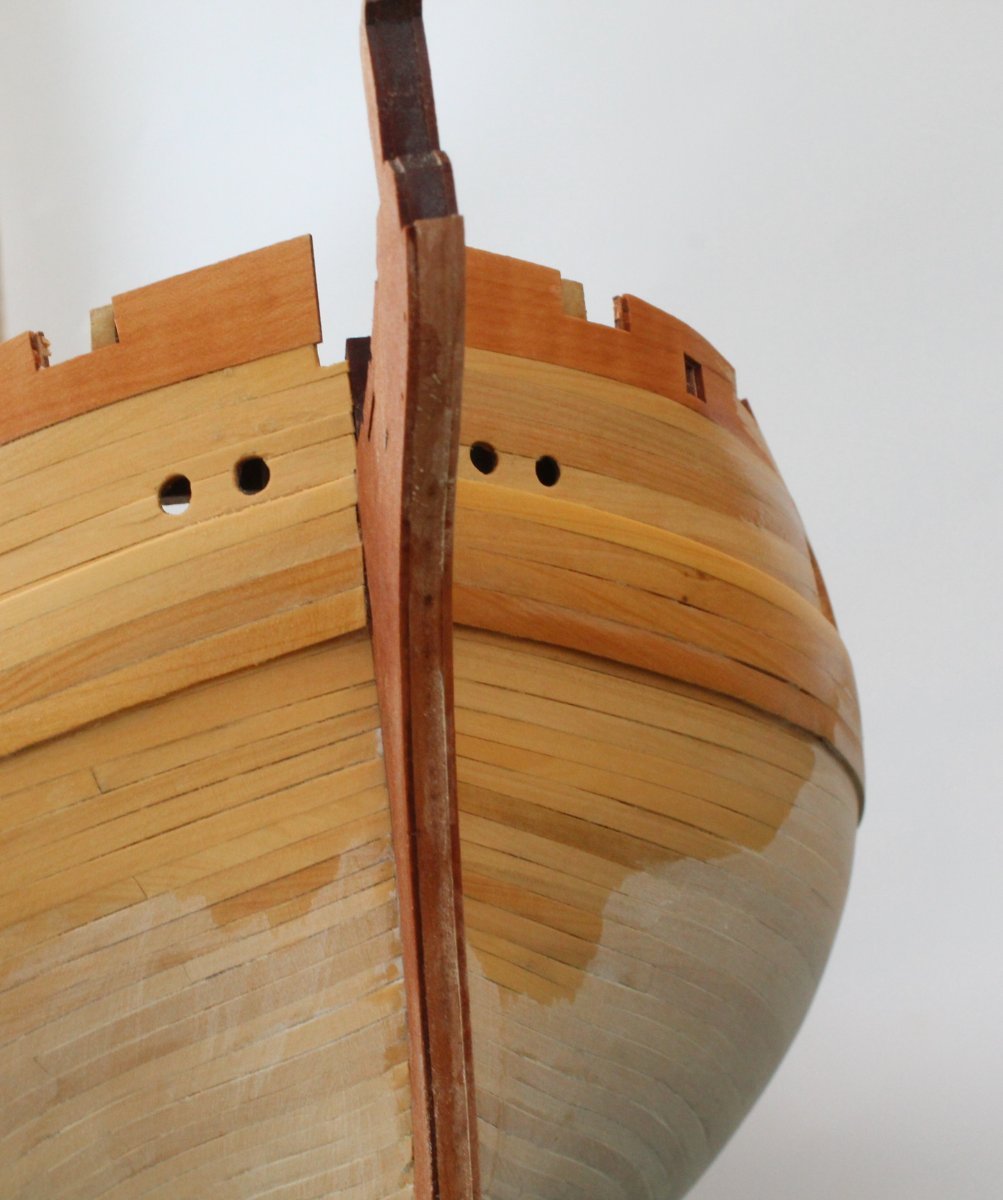
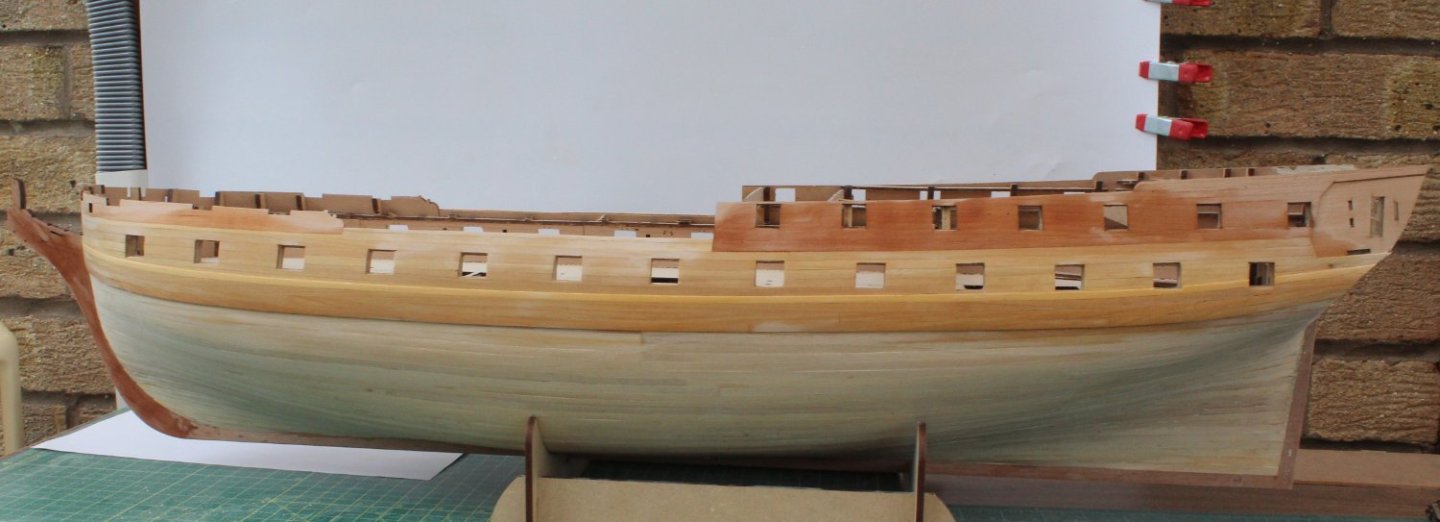
Second Planking – Left-Hand Side Second Planking Completed I have finally completed the second planking on the left-hand side of the Indy. I used a 4-butt shift pattern for the planks below the water line which really made the task a lot easier. I kept up with the tapering and lateral bending around the bow, I did not have to resort to adding any stealers. I also tapered the planks at the stern, below the transom. Compared with all of my previous builds the completed Indy LHS second planking is a big improvement but there is still plenty of room for improvement. I am planning on painting the upper section black and yellow, as per the plans. I am still undecided if I will leave the area below the water line as plain boxwood or if I will go ahead and add the copper tiles. The copper tile finish does have great appeal. I remember adding over 3000 copper tiles when I built HMS Victory (Caldercraft) and loved how the hull looked. I will now spend the few weeks adding the second planking to the right-hand side. In the meantime I have included a few photo's of the completed LHS planking.


- 587 replies
-
- 18
-
-
- Indefatigable
- Vanguard Models
- (and 1 more)