HOLIDAY DONATION DRIVE - SUPPORT MSW - DO YOUR PART TO KEEP THIS GREAT FORUM GOING! (Only 36 donations so far out of 49,000 members - C'mon guys!)
×


Glenn-UK
-
Posts
3,156 -
Joined
-
Last visited
Content Type
Profiles
Forums
Gallery
Events
Everything posted by Glenn-UK
-
 Just discovered your build log. You are building a great model. I am building the Alert and I have just finished adding the hull decorations.
 -
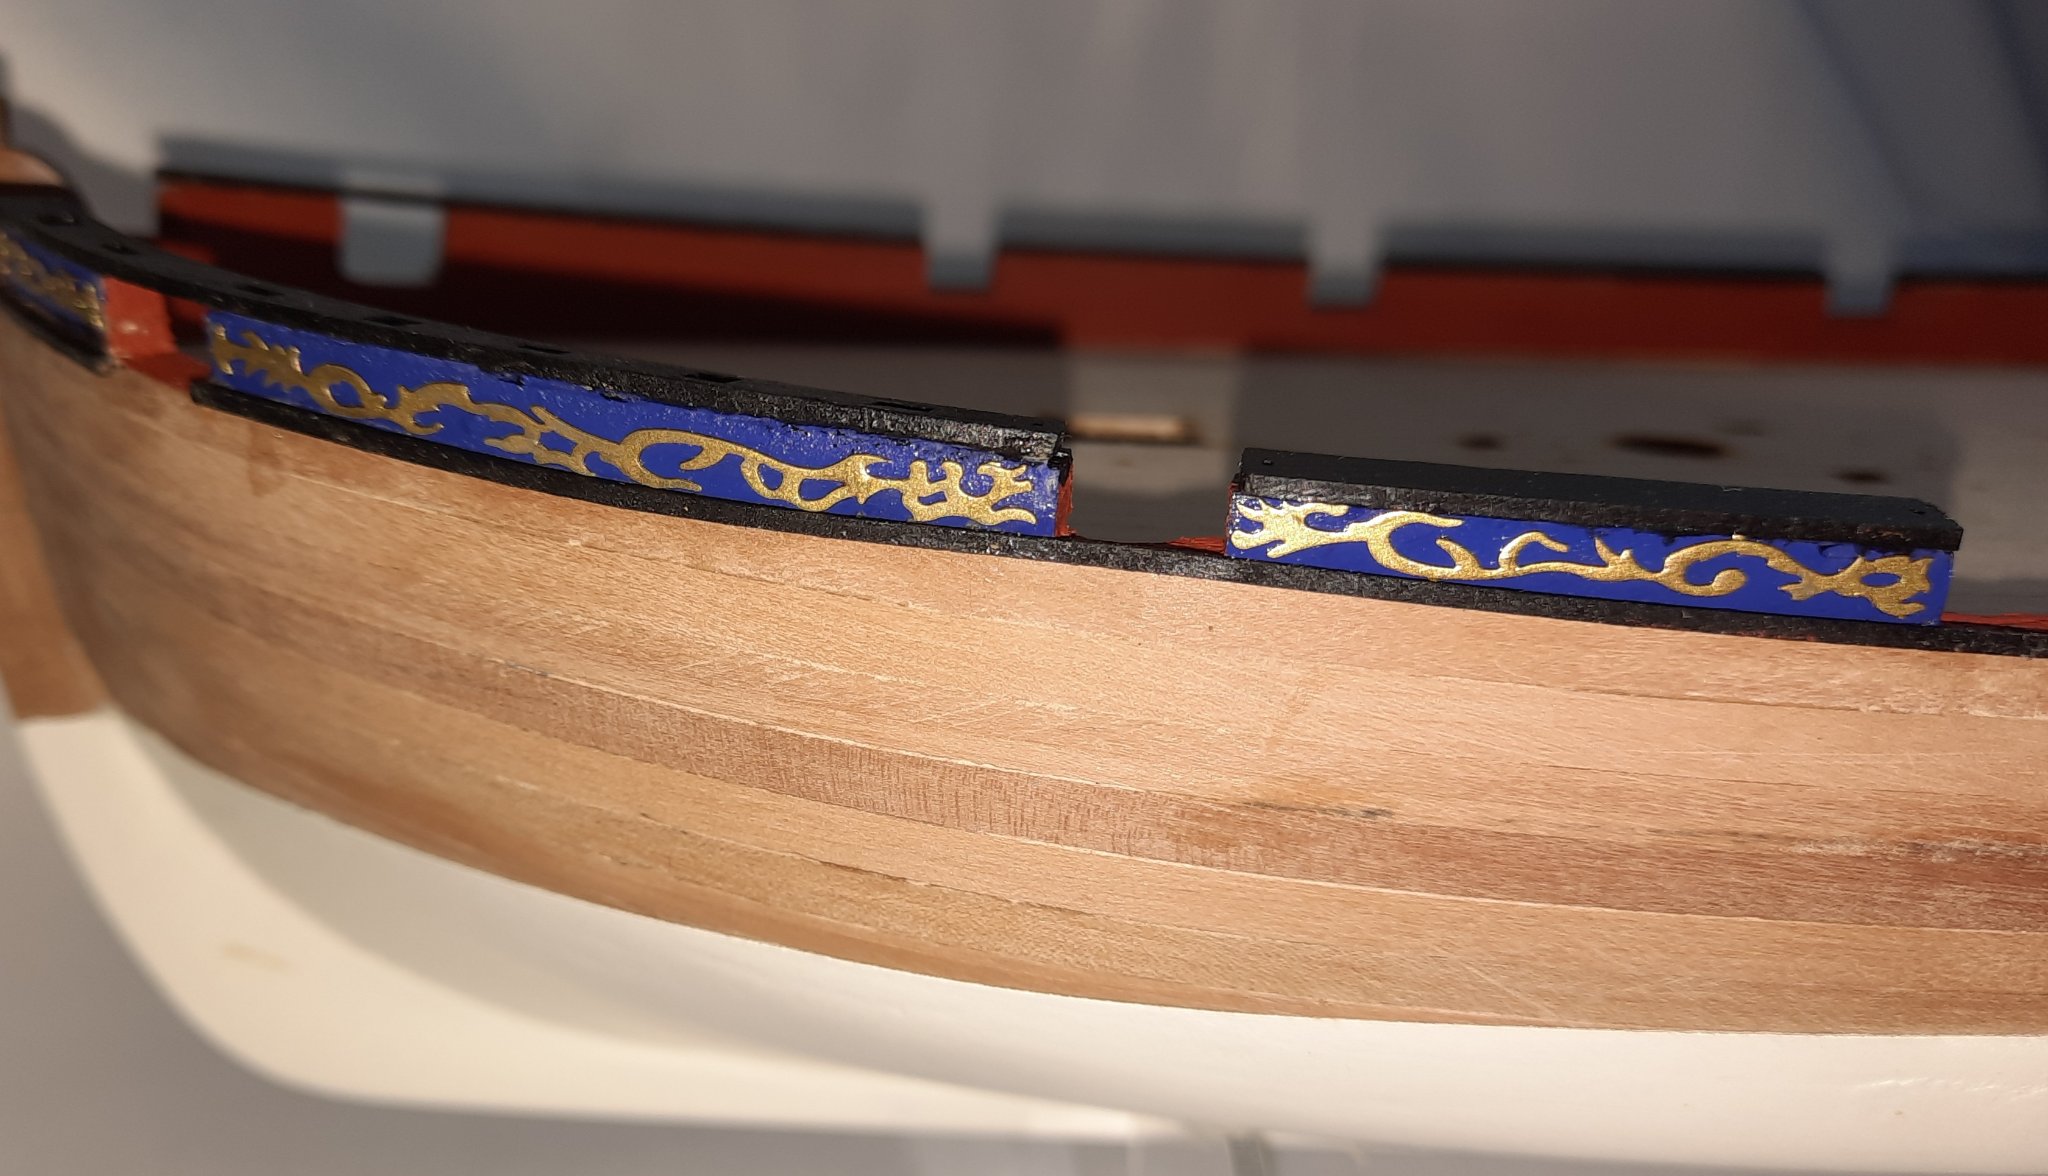
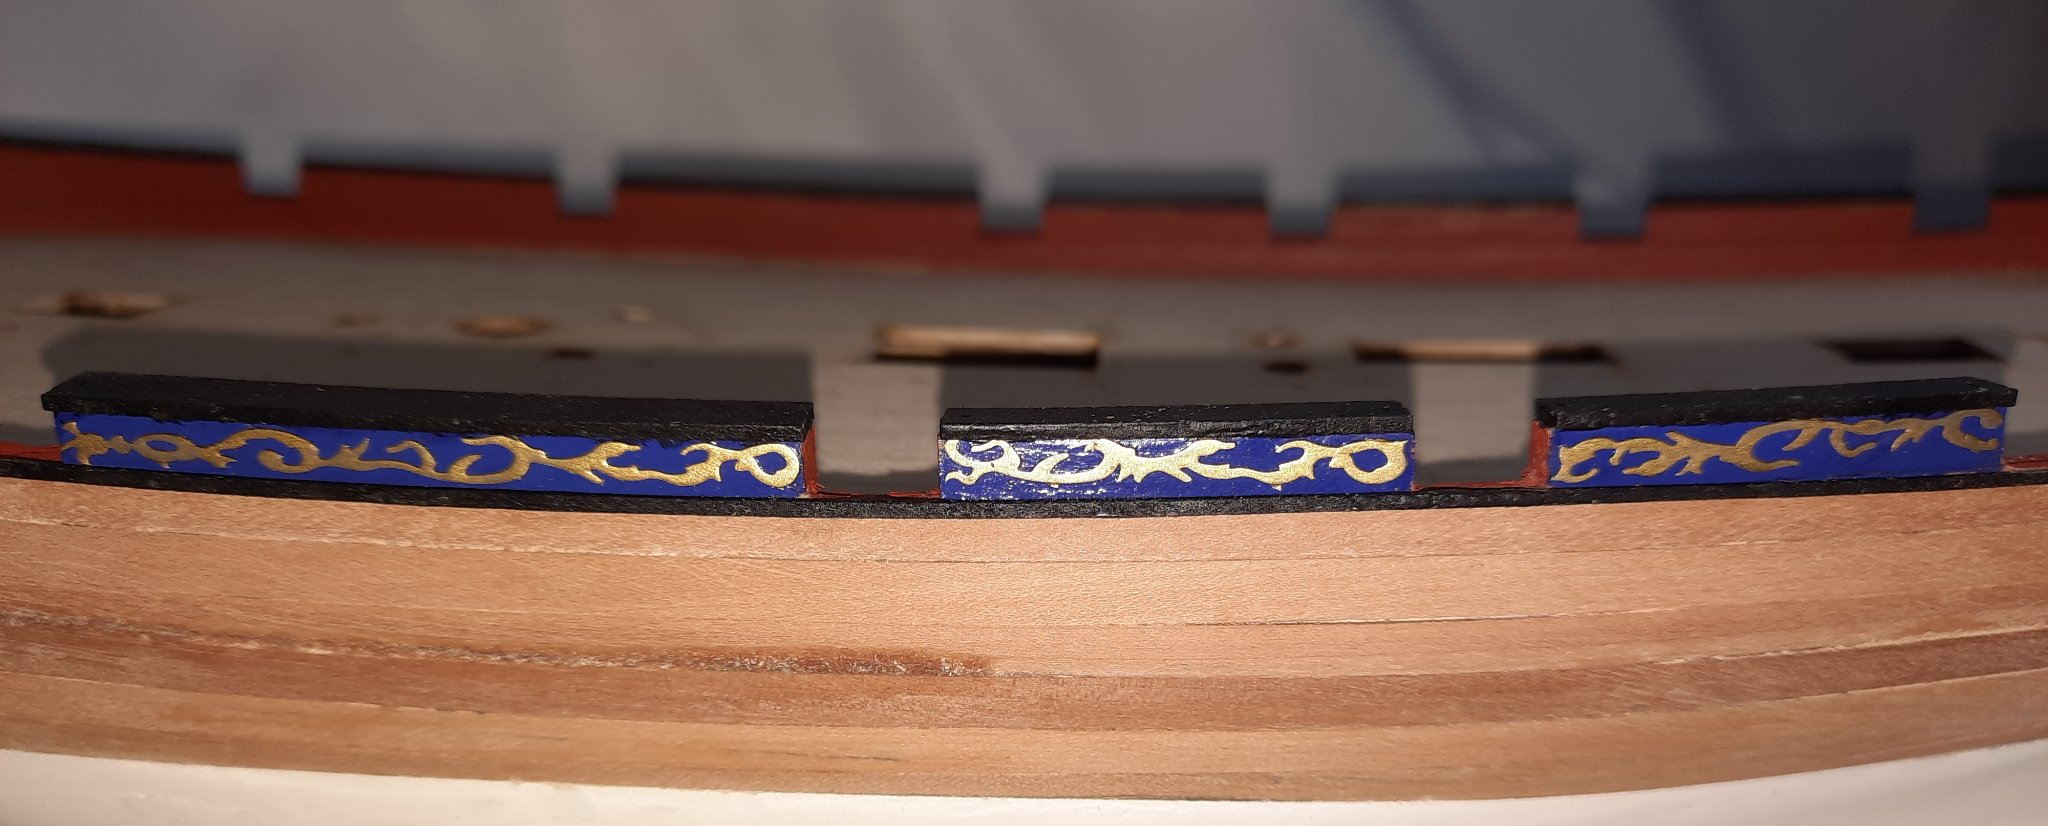
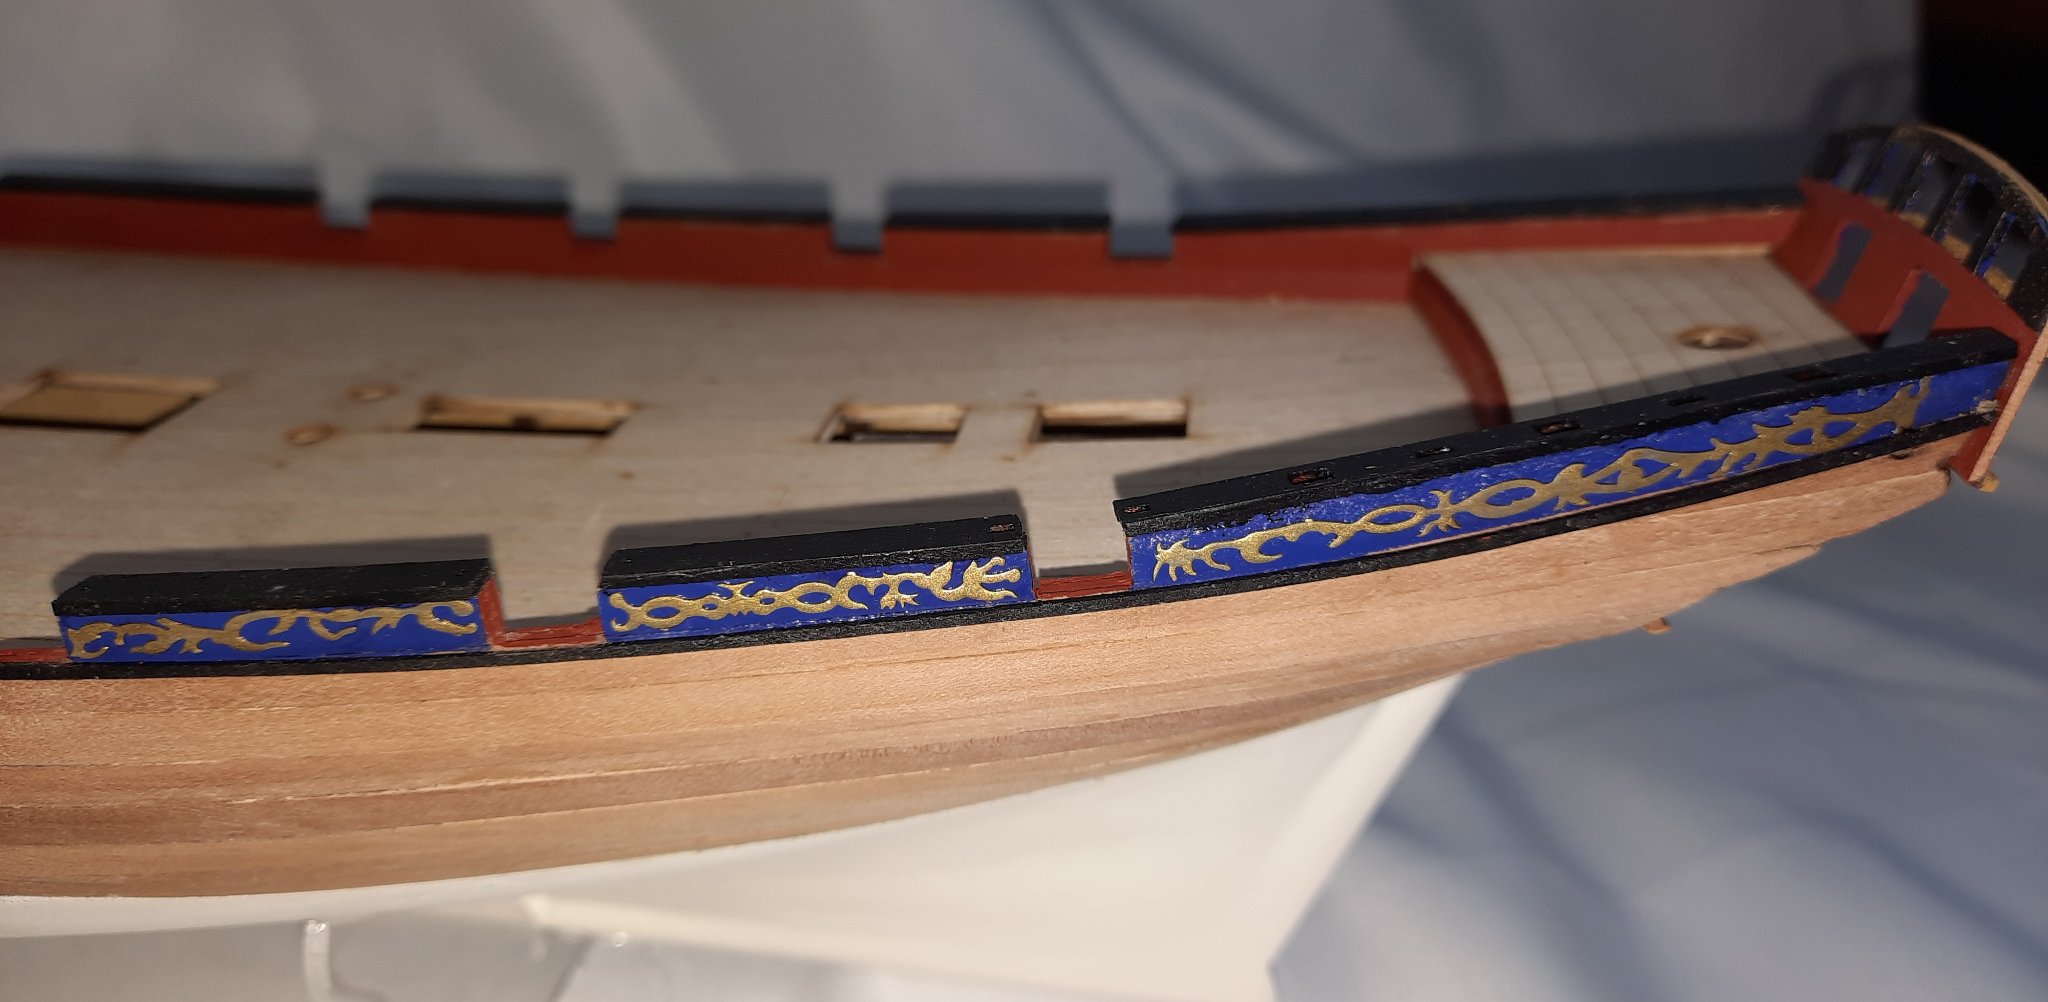
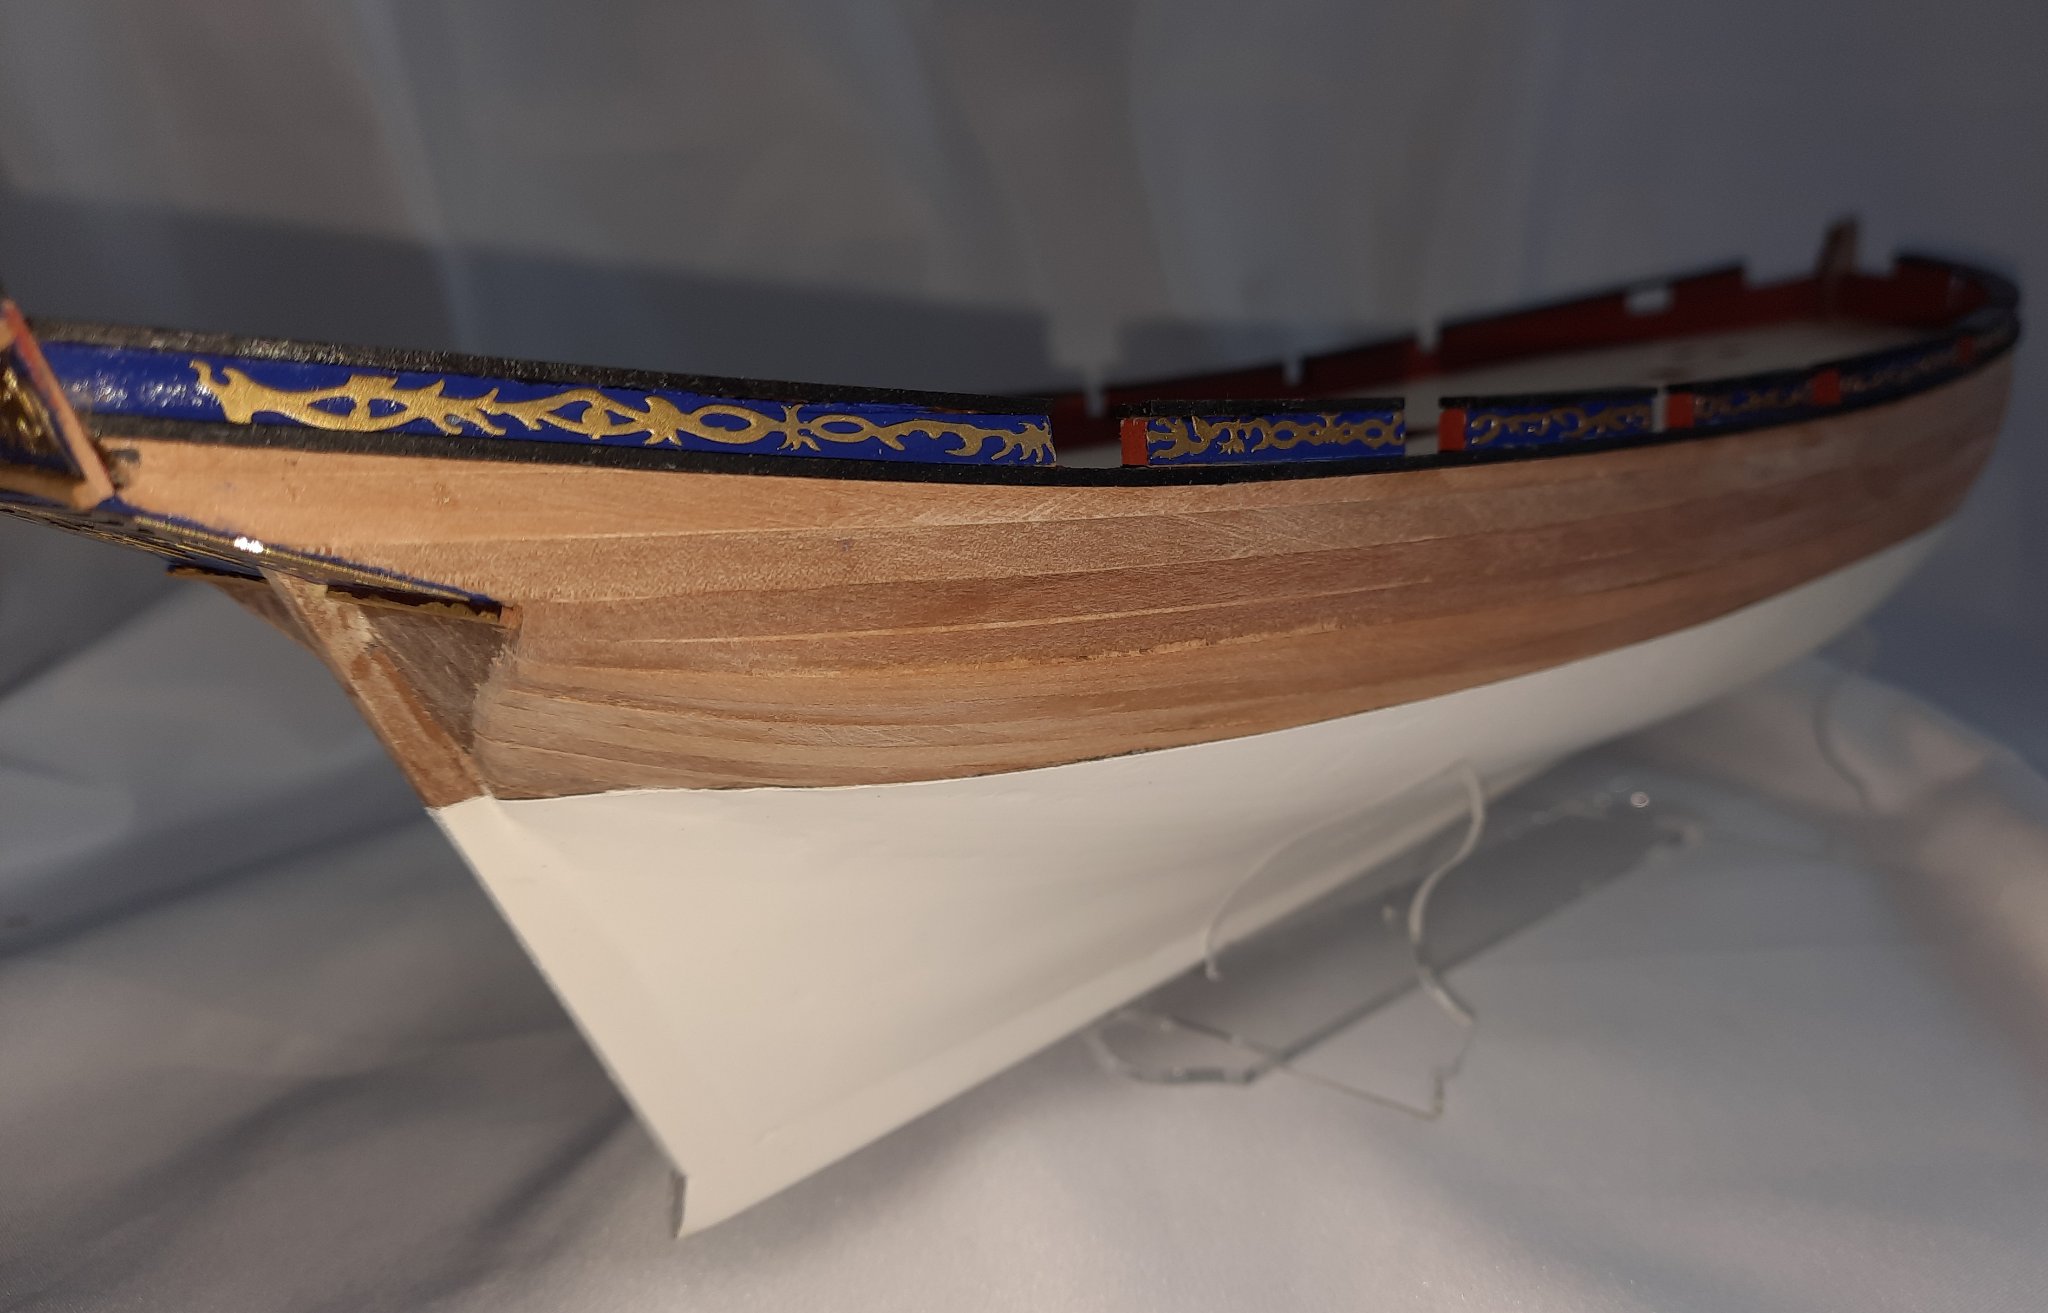
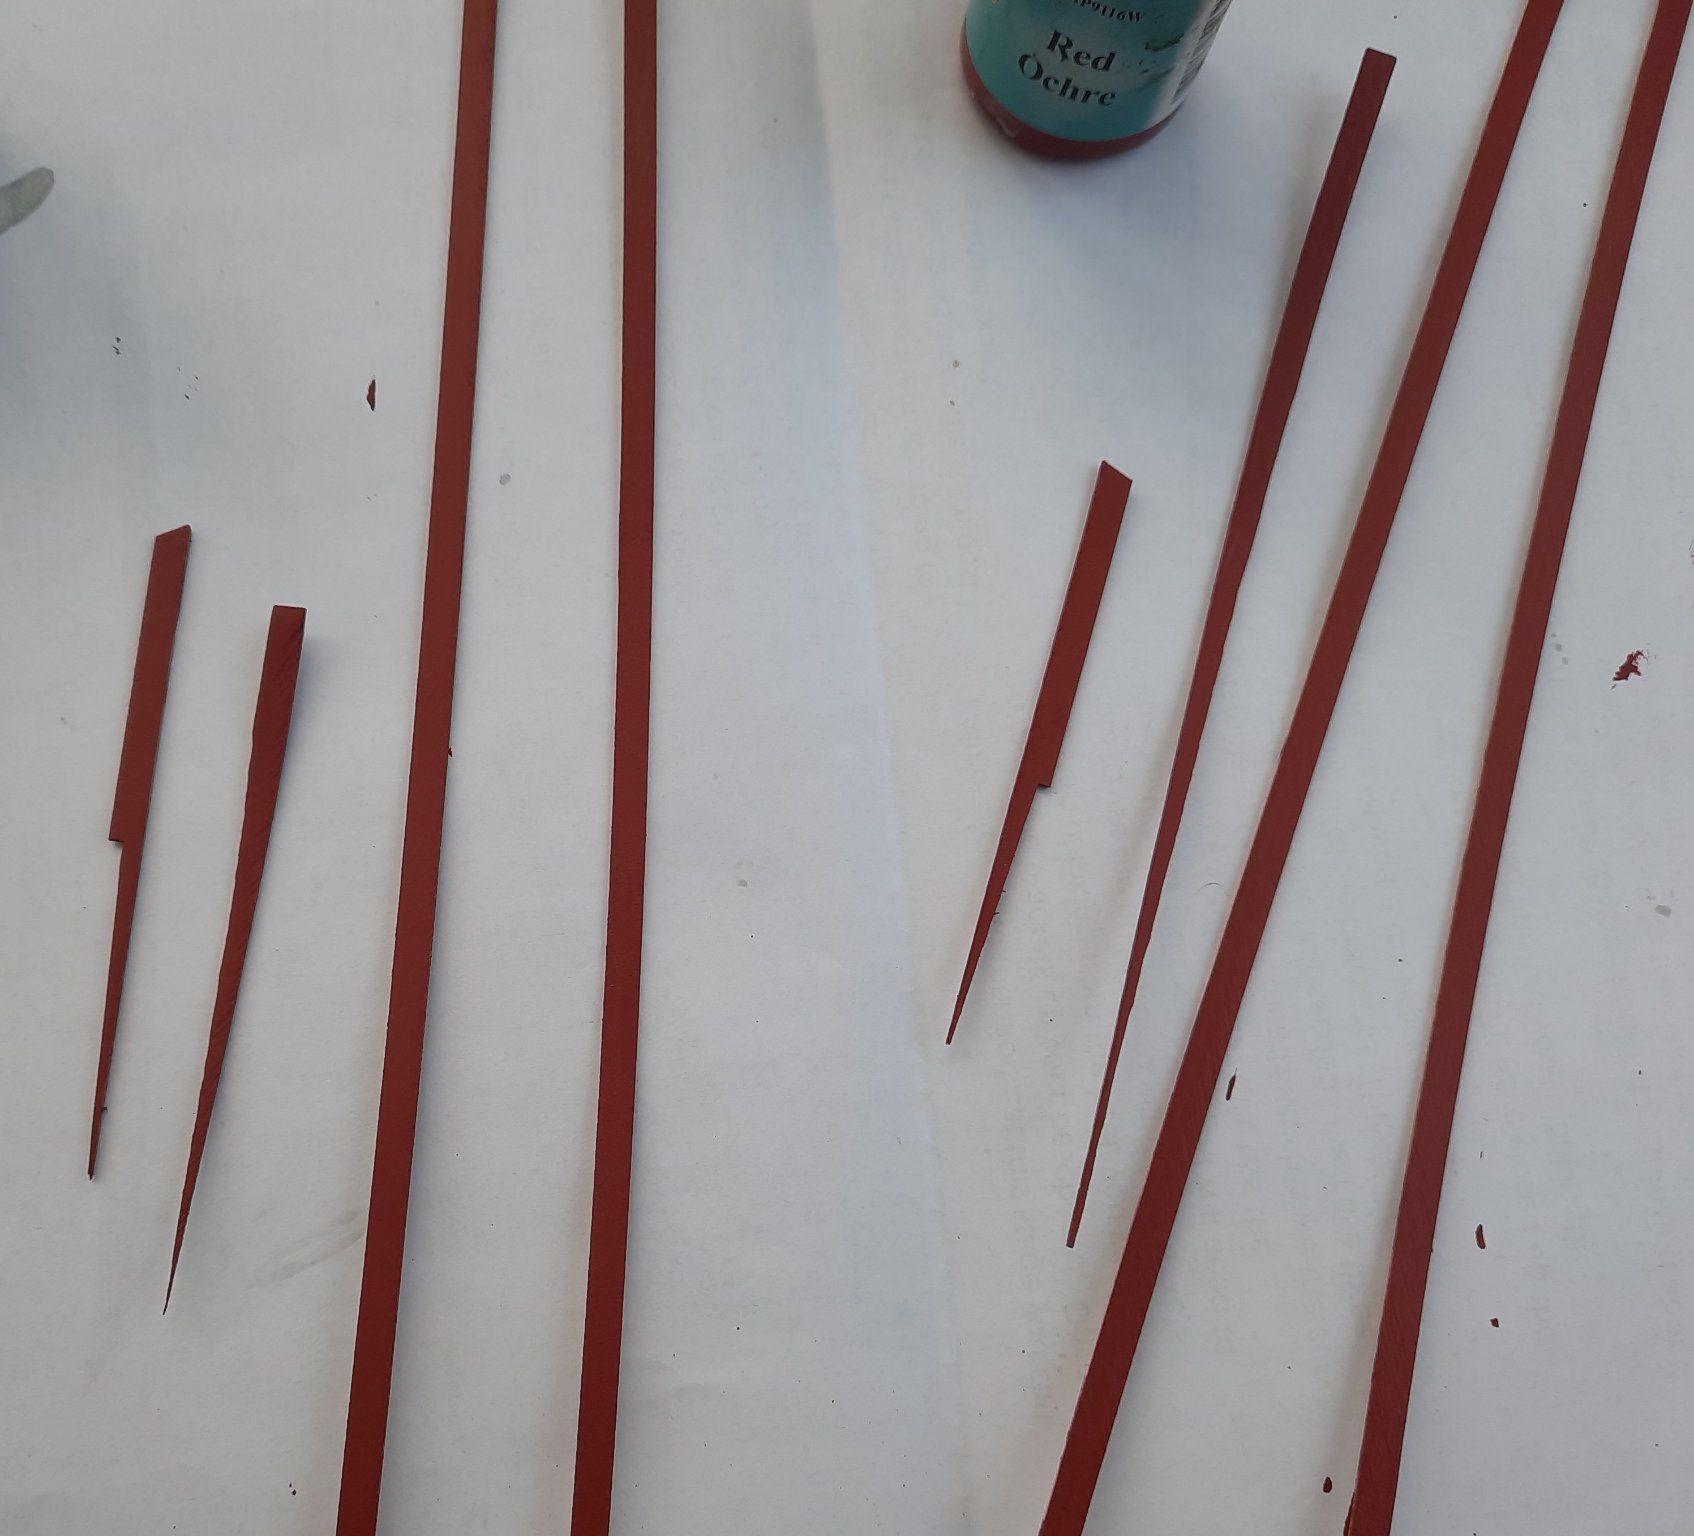
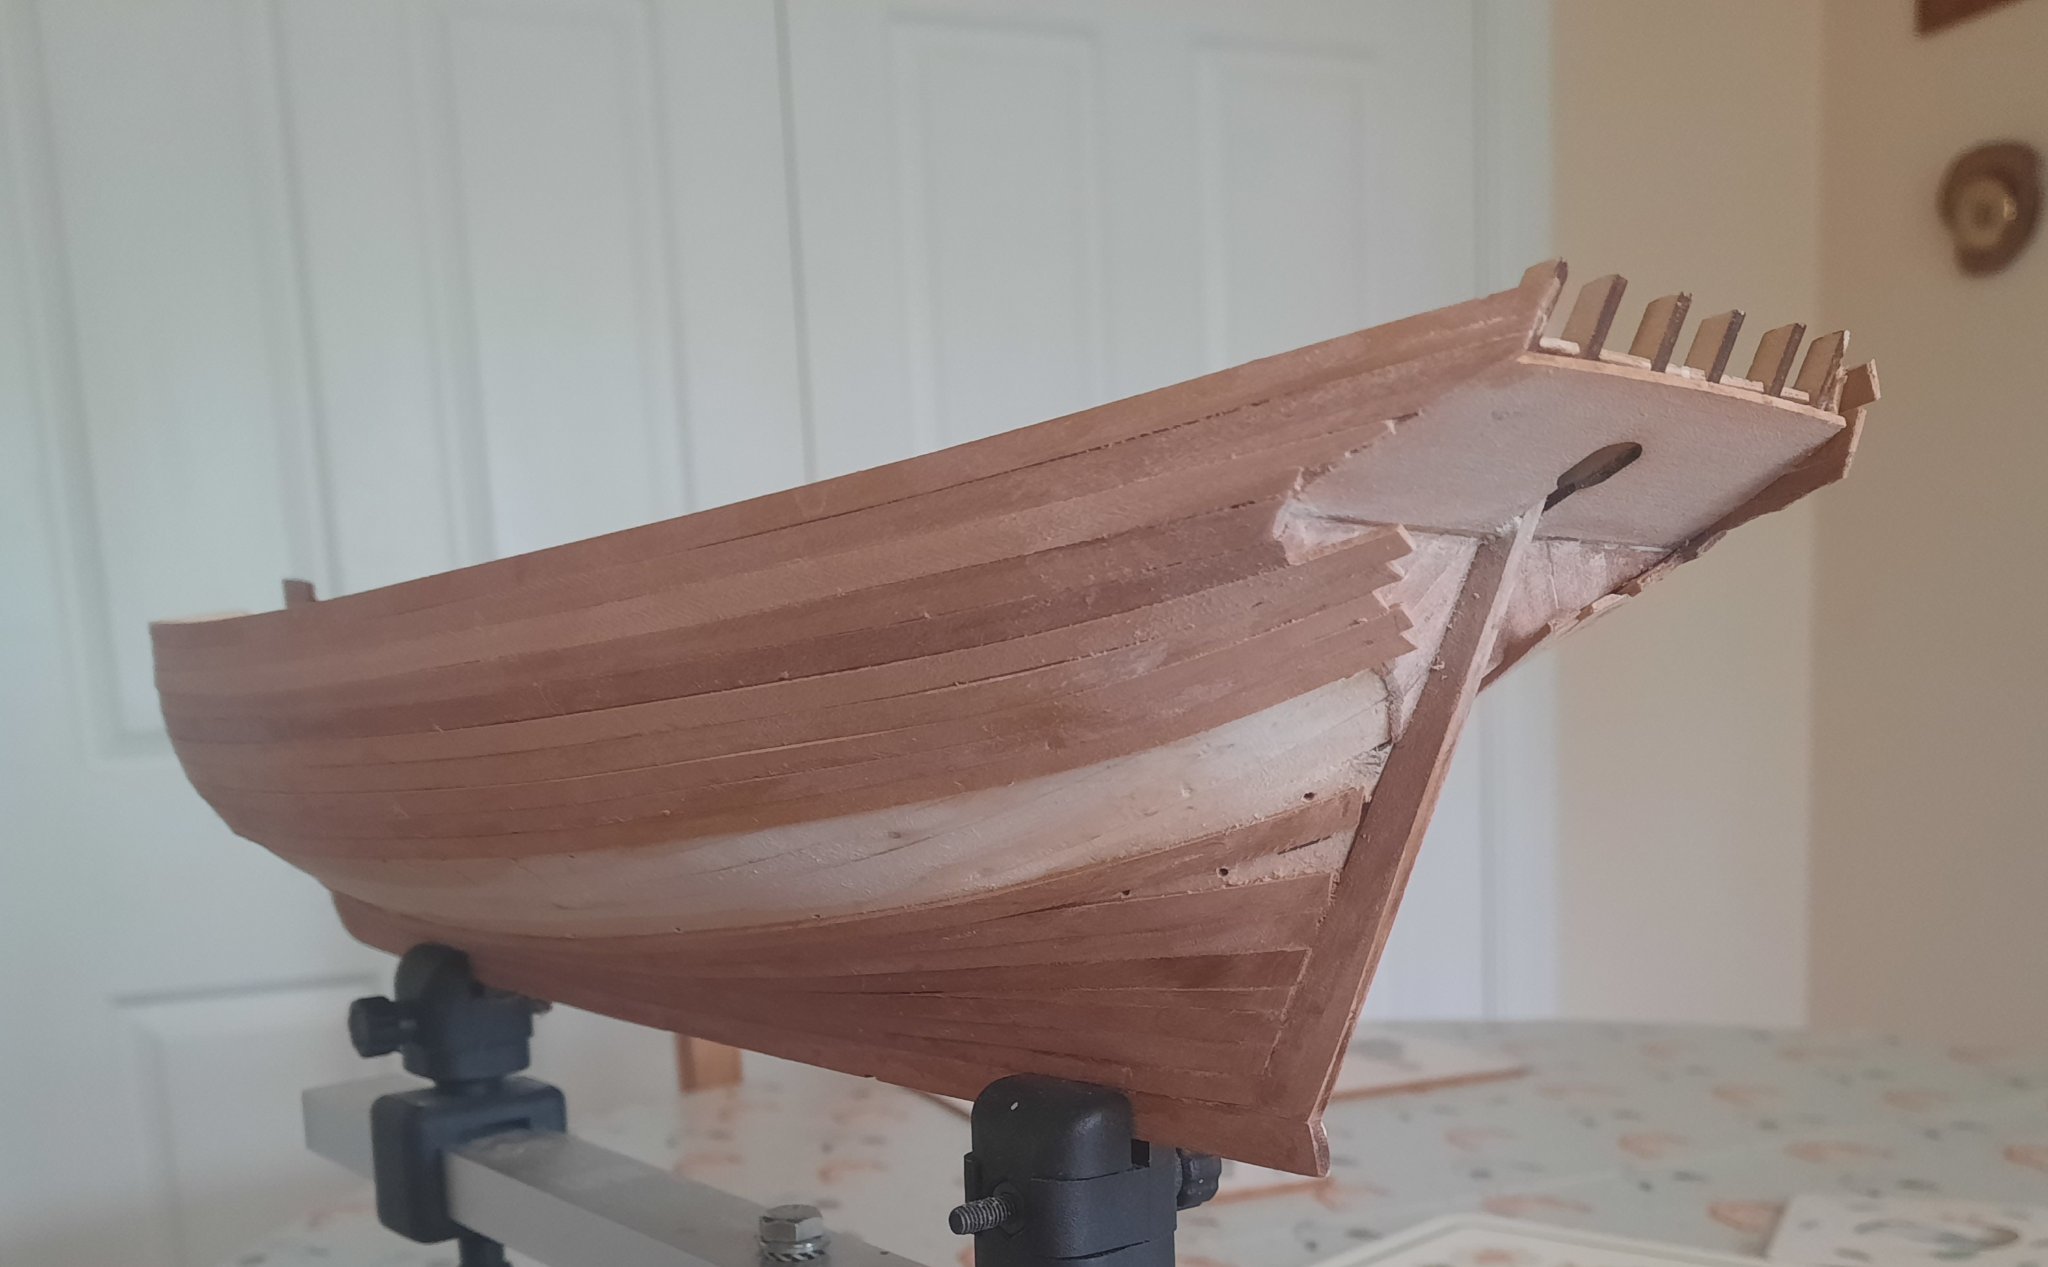
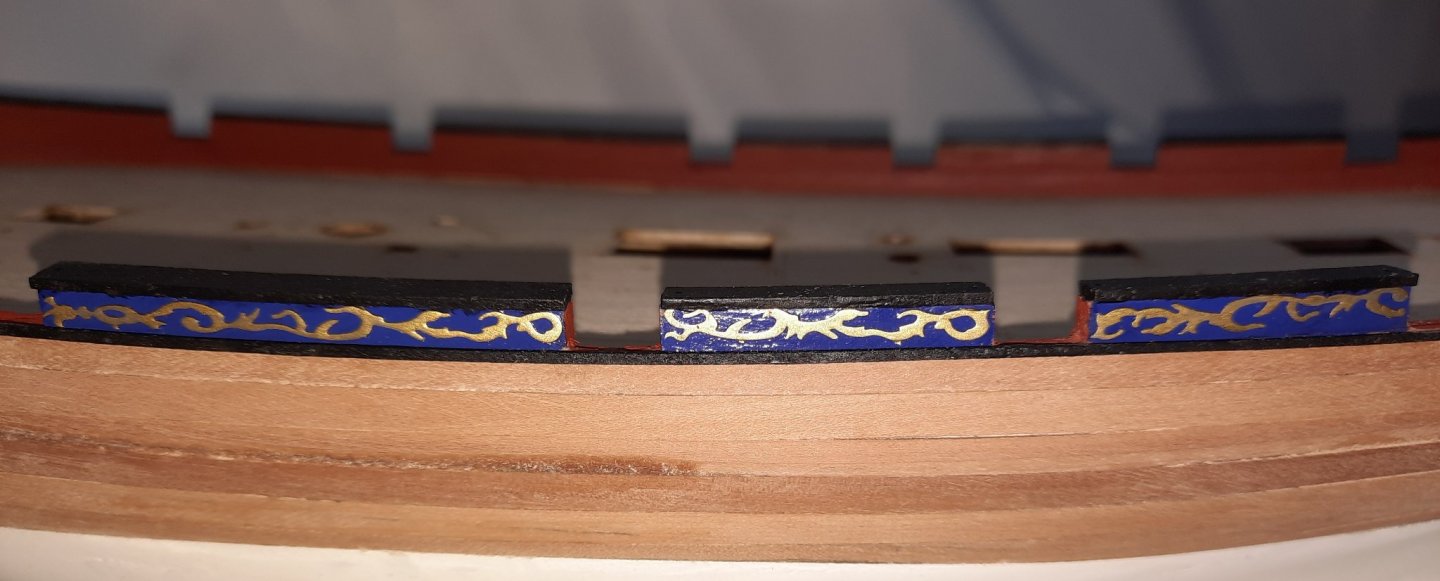
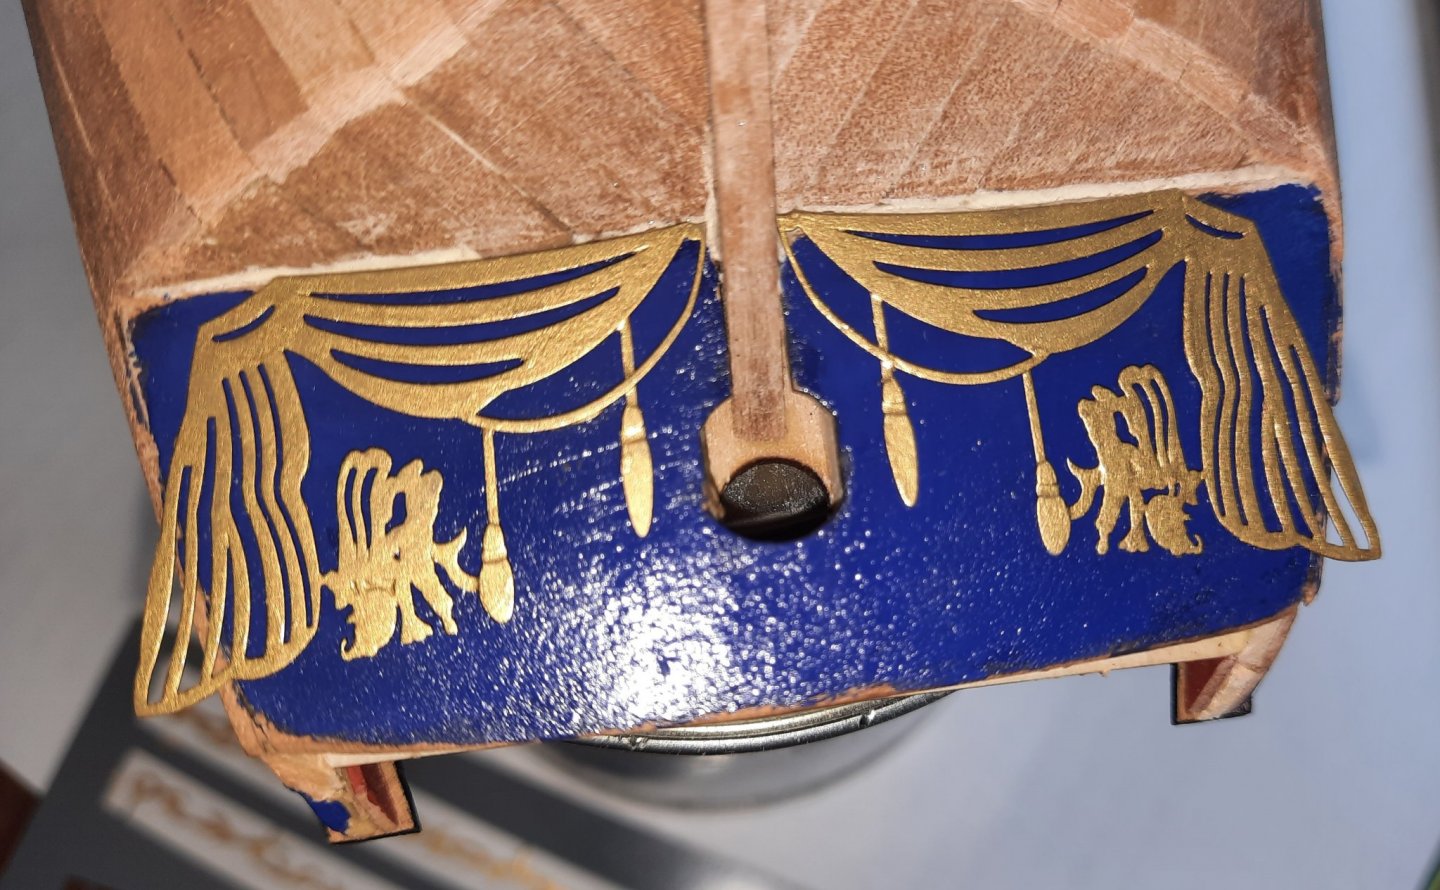
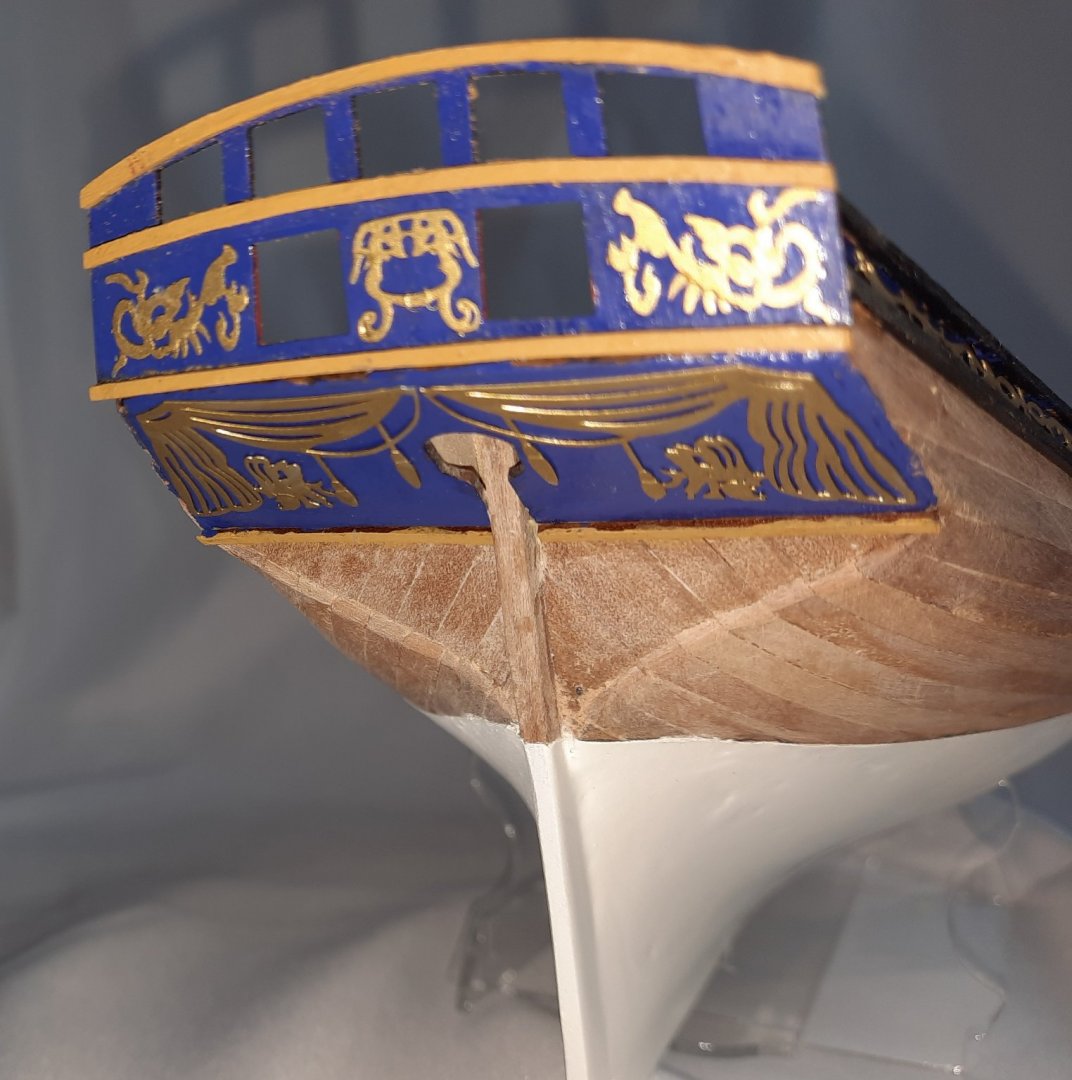
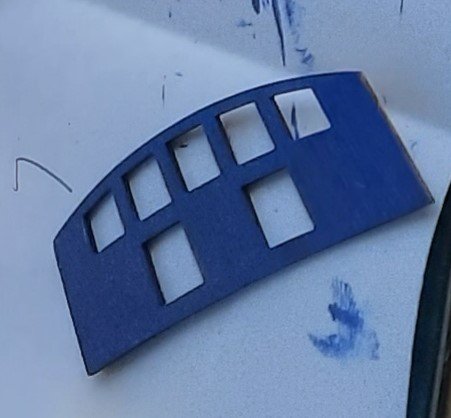
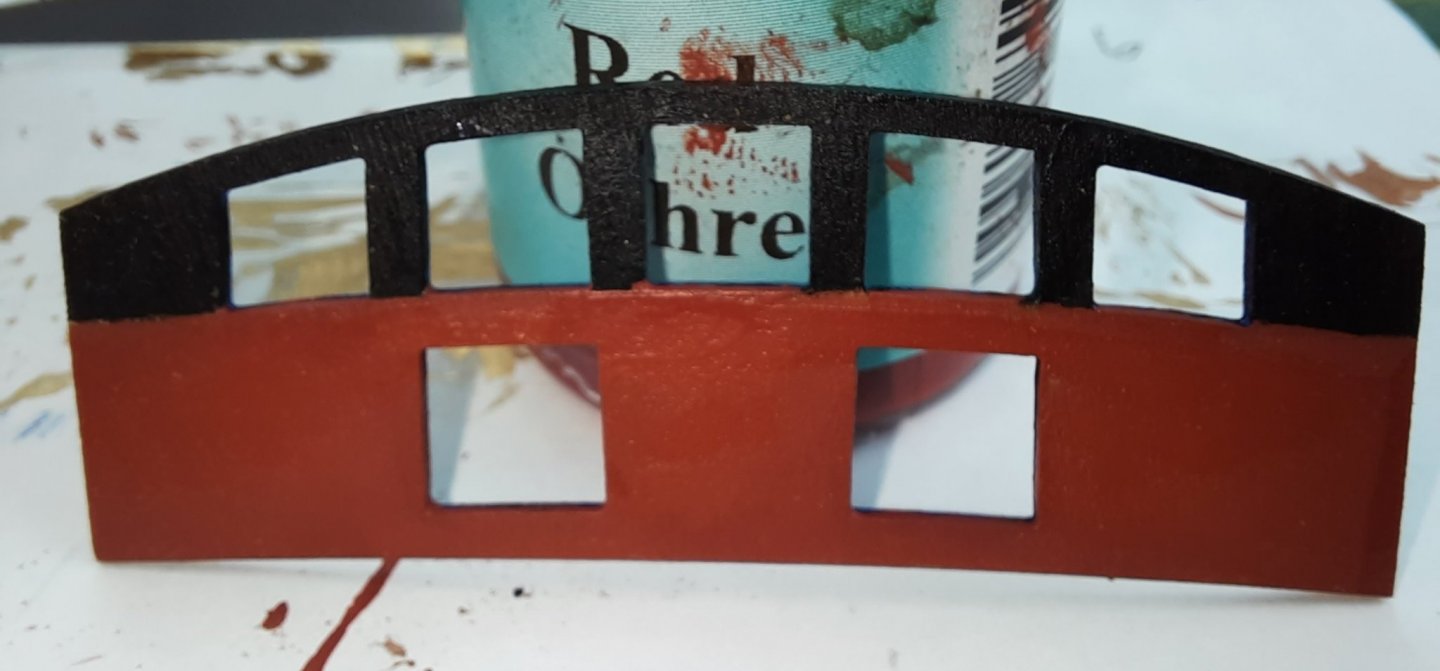
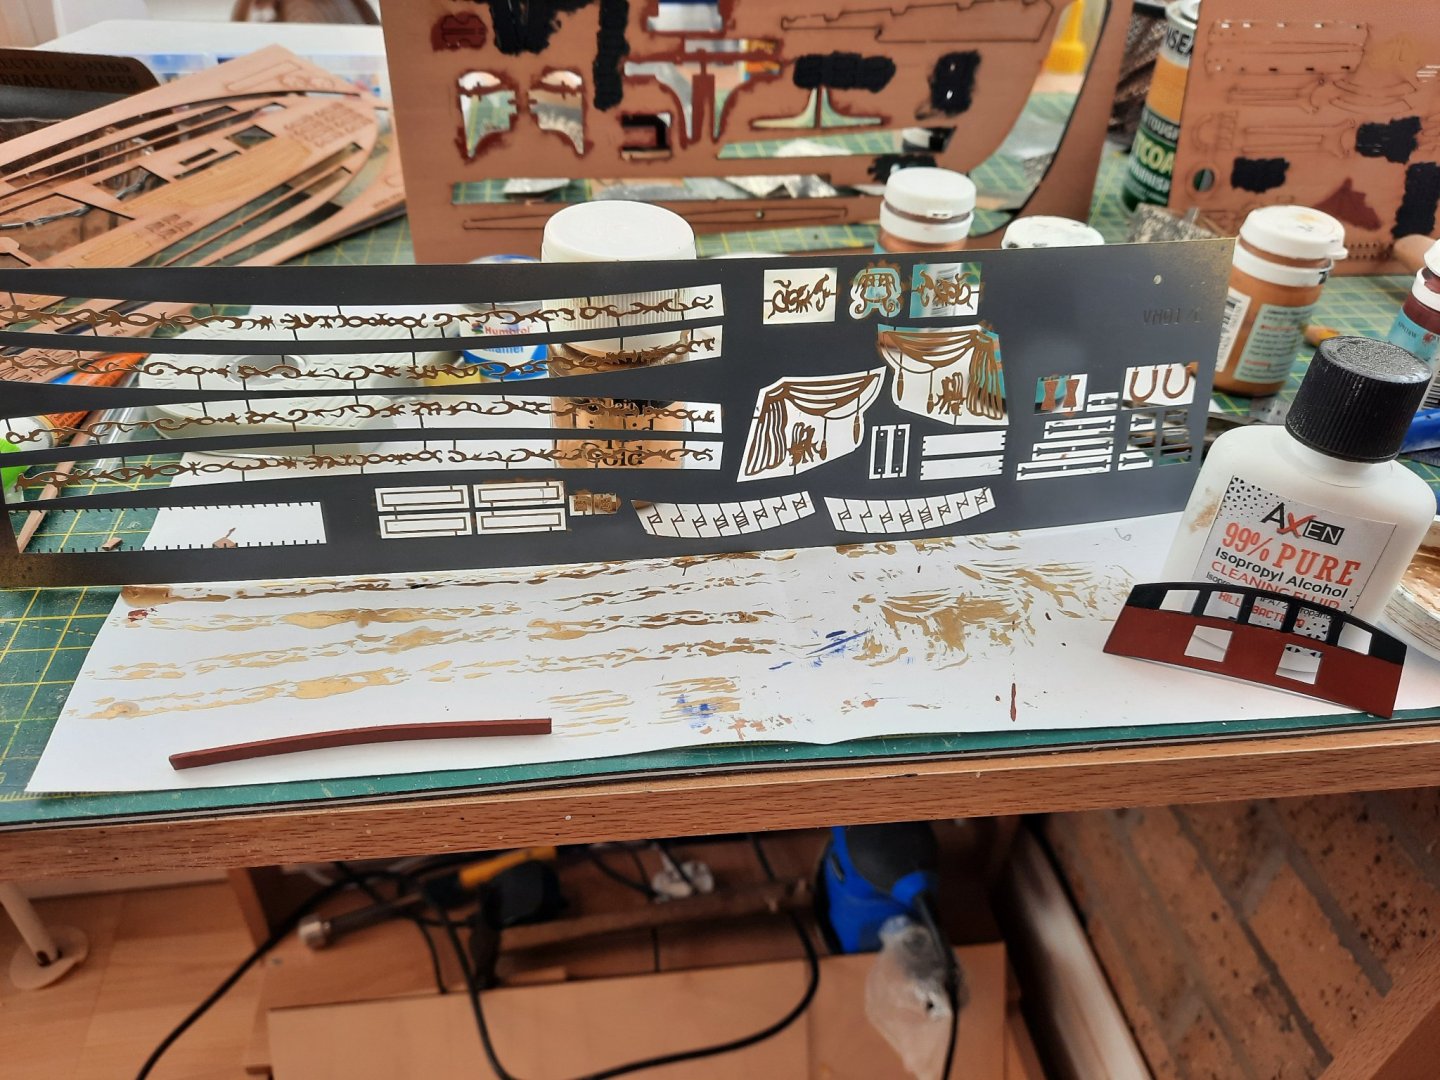
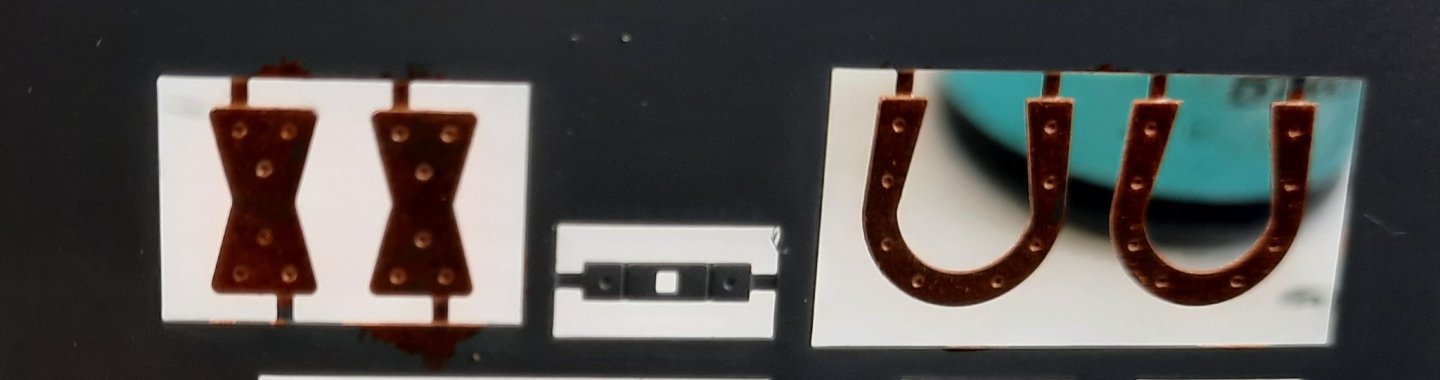
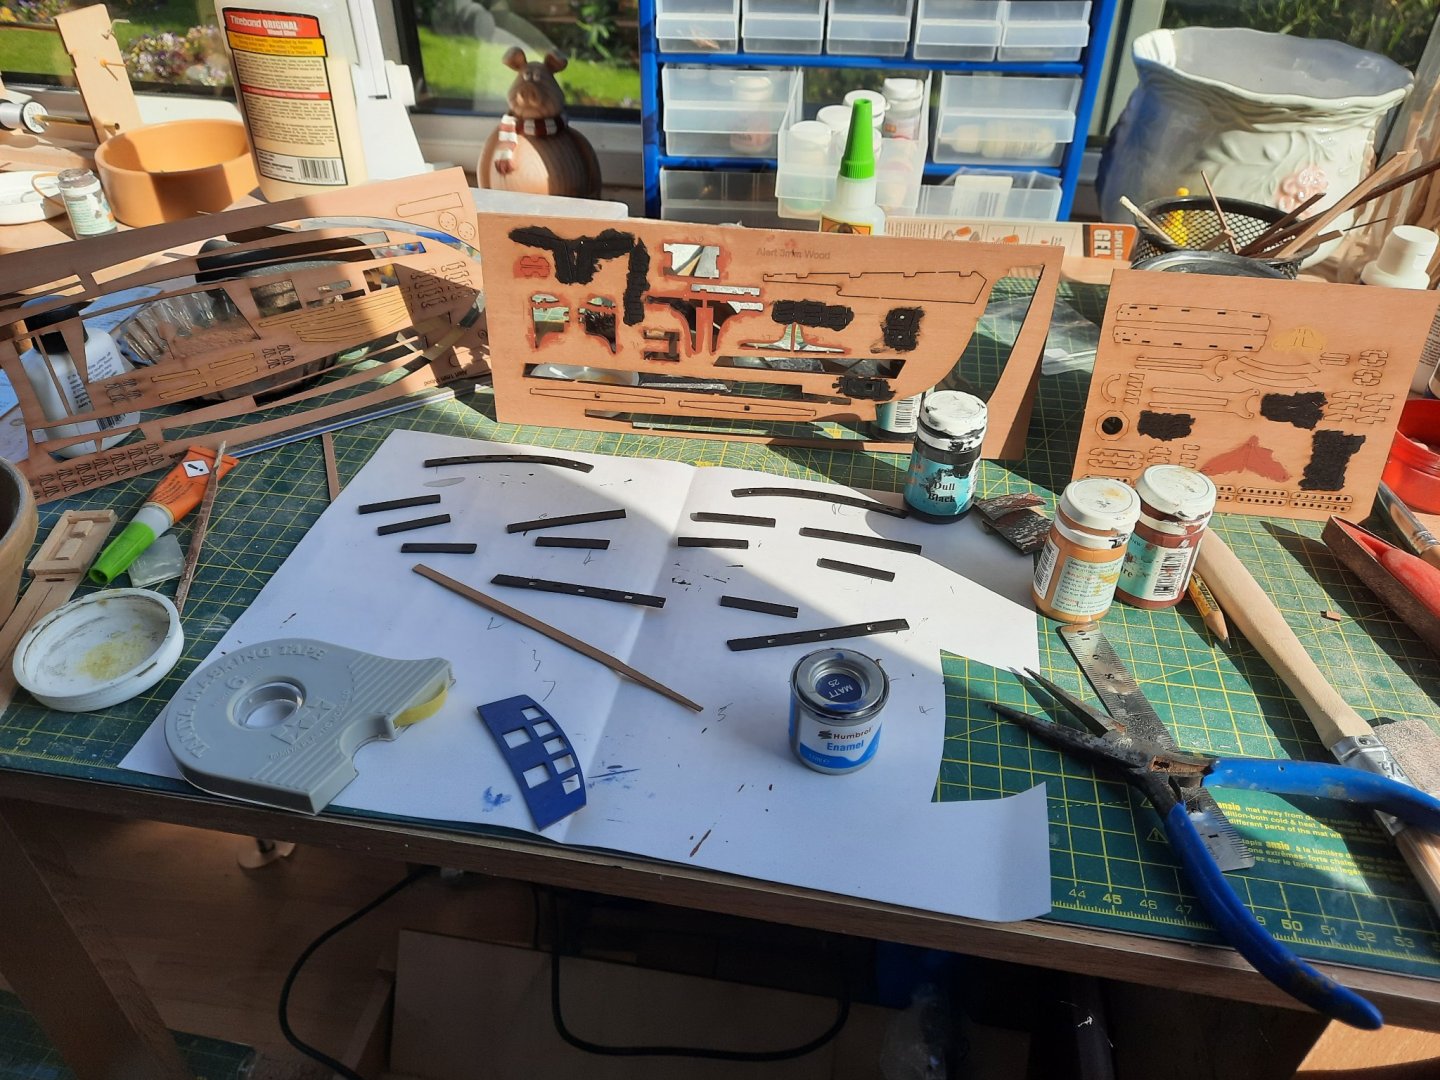
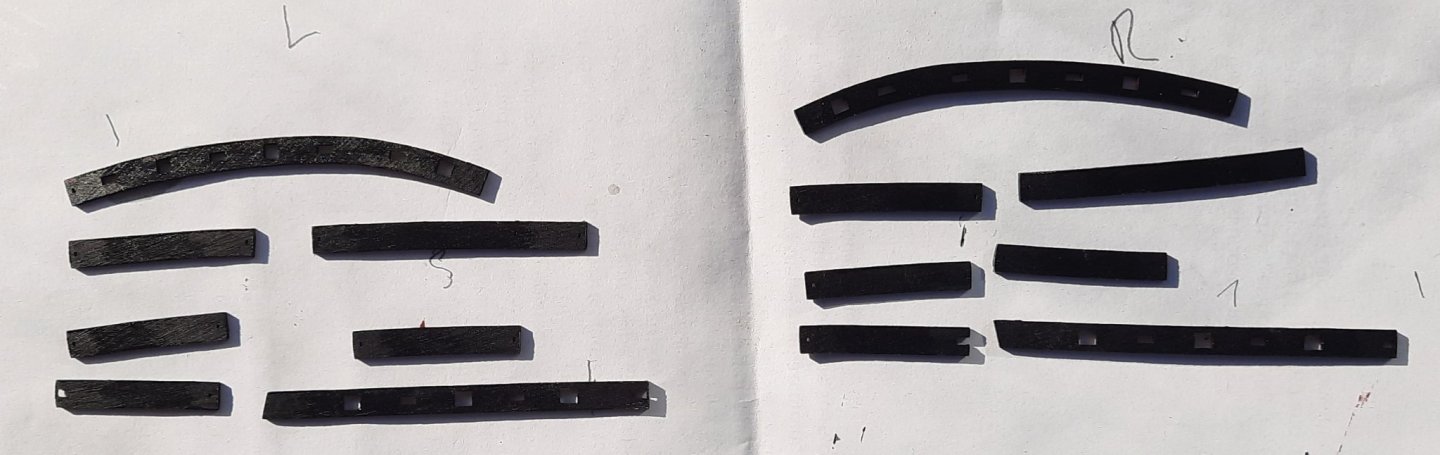
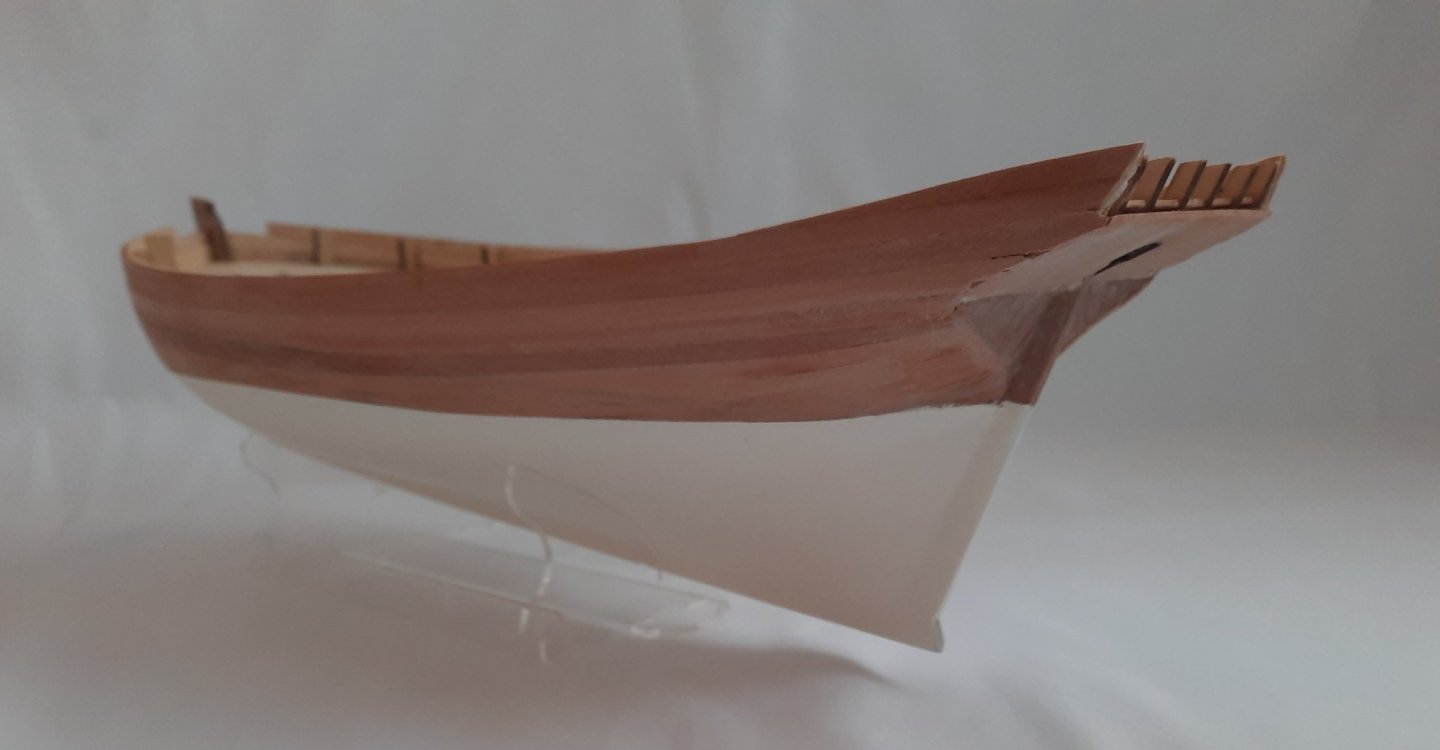
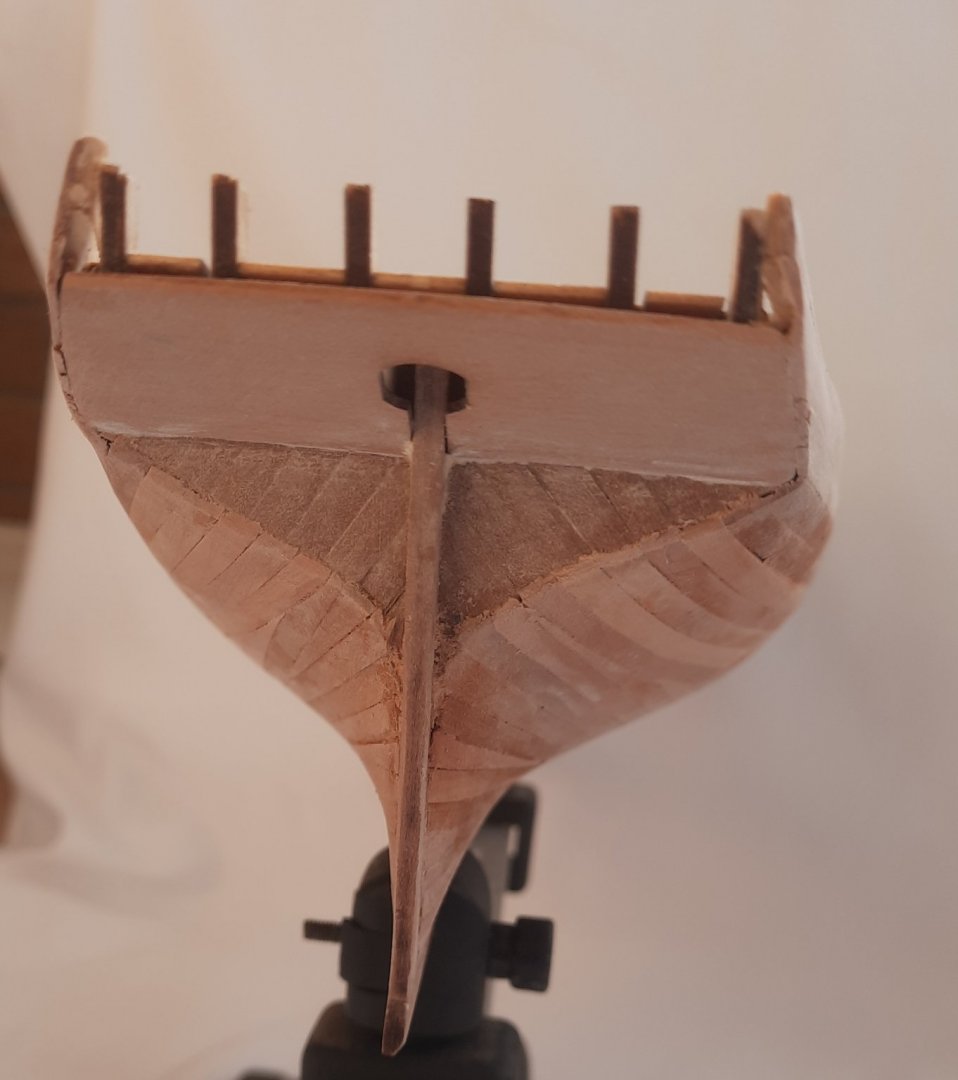
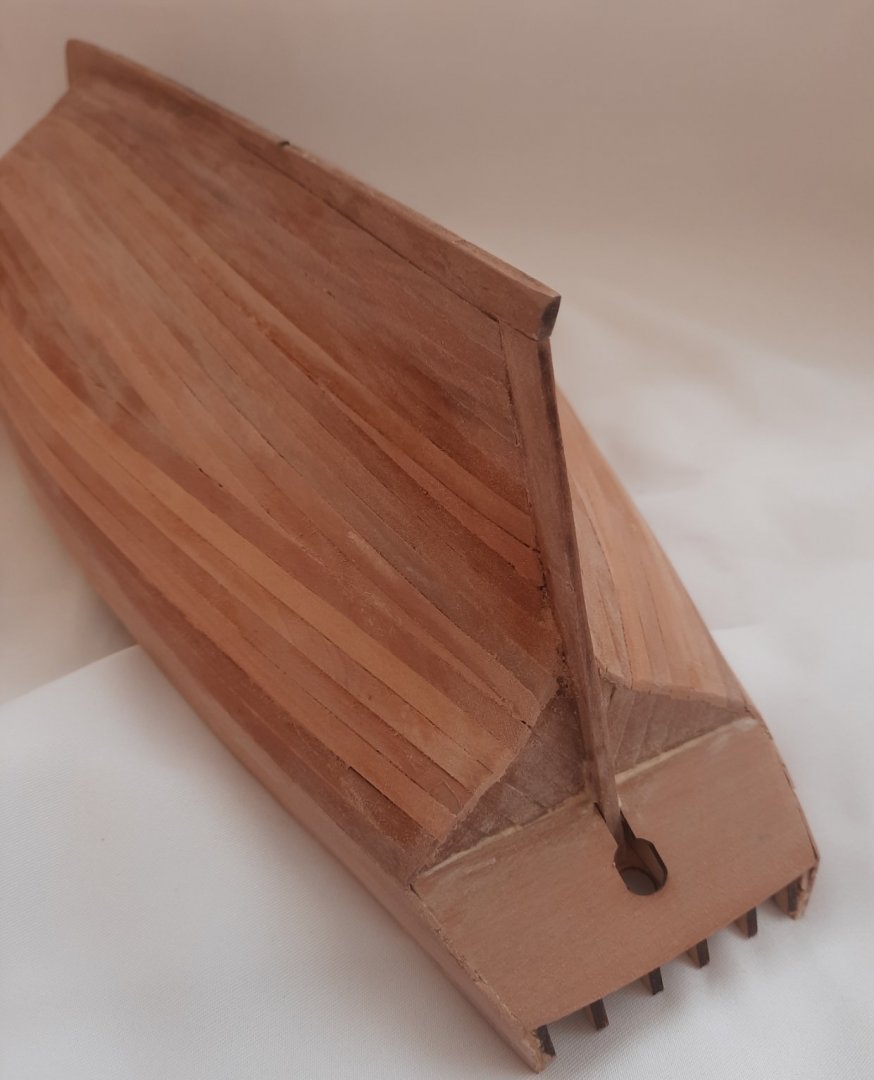
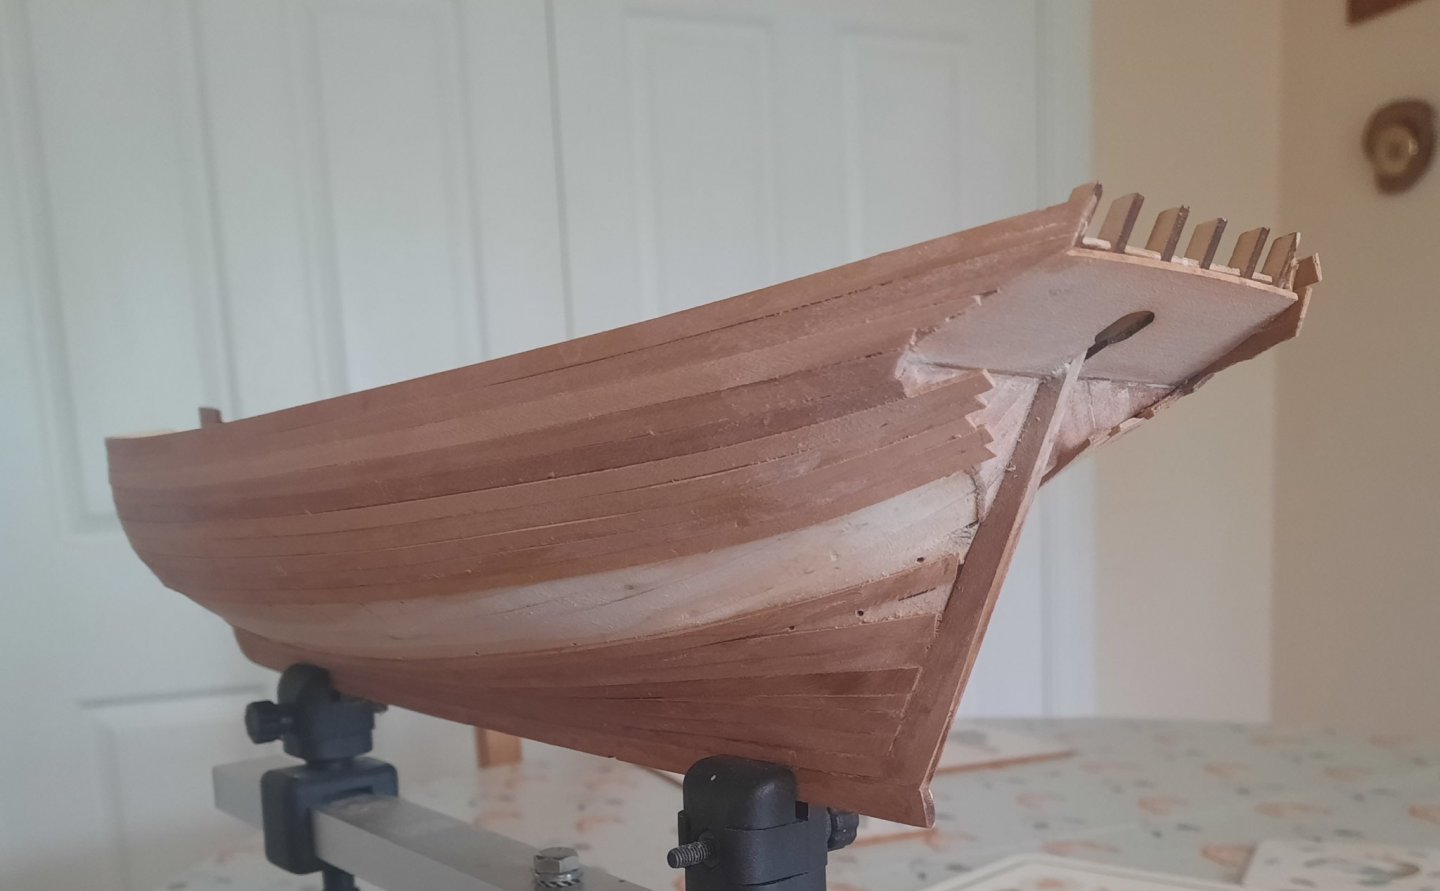
Today I have added the hull decorations, lower 1mm hull rails and upper stern counter pattern. I started by adding the PE patterns. When I did a test fit of the lower stern counter pattern decorations there seemed to be a problem with the PE parts as can be seen in the photo below. Thankfully when I showed Chris the picture he quickly pointed out that I had positioned the PE parts upside down. I sometimes wonder I how manage to get through the day unscathed.😂 I decided to use the method recommended by James Hatch for securing the PE hull decoration parts, which is to use Klear polish. I had tried and failed with this method when building the Duchess Of Kingston. Thanks to James for taking the time to explain the method to me yesterday once again and this time I had no problem using the Klear method. The PE part was positioned on the hull and then, using a small paint brush, the edges of the PE part were coated with the polish. The brushed on polish will then work its way under the PE part. Once all the PE parts were fitted and the polish had fully dried a second coat of polish was added over the top and allowed to dry. Next I added the 1mm rails which sits below the hull decorations. I painted the rails black before they were fitted. I used Titebond Original to secure the rails to the hull with a series of clamps to hold the rails in place until the glue had gripped and started to cure. I then added the transom rails to the lower and upper stern counter panels. After that I secured the PE decorations to both the lower and upper stern counter patterns, using the Klear method. Once everything had dried I glued the upper stern counter pattern to the hull using Titebond Original. The lower and upper stern counter patterns. The two lower transom parts needs some more yellow ochre on the upper edges. The upper stern counter pattern. The paint work needs a tidy up in a couple of places. There is some additional wooden parts to add. Bow section hull decoration Stern area hull decorations Midships hull decorations Midships hull decorations Rear Midships hull decorations


- 160 replies
-
- 2
-

-
- Alert
- vanguard models
- (and 1 more)
-
I totally agree. It will look even better when the decorations have been fitted
-
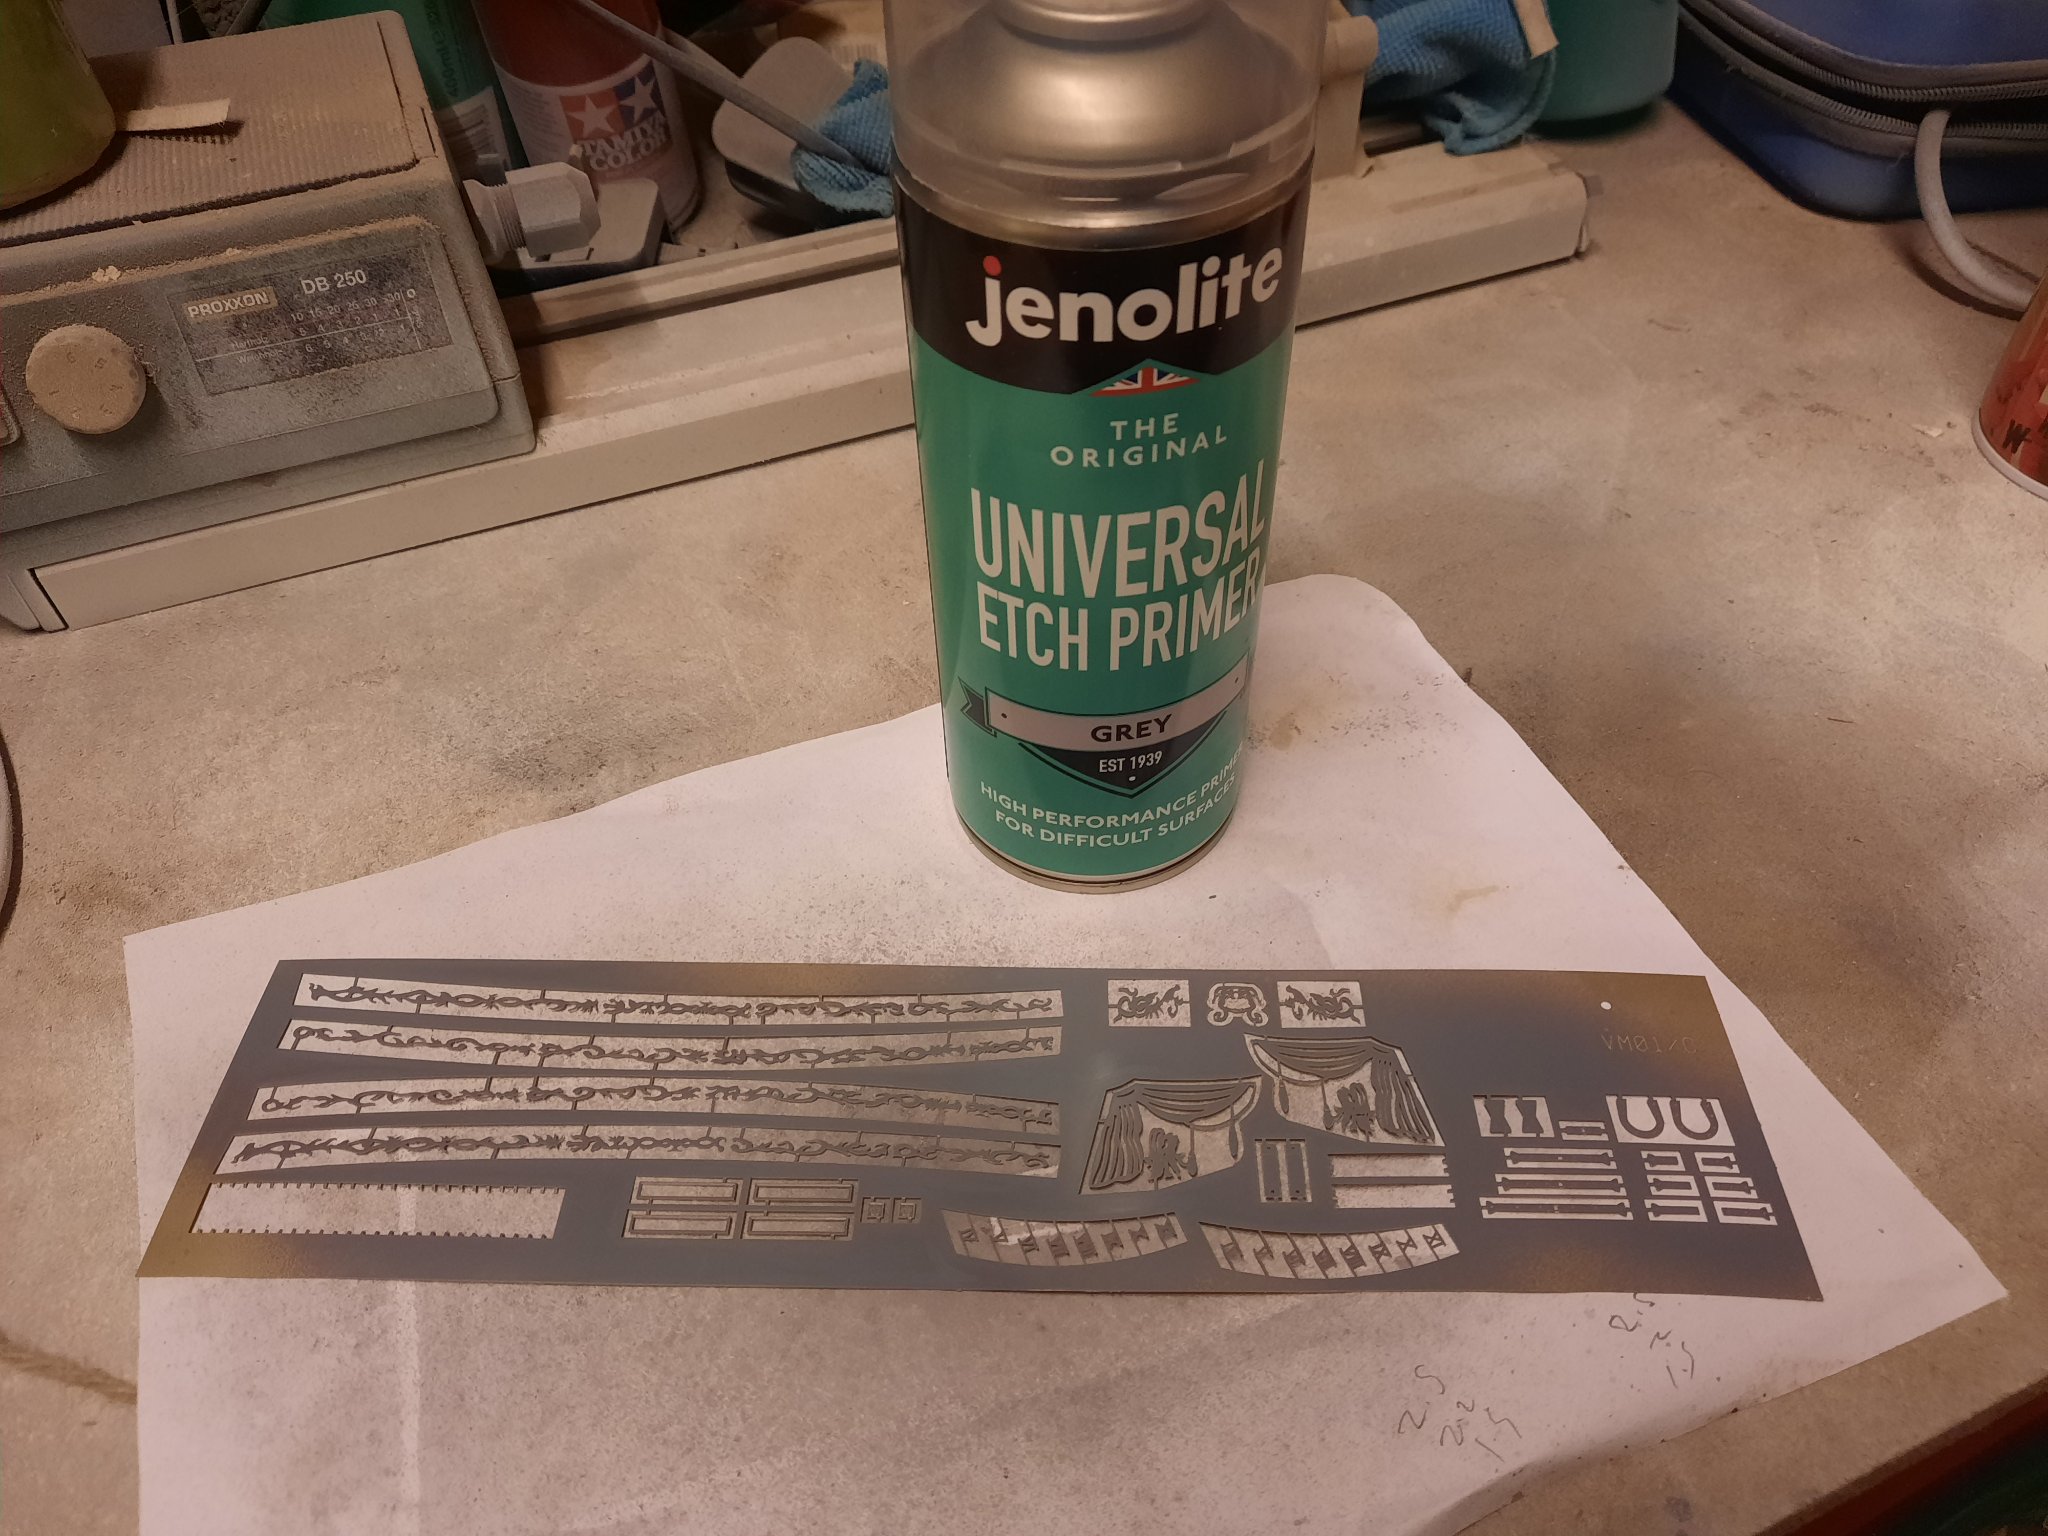
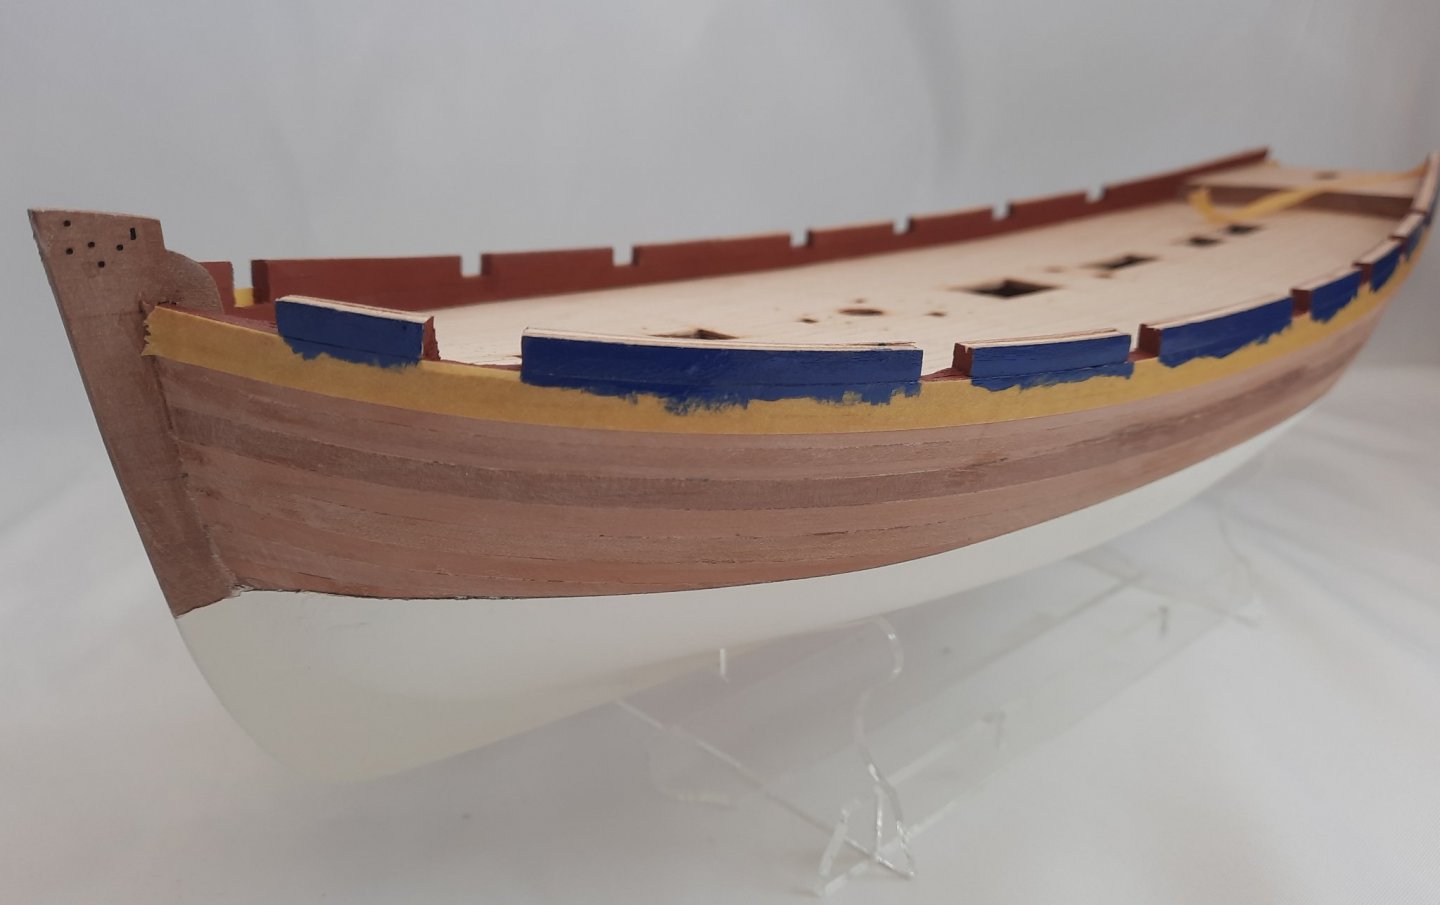
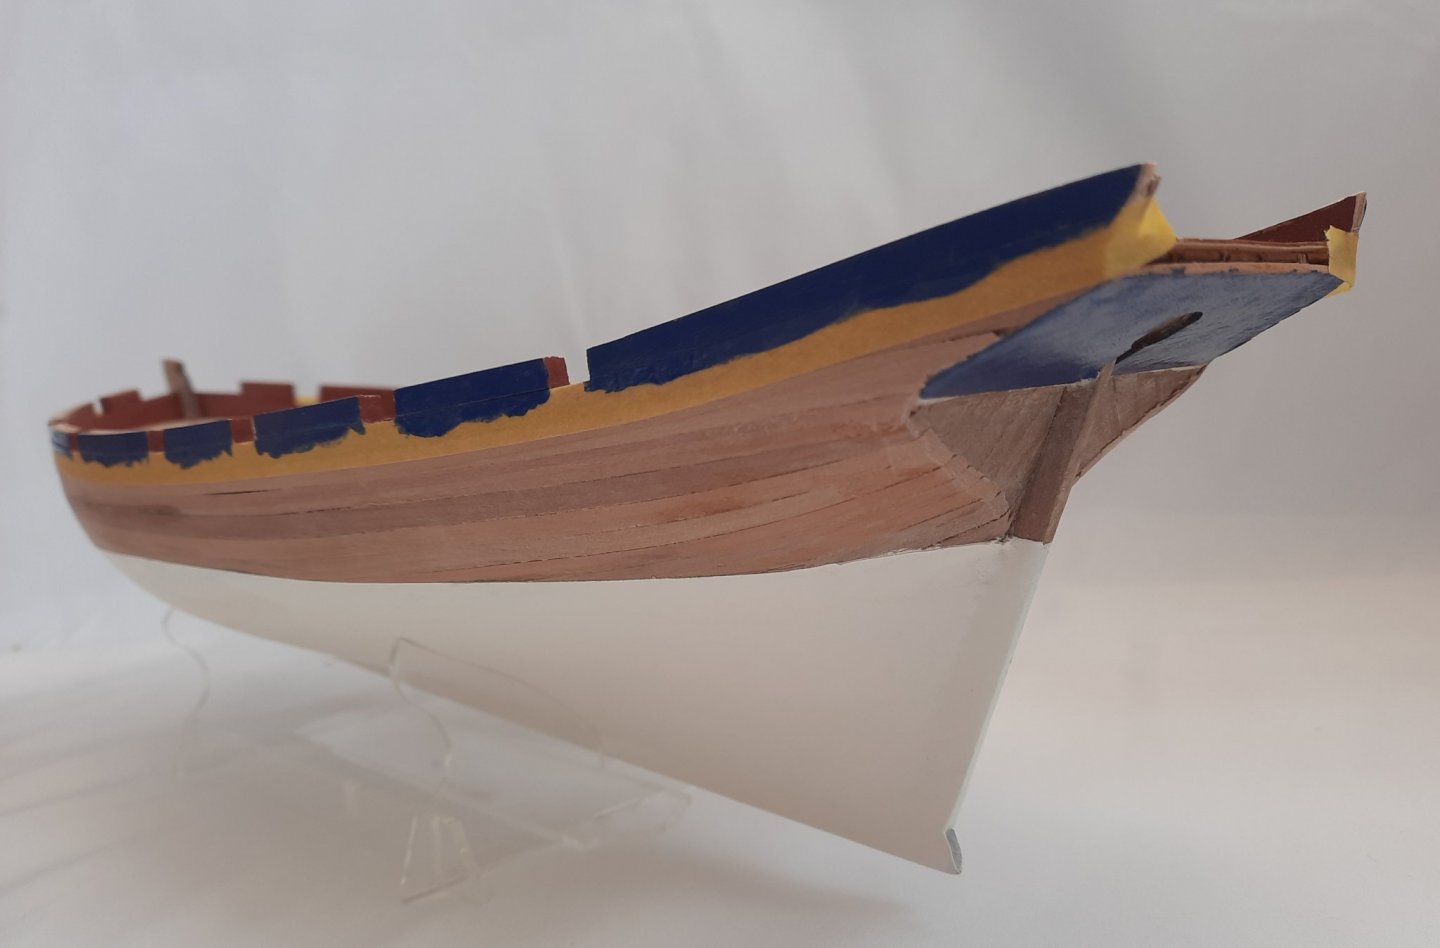
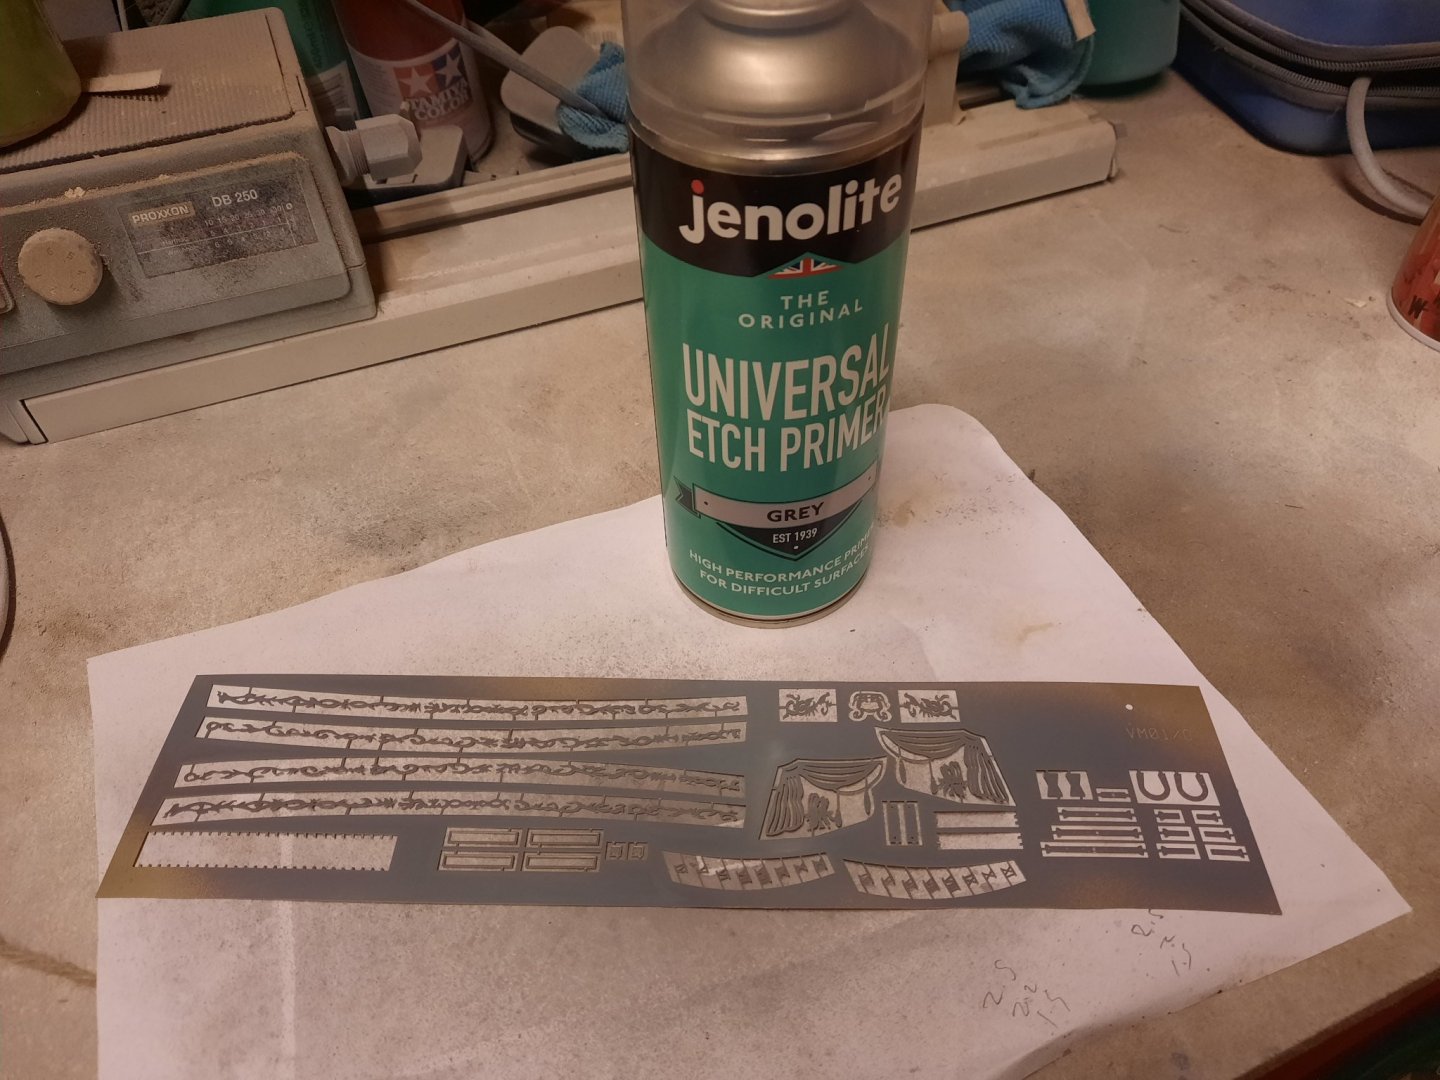
Time for a quick update on my progress to date. I started by taping and and painted the upper outer bulwarks blue. As can be seen in the next photo I also painted the lower stern counter blue The gunwales had been cut to size and painted black. I used Titebond original to secure the gunwales. I applied a thin coat of Titebond to the top edge of the bulwarks. I also brushed a thin coat on the underside of the gunwales. Each gunwale was fitted in turn and I did my best to ensure they sat centrally with a slight overhang on both the inner and outer bulwark edges. Next I pained the stern transom pattern, blue on the outer edge and red / black on the inner edge. Outer edge Inner edge Moving swiftly on the hull decorations were cleaned in acetone and then soapy water. I then sprayed two thin coats of etch primer (Jenolite) Once the primer had dried I painted the parts. I used copper paint for the horseshoe, fishplate and draught markings and gold paint for the hull decorations as I think it will look better the yellow ochre. PE parts painted and left to dry Fishplate and horseshoe painted copper Finally I painted all the other hull parts, such as the catheads and timber heads.

- 160 replies
-
- 3
-
-
- Alert
- vanguard models
- (and 1 more)
-
Thanks, I think the tape guidelines really helped with this task to get the neat finish.
-
Uwe Many thanks. It turned out to be a much easier job than I was expecting. The key I have always found is preparation.
-
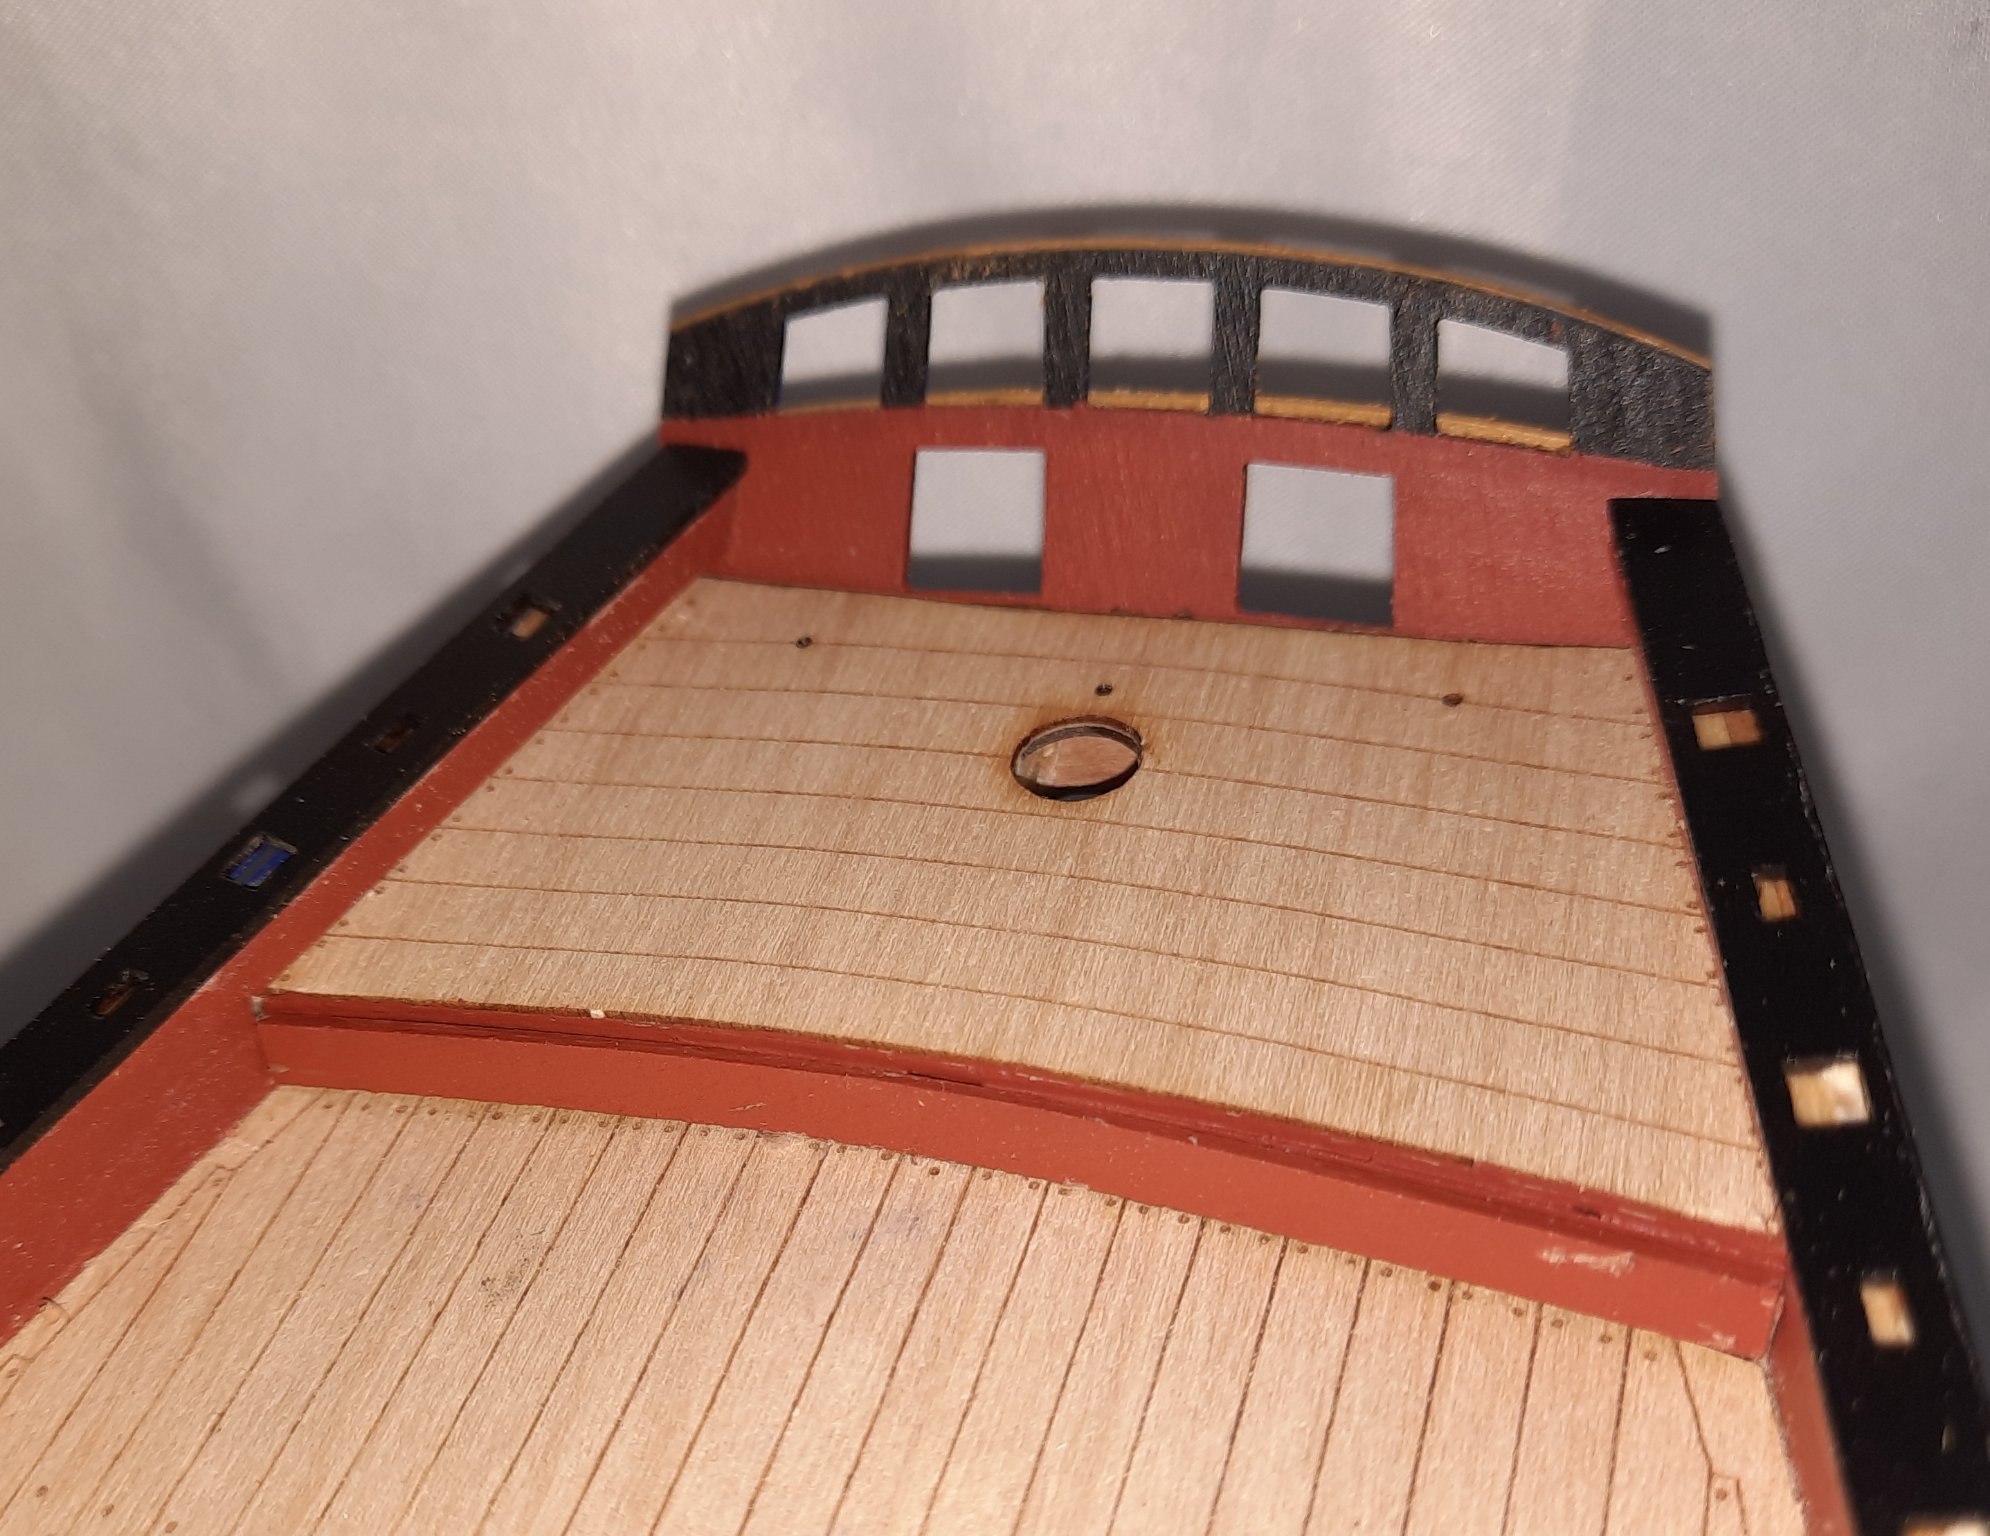
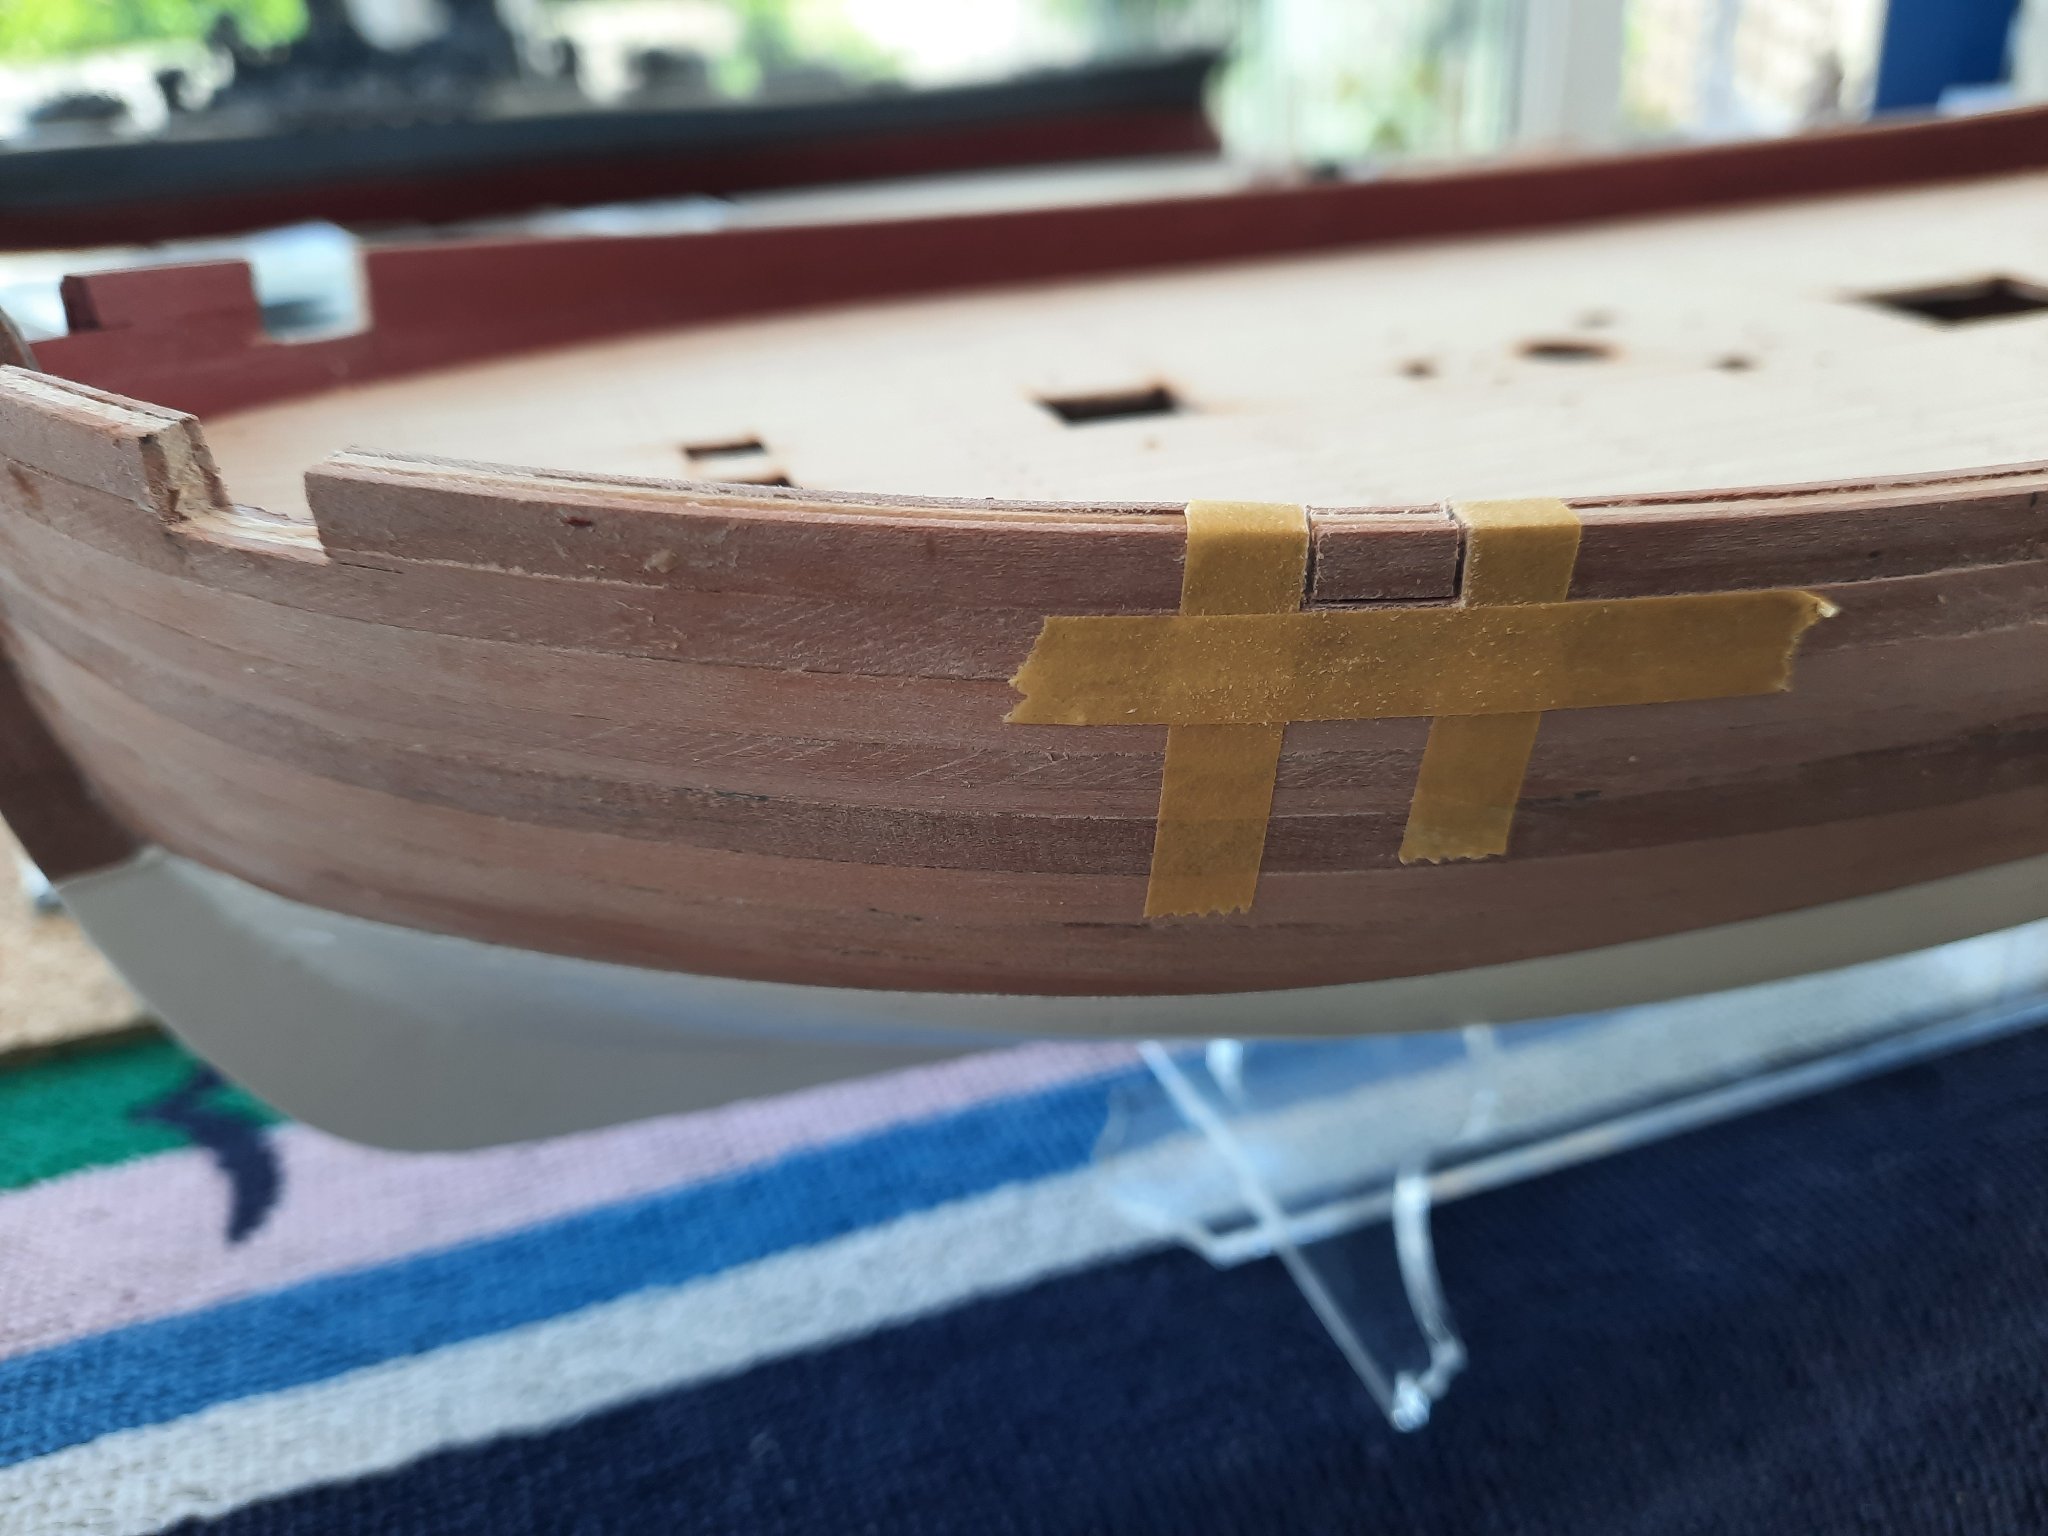
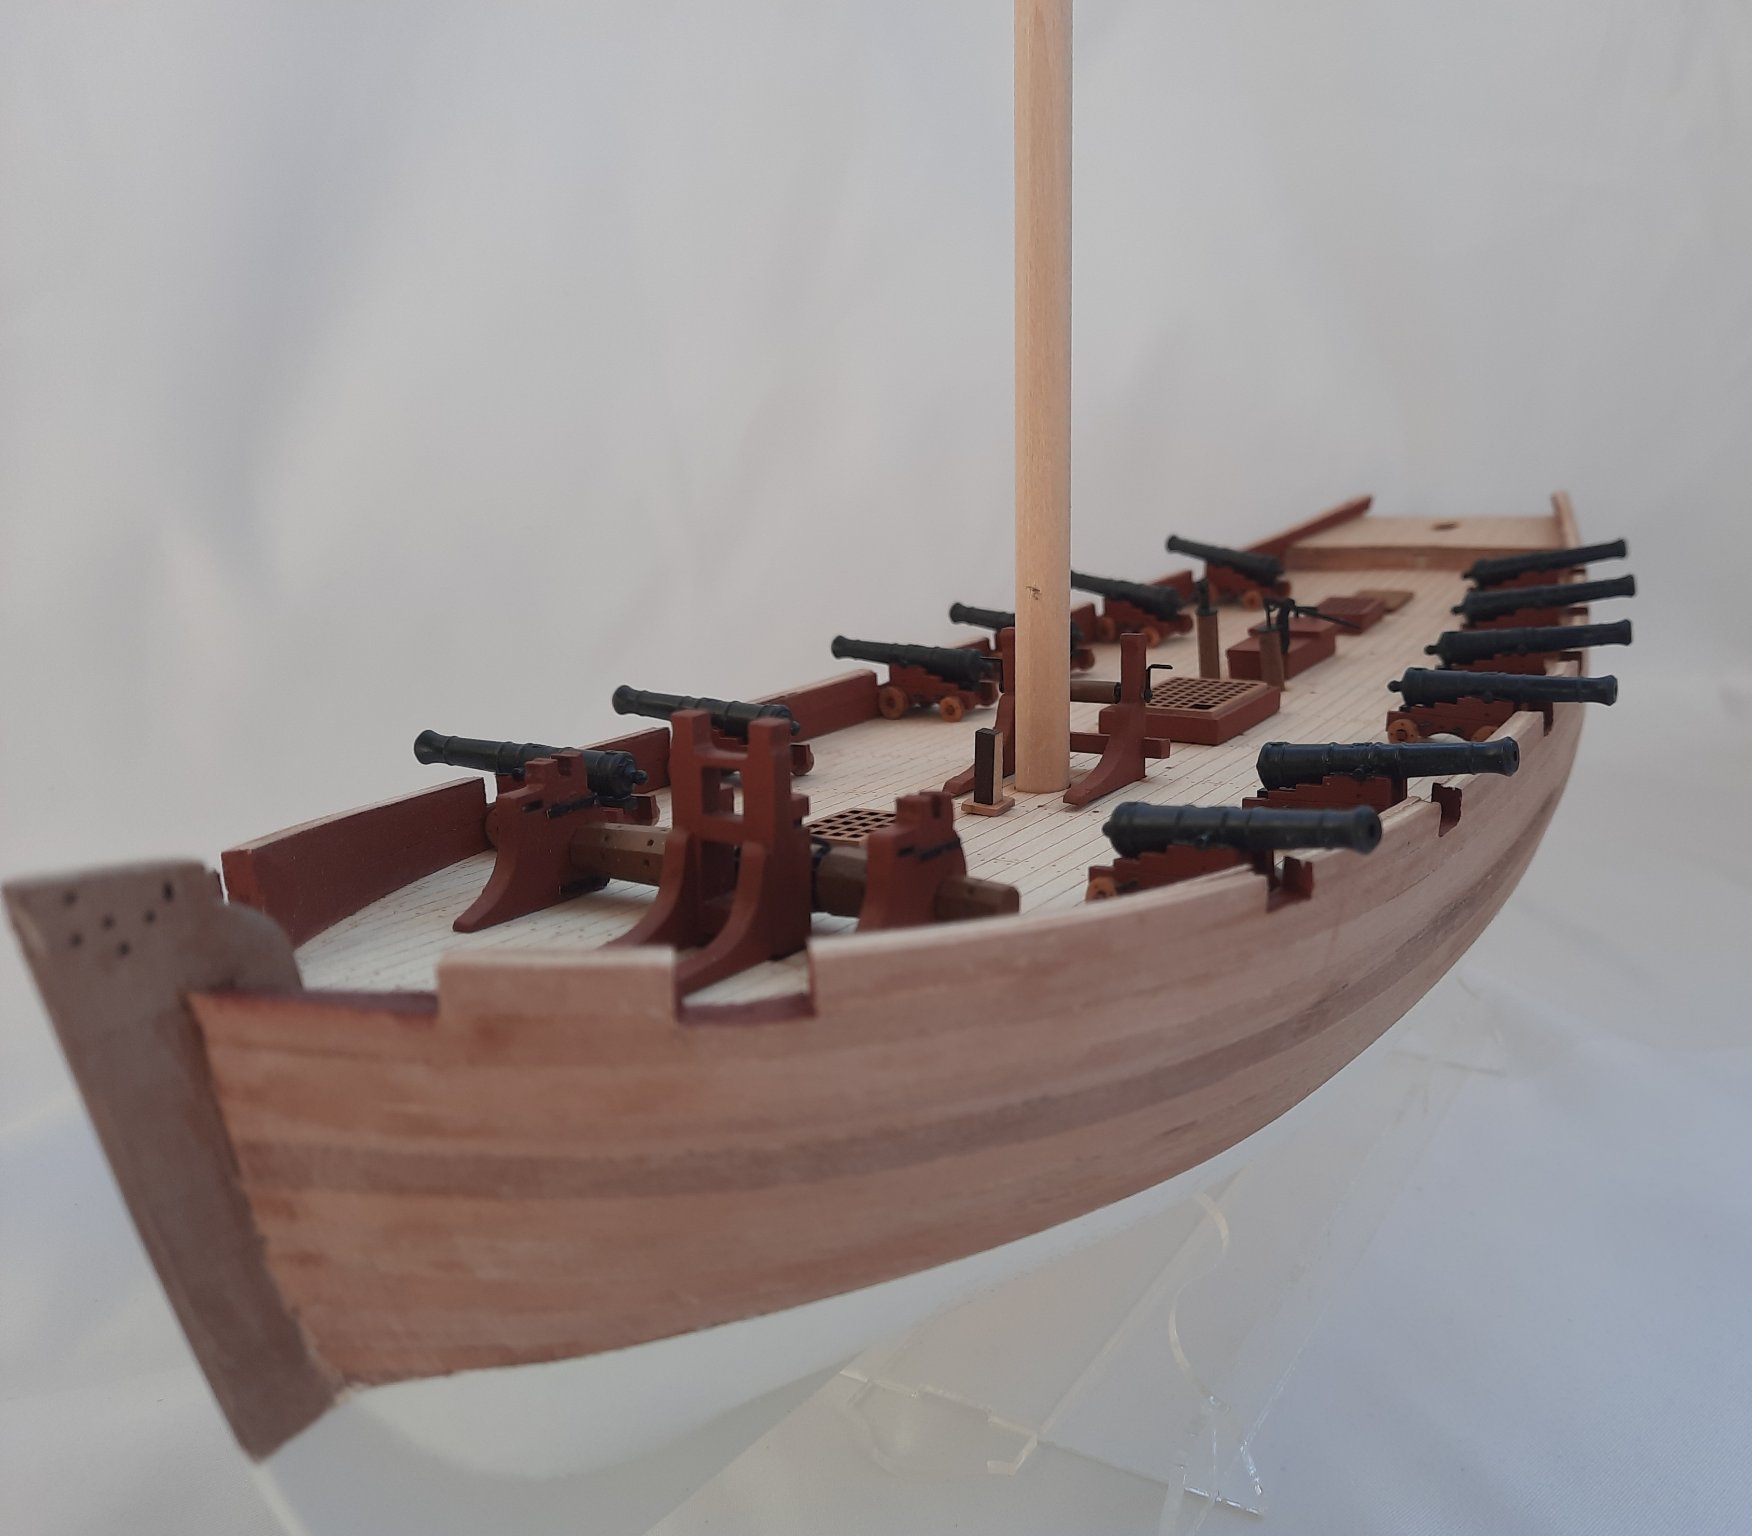
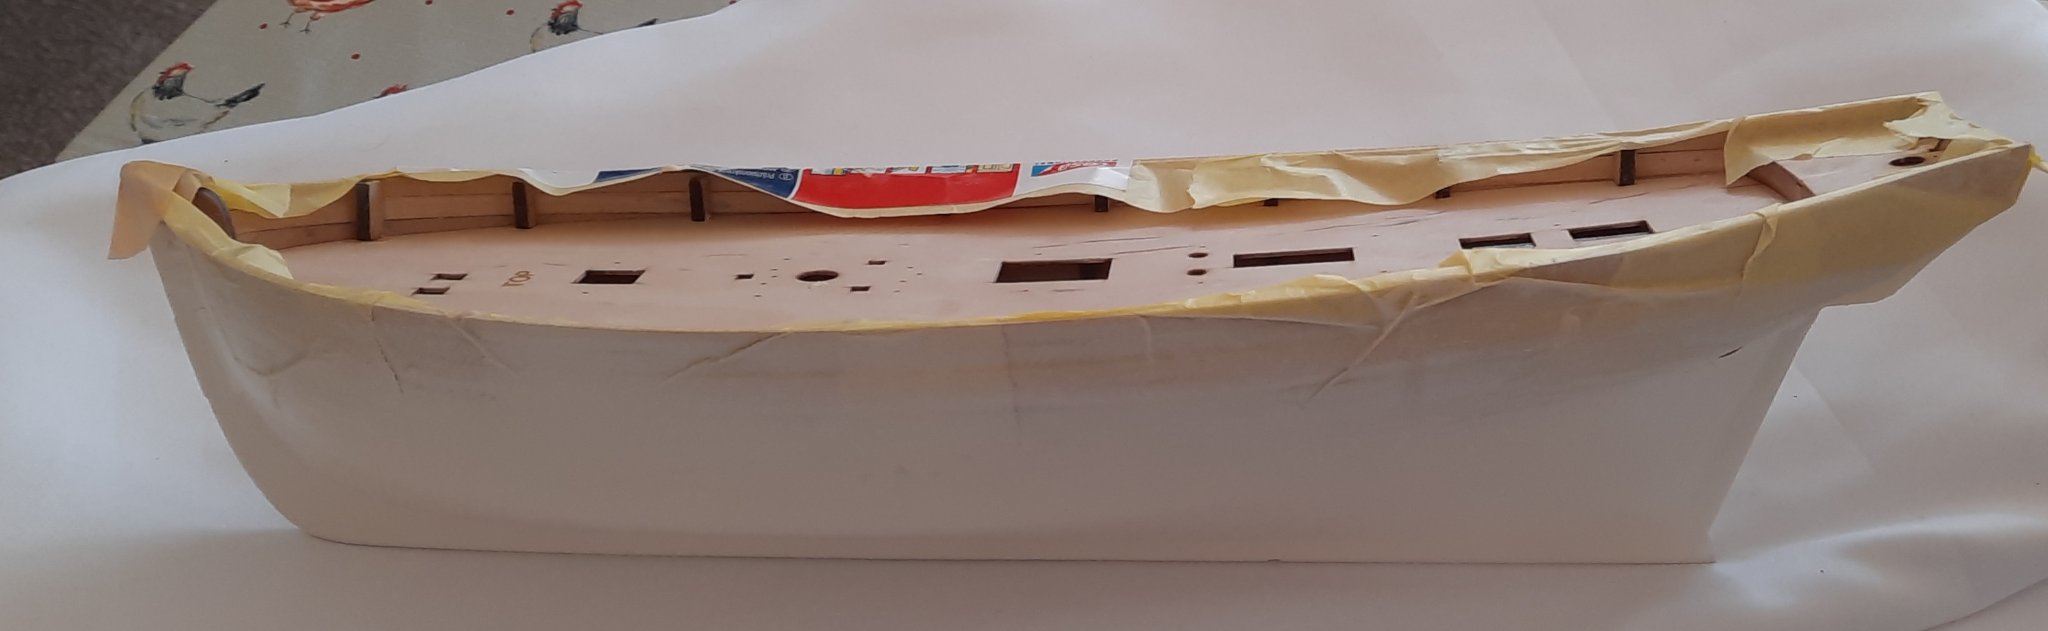
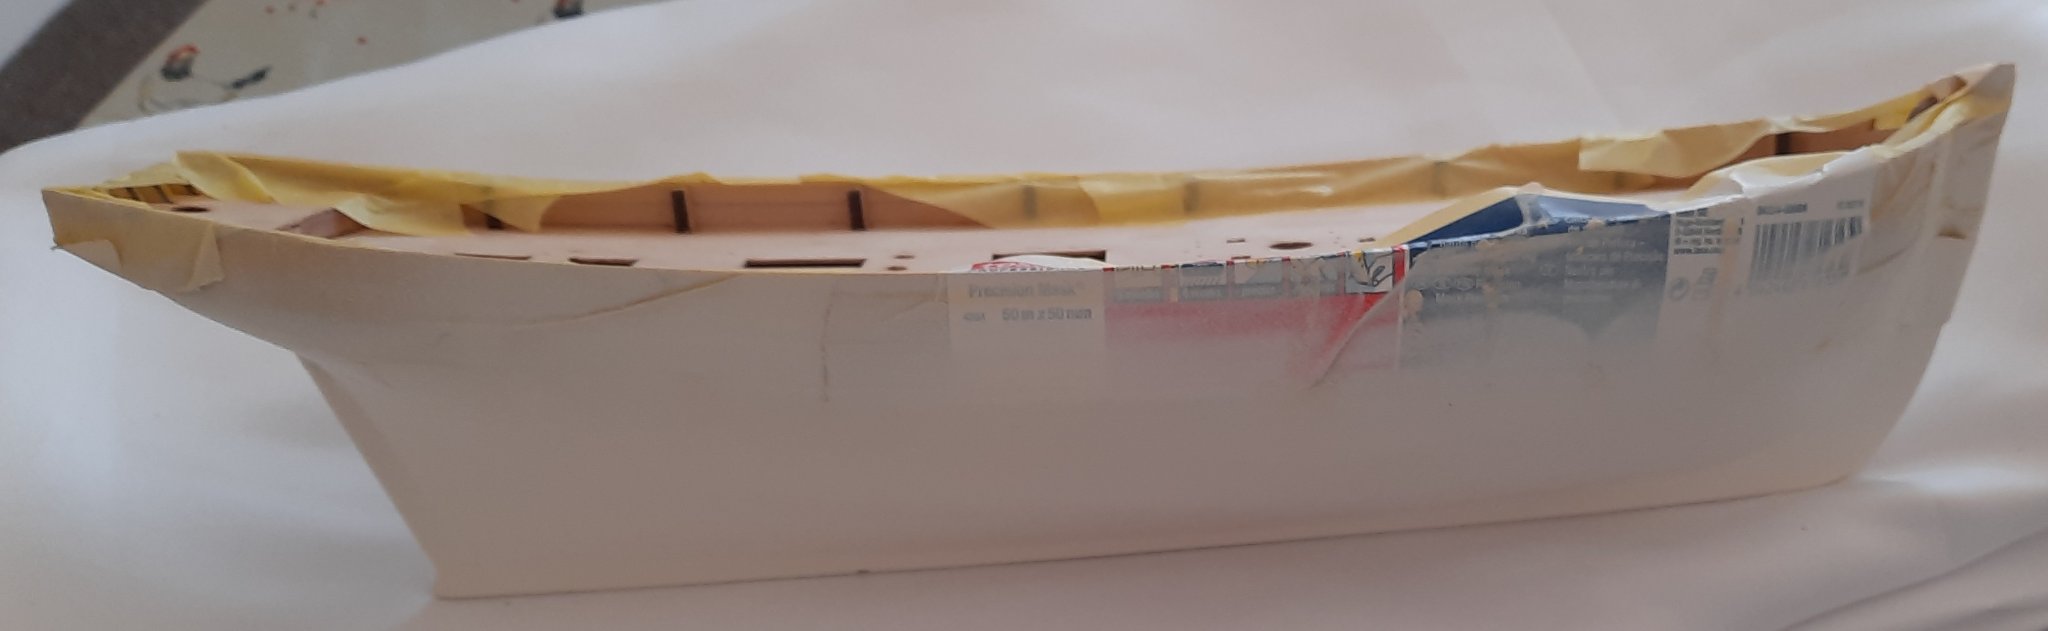
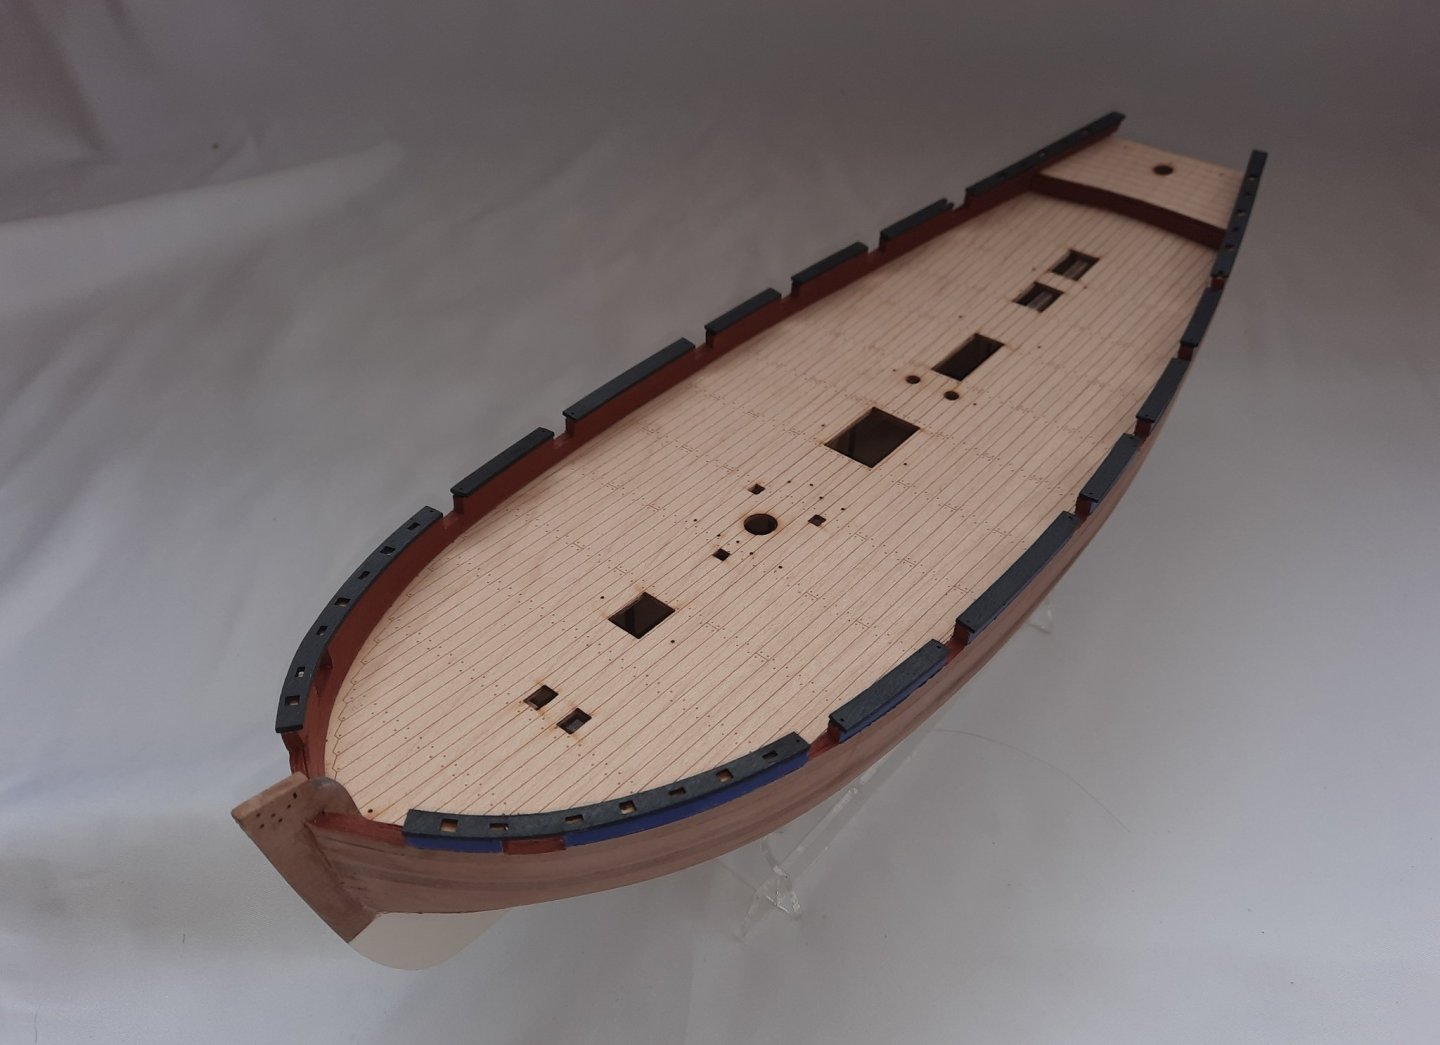
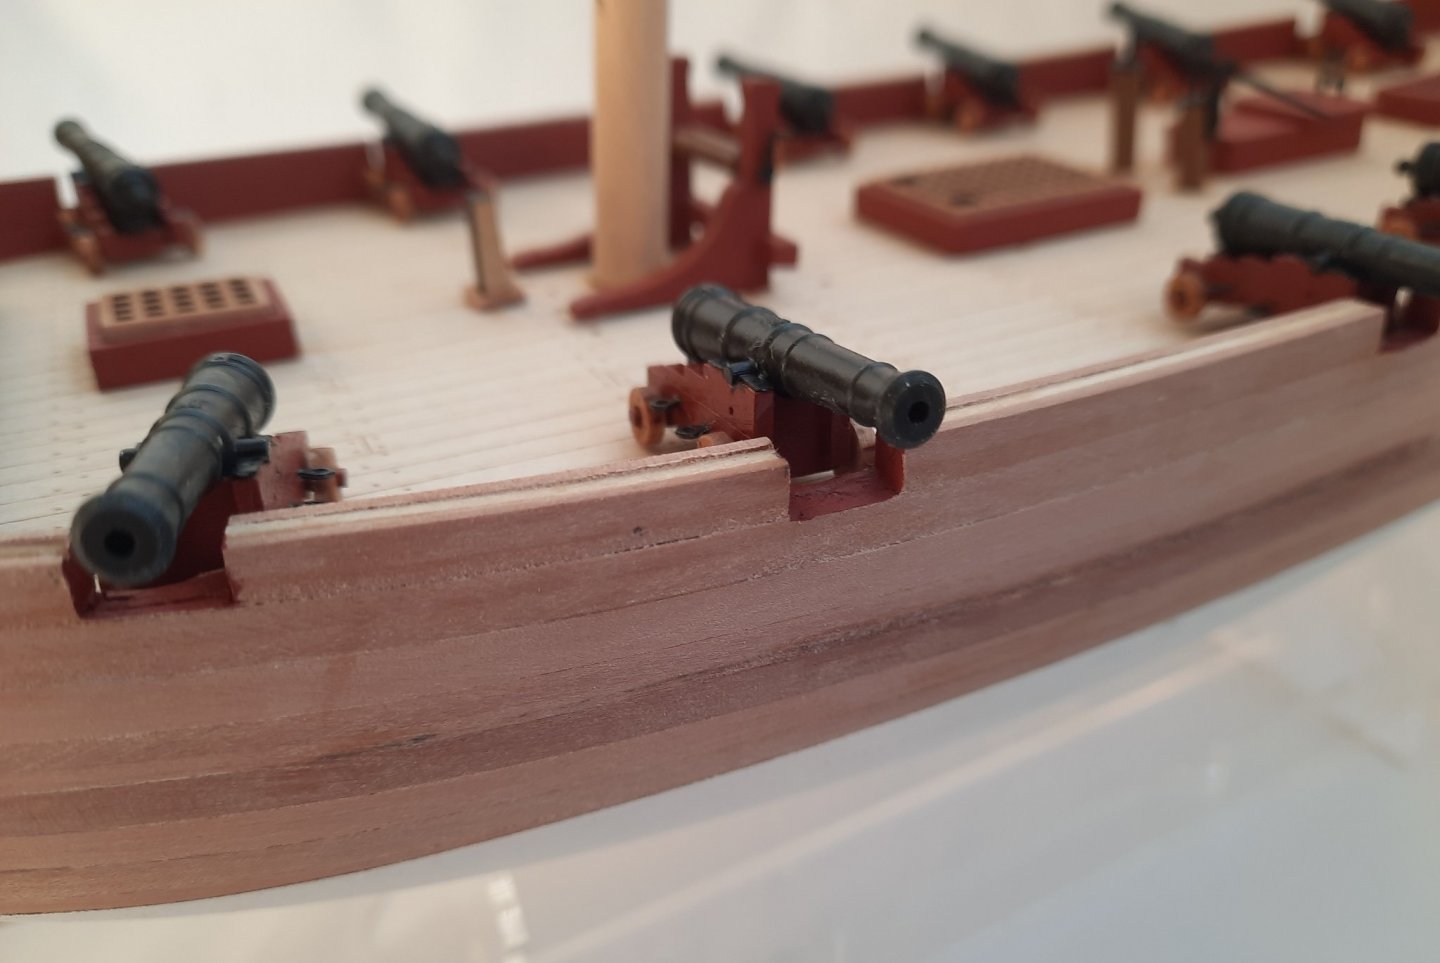
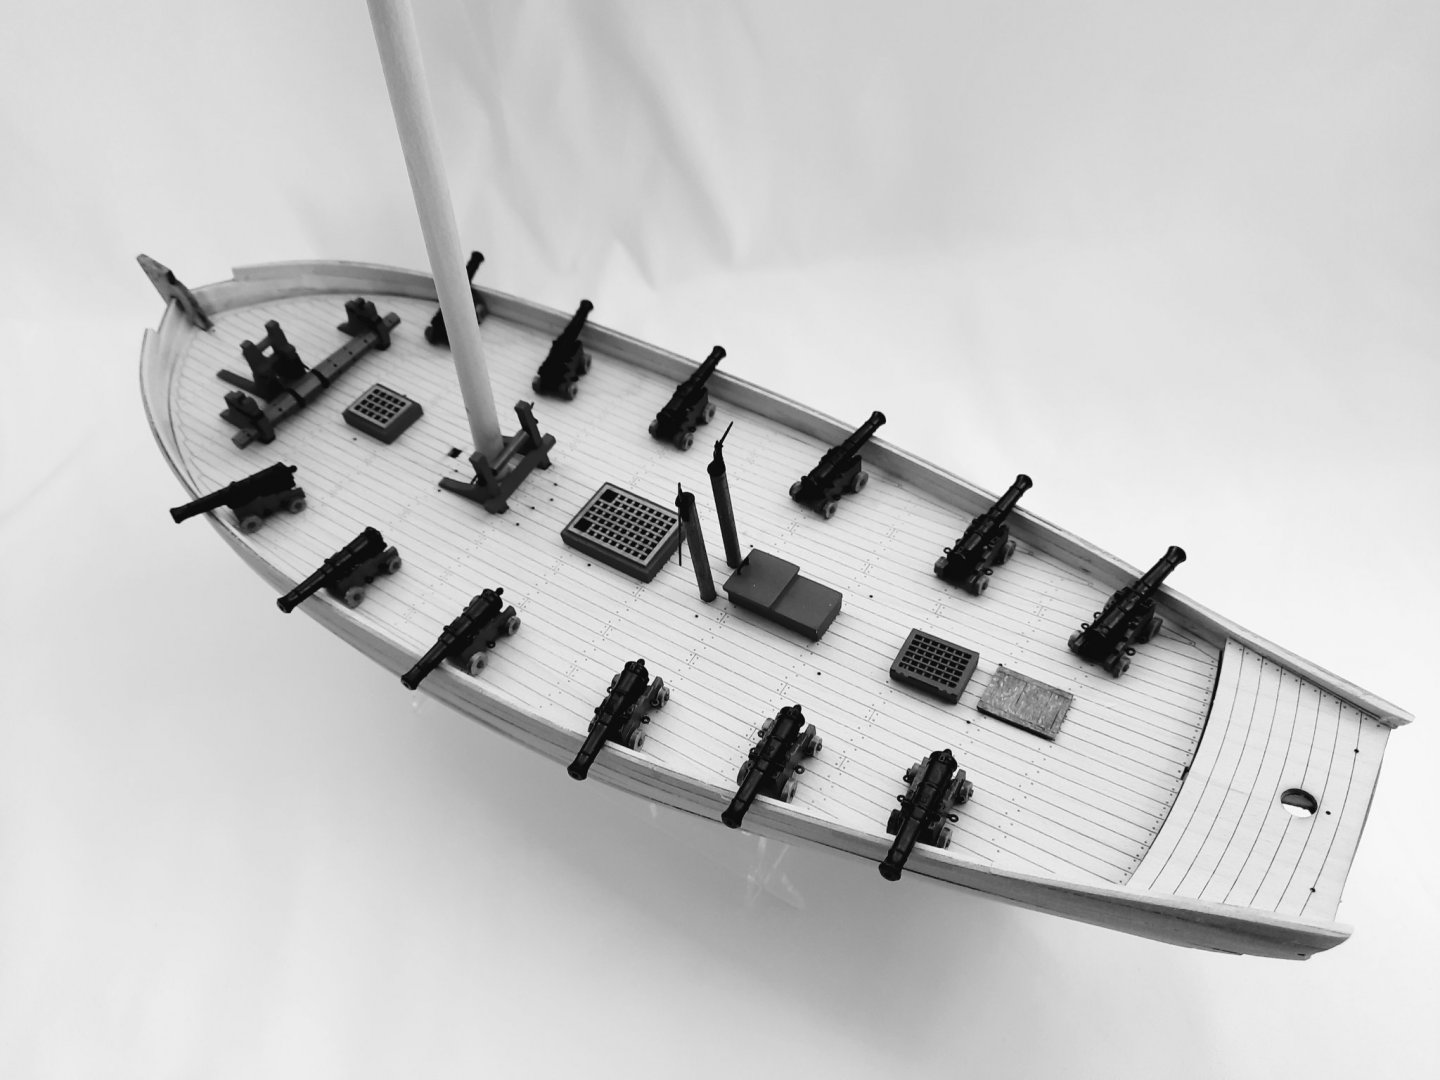
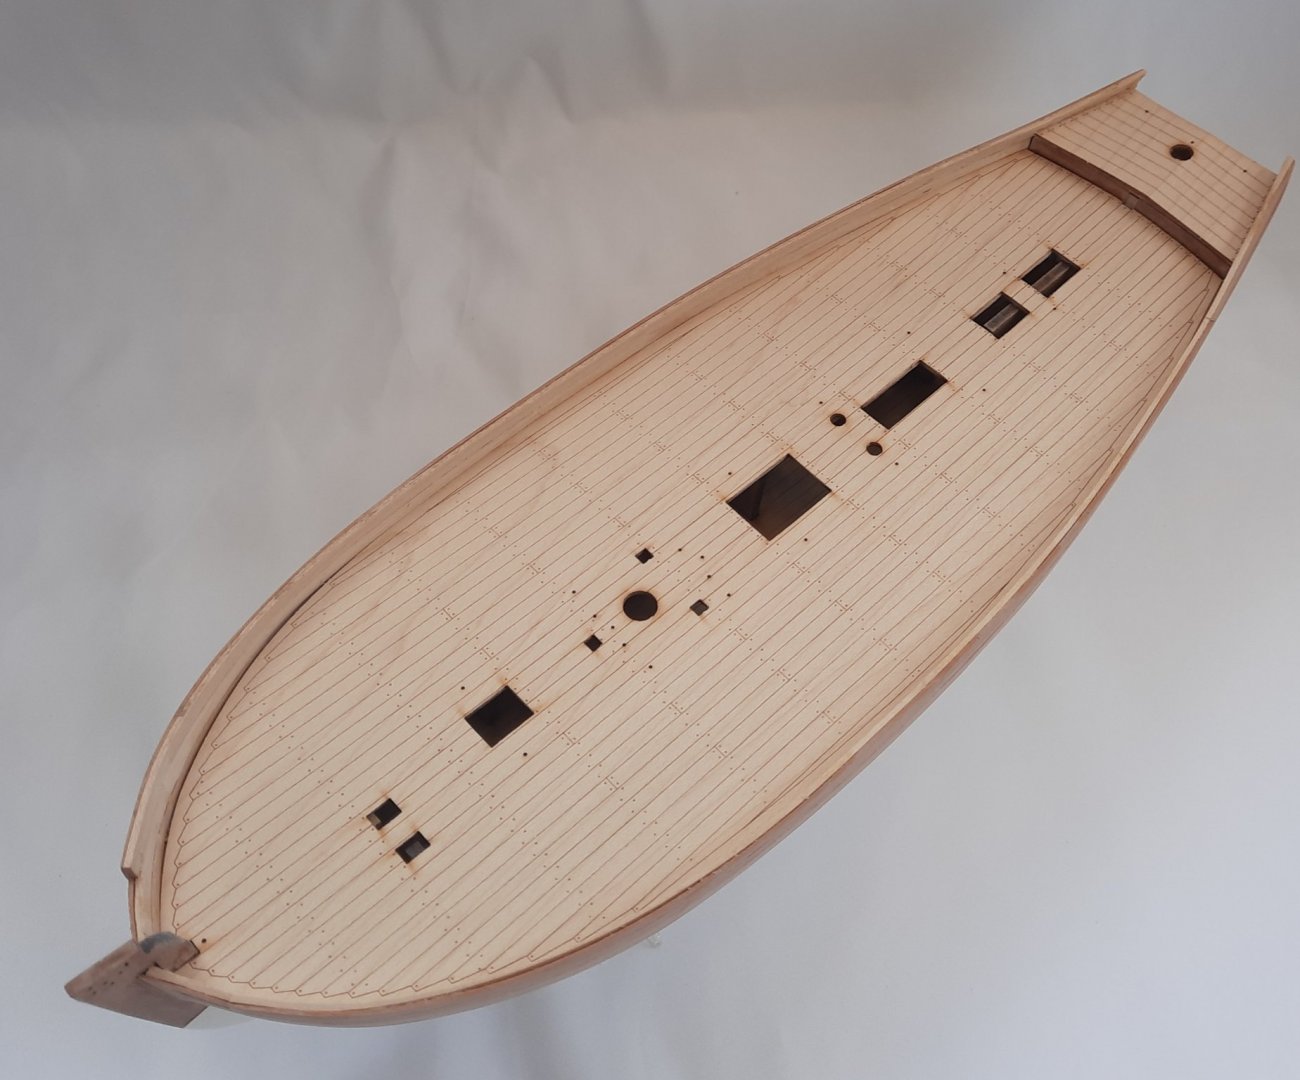
Sometimes when building these models you get a nice surprise. Today I added the gun port cut-outs. This was a task I was dreading for many reasons but it turned out to be a very simple and trouble free task. The gunwales were marked with the position of the gun ports. It did not take me long to mark these positions on the hull. Next the gun wales were cut to size. I then marked out the position of the gun port using some tape. The gun wales were used to double check the position of the taped area. Once I was happy I used a razor saw to make both vertical cuts. With the exception of the bow cut-out, all gun ports were cut to a depth of 4mm, which matched the width of the top plank (both for inner and outer bulwarks). I used a craft knife to make the vertical cut along the joint line between the first two planks. Therefore it took very little effort to make a clean cut and the resultant gun port opening required very little sanding. The picture below shows a taped gun port during the cutting process. Once all the gun ports had been cut out I painted all the edges ochre red. I thought it would be good to dry fit all the deck items for the photoshoot. This is a close up of a gun port I like this picture of the deck items A different view of the deck items I have also painted the gunwales black so they are ready to be glued in position in the morning.


- 160 replies
-
- 7
-
-
- Alert
- vanguard models
- (and 1 more)
-
Thanks Uwe for your kind comments. With regard to the gun ports I plan to use my razor saw to cut the depth. I will probably then use a craft knife to remove the material. With the exception of the first gun port which is 6mm deep all the others are 4mm deep which is same depth as the top plank so it should be an easy task.
-
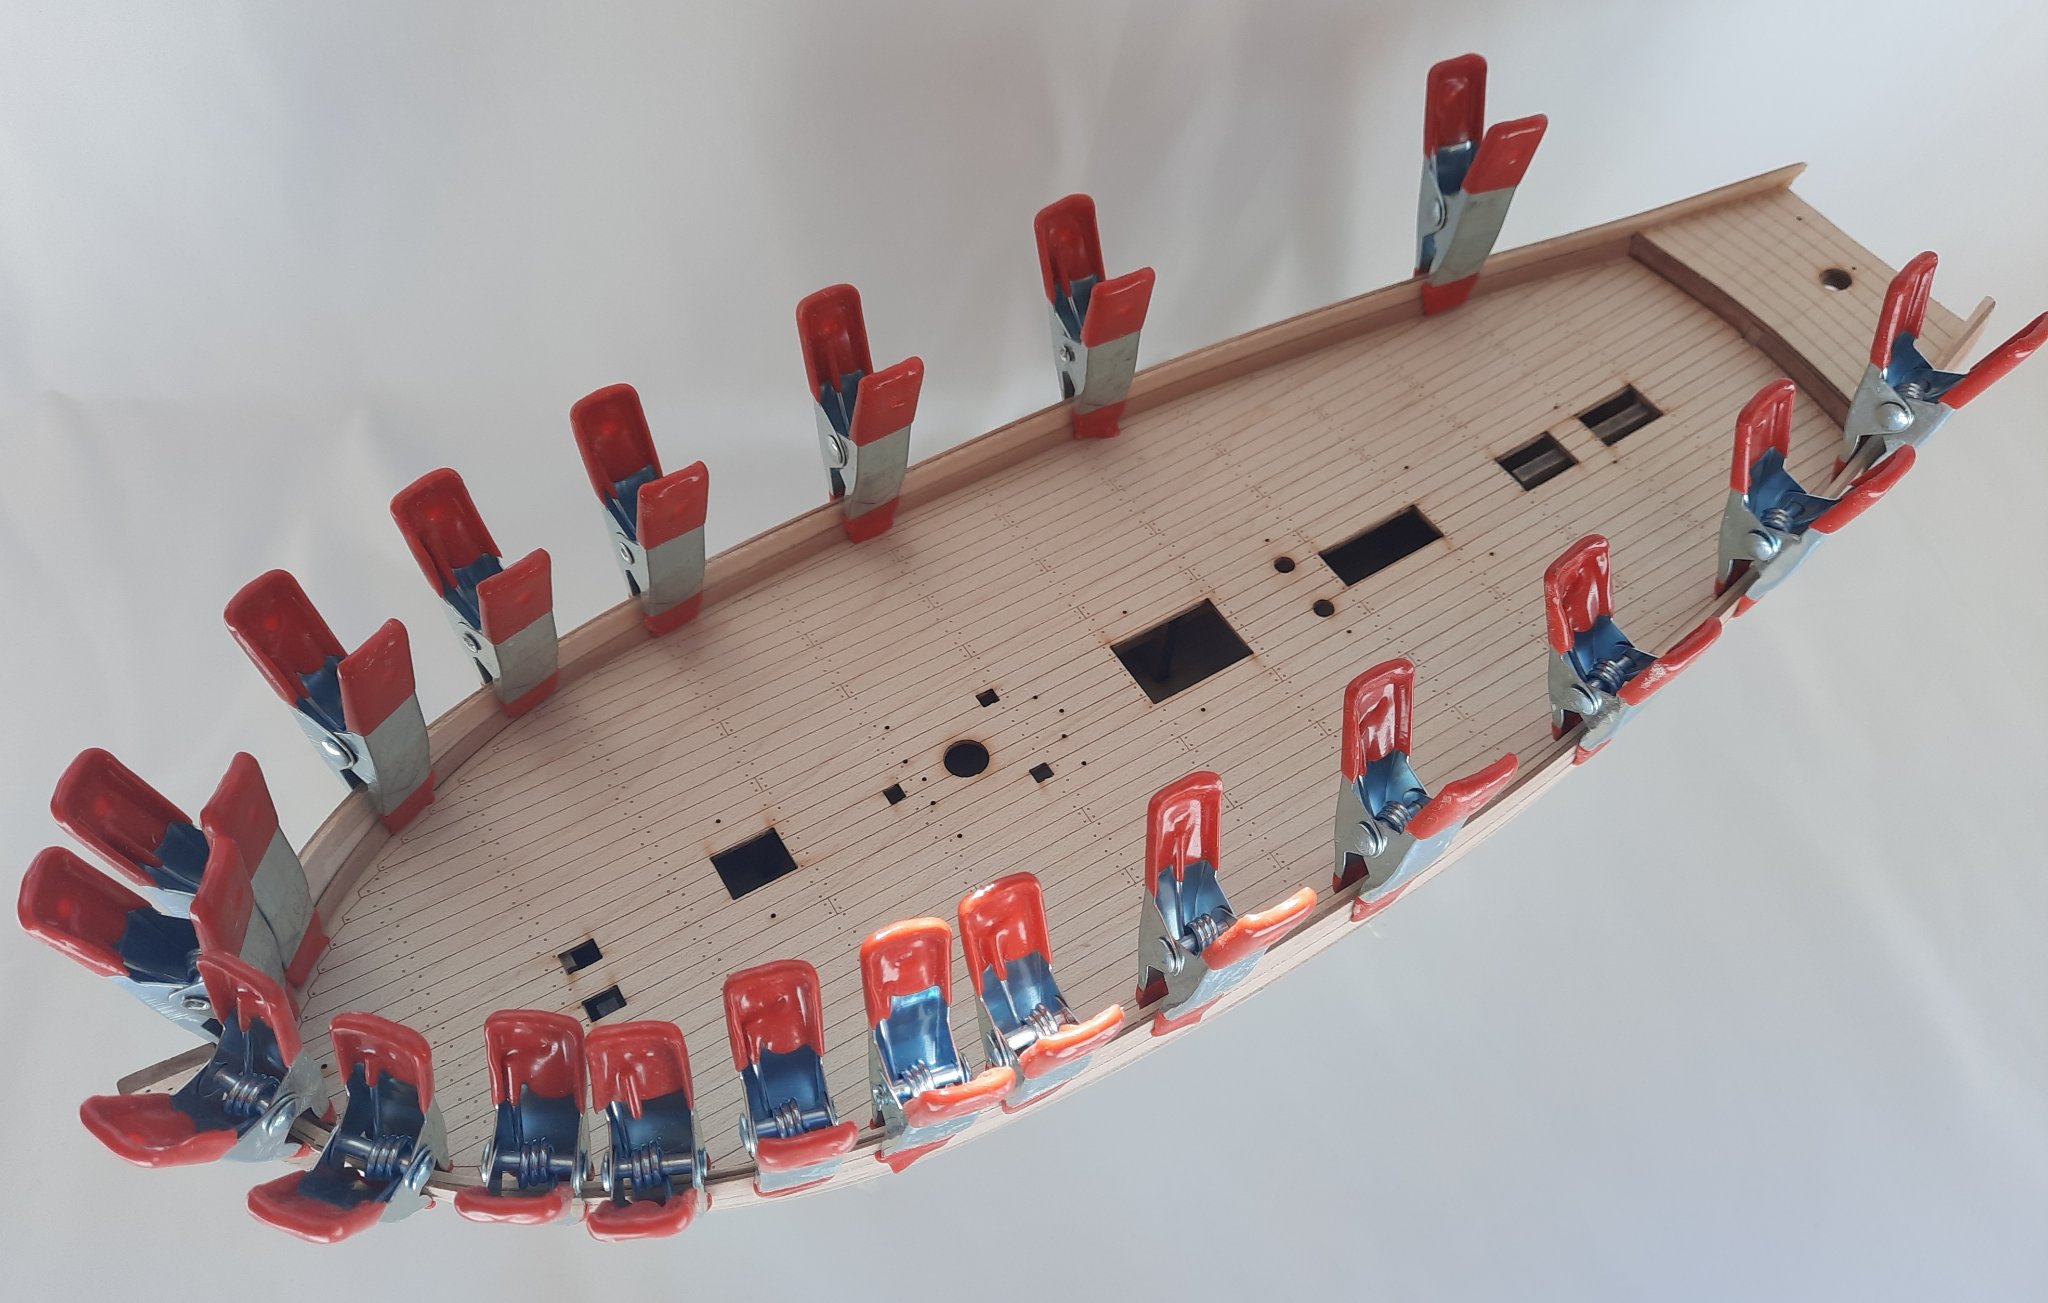
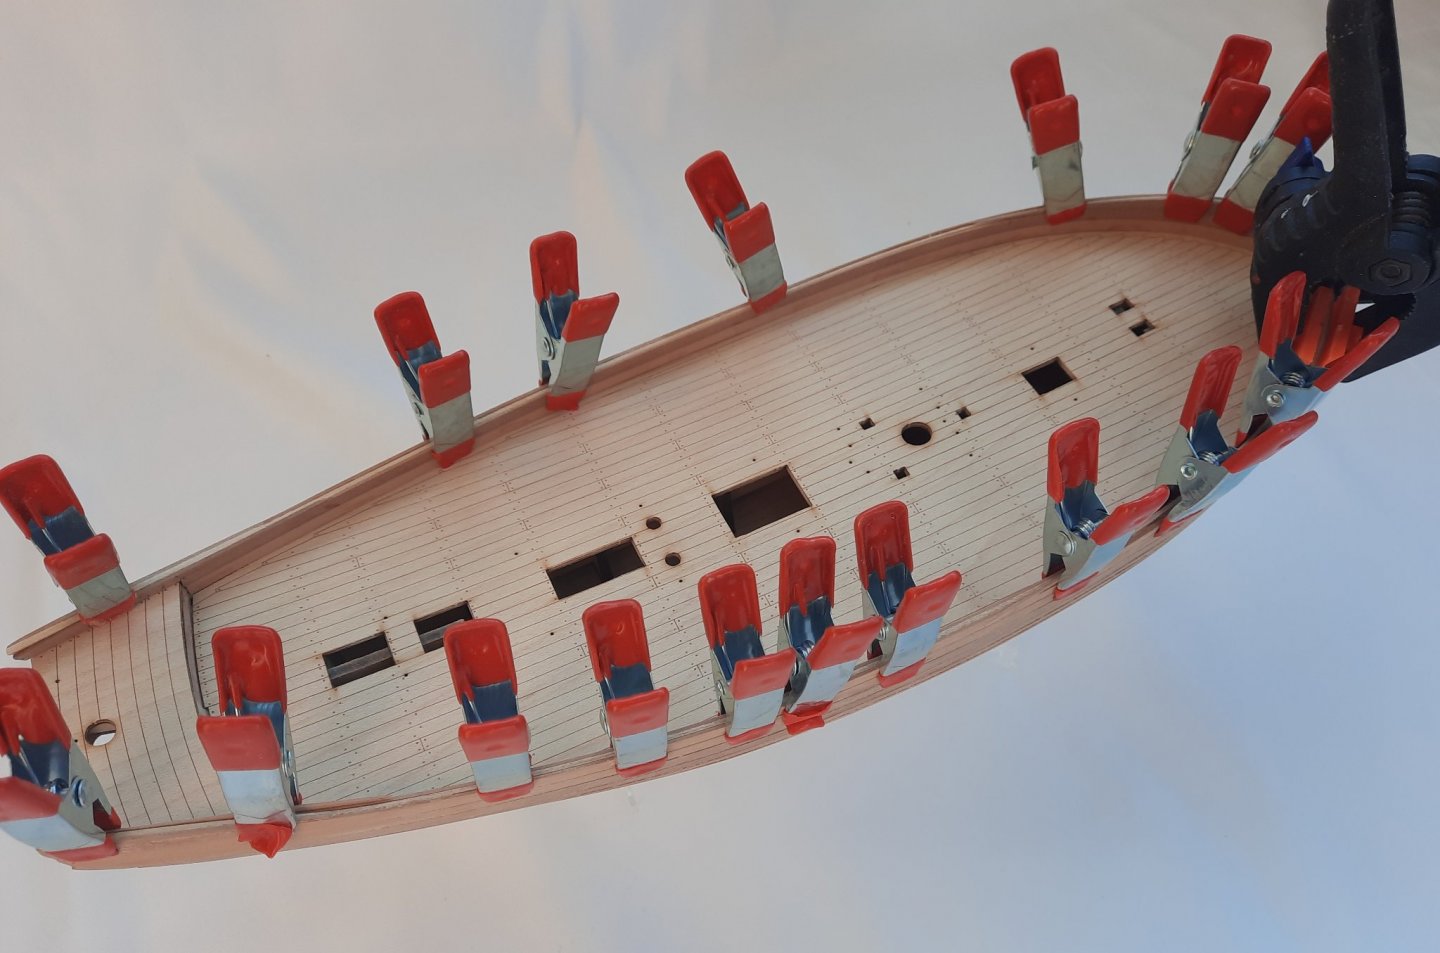
I have made more progress this afternoon and evening with adding the inner bulwark planking. The left and right lower planks were dipped in water for a few seconds then they were clamped in position. I then clamped the second upper dampened plank in position. Finally I added the tapered bow and stern third planks. Once the planks had dried, retaining the curve, I applied a very thin coat of polyurethane varnish to each plank and then, once that coating had dried, I painted the planks with two coats of red ochre. Once the paint had dried, using Titebond Original, the planks were glued in place. I now just need to trim away any excess plank material along the top edge and to plank the front face of the step between the lower and upper deck. The next job will be to cut the gun port openings


- 160 replies
-
- 3
-
-
- Alert
- vanguard models
- (and 1 more)
-
Thanks Derek, I took my time with plenty of sanding (and filling) between paint layers. I am really pleased with the end result.
-
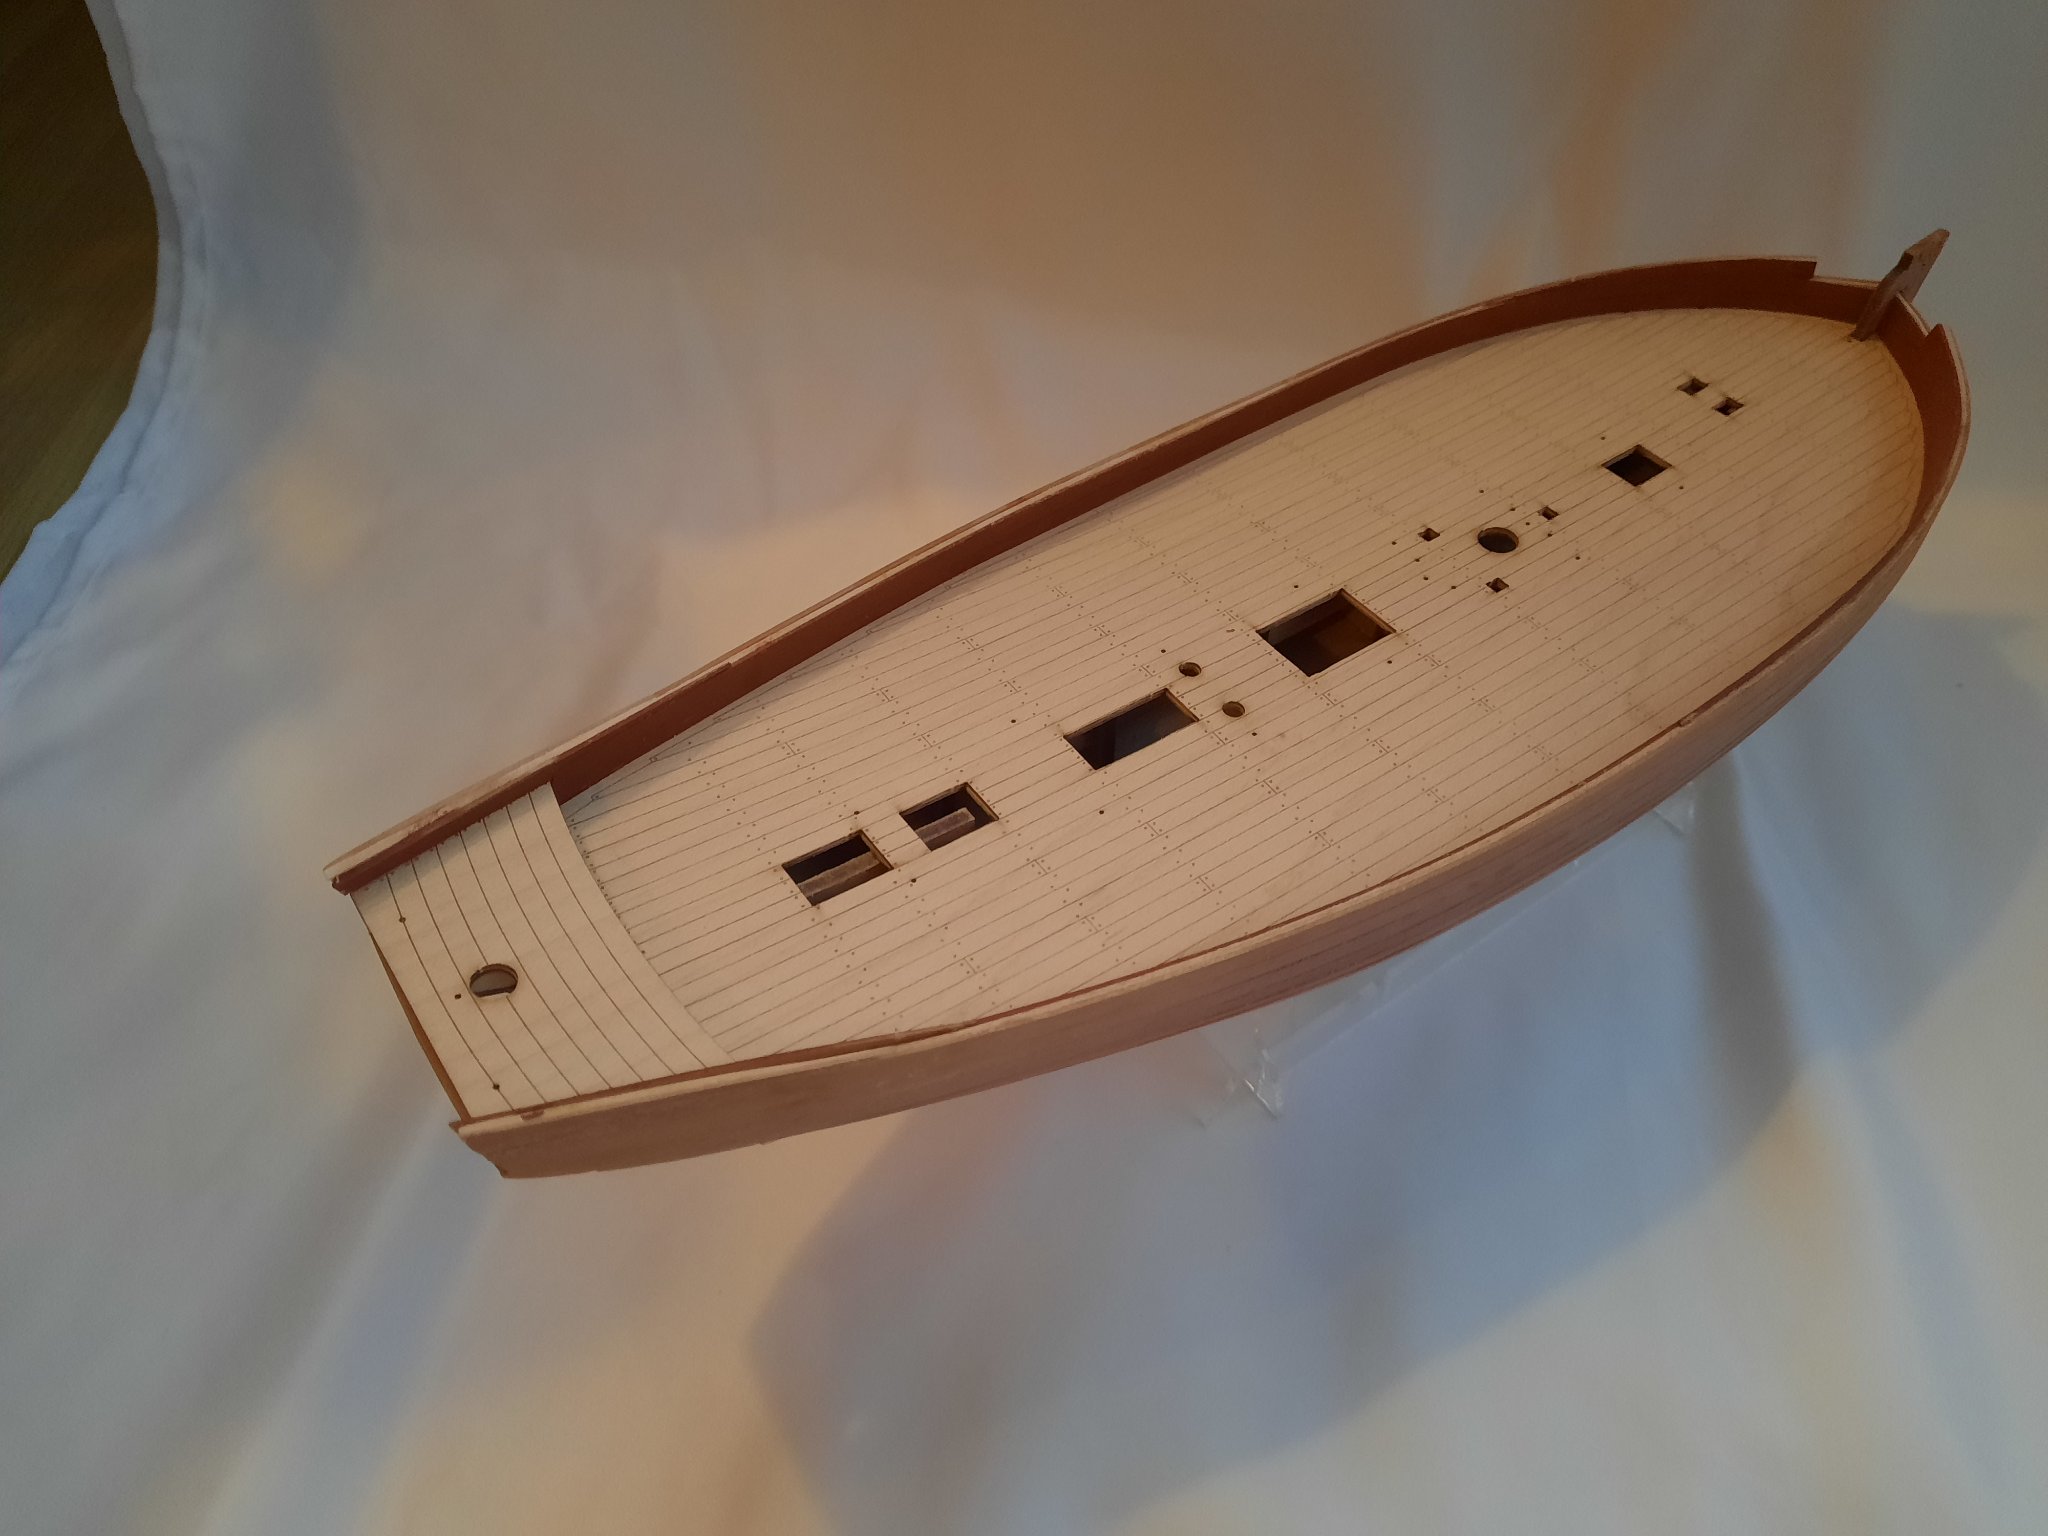
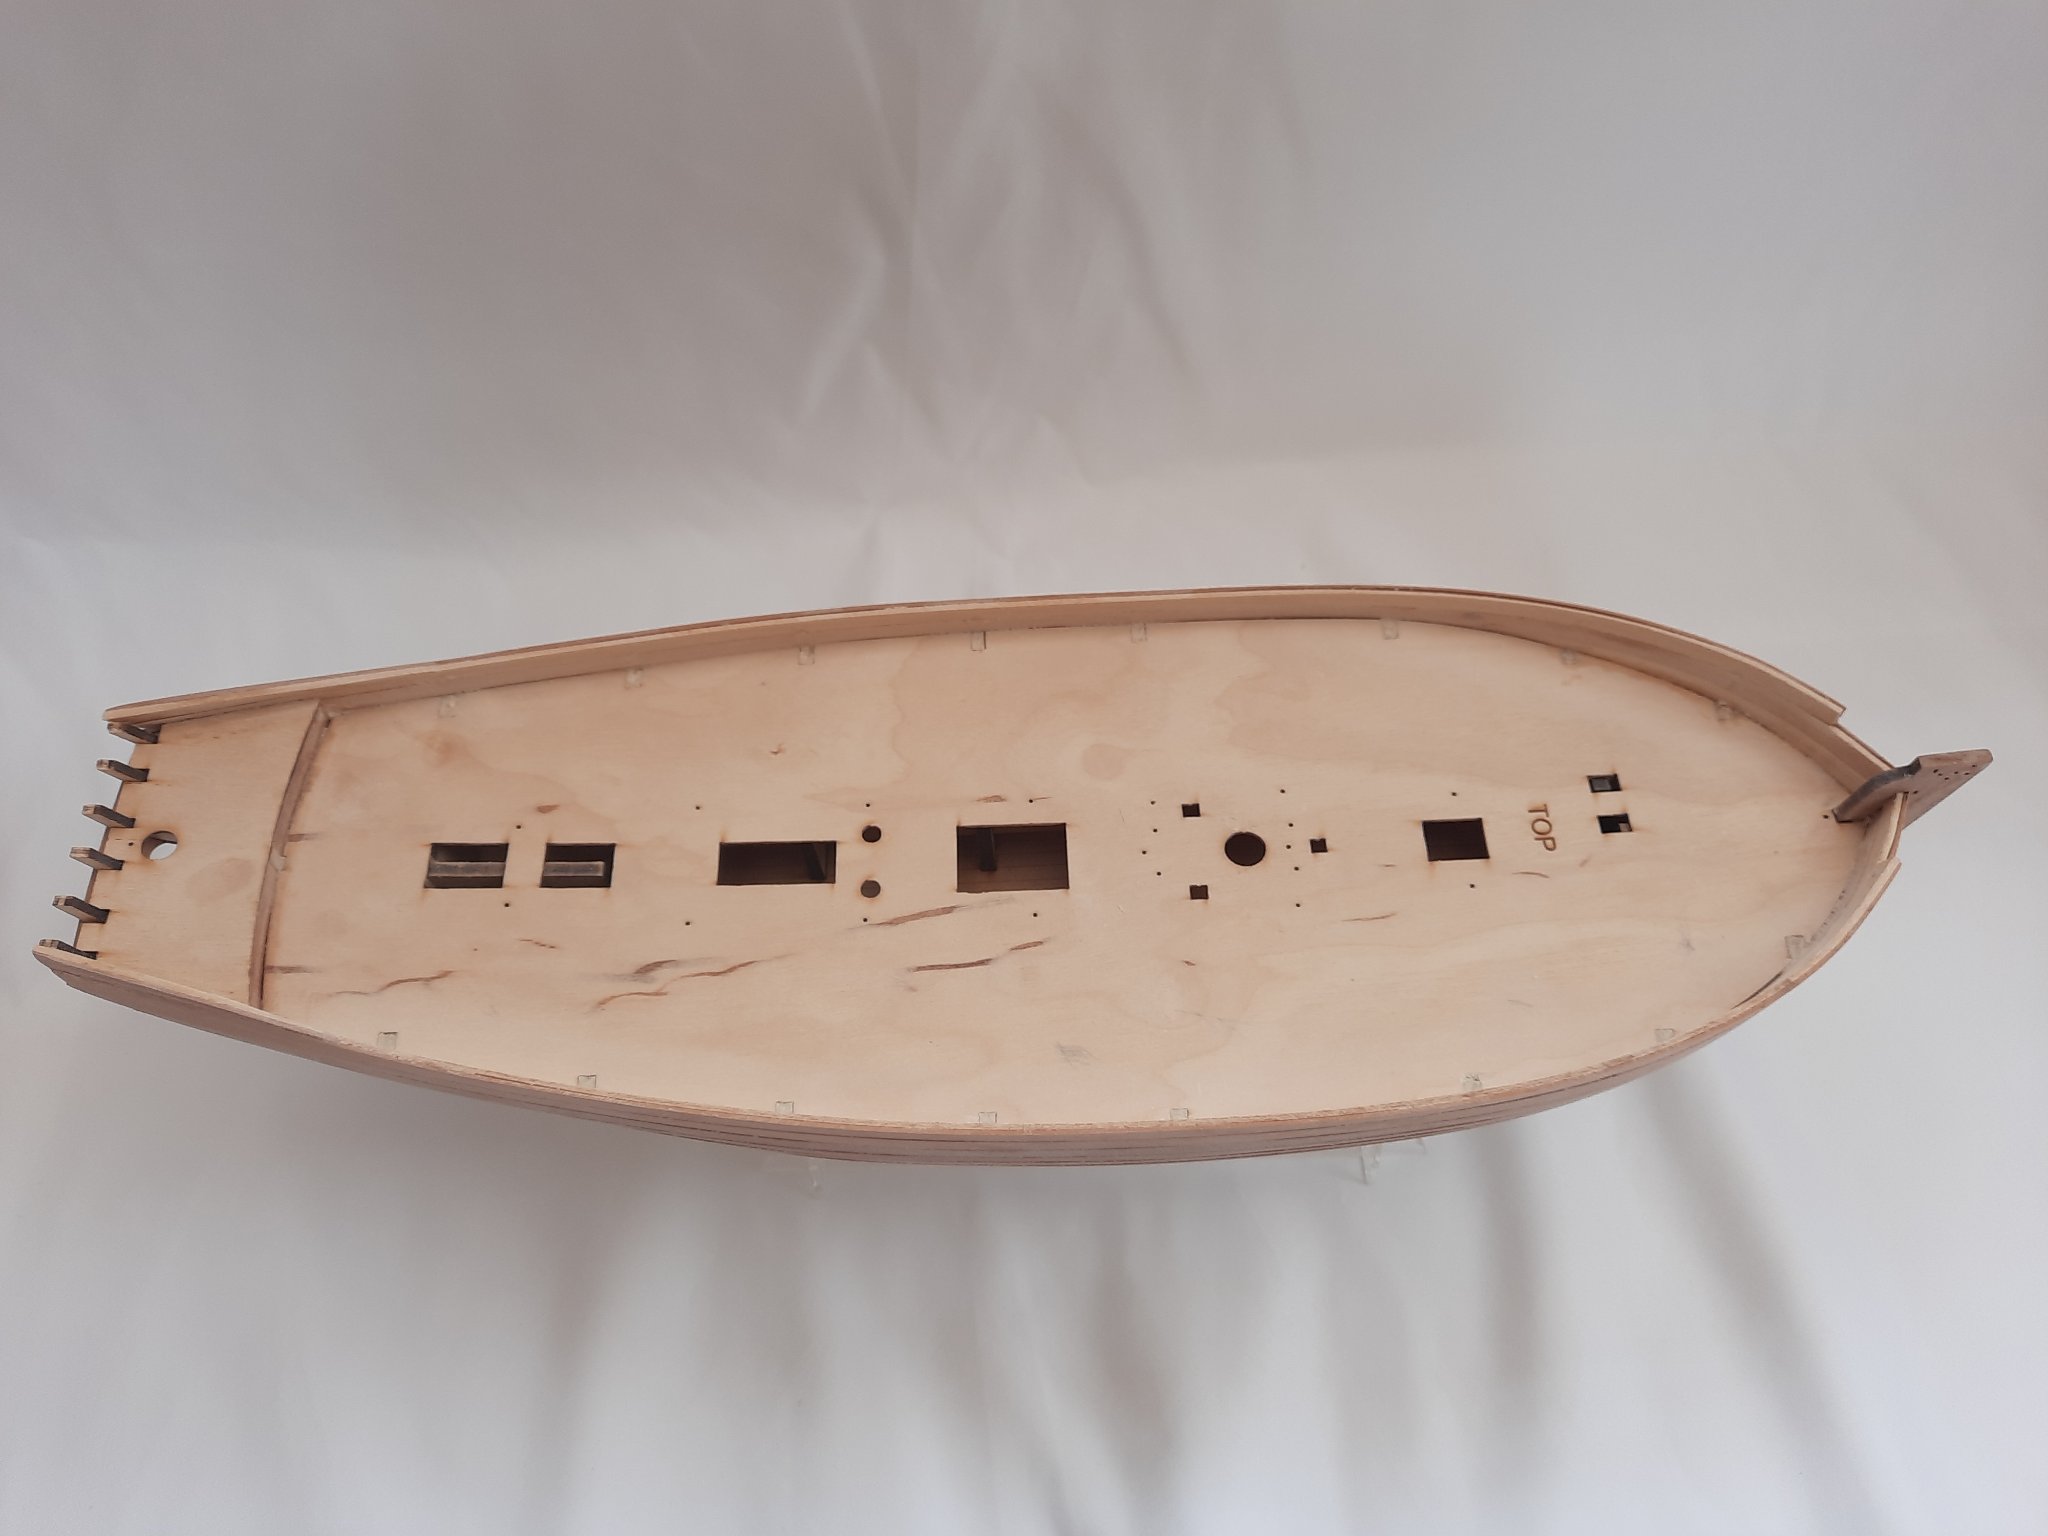
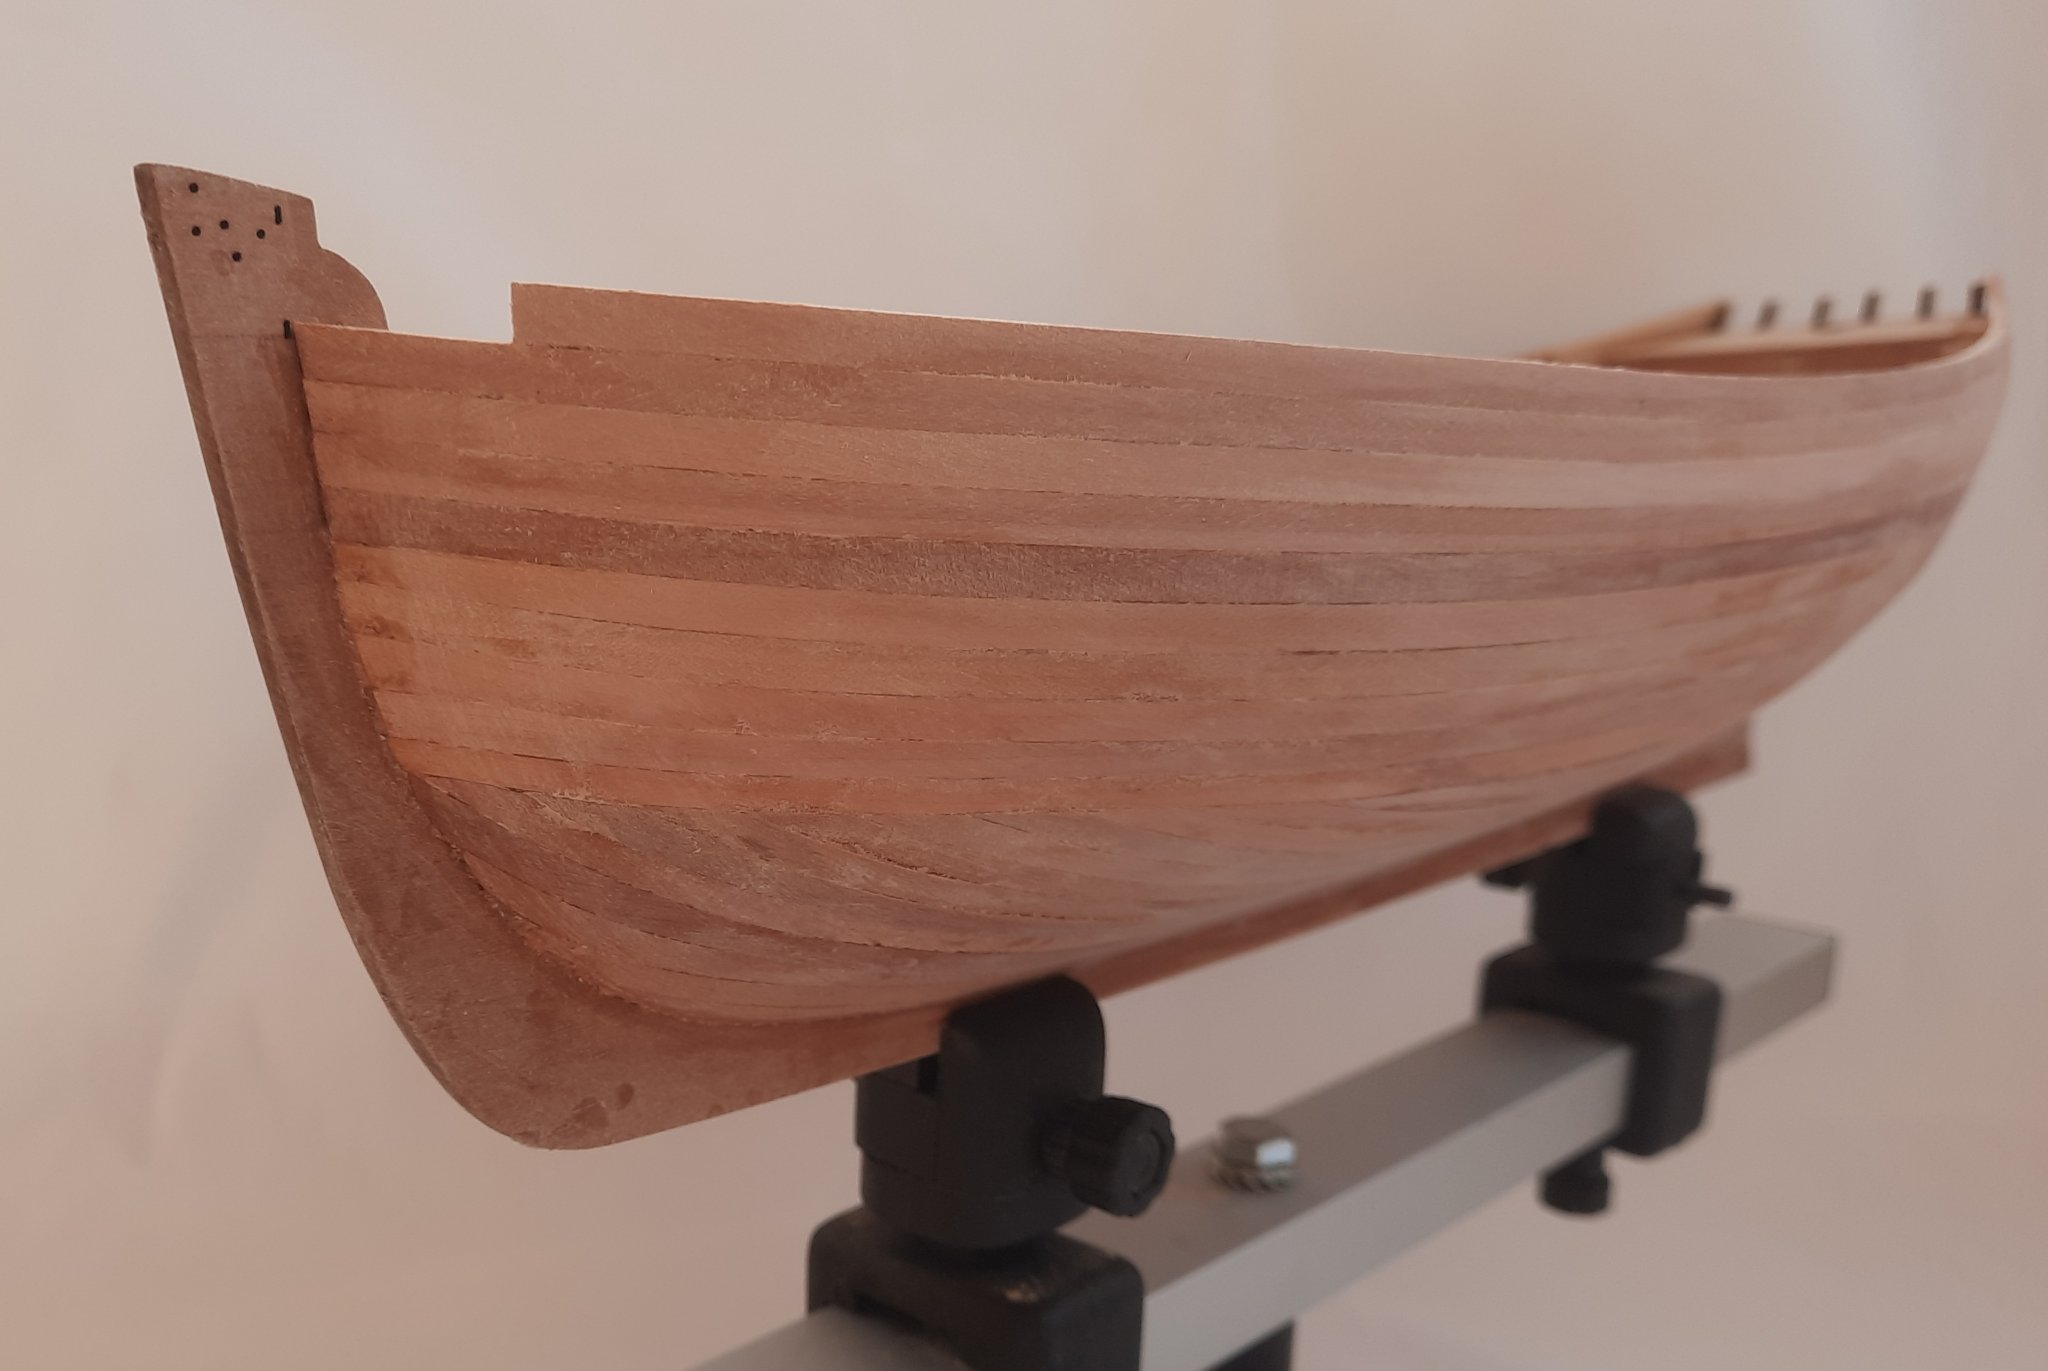
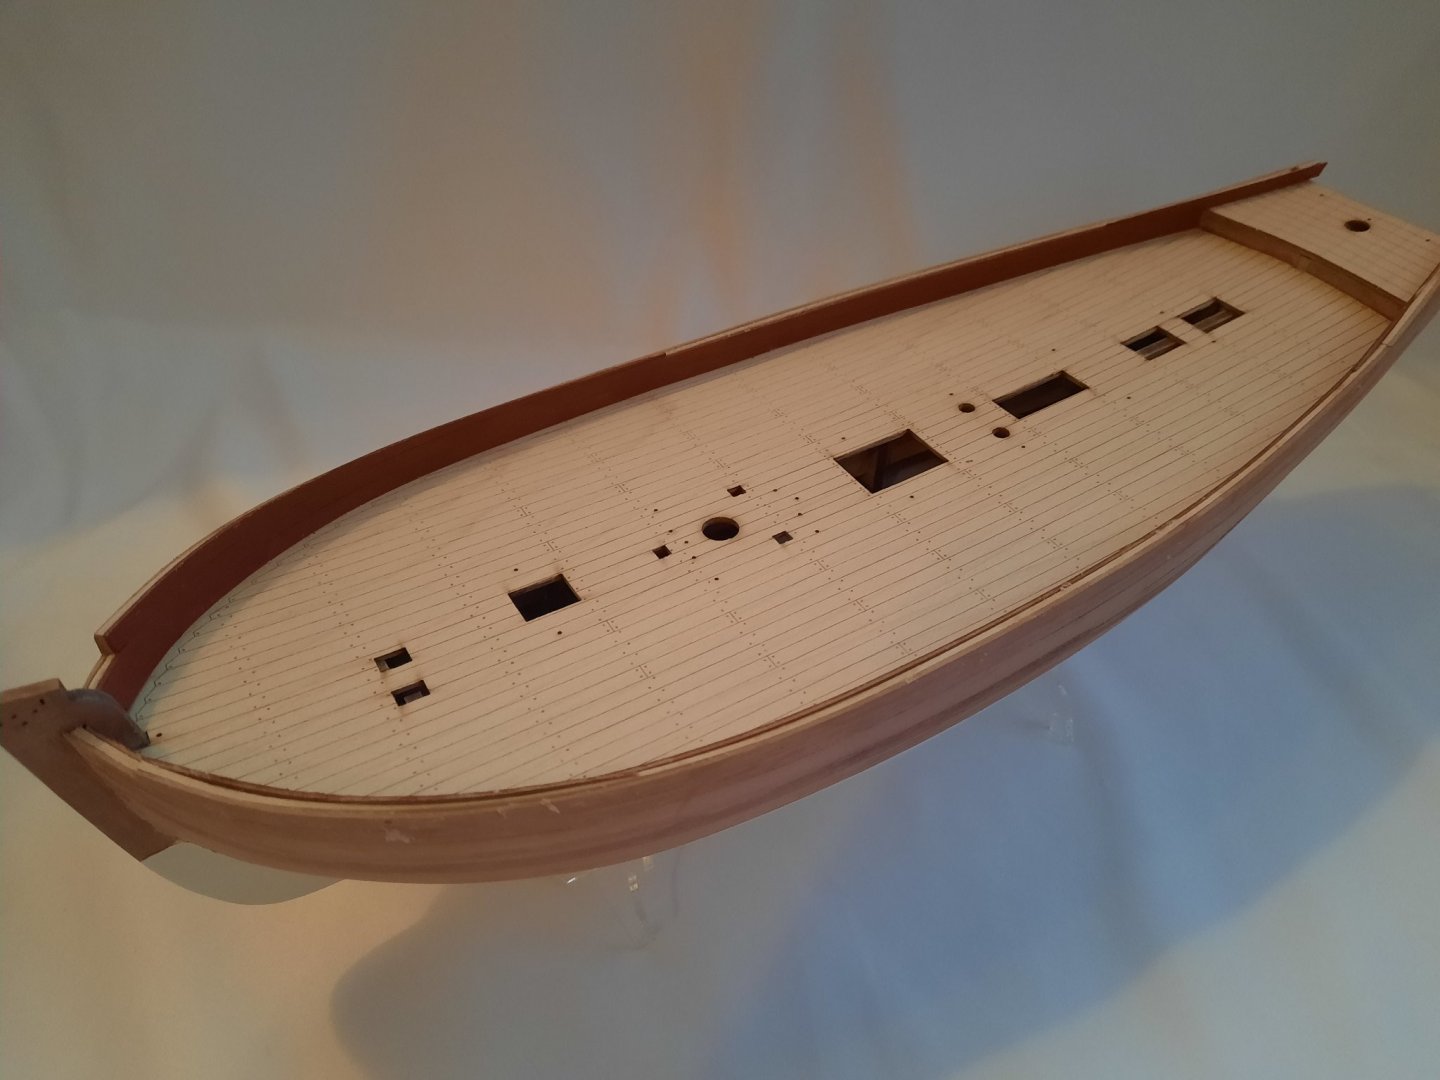
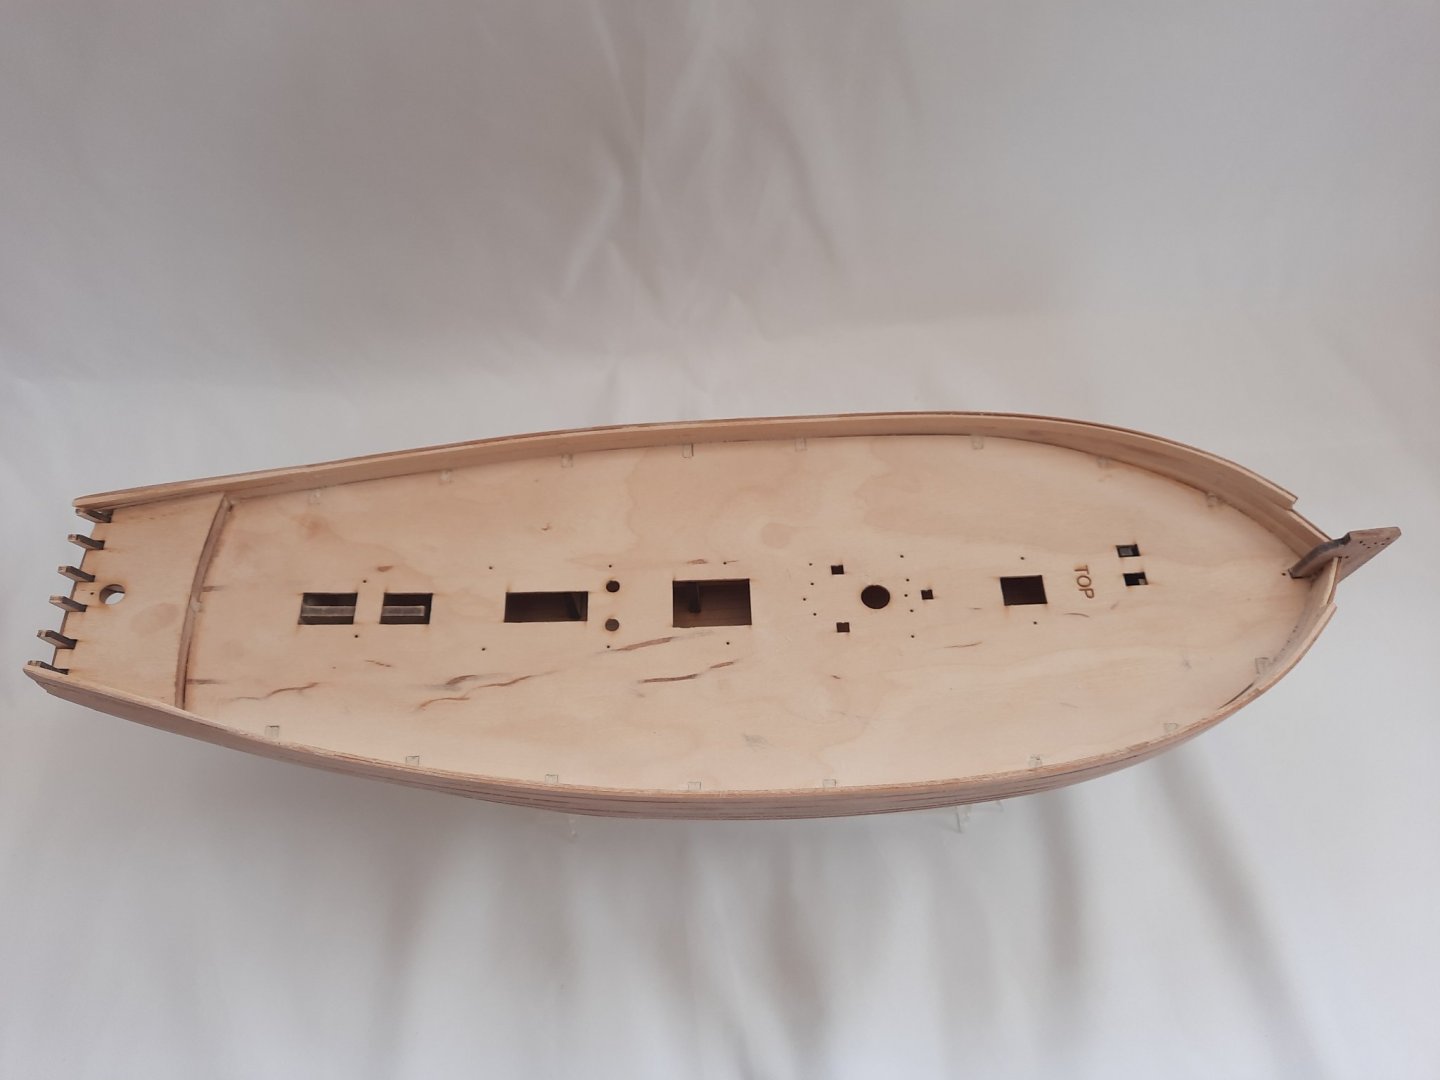
It has been an interesting morning in the shipyard today. I started by giving the unpainted part of the hull a very light sanding in a few areas to remove some unwanted pencil marks. I am really pleased with how the hull now looks, after adding the white paint below the waterline. Forging ahead I then removed the bulkhead tabs and filed the stubs flush with the deck. I also sanded the inner bulwarks smooth removing any residual glue. In the photo below the 6 x stern tabs are still to be removed With all the tabs removed I then proceeded to test fit the two laser cut deck parts. They were both almost a perfect fit. I just had to sand a couple of edges to ensure the decks would lay flat on their respective false decks. The next task will be to fit and paint the inner bulwark planks, however before doing this I thought it would be fun to add the previously built deck items. The deck pumps are sitting very proud as I did wish to force them in position as the pump shafts will require a little bit of sanding. I will also paint the rear hatch red ochre to match the rest of the deck fittings. I quite like the black and white version

- 160 replies
-
- 4
-
-
- Alert
- vanguard models
- (and 1 more)
-
That is praise indeed😁. However I am still in awe of your skills and speed.
-
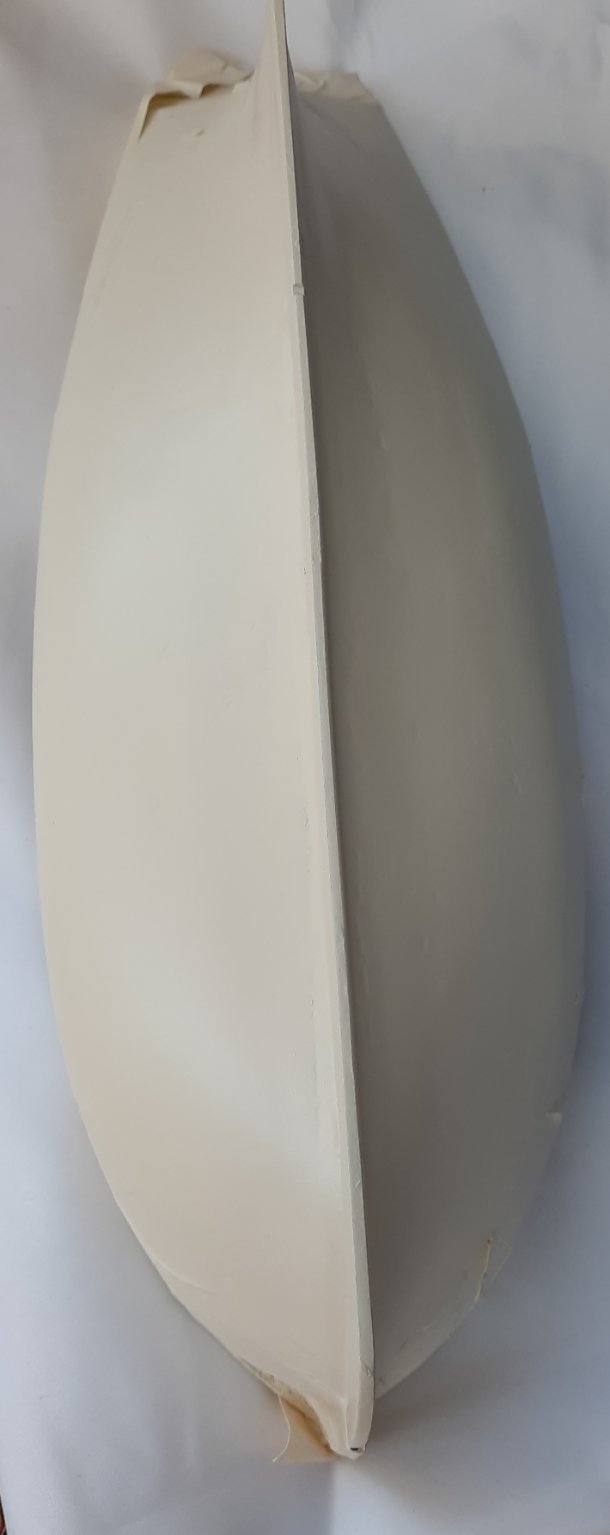
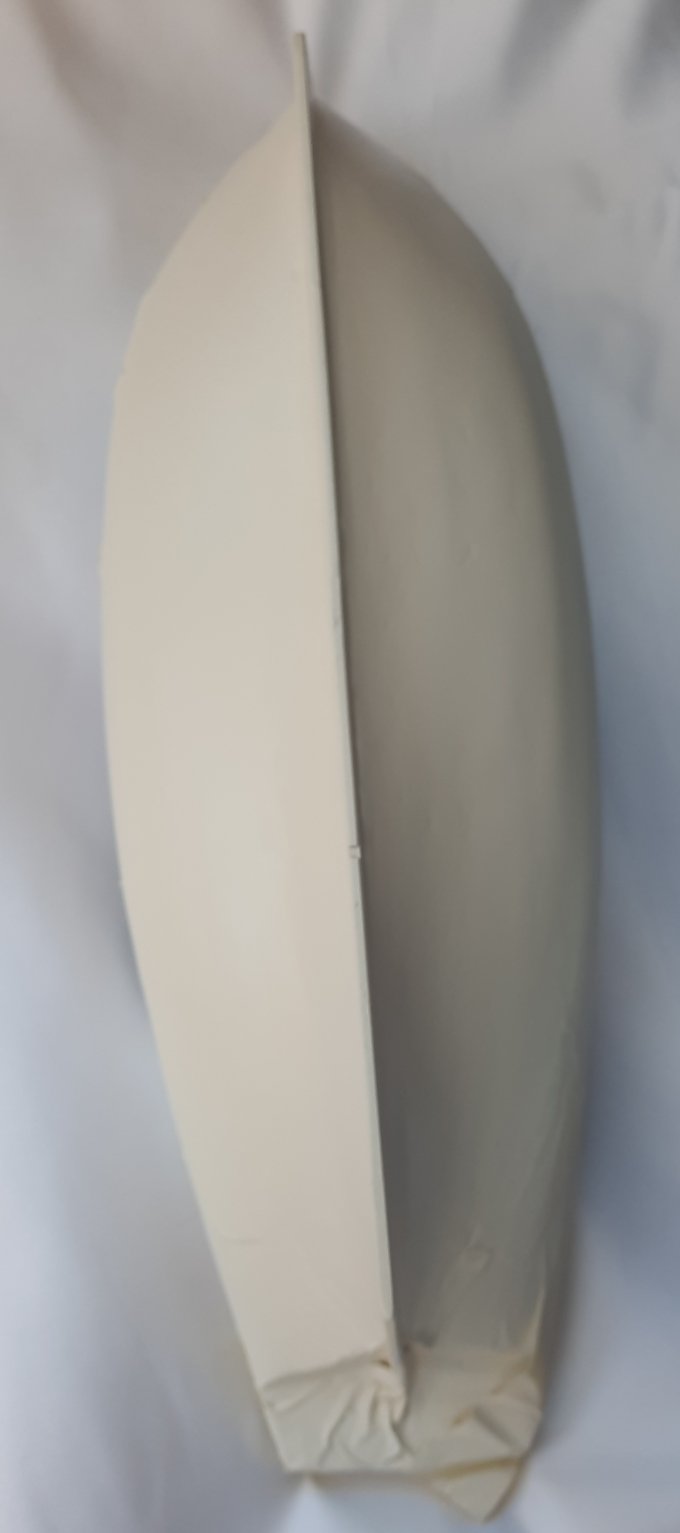
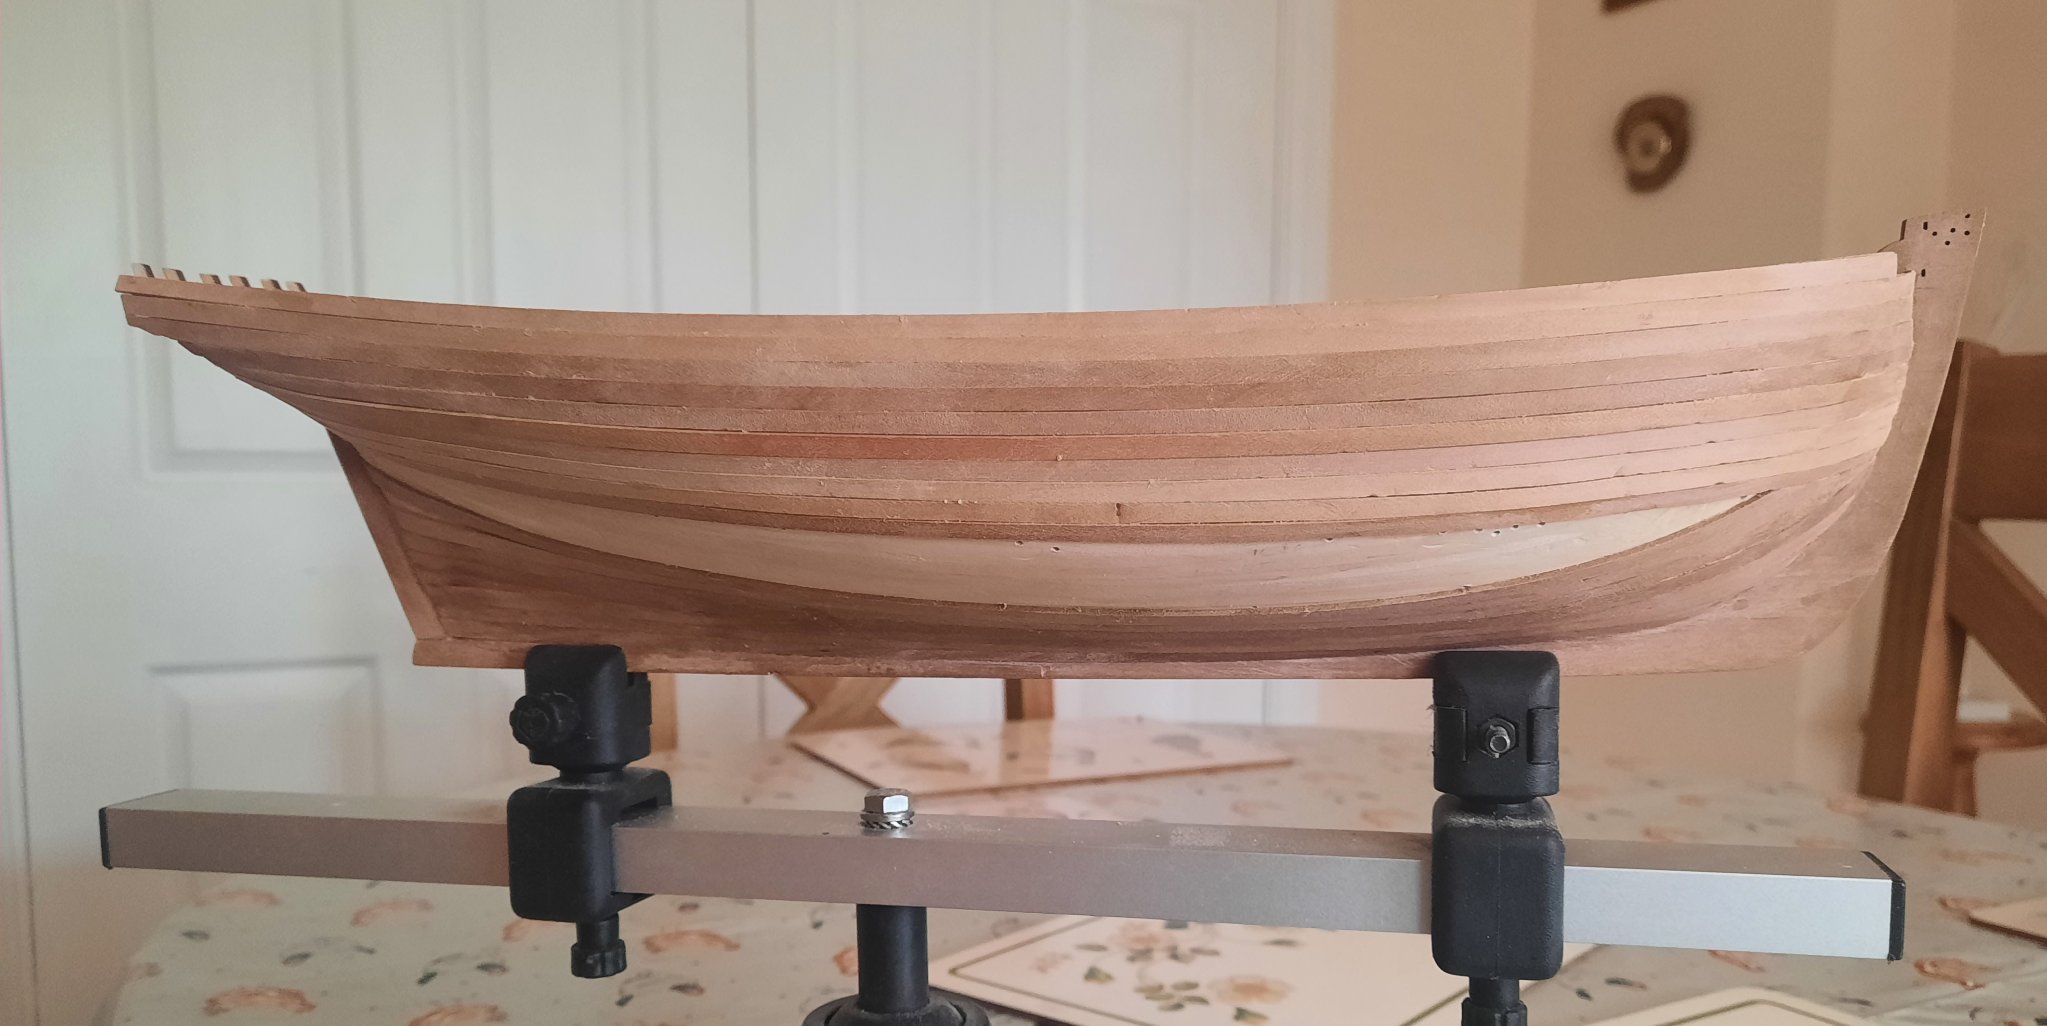
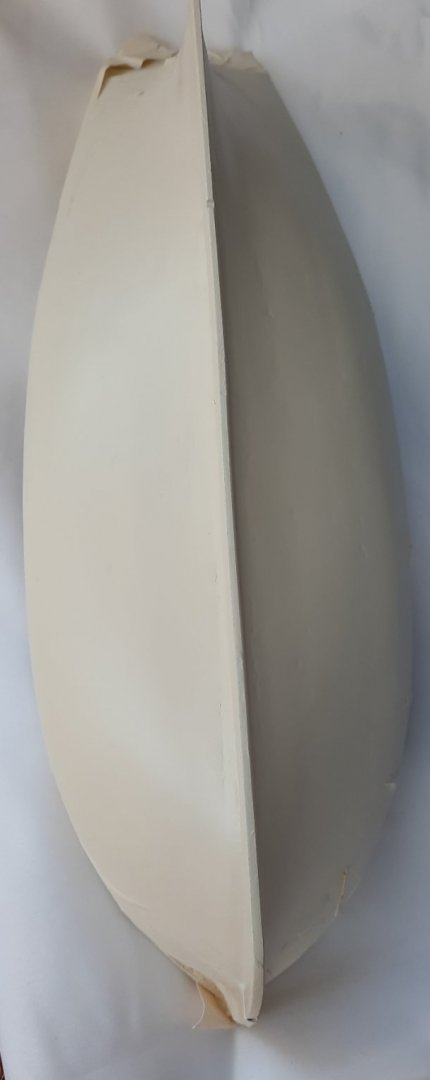
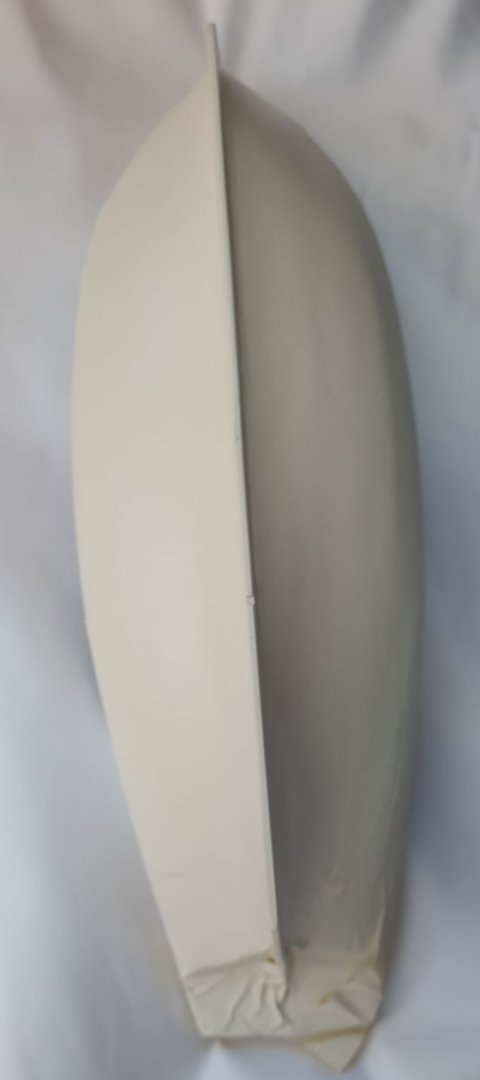
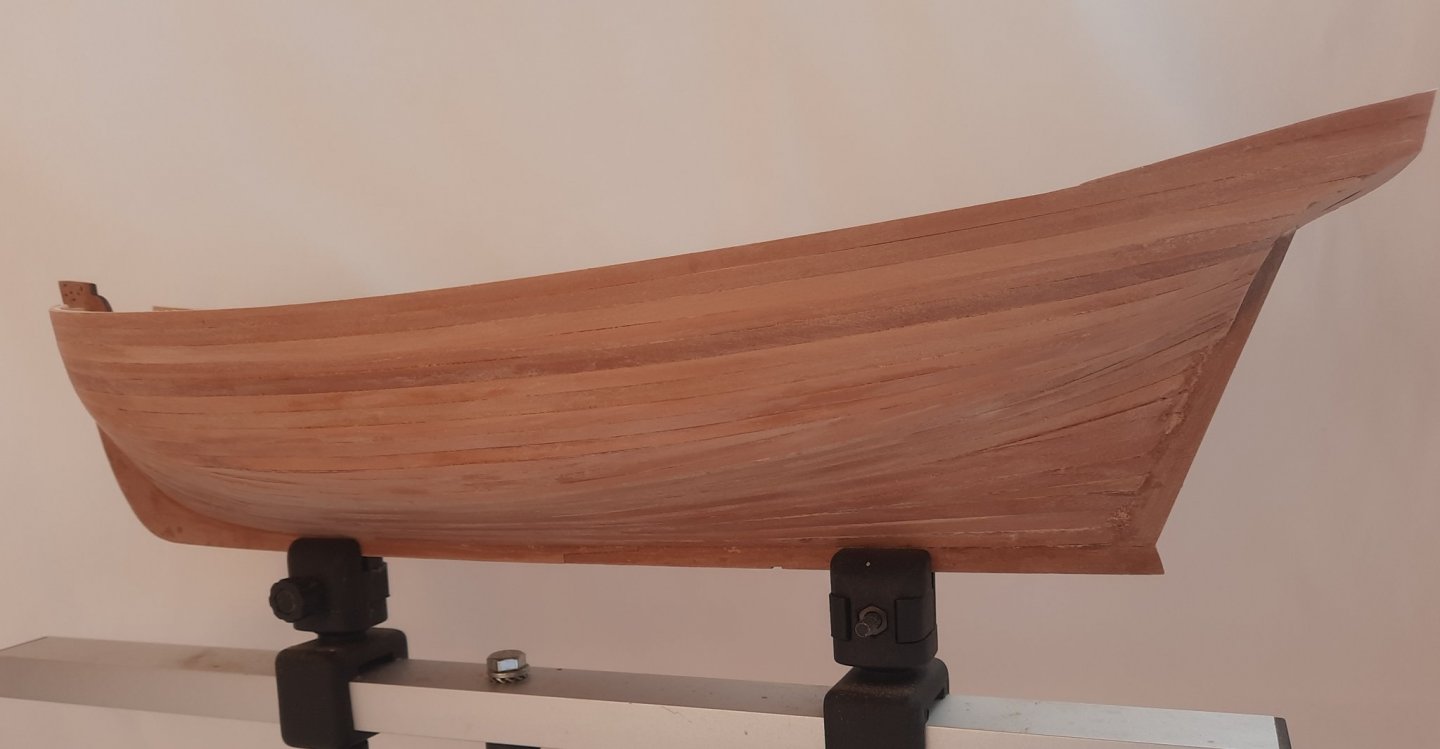
As I finally decided I was happy with how the white painted hull (below the waterline) looked I took the plunge this evening (while watching tv) to remove the masking tape. As the upper tape layers were being removed I was a tad anxious to see if there would be any paint bled.😬 As the final waterline tape layer was removed I was very relieved to note there was no bled. I really like the sharp lines along the waterline and I am very pleased with the end result. 😁 I plan to give the hull a very light sanding above the waterline to remove some unwanted pencil marks as I did initially make a positional error with the initial waterline marking attempt. A nice side picture of the painted hull There is a little bit of work required on a plank half way up the stern counter pattern. I do have plenty of sawdust left over to fill the gap. Bow area


- 160 replies
-
- 4
-
-
- Alert
- vanguard models
- (and 1 more)
-
Thanks for you kind comments. I liked the coppering finish on my Speedy and Victory, the do look great when done. I liked the grey paint in my Yamato and white paint on my Duchess of Kingston.
-
I now believe I have completed the painting the hull white below the waterline. When I look closely at the hull there are still some very small "potholes" visible . I know I could continue to fill, sand and paint the hull to eliminate these few remaining "potholes" but I am not sure if it will be worth the time and effort required as I think these "potholes" actually add some character to the build therefore I am tempted to leave them. I have attached a couple of pictures which shows how the hull now looks. Once I have finally decided to move on with the build with the hull as is I will remove the tape. Hopefully there will not have been too much paint bled. Starboard Side Port Side Arial view Arial View


- 160 replies
-
- 4
-
-
- Alert
- vanguard models
- (and 1 more)
-
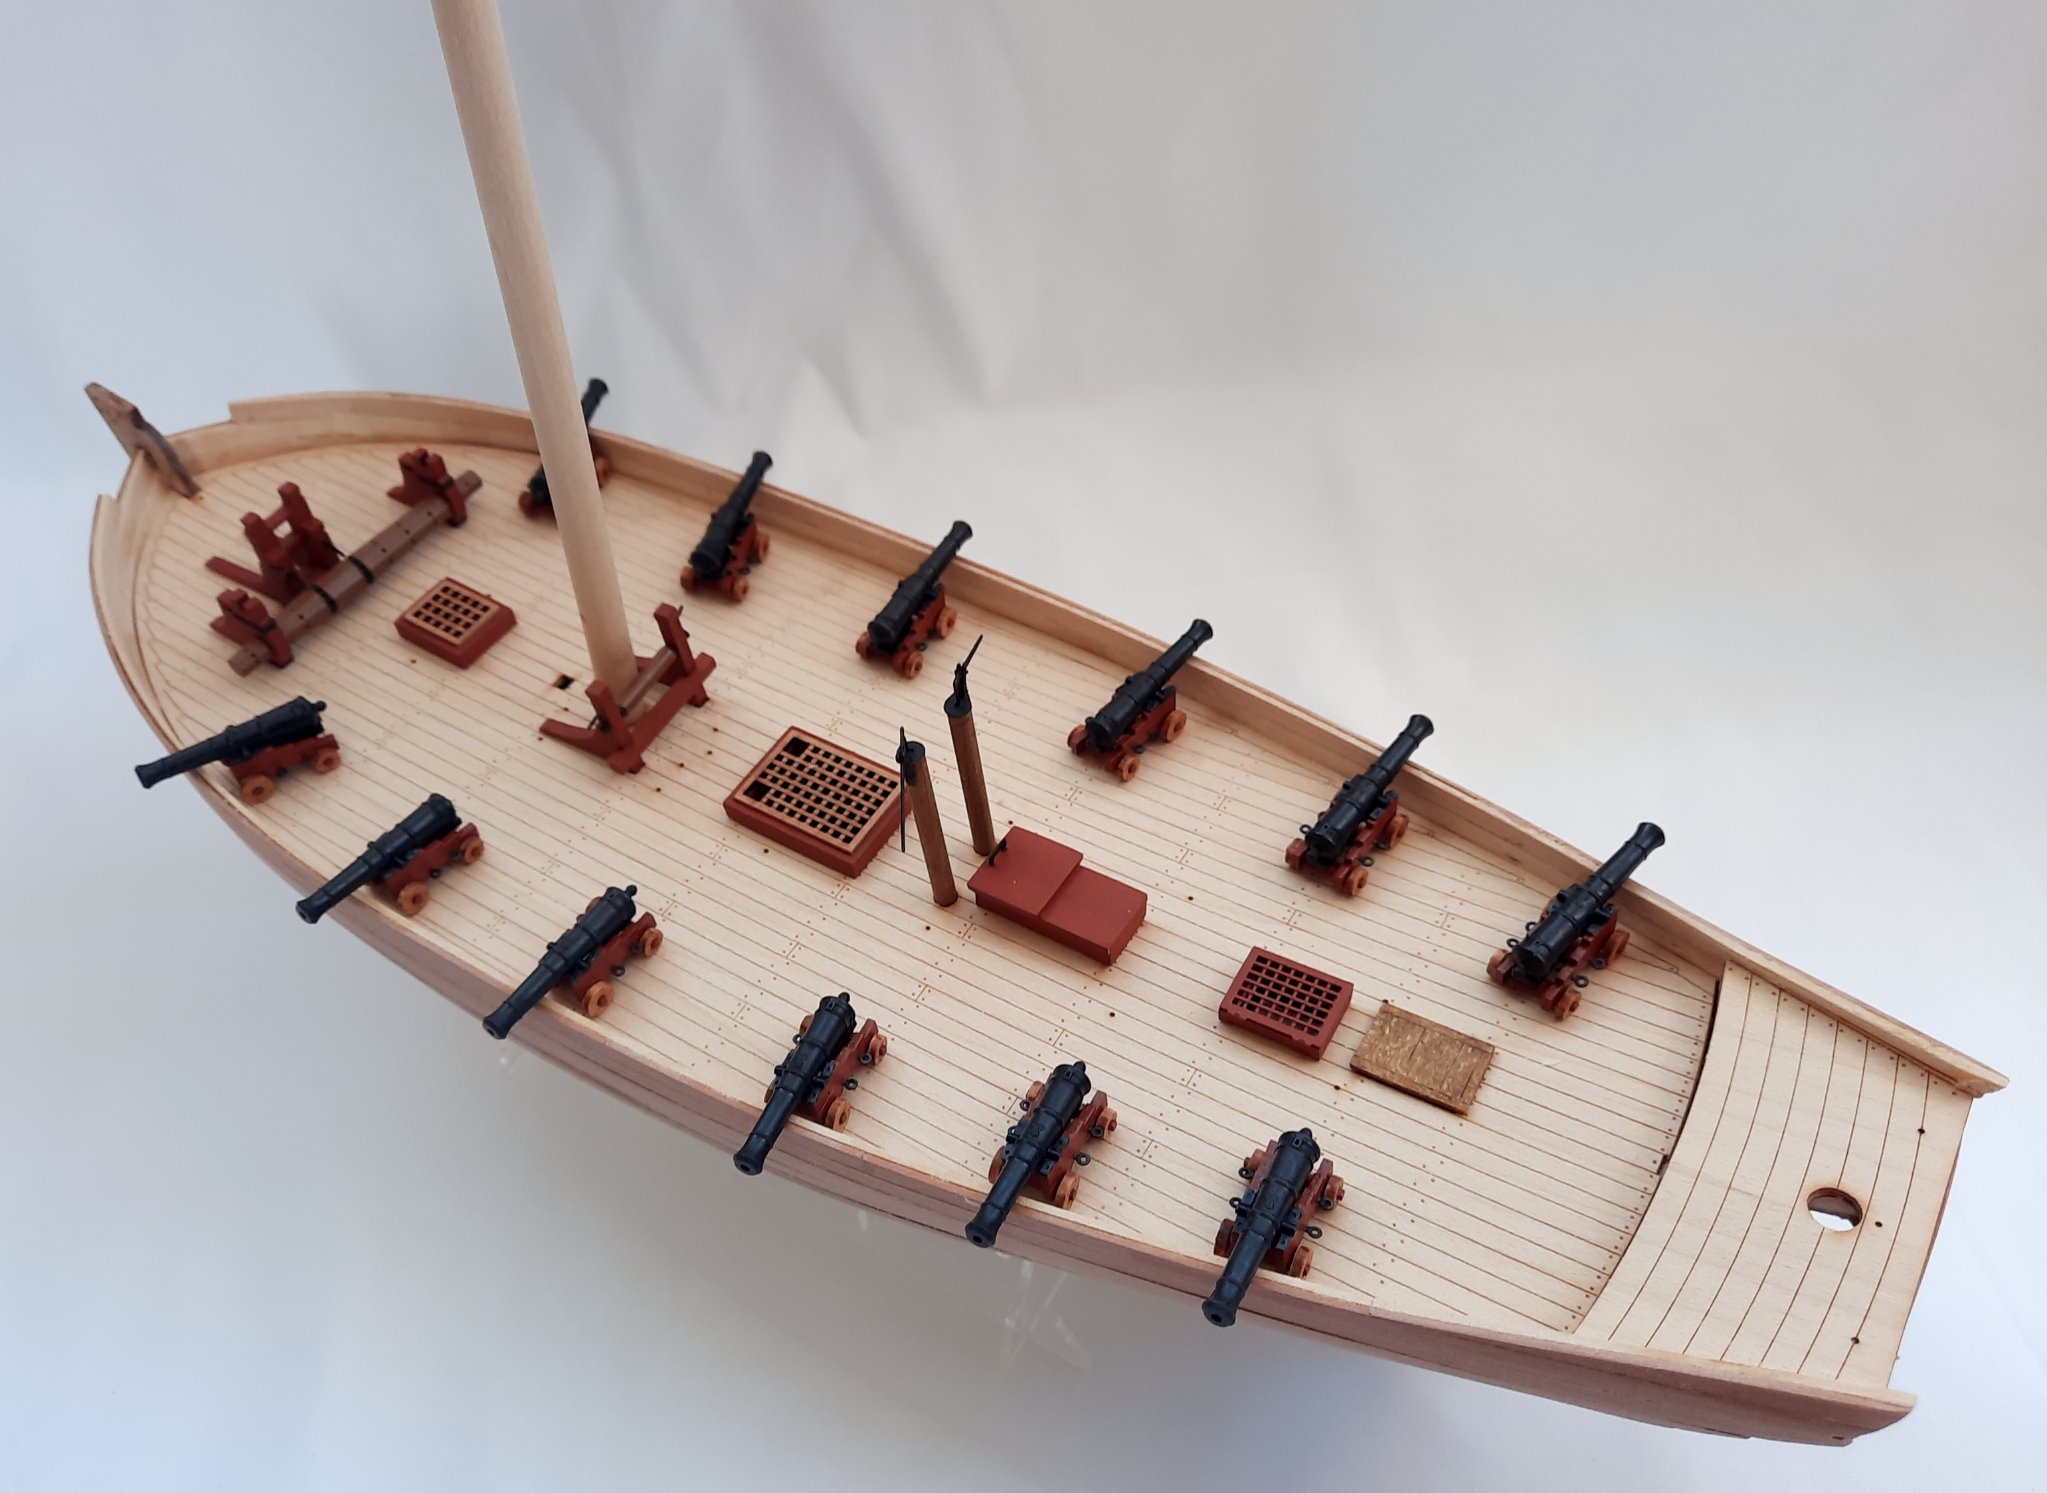
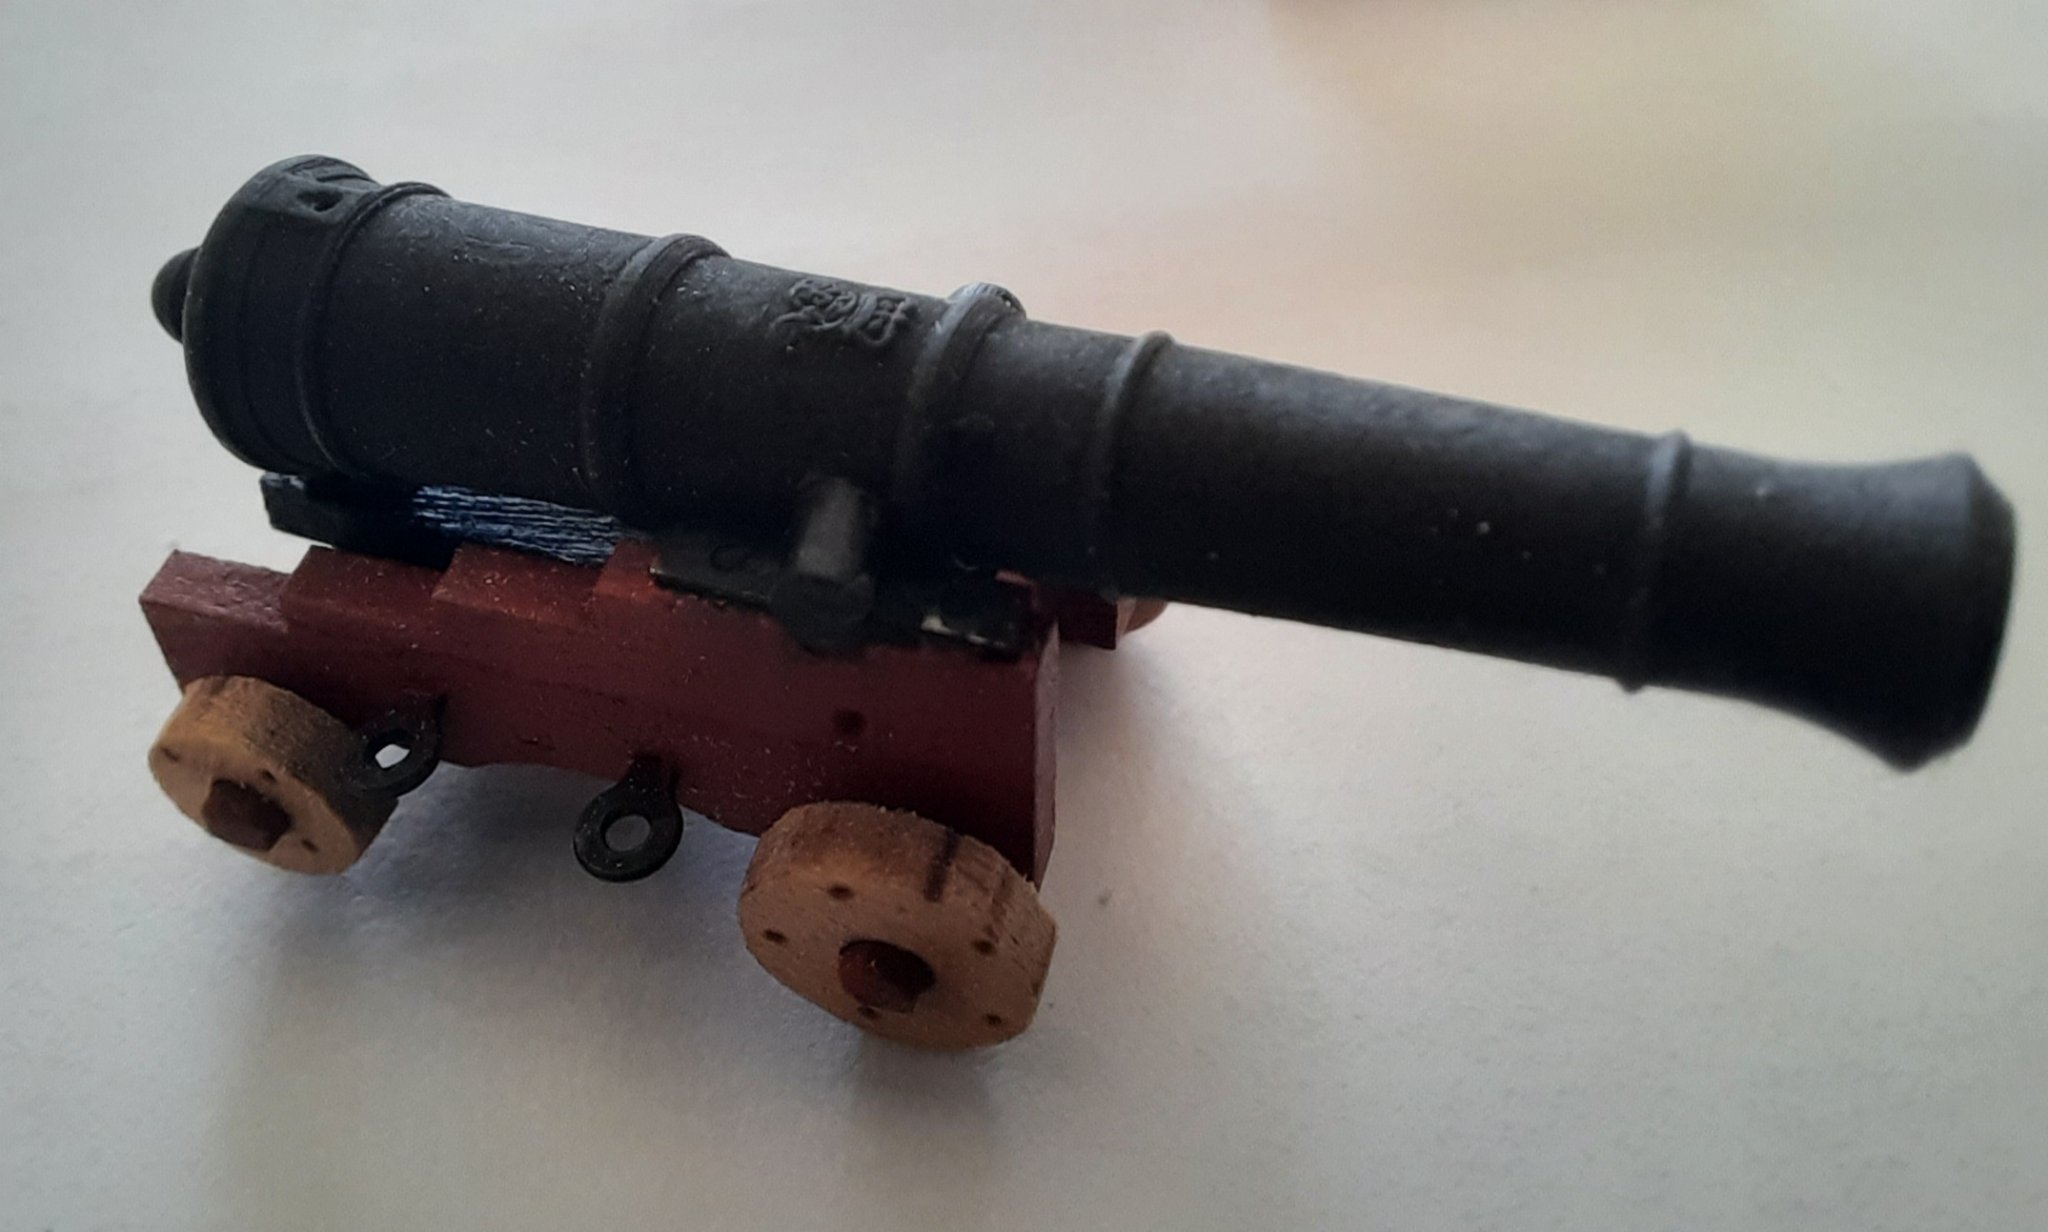
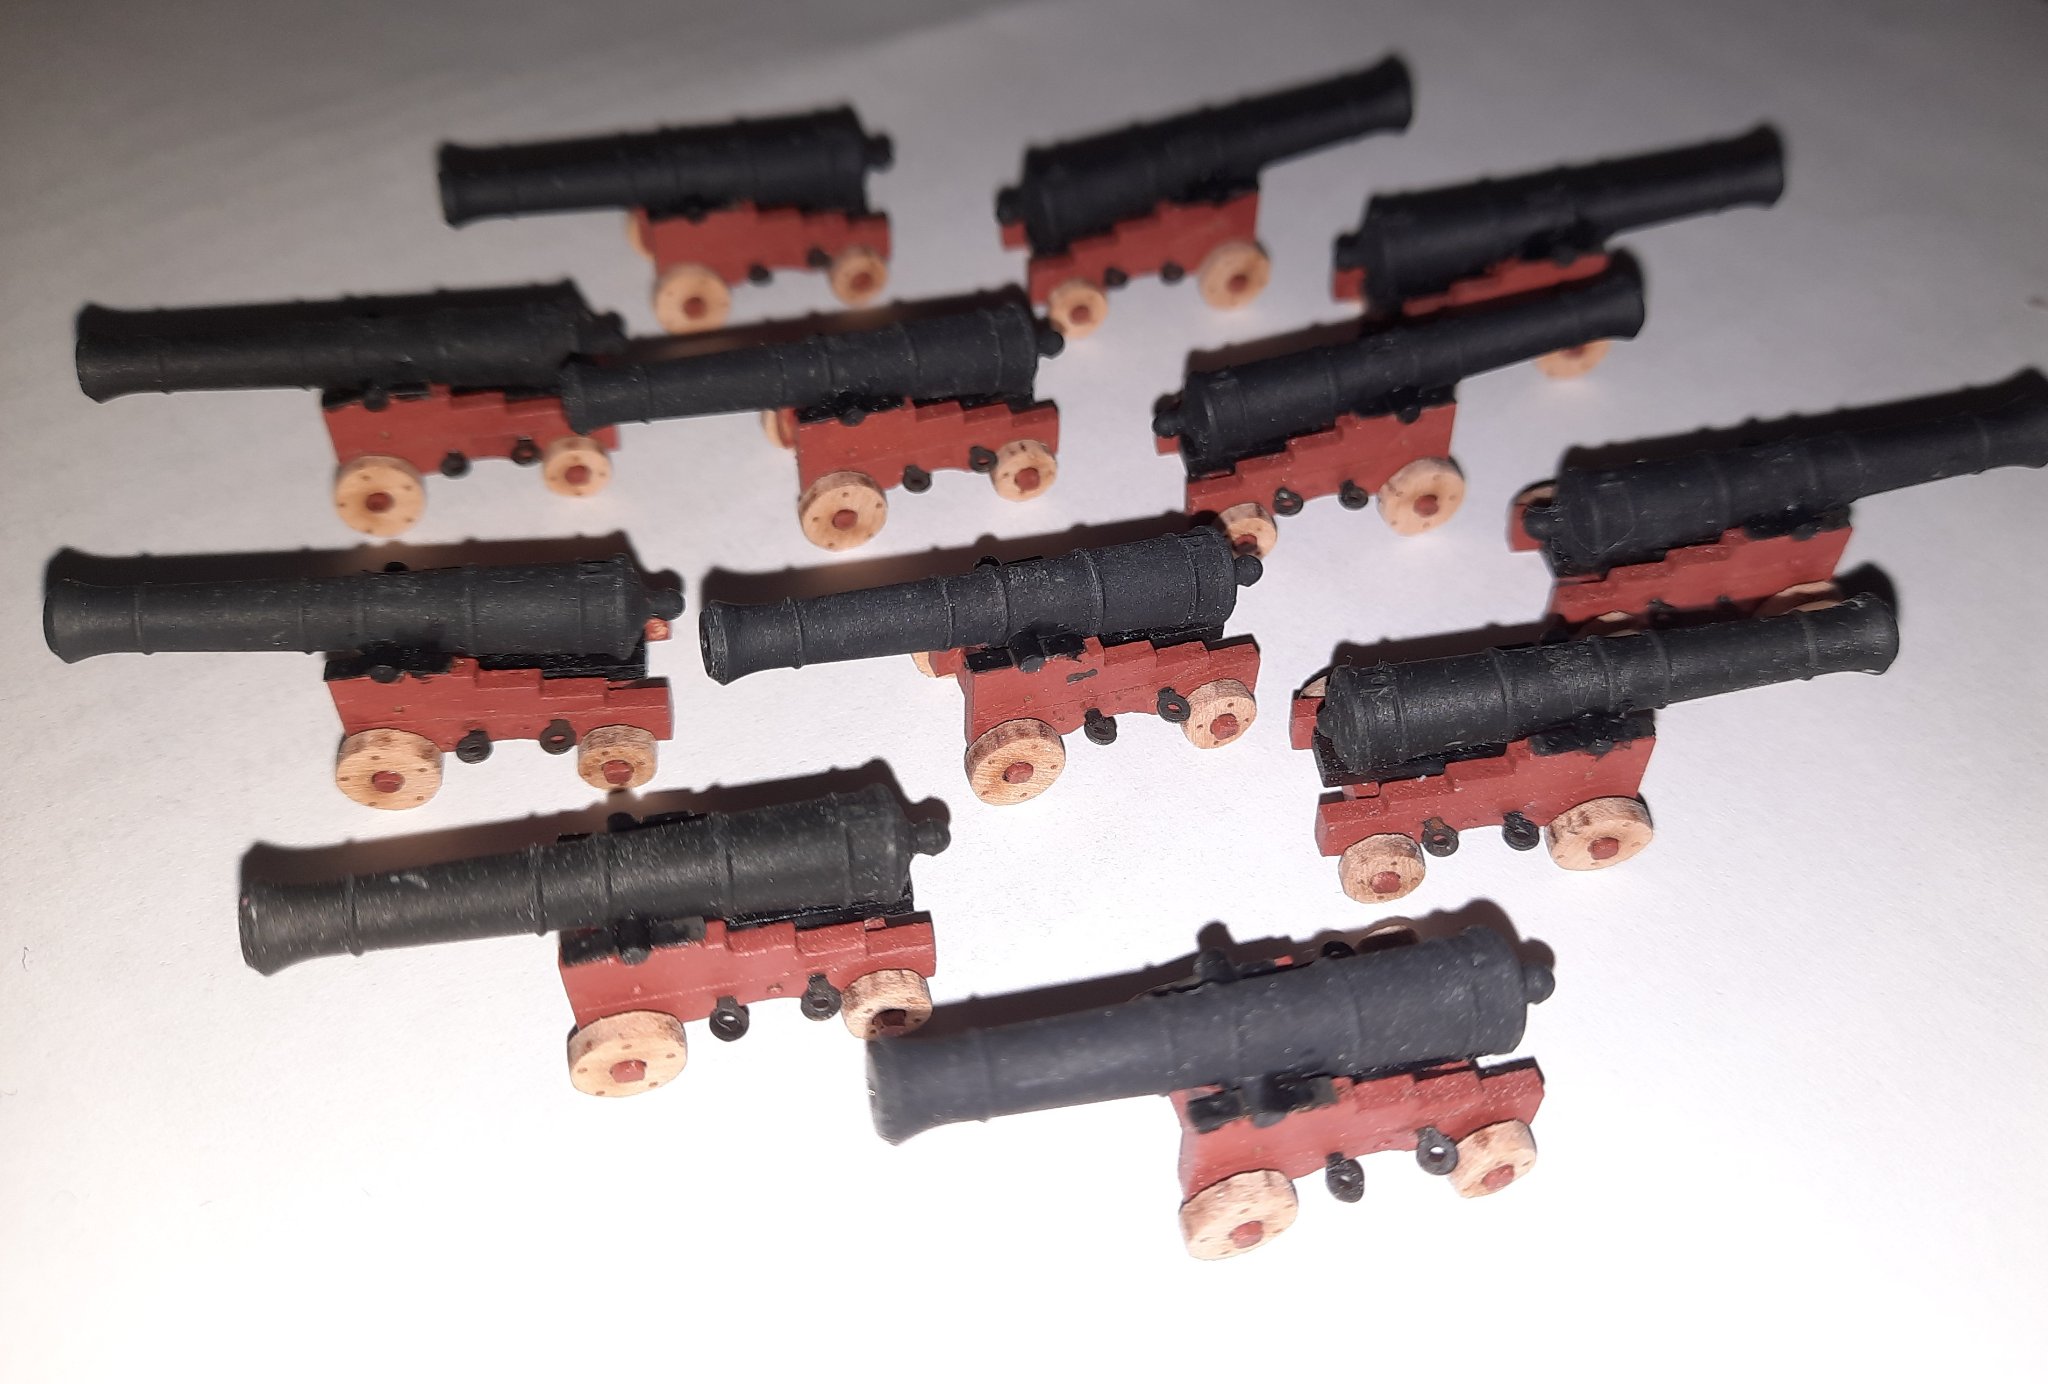
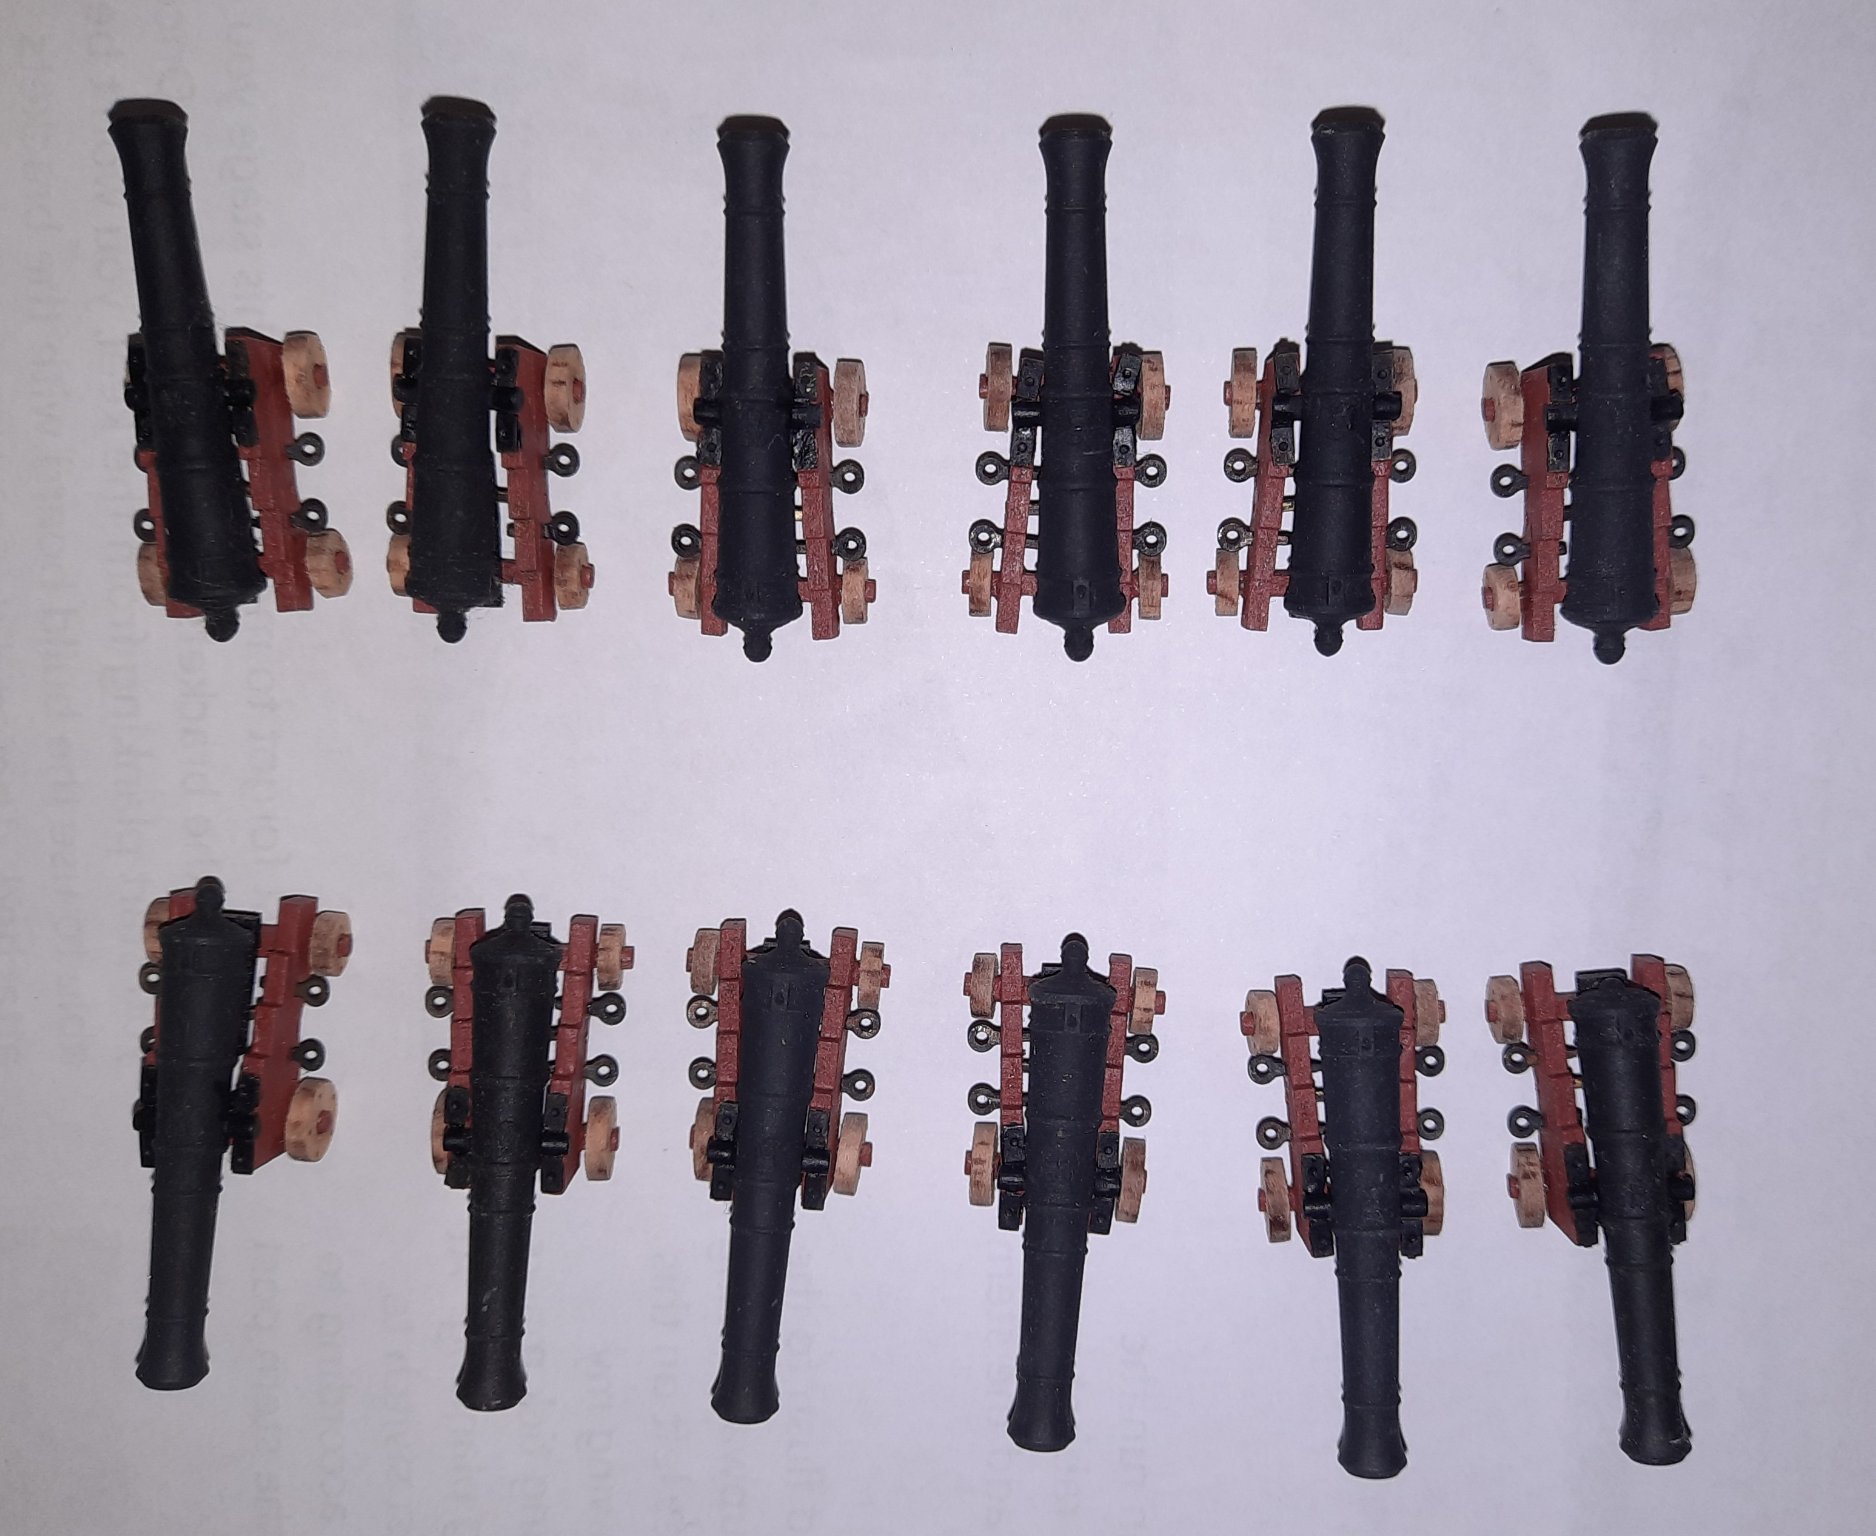
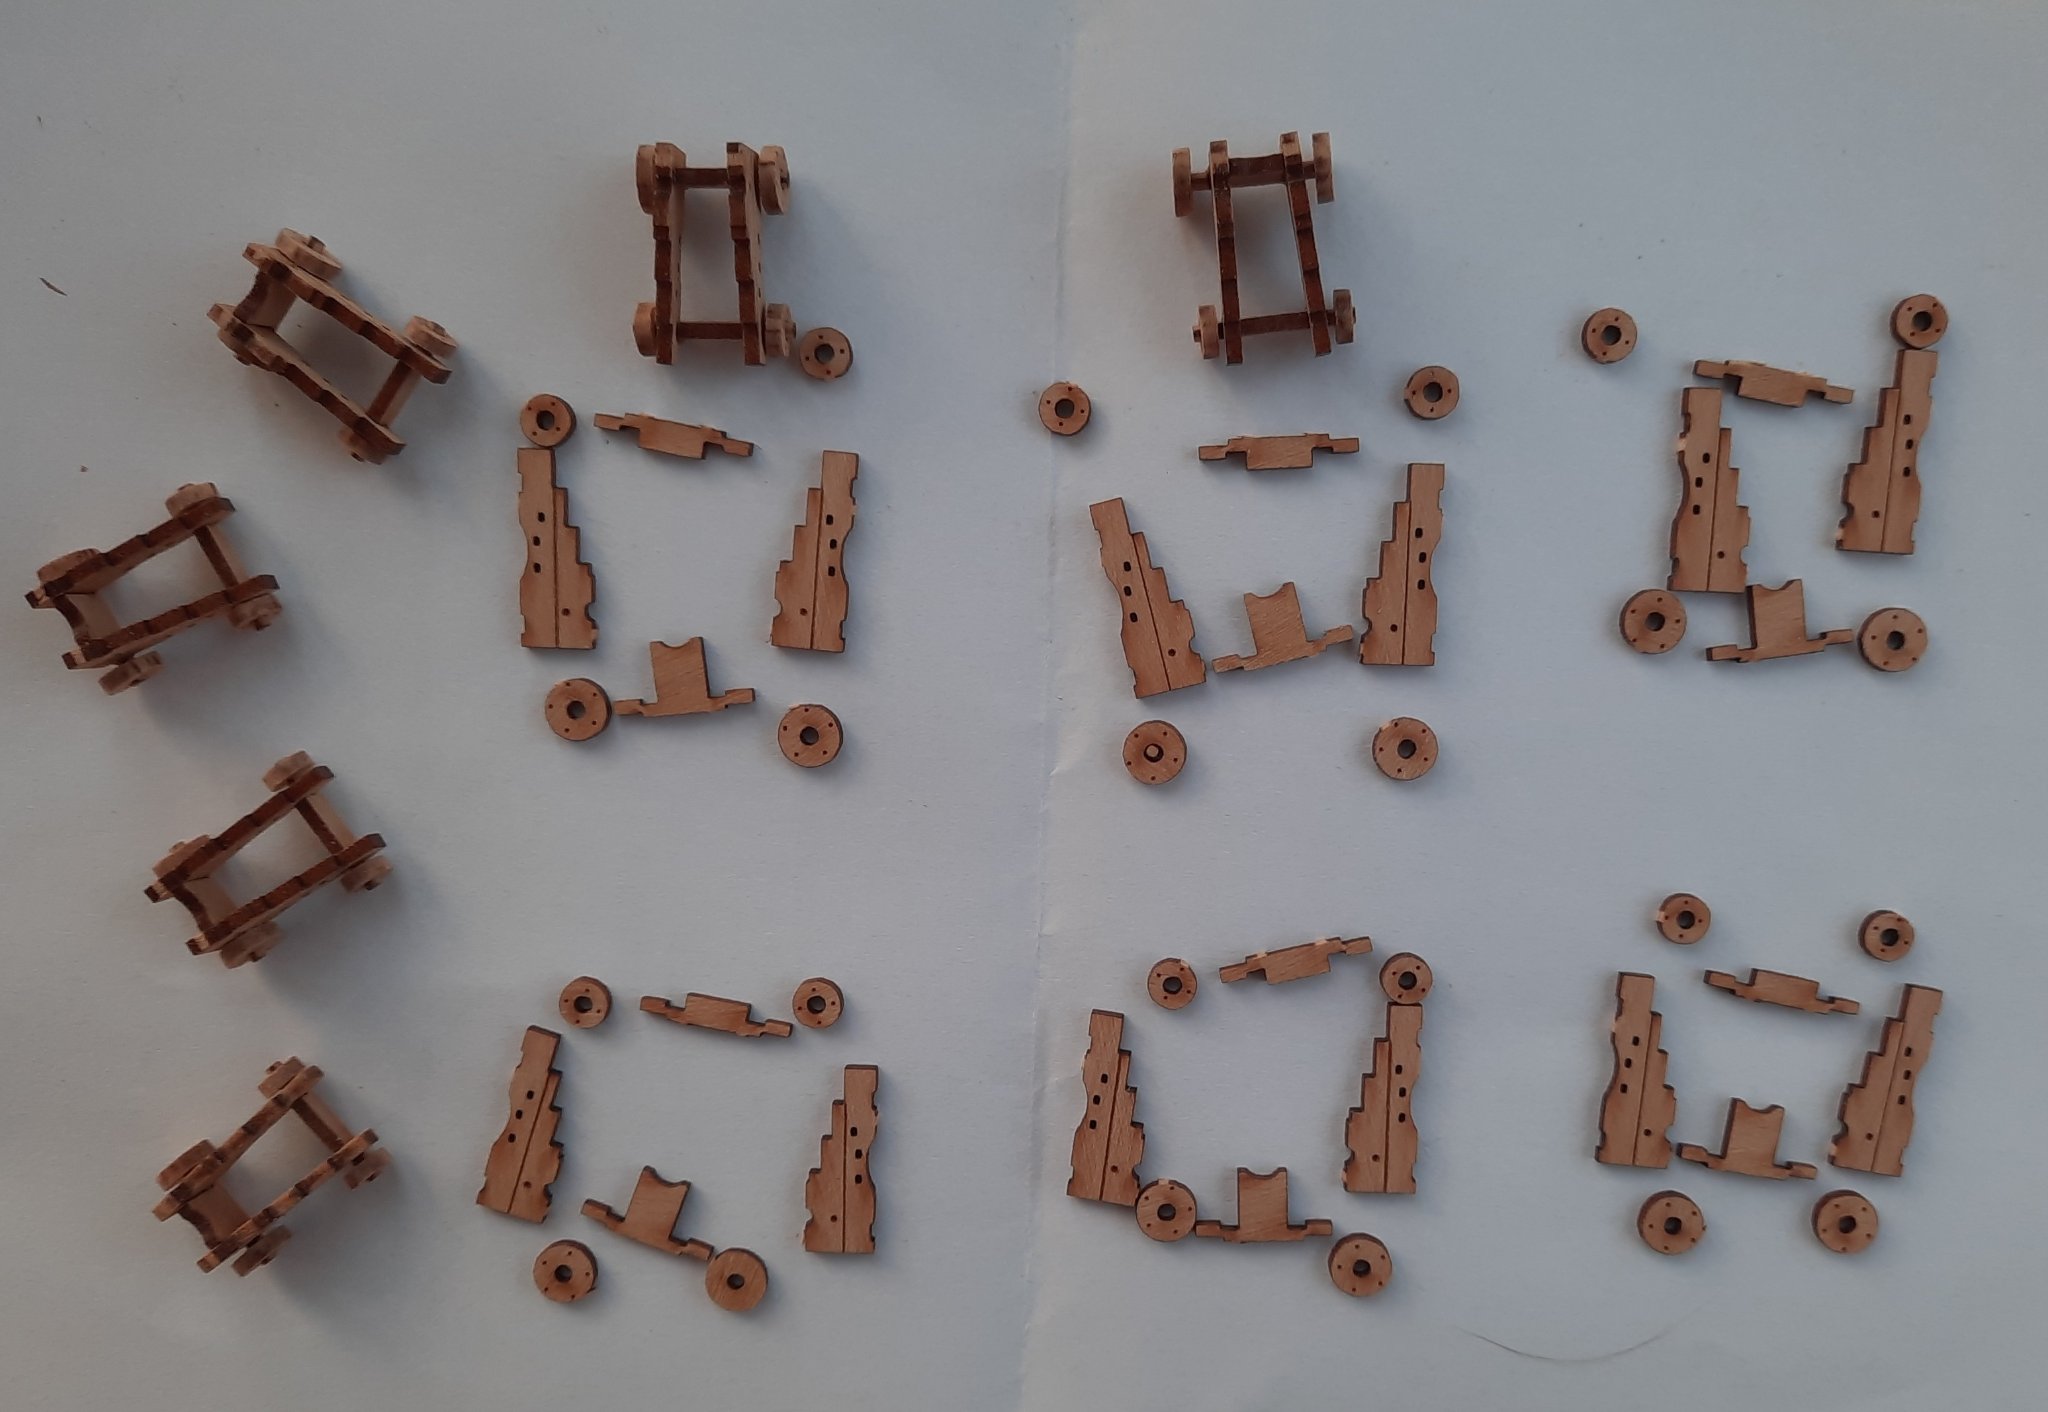
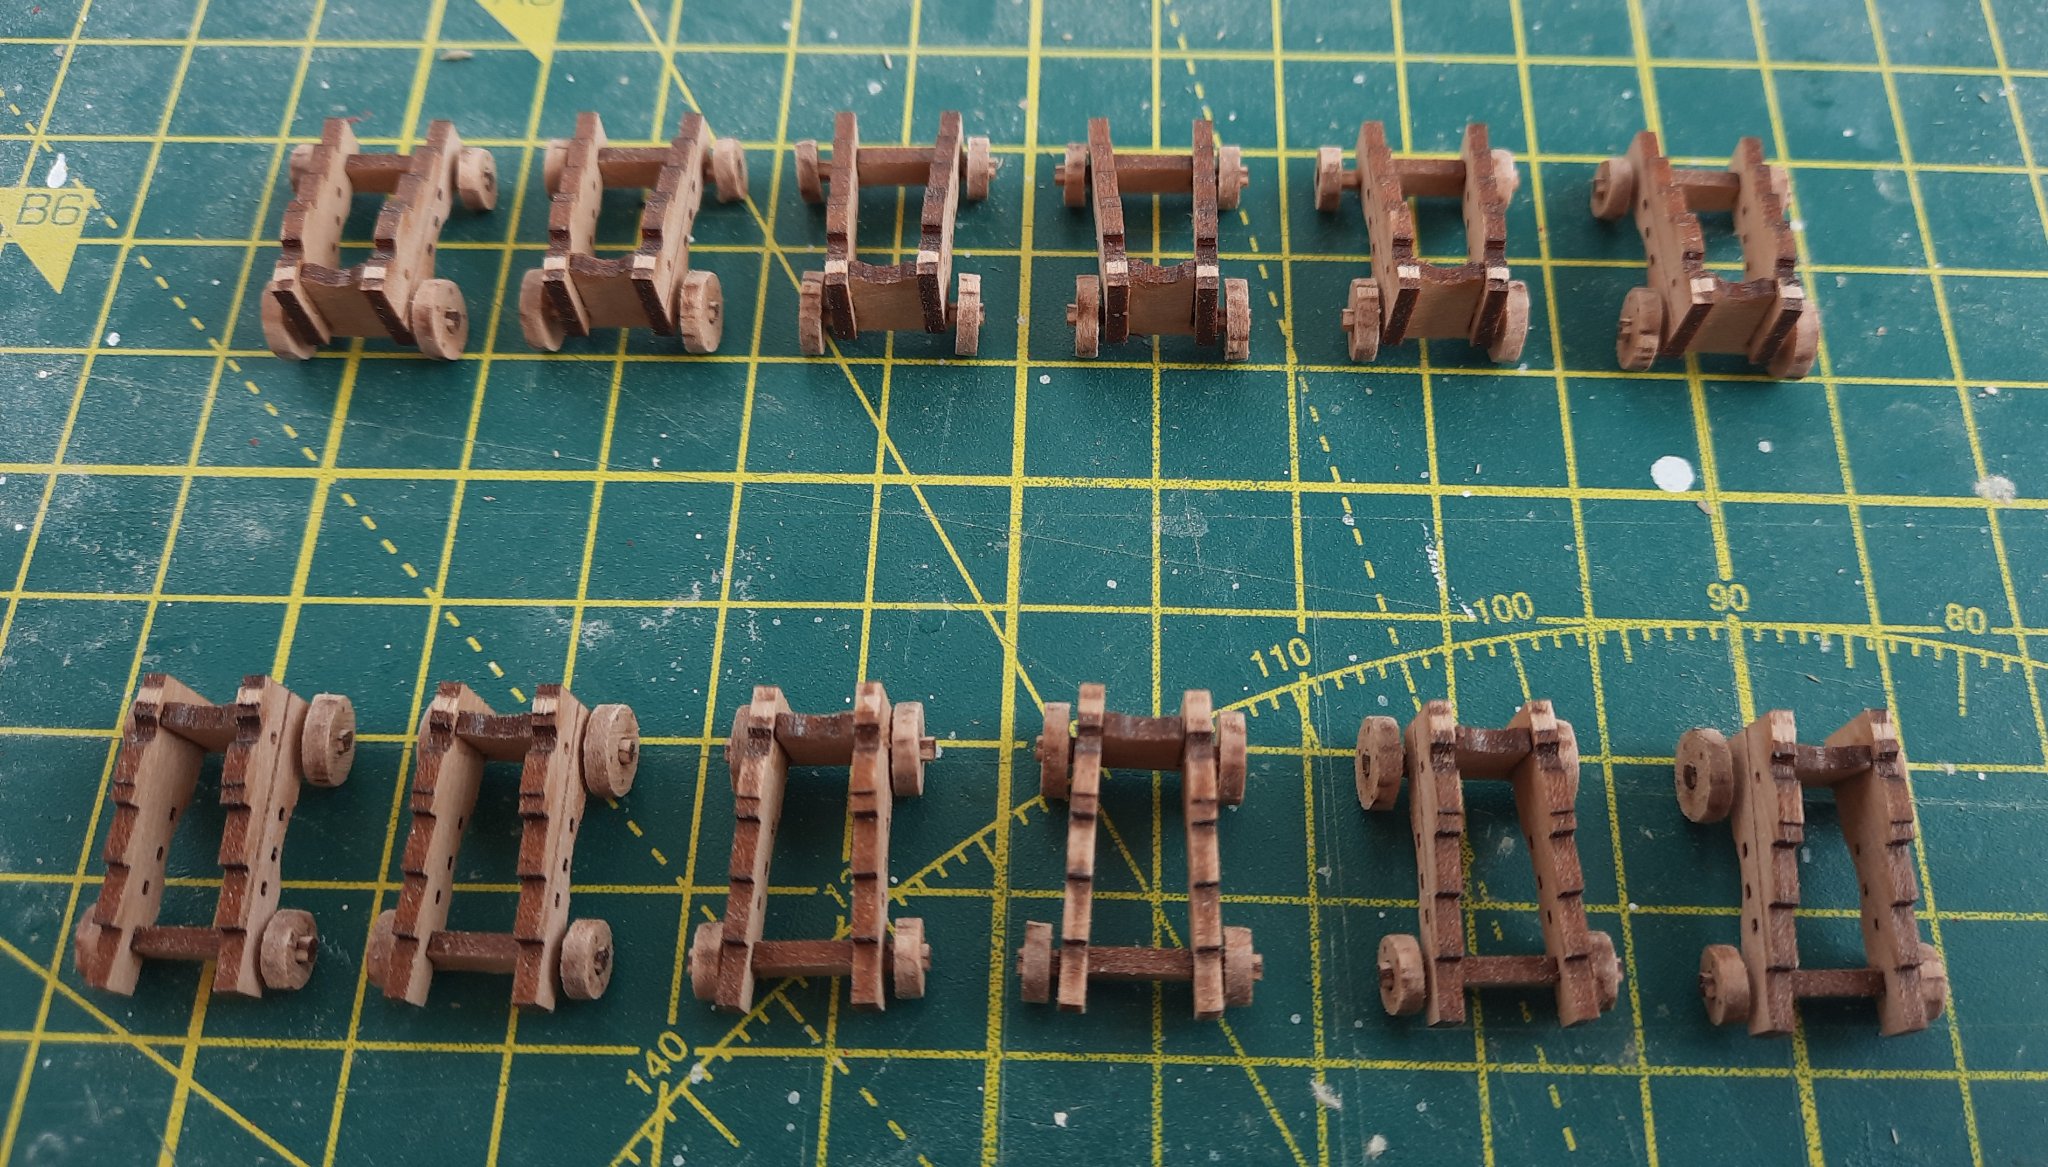
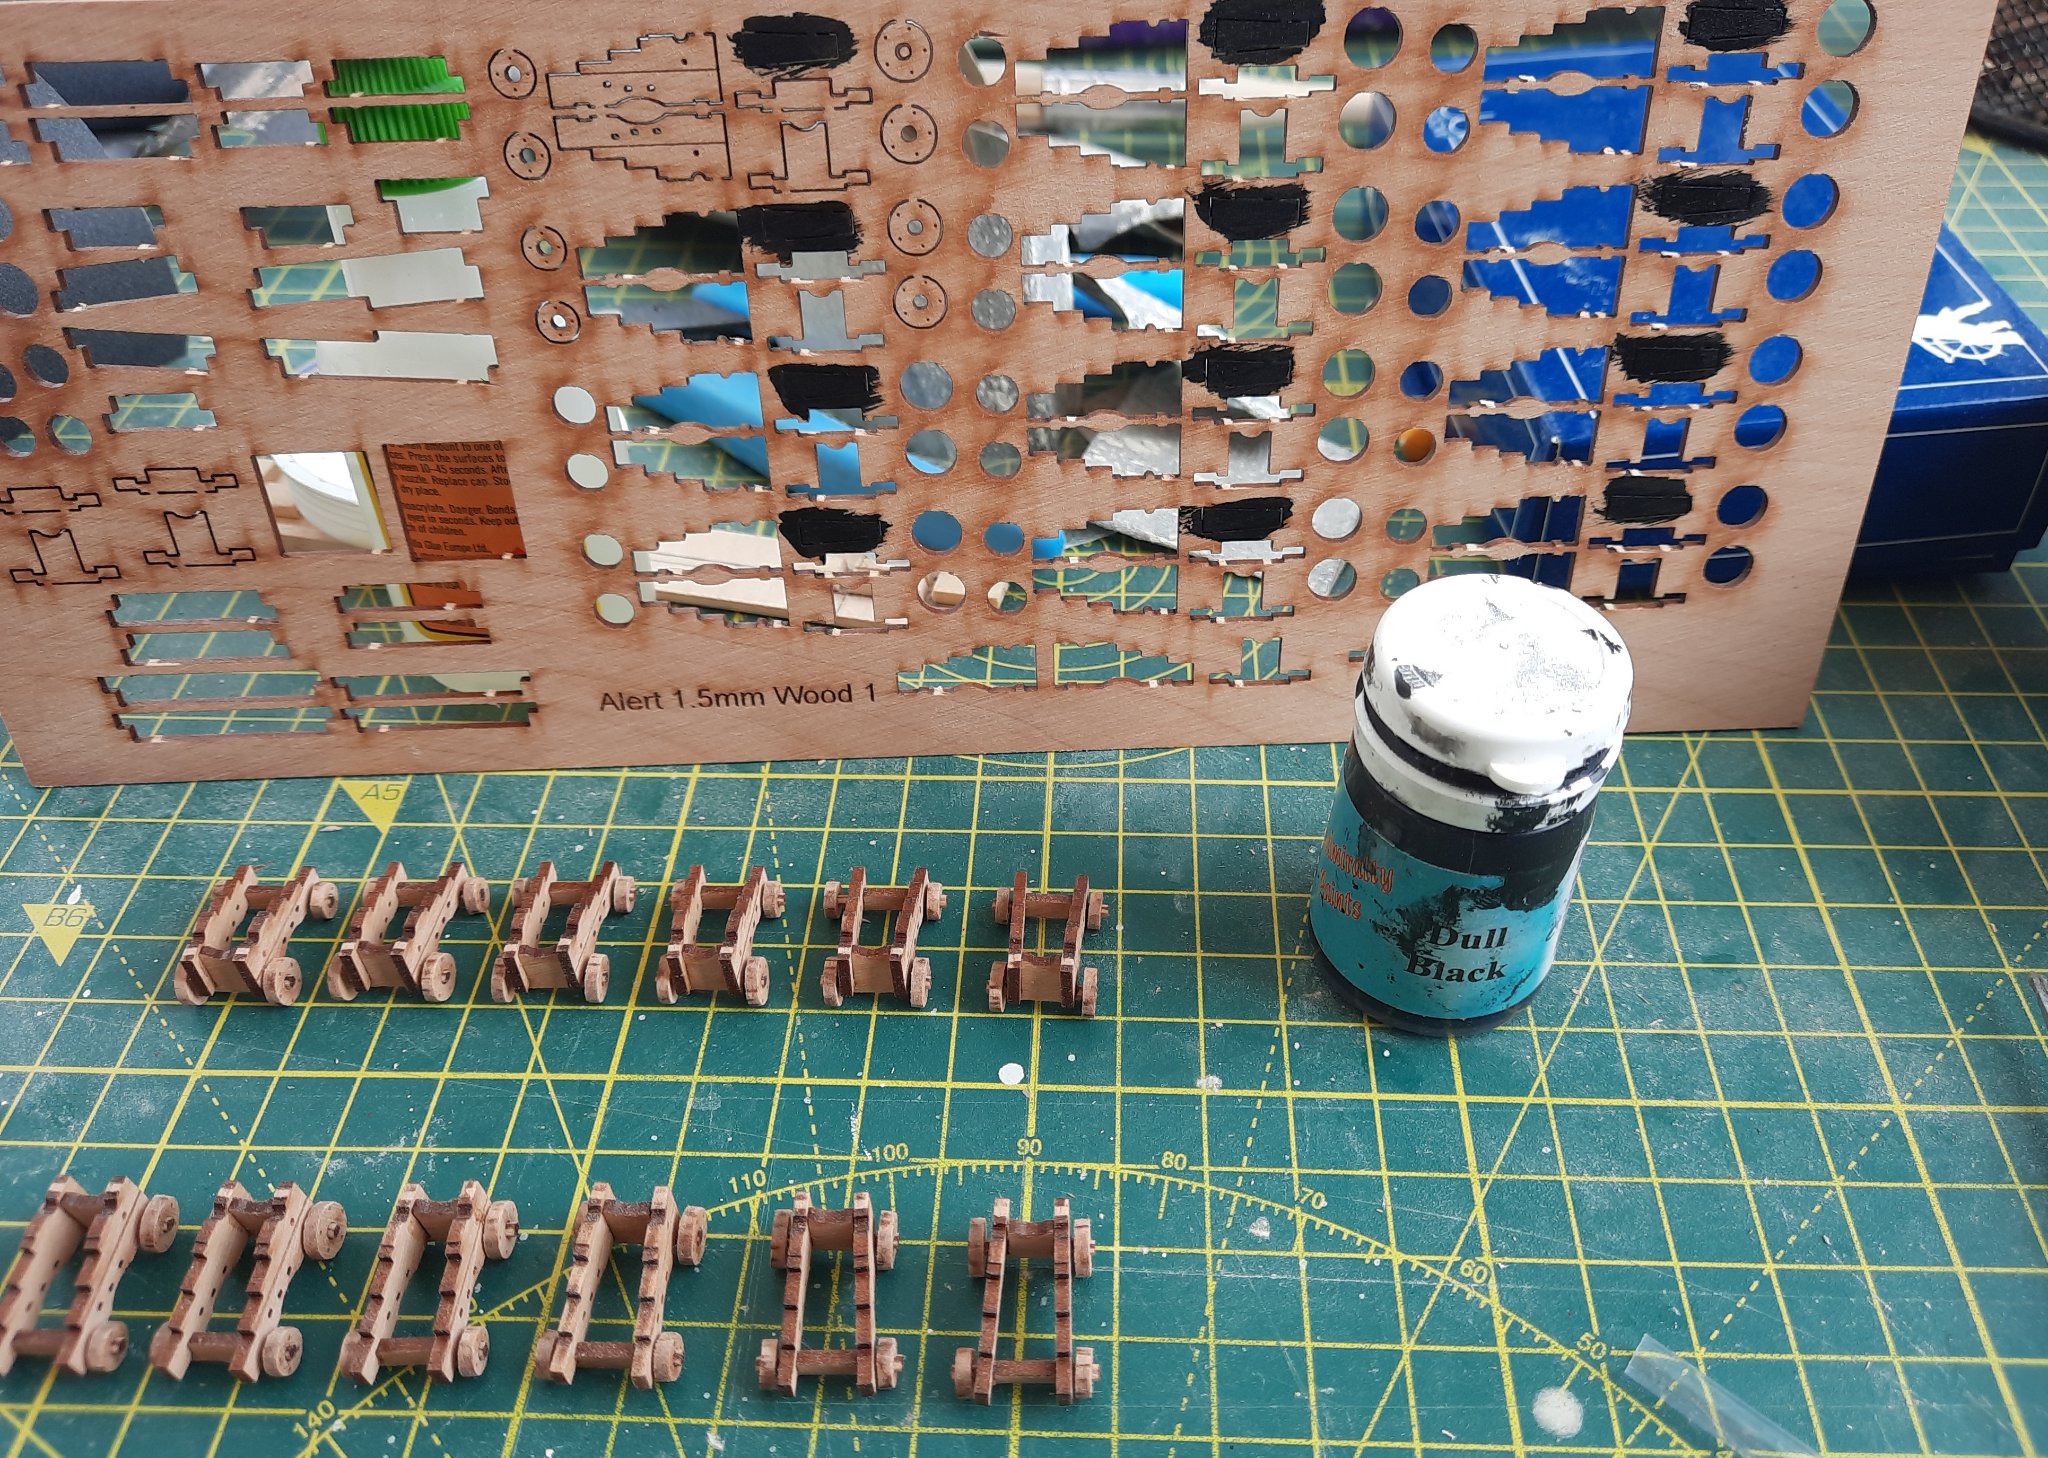
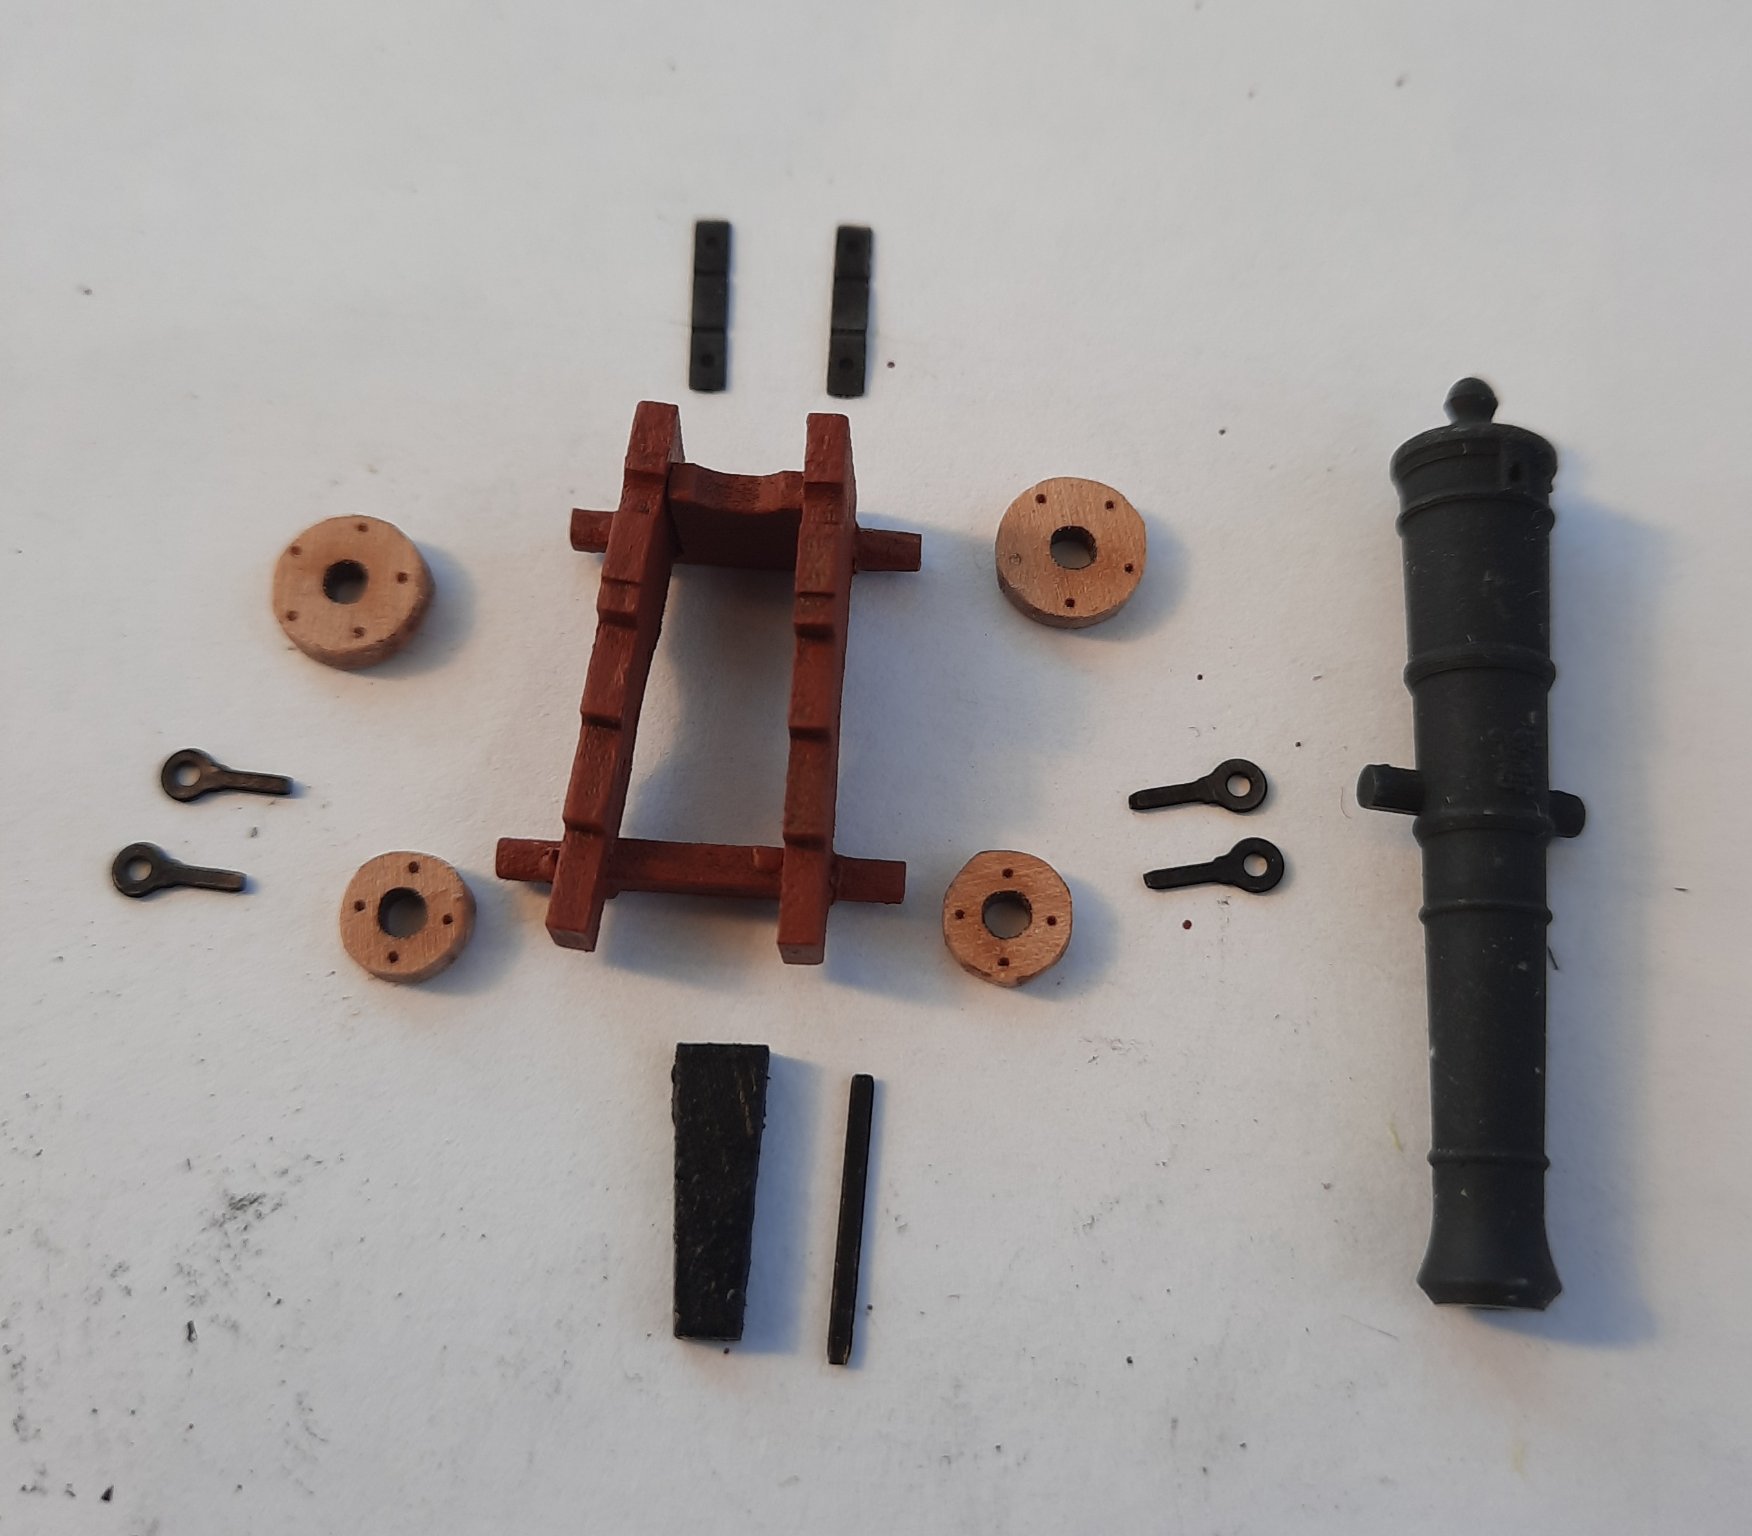
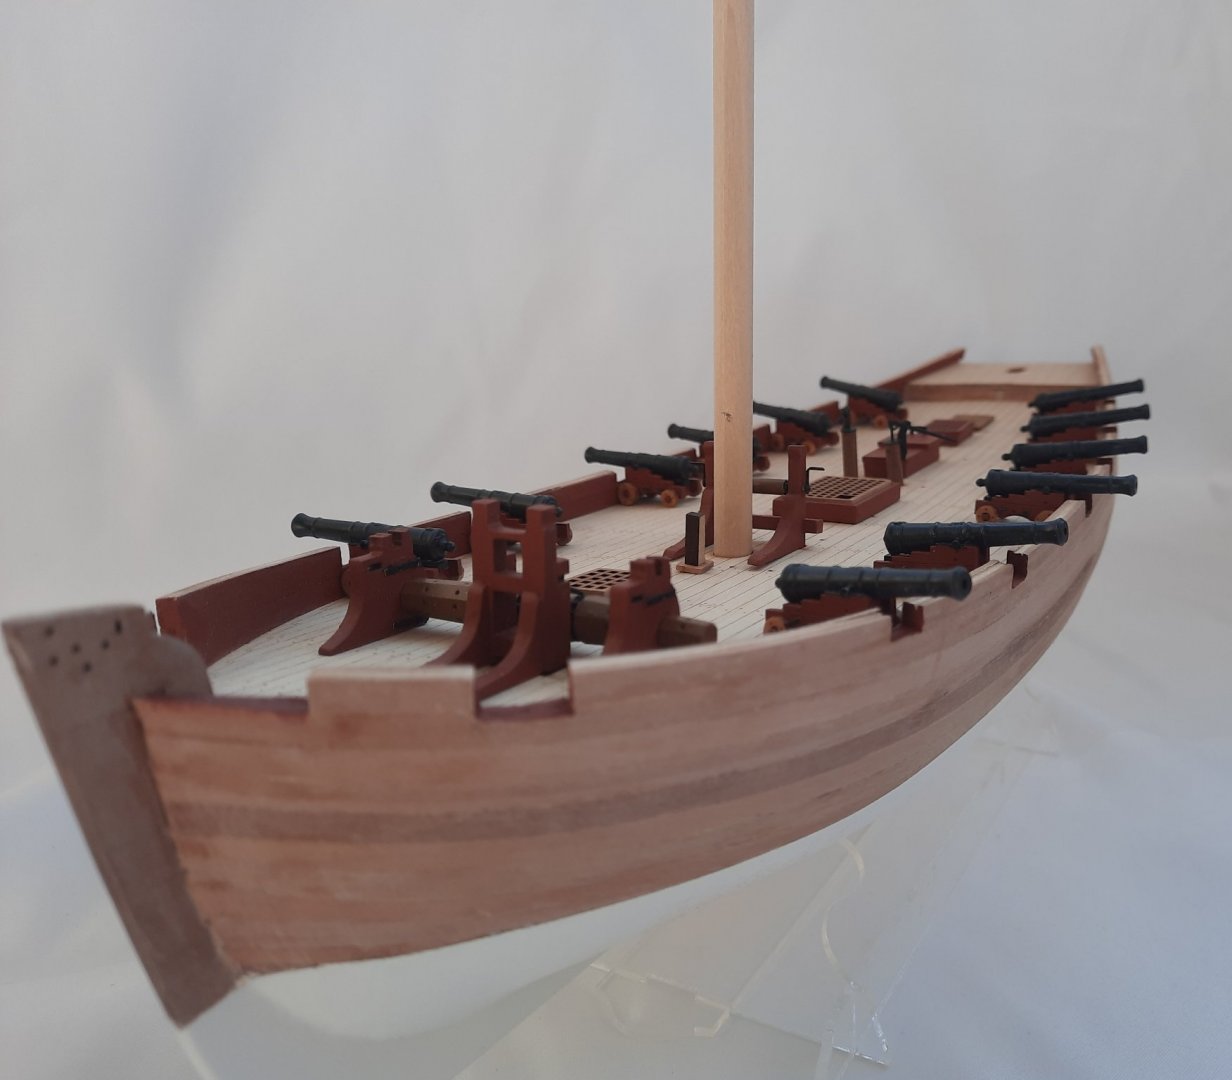
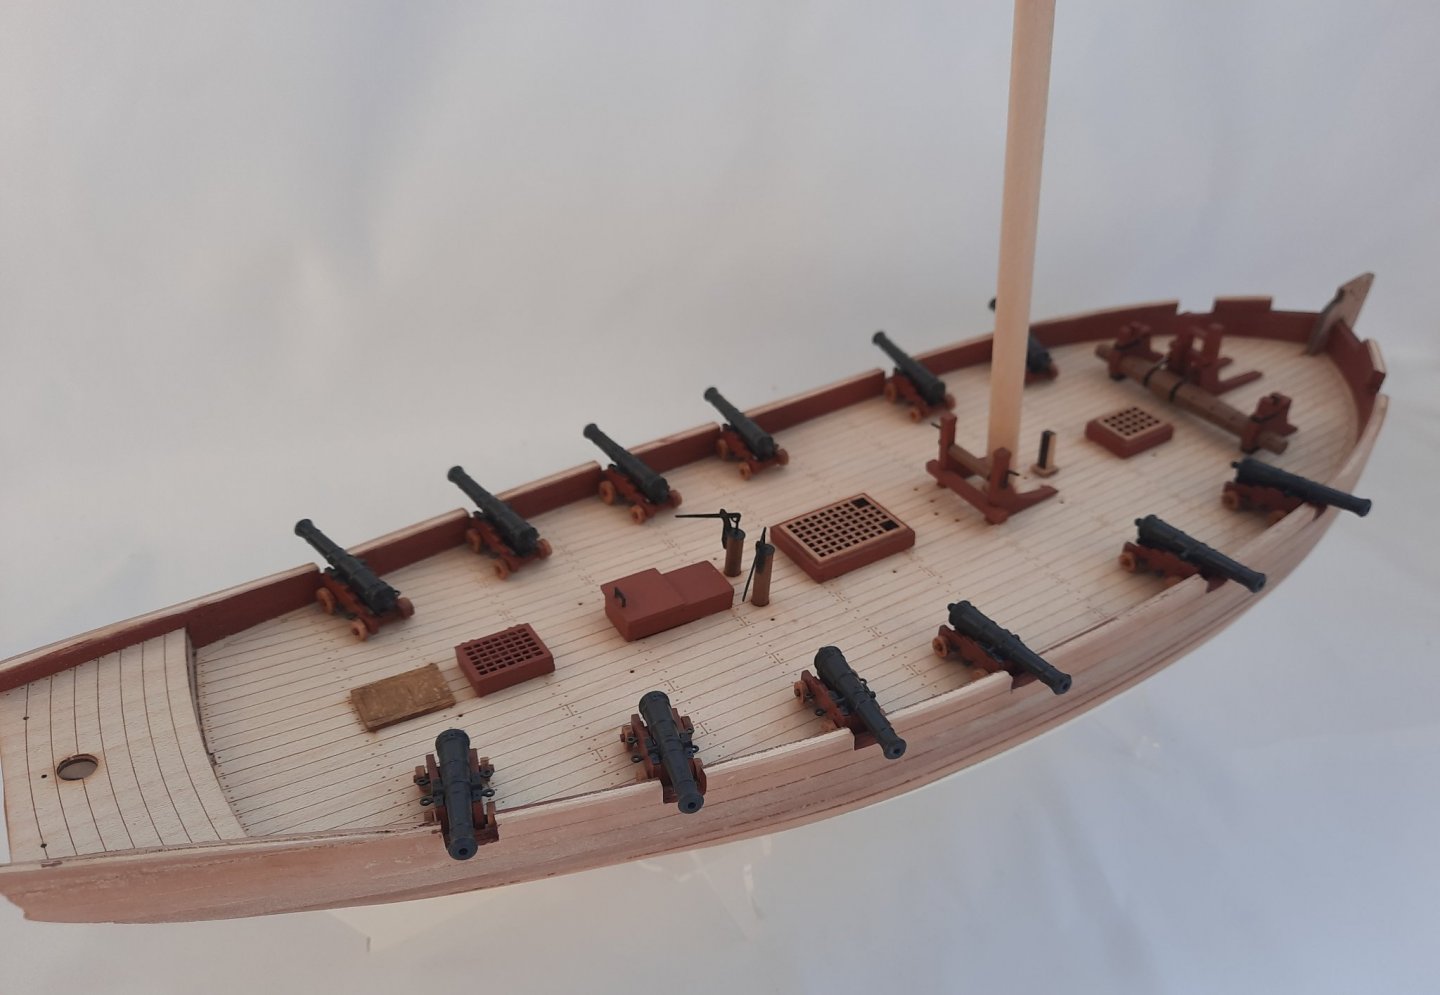
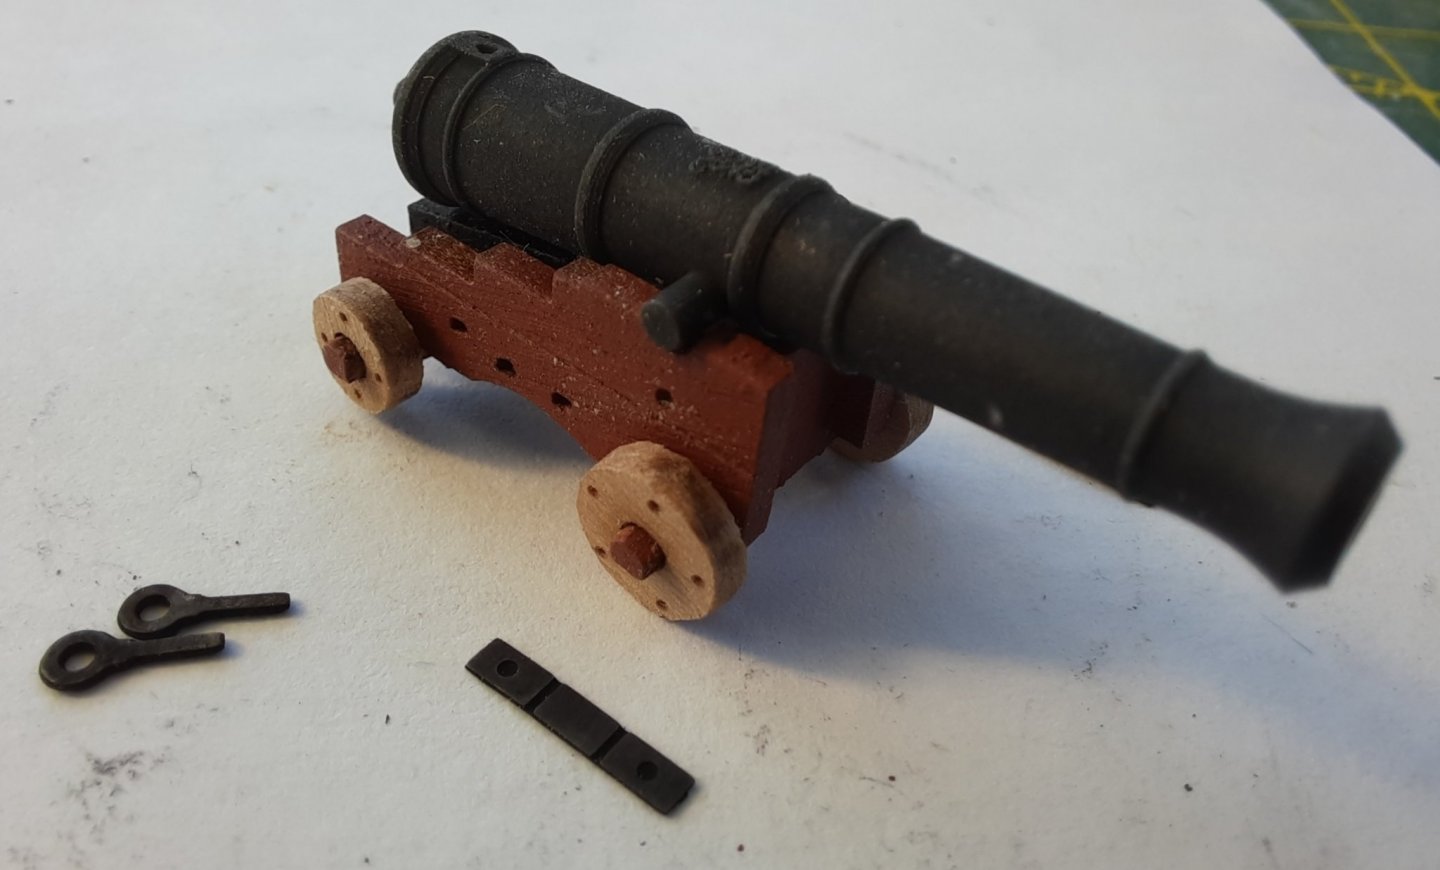
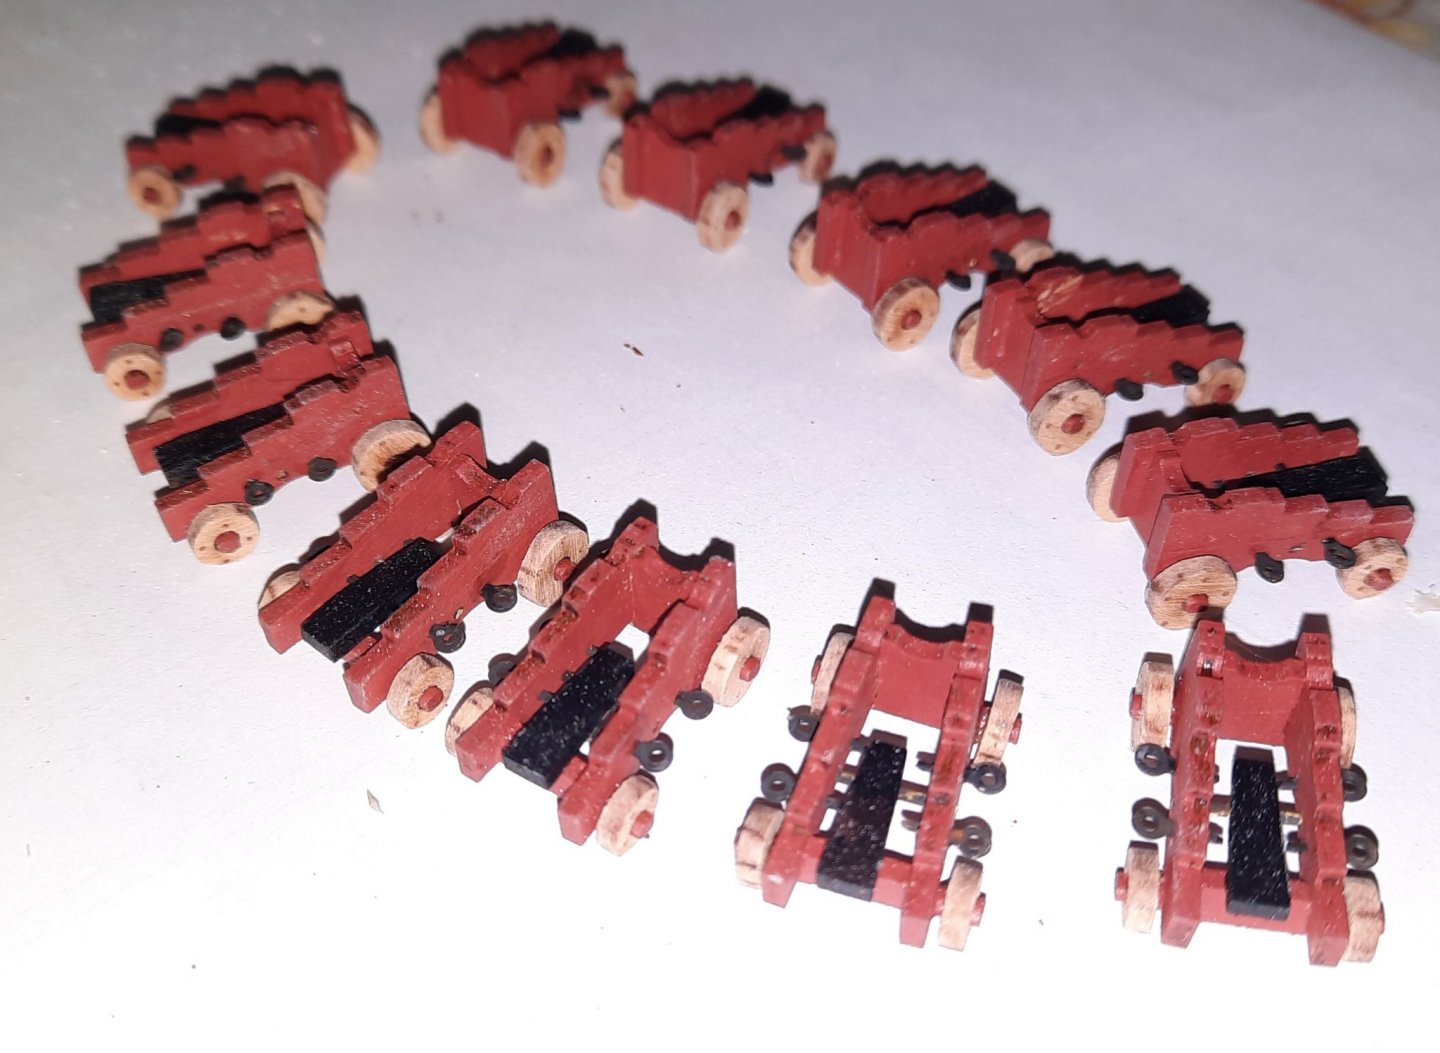
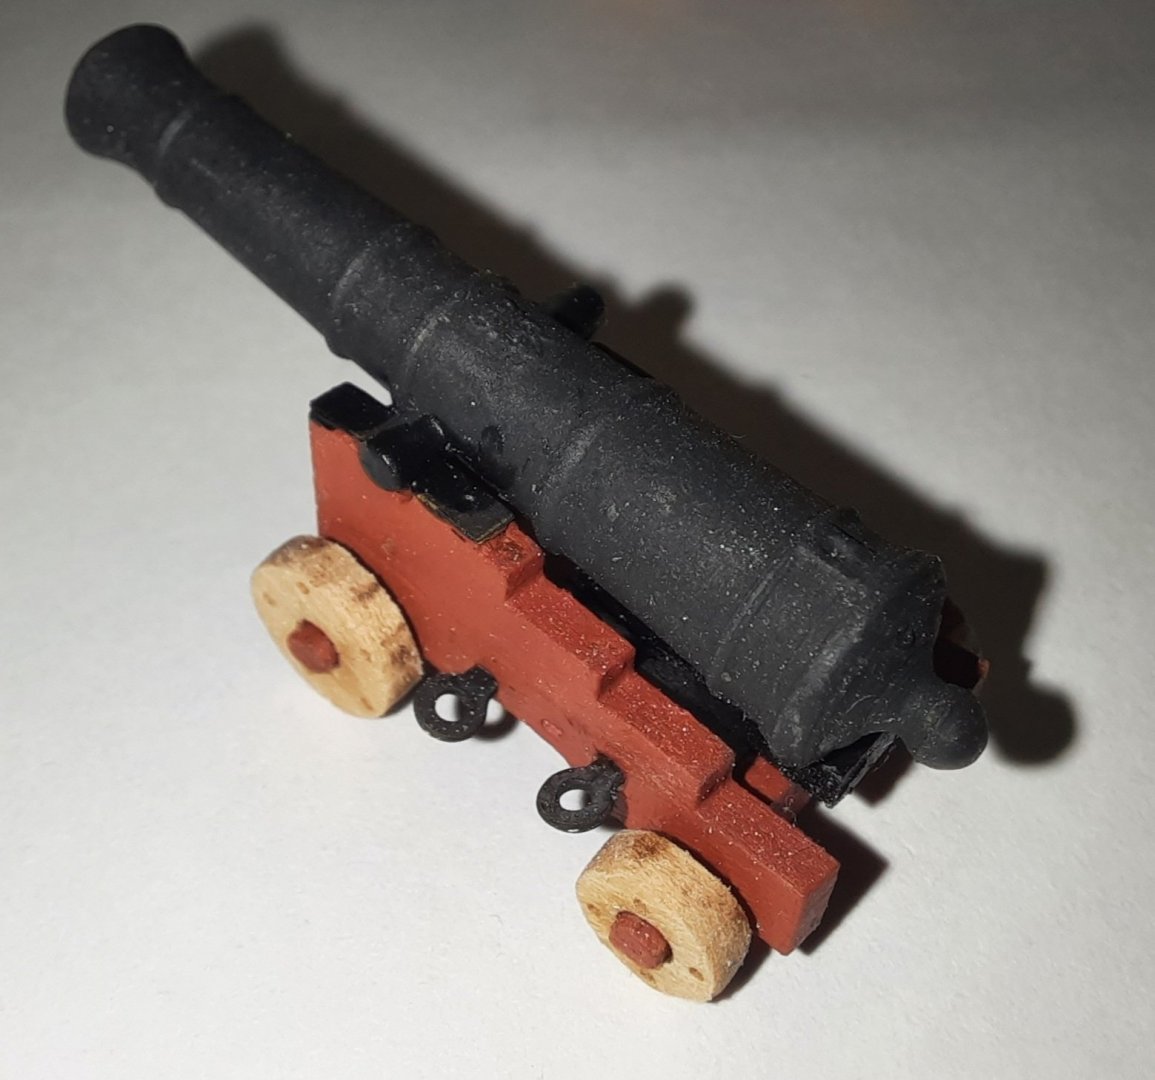
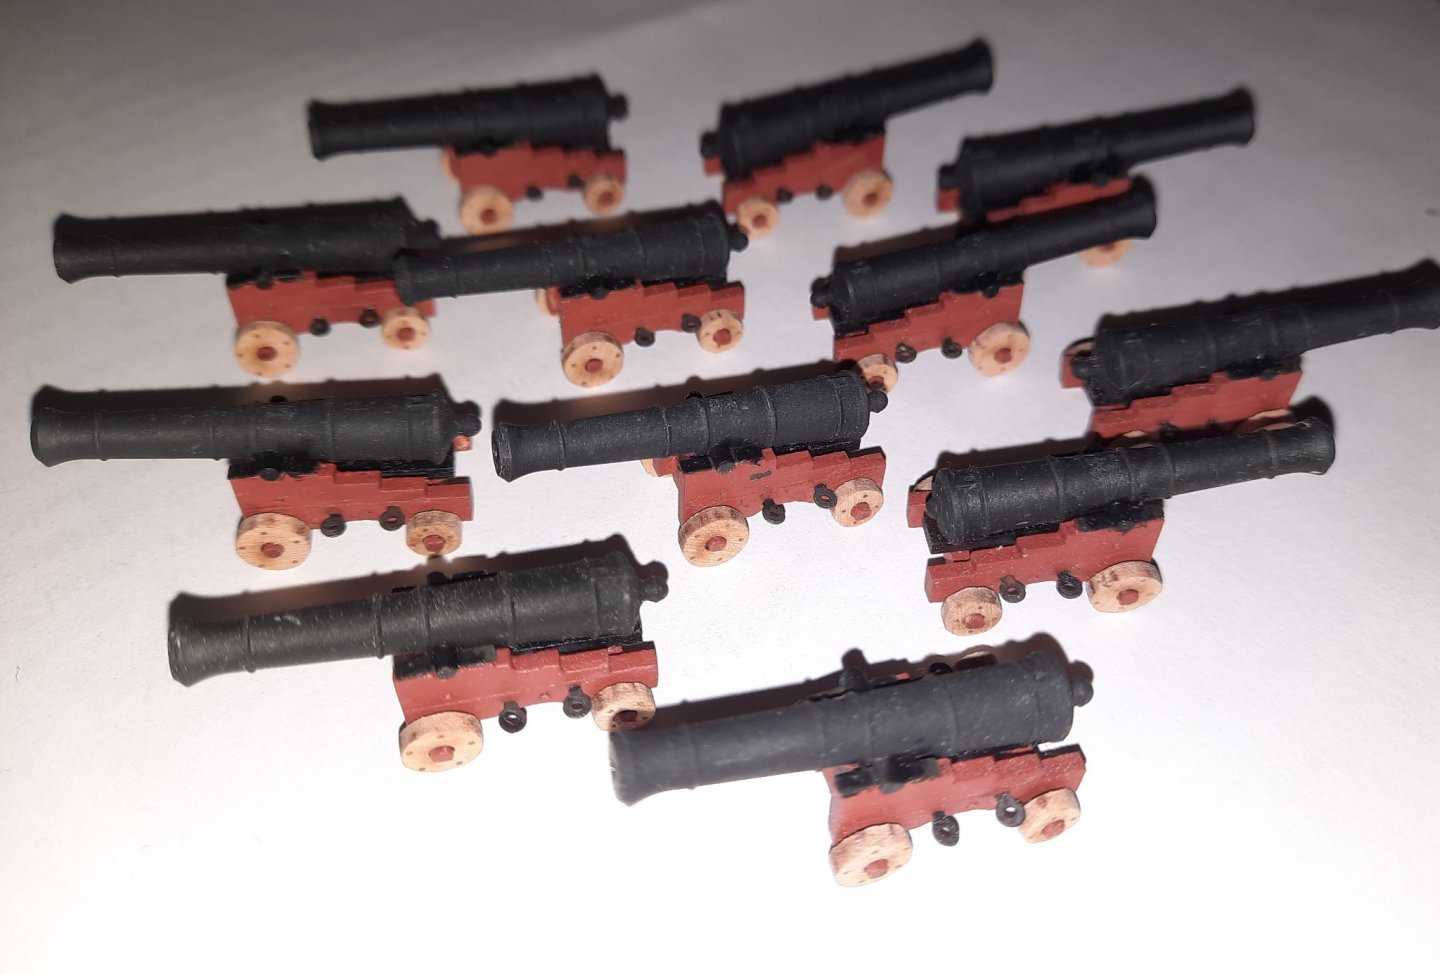
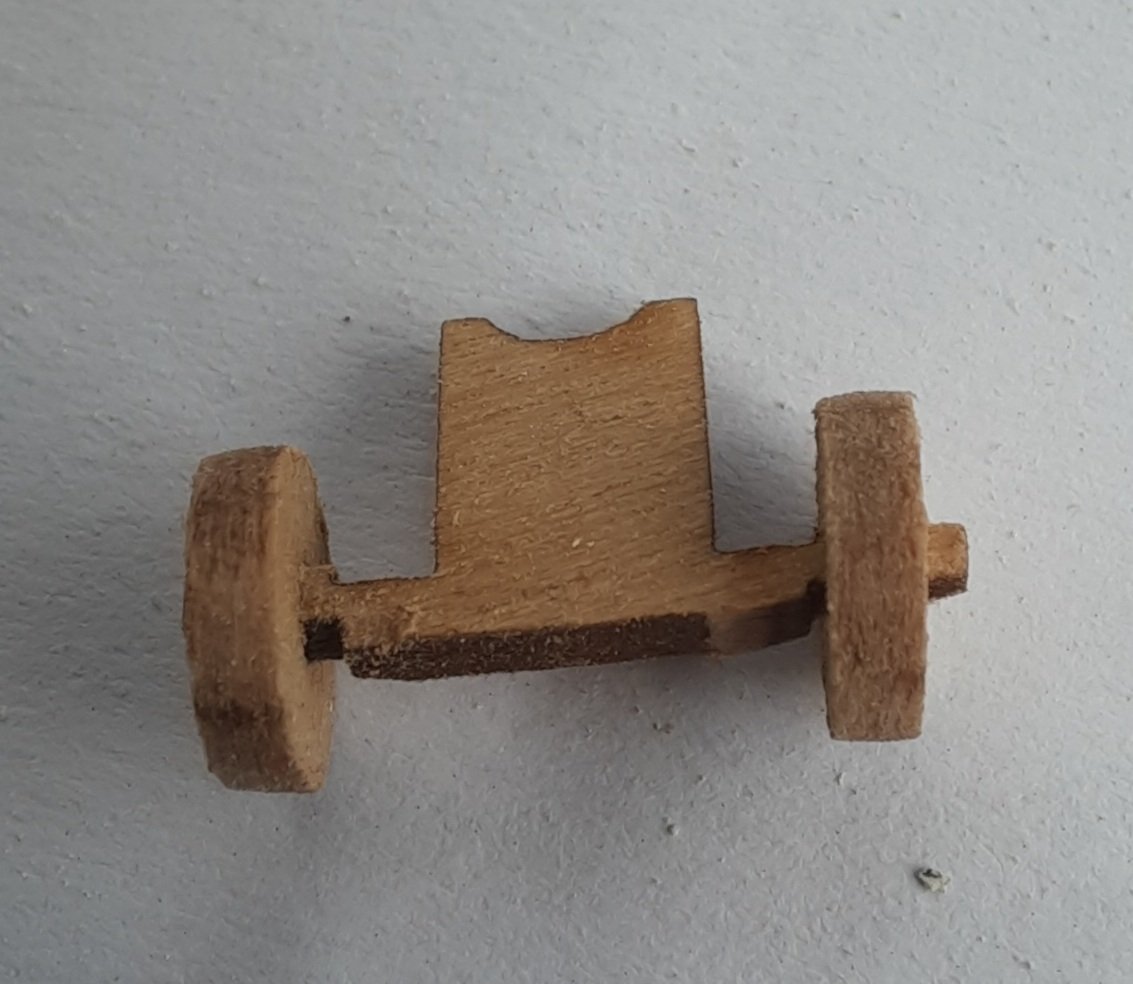
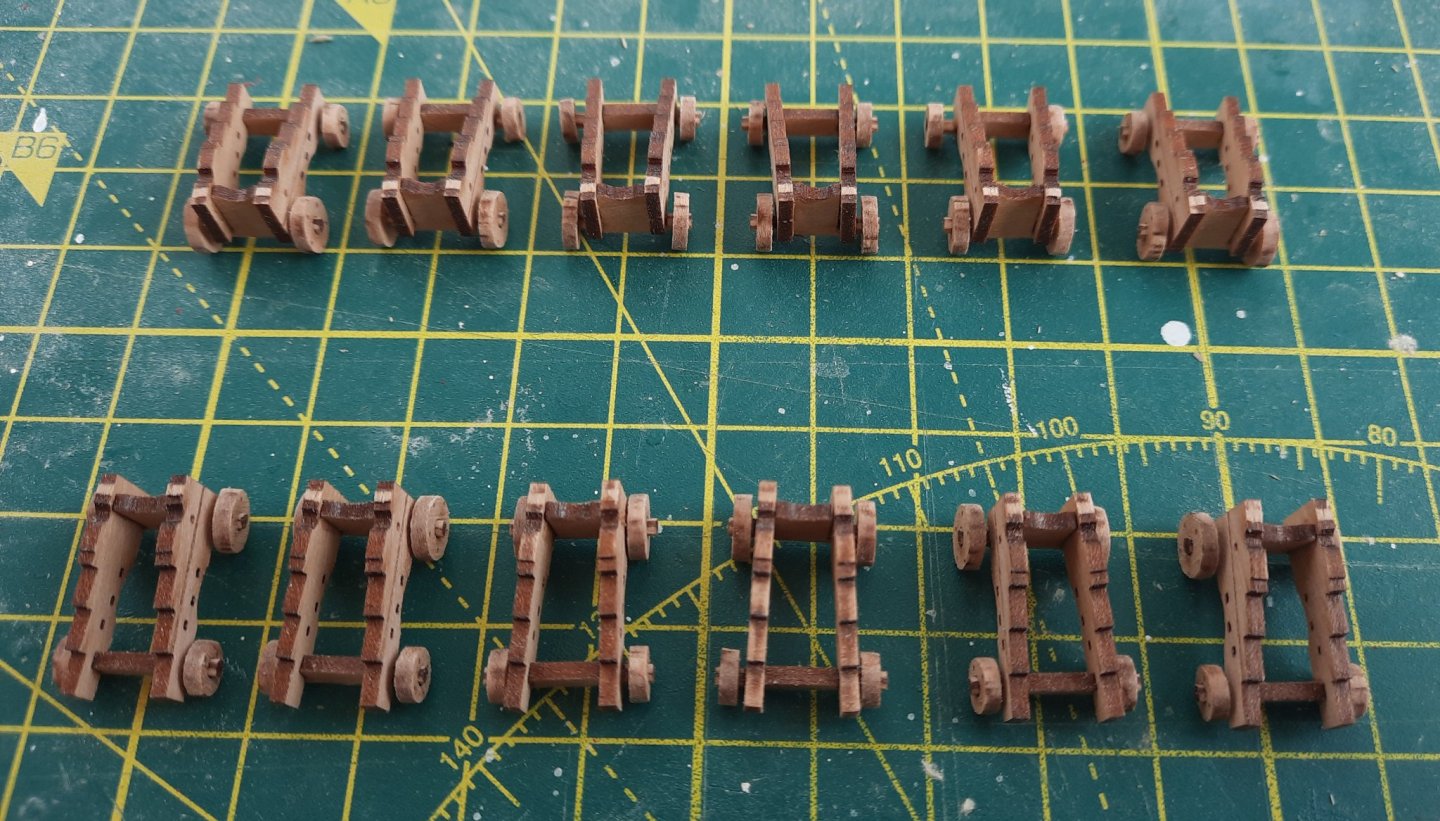
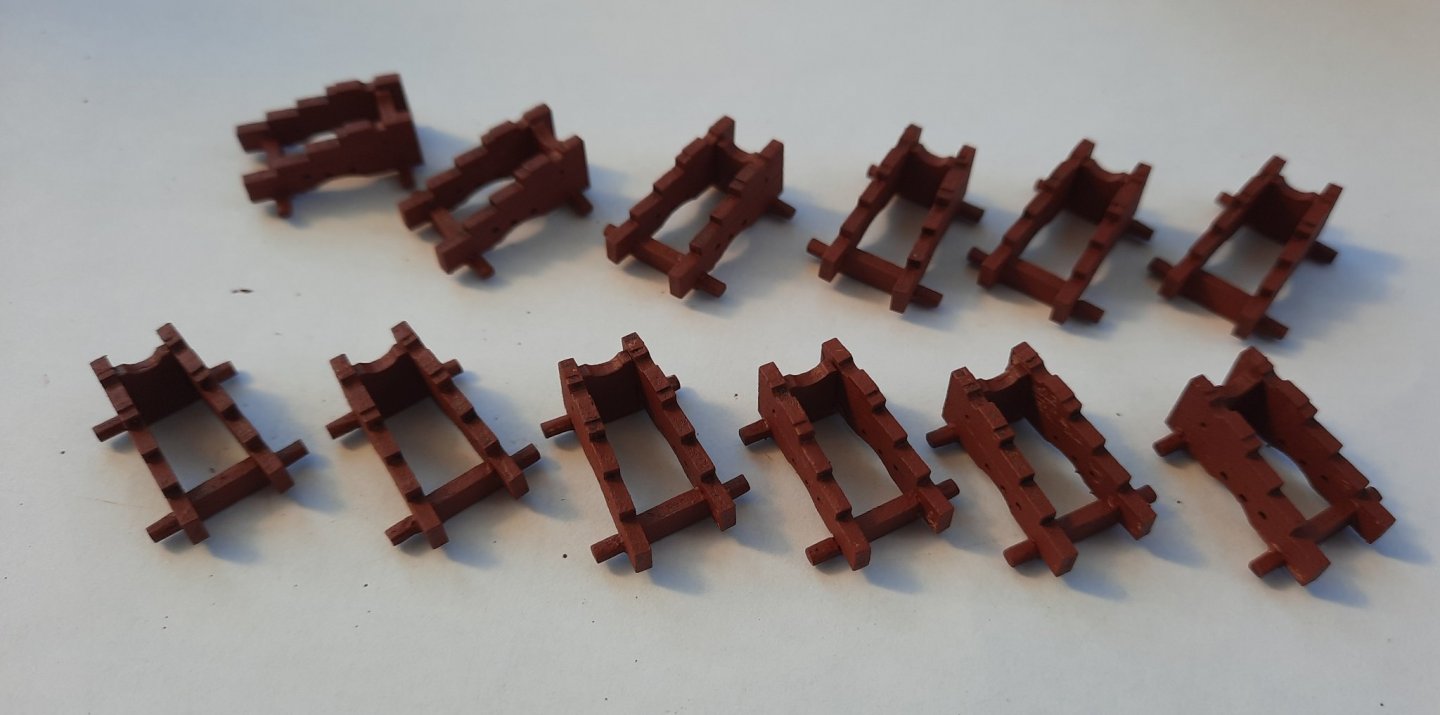
I am currently painting the hull white (below the waterline). After each paint coat the hull is sanded and filled as necessary. Hopefully the painting of the hull phase is now nearly complete. As there is quite of bit of dead time as each paint coat dries I thought I would use the time to build the 12 x 6 pounder cannons. Stage 1 - Preparing the Axles The first task was to file the edges of the front and rear axles so that the wheels would fit. As each axle was sanded I did test fit the wheels, as shown in the photo below. I also removed the laser char from the 24 front and 24 rear wheel rims. Stage 2 - Building the basic cannon frames This was a simple task of gluing the left and right gun carriage cheeks to the front and rear axles. I applied a drop of Titebond original to the slots in the axles. I fixed both gun carriage cheeks to the front axle and I then added the rear axle. Once the assembly was completed the frames were painted red ochre. I also painted the gun carriage beds black. 6 down and 6 to go All 12 completed The gun carriage beds have been painted black Gun Carriages painted red ochre Stage 3 - Adding the PE parts Each 6 pound cannon requires 1 x carriage transverse bolt, 2 x cap square and 4 x eyebolts. These are PE parts and need to be blackened. These parts were cleaned in acetone and then warm soapy water. Once they were cleaned and dried they were blackened using a burnishing solution. Parts ready to be fitted I started with fitting the carriage transverse bolt. Once these were in place I was able secure the carriage bed's. Next the four wheels were added to each gun carriage. Picture with the cannon dry fitted All 12 cannon frame assemblies completed Stage 5 - Adding the cannons and cap squares I used a touch of Titebond to secure the each cannon to the gun carriage. I ensured each cannon was correctly positioned with the crest and firing hole upmost. Once all the cannons were glued in place I added the cap squares. Picture of 1 completed cannon, the crest and firing hole can be seen on the cannon Completed cannon from a different angle All 12 completed cannons


- 160 replies
-
- 6
-
-
- Alert
- vanguard models
- (and 1 more)
-
This is so true, I am somewhere between a beginner and average ability modeller and I have found a range of accessible and outstanding looking models to build.
- 355 replies
-
- 3
-
-
- vanguard models
- Sphinx
- (and 1 more)
-
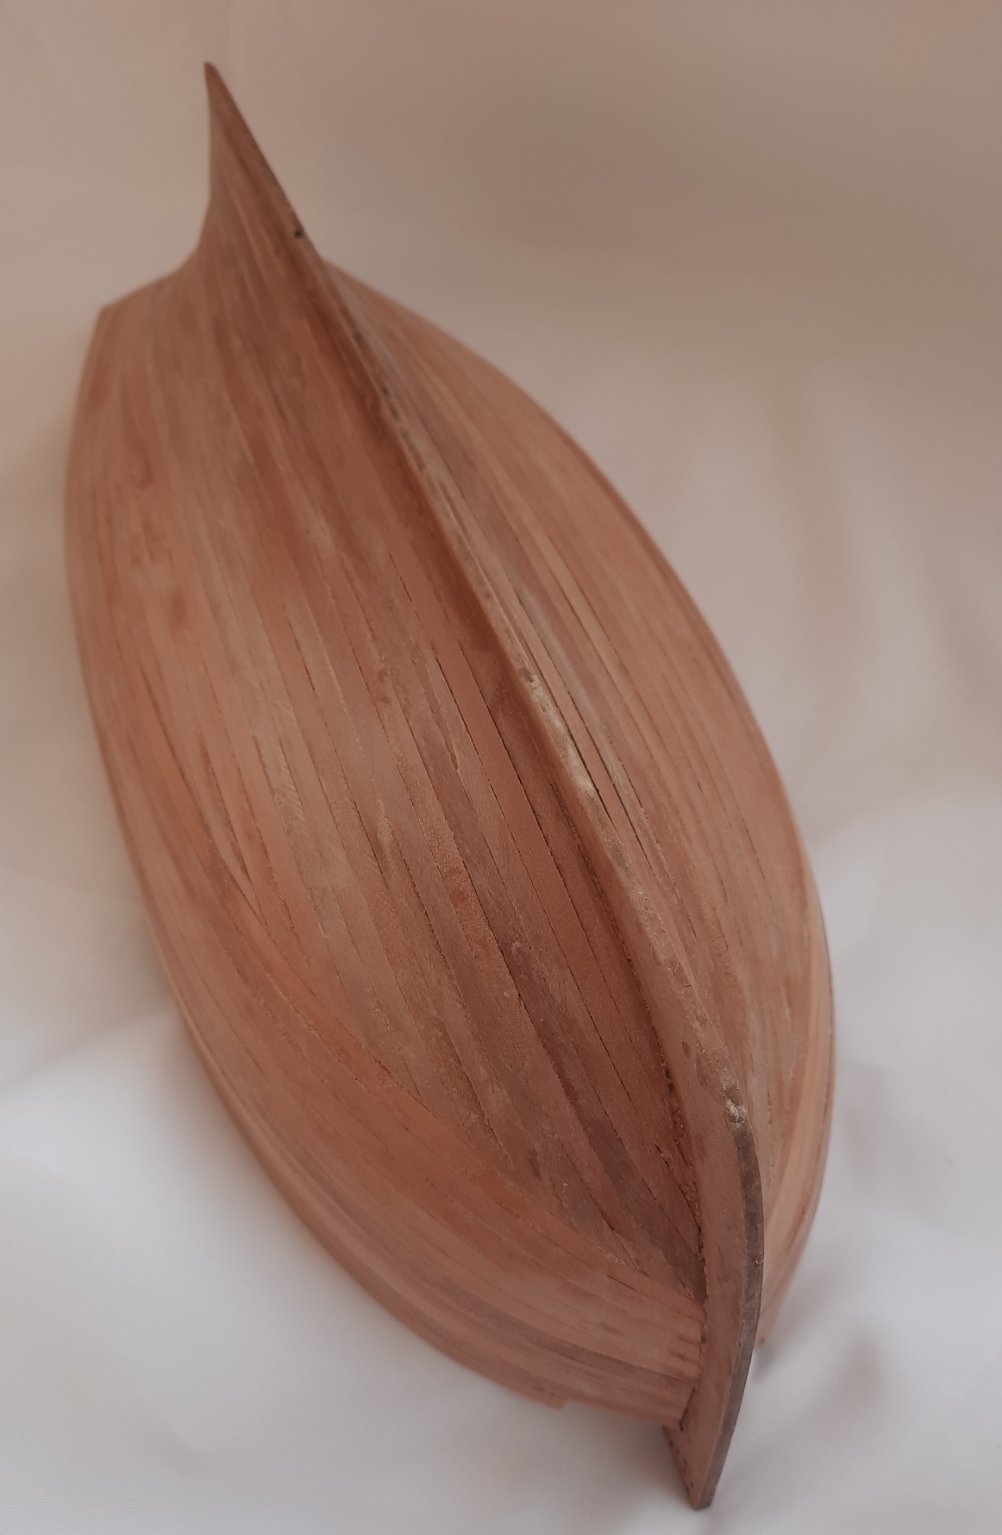
I did start by filling and sanding back the obvious dips in the hull using a sawdust and diluted titebond paste mix. I then like to add a thin coat of paint as I find this highlights the less obvious areas that requires a bit of additional filler. For this I will use a diluted 50 / 50 titebond and Ronseal wood filler mix. I did cut the waterline parts from both sides when removing them. Part 5 started to delaminate as it was being cut and was due to a fault in the material sheet.
-
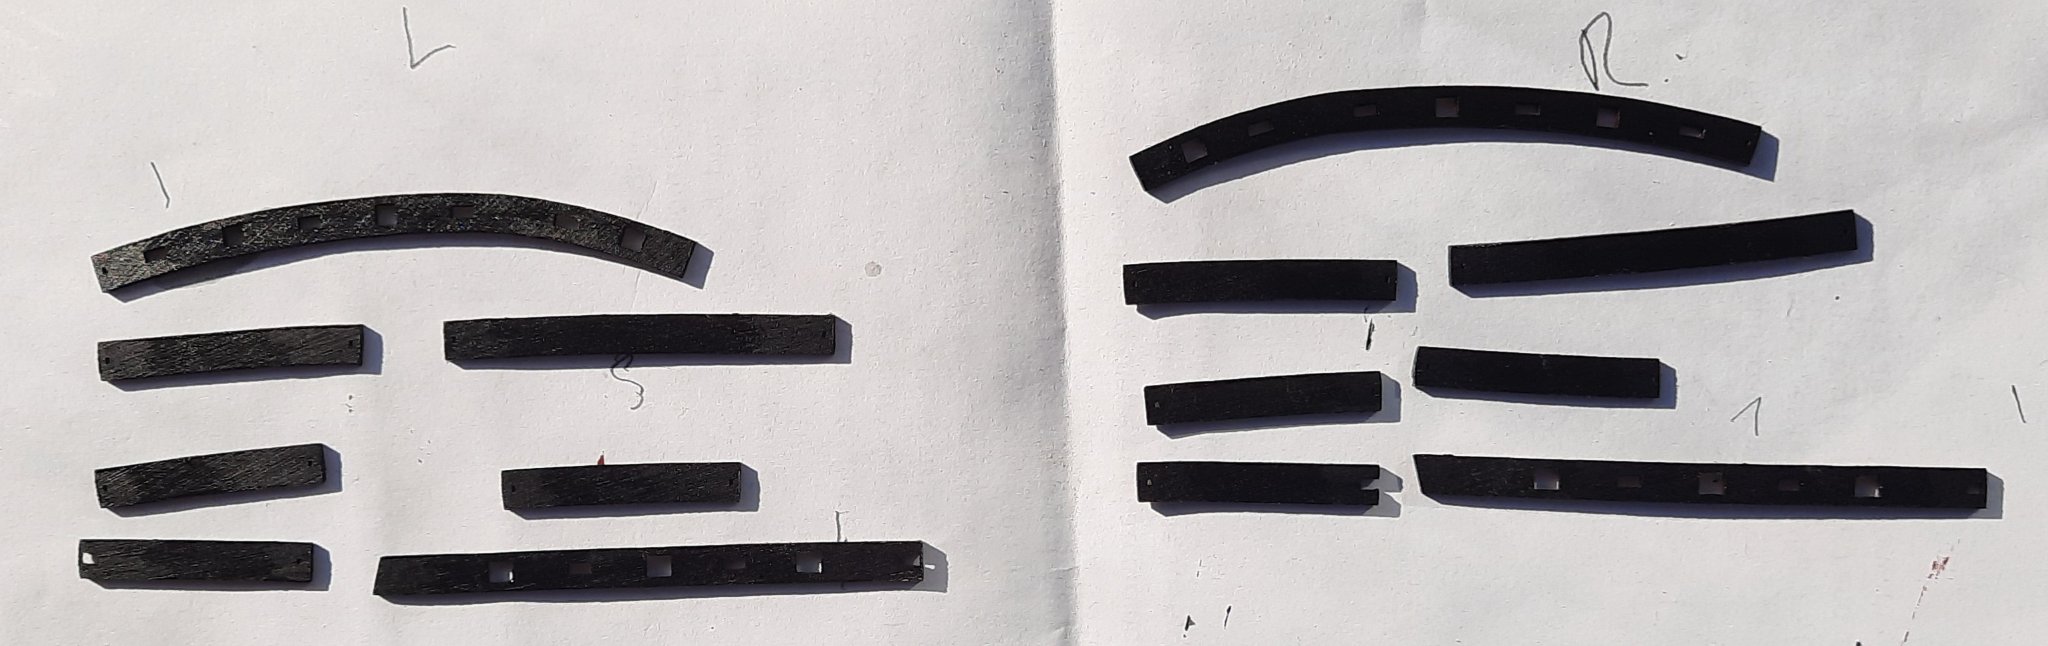
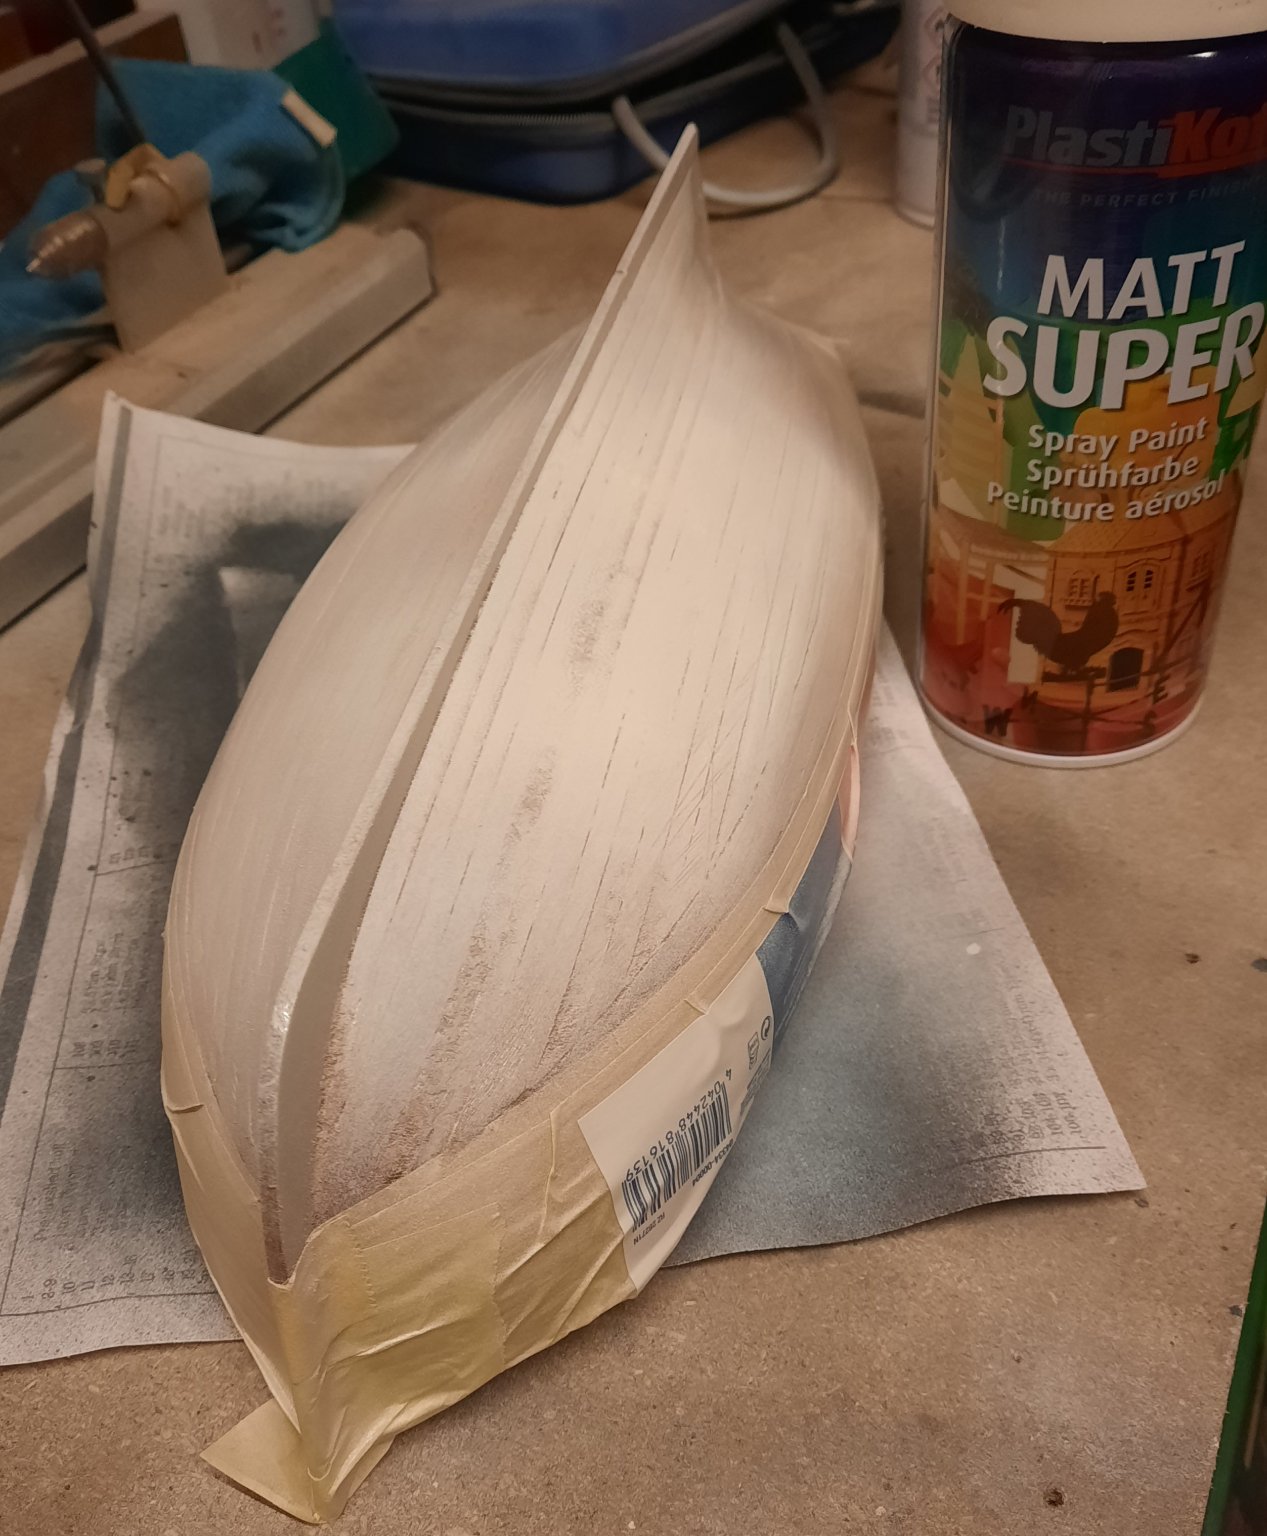
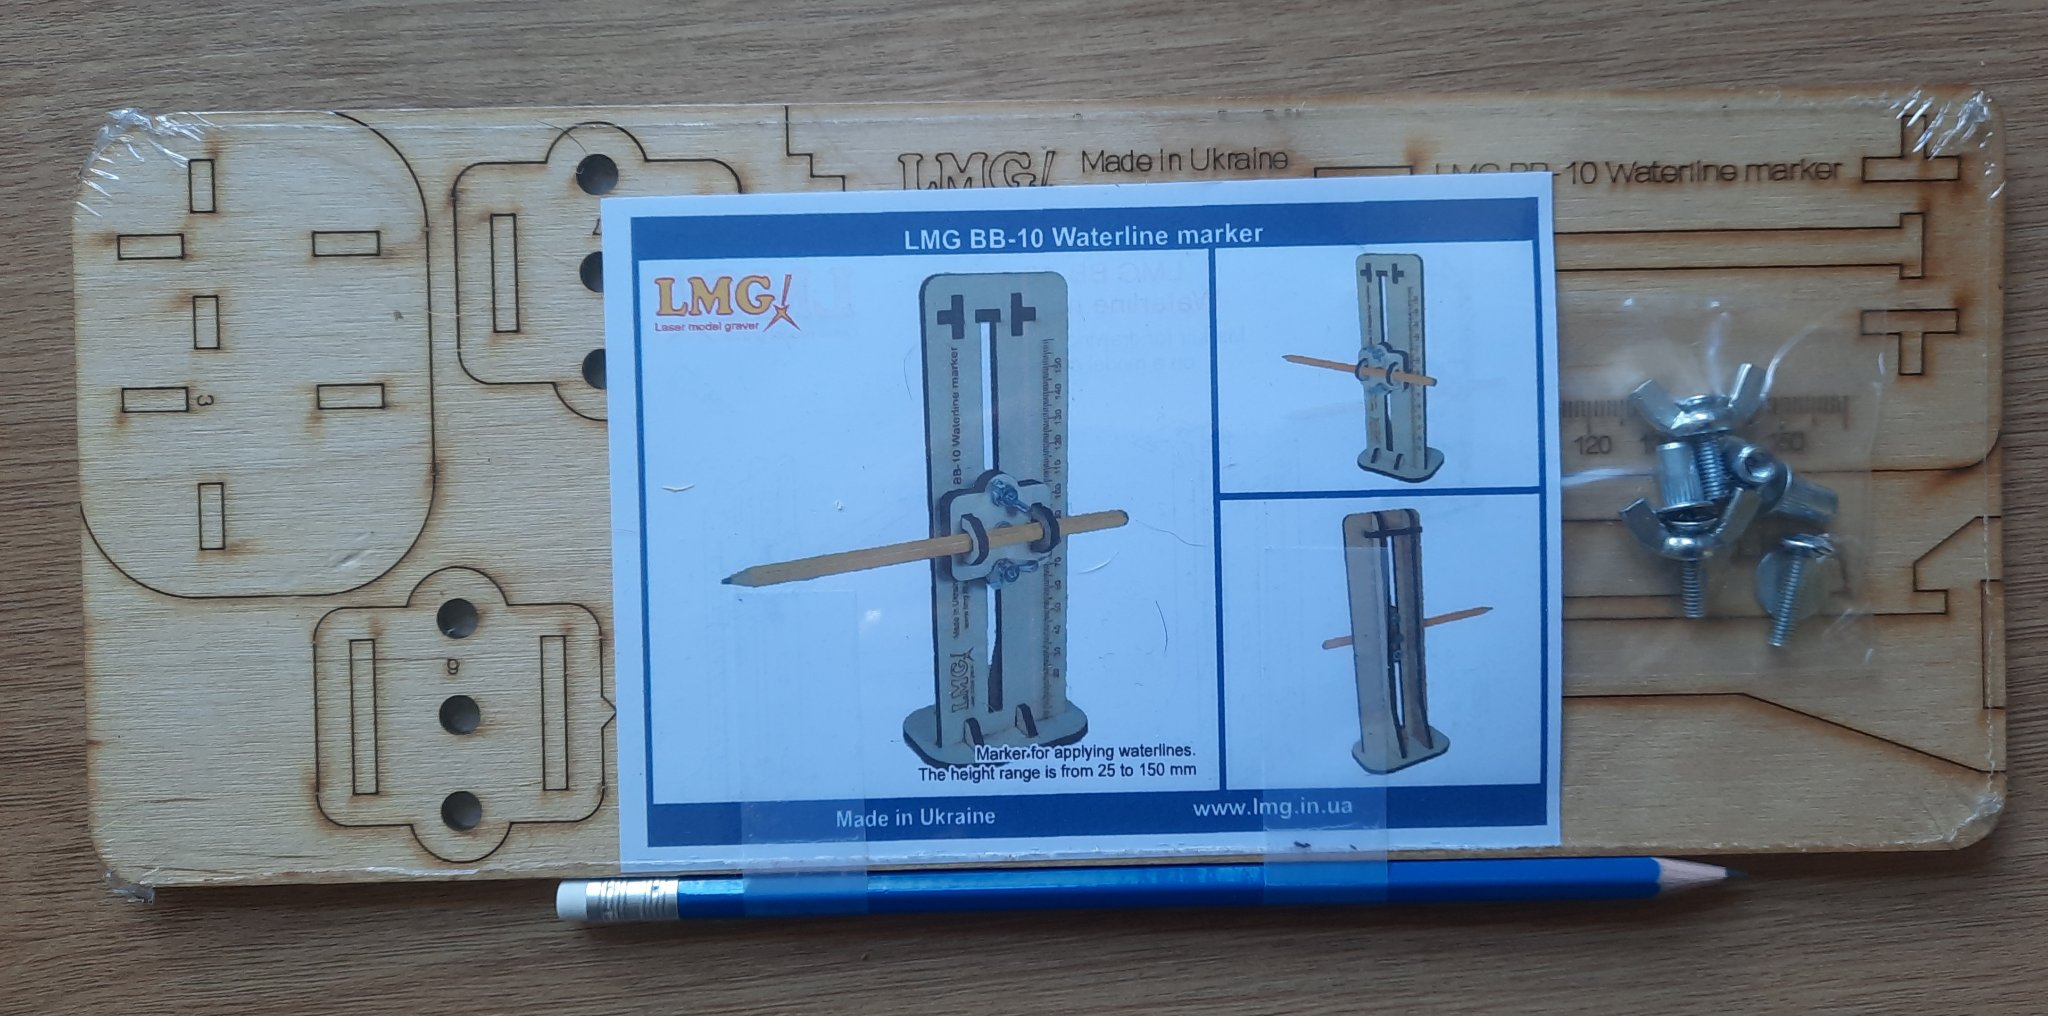
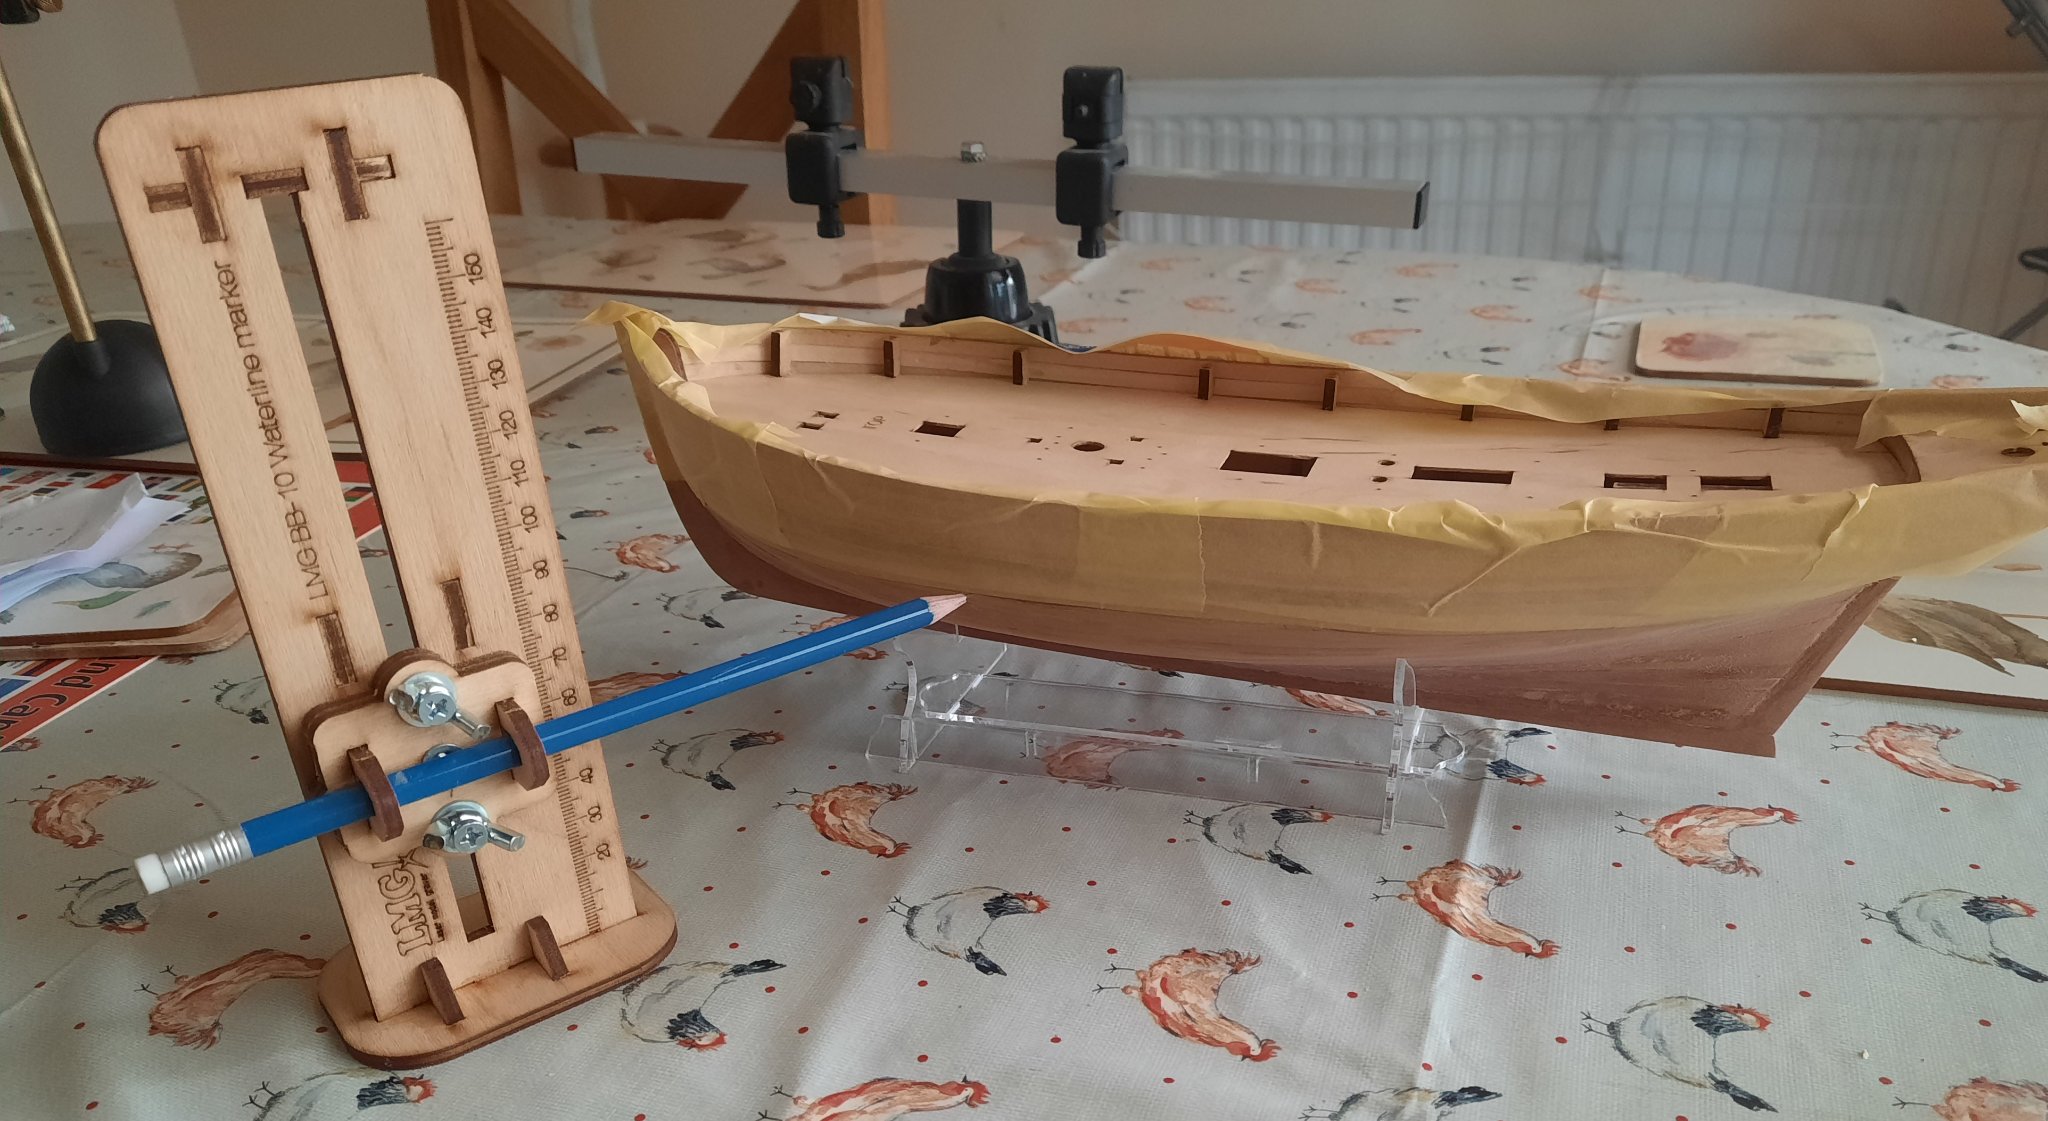
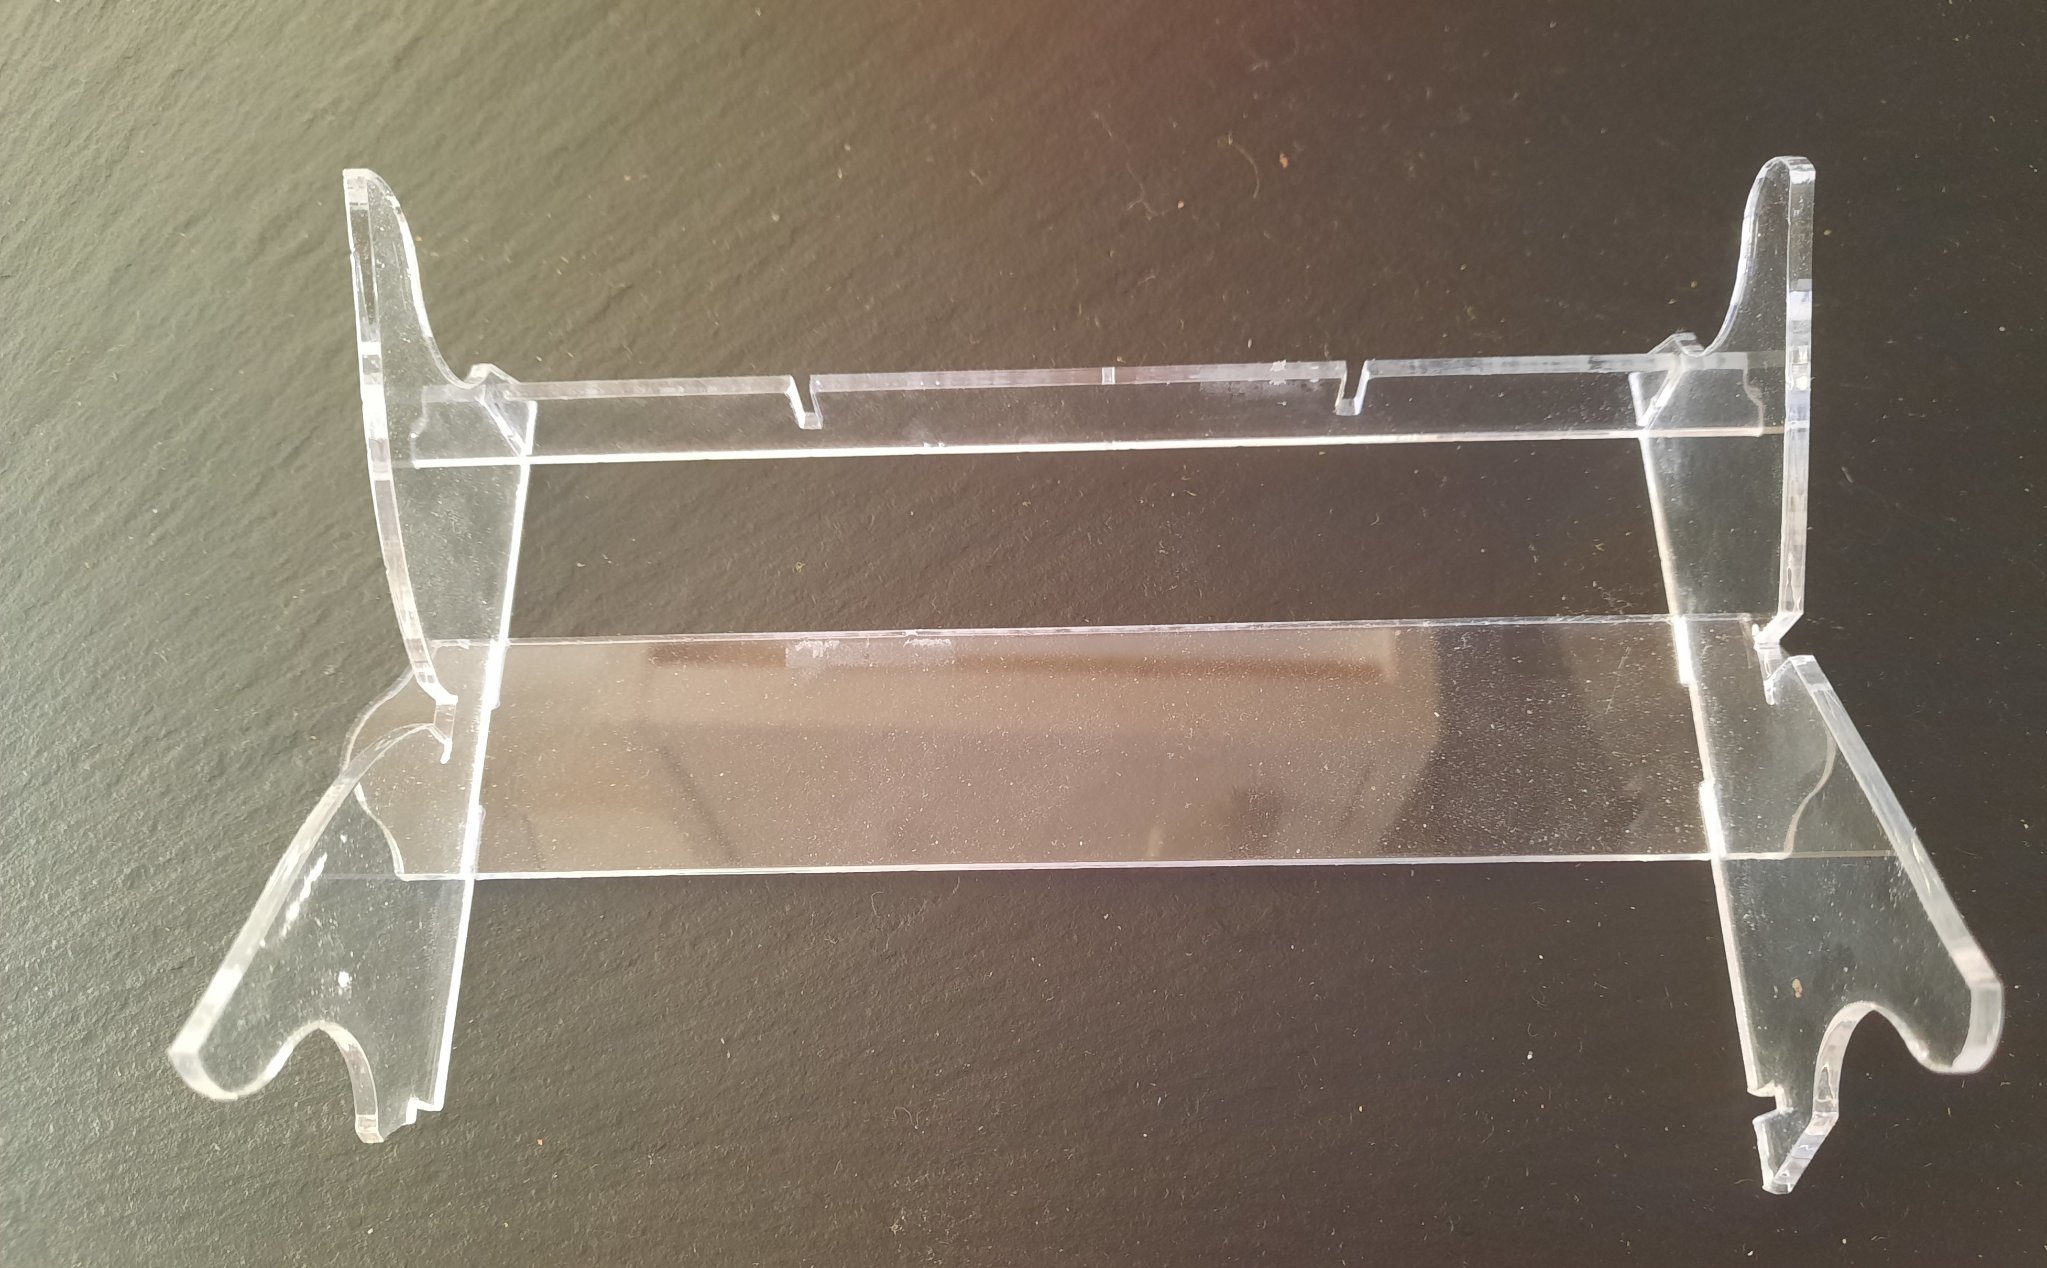
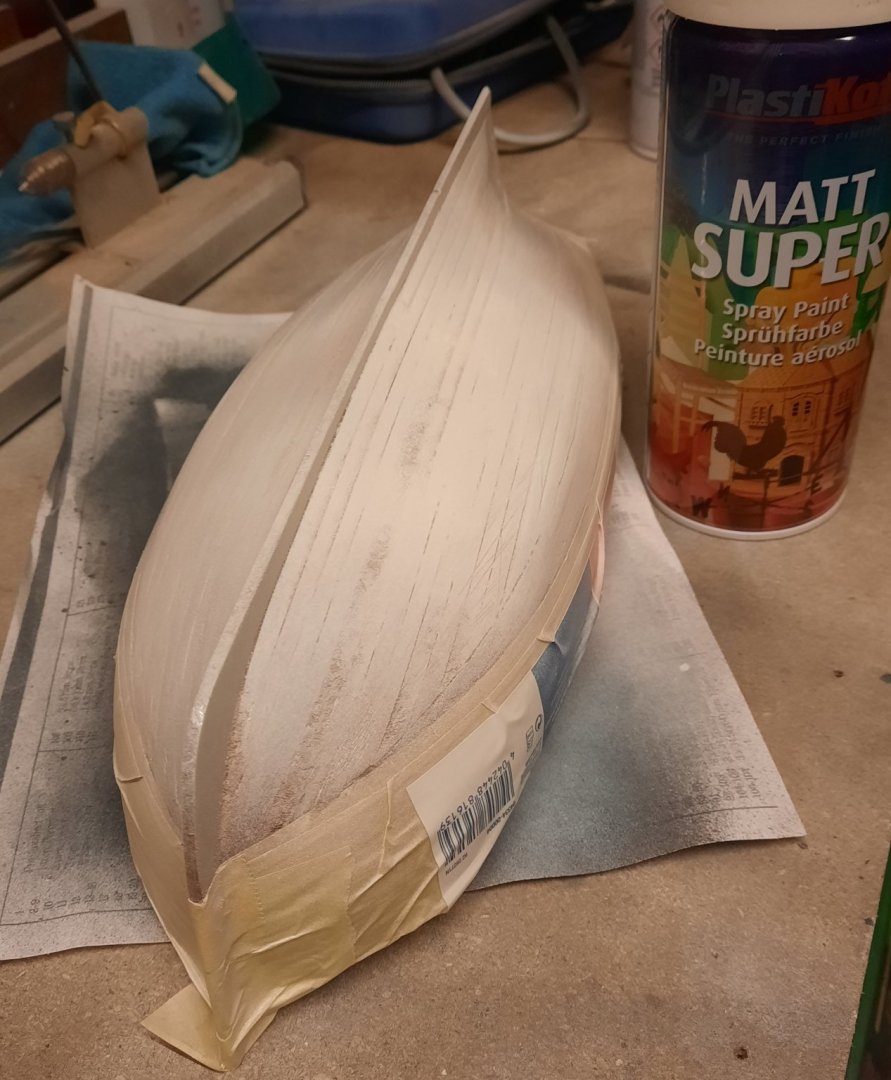
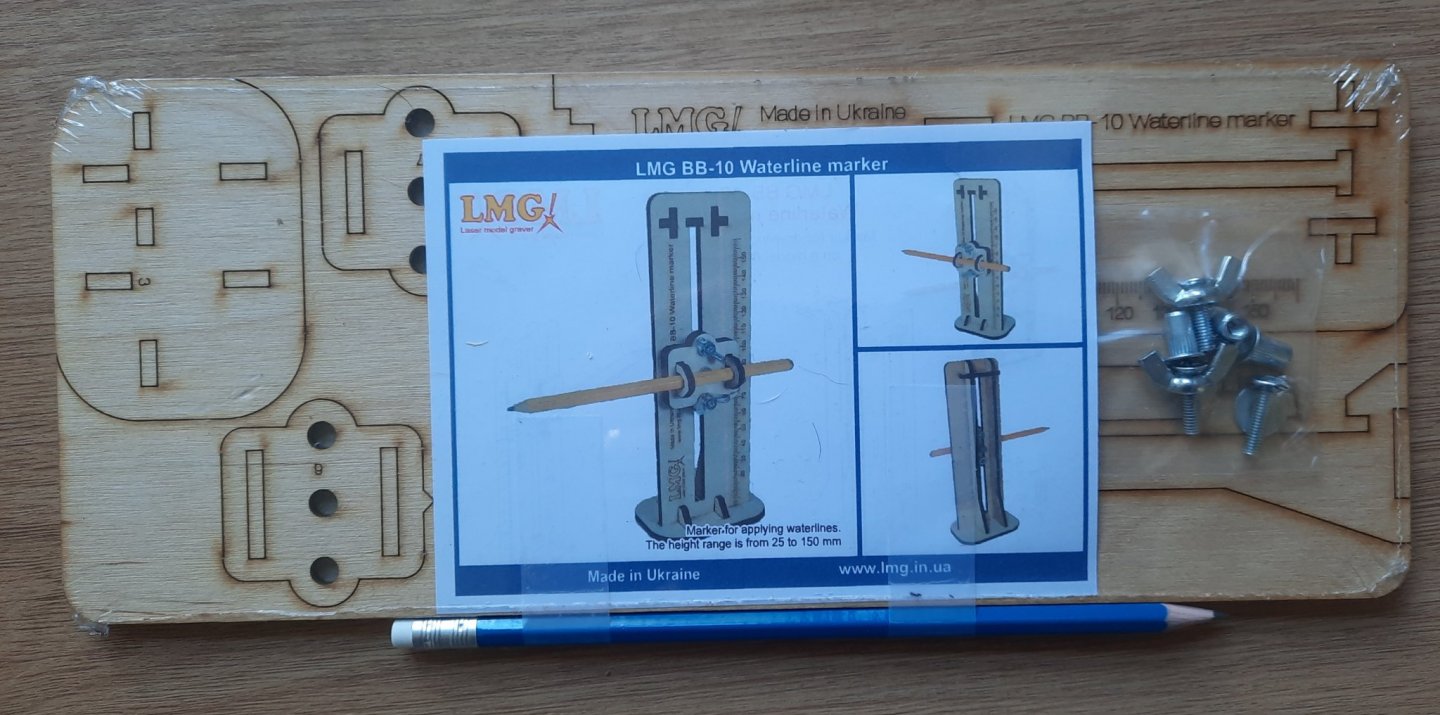
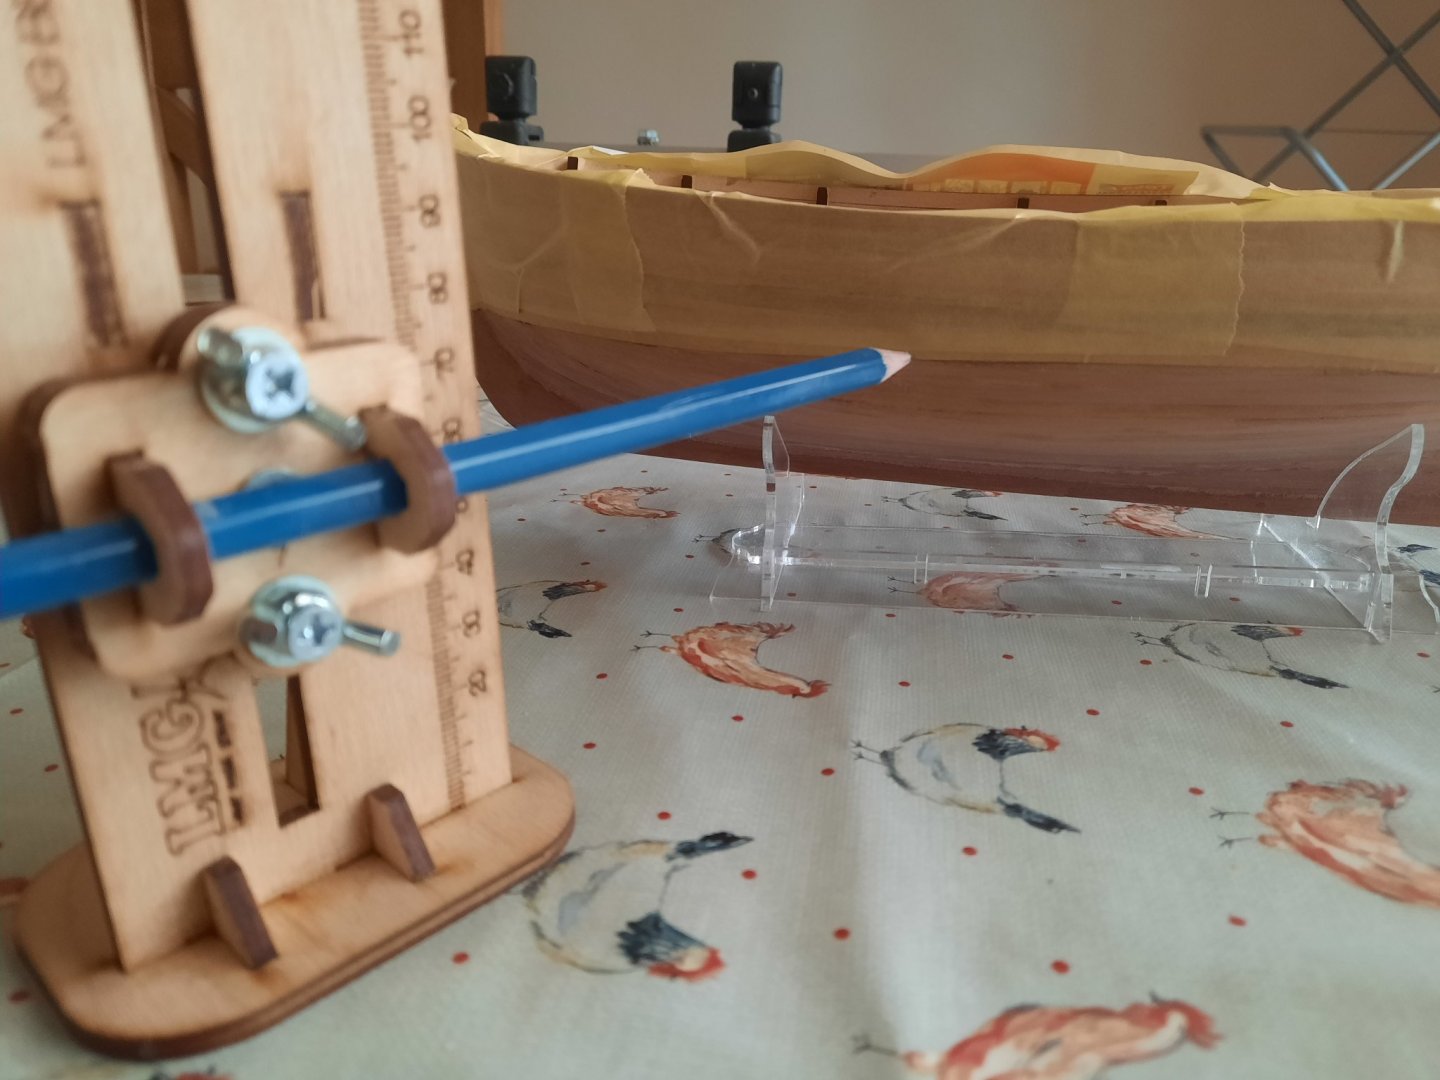
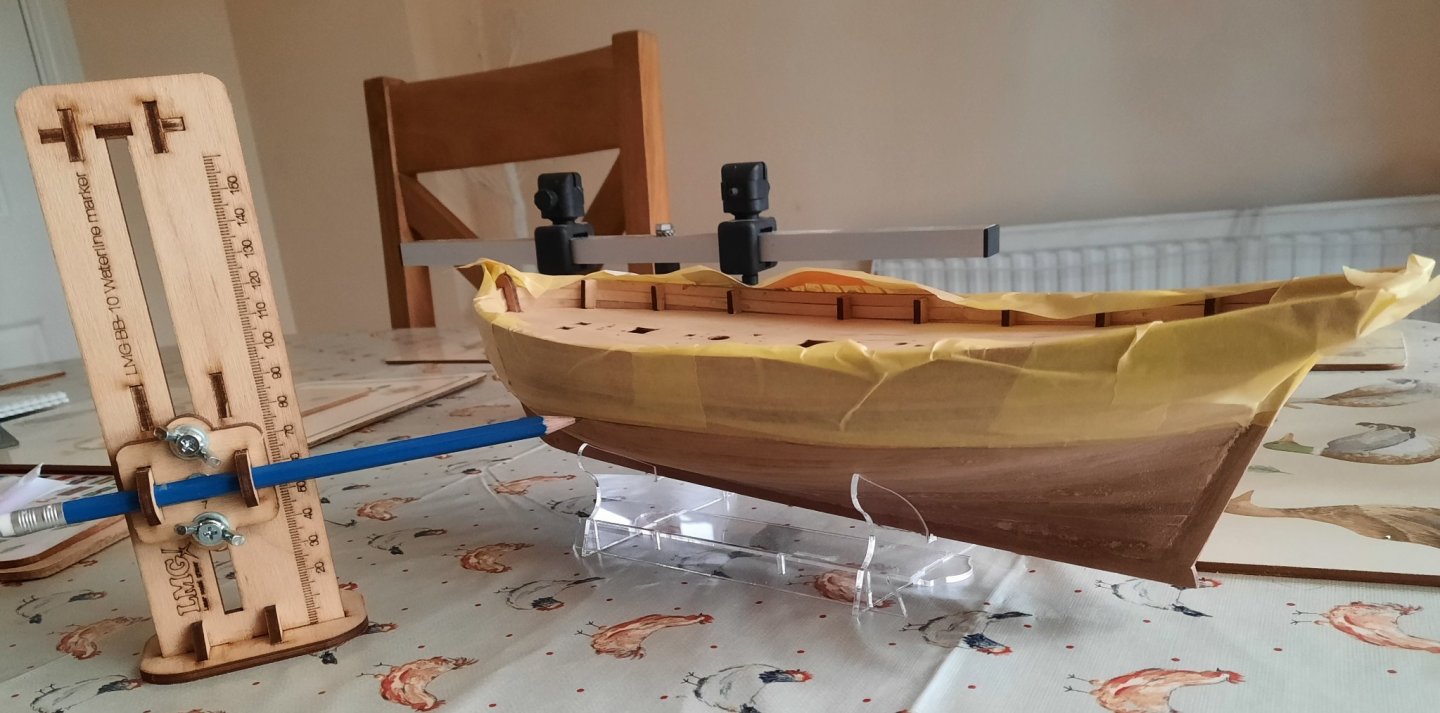
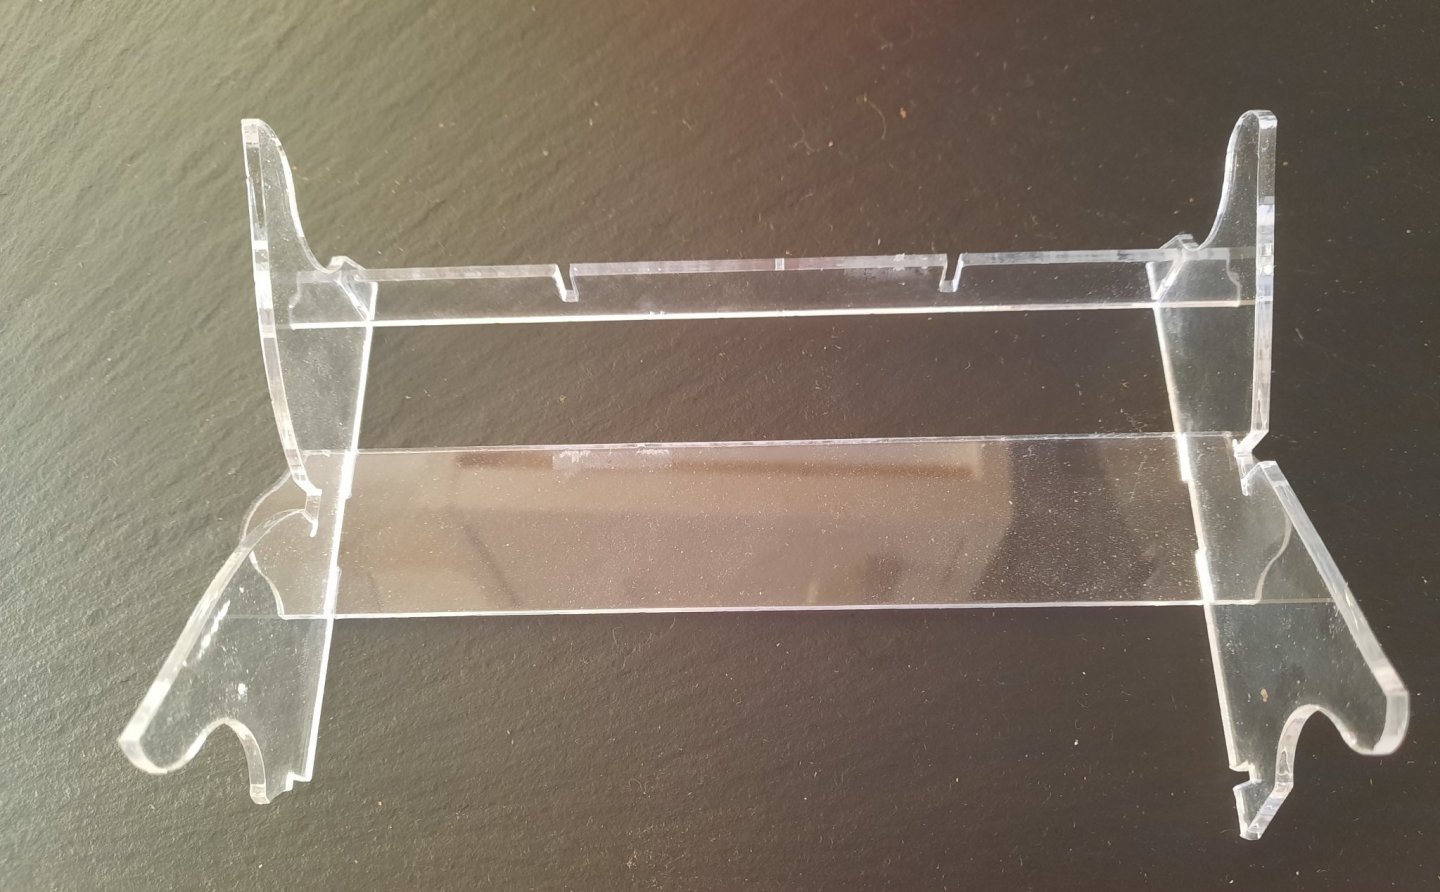
When assembling the stand for the Cutter Alert I managed snap some of the support brackets 😪 as I was trying to slot the parts together. I was gutted but thankfully I had enough unbroken bits to make a usable stand. As can be seen in the following photo both name plate brackets are beyond repair as it one of the long support strips and are therefore deemed to be missing in action. I also received the waterline marker I ordered from Vanguard Models at lunchtime today.😀 I will be honest I was not overly impressed with the quality of the materials of the waterline marker as a couple of parts suffered a bit of delamination which was an easy fix with some watered down pva. I also had to file some of the slots in order for the parts to fit together. I did change my mind on the tool however as I did find the tool easy to use when adding the waterline to the hull. After I marked the waterline I applied tape to the hull in readiness for the painting. I decided to use the Plasti-kote 3100SE Super Matt White Spray paint. I have now given the hull a light spray coat of white paint which is now drying. Once dry It will be a case of more sanding and filling (where necessary). I will then spray another light coat of white paint which will be followed with more sanding (600 to 800 grit) and light spray painting until I have an overall smooth white finish.

- 160 replies
-
- 2
-
-
- Alert
- vanguard models
- (and 1 more)
-
A nice package arrived just now. This is my next task after lunch. Thanks Chris

-
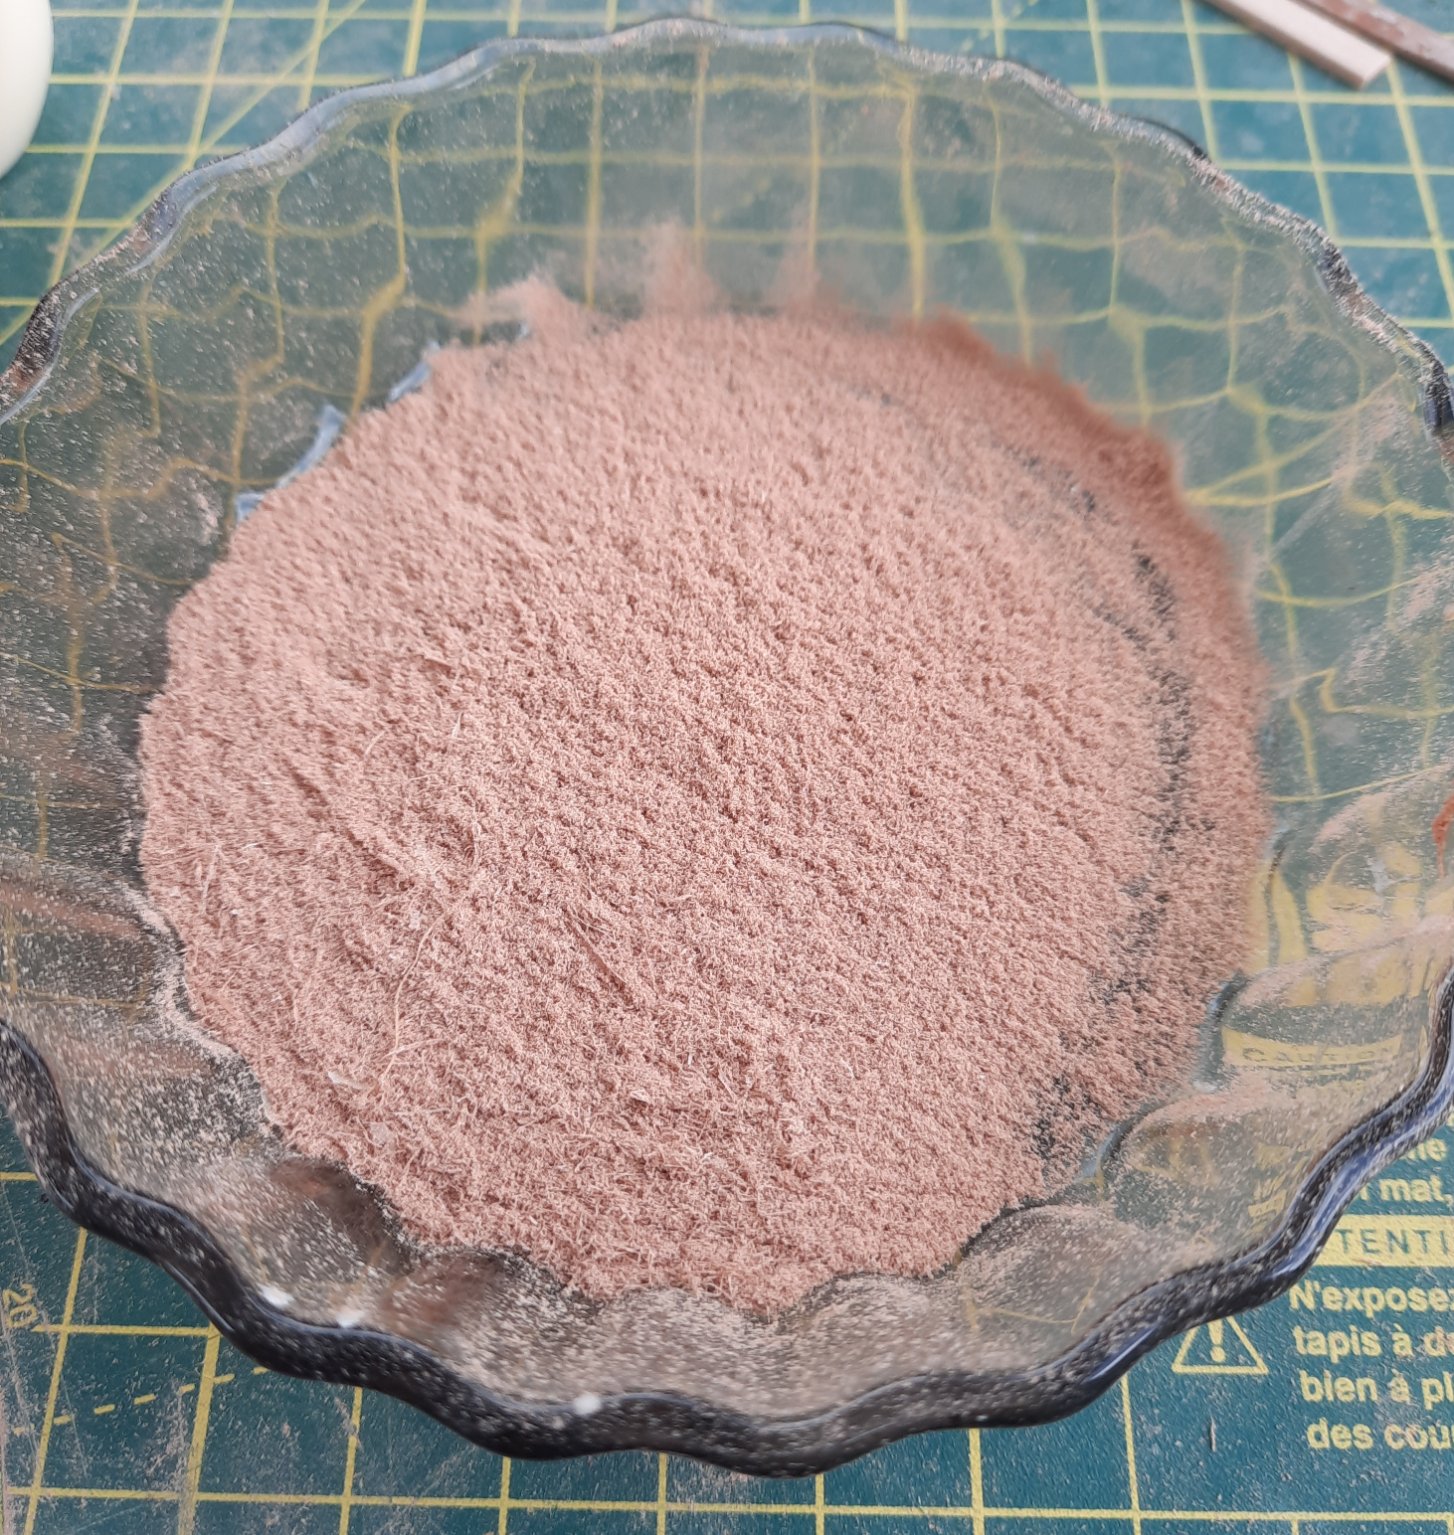
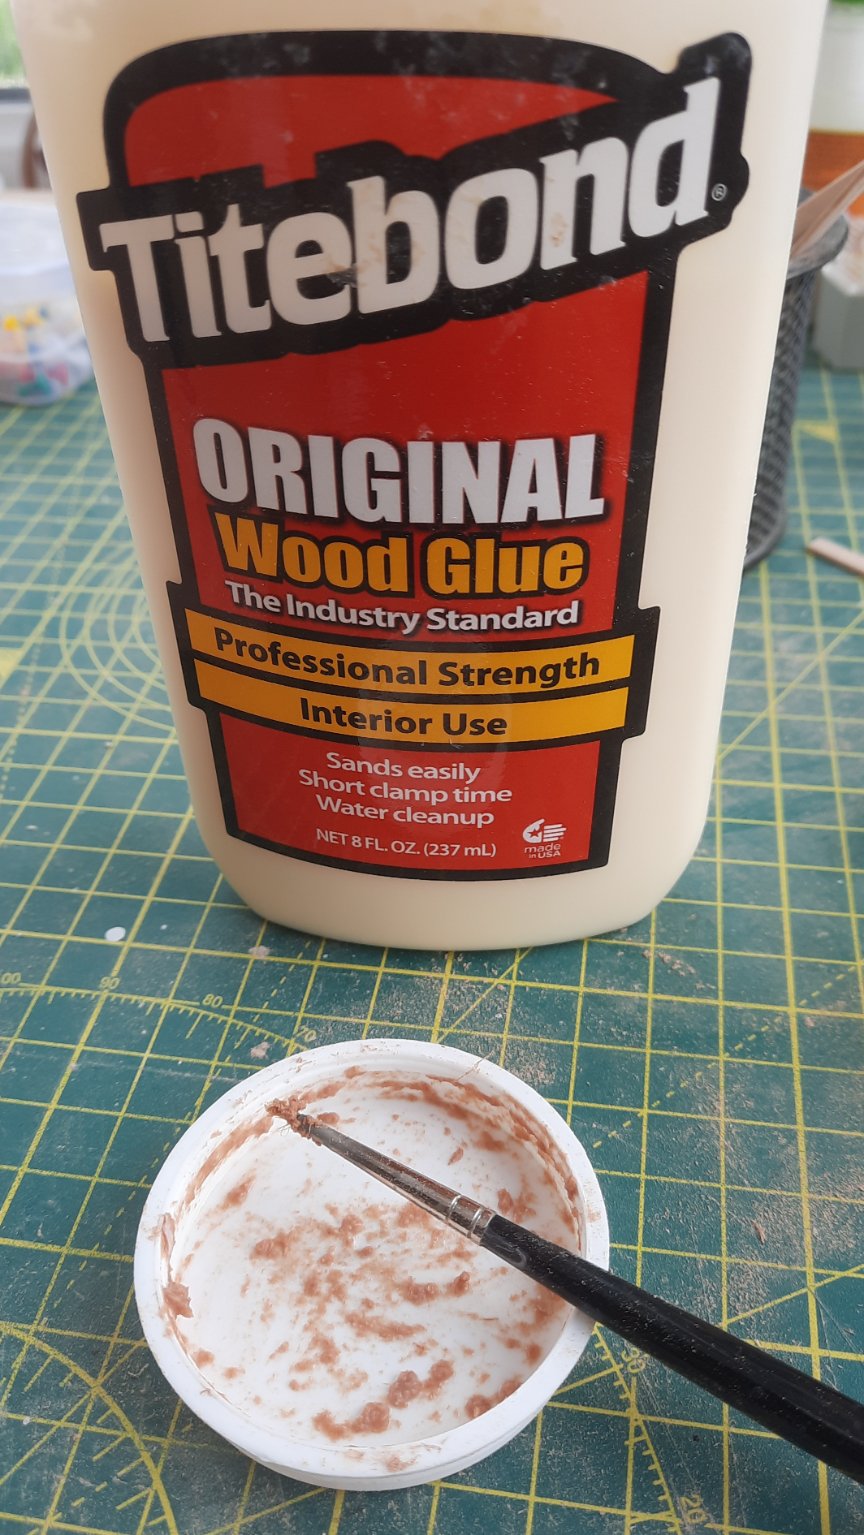
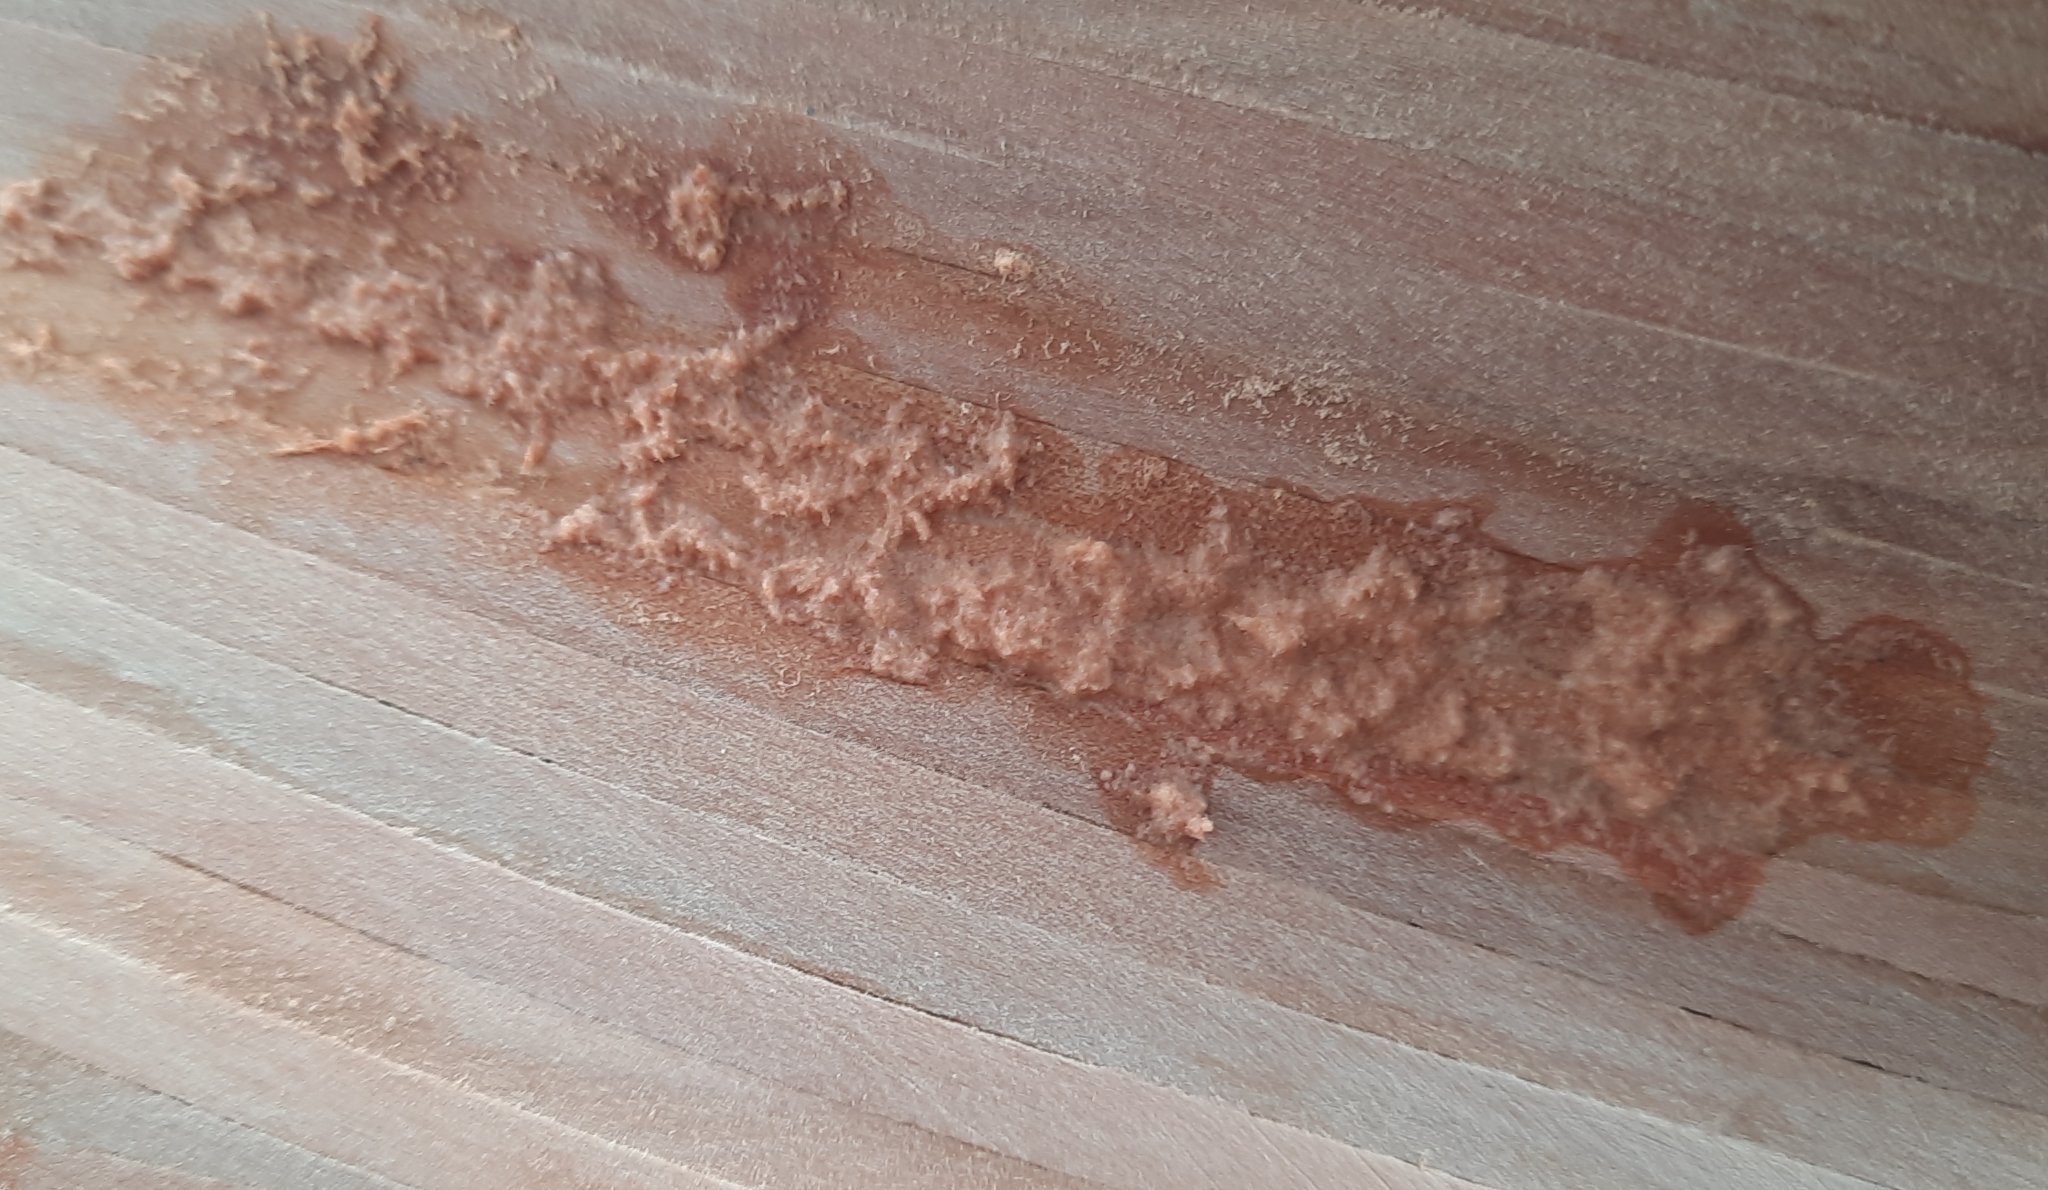
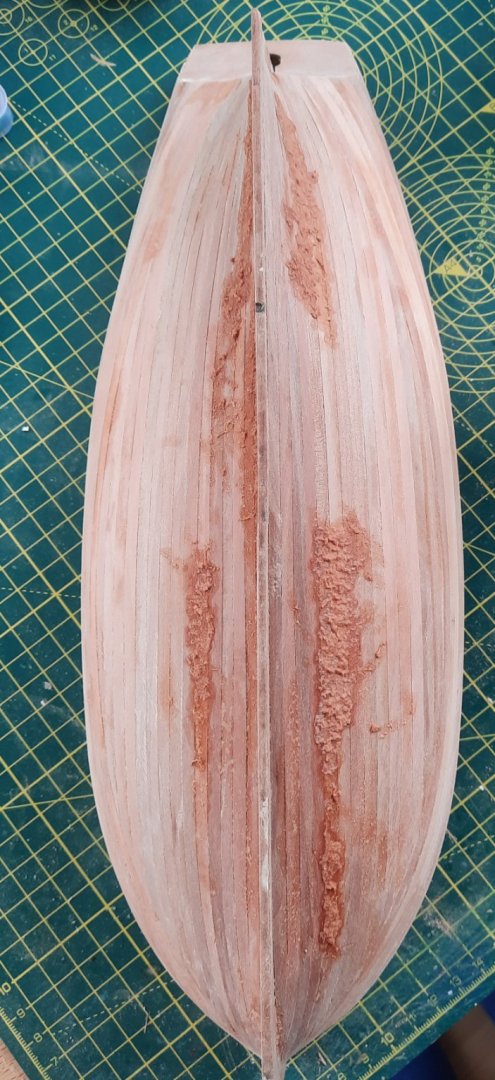
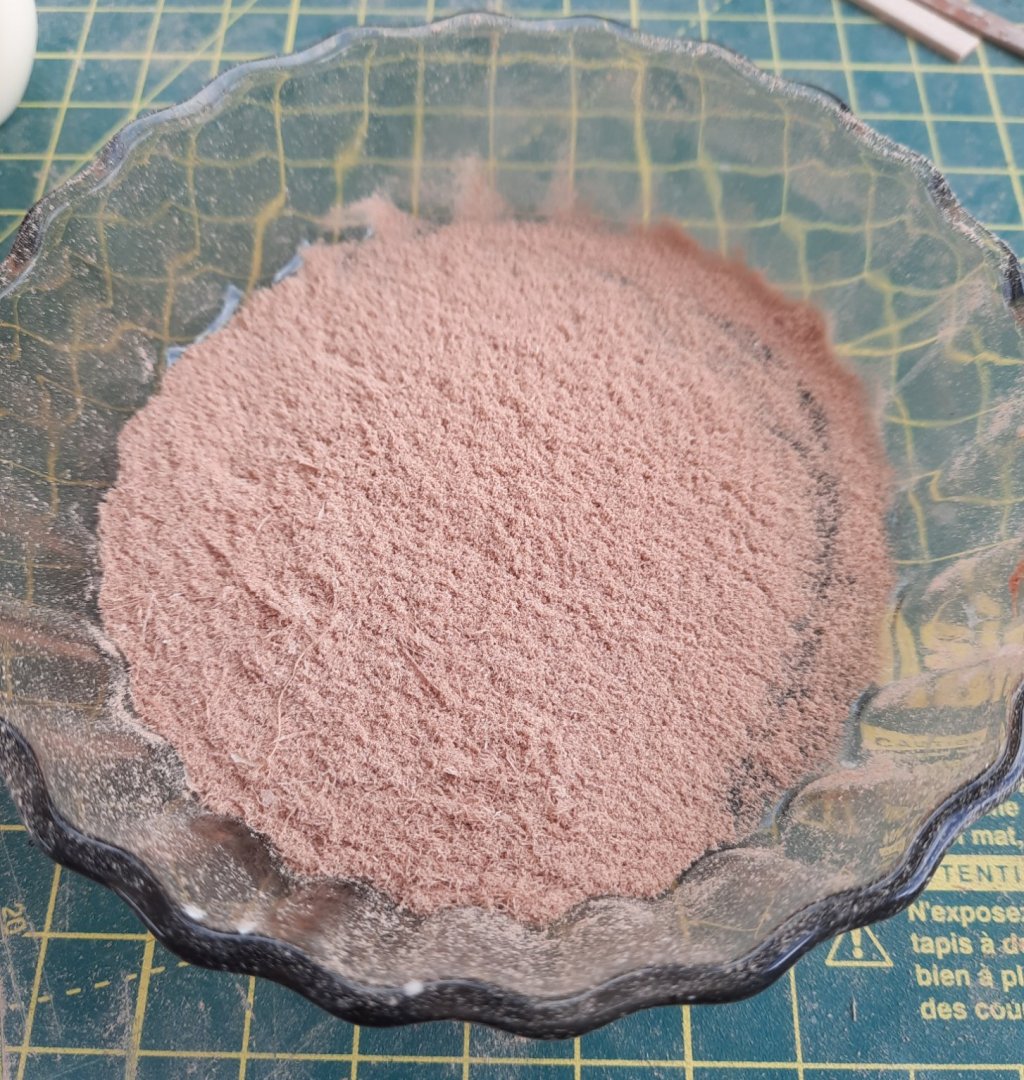
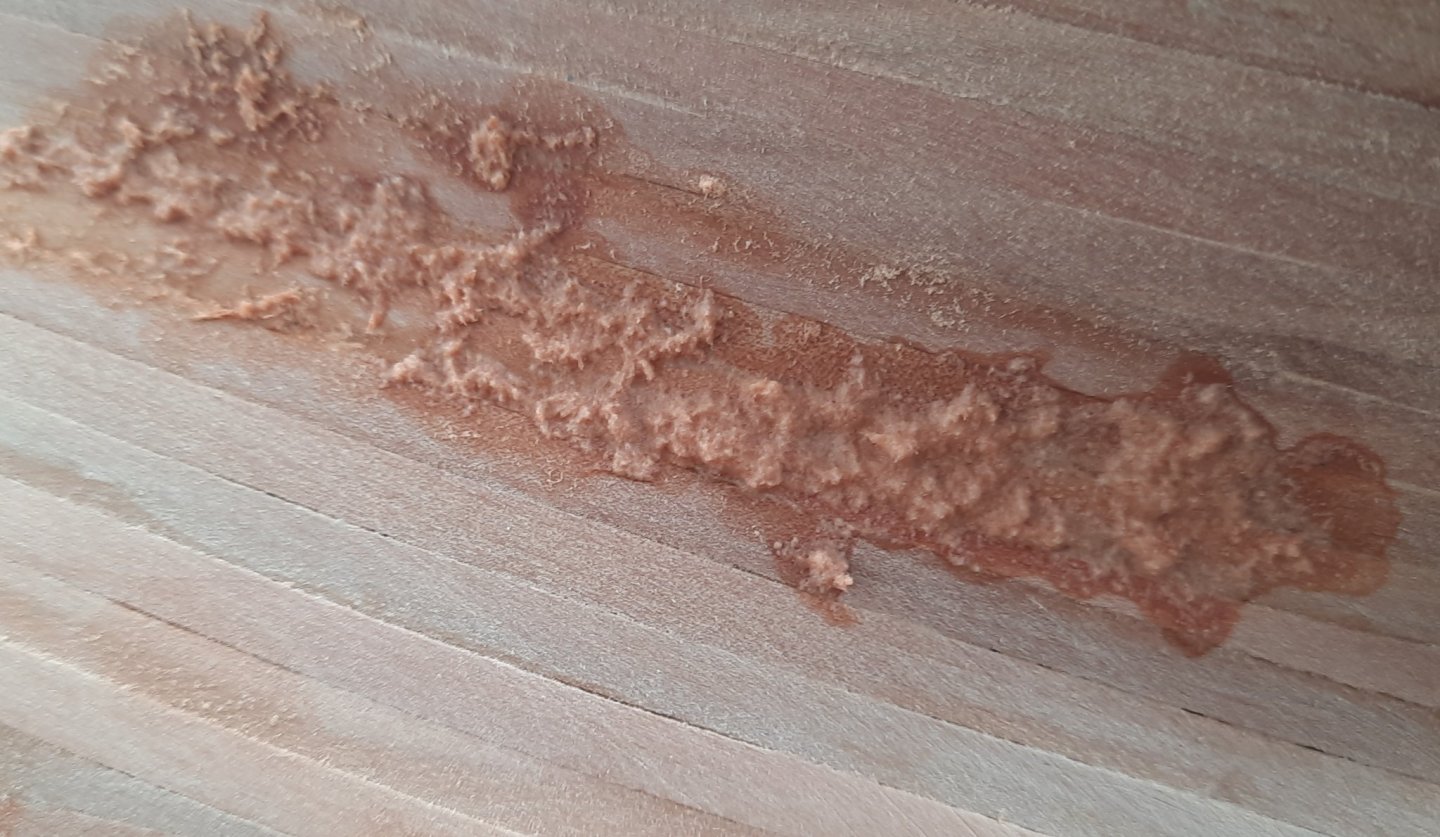
Today I have started the process of sanding the hull. After the initial sanding all over (using 320 grit) I was pleased with how the hull looked. I will need to complete the hull sanding processes with a finer grit (600 or 800 grit) at a later stage. Before I do this as the hull is to be painted white (below the water line) it is very important to fill in any dips to get a nice smooth paint finish. My first step in this regard is to fill any areas which are clearly visible to the naked eye. To do this I used my Gimour TPK-PT014 (a cheaper version of the standard Dremel) on some left over planks to collect some sawdust. I then mixed some of the sawdust with a diluted pva solution in order to create a wood filler paste. The following photo shows the remnants of a paste mix and the brush used to apply the paste. I apply plenty of the wood filler paste to the dips. It does not look to pretty (as can be seen in the photo below) but once the paste has dried it can be sanded smooth and any remaining dips can filled with more past. The whole hull coated with areas coated with sawdust wood filler paste I will post some more photos of the sanded hull to show the end result in the next day or two. Once I happy with how the hull looks to the naked eye I will spray a thin coat of white primer paint (below the water line) which will highlight possible imperfections which are not visible to the naked eye. These imperfections will be sanded smooth or filled as necessary. I will probably use a diluted Ronseal wood filler /pva mix when I get to this stage to fill any remaining dips. Hopefully the Vanguard Models waterline marker I have ordered will arrive in the next day or two 🤞😀 as I do not really like the Amati waterline I currently use.

- 160 replies
-
- 2
-
-
- Alert
- vanguard models
- (and 1 more)
-
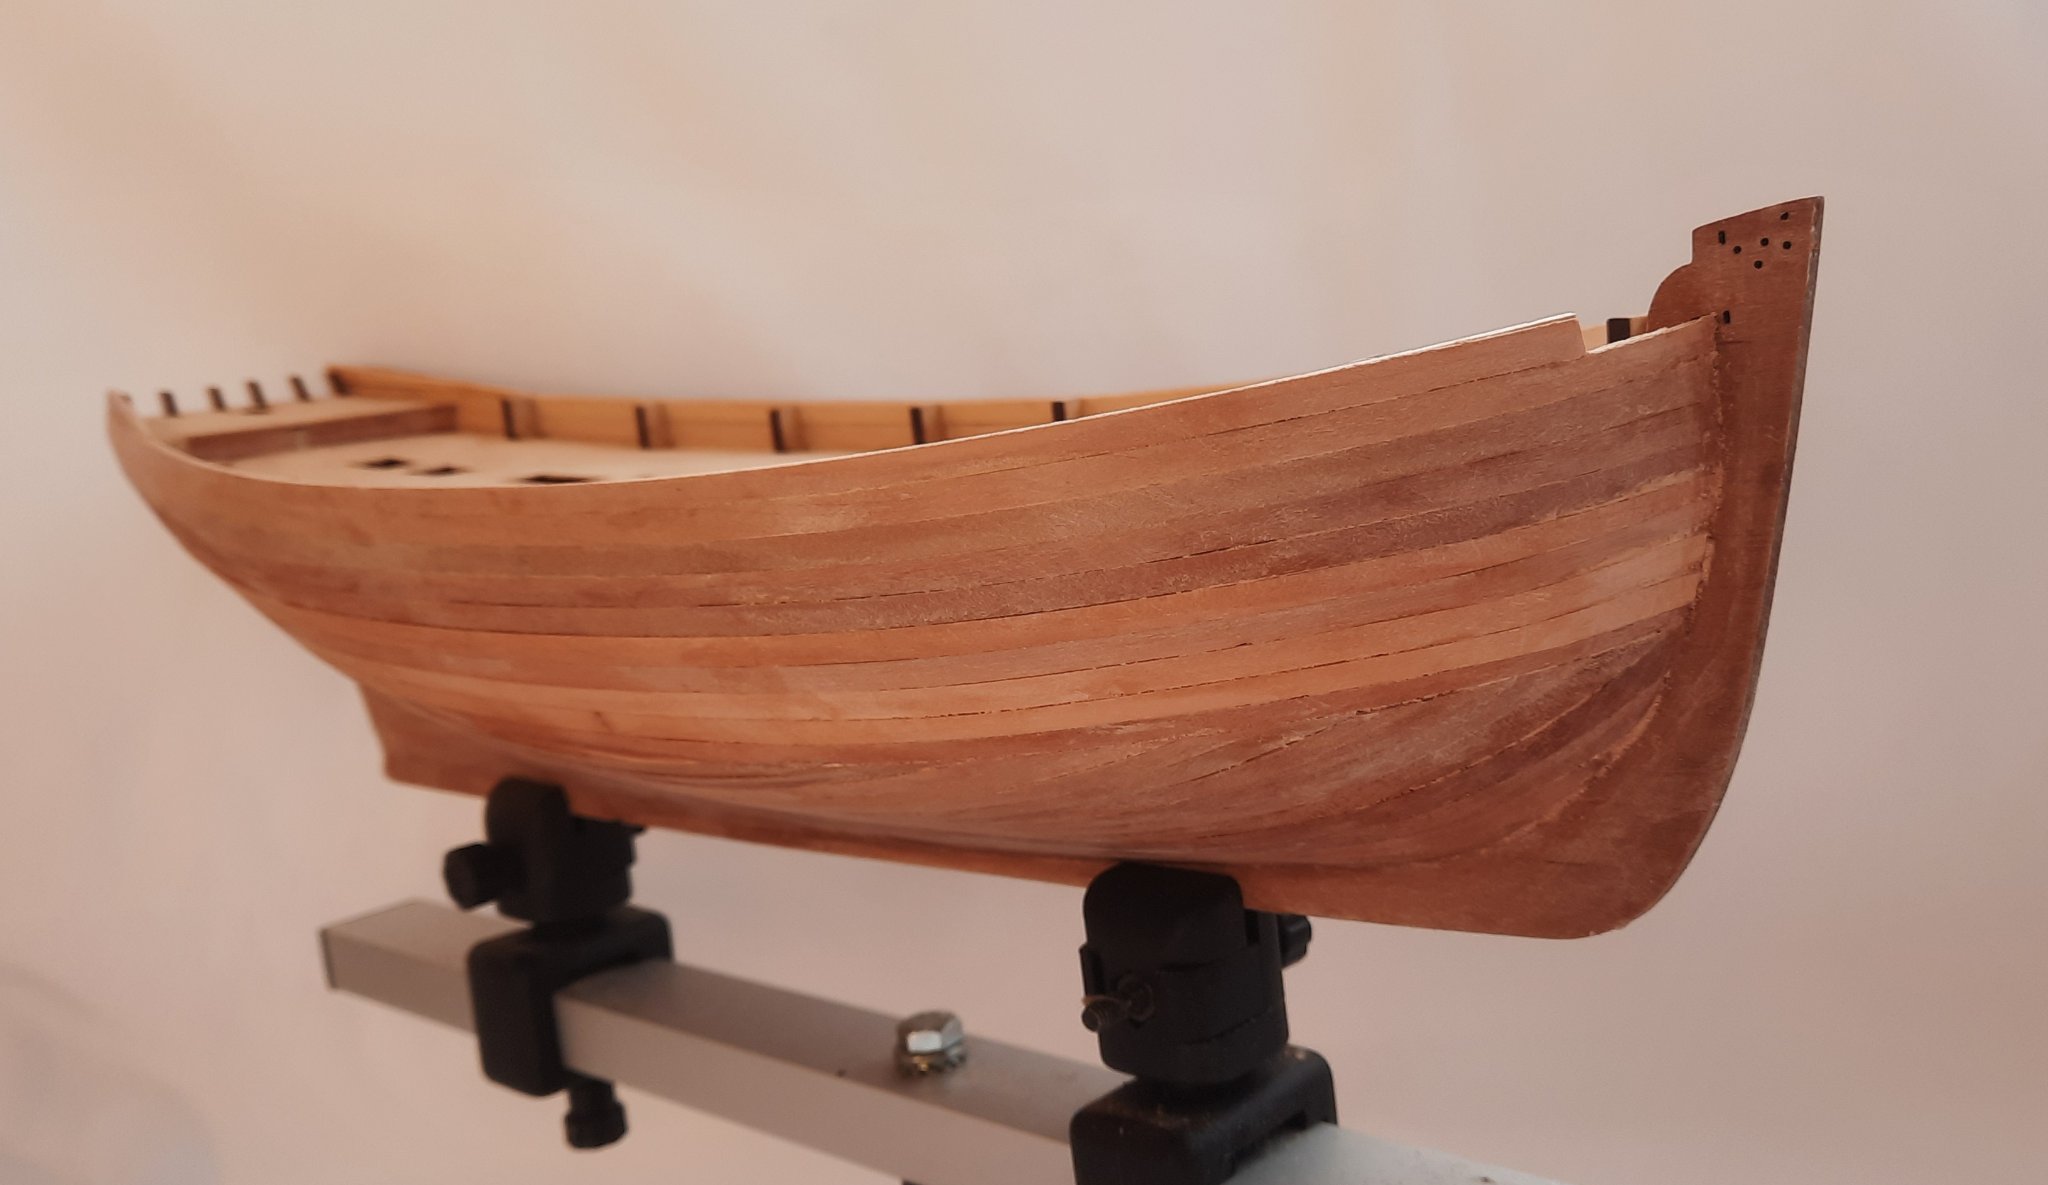
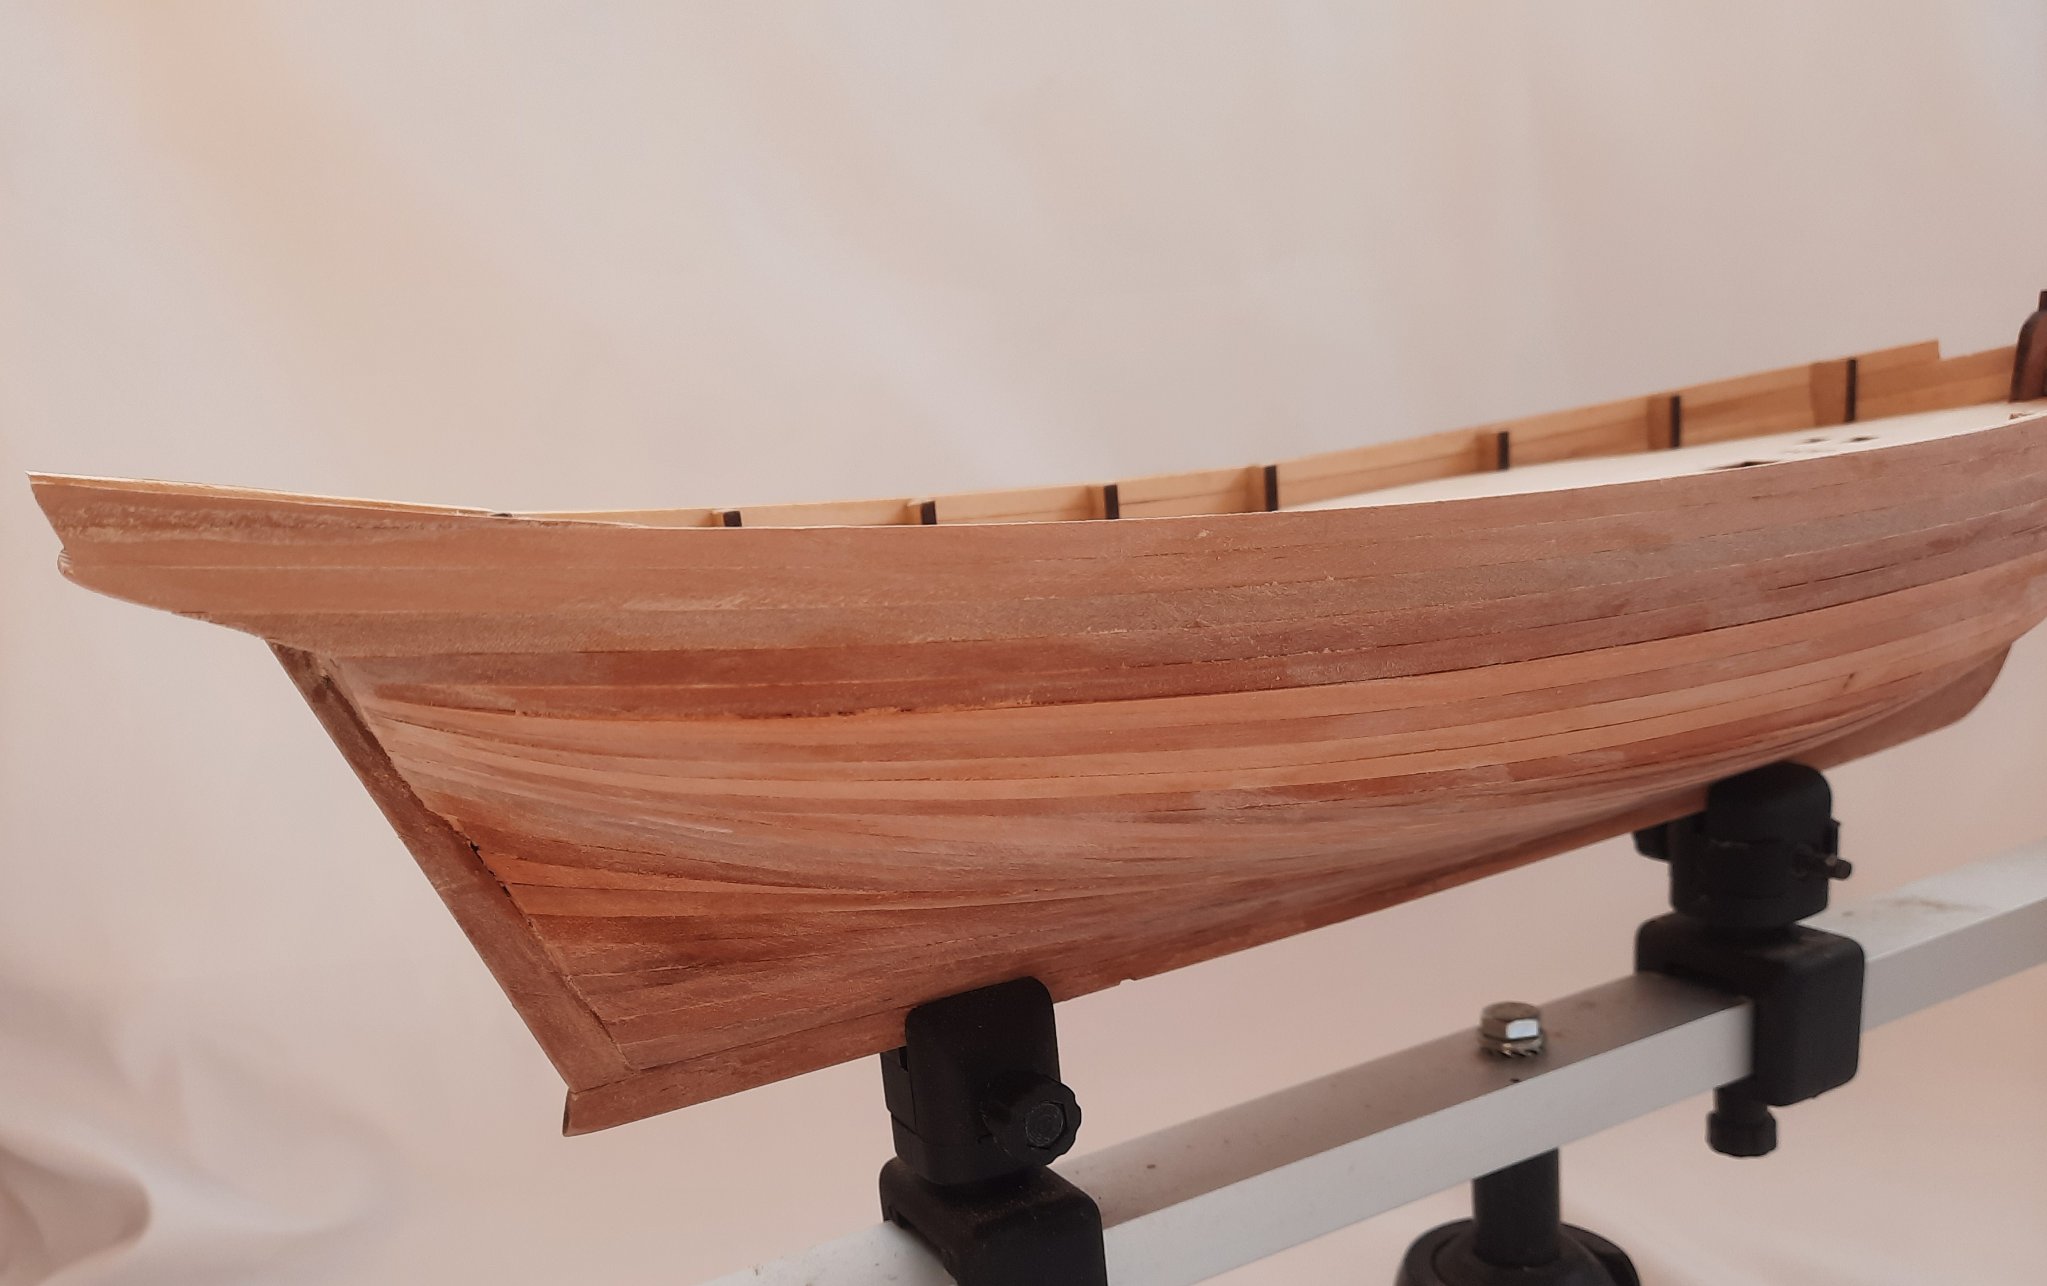
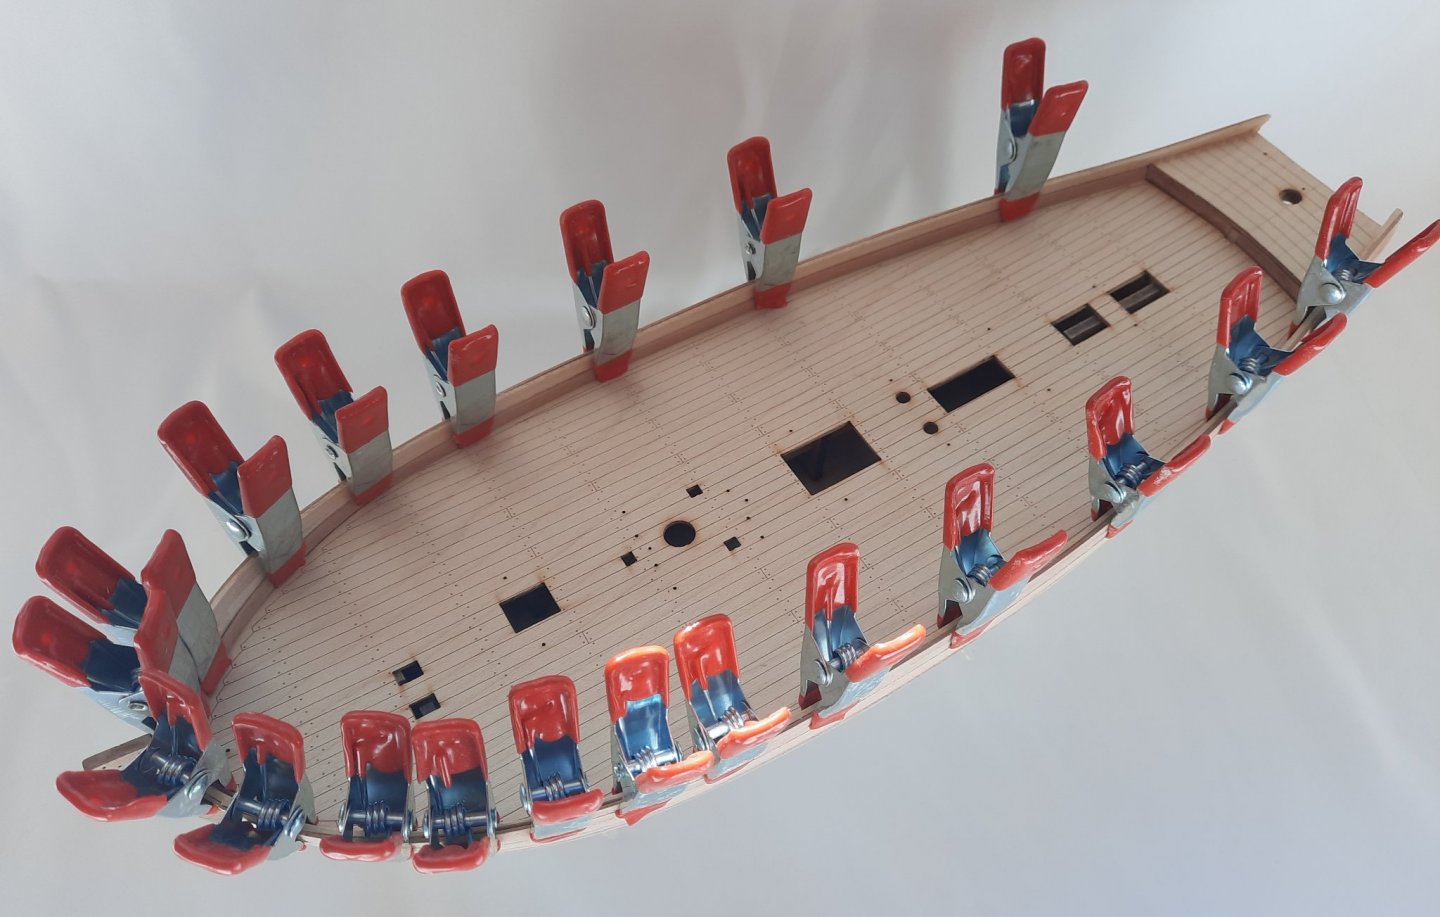
I have had a good day in the shipyard today and I finally completed the 2nd planking. The 2nd planking has been trimmed around the stern area. I then applied a thin diluted coat of pva over the hull and gave it a light sanding in order for some of the sawdust to fill any gaps between the planks. The hull will require more a bit more sanding (and filling where necessary) before I can move on to the next phase of the build. Here are some pictures.


- 160 replies
-
- 4
-
-
- Alert
- vanguard models
- (and 1 more)
-
Very excited about The Sphinx it looks amazing. Fingers crossed for a July release date.
-
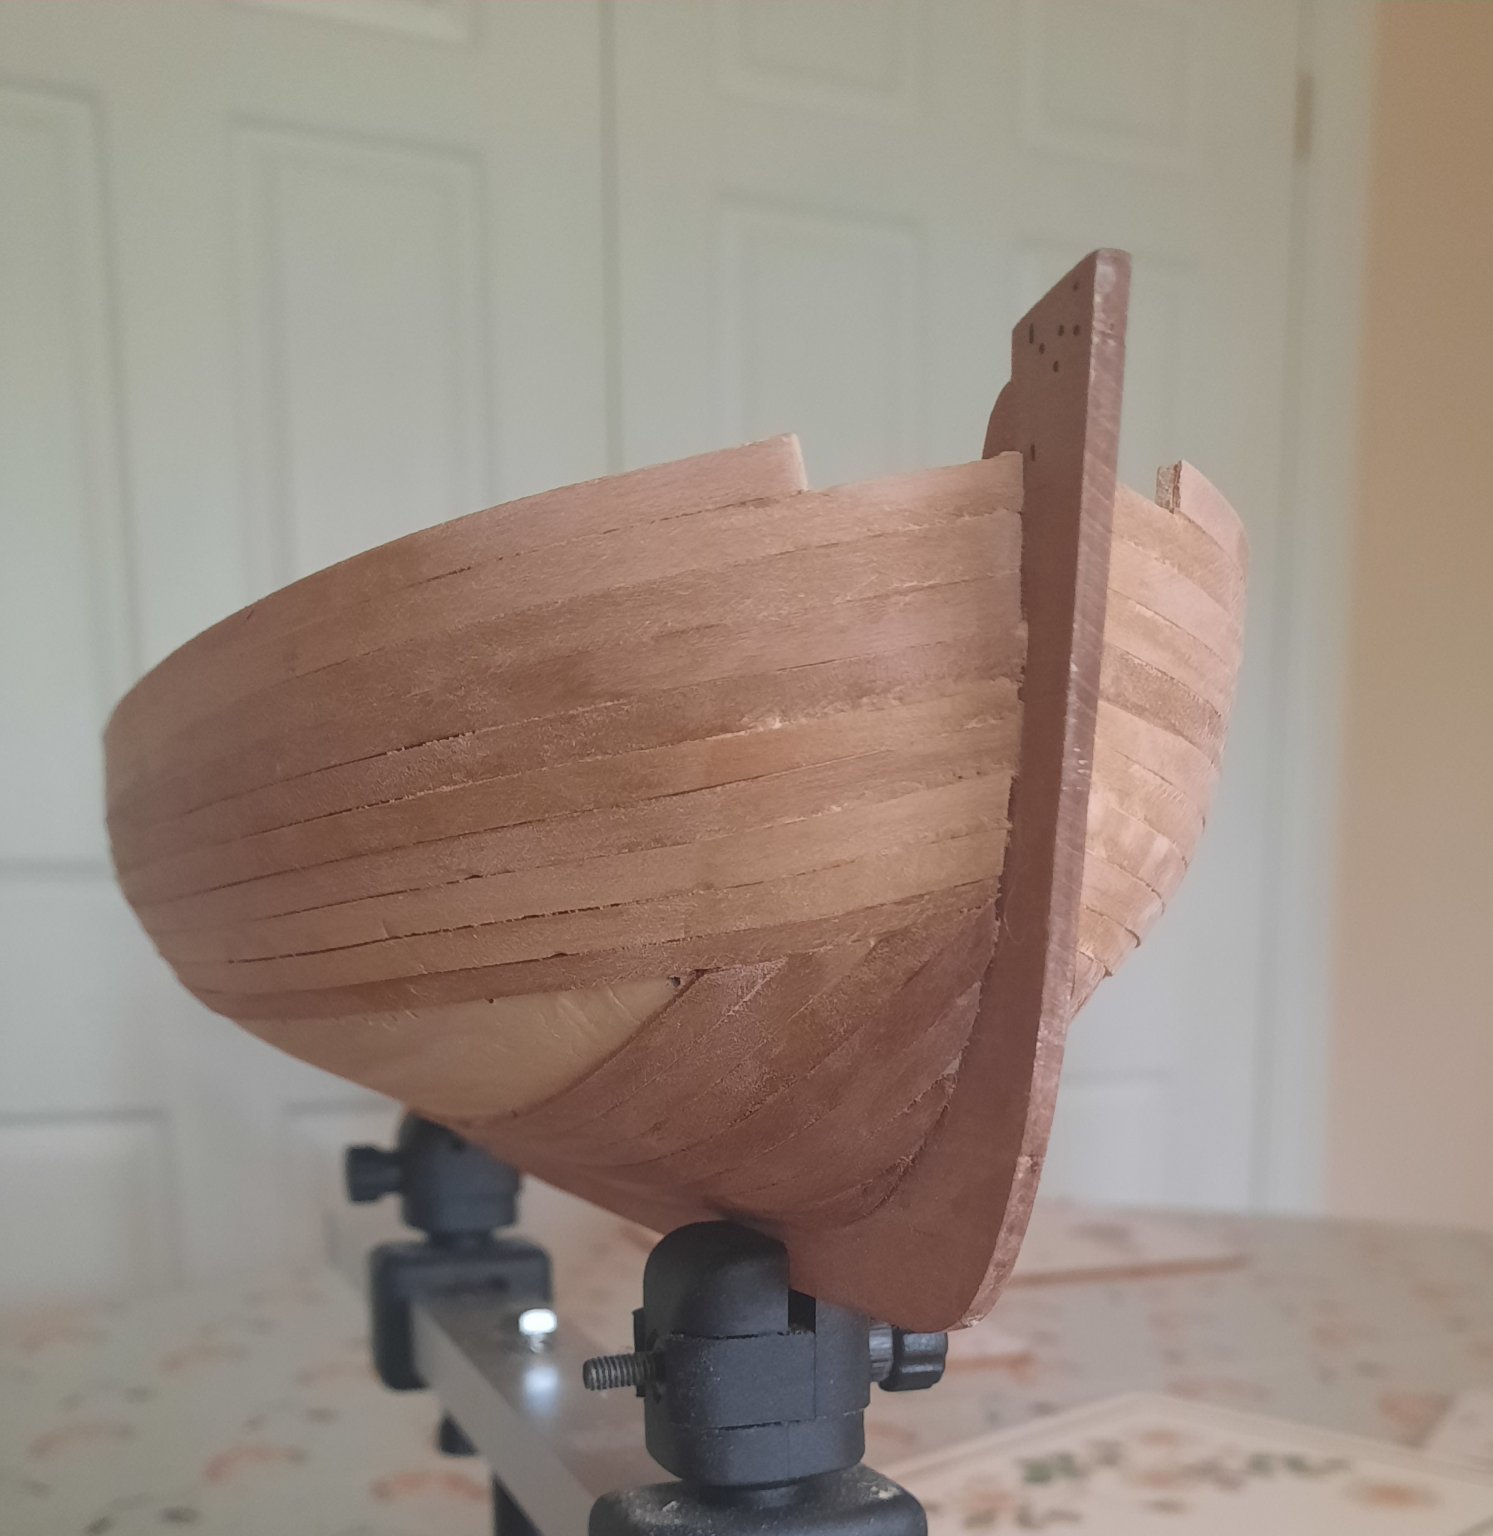
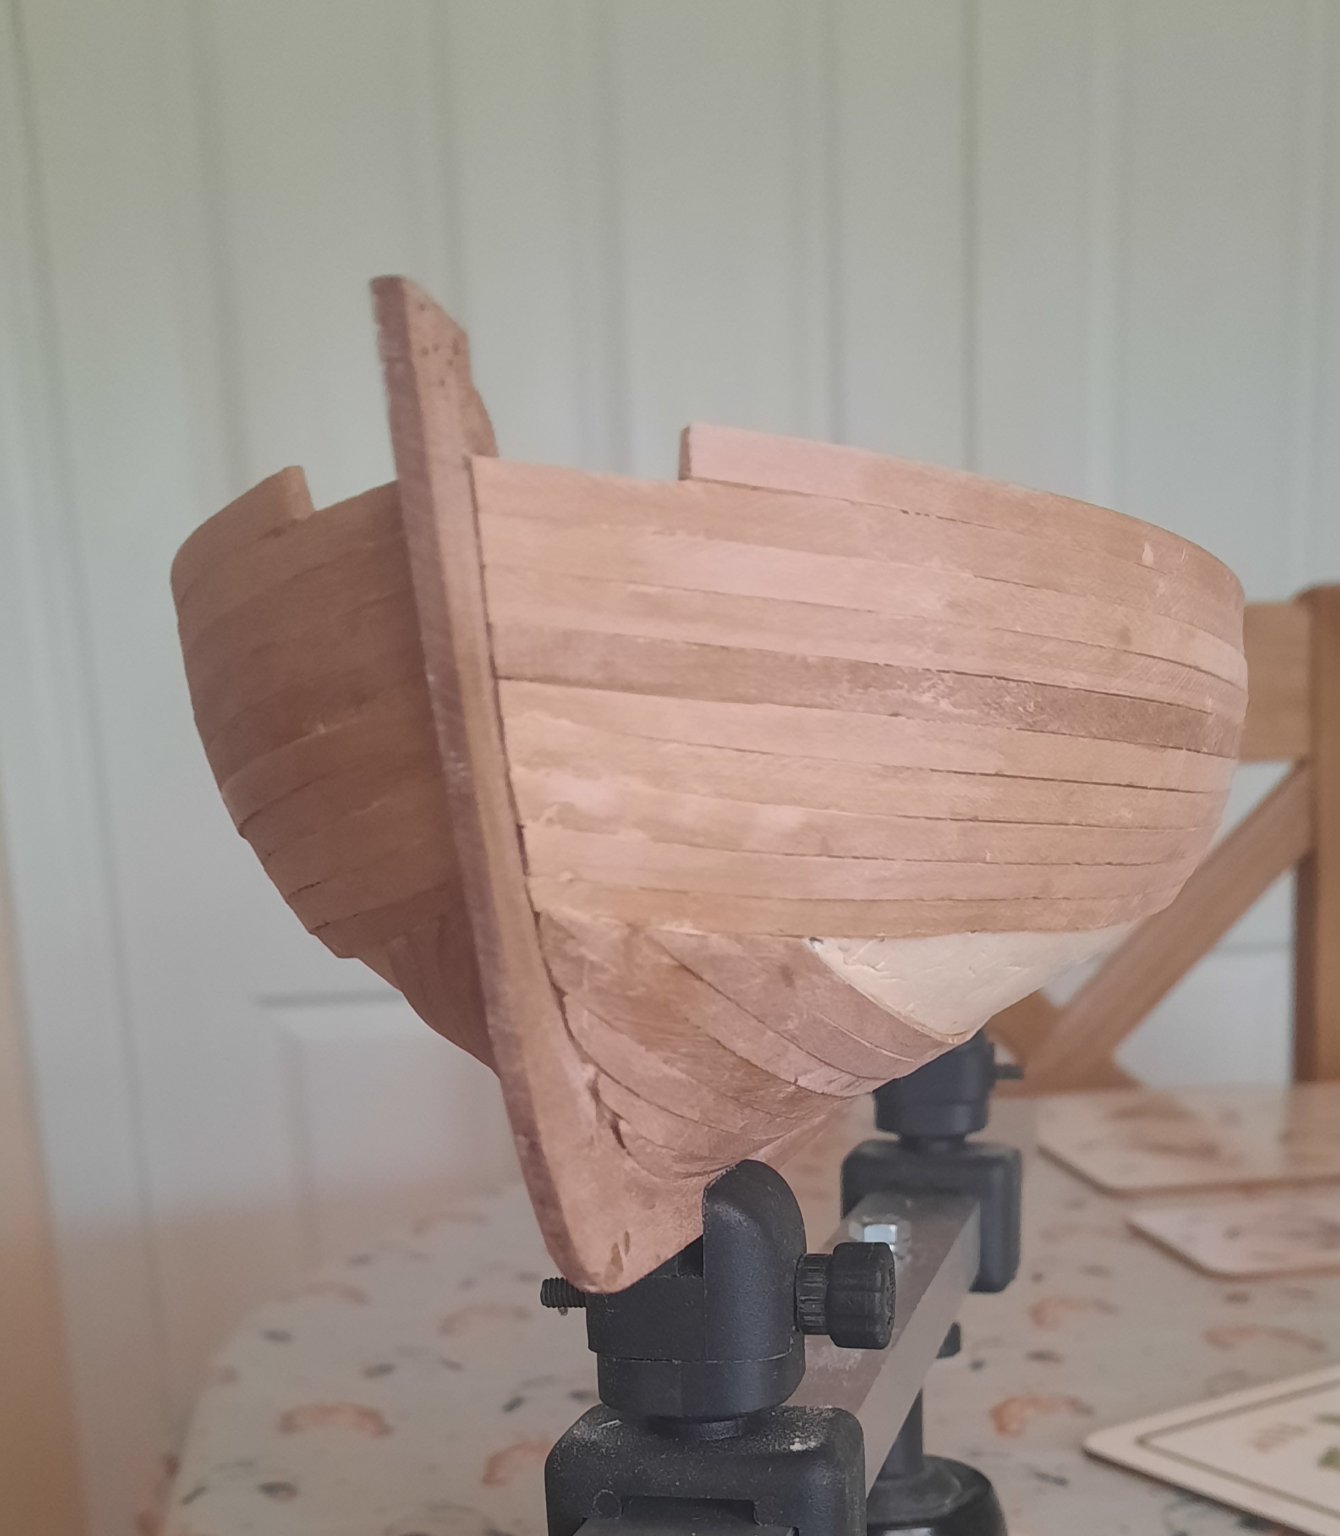
I have continued on with the 2nd planking and I expect to complete this task within the next 2 or 3 days time. I do have an Amati water line marker but I have never been happy with it as I have found that the pencil tends changes position when I attempt to add a waterline mark. I have therefore ordered the waterline marker from Vanguard Models (new tools section) which I hope will be better, fingers crossed it will arrive in time. I have been using my quad hands to add the lateral (side) bend to the planks. One advantage of using the quad hands for side plank bending is they can be stacked up so multiple planks can be bent at the same time. In the picture below I have a left and right side plank being bent after a quick 5 second dip in water. With regards to adding the second planks I have continued to use a combination of Titebond original and map pins. Initially, when working in both directions (up and down), I was adding 4 planks at a time (2 port and 2 starboard). However once I reached the waterline mark (at the bow), which is where the up and down planking met I moved on to just adding 2 planks at a time (one per side). It takes around 5 to 10 minutes to shape, bend and chamfer the planks. Once they are glued I normally leave them for around 30 mins before removing the map pins and moving on to adding the next plank pair. The following set of pictures shows the current state of play. The holes left by the map pins can be seen, but will be covered up when the next layer of planking is added. A small amount of filler is required below the water line where some planks meet the stem post. Before I was adding the lower stern planks I sanded the depth of the plank to try to get a smooth line with the keel and stern post. It may not look like that in the picture, but is pretty much the case as it stands.


- 160 replies
-
- 3
-
-
- Alert
- vanguard models
- (and 1 more)