


bear
-
Posts
346 -
Joined
-
Last visited
Content Type
Profiles
Forums
Gallery
Events
Posts posted by bear
-
-
Looking at the numbers of clamps that I have for building now. Just wanted to know how many you might have?
My total is:
Kant Twist clamps-26 total ranges in clamping size from 1" to 10"
Machinist Parrellel clamps-10 total from 3" to 6"
"C" clamps - 12 total- from 1" to 14"
plastic clamps from Model Expo small 20 total 1/12" large 10 total 2 1/2"
plastic bar clamps 6 total 6"
Today ran out of the plastic clamps-small in clamping up parts that I was veneering,so I have ordered another 1o0 to add to the growing collection.
I keep them in drawers seperated by type and size.
Keith
-
I guess we could say that you are just a "little screwie" with this posting. Thanks for the charts.
Keith
-
Hi Alistar
I also use Dulcoat and realy like it on decks. You can get a nice smooth finish and rub it down to any dull of gloss finish you want. And it goes on smooth if you have the right brushes as you stated before here.Here's a photo of my just completed Union Picket Boat Number 1 kit by MSW. I used Testors Dulcoat as overcoat and Model Master enamal paint for all color paints.
Keith
-
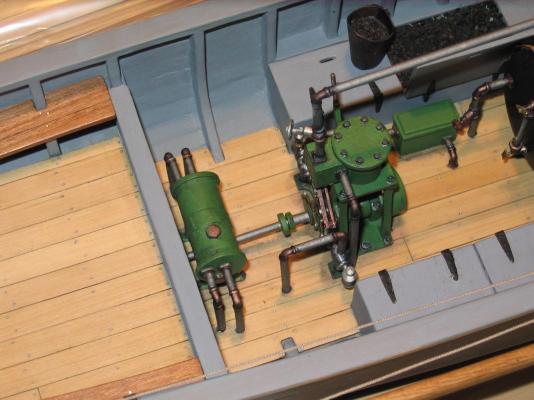
Here's a photo of my Philadelphia build.
Keith

- WackoWolf, Ryland Craze, tarbrush and 1 other
-
 4
4
-
Hi
I would start by cutting the keel between each frame and then debonding the keel section from the frames one at a time.Make a new keel and a new lineup jig.
You need one that will have a center bar going in line with the keel about deck level so that you can center up each frame on center to the keel up at the deck level. At the keel you can center with the notch that is in the frames,but you could have an outer bar on each side (making sure that they are equal distance from the centerline) and have them out from the frames,so that you can measure the gap between the frame and bar. Then you can adjust the frame until it is centered between the bar and equal distance on both sides.
Bottom line is that you need to be able to measure the frame to the keel at the top and bottom,and make sure that they are equal distance to the center. You can not have a tight enough joint at the keel that insures that the frame will be centered at the top. You have already proven that with your frames and keel now.
It's a lesson that all of us go thruat least you had not put your whales on or planking or deck.
Keith
- Jaekon Lee, mtaylor, tarbrush and 1 other
-
4
-
Hi Larry
As has been said many times before-You are the Captain and it's your ship to build as you want.
I am finishing up my build on a MSW's Union Picket Boat-which can be seen on our building groups blog site- woodenshipclass.blogspot.com .I was going to paint the hull black like the real one was but have decieded to leave most of the side opposite of the spar torpedo unpainted to show how the planking was done.
I used this build to practice on my planking and it came out very nice looking. So I do not want to totaly cover up all of the work with black paint,just like doing an Admiralty type build showing off the frames.
So if there is an area that you realy excell in-show it off,if only for yourself. Most people who do not build do not have any idea how much work and effort goes into what all of us do in building models.
From picking a subject,research for the building,time,money and work and hard learned skills to achieve the finished model.
It is nice to be able to see what you have worked so hard to build. And not have but only a small part showing for display upon finishing a model.
Keith
-
Hi Fletch
How about tacking the strips in place with the gell CA in small places,then use super thin CA with a small aplicator and just flowing some in between the strips and the hull?
I have also used styrene strips onto wood before and had problems with it taking long for the CA to hold if there was not a very tight fit,what I came up with was a clamping system that wouldjust have a small point that would touch and hold the styrene strip in the center,holding it down onto the wood. Then I flowed thin CA down the crack on the side of the strip and wood hull. I then took a Q Tip with CA accelerator on it and ran that over the side where I had put the CA glue.
I also etched the back of the styrene strip with the tip of my axacto blade so the it was rough,and would give the CA something to hold onto. Smooth plastic surfaces sometimes do not hold CA glue well.
Try some of these and find out what will work for you.
Keith
-
Hi
I just have the Pontos for the Bismark.Thier first set,I still have to get theiur second set for the Bismark.
I would rank Pontos as the number one company for details and quality for the Bismark and other sets in 1/200 and 1/350 and with thier photos and drawing sheets in color make sence of all of the parts and locations,which the other makers do not have.. The wood decks are also the correct style with the correct edge nibbing of the planks.
I just wish that Pontos did a 1/200 set for the Arizona. I have the Mrk 1 PE and wood decks.
Now I have been building wooden ship models for over the past year,with these kits above put back on the waiting to continue shelf.
Keith
-
Hello Building the Picket boat and am at the end of the build and looking for details of the spare torpedo launching brackets. I know that the one's in the MSW's kit are simplified version of the real ones that were used.
Are there any drawings or srticles that are of the brackets that where used,and how was the torpedo deployed and set off? I think that somewhere I read about making them over in a build.
I have a couple of old prints from newspapers that show side and top down views of the boat and torpedo before and after being deployed. What I want to know about is the front bracket that is shown a the pivot piont for the spare that keeps it down for the deployment of the torpedo under the hull of the ship being attacked.
But the print is too small and dark to see how the front guide bracket looks like.
Thanks
Keith
-
Hi Guys
I buy sheets and strip out the planks I need. No saw used-just an xacto knife blade and a 4" small Starrett combination square used.
I set the square's scale at the width that I want to cut,then I hold the combination squareup to the sheet and scribe along the rule that is at the width of the strip you will be using. I then scribe along the length of the steel scales end,then advance it down the sheet less than what the width of the scales end is. I continue to do this the total lenght of the sheet.
I then put the sheet down on my cutting board and trace thru the cuts that are the full lenght of the sheet with the Back edge of the xacto blade-not the cutting side(I do this because it will follow the scribed cut that you hvae first made down the lenght of the sheet. Being carfull to lightly do this at first,and being 90% to the sheet. If it is thin-say 1/32 you can after about four cuts just break off the strip from the sheet. I can keep mine within .003 over the lenght of the strip for width. It will take some practic,but you will not waste ant wood to a saw blade,save the wood for greater yeald from the strip.
Not have to spend a lot of money on a saw.
For thicker sheets I also use a .005 thich razor saw to finish cutting the strips . I have done this for years in building Gliders and other models. Works well on Evergreen Plastic sheet also.
As to figuring out the wood needed for a build,the decks are easy just figure out the area and yield on the strips you will be using. On the hull,I just ball park figure out the area and multiply it by 1-3/4.
I also use thick file paper for spliing my planks before cutting any wood.
Keith
-
Hi Chuck
I vote for the black on the caprail , sheer strip and natural wood on the transom. The blue makes it look "cheap" and small to me. As to red-to me it would just take away from the clean lines.
Keith from cold and windy Troutdale,Oregon
-
Ahoy Mates
First I know that I am the builder and can do what I want with my model.
At our building groups meeting yesterday when showing them the progress on my Union Picket boat build,I showed them a test painted strip of the black that I will be painting the hull. They asked me why I was going to paint over the nice job that I had done on the planking of the hull?
Doug in our group was even mad at me for thinking of doing it. He has had a hard time with planking on his Boiunty and had to use quite a lot of filler on his planking. And said that it was not right to hide the planking on my build behind black paint.
I have thought about covering the planking that I had spent spiling and making sure that the steelers were used in the correct shape and size. I used this build to realy get ready for my build of the Caldercraft Mary Rose and other models that i have to build that will be bare wood,just sealed in clear.
I told them that I had thought of just painting black one complete side of the model leaving the other without paint to show the woodwork used in building the model. Or that I would just mask off an area on the hull when I paint it black,that will then only be in the clear coat showing the planks.
Have you seen any builds that have been painted with areas that have the wood planking showing without the paint covering them? And if so,what was the shape and size of the area that was showing the details?
What would be your siugestions as to shape,area(size of masked off area) and area of hull or areas to mask off and show?
Thanks ahead of time for your input.
Keith
-
Hi
What figures in 1/72 have you have for your build? I am interested in the 1/72 figures that you have.
I will be starting a build of a 1/48 scale Mary Rose in the next week or so. Just the hull will be around 34 5/8" long,with a beam of around 9 1/2" I have the 1/80 Jotika Mary Rose kit and want to scale one up from this kit. Want it in 1/48 to match most of my other builds.
I ordered some 1/72 figures from Fredericus-Rex in Germany last week. Will let you know what they look like when I recieve them. They have already shipped. Will see just how big they are in 1/72. If they are to the short side of the scale,I will use them on my 1/80 Mary Rose build.
As for the 1/48 scale build,I will have to use figures from another time period and change them.
Keith
-
Hi Andy
Thanks,thats just what I have been looking ofr as to drawings of the Hunley. Now I can add it to my models to build list.
Thanks again for the help.
This site is the BEST on the internet. Other sites are with their self important trolls would just as soon ask why I wanted to make it,or make some other jerk comment.
NOT HERE,the Greatest site on the internet.
Keith
-
Great work. Are there any drawings now avaliable with dimensions of the Hunley as found now, so that you can make a scale model of it? All the previous drawings and models are out of date and wrong since the recovery of the Hunley.
And are there any photos close up showing the details of the hull plates as to the spacing,size and locations of the rivets and screws and plate sizes?
Would like to build a model of the Hunley in 1/24-1/12 scale for display.
Keith
-
Look at the Caldercraft Models PE brass hooks. They are made out of hard brass and I got mine thru Cornwall Model Boats along with other rigging hooks and eyebolts. They are larger than Syrens thats listed below. Just go to Cornwalls fittings area and lookup Caldercraft.
I have the Syren 3mm and 4mm laser cut .010 thick black vinyl Hooks. I like them for the smaller scales and rigging because you do not have to blacken or paint them. Just cut them off the carrier sheet-175 pcs per order from Chuck. They are PERFECT for gun carriage rigging block hooks! And a GREAT VALUE. I am not working or paid by Chuck in any way. Just a happy customer.
I use the brass for the larger models and areas that have to have tension on the lines,while use the vinyl on small rigging where there is little force on the lines other than just the weight of the line and blocks.
Happy building
Keith
-
Hi
I just finished building my Sloop a couple of weeks ago. Just a sugestion,you might want to remove the bowsprit until you have finished rigging the mast and all thats behind it.
I found that it was realy nice to not have to look out when I was moving the ship around to do all of the rest of the rigging. I had seen others in our building group pull their har out when they were rigging their Niagara's with its bowsprit.
I afstened all that I could to the bowsprit before I finialy set it in place. I did not glue it or even pin it in place. It fit snug in the metal strap and hole in the bow.
I realy had an easyer time with being able to run the lines and rope coils under the mast and around the deck before installing the bowsprit.
I did run a temperary forestay line from the topmast to the hole in the bow for the bowsprit,to keep a tension on the mast while doing all of the backstays and shrouds. After completing all of the rigging aft of the mainmast is when I put the bowsprit in place and finished up the rest of the rigging.
Keith
-
Hi Harvey1847
Glade that I bought my books months ago. At that time they were around $79 each,sounds like they are OOP and the new stock is gone.
As of minutes ago the US Amazon site has the books on the Weapons of the Mary Rose. They are listed at list price for now. Not the OOP premium prices for now.
The only issue that I have with the books are that they do not have drawings of what they think represents what ship looked like above the discovered areas, which is what modlers want. But they only deal with what they have found in the recovery.
Keith
-
Greetings
I have all of the books you write about from the Trust plus others on the Tudor era navy and the Jotika/Caldercraft kit. Looking forward to seeing your crosssection build.
Do you know of any recient drawings on what they have found out about the Forecastle details since these books were published? I had heard that the new information showed that there were diferences in shape from the books reditions and drawings.
Keith
-
Hi wq3296
As to the 1/16",I was scaling it down to 1/48 scale,which is .0013 . As to the difference between 12" and 15" spacing being 3" which in 1/48 scale would be .0625. Which is were you got the 1/16",now I see what you were talking about in variations in the spacing being 1/16".
It coud be the same type variations in the heights of the deadeyes. As you noted in real life there would be very few instances where they were all the same spaces and heights.
Now,add that you are entering a built model into a contest,if they were not all perfect,just what kind of deductions would take place for uneven Deadeys and random spaced ratlines?
I just look at it as to what would be a "guideline" or "ballpark" measurment be. And if there were differences between civil and naval ship rigging.
Thanks for adding to my knowledge base on rigging this week. And for the help it was in my current build.
Keith
-
Thanks for all the information and opinions. I have just finished with my ratlines on my MSW"s Armed Virginia Sloop. I ended up setting the spacing at 14" or .291 in 1/48 scale. It looks right at that spacing.
I made up a spacing block so that I could check the spacing as I went along. Being the Toolmaker that I am they all came out within .020.
As to the 1/16" building tolerance,I would presume that you are talking about 1/16" in full scale,which would be .001 ? I have made up displays to show our building group just how close of differences can be seen by your naked eyesight.
As for feeling diferences on a surface,the average person can feel height differences side to side of .0002.
I uild to variuos tolerances as everyone does.
It just is up to each person as to what is important to them.
I tied on the outside right shroud line and then went across to the other side. Just used the block to check along as I went. It's just takes time-about 3 hrs later they were all done.
I did not measure any of them with a dialcaliper,I just looked at how they compaired to the setting gauge stick,and how they looked as a whole. It's better to have a little variation. Too perfect can also standout as being unnatural.
Thanks
Keith
-
What is the spacing between ratlines? Is it 11" in full sclae on a ship?
Thanks
Keith
-
You can see some photos of my completed Philadelphia on out groups blog woodenshipclass.blogsspot.com .
Keith
-
For me it's just how you want to spend your time. I would rather spend my time on working on what will be seen. And not so much on the jigs to build the model.I only wish that I could paint to the level on the Flemish Galleon shown.
I agree with Chuck,it's only a variation on POB. And another layer of planking and using staples.I would think that the time spent to remove the staples carefully might outweigh there savings in time if any. It all goes into the catagory of just how you prefer to build.
Being a Tool and Diemaker,I go about building different I would expect than a Cabinet Maker would. But I look at what it ends up being as the real fruit of your effort.
I realy like to see how others do their builds,and learn a lot in very one I see. And try to use what I see to further my building skills.
Keith


Planking -1490-1545 English warships-How even were they?
in Building, Framing, Planking and plating a ships hull and deck
Posted
Hi and Merry Christmas to ALL- I am building the Jotika Mary Rose. Wanted to know on the deck planking,how even was the surfaces from plank to plank? Where they made to be a tiotal flat surface from plank to plank?
Or were they uneven ,say a little like 1/4" between them randomly?
I know from the Trust books on the Mary Rose and their plans that are based on the wreck itself, that the planks for decking that were recovered that they were in areas made in random shapes,but that the majority were straight planks,but of different widths and lenghts.
But I was in question as to the thicknesses of the individual planks to each other.
Thanks
Keith