
bear
-
Posts
360 -
Joined
-
Last visited
Content Type
Profiles
Forums
Gallery
Events
Posts posted by bear
-
-
Ahoy Mates
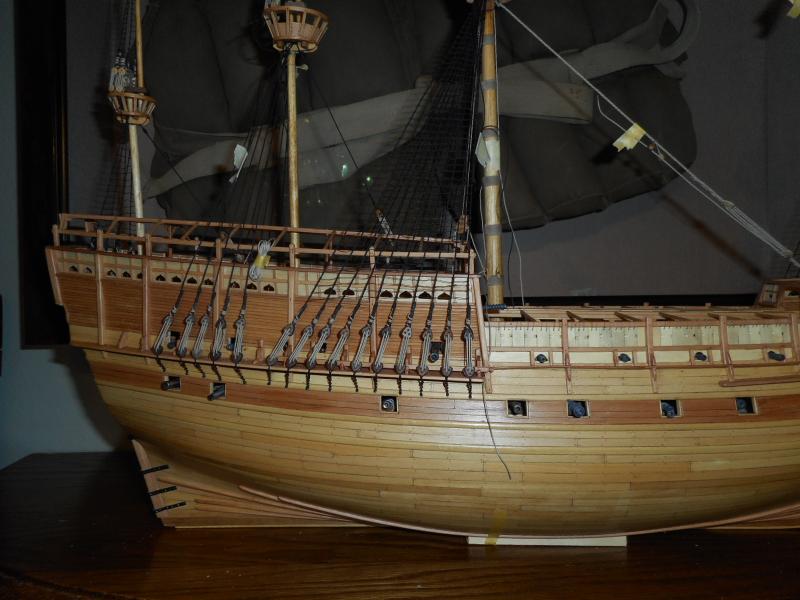
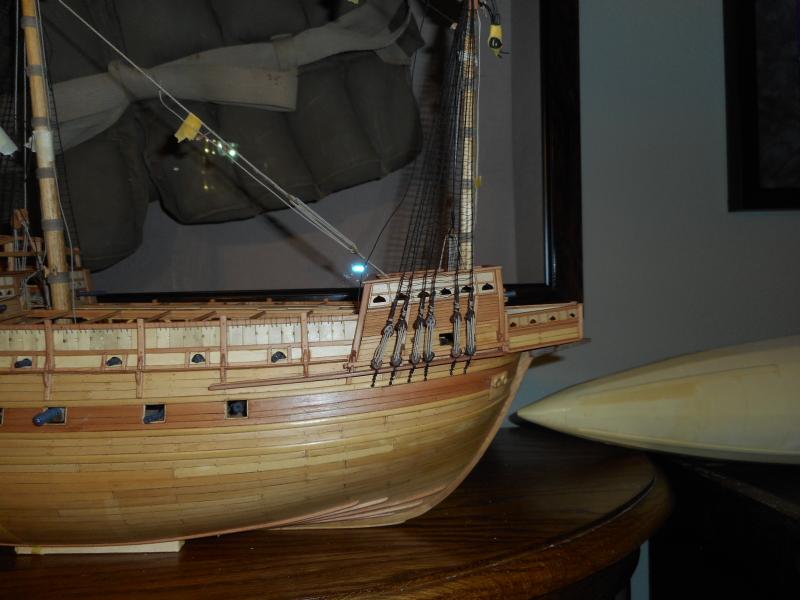
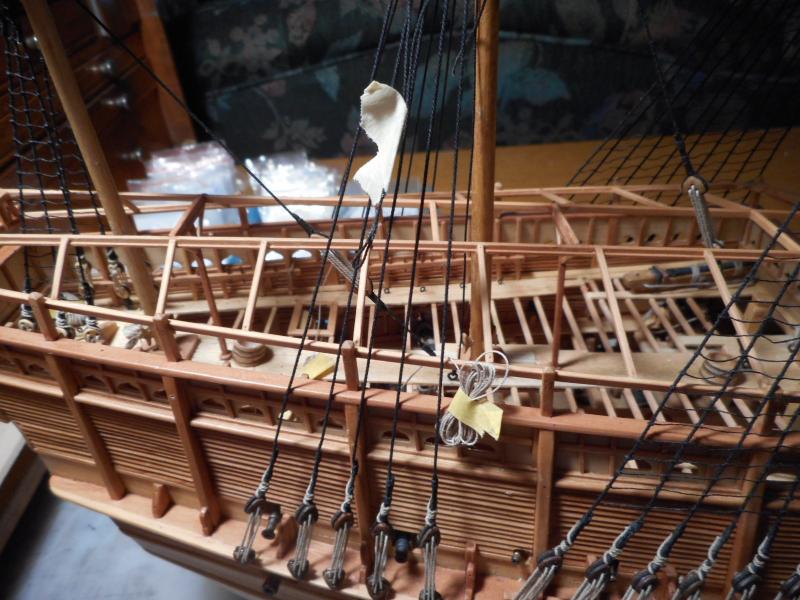
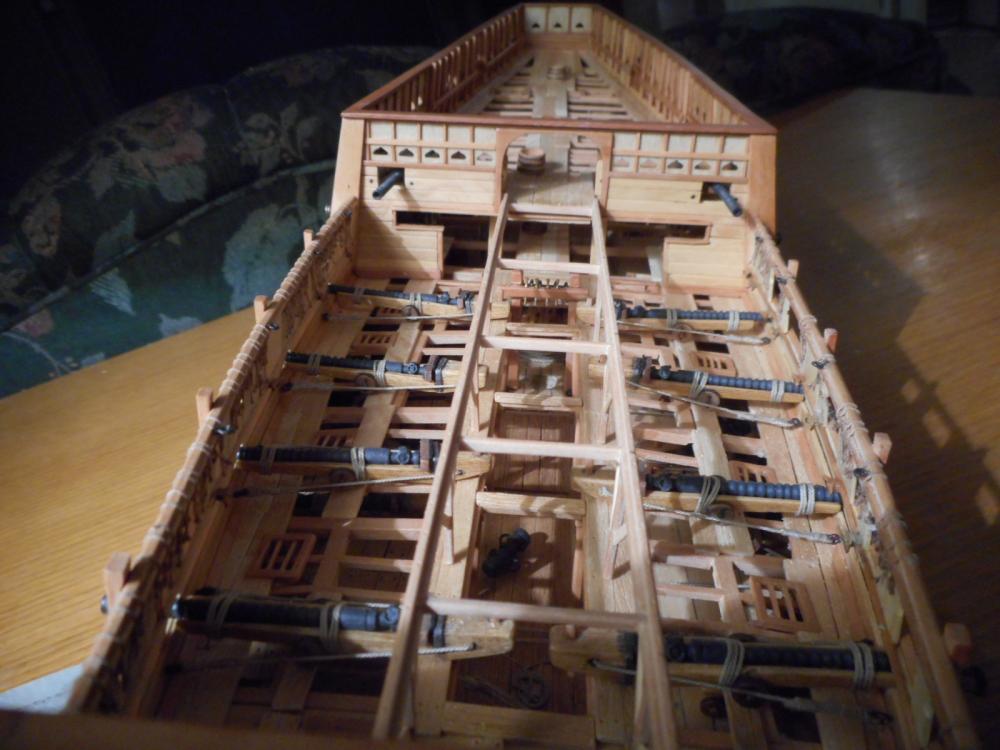
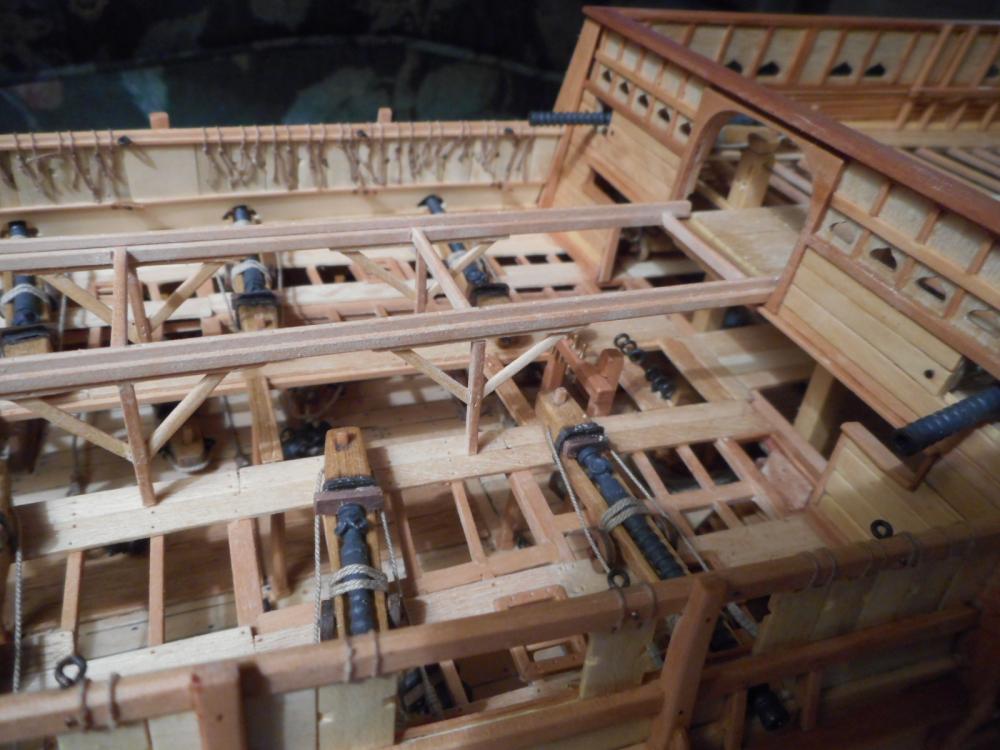
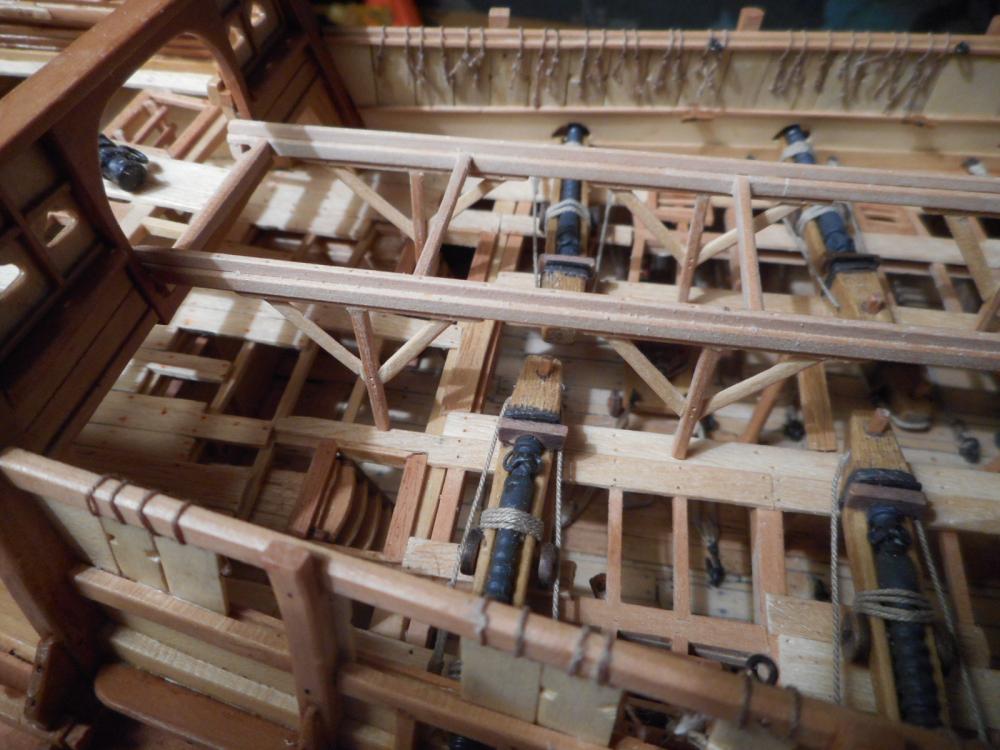
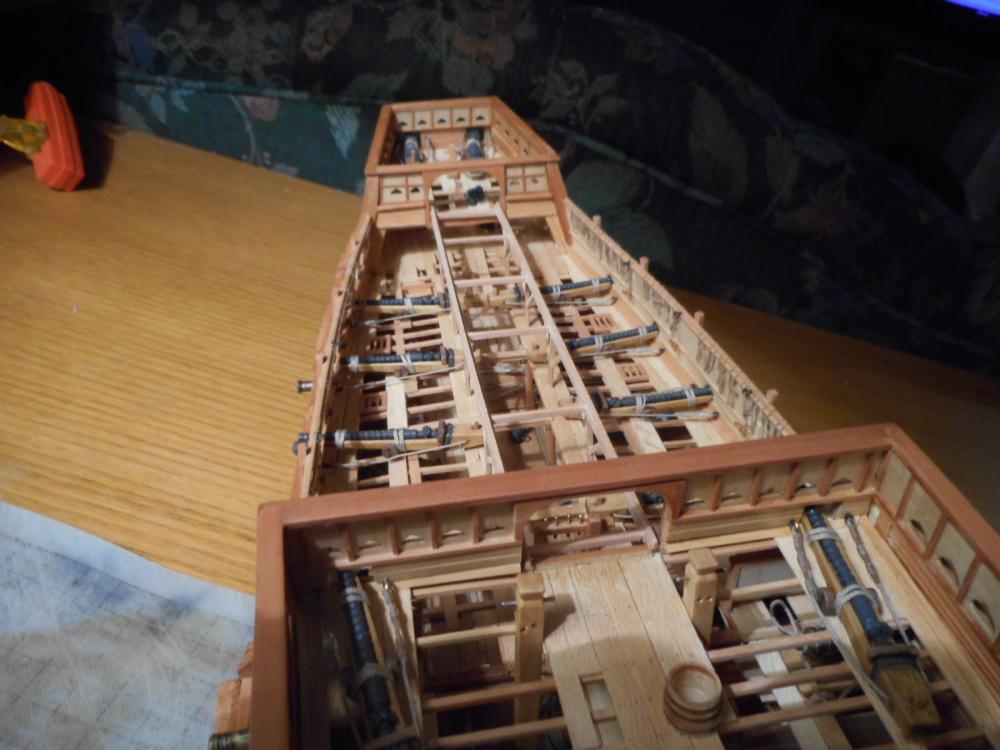
Here's whatbasswood for the deck planks,boxwood for the hull planks and swiss pear for the gun port line planking and the lap planking on the upper hull looks like on a Mary Rose build in 1/80 looks like. I have done it in admiralty style to show down thru the decks to the main gun deck. I have the main deck cross beams in boxwood and the smaller beams in swiss pear. The finishes are a Minwax oak for stain and Testors Dulcote to seal all the surfaces.
Keith
- Canute, mtaylor and Landlubber Mike
-
 3
3
-
Ahoy Mates
I have been working on my Mary Rose now for about 3 years now,and will complete it in the next 3 weeks. I have a show to enter it in as a deadline. But there have been times when I was fed up with the build.
That's when I would find a small sub build for the Mary Rose that was different from what I had been working on to break the negative feelings that had built up from the stress of building.
You do two things,work on something different and make up and complete a new addition to the big build. And just look at it as a new small kit.
I often use rigging and yards as subjects for these little "kits" > There's lots of yards to make and plenty of blocks to seize .
Keith
- Mike40, CaptainSteve, Canute and 4 others
-
 7
7
-
Ahoy
NO ON THE BABY WIPES!!!!! They contain oils that would only damage your model. Try to find a museum with a qualified conservator and get second opinions before doing ANYTHING to your model. Take your time in finding out what to do. And first do an area that's not clearly visable,so that you can try out the cleaning process on a very small area,and then let it age for a while to see if there are any adverse aftereffects to what you have done in cleaning.
Take your time in researching out the information and those who can help you. Make sure they are documented people in cleaning artifacts.
Just remember that you want to do it the correct way the first time,and not to end up with something that's worse than what the condition is now.
I just wish I had this task to do now that I am retired.
Keith
-
Ahoy Newbie
Boy ,now you want to start out on two of the biggest models that there are? WRONG,do not go there. For your first build these are not even in the same universe that you are in now.
I would recomend the Model Shipways Gunboat Philadelphia 1/24 kit to start out with,and here's why:
First,the odds of you completing it are better than even,while the Surprise and Constitution completion odds are NONE!
Second_ It's a simple flat bottomed shaped hull with a bow and stern shape that you will be able to make and learn from.
Third- It's a large scale that will allow you plenty of room to work on the rigging but still have lots of things to learn and be succesfull at. That is VERY IMPORTANT for your first build. Learning and success without being so simple as to be boring,which this kit is not.
Fourth -Great kit and instructions and plans and not too expensive.
And most important-You will have fun building it because it will challenge you without defeating you!
Look up our building groups blog at www.woodenshipclass.blogspot.com and see back in time how our group built our Gunboats.
You have to crawl before you walk,and this kit will take you along in a very rewarding journey in starting out in ship model building. Do not by the first ship kit you like before you have the learned skills to finish it. I would say that maybe 99-95 % of all first wooden ship kits purchased NEVER GET FINISHED,and end up in disapontment and the fate of the closet top self until they are either sold at a garage sail or thrown out years later.
Keith
-
Ahoy Mates
Regarding wooden ship model contest's,who holds them and what are their rules?
As far as IPMS shows they used to be limited to only plastic models or some high percentage of plastic used in the model. The latest rules are stated as "material that is appropriate " which does not exempt wooden ship models.
Our local IPMS club changed their name from Oregon Historical Modelers Society to Oregon Modelers Society since their are now more car builders and other types of modelers in the club.
And I know that there are standards established for museums models.
Keith
- CaptainSteve, EJ_L, dgbot and 2 others
-
 5
5
-
Ahoy
Use whatever works best for you. Most of the time whatever you use other than wood to start out with gets painted 99% of the time anyway,and who cares what's under the paint.
And I have used wood, brass plastic and steel for wooden parts that I ended up painting to look like wood in the end. And the result was that if I did not tell what it was made of,all thought it was WOOD!
In our building group our founder and owner of the hobby shop could not stand that I was using evergreen plastic for parts on my wooden ships instead of brass. We argued about it,I said that since it was painted black ,that if I had not told him otherwise,he would have assumed that it was made out of brass and either painted or blackened.
After about 3 years and beating him in contest's for those years,he finally is quite about the subject.
It's your shipyard.
Keith
- Rick01, CaptainSteve, EJ_L and 3 others
-
 6
6
-
Ahoy Mates
Just wanted to know what types of glues you use when rigging in black rope other than CA that will not "silver" when dried?
I have tried diluted PVA glues with a range of results. From being unseen when dry to being white-"silvered" air under the glue when it's dry.
I use Titebond for my Tan Syren rope with no problems,but the black is different for some reason unknown to me. Where the tan will take to the Titebond with little effort,the black doesn't want to hold onto the glue and dry the same as the tan.
What do you use,and how do you use it? And what should I be doing different for the black rope that is not the same as for the tan and light rope?
Thanks
Keith
- Canute and thibaultron
-
 2
2
-
Ahoy Mates
When knotting ratlines,at what small scale do you just use an overhand knot in place of a clove hitch? This question just came up in our group meeting yesterday.
Would it be like smaller scales than 1/72? That's getting so small that it would be hard to see the difference.
If you have elves doing your building with tiny hands this question doesn't have to be asked. We are asking for the normal builder,not an OCD one who would do it down to 1/200 scale or smaller.
Thanks
Keith
-
Ahoy Mates
To start with I am a now retired tool and diemaker who has been using mills of all types for the last 50+ years. What advice I would give all about milling is that,since you are not having to do it for a job with time being a large factor- Take your time milling. Small cuts do two things: 1- it saves wear on your cutters which are costly to replace and 2 nd it reduces any deflection of either the cutting tool and reduces the over cutting of the mill cutter in your work piece.
The small milling machines are not built to handle deep cuts by the milling cutters. In size a standard Bridgeport milling machine handles cutters up to 1" dia. but even then they have a hard time with full cutter depth cutting.
If you kept the same size and capibility ratio of milling machine to cutter,the small mills would have only a cutter of 1/4" dia. with a cutting flute depth of only 1/8".
So take it easy.
And if you are burning wood,either your speed is too high,feed too fast clogging up the flutes of the cutters,or you have a cutter that doesn't have enough room for the chips created by you cutting speed and feed.
Mini mills EQUAL MINI CHIPS!!!
Keith
- reklein, michael mott, druxey and 9 others
-
 12
12
-
-
God Bless you Chuck!
You know how to make my day. I am looking forward to building this kit after I finish up my Mary Rose. It will be great to be able to purchase the resin castings and then be able to carve and learn also.
This barge will fit in nice next to my Gunboat Philadelphia that's also in 1/24th scale. And my first build to use all of your rope and blocks in it's building.
Keith
-
Chuck
As for the laser cut parts for the carvings,will there be extra's included for those who have mistakes when shaping them? Or will you offer to sell set's of the laser cut parts that need to be carved?
I know that I would want at least an extra set so that I can use one to learn how to work the shapes out,and another for the finished model.
Please put me on a list for this kit.
Happy Customer from Troutdale,Oregon
Keith
-
Wow,eye candy for the ship model builder and a level of craftsmanship that few attain. I can do this same level of work,but only in my dreams. I sometimes hate it when I wake up and realize that it was only a dream.
It's like when I would see my dog Vincent sleeping and dreaming while he was laying on his side and his legs were moving like he was running after a chipmunk,And then when he would wake up,his look on his face was ,crap I did not catch that damn chipmunk,it was only in my dream! Still hoping someday that it will not be only a dream.
Great work Mick.
Keith
-
Ahoy Mate
This is what I have been working on a Mary Rose 1545 showing all the structure down to the main gun deck admiralty style. All scratch built using basswood for the deck planking-what is there that is,and boxwood and swiss pear for the planking and deck beams.
I use the basswood because I can then add the wood grain to it by engraving the grain with the point of a xacto blade easily. The boxwood is best for the long beams because it's stronger than the swiss pear. I used the swiss pear for the cross beams for a color difference so that you can see that there are different parts in the structure and where they join.
On the hull it's boxwood except for the band that the main gun ports are in,that's swiss pear.
The boxwood and swiss pear are hard so that they hold their edges and do not get dented. And you can file slots without having to deal with burrs like on softer basswood.
Keith
- ndeconte, uss frolick, Canute and 7 others
-
 10
10
-
Ahoy Mates
A couple other things you might do: sand the sides of the eyebolt end that gets glued in. I roughens up the surface and also removes any oil or oxidation that would lessen the holding power of the glue that you use.
If the eyebolt is going to have tension on it straight in line to the hole it's in,file some notches into the sides of the end that goes into the hole 90 deg. These will fill in with glue and hold the eyebolt in even better than just the glue around the straight sides of the eyebolt end.
I have not had an eyebolt come out of a deck after notching the ends for the glue.
Do not have a hole too tight to the eyebolt size,you need some space for the glue to form a film around the eyebolt sides.
Keith
-
From what I have seen there doesn't seem to be much of a wooden ship kit collectors market for vintage kit's other than those of around the 30's-50's era kit's.And some limited production kits like LSS kit's from the 90's.
The market is very limited and now is depressed due to old collectors like me selling off their collections or the kits being sold off in estate sales due to old collectors of my age not living long enough to sell off the kit's themselves .
Their is just not the interest of the younger generations in these hobbies. Same is true in Brass Age Car's. Our fathers collected them because they grew up driving in them and driving them,now that hey are almost gone their prices have fallen,just see some of the car auctions ,not enough bidders wanting them now days.
I just wish I had sold my kit collection off twenty years ago when prices were at their peak for plastic kits,and as for the wooden ship kits'I was not collecting any back then.
Keith
- Pathfinder, Canute, mtaylor and 1 other
-
 4
4
-
-
ahoy Mates
I use a clove hitch for the ratlines except for the two ends. I have used an overhand knot,but should I just use the clovehitch on the ends also?
And how do you trim off the ends fluch with the shrouds on the outside?
Keith
-
-
Ahoy Mates
Trying to find out how cat davits were set up on the bow of ships in the time period of around 1535 on English warships? It's for my Mary Rose build.
The new Anatomy Of the Ship Mary Rose has sketches showing cat davits that were used,but do not show where or how they were set and rigged for use and storage on the Mary Rose.
I have made the two of them up and need to find out this information. Have looked thru all my books and have searched for "cat davit" with no answers being found.
Would they have been lashed to the deadeye's on the bow when not in use?
I would like to have my model with one of them raising the anchor into place.
Thanks
Keith
-
Ahoy Mates
Subject: Civil War Blockade Runner
Scale: 1/48
Build Type: POB or POF doesn't mater And a Short Kit. Fittings fine in kit,but planking is up to buyer-keeps price down,and buyer can go with either economical wood or other more expensive wood choices.
Price Range: $150-$300
Quality- Must have bulkheads and frames that line UP! That are fair and not being 1/8-1/4" off being fair,or shapes not the same frame to frame. Maker should have a outside builder build and show that they are right.And do it before the kit is being produced and on shelves for sale!
After buying kits from 6 manufacturers over the last 4 years,not one has a kit without this problem. From 2 that have had just a couple problem frames to a majority where 75% of the kits frames-bulkheads were wrong shapes,and had to be corrected.
There are other types of kits using laser cut frames and bulkheads that have tapered and other shapes like the ships we build,but they do not have the same problem with their kit's.
I have been in production for all my adult life and quality control processes. There just needs to be a raising of standards of all in the kit making community. Some just need to be made aware and have very little to work on. Others will not care or even listen or try.
Just think of it this way,if you have a terrible first build and not the skills to deal with uneven shaped bulkheads to start with. Do you expect that person to want to build another kit-or even finish the first kit with problems?
It will only help all of us if the standards are raised up to a level that they should be with CAD and laser cut parts. We are not talking of old school steel rule cut kits of the past.
Build Time: I like short time builds and long. I lke to vary it. 6 month's to 2 years
I frankly think that raising the quality question and problems that we all are subject to is correct if you are talking about new kits and what we want. I want it to be taken in a positive way not just a ranting way.
Keith
- CaptainSteve, reilly, Canute and 3 others
-
 6
6
-
Ahoy Mates
Just to start being 63 when I started out in a machine shop bak when I was only 12 there was only the lead screw dial that was on it and the next step was mounting a direct reading indicator to show the movement of either the carriage or tool rest. You had to deal with lead screw backlash and it took a lot of skill and use to use them correctly and get things right.
Next was when I was 17 and the shop had travel dials on the Bridgeport mill table and cross feed. They were better than the dial on the lead screws,they showed the table travel. But they could slip and if you had to be very accurate,you still had to set up direct indicators on the X and Y axis to also show any crabing of the machines tables when moved,or to show movement when they had to stay still. Still al lot depended on the skill of the toolmaker or machinist .
Then DRO's first generation came out. they were better than what had been used before,but the resolution was only .001 total because they used a glass scale with lines etched into the glass. The reader owuld detect the bar and the counters would add up the total number of lines crossed. At this stage they used frequency counters that had been around since the 1940's and Nixe tubes for the numbered lights to show how far you had traveled. You could have a total of .001 error since you could be just up to the next line going both ways without the numbers changing-thus the error of distance. I still had to use a direct reading indicator to know where I was really at.
Then they went solid state and now use magnetic encoded bars.
They have come a long way,and those of you hwo have only used their mills for hobby work,you really can not know the preasure that we went thru before the DRO's came about to know where your mill table was in relation to you mill cutter of boring head. I have not said anything about the spinel that your tool is in. These also deflect and move around either from being lose in the quill of machine head from use,and the bearings in your spindle also make up a large part of being accurate in holding the cutting tool on center and not deflecting when cutting forces are applied.
Just gong down memory lane here. Less and less guys around who had to machine before DRO's were around. I also used tooling buttons,which you set suing height gauges and indicators. You would set these round cylinders on the part you wanted to drill or bore a hole in the exact center of the hole. Then set up the part in the mill or lathe. Indicate the button until it was in the center of the spindle where your toll was. Set up direct reading indicators on all moving parts of the table if you were in a mill. Then remove the tooling button and drill and bore your hole in this place. And hope that it did not move,and if so that your indicators would allow you to move it back on the center you wanted.
Are there any guys out there who know what I am talking about with tooling buttons? I still have about 100 of them in different sizes-home made ones and also Starrette made ones.And one's over 100 years old that I got from my Dad.
Keith
- clifforddward, Canute, druxey and 4 others
-
 7
7
-
Ahoy Mates
I am just about to start on the main rigging of my Mary Rose and am excited about doing the rigging. Not only because I have been building the ship for over two years now and it's a welcome change,but that now after rigging 3 ship models in 3 years I really love to work on the rigging.
From searching thru my books for how to rig different time periods and ship types to seeing how tight and consistent I can get my seizing.And seeing what everyone here is working on,and getting answers to questions here.
And most important how even all the deadeye's lashing to each other.
And with most builds there's another area and skill to learn and master. Like in diemaking after a while there's little that is really new,just different situations doing the same things. And trying to master what you are doing.
So back to my question-do you like rigging?
What do you like and what do you not.
Keith
- EJ_L, Elijah, CaptainSteve and 3 others
-
 6
6
-


US 'C' class submarine 1914 by overdale - RESIN
in - Kit build logs for subjects built from 1901 - Present Day
Posted
Ahoy Mate
I have their 1/72 German Torpedo Boat resin kit,they are expensive by they are very detailed and the only ones being made. I like the half hull type for space requirements. I remember that one member of our modeling club made up a submarine diorama that had the ocean surface with what he stated as a 1/35 scale Typhoon Class Russian at periscope depth.
He had a base that was only 4" X 8" with the ocean surface made out of resin with the periscope sticking up 3" ! The rest was underwater! Or under the base he would say with a smile.
I just wish they had other types of submarines. I do have a 1/72 resin kit first type Holland submarine kit that was made a decade or more ago by Bluewater Navy.
Keith