


bear
-
Posts
346 -
Joined
-
Last visited
Content Type
Profiles
Forums
Gallery
Events
Posts posted by bear
-
-
Hi Chuck
Just a coule of questions.
When drilling the hole,how deep do you drill the hole?
When using the awl,how far do you push it in the hole? Is it just to make sure the hole is round after sanding? And if it is just for rounding out the hole,could you just use the same size drill and just use it in reverse to round out the hole befor using the pencil lead?
Thanks Keith
-
-
Hi Chuck
After drilling the #78 hole,what do you fill it with? What are your steps and what do you use?
Thanks
Keith
-
Ahoy Mates
Looking ahead to when I have to paint the decorations on my Panart Royal Caroline build with a Gold Leaf paint color. Will be panting whatever Gold Leaf paint that will be chosen from the recomendtions from all of you. I will try out several paints recomended on sample parts.
I would also like to know what you do to add depth and high lights to the Gold leaf in dry brushing or washes for the inside corners and outsdie edges.
I will be painting over wood,plastic nd cast brass parts.
Thanks for your help.
Keith
-
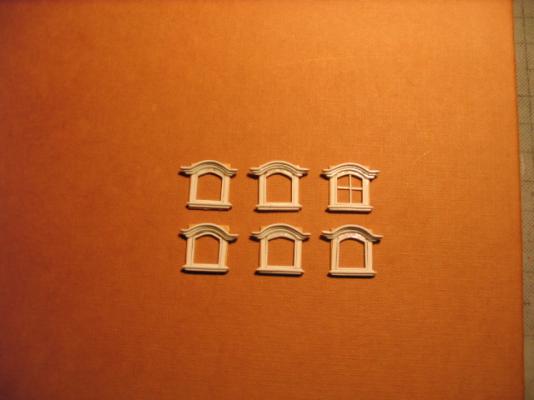
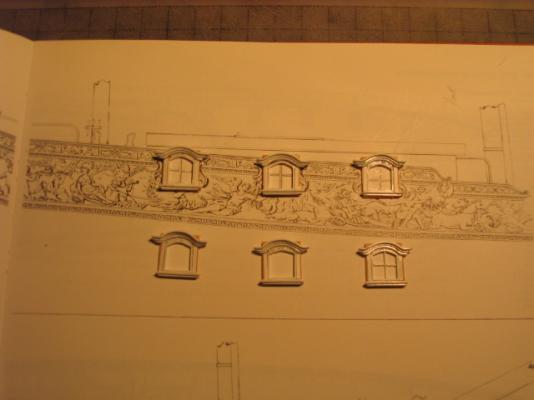
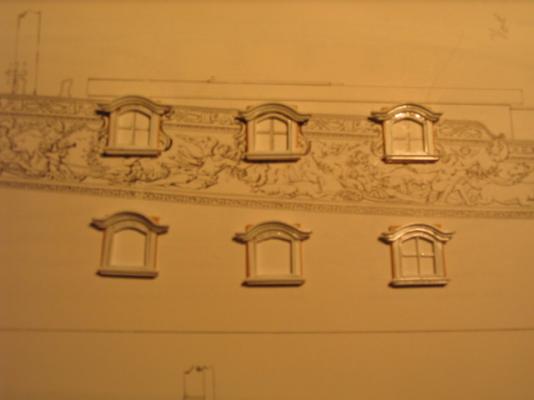
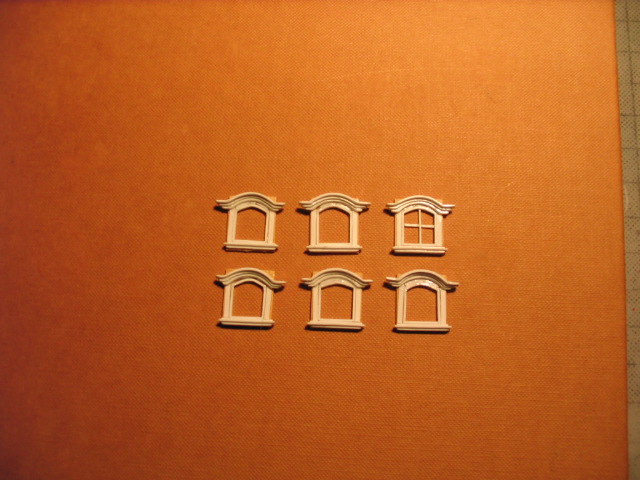
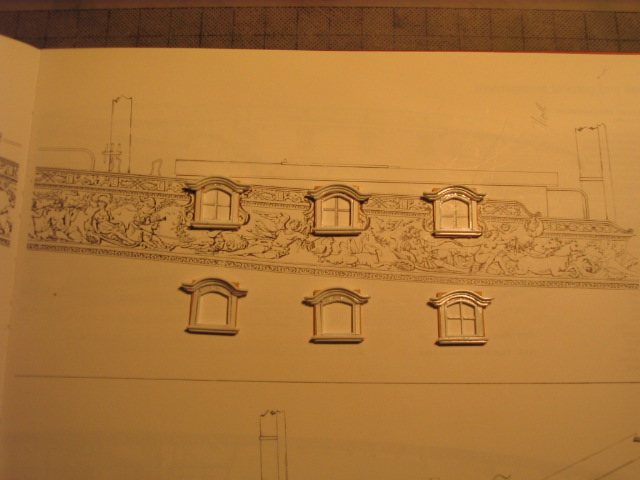
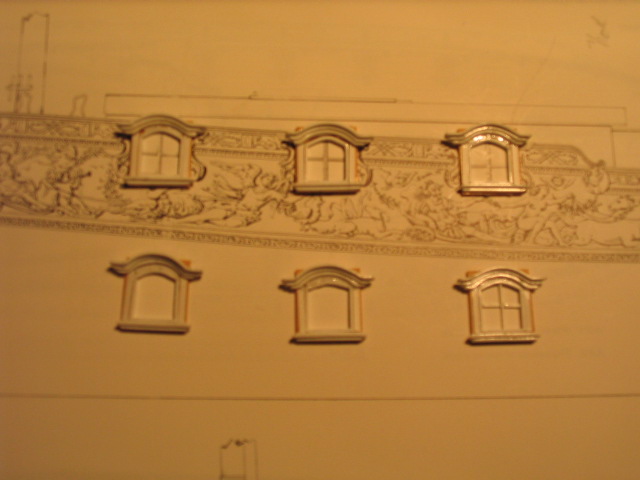
Hi Allan
Here's what I finished up with as to the windows and their frames that I made out of Evergreen Plastic strip material. Strip material used:
.020 X.060, .020 X .030, .030 X .030, .030 X .080, .030 X .140 and .030 sheet.
The parts are on top of the 1/48 drawing in AOTS Royal Caroline.
Still have to put in the window muttons in 5 of the six windows. The frames get painted gold leaf when finished. The back of the windows are 1/32 boxwood that was cut out for the window,and the window's frame was glued inside the opening in the 1/32 thick boxwood. They will be inserted into the cabin window cutout's.
So much for casting the parts. Just one days labor.
Keith
- mtaylor, IgorSky, garyshipwright and 3 others
-
 6
6
-
Hi Allan
The parts that I am making get painted with a blue color,so that it doesn't realy matter what they are made out of.If the parts are to be painted I use all types of materials to build with. Just as long as they will have a long life.
Thanks for your questions and sugestions along with the others who have answered this posting. I just wish that I could find a great replacement for the brass castings in the kit! I know that I would pay a nice sum for a set like others who have carved theirs that are shown here on MSW.
Keith
-
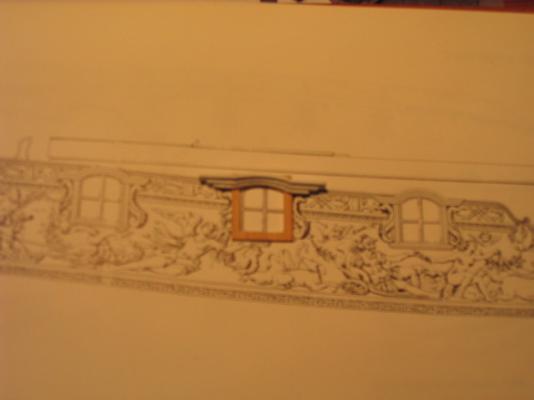
Hi Allan
After I posted the question,I looked up what it would take now in cost and started to carve the parts now. They are the same. They are the side window eyebrows for the cabin windows on the Panart's 1/47 Royal Caroline. I have attached a photo here of what the master. It sits on top of the drawing in the AOTS's book.
I ahve made lots of masters for 1/35 tanks and conversions in the past. It's been a long time since I looked at the prices for all that is needed to resin cast. If I was looking at a lot more than 6 parts,I would do casting.
Thanks for your input.
Keith
-
-
Ahoy Mates
Looking to cast some fittings in resin. What would be the best resin and rubber and mold release to get started for casting parts?
The parts are some trim work around windows that I have to make ten of. I have a master completed,it's 1/8" x 1/4" x 1 1/4" overall size.
Thanks
Keith
-
Have read that some kits are comming out with MDF material instead of plywood. Is it good or bad? How is the mdf to work with? Can you use screw clamps in MDF? Ant warping or other problems with it,like formaldahide smells?
And what kit amkers have switched to using MDF? And why?
Thanks
Keith
-
Trying to find decorations and Frieze's for my Roayl Caroline Panart build for the areas and decorations that the kit doesn't have.
Are there any decals or frieze's that are made up in strips for use in the craft hobby's? Or in jewlery? That You can use on ship builds?
Thats ahead of time for your help. I do have the Frieze downloads that Chuck had here for the pinnace model.
Keith
-
This might be your problem. Heating up the metal too fast,before the flux can melt and create the covering to protect the copper from oxidizing.
You might have better luck with 50% silver solder-cad free,wire 1/16" dia.-no flux. Use water based white silver soldering flux paste. Sand the surfaces to be soldered clean.
Hold them together in the possition to be soldered. Coat liberaly with the flux paste. With a low flame-heat up the parts slowly. The flux paste water will boil off,leaving a white layer. Continue heating up-adding flux to cover the parts,when the flux is clear,you are near soldering temp.
Try this out on prctice parts until you can heat up the copper with flux,and getting it up to heat without causing oxidation on the copper,only clear flux is what you are working to have all over the parts to be soldered.
Then when up to temp,just touch the patrs with the silver solder wire,that has been dipped in flux,and the parts should melt the solder.
Be sure to use gas welding glasses,so that you can see what you are doing in the intence light of the torch. Practise ,practice,practice-you will only get the right combination from doing it until it is natural for you. Try to get someone who knows just how to do it,to teach you and show you wnat is right and wrong.
Keith
-
Hello
As a retired Tool and Diemaker I bow to your skills sir. You are truely a Master at machining and most impresively in minature machining. At the watch making levels.I have patience but your level is truly wounderful to see. I just hope that people around you can let you know just how good your work is.
So much for the CNC button pushers now machining parts. These are the real skills of a great trade,and have all but gone away now in the modern world.
Those who have never machined parts or designed progressive die's have no way of completly knowing just what you are doing here. Or just how hard it is to do. Only with God given tallents can you get to this level of work. No training can get you to this level of mastery.
It is sometimes hard to see this kind of work when you know just how much time and work it takes to acomplish.I have been in the amchining and toolamker world my whole life. I am second gereration toolmaker,who was trained by my Father and worked with him for over 25 years,and was working in the trade for 44 years.
You are the master my Friend.
Keith
Keith.
-
Hi David
You might want to try using Testors Dullcote Laquer brush paint. It also comes in gloss. I use this over most of my paints. Works great straight onto basswood and boxwood. It will darken it a little ,and bring out the grain in the wood.
Try it out on the wood to be used,look at in in natural light also to see what it realy has for any color.
Have used it over Tamiya Acrylic paint with no problems,only watch out for it might pick up some pigment from the acrylic.
I use one bottle for just over wood and others for over colored painted areas.
Sands easy,you can also scrape it down level if filling in the grain or seams. I have been able to put down many coats in several days time. Depending on the humidity of the air. Great for sealing wood before painting with enamels and acrlyic's.
I love the dullcote over decks and other wood areas. Seals them,dries fast to the touch in about 20 minutes. Can be sanded and even buffed to get a shine after drying a day or so. Or just leave it flat.Shrinks down well after drying.
Try it out. Better than waiting for varnish to harden up.
Hope this helps some.
Keith
After this ship it's onto my 1/48 build of the laser cut Mary Rose and finishing up my 1/80 Jotika Mary Rose,which was used for the frame outlines of my laser cut 1/48.
-
-
Hi Guys
I did not intend to start a spirited discussion on the subject of the planking. Chuck,I will have to get out my Confederacy kit and look up your instructions on the planking.
Since I did my Virginia Sloop and completed it a long time ago now,I just was about to strt planking on my Royal Caroline and have found all of this out now.Well back to your plan instructions Chuck for now. Looks like I have a lot of figuring out to do now.
Thanks to all. The nibbing and the margin planks were fun to do.Now I have the hooked and taper planks to tame.
Keith
-
Hi Chuck
Is there a tutorial somewhere on how to do the "hooked" and tapered planking that was used in this time period? Or a book that has the "rules' standards as to how this style of planking was done?
The quest for knowledge never ends. Just the hard drive and book collection gets larger.
Thanks
Keith
-
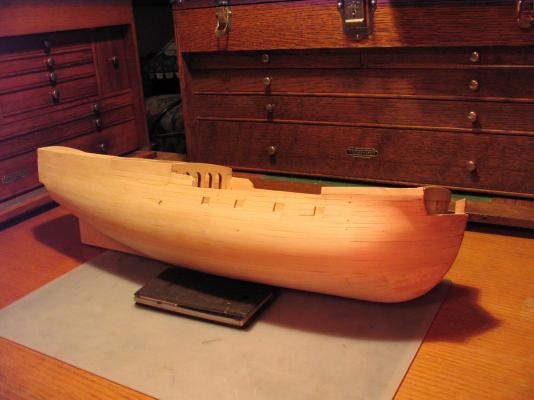
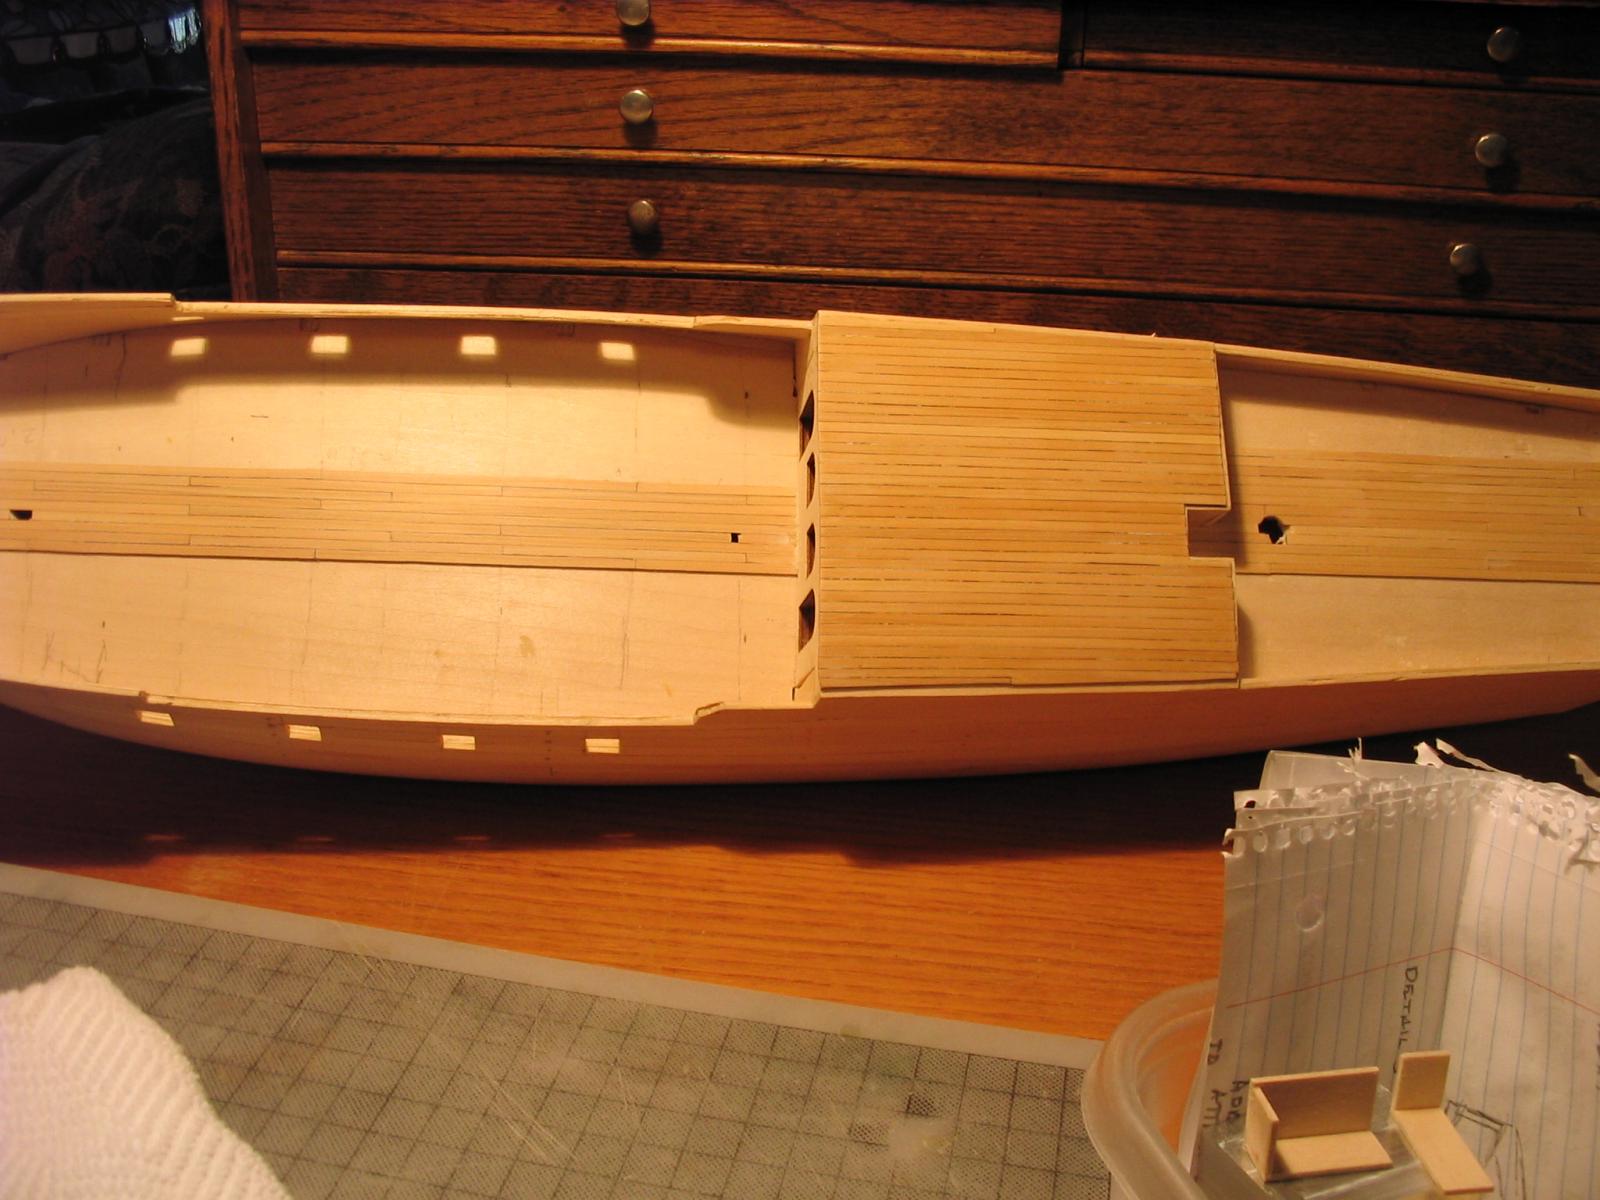
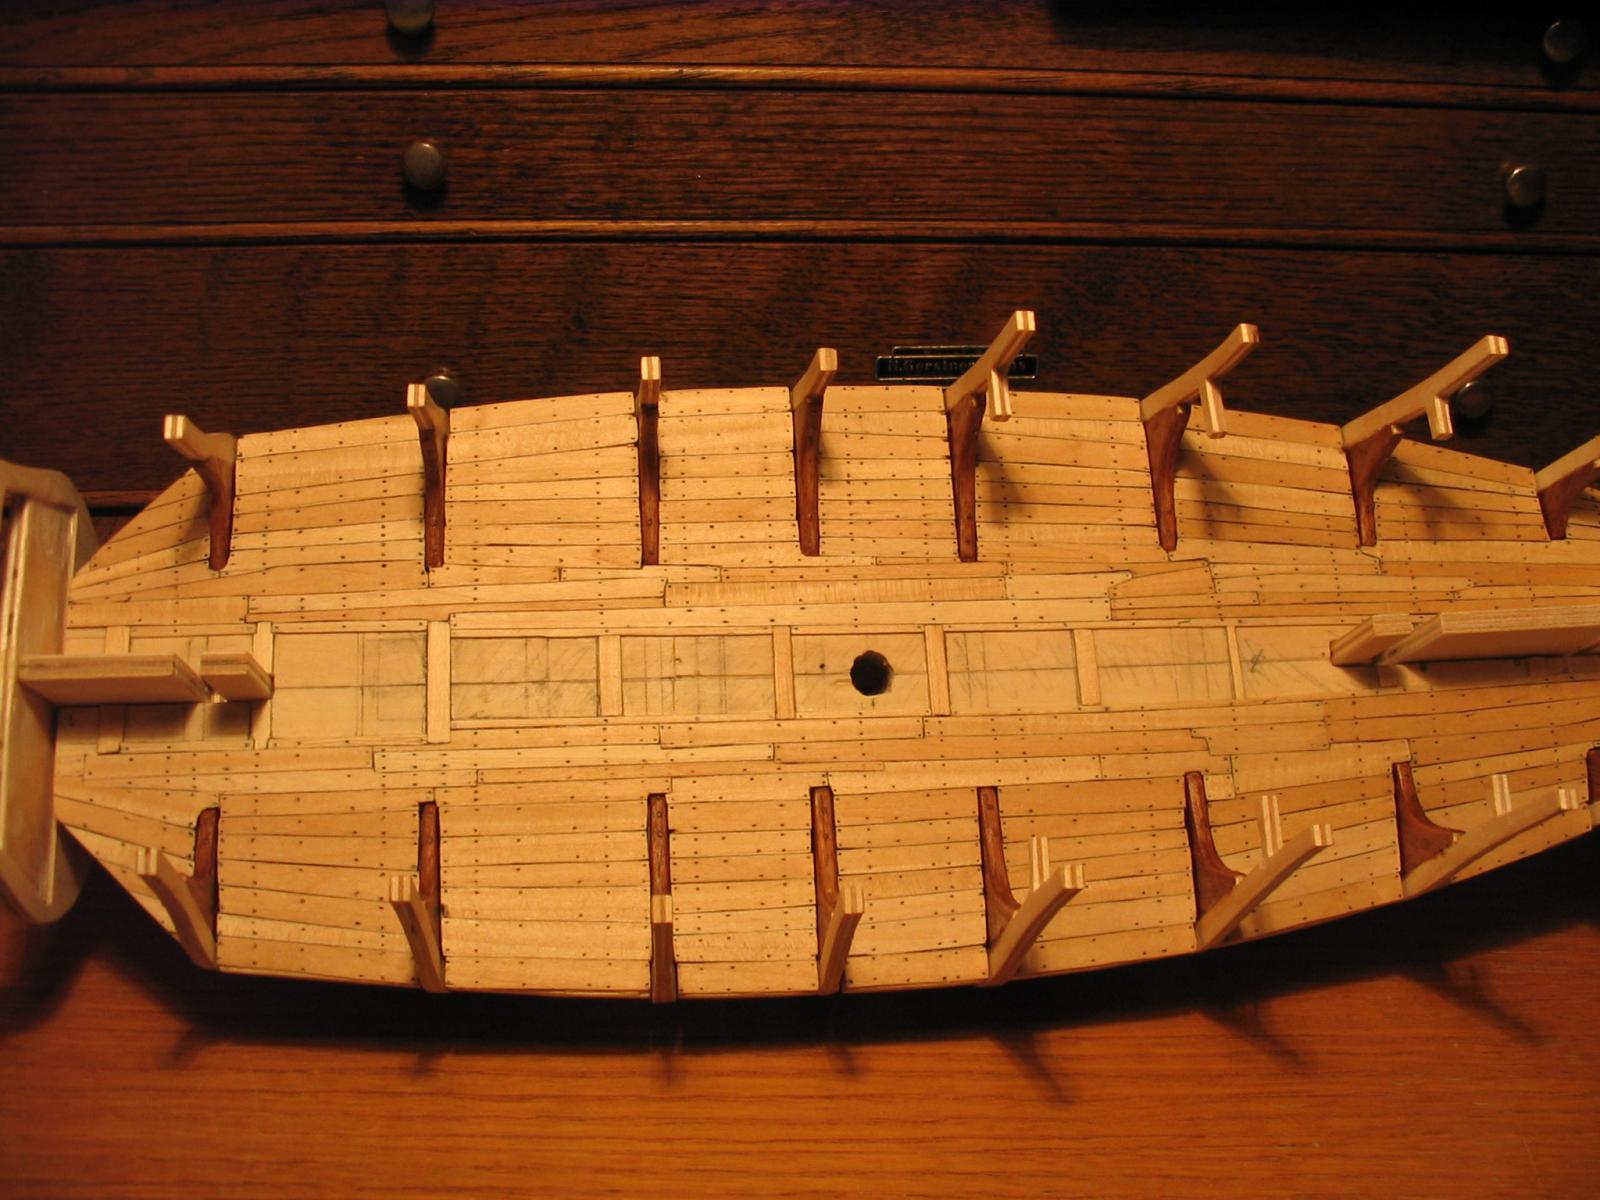
Hi David
I am building this kit also. Here's a photo of my hull with the first planking on it. I have changed a lot of the kit.Made a new stern with it now being curved. I just wish that the brass figure decoration castings were not from 30 years ago along with the etched plates. You build a nice model and then have to put this stuff on it.
I will be leaving these off and trying carving some myself.
Good work David.
Keith
-
Hi Brian
I do not know just what to say other than I nibbed mine like the plans and in the book that I have Modeling an Armed Virginia Sloop of 1768 by Claton A. Feldman. I would say that Chuck is most certainly correct in what he says that they were used later.
I am working on a Panart Royal Caroline kit build now along with a 1/80 Jotika Mary Rose and a 1/48 Mary Rose that I had laser cut. I asked about the planks because I had seen it done both ways.
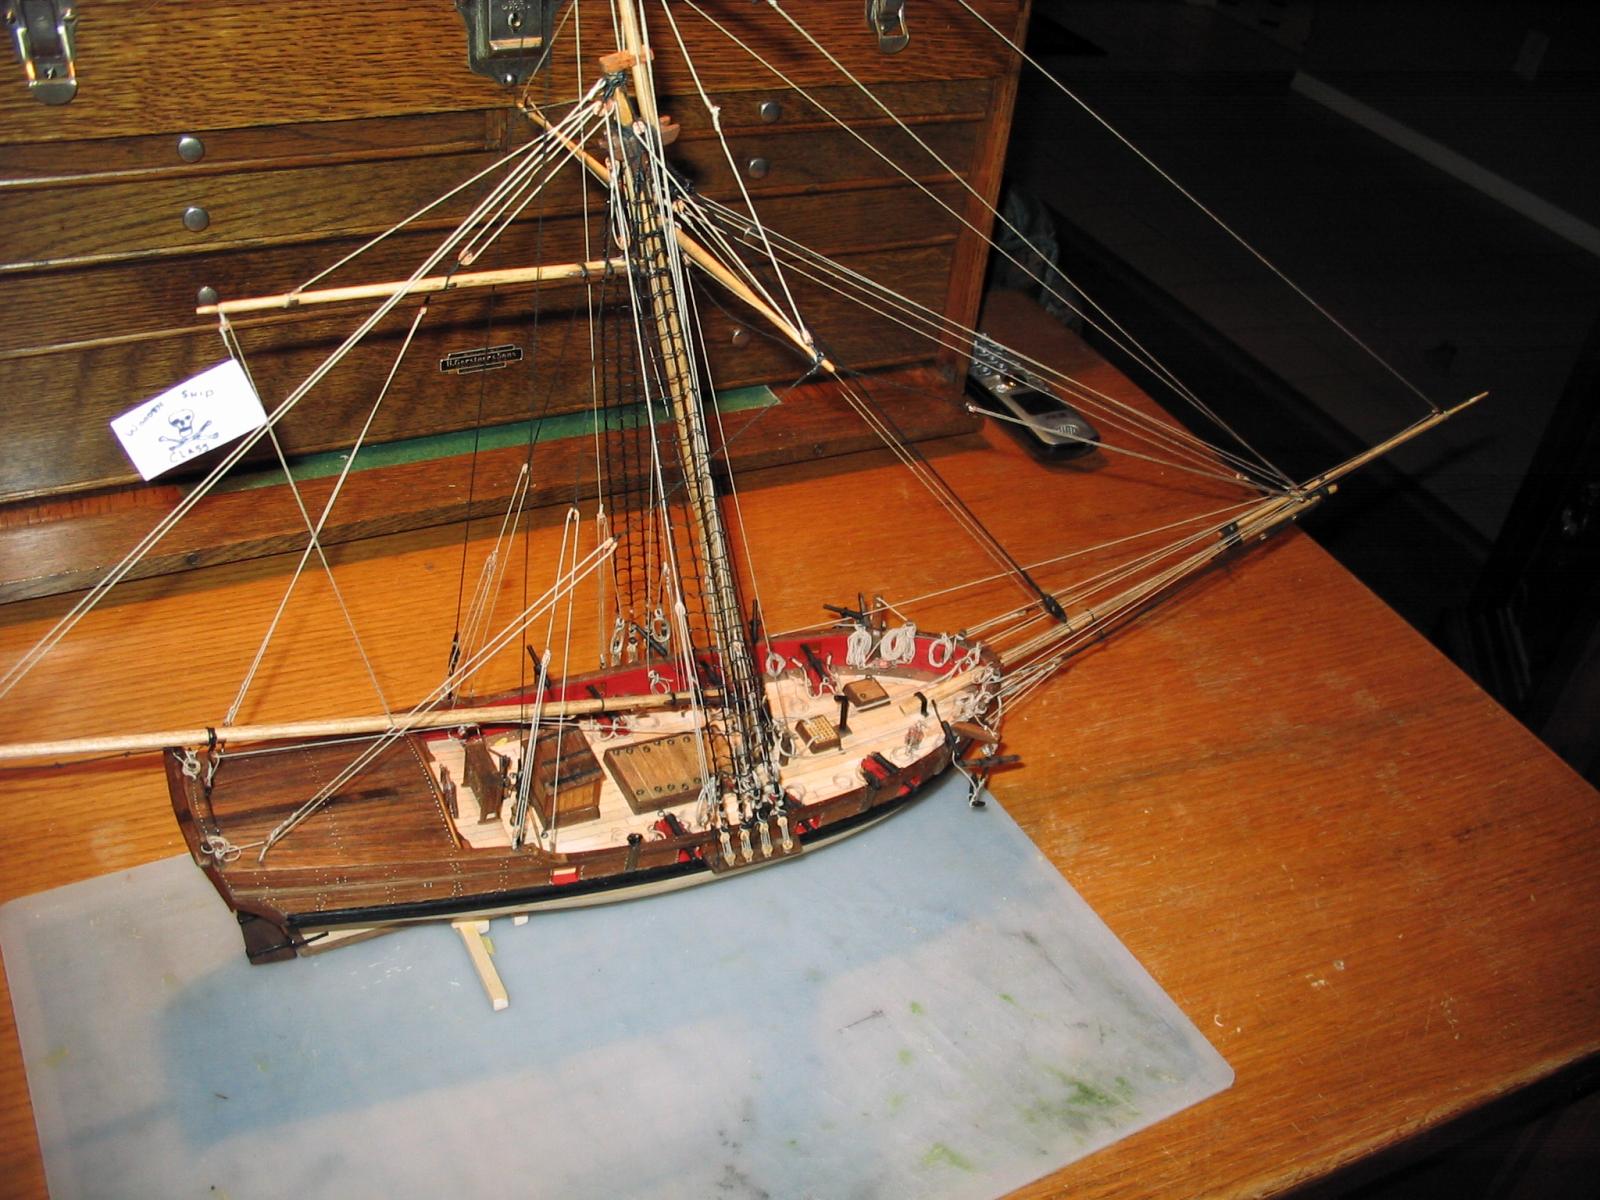
You can see photos of my Sloop on our blog at woodenshipclass.blogspot.com . It's back in the blob a ways,but there is a couple of close photos showing the deck and the nibbing I did. On the Sloop,it looks great,even if it is wrong.
It's a toss up as to what I would do if I were you now. It was my first nibbing and I considered it a real challange to get the fits close. I did the planking in .040 basswood x .250 wide.
Let me know what you end up doing.
Keith
-
Rookie question here-What was the established deck planking patterns for the Royal Navy around 1760? And what type of nibbing pattern was used for the end planks and waterway?
Is there a book that has these details for this time period,and maybe others that I could get?
Thanks
Keith
-
Hi
What are the round parts on the "T" pins that you clamp down your fiish planks with? And where can I buy some?
Thanks Keith
Your Planking looks great on your Armed Virginia Sloop. Here's a photo if mine.

-
Hi
Just finished the first planking nad need to fill in some gaps and low areas after sanding and scraping before planking with my finish second planking. Need to know what would be the best wood filler to use.
I am not going to paint or stain over this filler,just gluing my finish planking down on top of it .
Thanks
Keith
-
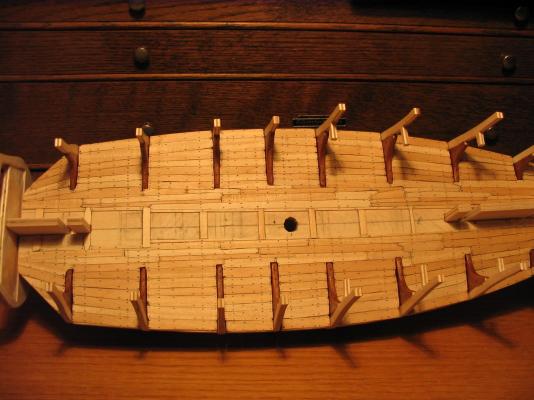
Hi Here's a photo of my Model Shipways Gunboat Philadelphia 1/24 scale that I planked using 1/32 Red Oak veneer glued onto 1/32 basswood for all of the decking and hull planking. I first splied the plank shape in the 1/32 basswood.
Then after getting the shape for the plank needed,I roughed up the mating sides of the basswood and oak veneer (the red oak veneer that I was using had a cloth backing to it,so I scratched cross hatch patterns with a xacto knife blade point,so that the Titebond would have something to hold onto. I tried to glue the veneer without this"roughing" but it would just not hold onto the basswood).
I then glued them together with the TiteBond and clamped the glued plank to a straight steel surface,so that the ply will dry flat. Both woods curl when you put the Titebond on one side only. Then after an hour I would unclamp the "ply" ,trim off the 1/16" larger Oak veneer to the basswood plank shape and then glue it onto the bulkheads.
When you cut out the red oak veneer to glue onto the splied basswood plank,make the oak cutout about 1/16 to 1/8" larger than the basswood plank. After gluing them together,go around the mating edges and make sure that you have a fillet of titebond around the smaller edges of the basswood. If you do not,there might be gaps in the glued edges of the "ply" after you trim the oak veneer down to the shape of the basswood.
Like said above,you have no room for sanding down a hump that is not the shape of what you want,but getting the type of wood and grain that looks better than what is normaly used for planking makes the effort well rewarded.
I won 1st Place in our Regional IPMS show this September with this model. I bought my Red Oak veneer from my local WoodCrafters staore. The sheet was 3' X 4" and cost me a grand total of $45.00.
- JPZ66, mtaylor and Ryland Craze
-
3
-
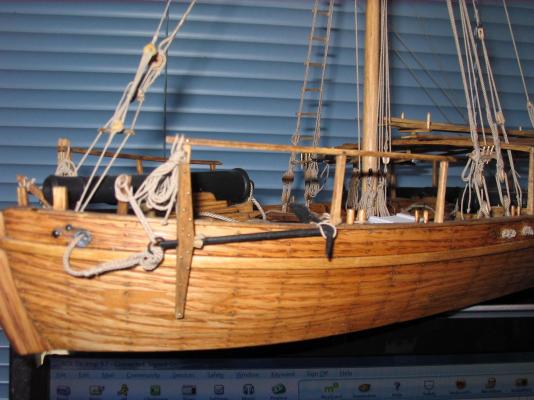
Hi John
Here's a photo of my 1/80 Mary Rose's main gun deck. The Jotika kit has made it flat,so I put a deck above it with the crown and sweep that the upper decks have.
I planked it with basswood and on the frames ,I reshaped the knee areas on the plywood frames from just a square upper deck support,to the correct knee shape. I reduced the thickness of the ply frame down to 1/8". The reshaped ply,now in rising knee form was then covered with 1/32 walnut veneer. I then stained them with Minwax Golden Oak stain.
Keith
- archjofo, tadheus, Mirabell61 and 4 others
-
7


HM Cutter Cheerful 1806 by Chuck - FINISHED - 1:48 scale - kit prototype
in - Kit build logs for subjects built from 1801 - 1850
Posted
Hi Chuck
Will the of bulheads for the Cheerful also include the keel?
Thanks Keith