
.jpg.f4fa790b1fa2f0e00e3d149ed7bdd37c.jpg)

shipaholic
-
Posts
517 -
Joined
-
Last visited
Content Type
Profiles
Forums
Gallery
Events
Posts posted by shipaholic
-
-
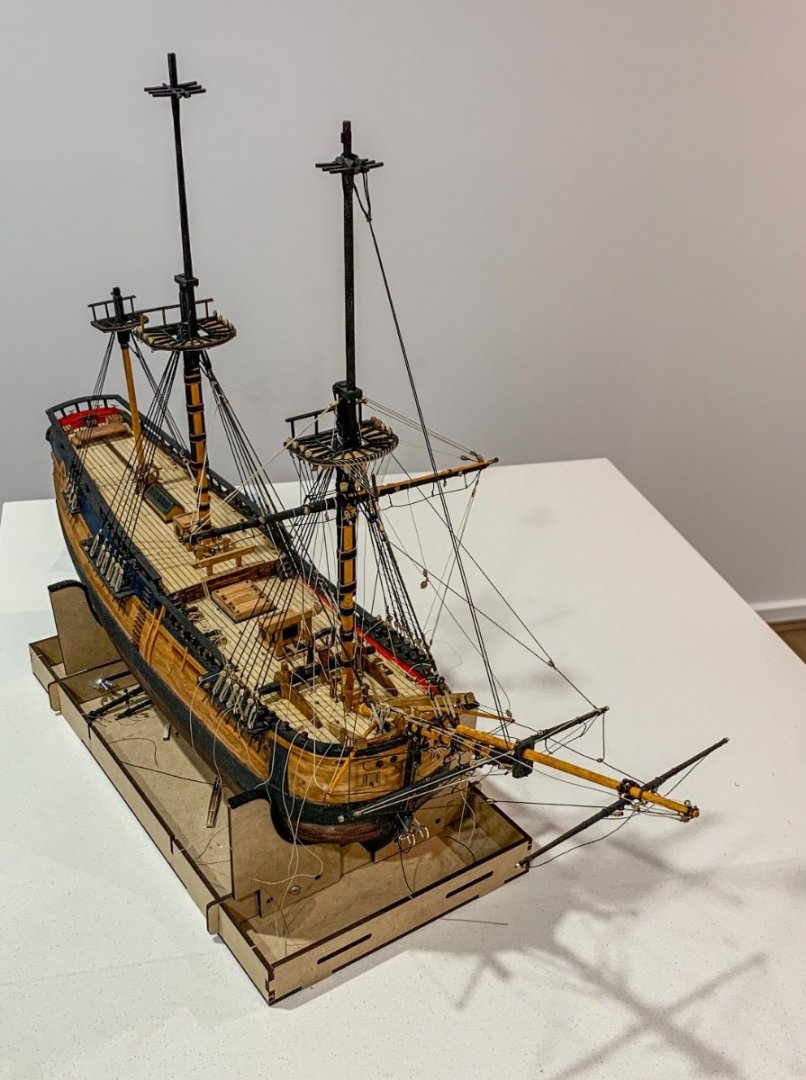
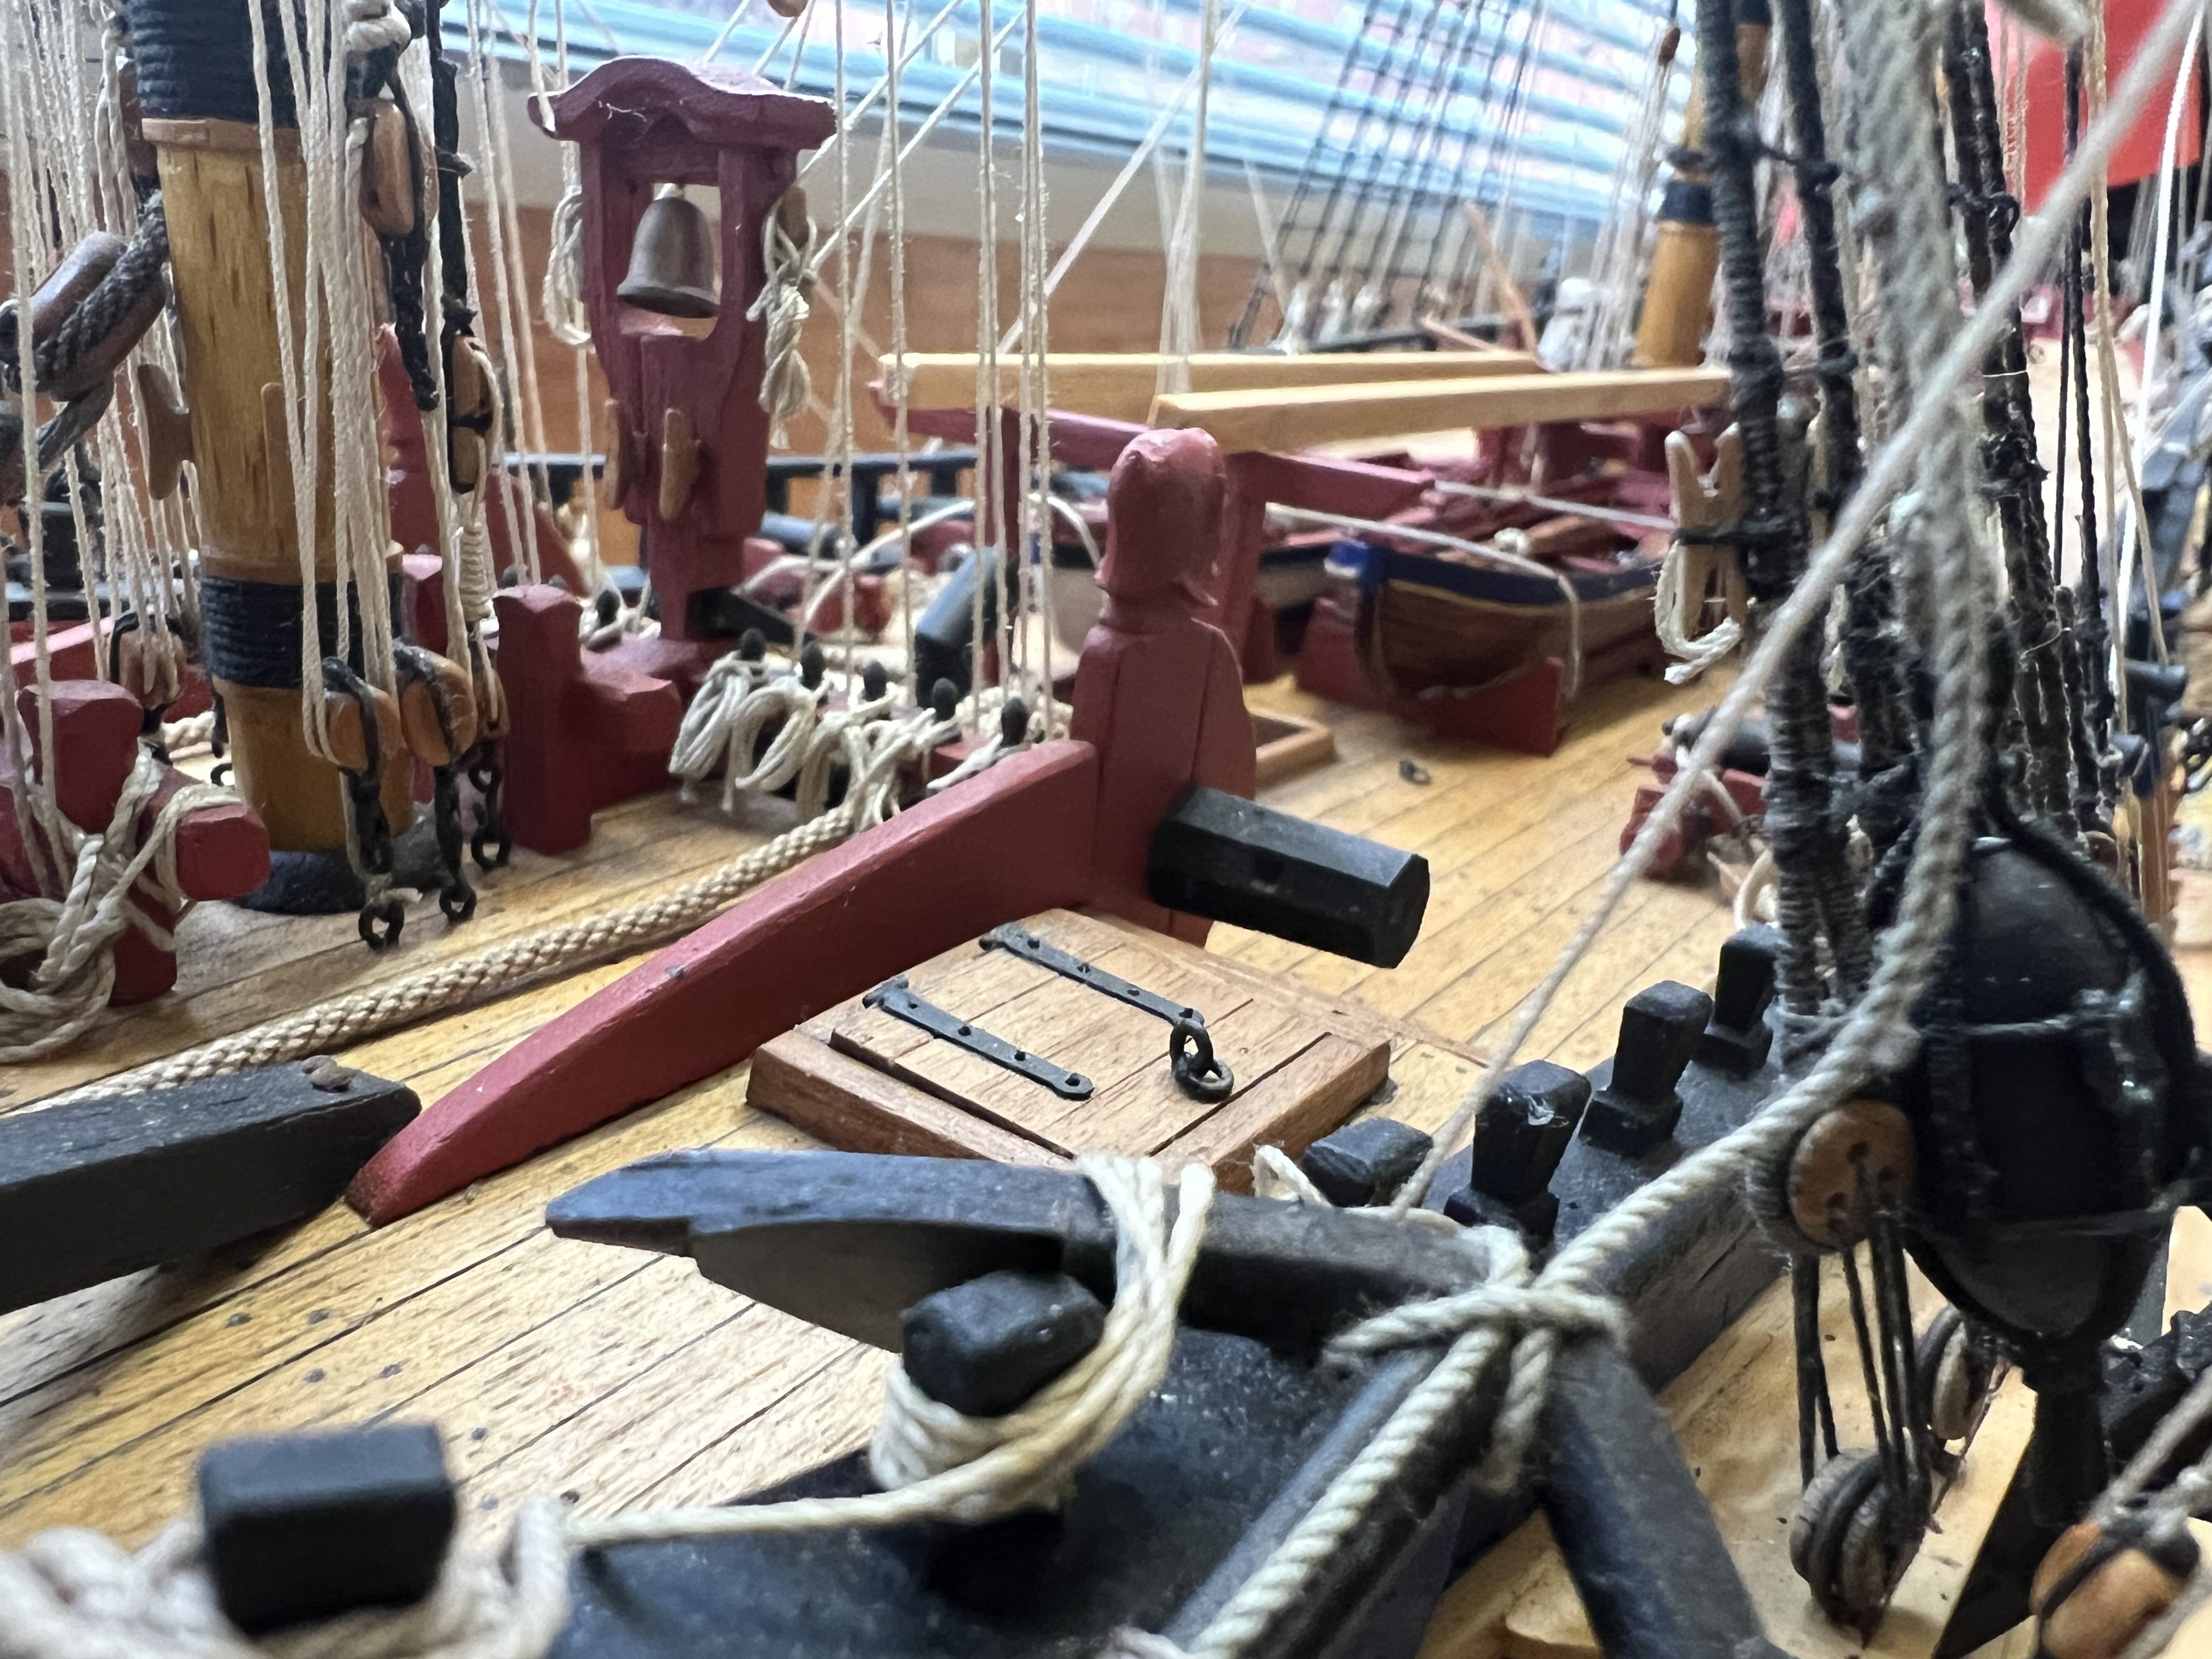
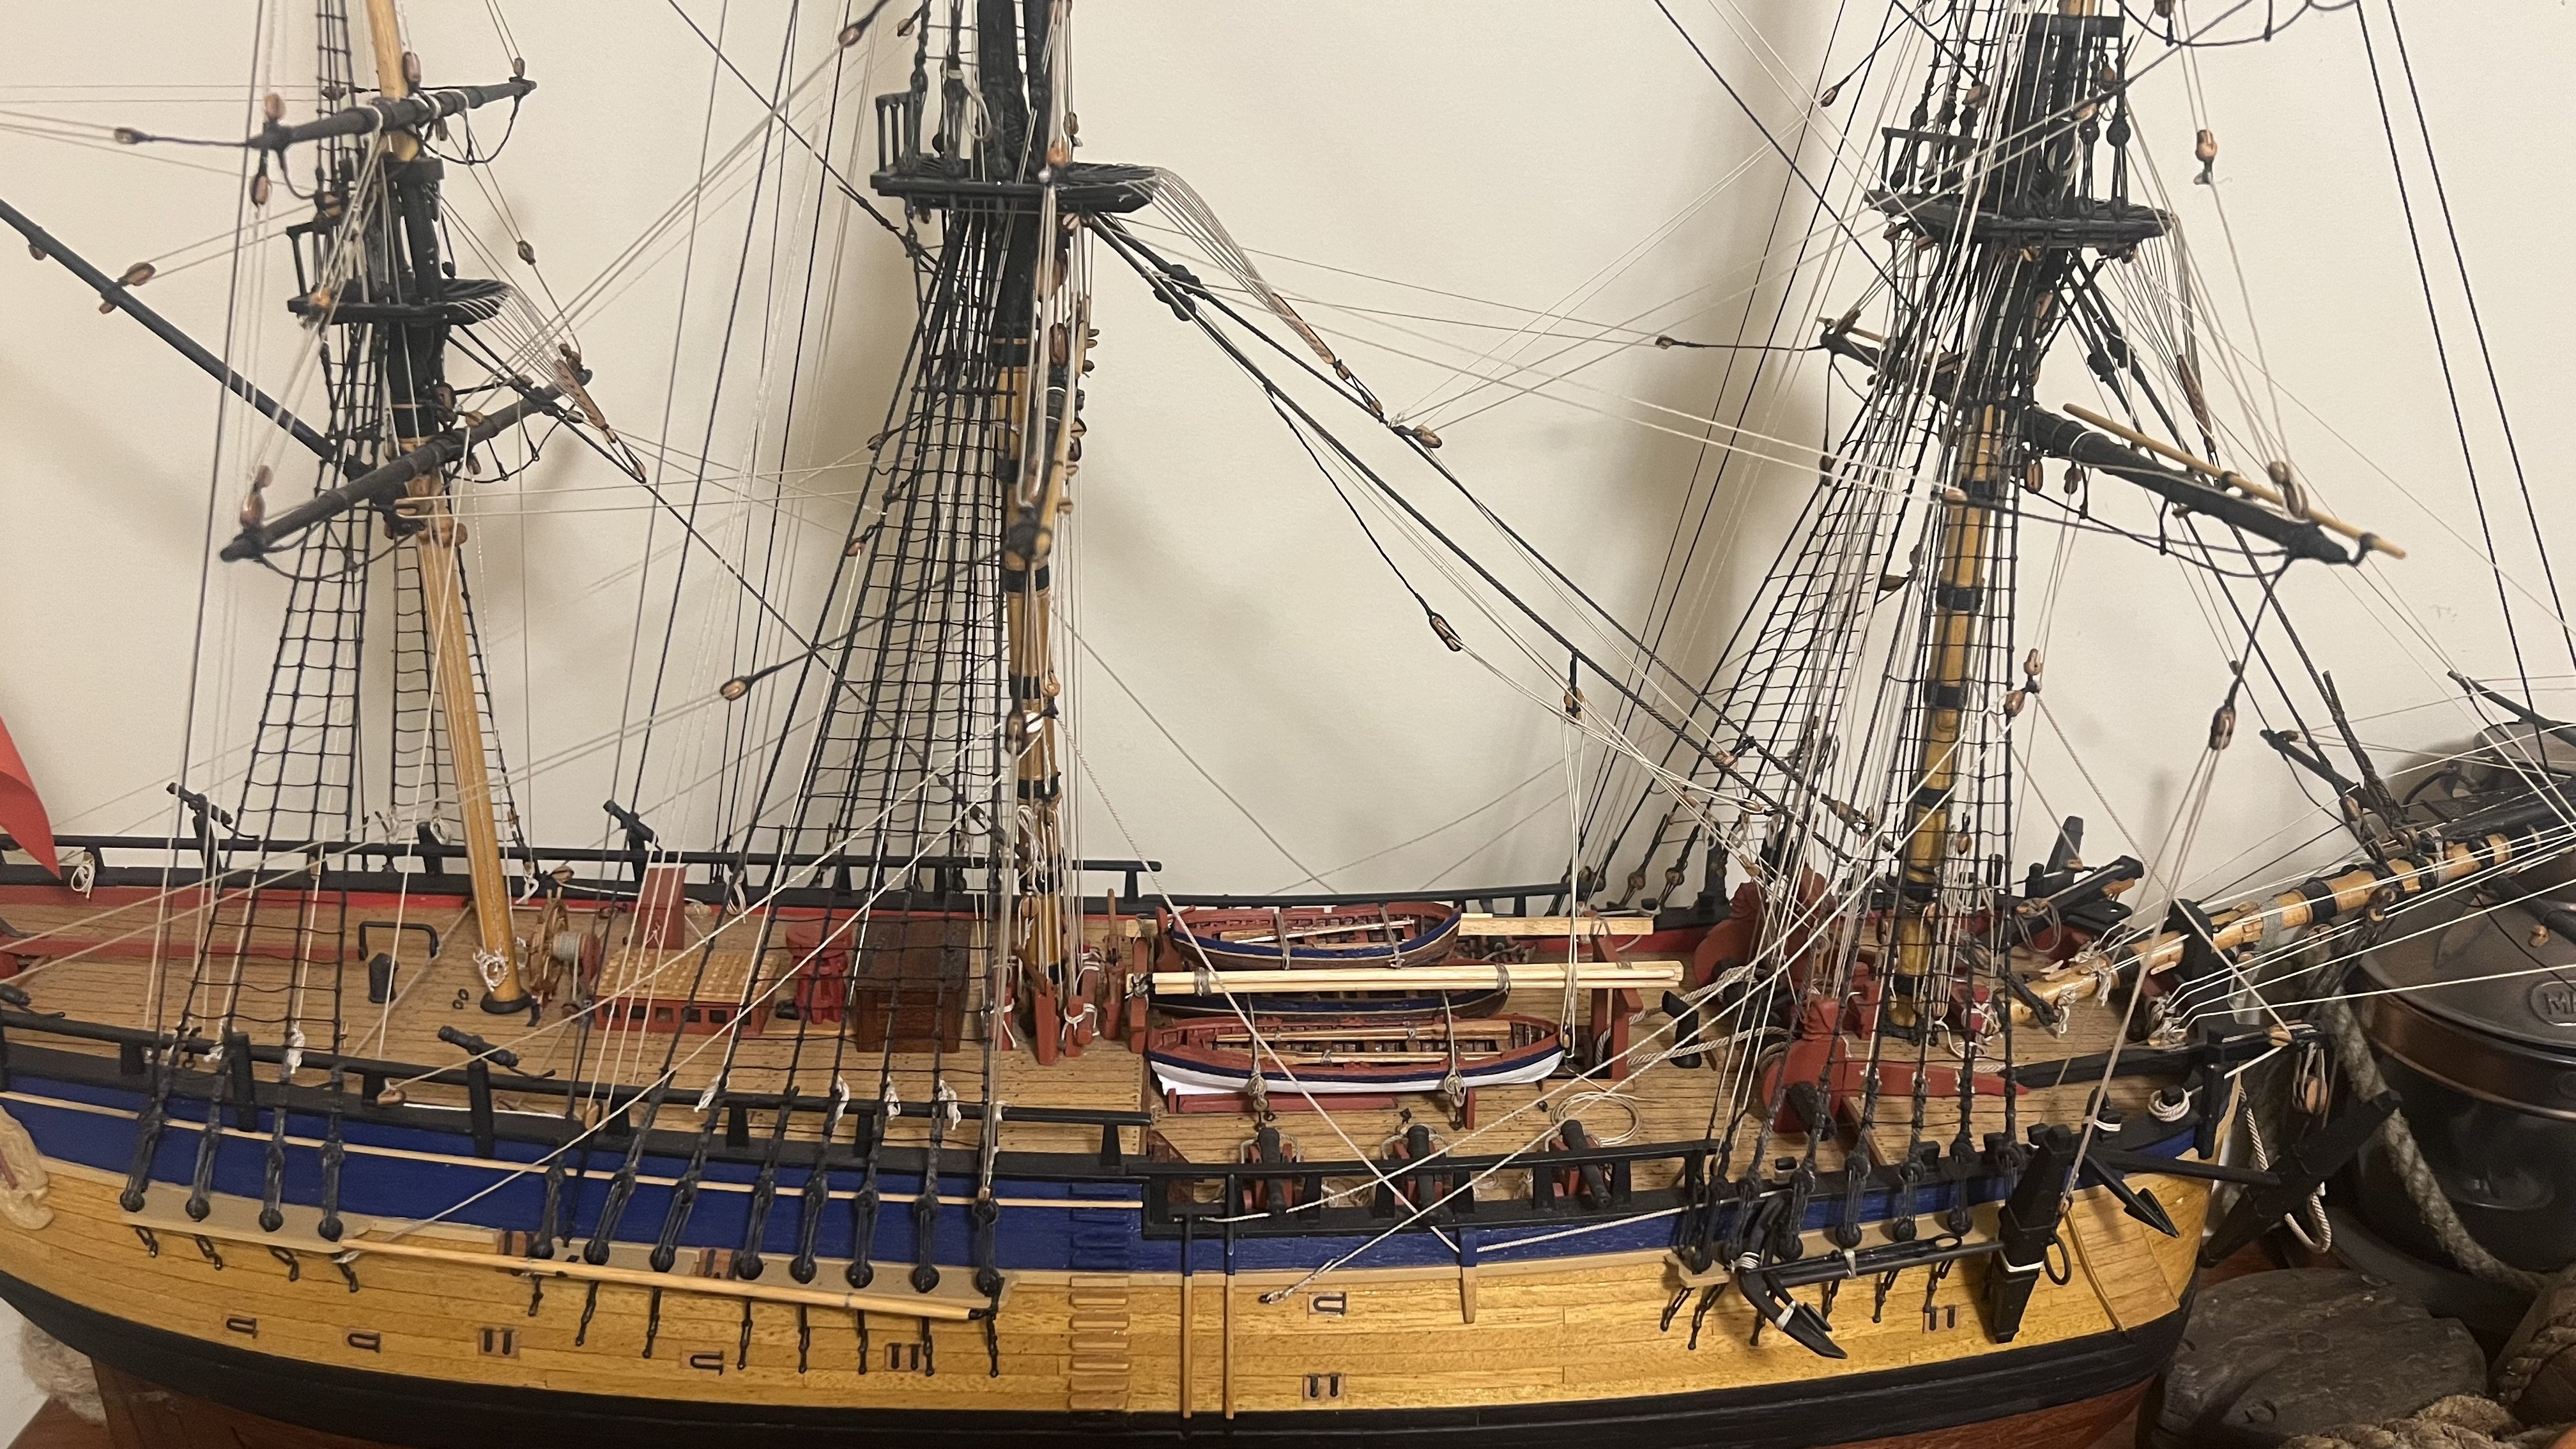
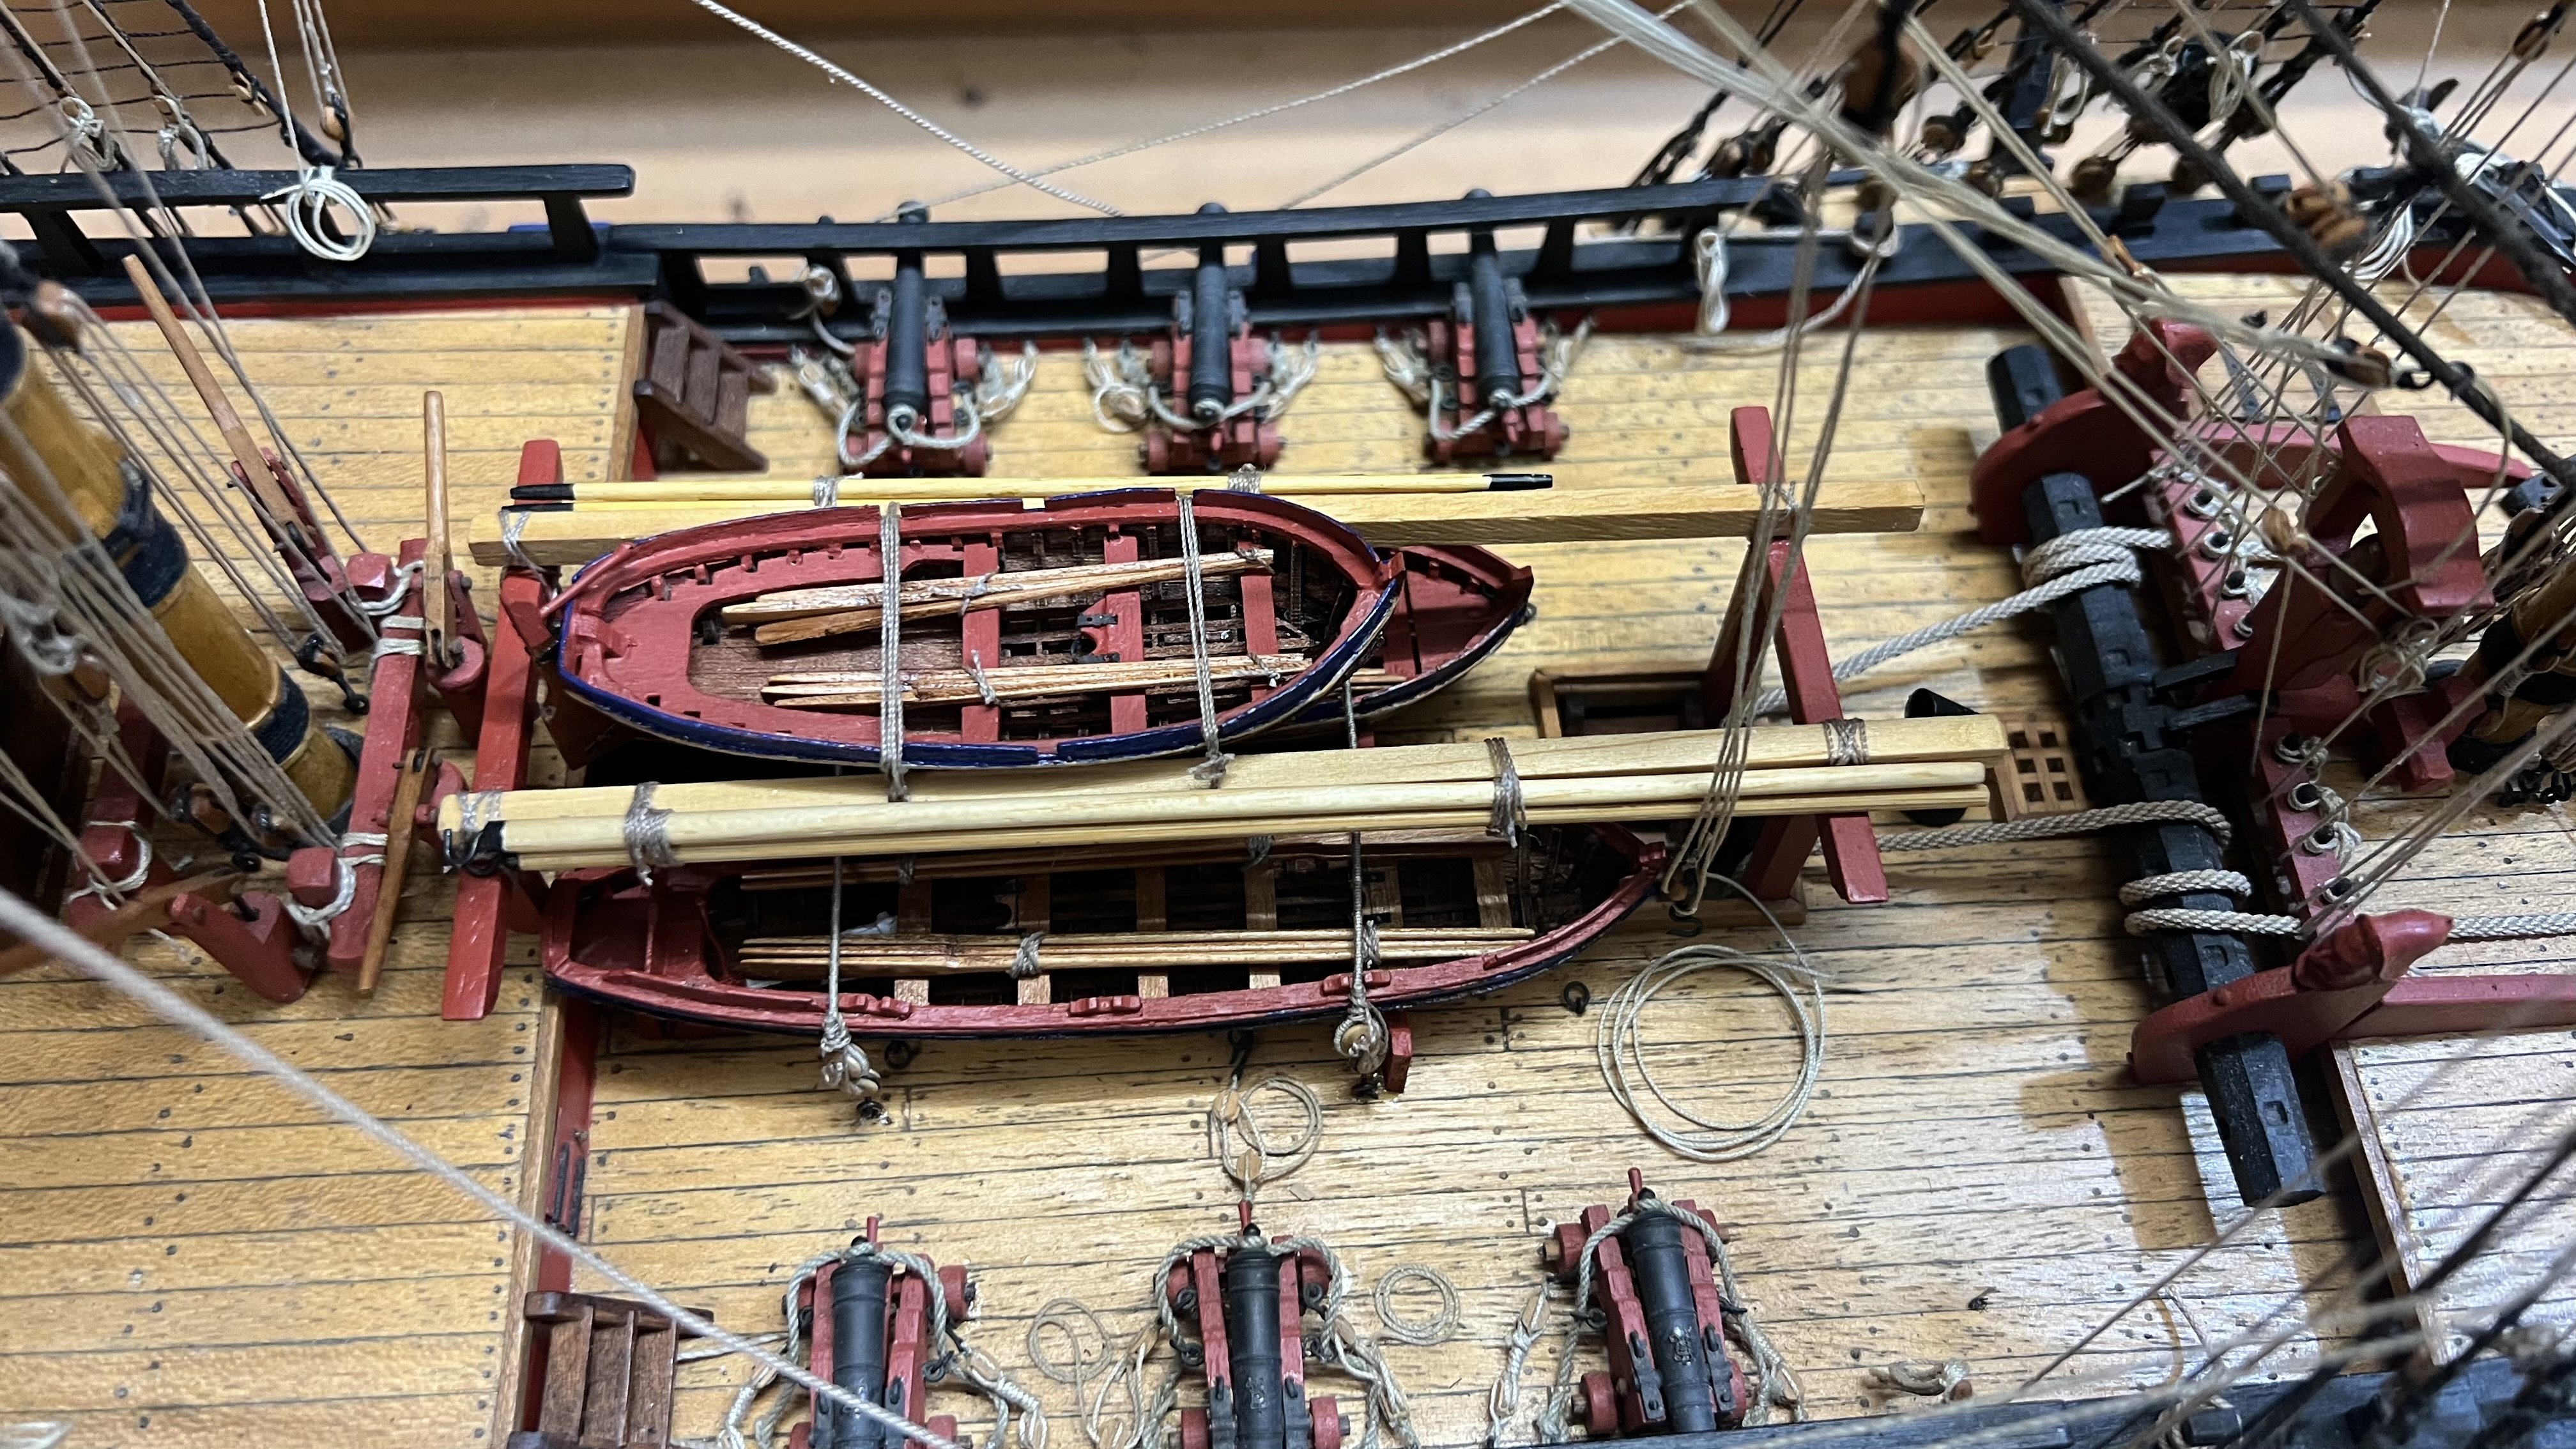
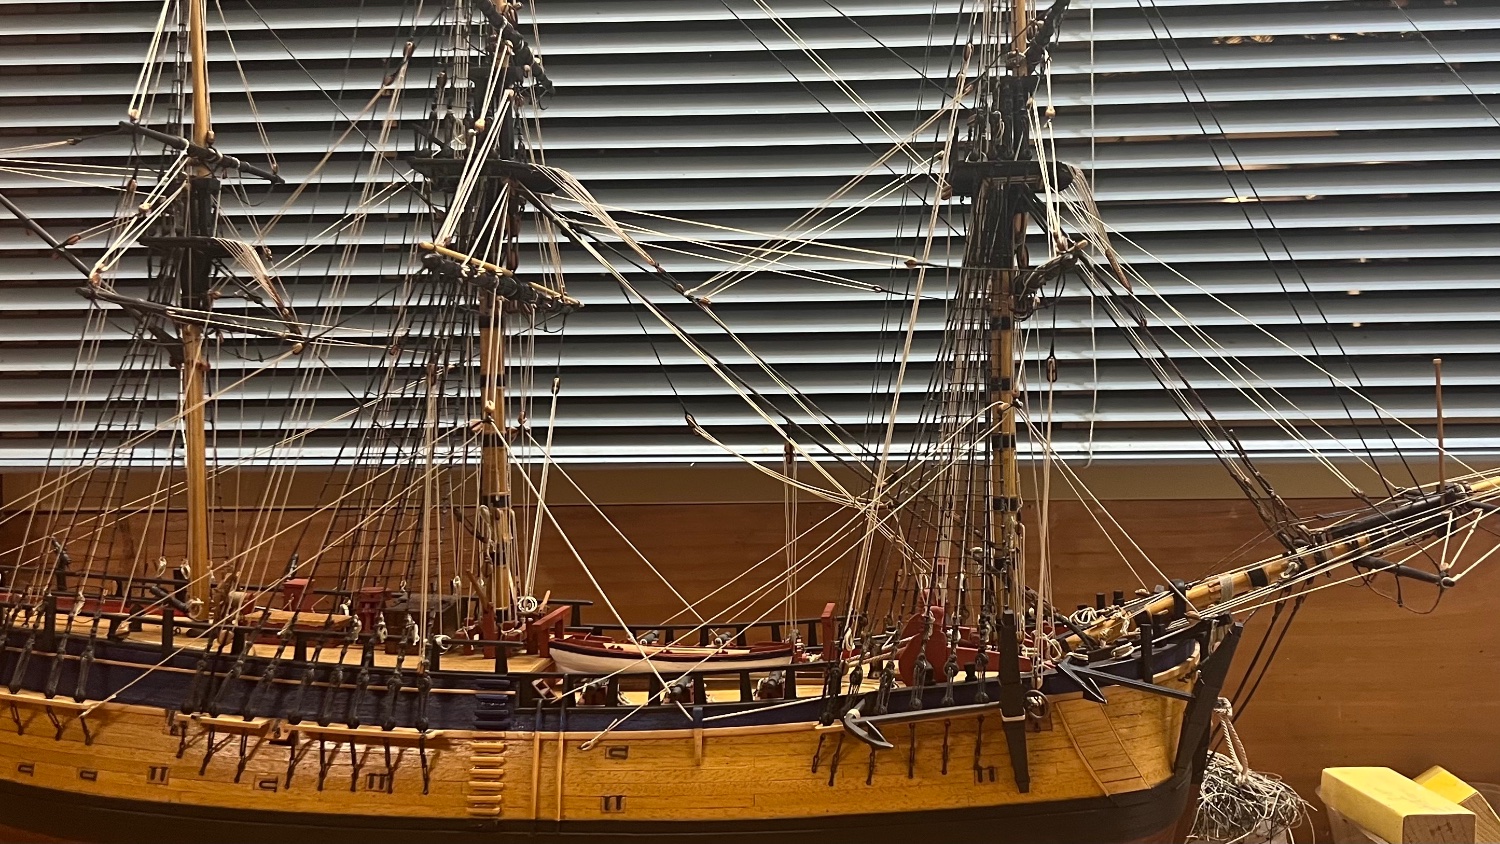
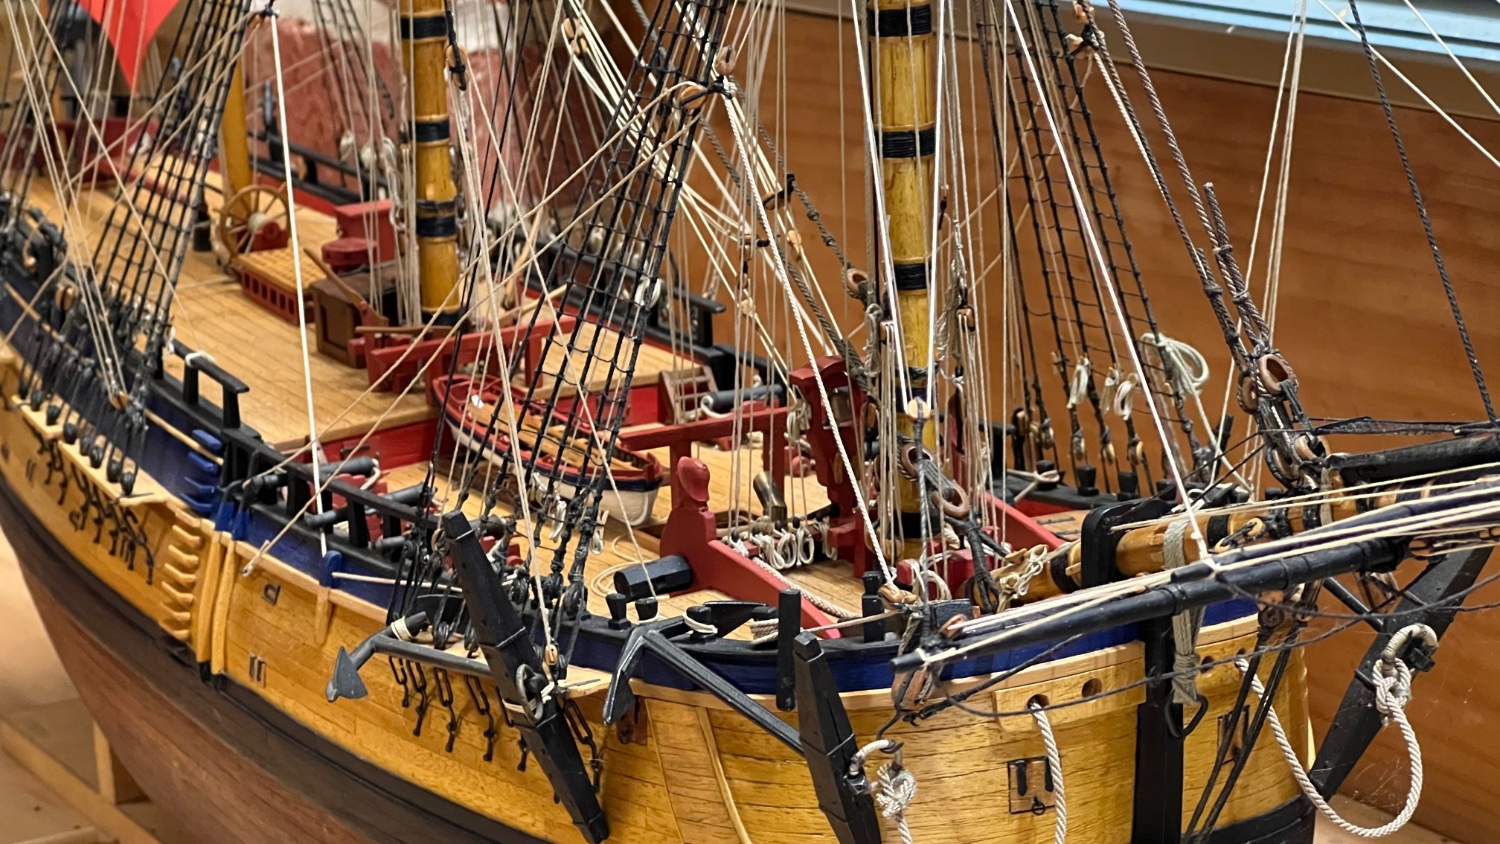
Today I finished fitting the third boat, the yawl, onto the "booms". I am not going to attempt to make Bank's skiff, too hard. So effectively its finally finished
 after 13 and a half years since I started. I must admit I haven't spent a lot of time on her the past few years, just doing bits and pieces when time permitted. I have been a bit controversial over the years, not following that single source - the AOTS, instead I have researched many other different sources of information.

-
-
I have almost finished the second boat, the longboat. Now building the yawl
.jpg.8c212f6bc86fb1bf739171b5ad7a542f.jpg)
- BANYAN, Knocklouder, usedtosail and 1 other
-
 4
4
-
On 3/19/2024 at 12:45 AM, ccoyle said:
Hey, did this build ever get wrapped up?
Not quite finished yet. I've done hardly anything on her the past year or so. I am currently building the last of the three boats, the yawl, and making a display stand
-
-
-
Sorry Sab I didn't see that post, I haven't looked at my build log for a long time. The Eaglemoss instructions are in 100 weekly magazines, a bit hard to send.
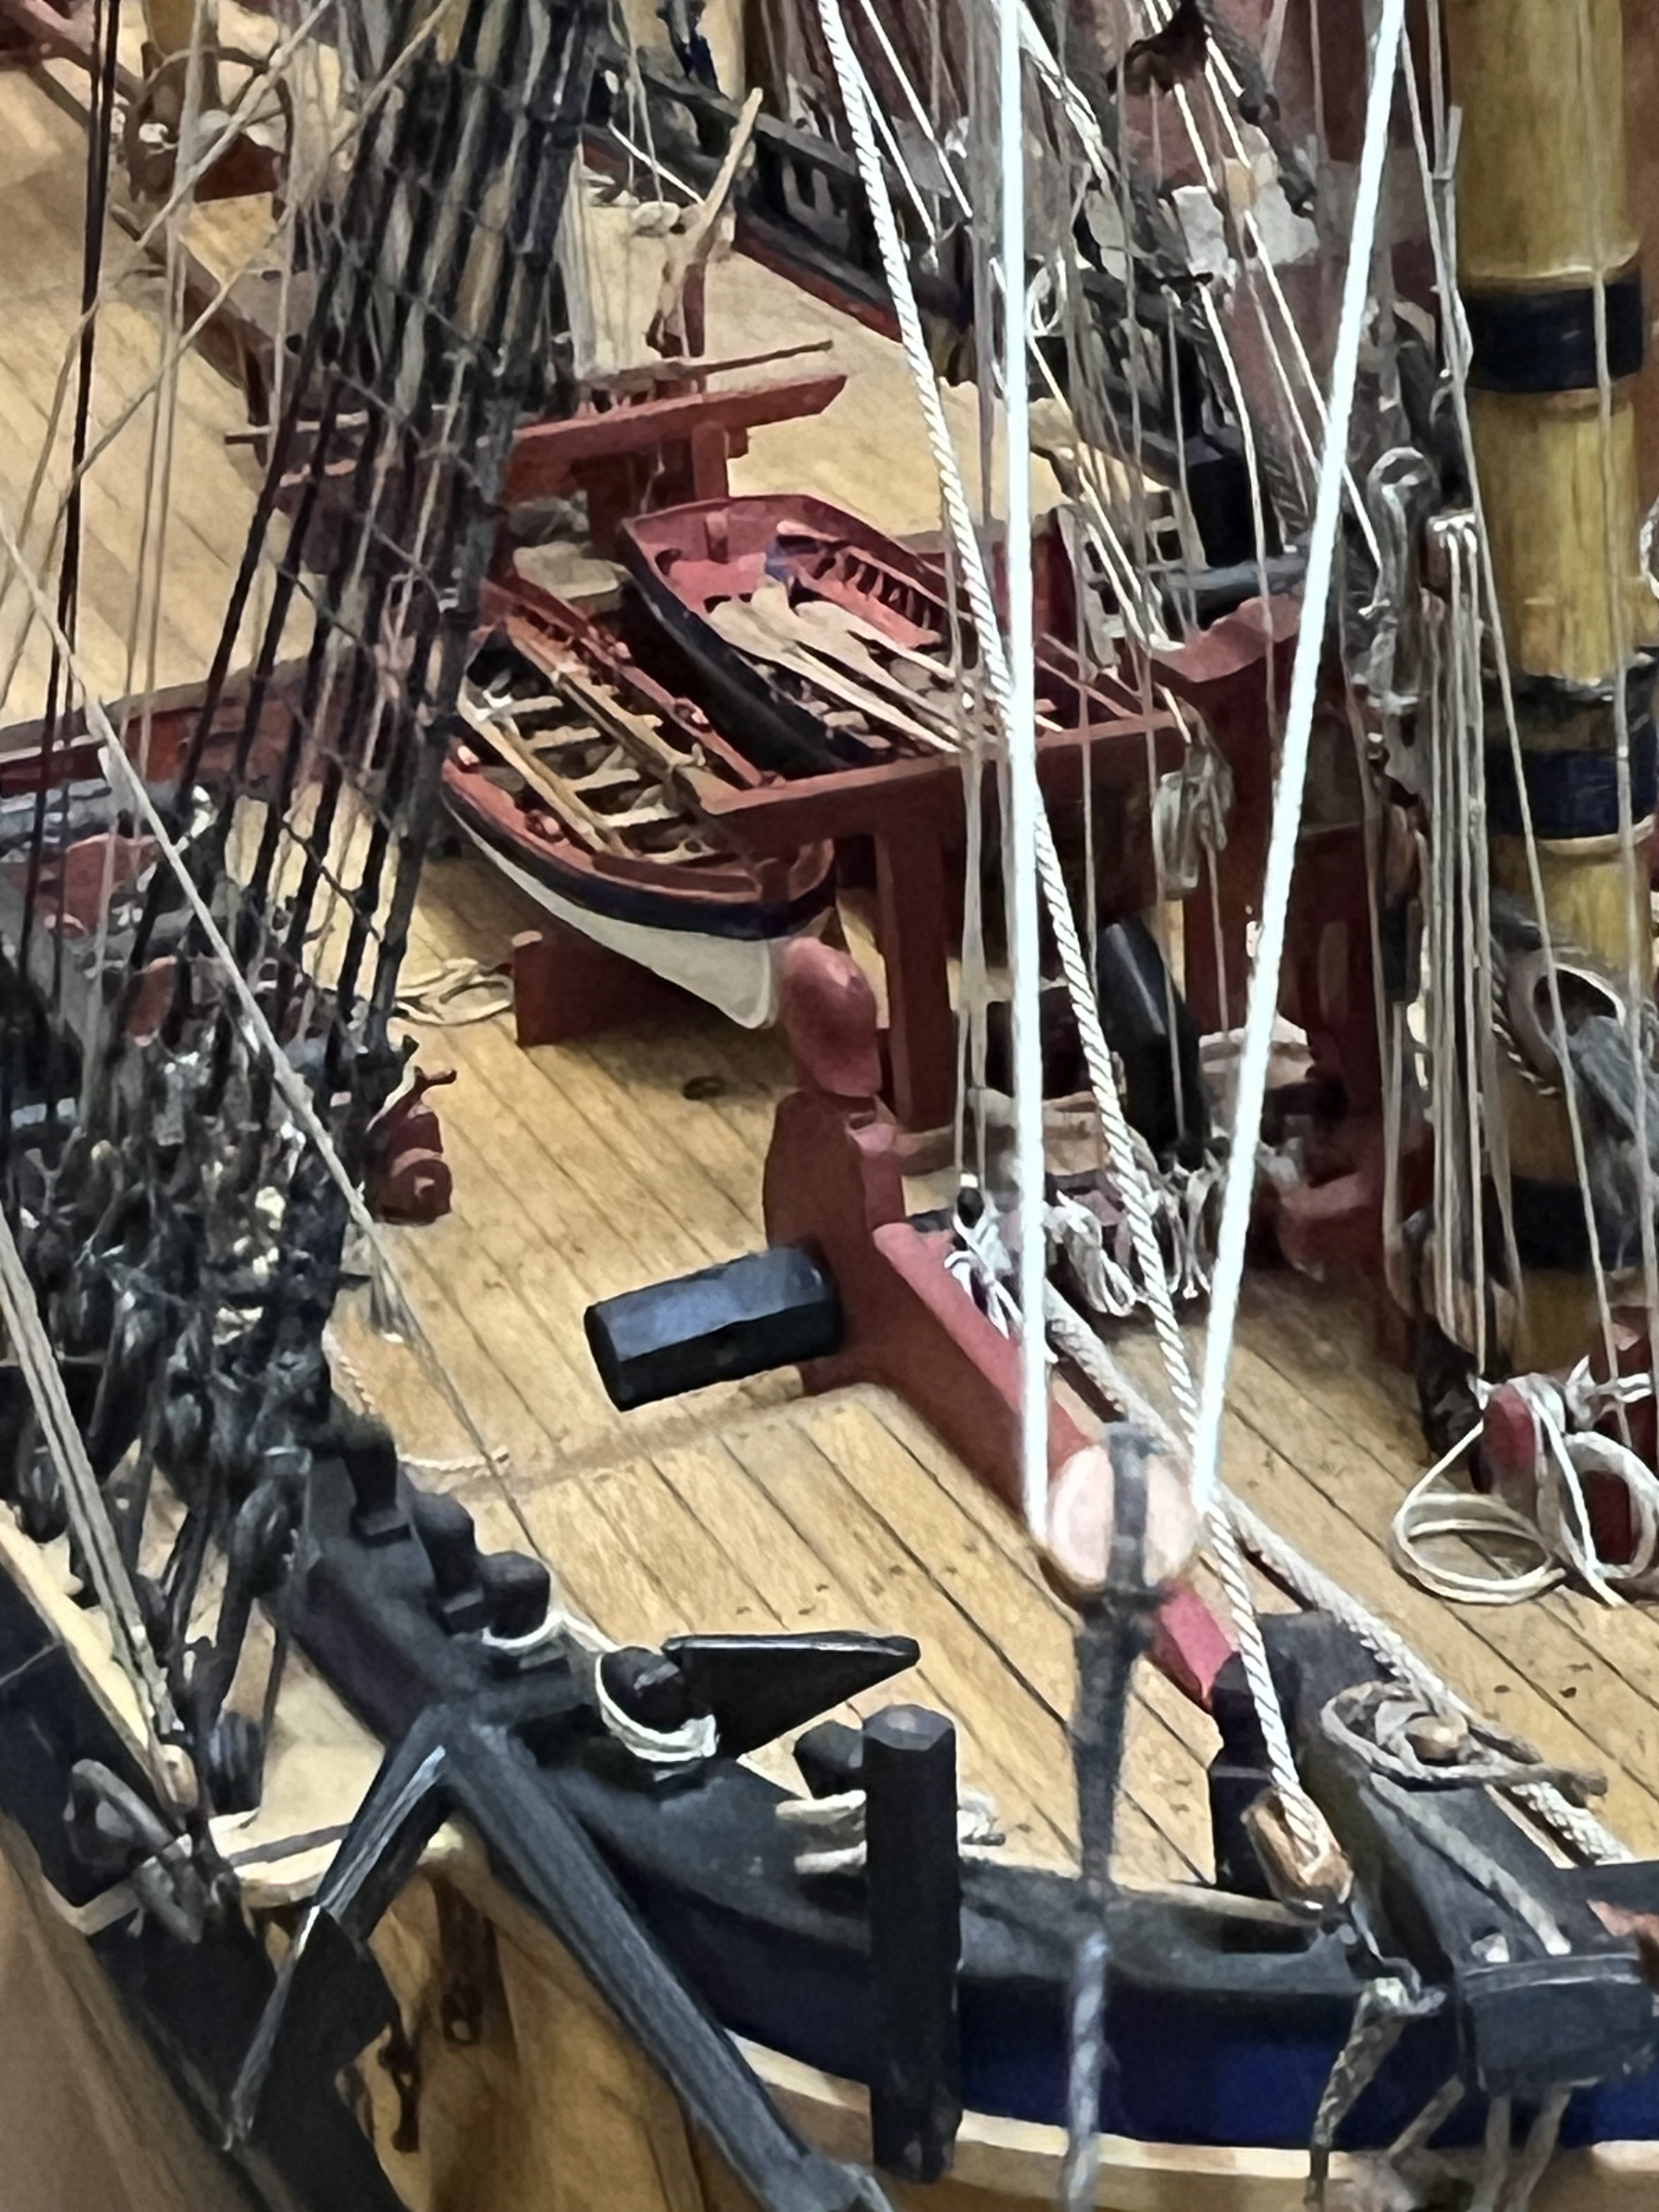
It has been a while since I did anything much on the ship, but lately I have started to make the boats - the last job to be done. I have completed the pinnace, two more to go
.jpg.d35e3d0f09cb086acf014759752292bb.jpg)
-
Good work, planks look great
-
11 hours ago, Peter6172 said:
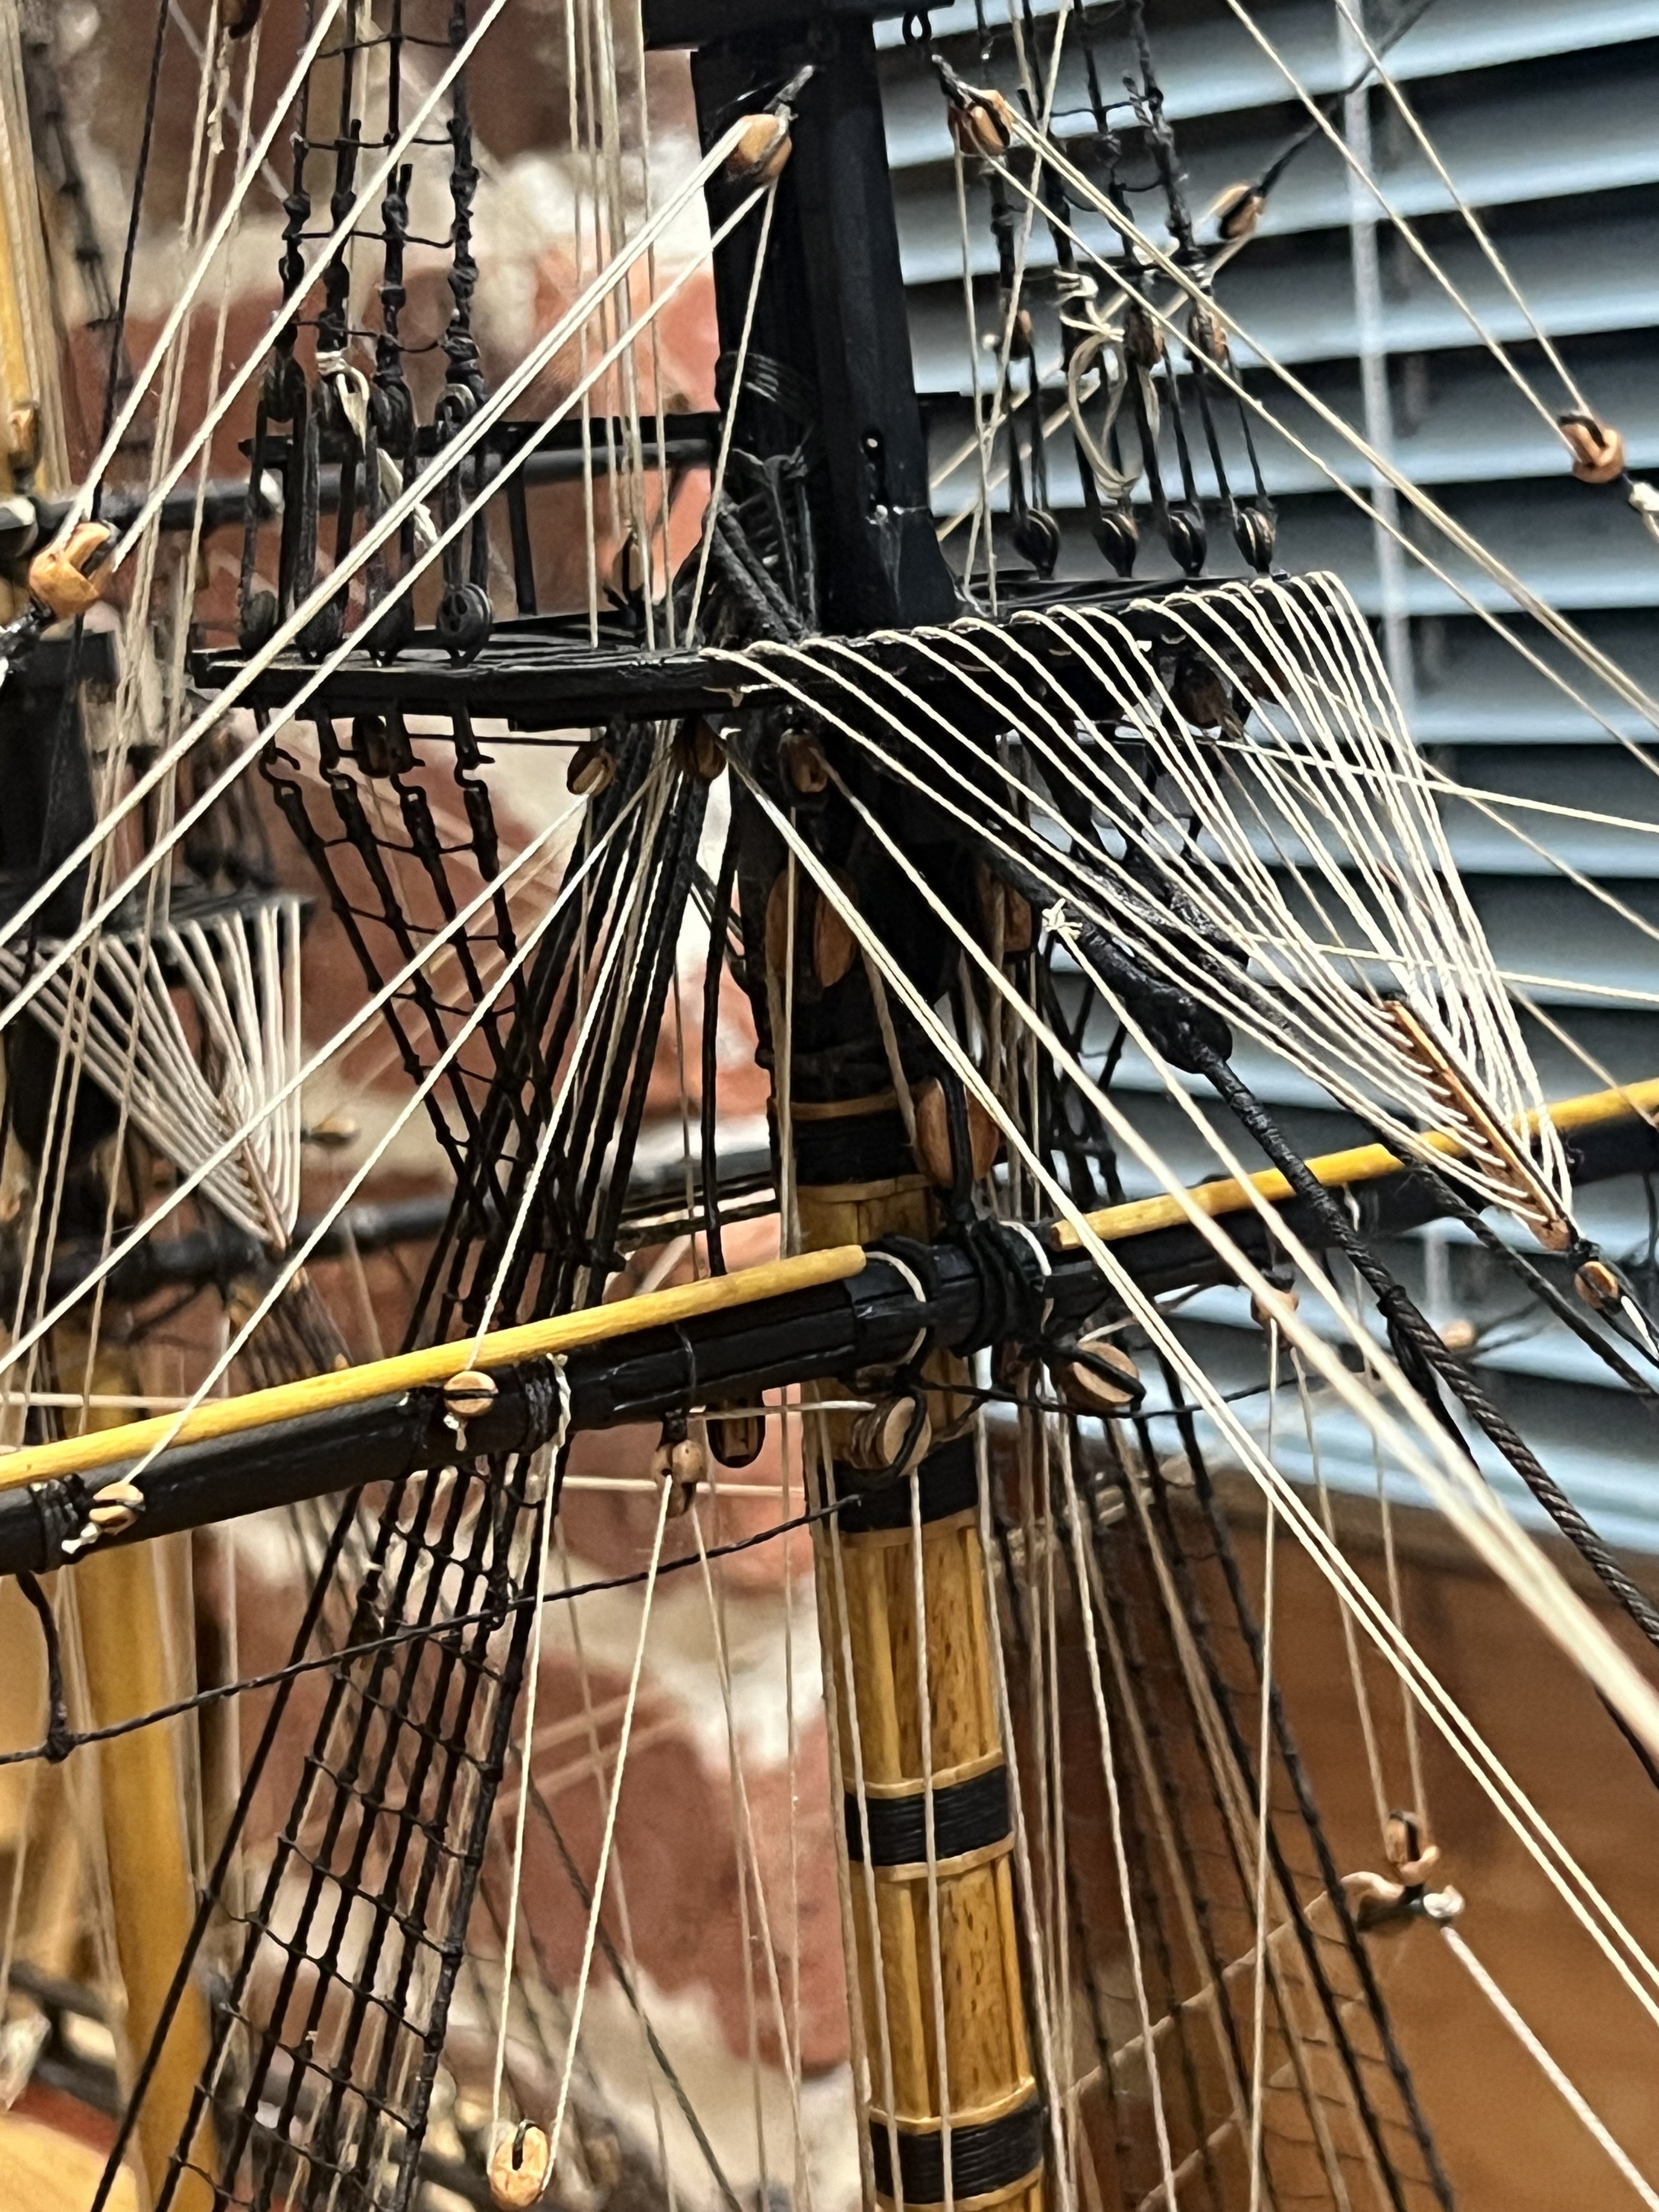
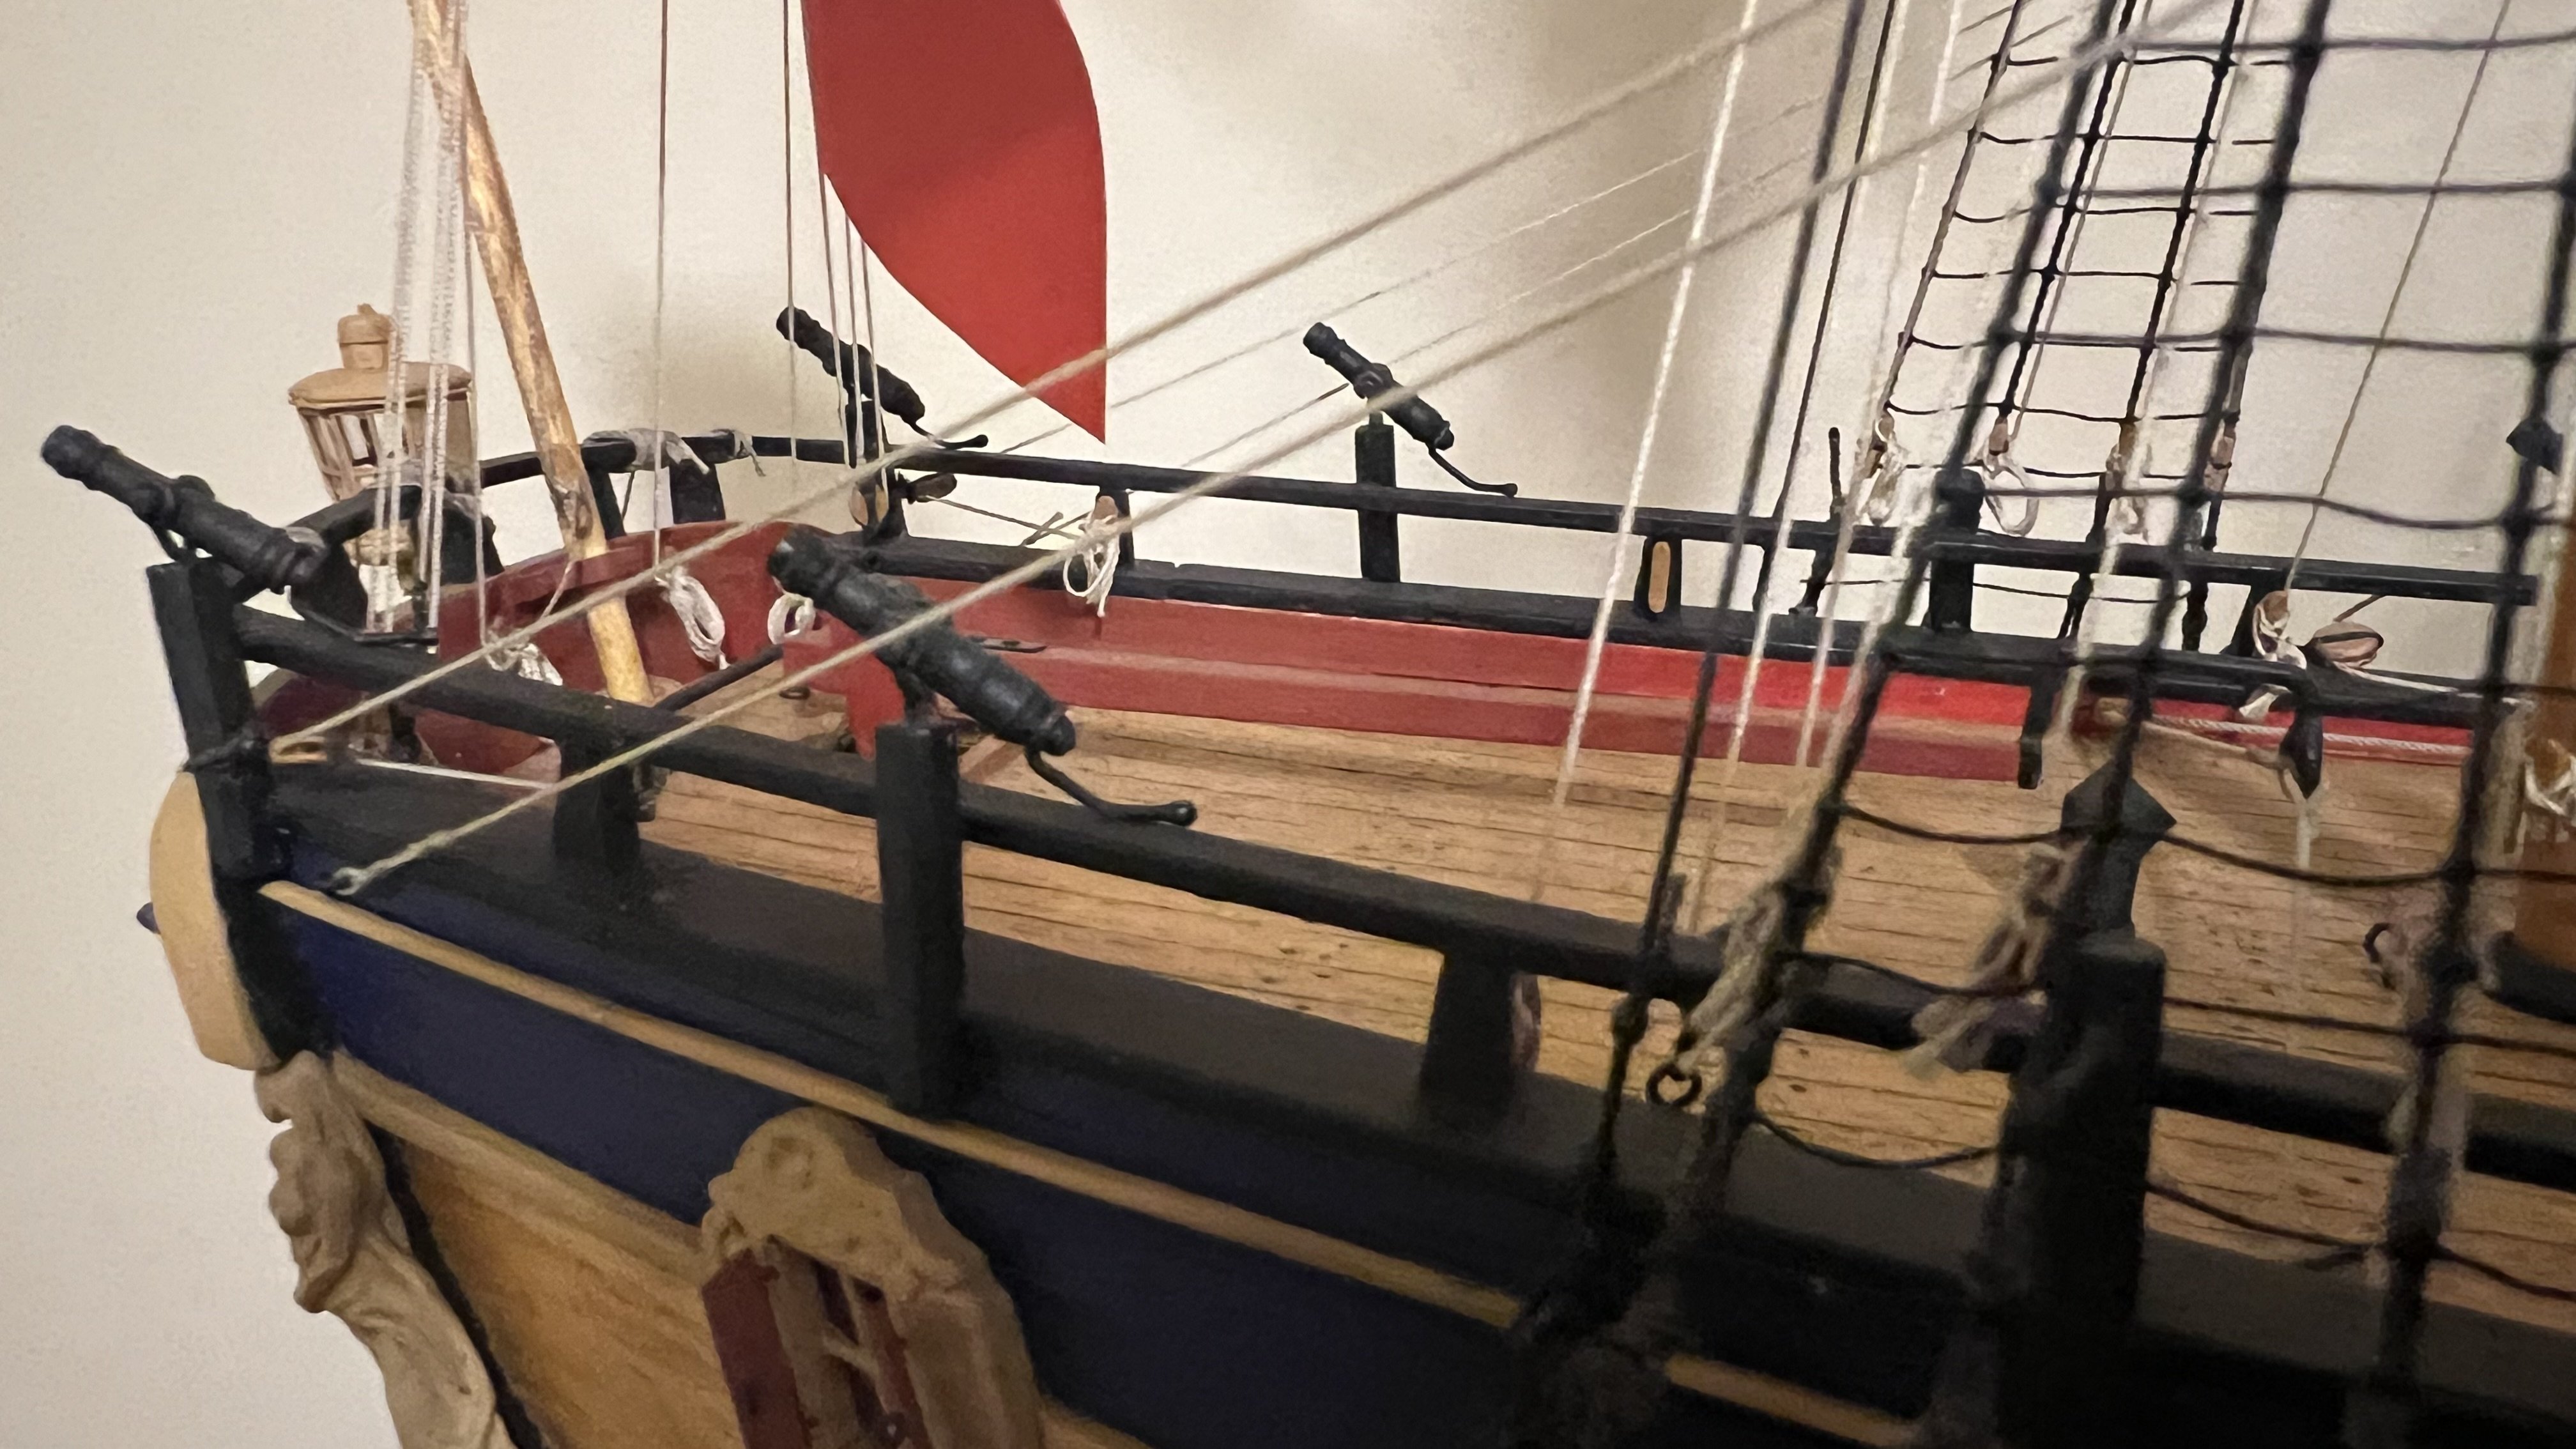
Rigging has slowly progressed. Still waiting for my next order of Ropes for Scale as I am short some standing rigging. I'm close to completing the fore course yard and will soon progress to the Topsail mast and yard. The Stays on the topsail mast are only temporarily in place (held down by a bulldog clip on the stem post) as I wait for standing rigging to make up the pendants and shrouds. I still have to make up a truss for the fore course yard but have yet to identify where it ties off too as its not represented in the kit, Marquardt's drawings or the replica ENDEAVOUR. According to Petersson's book on rigging it would venture to the base of the fore mast via a table hooked to a ring in the deck and tie off on the bitts aft of the mast. but there aren't enough belaying ins for this purpose.
Hi Peter
Regarding the fore course truss pendants: they lead down to a pair of double blocks and an eyebolt at the base of the mast. The replica vessel has them rigged this way, and there is a cleat on the mast to belay the fall. Also described this way in Lees and the book by Darcy Lever - A Young Sea Officer's Sheet Anchor
Cheers
Steve
.jpg.591bcfc8ed79ade1e50857599d8ffd0d.jpg)
.jpg.831b8ec37bcab82662e187341beabe06.jpg)
-
The pinnace bottom was painted with white lead, whereas the longboat bottom was varnished, probably the yawl as well. There is a commentary on the boats in AOTS. Most likely the longboat was also painted with white lead by the time they reached Australia, because the carpenters had to replace the bottom at Tahiti because it was destroyed by worms, and Cook noted in his journal that the pinnace was unaffected due to the white lead
-
-
Hi Kristyn
You shouldn't get to fussy about the first layer of planks because they won't be seen and you will sand them a lot and probably need to use some filler on them where there are dips. They are just a base for the thinner second layer planks. Those thin second layer planks on the sides are the the ones to concentrate on and they are tricky ones because they are thin and don't like lateral curvature without kinking. The darker wood second layer planks below the main wales don't too matter much either because once varnished its difficult to see the individual planks.
Cheers
Steve
-
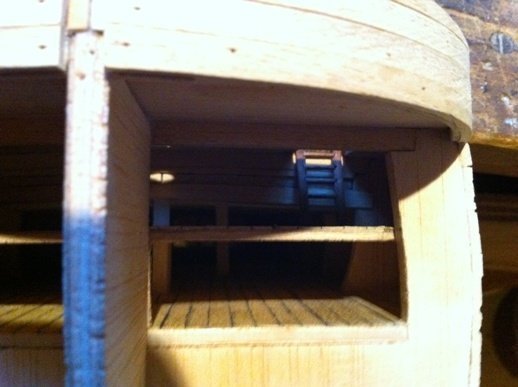
Hi Kristyn
Good job on the stairs.
That block under the stairs is a ridiculous idea by Occre. On the real Endeavour there was a different height deck under the forecastle, so instead of the block I put another deck under the forecastle and a ladder instead of stairs, which I thought was more appropriate for a small scuttle.
.jpg.7e15dd0606dcb2d2db74a99d78466855.jpg)
.jpg.31823ecd9e2899a31900ecd2f590b36a.jpg)
-
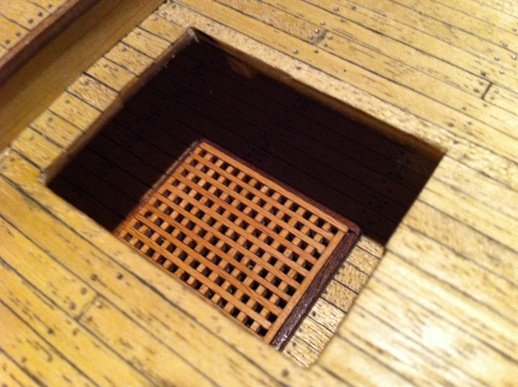
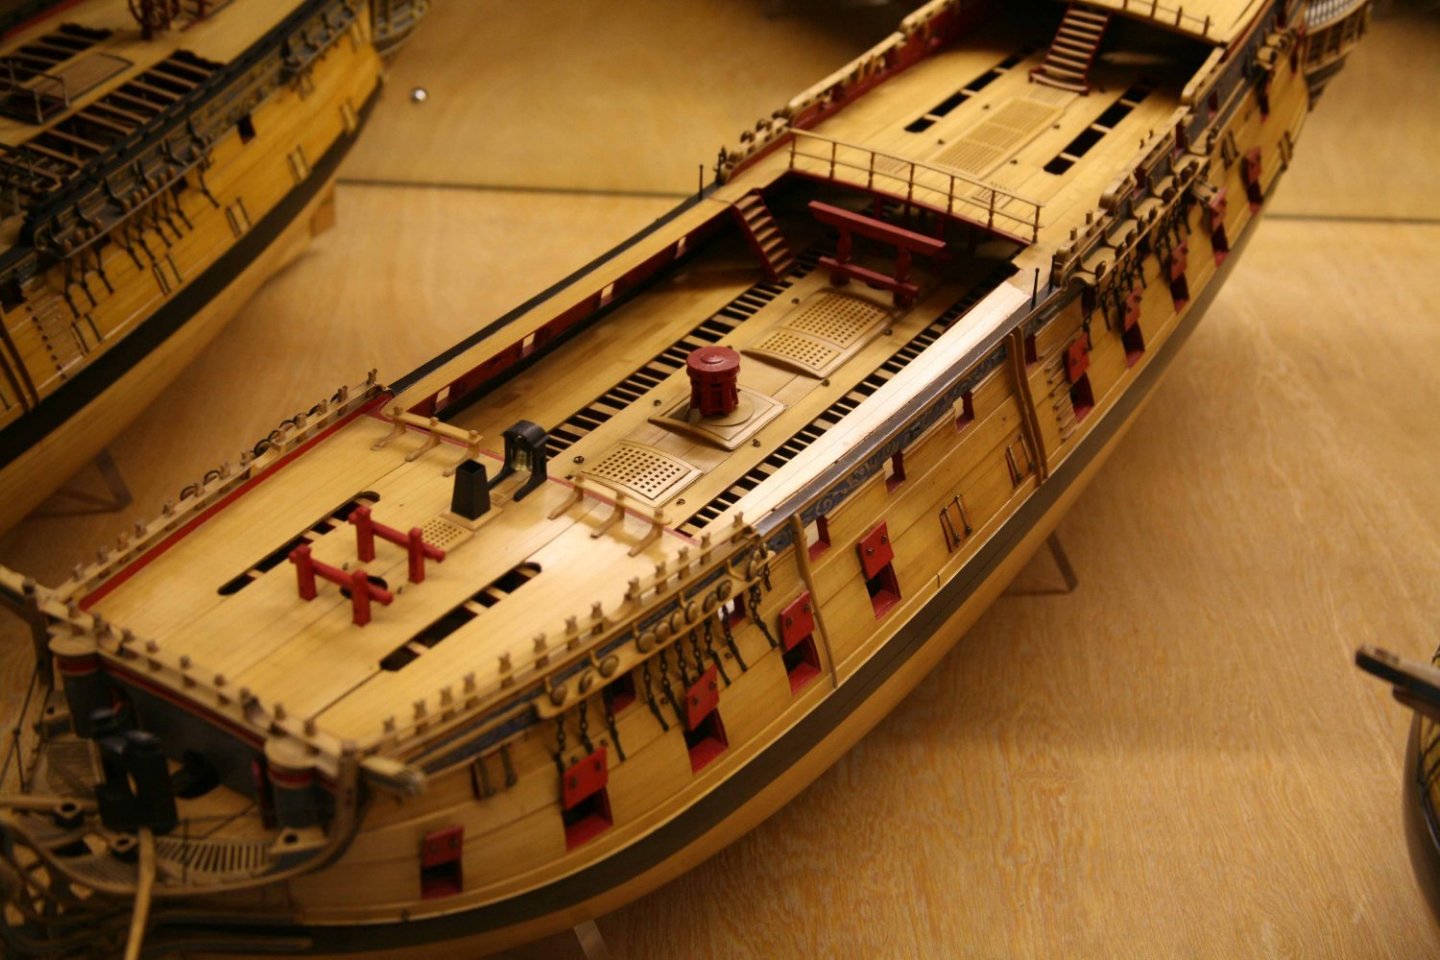
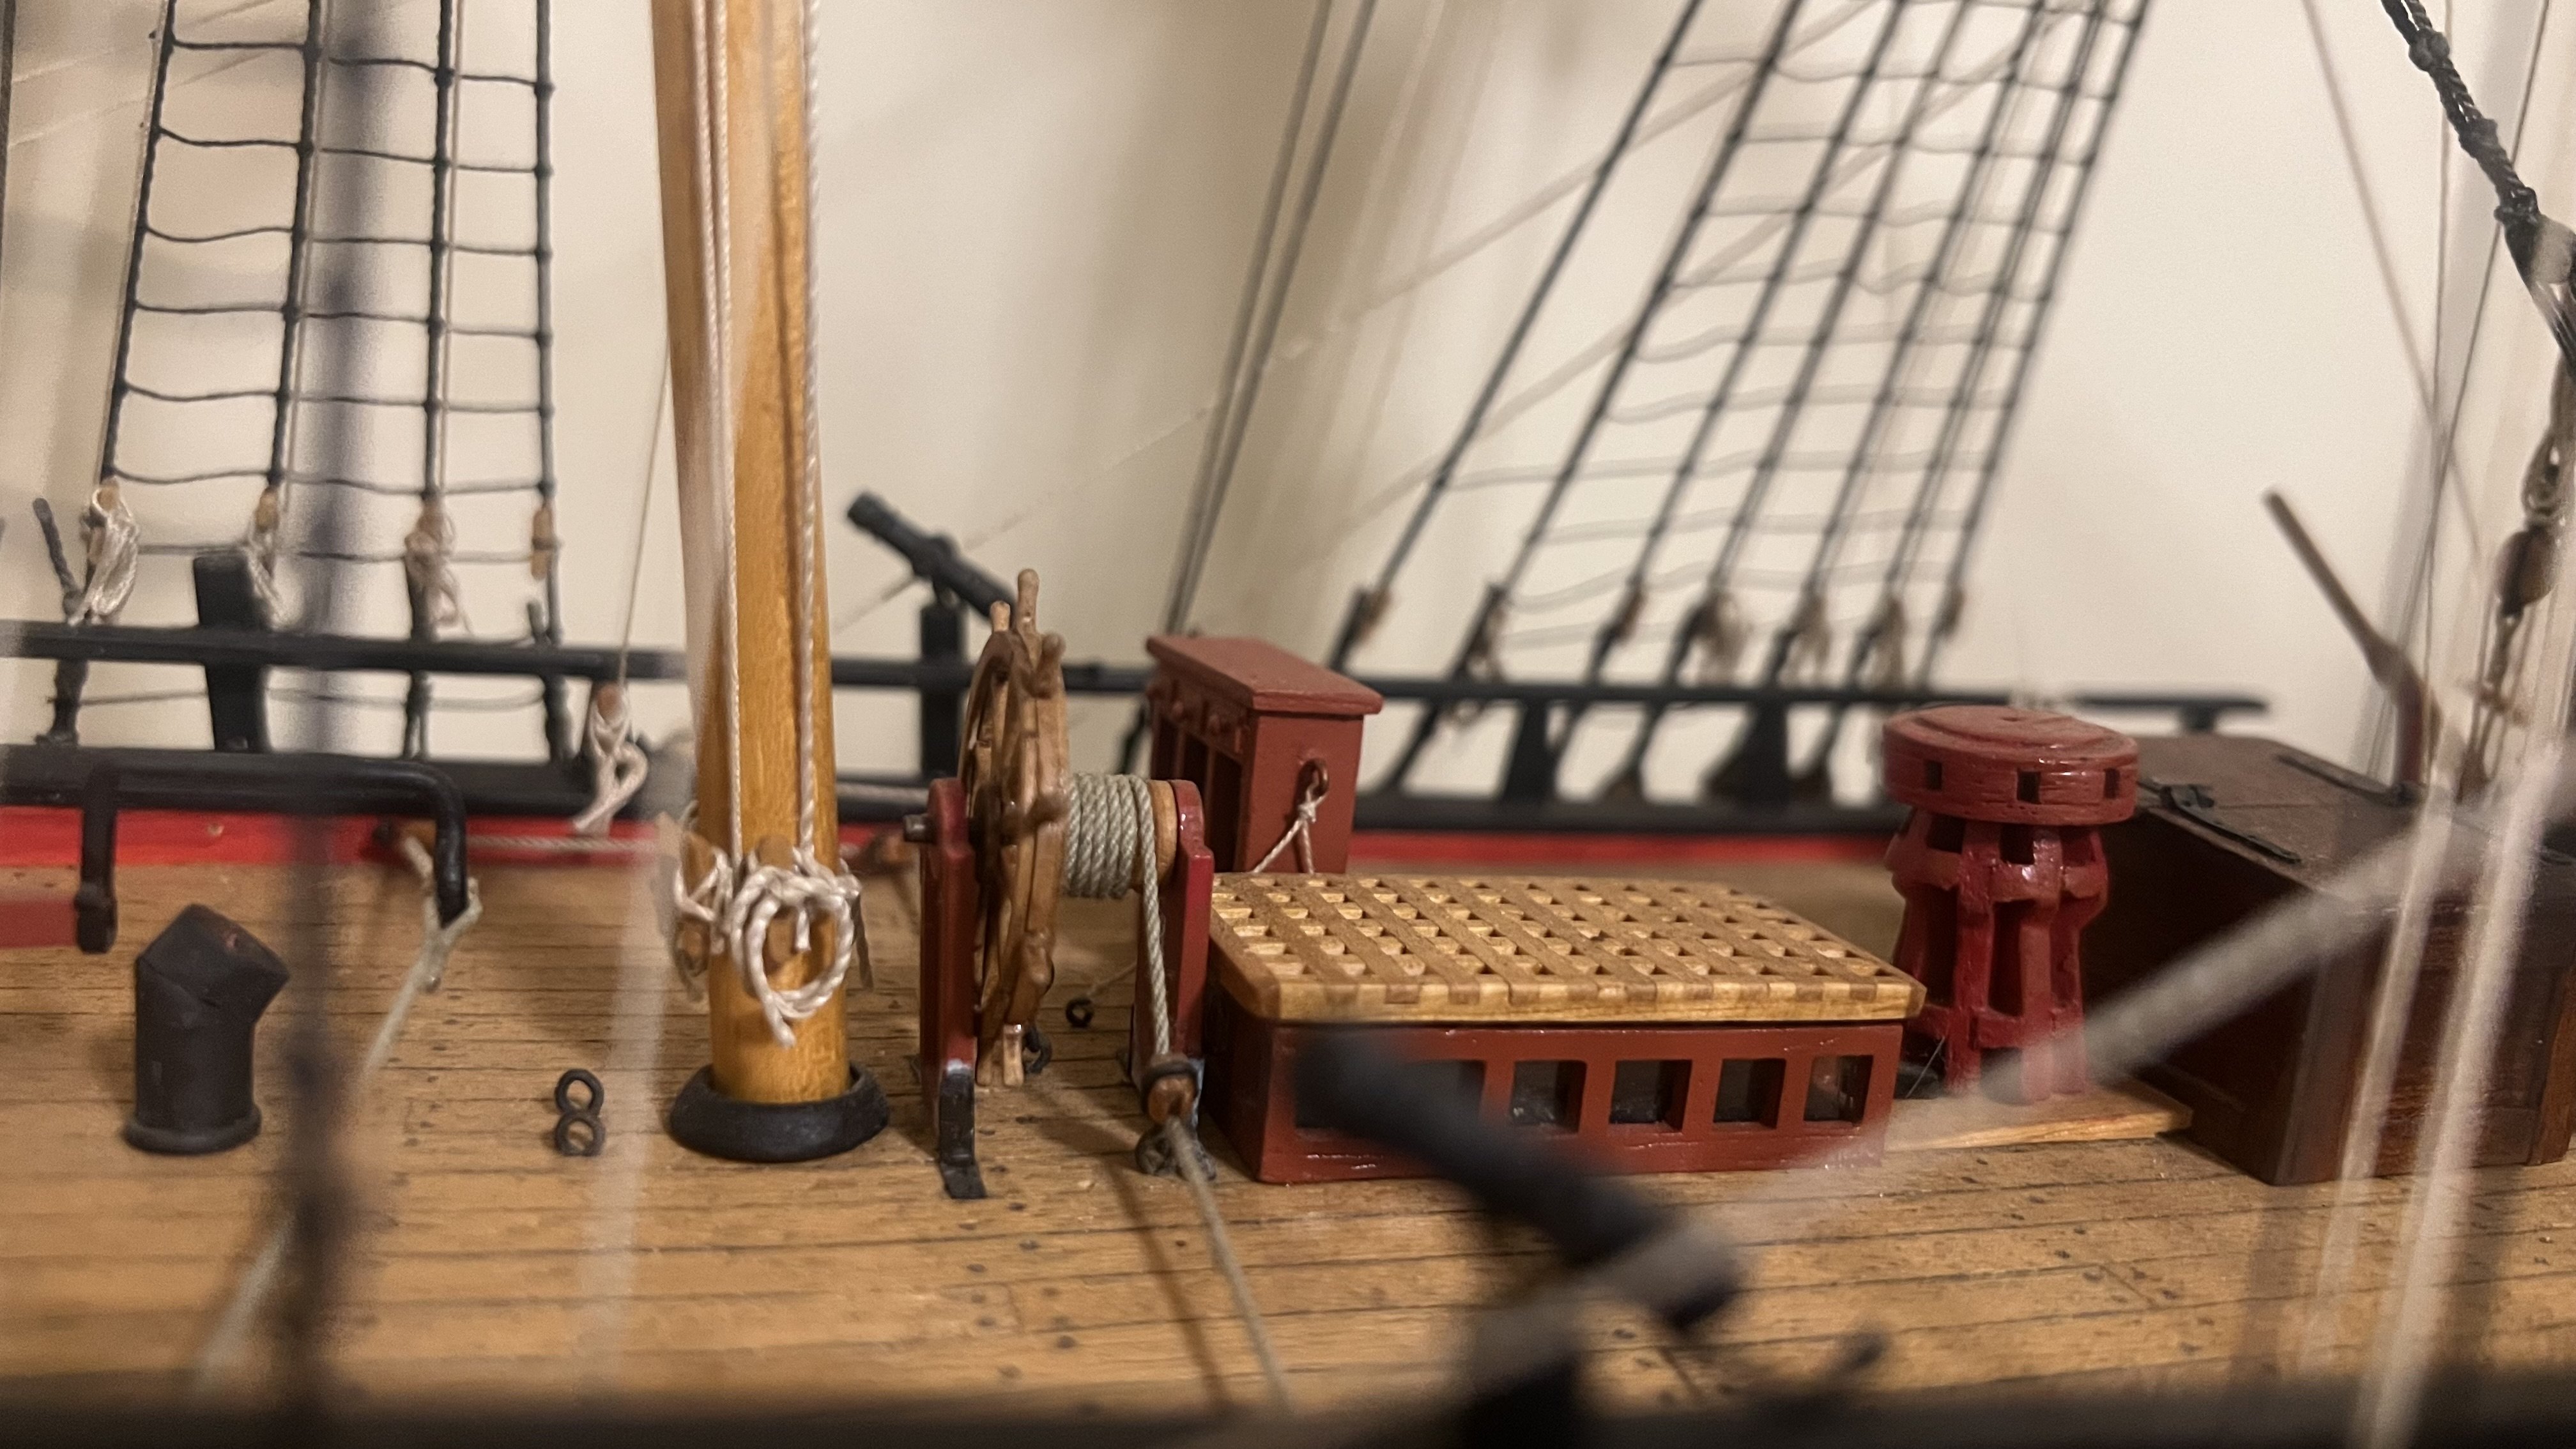
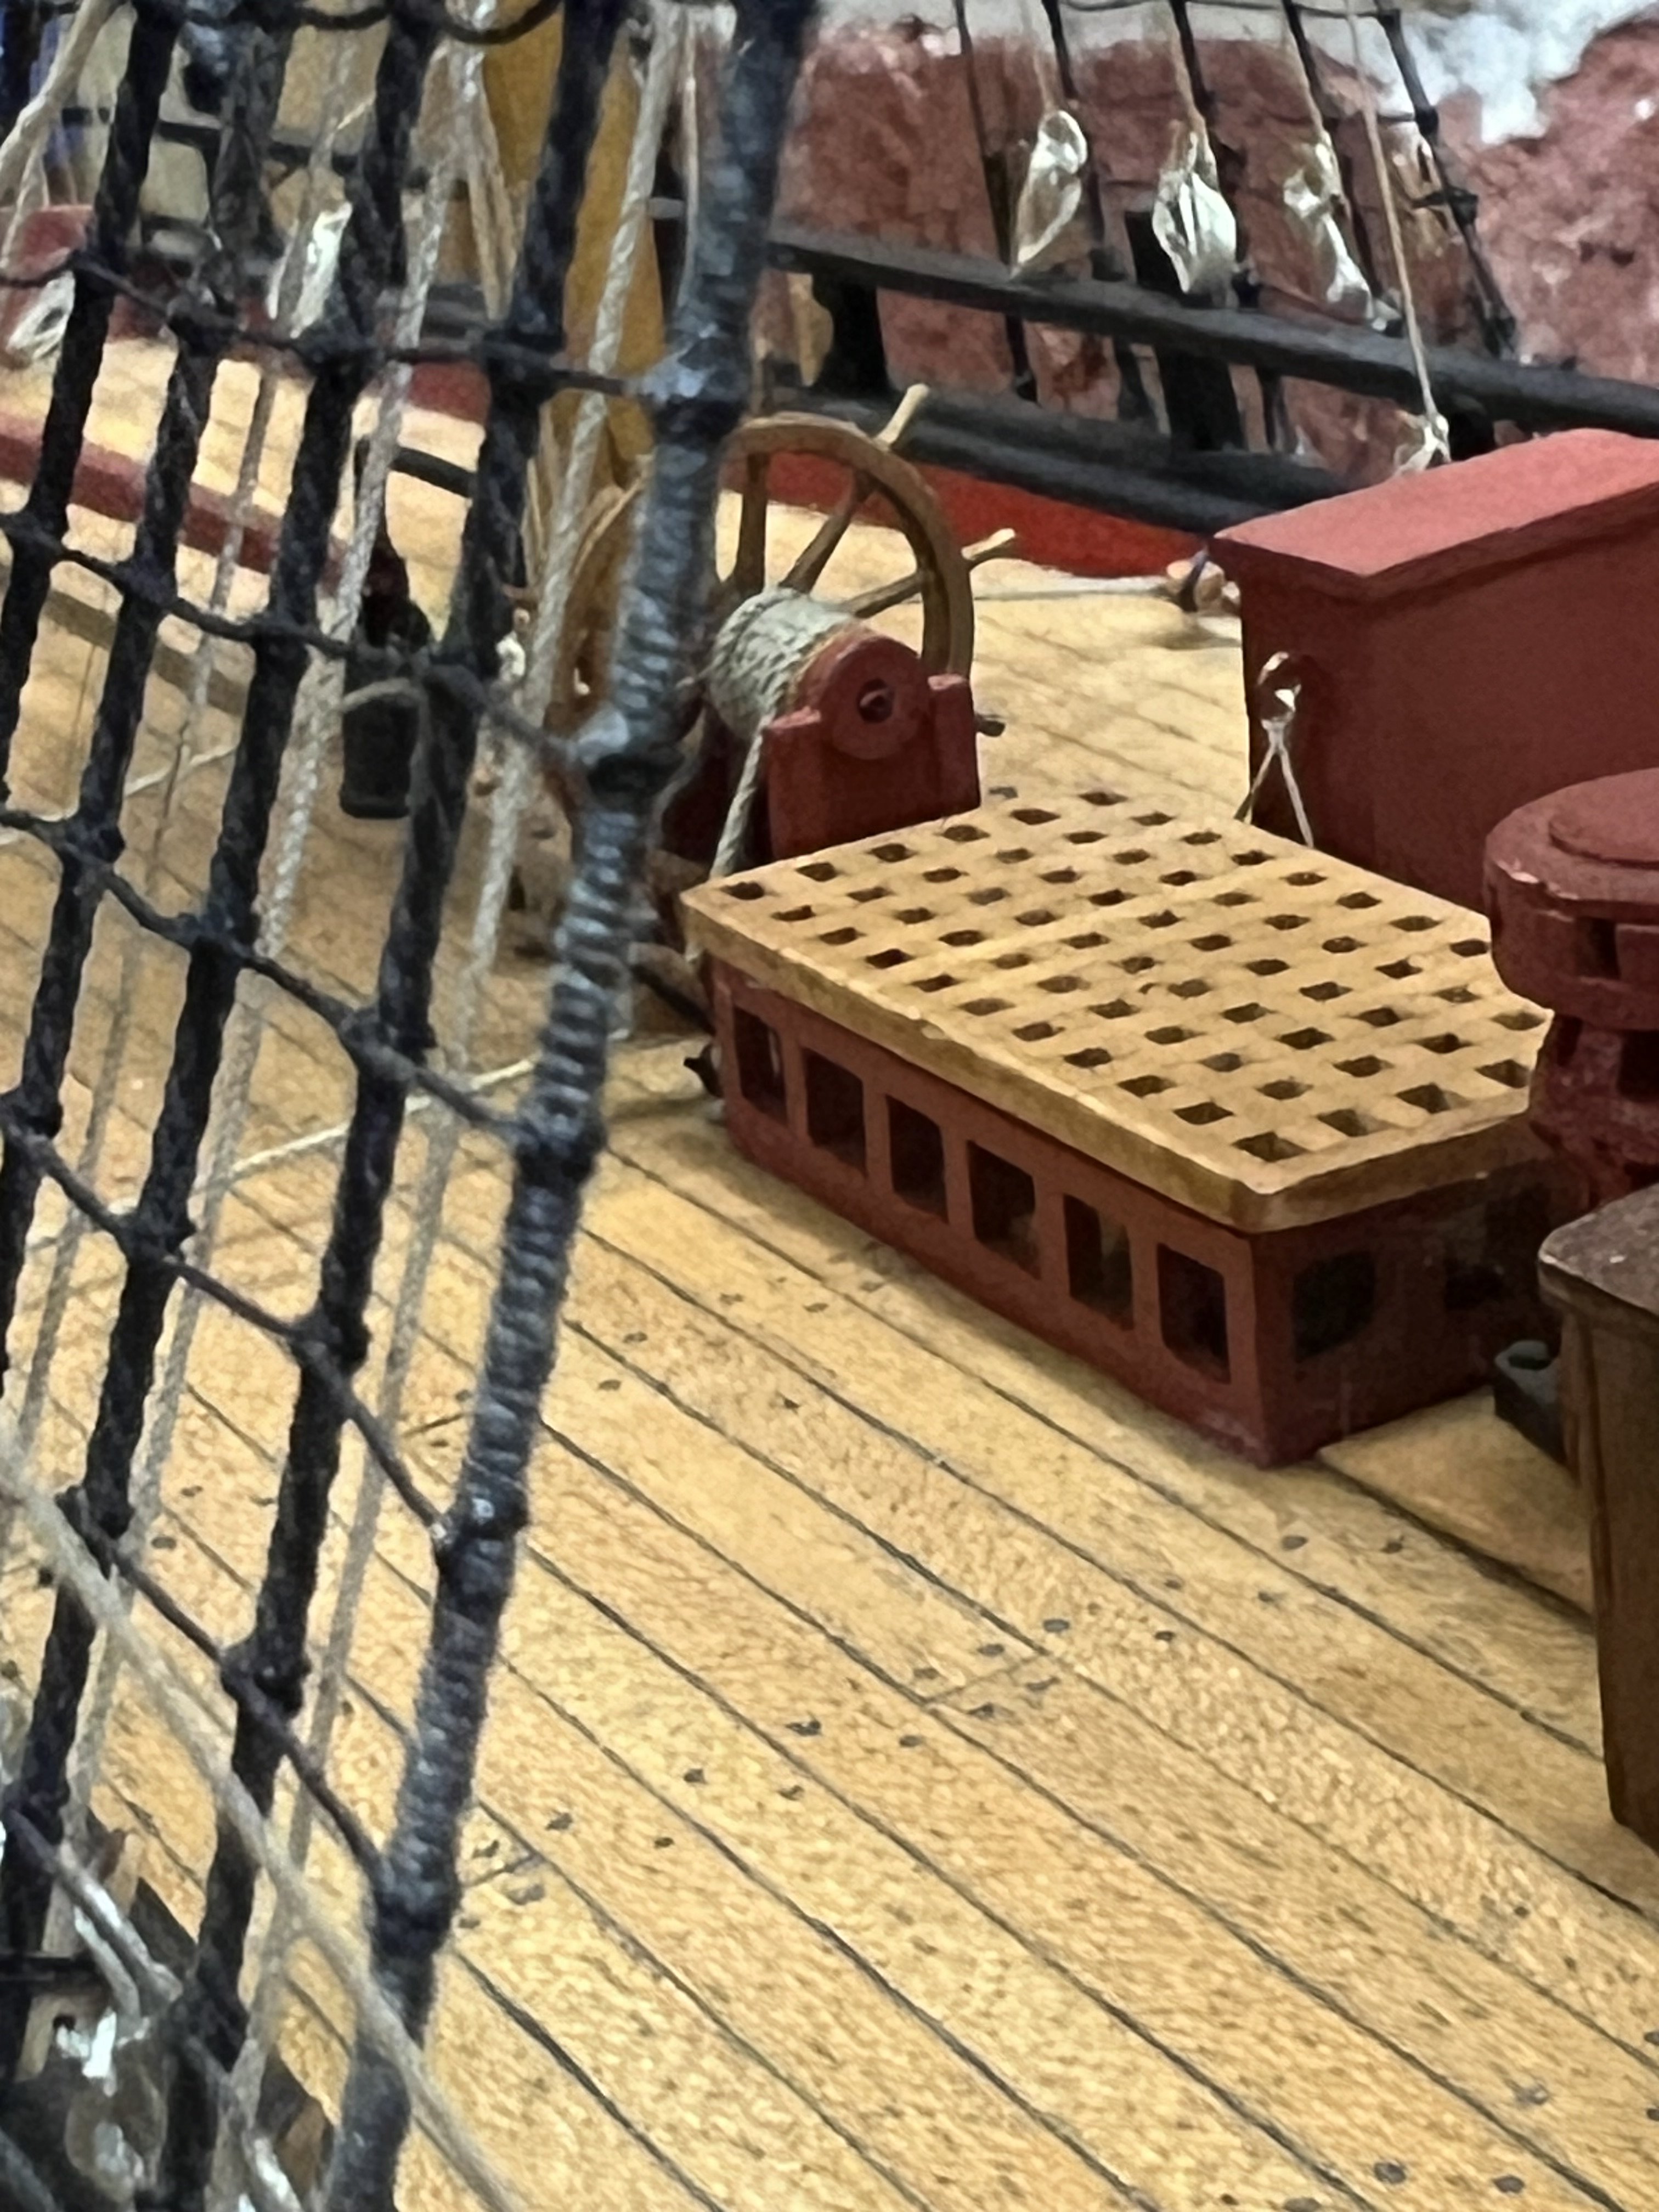
Yes I did my skylight (or companion as it is called on the draughts) similar to the replica vessel. If you look at the table of works carried out during the refit on page 72 of Parkins books it says "Companion on the Quarter Deck to be framed with sash light all round & sash & Grating on the top" which describes the replica and mine, but not the other ones such as Marquardt's version.
The hatch on the lower deck of my model is a dummy one, I just glued the frame onto the deck, and painted the inside black under the grating.
-
Ah yes, the main hatch. Some ideas for you. I had go at a couple of different versions as you can see in these pics. Notice I installed another hatch to the hold on the lower deck. I wanted my hatch to be open so you could see there was another deck below and another hatch so I settled on a grating over only half of the hatch. Yes the Occre rings are ridiculously large so I made my own from copper wire and did the hatch like Marquardt shows in AOTS, didn't like it. A grating looks more suitable for an 18th century ship.
If I could go back and do mine again I would do it different, with more curvature as in the other photos
And I hope you don't do the skylight like Marquardt shows, that is more like a 19th century clipper skylight and contradicts the description given when Endeavour was refitted (the description is in Parkins book) The replica vessel skylight is correct.
.jpg.1b2adda2be43892db05ed54377ca037f.jpg)
.jpg.91fab2d98f3164b417a106a16dc77b9d.jpg)
.jpg.3f23dd5d5178c5433d86fdd5c85525a6.jpg)


.jpg.b41a2dd9ada3082b061e4417e309f109.jpg)
-
-
Hi Kristyn
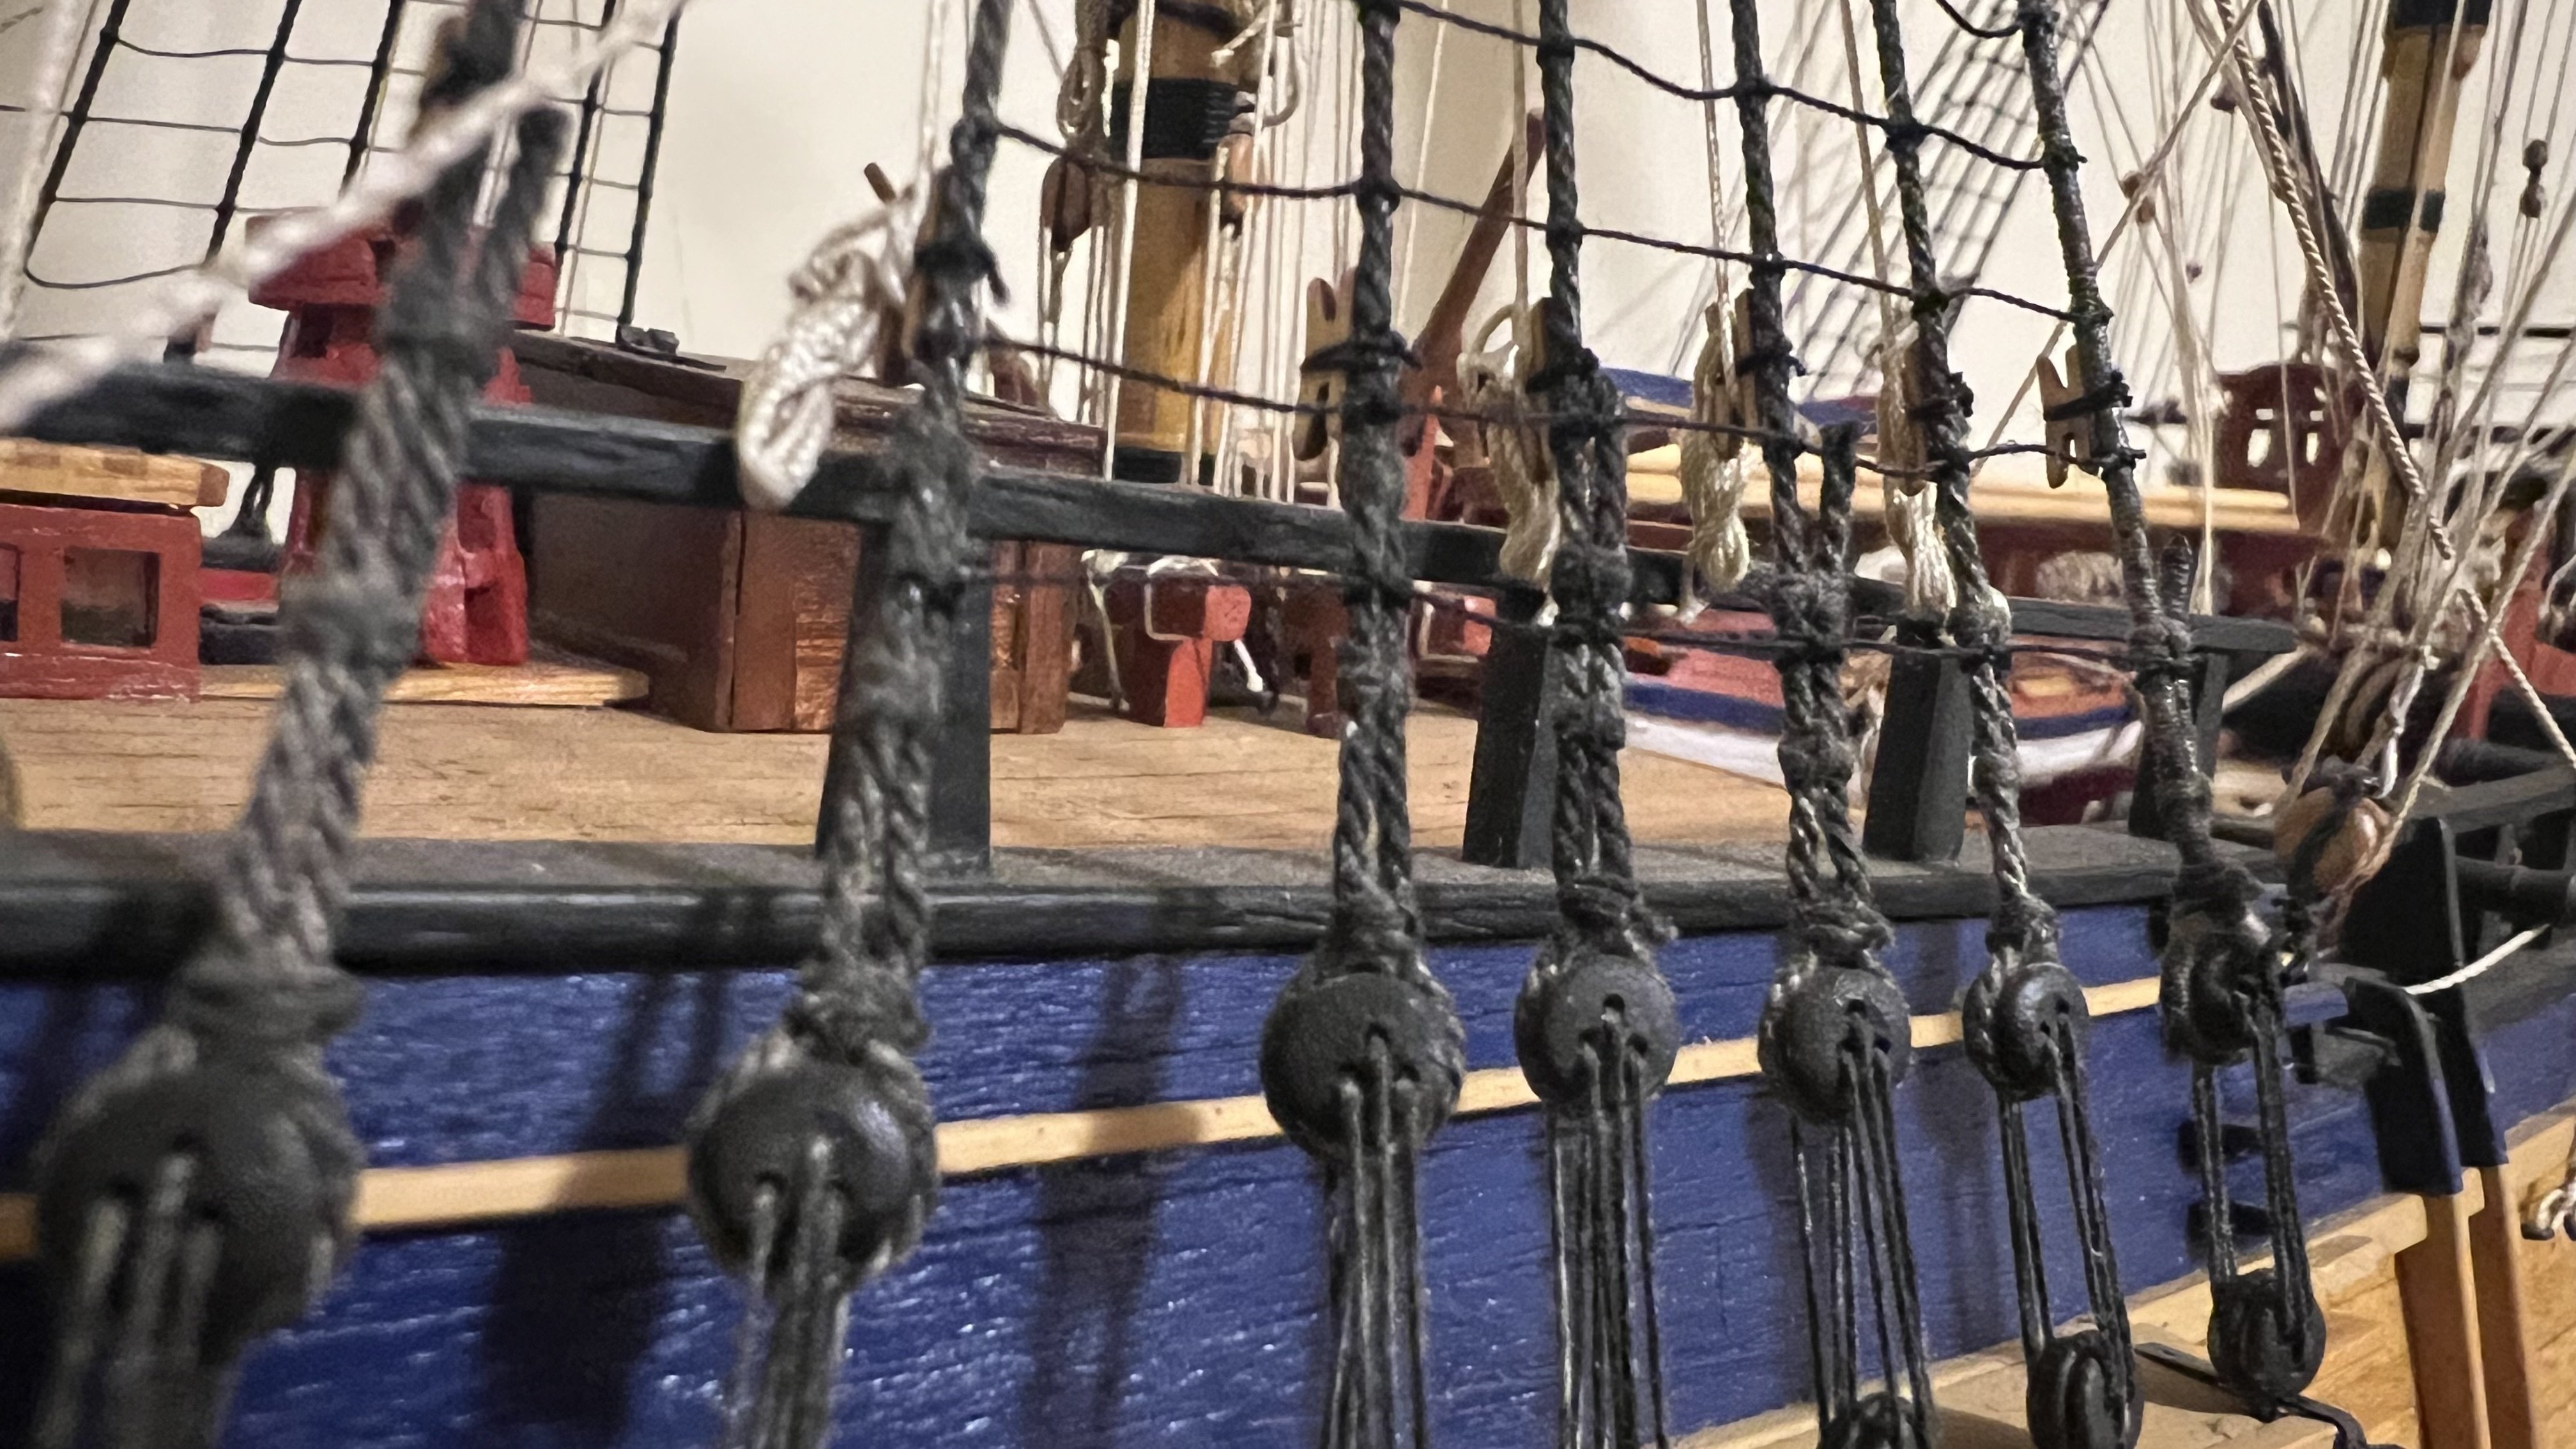
You really didn’t need to fill those gaps in the outer bulwarks, they will be covered by the planks you add later. On the subject of the hull planking, the instructions tell you to use small nails on the first layer of planking, but that first layer of planks needs to be heavily sanded to get a smooth base for the second layer of thinner planks. Those nails make sanding very difficult. Use dress making pins to hold the planks down until the glue dries then remove them with pliers.
cheers
Steve
-
-
Hi Kristyn,
something I just remembered from my build and something I should have realised to advise you of earlier. You should have planked the upper decks after fitting them so as to cover up those notches where the frames are. Not sure what the Occre instructions say about when to plank the decks.
-
Only on the quarterdeck because it gets narrower towards aft. And it’s still a cylinder.
As an example exercise - Cut a piece of wood the width of the most aft beam, lay it on your template so that the arc intersects with the lower edge at each end, you will see that it is not 3 mm high at the centre -
Hi K
Just something to note before you shape the deck beams, I remember when I did mine that as you move aft on the quarterdeck the amount of rise at the centre of the deck needs to reduce, i.e the diameter of the curvature remains the same as the deck width narrows. So at the aft most beam the centre is only raised about 1 mm. Make sense? I didn’t do mine mathematically just trial and error, and I just used small chocks on the centre of the beams at the rear of the quarterdeck because they can’t be seen anyway. Alternatively you could use template for the foremost beam and as you move aft use the same template but you will find that for the same curvature the shorter beams have to be less raised at their centre
cheers
Steve
-
-
-
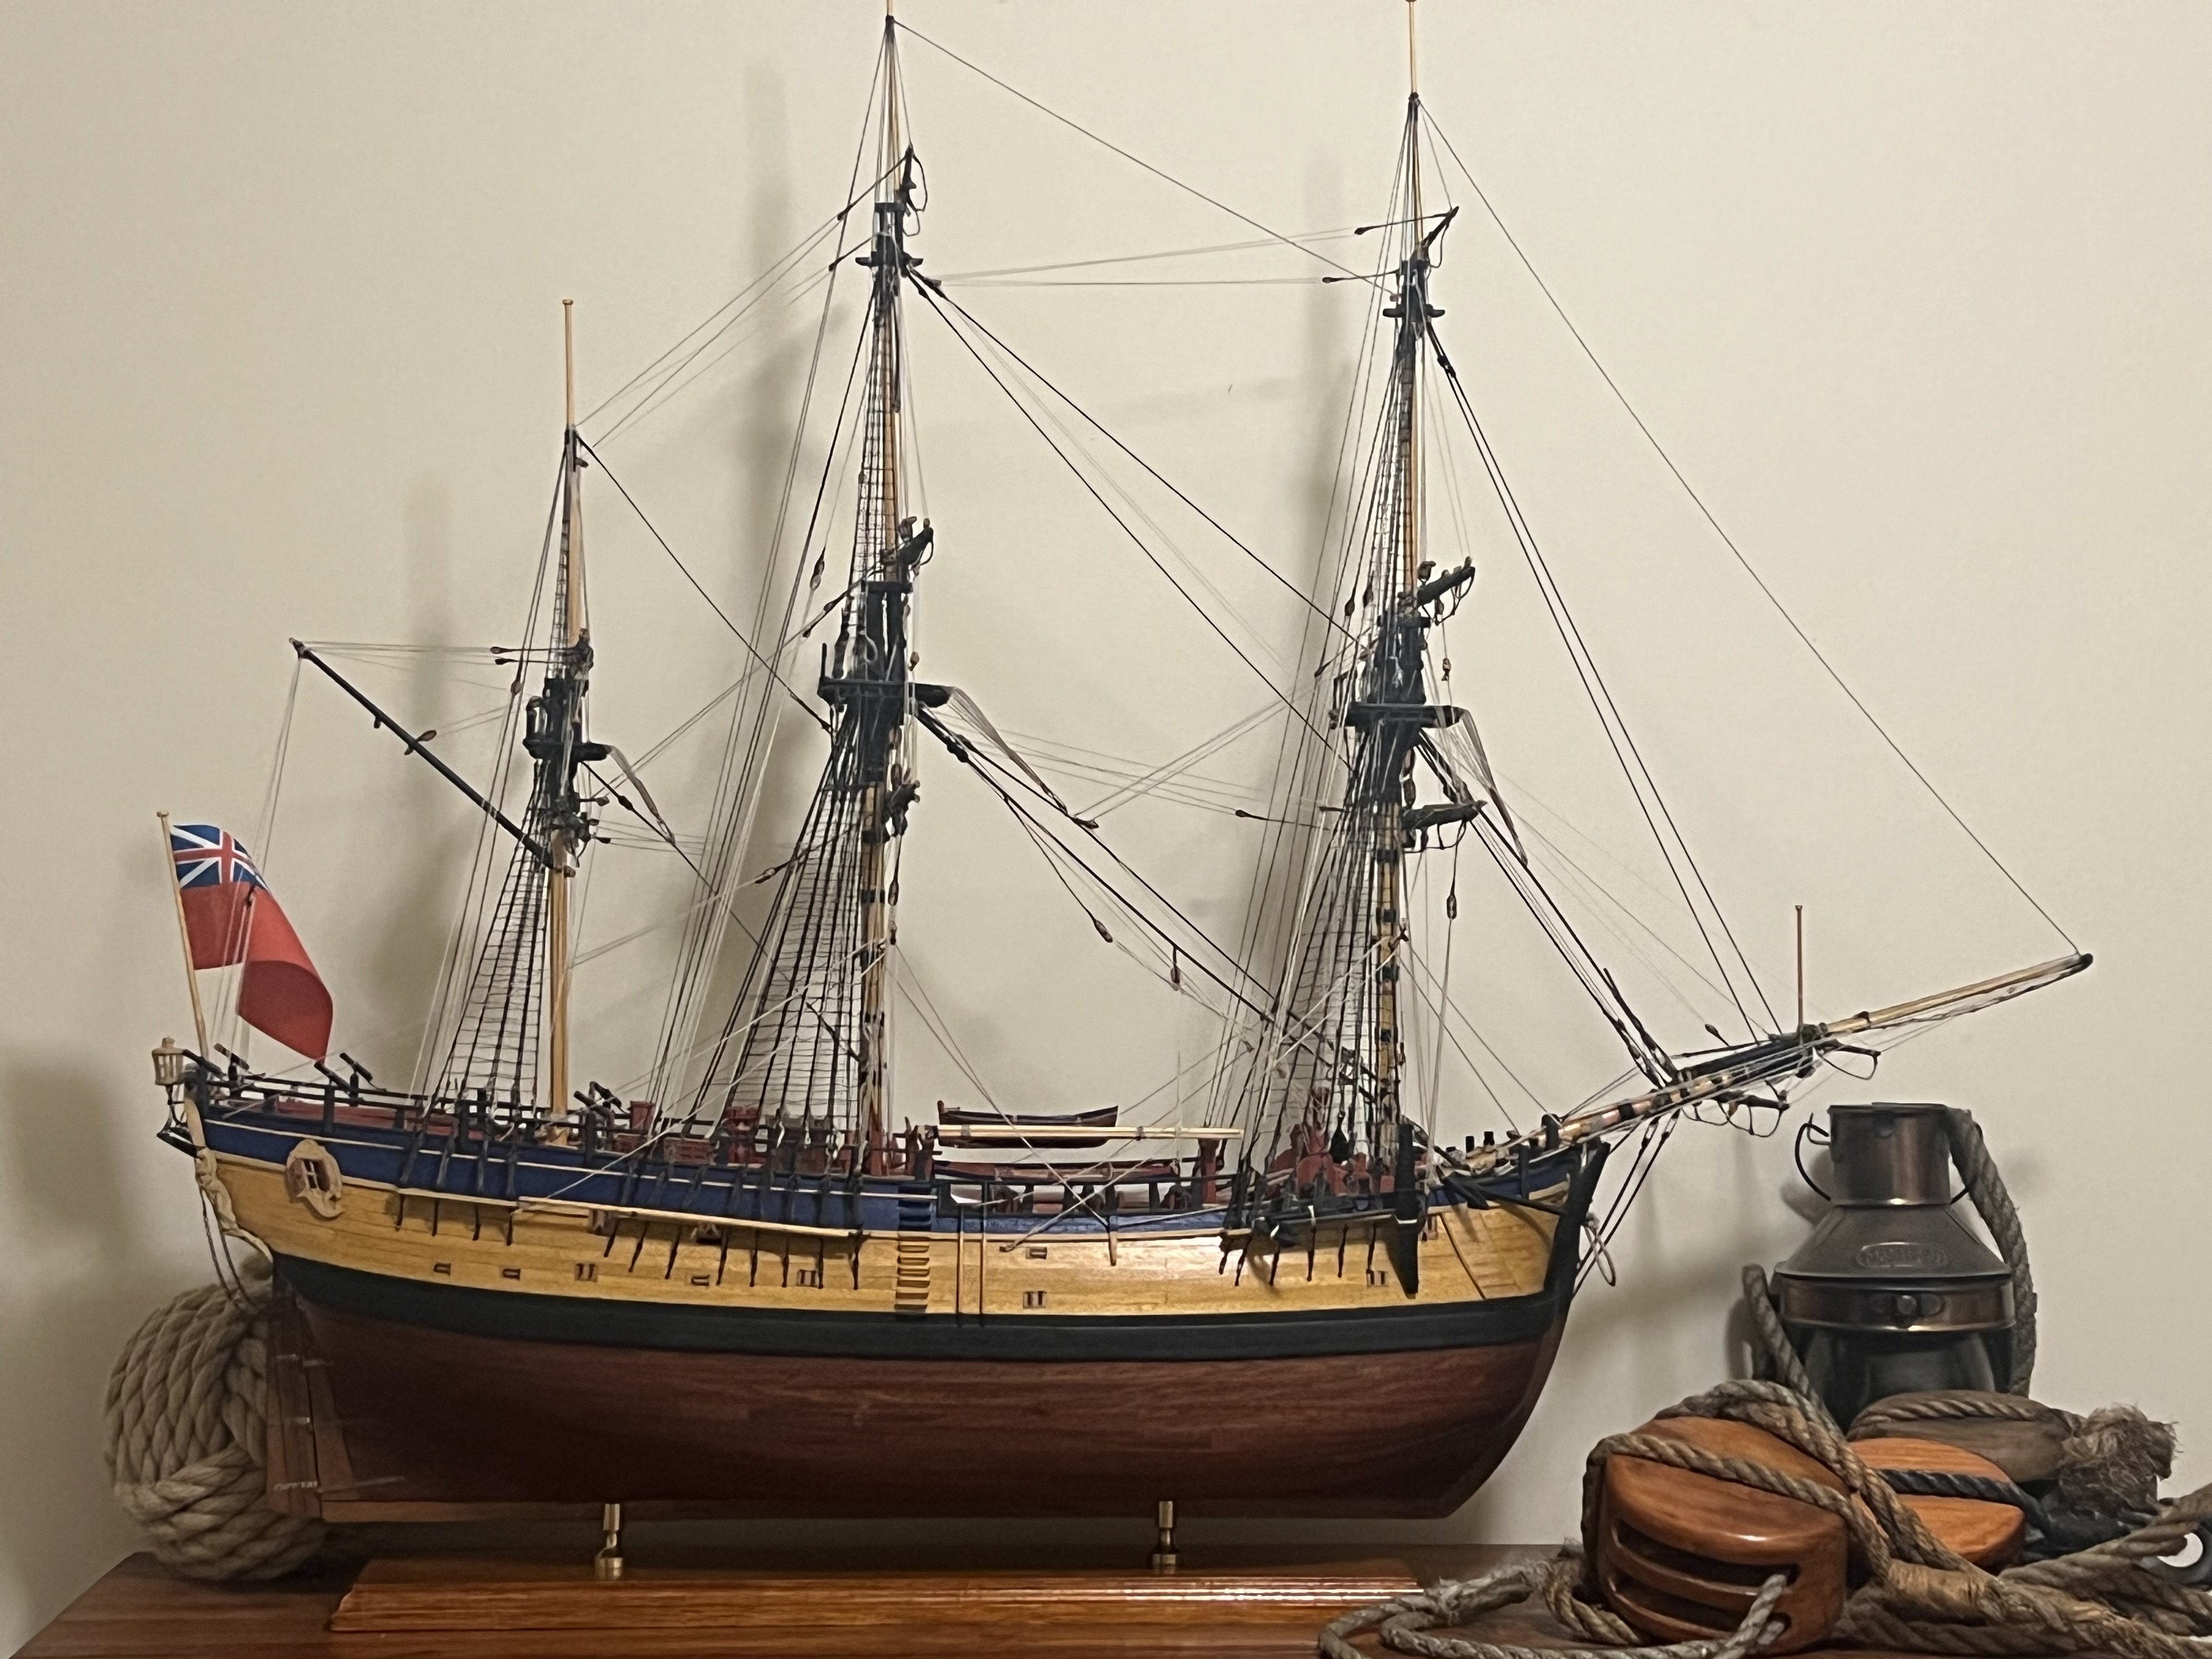


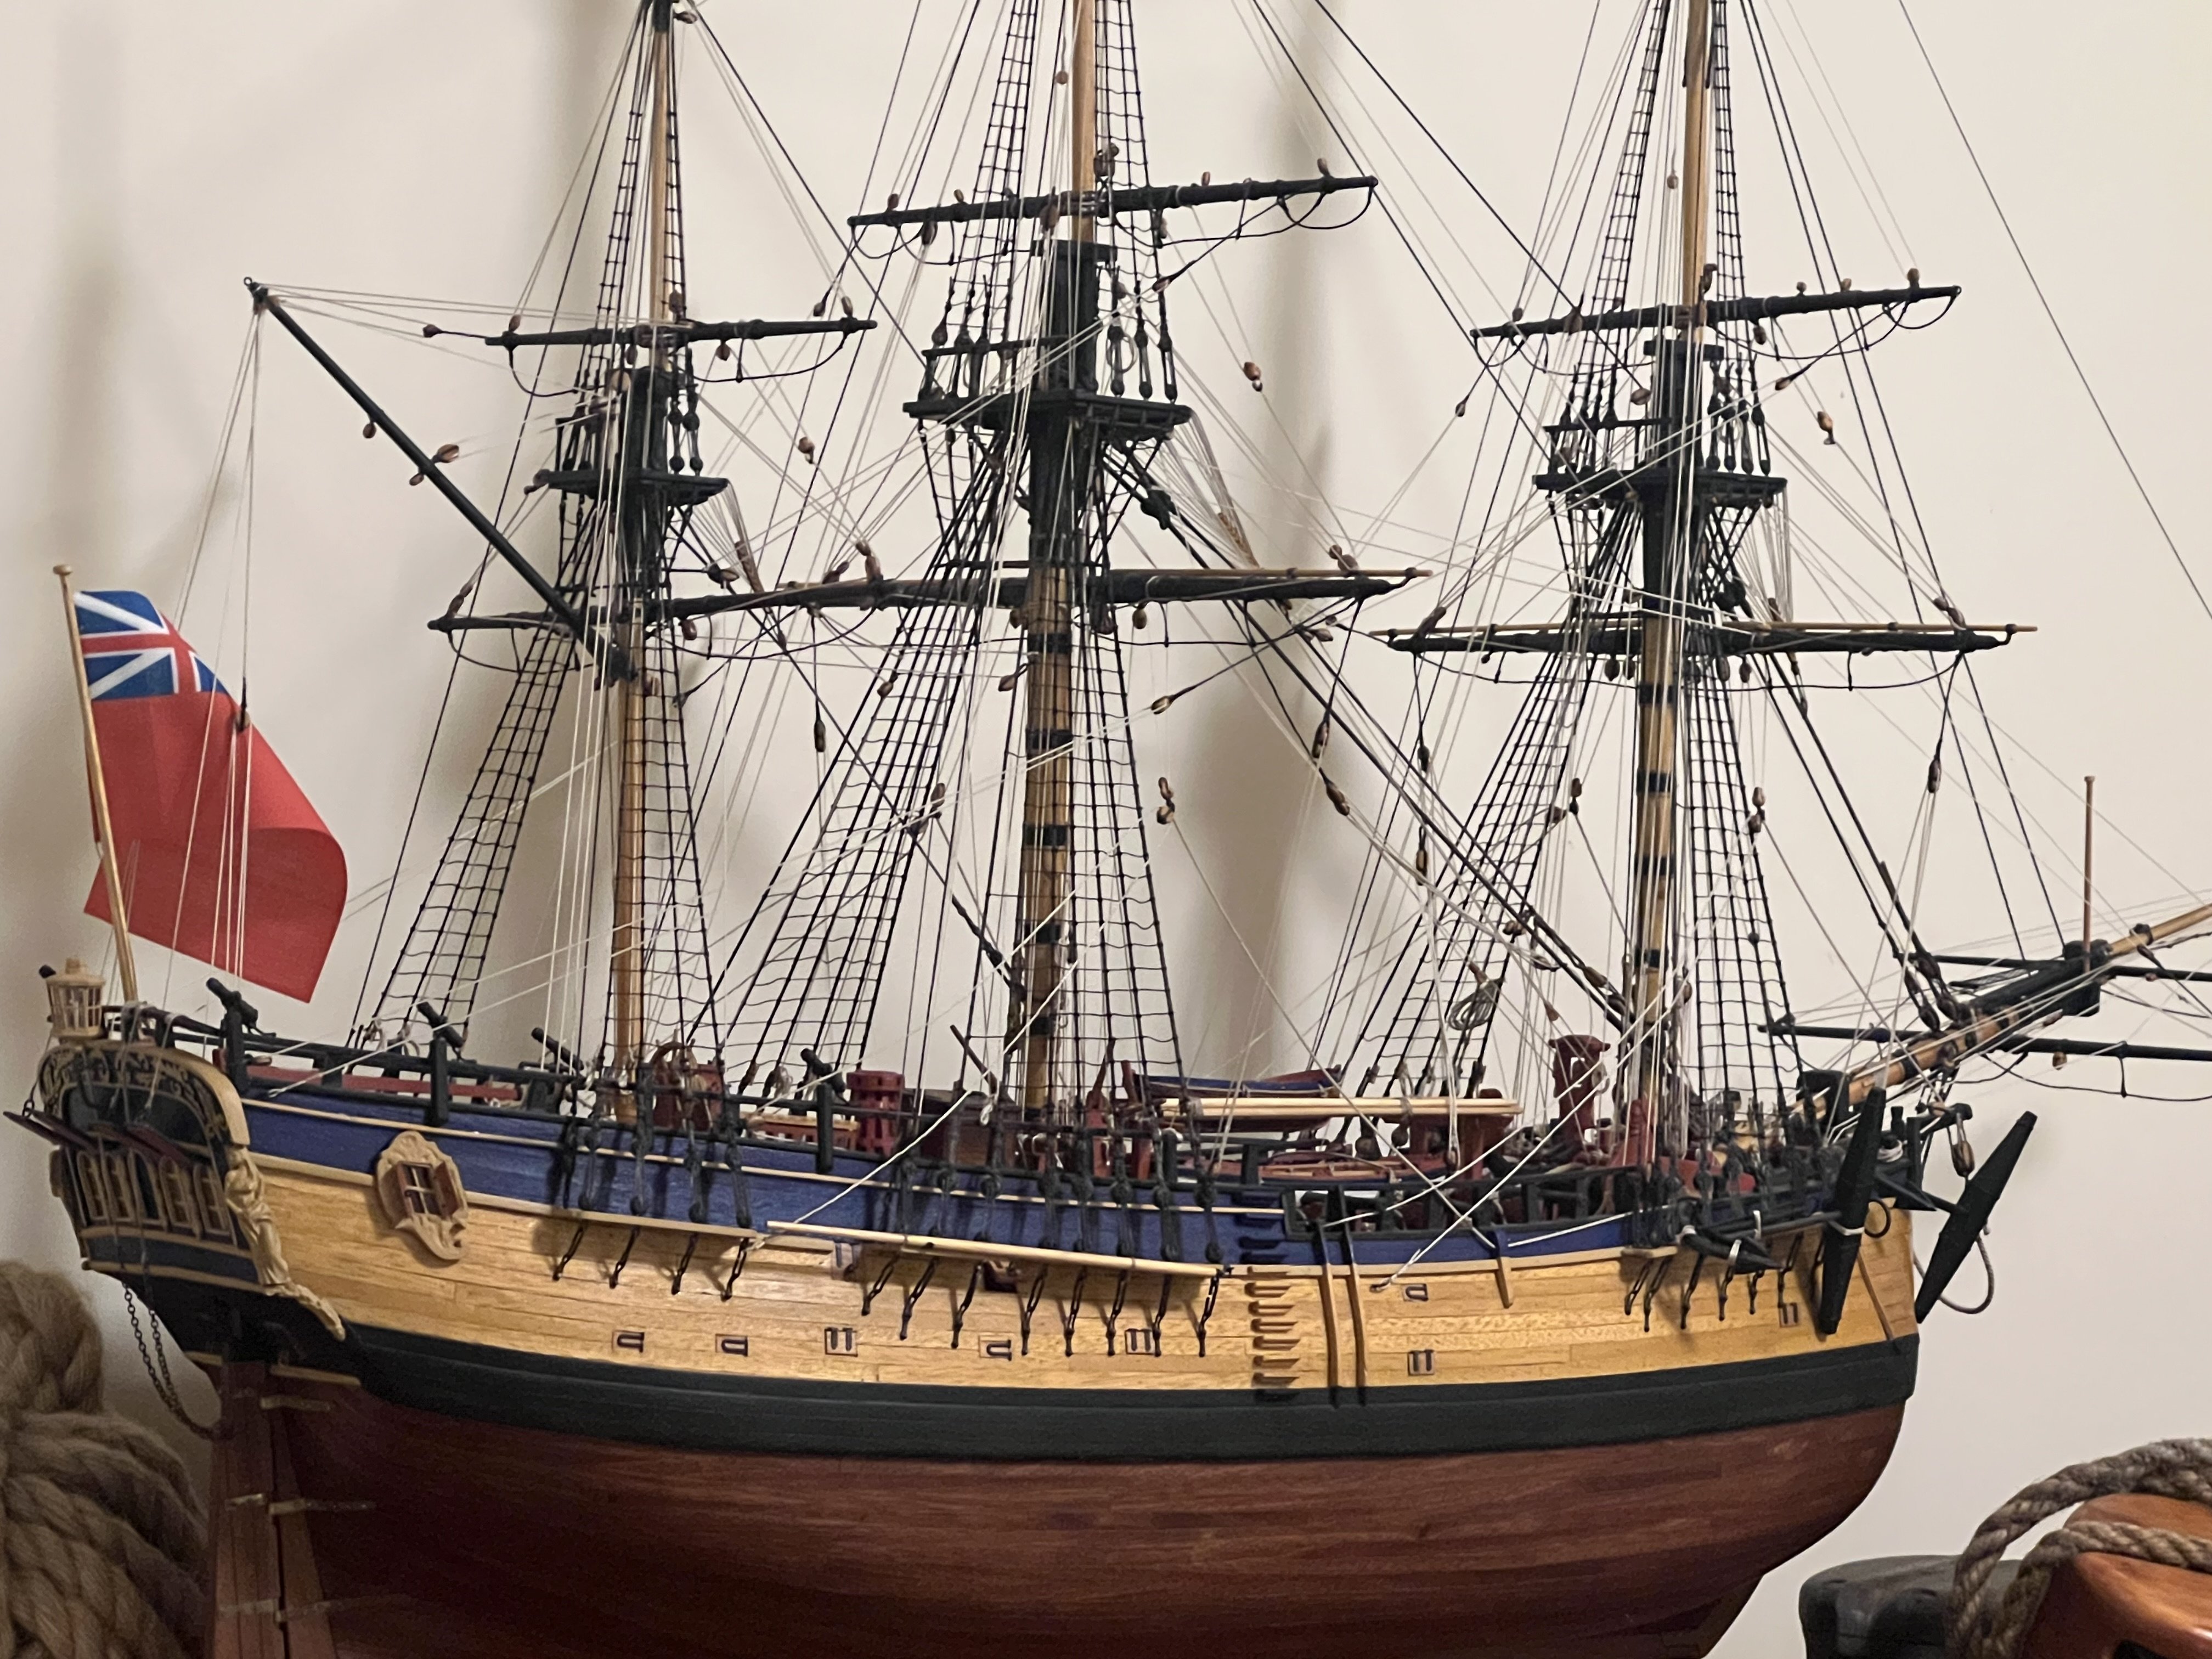
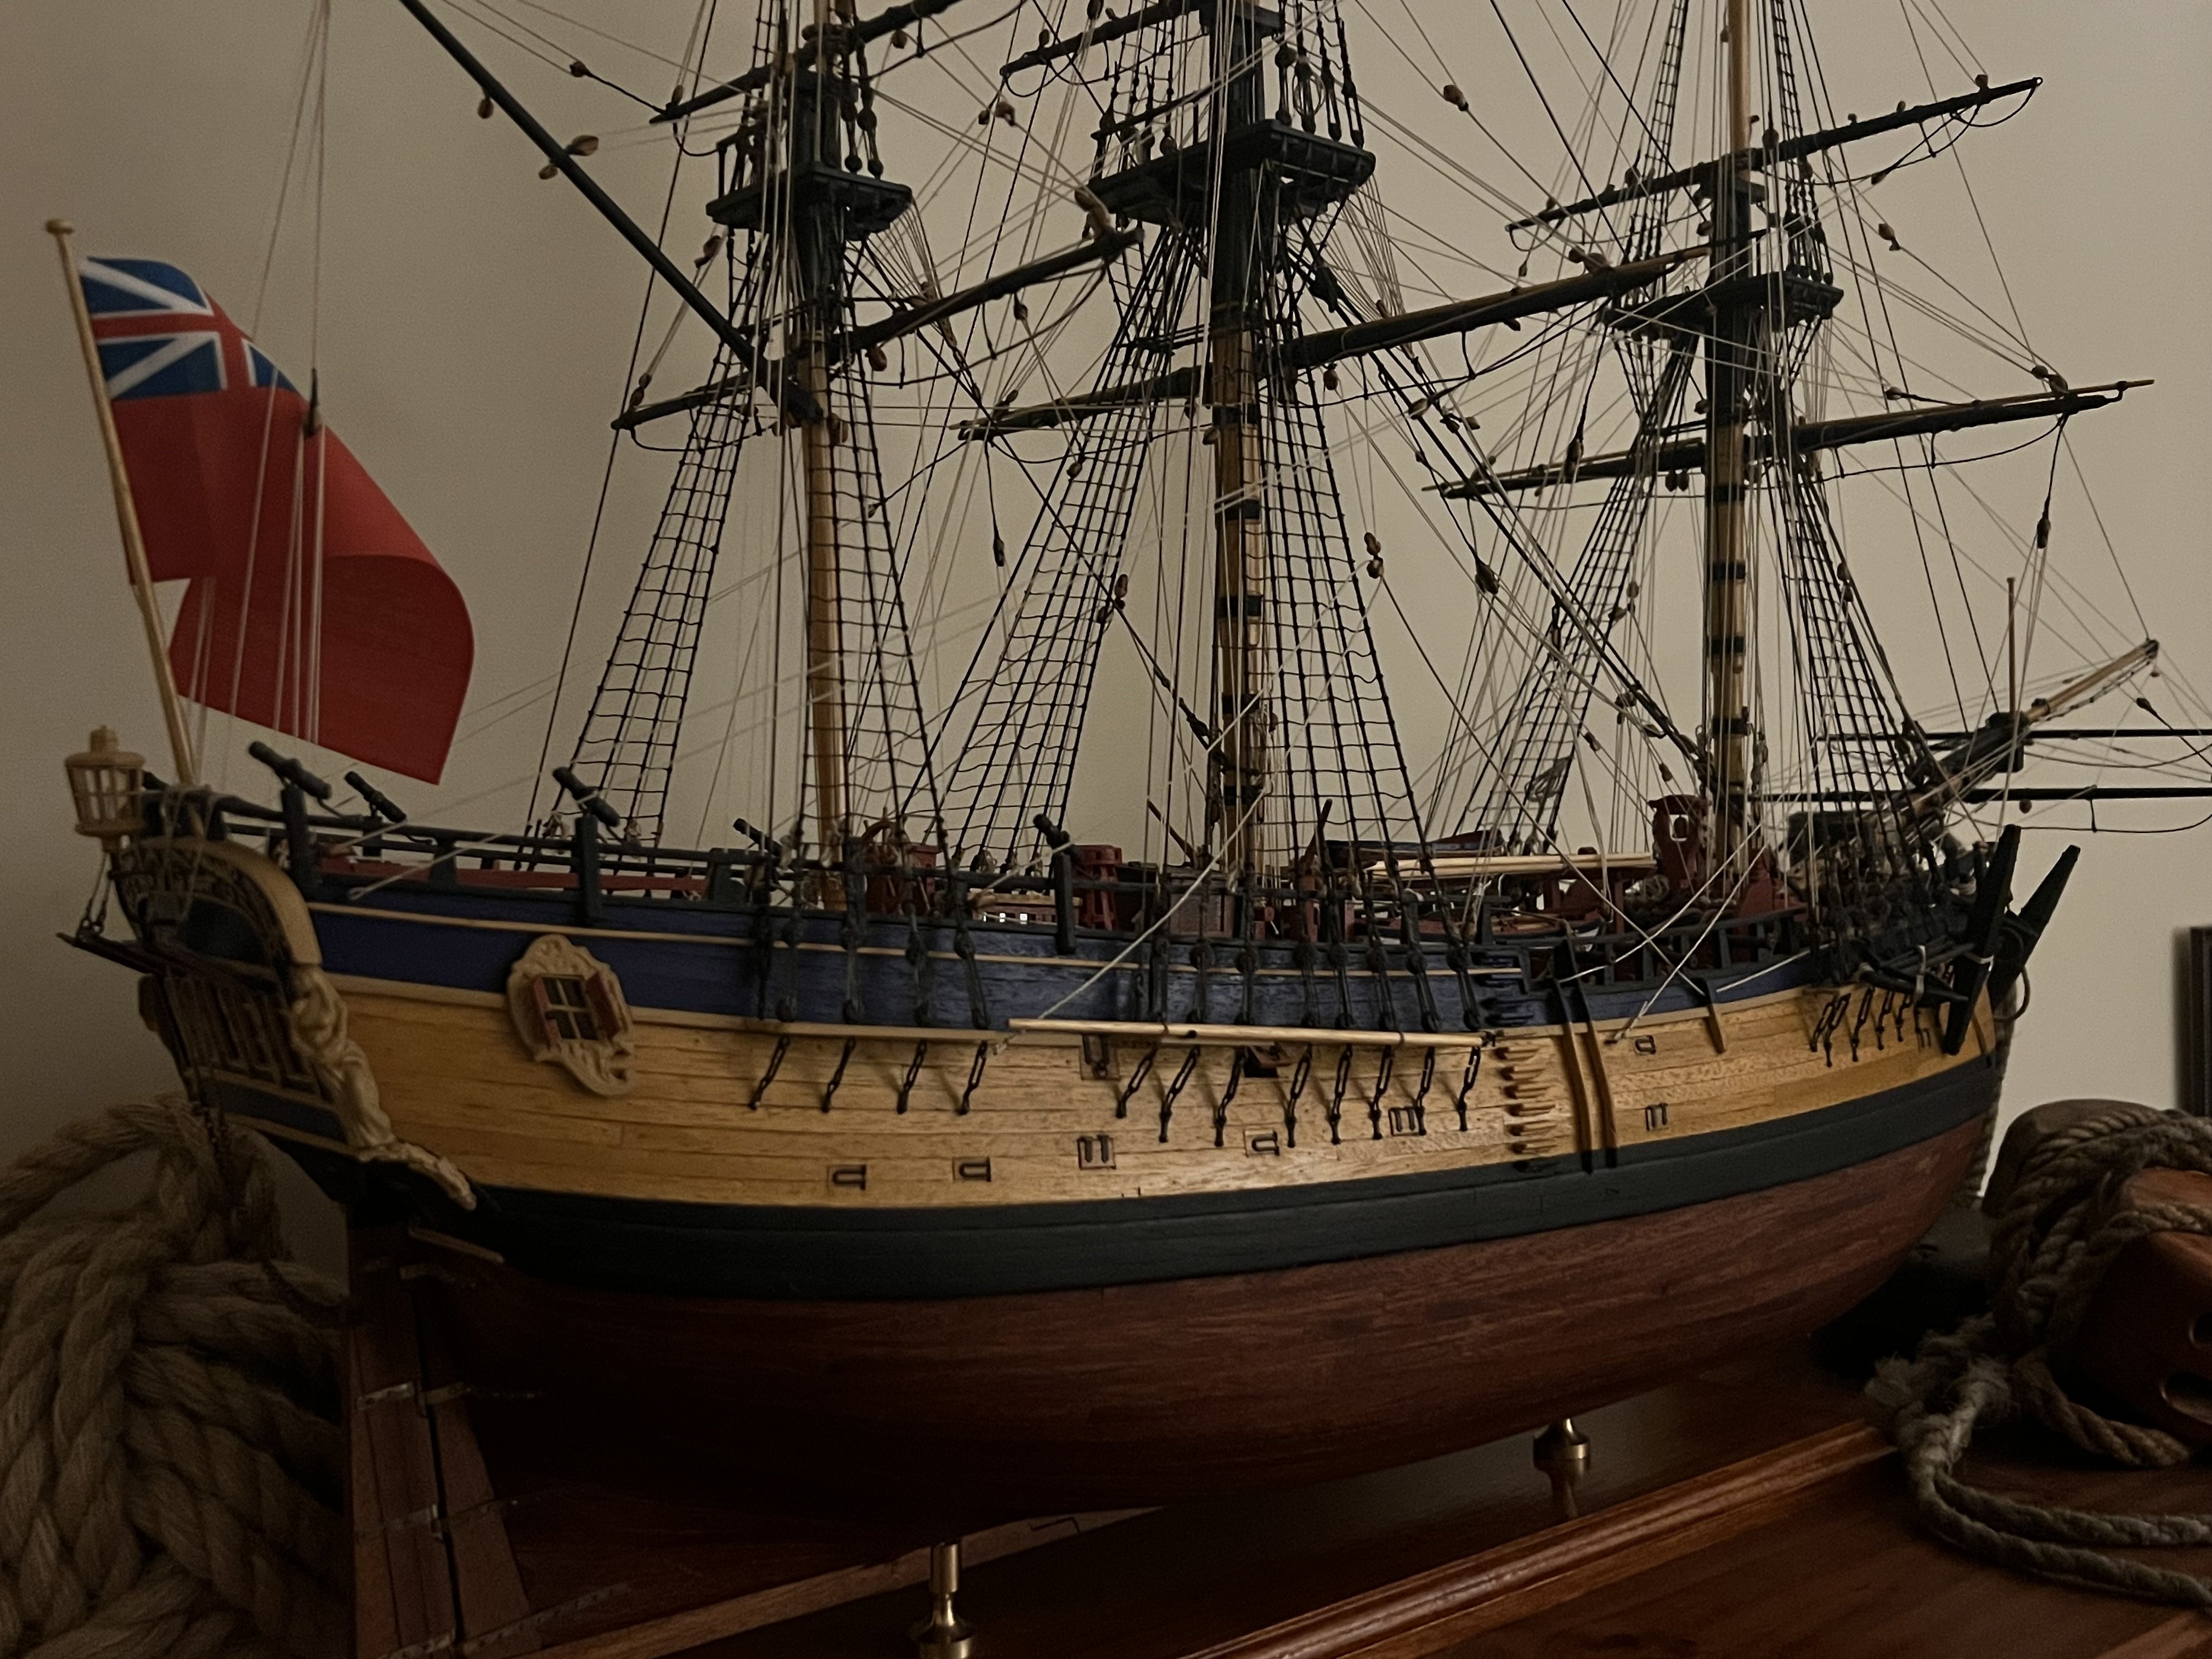


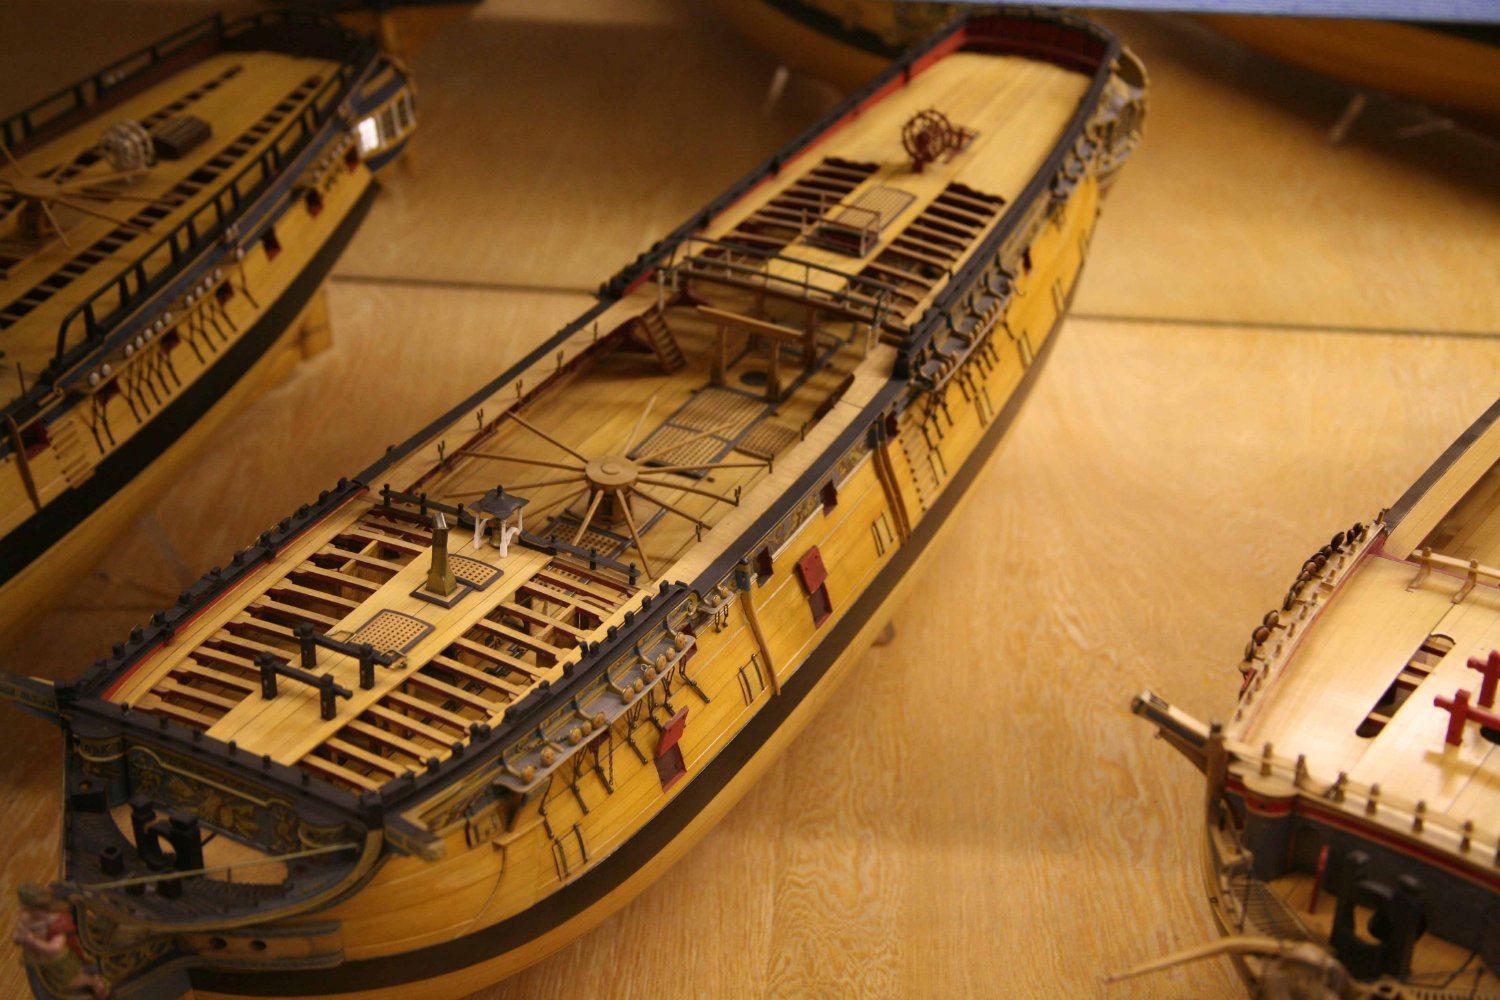
HMB Endeavour by shipaholic - FINISHED - Eaglemoss - 1/51
in - Kit build logs for subjects built from 1751 - 1800
Posted
now that the Endeavour is finished it might be time to do some cleaning and maintenance on the old Victory I built 35 years ago