Supplies of the Ship Modeler's Handbook are running out. Get your copy NOW before they are gone! Click on photo to order.
×


robdurant
-
Posts
837 -
Joined
-
Last visited
Content Type
Profiles
Forums
Gallery
Events
Everything posted by robdurant
-
 Signed up with great hopes we shall see this on our screens soon.
 -
uploading pictures
robdurant replied to David56's topic in Using the MSW forum - **NO MODELING CONTENT IN THIS SUB-FORUM**
You may find it's easier just to use the "choose files..." button underneath the post editor and manually select the pictures from your filesystem instead of dragging and dropping straight in. You would need to export them from iPhoto first, but it's probably a more robust method than dragging and dropping, (which relies on iPhoto working out it needs to export the photos, and then passing that information through the clipboard to the browser, which then imports them). Your problem could be caused by any number of issues (spare physical memory / page file / processor capacity on the computer to process what's happening, app incompatibility, application race condition, etc...), but as I said, the easiest thing is to take the issue out of the computer's hands and just use a more robust step-by-step method. If you want it to not be irksome, you could perhaps write an automator script that did these steps. That may depend on which version of OS X / OS 9 you're using, and how comfortable you are with Automator. Hope that's helpful. Rob -
Oh yes, and another note that may be of help to other builders of Stefano. In the instructions, when you get to the point you're installing the rosettes, there are rosettes for the hawse-pipes, but then another rosette is mentioned for the anchor opening... that in fact is the rudder opening rosette. It's 1mm ply, and marked as no. 32 and it forms a surround for the rudder post hole under the transom. You can see it in place on plan sheets 2 and 3. Happy building. Rob
-
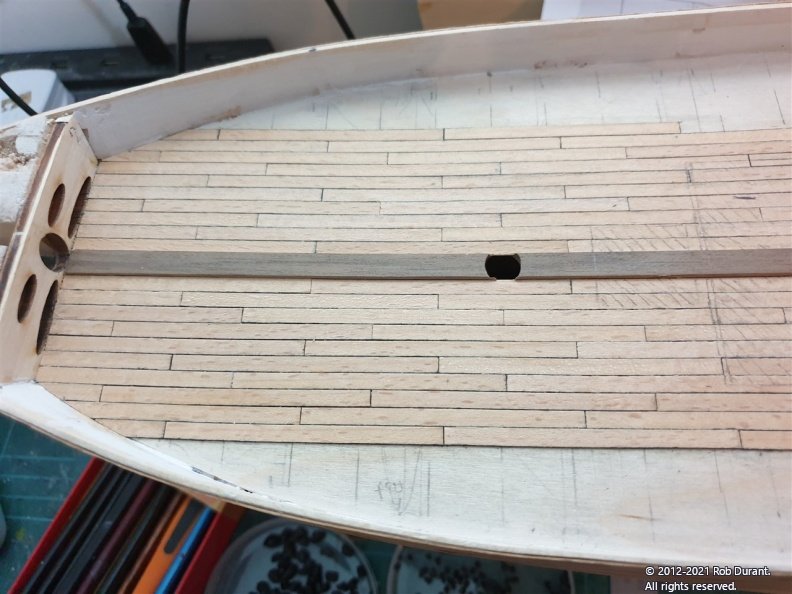
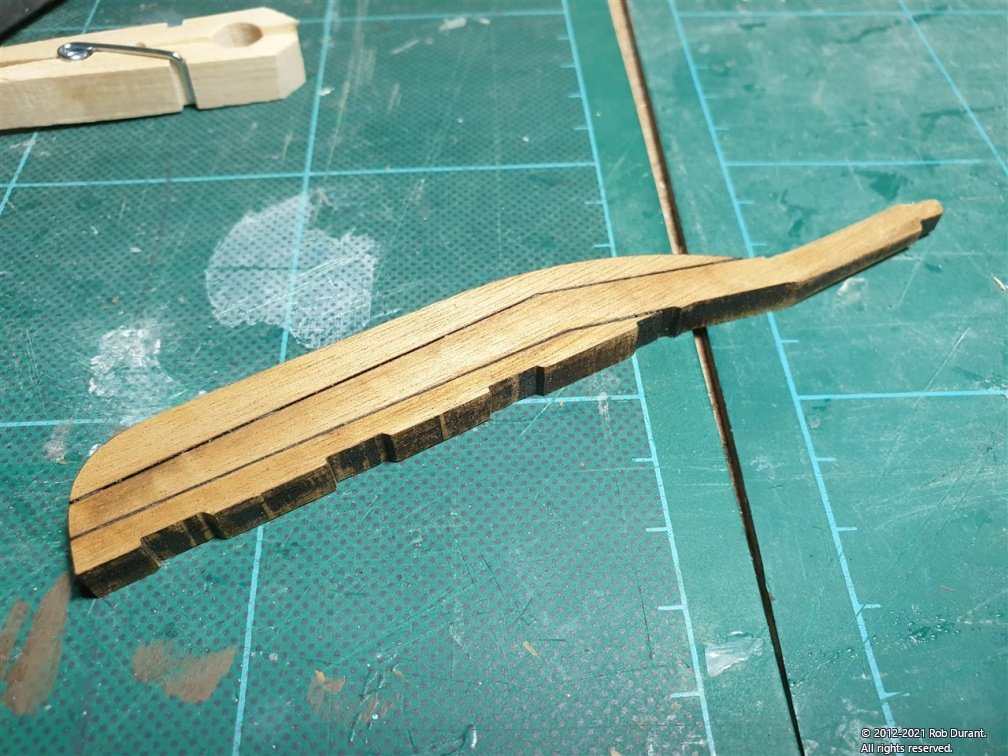
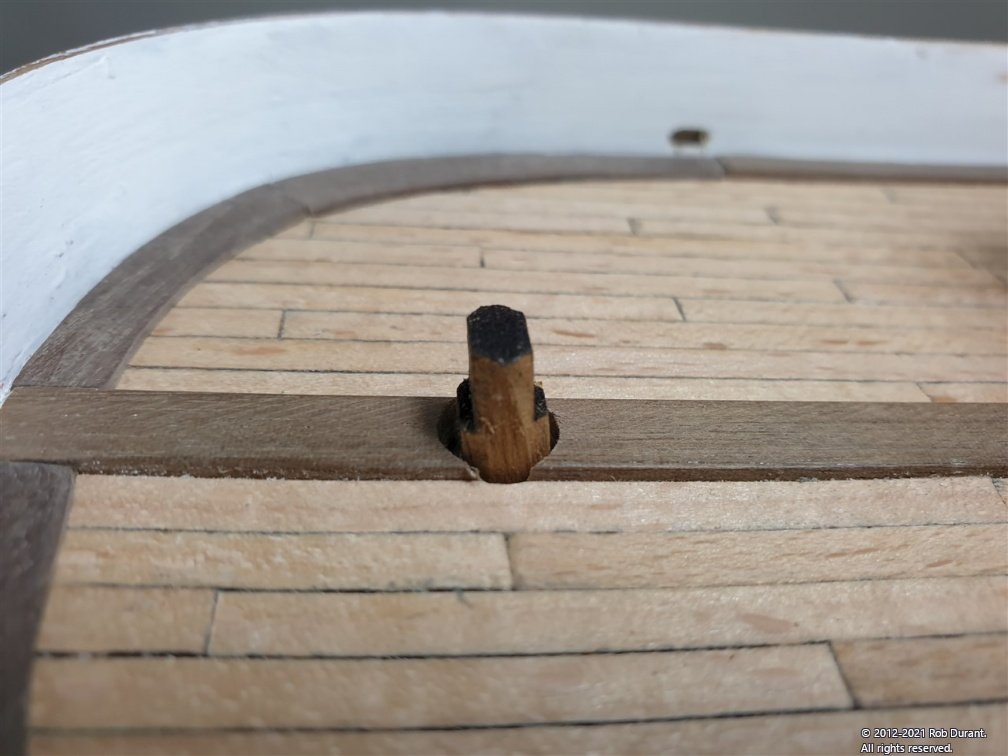
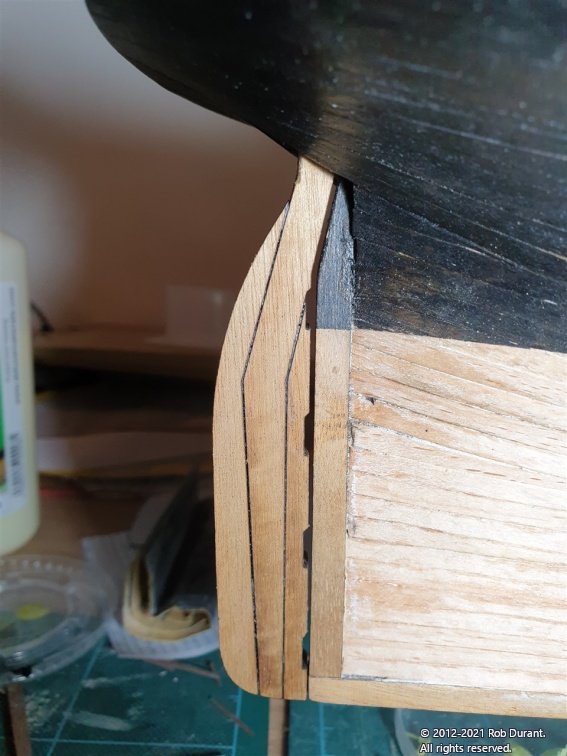
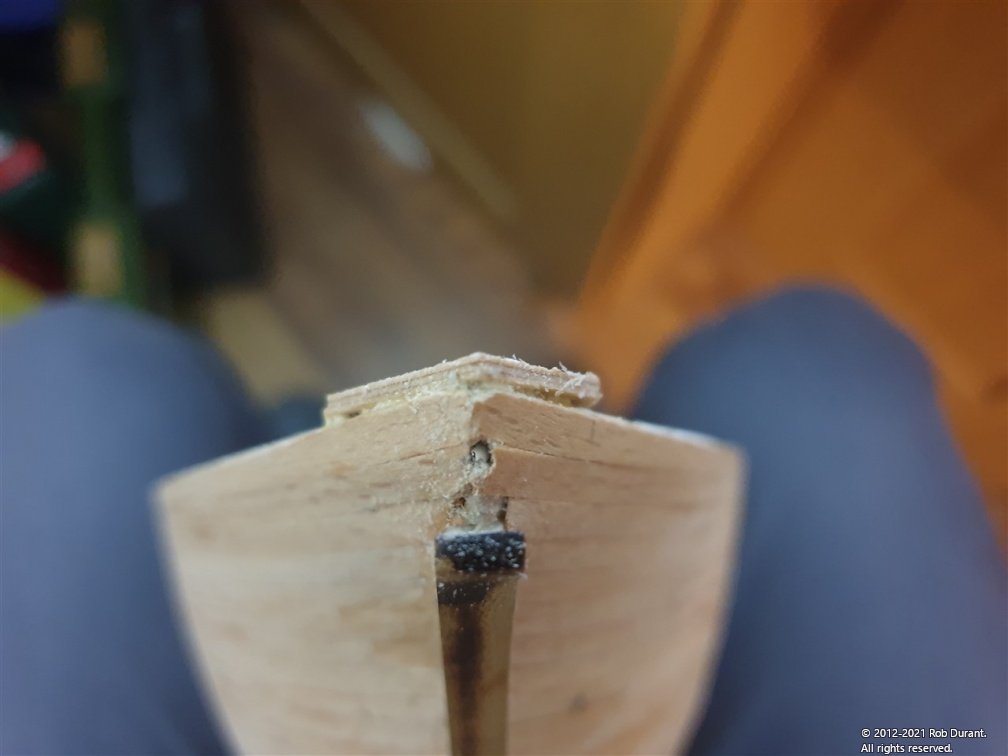
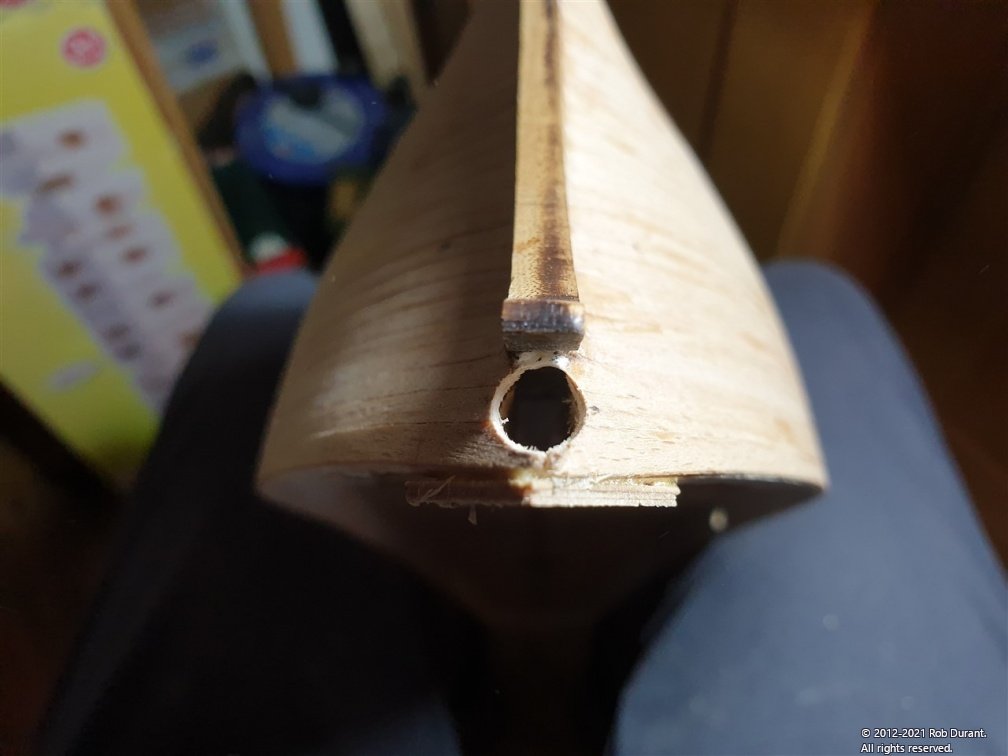
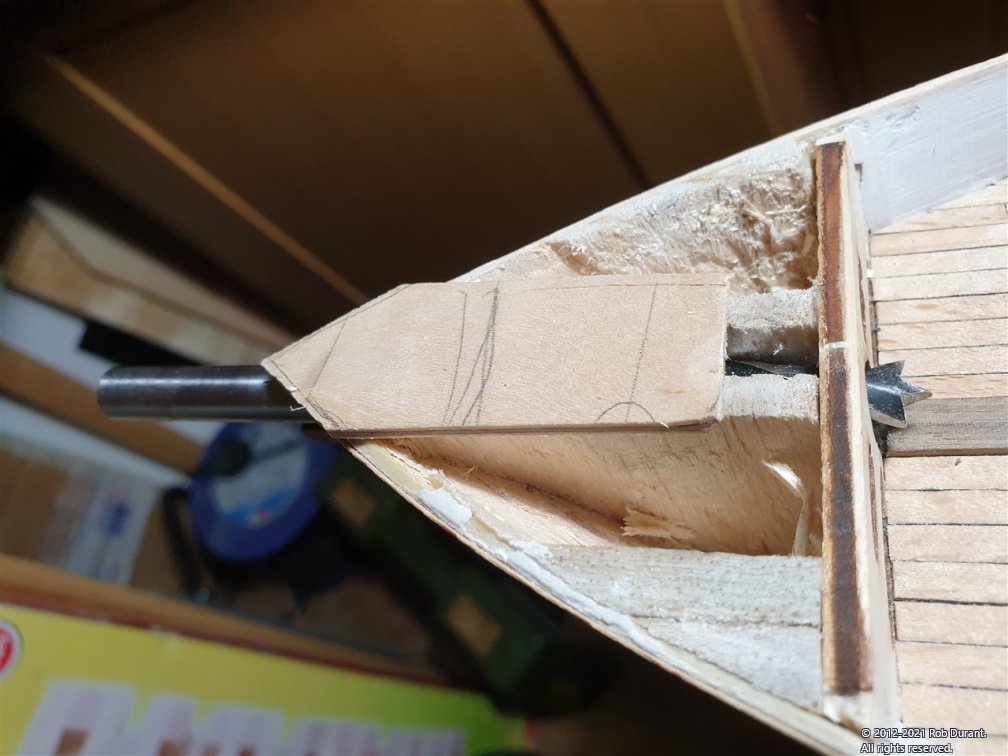
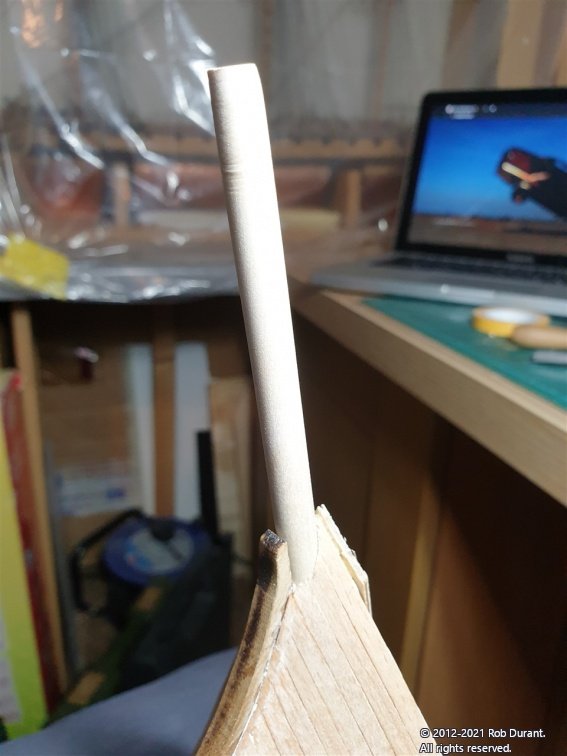
Hi all, Thanks for the likes. I've made a little progress by drilling out the (almost) vertical hole through the transom for the rudder post. In retrospect, perhaps I should have done this before I glued on the stern post, as it would have made for much easier access to drill from below, but the stern post was glued in place, so instead, I measured up where the hole should start, and then used a 1.5mm drill glued inside some 2mm plastic tube to make the initial hole. The plastic tube allowed me to align the drill by running the tube along the stern post, thus creating the right angle for the hole. The photo below shows that the stern post steps in towards the top (as does the rudder) so by putting the 1.5mm hole vertically above the top of the aft extent of the stern post, the hole ends up in the right position. Hopefully that makes sense... I neglected to take any photos of this stage. With careful checking at regular intervals, the hole eventually made it's way through the king plank on the deck, and it was then opened up using a series of drills from above (being careful not to scratch or dent the stern post as the drills made their way through to the other side) until the hole was approx 7.5mm. At each step, the hole was checked to make sure it remained central to the king plank. (As it turns out this was approx 1mm to starboard of where it should be, but I'd rather shape the rudder post so that it looks central than have the hole off-centre - this won't be a working model after all, so I can cheat ) Once opened up, the rudder was constructed from it's laser-cut parts, and with some rough shaping of the rudder post it was test fitted. The rudder post fits beautifully, with a nice small gap between the sternpost and the rudder (it had dropped away from the hull a little when I took the photo below, but it does sit closer). I'll bevel the fore edge of the rudder and perhaps taper it towards it's aft-end before finally fitting, the top of the rudder post will need to be shaped for the tiller, and there'll be plenty of work to do to get it coppered, etc... before it gets fitted, but I was keen to ensure it would work before I went too much further. Thanks for looking in. Rob
-
Very nice
-
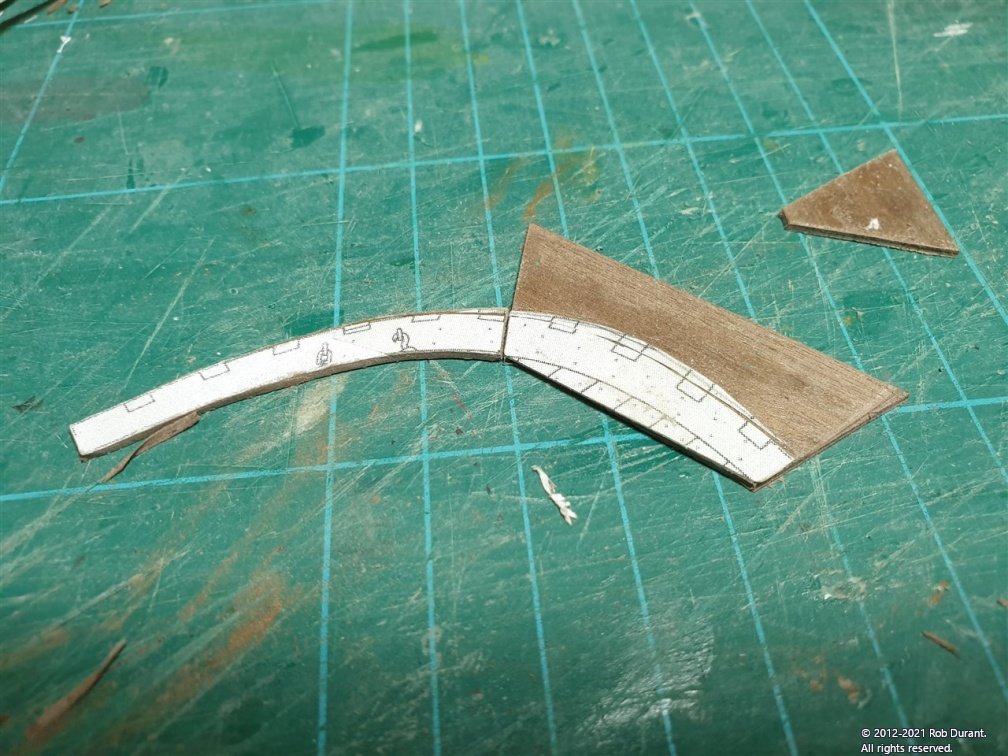
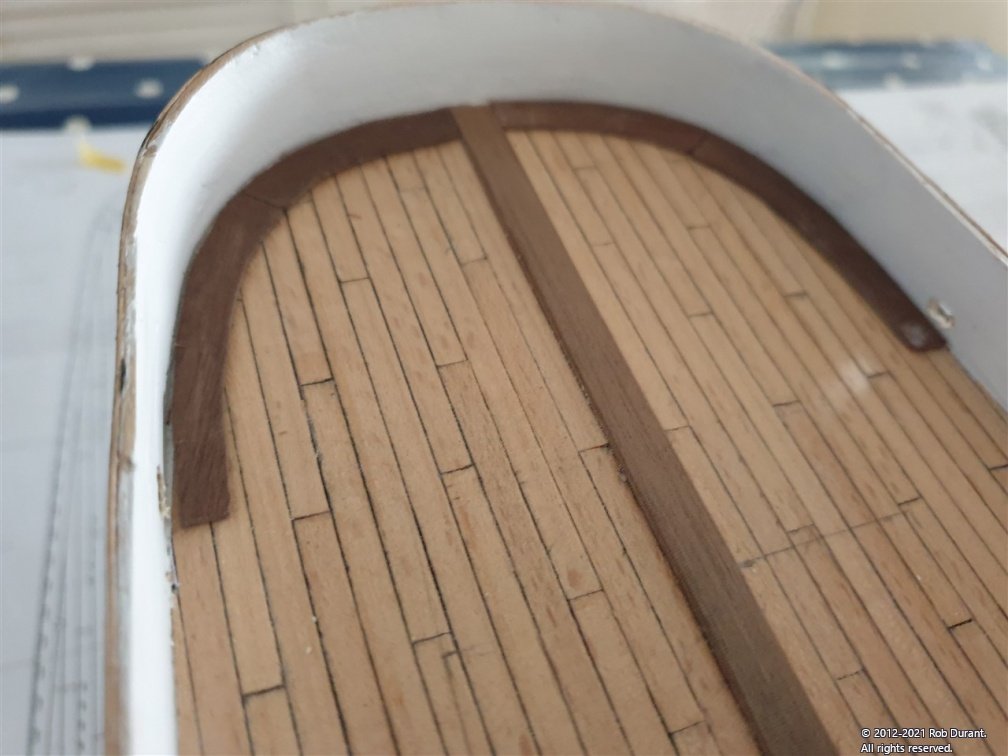
Hi all, A little progress to report. I finally bit the bullet and - using a sheet of 1mm walnut from Cornwall Model Boats - for the curved sections, I made up the parts that edge the deck (the "covers" as they're described in the instructions). It took a few attempts, but eventually I got some neat parts cut out and shaped for the stern and bow, and the centre was 1x5mm walnut. I used left over stock I had lying around, but that doesn't mean it's not in the kit - it just means it came to hand more easily, and I'm lazy by nature. The process for the stern and bow sections went something like this. Scan the top-down plan on Sheet 3 that shows the deck edge. Print out the plan to 100% size. Cut out, and modify the shape at the stern and bow to fit the model itself. Mark out some sections so that the grain roughly follows the length of the pieces being cut out... Cut out the sections and pritt stick to the walnut sheet (noting the direction of grain, so it runs along the piece) Cut out the sections carefully to shape and then steam the pritt stick'ed patterns off the wood by holding with plyers over a boiling kettle for a few seconds. Trial fit, sand and trial fit again until it's ready. Here are a few pictures of that process and the results... Having glued these parts down with carpenters' glue the gaps were then filled in with the 1x5mm strip. Right... happy building to you all More soon. Rob
-
My order was less than £135 so it didn't qualify for customs tax... at least that's my understanding and I didn't get asked to pay any extra, where I have in the past on larger orders. Don't take my word for it tho. You can check out the regs here... https://www.gov.uk/goods-sent-from-abroad/tax-and-duty I guess if you got all those.blocks you may end up paying tax to import them. I did on the gun carriages I bought from Syren. As long as you factor it in then it isn't a nasty surprise
-
uploading pictures
robdurant replied to David56's topic in Using the MSW forum - **NO MODELING CONTENT IN THIS SUB-FORUM**
Great news. You're very welcome. -
Hi @BranPie I bought straight from Syren in the states. I've done that before and never had any problems. Rob
-
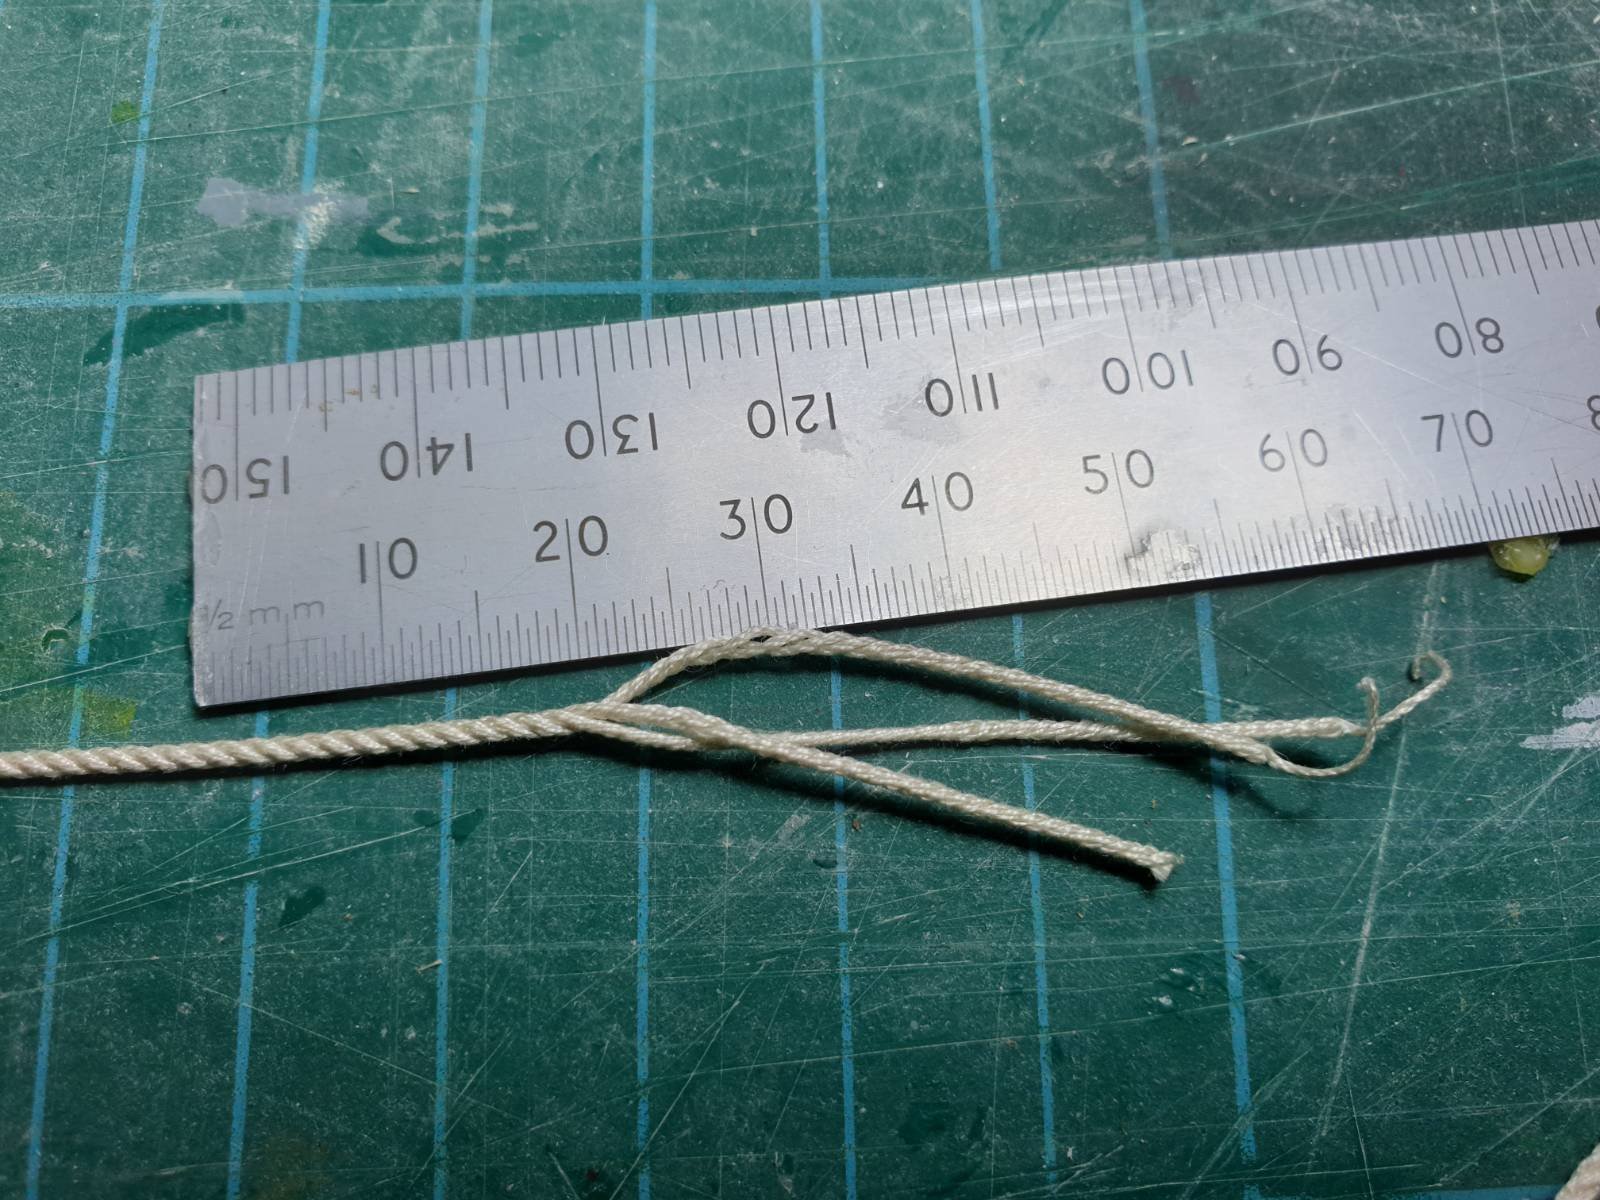
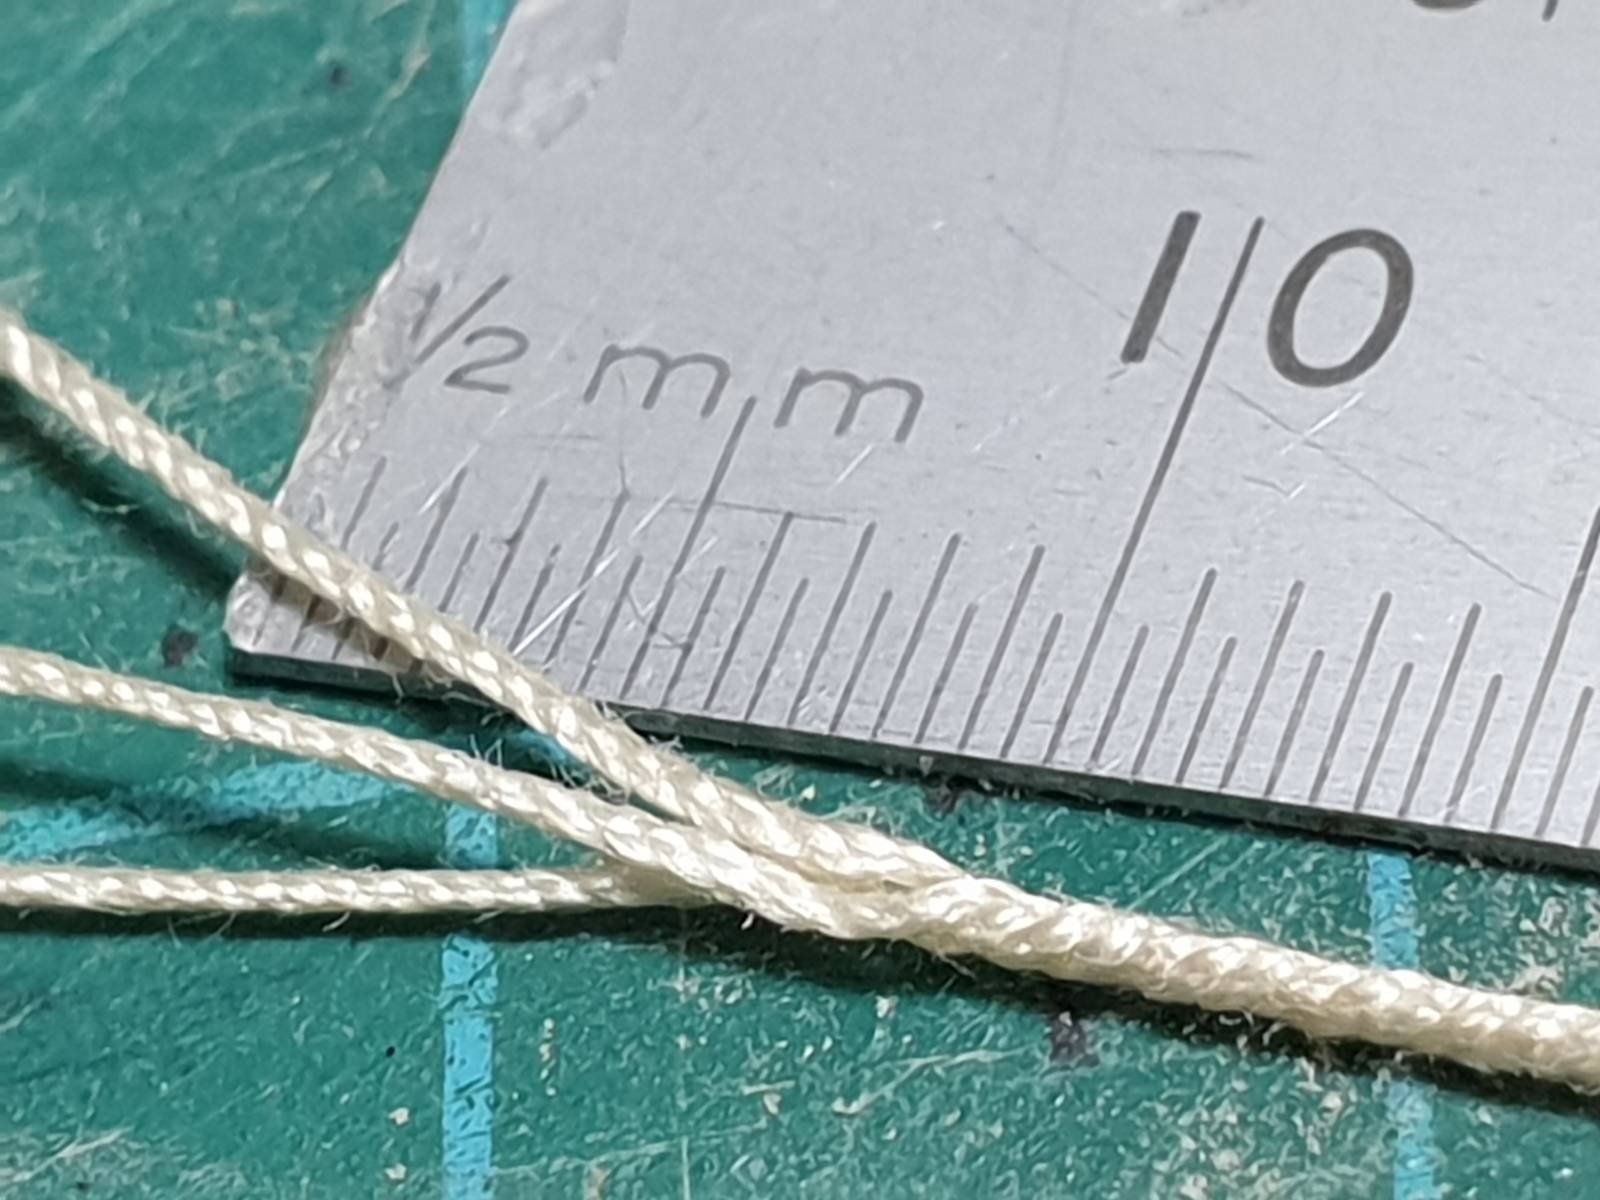
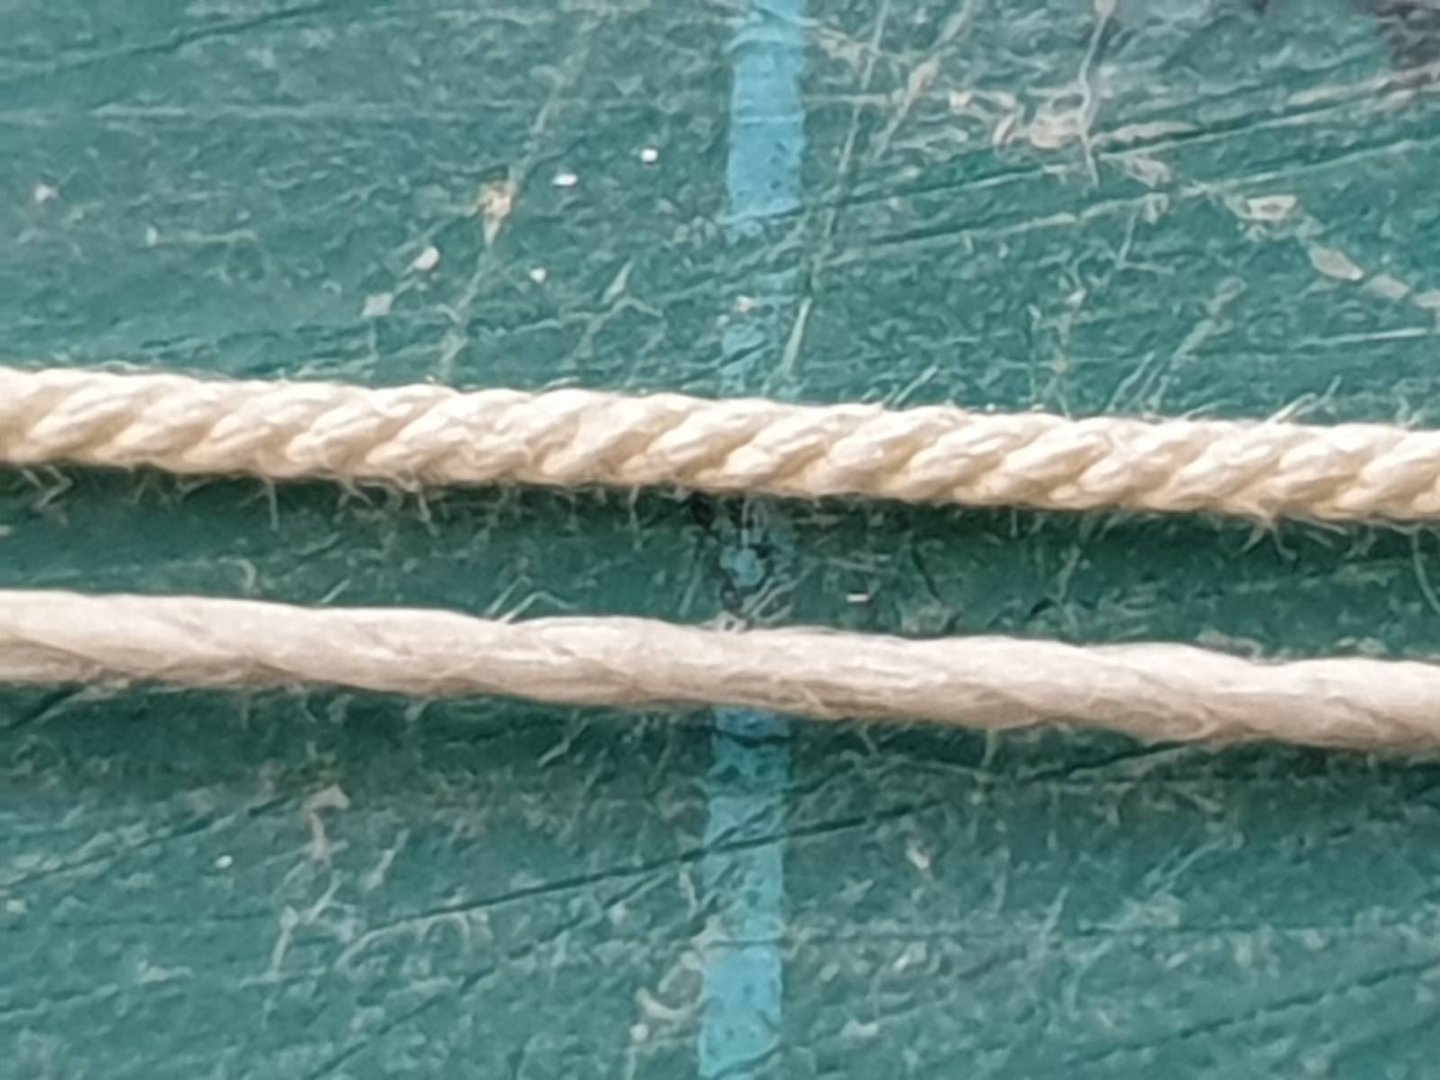
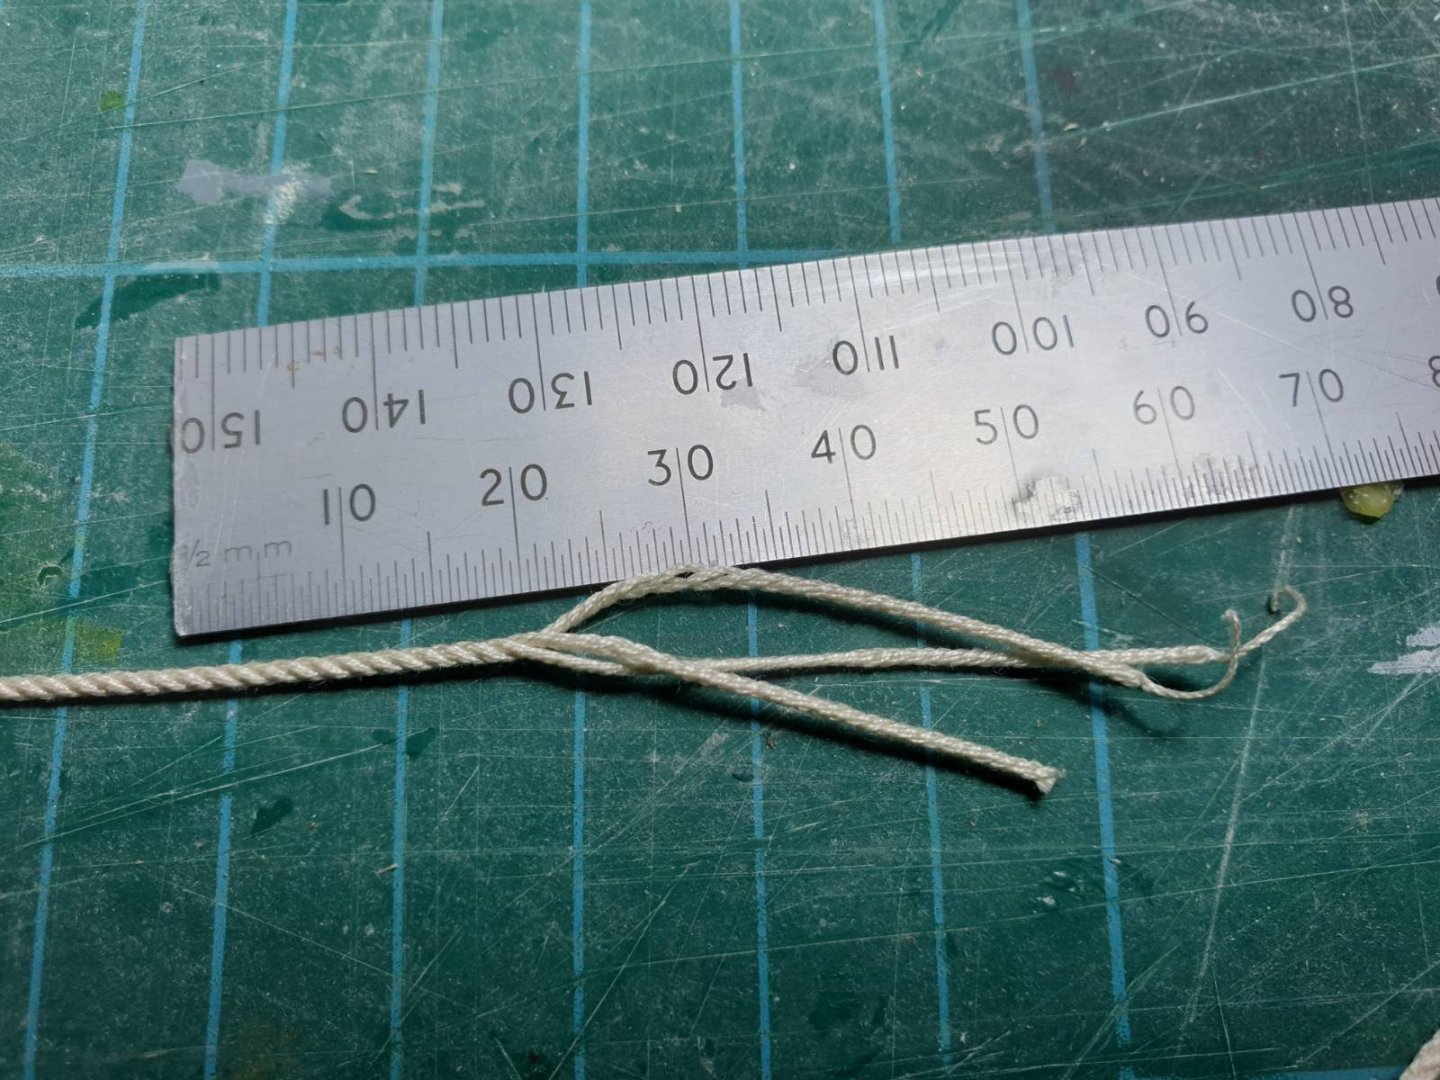
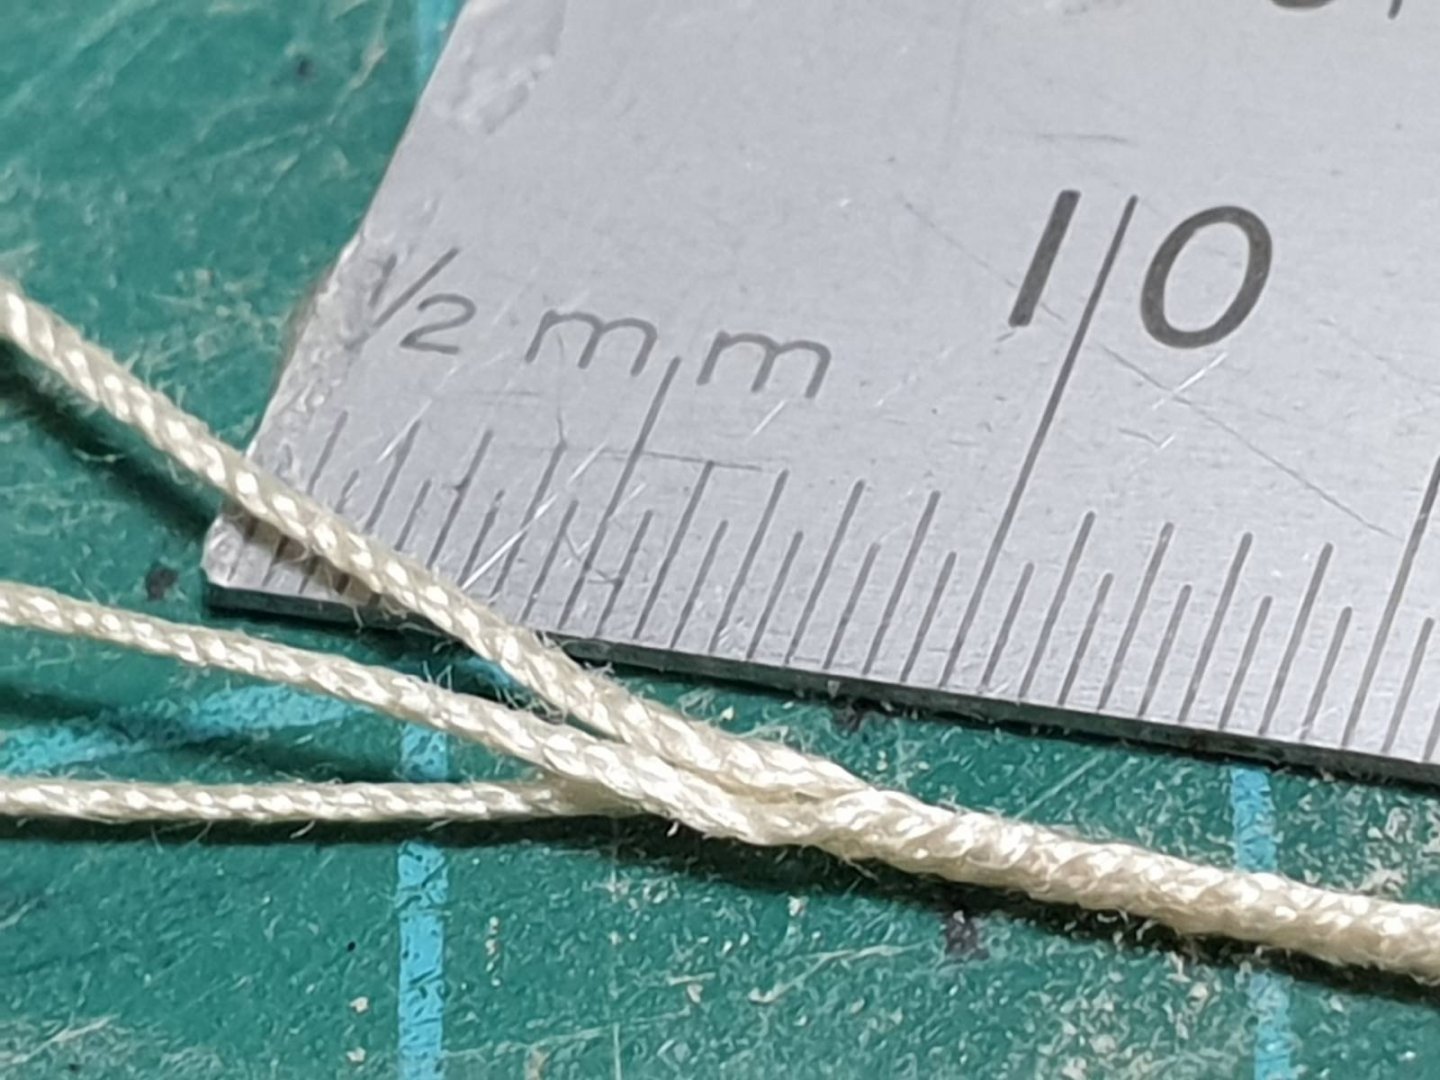
So I can't remember whether I mentioned I bought one of the "Rope Rocket" rope making machines from Syren Model Company. It arrived just over a week after I ordered it and I assembled it with a little trepidation. I'd heard other say that using it was really easy, but I wondered whether this was false humility... Well, it turns out not. I watched the videos Chuck has on youtube (just search chuck passaro rope rocket on youtube, and you'll find them), and followed the instructions. And here's the result... The top rope is one I made (0.72mm made of three single strands of DMC Cordonnet Ecru No. 20) - the very first rope I made!... and below is the shop-bought rope I've been using up to now - again labelled 0.75mm. So now that I've got a whole bunch of thread (I bought 20, 40, 50, 60, 80 and 100) and a little time, I'll be working out what makes up which... Here's one more photo of some of the rope I've made so far... Both with no. 20, the first three single strands, and the second, turned the other way with three triple strands. Making, respectively, 0.72mm and 1.5mm rope. So... kudos to Chuck for a brilliant, elegantly simple design and kit. This rope rocket really is that simple! My models will never have anything but my own rope on them from here on in. It's worth pointing out that these photos were taken under a very bright daylight bulb, and are nowhere near as shiny in real life. Take care and happy building. Rob
-
uploading pictures
robdurant replied to David56's topic in Using the MSW forum - **NO MODELING CONTENT IN THIS SUB-FORUM**
Hi - I'd suggest you watch the video linked on the first post at the link below... It both describes why the problem occurs, and if you want a solution, I've programmed an application to remove the problem. It's cost free and may be of help. -
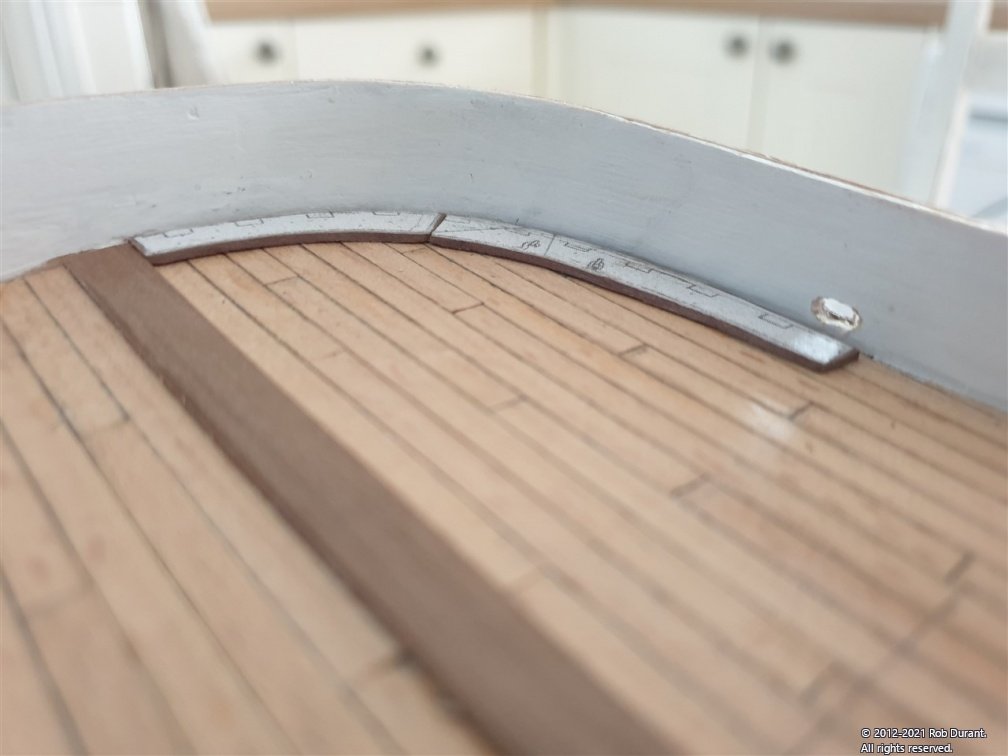
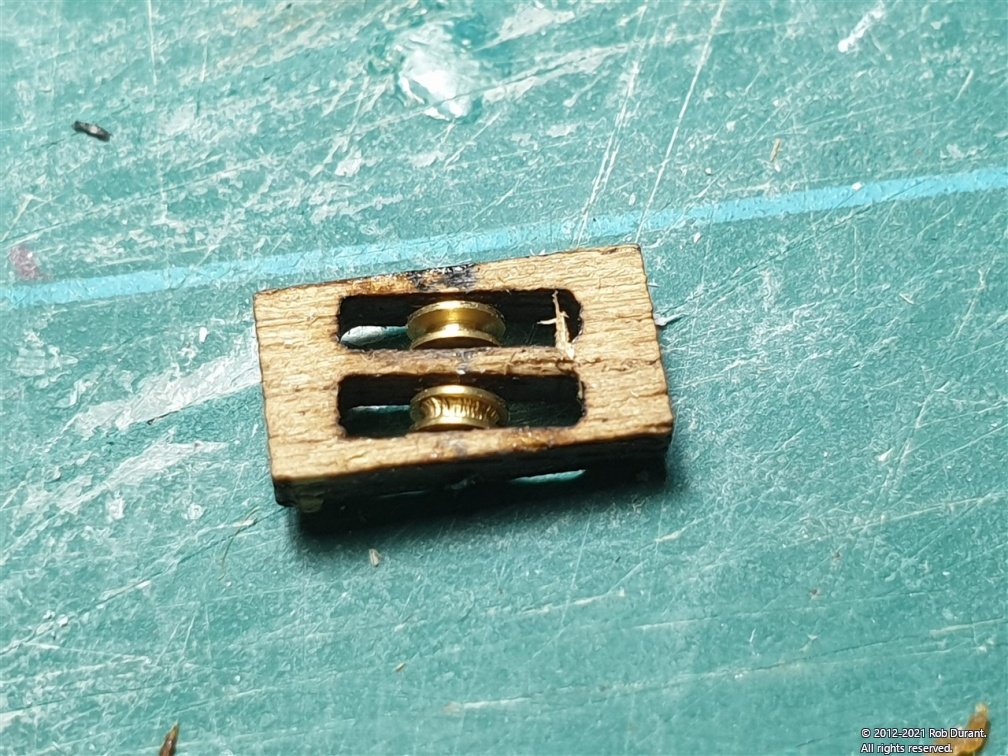
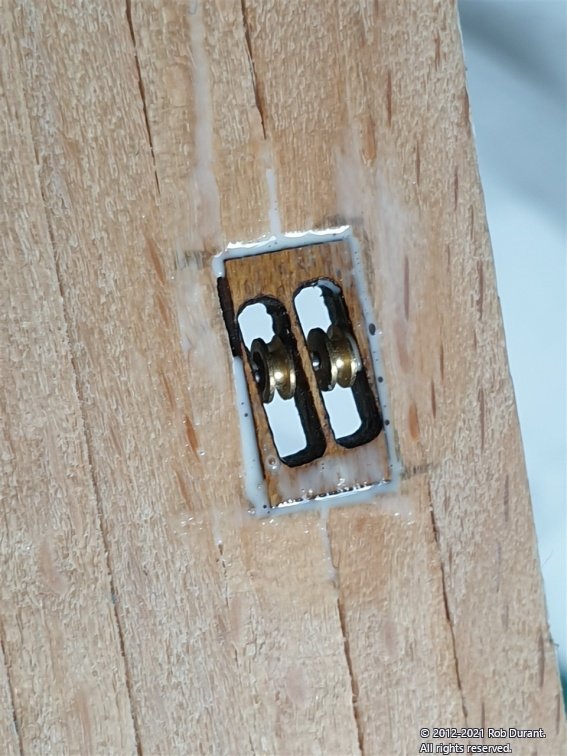
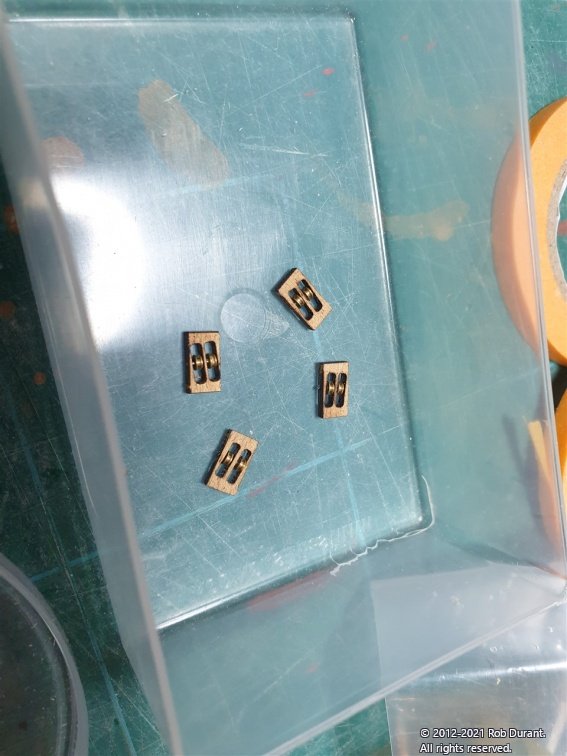
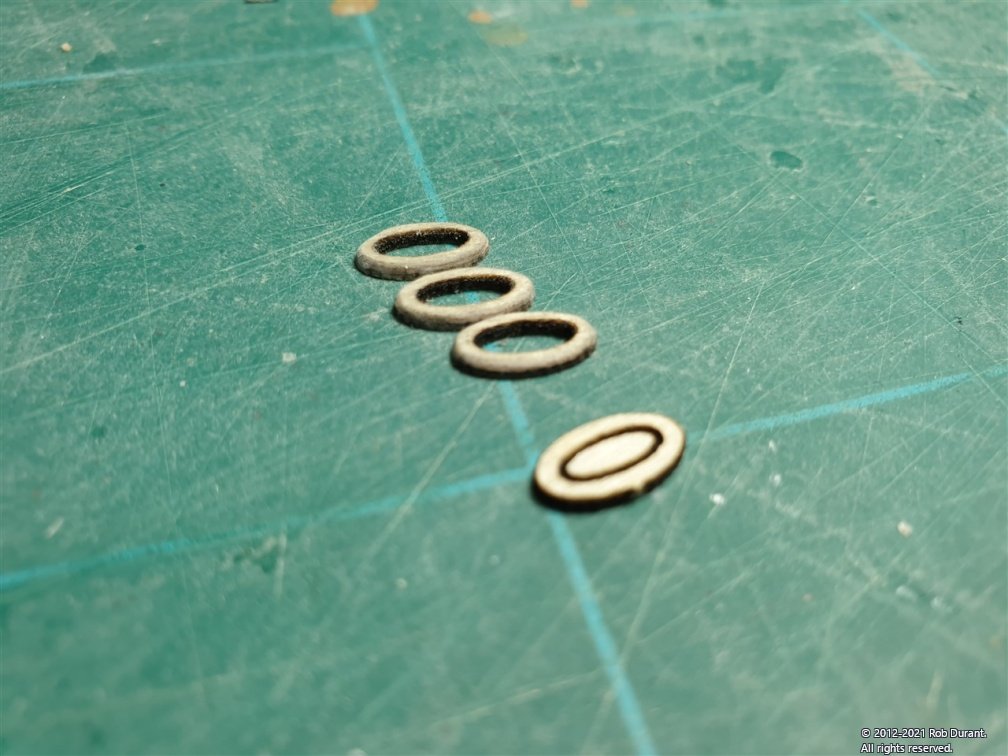
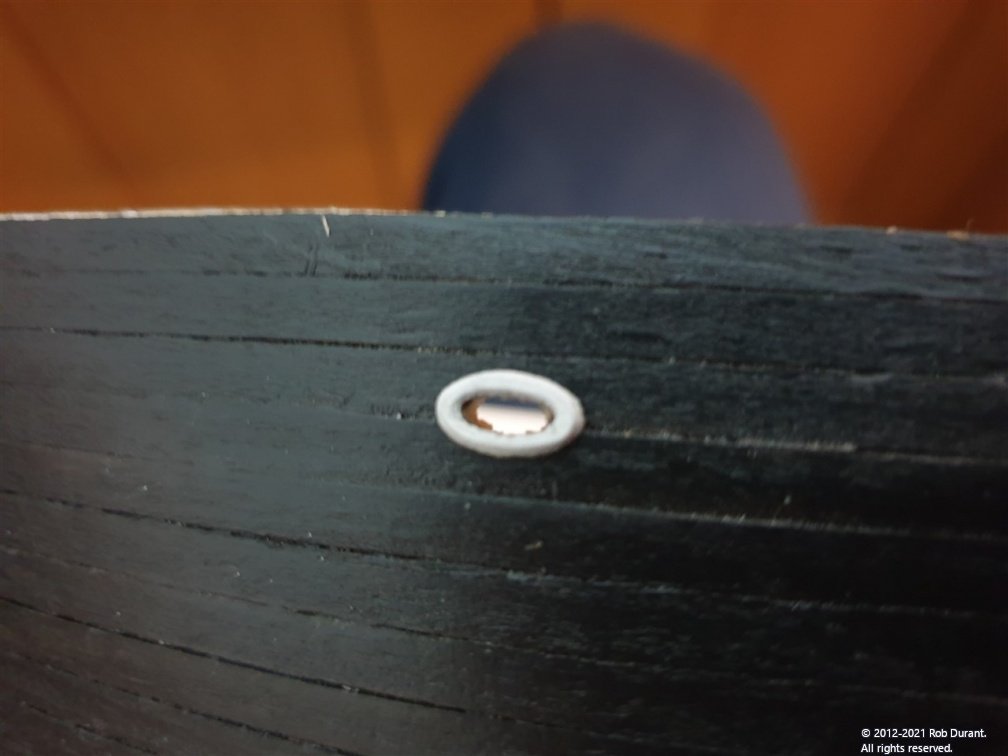
I've finished making holes in the hull for the time being, so I masked off the deck and gave the bulwarks a coat of admiralty paints matt white. Then I made up and mounted the double blocks in the bulwarks using the smaller sheaves provided in the kit and the 0.5mm wire also provided. The holes were hand drilled very carefully with a 0.6mm pin-vice. They're not perfect, but I was worried I'd destroy the parts using a power drill. The blocks were assembled and a drop of superglue applied at each end to secure the pin in place. The blocks were glued in place with carpenter's glue. They all slope so that the fore end is higher and the aft end lower. Once mounted I masked the sheaves themselves, and painted the bulwarks again. Having done this, I marked the waterline, masked it, and painted the hull above the waterline with Admiralty paints dull black. I started with a 50% water mix to act effectively as a mist coat, and then use a 80% paint / 20% water mix for a few coats after that. Then it was time to start opening up the holes for the surrounds, which were gently sanded to round them off, and then glued in place once the holes were opened up to match the insert. So far I've just done the rosettes on the port side for the mooring ropes. These photos are seriously close in, and a bit brutal and show that I have plenty of room to improve on this task! Hopefully I can clean these out a bit. I'm very pleased with the overall effect, though. Thanks as always for the likes, comments and encouragement. Rob
-
Yep, They look very similar to the Mantua ones on Cornwall Model Boat's site... https://www.cornwallmodelboats.co.uk/acatalog/35050-Ships-Wheel-Boxwood-20mm-35050.html#SID=63
-
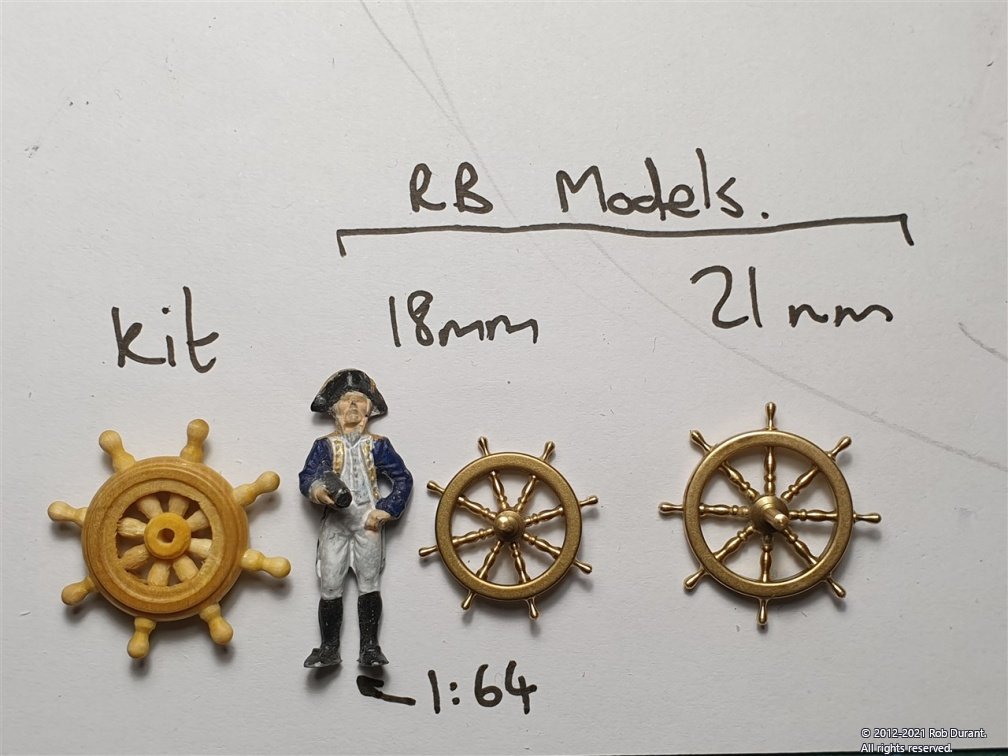
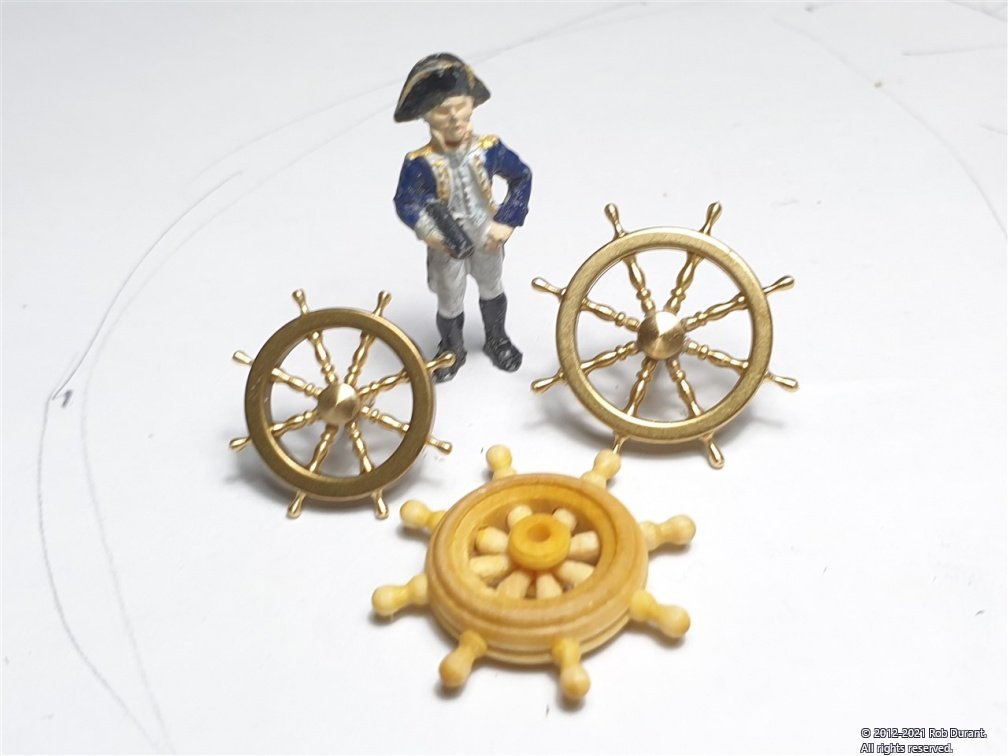
Finally, I've had a good look through the fittings. And the majority are really really good. There was one item I felt let the side down a little, and that was the ship's wheel. Thankfully this is easily solved. A quick look on Cornwall model boats, and £2.98, and I had an 18mm ship's wheel in brass winging its way to me. I wasn't quite sure which size I'd need, so I ordered the 21mm one too, which as it turns out feels a little large... that was £3.10... And here are the results next to a 1:64 figure... (bearing in mind Stefano is 1:63, so for someone my height, the difference would be 3cm!) As you can see, the kit wheel is both a little rough and ready (with an offset centre), but also grossly oversized for our poor captain's hands, being presumably designed for a much smaller scale model - perhaps 1:24... The RB models wheels are, to my eyes, far more fitting for the scale... In this shot, the RB models version are both front down as they have a rod extending from the back, which will make them really easy to mount when the time comes. The RB Models wheels come as a kit, but it's simple enough to put together, with a clever bit in the middle to put the superglue, once all the parts are in place... then it's all capped off with a boss. (21mm assembled, 18mm in parts, below) Finally, the wheels from the front.

-
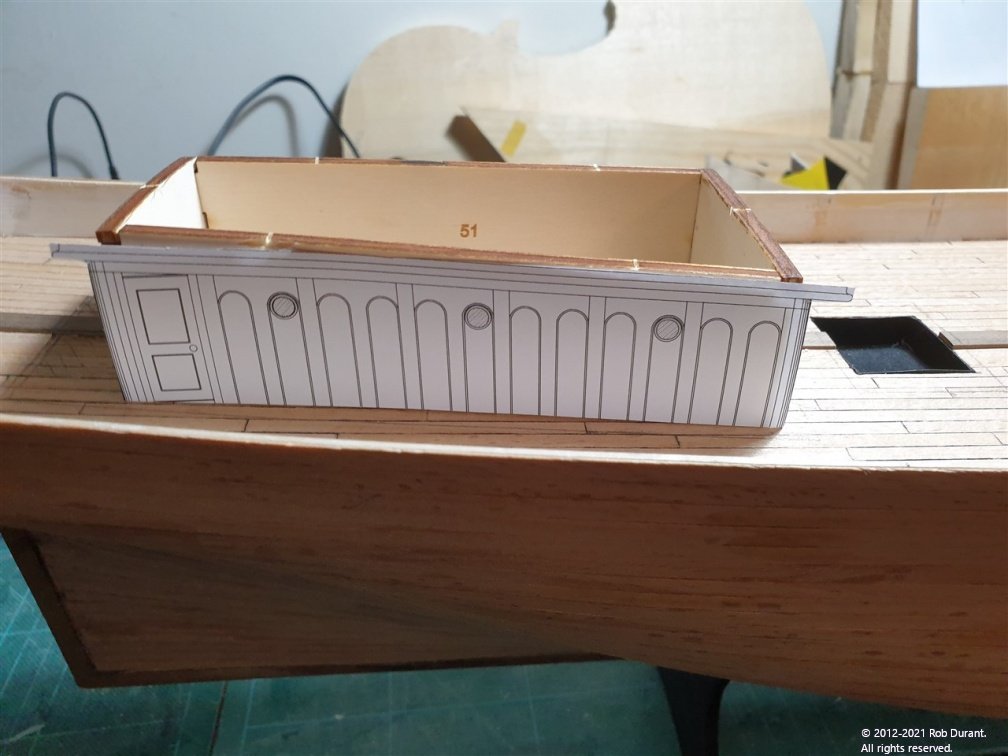
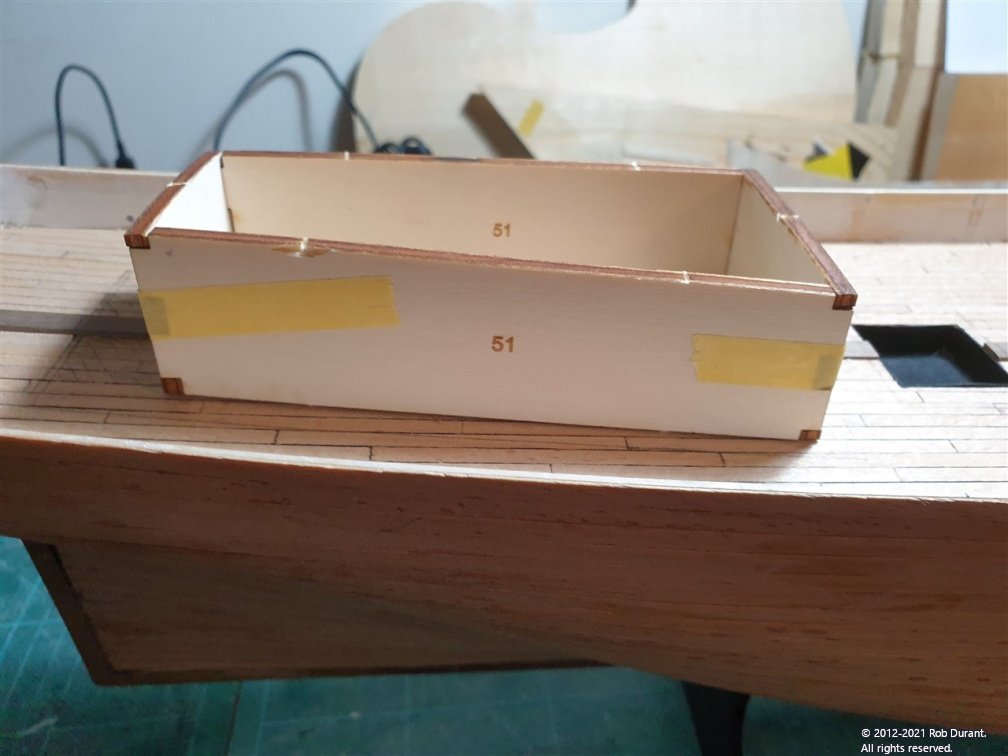
While I was working on all that, I also had my eyes on the superstructures, wondering how they would go together. So I quickly assembled the laser cut structural pieces. And I have to say they went together like a dream... If the superstructure ends feel like they won't fit, try them at the other ends... The lower edges matched up to the deck better than any kit I've built before. Really really nice! Part of my desire to put these together was because I wanted to start thinking about how these cabins would look. There's nothing at all wrong with the kit, but I wanted to try a little scratch building, and thought these would make good candidates... So... I did some measuring, and set to with CAD, and this is the result. It's based on a bunch of photos from various clippers / merchant barques, including Cutty Sark, and the James Craig in Sydney (a barque from a very similar era that is still sailing). So, I want to make the look something more like this, but also, I want the windows to be glazed, the door to be open, and some detailing to be done on the inside (e.g. a tiled floor etc...) We'll see how far I get with that. I definitely want the finish to be varnished walnut and white. My guess is that although the kit parts are brilliant, I'll probably end up remaking some of the structure. Watch this space!
-
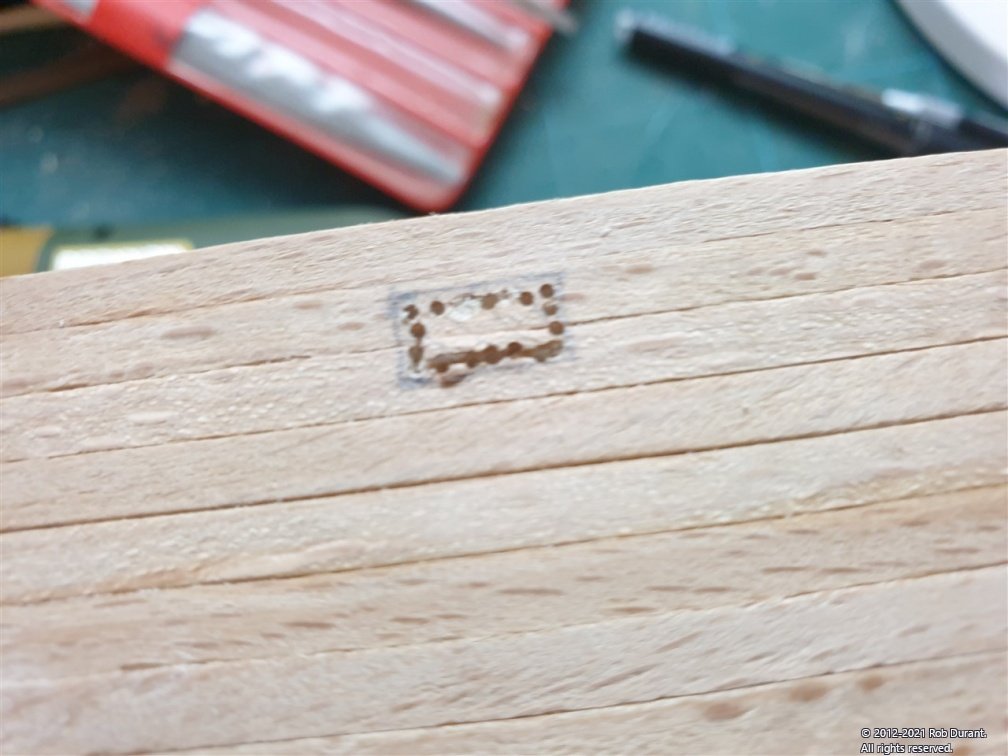
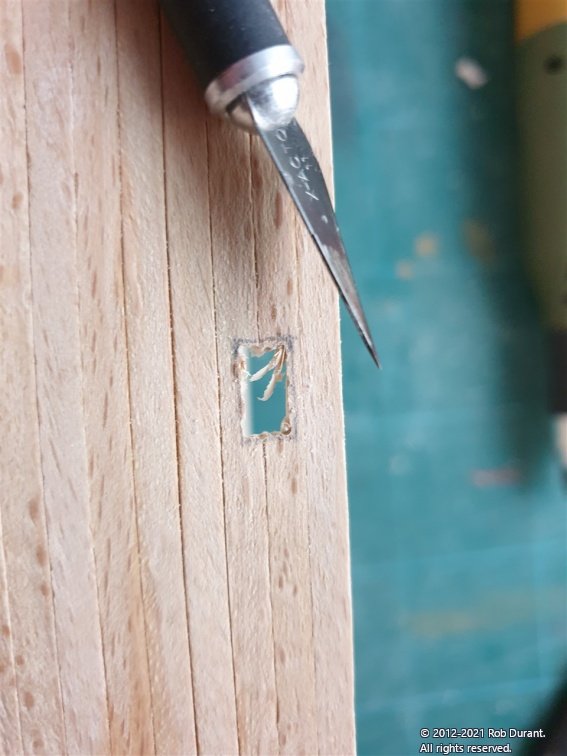
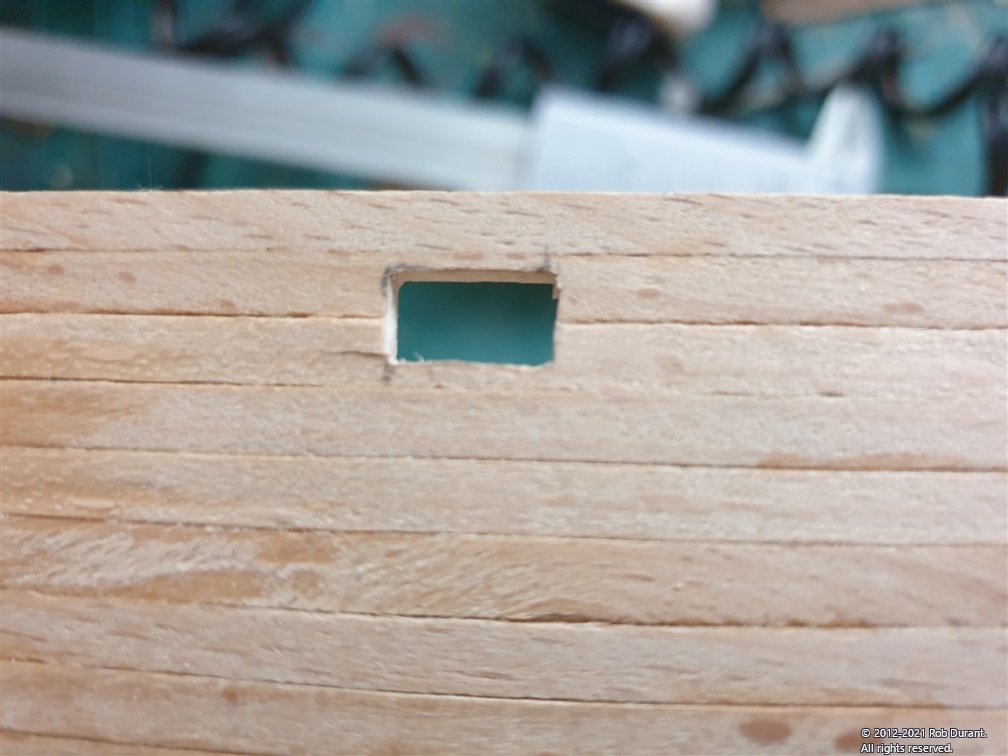
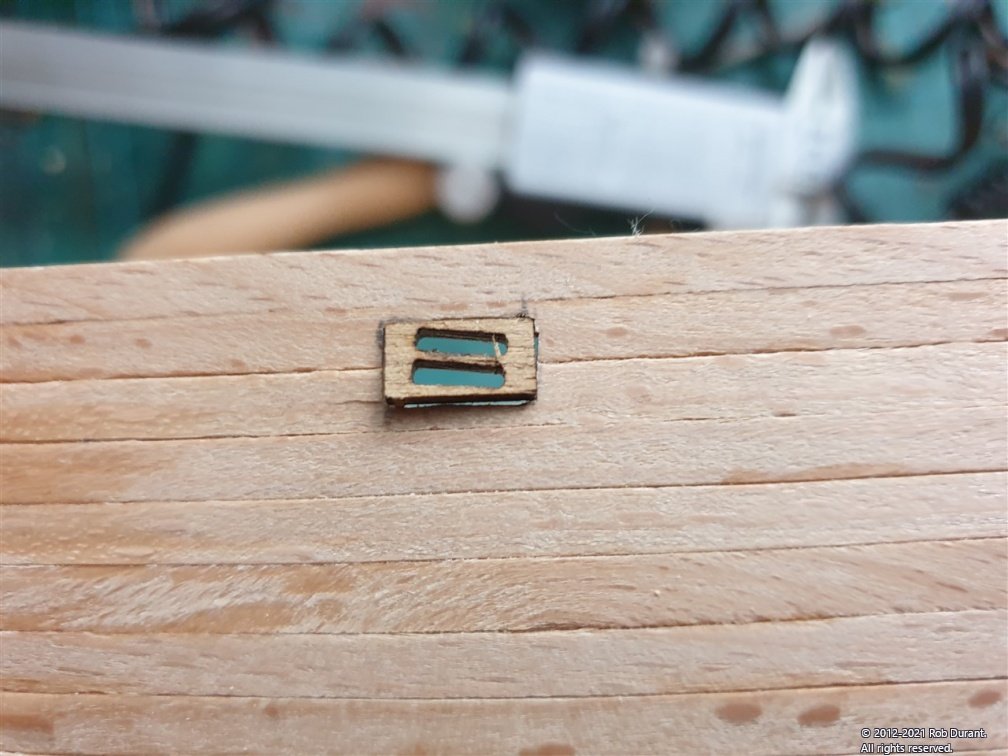
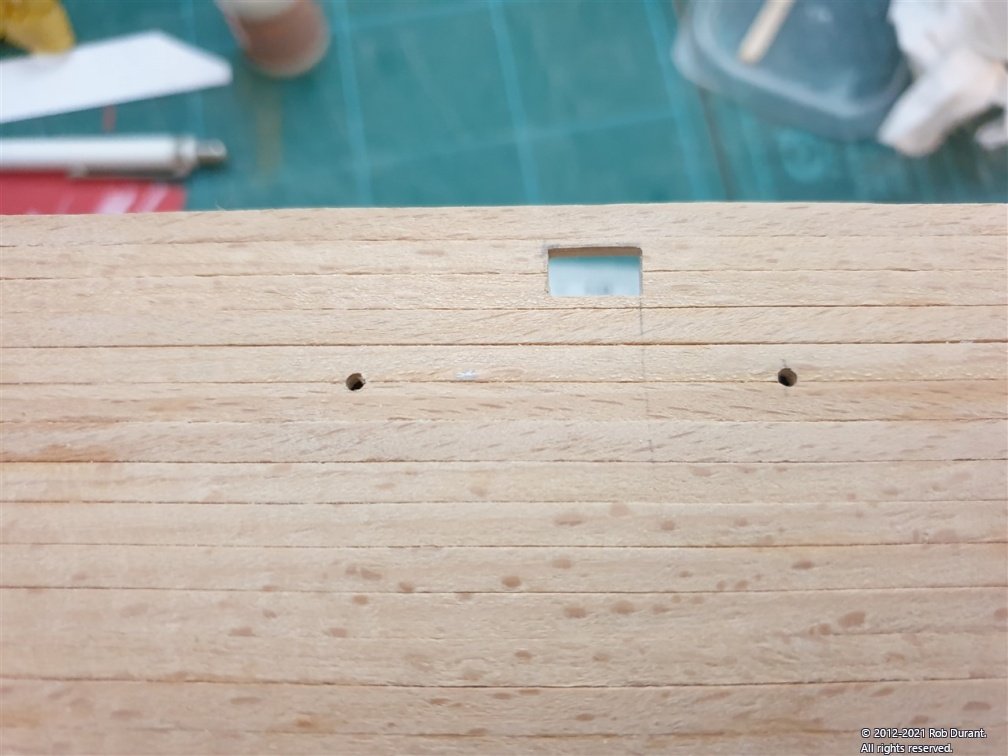
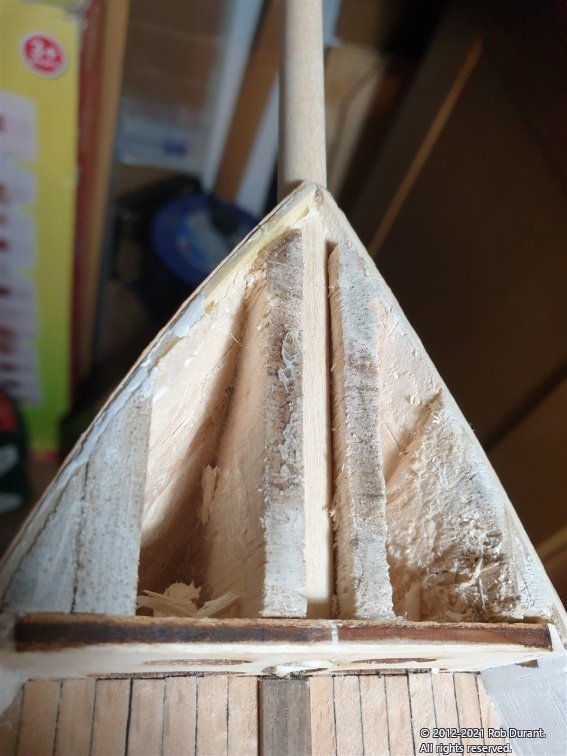
Hi all, Some more progress. I've been cutting out the holes in the hull, some of which I haven't opened up to their full size, so that I can do that once the surrounds are glued in place and I know precisely where they are and what size they need to be. The openings for the double blocks were marked onto the hull, chain-drilled round the edge with my proxxon mini drill and a 0.5mm drill bit, and then cut out carefully with a sharp xacto #11. As I trimmed the wood, I checked the size against the blocks with a set of digital calipers. And finally, the block was checked. These blocks are very finely cut, and I haven't broken one, but I can imagine they're pretty fragile, so you want them to be a gentle push fit, not to be forced into place. Before I glue them in, I'll need to drill down through them to fit in the sheaves. I've been putting that off... but I'll summon the courage at some point. Freeports were also drilled (with their centres 21mm below the top of the hull), along with openings for the hawse ropes... these are the holes that mooring ropes go through... When the instructions mention bitts, don't think of the large wooden frames that go on Napoleonic frigates... think of the metal uprights with a cross over that you get on modern ships... (it's all on the plans, but it took me a few seconds to switch era!) It's worth double checking these measurements, because if you get it wrong and drill too near the top of the bulwark, you'll end up with a drill bit appearing through your nicely planked deck. I used some masking tape to make sure I had a smooth line, drilled them at 1mm, then opened them up to 2mm. These will have corresponding holes in the deck where the pipe to allow water off the deck begins. (This is where it ends) Anchor chain holes were also drilled. I've left these small so I can adjust the size later. I'm wondering whether to have a brass pipe through from the deck... we'll see. I remember doing that on my Deans destroyer, and it made for a nice look. Regardless, you need to chisel out the balsa block to make room for chains to come through the space. That space will also be needed for the stays that go from the bowsprit through the bow. Three on one side, and two on the other. These also need to be lined up so that they don't interfere with the decoration. It occurred to me that this decoration would be lined up according to where the bowsprit went, and so I opened up this hole at the same time. To stop the bow getting damaged, I temporarily fixed a scrap of plywood onto the bow to take some of the strain. This was fixed to the balsa I left in place to support the bowsprit. The hole for the bowsprit would form a channel in this balsa on either side, and it would also provide a support for the middle of the focsle deck. Here's the scrap of ply, with the balsa hollowed out. The first hole drilled in the bow... And gradually opened up... A wood drill bit (not attached to a drill) was used to make an even channel through the balsa... Care was required to make sure it did not run through and scratch the deck... (especially the king plank that runs down the middle of the deck) Once through, and trial fitted, it proved to be very sturdy. And so the scrap could be removed with gentle pressure... So, as it stands, I now have the reference points to work out where the decoration goes, and where the five holes for the bowsprit shrouds / stays(?) go. There's more to share, but I'll put it in another post Rob

-
Hi, Just tracked down this build, and you've made fantastic progress in such a short time. Those rows of guns look really neat and it looks like you're making short work of the rigging. Hope you don't mind if I pull up a chair for the rest of the journey Rob
-
That's a nice neat painting line you've got there between the black and the wood... I always have my heart in my mouth hoping I won't end up with my head in my hands doing those jobs! Supply's come on in leaps and bounds since I last checked in. Keep up the good work Rob
-
Hi @lraymo Really glad it's been a help! Let me know if you have any questions. Rob
-
She's coming along very nicely do keep posting. It's great to see your build coming together.
-
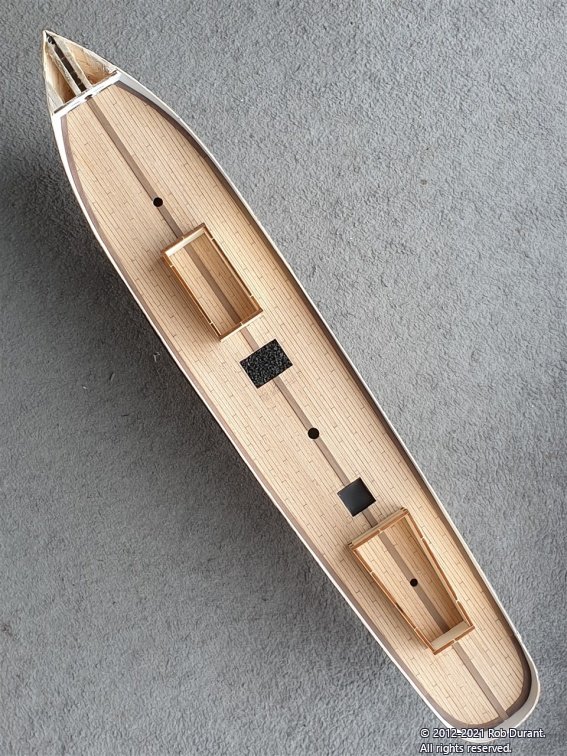
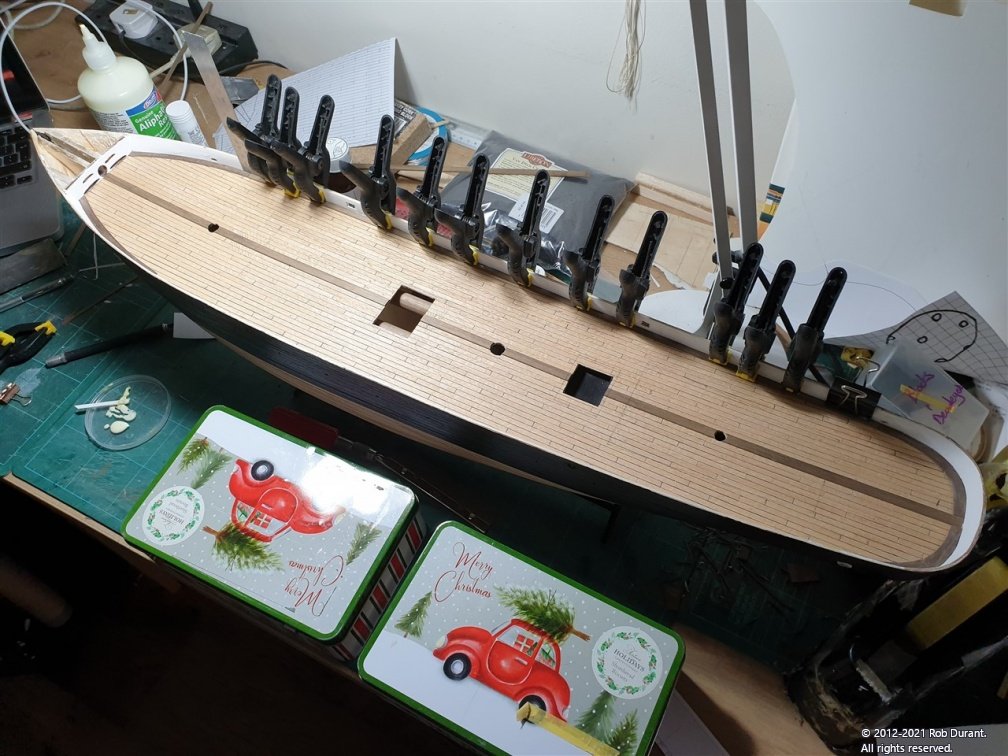
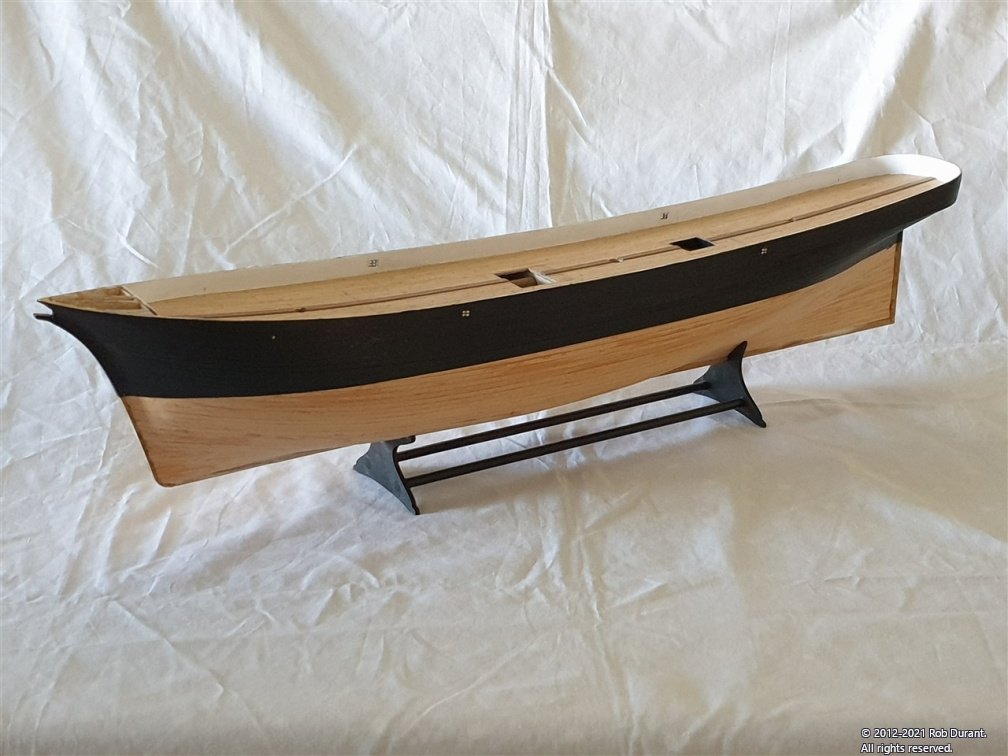
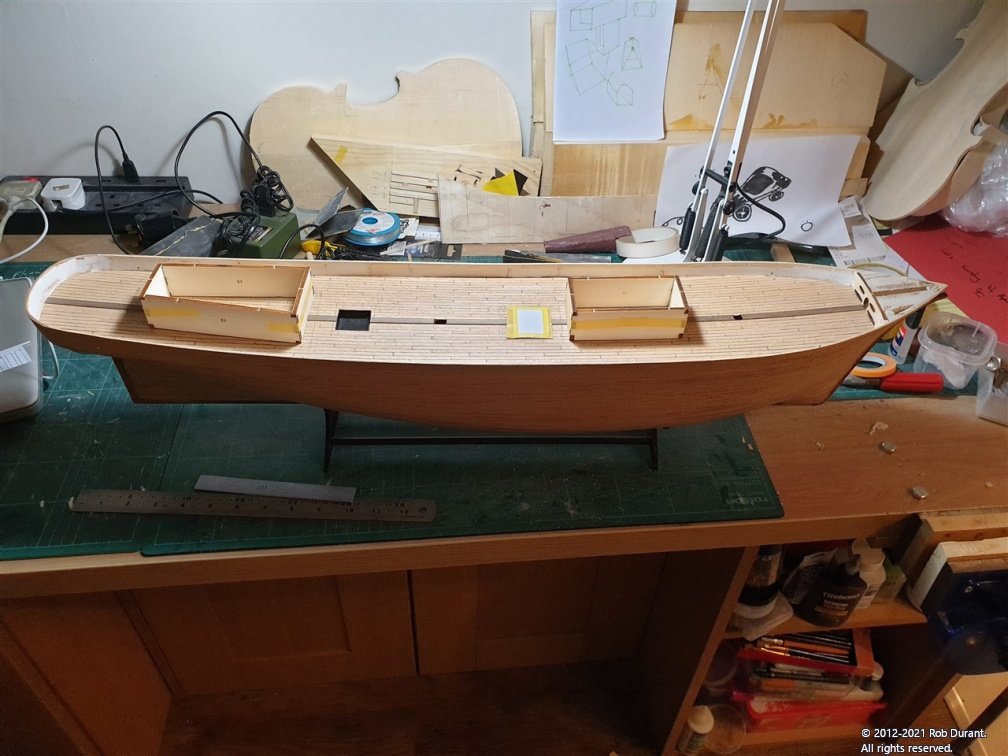
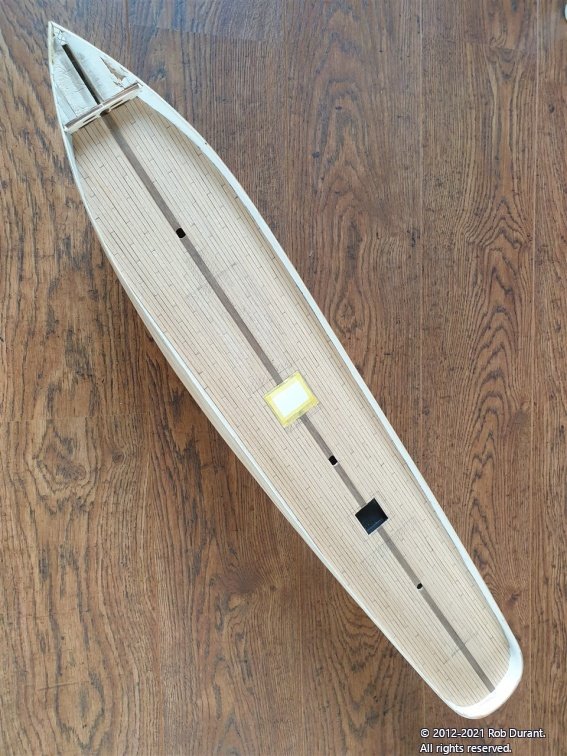
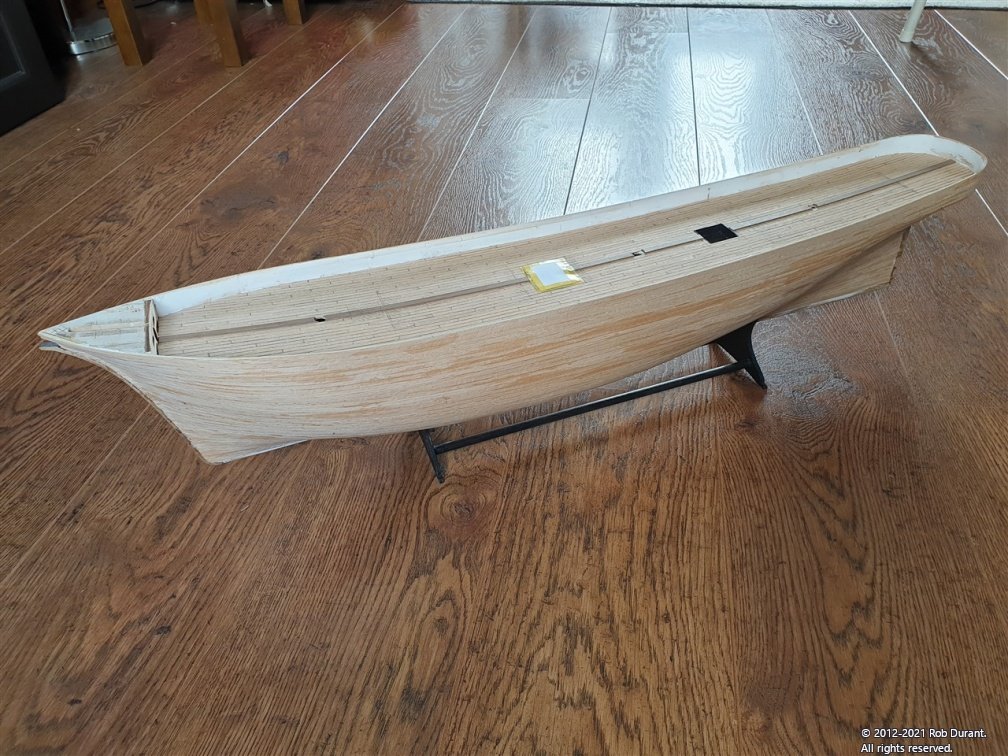
Okay - a milestone to report I've finished planking the deck. I also took the opportunity to get a photo with one of my other models in shot as a comparison. HM Cutter Sherborne (a Caldercraft kit). The paper cover is to stop the coal getting lots of dust on it from the build. I believe the next step is to start making the holes in the side of the hull for the scuppers and fairleads, etc... Happy building, and thanks to all who take an interest in the journey. Rob
-
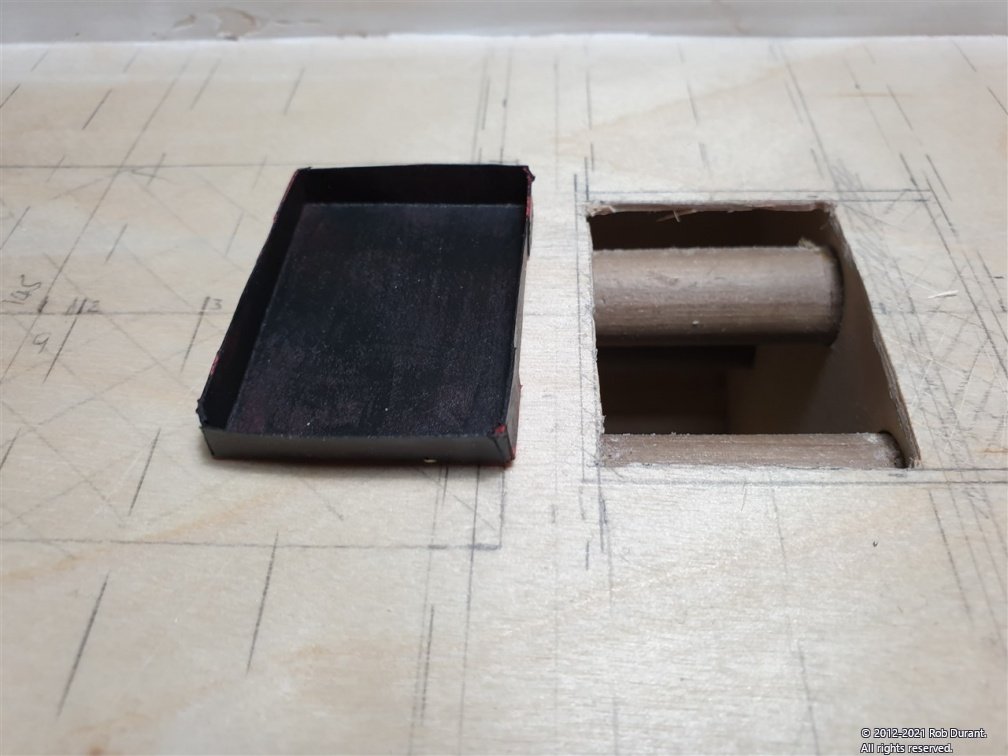
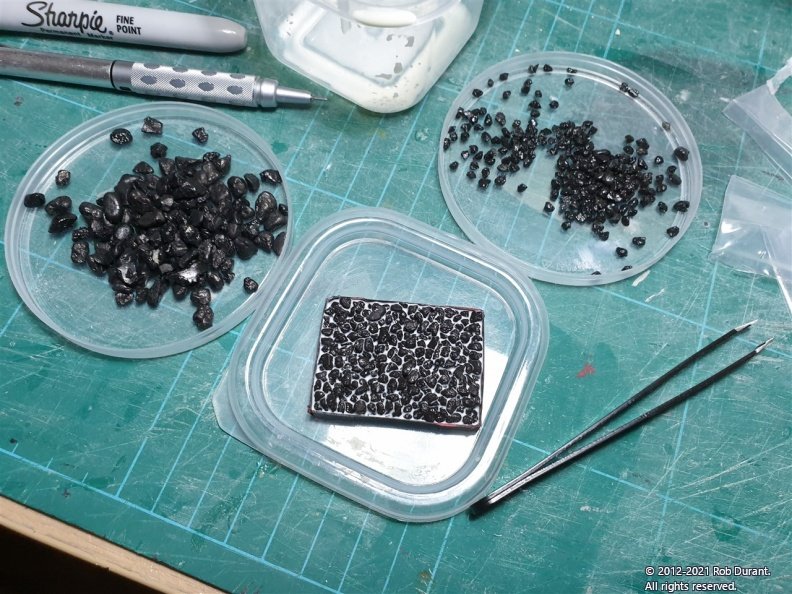
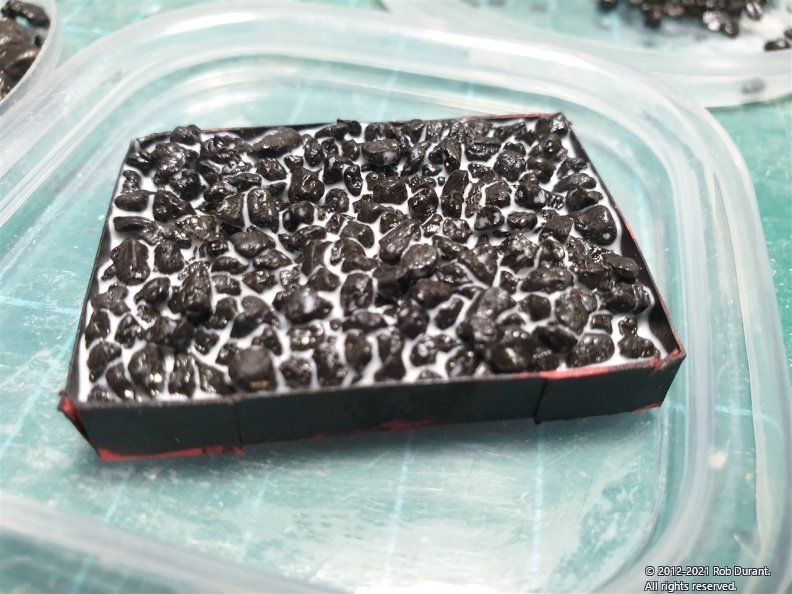
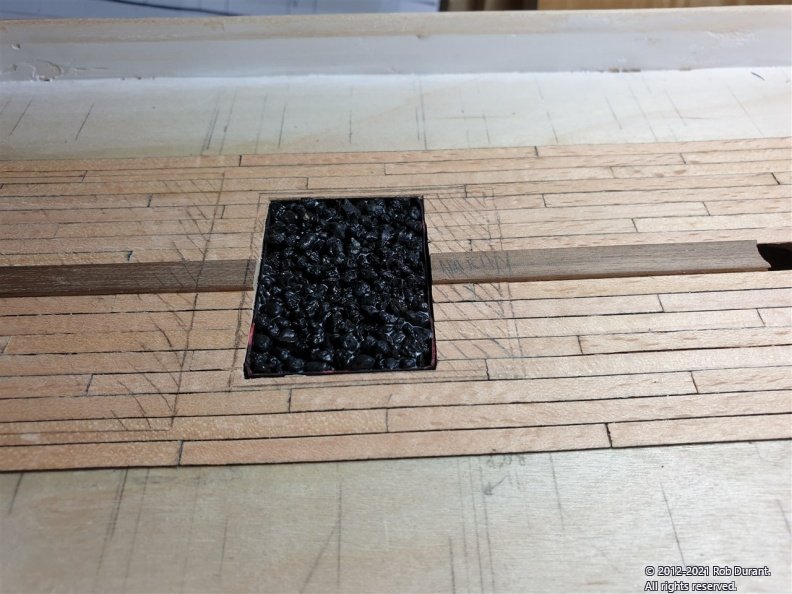
Thanks Eamonn. And thank you to everyone for your likes and encouragement. As always, they spur me on. The plank chopper works well, but usage has shown that pine was the wrong wood to select for the base. It's got pretty mashed up now, and doesn't cut as cleanly as I'd like. I'm almost there, though. Plywood would work much better I think. The model railway coal arrived, so I thought I'd have a go at filling the hatch insert. I used the smaller grade, and once it was packed into the holder, I poured watered down carpenter's glue into it. It made quite a mess, but I left it to dry overnight, sat on a plastic surface (so it didn't stick to it), and wiping the excess away, and it worked beautifully. Some pictures... The holder... Filled with coal... And the finished result... Once the coaming is in place, and a few of the covers left off, it should look really smart. Finally, a picture of the planking so far... The waterways will cover the edges here, but I'm enjoying trying to get a nice neat edge anyway. Happy building Rob