HOLIDAY DONATION DRIVE - SUPPORT MSW - DO YOUR PART TO KEEP THIS GREAT FORUM GOING! (Only 51 donations so far out of 49,000 members - C'mon guys!)
×


Tankerman
-
Posts
45 -
Joined
-
Last visited
Content Type
Profiles
Forums
Gallery
Events
Everything posted by Tankerman
-
 Kevin, if you refer to profile Plan No.4 you will see a purple line marked from stem to stern. This is the level of the top of the deck clamp upon which the deck beams rest. The deck beams are 6mm. deep and the deck planks are 1.5mm. giving a height of 7.5mm. That is the line marked on Plan No.6 to which you have referred and is at the correct height for the cannon at the gunport. The top horizontal timber you have added at the stern is the wing transom and the three below are filling transoms.The two vertical timbers each side that you have yet to add from the deadwood to the lower filling transom are the "vertical filling pieces". Chris
- 312 replies
-
- 3
-

-
- enterprise
- caf
- (and 1 more)
-
Sorry Kevin, I had just been corresponding on another web forum with a gentleman named Derek about a Pocher 1/8 scale model car I had built so had the name on my mind. Chris
- 312 replies
-
- 2
-
-
- enterprise
- caf
- (and 1 more)
-
Derek, try working from for'd and aft towards midship, that way you have space to see what you are doing. On the matter of terminology, the frames that you have assembled in the two jigs are known as the "hawse pieces" or "hawse timbers", the "cant frames" are the half frames nos.1-7 that you have assembled. Chris
- 312 replies
-
- 4
-
-
- enterprise
- caf
- (and 1 more)
-
I have found it easier to scrape the char off with a Swann Morton No.2 blade on each segment before glueing anything together. Even those frames that require bevelling get this treatment as the char does not then clog up the Proxxon sanding drums. Chris
- 312 replies
-
- 4
-
-
- enterprise
- caf
- (and 1 more)
-
Kevin, the frames where bevels are marked were built with futtocks placed squarely on top of each other. You already have it correct by placing the B futtocks face down on the template, add the A futtocks on top and when you lift the assembled frame from the template you have the bevel marks visible on both sides. I use the Proxxon Micromot power drill with sanding drums to form the bevels and stop just short of the engraving marks. When you finally remove the hull from the jig there is only minimal sanding then required to fair up all the frames.
- 312 replies
-
- 4
-
-
- enterprise
- caf
- (and 1 more)
-
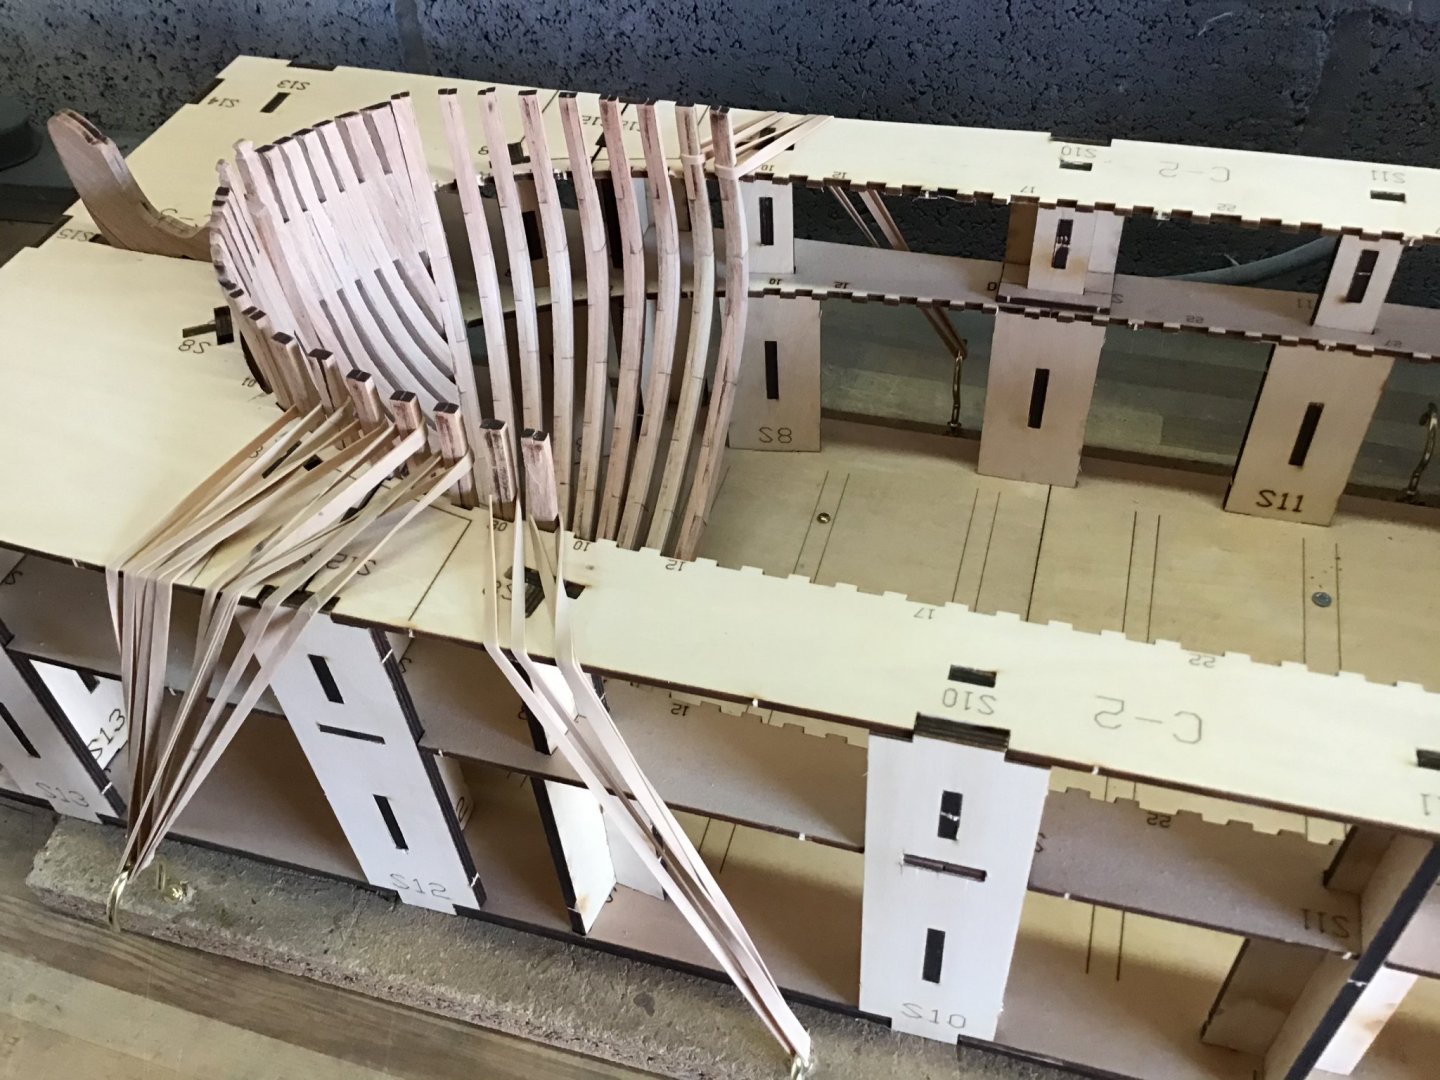
Kevin, I am a few stages ahead of you on the construction of this kit and have been hoping to find time to start a build log here soon. I am sorry to read that you are having problems with the building jig as I found that once I had sorted out what goes where from the instruction illustrations all went together as intended. The tabs and slots are a tight fit and work with a file is required to remove the char but as the jig will form the basis for an accurate hull nothing can be loose. I have studied your photos carefully and cannot see how things went wrong, the photo below shows my jig in the same area. I can assure you that you should not have any problems with the fit of parts as your construction of HMS Enterprize progresses. It is a superb kit but just requires a lot of concentration and pre-planning so do not be dis-heartened, you will enjoy it. I see you too, are in Somerset. PM me sometime and we could probably manage a "socially distanced" meet up. Chris
- 312 replies
-
- 16
-
-
- enterprise
- caf
- (and 1 more)
-
ancre Coureur by cafmodel - 1/48
Tankerman replied to cafmodel's topic in - Build logs for subjects built 1751 - 1800
Bob, I would guess that it is up to you whether to leave some planks off on either the port or starboard side of the hull. With all the frames in place the structural integrity of the hull is secure and you could even decide not to plank one side at all. That is how I interpret Tom's intentions. Chris -
kit review Kit Review - HMS ENTERPRIZE (1774) by CAF MODELS
Tankerman replied to kljang's topic in REVIEWS: Model kits
This is the answer I received from Tom at CAF Models when I asked the same question: The specifications of HMS enterprise are B and C B. C material: cherry and maple B. CWood carving: Boxwood B. CMetal parts: Brass B: window: Bovine bone 😄 window:Boxwood B has less wood color difference C is in stock, B needs to book (I need to select timber) the estimated processing time is 3-4 weeks I hope this helps, Chris -
As an alternative for shaping your waterway you could use brass unequal angle sections such as this with far less chance of sanding down the sides of your jig as you sand away: https://eileensemporium.com/index.php?option=com_hikashop&ctrl=category&task=listing&cid=1082&name=nickel-silver-1&Itemid=189 Chris
- 950 replies
-
- 2
-
-
- syren
- model shipways
- (and 1 more)
-
Before you give up, which would be a real shame why not try a method I have used in the past. Spray your copper plating with matt varnish with a drop of matt green paint added to it and it will tone everything down. It doesn't look too bad and certainly won't draw your attention the problem that only you can see.
-
ancre La Jacinthe 1823 by guraus - Scale 1:48
Tankerman replied to guraus's topic in - Build logs for subjects built 1801 - 1850
That is a truly inspirational model of a beautiful ship, I thoroughly enjoyed viewing all your photos. Chris -
I am just over two weeks into the construction of this model and your photographs are a total inspiration for me. Thank you. Chris
- 315 replies
-
- 2
-
-
- master korabel
- avos
- (and 1 more)
-
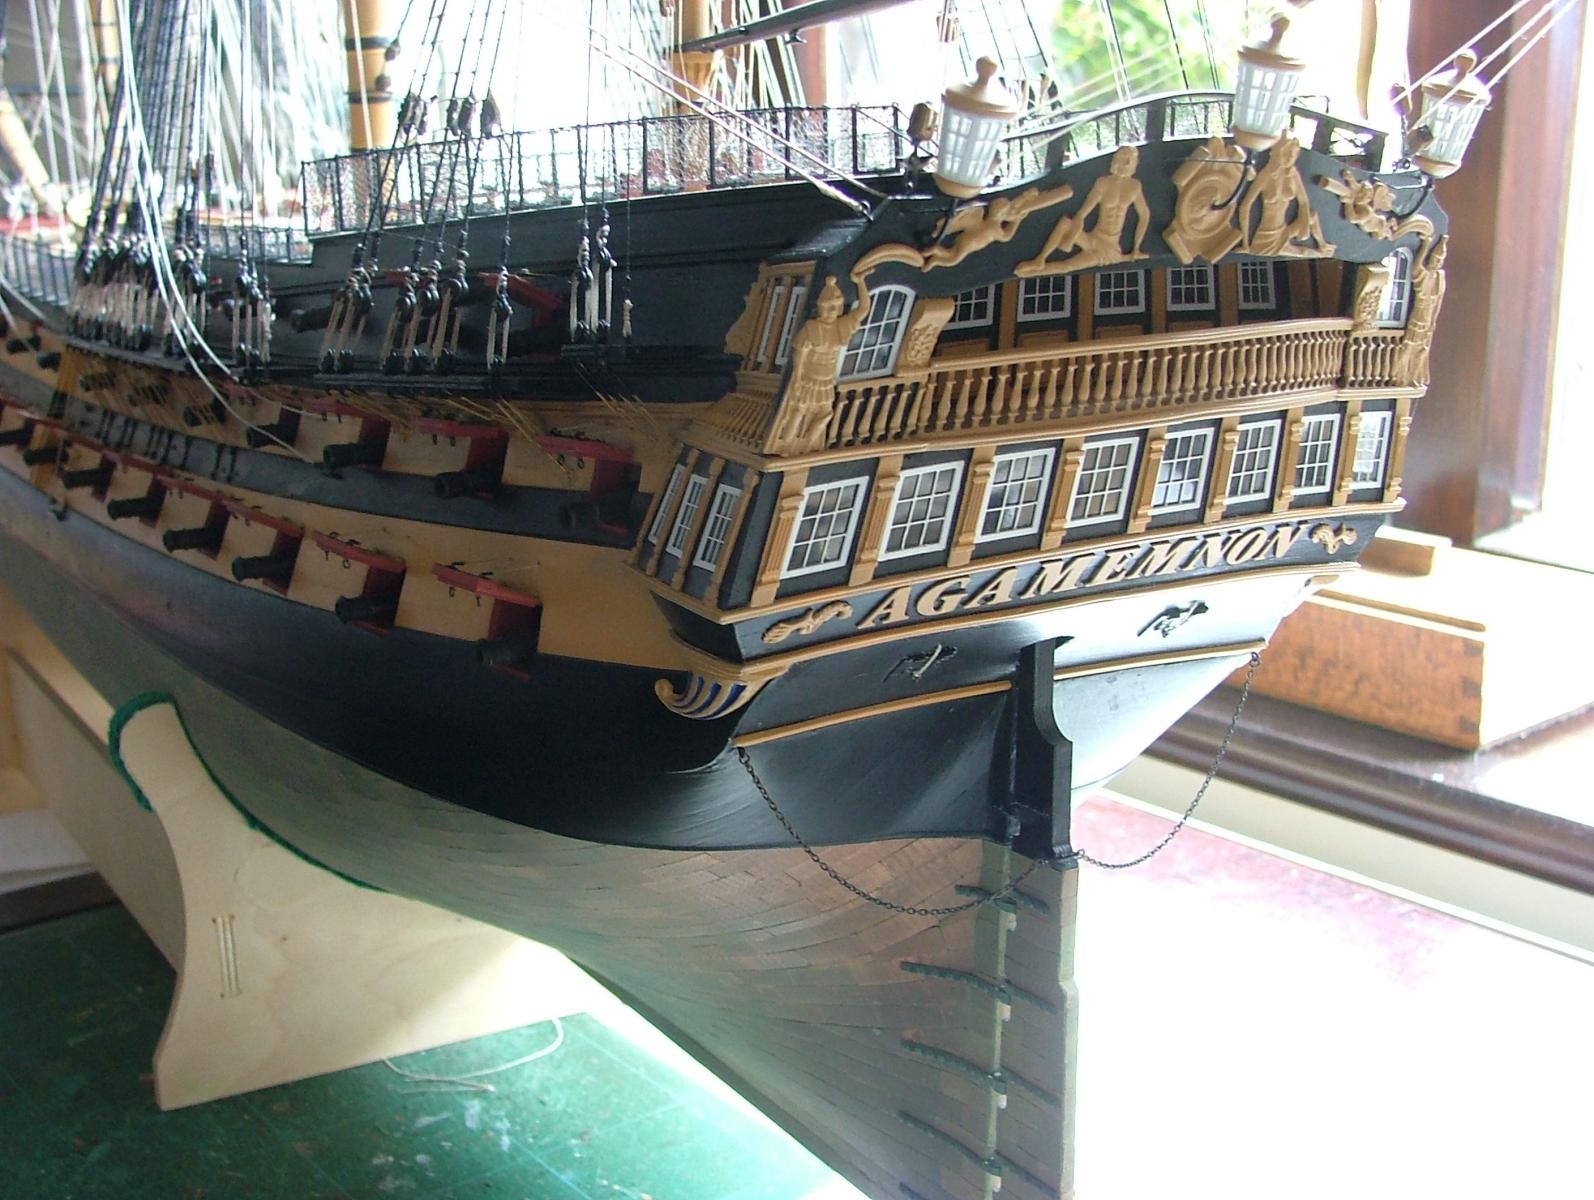
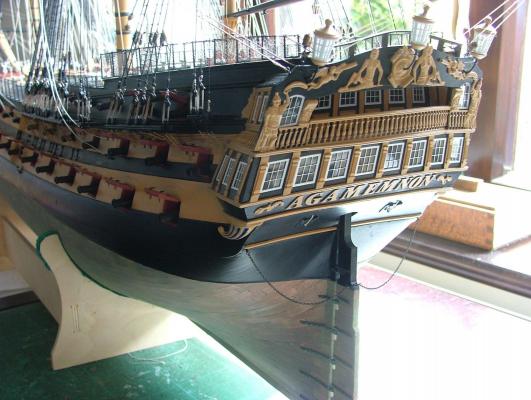
Hi Sjors, I have been following your build of this model with interest as I made the same kit some years ago and I am impressed with your work so far. I note that you you are having trouble with the stern so I thought you'd like to see a photo of my attempt at this area, I hope it helps you. Chris
- 1,616 replies
-
- 7
-
-
- caldercraft
- agamemnon
- (and 1 more)