scott larkins
-
Posts
489 -
Joined
-
Last visited
Content Type
Profiles
Forums
Gallery
Events
Everything posted by scott larkins
-
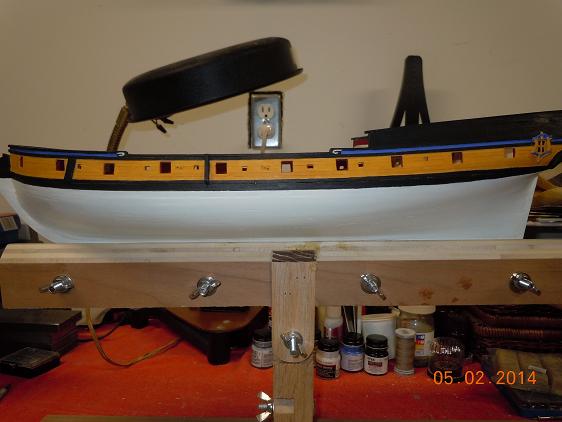
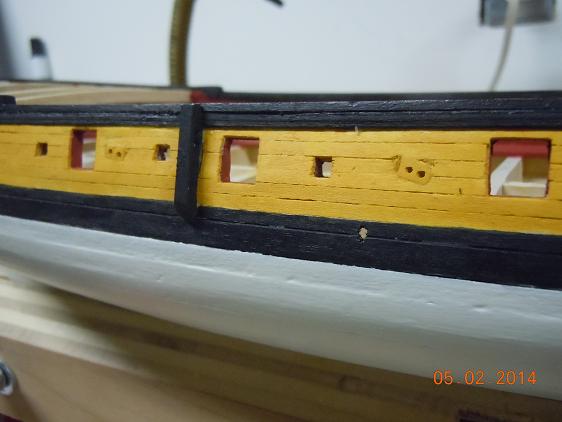
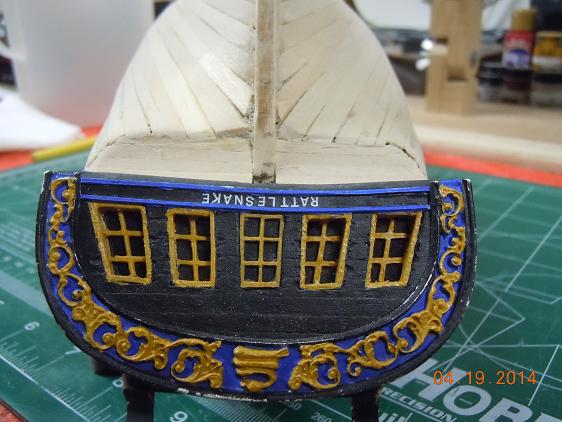
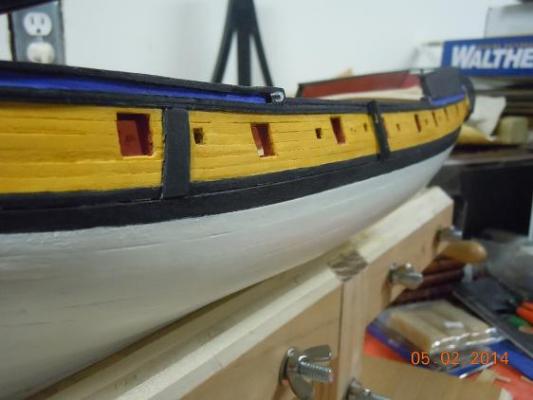
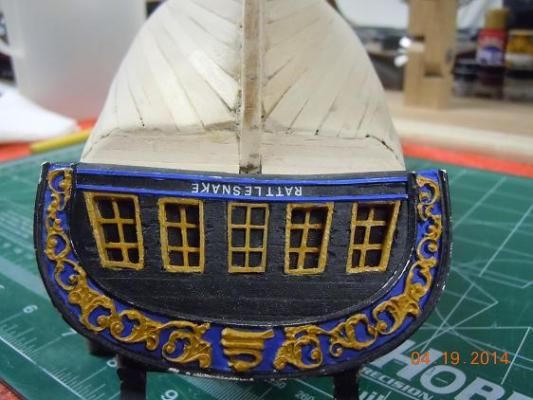
 Okay ship log, finally got the outside planking on, sanded and painted. I primed the bottom of the hull with a gray first. I think my gray was too dark, it took 5 coats of white to cover it up. A tad bit frustrating. The gray certainly showed the mistakes / beauty marks I made as well as any wood imperfections. I tried to use the best wood I could from the kit, but obviously not. The yellow ocra was watered down so it was more of a painting stain and not as sharp as the yellow ocra I put on the metal parts of the transom and side windows. Used 2 light coats to get the texture that way I wanted it. The black molding took quite a few swipes with the blade, too bad you can't really see the cuts in the wood in these shots. I was quite surprised to see the wood actually curl up as I ran the blades over it. Kind of hard with the naked eye too. Overall, I'm pretty pleased with it. Next comes the deck. Made sure to put all of the rope holes in the sides of the hull as well as the anchor bumper and chesstree now so the glue would not mess up the paint if I did this later.

- 264 replies
-
- 8
-

-
- rattlesnake
- model shipways
- (and 1 more)
-
Hey Sport, I used to coach baseball as well. Officially retired last year. I'll have my final hull paint job up in pics hopefully this weekend. All that is left is the yellow ocra stripe down the gun ports.
-
I primed the bottom portion of the hull too and it has taken a lot more paint than I had hoped to get it back to the desired white. But I can say the gray really brought out the wood imperfections and mistakes. I'm waiting for my white to dry over night. Hoping I'll be done with that color today. All I have left is the yellow ocra to do along the gun ports and I will be done. I'm doing a black to the poop deck sides, black molding with a stripe of blue between the molding lines, yellow ocra along the gun ports, a stripe of black at the transition between the narrow and wider planks and a white hull. Transome will be black with blue and yellow ocra decoration, as I've posted in my past log pics.
-
Coming along great I see. I like the grating there too.
-
That seems to have worked out well for you. Nice addition.
-
Brian, Sanded out nicely I see.
-
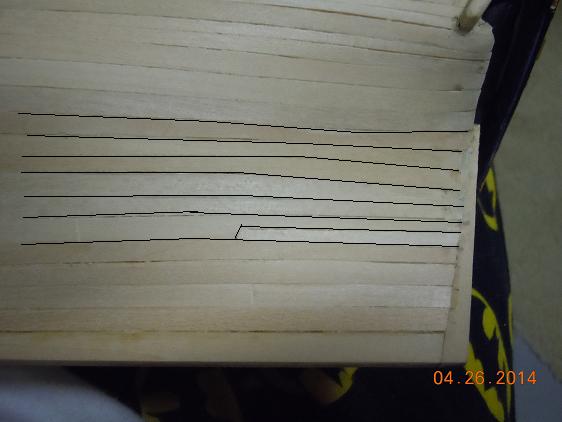
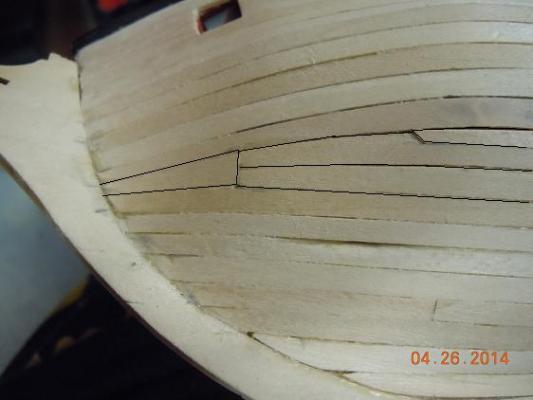
Brian, I see that you are running into, what I thought was only my problem, where the planks come together there at the stern and get very thin in width. I ended up thining down the two planks on either side of the one that was going to be less than 3/32 wide. I ended up going to 4/32 wide and the other ones were about 4/32 was well. I had to do a lot of measuring so as to keep my thinest plank no less than 3/32. Otherwise I had to put in a piece that was wider and have the two planks come to it at 3/32. Here are two pics of how I managed it. I put in the blackened lines for you to see. Or maybe the others will see this and tell you what not to do. LOL this is where the planks were getting too narrow and I had to do a little sanding so as not to cross over that 3/32 rule. Here is where I had two planks that would end up coming together and being too narrow so I put in another board for them to but up to. And I put in plank at the top there too. Hope these help one way or another.

-
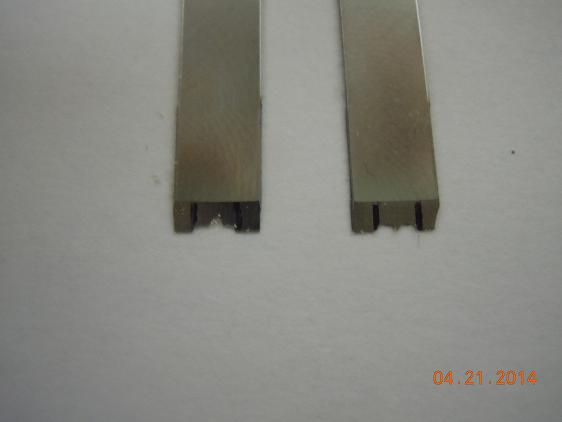
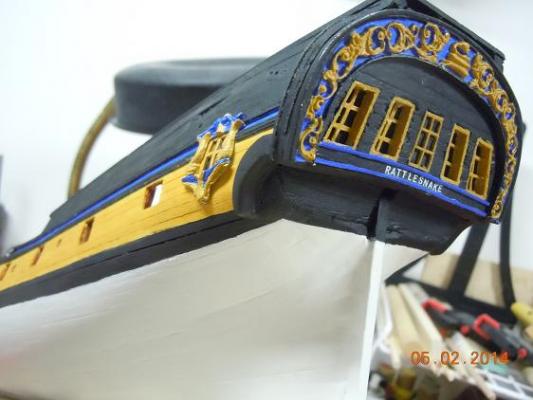
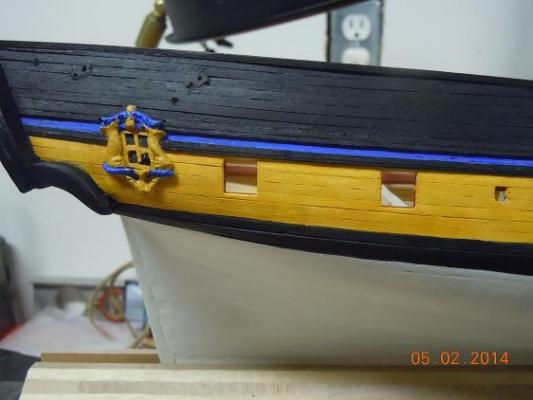
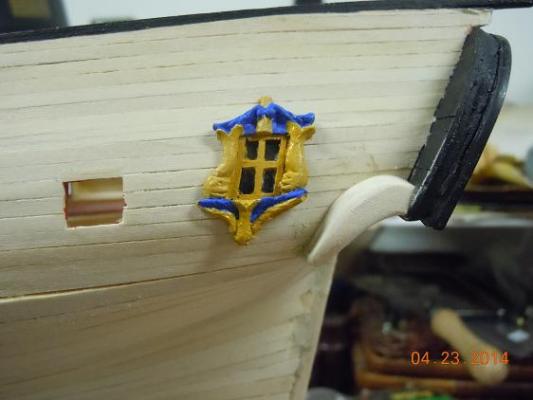
Dear build log, Molding has been cut and is waiting to be attached. Now I'm in the process of finishing the other outside hull items, put the molding on and then paint. Hey Martin, Wow, that really stinks. Good luck with that stuff dude. Here is the side captain's cabin window. Looks like two dolphins over the wings of a bird that is swooping down. Also got the decrative transom piece finished and attached. It looks fat here but it really isn't. It sweeps in towards the hull as it goes down and under.
- 264 replies
-
- 2
-
-
- rattlesnake
- model shipways
- (and 1 more)
-
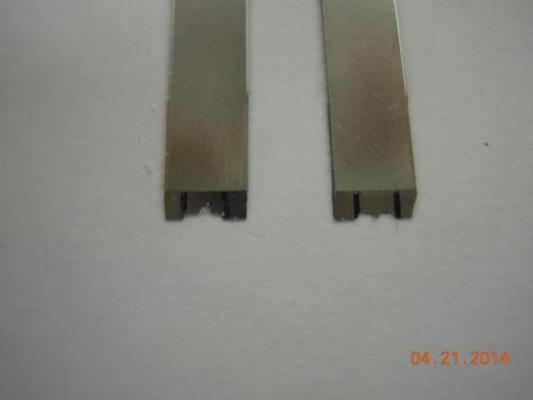
Thanks guys. Next ship is the Niagara and the stern is different in some respects. Here is my attempt to copy a molding idea for the outside of the ship. I think it was sport who came up with this. If not, will the real knife molding person please speak up so you can take full credit.
- 264 replies
-
- 1
-
-
- rattlesnake
- model shipways
- (and 1 more)
-
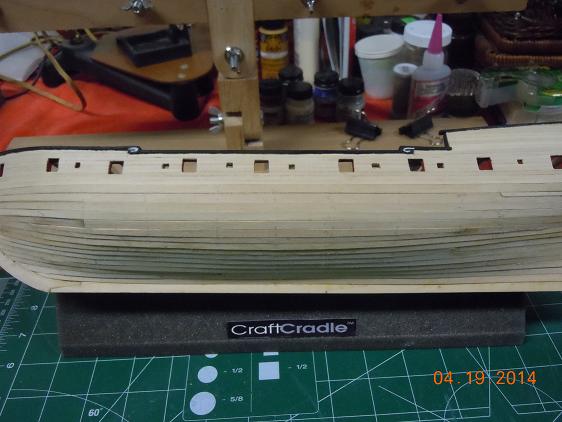
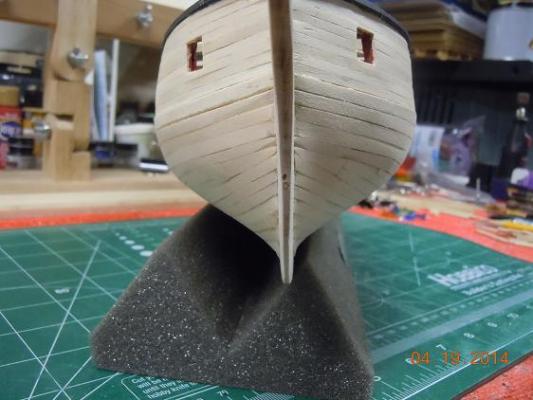
Finally finished with the planking. Think it took about a month to do. Not bad for my first real planking job but not a good as some of the ones I've seen on the site. Oh well, hopefully painting will hide some of my errors. Pics below. Don't really have any good tips for the people following along. As I've said, things went a little sideways in the planking process and I'm not sure why or where. I could guess though. Once I got everyting sanded thought it looks pretty good. Nothing sanded yet. Just happy to finally be done. Yeah, I had to do stealers, and the two different plank insertion methods listed in the instructions. Was hoping to avoid that but nope. Well, it was a good learning experience never the less. Took me about 1 hour to sand each side. Started out with 120 grit then moved onto 320 for that final smoothness Yeah, the transform / stern was not fun to glue down. Used my clamps alot with a small piece of wood to add some cushion between the wet soft wood and the clamp. Big help with this whole planking thing was wetting the wood in boiled water. Yeah, you can see some of the different insert I had to add and a few "beauty" marks. LOL Well, no denying she's my ship.


- 264 replies
-
- 5
-
-
- rattlesnake
- model shipways
- (and 1 more)
-
Wow, that stinks.
-
Yeah, we all lost early pics due to a site melt down. The ones who were not a far along as you had it easier in replacing those pics.
-
Wel done.
-
Great progress on this stuff.
-
Hay Mike. Not as well as I hoped as my final planking post will state some time soon. Had a few mistakes, or should I say, the planking hasn't followed the rules as well as I hoped. Think I can recover though. Time and injinuity will tell.
-
Zev!, you do still exist. Good luck with the move. Pack that ship well and keep it in your car, not the moving van. Look forward to getting you back.
-
What's happened to all of the other Rattlesnake people? Other than Brian that is. LOL
-
Yeah, the planking has been a new challenge, as others have said, and I've run into unexpected issues. No dought my fault, but I'm getting through them. Good thing I'm painting and not staining. I'd be SOL if I was. But since you have done some things I have not yet, I will be reviewing your log as well.
-
Brian, Nope, not there yet but thanks for the heads up. I'll make sure to triple measure and cut once. I'm still on the planking. I've got 5 more planks to put on, then sanding all of those lower planks, cutting and attaching the outside molding and then painting. Been going slow lately due to the warmer weather and getting outside to clean things up in the yard. Keep up the good work.
-
Coming along great Brian.
-
For all of your problems you certainly seemed to recover well. This small build turned out really good and is a nice compliment to the wonderful ship you've built. I bow to your mastery.
-
Yeah, that's what makes this site so great. You can see what others have done that are ahead of you so you get an idea of what works. Yes, this model can be tricky, and I'm finding out from the planking below the wale line. As I'm getting closer to finishing I'm finding some things out that I had no idea were going to pop up. But the fun, or challenge, or anxiety, is trying to figure out how to fix things. I think I can get the planking done but I'm definetly going to have to work on a fix. But since this is my learning kit I'm hoping to get the skills I need and have better tuned for my Niagara kit that is waiting in the wings. Keep up the good work Brian.
-
Making great progress. Are you planning on painting the inside of the cannon and oar ports or leaving them natural?
-
This is turning out very well.
-
Nice work.