scott larkins
-
Posts
489 -
Joined
-
Last visited
Content Type
Profiles
Forums
Gallery
Events
Everything posted by scott larkins
-
 LOL, Nice job on the nuclear, H2O2 and He there, right up my job field. Never thought I see my work life brought into the ship building world. LOL
 -
Kenny, also keep in mind that you are going to have to thread the anchor rope through that area, so if these two pieces of wood are too thick you may have an issue there. Mine were a little thicker but not so thick as to block the anchor rope.
-
Yeah, I hear the difficulty in threading that line. Two pairs of tweezers and a flash light helped a little but not a bunch.
-
those are looking pretty good.
-
Dude, I so do not have that skill level. I'll have to come back and visit these pages again. I'm working on sanding down the yard arms to their propery dimensions at this time. As it seems you are working on a different portion of the ship, looks like I'll have to go digging for examples somewhere else. I so bow to your skills. Not worthy.... not worthy. LOL
- 974 replies
-
- 1
-

-
- rattlesnake
- mamoli
- (and 1 more)
-
Fillers are looking good. Make sure to use a piece of planking and mock fit that bow filler where it comes together with the rabbet line. If you don't sand that filler back far enough the planking at the bow won't fit into that rabbet line. If you sant it back too much you end up with a gap and end up filling it in with a bunch of puddy or glue. As for the stern filler, again, I suggest a mock fit. No lines up there by the transom but as you rock the plank back and forth you can get a good idea on how the flow of the filler block effects the planking and you can finish sanding it as necessary. Unless you've already thought of all of this and well..... never mind.
-
That is some serious bending of the plands there at the bow. Better you than me man. LOL
-
Thanks Martin. The truth will come when I try to tie in the shrouds. The little voice in the back of my head says something will go sidewasy. I'll keep my fingers crossed though. Good catch Pett, I had forgotten about those two points in my post. And the masts are all done. Starting to look like an old sailing ship now.
- 264 replies
-
- 5
-
-
- rattlesnake
- model shipways
- (and 1 more)
-
Larry, Good note to know about. I see where that would make things easier.
-
Neat trick but I'm still a little lost on exactly how you did that. Can you provide some closer pics of those lines. I'll be headed here probably in a week or two and I had a different idea on how to creat those lines.
- 974 replies
-
- 1
-
-
- rattlesnake
- mamoli
- (and 1 more)
-
Ken, If I understand your question correctly, the top of the wale line, lines up with bottom of the deck line. If you look at the plans that display the planking you can see how the two line up. Not the top of the deck planking, but the bottom, or in line with the bulkhead deck line. If anyone else thinks differently please chime in. Since this is my first build I am by no means an expert. And thanks Ken for the compliment. I think you just found the best thing about this site.
- 264 replies
-
- 1
-
-
- rattlesnake
- model shipways
- (and 1 more)
-
That seems to have worked out rather well for you. When I get to this step I'll have to keep it in mind. Seems like a clean alternative to framing before hand.
-
Ken, Interesting pic on the shadow sheet rock trick. Can you explain what one should be looking for in such a step?
-
Mog, No, no bunt blocks or lines on the back. The plans don't call for it and I don't see a need for them. The bunt blocks up front have a specific purpose.
-
The paint job came out really nice. This is what I've been saying about the Rattlesnake for some time now. We have a lot of people building it but I don't think I've ever seen two paint jobs ever done the same way. Or in some cases, simply different woods instead of paint. That's what is so cool about this ship. Looking forward to additional progress.
-
Keep going on those bulkheads. The extra time you take now to get it right will pay off a ton later.
-
Building another ship hug JPett? I look forward to peeking in occasionally on this one.
-
that transome came out really nice. Good job framing in those windows.
-
that came out really nice.
-
And finally the finished product. Tied on blocks and eye bolts included. Sorry I couldn't get closer pics of the platforms. The camera just wouldn't focus too close.
- 264 replies
-
- 4
-
-
- rattlesnake
- model shipways
- (and 1 more)
-
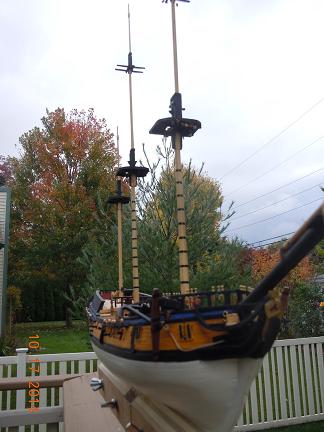
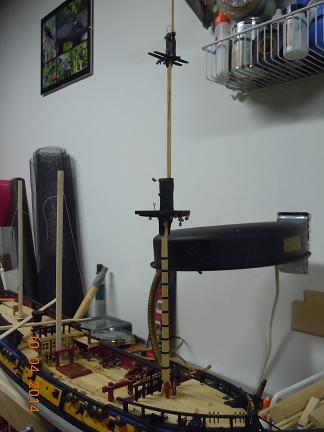
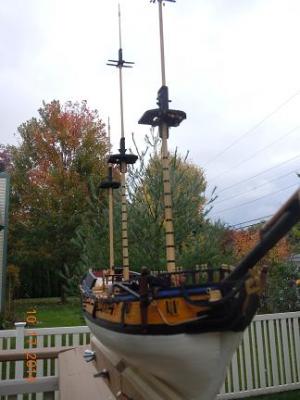
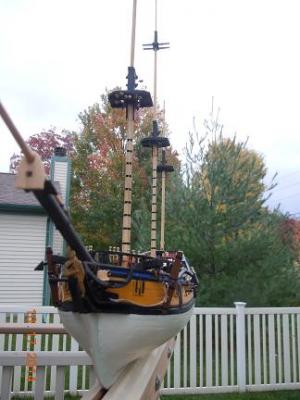
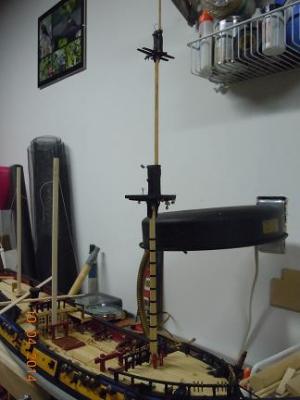
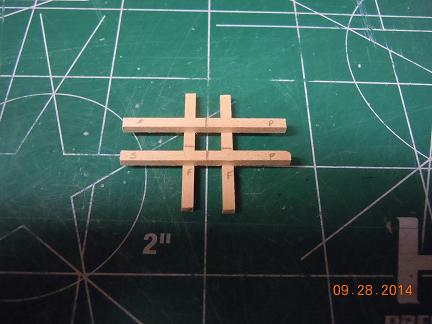
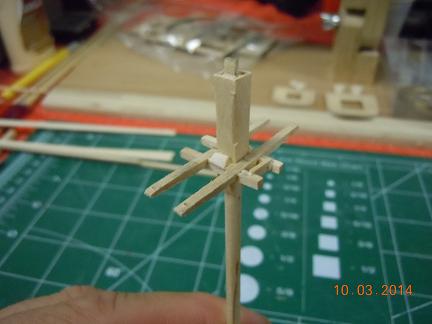
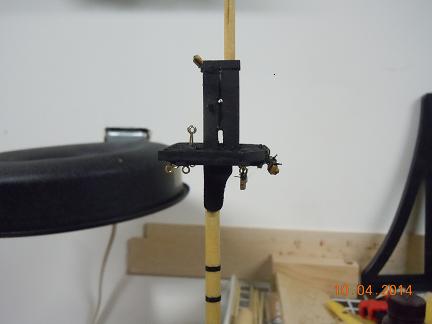
Foremast continued. Here is the finished platform supports. Be careful when using the plans vs. what you actually create. I suggest you put the platform pieces together according to your squared mast top and not the plans. It was a little tricky. I tacked on two pieces of wood to the side of the mast and then measured the places where the four pieces of wood would cross so I could cut them to fit. I didn't trust the plans vs. my actualy product. Next was the cross tree. I made it the size of the plans but again, connected the four pieces to the squared off top of the top foremast. Here's how the platform finally looks on the mast. And here too. Oops, I forgot one thing in the plans and my finished product. I made my square pieces to thick. But I like the way the pieces lined up and looked. So I ended up actually cutting out the areas where the rat lines and shrouds come up to the mast. Yeah, I messed up but I think I recoved pretty well. My bad, hopefully you will learn from my mistake. Really big word of warning here folks. Make sure you look at the plans before putting on all of the block and tackles. There are different sized pieces for different circumstances. I messed a few up, but luckily since it's just string I was able to easily recover.
- 264 replies
-
- 3
-
-
- rattlesnake
- model shipways
- (and 1 more)
-
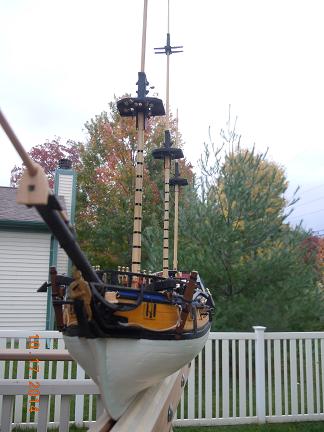
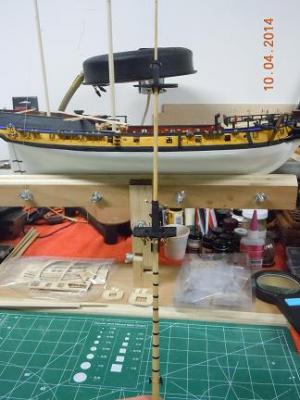
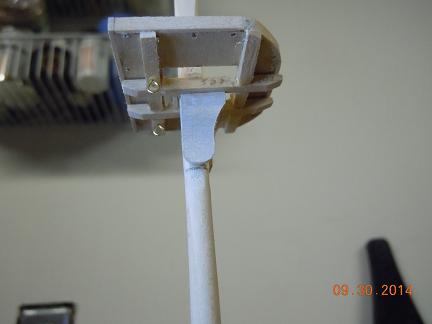
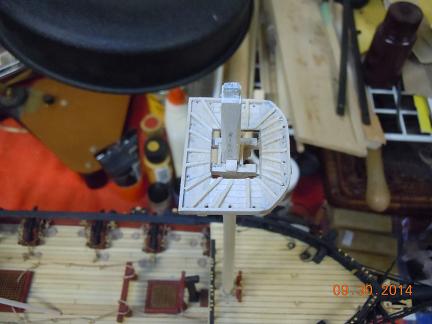
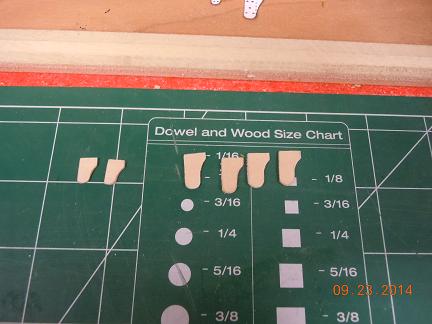
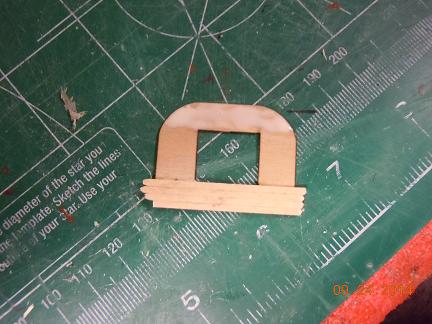
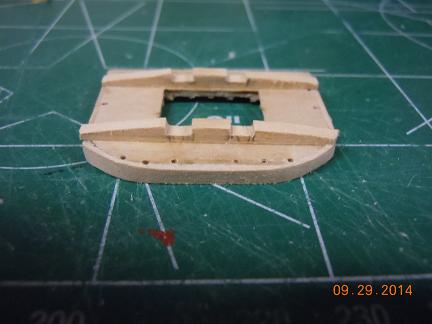
Now for the foremast. Again, I used my drill as a laithe. Make sure you measure according to the plans and your caliper. The plans show that the top of the lower portion of the foremast is squared. I measured out the square piece and used left over planking to make the square. I sanded down this portion of the mast even more so the square pieces would be closer to the round portion so it looks like it blends better. Just follow the plans. Here are the platform rests. I photo copied the plans and cut out the pieces from scrap. Just that simple. I used the laser cut platforms and then planked over them according to the plans. I used extra pieces of the planking for the gunwals of the ship. Put on the pieces according to the plans. Not to tough. Where possible I cut the wood a little longer so I could sand them to size. Then I sanded the tops with fine sand paper. I was pretty happy with this. Once I was done with the planking I added the sides and back. Next would be the front. I soaked the wood for a long time and bent it just for the front. It was a little tricky, well, maybe a lot, to get the wood to stay bent however. I had to use CA glue along with wood clue to get the front to stay. Once the sides of the platforms were on and sanded down I moved on to the platform support pieces. I used a combination of the plans and what I actually came up with to make sure these pieces were as close as similar as I could. I actaully think I got it pretty close.


- 264 replies
-
- 3
-
-
- rattlesnake
- model shipways
- (and 1 more)
-
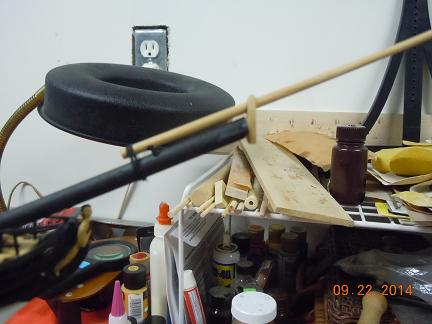
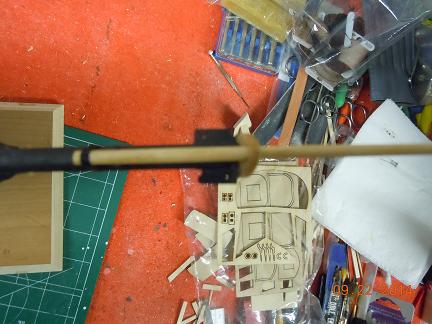
Now that I'm done with the hull it's time to move on to the masts. Started with the bow sprit first. Pretty simple really. Just measure out what the diagrams show, sand it down and bam. I used my drill as a poor mans laithe. I put some tape around the end I put in the bit and wrapped sand paper around the dowel and turned on the drill. Watch that you take breaks, the friction gets worm. I used two grits of sand paper, 120 to get the rough size and 220 to finalize it. I also used a caliper to make sure the dowel was sanded down to the correct size. I hightly suggest a caliper for this. Oh one last word, when wrapping the rope between the jib and the bow, watch how you place the rope. Don't forget there is a slot there within all of that wood you put on earlier. And here is the top to show the other wood pieces you need from the plans. I stained and then painted it than attached according to the plans. The little saddle between the two pieces is really small so be careful and take your time with it. I wrapped a piece of sand paper around a wood dowel to help form the saddle.
- 264 replies
-
- 3
-
-
- rattlesnake
- model shipways
- (and 1 more)
-
Looking good, can't wait to see the final product.
-
Welcome aboard Kenny. JPett is correct, those bulk heads have a few issues. A couple of them do not have the center cut, cut in the center. I showed a kind of neat trick to check that out. Basically you should photo copy each piece, cut them out and then fold them in half top to bottom. You will quickly see which ones are centered. Pett is also right about those upper deck pieces. Don't remove them. They will break. If you have already, like he said, put them back with tape. You'll be happy you did. You will also note, if you look at some of the other build logs, the deck and water lines are key to a good ship. If they are not spot on you will pay for it later. I highly suggest you review the previous logs and take notes. They helped me a ton and saved me a ton of time and cursed words. Take your time and have fun. Look forward to your progress.