


scott larkins
-
Posts
489 -
Joined
-
Last visited
Content Type
Profiles
Forums
Gallery
Events
Everything posted by scott larkins
-
 Nice idea. How did that work out for you? It's a nice way of transferring that curve. I eyeballed it but this seems more precise.
 -
I echoe jpett's word of warning. Watch that garboard piece. It must not in anyway start to curve up. It if does you will be screwed later on. I suggest you put an eye along the top of the board and look down the board to make sure it does not bend up.
-
thanks guys.
-
Almost looks like I can reach out and feel the smoothness of that hull. Nice.
- 1,354 replies
-
- 1
-

-
- constitution
- model shipways
- (and 1 more)
-
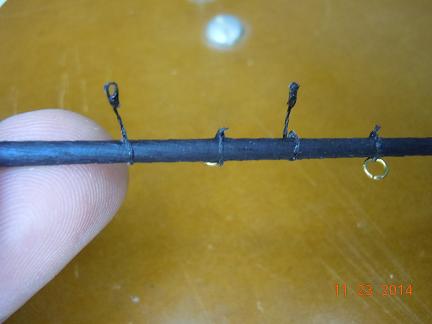
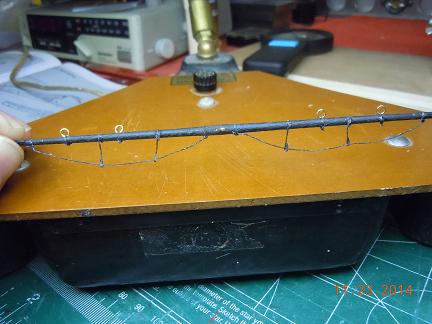
Okay, been working on the foot ropes. This series of picks was for the spirit sail yard. Here I first drilled holes in the underside of the yard. These will be the tie in points for the hanging ropes. Here are the hanging ropes after they've been glued into the tiny drilled holes. Now I'm sure some people would not approve of my way of making the loops in which the foot ropes would be threaded. I cut the ropes 1/2 from the bottom of the yard after I wrapped it once around the yard and used a small dab of CA glue on the back side of the yard to hold the rope in place. Once dried I dabbed another dot of CA glue on the end of the rope, used my small dweezers, placed it right next to the dot and then wrapped the rope end until it touched the longer piece of the rope. Sometimes it takes me a few tries, other times I get it right the first time. Then I tied the rope to the end of the yard, cut off an appropriate length, threaded it through the hanging ropes and then tied the other end on the yard where the plans said to.

- 264 replies
-
- 6
-
-
- rattlesnake
- model shipways
- (and 1 more)
-
Those bulk heads came out nice. Did you find any that weren't exactly center when you put them on? I know there's been talk about sometimes the bulk head slots that go over the keel may not always be centered.
-
Wow, that's been a lot of work. Nice going.
-
Looking good there. Stain really came out well against the othe colors.
-
So many have said it but I'll jump on the band wagon. Looks great.
-
Doesn't it feel great to reach the Milestone. I know how I felt after I put on my last plank on my first ship. It all looks good. Make sure not to over sand though.
- 1,354 replies
-
- 1
-
-
- constitution
- model shipways
- (and 1 more)
-
Yeah, don't get in a hurry to glue in the masts. I have found it very useful so far to be able to remove them as needed.
-
I love assassins creed. I've played them all and am working on the latest now. How ironic that the one I'm playing is all about sailing a ship. But now, I haven't gone to far into looking up much more. Don't ever seem to have the time.
-
It's all looking great.
-
It's exciting to see how a ship comes together isn't it? Looking good there. Keep it up.
-
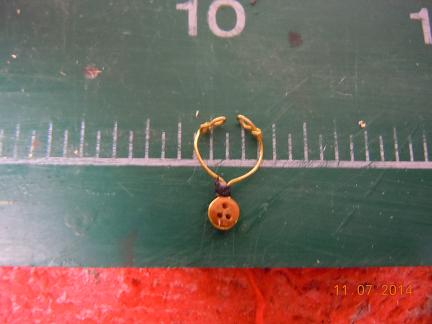
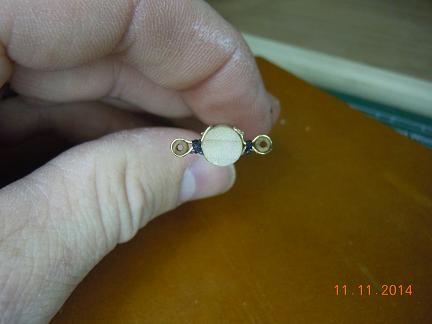
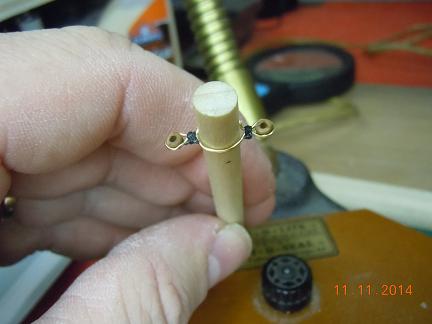
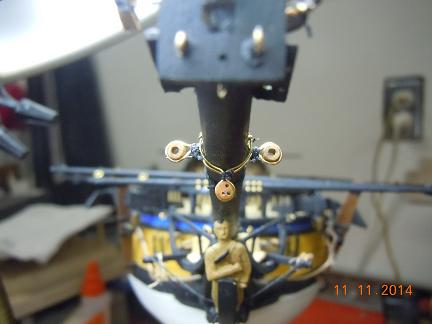
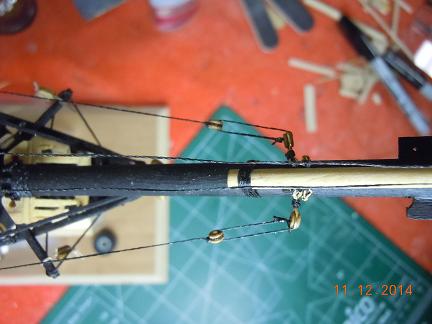
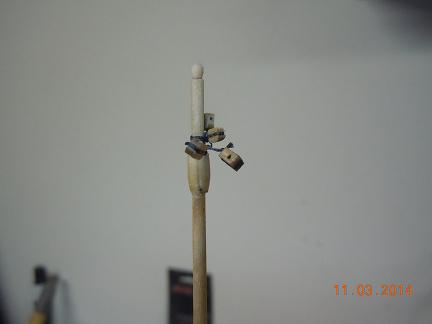
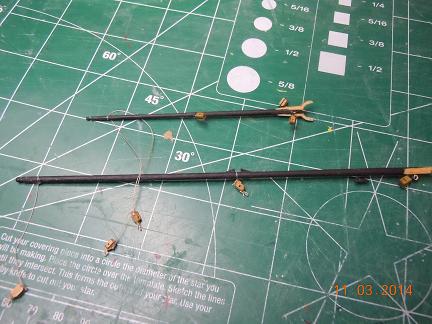
As I've been working on the yard arms and blocks and tackles I've taken a few breaks so as not to burn out. Here are a few brass pieces I've done some work with. I plans didn't really say if they were rope or brass and I like the look of the brass. I'm not sure how to describe the work I did, but I'll try as the pics go along. If you try this, make sure to leave a lot of brass on either end. I tried to do just enough, twice, and it didn't work out until I used lots of extra. I used the left over dowel of the jib to bend the brass and used my fingers to bend the brass around the wood piece. I had a little help with some forceps as well. Again, use extra brass on both ends, I first bent the brass around the wood bulleye on one side and wrapped the thread as per the plans. I continued to bend the brass around the extra dowel and repeated the bending of the brass around the wood. I rebent the brass around the wood dowel a few more times just to make sure it wrapped well. I used forceps to bend the end of the brass into a hook on each end which I tied more thread to and then put it on to the jib. And here are the collars combined on the jib and roped in.
- 264 replies
-
- 5
-
-
- rattlesnake
- model shipways
- (and 1 more)
-
Good job of thinking ahead there. Those cannons are a real bugger to rope in aren't they. Looks good.
-
I got my hearts from Model Expo, 7mm Walnut hearts MS0707. I also purchased 2.5 mm bulleyes MS2460 for the thimbles in the shrouds and other tight areas. I also purchased 2mm Parrels MS0940 for my gaffs and lower fore and main yard arms. I just didn't see any way I could create these pieces with the tools I had. I was also finally able to order sail materials but I'll be ferreling my sails for my build. Well, I hope I will.
-
I'm almost here too. I just purchased some hearts and bulleyes for this stuff. My parts were shipped last night so I should have them early next week. A word of warning to ya. There are a lot of blocks in that little area of the seats of ease.
-
That's starting out nice. Never seen anyone angle to deck wood like that before. Very interesting. Was that by the plans, historical, or just something you decided to try?
-
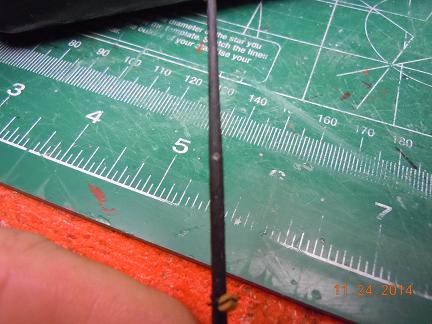
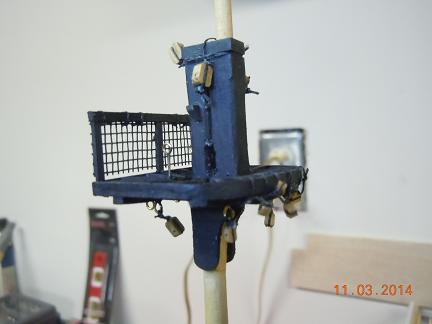
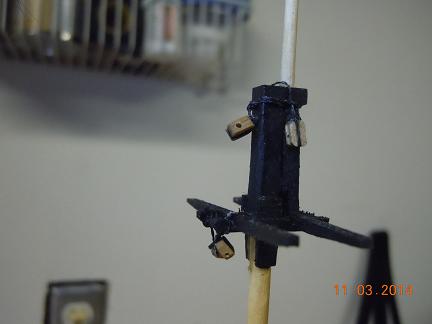
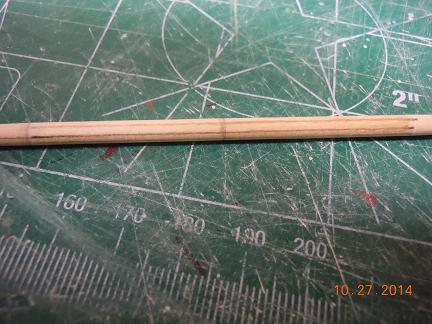
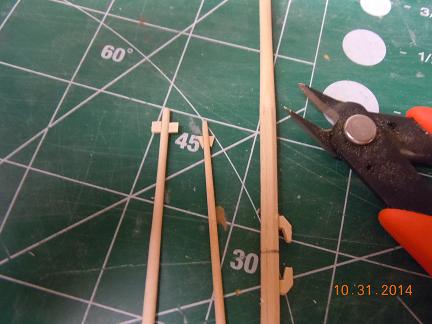
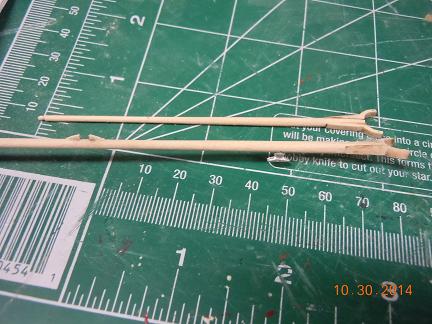
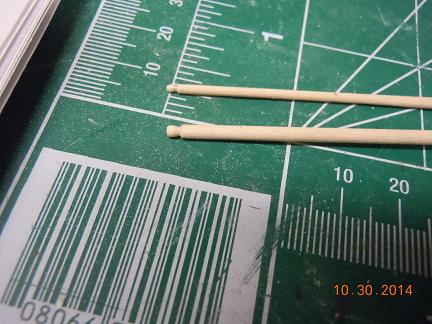
Okay, here is my continueing saga with the masts and yard arms and tackles. Yeah, lots of blocks here. I used window screening material for the protective fencing. Because I have two dogs that like to jump at my storm doors when we have visitors or mama and I come home, I keep a supply of screening material. Who would have figured. LOL More blocks. Again, look at the drawings and the manual to make sure you get the right size and number of blocks. Funny how the tiny top of the mizzen mast has so many blocks. As I've said before, I cut/sanded my yard arms out with my drill as a poor mans lathe. Yeah, I ended up snapping three yards. AAaahhh!! Then in the center of the lower yards I simply used a mechanical pencil, put the lead on the side of the yard ared, extended out the lead and broke the yard in to four sides twice. Then I used my exacto knife and "scraped or plained" between the lines to get the required octagon sides as per the plans. Here are the ends of the yard arms prior to cutting and afterwards. What is nice with my train hobby and ship hobby is the ability to use tools from both to help the other. I used my rail cutter to cut off the square ends on the arms. Also pictured is the pieces for the center of the lower yards. Here are the Gaffs And the Gaff ends And finally the finished Gaffs. Lots of eye bolts on the bow sprit
- 264 replies
-
- 6
-
-
- rattlesnake
- model shipways
- (and 1 more)
-
Just checking in folks. Yes, I'm still working. Been getting the block and tackles put on various parts of the ship and gaff. I'll get some pics put up soon but not a lot to say on it. Just follow the plans but occasionally look in the instructional manual. Occasionally there is a better pic in the manual then the plans. Perhaps it's really just a better angle. Soon wil be the ropes on the yard arms and their block and tackles.
- 264 replies
-
- 1
-
-
- rattlesnake
- model shipways
- (and 1 more)
-
Planking is coming along well. Any ided how you are going to plank once the space get too small for those nifty paper clip holders?
-
Nice work so far. Yeah, I ran out of grating too but purchased some more because I figured I was going to need the extra when I build my Niagara after the Rattlesnake. The only other wood I had to purchase was for the ribbing for the life boat. That brick color red works really well with the other paints.
-
Looks good. Sometimes the extra work is worth it.