scott larkins
-
Posts
489 -
Joined
-
Last visited
Content Type
Profiles
Forums
Gallery
Events
Everything posted by scott larkins
-
 Mike, Looks like you got the stem pretty good. Nice. I am going to use the metal block method. I got my pieces from my work's metal scrap bin.
 -
Okay, so my solution for the back top desk was this. I sanded down bulk heads K and M just a little and it brought the deck to a little more level. After looking at the bulk heads with a flat edge and thinking that I didn't want to mess with all of the bulkheads, that was my solution. Less is better. Perhaps not perfect at this time but I can address that later. I've sanded all of the bulk head main decks though to appropriate depths. I'm satisfied with them. Now to work on the beveling of the bulk heads for planking. Then fairing. Or should I fair first and then bevel? Opinions? Thanks Augie, will do. Hoping people will learn from my errors.
- 264 replies
-
- 1
-

-
- rattlesnake
- model shipways
- (and 1 more)
-
Mike, I tapered from below the area where the figure head is down to the bottom keel. That being that I let it go back to its normal width right where the stem glues to the bottom keel piece. A nice little bit of sanding should give a smooth transition between the two pieces. Of course don't sand the stem to a point. They didn't do that sort of thing with wooden ships and "knifing" the water like todays modern steel ships. I was a little concerned as well because you are right, no one else had mentioned it. I did it because I thought it made sense since the Rattlesnake was known for her speed. As for the figure head, if you look at mine and Zev's site you can see that we did a seperate etching for the legs of the figure head and left that section of the stem its normal width. I used some wood carving tools that my father-in-law left for me. As for the warping, before you steam, perhaps plopping some weights on the wood for a day or two would be better. Just a suggestion. Since my wood has not been warped I am no expert on the solution.
-
Hey Mike, Welcome to the Rattlesnake club. I too am building the MS Rattlesnake. There are a lot of build logs on this ship. I did not have any warping problems to speak of. I did taper the stern piece. If you take a look at my log you can see what I did and decide if you want to follow suit. There are two different manufacuturer logs and a kit bash that you will find. I have spent a great deal of time looking forward into the various logs to see the things I can expect.
-
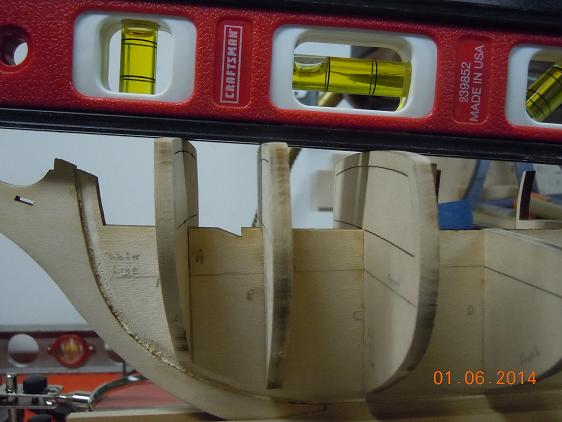
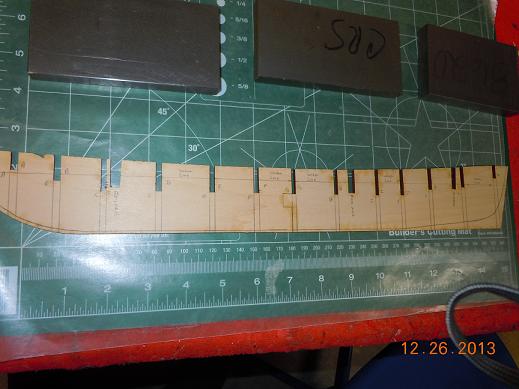
Well I feel stupid. Went to work on bulk head C last night and was taking another look at why it just wasn't sitting right. Why on earth was it sitting higher than any other bulk head. Sure, it was easy to blame the manufacturer, isn't that always the easy way out. Upon further / closer inspection, I figured it out. I didn't have the bulk head slid all of the way into the center keel slot. The problem was that it didn't fit all of the way to begin with; so after a little sanding of the center keel slot I was able to get it to fit in. YEA! Now bulk heads A - H all sit well. I will have to still do some deck sanding of A & B so they line up with the center keel but I can live with that (easy fix). Even the tops of A-C line up well for the forecastle deck. Who would have thought? See in the pic how things finally worked out. Now I have a new problem with the lining up of the quarter deck top deck lines. See, I'm taking my time and looking and measuring twice before moving on. See how this straight line sits fine on the back three bulk heads but the not the front two. If I shim up the top of the bulk heads to make things line up I feel it would raise or should I say lower the side piece extensions. But the water line reference lines line up fine. I'll have to go back and look at these better again. Perhaps I'll get lucky like I did with "C". Nope, I looked and they sit correct. Perhaps I could sand the back three down just a little and build the front two up just a little and meet the difference in the middle. Suggestions?


- 264 replies
-
- 1
-
-
- rattlesnake
- model shipways
- (and 1 more)
-
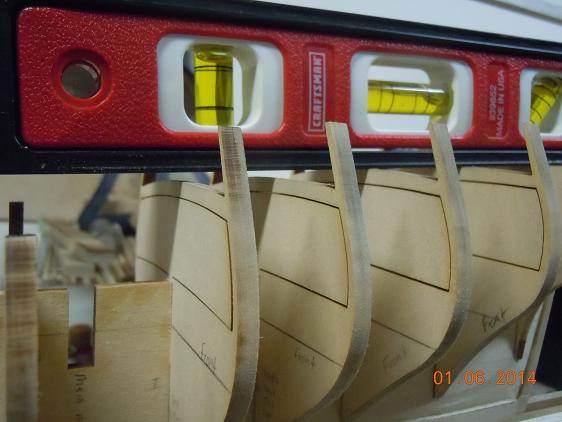
All done with the sides of the bulkheads. Got them pretty good. Just enough to even things up better but not perfect because there will be more sanding and cutting to do to get the planking angles. Looks like the water line marks are lining up pretty well. You can see how the bulk head sanding went. Ahh man, you can still see that bulk head C is still messed up. More than any one bulk head in this entire kit. I think this one bulk head has just about everything wrong. Note the water line reference line, the deck line and the fact that it does not line up with the bearding line. Any suggestions on the best fix for it? Ahh, looks like bulk heads E, F, G and H are lining up well. YESssssss But it looks like I and J will need some shimming. Guess I used all of my luck on the other four. LOL Note that these two bulk heads were not due to my sanding. you can still make out the faint laser burnt marks. Will have to shim and then sand to the correct angle.

- 264 replies
-
- 1
-
-
- rattlesnake
- model shipways
- (and 1 more)
-
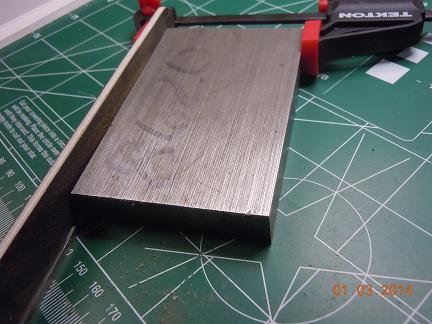
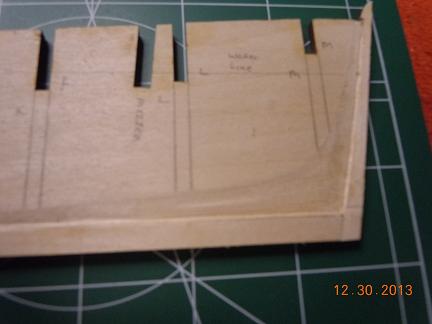
Okay, at the suggestion of JPett I went with his hunch and worked on the sides of the bulkheads for the last day. Basically the idea is that the wood causes bending of the cutting laser and may not cut the wood perpendicular. So I made myself a small sanding bench, pic below, and slowly sanded each side of the bulk heads and deck just enough to get rid of the burnt wood and gain some sense of perpindicular. mocked up sanding table. I used a small C clamp to put one of those large nail files perpendicular to the metal block. Then I slowly rocked the bulk head back and forth on the metal block and against the nail file. Making very sure not to put too much pressure at the top. Don't want to snap those posts yet. I'll have plenty of time later to mess those up. As you can see after just a few swipes with the nail file, JPett was right. Notice the uneven burn marks. I obvisouly have a lot of work ahead of me. Yikes. But remember, not enough to mess up the bulk head size and throw everything off. Moderation.
- 264 replies
-
- 2
-
-
- rattlesnake
- model shipways
- (and 1 more)
-
Wow, that looks GREAT!!!. I can only hope my model looks half that good.
-
Thanks Jon. I'll review the instructions and I found two papers here on this site about planking and bulk heads. I will read before moving on.
- 264 replies
-
- 1
-
-
- rattlesnake
- model shipways
- (and 1 more)
-
Hey Jon, Yeah, so far it's just a rough fitting of the bulk heads. I've read so much about messed up bulk heads that I'm a little nervous on this series of steps. I know how critical getting these right is. I'm kind of confused with your water line comment. Should I not use the drawings to set the bulk head water lines? I haven't looked yet to see how bad the deck lines match up with the center keel. I've left the wood in for some of the bulkheads like A - C and the back ones to help prevent breaking those pieces of wood as you have said. I'll remove those last or very close to last. No, I have not faired the bulkheads yet. Fairing means sanding them to the proper plank angle right? That was a question of mine. Have people done that before putting the bulk heads in or after? The instructions talk about doing it before they are put in place. I worry about doing it before because I am not sure of the proper angles that each bulk head needs. I definetly will do A and M and I would like to do it on the two other bulk heads leading up to them. Battons are the pieces of wood that run down the length of the bulk heads right? I think I've seen pics of people pinning them along the bulk heads. How do these really help though? I'm not sure of the purpose of putting them on. Yes, I have a building board, I just haven't put it in my pictures. I also have square blocks of metal to help make sure the bulk heads are perpendicular to the center keel. Thanks for the help.
- 264 replies
-
- 1
-
-
- rattlesnake
- model shipways
- (and 1 more)
-
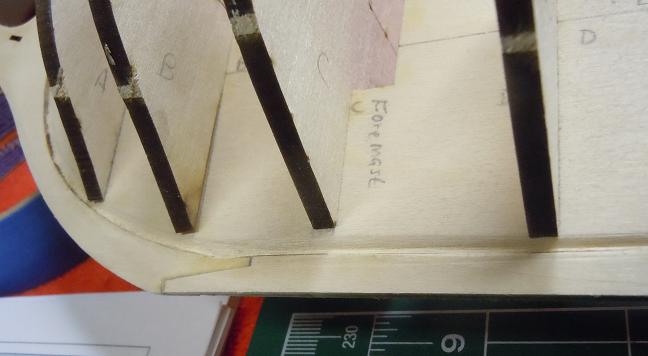
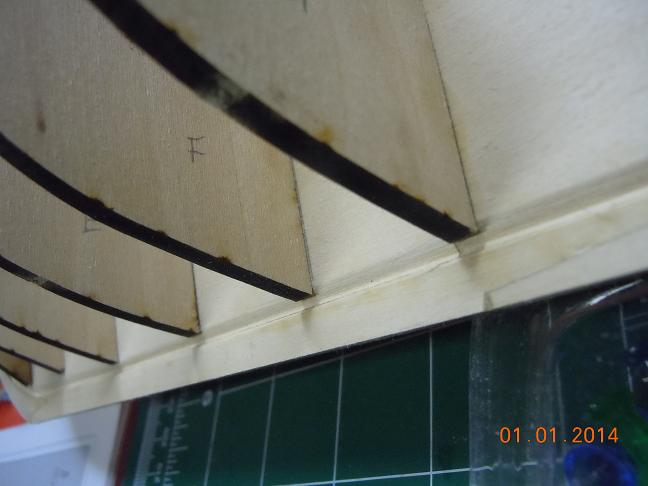
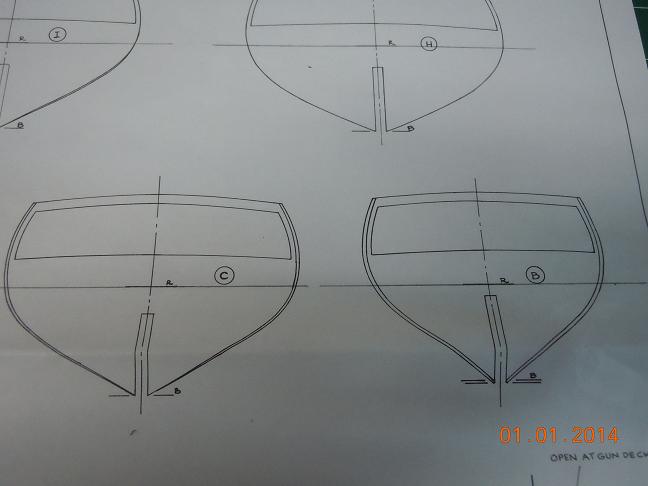
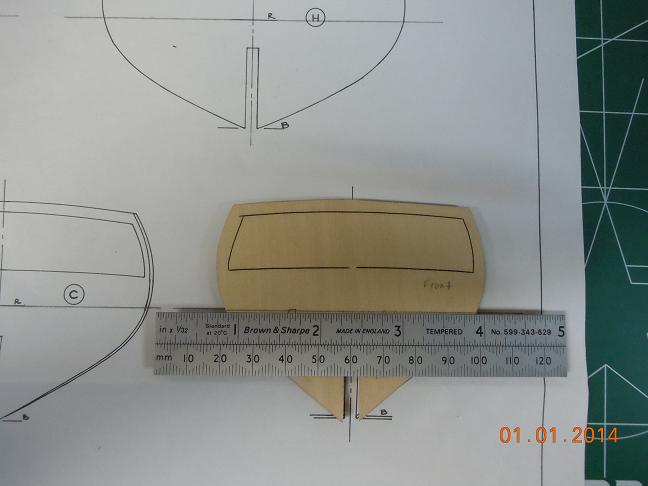
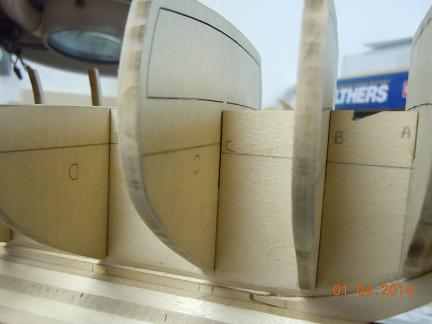
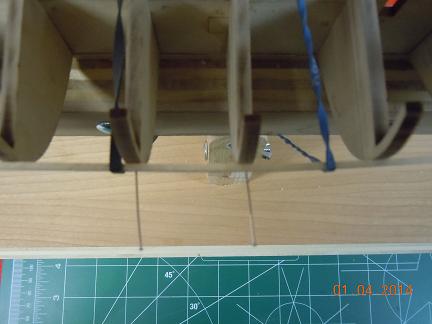
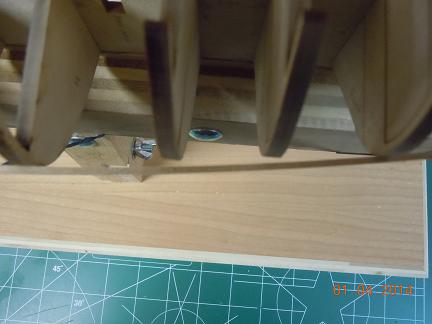
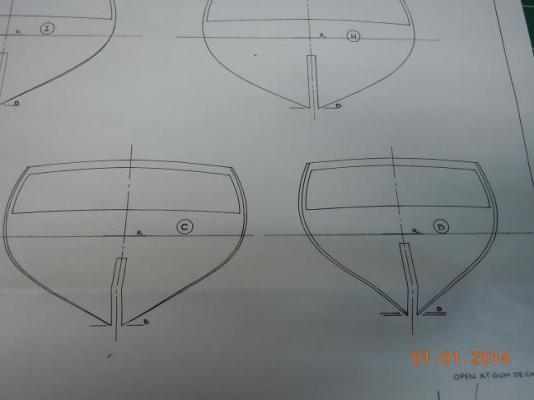
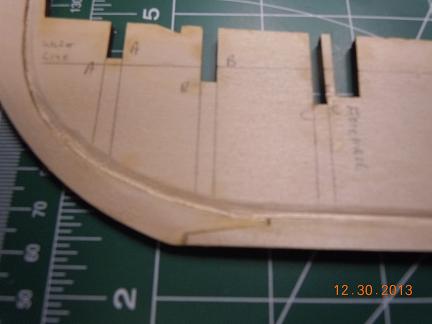
01/01/14 Got a little down time between snow shoveling. Finished rough fitting the bulk heads to the center keel. Work wasn't too hard. I had to sand both sides of the bulk head keel slot and the actual center keel slots in order for the bulkheads to fit. I used one of those larger nail files that you can pick up and most any store. Believe it or not, that thinkness of that large two sided nail file is the same thickness of the wood for this kit. Wow, was that a lucky break. This allowed me to sand both sides of the slots at the same time with the same amount of pressure. Until I figured this out I was worried that I might sand one side of the slots more than the other and thus end up making things off center. Pics follow for the rough fittings. As you can see from these two pics, as everyone else has experienced, the bulk heads do not all line up perfectly with the beard line and thus shimming and trimming will have to be done. Can't say I was surprised when I saw this. Not sure how you guys transfer the water line reference mark from the drawings to the bulkheads. Couldn't find any specific references on anyone's log. So here is my idea. I drew out the reference line on the drawings, as seen in pic 1 and then will lay the bulkead on the drawing, lineing it up with the drawings lines and place my straight edge on the bulk head and line it up with the extended WL reference line from the drawing and basically "transfer" the line from the drawing to the wood. How did you guys do this? Is there a better way?


- 264 replies
-
- 1
-
-
- rattlesnake
- model shipways
- (and 1 more)
-
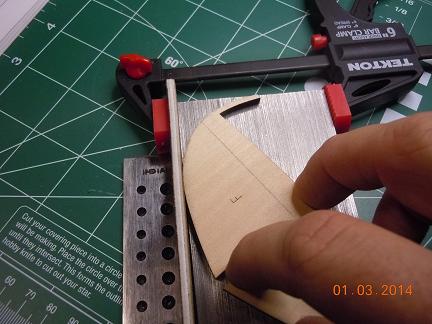
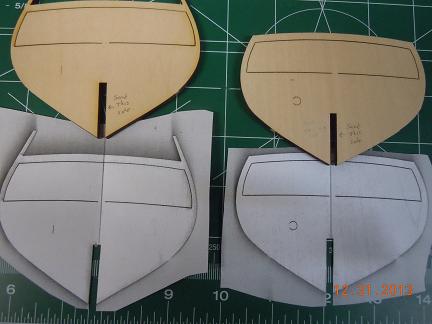
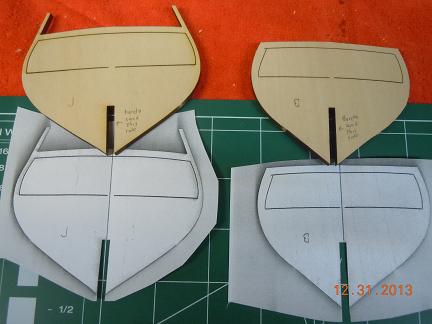
Okay, got some sleep, wife off to work, Mom still in the hospital so it's just me and the dogs. Thought I'd get a little prep work done. As I said before, after reviewing Zev or Prett build log, forget which one, I took a look at the symmetry (SP?) of the bulk heads. Then I had an appifany(SP?). Instead of relying on bad angling of my pencil and poor cutting skills, why not photo copy the bulk heads, roughly cut them out, and then put them on a light table to line up the lines. Take all of my human errors out of the picture. Since I didn't have a light table to fold / line the lines up with, I used my south facing doorwall and an unusually sunny day in Michigan. So I roughly cut out the photo copied bulk heads and lined up the lines on the window. Results are below. Here are the two better of the four bad bulk heads. I had to make sure to cut along the woodline and not the shadow line for the center slot. Very important to remember. Probably will not have to shim these but I'll see. Here are the two worst of the four. Note I marked which side would have to be sanded. I'll shim it when I test fit it to the center keel. Hope this method of testing the center keel slot will help someone in the future.
- 264 replies
-
- 1
-
-
- rattlesnake
- model shipways
- (and 1 more)
-
How did you cut out those shapes in the blades. I'd like to use that idea when I get to this point?
-
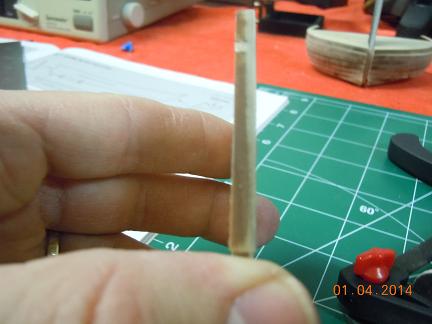
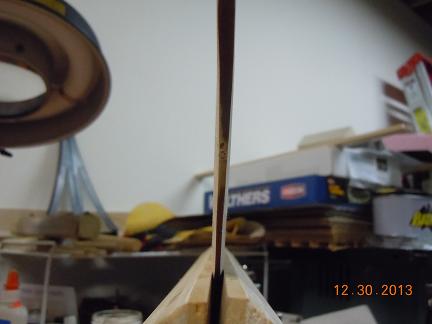
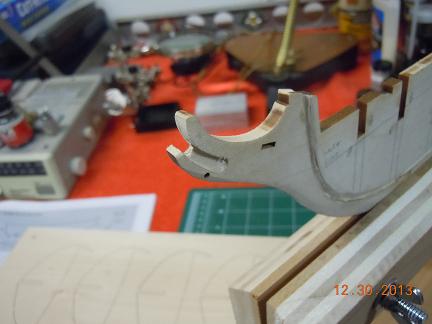
Thanks for the heads up Ken. I just cut out the bulk heads a little while ago and will have to keep in mind the frailty (SP?) of these pieces. Okay, captains log 123013.2302. Always wanted to say that. LOL. The last few days, or should I say nights, have been busy. But trying to keep in mind that I must work slowly or mess things up in my haste. It is so difficult to work slowly. I just want to tear into this model and move, move, move. Anyways. Pics and progress are listed below. Port bow rabbet line. Was extremely nervous doing these cuts. I was always worried that I'd push the chisel too hard and snap the keel right off. Tried to keep the cuts and sanding to between 1/32 and 1/16 in depth. Closer to 1/16. No easy task. I fear my line wavers a bit. I did use a piece of planking to double check. I think if I had to do this again I would have sanded the rabbet line before putting the keel on. I would have gotten a better angle on the wood. Port stern rabbet line. Starboard side is just like this side but I think the port side is a little better as I used the starboard side to cut my teeth on. As everyone has suggested, move slowly and take frequent measurements. I used a combo of chisel and nail files for these. Bow taper. At least I hope this is correct. I looked at the big plans and they mentioned to taper the stem. Seemed to make sense for the ship's ability to cut the water. Let me know if I just destroyed the ship. Or don't...... I might cry. Only the part that would actually cut the water was tapered. The stem goes back to its normal width as it approaches the figure head and the bottom of the keel. And finally the etched out portion for the figure head. You can kind of see the stem taper a little better or differently from this angle. It didn't seem to come out very well in the pic but I think I kind of like the bow taper. Comments are helpful. As I said above, I just cut out the bulk heads. I saw a post, Prett's I think, and will be doing outlines on paper of the bulheads to see if the slot is actually centered. Tried to fit the bulkheads on the center keel tonight but I couldn't get a single one to easily fit. After spending the last 4 hours in the hospital with my mom I was too tired to try to hard to get them to fit. Felt like I had boxing gloves on tonight. I'll cross that bridge after I outline and fold the paper bulkheads. Any additional hints before I move forward are welcome. I will be reviewing all of your logs probably tomorrow. You all have a good night.
- 264 replies
-
- 3
-
-
- rattlesnake
- model shipways
- (and 1 more)
-
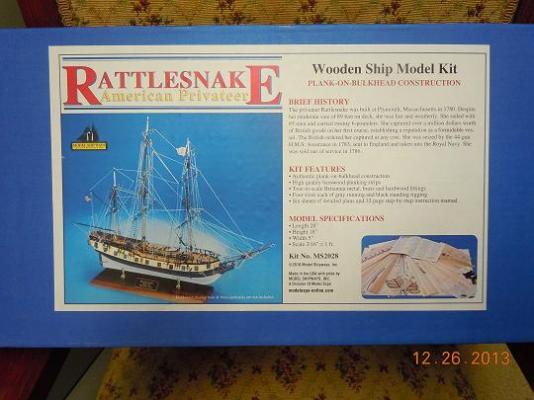
Okay boys and girls, as I've been saying, I finally got my Rattlesnake kit as promised for Christmas. Last night I sat up rather late into the night to read the opening pages. Yawn, had to go to bed after the first 5 pages. Today I finished and got the keel out and started working. Remembering to take my time, read the instructions and look at the plans several times before making a move. As previous people had mentioned in their posts about the Model shipways drawings, yes, they do not match up exactly to the cut out wood pieces. Sadly I was hoping that it was a fluke but it is true :-( Anyways, knowing this, it really did not hinder the start of my project. I've also read where the wood is extremely fragile. Yep, found that out already too. Didn't even realize that I had my finger too close to one of the bulkhead seperation spaces and as I was flipping over the keel to put pencil markings on the other side I heard the faintest of "snicks" "Son of a Witch!" Good thing I was in the glueing process. LOL. Anyways, here is the start. Please comment all you want on my progress and offer any suggestions you can. It has been a long time since I built a wood ship and my first to this scale and detail. Here is the keel with the suggested markings as per the instructions. Got the rabbet line on, the water line on and the bulkhead markings. I saw where one modeler sanded the rabbet line to size. Not wanting to really work with chisels I think I'll take the extra effort to sand this to size.
- 264 replies
-
- 3
-
-
- rattlesnake
- model shipways
- (and 1 more)
-
Jon, Quick question. I know you are doing a kit bash but I was wondering something on the deck planking. I like the idea of the people who have put down a solid piece of wood for the deck and then put the individual planks on. But how badly would the extra layer of wood mess up the cannon ports, and vertually anything else from the deck up?
-
I've seen it made of multiple planks lined up and sanded to the appropriate angles. Probably easier making it out of one piece but more realistic making it out of multiple pieces.
-
Sport, Looking good. I like your decking. Are you going to complete the poop-deck or leave it partial?
-
Jon, Nice work. Glad to see you added to the log. Was wondering what was next.
-
Sport, Nice log. You are probably one of two main Rattlesnake logs I will be paying a lot of attention to as I do not get my kit until Christmas. I'll have some railroad cars to build first before I get to the model. There are a few other logs I will be reviewing for inspiration as well (Matin W). It looks like you got the most recent kit like I did. That being the blue boxed version. Please keep up the good work and make sure to mention the things gone wrong in this log and how you corrected or fixed them. From reviewing Jprett's (SP?) log, I find the TGW to be very helpful so I can look out for or avoid similar situations. Keep up the good work on your log.
-
JPett, Wow, I have to compliment you on your work and this log is GREAT!. I too am new to ship building and after doing some research I also have chosen the Rattlesnake. I will admit though, going through your log here is making me nervous about my choice of getting into this hobby. I'm no slacker when it comes to building things. I've built highly accurate plastic models and have built a pretty accurate model train layout as well. So I know I posses building skills and an eye for accuracy. What worries me is the lack of experience with so much wood. I tell you this though, I know my build will be slow because I will be reviewing so many logs from this site to make sure I mess up as little as possible. Please keep this log going right up to the end. I'm really getting a great education and you seem more candid then other postings on things gone wrong and things gone right. I hope to learn from the things gone wrong so I don't make them too. That is probably the best thing you can do on this site. Help us learn from others mistakes. I tip my hat to you. Thanks again.