scott larkins
-
Posts
489 -
Joined
-
Last visited
Content Type
Profiles
Forums
Gallery
Events
Everything posted by scott larkins
-
 lb, I see on your planking tutorial you used pencil but it seems you are not quite satisfied. Probably too late to tell you my idea now but I will anyways for any future builds of yours. I used a sharpie for my caulk lines on my Rattlesnake. Just run the edge of the sharpie down the edge of the plank, making sure that if you are going fall off the edge that you sweep the sharpie to the side that would be the bottom of the plank. The sharpie soaks in ever so slightly and even after sanding the top of my deck to smoothness the sharpie caulk line stayed. This is my forecastle after I stained it.
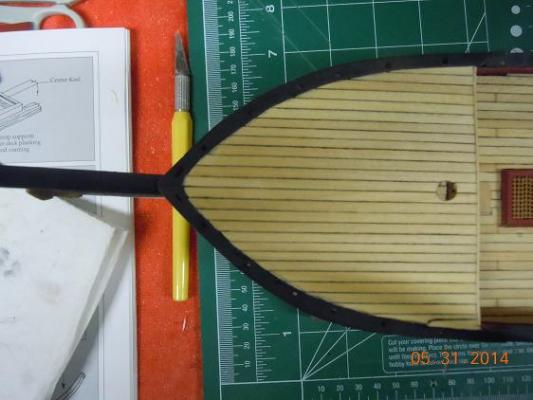
-
Jason, All of it is coming along really well. Your work is outstanding. And I would have to agree with you, those new carronods do seem to fit the model better.
-
Thanks for the paint info. I do go to the site often to look for things for my Rattlesnake right now but will keep my eye open for the Niagara paint scheme.
-
Larry, what color paints did you use on the bulkheads and what brand? I'll be starting my own Niagara next year and I'd like to have some ideas.
-
That bow work looks really good Ken. Did you have to do a lot of bending or did you just peice together straight pieces?
-
Thanks Russ. Getting closer to starting the masts soon. Looks like I'll be starting a new adventure soon.
-
If I remember right, some of my bulkheads needed more fairing than others but that was 6 months ago and I don't remember. I'd have to go back to my log. My suggestion is to do the fairing in little bits, than look and line it up, sand a little, and repeat. Some of my bulkheads in the middle didn't get anything while some I had to add wood.
-
That deck planking is loking really nice. So clean. I'm impressed.
-
Tom, That planking is coming along great. I too was nervous when having to remove planks once I put them on. No great way to overcome the anxiety on that one. That planking is clean and looks like it is fitting really tight. I used the same paper clip method when attaching my planks for my Rattlesnake. The biggest problem I had was when the spacing got too narrow to use the neat little clips. Then my fingers, quick drying glue and a wing and a prayer were used heavily. LOL
-
Bob, It is all looking really great! I use the same glues you do for the same purposes. Although sometimes I will use CA if I have to glue a piece of wood to a painted piece of wood. I look forward to your continued work.
-
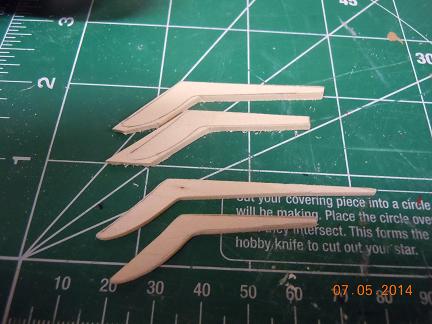
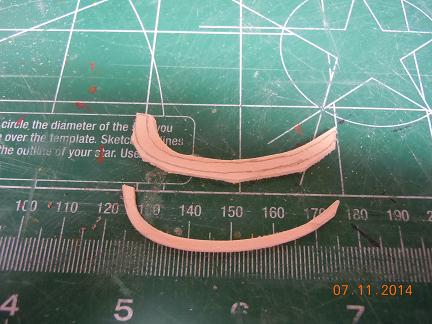
Thanks Martin, it took me three attempts with those two, what I call, bottom shel, pieces. i could cut to two dimmensions but getting the wood to bend at such a steep angle was very tricky. I guess I could have pieced it together but I thought it would be more work. In the end, it all worked out and I'm extremely happy with the way it turned out.
- 264 replies
-
- 1
-

-
- rattlesnake
- model shipways
- (and 1 more)
-
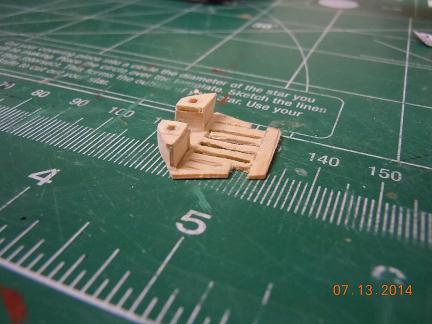
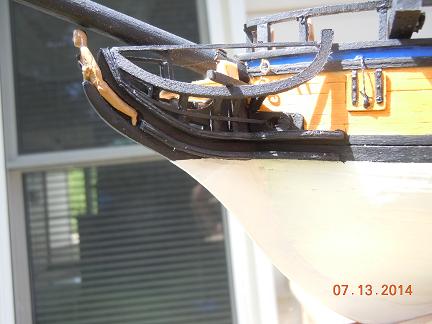
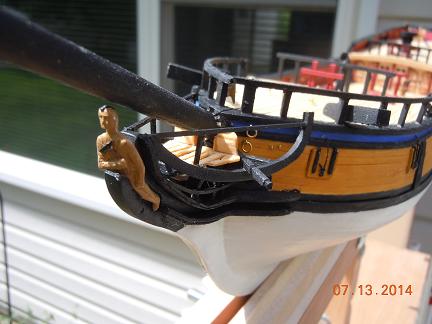
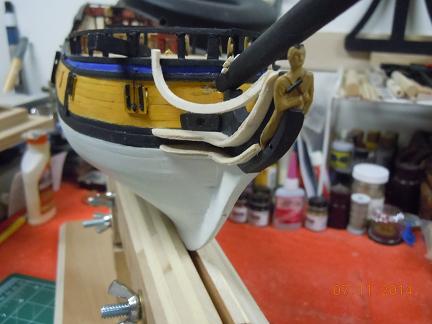
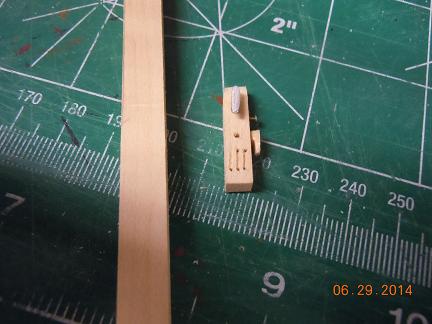
And finally the toilets and finishing pieces. Again, remember, you are going to be putting the bow sprit rope through the slots in the platform. Tried my best to make my piece as close as possible to the plans. Yeah, my slots are wider but I did my best. The final piece was cleaned up from what you see here. I little fine cutting under a magnifying class helped. LOL, kind of looks like the grill to an old WW II jeep. I was amazed that I got those toilets and plank to fit the first time in the small area. I can't believe there is so many pieces of wood in such a small area. Forward thinking was most critical in planning out the work of the bow. I can't warn you enough, think ahead on this step.


- 264 replies
-
- 7
-
-
- rattlesnake
- model shipways
- (and 1 more)
-
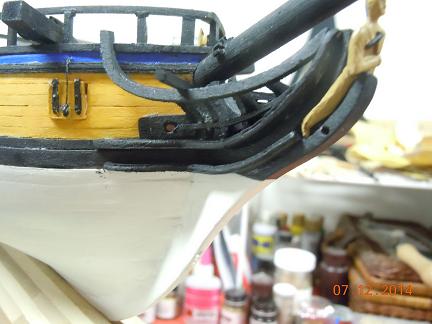
More of the bow processes. This is the next part of the process. The curved pieces coming up from top shelf piece were a tad tricky because you have to keep the bottom arc the same from the front to the back. I used the outer circumfance of my sanding drummel to make that happen. Also, for those following along, you need to make sure you measure out where you put those arc pieces so they don't cover up that slot in the bow again for the upcoming bow sprit rope.


- 264 replies
-
- 4
-
-
- rattlesnake
- model shipways
- (and 1 more)
-
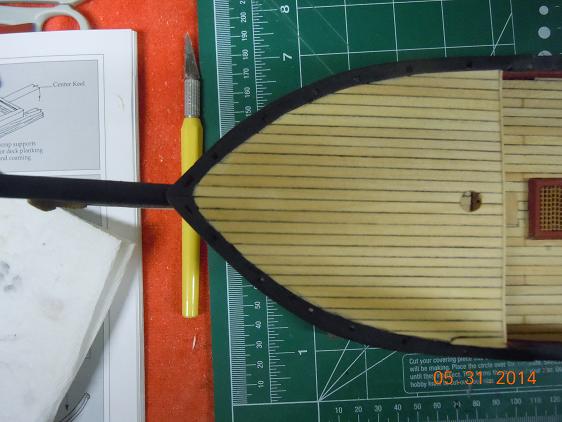
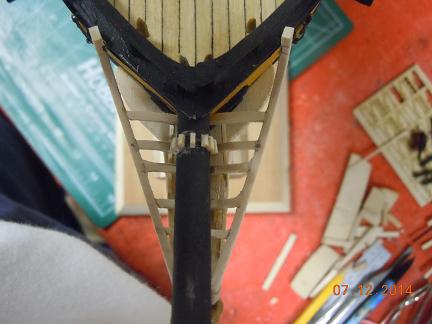
Wow, what a work out the bow came out to be. Plenty of broken wood in the process of building up the bow. For those following along, I did do a lot of photo copying of the plans because the plans actually were right on for sizing. Pics and the process follow. All of these pics show the cutting, sanding and attaching process for the bow. When attaching that top "shelf" piece, be careful that you don't cover up the slot in the bow where the future bow sprit rope will go.

- 264 replies
-
- 3
-
-
- rattlesnake
- model shipways
- (and 1 more)
-
Framing is looking good.
-
That's what I like about this site. I can't wait to see what else you come along with on this build.
- 467 replies
-
- 1
-
-
- fly
- victory models
- (and 1 more)
-
Thanks Martin, I can see your point. Since the rattlesnake didn't have a sub deck I guess I wouldn't have done that. I tend to put my notes on my plans and instructions.
- 467 replies
-
- 1
-
-
- fly
- victory models
- (and 1 more)
-
Martin, What are all of marks on the decking for? Not the lines, I get those, but the notes.
-
Those side windows at the stern came out really well.
-
The decking is coming along really well. I applaud your patience.
-
Thanks everyone. Martin, I did try that technigue. Still didn't work. I think part of it had to do with the direction of the grain. The grain was running perpendicular to the cat head slots when I was using scrap wood from the pieces I pulle out of the forcastle and poop deck punch outs. I ended up using a larger piece of square wood that didn't really have any grain to it plus I made it a tad wider. I think maybe about 1/32 wider. In the end, it all worked out. LOL thanks for the tip though, keep them coming.
- 264 replies
-
- 1
-
-
- rattlesnake
- model shipways
- (and 1 more)
-
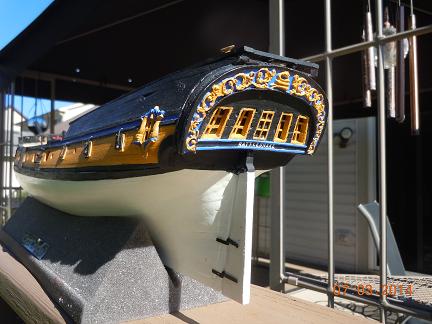
That scrolled piece can be a bear. I just used my exacto knife edge and carved it out. Took me three attempts to get it right. No way was I going to try the suggest method in the plans. I'm not that precise when using my limited tools or skills. And the real shame is, once you paint the rails, you'll never really see the scrolling. Oh well. Keep working on it.
-
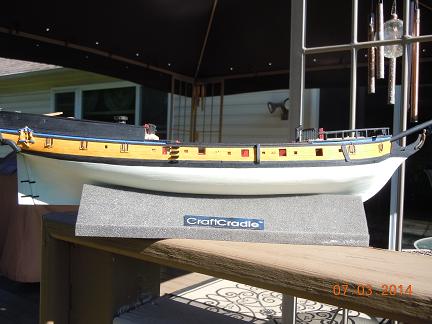
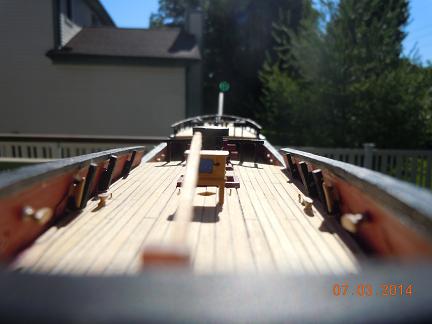
Since it was such a nice day outside, thought I'd take some pics in the natural light. View as if I was piloting the Rattlesnake myself. The natural light really adds something to the colors I think.
- 264 replies
-
- 8
-
-
- rattlesnake
- model shipways
- (and 1 more)
-
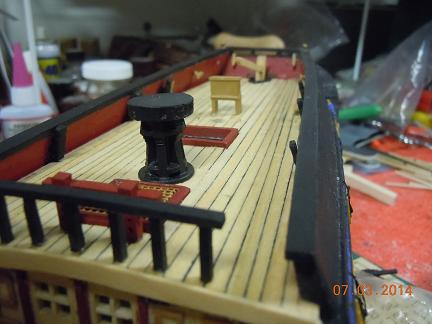
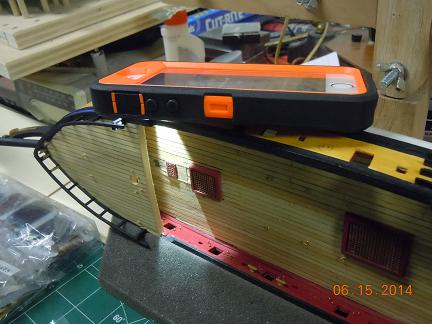
Dear build log, Been a while since I've entered anything on my work. Been doing lots of little things but all important as I close in on the masting portion of the build. I don't have a lot of helpful hints for anyone following along. I simple followed the directions. The only thing that actually did go wrong was the bucket rails. I ended up trashing them after a week of trying to get it right. Either I lack the necessary skills or the britannica metal was not molded very well or something. But I can tell you this, the 6 buckes side-by-side are really too wide for the space you are supposed to put them. I used the metal parts from the kit for many things. I figured if I had them I'd use them. Anyways, pics follow. Here is probably to most wood work I did for this section. The Cathead has to be made out of scrap wood. Took me three times to get this right. Instead of scrap wood like the instructions said, I had to take a larger square piece of wood and cut it down. The soft wood from the kit kept splitting as I was drilling the rope holes for the anchor lines. Oh how I got mad. I also had to make the cathead a little wider than the plans called for because of the splitting wood issue. I don't think anyone will notice. Here is the finished forecasle with rails and cathead. Found a good use for my eyephone while I was trying to drill holes in the sides for the cannon rope rings. I just learned a little while ago that my I-phone can use the camera flash as a flashlight. Who knew? LOL Yeah, I'm shining that through an open cannon port. Kind of hard to see the spots to drill under that forecastle without a little light. Finished poop deck Finished anchor and cannon rope rings. Simply follow the plans for placement. Also I put down the deck rope eyebolts for the future mast/yardarm/sail lines.


- 264 replies
-
- 3
-
-
- rattlesnake
- model shipways
- (and 1 more)
-
Jon Making great progress. The tansom looks great and the metal decoration piece came out really well. I too have found that pictures and angle or quality of light can bring out flaws that my old eyes did not see the first time. Keep up the good work.