scott larkins
-
Posts
489 -
Joined
-
Last visited
Content Type
Profiles
Forums
Gallery
Events
Everything posted by scott larkins
-
 Brian, Looking good. Looks like you did the same thing I did with that extra piece on the bulkhead of the quarterdeck. Not saying that I know best. Just that you did the same thing.
 -
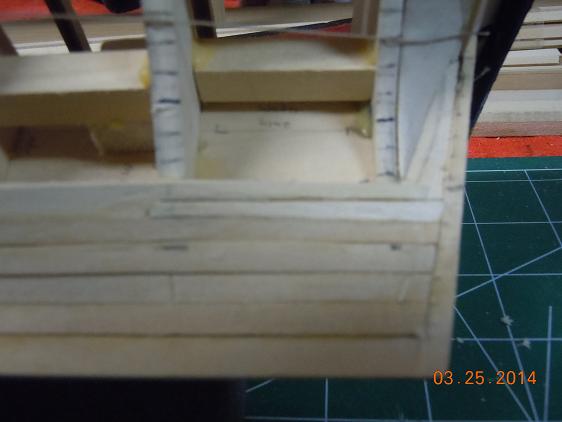
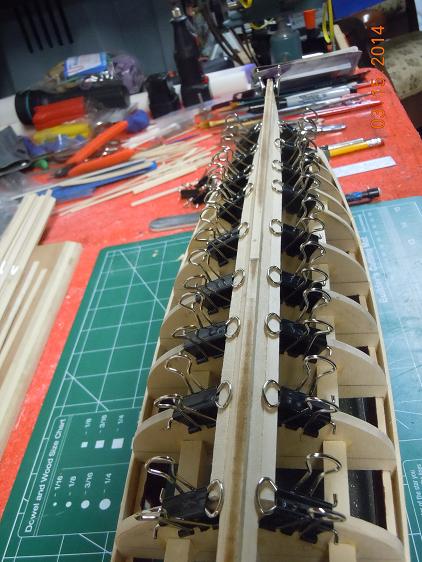
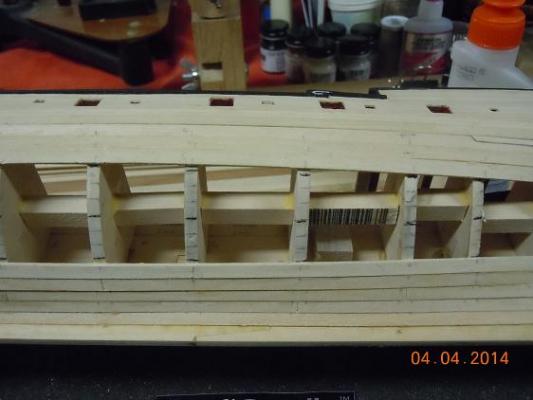
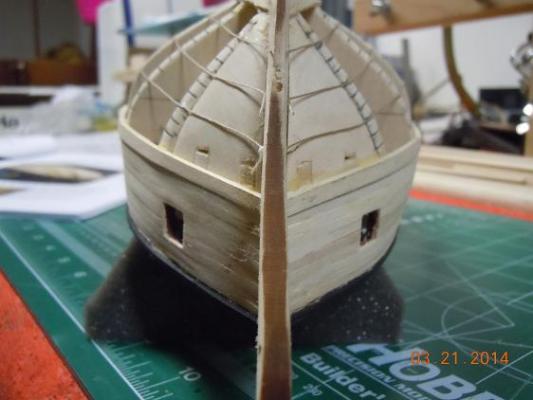
Dear ship log. Well, about half way done with the planking. This is a slow process and the stern under the transom is a bit of nasty work. Here is how I am getting the planks to form to the stern. Not sure if others have done it this way so I'm flying a little blind here. Don't remember anyone saying or showing pics of their solution. Maybe Eric? Looks like the bow is measuring up well on both sides. Go figure. It's obvious that some sanding will need to be done. Side looks a little better. Let me tell the others following this log. It is much advised to sand the top inside of the planks at a slight angle as the bulkhead starts to bend down. You can get the lower plank to snug up close to the top one by doing this and thus reduce some of the sanding when the planking is all done.
- 264 replies
-
- 1
-

-
- rattlesnake
- model shipways
- (and 1 more)
-
All really nice and clean work.
-
Well that stinks. Thanks for the warning though. I'll have to really watch this when I get to this step.
-
My Niagara came today. Man the instructions and the plans are so much better than the Rattlesnake's. Can't wait to get started, even though I know I should wait.
-
Brian, Yeah, there was not much of a twist for that plank. The real twistiing starts below that as the planks butt up against the bottom/back there. They literally due almost a 90 degree turn. Plenty of boiling hot water and a long soaking has helped the twist for me.
-
Jerry, Take your pics first. Open them up on your computer. I use paint and resize them down to 13% both ways. Then post a comment. Then go back and edit it using the full edit tab. This allows you to then locate your pics in your saved file on your computer. Once find it and upload it put your blinking curser in your test where you want the pic to go. Then add the pick to the post. It's really quite simple once you do it a few times.
-
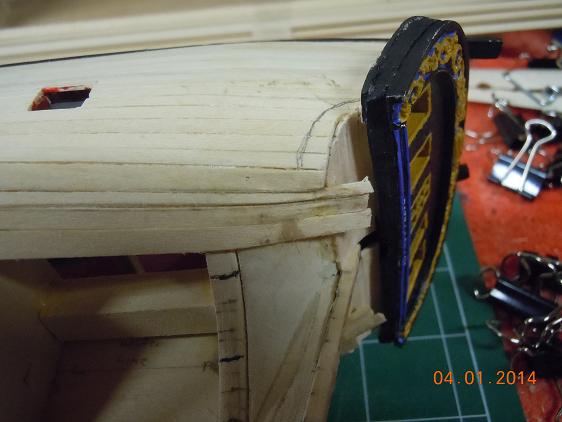
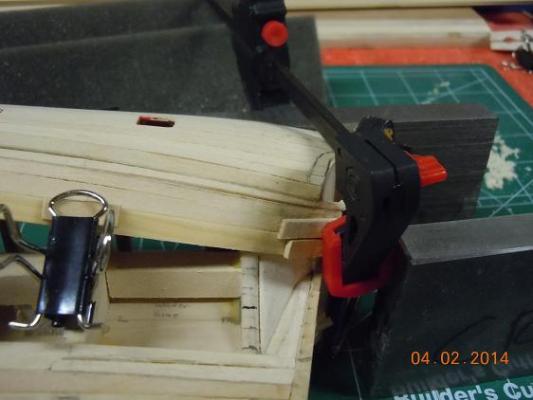
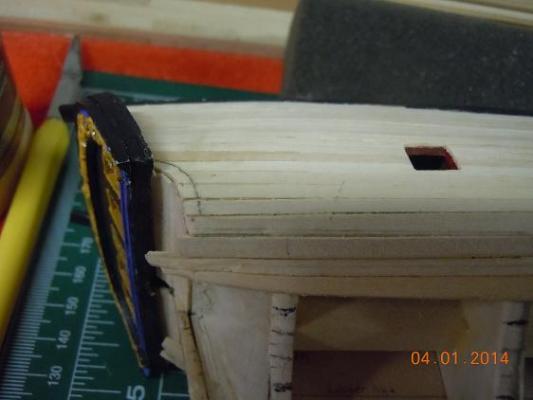
pics are up. Hope they are what you want. The wale plank is the one right under the pencil mark. That pencil mark is the decorative piece that will butt up against the transom once I get all of the planking and molding done. Hope these pics don't embarass me. The longer planks are the hull planks that will be trimmed down once I get done with this portion of the stern. Yes, the next plank underneath the wales are of different sizes. I had to get the distances to the rudder post to equal out due to my misstep I mentioned earlier. As I said, most people probably will not notice, especially since this area will be painted. So I let a little secret out.

-
LOL, I like the boat cradle you are using there.
-
Brian, What I meant is this. If I plank the deck and do enough to go just past that wall, will it raise the wall too much and mess up the door lines or even push the door lines into the bottome of the quarter deck? You are right, the plans and instructions so not say exactly how to tackle this. As a matter of fact, this wall isn't even in the written instructions. Probably my greatest frustration with wood ships, the lack of complete instructions. Frustrating really when you are used to working with plastic models and every step is detailed. Keep up the good work. It is truely impressive. I'll try to get those pics tonight. I have agility dog training tonight so I'll see what I can get you.
-
Brian, I'll see what I can do. My wale board is slightly messed up. I ended up having one side exactly one board higher than the other in the stern area. One would not know this if I didn't say anything are actualy took the time to count the board. I think I mentioned that a page or so back. Since it ultimately did not mess things up, as I was able to cut boads to get myself back on track, it is now a non-issue. As many have pointed out, wood ships can be forgiving.
-
I like that carving work. I take it you are going to deck up to this bulkhead and not just past it and under it. I, myslef, have not decided. I'm wondering if I deck under the bulkhead if it wil mess up the lines.
-
MAN!! How do you manage such good work? I bow at your craftmanship.
-
I like those pieces. My Niagara is on its way to me right now. Almost want to start it as I'm building my Rattlesnake, but I probably should wait until I'm done learing on the Rattlesnake. So tought to fight the urge. LOL
-
Looking good.
-
Okay ship log. All of your pictures are back up.
-
Man, with so many people loosing their pics further back on their logs due to the outage, building a future ship as good as this will be extremely difficult.
-
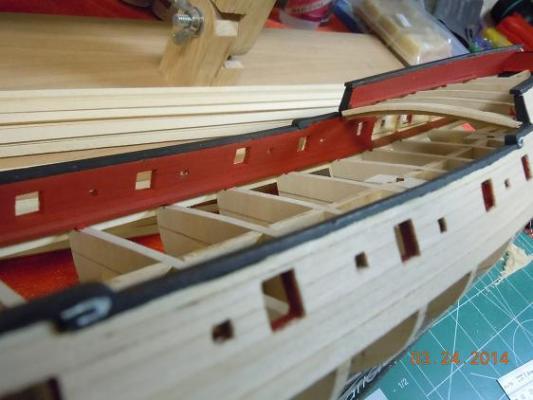
Dear ship build log. Making progress on the planking. Tried the plank insert today. Forgot what it's really called. Think I did okay. Slowly working on getting the first Rattlesnake planks in line with my new guide. Maybe one more plank and another insert. Good thing I'm painting the hull. LOL Also repainted the inside of the gunwales today. I used a lighter red over the rust. I like the color.

- 264 replies
-
- 4
-
-
- rattlesnake
- model shipways
- (and 1 more)
-
Have a question on the steering rigging. How would the crew had fired those cannons and not have them kick back into the steering rigging? Not questioning the builders skills. Just wondering in a real world application who thought of that idea.
-
Truely inspirational.
-
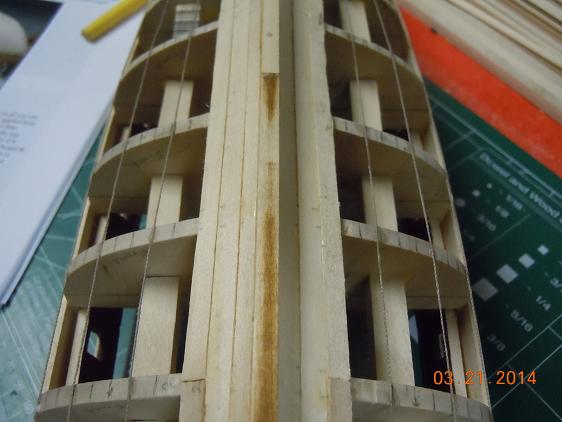
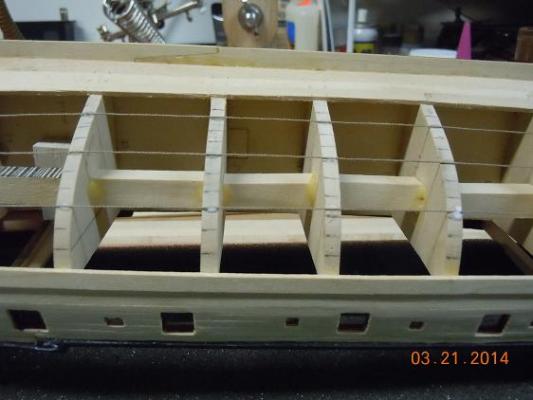
I finally found a planking tutorial that I can work with. I found "Planking the hull - a tutorial" by Keith Harris (Jack nastyface) and Wayne Tripp (trippwj). I know there are two other tutorials out there but for some reason this one finally broke through to my sense of ...... or low level of...... well, you fill in the blank. LOL. Anyways, the Rattlesnake plans show three groups of six planks and doesn't really show any actual "rules" for the width of those planks; this tutorial has me with four groups of sections (3, 3, 3, & 4) and it comes out to a total of 15 rows instead of 18. Including the Wale and Garboard strakes. I also got to keep those middle bulk head plank widths the original width. The Rattlesnake plans have you resizing all of the strakes. I'm not so sure all of the extra work was really worth it. So anyways, here is what I have so far. I had to remove one strake in order to get back on track. But then, from my readings of the other logs here, who among us hasn't had to do some strake removal. The tutorial uses black thread but I figured, hell, wouldn't any thread really work if you are using it to connect the lines as you lay them on the bulkheads? Yep, removed the strake that I had for line number three. The Rattlesnake plans strake was going to mess up "Nastyfaces" plans. The only thing I had to keep in mind, which was not explained well in the tutorial, was when you figure out your middle bulkhead number of strakes, you have to use that number for all of the bulk heads. For my ship, that was 13 strakes not including the garboard and wale. If your recalculated for each bulkhead you would end up with 11, 12 and 13 strakes. Now how does one make strakes dissapear? Looks like I was able to get things to line up.

- 264 replies
-
- 4
-
-
- rattlesnake
- model shipways
- (and 1 more)
-
I like that lettering on the transom. Nice choice. Filler blocks look really good to. Looks like you are moving right along
-
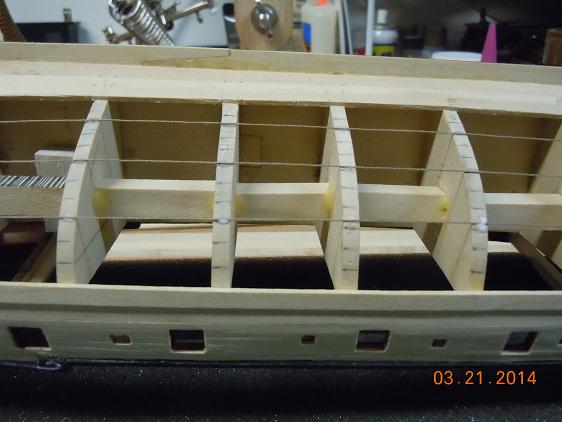
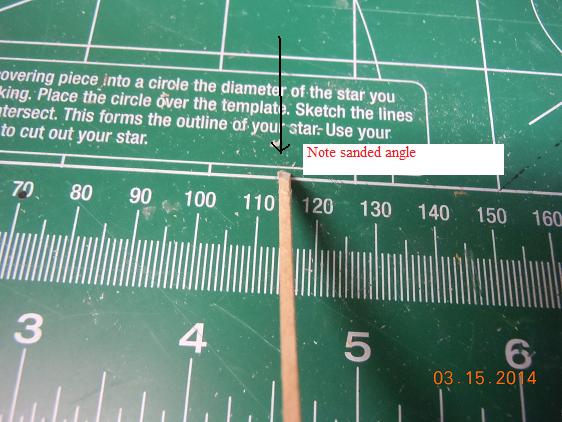
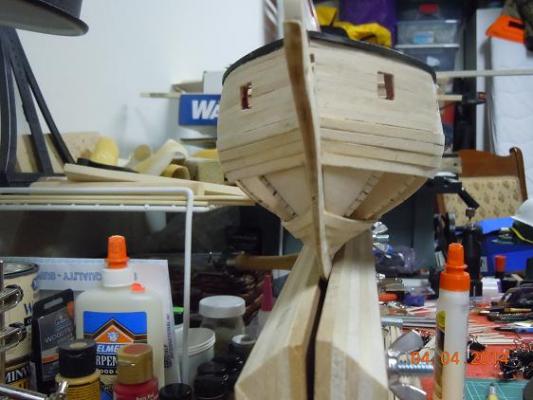
Okay ships build log. Onto busting open my anxiety about planking. Keeping my fingers crossed. Here are picks of the gabbard strake and the next one up. Thought I'd start at the bottom since there seemed to be the least amount of strake shaping as possible. I've read that it doesn't really matter if you start at the top or bottom. Why does the little voice in the back of my head say that I'm going to mess this up somewhere and have like only half a strakes worth of space left when I get to the wale line? As you can see in the pic I'm also messing with cutting the strakes every 4 bulkheads long. Not sure I'f I'll continue this. I don't really like trying to fit the pieces together after I've glued them, especially in the bow area. The middle I can cut and then glue at the same time but I'm finding the bow to by the most difficult area to work with at this time. The angle and small point of the strake are making it difficult. I'm sure I'll find more issues later. Thought I'd try doing a little inside sanding of the strakes where they come into the bow. My idea was to better fit or get a smoother fit into the beard line to keel slot. Seems to work for a dry fit. I'll let you know how it comes out when I get the glue out. Note I pointed out the sanded slight angle on the inside of the strake.


- 264 replies
-
- 1
-
-
- rattlesnake
- model shipways
- (and 1 more)
-
Looks like the effort paid off. Many of us following behind you appreciate the work and trail blazing you are doing for us. All good tips for us when we get to your posted steps. Thanks.
-
All nice work. From other posts I read while I was doing the stern blocks was mostly about those two lower blocks. Make sure the angle is good for when you are bending the strakes the come into the beard line smoothly.