harvey1847
-
Posts
528 -
Joined
-
Last visited
Content Type
Profiles
Forums
Gallery
Events
Everything posted by harvey1847
-
Love to see your log Piet! It keeps growing every single day. It is like reading the news every single morning... Now I can see the cockpit, I´m a believer... I´ve got a question, if all that space is covevered with water, when the sub emerges how you "evacuate" the water? Does it has some kind of scuppers? or they pump out the water? By the way, my indoor workshop is about 10ºC... Daniel.
-
Looking Good Richard! What temperature (in celcius) you have up there? The "Hercules" has been a pretty good storm as I have heard on the news. Hope you are all ok. Keep going. Daniel.
-
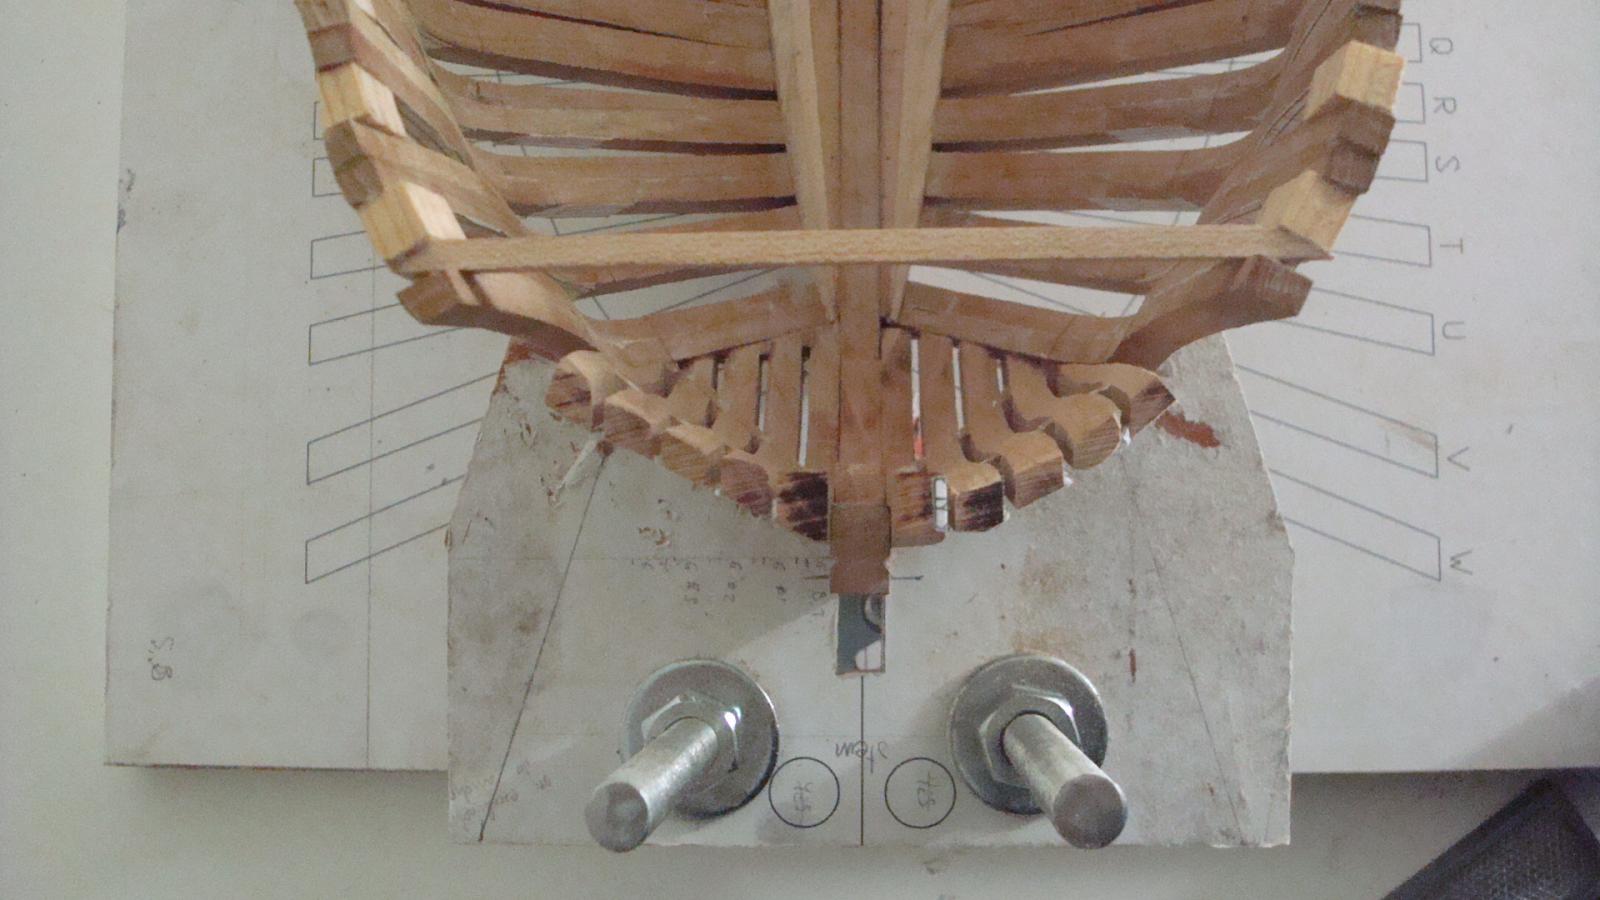
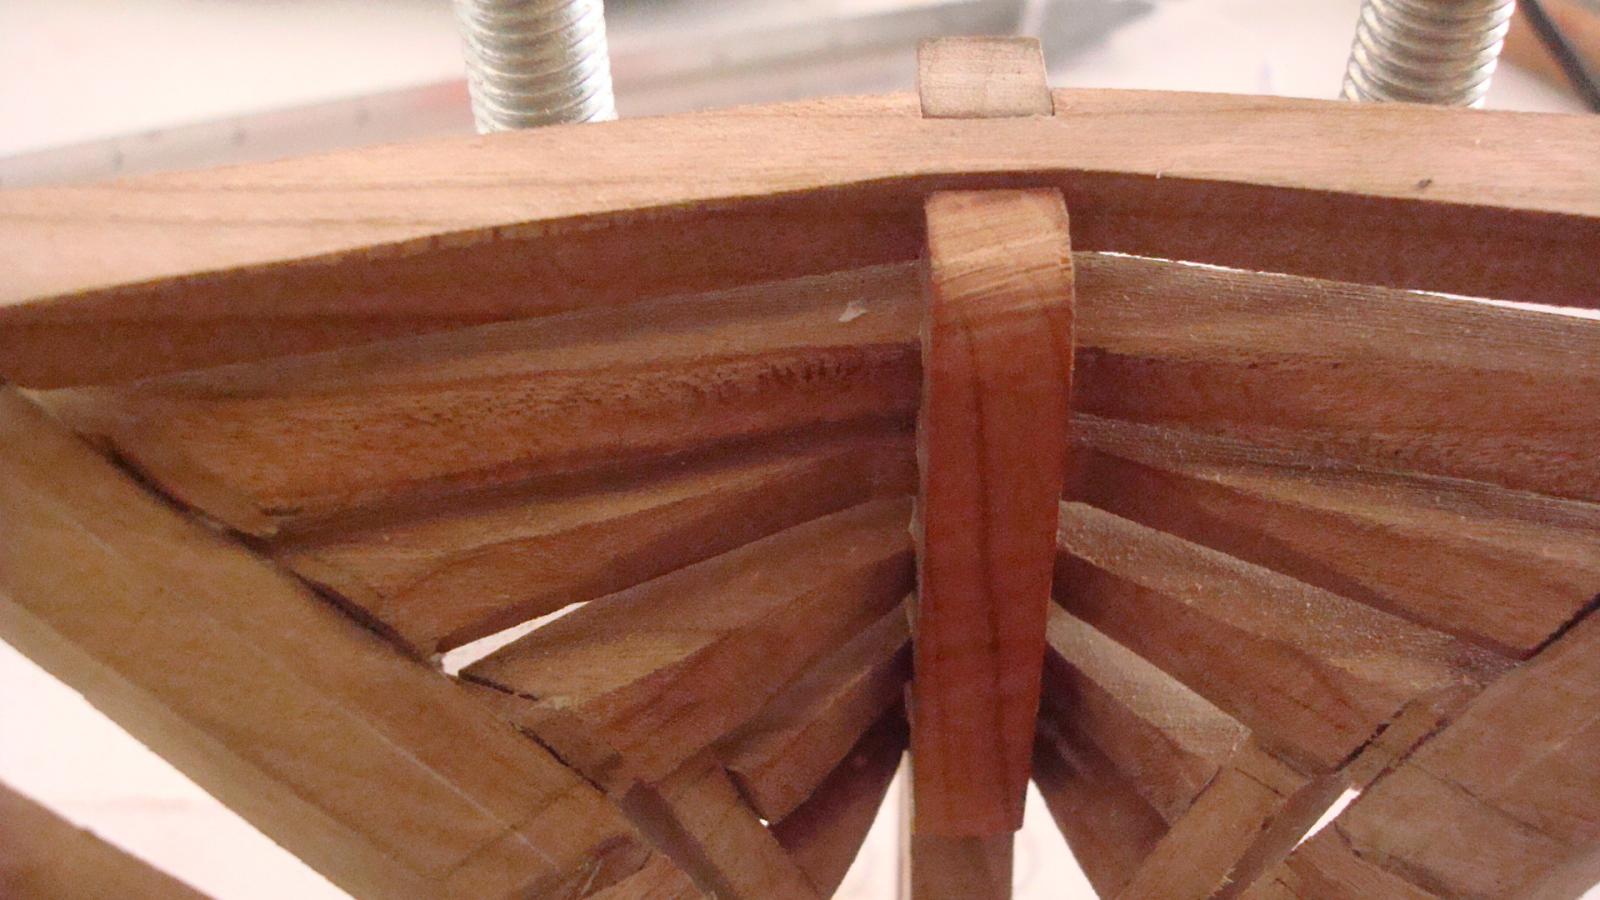
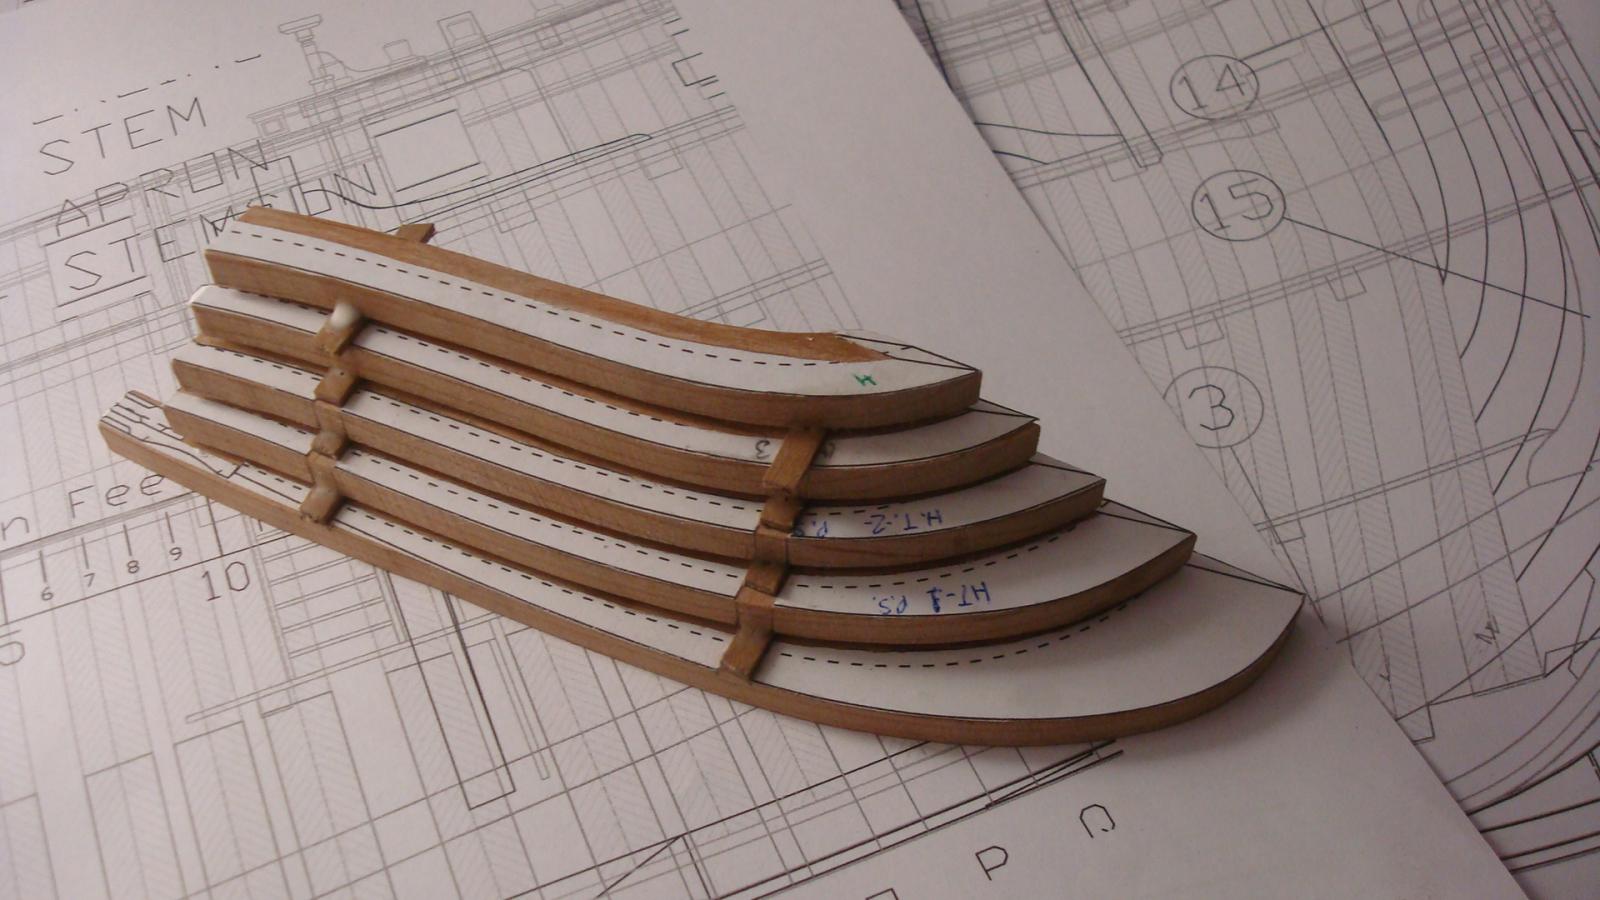
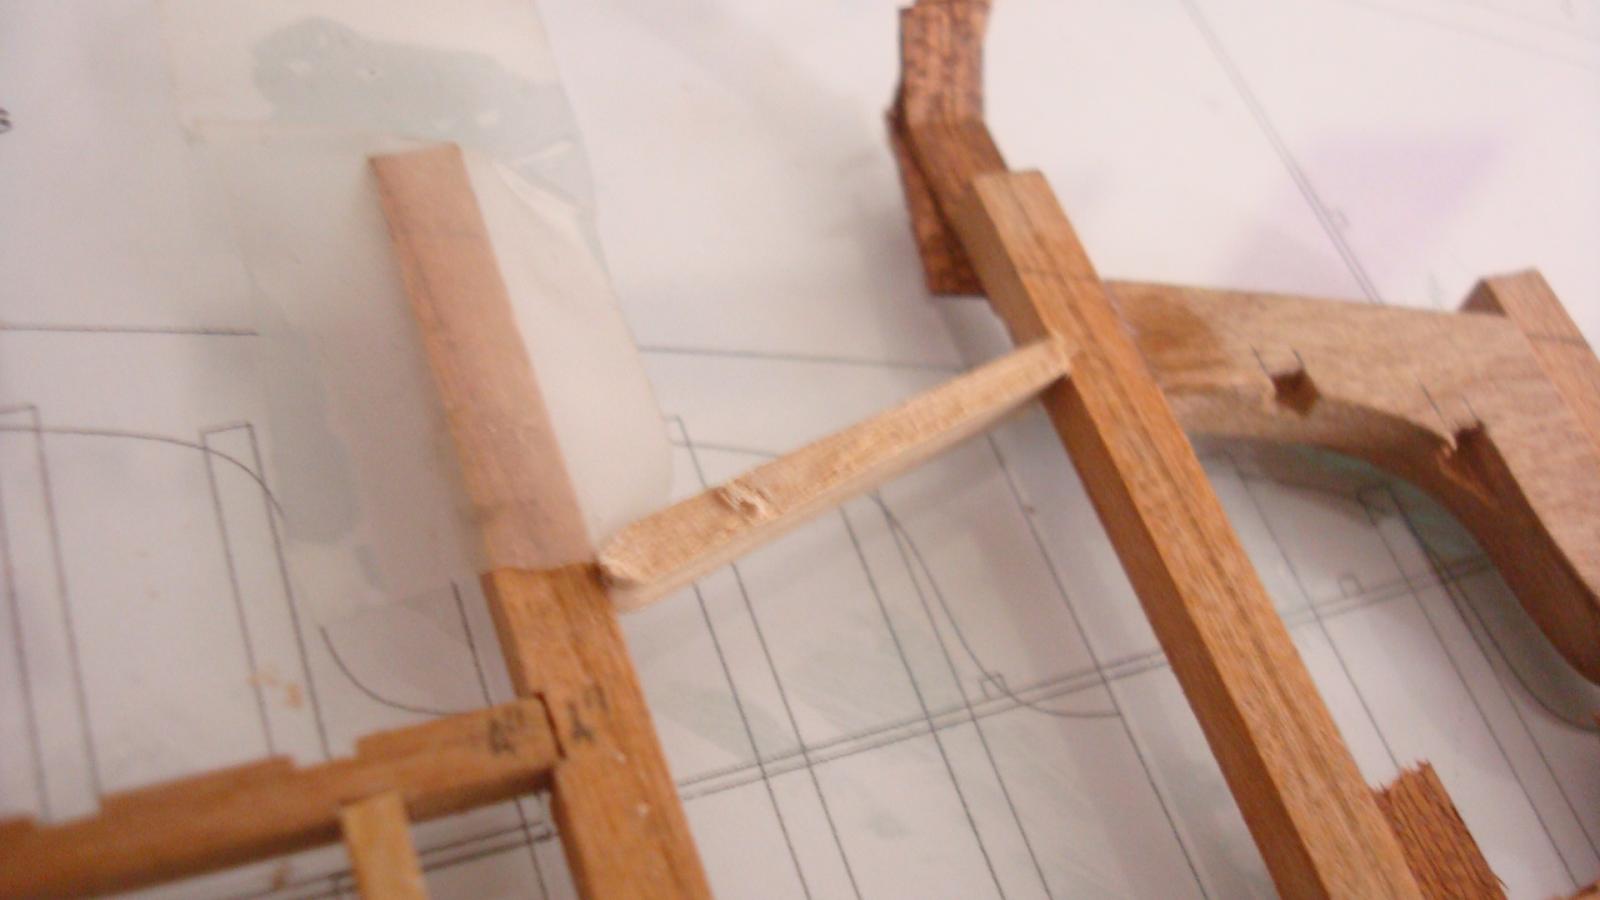
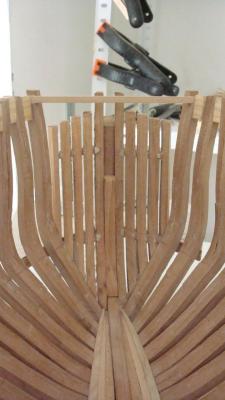
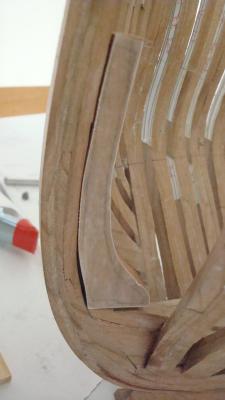
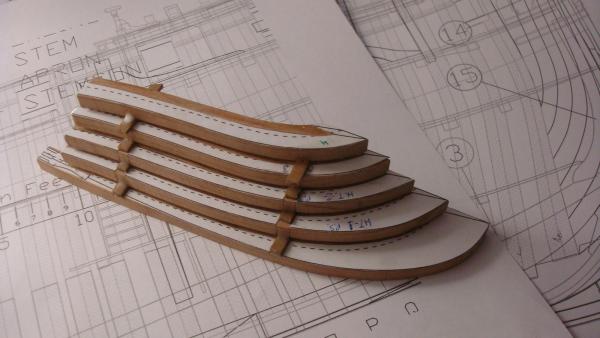
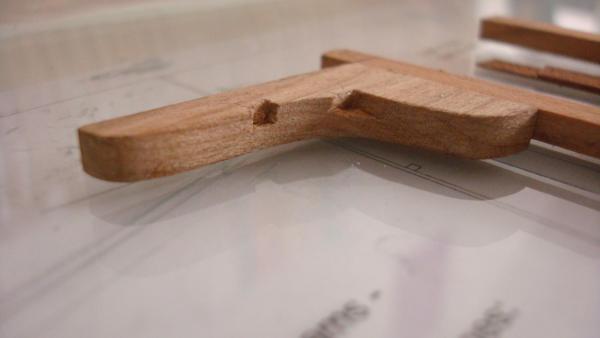
Hello! I hope the Three Wise Men have given you lots of presents. I have none just coal… Here are the pics of the hawse timbers glued plus the stemson. Once I finished this I moved to the stern to put this little piece that I do not know how to call. It surely strengths the fashion timbers. It´s not glue yet only set because I have to sand it a little bit. Three pieces more to go with the lower deck clamp. In fact while uploading this I am boiling one of them to glue it in place. Best wishes to all! Daniel.


-
And Do not forget to set the Flying Dutchman flag and a big bottle of champagne! or a 1:48 little botle that I am sure you could model... Daniel.
-
Thanks Wang!! I Know is kind of hard to open a new log and put the pics and write in English... BUT... Why you don´t start a new log here in MSW.2.0? Your tips and skills about modelling would be really apreciated Wang! Let´s see how goes 2014... Still 360 days ahead! Best wishes! daniel.
-
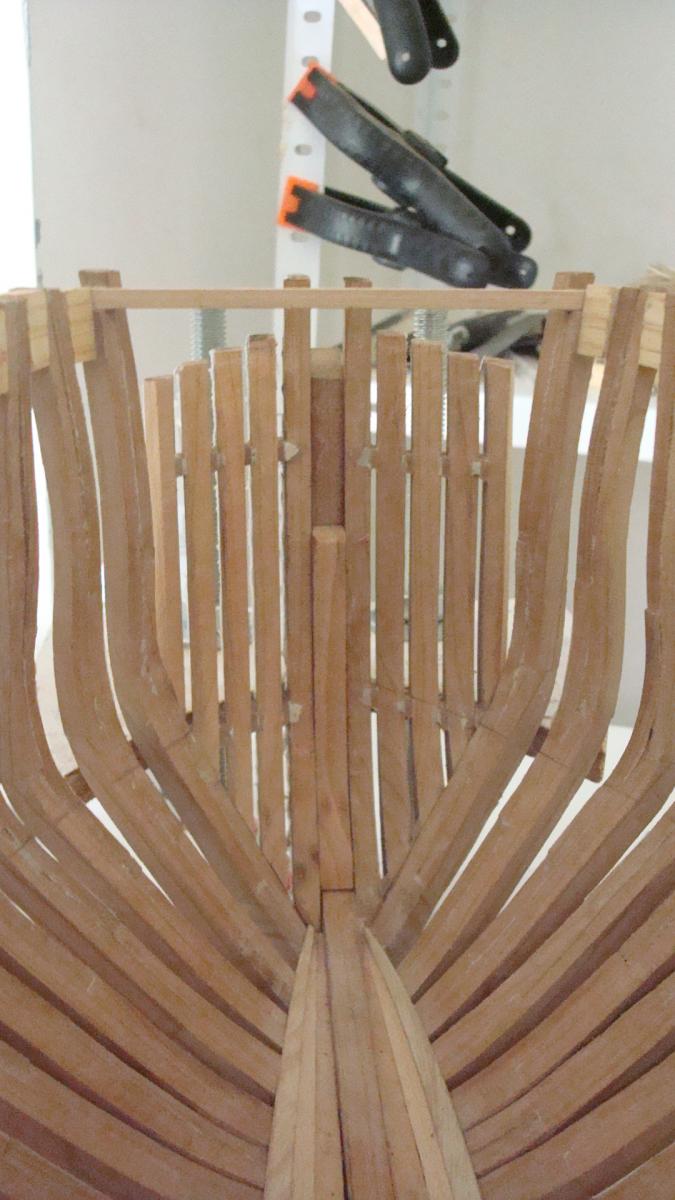
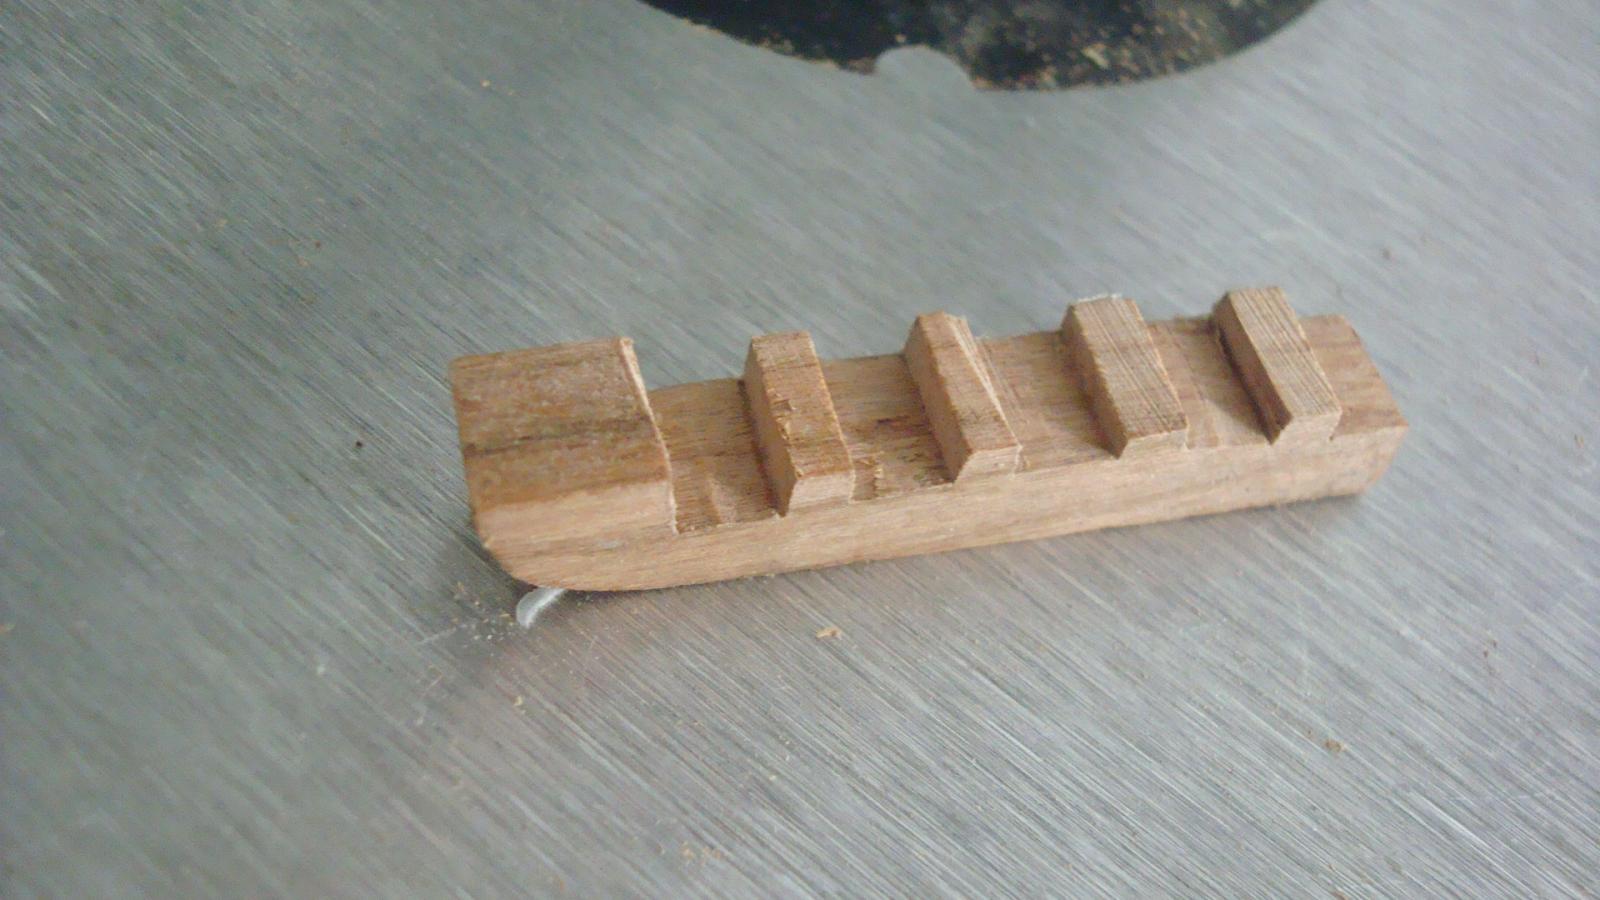
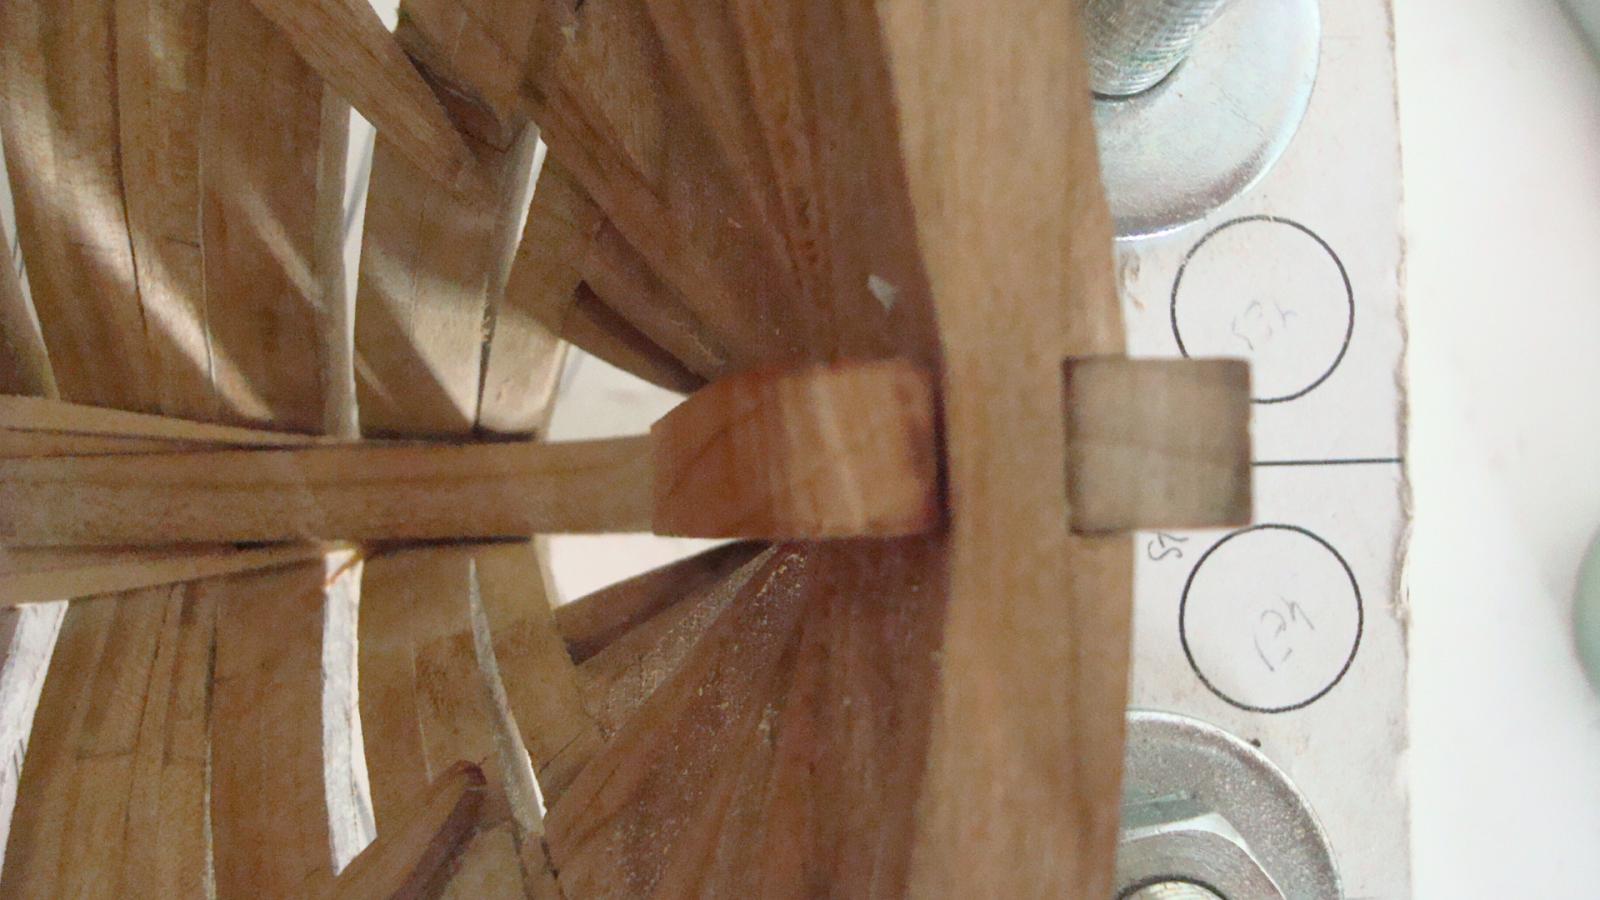
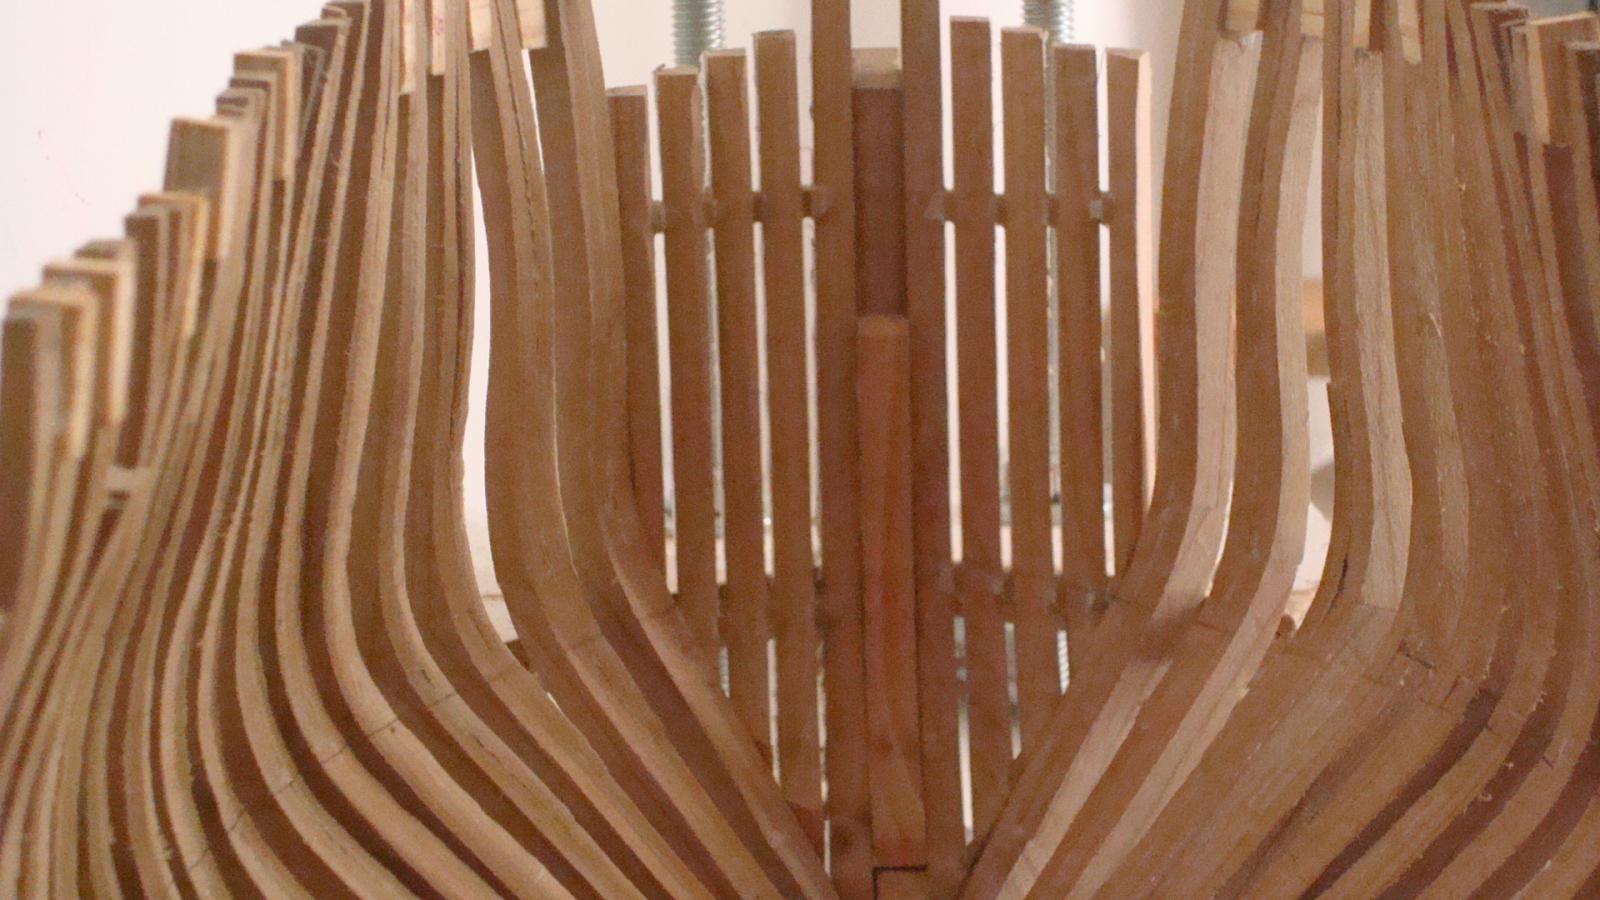
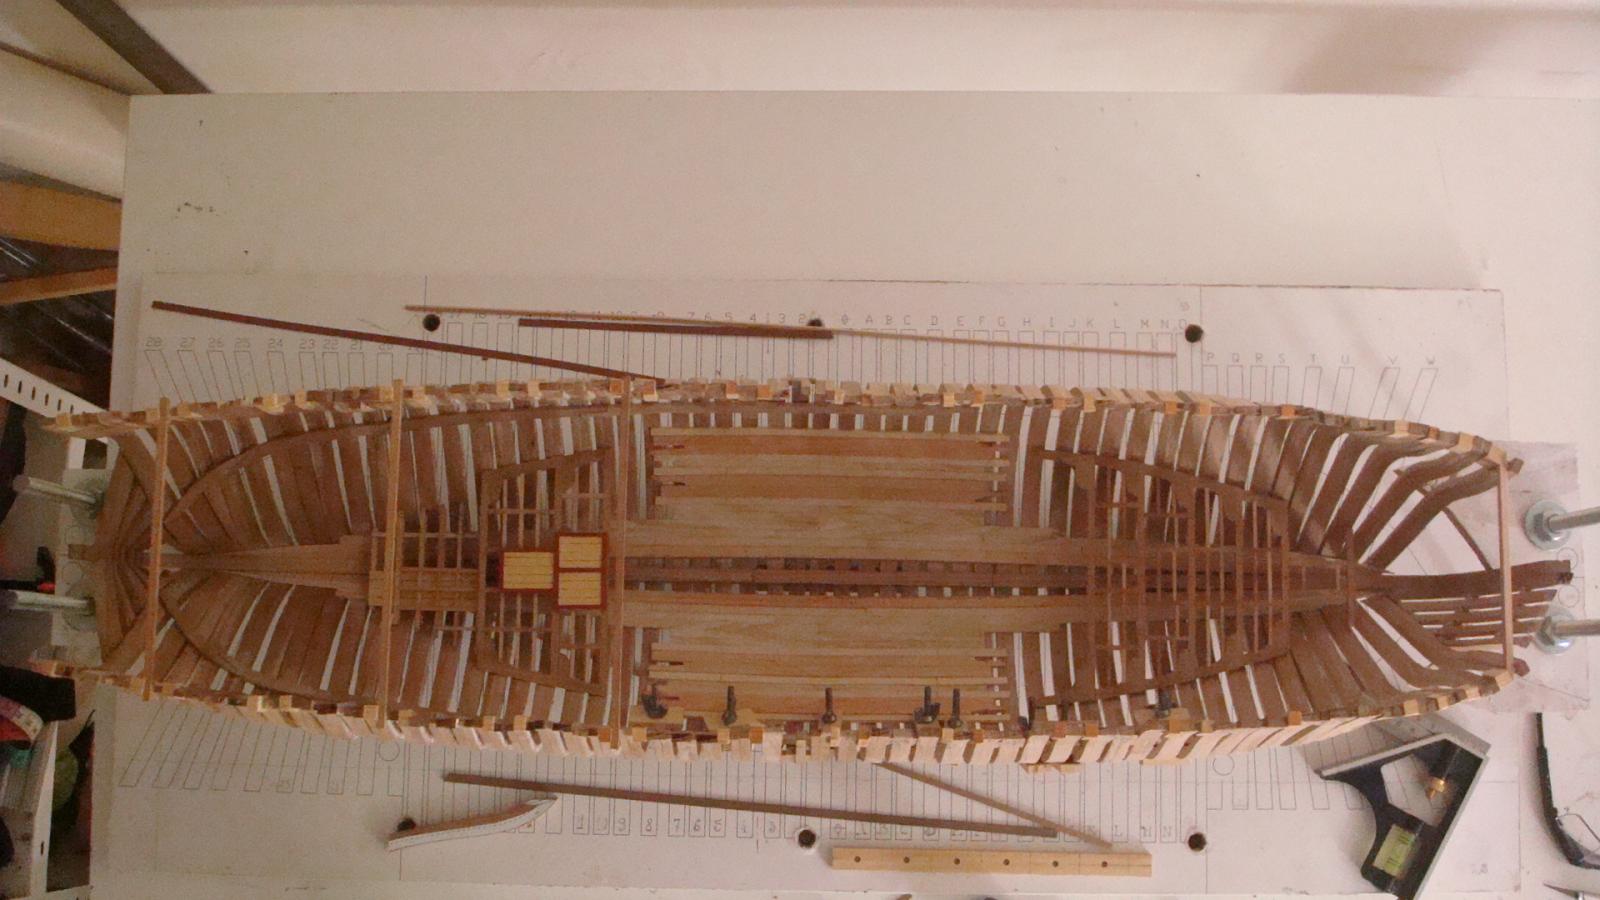
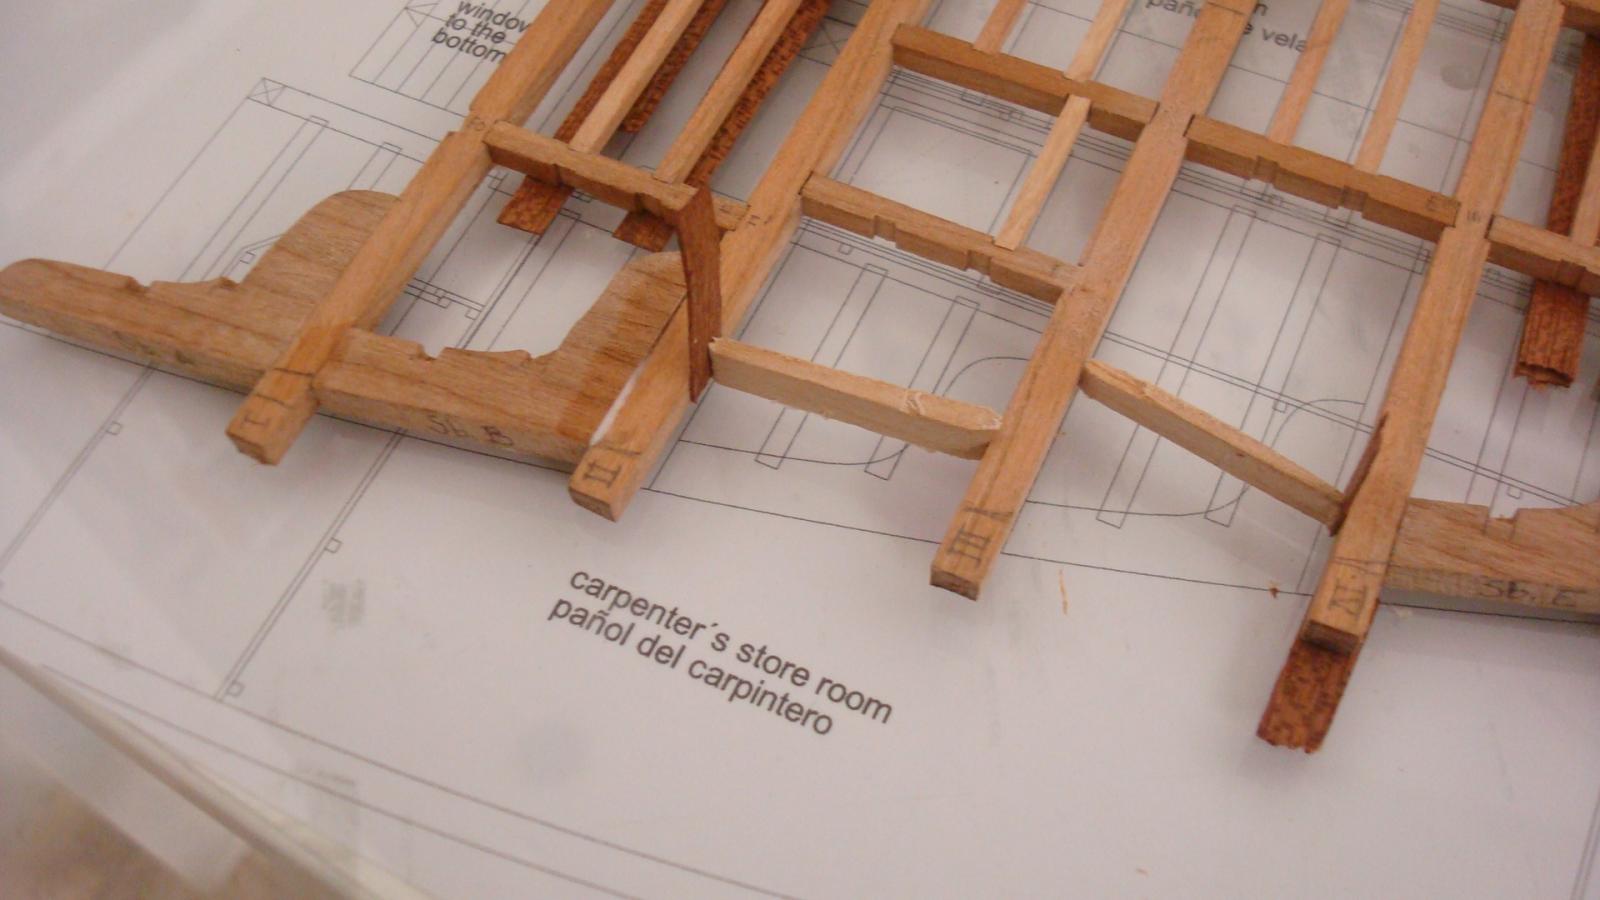
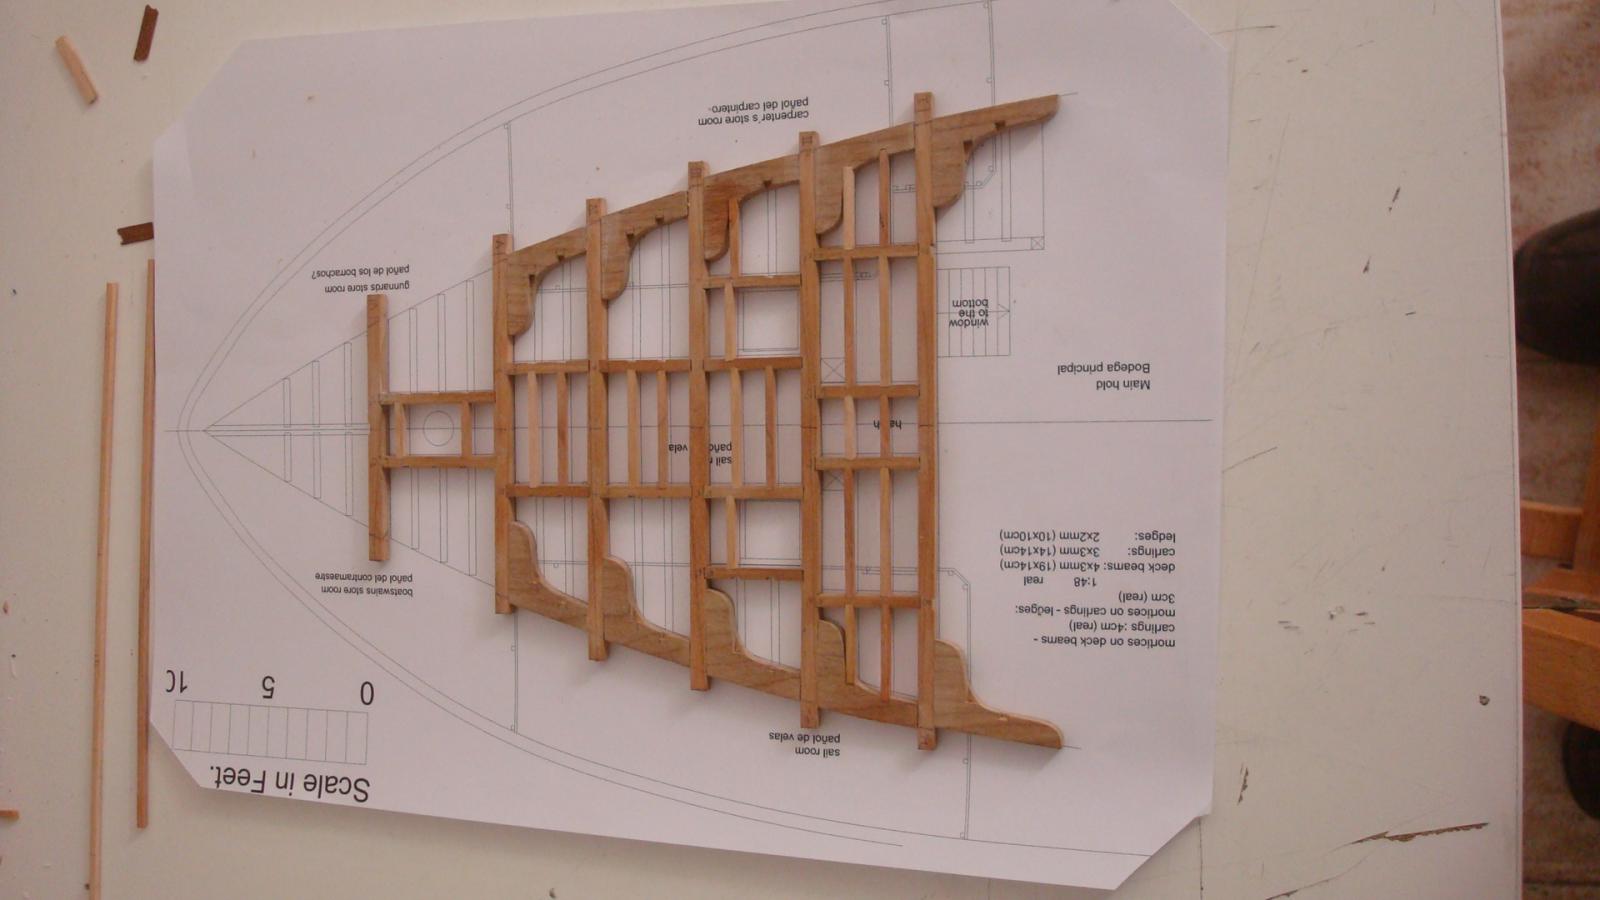
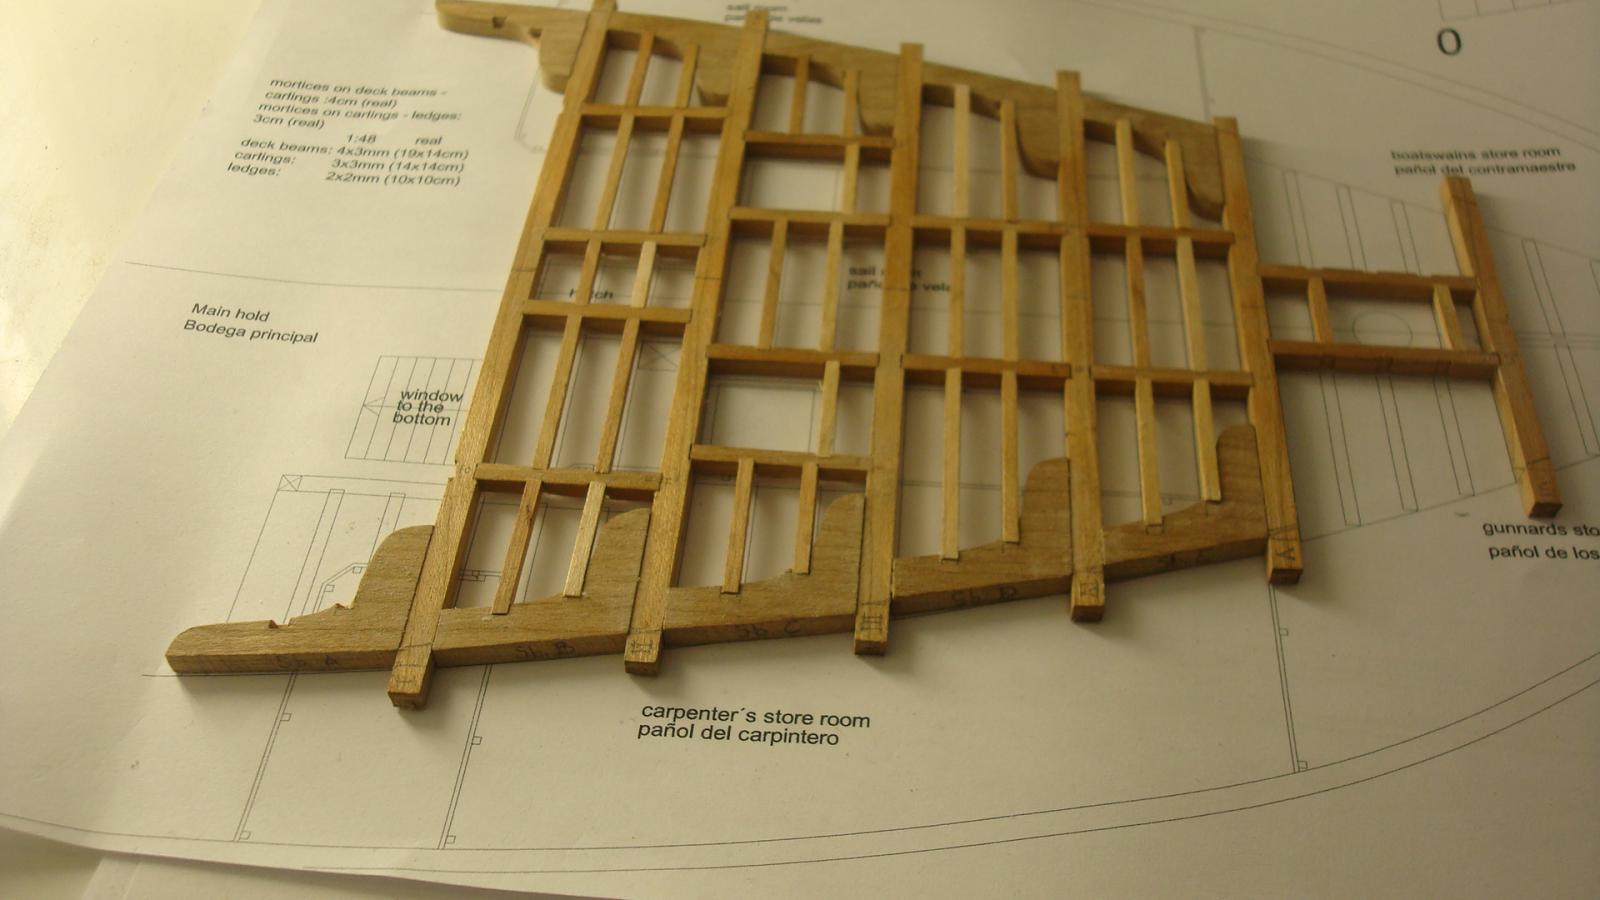
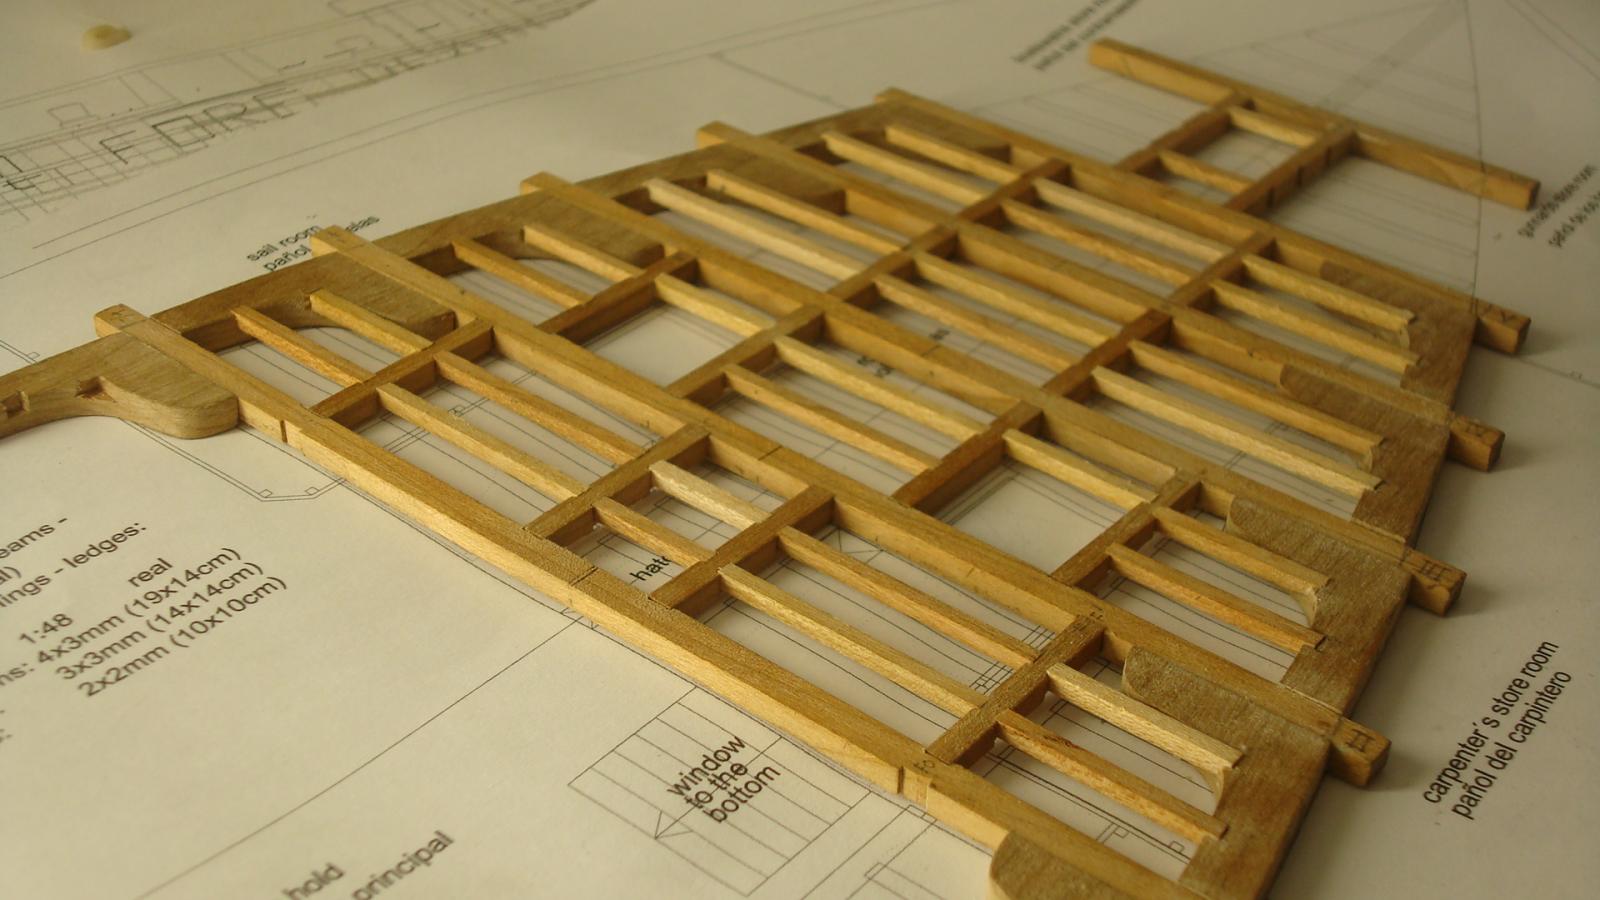
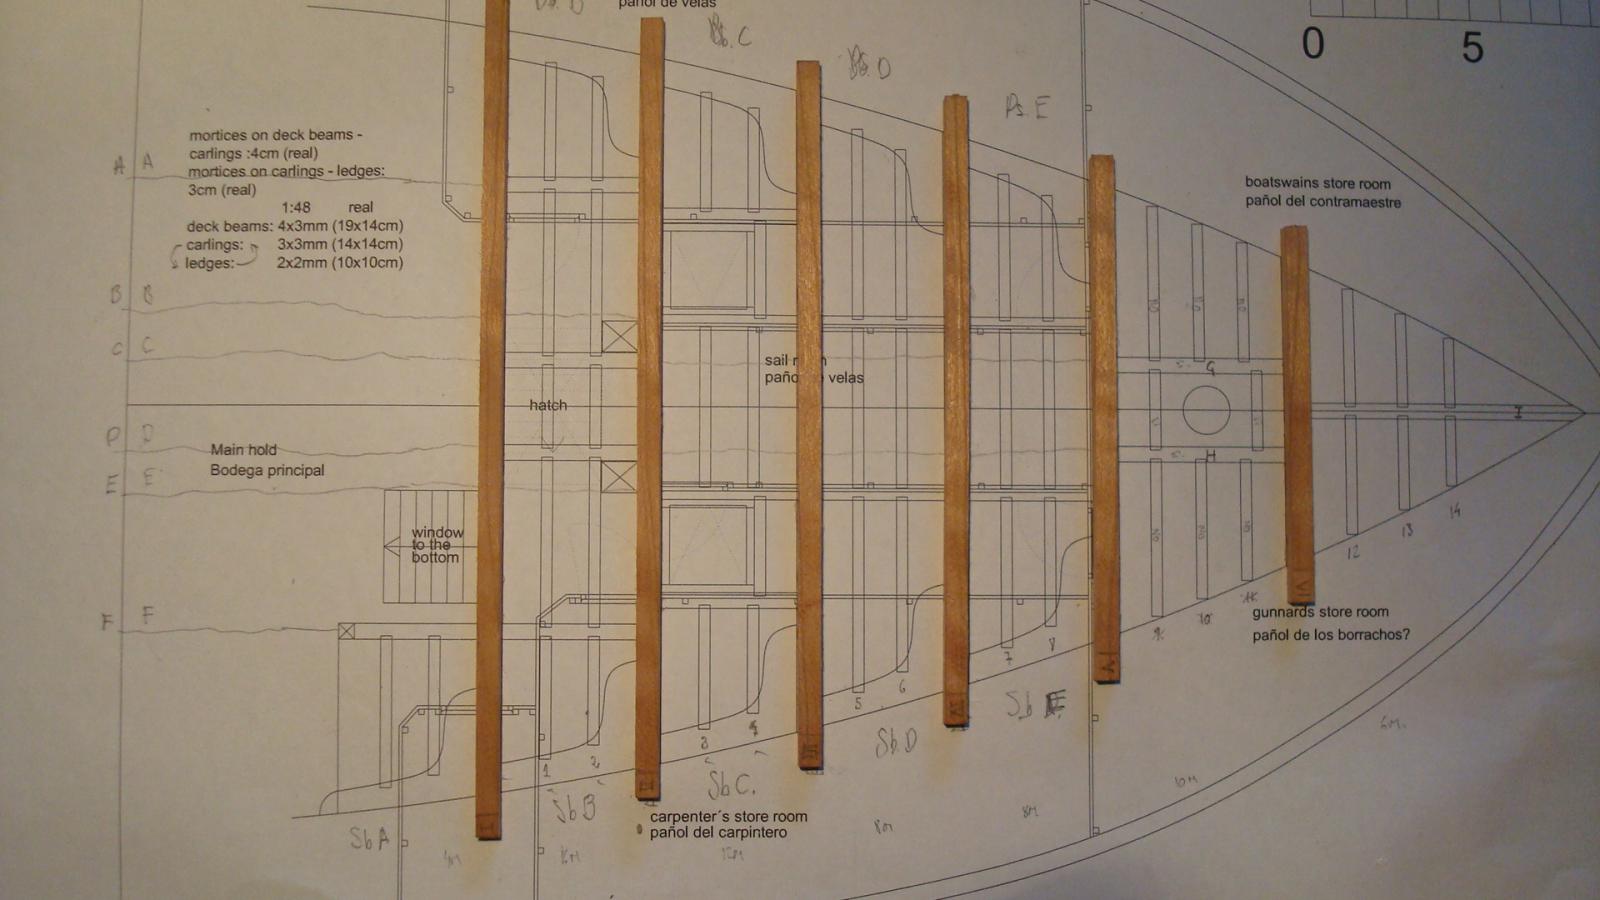
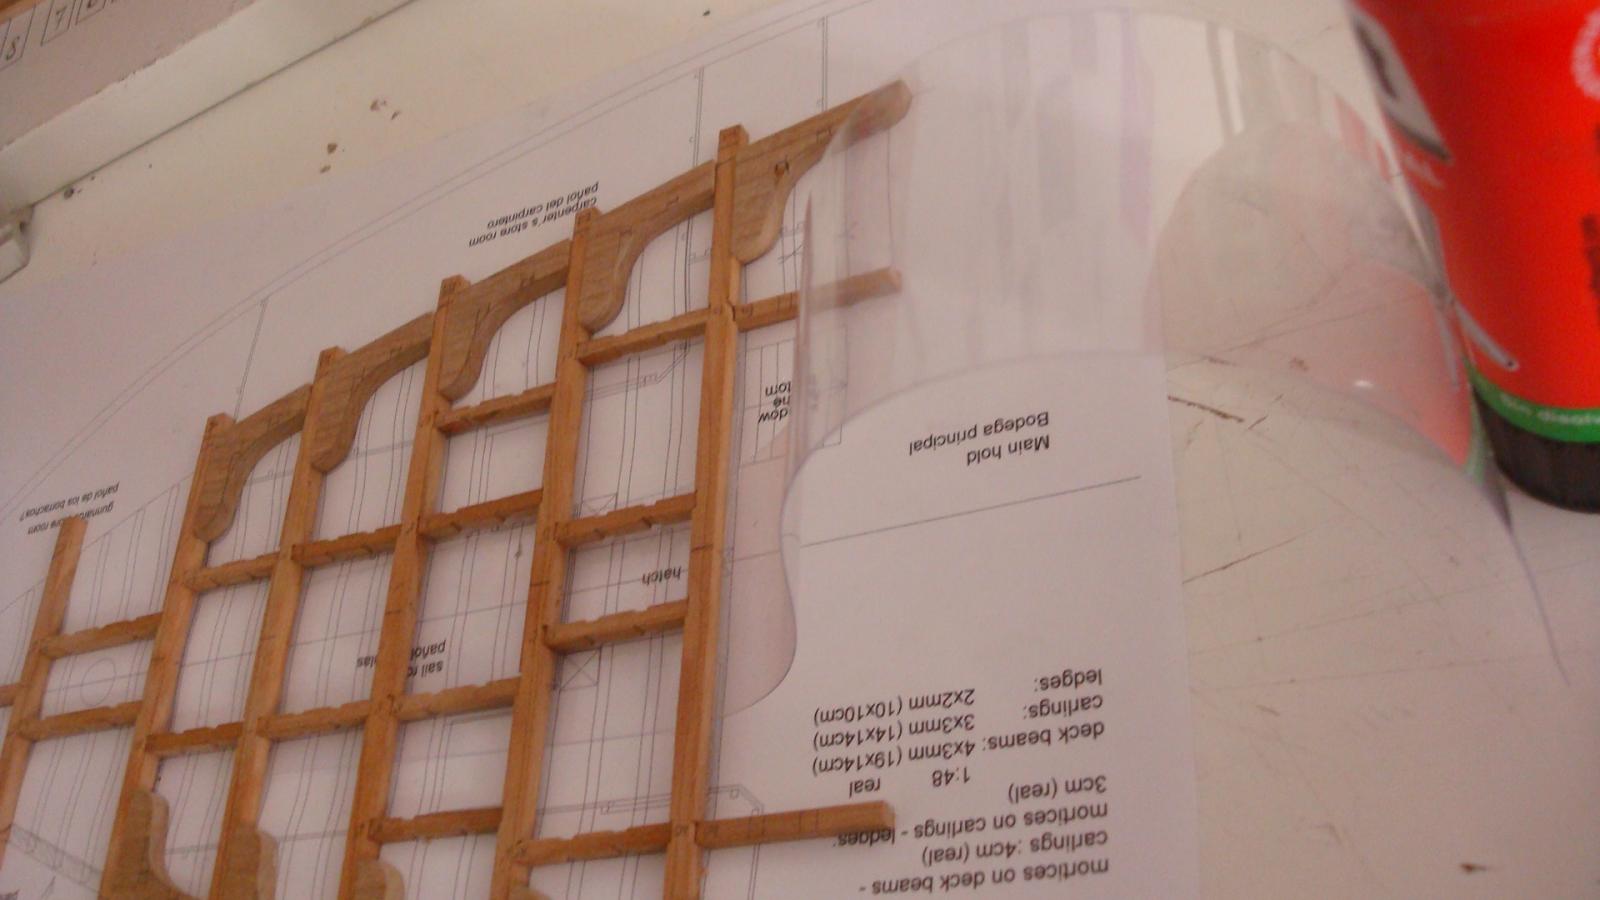
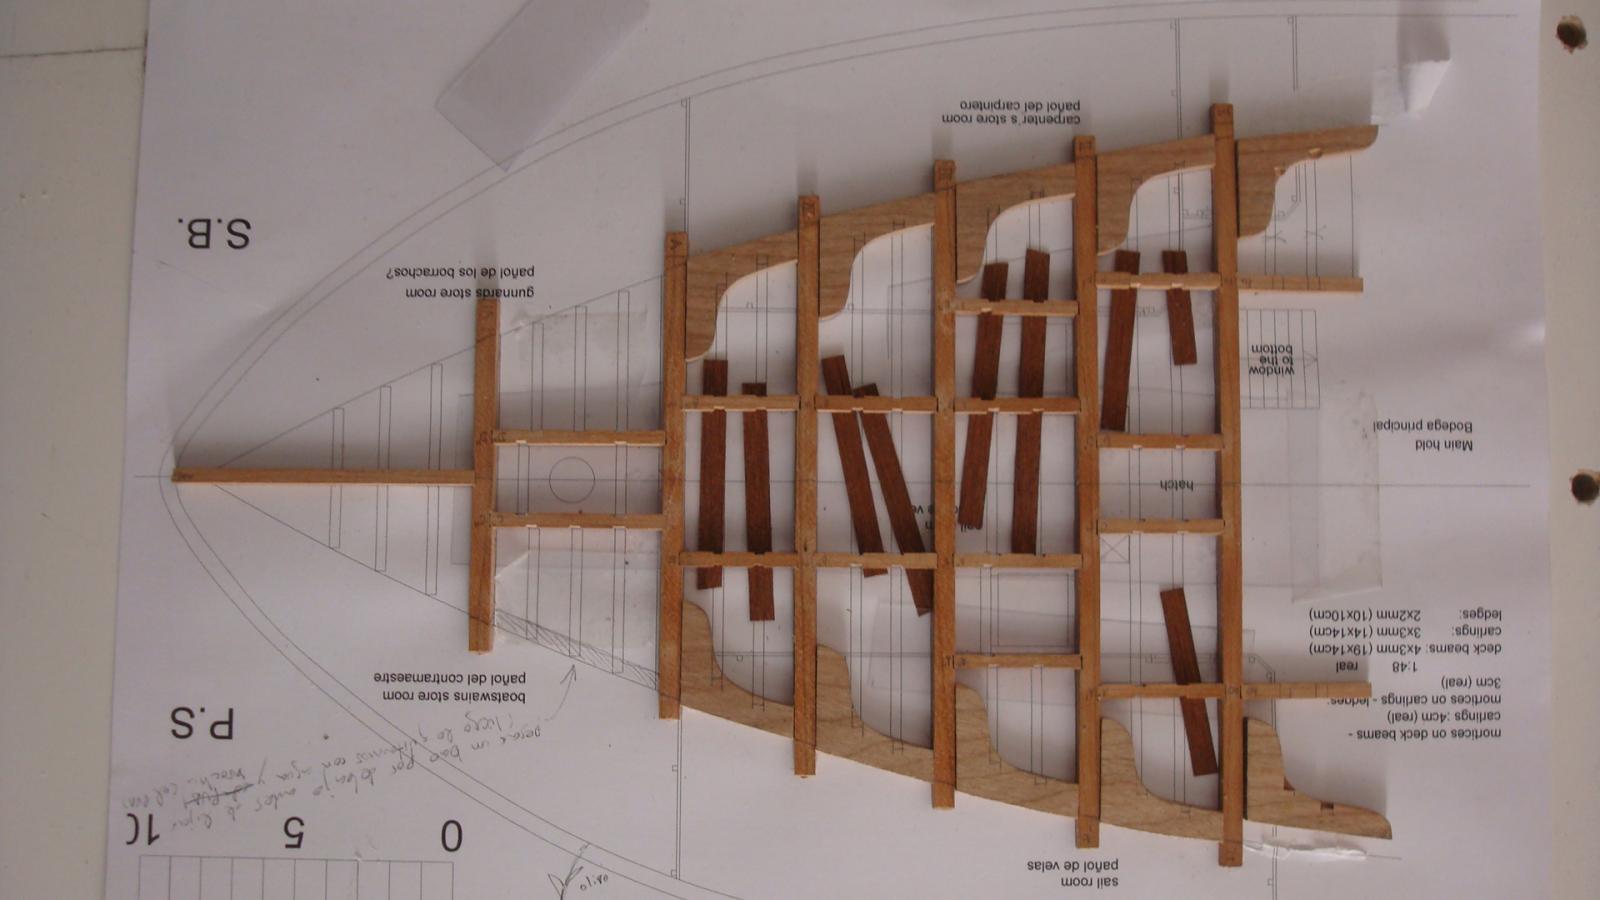
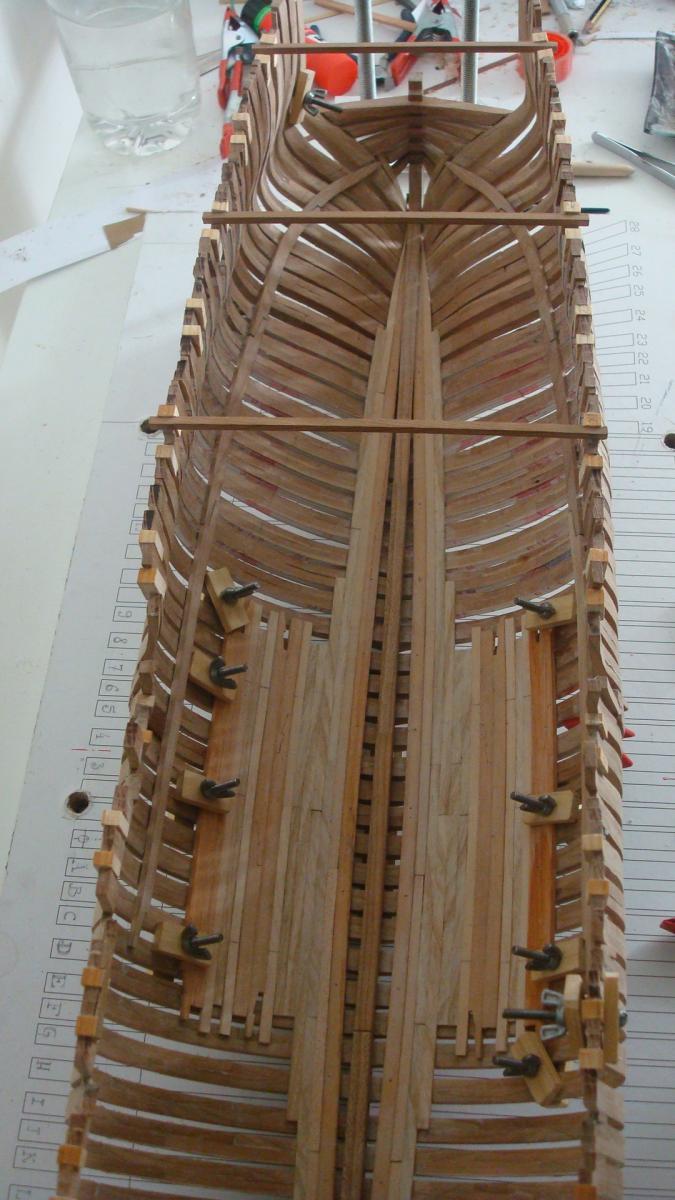
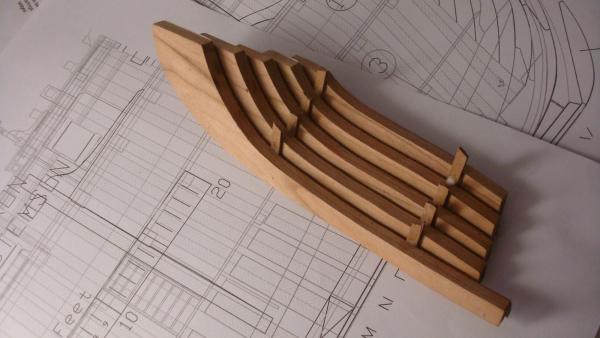
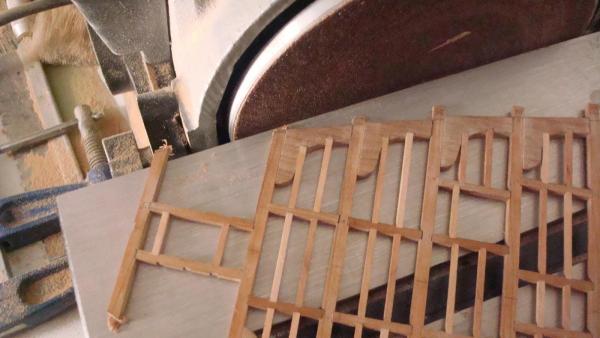
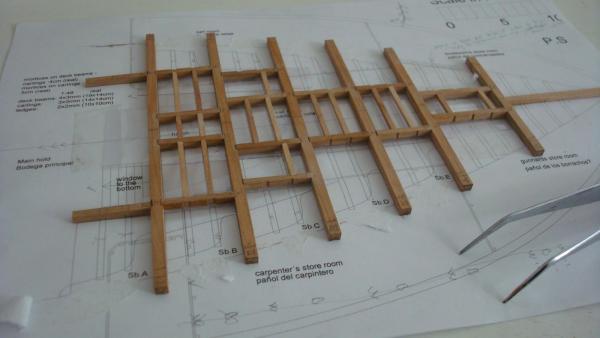
Hello All and Happy January 4th…! Here is the work done so far today. The mighty hawse frames, I have omitted all the process cause I thing it has been already explained. and I have a big question… First the bunch of pics about the hawses: (sorry about my nails, so much dust around...) And I have a question to all of you. Do you thing this kind of ships use to have a hold like in the HMS Victory for example? The hold looks pretty “empty” without those platforms on each side. I´ll be waiting for your answers. And again happy January 4th or 5th!! Daniel.

-
HAPPY BIRTHDAY WANG!! cannot believe you are 29 today... !!! daniel.
-
Hola Hola! I have glued the hawse pieces today plus two or three timbers today here are the pics. I have spent like two hours, mainly to let dry the pieces. Meanwhile I have moved to other stages I´ll explain later on. Richard! I do understand you but If you start another thing, yes or yes is going to rest you time from the Triton. Believe me that once the hull is complete the Fun starts Again. Like Remco says “Treat each part as if it is a model on its own, you will finish more models in a day than others do in a lifetime.” I have kit models of airplanes on their own boxes which my kids probably will inherit. They were kind of a temptation to me once but not anymore with the hull “finish”. I write this with total respect. All of us are free to move to whatever we like to do. Best wishes. Daniel.
-
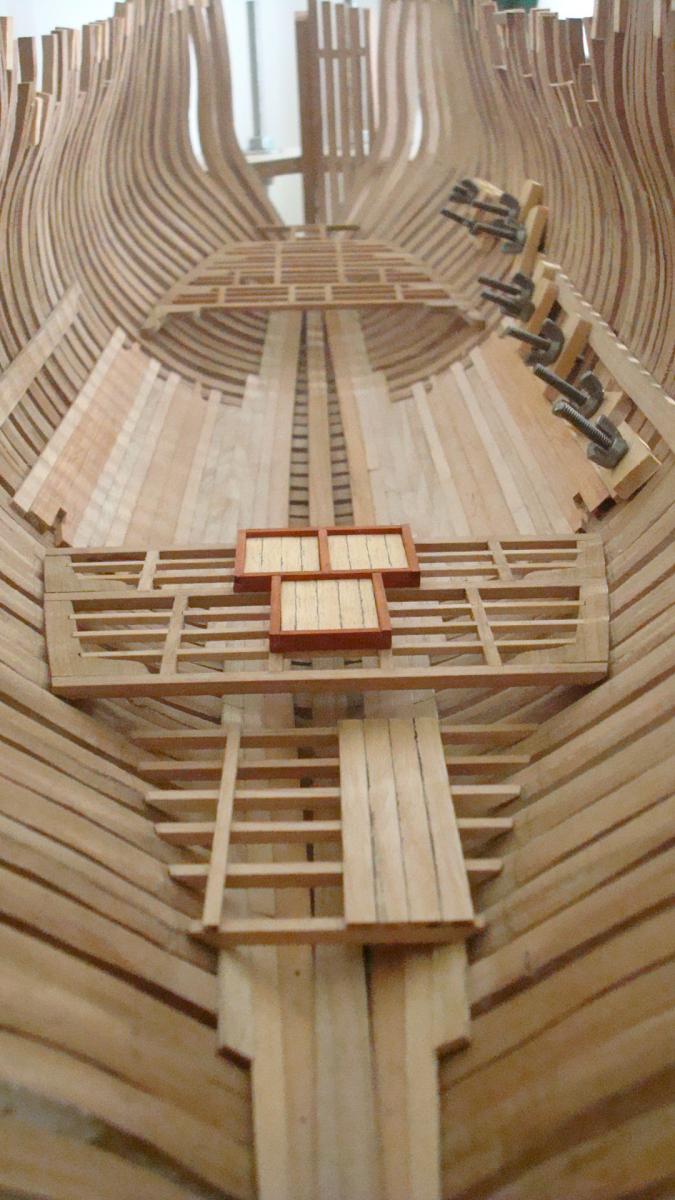
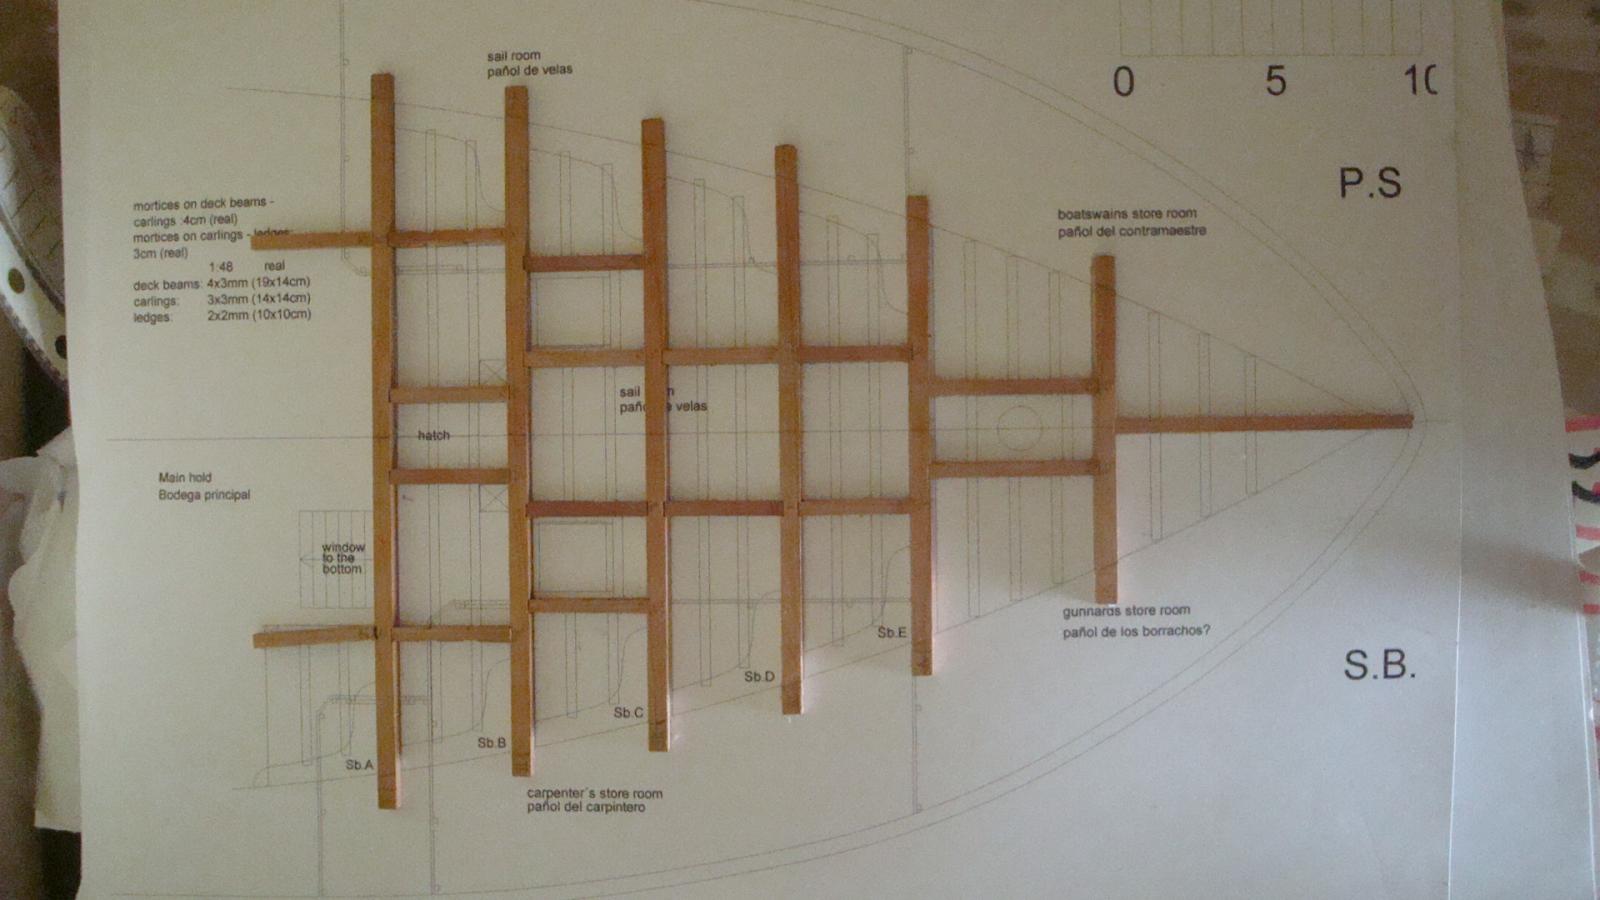
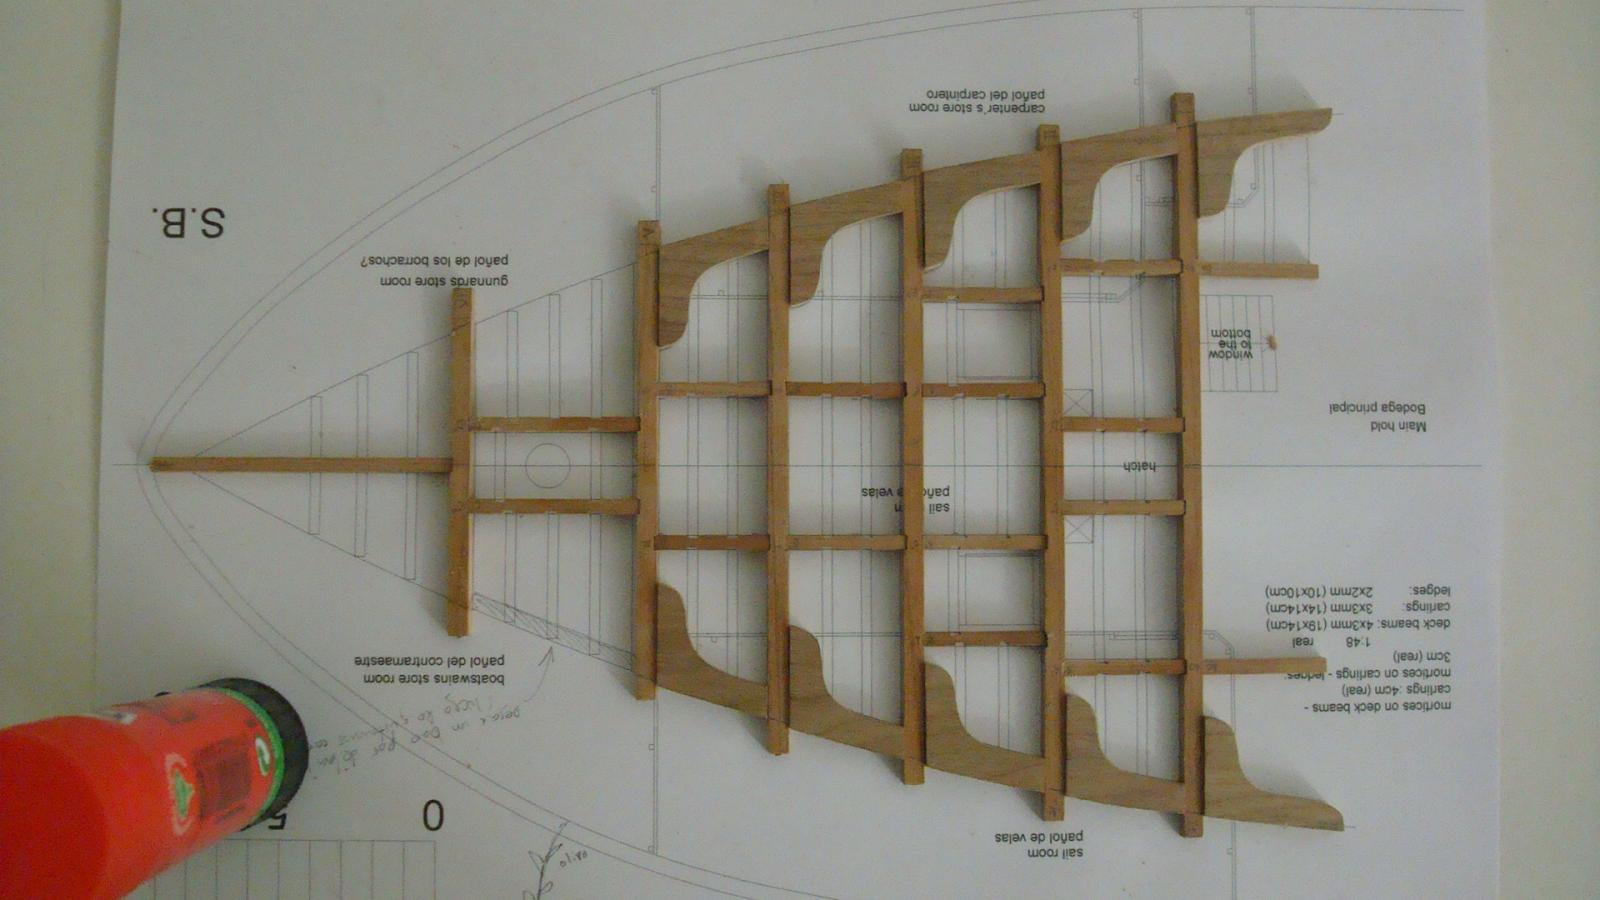
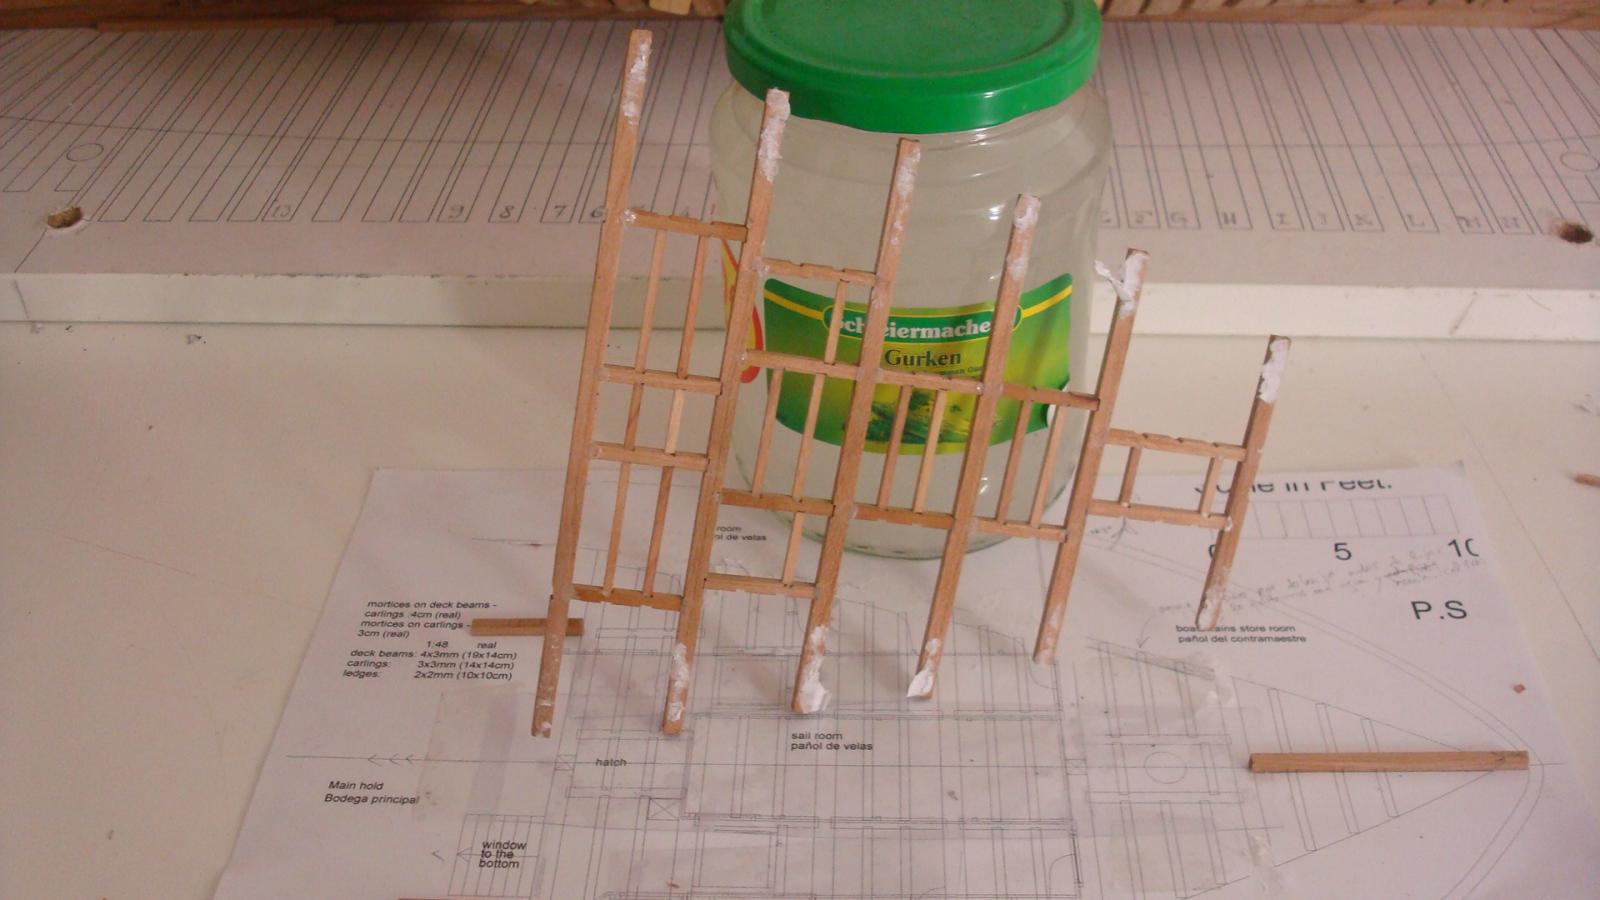
Hello hello! Looks like with this brand new year a few people is getting back to the full model practicum… Randall, Guy, Richard… Just a little thought. Making the frames and gluing them was pretty tedious. Once the hull is done the complex of the work ahead goes higher and higher meaning more and more fun… You can move on more different thinks. You can start with the keelson, the limber strake, the thick stuff, the platforms, the deck clamps,,, you can start measuring the plans and making little structures inside… And you can move from one work to another. Sometimes I spend the day at the living room just making scarfs on the beams or on the ledges and the workshop is close. So I encourage all of you to complete the milestone of completing the hull. The shape and the size of her are really nice. Anyway… Here´s the result of the fore plat and the work done so far. I love pics not like you guys with all that words and literaure...! pics, pics we love pics! come On!! I could not resist taking these shots of all the platforms done so far… Are all set but I have to finish the hawse pieces first, the L.D. clamp and faired the exterior. Richard, I recommend you to finish the hawse frames, you might become lazy like it has happened to me. It´s a quite tricky piece to do. Indeed, after writing this, this morning, I have started the left piece on the portside… ... Best wishes! Daniel.


-
Hello Piet and Happy New Year! That little superstructure is getting richer and complexity. Is the cockpit going to be covered? I cannot remember anymore the pics about the structure... one thing is to see the pictures and another to actually see the details, the doors, the periscope, the deck planks... Always a pleasure to see your updates. Best wishes! daniel.
-
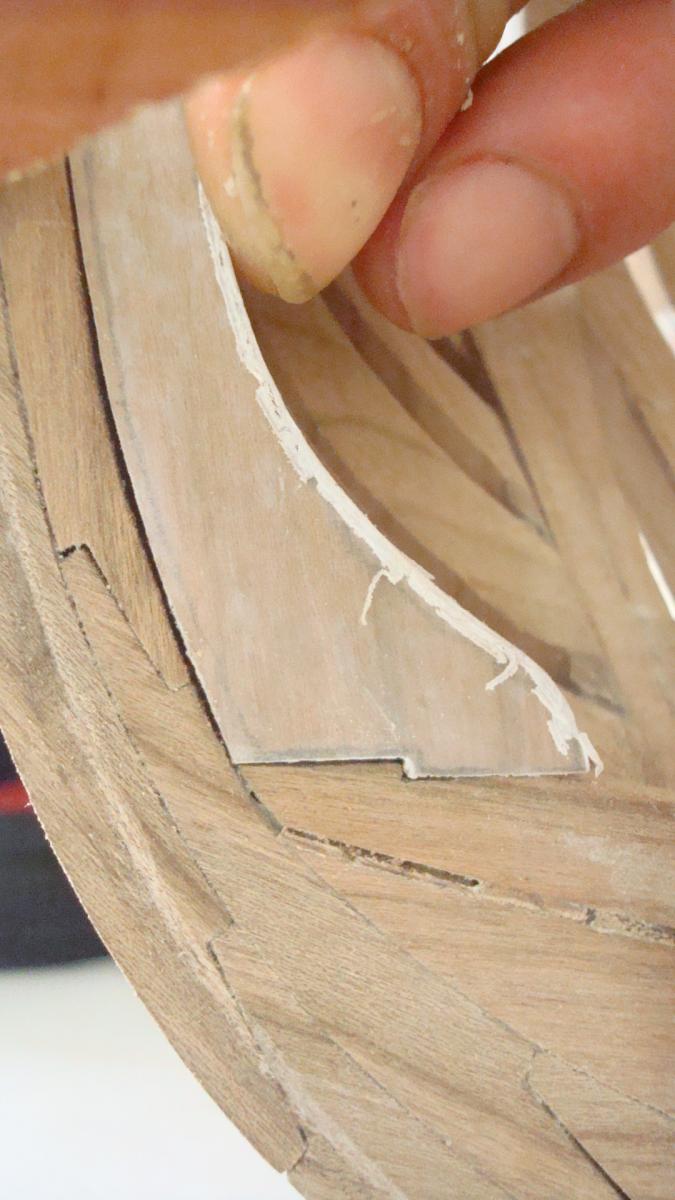
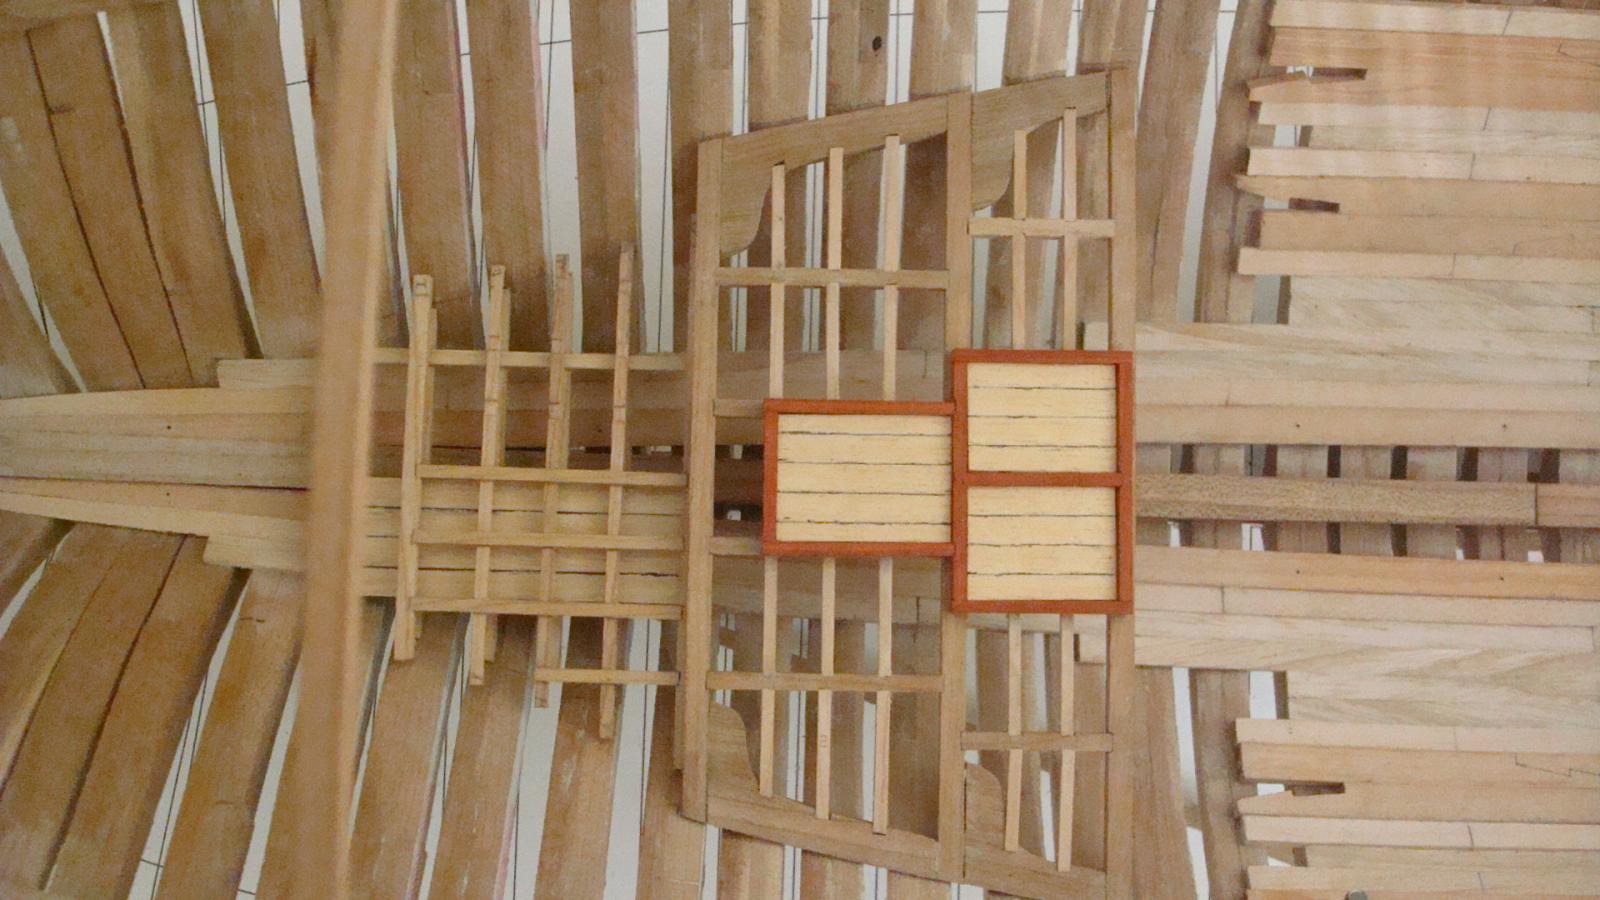
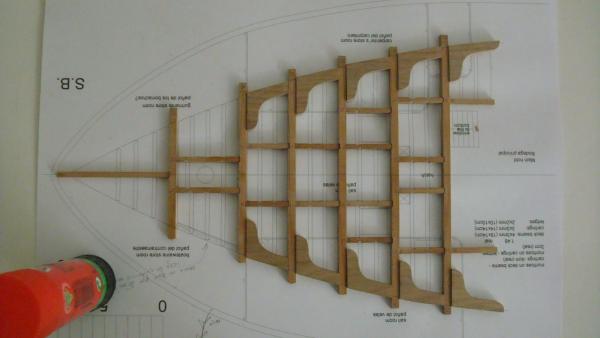
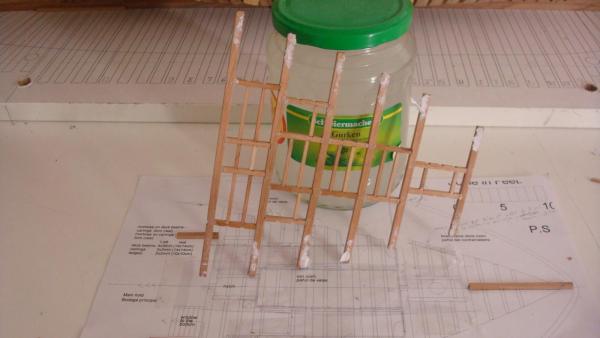
Hello! No kids around for one entire day… they are at my mum´s house and the Admiral reading… Peace on earth and much more time to spend modelling! I have glued together all the pieces of the fore platform. I am quite happy with the result. I still have to sand it and clean it a little bit. I´ll do it this afternoon. No literature, just a bunch of pics. Happy day! Daniel.


-
Hi Randall, If I were you I would try to divided that different of 5/16 onto the different scarfs of the pieces #2,#3 and #4. Hope you have not glued the keel pieces. If you have done it, soak the pieces in water and try to separate them, let them dry for one day and cut the scarfs. good luck! daniel.
-
Hello Randall and Happy New Year!! I do not know what could happen with your plot plans. Sometimes the “printing guys” think by themselves that are smarter than us and even if you state to them to print the stuff at no scale at all, they just send the different pdf´s to the plotter by anxiously clicking and clicking and the result it´s what it is… It could be one possibility. It has happened to me once or twice. I always check the “scale on feet” on every single plan plot out. A deviation of 1/8” means in the real ship about 15.24cm if I am not wrong so don´t worry too much… Best wishes! Daniel.
-
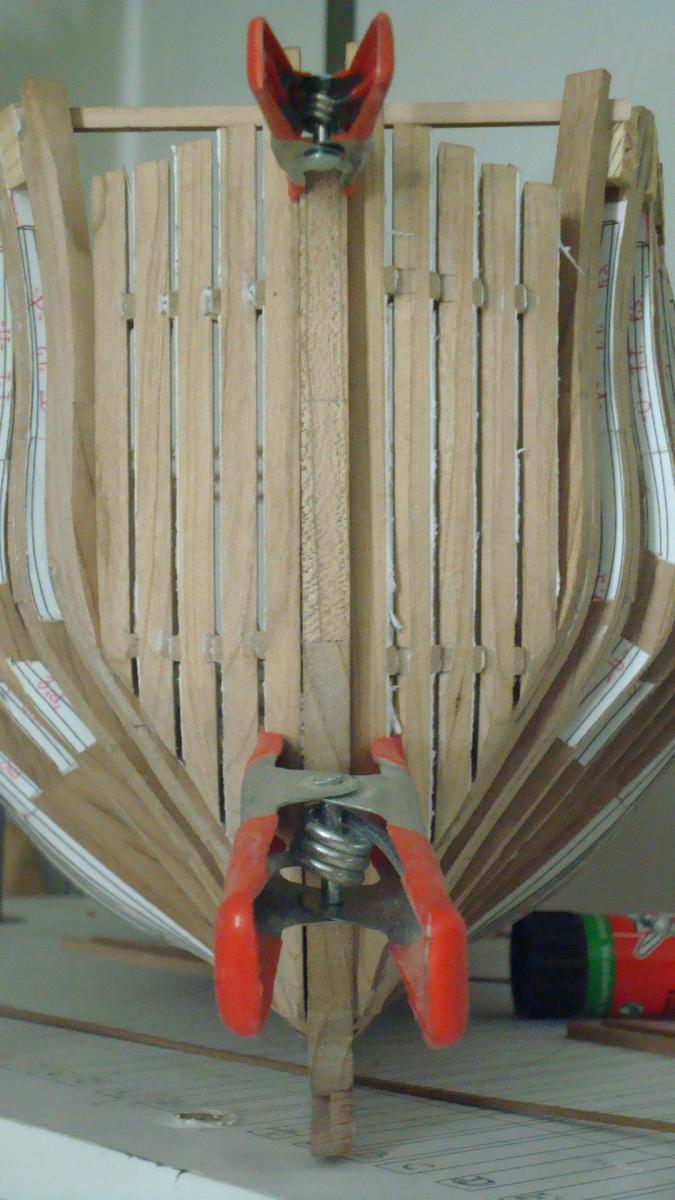
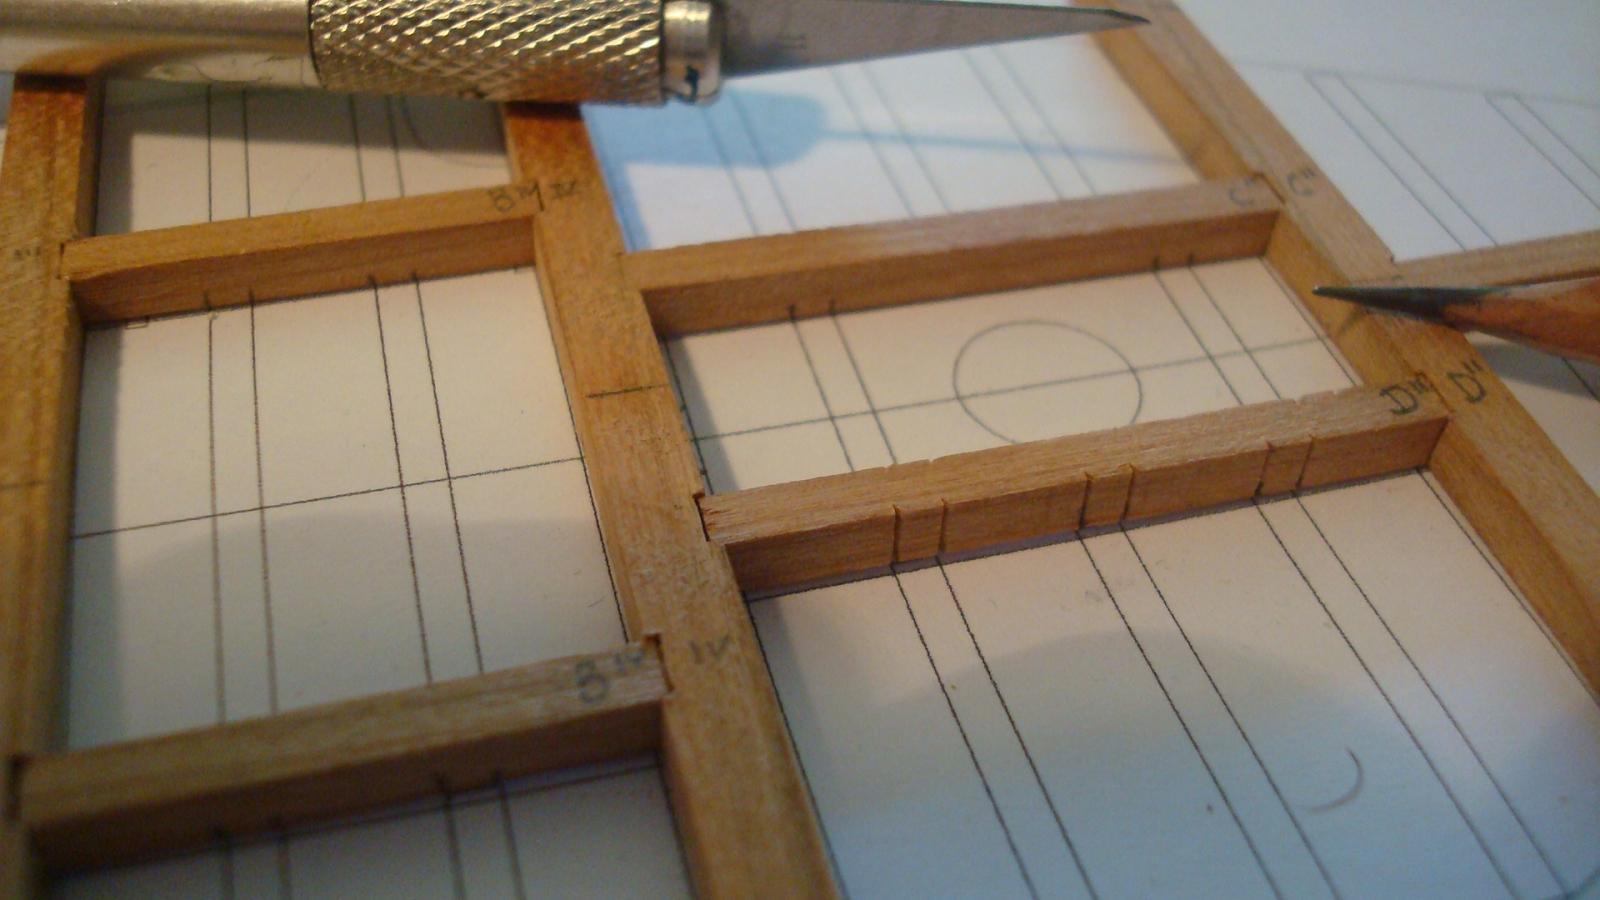
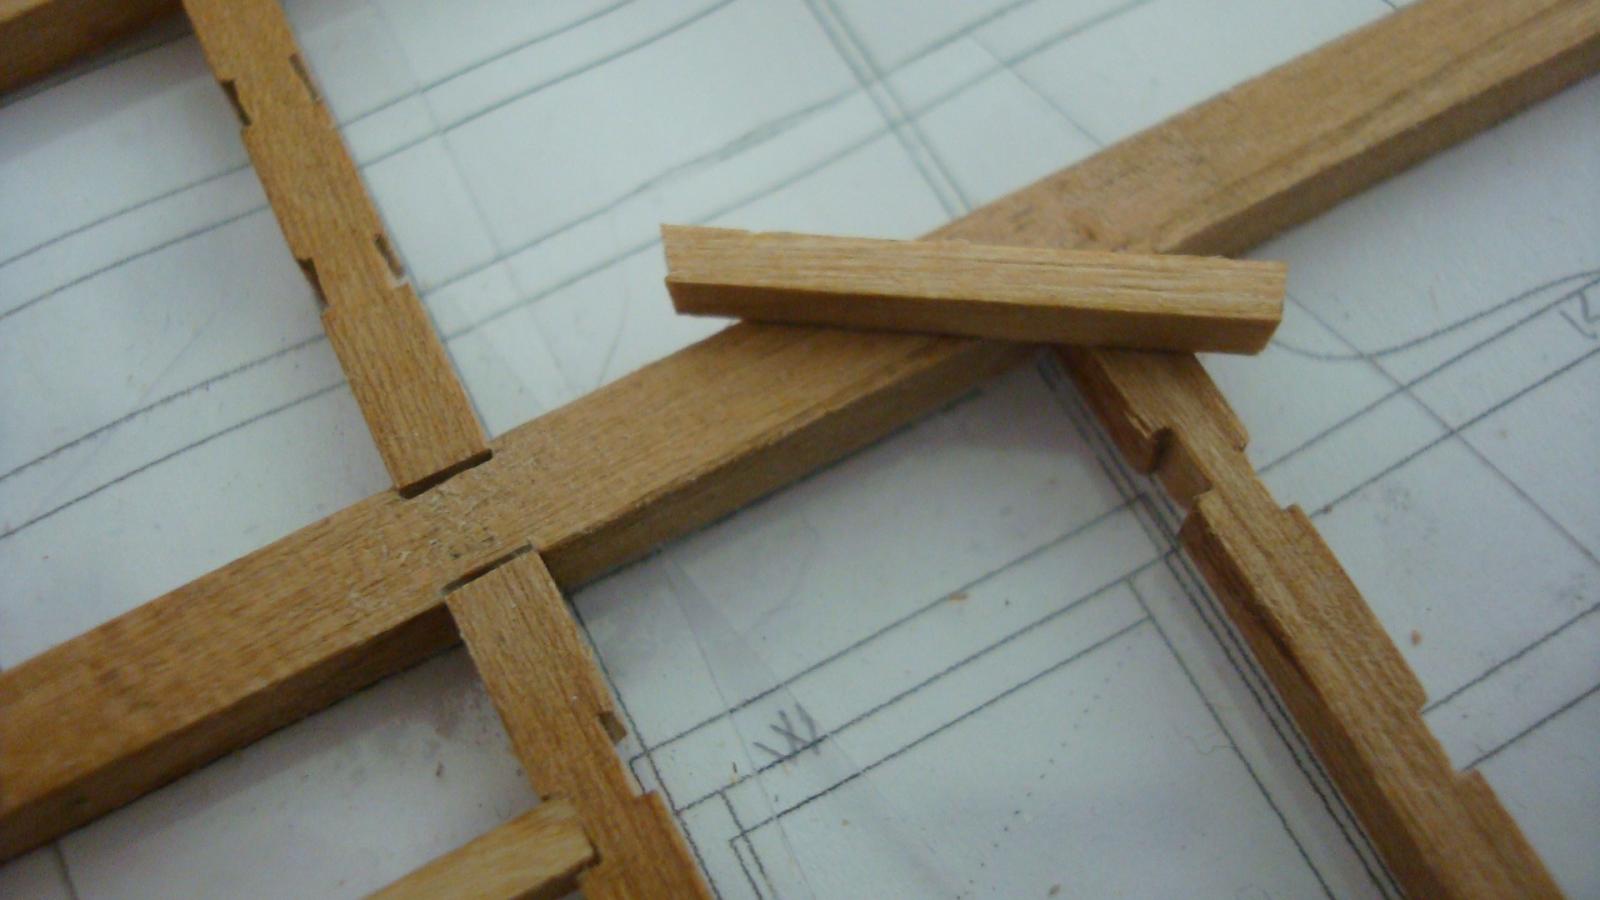
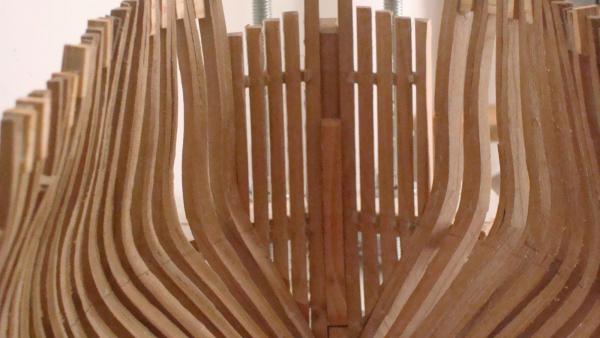
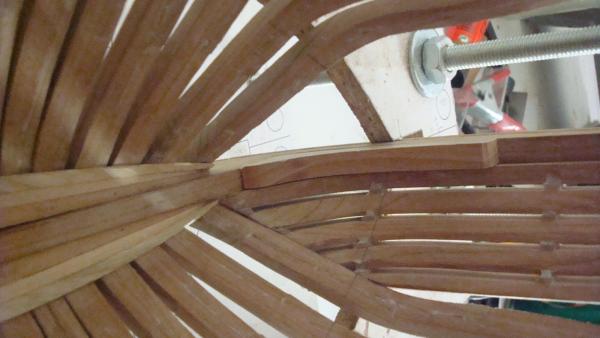
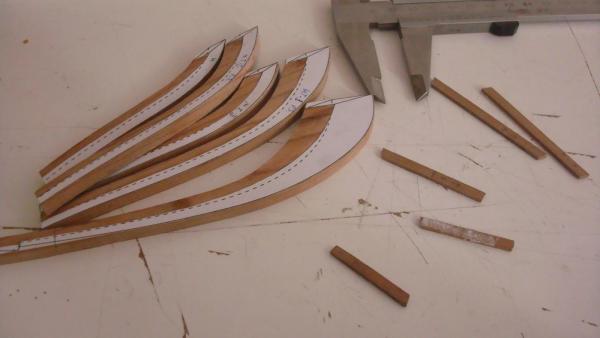
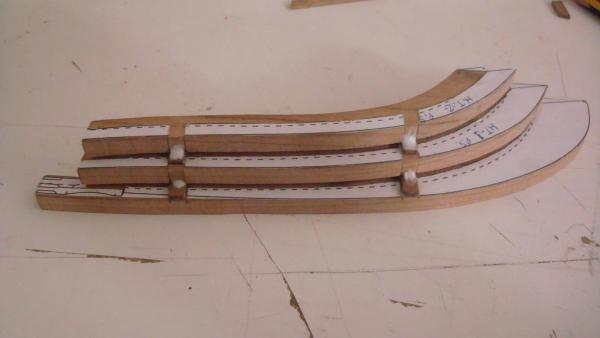
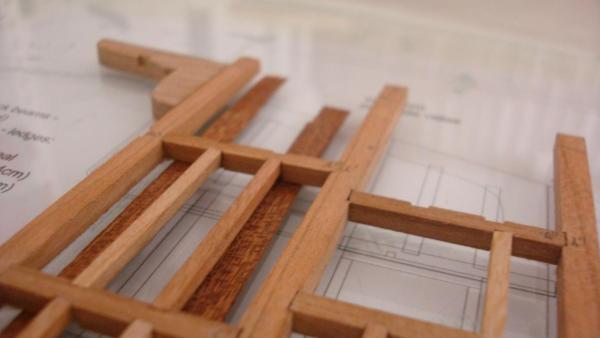
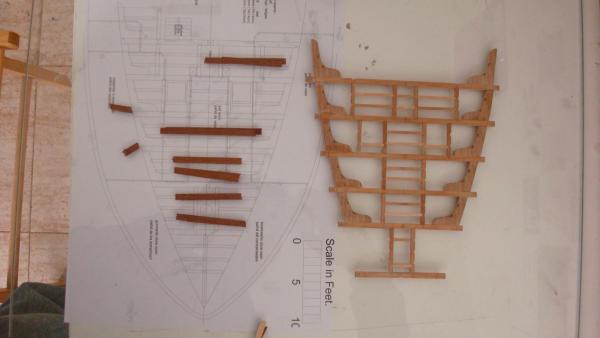
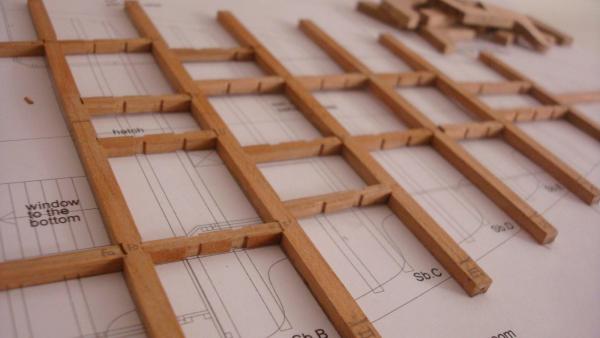
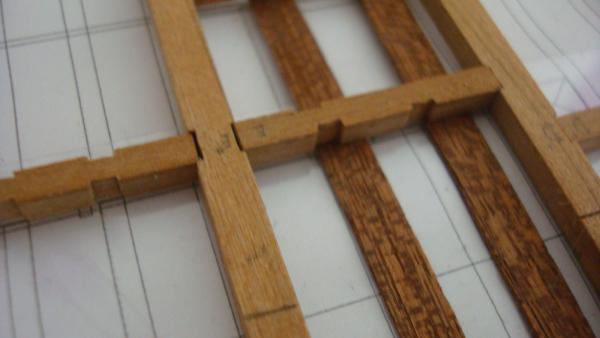
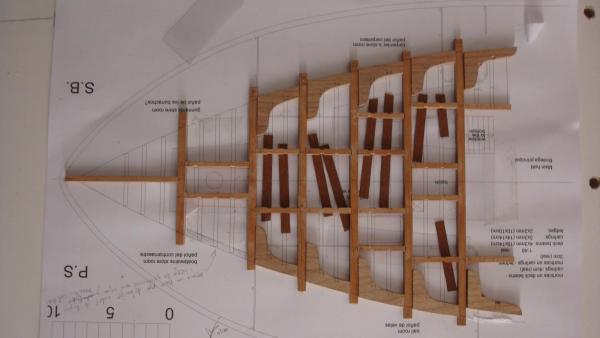
Hello All! Hope you are having nice days… I am dealing with the fore platform. I did the aft one using the method of doing it backwards. I am building the fore one seeing the whole piece from above. It has been easier for me because I can actually see all the joints and I have been able to clean them with a wet brush the excess of glue. Like the aft plat… The number of parts involve are amazing…: 6 beams, 16 ledges, 54 carlings, 10 Knees, and 29 mortises on the beams, 20 on the Knees, 54 on the ledges… I cannot imagine how many pieces and mortises are going to have the lower deck or the gun deck. First I glue the beams with a small amount of glue at the ends of the beams to the plan. I mark the scarfs of the ledges. I mark the center line with a blade and a pencil (I use a rubber to remove the excess of “pencil” I just one a sharp black line on the beam). I remove the beams and cut the scarfs with an x-acto blade. I have printed another plan for the next stage. Second, after gluing again the beams I set the lodging knees in between them. Naming the different pieces it is crucial. It was a quite tedious,,, sanding and trying, sanding again and put them together against the beams. The disc sander was pretty useful. I glue the knees with a small amount of glue and finally I mark the scarfs with a pencil on all the Knees and the ledges for the carlings following the plan. Third, I cut the ledges using a blade and set them all together, not glued yet. You can either go in one way or another but I started making the scarfs on the ledges. Once the scarfs were all completed I started to glue them to the beams using spacers (0.05mm timber) to ensure the ledge it´s leveled. I put a plastic sheet underneath in order to remove the excess of PVA and not glue the thing to the paper plan. Remember that I am doing it from above… Fourth, I cut the carlings using a blade. I am not using spacers but cutting the carling slightly inclinated in the “Z” axis and with some tweezers I glued it with no problem at all. The Fifth stage will be to print out another plan and by using spacers glue the beams to the knees. The different in height is about 1mm. I have measure it with a caliper. At the same time I am gluing the thick stuff and put in together the lower deck clamp. Best wishes and Happy Happy New Year to all of you!! Daniel (and forget about modelling!! at least for two days...)


-
At last all that "pipes" and styrene tubes cover off! She is going to be beautiful Piet. What a nice vessel... Daniel.
-
Hello Richard! You could dilute achrylic white paint in water and work by layers of paint. Like if you were making a watercolour paint. The paint diluted is tricky to keep in place. You are not going to be able to mask the frames, the paint will run out every single place. That´s why I recomend you to paint the stuff before and glue it with white PVA... I painted all the beams and the floor planks in my house using this method. Of course I didn´t use achrylic... i used water base industrial paint diluted in water 1:4. Here´s a pic. Merry Christmas! daniel.

-
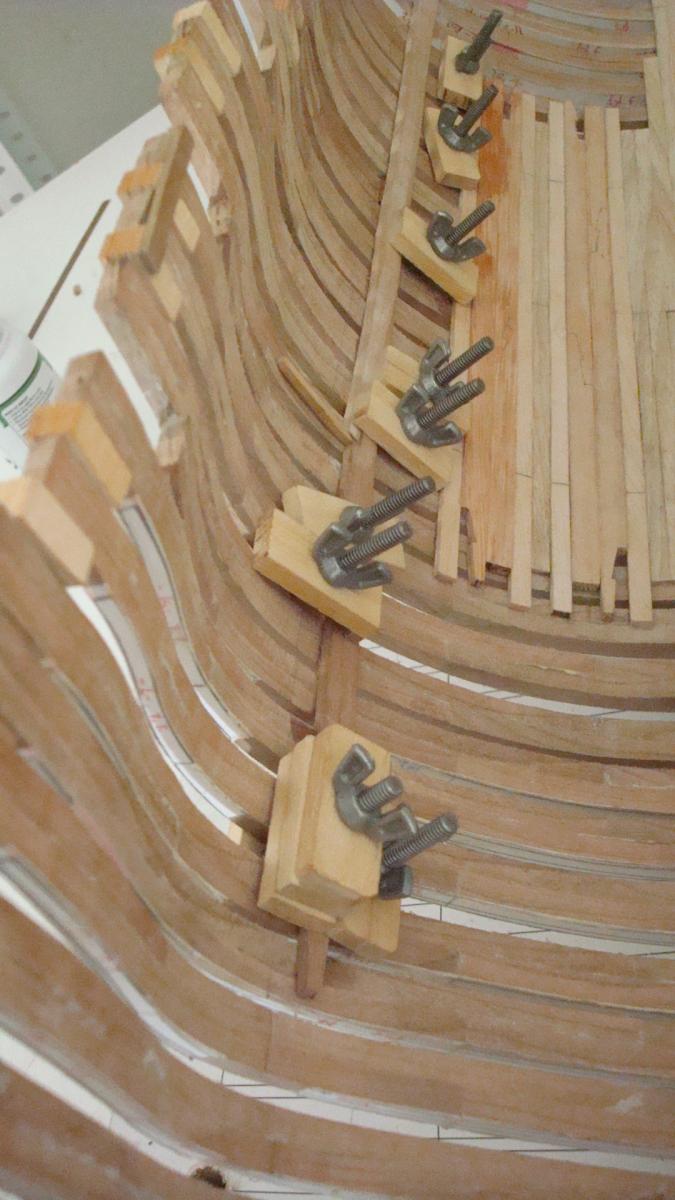
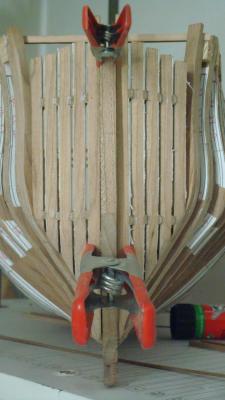
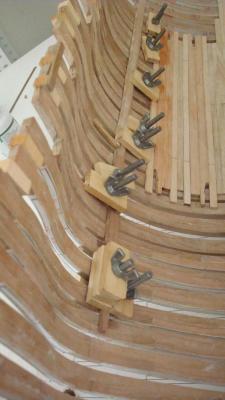
Hey Guy and Christian! Guy, I leave the timber at least 12 hours or more... with so many clamps I can be moving on and glue at least 3 timbers (my best goal). I tried once to remove a "wood pattern" after 6 hours and it just suddenly poped out. I glue the pattern while it is wet from the boiling process and I guess that this moist timber melts the PVA... that´s why I leave it at least 12 hours, most of the times is one entire day, meanwhile I move to other things. Hope this helps. What about some pics of your Triton??. Best thing about Ed´s clamps are the "hand washers". I could not find that stuff here in Madrid so I made a shortcut. I asure you that they just work. The important thing is to put that round piece (mine´s are square) on one of the wood piece of the clamp. Christian, hope work is treating you well... Happy days both and all of you!! Daniel.
-
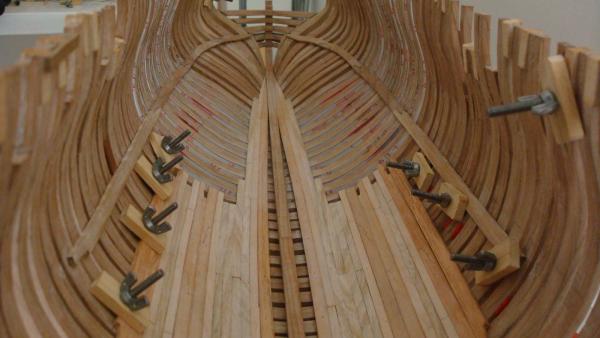
Good night! A small update. Just two pics. One about the lower deck clamp and the other about the thick stuff amidship. Best wishes and happy happy days! Daniel.


-
Hello all! Wacko, excellent job with the solidwork you´re doing. I will try in 2014 to learn about that beatiful program. The things you guys do with it are amazing. Till then I´ll continue working on 2D with Acad 2011. Here´s the pdf file about the pump box and the shot locker. If any one wants the whole file in cad PM me and I´ll send it to you. It weights more than 2MB...(mainly because the subjacent pdf´s files or images inserted on the drawing) pumb box.pdf Merit Chrirristmaxs! Daniel.
-
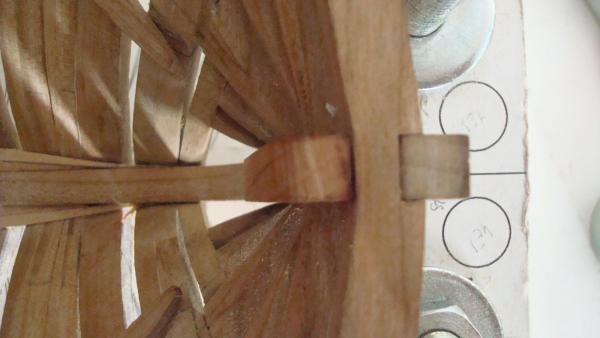
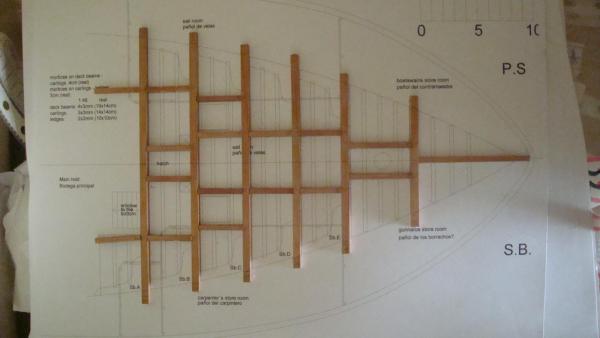
HO HO HO ! Here in Spain till December 22th – with the lottery day- we don´t “start” Christmas time, at least me, but anyway Happy Days to All!!. (I hate Christmas) The Triton is growing and growing. I am having lots of fun with the interior works but the lower deck clamp has being feeling kind of pain in the neck. ¡’?·”@... cut the pattern, cut it, sand it, boiled it, let it dry, boiled again, clamp it… anyway four more pieces to go… I made some clamps like Ed. I couldn´t find the screws and stuff Ed used to do his clamps but these work just right. They are not so fancy but I´m proud of them. My intention is to make kind of a cross section amidships (thanks Rusty) and let a lot of spaces around to see the Structure, the ribs, the frames… We´ll see. Here´s a pdf of the scarf for the thick stuff I am using in this kind of cross section. The scarf in the middle of the timber is being simulated with a blade and a pencil. to be edit- Right now I am working with the pump box (cad) cause is the next part I´ll do after the f deck clamp. The plant plan and the sheer plan are not aligned so I guess I´ll have to make a shortcut to somewhere… Back to the workshop! Daniel.


-
Good morning Piet! But don´t wait to much! We need your updates coming... This Log is starting to look like a doctoral thesis about the O-19. Lucky us that you are not dealing with a Typhoon class sub. Best wishes! Daniel.
-
What a beautifully simple idea! That pic, the one about the washer, goes to my "research folder"... daniel.
- 1,215 replies
-
- 2
-

-
- sloop
- kingfisher
- (and 1 more)
-
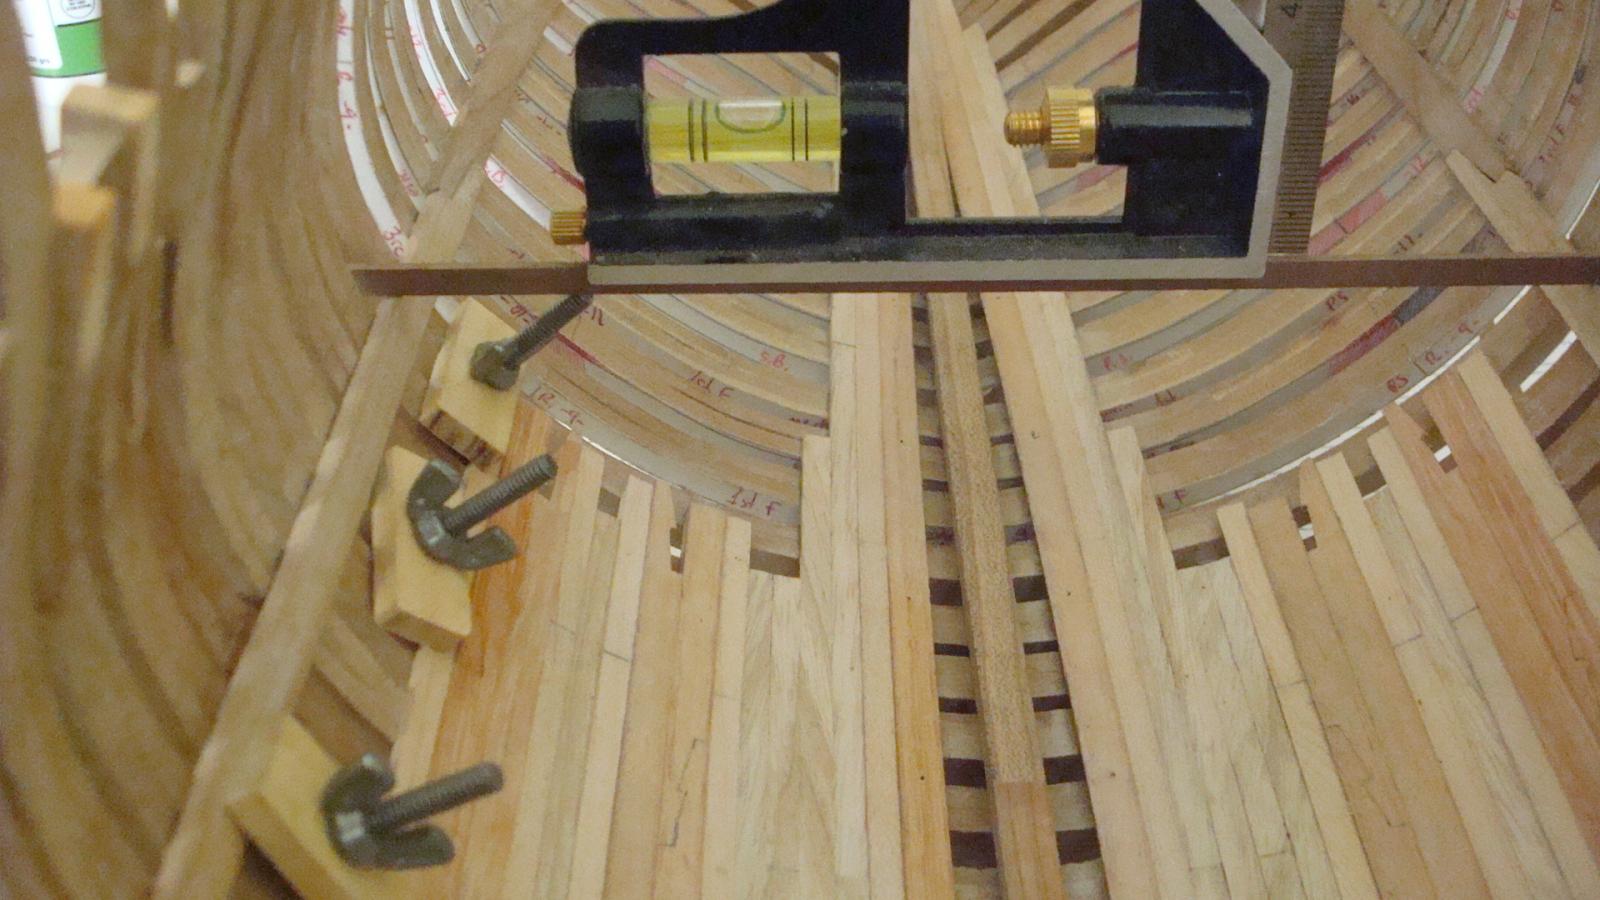
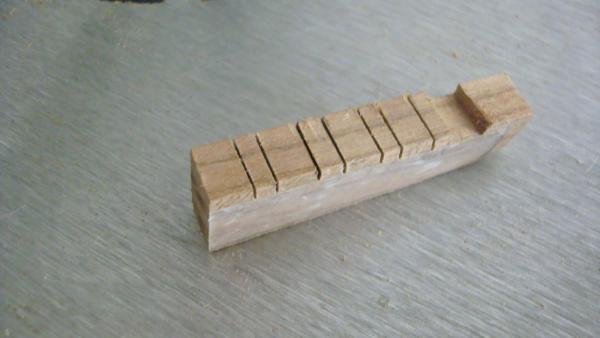
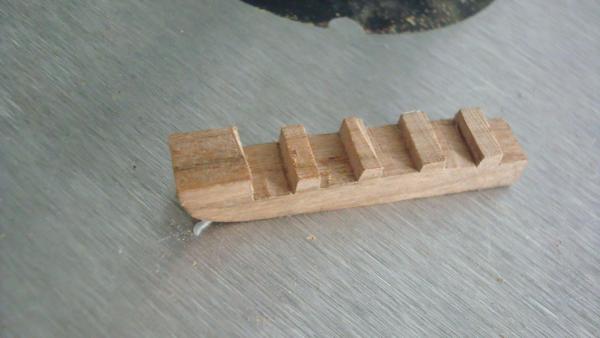
Hello all annd happy days! Some pics... i´ll try to add some words tomorow. Here´s 2:15 in the morning... back from the same pub with old good friends like the other day... For me is still satuday... The scotch tape stuck to the hull. I draw a rough line with pencil. I put it on a paper and stick another layer of scotch tape so as not to erase the pencil. I glue the "wood pattern" to another piece of wood with PVA. leave it dry for 12-24 hours clamping both. By boiling them the pieces will separate almost inmediatly and you can remove the PVA glue with a sharp blade like butter. I set the piece just to see where I have to sand more or less the scarf. I will not glue the whole clamp till all the different pieces are done. -------- this pic is just to "know" if the platforms are aligne and level. I have not thousands but hundreds of "control pictures" that help me to see if I´m working in the right direction. what a camera can see is sometimes much more accurate than the human eye. Hope you have had a good weekend! Daniel.


-
Hello hello! wellcome aboard! Way to go! good luck. Daniel.
-
Hello Ed! Remember post #149 ... Well, it has taken you eight weeks to get till here. Amazing!! With that rate by the end of the year you might complete the whole hull... daniel.