harvey1847
-
Posts
528 -
Joined
-
Last visited
Content Type
Profiles
Forums
Gallery
Events
Everything posted by harvey1847
-
Only three hours? I guess we all work pretty much the same way... Have you seen albert´s workshop? the one who is with the Naiad. It´s like a surgery room. Anyway, I always like to see the workshops of the people around. No room in the house smells like our shops with all that dust, oil, paints, jars and thousand of hours working there to build jewels. Enjoy the weekend! Daniel.
- 421 replies
-
- 3
-

-
- granado
- bomb ketch
- (and 2 more)
-
Rusty!! That deck planks looks like white marble to me. Always a pleasure to see your log, so neat, so clean... Have you been staining with oil the deck and the hull as the model grow up? or are you going to finish the whole thing when completed? Best wishes. Daniel.
- 421 replies
-
- 1
-
-
- granado
- bomb ketch
- (and 2 more)
-
hello Juan! Beautiful lines she has! Can you tell us the different grits of sand paper you used to sand it? She is looking so tiny but so well detailed... Congratulations with this milestone done. Good luck! Daniel.
-
Hello Richard! To be honest with you I have moved to the platforms cause I was starting to feel pretty bored with the hull. I have to faired the exterior (the interior is done) but I need to strength it. That´s why I need that lower deck clamp done plus the other strake underneath it. When I started to mark the decks inside one thing went into another and I endend makig the platforms... The hawse pieces and the deck clamp was exhausting me so I decided to move on and start a part to have a little bit of fun. I thought about making the oven...but I chose the platform. More pics tomorow! The Admiral is around supervising... Have a good day! (the rest of it) Daniel.
-
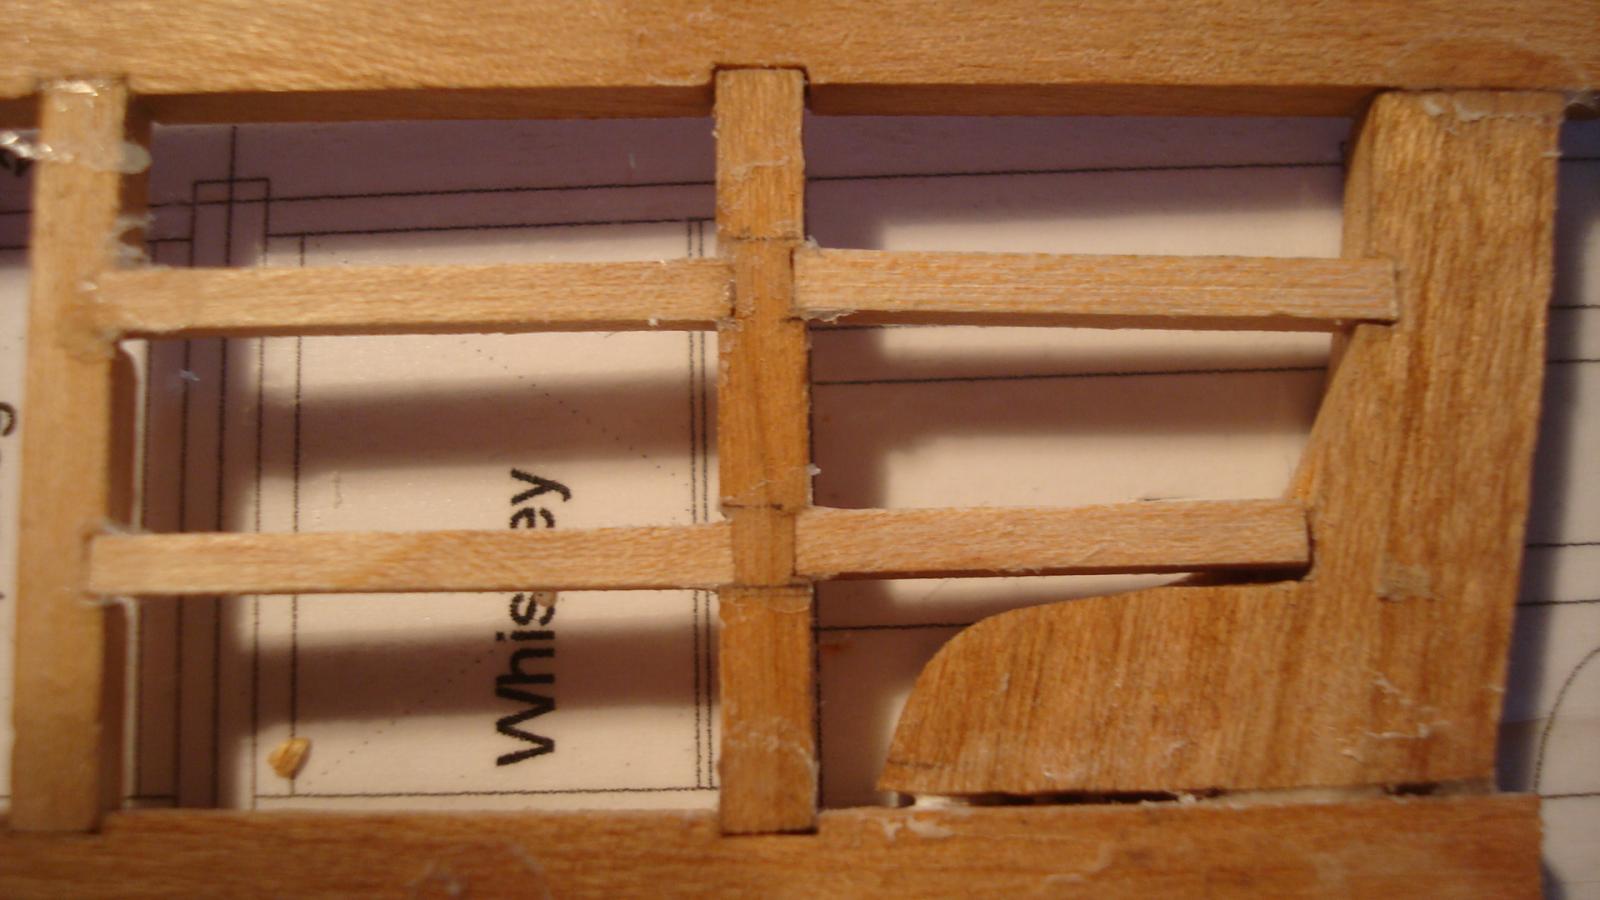
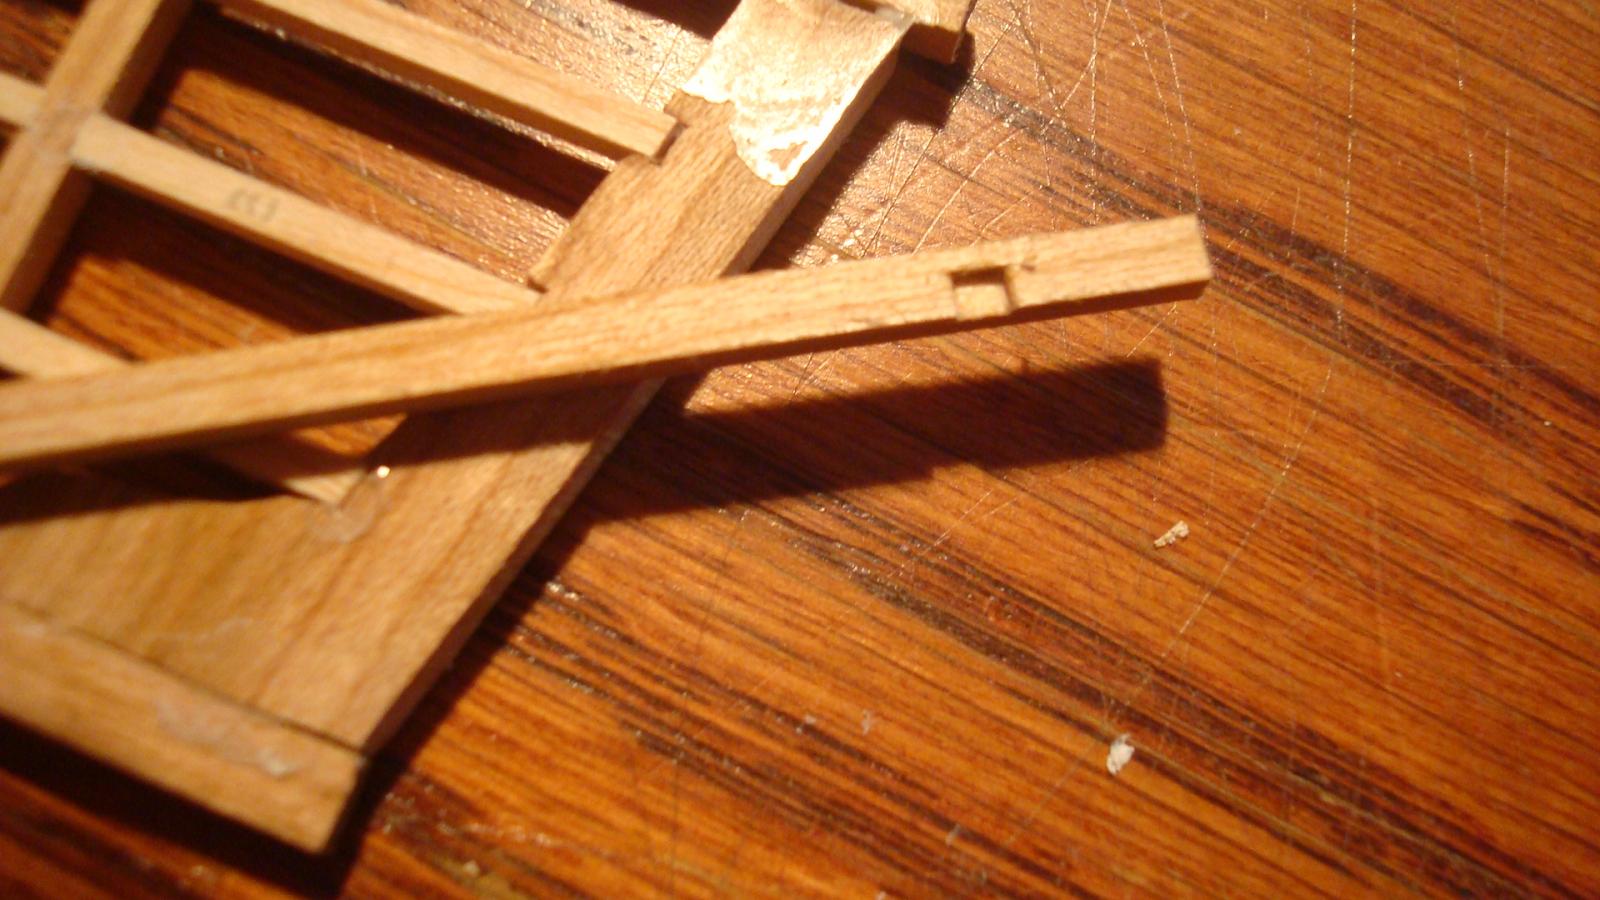
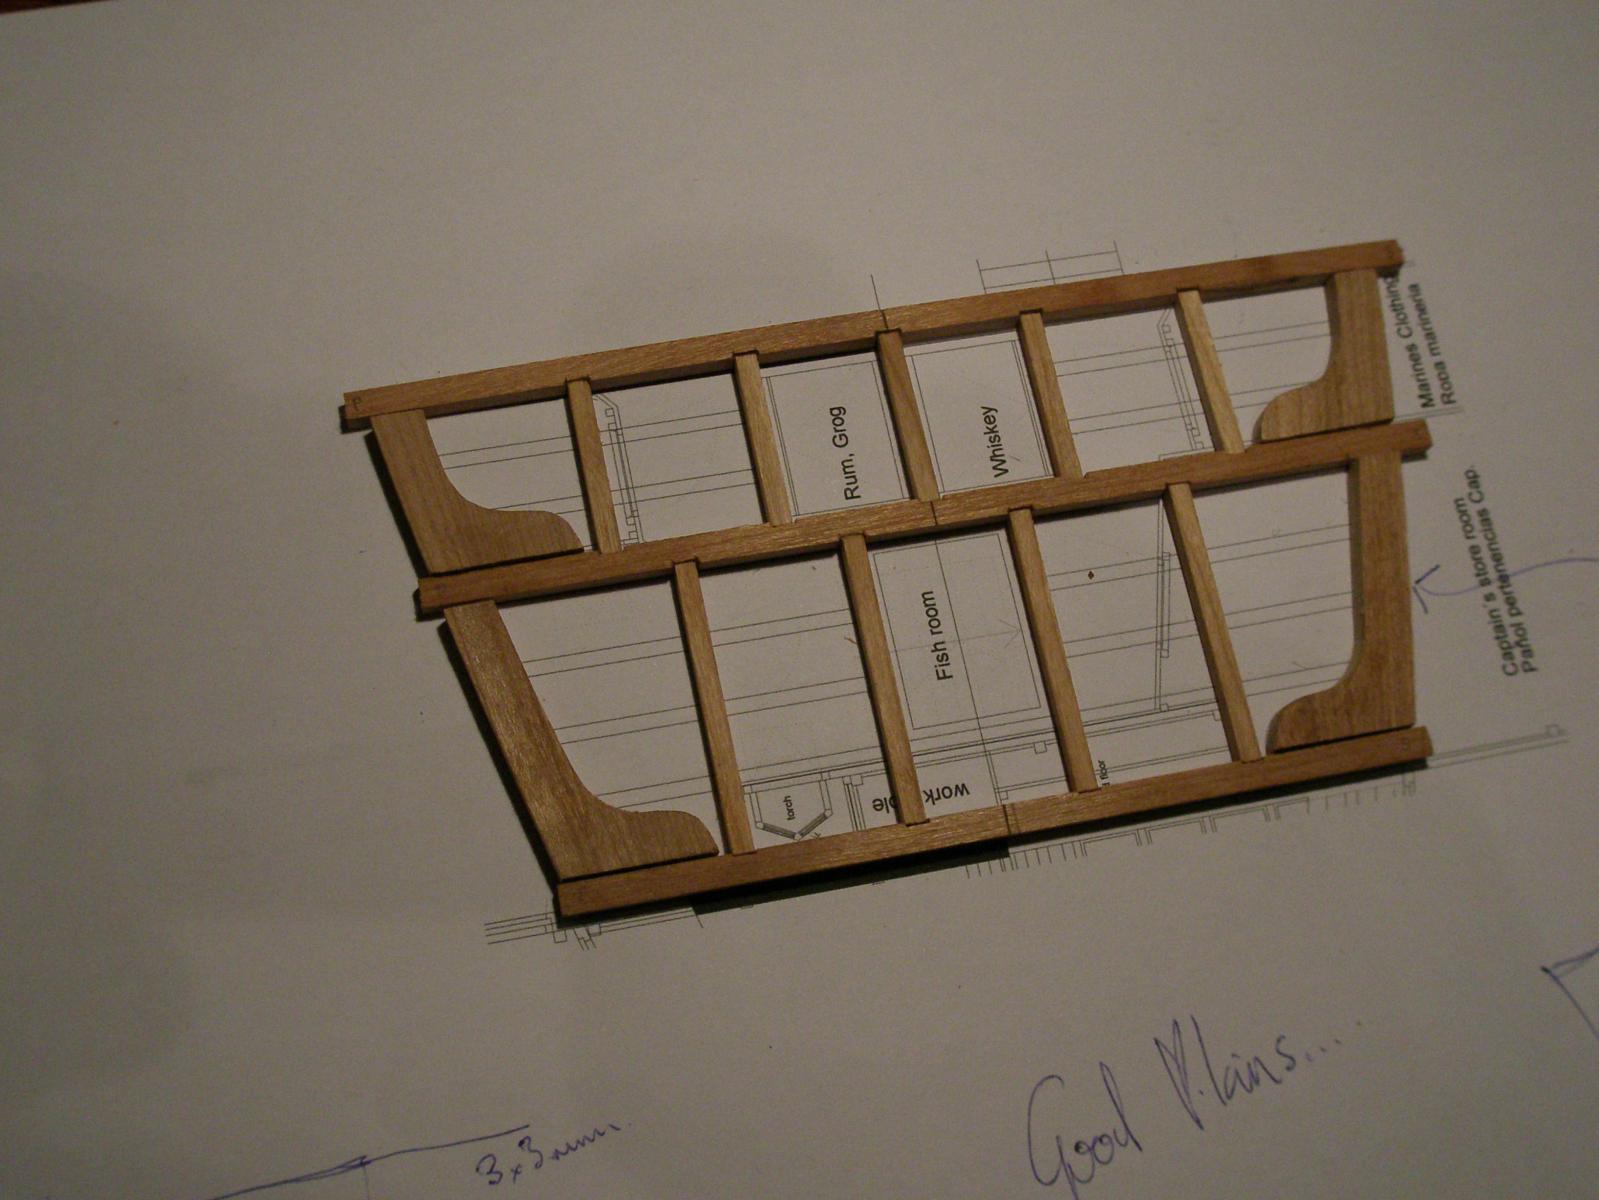
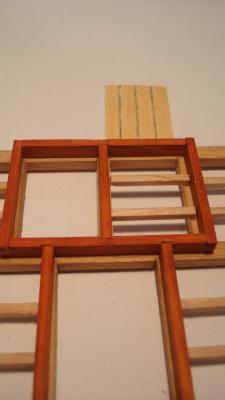
Hello All! And when I say all I mean it. Those who click on the “like” tab and the ones those actually write something. Richard!! Glad to see your Triton growing and growing and mini-you going smaller and smaller with all that frames above you. After doing some surgery with the platform, cleaning all that glue and removing like eight carlings, the refurnished piece looks good to me. I have moved to do the “floor doors” for the fish and spirituous drinks. The wood for the frames is blood wood (2x3.5mm). The cover is ramin (0.6mm thick) and the transoms underneath walnut (2x2). These transoms are not going to be visible but God sees everything… I have tried Ed´s method to simulate the caulking mixing the glue with dark acrylic paint and it worked out! I rasp the excess of glue with a sharp file just on the visible side. I made a sketch of what I´m intended to do. The hinges will need some thinking but probably I´ll cheat and make them with evergreen plastic stuff. I have no equipment and room to be soldering around. Photoetched parts? I´d love to do them but I´m kind of broke and the etched parts are not cheap. Here are some shots. Cutting the scarfs using an aluminum jig. This last one is from one of the kitties haunting little mousses. I could not resist to put this pic dealing with the fish room and the limber right now on the Triton. Not everything is wood and timber… best wishes. Daniel.


-
Well done Richard! Don´t be shy and put some more pics! This is a milestone has to be done. Like mini-you down there in the midship. Keep working!! best wishes. Daniel.
-
Hello Piet! Sorry for the silly question... I am kind os lost with so many tubes and pipes... Are the styrene tubes for the AA guns or the other ones? Any pics of the AA guns undeployed? Best wishes! Daniel.
-
Amazing Toni! A truly inspiring work with the mortises and an excelllent tutorial for that tricki knee... Did you use some kind of jig to cut the mortises on the "pump box"? I mean the pillars with that 11 blade. What stuff do you use to simulate the black bolting on the knees? Beautiful. Daniel.
-
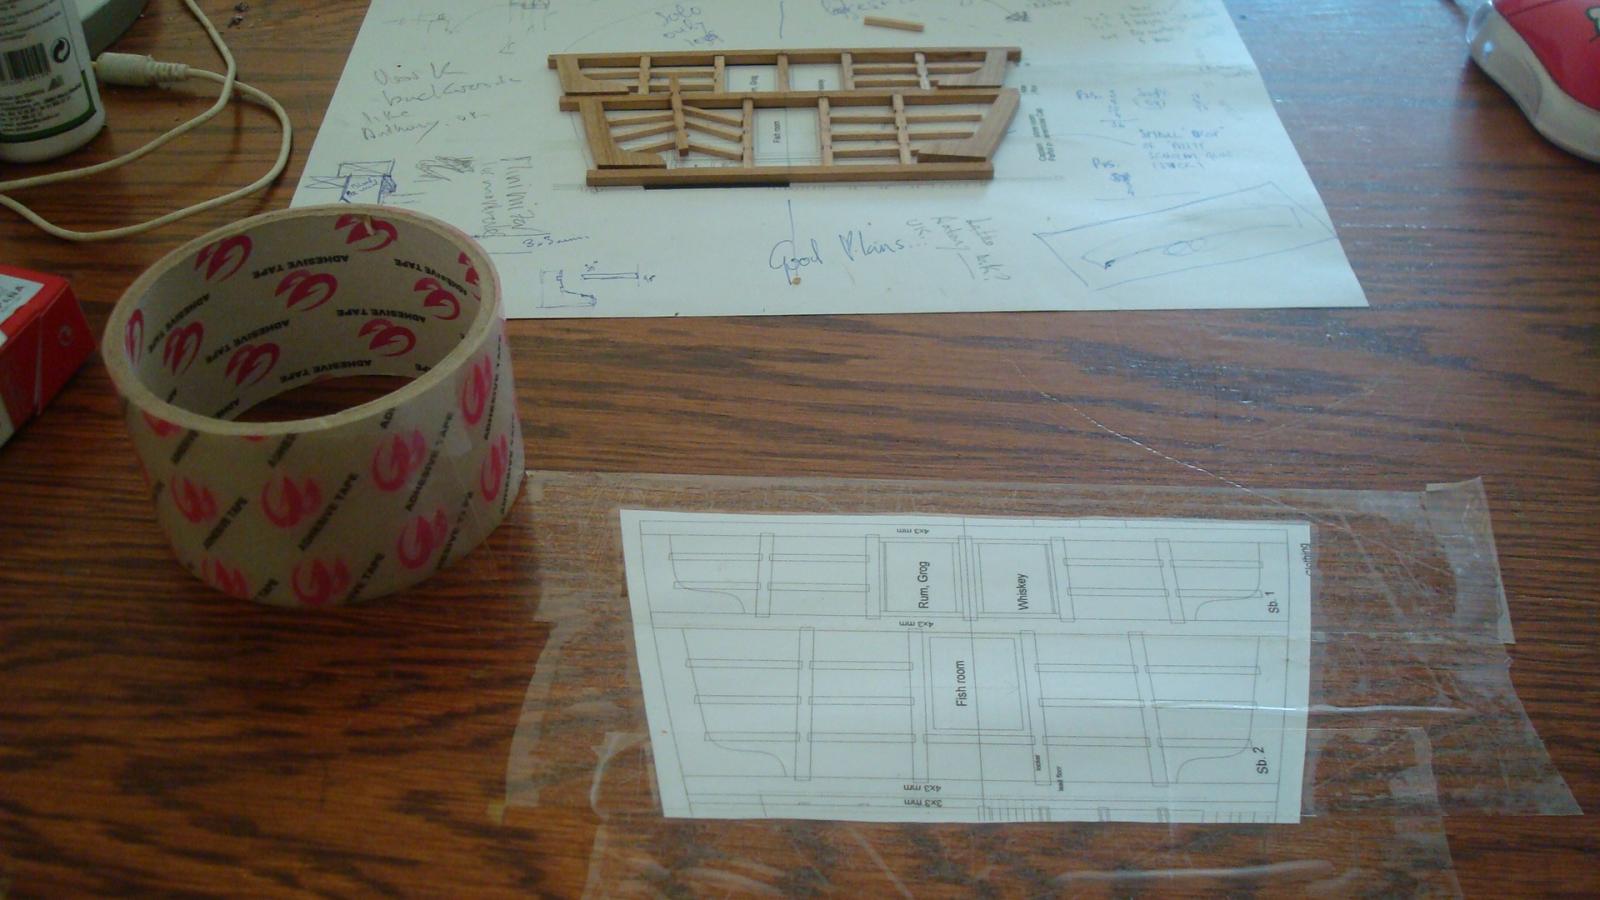
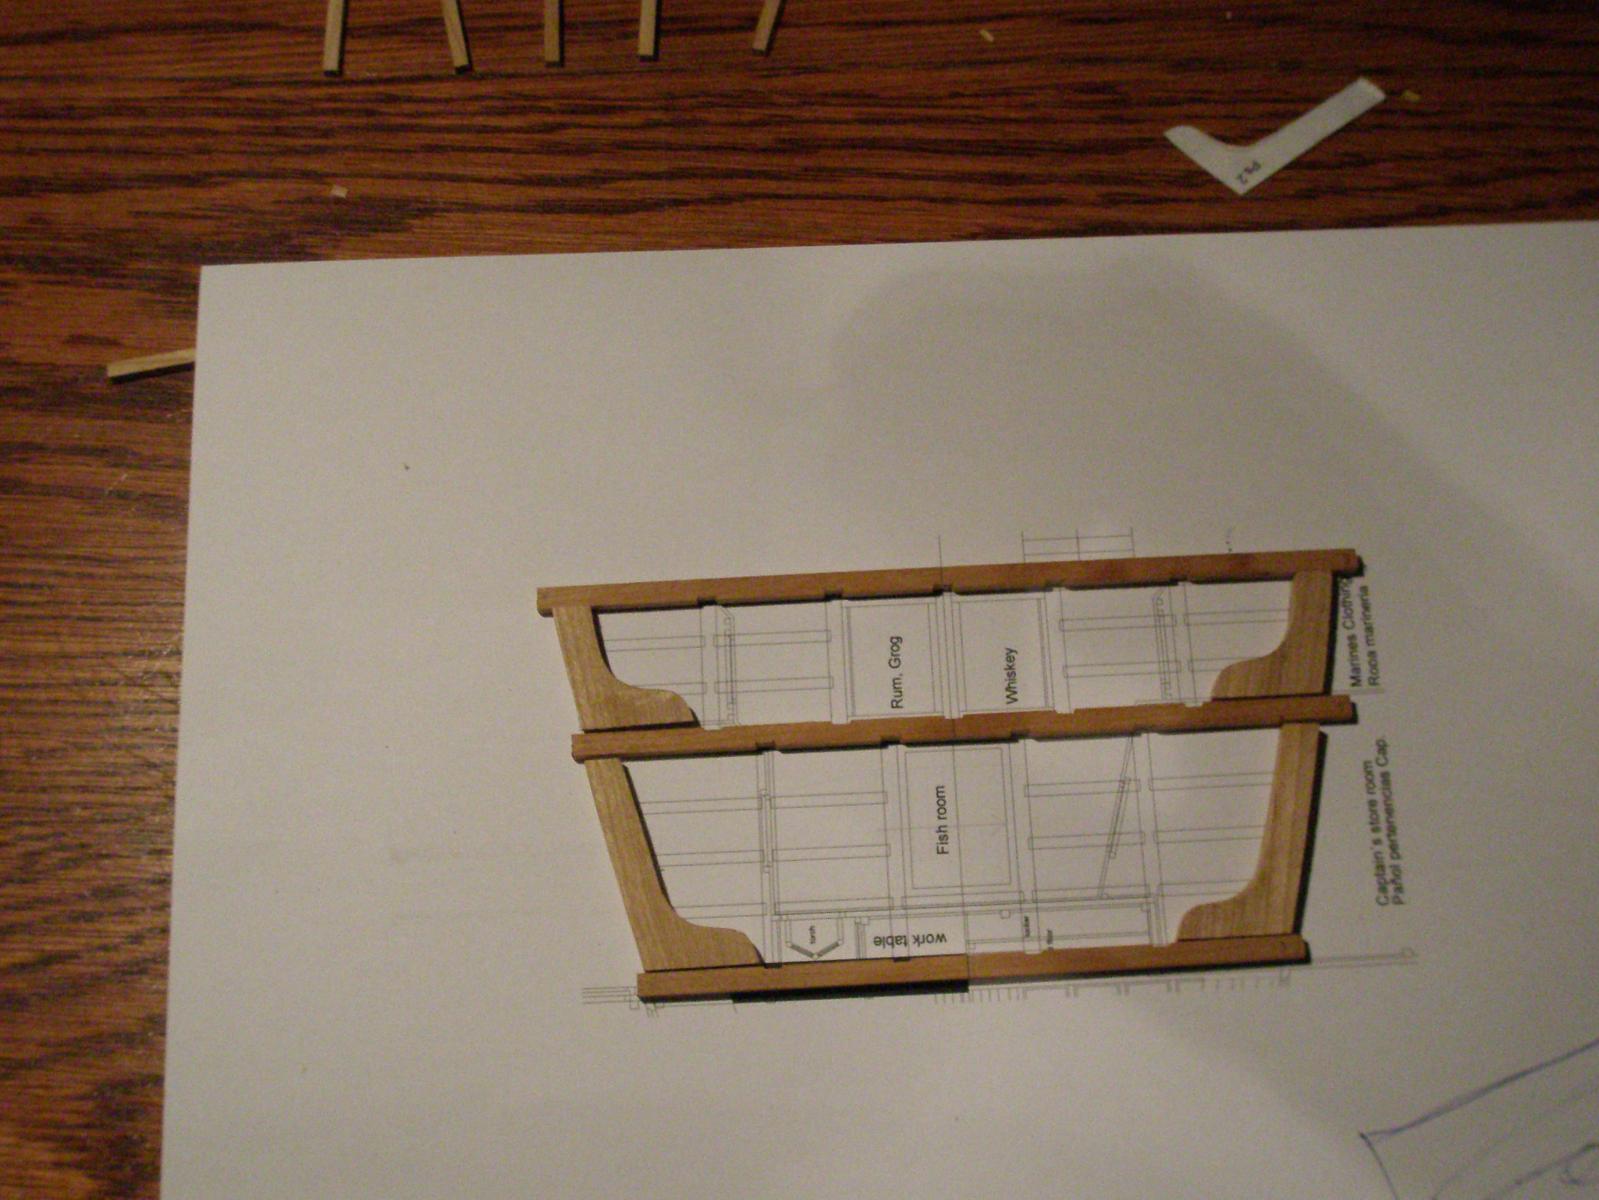
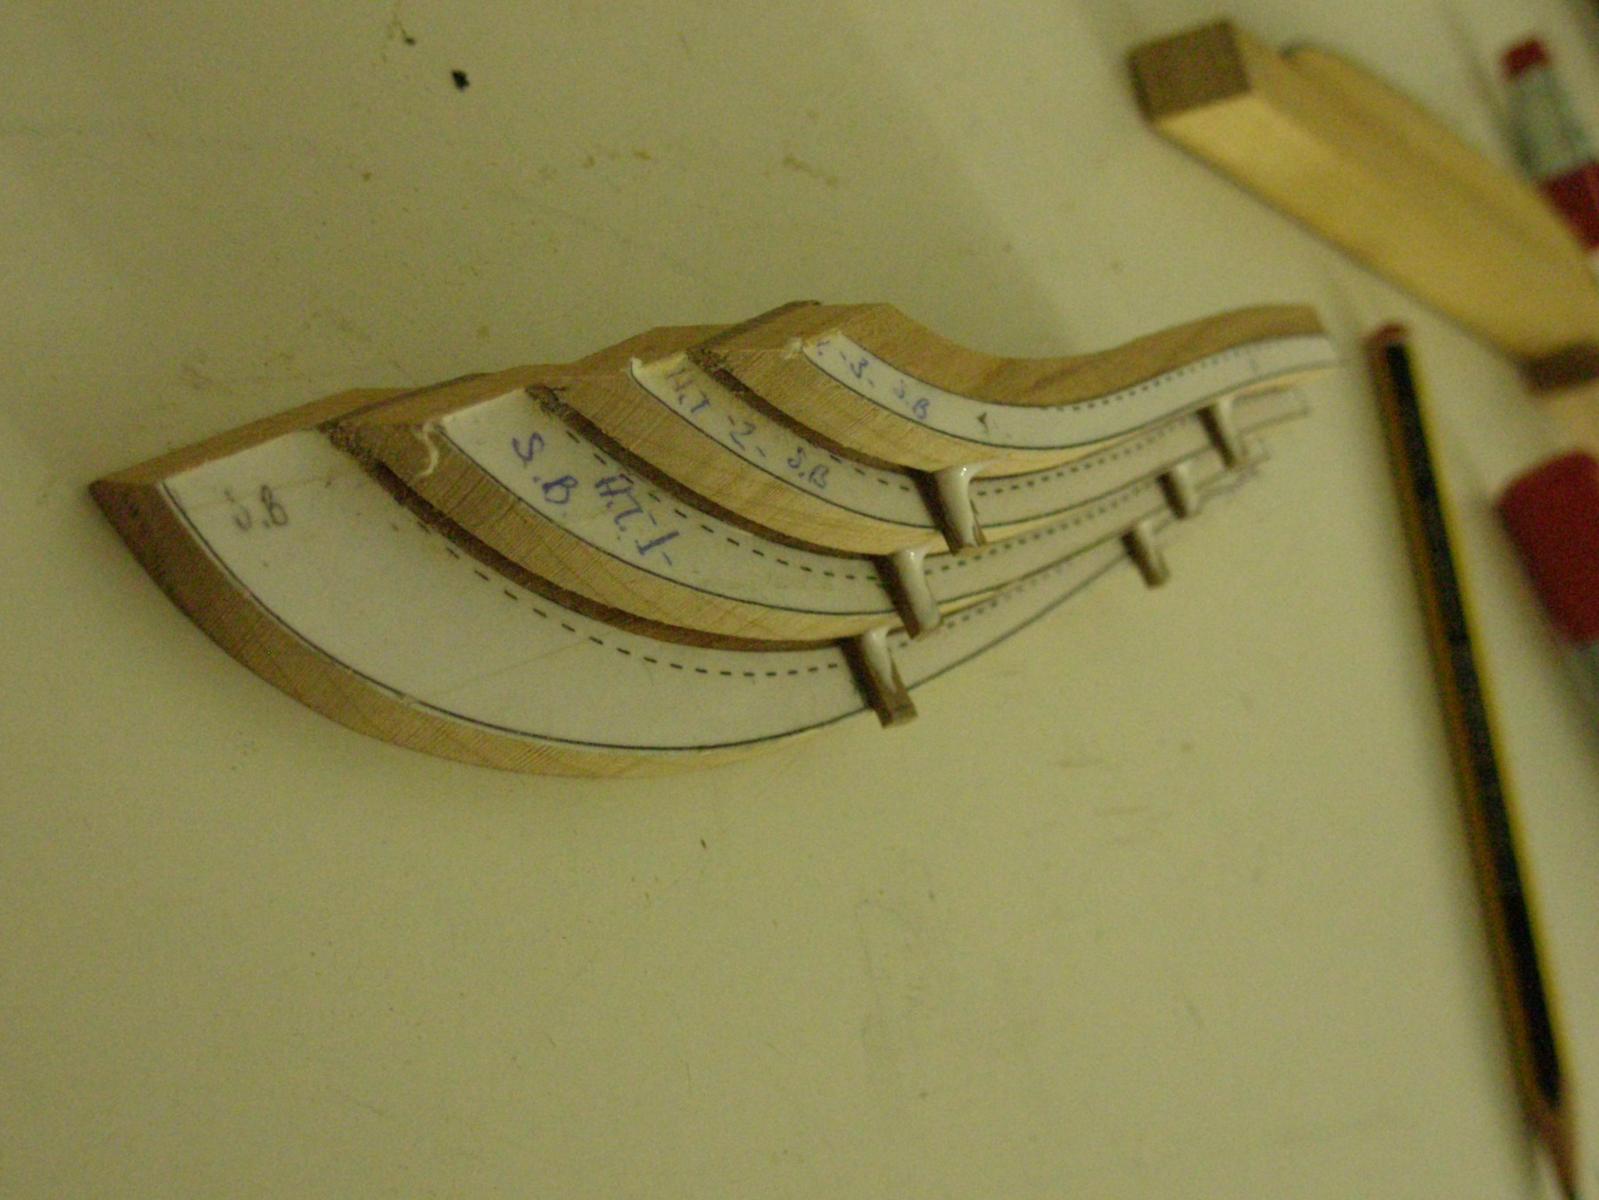
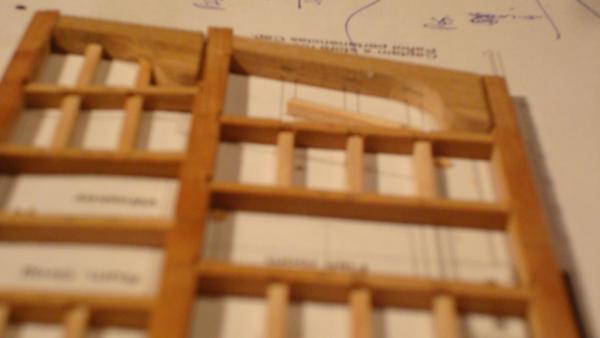
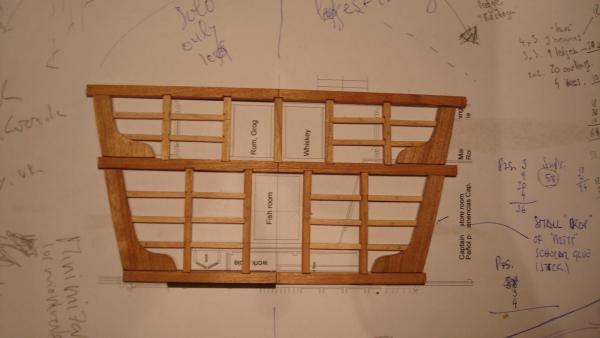
Hello and happy Monday! (Written in the morning) After finishing the aft platform for the fish and the spirituous drinks I am moving to do the magazine. I have been thinking a lot during the construction of this platform. With all that amount of pieces and mortises to be done I´m going to “cut” a little bit the project cause I´m not sure if I´ll end it in 2018… Anyway I have redone the magazine plan this morning. The big difference is that I have divided the magazine boxes in four instead of five. I am not sure if I am going to make the cabins so I´ll attach two plans, one with the structure and the other with the beams and the plant of the cabins… I´m much more interested in the structure than the inner rooms. Here is the pdf´s. .- no cabins: Decks_fore_popa_plattform_V02_ok.pdf .- with cabins: Decks_fore_popa_plattform_V02__cabin_ok.pdf Joss here´s the pic about those tricky pieces of the LwDeck clamps. They have been unglued for almost a week and they have held the shape. Monday bloody afternoon Monday! (U2) could be a version..)) Afternoon, I have finished the platform. The result is totally awful on the joints. A disaster. I will repeat the whole piece. Will not work again with that backward method. What works for someone does not always work for everyone. You go totally blind on the visible side. That´s it. That´s the question. To be or not to be… Three days to the trash bin. I want to see the glue going into the carlings and them going into the ledges and the ledges into the beams. Anyway here´s the pics... I´ll go this way. mortices in a 3x2mm sq timber can be done and I wil work seeing the whole piece from above. Daniel.


-
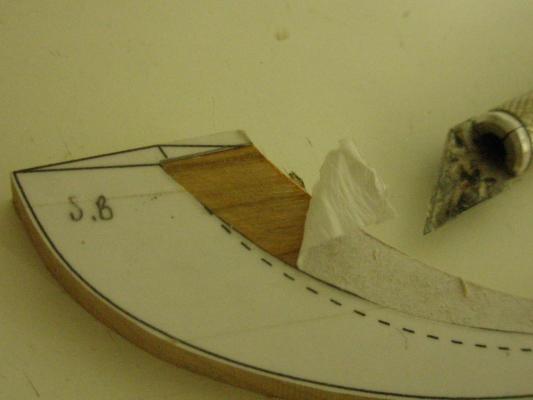
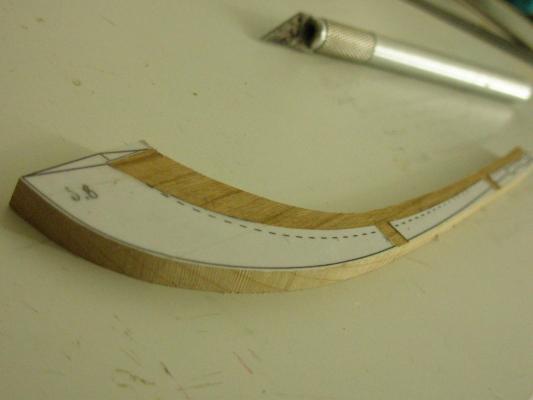
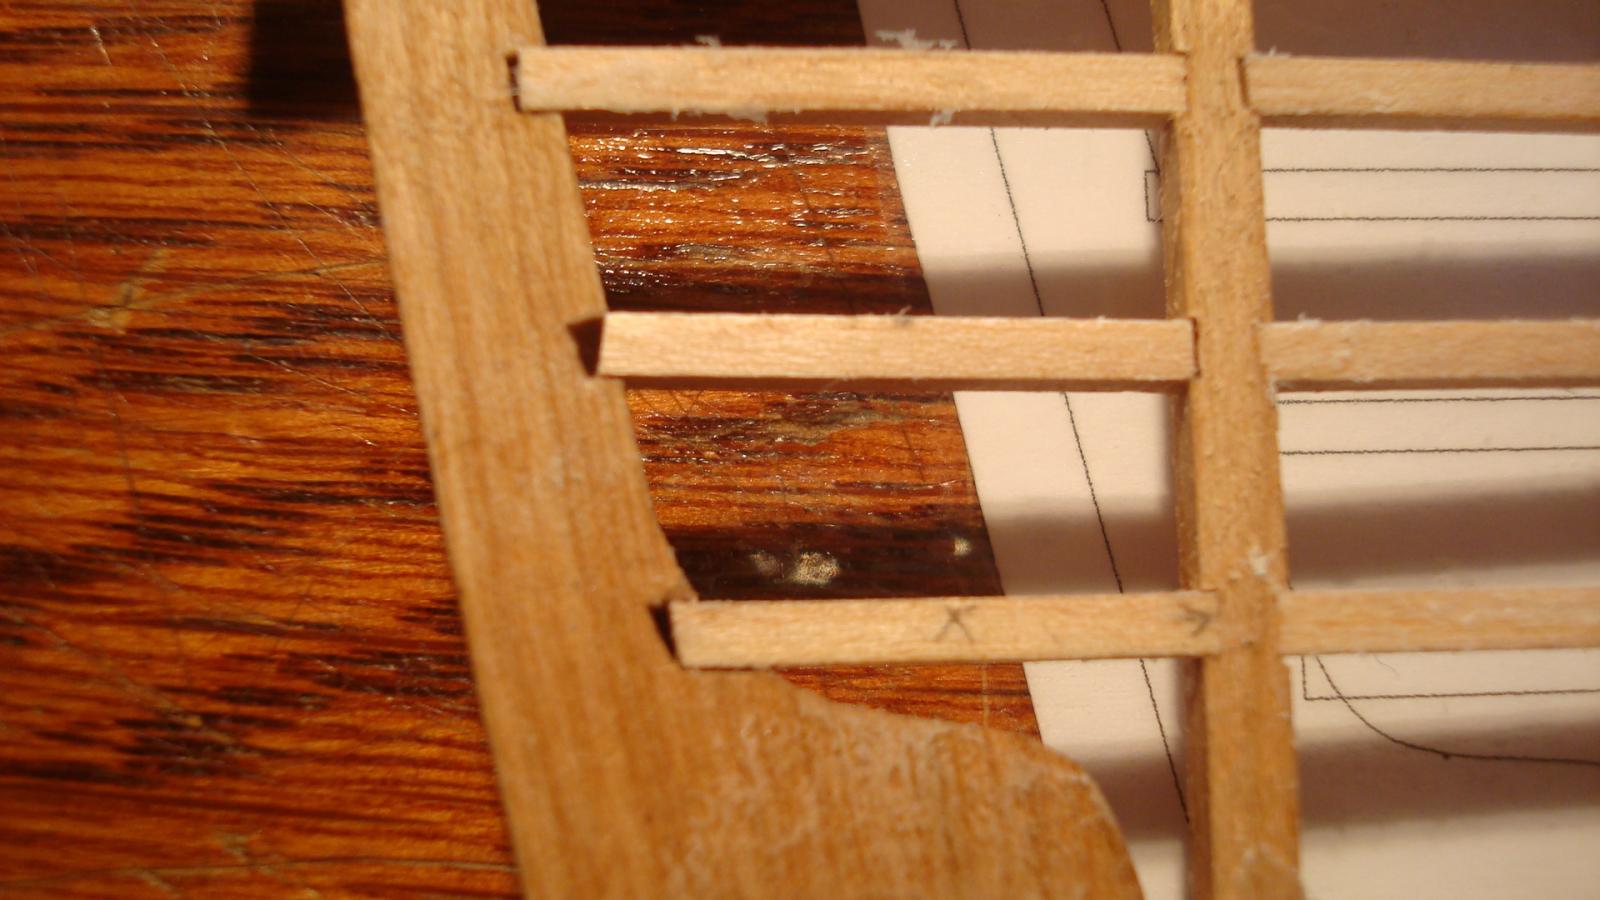
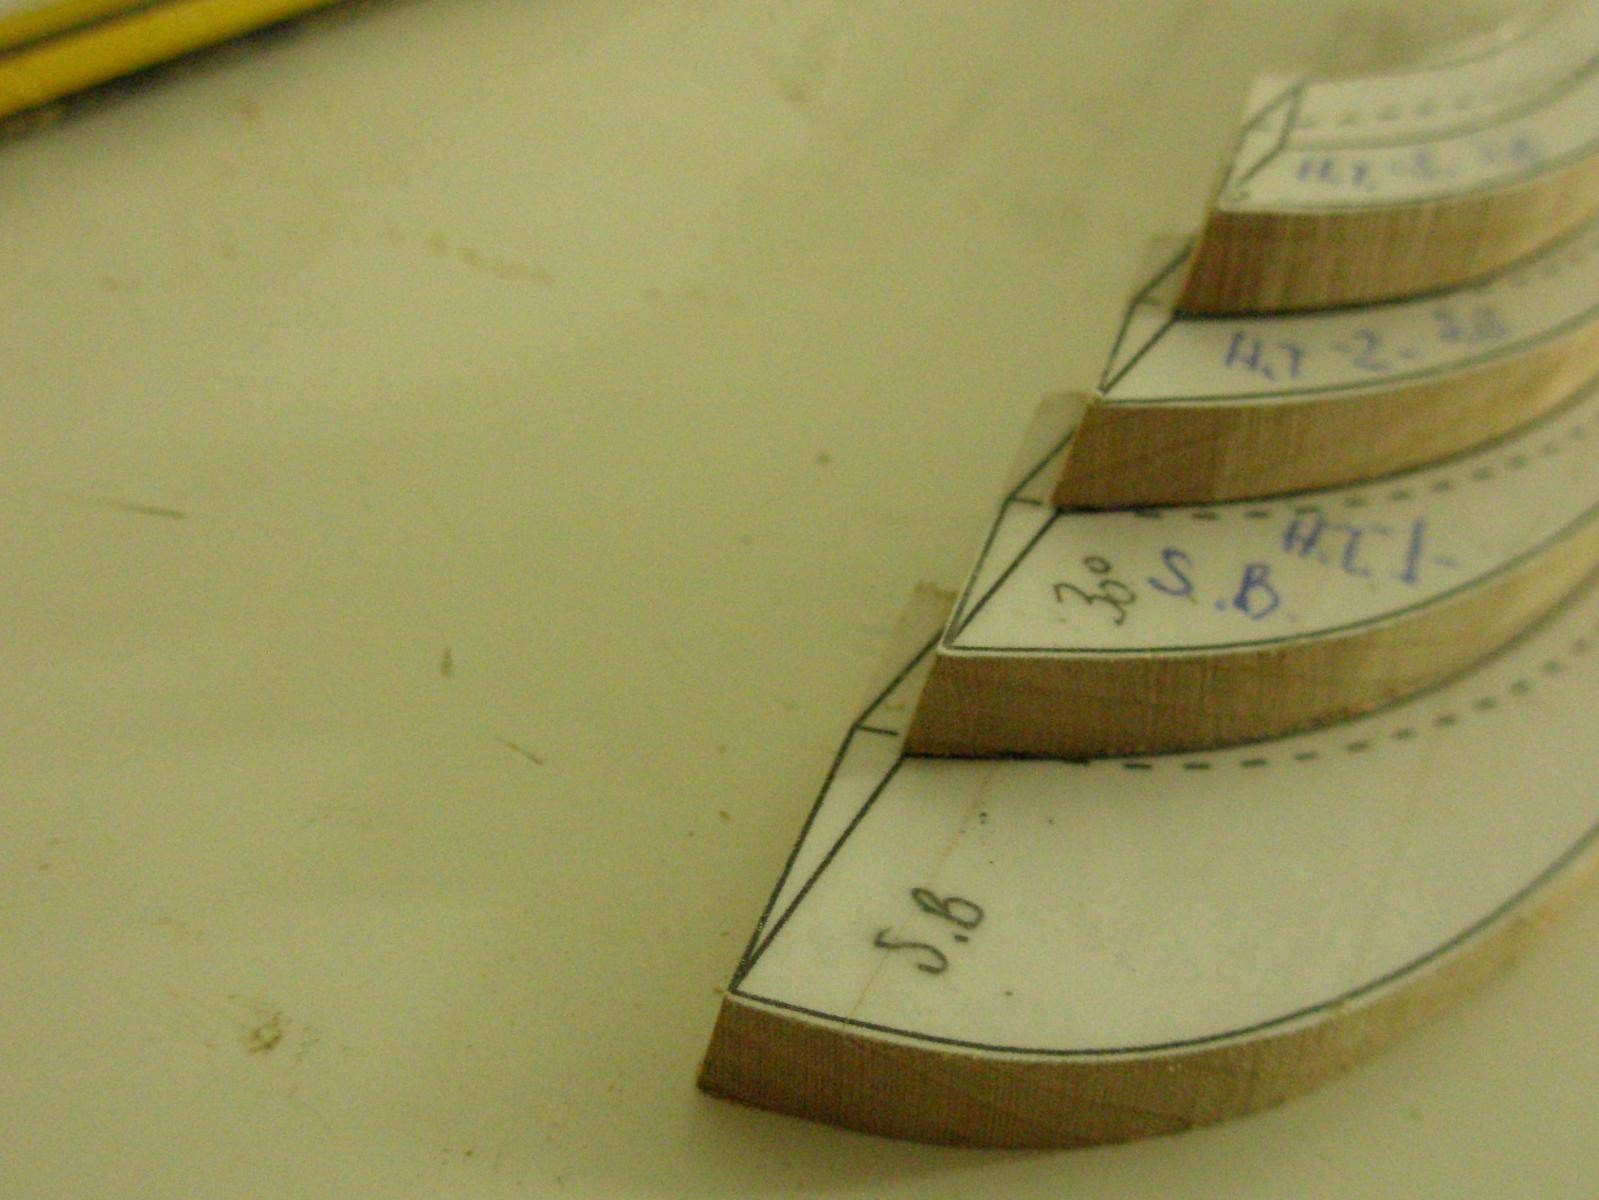
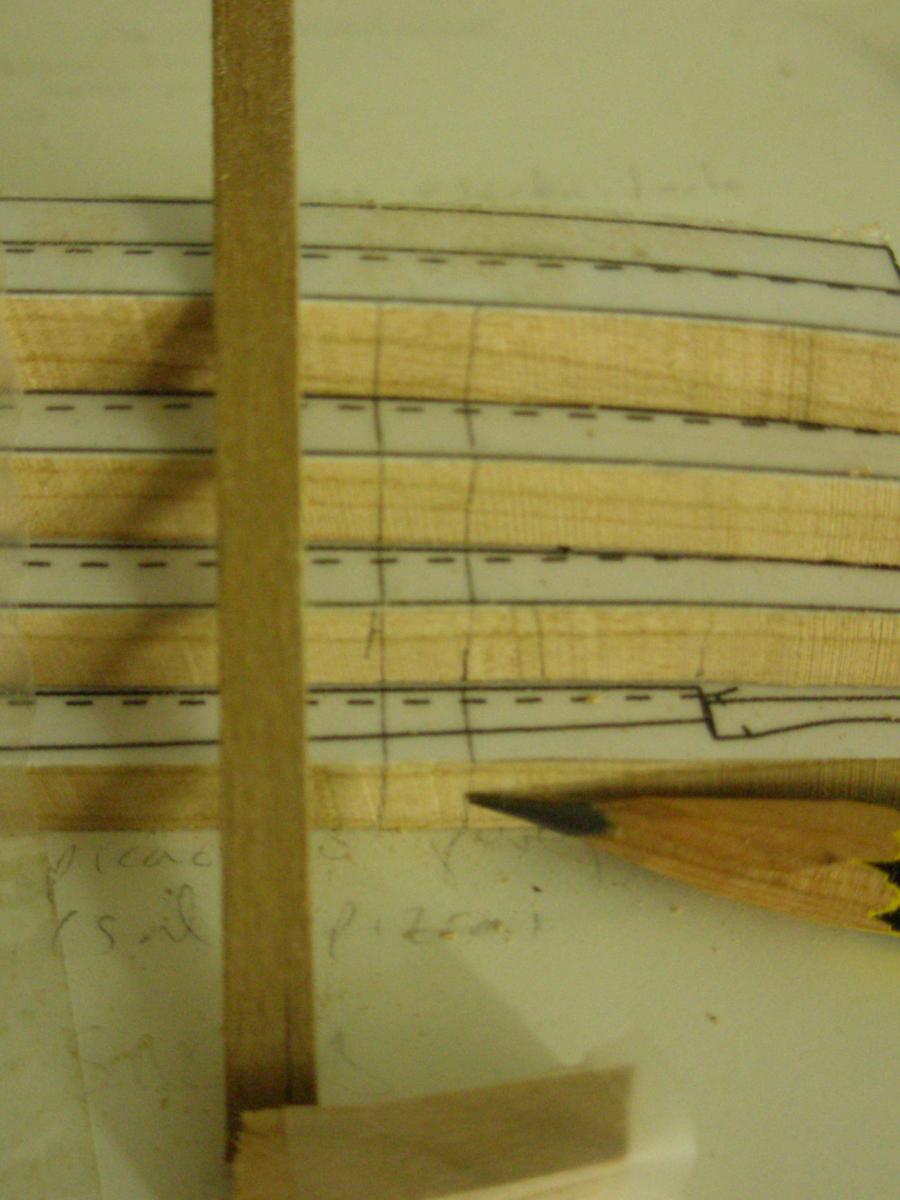
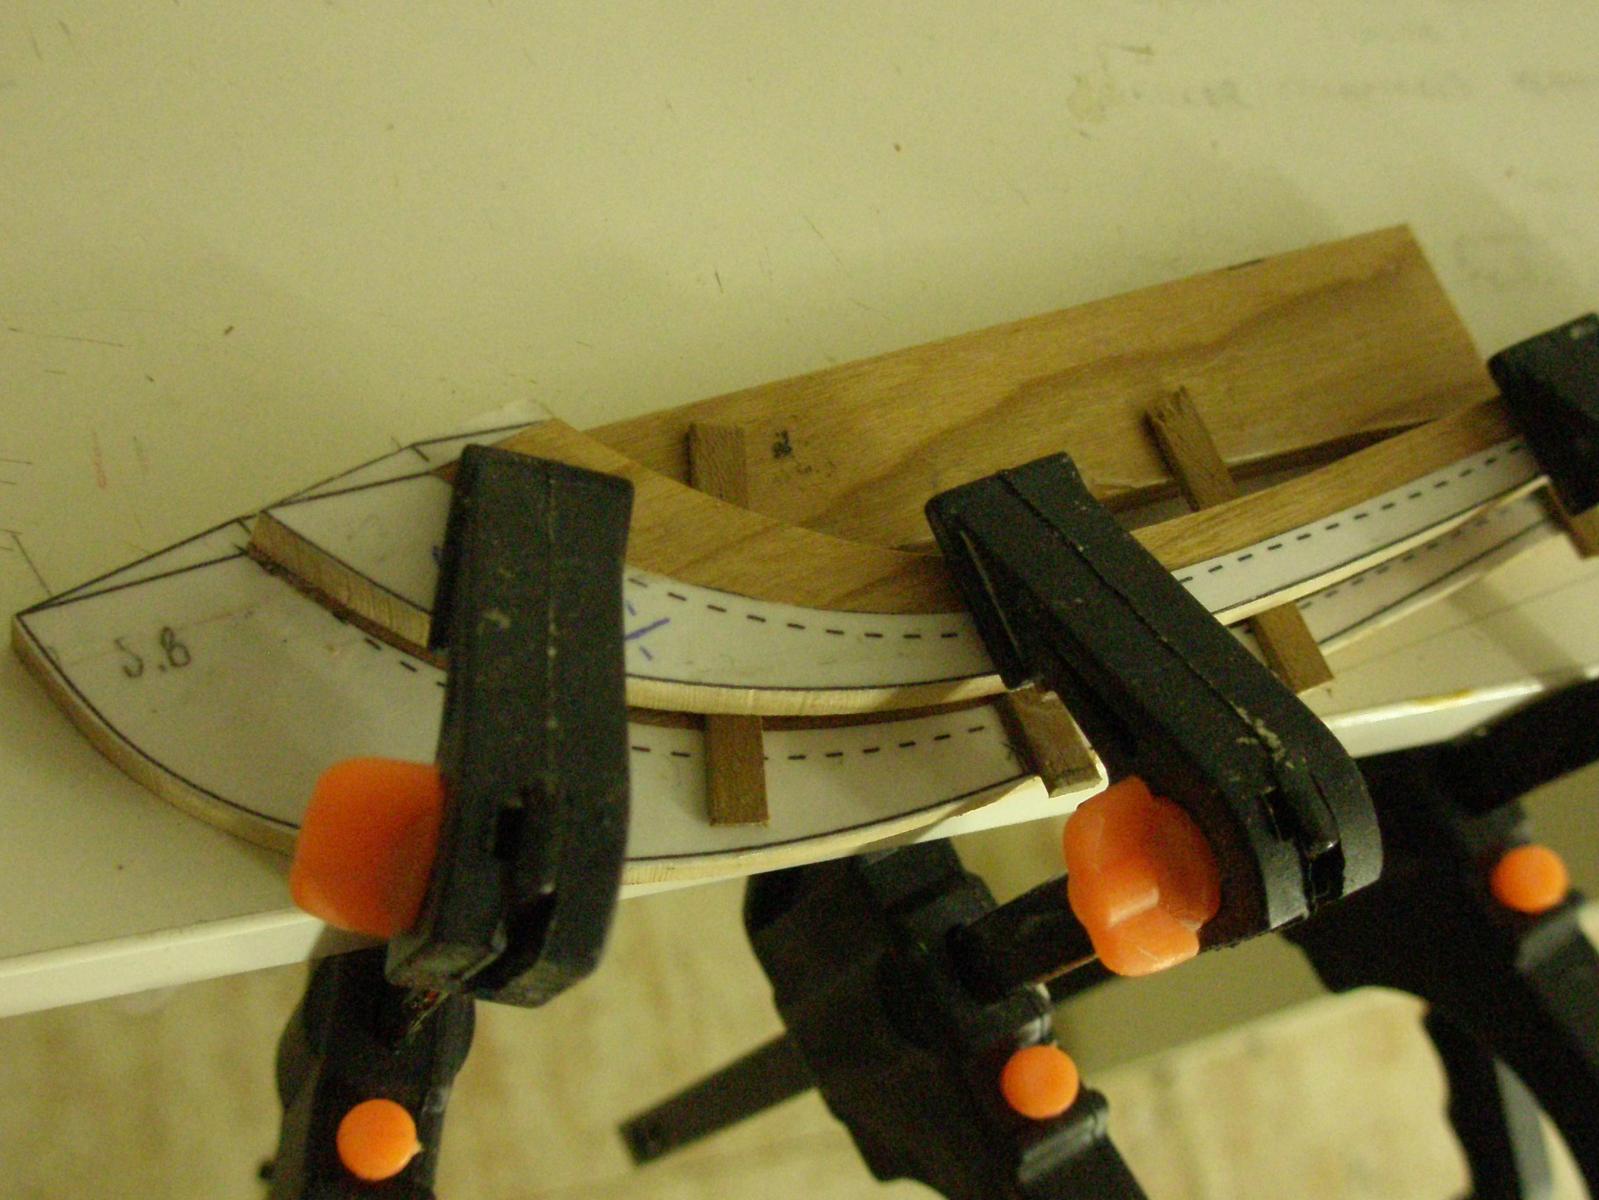
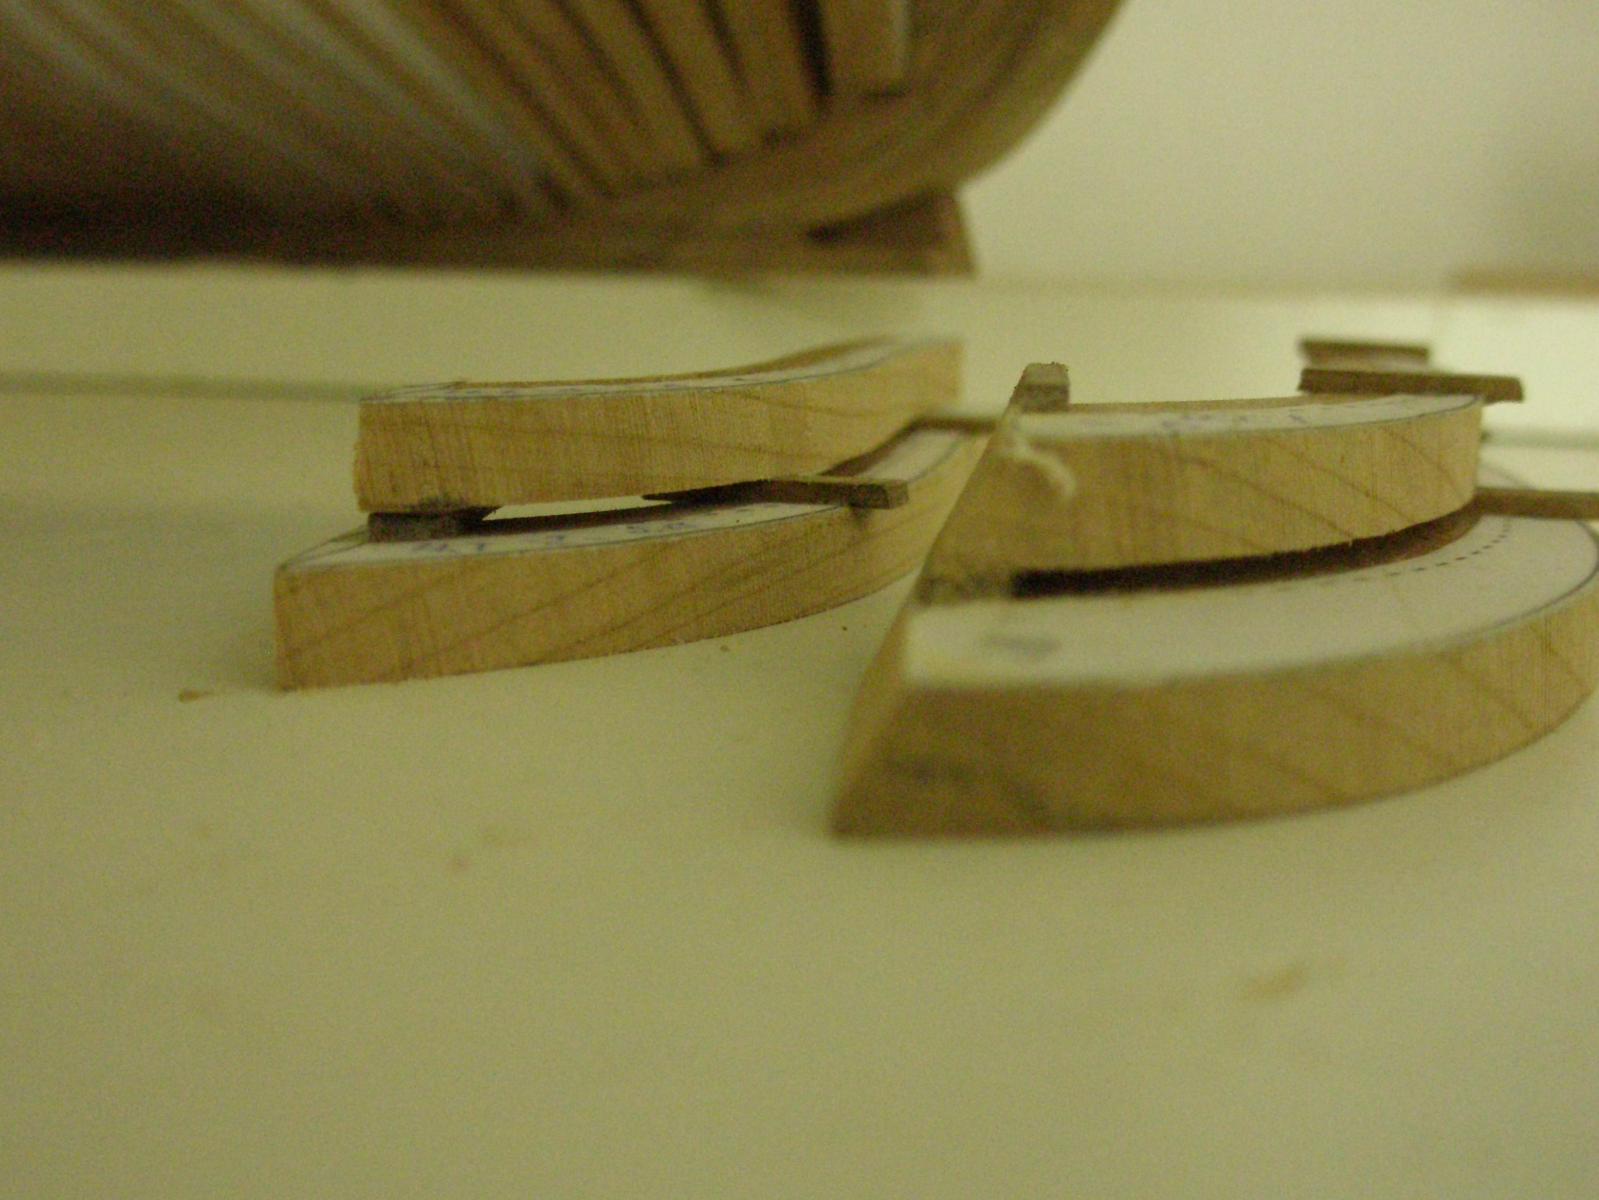
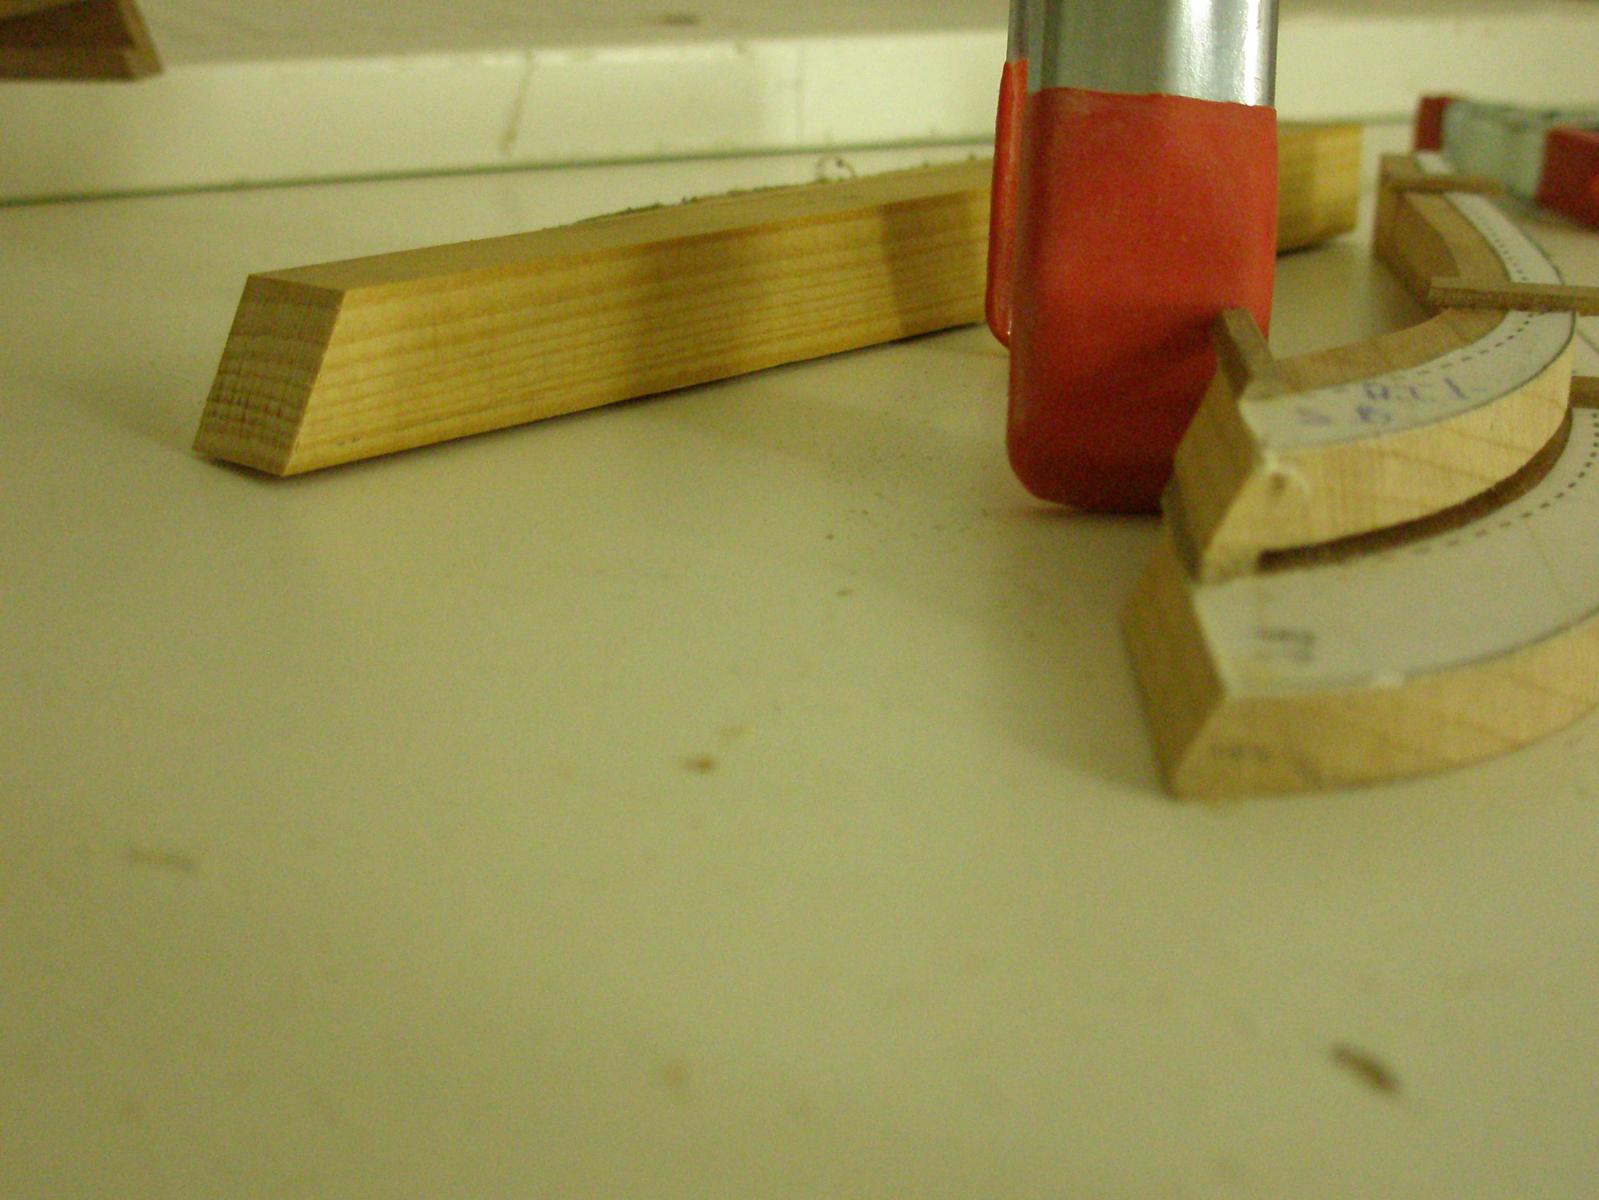
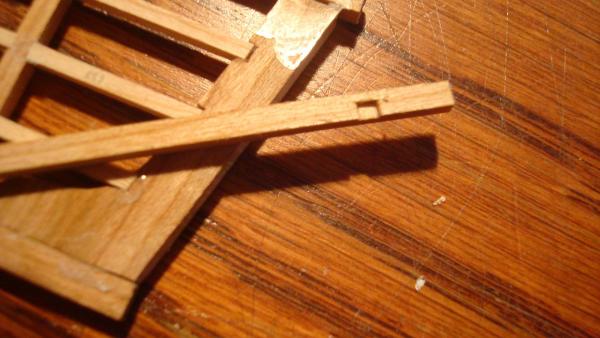
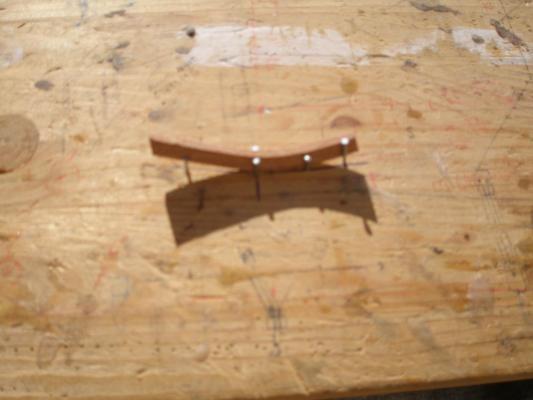
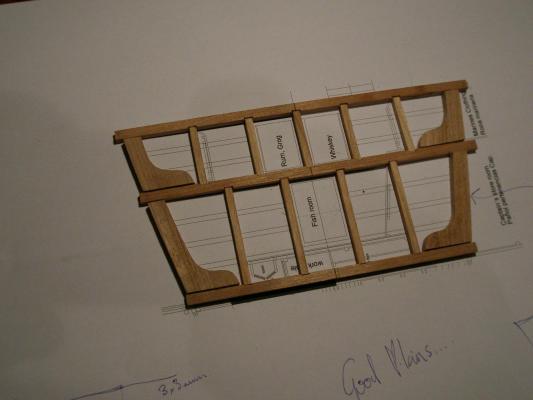
Hi Hi Captains!! And All! Winter has come. Best place to stay our workshops… minus ten today in Soria. Uff! Back here in Madrid and the platform pieces done. All set but not glued. Mark, those tricky pieces have changed a little bit, I´ll post some pics tomorrow. I wanted to do the deck clamp with scarfs so I unglued the stuff and cut the scarfs. Joss, I guess the secret it´s just to let the piece dry and dry. I did leave it for 24 hours and it holds the shape perfectly. Next time I´ll put some wood spacers between the peace and the nails. The pin has “harmed” the timber and I have had to sand it. For the camber beams I will cut them with the scroll saw but for this the steam has worked for me. Here are just two shots of the set Daniel.
-
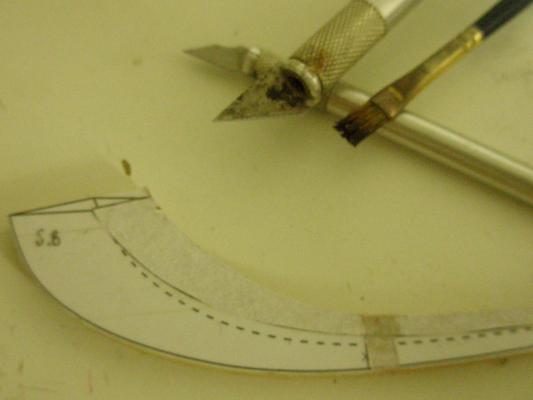
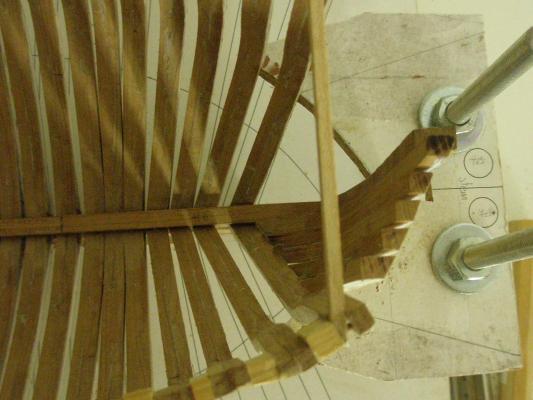
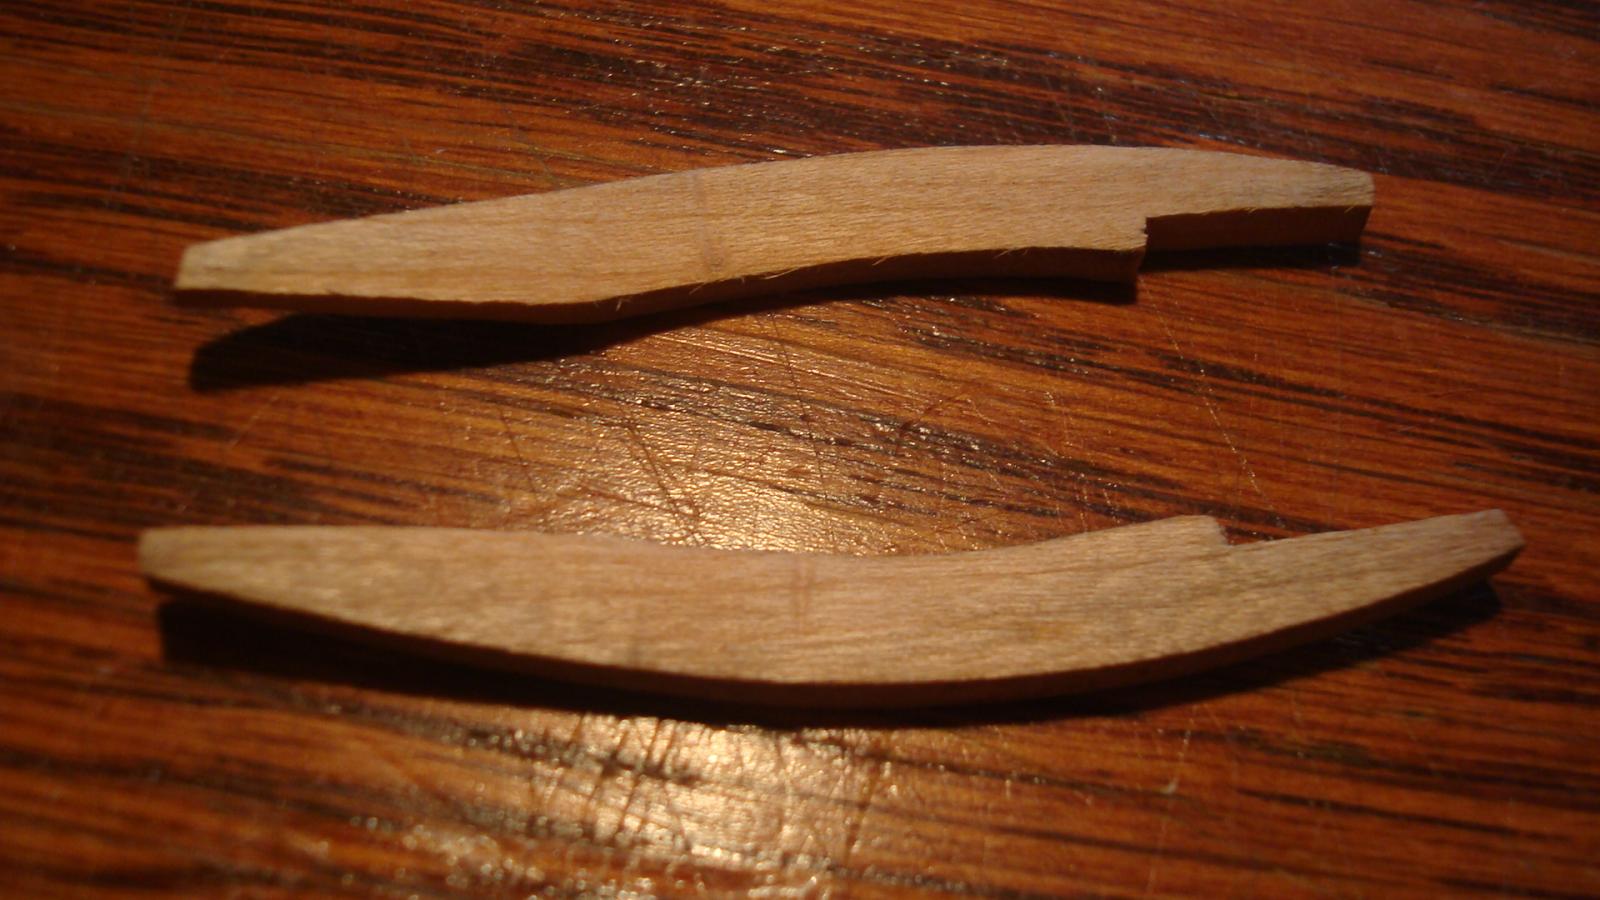
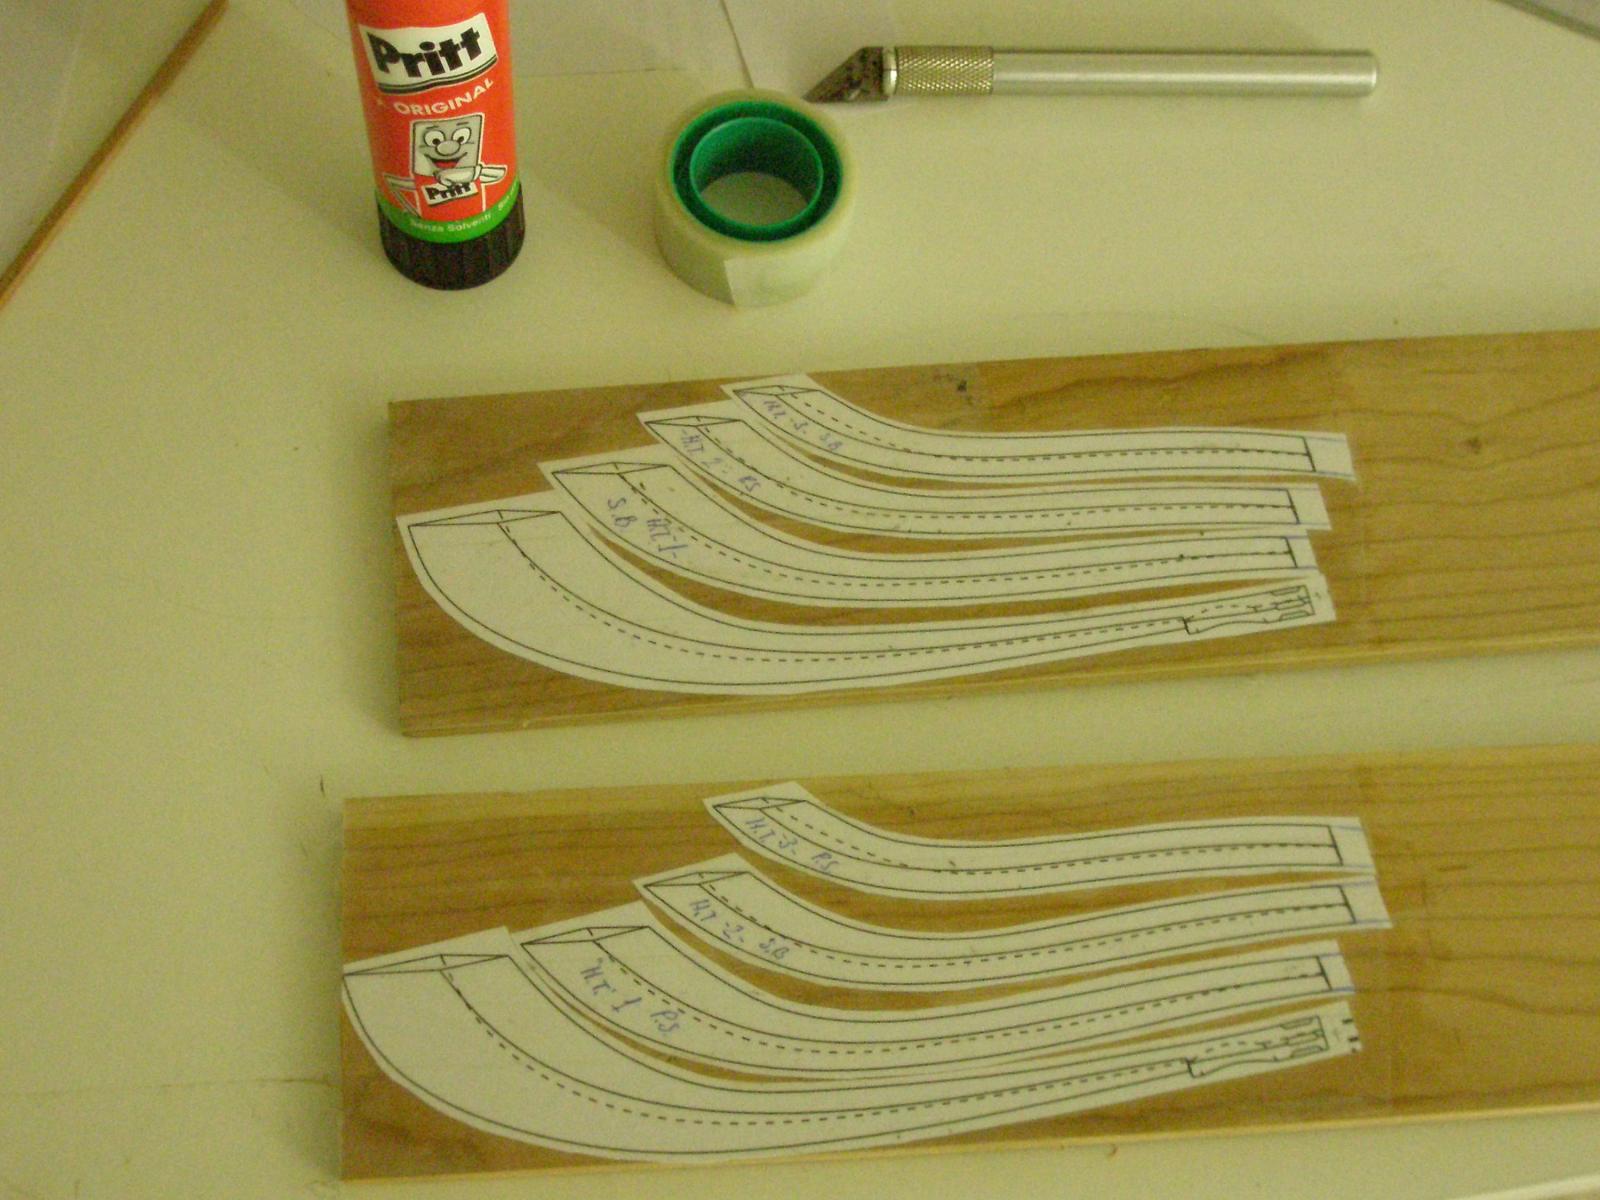
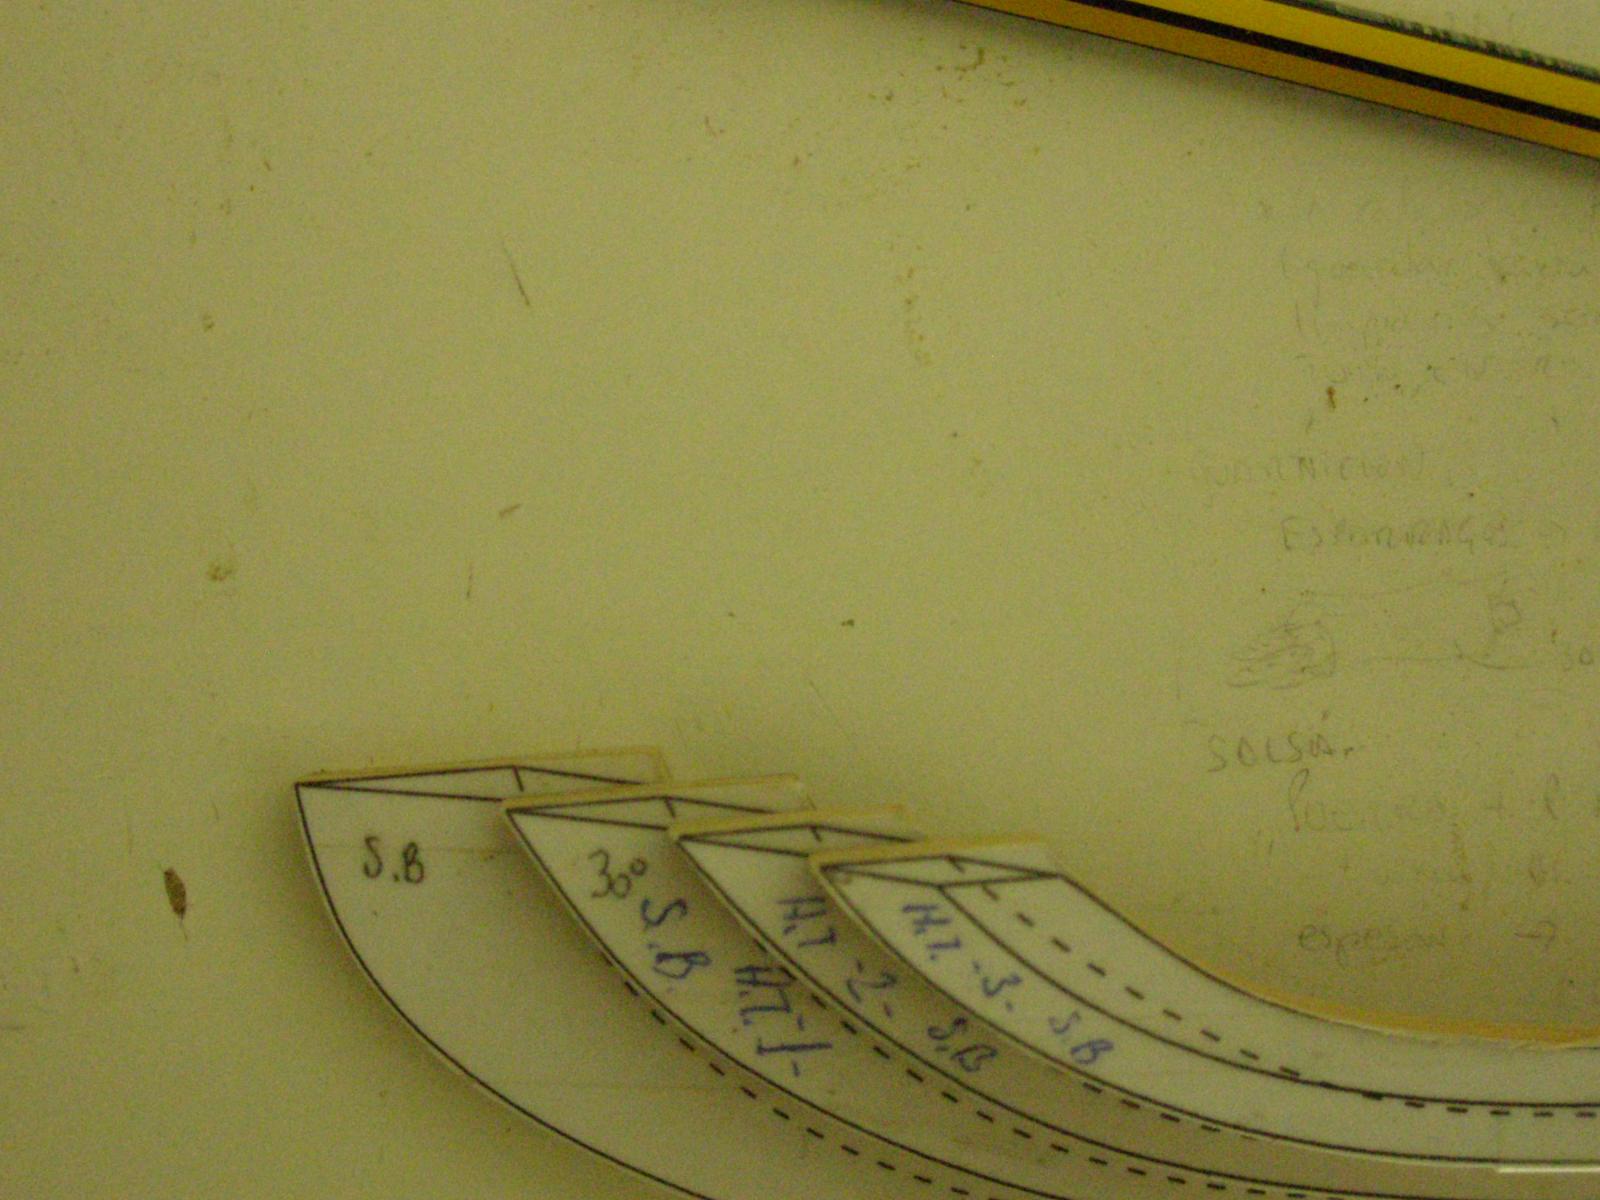
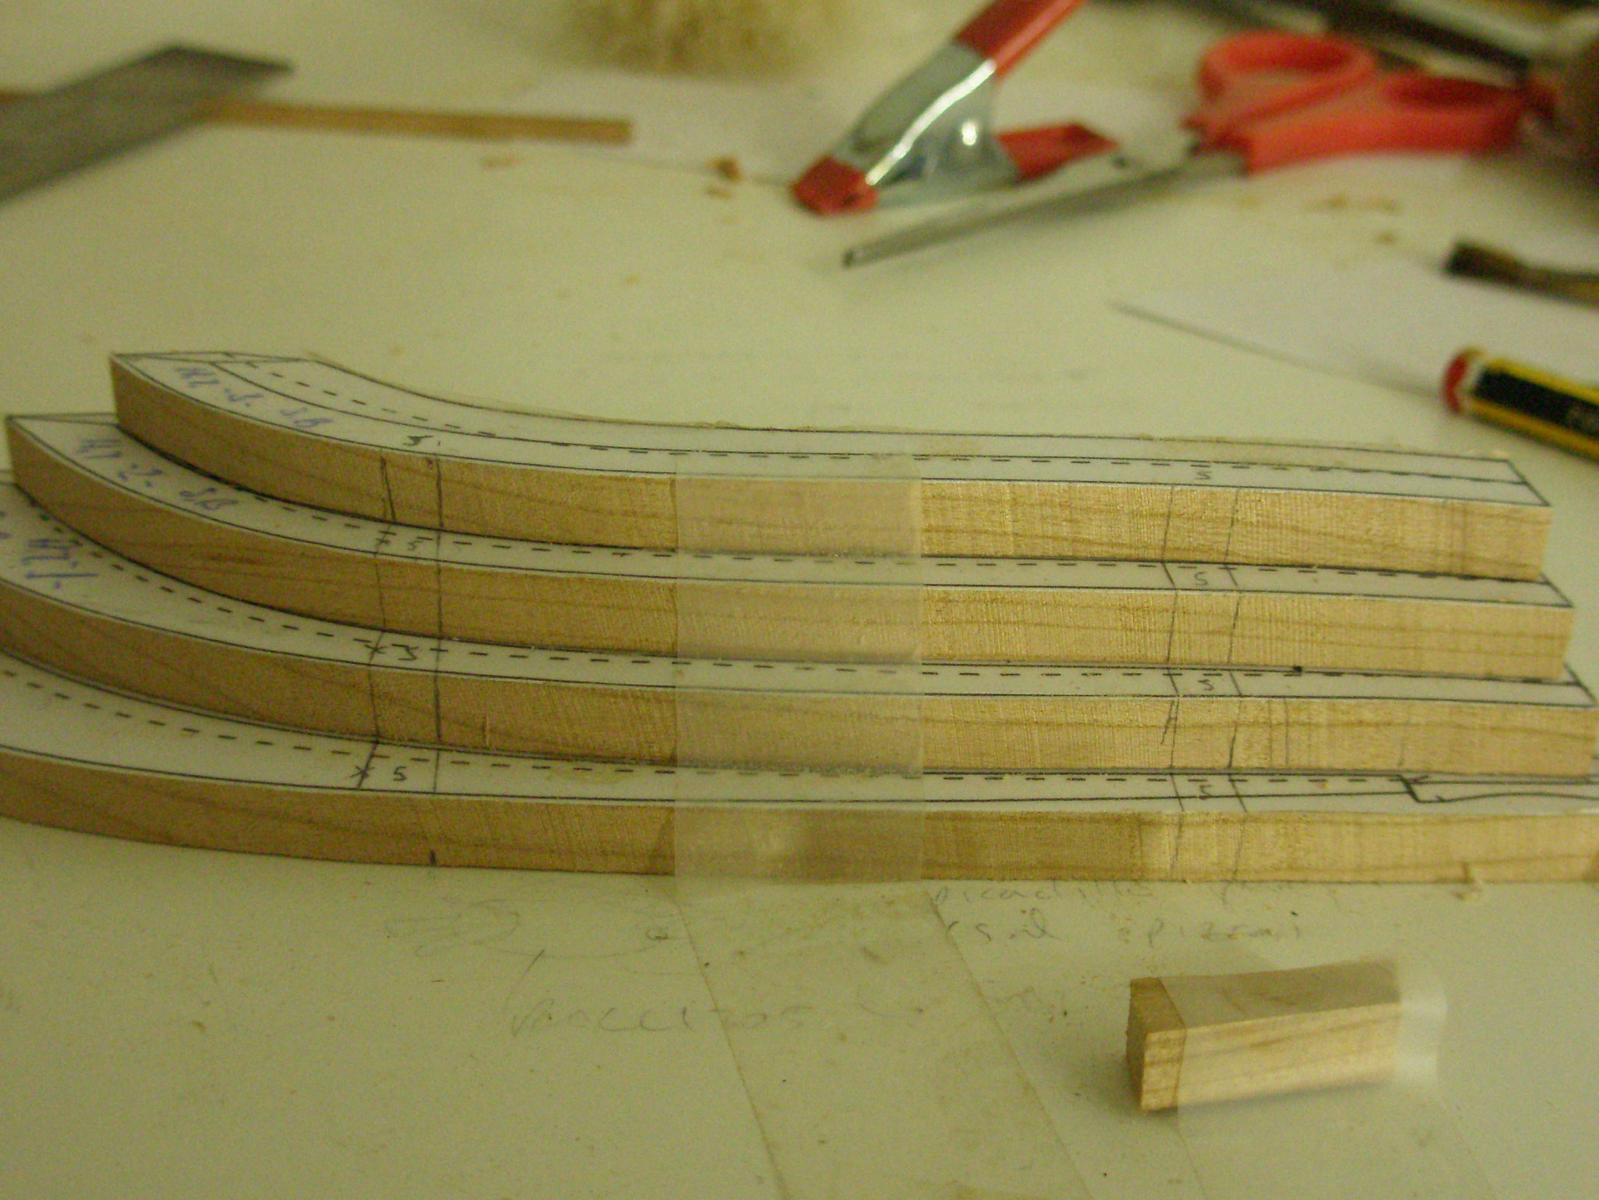
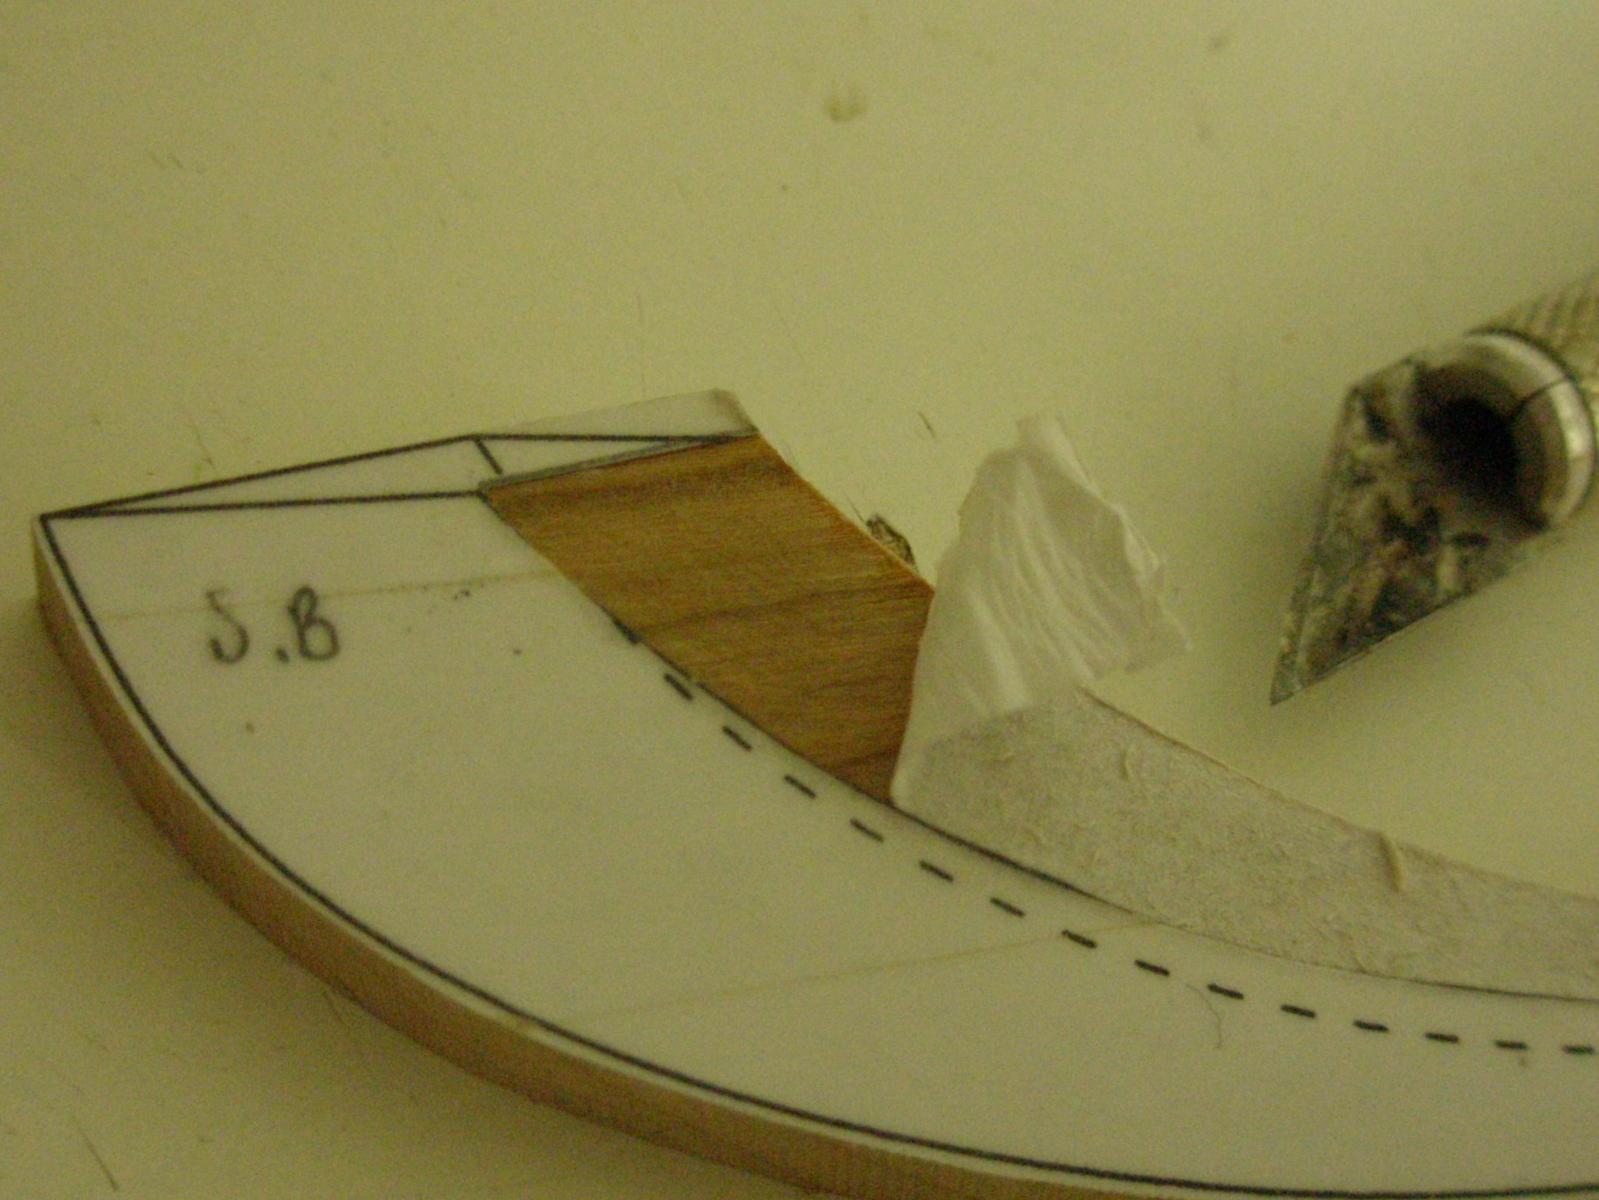
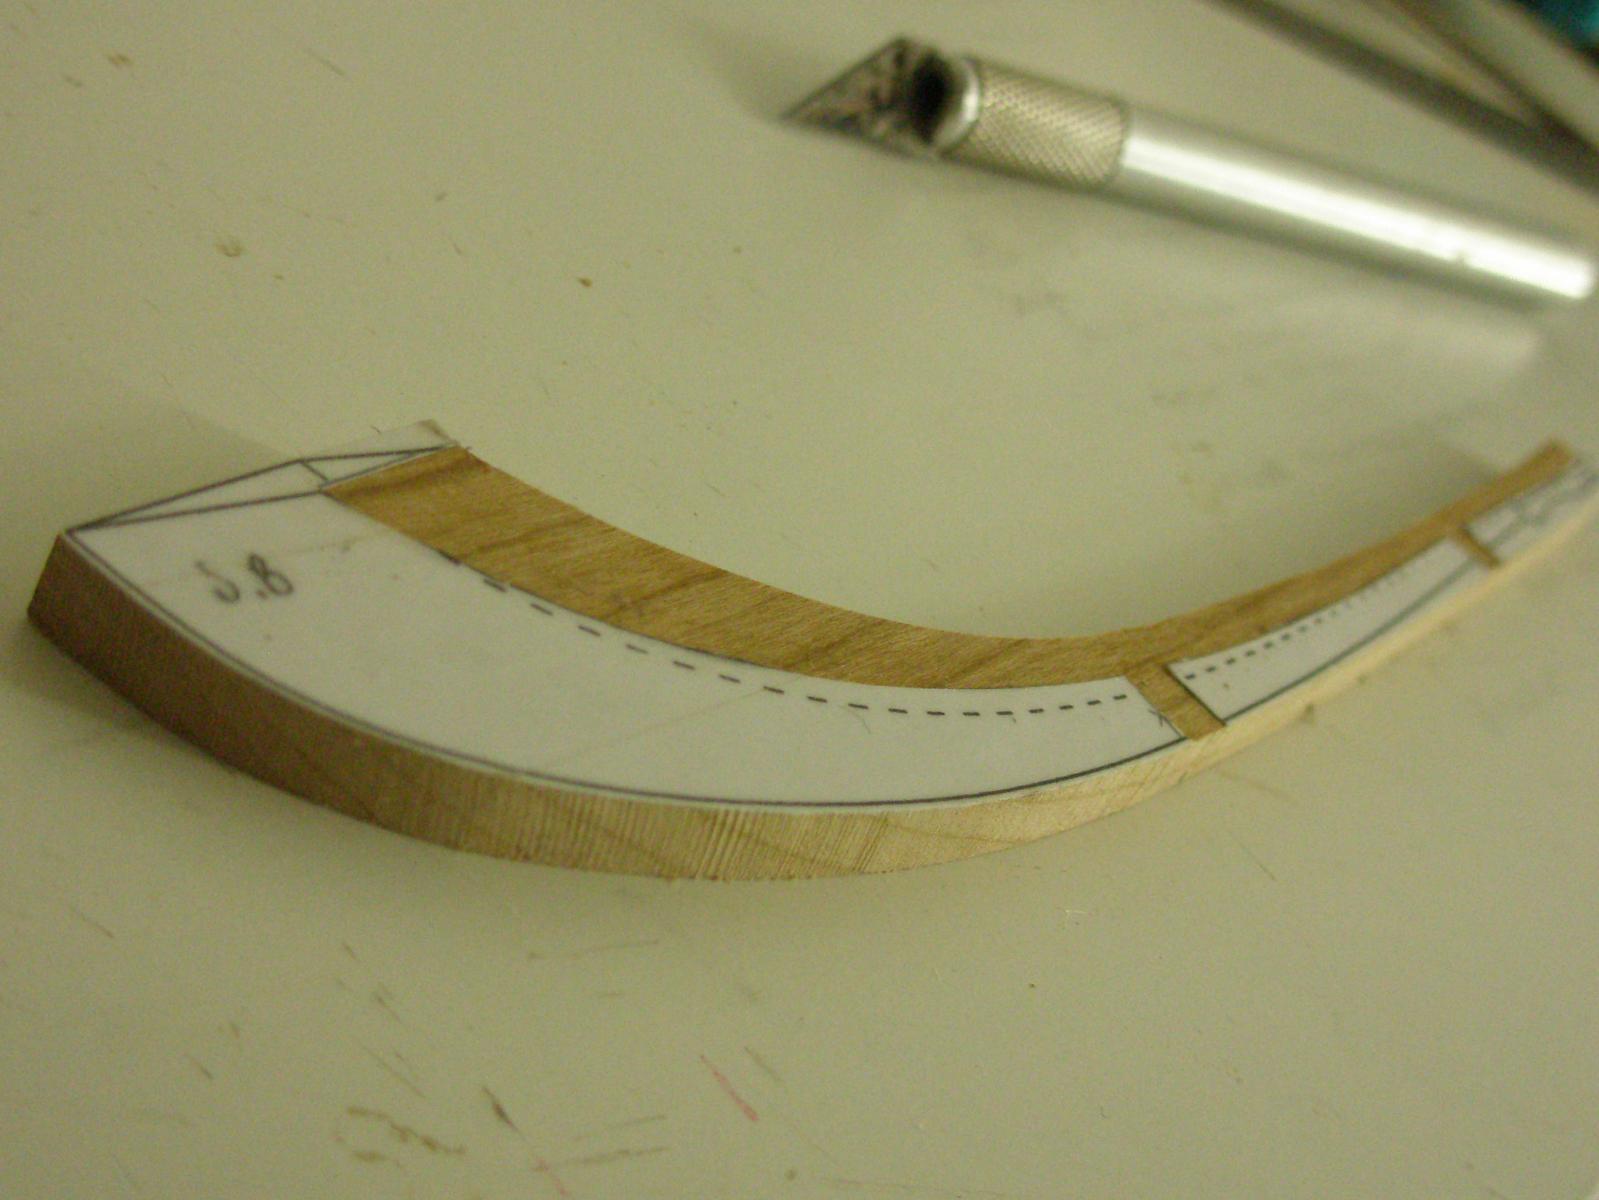
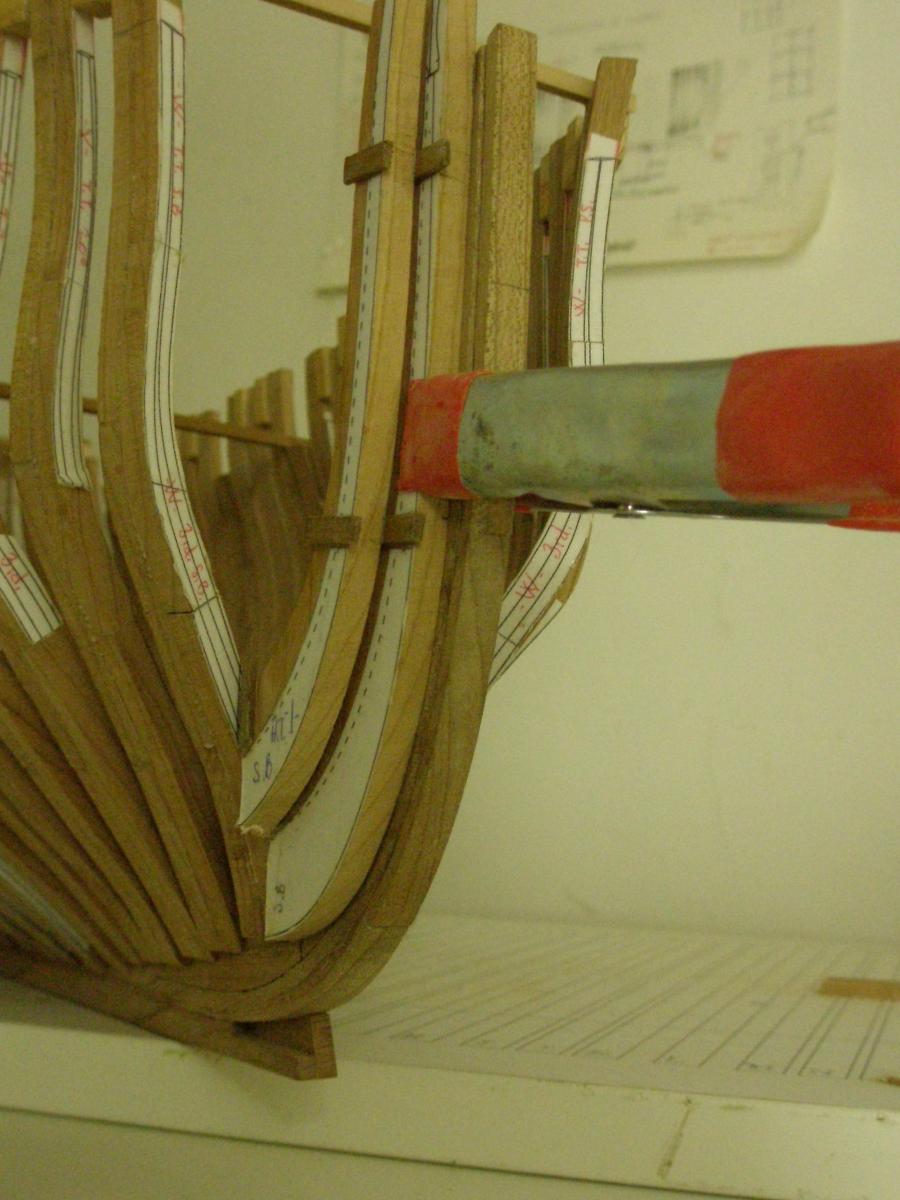
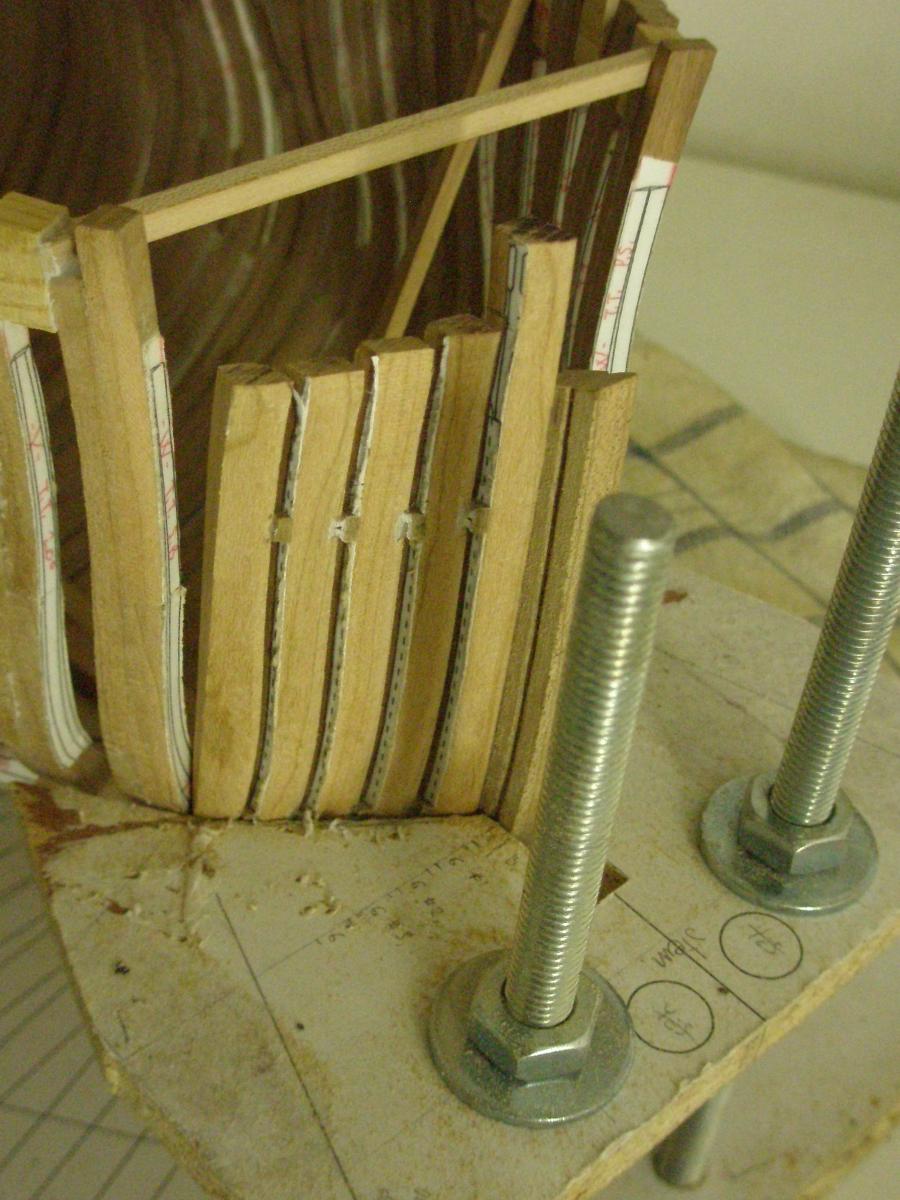
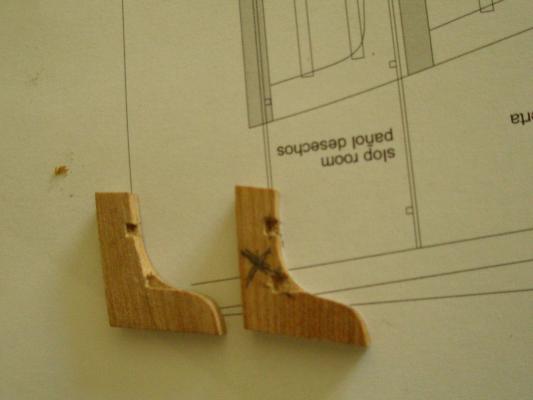
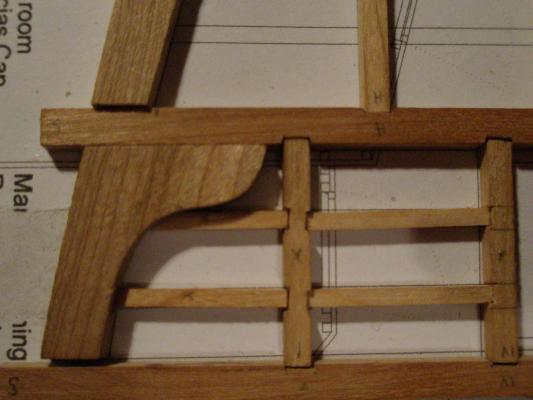
Hello hello! Today is friday, is party here in Spain. The Constitution day. Three days ahead with the Admiral and the kids around… Worst enemies for a modeler. I have started the aft platform just to “forget” a little bit the tedious work with the limber strakes and the thick stuff. Soon I have realized that only this little platform is a model kit itself… 36 pieces and 58 scarfs… I repeated the lodging knees twice mainly because the scarfs. How I envy you guys with those sherline or proxxon machines!! I´m using an x-acto blade and a rasp. I am using Antony´s (1:36 Victory cross section) method for the platform. To do it backwards. One goes blind. I am not sure how the joints are working in the other side caused I cannot see them and it´s the part that is going visible. Let´s see how it works out. I am using this cause the platform is “flat”. Do not know how will work with the camber beams of the rest of the decks. I have also start with the lower deck clamp to strength the hull in the half of her. The piece is quite tricky. It´s bend it in two directions. First I tape the part with scotch tape (that kind you can write on it with a pencil). Then I drew the pattern. Cut, sanded it and boiled in water for about 15 minutes. Then I let it dried in a sort of jig for 24 hours. It took me two days to glue both in place. I am going for a walk with the sailors and the Admiral. Enjoy the day! Daniel.


-
Bismarck by NBP - 1:100
harvey1847 replied to NBP's topic in - Build logs for subjects built 1901 - Present Day
-
Hello! I guess that since the water way in a man of war ship is cut back to allow the wheels of the cannons go foreward, the tree nails should go on this "cut back" surface. I guess the surface should be around 45º if not rounded. The amount of treenails, don´t know but I would drill them agains the frames in a 45º position. Here´s a paper of a shipwright from here, he is naval engineer. Maybe it is helful for you or others. This kind of papers you cannot find around bookstores. PONEN_FRANCISCO_FERNANDEZ_GONZALEZ_152p.pdf (See page #132) Regards, Daniel.
-
Beautiful anchor Piet! The last picture looks like the tiny piece actually weights tons... You are not going to leave it like that with that black rope, are you? A black metal chain could be better to improve that gravity of the hanging anchor. Just an idea. Thanks for the explanation about the heat sink. Now I understand it perfectly. I´ll ask Remco about the "potato method"... Daniel.
-
Good morning Piet. Looking at the pictures of the real anchor and the first one with all that tiny brass pieces frighten me. I mean the soldering work ahead… I was looking yesterday at Remco´s log and he use a potato as a heat sink. You use an iron clamp if I´m not wrong. Could you explain us more about the soldering method you use and what the hek is a HEAT SINK? Sorry but all my feedback about this is soldering copper pipes for the central heating in my house. I am far away of soldering pieces for my project. I am just wondering about this question. Good Luck! Daniel.
-
What a beautiful picture Ed! I have been looking at it for minutes and minutes... This guys were not dealing with proxxon or sherline machines but with quite big stuff. All those chains and wood wedges under an enormous tension, look so real. I was wondering what it is the big structure in the back of the pic. Looks like the stern of clipper. Might be a crane but with all that scalffolding and twood poles looks like a piece of ship to me. Beautiful explanation anyway. Green goes Red Stop. Makes sense to me. Good luck with the aft frames! Daniel.
-
You Bet it Piet! I am willing to see that anchor in place covered with that tiny small piece of brass. I guess is not just me but all of us! best wishes! Daniel.
-
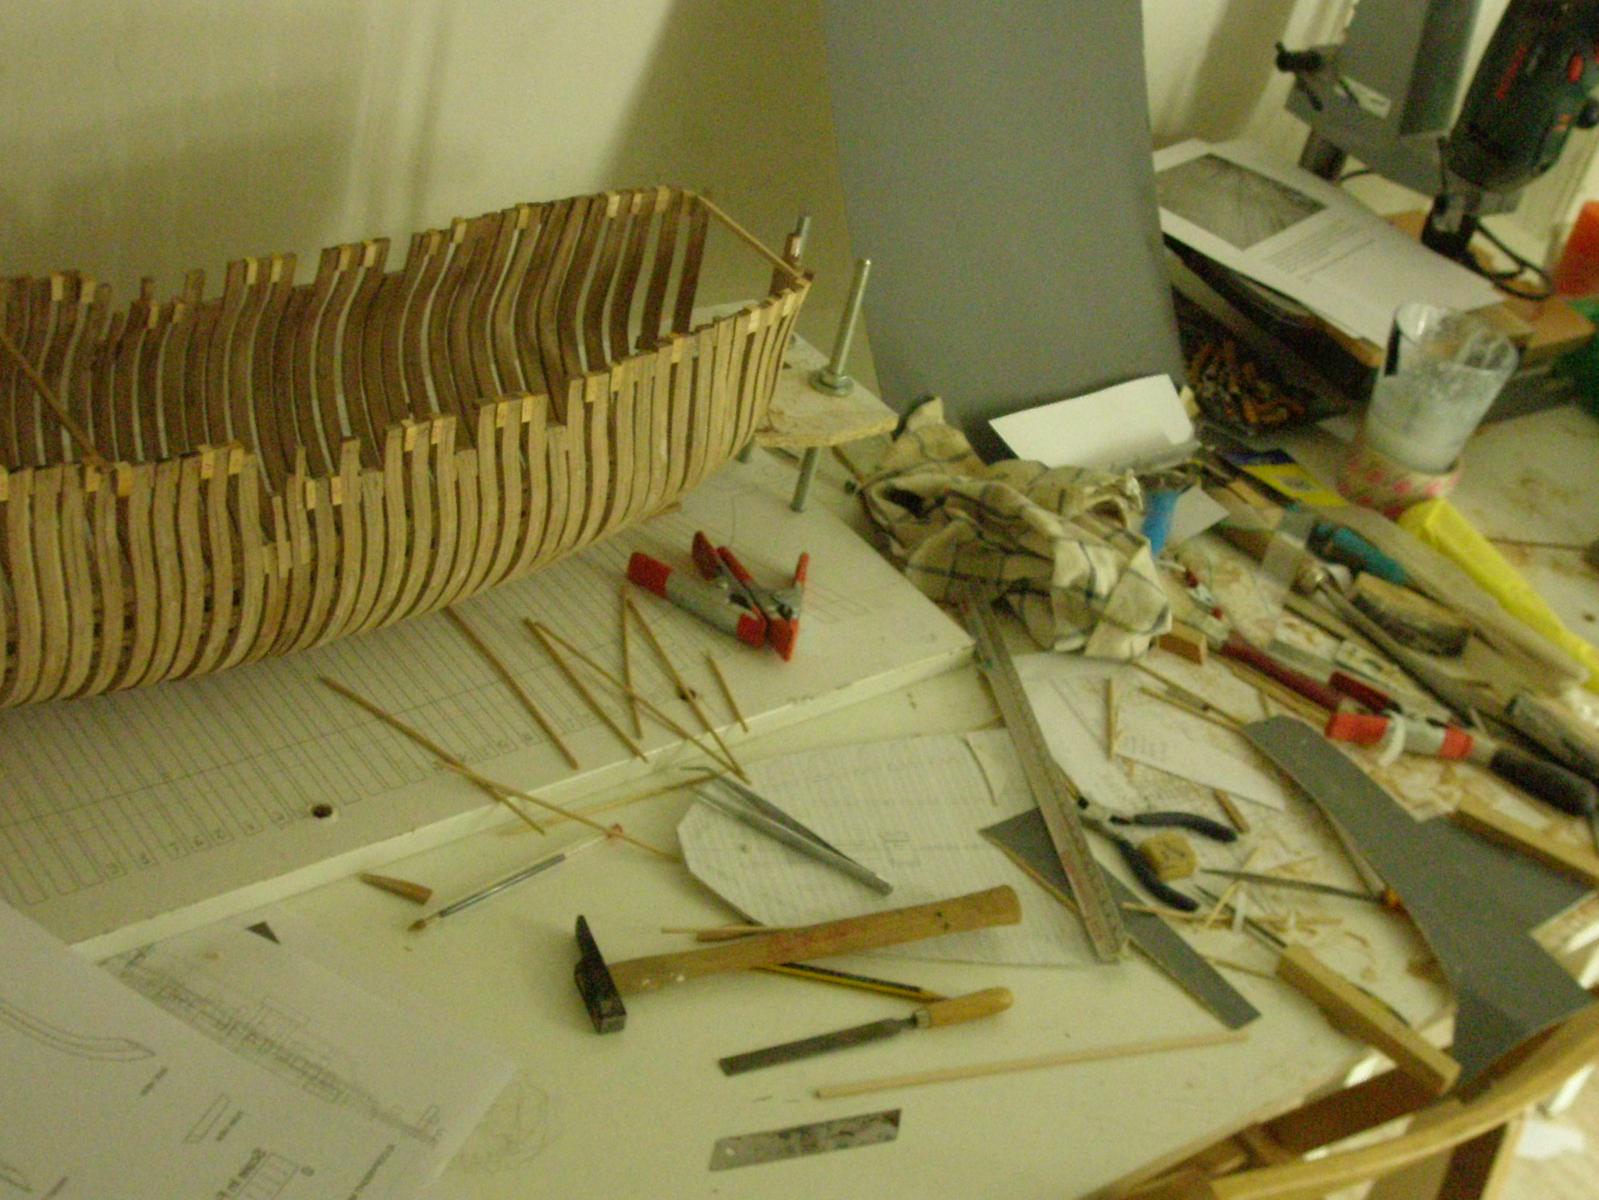
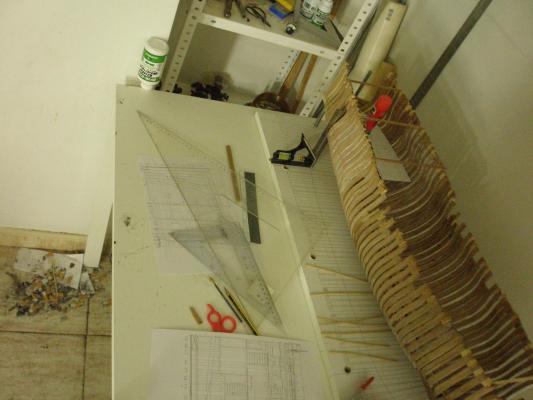
Hello boys and girls around Model ship World! Joe, are you in another topic on this forum about 3D drawing? I have ACAD 2011 but I do not know how to use the “lofting” tab. I guess it is harder the 3D with AutoCAD but do you think that the task could be accomplished using 3dCAD? (please send me the icon for the lofting thing so I can know where to find it, my version is Spanish) I have no Solidworks and looks like I am not going to have it for a while… A small progress during this weekend was done. I have redone the pdf´s for the symmetrical hawse timbers. They are already uploaded on the post about it. The thick stuff plus the different pieces are going quite slowly. That is why I am moving to other things like marking the deck clamps for the lower deck. It took me like one hour or more to set the first pattern in place measuring and measuring again with the square sets. Anyway here are some pics… This last one is dedicated to Piet. All our workshops tend to look like a mess. I am going to put at least one day in the week schedule to tidy up and clean. With the amount of tiny chips and pieces of timber the table is starting to look like a circus rather than a proper log… Happy Monday! Daniel.


-
Good morning Christian! Nice to hear that. Lot of work ahead for you. What program are you going to use? Have you thought about sharing the files here on the forum? and the last one, do you work on 2D or 3D? If you cannot model at least you can draw. It´s kind of relaxing to do so and forget about the dust and the mess of the workshop. Best wishes. Daniel.
-
Happy happy Birthday Marius!! daniel.
-
Hello again! A small update. With so many wood around is kind of tricky to chose the proper ones sometimes. I have printed out the order I made back on summer this year. You can see there the prices aswell. I purchased all my wood here http://www.acercamadera.com/ They deliver all across Europe but you´ll have to see how much is the derlivery of the package. They do not speak english. PEDIDO acercamadera post.pdf Almost ten AM and I am still here. It´s freezing up there in my workshop! Daniel.
-
Hello Doc, Happy Thanks giving! Just wondering how is it going the Triton? How your hands are feeling? Eveything it´s ok? Best wishes Doc. Daniel.
-
Thanks Mark, Druxey, Pete, Joe... and all! Pretty exhortative Voron, do you belong to the Army? hahaha just kidding! On post #89 there´s a pdf file where I have mixed the disposition of the frames and the section plus the keel. Looks pretty messy but it is acuarate, you have just to see where the deck beams are and you´ll know where to set the platforms. Nothing really special. The plan is the key. Back to the workshop. daniel.
-
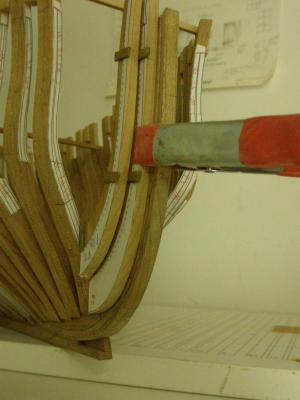
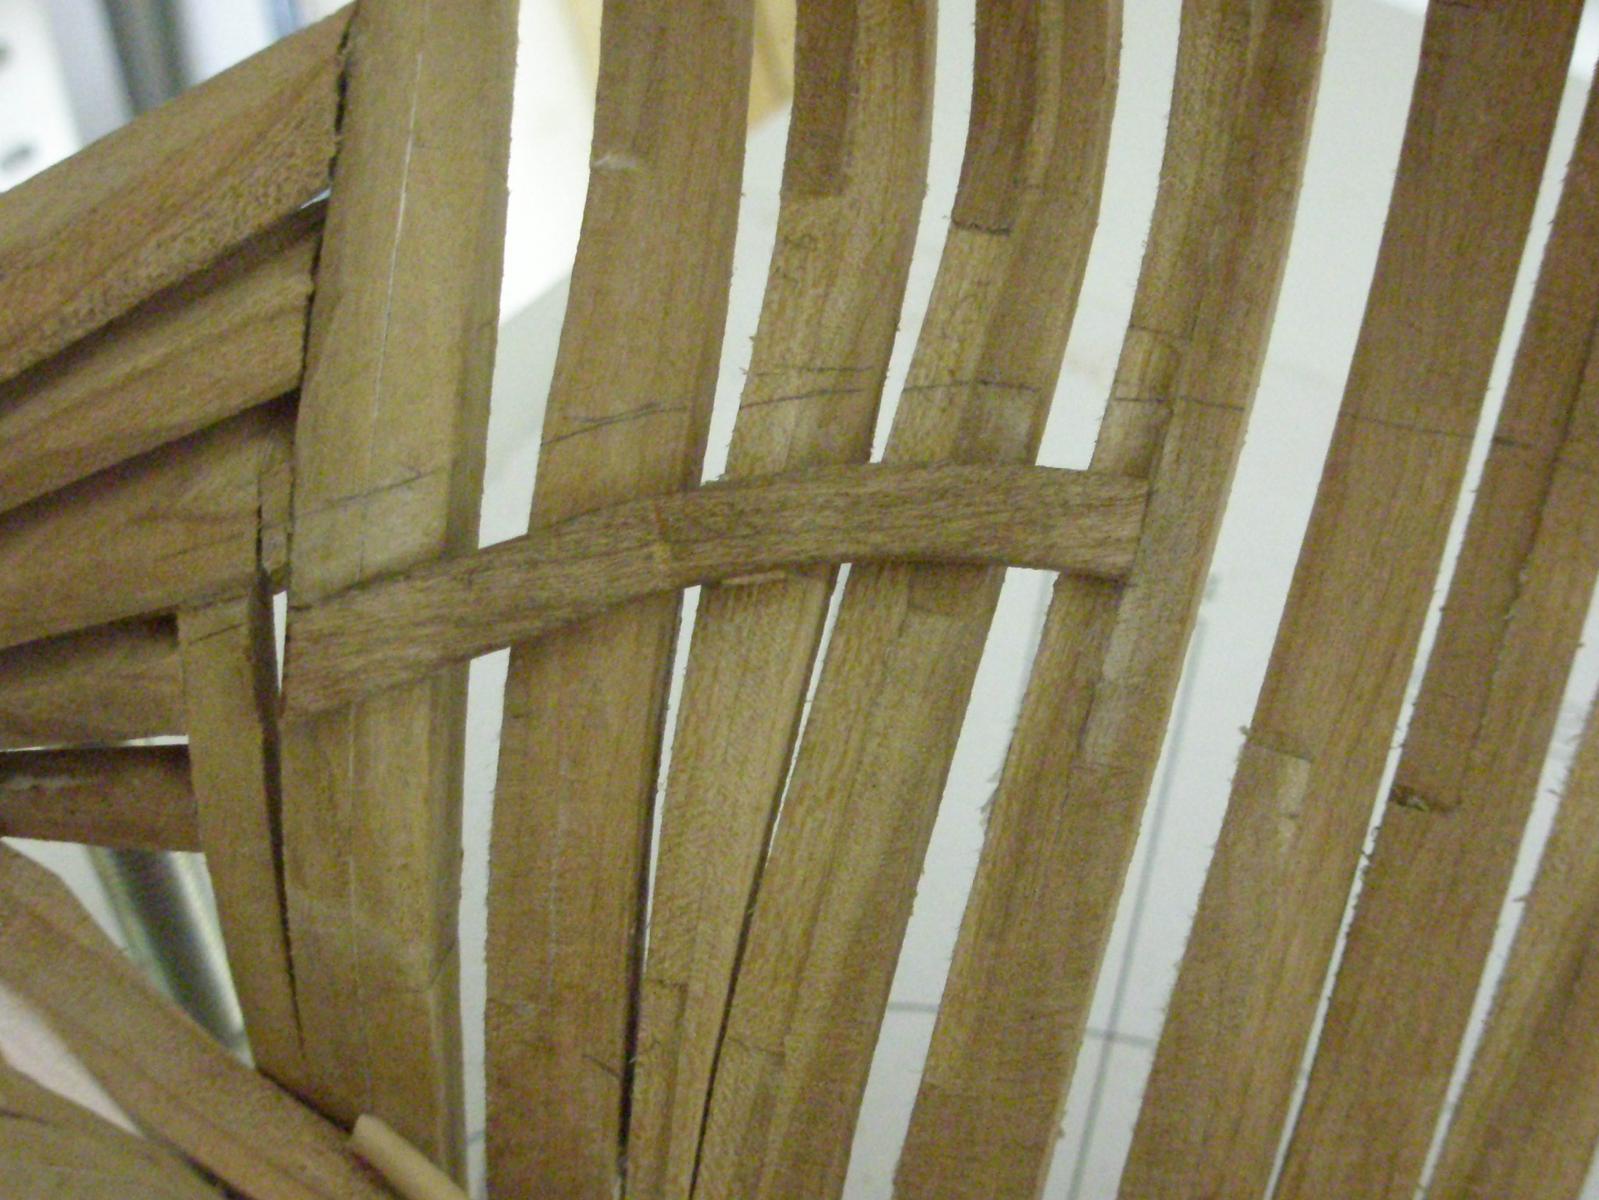
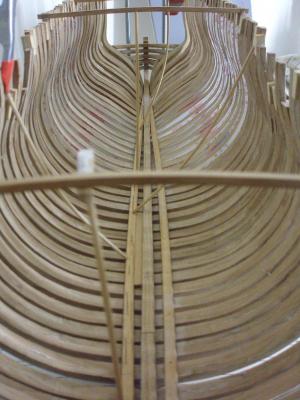
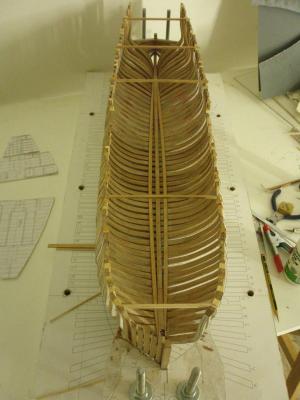
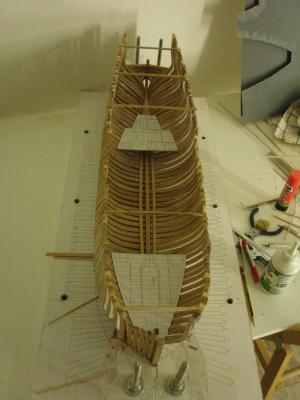
Arrgh! Sometimes while you are posting,,, and you have attached all the pics and write everything… suddenly inet says “no” and all the work and effort go to the trash bin.Anyway, we are just dealing with ceros and ones not with wood. Thanks very much Pete! Nice place you live. I have just checked it out on google maps and looks beautiful. Lots of forest to make model ship building or Bourbon barrels… Christian!! Where are you?! How is the HMS Pegasus going? Sometimes one feels so alone here in the “Complete Model” forum… Here´s the work done so far during these two last days. As you can see the top beams (4x4mm) at the ends of the frames were pretty helpful to glue the limber strake. Here´s a shot of the two strakes glued. Took me two days. Meanwhile I was cutting more patterns, studying the plans and sanding the hawse pieces. And here is where I am moving on… the fore and aft platforms. I have to buy a small level to ensure the platforms are leveled. It is a device quite expensive. Made in Japan. Hope to post more tomorow. Fingers Cross. Daniel.

-
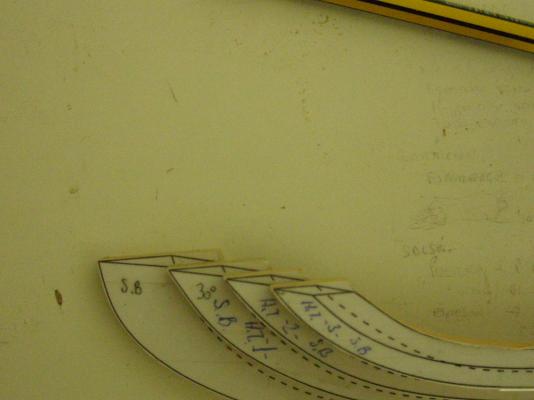
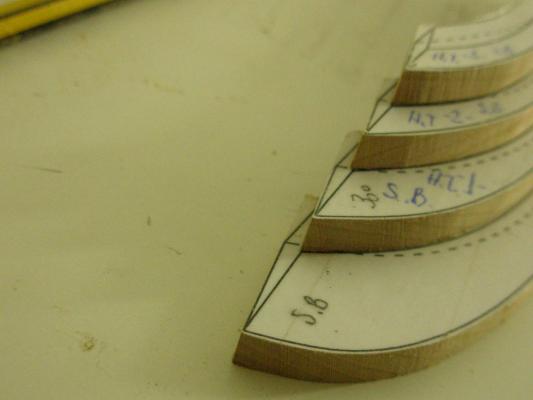
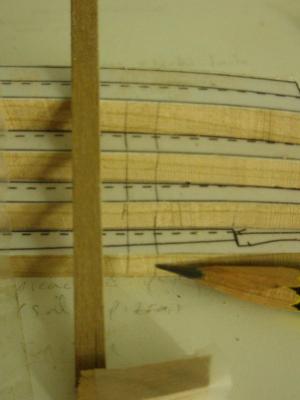
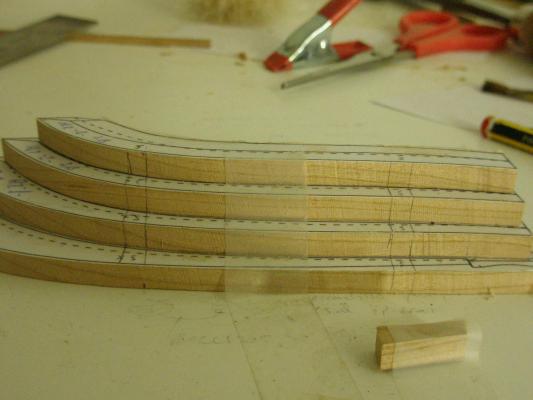
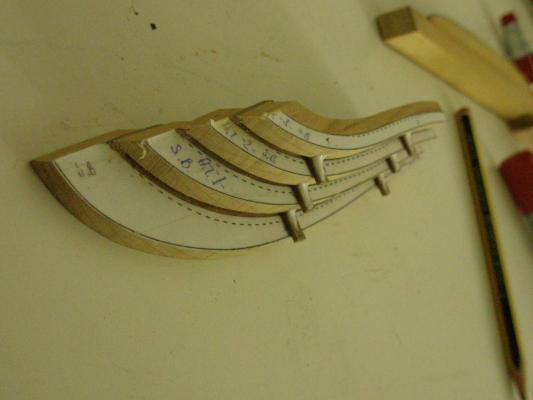
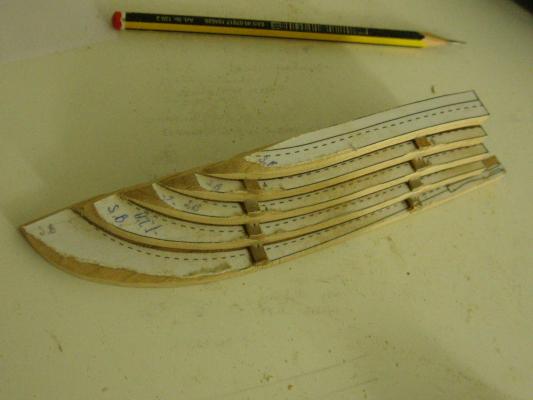
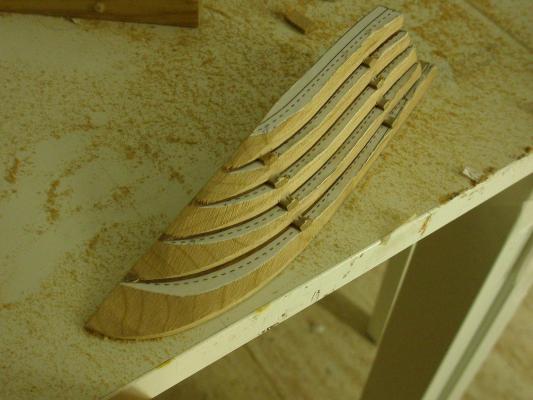
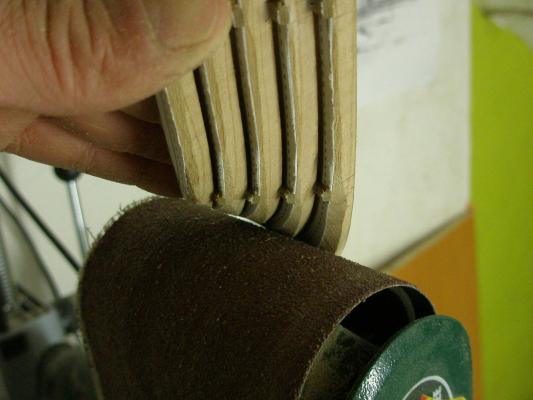
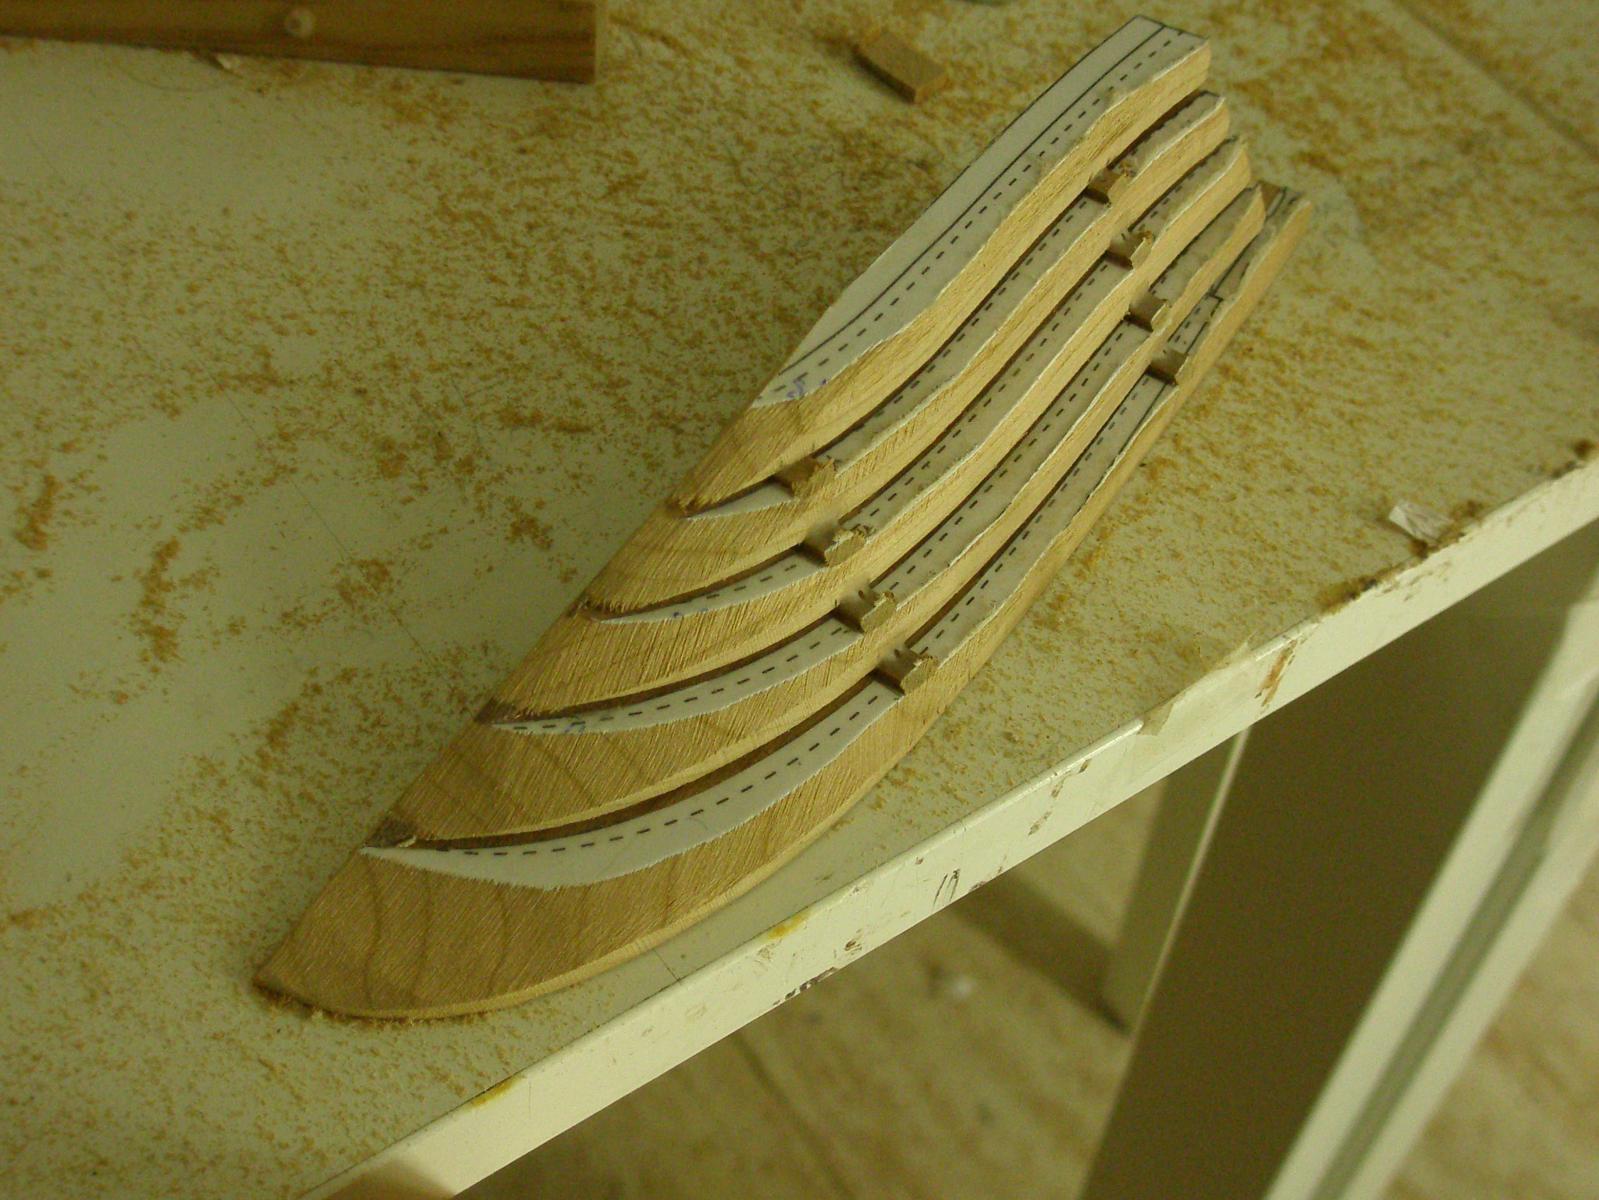
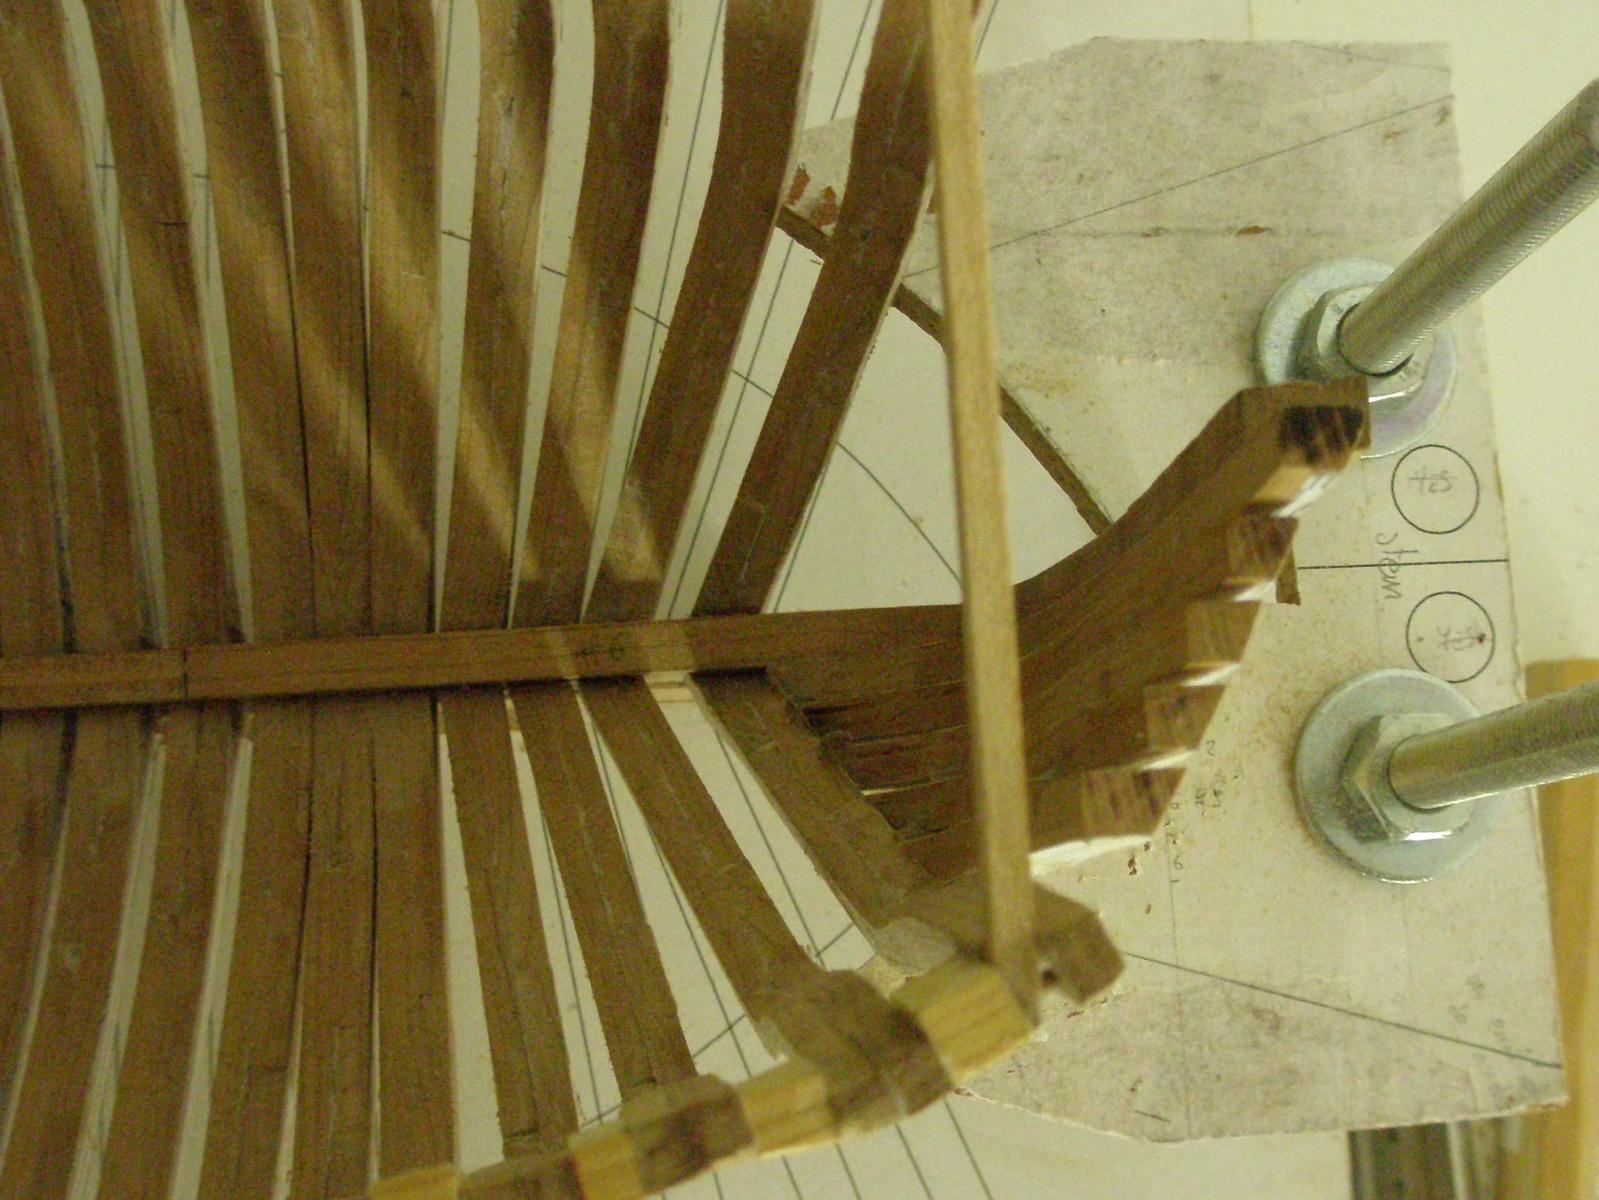
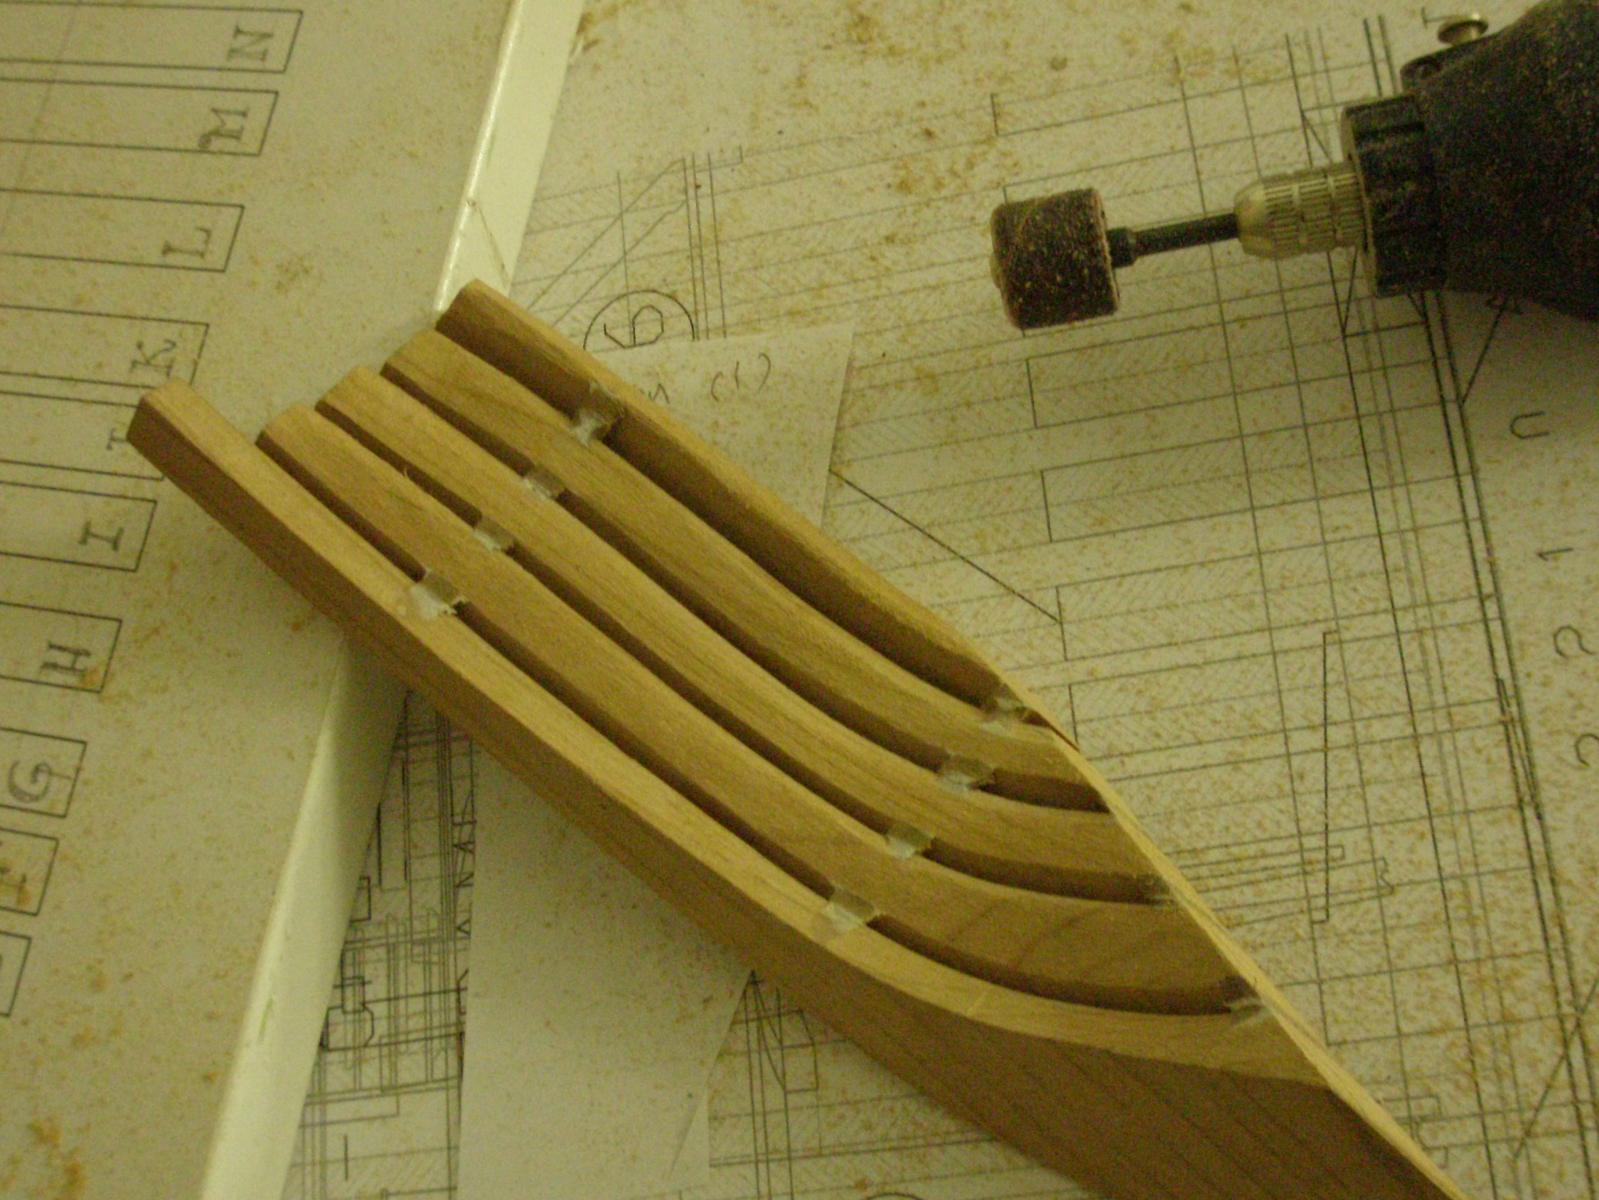
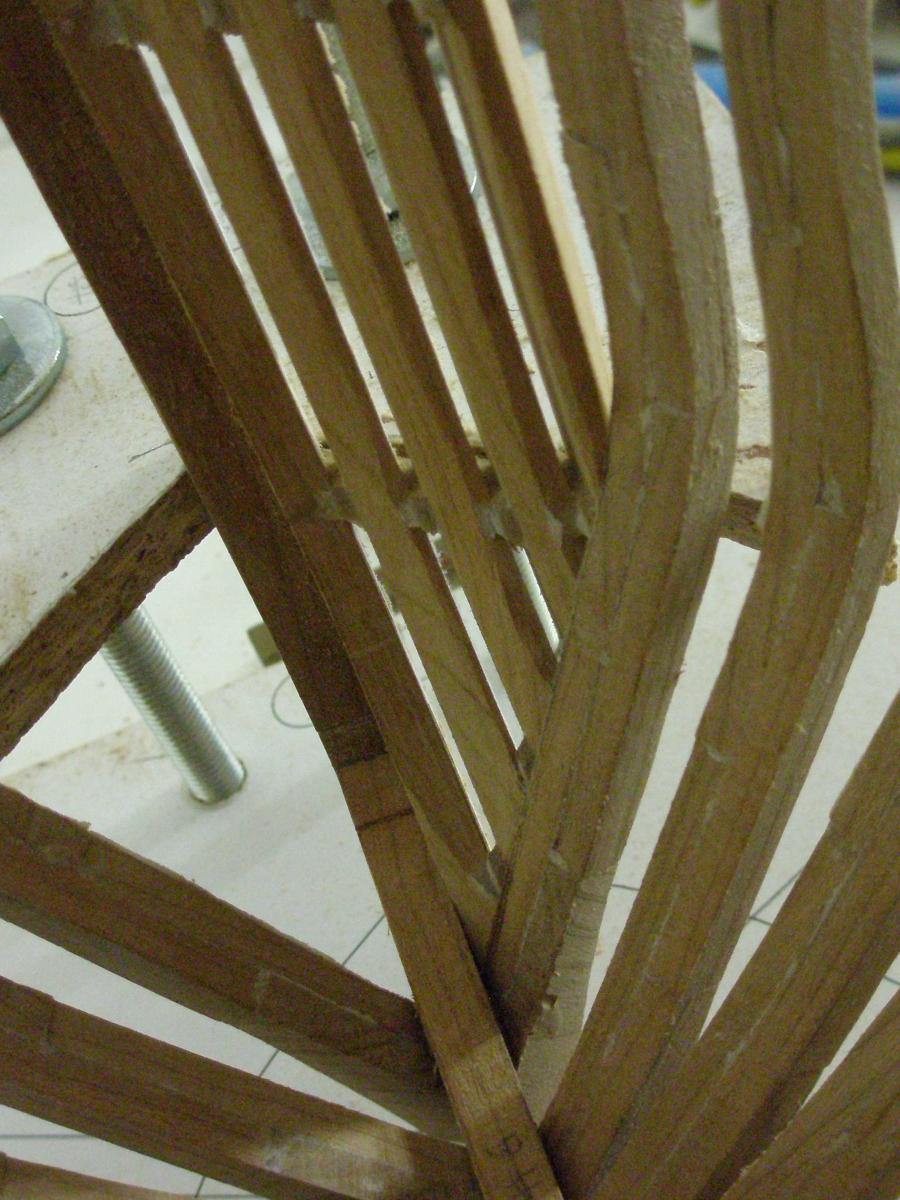
Hello All! As I said, I was going to make a "practicum" about the Hawse frames but I dropped the idea. I´m not an expertto do so. Instead I´m going to put a bunch of pics that I hope will speak by themselves... There we gooOOO! Just checking. One pair sanded and the other one not. The angle in my model against the -W- frame was 26º so I sand a piece of pine to put it against my tilt sand table. All rough sanded. I will add the 5th one later on. Starting the sanding. Pretty pretty slow and always checking. When i say slow is slow and slow... Checking the outside fit. the interior is not still faired. The inner side was much more easy than I expect with the minidrill. Checking again. Did I say it? wood is patient like some body says... and that´s it till now, still the portside to be done... Best wishes and happy thanksgiving!! daniel.