HOLIDAY DONATION DRIVE - SUPPORT MSW - DO YOUR PART TO KEEP THIS GREAT FORUM GOING! (Only 24 donations so far out of 49,000 members - C'mon guys!)
×


harvey1847
-
Posts
528 -
Joined
-
Last visited
Content Type
Profiles
Forums
Gallery
Events
Everything posted by harvey1847
-
Hello Ed and Happy Thanks Giving to all there in the New Continent! The term "irregularity" just made me smile while reading the post. Your skills are far beyond than the average of the rest of the world,,, hahaha beautiful as always. Daniel.
- 3,618 replies
-
- 2
-

-
- young america
- clipper
- (and 1 more)
-
Hello Mike! Only looking the stairs cause me vertigo... I can not imagine the sailors climbing from the boat to the ship in the good old days. How tall is she from the water line to the top rail in feet? I am thinking about making a cross section of a 74 and I have another question, How long has taken to you to build it till this stage? I will not rigging her. Provably will be a spanish ship from mid´s XVIII. Excellent work! daniel.
-
good afternoon! I have updated post #82! you´ll find there the pdf file of the lower deck I´m going to use... Enjoy! Daniel.
-
WOW! 143 ! One hundred forty three holes... Amazing!!! Daniel.
-
Hellooo All! Ken and Voron, and for all... The pdf´s I have attached are just work that works for me. If it is helpful for you it´s fine but I insist are just drawings that I make to myself and on this particular project. The porpused of that symetrical patterns is just to Know where I have to sand in the oppsite side (mirror) from the start board. I do not Know if I answer your question Ken. I guess not maybe. Anyway, I´m still alive (Thanks God) and Kicking "o como sea"... I´m pretty tired today. and kind of drunk after so many pints! Hope you sleep well. I´ll do for sure. Zzzzz
-
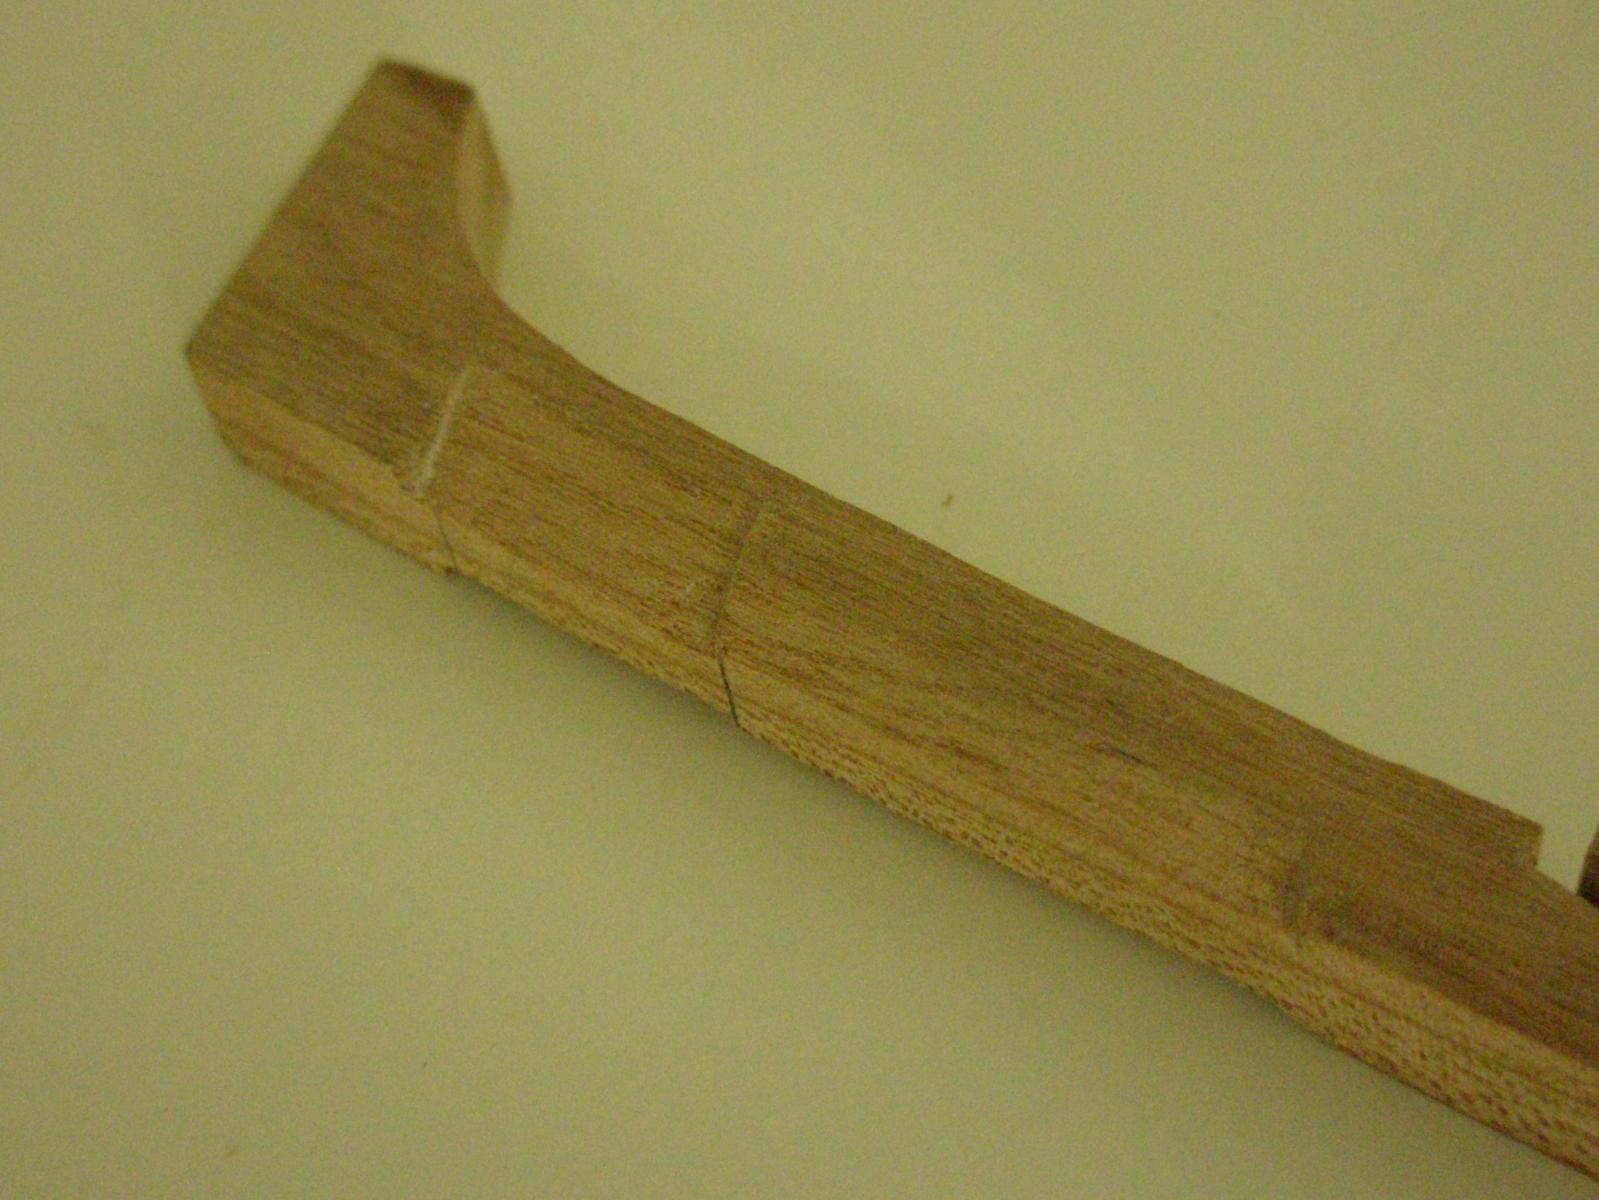
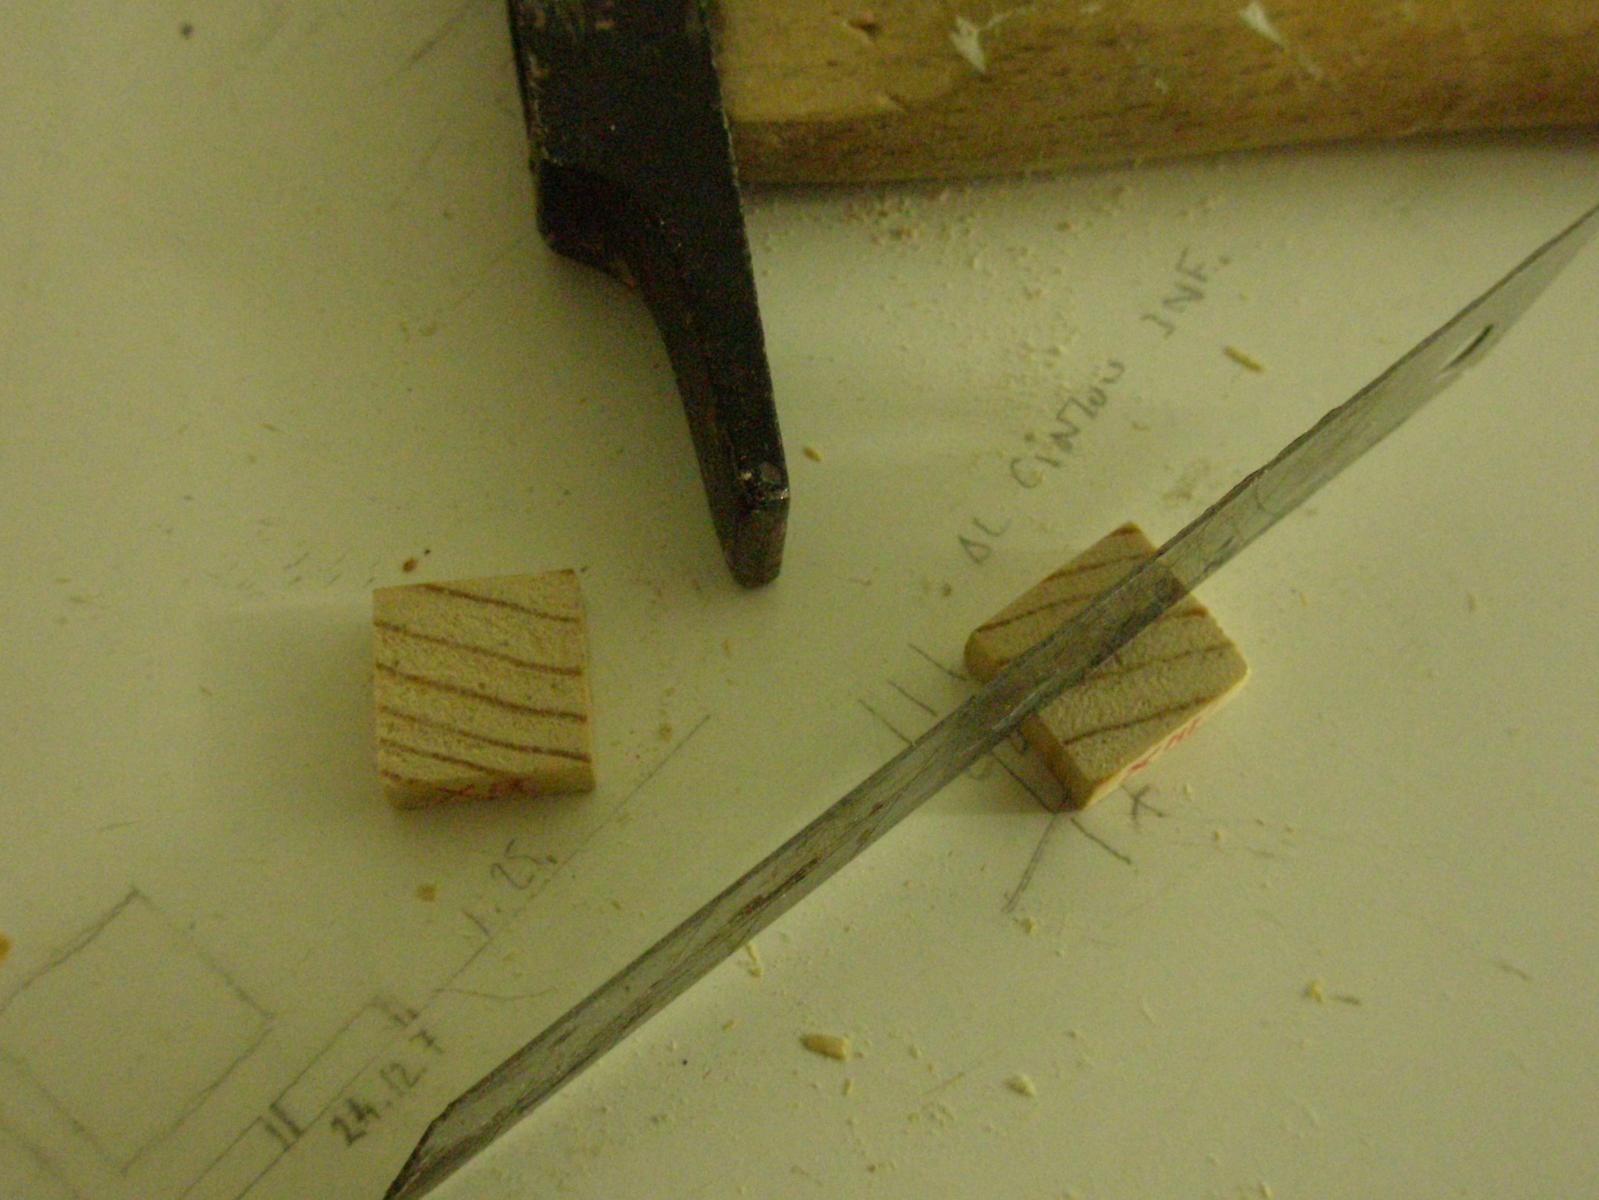
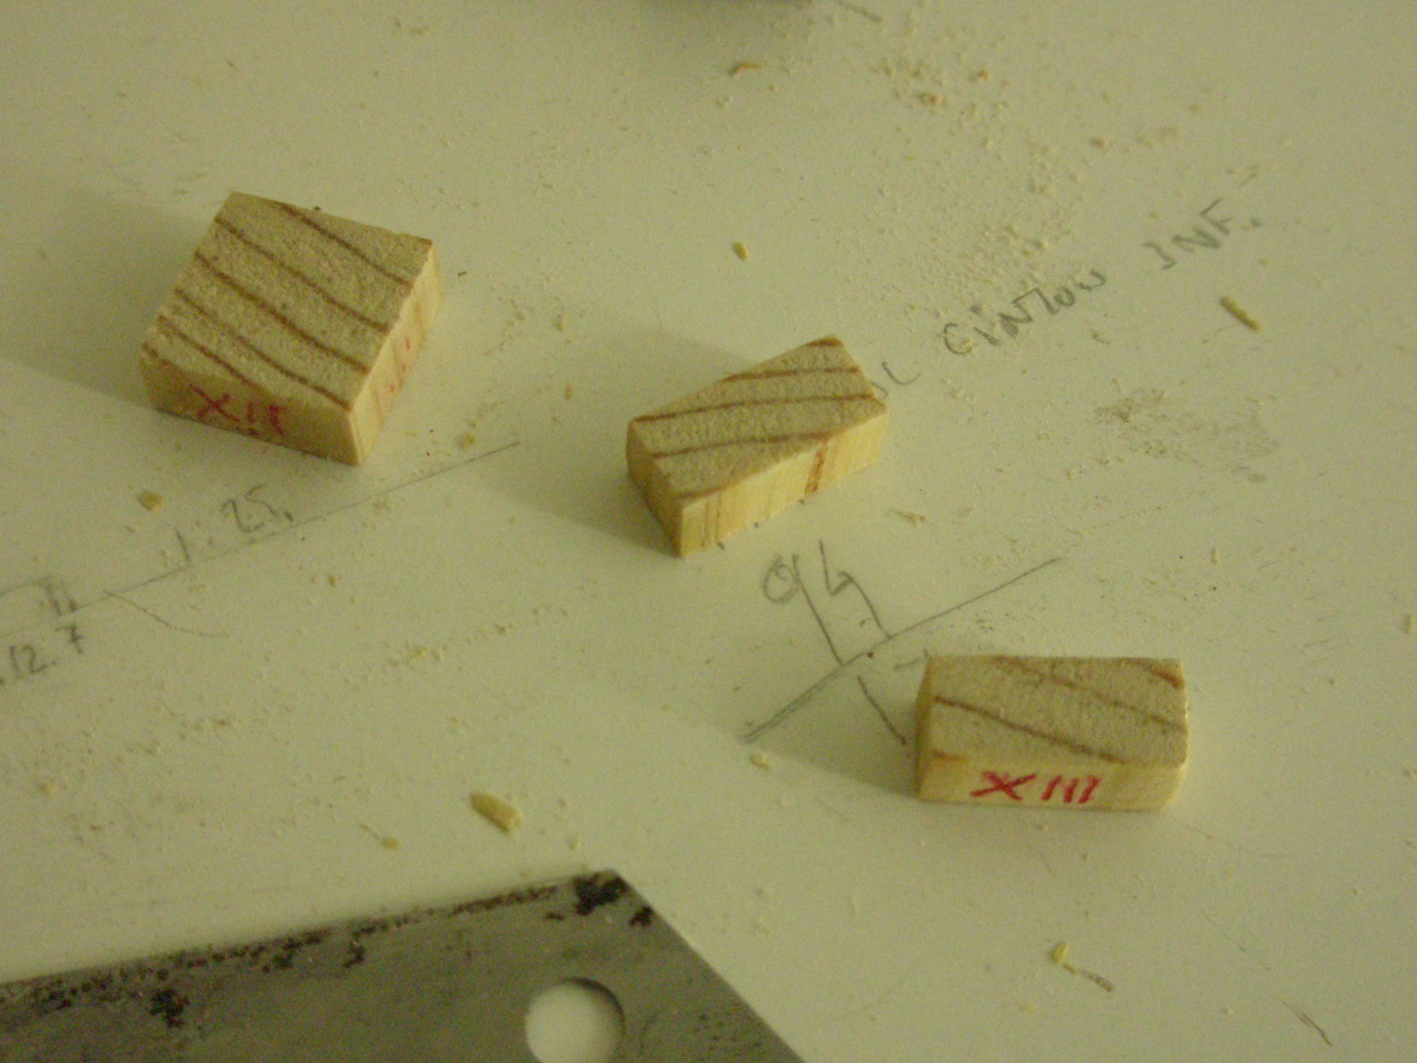
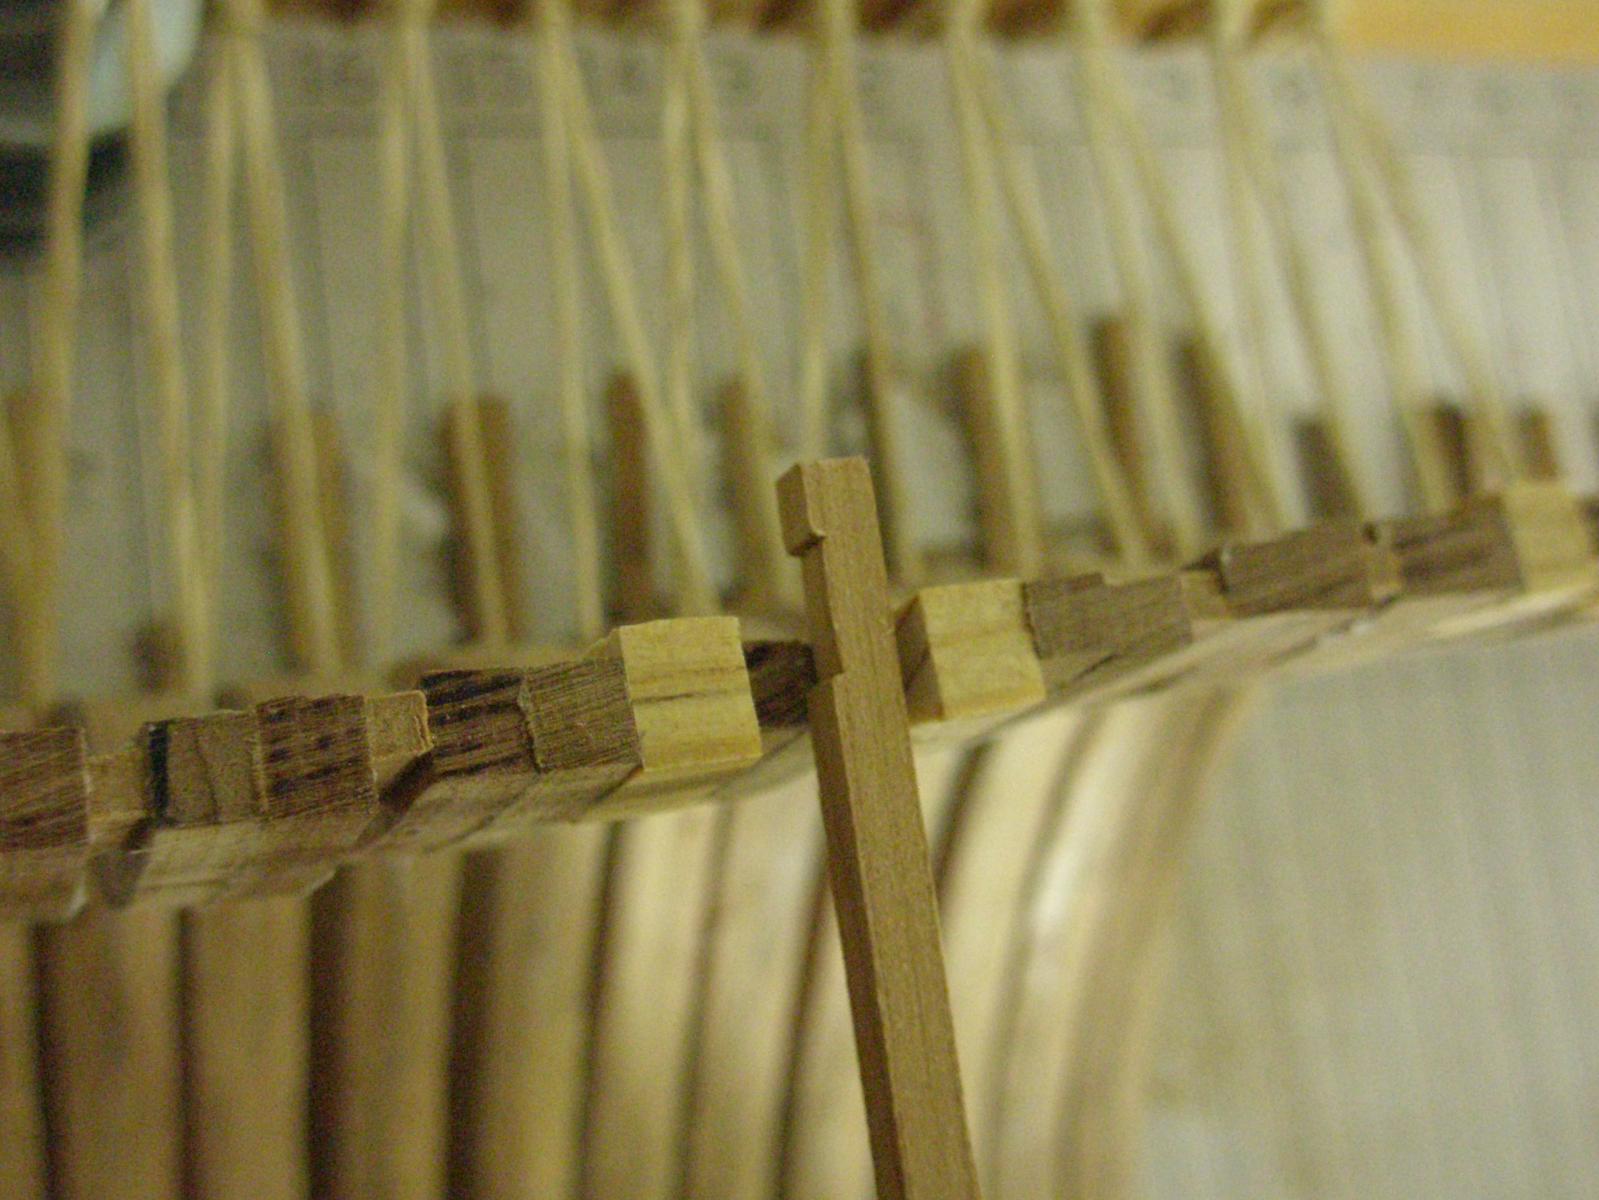
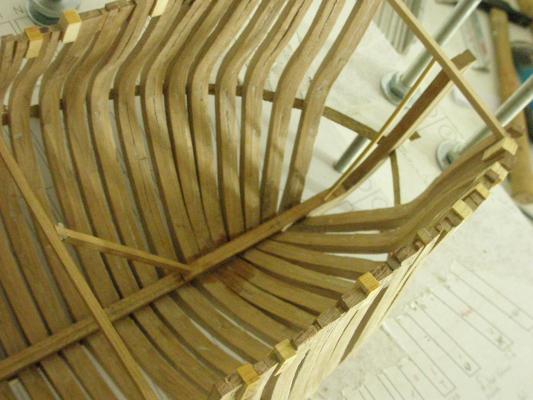
Hello all! Thank you Joe! I´ll keep the pics coming... After the milestone It´s been completed the thing is getting more complex and more exciting. The worst thing,,, my "mom´s camera" It takes awful shots. Now I´m dealing with the hawse pieces. The Sart Board ones are completed but not faired. <----Here´s the tricki part!!! (fairing them) I have make a symetrical patterns for the Port Side. There here are. I´ll wait to put the pics of the hawse timber cause I want to pepared some kind of practicum about them. Maybe it sounds pretty ambicious but I´ll try it and the work has to be completed. Taking lots of pics to explain the proccess, don´t worry. I have "converted" all the pdf´s but I am only using the bollard timber and the HT from 1 to 4. UPDATED 01/12/2013. Here are the new plans. They are a little bit bigger (about 0.3mm) but are much more better than the old ones. The frame #6 is not here. It´s so small piece that is going to be done on porpuse to the model. bollardtimber@48-1_sym.pdf Hawsetimber@48-1_sym.pdf Hawsetimber@48-2_sym.pdf Hawsetimber@48-3_sym.pdf Hawsetimber@48-4_sym.pdf Hawsetimber@48-5_sym.pdf Best wishes and happy Sunday. Daniel.
-
Beautiful piece of metal Piet! Are you going to add some kind of locking wheel? It looks on the pictures like it has none. Maybe was some kind of interior lock and the preassure door was under this first one. Just thinking. Maybe I´ve seen lots of movies... Happy modelling. Daniel.
-
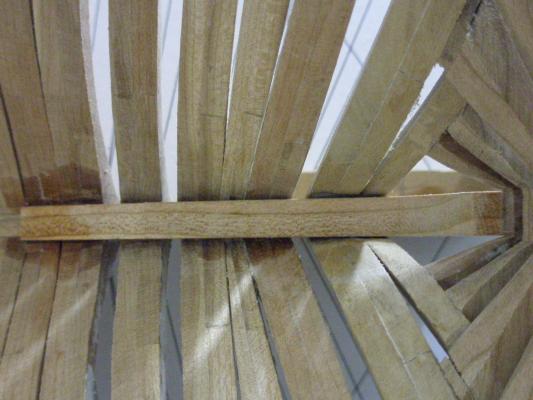
Hello All! At last Saint Fryday! a whole weekend to spend modelling... A small update. The keelson. When I remove the Triton from the jig, even all that pine chocks between the frames, was quite weak. Indeed I broke some of them trying to simulate the movement I should do with a sand block. I put the keelson to strength the hull. From now on I have a good central "line" of wood and I can start adding the thick stuff in the inside. The inside is allready faired. I also cut yesterday the mighty hawse pieces. I´ll give them a try today. Finger cross. Here are some pics... I had to bevel a little bit the stern keelson to be able to fit it between the aft frames. The gap there was pretty narow. Best wishes! daniel.


-
ancre Le Fleuron 1729 by rekon54 - 1:24
harvey1847 replied to rekon54's topic in - Build logs for subjects built 1501 - 1750
Happy Birthday Girogio! No modelling today, just a good meal a nice cake and leters of limoncello!! Daniel. -
Reading your post and watching them the numbers are amazing!! Ten hours a day working on her, 1700 plastic parts plus the handmade to superdetailed the structure and the whole thing... Simply amazed me! I´ll be here watching for sure! Daniel.
-
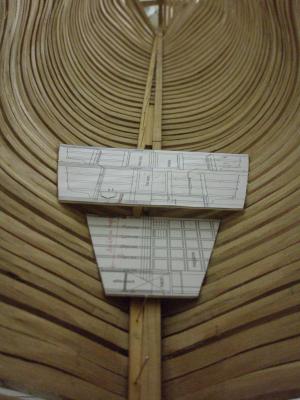
hELLO! A small update. I have mixed the keel, the disposition of the frames and the interior decks using photoshop. I have printed it out just to check the scale and is accurate. the size is an A1. I hope it will help you in order to set the location of the inner deck clamps and more. I am trying to print it with more quality, this one has only 100 pps. (updated) If you want the higher version on 300 pps, just PM me and I will send it to you via mail. It wheights 4.2MB. keel_frames_decks_PS_100.pdf Ahoy! daniel.
-
beautiful workshop Albert! Looks like a surgery room to me. I couldn´t work so neat and clean. It amazed me. Cheers. daniel.
-
Hey Guy! Nice to hear from you! Try to work at least one hour a day on her. It worked for me. Sometimes I spend hours in the workshop, but so many days I only spend half an hour or just one. The point is to keep the thing going. It does not really matter if you complete a full frame or just cut four futtocks, if you are "constant" you´ll catch me for sure. I asure you. Any pics of that honey boos? Must be a wonderful weather for the bees up there in California! Best wishes. Daniel.
-
Believe Richard I do understand you! The Admiral and the kids don´t undertand why I am upstairs in the workshop for hours and hours and not watching sponge bob with them. When she see the progress I have done so far says things like " ah ha...nice" and that´s it. Let me quote again a said from Kelvin12 back from MSW 1.0. I think was his signature: " Seems women the world over don´t realize how important this building project really is. They expect us to drop everything and attend to domestic chores when this building is obviously way more important" I think is totally a declaration of intent. Are you going to drop the project and start a Swan class? Regards, daniel.
-
Looking Beautiful Paul! Congratulations!! Those clamps of do not Know how many meters are astonishing. Are they handmade? What´s the length they can be opened? Amazing clamps. Cheers. Daniel.
-
Thank you very much Pete! Ahhhrrg the Hawse pieces...I am so scared... the easiest part it´s done. The patterns are cut. We´ll see how many times I have to cut them again and again. Thanks again. Daniel.
-
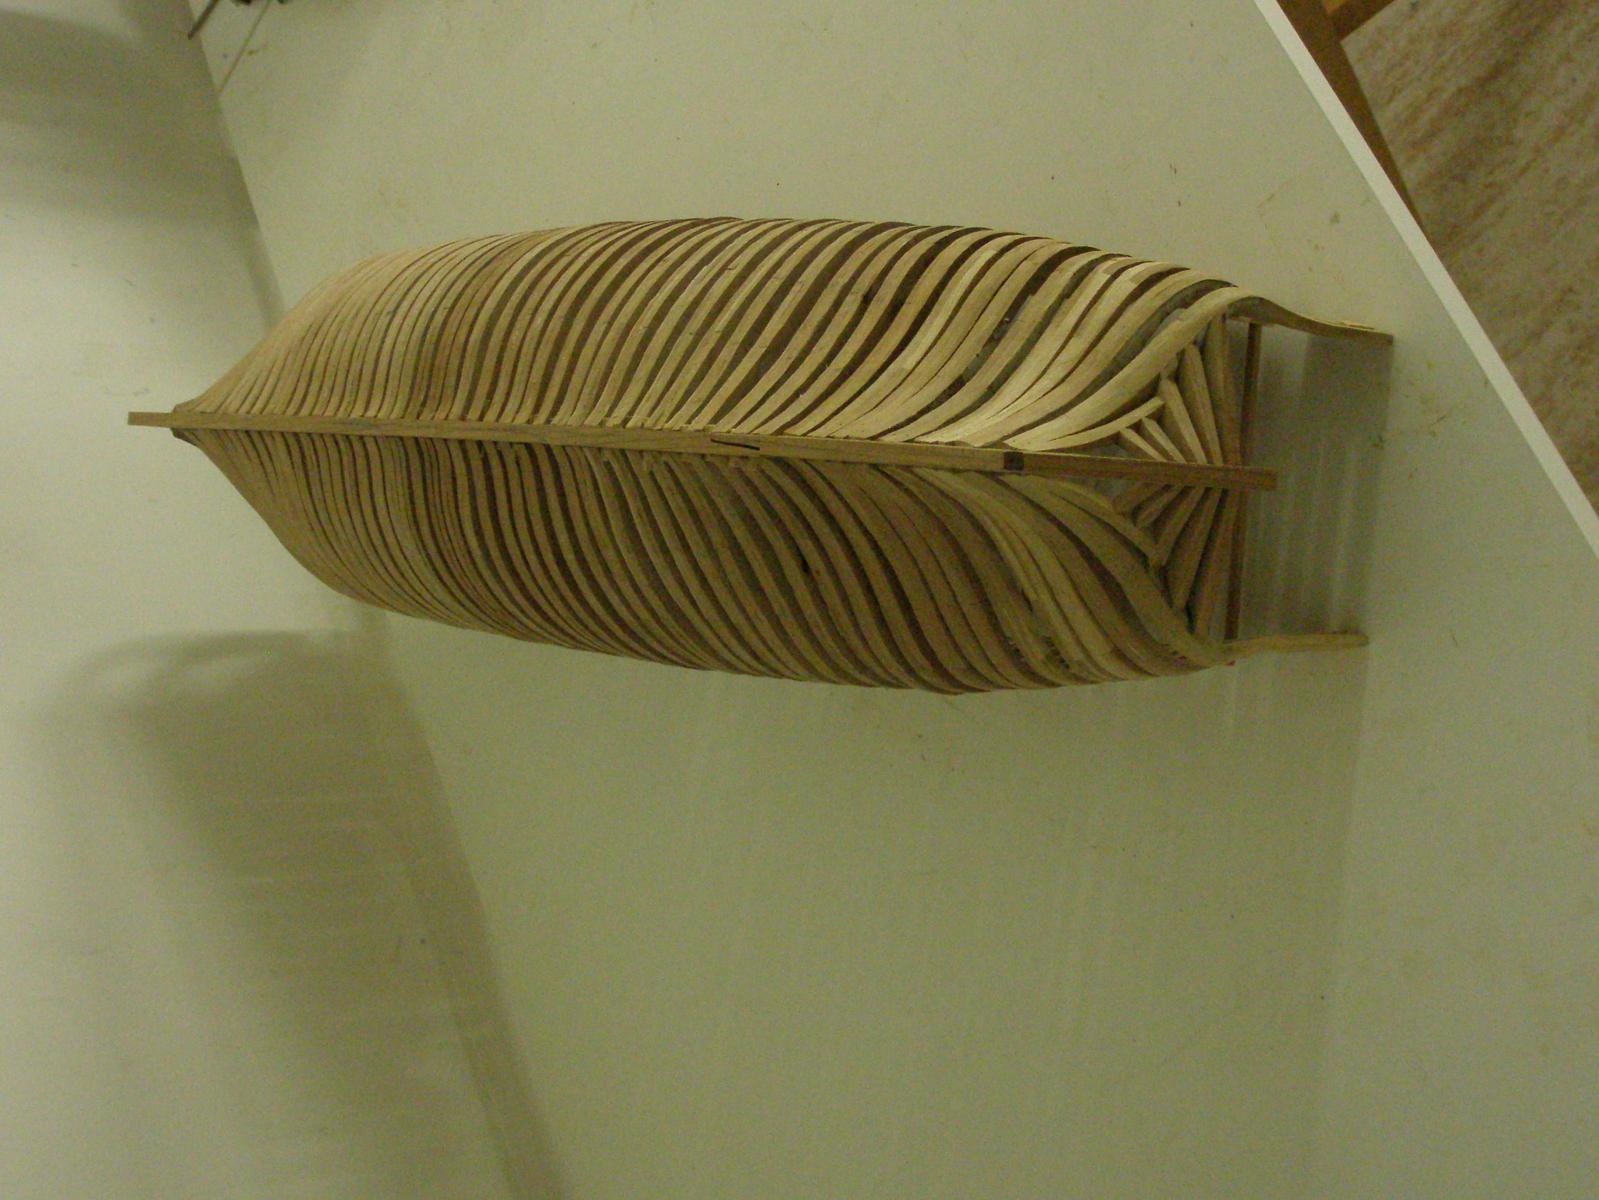
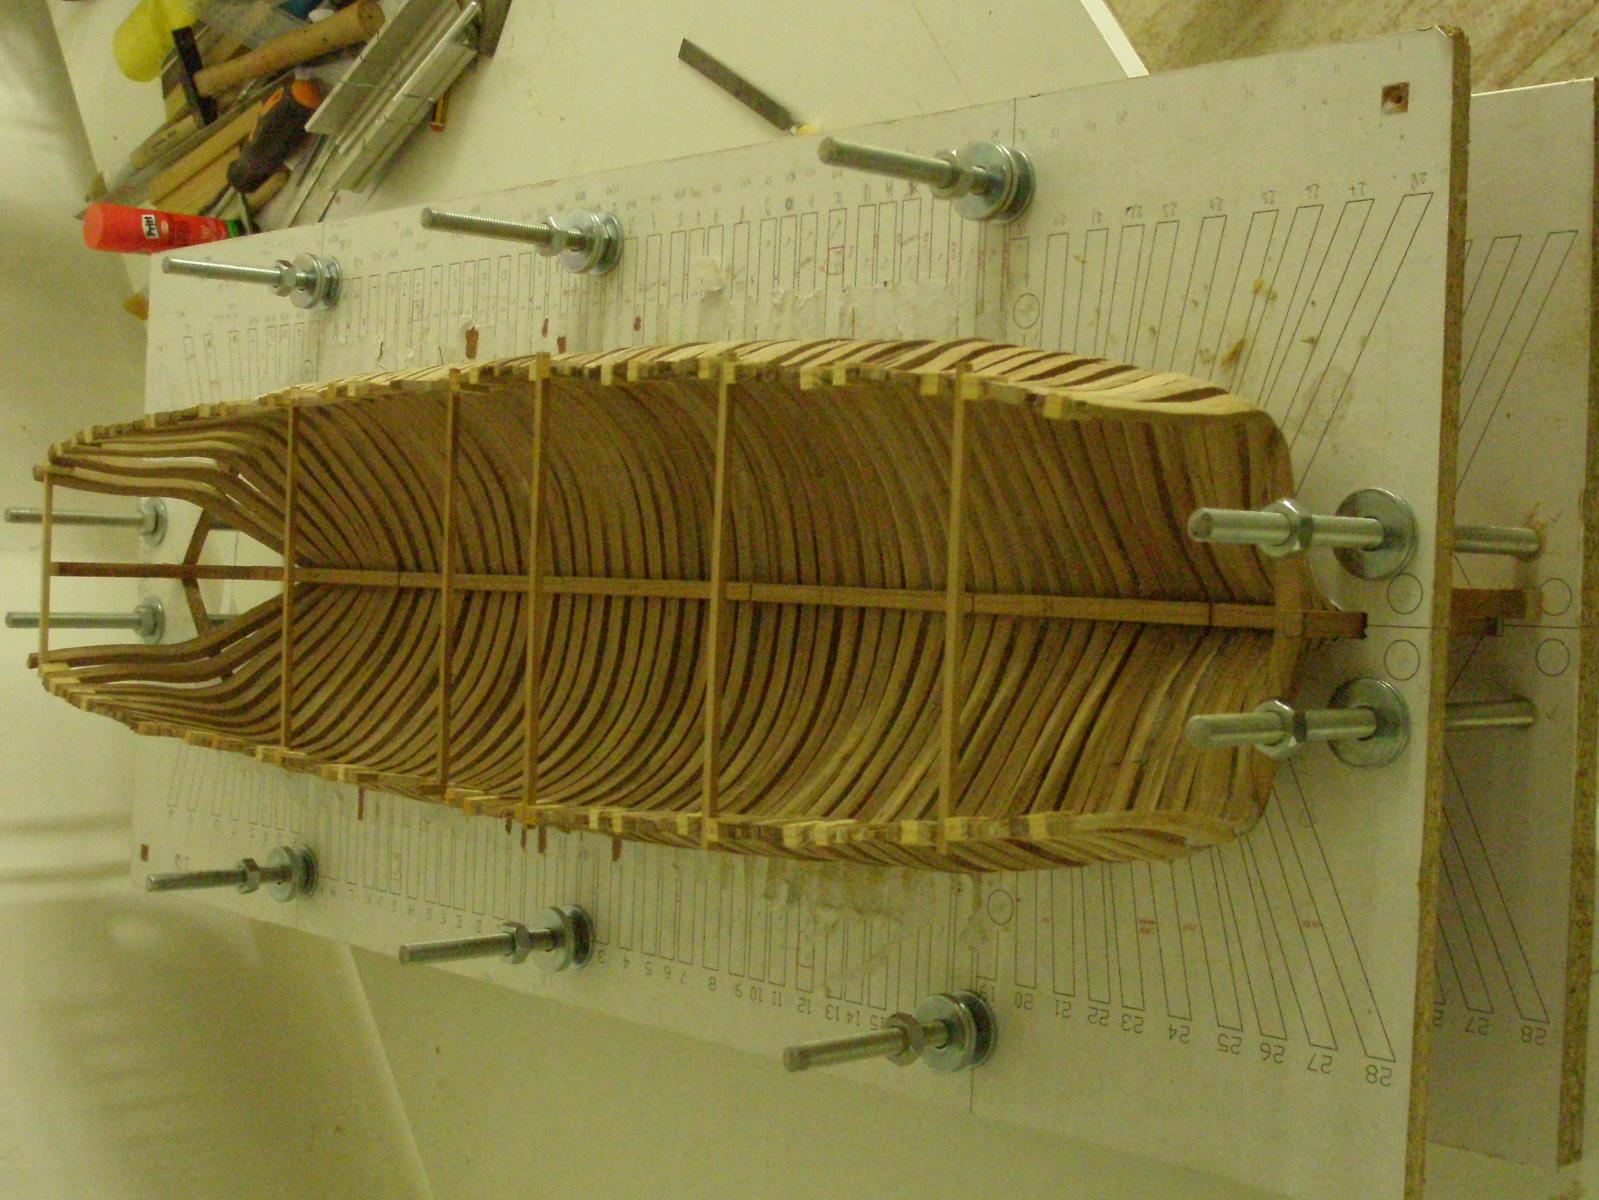
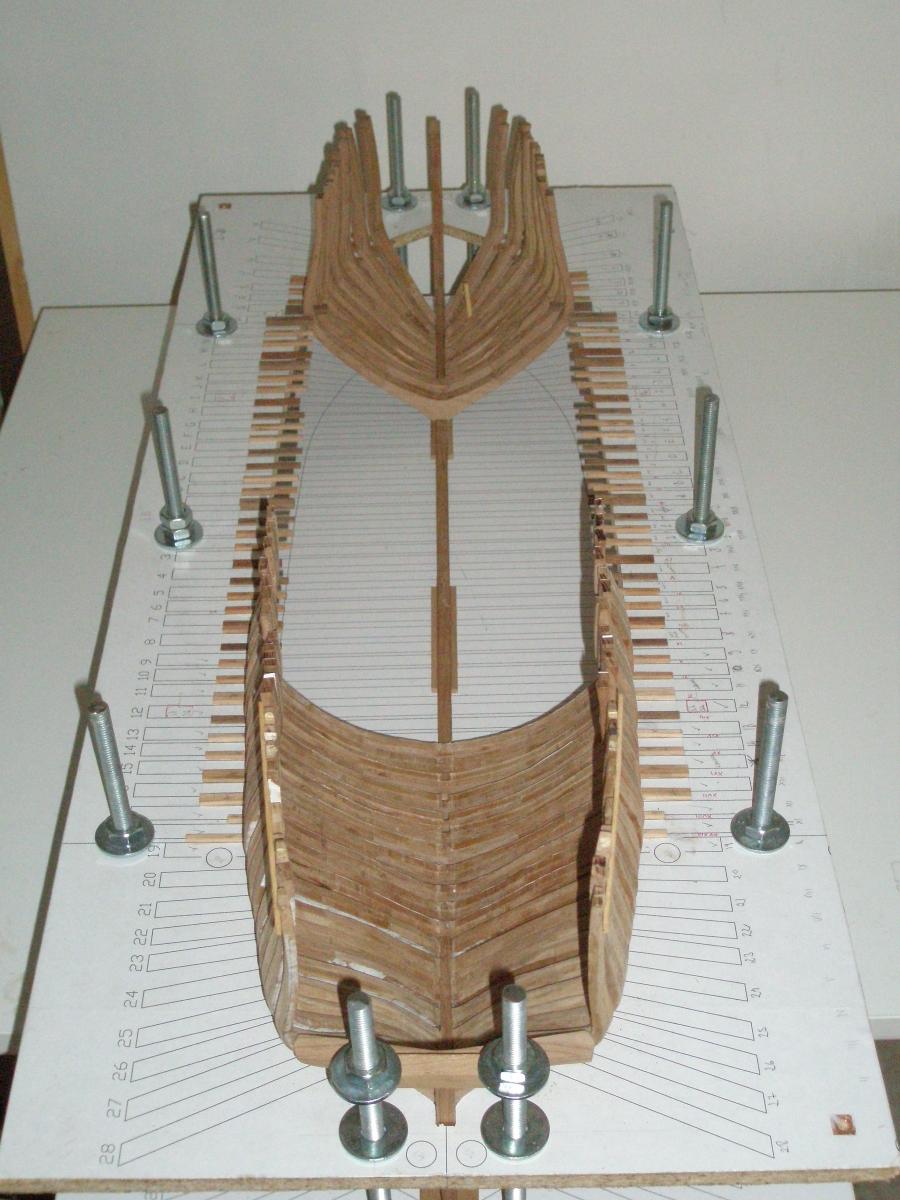
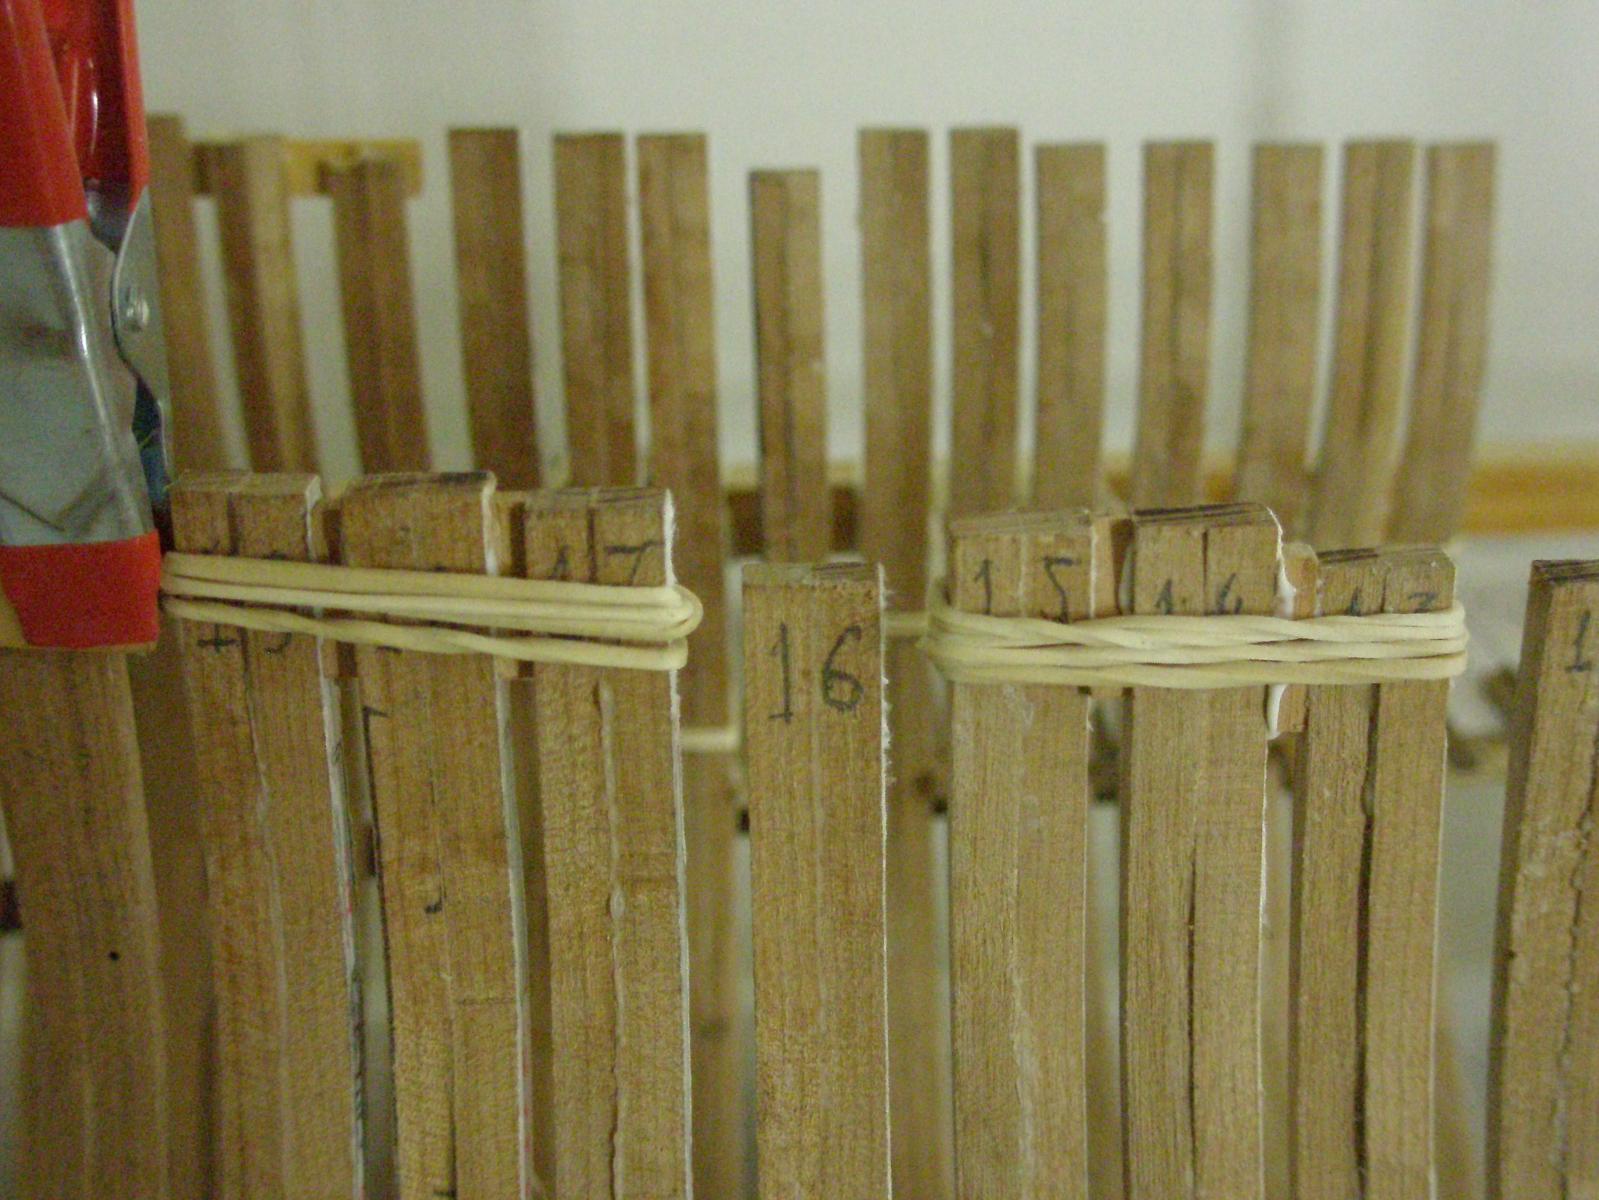
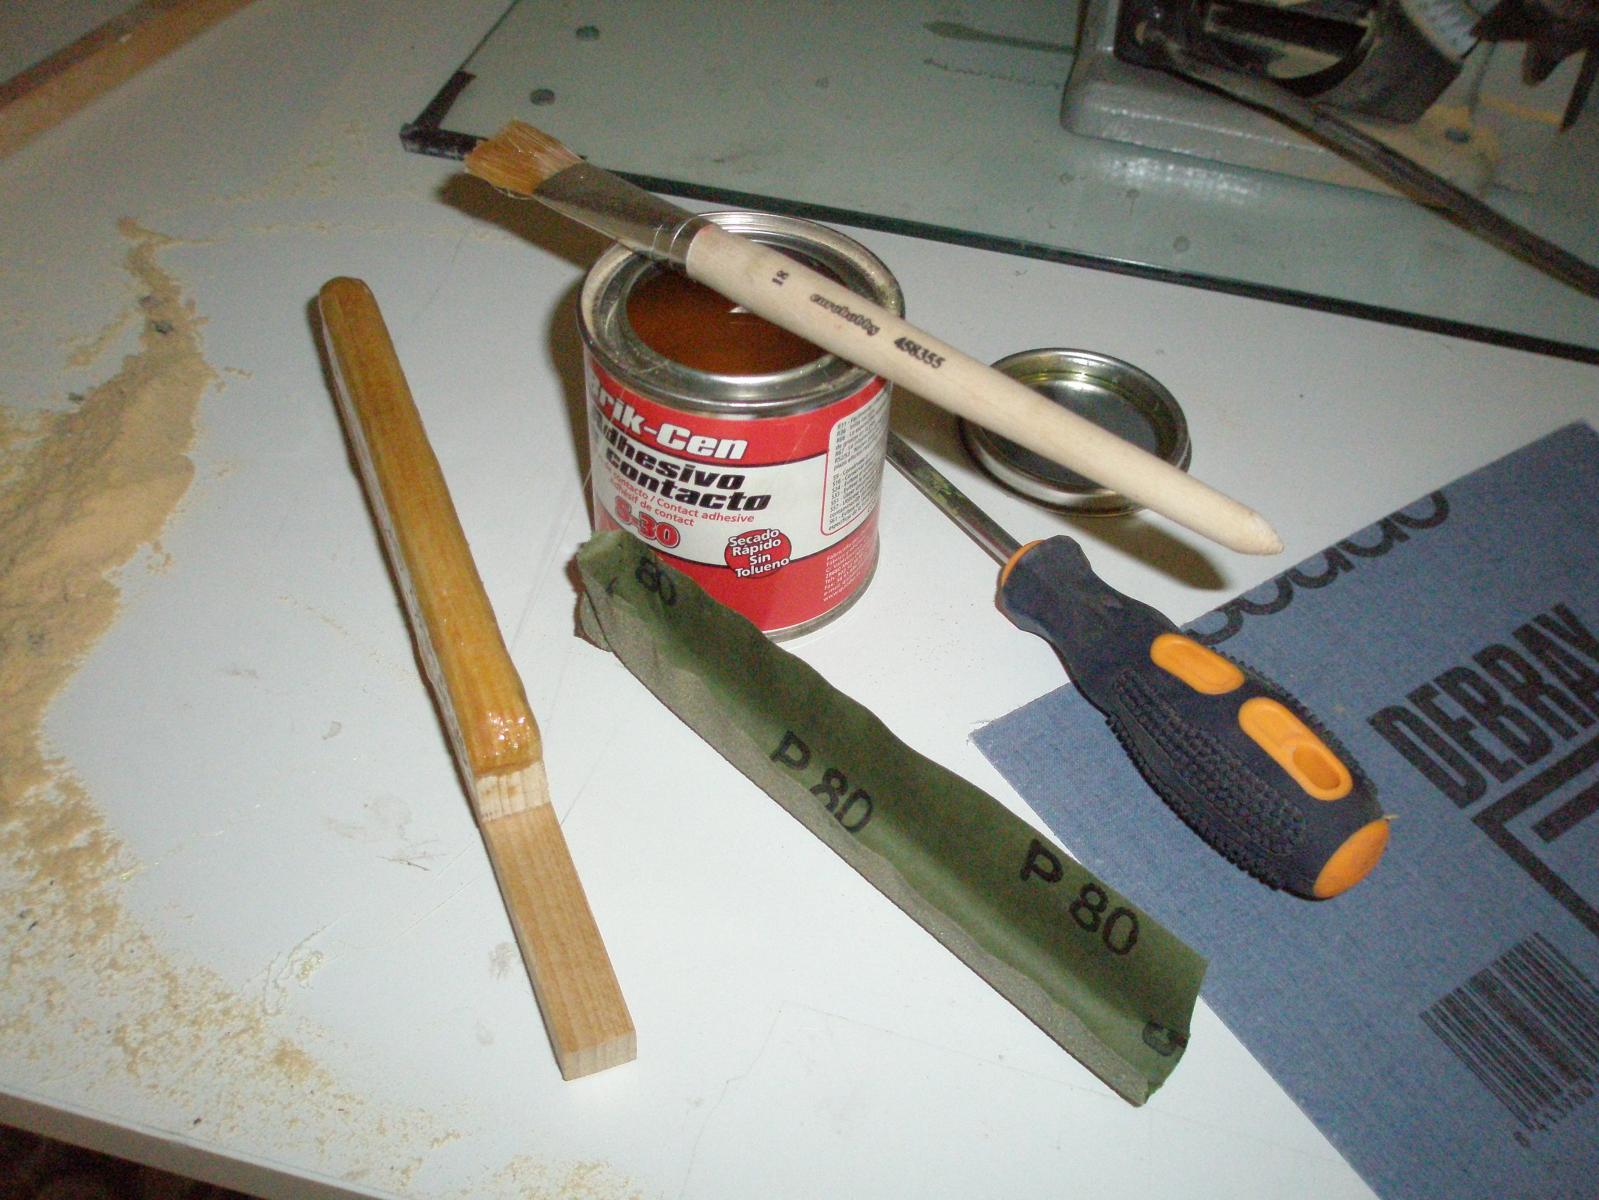
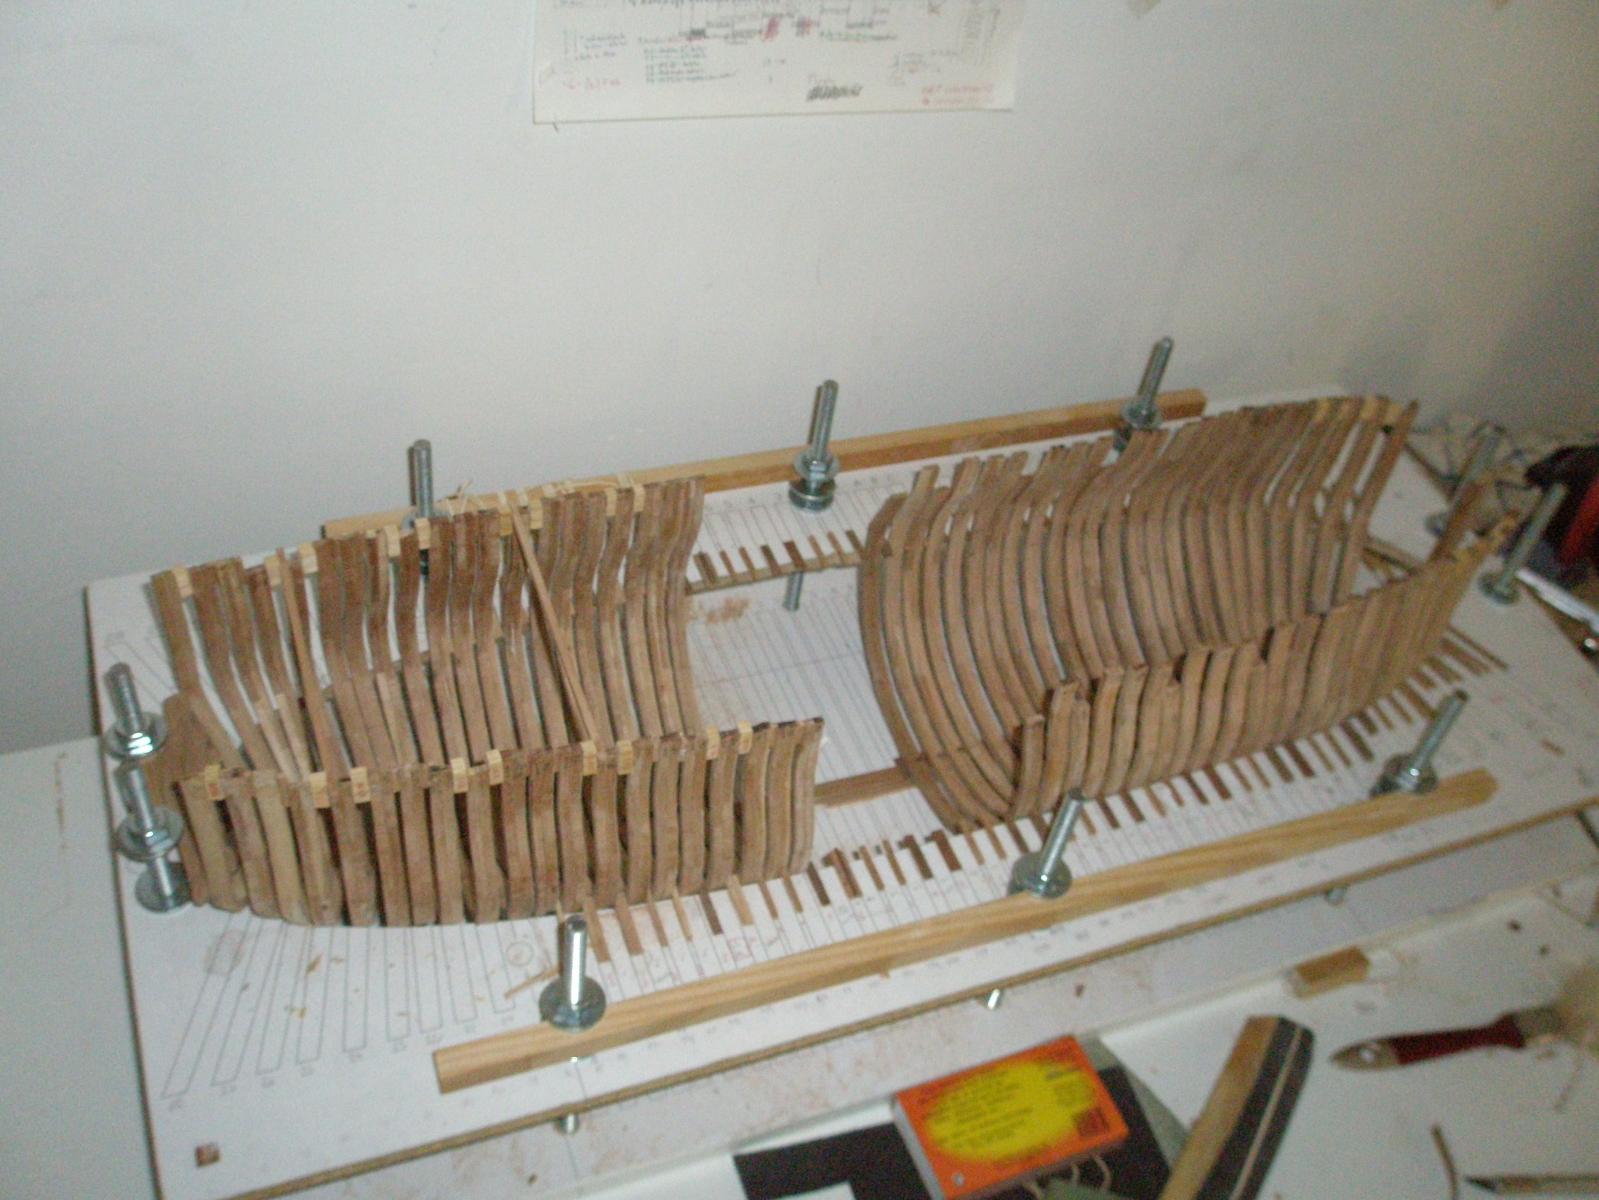
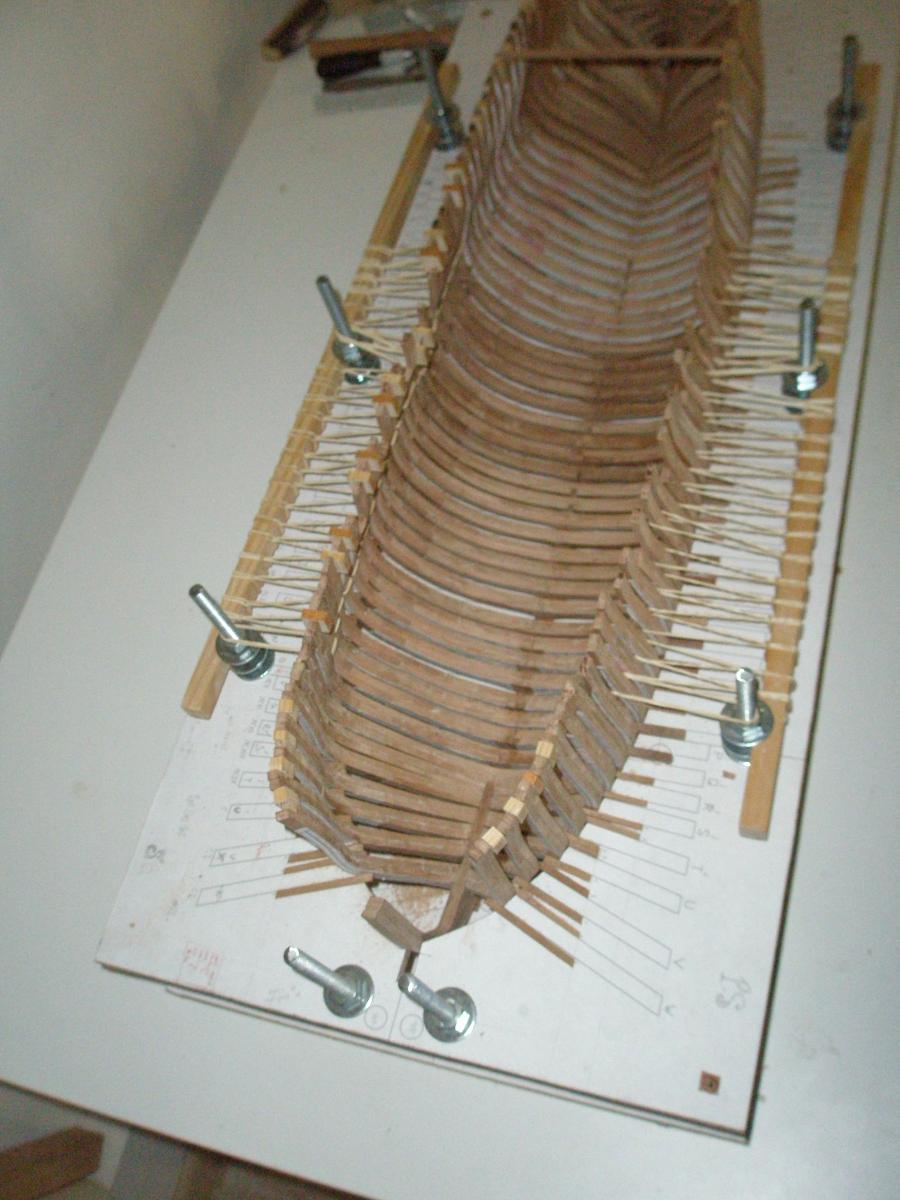
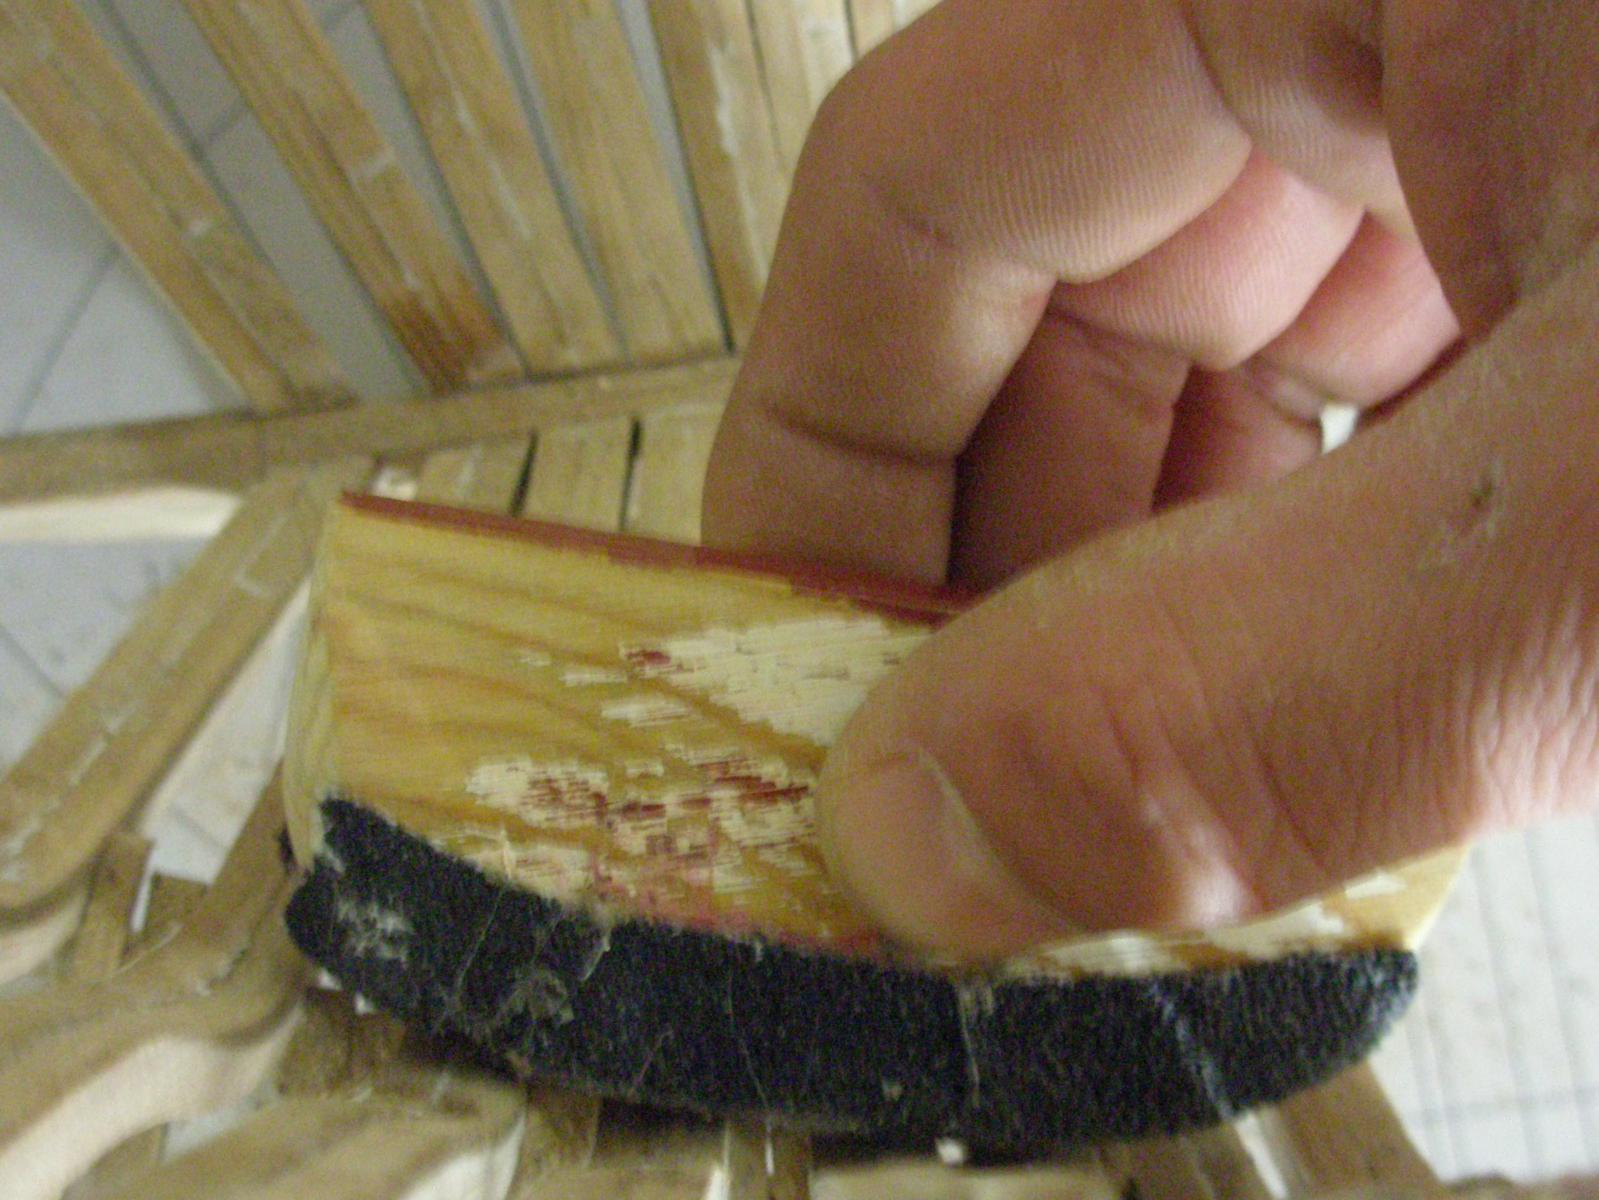
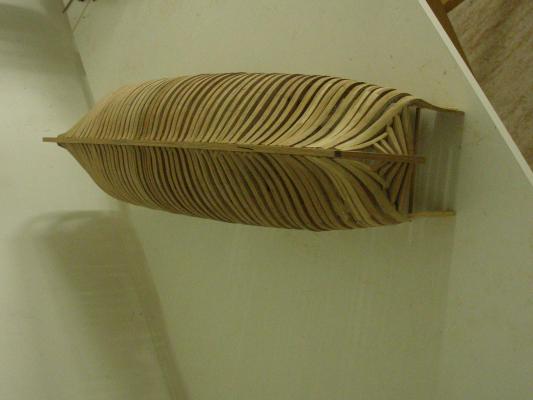
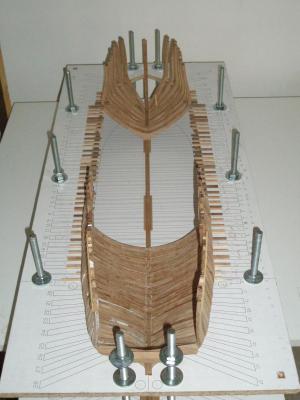
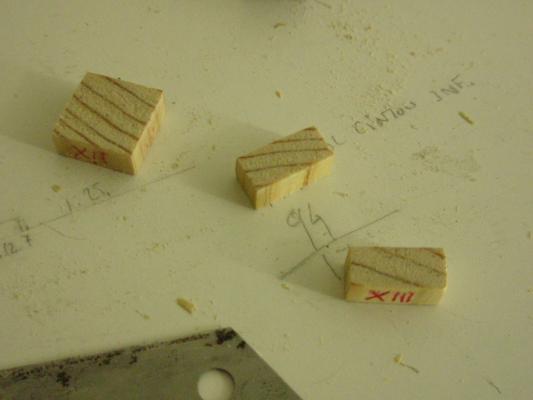
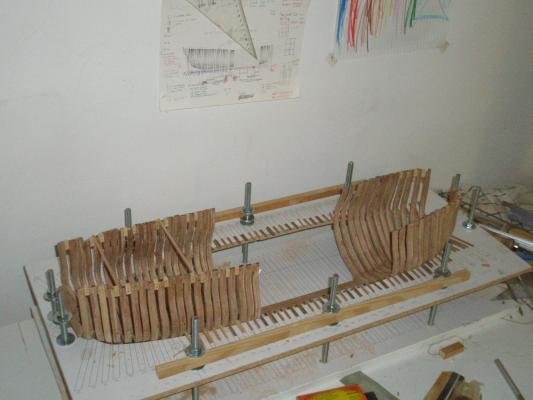
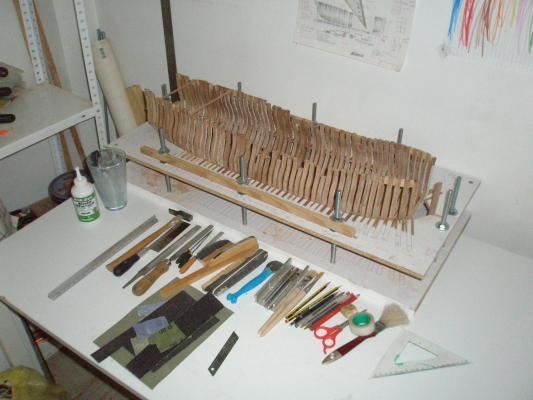
Hello all! Finally I´ve been able to get a camera ( a 2004 one from my mother). I will put lots of pictures at last!! In the last post all the frames forward from the stern were set but not glued. It took me a while to cut different pieces as spacers to put on the keel. I numbered this chocks because I removed all the frames and glued only some of them aft and the cant frames forward. I have started sanding both, the aft and fwd. frames. Before starting to sand I reinforced the frames at the ends with some chocks of pine and spacers of the same width like the ones I numbered on the keel. Since there were no frames in the middle of the hull the sanding was easier. The bevel goes pretty steep on those. It is a Good advice that Randy or Bubblehead told to me once. Thanks to them. I have put lots of chocks between the frames, some a strip of timber, other ones made from a same piece of pine wood cut in half to ensure that in both sides (PS and SB) is the same width. The handmade sanding blocks were pretty useful. I started with a #3 grit paper. I´ll sand it later with smaller grains. I have glued the paper to the block using “contact glue”. Hope the pic attached will talk by itself. One that has been the best is just an ikea spoon, specially working on the cant frames. Once the aft frames were much more or less sand I secured the hull adding two 4x4mm beams. Then I have moved to glue all the square frames of the middle. Put the rest of the chocks between the frames and back to sanding again. Right now I am cutting the patterns for the hawse pieces and for the keelson. My intention is to strength more the hull by adding the keelson and the at least the #9 thick stuff and #12 lower deck clamps. Then I´ll glue four or five temporary #14 lower deck beams to strength again the hull and get ready of the 4x4 beams… I have completed the hull on November 16th of 2013. She looks beautiful. While sanding her with my hands once and once again sometimes I close my eyes and just feel the shape of the hull. It feels funfantascic, is like touching a sculpture… Anyway I use a 4x1mm ribband to see where I have to sand more or less. It is very helpful. Lot of work to do ahead but I feel kind of happy seeing the main whole thing completed. Happy Wiiiiinter! Daniel.


-
Happy happy birthday toooo youuuu! lalaala laaala la laaa.. ENJOY!!
-
Mike, That is a skysraper to me for sure! Hope you enjoy a good modelling journey todey with the lids. Keep the pics coming. Daniel.
-
What a nice work! At the end of this building, plus the Naiad, plus The Victory you will surely achive the PhD in Naval Modelling if you haven´t allready got it!! Always a pleasure to read and re-read your posts Ed! Daniel.
- 3,618 replies
-
- 1
-
-
- young america
- clipper
- (and 1 more)
-
Welcome aboard Marc! I hope you understand me. Are just thougths. If you are going to make a POF model you are going to have to make lots of futtocks and put´em together. If you are going to plank both, the interior and exterior you could make the frames using plywood (laminated) as Mark is suggesting. By gluing some chocks of pine wood at the ends and between of the frames the strength you achieve is enormous. If you are going to go for the POF option, what I recomend you, cut the patterns and take your time to glue them in "order" on the wood sheet you are using. You´ll save lots of wood. Best wishes! Daniel.
- 305 replies
-
- 2
-
-
- utrecht
- statenjacht
- (and 1 more)
-
Beautyful bow Piet! I would´t like to be in front of her diving around... It looks so agressive and pretty at the same time. Anyway, I thought you were goint to painted lioke the one you show us in the first posts, green, black, grey. Those cable net cuts are hand made or you photoetched them? Nice blue rusty bucket !! Best wishes Piet! Daniel.
-
Welcome aboard Jzwei! Sure you are going to have good fun here building the cross section! Best wishes. Daniel.
-
Wellcome aboard! A beautyful day to start such a nice ship with a female name! The Pint!! Best wishes! (¡Que vaya bonito!) Daniel.
-
Good morning Mike! Can I ask you how you simulate the treenailing on the deck planking? and What kind of finishising are you using, Wax? Oil? None? Beautyful work! Daniel.