harvey1847
-
Posts
528 -
Joined
-
Last visited
Content Type
Profiles
Forums
Gallery
Events
Everything posted by harvey1847
-
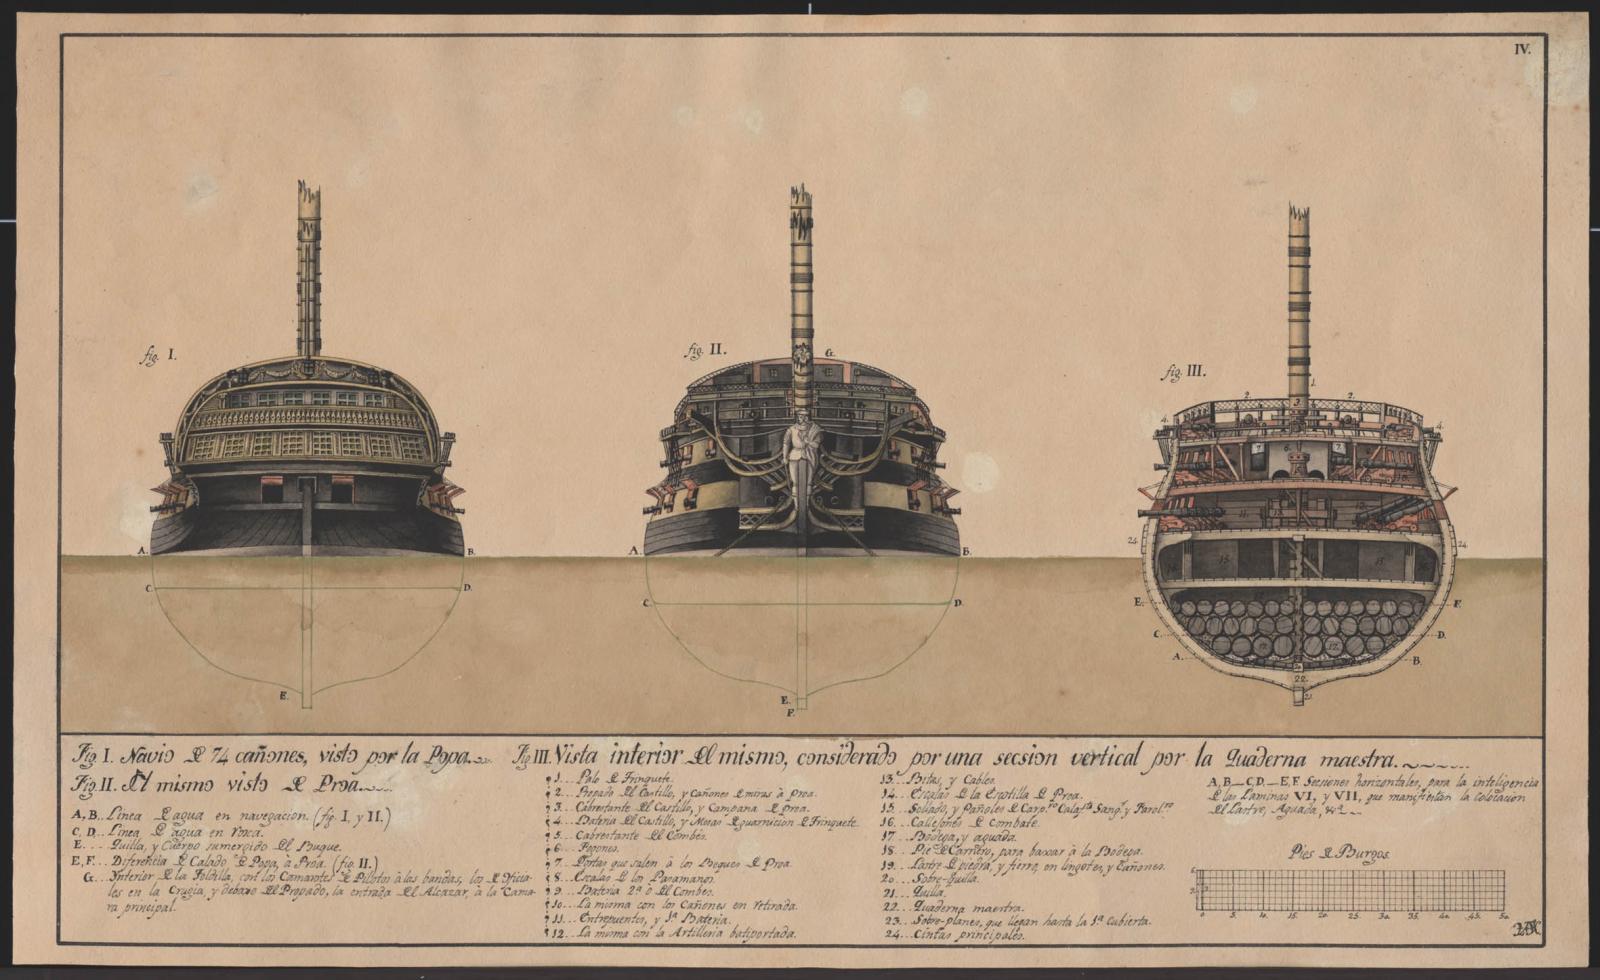
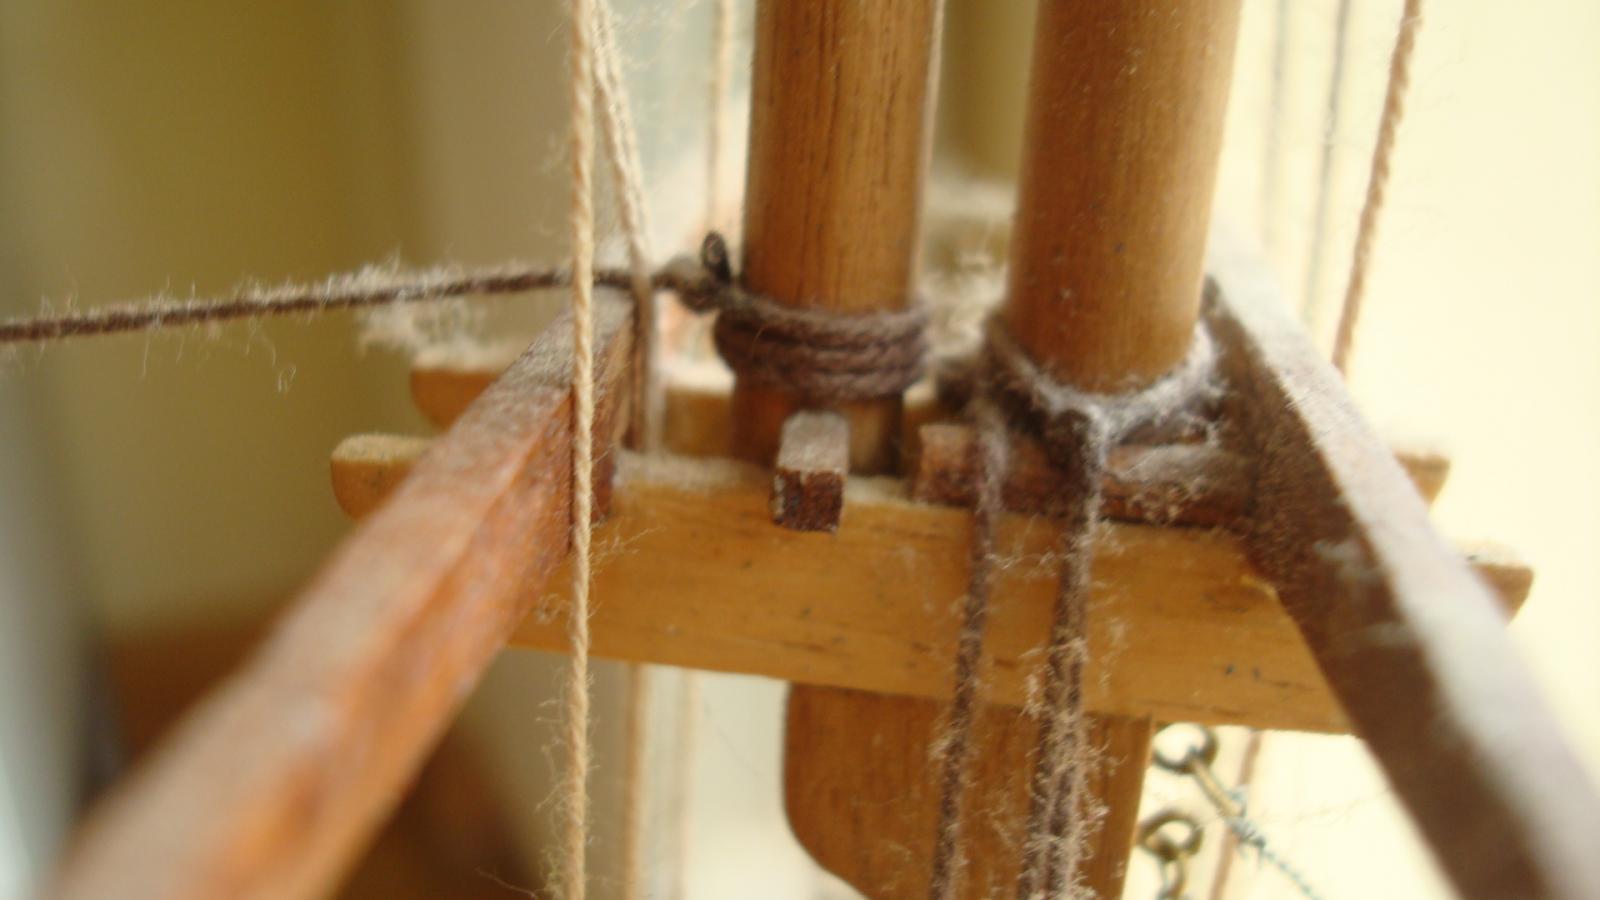
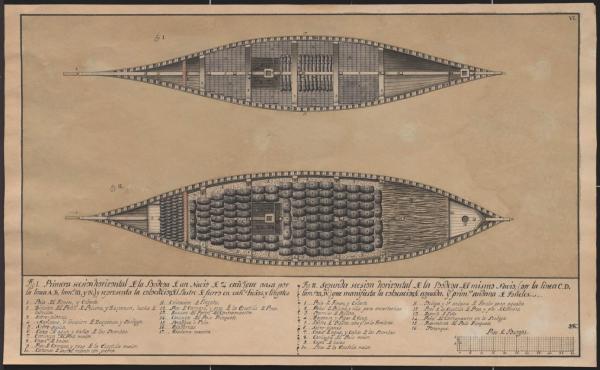
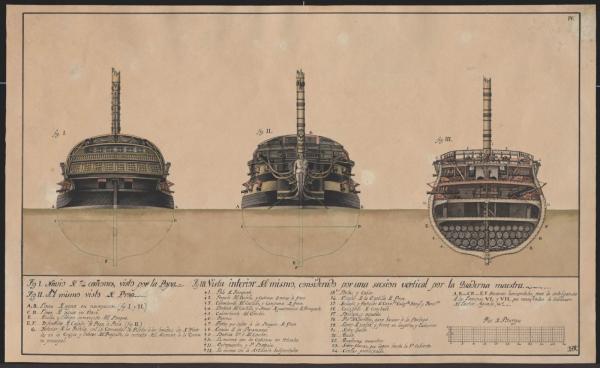
Hi Karl! I just cannot imagine the amount of time to put all that ballast together… The size of the stones looks the size it has to be. I have seen models at the museums where the pieces were oversize and kind of ruin the whole thing. But yours are just amazing. Must weight around five to ten kilos, something that a sailor could work with having no problems or injuries in his back… Can you explain us a little bit the process to glue them together? I have attached to plates from a Spanish v74 of that period. Note that they use to put cannons as ballast filled with stones as well. I do not know if the French use to do this. Here they are. They are quite big so you can use a good dictionary to translate all the different numbers of the plate. Excellent work. Best wishes! Daniel
- 662 replies
-
- 1
-

-
- bonhomme richard
- frigate
- (and 1 more)
-
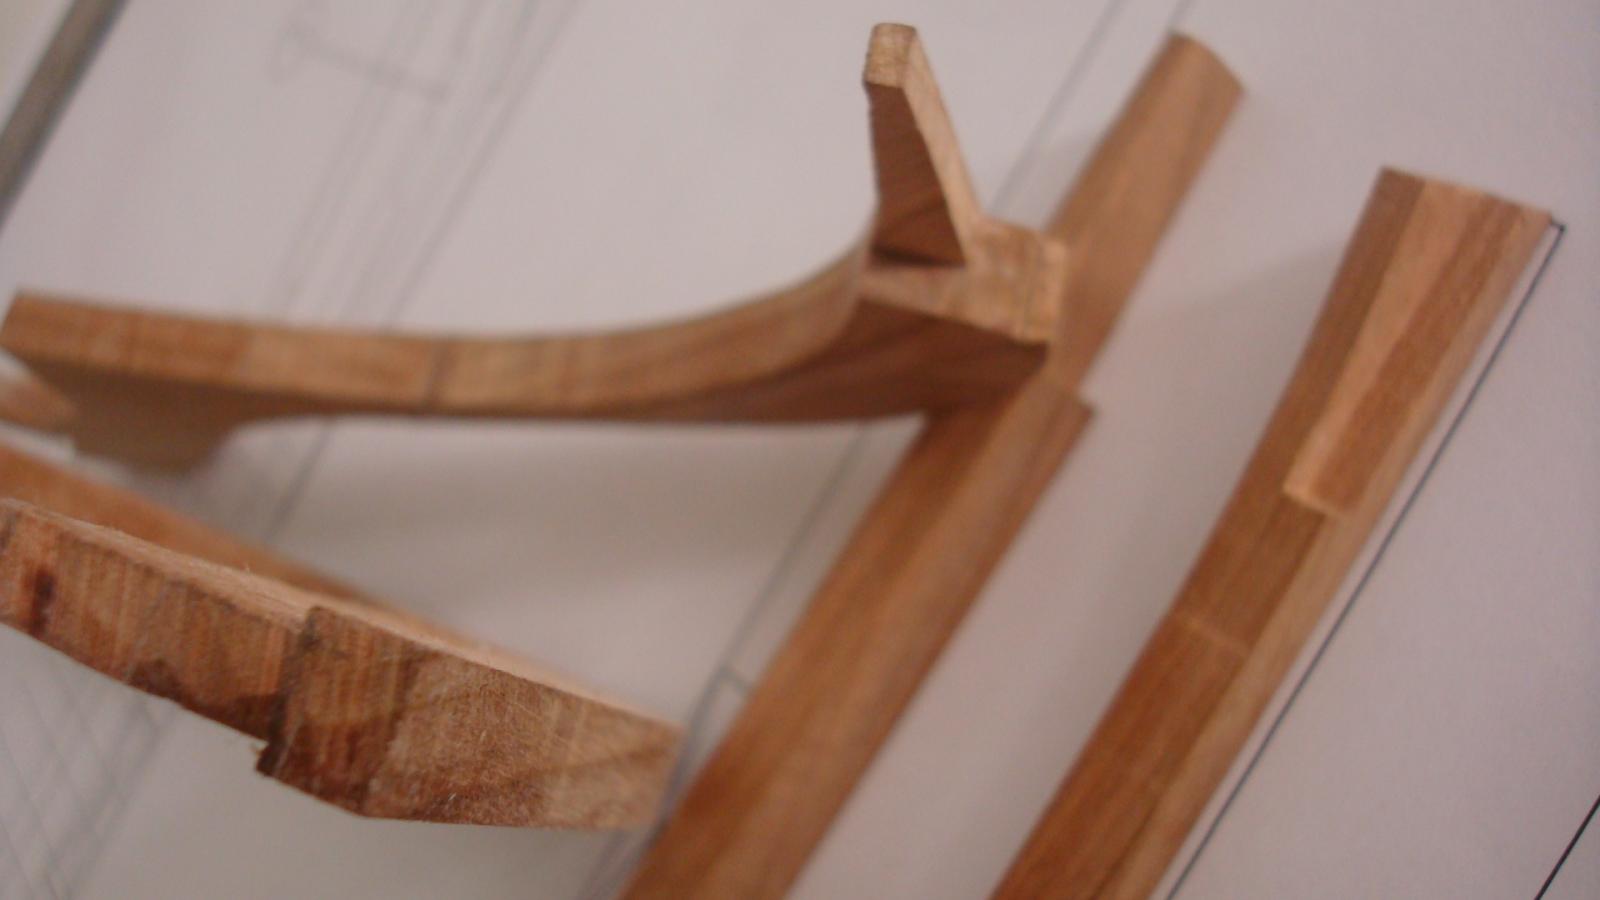
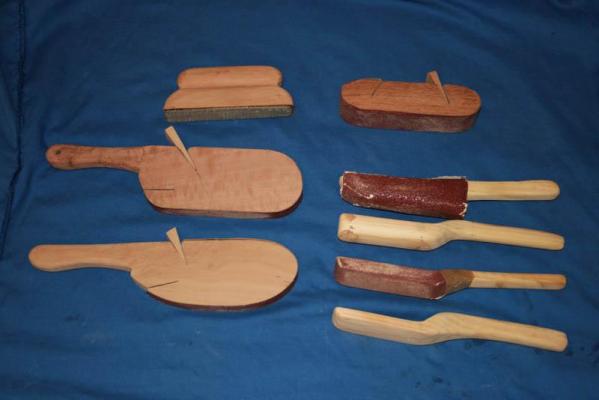
Hi All! It has happened again. Two weeks doing nothing but making steps and a wood wall at the house. No time for the hobby... I will be here in Madrid for the next two weeks so I hope to start raising the frames. I´m willing to start. As Guy says this goes soooo slow, so slow but It´s something that one is allways thinking about. Time, time, time... Richard yes I will leave lots of fat on the aft frames and much more on the fore cant frames. If I have to spent two weeks fairing the inside I will not mind. I have to make lots of different sanding tools like these I attach. Are from "recon 4". Doc the log I FOLLOW is the Wang´s one. It has no literature but the pics talk by themselves. I will not say again " Hope to post something in a week or so..." ha ha Happy October! Daniel.
-
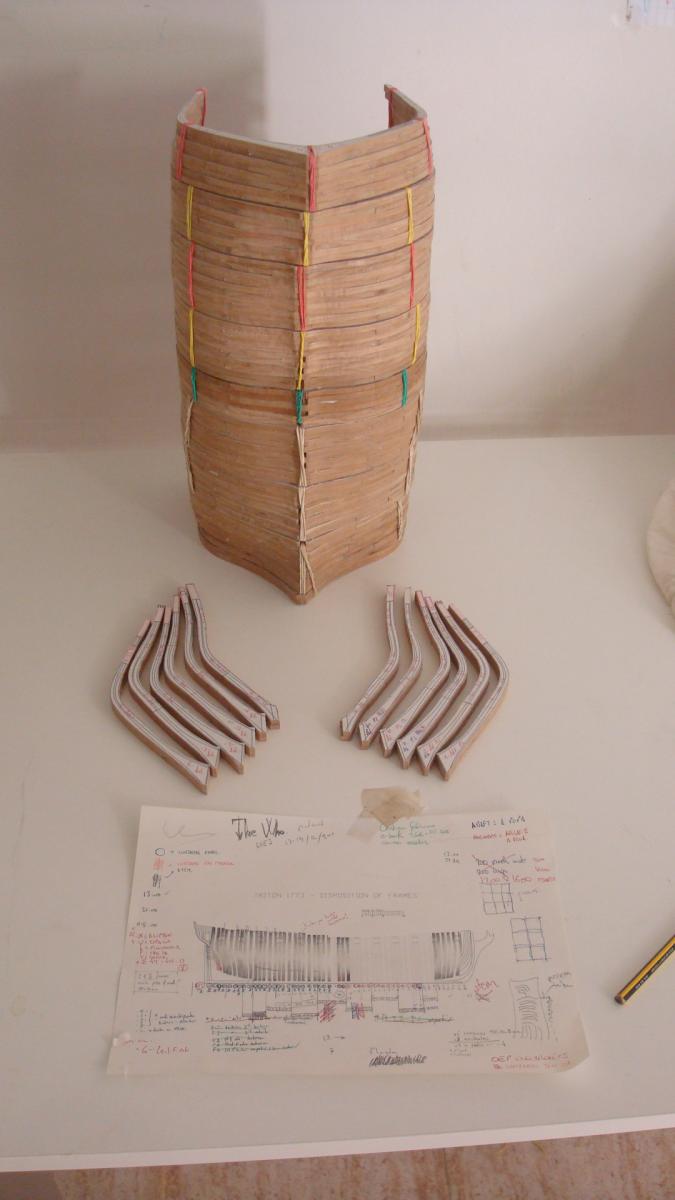
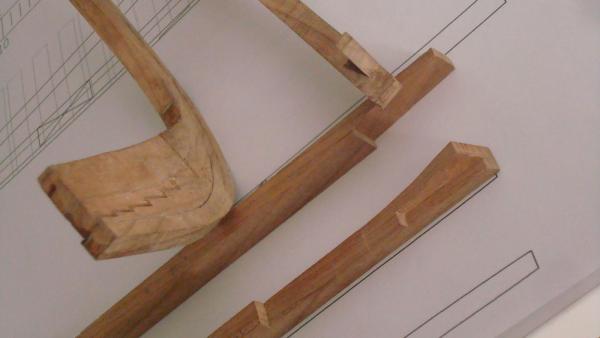
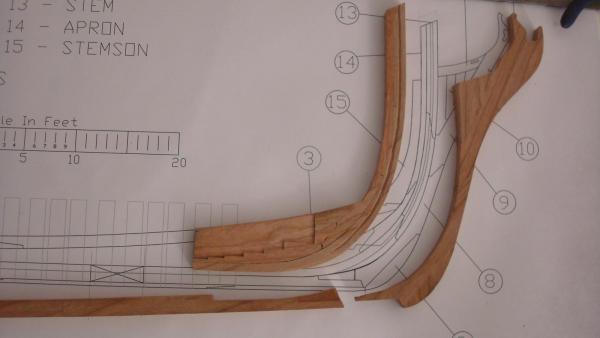
Hello all! Small update, I have been making the steps on the stem deadwood. It took me a while. I still have doubts about this piece. It seems to be beveled just a little bit, as seen in Wang´s Triton, so I will wait for the frames raised up (not glued) and try to imagine it out. As you can see I stopped the step on the “W” frame. The hawse pieces will rest between the stem post and the “W” frame so I will not “weak” that zone by beveling where the W frame ends. (I do not know if this makes sense) Another important thing about the device for the rabbet (see post #52). It worked superb when the fiber of the timber was straight but it did not work when the fiber was cross or not quite aligned. So I had to do it by hand using a small x-acto blade. Fingers cross with the keel… I also made the six patterns using CAD for the angles or the fore cant frames. The idea is to glue them to a piece of wood or cardboard and put them against the disc sander table to get the right angle. My table can tilt till 45º. Here is the pdf file just in case any of you are at that stage. angles tilt sander_A4.pdf Hope to post some more in a week or so. Happy Autumn! Daniel.

-
Absolutely beautiful!
-
HMS Sussex by mij - Scale 1:48
harvey1847 replied to mij's topic in - Build logs for subjects built 1501 - 1750
Good luck mij! I will folow you aswel Daniel -
Good Luck Doc! Do not force your hands a lot. Just keep it easy and work the time you feel ok with. Best wishes. Daniel.
-
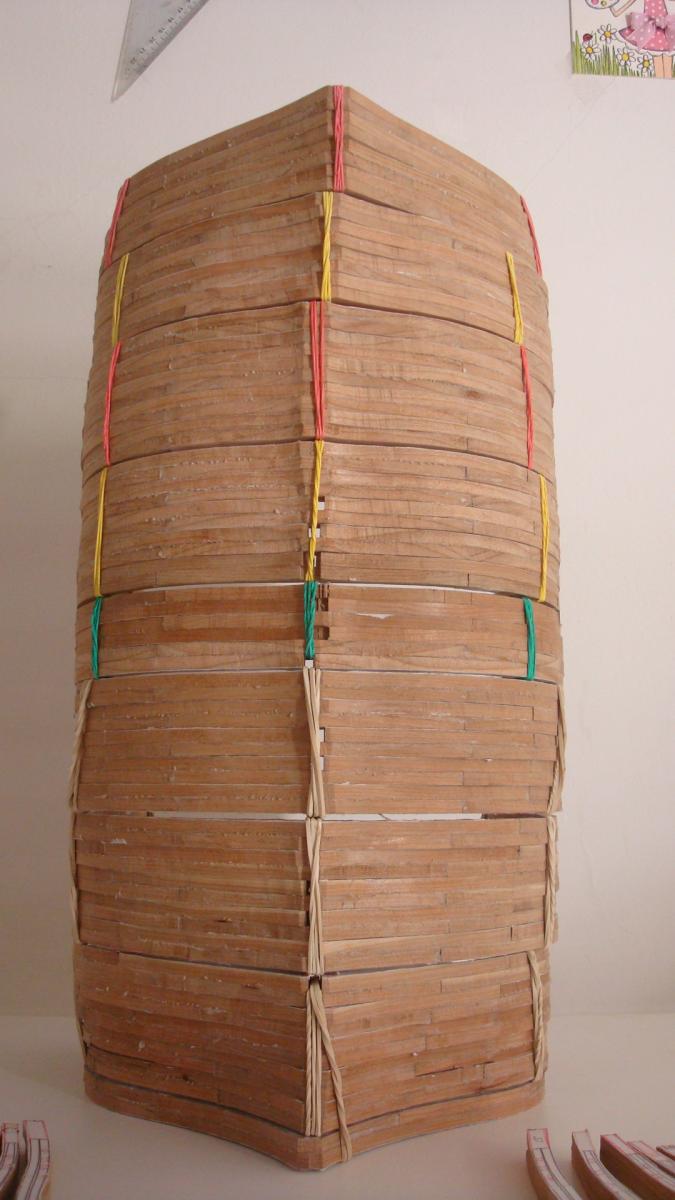
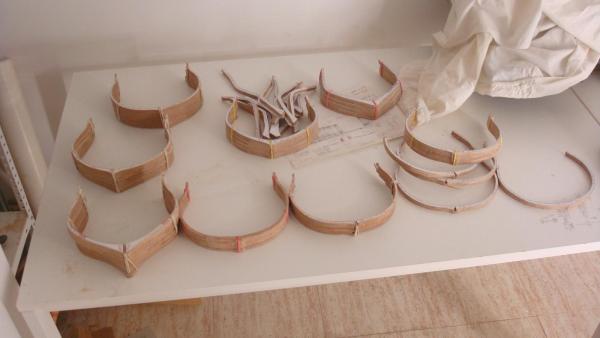
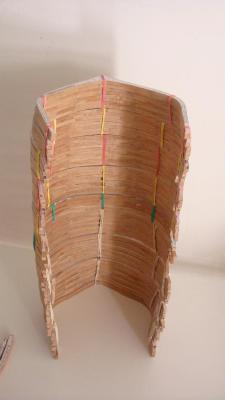
Hello People! At last something to post on! I could not make some work since June… three months doing nothing but frames and doors for my house. I have been around visiting amazing logs and willing to post something like I am actually doing . Someone said once “do not attempt to do all the frames, just do them one by one and raise them”. Well as you can see I went the tough way and now somehow I can see the hull in some way. Now I know I am going to be able at least to make the whole structure. Here are some pics. I did all of them in just one month more or less. All the frames ready to put in order. Nice and clean... Our dinner tonight, Kebabs rolls for all. Or maybe ribs... NOW the fun thing starts since I have all the frames. Thank you all for the nice words during these months!


-
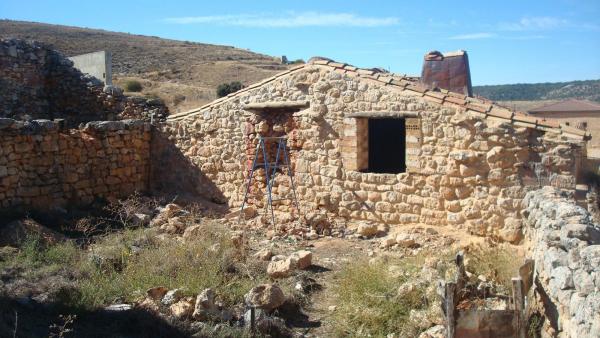
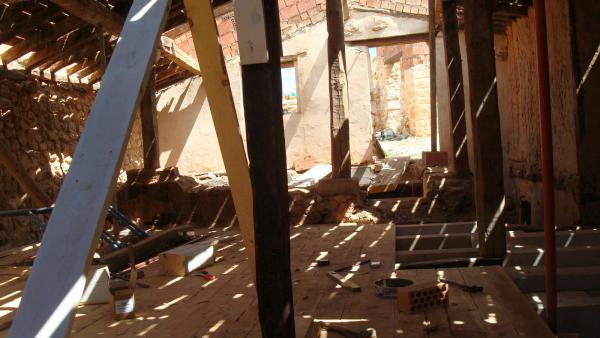
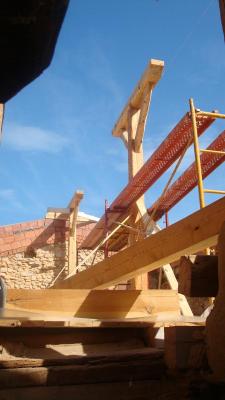
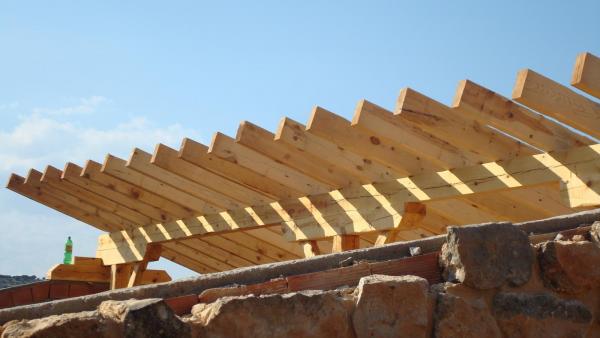
Beautiful kitchen! what a nice job Paul. I have similar expirience since I made my own house from an old stone shed of the nineteenth century... It only took seven years to acomplished the whole thing. This summer I have finished all the frames (22) and the doors (12). That´s why I could not be modelling a lot. As you, there´s lots of things to do but now is habible and seven years ago it was nothing but a ruin. the ruin, looks in good shape but believe me it was not. demolishing the roof, all the timber had woodworms, I could use none of them. New pillars and beams, really fun stuff with the chainsaw and 200mm nails. At this time I joined the old MSW 1.0 getting traped with EdT´s Naiad... and then I joined the Triton project And the final result, still lots of things to do. Best wishes Paul! There is something priceless when you do the things by yourself. Daniel.

-
Funfantastic job Paul! Nice and clean. Now you can start to mess the whole room again with posters,frames, shelves... Did you do it all by yourself or you hired the work? It´s allways a good time to get rid of all that we acomulate as years and years passed. Are you going to build another table to work on? Being there in an island, do you have problems with the humidity of the air? Congratulations! Daniel.
-
Anja, Pete and all, thank you very much! It was just a normal day for me like any other day. I was modelling for some hours... the kids at grandpa´s home. The Admiral resting on the sofa and me, sanding the last square frame. Couriosly was the -A- one because the Blue Top Timber is missing in the plans. I cut the patters months ago and I did not realize were not there. Hope to post some pics at the end of the day. Thanks again! Daniel.
-
Helloo TJ! Can not imagine the amount of scrap pieces you must have in your box after soaking and bending that one by one timber... Best wishes and keep going! daniel.
-
And this was supposed to be a small project!!? How I envy you... in a good way Excellent work. Daniel.
-
Hello! Can you post a picture of the stern with that detail ( a plan) . I´m very interested with that port. Somehow is like you are making the stern weak. I mean not you but the shipwright at that time. Regards. Daniel.
-
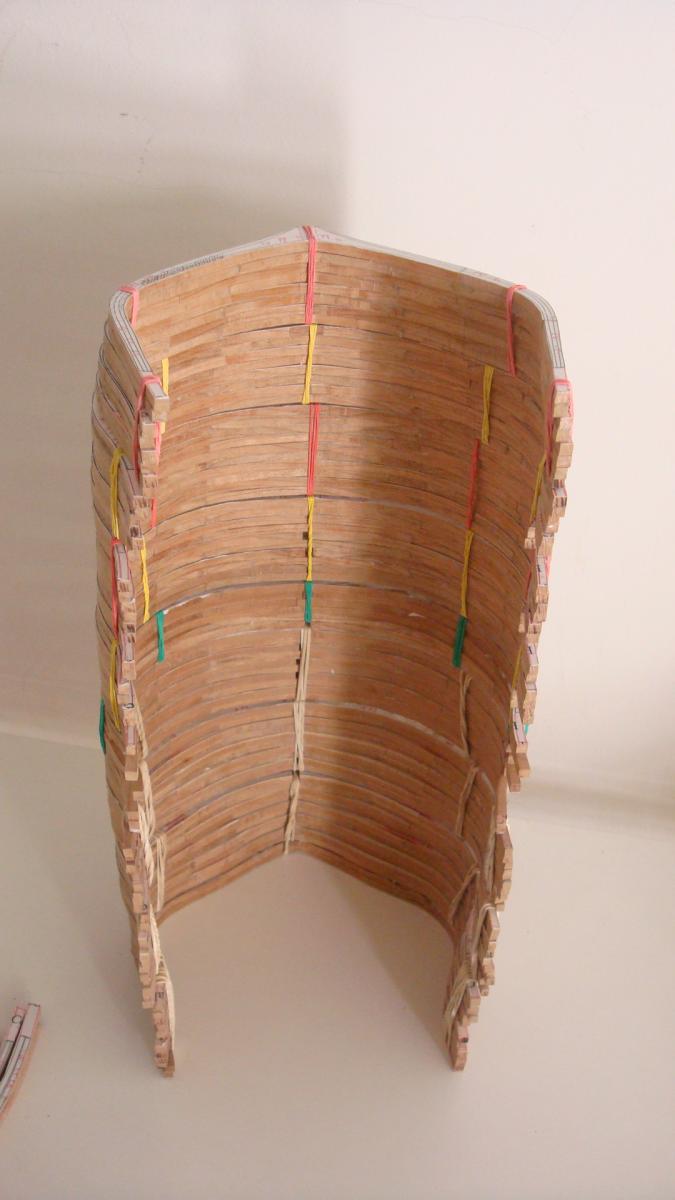
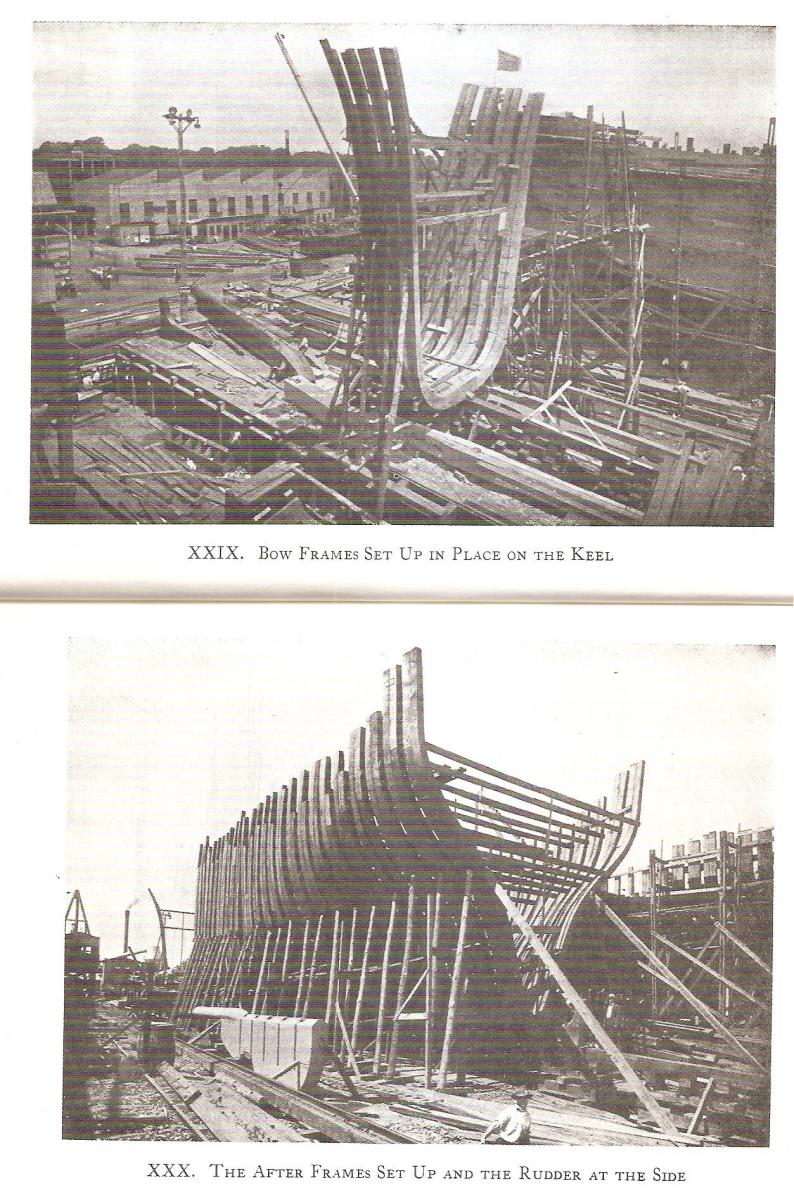
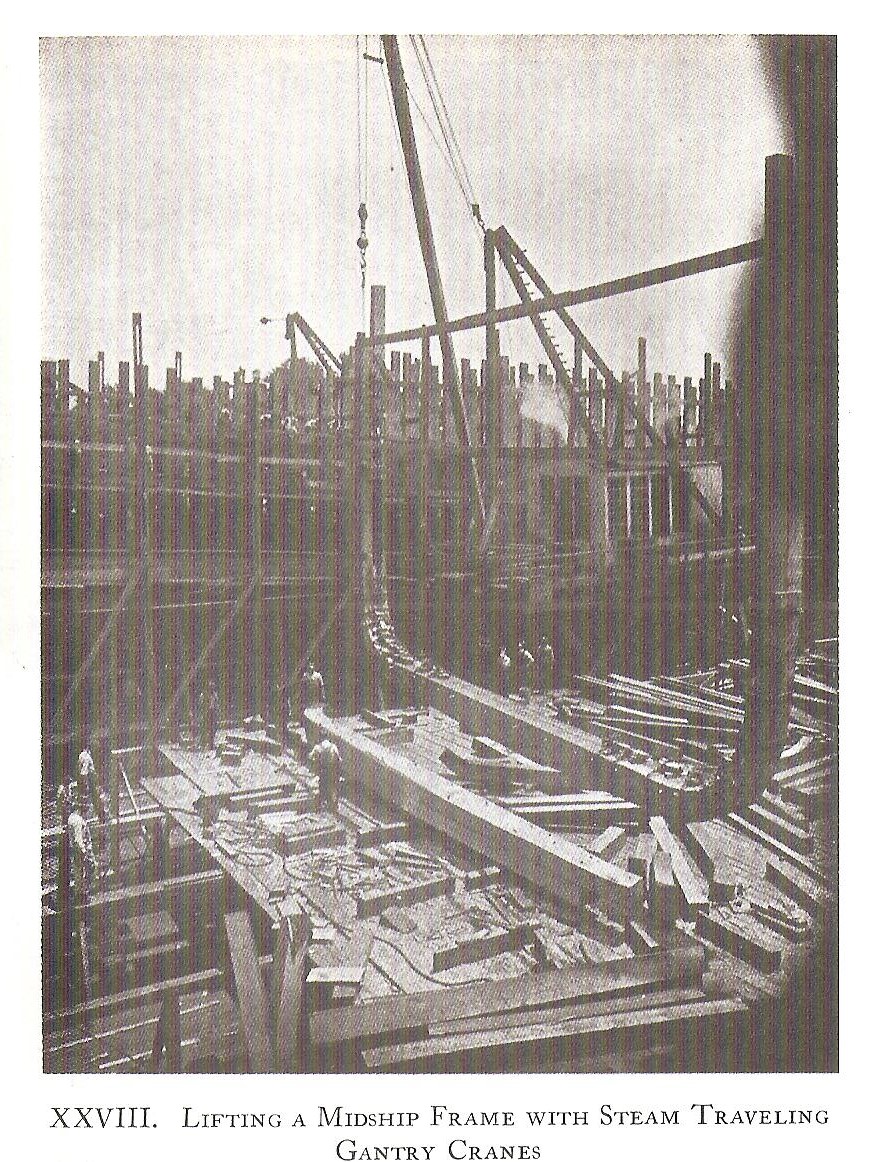
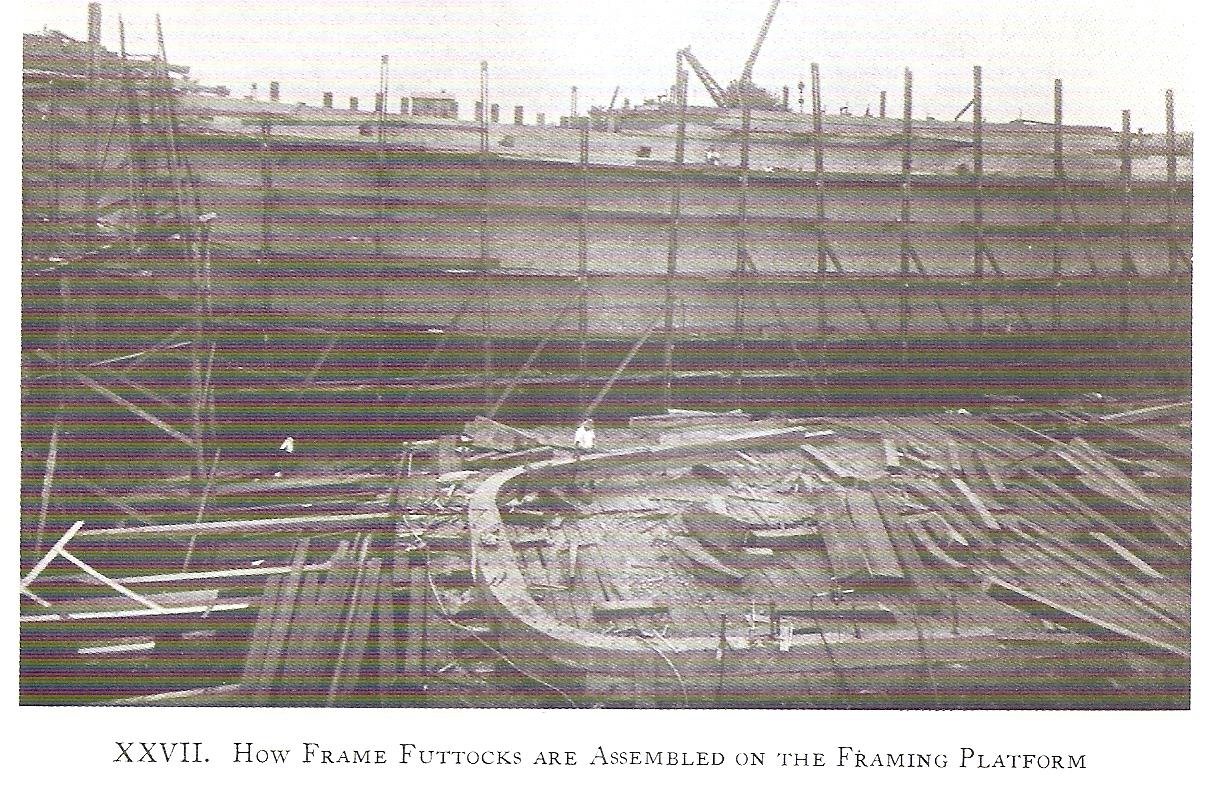
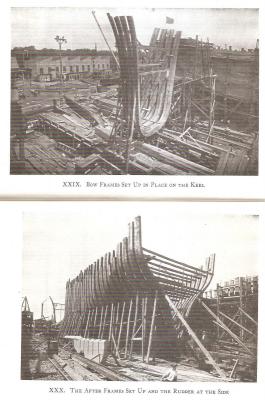
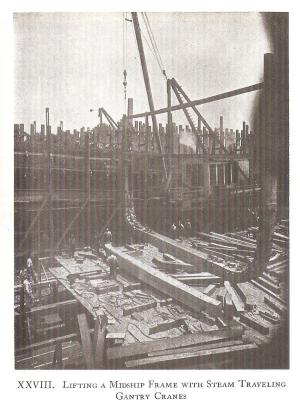
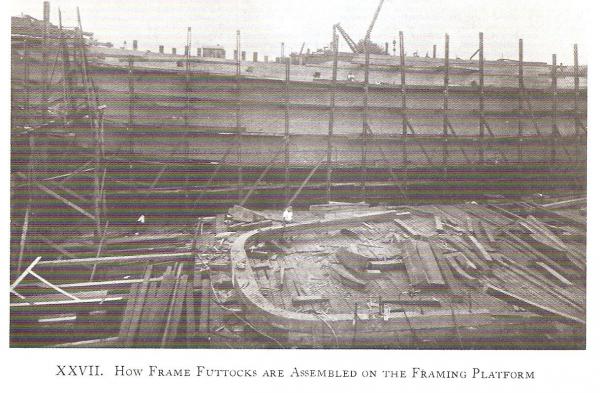
What a massive frames! You might need a crane to rise them and put´em in place... At that scale the amount of detail you are going to put on her is going to be amazing! I cannot imagine myself working at that scale. There´s something magic when you see a model of that dimensions in a museum. Best wishes. Daniel.
-
What a beautiful work Ed! Every single part is so well explain that in some way is like reading a book in fascicles delivered every single week… I just could not resist to attached some pics from Charles G. David´s book (The Built-Up Ship Model). Has nothing to do with the YA but are quite inspirational pictures. The size of the ship is going to be amazing and fully framed! Best wishes. Daniel.
- 3,618 replies
-
- 5
-
-
- young america
- clipper
- (and 1 more)
-
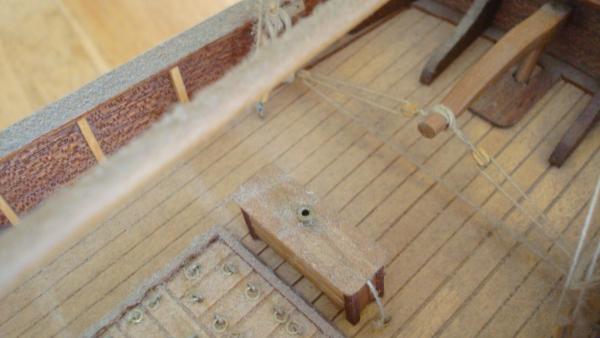
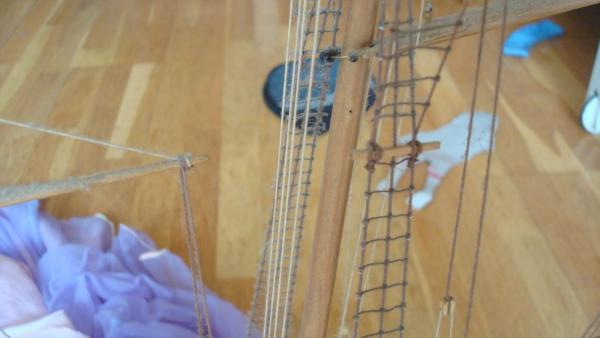
Exactly, the fid, the one that passed through the top mast. Sorry if I have not been able to see it on the pics attached. < I can see it now > Here are some photos of mine. I´ve attached some other pics of the details I put on her years ago. Ther we go... This is the fid, I did it in two pieces, one in both sides. This is the rudder rigging. and this is a detail of the standing rigging of the masts. I´ll try to clean the ship and put lots of pics in the finished gallery. Regards. Daniel.
-
Hi Blackie! Love the work on the rudder and the entire work you´ve done so far. This ship was the first I did years ago. Took me 1516 hours during a year and a halve. In the top mast you should put a chock all across the top mast or just two pieces of wood on each side of the mast. It´s a nice detail. I´ll try to put a pic of it but my Harvey is all dusty and in not very good conditions. It´s the bad thing of not having a glass case to protect it. Shame on me. Best wishes and keep going! Daniel.
-
Beautiful hands Albert. What a nice and clean workspace! Another log I will follow for sure too. Best wishes. Daniel.
-
HMS Pandora 1779 in 3D
harvey1847 replied to ppddry's topic in CAD and 3D Modelling/Drafting Plans with Software
Some updates to this topic... I´ve tried the Inventor from Autodesk and It´s working very well for me. It´s a whole new world. You can download a free version for students for ONE year (you must register). Here´s the link: http://students.autodesk.com/?nd=download_center And here´s a video of what you can expect from the program...http://www.youtube.com/watch?feature=player_embedded&v=80mdwh29ETU#t=960 Hope you enjoy it!! Daniel. -
Congratulations! Another log from you and a clipper! Sure we all be here with you all the way till It will be completed. It does not matter if It takes years and years. Allways a preassure to follow one of your logs. Best wishes and happy september. Daniel.
- 3,618 replies
-
- 1
-
-
- young america
- clipper
- (and 1 more)
-
You might be only the one in this planet earth who is actually building a ship out of bones!! Well maybe is just you and How many, five? ten? eleven?? Are you going to paint the cannons in black? hahahaha (risas) just kidding... Absolutely amazing work. Best wishes. Daniel.
-
HMS Pandora 1779 in 3D
harvey1847 replied to ppddry's topic in CAD and 3D Modelling/Drafting Plans with Software
Thanks for answering Timtom. I have no CNC machine. I have in mind that Sherline mill but it will have to wait, quite expensive to my walet... Rather than sketchup or 3Dmax I prefer to use AutoCAD or similars because are drawing programs pretty pretty accurate. You can actually work with things at 1:1. I guess sketchup is more a Design program. I might be wrong. Where is ppddry anyway?! Daniel. -
Way to go Randall! Congrats with the ebony cooking! Can you put some pics of how you actually steamed the timbers? Is it a close box or just a big pan where you boile water and put the wales for a while? Best wishes! Daniel.
-
I would recomend you not to "eat" a lot of wood from the frames. To put them all together and with the help of ribband try to figure out the shape of the hull. Do not try to fit a single frame and put it on place. I did this, thus shaping every single frame, and I had to repeat four of them because I ate to much to much wood out of the frame. It´s my opinion. Hope to get back to my Triton on September. Best wishes. Daniel.
-
Congratulations Rusty!! It has been a pleasure to follow your log since the begining. Beautyful model. What´s going to be next?? Best wishes! Daniel.
- 332 replies
-
- 1
-
-
- Triton
- cross-section
- (and 1 more)