BareHook
-
Posts
430 -
Joined
-
Last visited
Content Type
Profiles
Forums
Gallery
Events
Everything posted by BareHook
-
You could chemically blacken them and then use wood colored paint on the "block" portion and leave the strope black.
-
Thanks! I agree, in MSW V1.0 I think there were about 10 build logs of this kit. Its one of the best kits for a first build IMHO. Ken
-
So it comes down to "I would know" and we're all our own worst critics, so I gotta at least give it a try Thanks Ken
-
I mean the direction of the lashing nearest the deadeye. The two lashings above are wrapped around the parallel shroud lines but with the bottom one, the shroud lines cross and the lashing is in a vertical orientation between them. I can understand if this were done at full scale, the shrouds are too stiff to lash parallel against the deadeye, but in model scale it will and when the deadeye lanyard is secured around the lashed shroud, it will cover and compress the bottom lashing anyway?
-
I cannot decide whether to do the vertical lashing for the first lashing to the deadyes or not, after lashing the lanyard around it, it probably won't be visible. Plus doing that lashing will be difficult to keep the deadeye tight, probably use a sewing needle to thread it around. any opinions? Thanks Ken
-
Too many deaths, tragic
-
I'm not suprised, but considering the capacities are close to accurate, it lends its self to a certain amount of fun plausability. Ken
-
Can anyone verify whether this is true or not? It sounds a bit contrived to me but??? Ken The U.S.S. Constitution (Old Ironsides), as a combat vessel, carried 48,600 gallons of fresh water for her crew of 475 officers and men. This was sufficient to last six months of sustained operations at sea. She carried no evaporators (I.e. Fresh water distillers). However, let it be noted that according to her ship's log, "On July 27, 1798, the U.S.S. Constitution sailed from Boston with a full complement of 475 officers and men, 48,600 gallons of fresh water, 7,400 cannon shot, 11,600 pounds of black powder and 79,400 gallons of rum." Her mission: "To destroy and harass English shipping." Making Jamaica on 6 October, she took on 826 pounds of flour and 68,300 gallons of rum. Then she headed for the Azores, arriving there 12 November. She provisioned with 550 pounds of beef and 64,300 gallons of Portuguese wine. On 18 November, she set sail for England. In the ensuing days she defeated five British men-of-war and captured and scuttled 12 English merchant ships, salvaging only the rum aboard each. By 26 January, her powder and shot were exhausted. Nevertheless, although unarmed she made a night raid up the Firth of Clyde in Scotland . Her landing party captured a whiskey distillery and transferred 40,000 gallons of single malt Scotch aboard by dawn. Then she headed home. The U.S.S. Constitution arrived in Boston on 20 February, 1799, with no cannon shot, no food, no powder, no rum, no wine, no whiskey, and 38,600 gallons of water.
-
Yup! I gotta start using my daughters Iphone to take pics, my phone camera sucks
-
David, The build is looking nice, I like the real life action photos as well. Ken
-
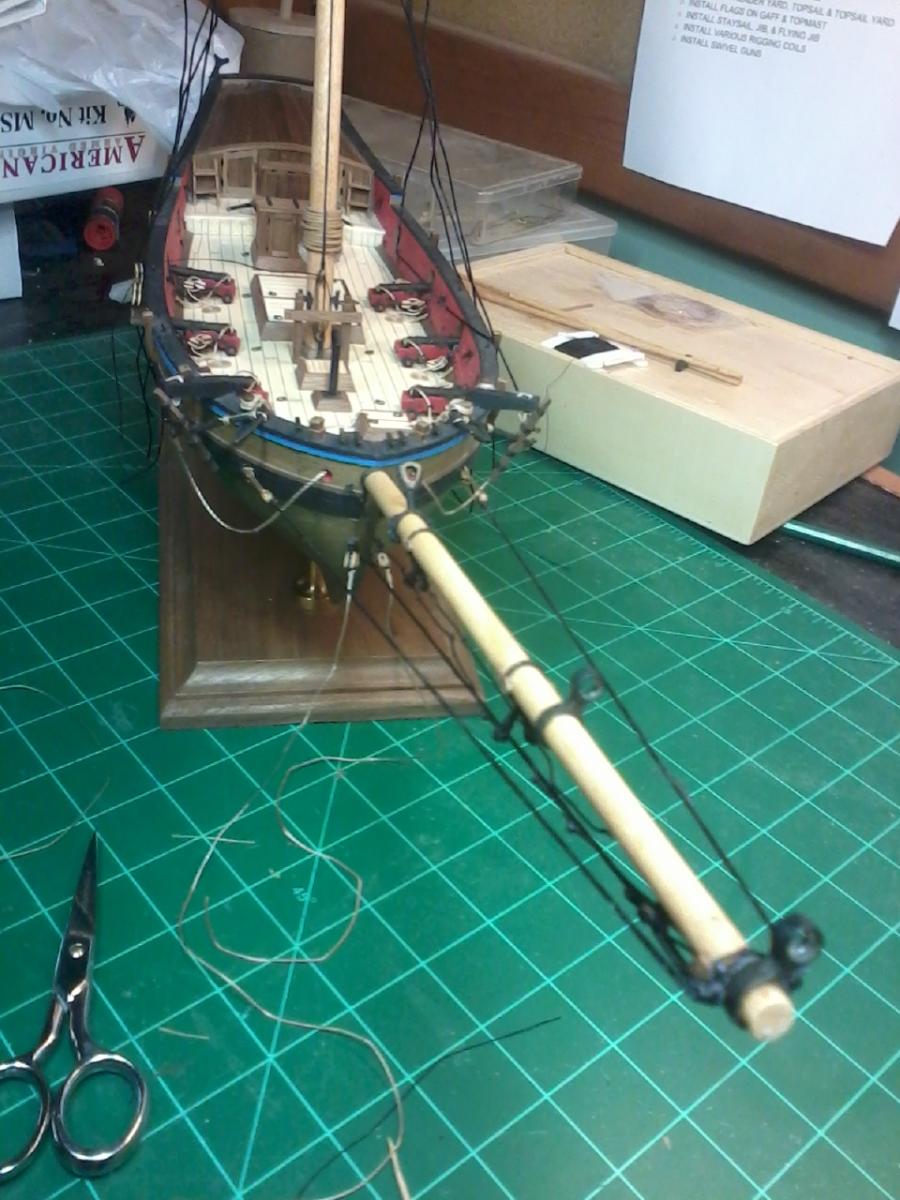
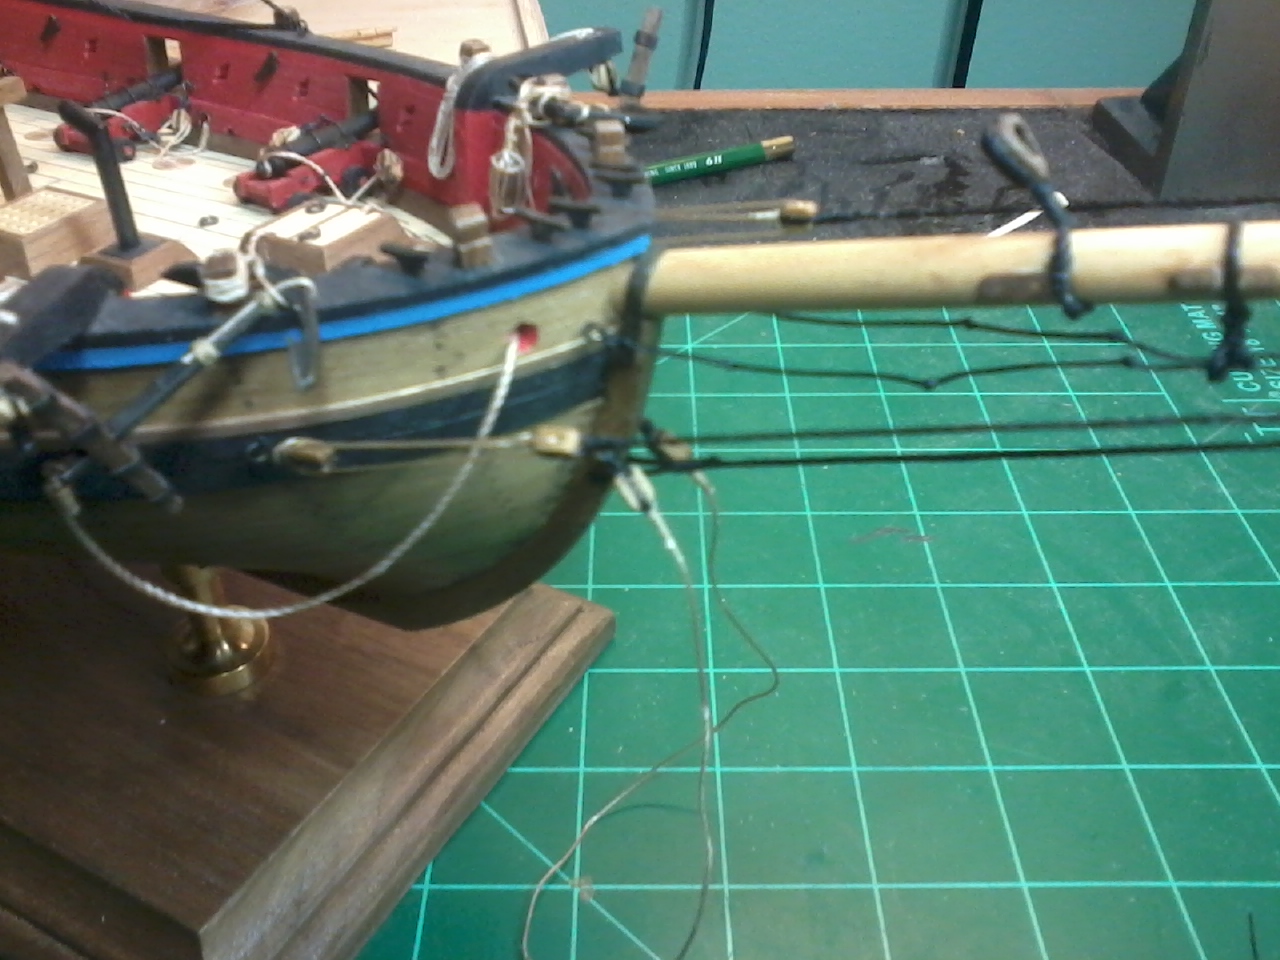
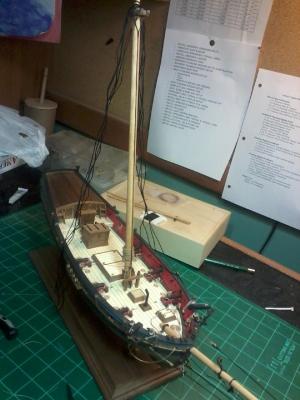
Well, finally got back to some modeling! Sort of took the summer off to keep the kids busy. I completed the Bowsprit, Jibboom, Mast, Topmast but still need to fabricate the rest of the spars I installed the Bowsprit with the lower standing rigging and footropes and started on the standing rigging for the mast. Next is: complete the spar fabrication, install the Jibboom, complete standing/running rigging setup, fabricate sails. Tricky part is getting the mainsail installed with gaff and boom: before, after, or ??? the completed standing rigging.


- 110 replies
-
- 1
-

-
- armed virginia sloop
- model shipways
- (and 2 more)
-
The MS Armed Virginia Sloop gets my vote. Its been an excellent learning kit so far and contains all elements of ship modeling to practise your skills on. There is also a wealth of experience and information available Ken Edit: Strange, I didn't see all replies and final decision posts earlier?!? Enjoy the build! remember its a hobby and we're all learning new things every day!
-
Color looks like cocobolo but????
-
Not really dangerous, the method is simplified version shown in the rigging thumbnails, was only performed when anchored or in harbor and the boats were small 4 man dorys. The oars were used to keep them from banging against the outer hull.
-
When I crewed on the Swift of Ipswitch, we would lift them with tackle on the yards and hold them off while lowering, using the oars. But that is a much smaller vessel. Ken
-
When I planked my AVS kit, the edges of the walnut were rough, but ended up clean through the tapering of the planks and limited spiling at the bow. The planks are usually full width near the center and taper narrow at the bow and stern. See the planking tutorials on the site if you are not sure. I found it can be a bit splintery, but if you soak it in hot water, it will flex well, just allow it to dry in shape. You will also find that the strips will have a preferred bending direction, flex them one way and they want to splinter, but the other way holds together better. Ken
-
Maybe try using the plank stripper by doing several shallow cuts instead of a single cut through the full thickness, this should help prevent the blade from following the grain. Ken
-
Here are a couple tutorials online: http://www.modelboatyard.com/hooks.html\ http://www.modelboatyard.com/stropping.html Ken
-
Check ebay for the proportional dividers, it might save some of your budget. I would keep the money handy and only buy the tools as they are needed unless you come across a deal you cant pass up. BTW, don't forget to sign your wife into the crew as your sail maker with that $900 sewing machine! Ken
-
Which Model-Expo kits are double planked?
BareHook replied to FlounderFillet5's topic in Wood ship model kits
The AVS is double planked. I suggest looking at their site, you can download a pdf of the instruction manual for each of their kits and it should have the info on planking. Ken -
My current first build the AVS was done using scaled length planks and following rules for the butt shift pattern. I did both layers using this method with the first layers' butts shifted 1 bulkhead so they were at different locations. With the size and scale of this kit, the planks end up in two pieces, I found this easier to plank than trying to get a full length taper and fit at each end. This was especially true on the bow, where I ended up doing some spiled (curved) planks. I would taper the planks to fit at the bow or stern for a clean fit then cut it to a clean fit at the butt joint. Ken
-
I had posed a question in the past regarding treenails and the minimum reasonable scale to do them. I believe most agreed 1:64 or larger is fine for treenailing deck and hull but the smaller scales would be difficult. I did treenails on the deck of my AVS which is the same scale as your kit (1:48) and was happy with the results. It comes down to the end effect you are looking for. I wanted to show some fine detail that represents construction and adds to the overall display and was happy with the result. So far I've only used "false" treenails (drilling holes and filling with putty) but I like the look and I don't know if I could make real ones with a draw plate without losing my mind Before doing it to your deck, build a small sample deck and try it out to see if you like the results. Ken
-
Methinks I need to paint my hoops a light wood color. Glad this came up before I assembled them onto the mast. Ken
-
USS Colorado?
-
RMS Queen Mary?