BareHook
-
Posts
430 -
Joined
-
Last visited
Content Type
Profiles
Forums
Gallery
Events
Everything posted by BareHook
-
Karl, Is that a model of a lathe or the real thing? I cannot tell!
- 662 replies
-
- 3
-

-
- bonhomme richard
- frigate
- (and 1 more)
-
I believe you could fire that cannon, a grain or two of power and a BB!
- 662 replies
-
- 3
-
-
- bonhomme richard
- frigate
- (and 1 more)
-
I used 3/4" wide regular scotch tape and it worked fine, just use the dull finish type, not the glossy. If you need wider tape, you can always ues two or more strips overlapping and get a wider surface. Ken
-
I can send the sail plans to anyone who's interested, they are 1:1 scale, so you just need to trace them onto the cloth. They were originally provided to me from Peter Jaquith who developed their design and also came up with a sail making tutorial. They were tough for my "sail maker" (wife) as she was not used to the precision sewing required for a scale model, where a slight variation is magnified at scale. Anyone interested in the sail plans, please PM me and I'll make some copies once I have a count. I'm not sure about postage, will see how many interested and cost of shipping to locations. Ken
-
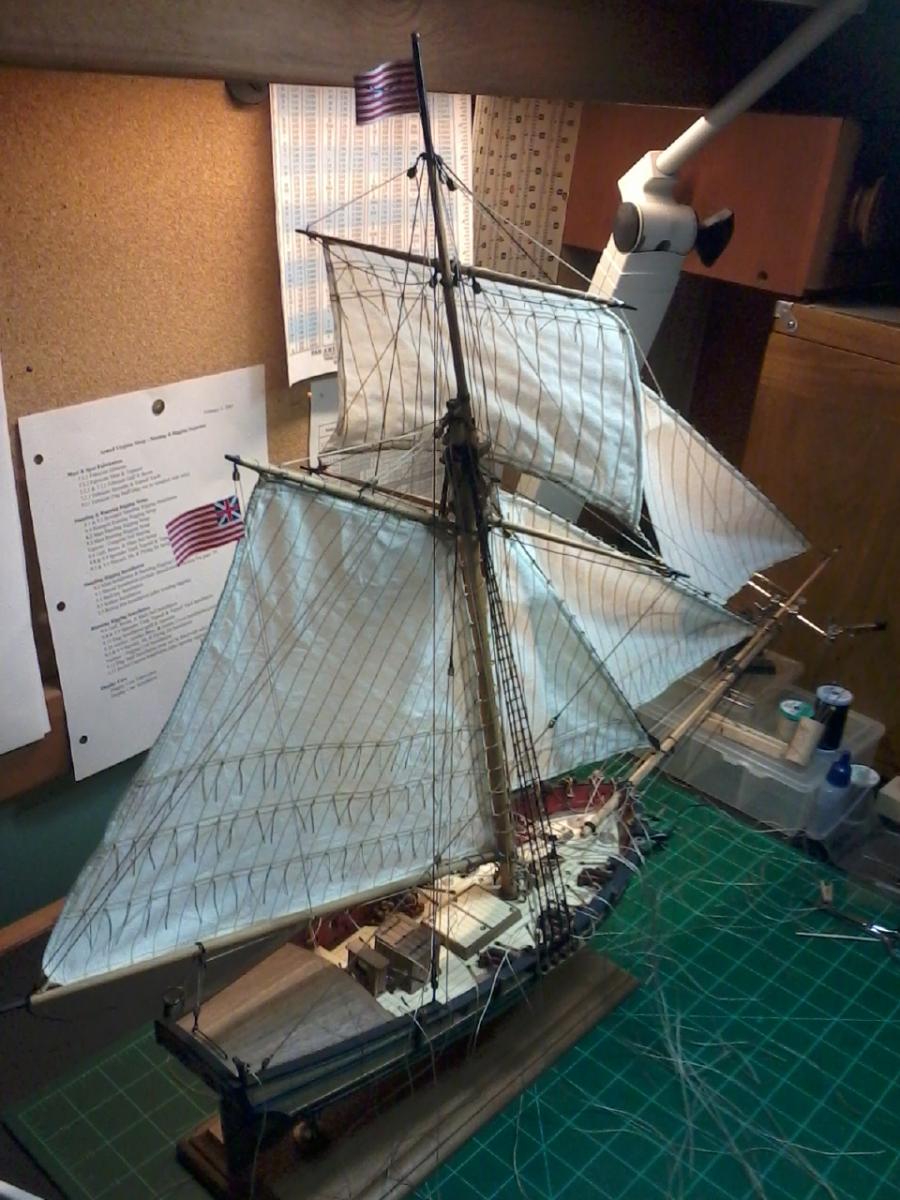
I bought the flags from Model Expo. I chose those particular for two reasons: 1) They matched up to the year listed for the AVS 1768. 2) Mostly because Peter Jaquith used the same flags for his AVS build, and I trust his research. The Model Expo flags are nice, they are available in 3 sizes and come in a cloth sheet that covers the full range of history for the American flag. Each version has its applicable years listed alongside. There was no need for fray-check, since they are made from some type of laminated cloth, but were a bit stiff to form curves and ripples. I attached them by clamping a section of the halyard under tension and horizontal with a knot at the two corner points for the flag. I then applied a tiny bead of gel CA along the edge of the flag and touched it to the halyard, then left it alone to cure. So far its held, but I haven't tested the strength in gale force winds. As far as wind direction goes... there can be lots of momentary eddies in wind where they flap in different directions what are the odds that I captured her in that rare moment! its ripleys I tell ya! Ken
- 110 replies
-
- 1
-
-
- armed virginia sloop
- model shipways
- (and 2 more)
-
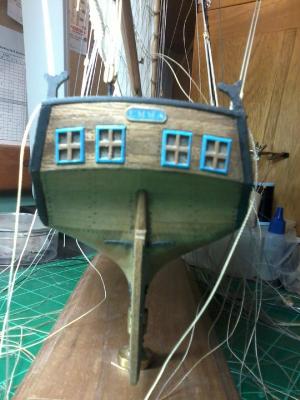
Amazing cabin! Are you going to put "checkerboard" canvas over the cabin planks? I'm not sure if american ships did this though. Do you plan to have a removeable poop deck or other access, or just peek in through the windows? Ken
-
Do you do any prep or sealing on the planks before applying the copper tape? Or does it adhere well to the wood? Ken
-
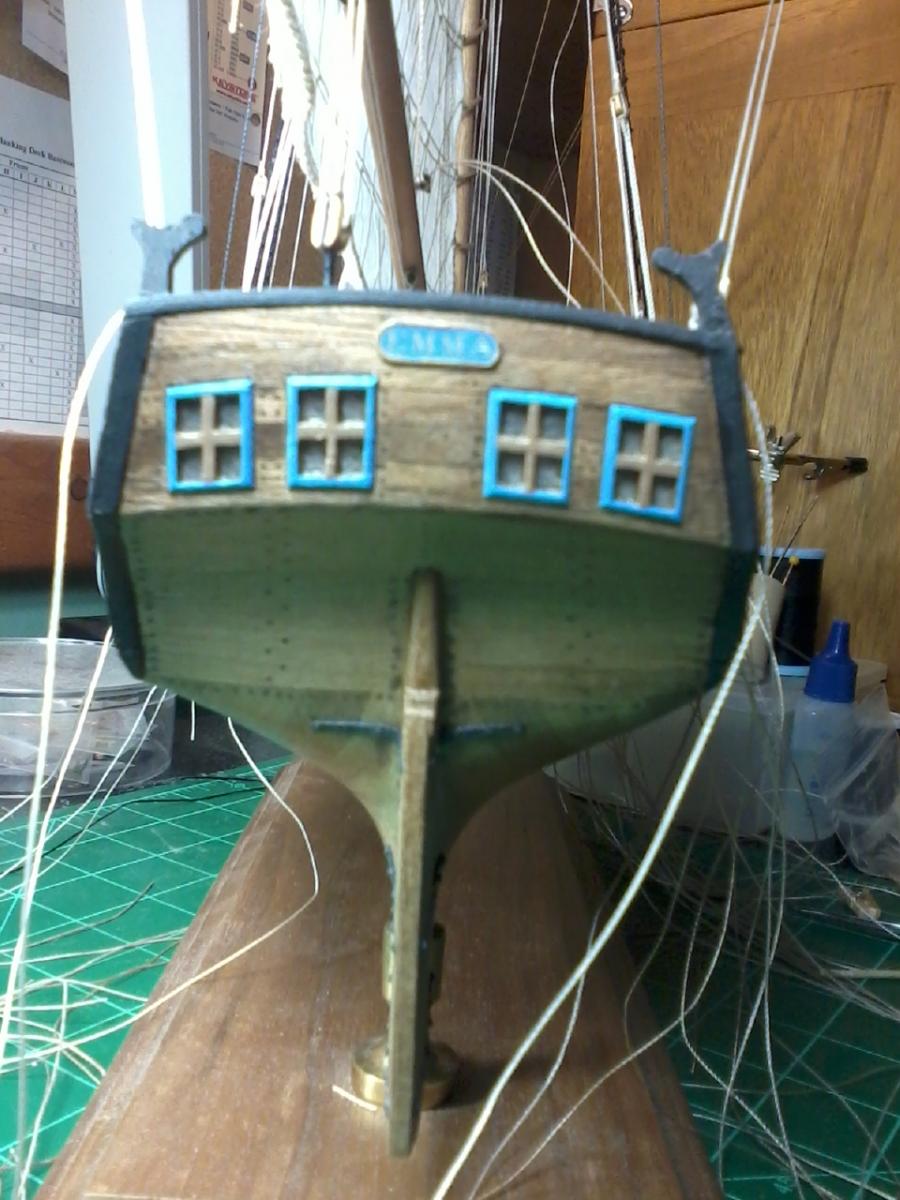
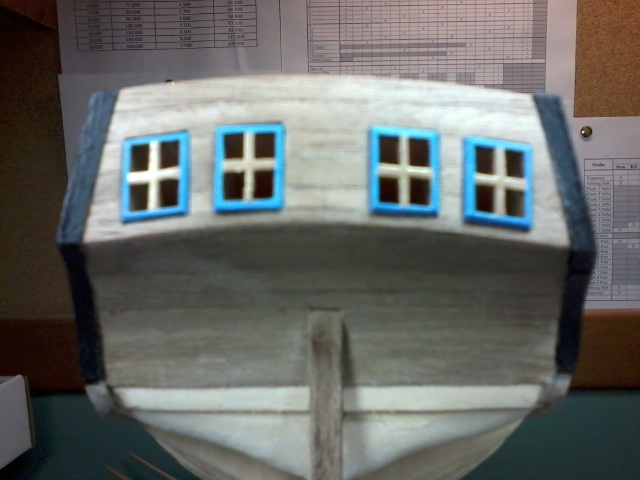
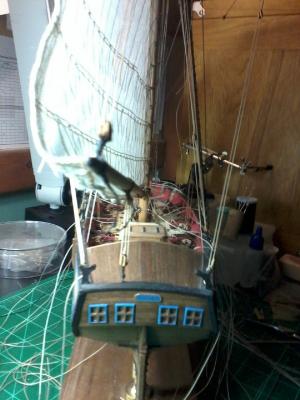
Looking good. You may also want to install some back stops where the windows are, its in one of the practicums, just remember the frames will be flush after planking. I deviated here from plans and design and decided to have my window frames protrude above the planking, with the edges rounded. Don't sweat the cabin framing too much, if the windows are held correctly. After the planking it will all look clean. When planking the transom, keep in mind your plank count and where the widths will end up in relation the the window frames, plus the planks have a curve following the counter and poopdeck curves. Ken
- 129 replies
-
- 1
-
-
- armed virginia sloop
- model shipways
- (and 1 more)
-
Painting fine details
BareHook replied to bill24's topic in Painting, finishing and weathering products and techniques
Multi layers of thinned paint vs. 1 layer of thick paint and paint separate whenever possible before being assembled onto other parts. Water base acrylics will not adhere well to brass, I use testors oil base flat enamels. Make sure the brass is cleaned with alcohol before painting. -
My thoughts as well, It would end up crewed by some type of mutant zombie looking guys with my detail skills, though there are some out there who have done an amazing job. Plus I find nearing completion of this kit is causing me to look forward to the next project and it would be very difficult to voluntarily submit to more time spent on the AVS. Ken
- 110 replies
-
- 2
-
-
- armed virginia sloop
- model shipways
- (and 2 more)
-
Thanks for all the compliments! Al, interesting thought, but where would I find sailors in 1:48 scale?
-
That Capstan is a work of art that could be on display on its own!
- 662 replies
-
- 5
-
-
- bonhomme richard
- frigate
- (and 1 more)
-
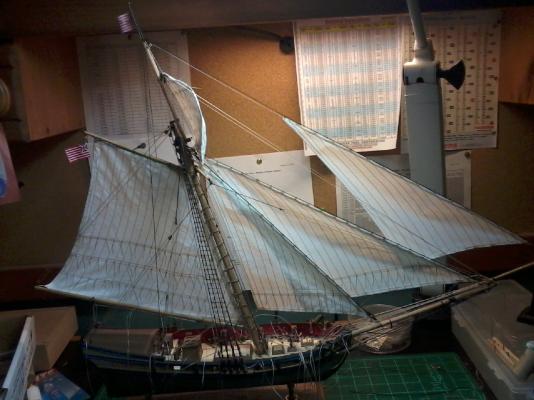
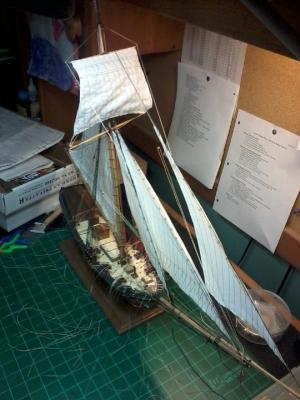
I think I may be approaching the "home stretch". All the sails are hung and filled with wind to the best of my abilities and the colors are aloft. Now is time for coils and more coils, what a messy crew leaving all the lines everywhere! I stiffened and shaped all the sails with dilluted white glue. I attached the flags to the halyards with a tiny bead of CA. I think all thats left to do are the coils, installing the swivel guns and any final clean-up and touch-ups. Ken

- 110 replies
-
- 9
-
-
- armed virginia sloop
- model shipways
- (and 2 more)
-
I worried way too much about the knight and timberheads, just get them faired for a smooth planking curve. You will also want some fillers on the bulkhead extensions for the hawsholes, sweep holes and gunport top/bottoms so when you do the cutouts, you dont have hollow spots on the bullwarks, but the practicum with probably tell you to add those soon. I didn't worry about the scuppers, they were too small to see past the planking. Ken
- 129 replies
-
- 1
-
-
- armed virginia sloop
- model shipways
- (and 1 more)
-
Got this info from BlueJacket, A rigging seminar in May BlueJacket will be holding a RIGGING CLASS here in Maine on Monday, May 5th thru Friday, May 9th. Space will be limited to 12 people. The class hours are 9-3 with a lunch break. This gives ample time to do some sightseeing etcetera if you like. The fee for the course is $400 and is fully refundable up until two weeks before the start (April 21st). Up until 1 week before (April 28) it is 50% refundable. Price of class includes a pin vise, 5 x #76 and 3 x #67 drills, needle-nose pliers, tweezers, and a hobby knife with blade. On Monday afternoon we will tour the BlueJacket facilities, and participants will receive a 10% discount on purchases anytime during the week of class. At the end of class, we will ship instructional items and tools for you. We have arranged a special room rate of $112 at the Fireside Inn (formerly Comfort Inn) in Belfast, which is where the class will be held. Breakfast is included. When you make your reservation, ask for the BlueJacket rate. Here is the web link: http://firesideinns.com/maine/belfast/ Of course, you can stay at any of the other fine hotels and B&Bs in the area if you prefer. So call us and reserve your spot. We have always sold out the previous classes we have held in the past. Syllabus Use of tools Types of ship's rig Terms and definitions Reading rigging plans Proper shaping of masts and spars from square stock blocks and deadeye stropping The bow - gammoning, catheads, bowsprit Stepping the mast Standing rigging Running rigging yardarms, booms, gaff, jib Knots and coils Davits, gun tackle If the demand for this class far outstrips our 12 spaces, I promise to hold it again in the fall. I want everyone who wishes to take this class to be able to have the opportunity to do so. There's nothing I'd rather do than work on, or talk about model boats. Have fun! Sincerely, Nic Damuck BlueJacket Shipcrafters, Inc
-
Another thing that I did regarding the subdeck was to layout the deckplanks, nibbing strake and butts plan in pencil, I found it helpful when it came time to plank the deck. The cutouts aren't critical, just reference for location, and I remember some logs where they planked the entire deck and then aded their cutouts after per the plan locations and dimensions. Most builders also painted the bulkheads and frame pieces black where they were adjacent to hatches or gratings, so they wouldn't show-up through any deck openings. Ken
- 129 replies
-
- 1
-
-
- armed virginia sloop
- model shipways
- (and 1 more)
-
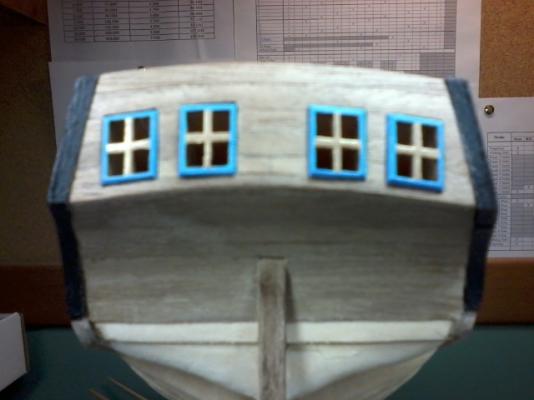
Sorry late response, but Alistair got it. I did my build using the free "Hunt" chapter and the rest using the "Earl" practicum and did fine, but also had all the feedback and support from MSW 1.0. There used to be almost 10 build logs of the AVS to scan through. I think the most help came from following Alistairs build (thanks!), since at the time he was just a month or two ahead of me in the build, so in a way I may have also built to Hunts' practicum by proxy The next "tricky" parts ahead for you, that I can recall are: Cabin/Window framing (keep the windows organized in their position. If you remove them from the sheet, they are very difficult to figure out which ones are inboard and outboard. It took me several times of studying the plans to figure out how the window/cabin frames are supposed to be done. Ironically it came clear to me just after I installed the frames but I decided to keep mine as-is and am happy with how they look. The windows are slanted, but I installed them vertical with the angles following the curve of the wing transom instead of horizontal with the vertical at an angle (I could be wrong though ??? ) there were many differing examples of how the windows were done. Be careful when installing the Wale, its important regarding its alignment/height from the sub-deck and where it terminates at the counter/fashion pieces.
- 129 replies
-
- 1
-
-
- armed virginia sloop
- model shipways
- (and 1 more)
-
Looking good, don't forget to install the two blocks that enclose the mast step before installing the sub-main deck. With the quarter-deck frames, just keep it even height port and starboard so the cabin face is the same height on each side. You also need to add an extension piece on each side of the cabin face bulkhead to provide a support surface for the planking where the rail steps down to the main rail. Did you fabricate the bow fillers yet? those really help with the planking as well. Ken
-
I agree with Alistair, you're doing fine, its just a lot of sanding at this stage. The cabin frames can be placed later using the window frames to get the correct spacing. When sanding the bulkheads, use a flexible block that spans across 3 or more bulkheads, don't individually sand each bulkhead. Ken
-
I saw one on EBAY yesterday
-
I have to agree with Eamonn. Only 3 decker I could find with no Poop deck.
-
Beautiful work! Before applying the copper tape, did you do any prep. to the wood planks to help with adhesion? Would wearing examination gloves help when coppering or make it too difficult? Ken
-
Brett, Your harsh reality diagram was pretty much correct for me. After cutting the rabbet down near the stem where the rudder will be, the false keel was almost transparent do to being so thin. Dont forget you lose some thickness from sanding though, you want the final plank to protrude a bit, so it can be sanded flush. Dont worry too much about the angles of the cut, just follow the bearding line and slowly "shave" away at the rabbet. Shave is the key word, don't do deep cuts, just take you time with shallow cuts and do a lot of fit checks with a piece of sample planking. Just slide a few bulkheads in place and lay the planking on it and against the keel to see where material needs to be removed. I was worried about the strength, but after planking, she is rock solid. PS In future when sanding, be careful not to go too deep with final layer, you can easily sand through it. DocBlake, Nice to see another wood finished hull AVS, looks really good! Ken
- 129 replies
-
- 4
-
-
- armed virginia sloop
- model shipways
- (and 1 more)
-
Nice work! excellent catch in planning the rigging.