BareHook
-
Posts
430 -
Joined
-
Last visited
Content Type
Profiles
Forums
Gallery
Events
Everything posted by BareHook
-
Hmmm, sort of reminds me of the river vessel in the movie "The Sand Pebbles" though I cannot tell if she is armed in that photo.
-
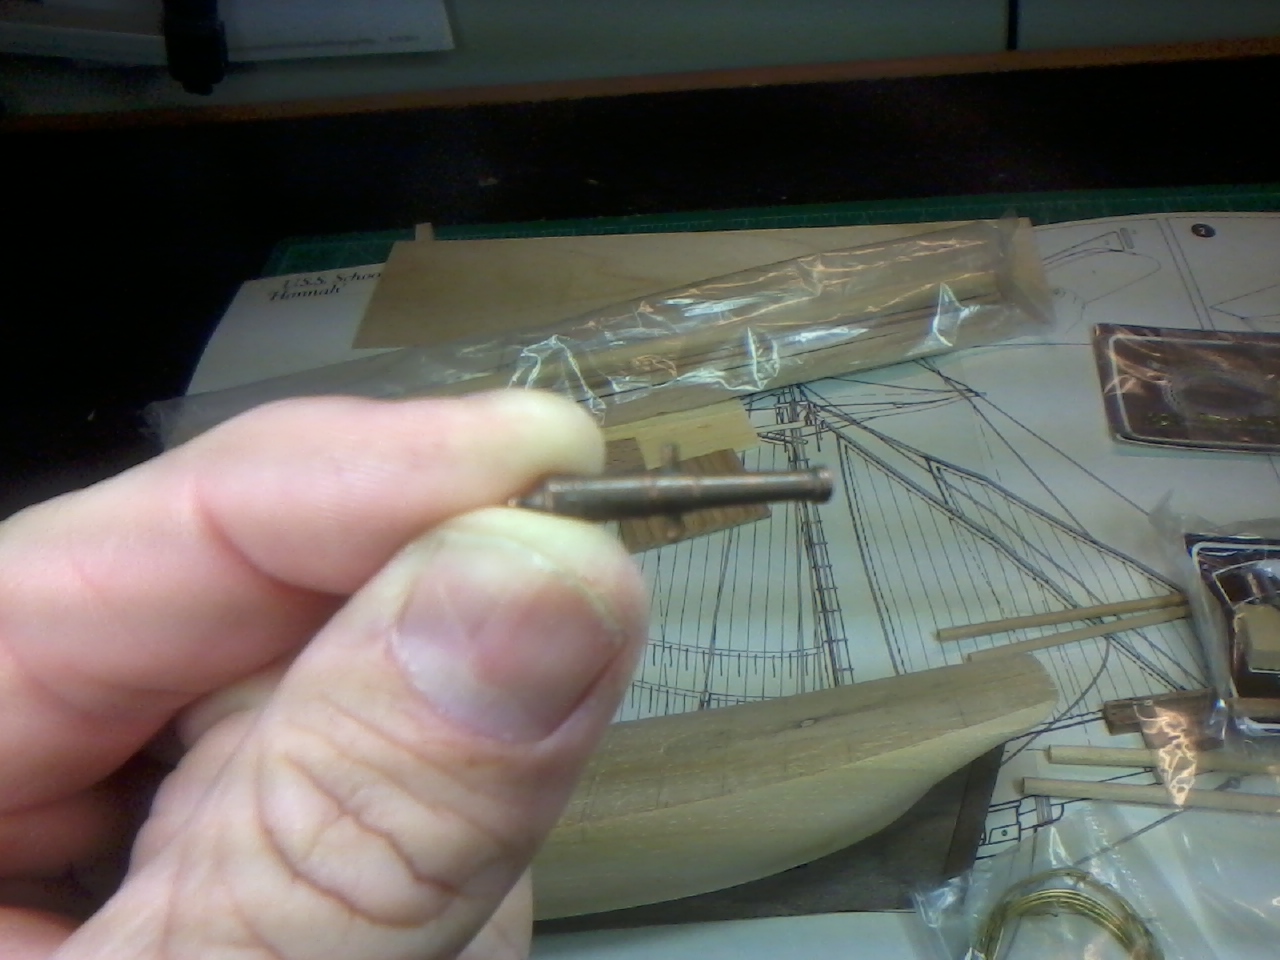
I need to fabricate swivels for my 1:80 Hannah build but am not sure how big to make them. The closest I've seen in cast parts for sale are 1/4" long and others are too big, but I think those may be a bit small and would be about 20" long at actual scale. Does anyone have dimensions for a typical swivel used in the late 1700's or a retail source in the right scale? Thanks! Ken
-
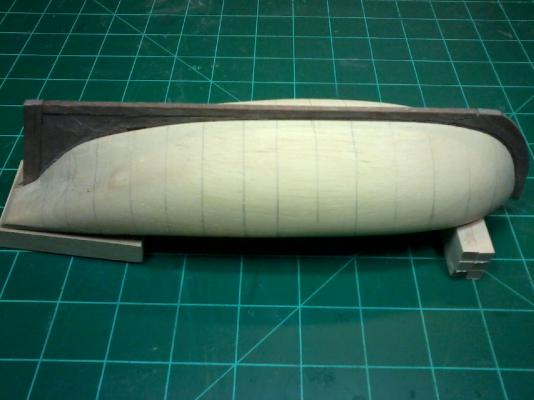
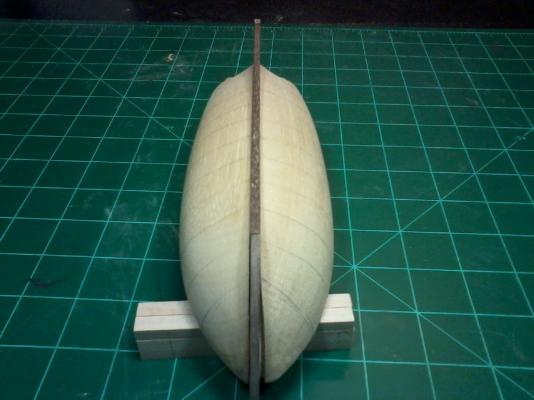
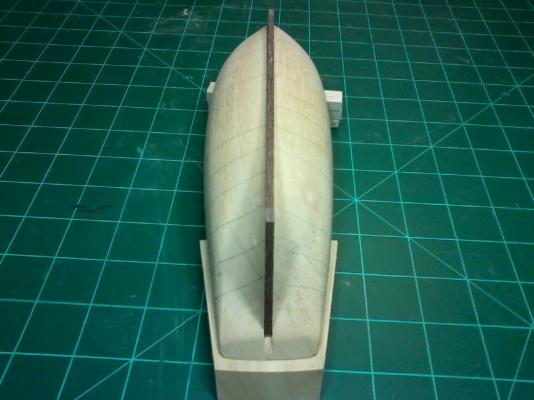
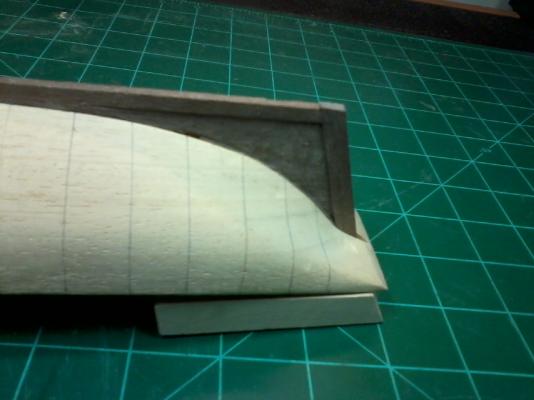
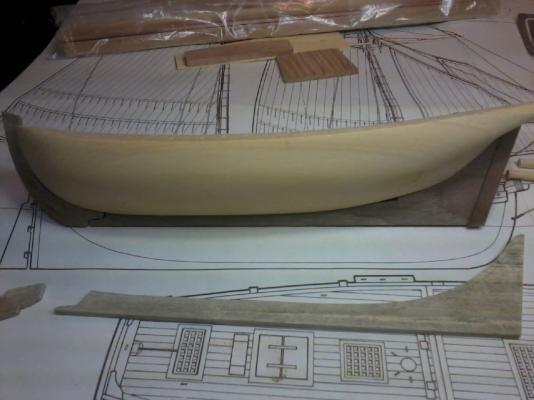
Fairing and the rabbet are pretty much complete, when measurung for planking both sides were really close in length. I just want to double check the stern section profiles, but mid section forward are a good match. In the bow pic, you can see where I had to fix the keel slot, all pieces are loose fitted at this time. Initial measurements look like 3 planking bands of 5 strakes each with a nominal width of 1/8" plus the garboard strake. Next up: Complete fairing Final hull and deck marking Trace deck profile for outer nibbing strake pattern Install upper deck spacers and frames Ken
-
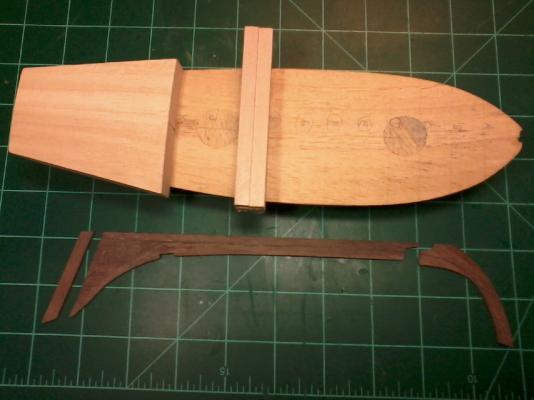
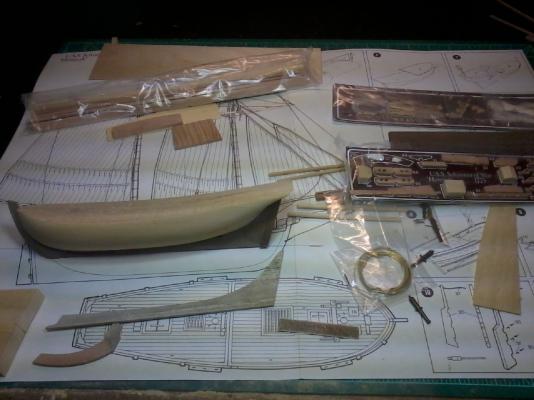
I'll call my official start date 6/14/2014 I found this kit on ebay, and wanted to build a Hannah without having to commit to a full POF scratch build. This will be a fun little build that will be for my youngest daughter Hannah. I want to try and improve the historical accuracy of this kit, but don't want to kill myself getting there, my main goal is a nice little intricate ship that represents the Hannah that my daughter will be proud to display in the future when she has her own home. The kit included a solid hull, plans, printed deck on thin wood, wood dowels, wood strips, several cut pieces, rigging materials, cast cannons and sails. The box claims 1:48 scale but by best calculatuions estimate her as 1:80 scale. The cannon casting in brass or bronze are suprisingly decent and am considering keeping them as-is as they have a nice aged patina finish. The upgrade will include planking over the solid hull, Planked deck, and complete full rigging following "Lennarth Petersson Rigging Fore and Aft craft" American schooner rigging info. The hull has now been initially faired, I had to align the stem slot a bit to starboard to be it properly centered, but the rest was within reasonable limits. I now need to do final checks between P & S for conformity and shape then mark the hull with lines for planking butts and calculate planking bands and widths for tapering. I remade the stem, keel and stern post from walnut so that it will match the walnut planking and give me the option of keeping the hull a natural finish. I will be planking with walnut strips for the hull and basswood for the decks. (Note: I have enough wood leftover from my AVS to complete these). Last nite I started carving out the rabbet and hope to have the garboard strakes installed this weekend. Ken EDIT: I will also be using the Sultana practicum as a guideline for this build

-
Thats the way to do it, you only get one chance at fairing, and I think almost everyone who has built the AVS, myself included could have done more fairing. Ken
-
Me either, I married my sailmaker . BTW you might consider adding support struts between the bulkheads, I really stiffens-up the frame and helps during the fairing process. Ken Edit: also the Bow fillers
-
Looking good! just came across your build. Ken
-
I probably could convert from any schooner, but when I start scratch building, I want to build as historically accurate as possible. Right now I'm "cutting my teeth" or building my skills on some ficticious kits that i'm renaming after each of my kids. Ken
- 175 replies
-
- 2
-

-
- washington
- galley
- (and 1 more)
-
I finished my hull with minwax waterbase satin. Be carefull sanding, the walnut layer is thin. Ken
-
Interesting, what kind of documentation/plan are available? Ken
- 175 replies
-
- 1
-
-
- washington
- galley
- (and 1 more)
-
Nice build and interesting subject! Makes me want to go to the "Dark Side" Ken
- 175 replies
-
- 1
-
-
- washington
- galley
- (and 1 more)
-
How about the Retvizan?
-
Brett, Looking good, you should also consider painting parts before installation, then you dont have to deal with masking. I also had varying shades of walnut and it took several coats of paint for the variance to not be obvious on the bulwarks. I ended up lining my gunports with then walnut strips and that worked pretty well also. Ken
-
I like the step by step progression of the quarter badges, I need to remember how you did that for future builds of my own. Ken
-
The Oslyabya?
-
I have an "Authentic Models" of Holland solid hull kit of the Schooner Hannah. The kit states it is 1:48 scale but the solid hull is only 9 inches I believe the hannah's hull length is about 60 feet so at 1:48 the hull should be about 15 inches The kit hull seems to be 1:80 scale which also seems to agree with the narrower width of the deck planks as well? Do you think the box is mismarked? The size seems closer in scale to the Amati resin hull kit. Thanks! Ken
-
Looking good! One thing to consider when planking the second layer is having planking butts patterned on the hull. Typical timber lengths available in that era of construction were 20 to 30 feet or 5 to 7.5 inches, so the hull timbers had offset butt joints that meet at the bulkheads, similar to the deck planking patterns seen on many builds. When I did the planking on my AVS, each strake was made up of two pieces with the butt joint offset in a pattern so that it did not repeat unless there were two strakes between at each butt joint location. Of course, if you are planning to paint the hull, the pattern will not show up and using full length planks won't make any difference. Ken
-
I had a hard time with the fashion pieces as well, I think I fabricated and scapped 2 or 3 before I was happy. Regarding the wale, dont worry about the fixes, they are on the first layer and your second layer walnut can be laid over the fixes. And finally, dont kill yourself with the close-up photography, it looks good for showing particular details and questions, but the naked eye is the quality standard, your build is looking good! Ken
- 129 replies
-
- 1
-
-
- armed virginia sloop
- model shipways
- (and 1 more)
-
I just found your build log, its looking good and I look forward to your progress. Ken
-
Excellent! You always take "scratch building" to the extreme I wish I had the space and patience to attempt some of the methods you have demonstrated on this build and appreciate the drive and focus it provides myself and others to take the extra effort in achieving such incredible detail on our builds. Enough said! Ken
- 662 replies
-
- 2
-
-
- bonhomme richard
- frigate
- (and 1 more)
-
Good to see you back, I cannot see any problems, but I'm sure all are here ready to provide advise. The beauty of wood models is that most problems can be fixed. Ken
-
Bob, She is looking awsome! Just a thought, have you considered doing some internal lighting with flickering leds? It might really set off all that internal detail you are doing. Ken
-
Thanks to MSW and all for the compliments and support, I plan to post some better photos monday and get them in the completed gallery. Special thanks to the following: Peter Jaquith for providing build documentation and sail plans. Alistair for providing a "build path" to follow and learn from. It was great (and educational ) to follow the same build that was a few months ahead of me, though you accelerated and left me in the dust at the end Ken
- 110 replies
-
- 1
-
-
- armed virginia sloop
- model shipways
- (and 2 more)
-
Rafine, Its looking great, I love all the extra details. Are all these cabin details and other extra's you have done, part of the kit plans or are they beyond what the basic kit includes, what level of bashing are you doing?
-
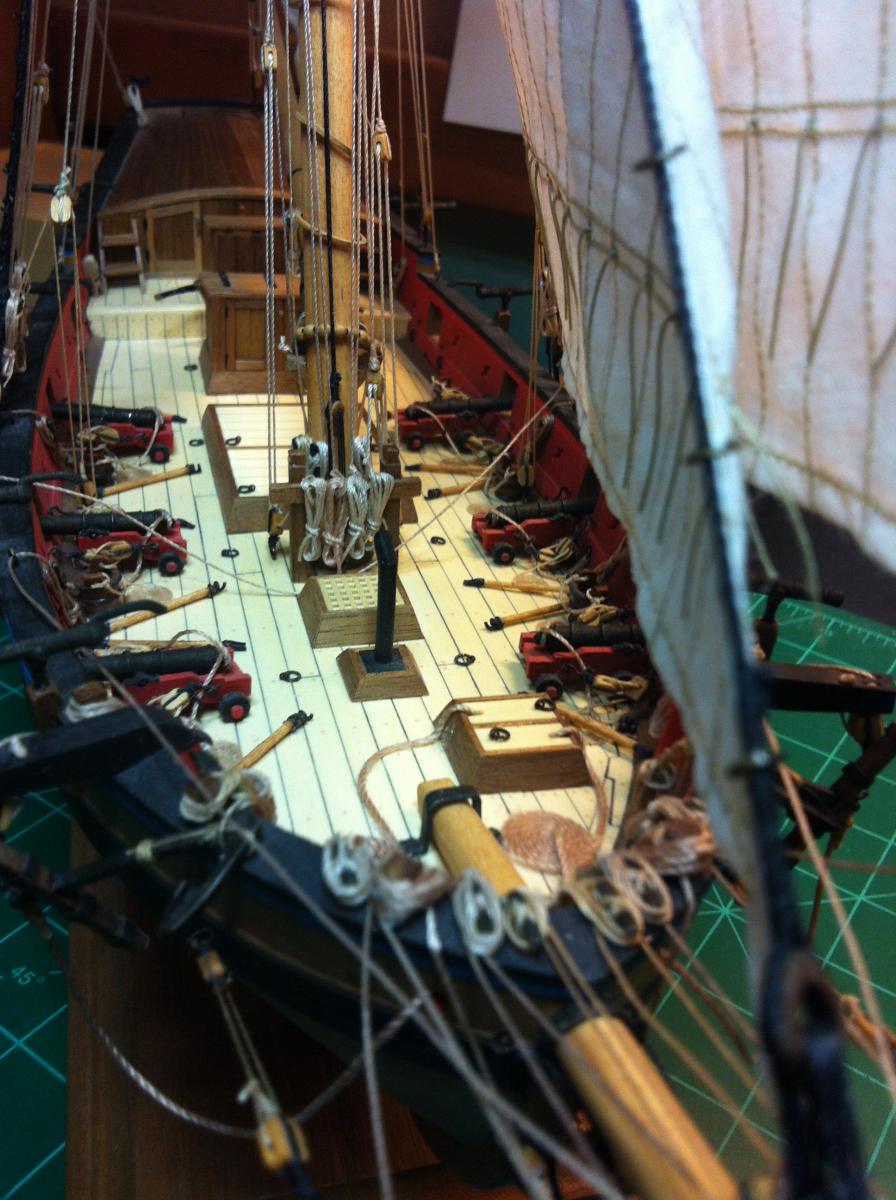
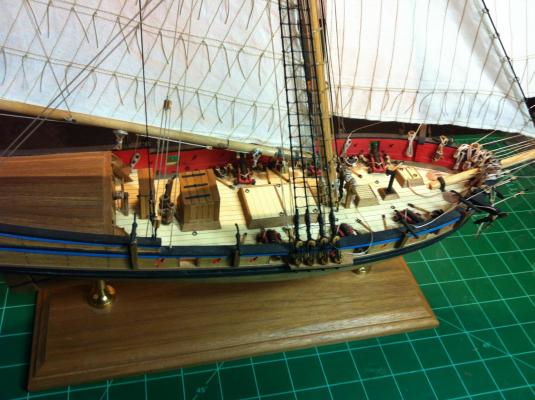
Complete! The armed privateer "Emma" is ready the become the scourge of English merchant shipping. 2 1/2 years to complete, who knows how many hours? Below are a couple quick shots, I plan to setup a better photo shoot when able, right now the next couple weeks are really busy with moving to a new house, so I finished her just in time. Ken


- 110 replies
-
- 9
-
-
- armed virginia sloop
- model shipways
- (and 2 more)