


Beef Wellington
-
Posts
2,245 -
Joined
-
Last visited
Content Type
Profiles
Forums
Gallery
Events
Posts posted by Beef Wellington
-
-
Stergios, 2mm blocks would probably be best, but no-one supplies double blocks in a 2mm size, 3mm is the smallest I could find. Also different manufacturers seem to measure their sizes differently. I stuck with Caldercraft for consistency. I bought a 'block sander' from Model Shipways, basically it acts like a rock tumbler and should take of the sharp edges, this also has the benefit of making the block look smaller. I'm still experimenting but will post a pic when I can.
-
Hi Stergios, yes, I think we're on our own on that, although there seem to be plenty of references. I ordered some extra blocks and copper ringbolts to allow them to be rigged more fully (3mm double and singles which seem to be that smallest doubles that can be found), Jim has some good pictures of the ones he has rigged. I'm still debating on how I want to approach this but hope to have some pics soon.
-
I'm glad people are starting to have the foresight to try to save these historically significant ships, so many have been lost. I know the Unicorn Trust is also looking to secure lottery funding which I pray will be forthcoming, HMS Unicorn is also getting in a bit of a sad way and I hope people come to their senses before she gets beyond a point of no return. For those not familiar with the ship, she was placed into ordinary immediately after completion and has never had masts stepped, as such, she is arguably the most original of all the sailing ships in existence.
-
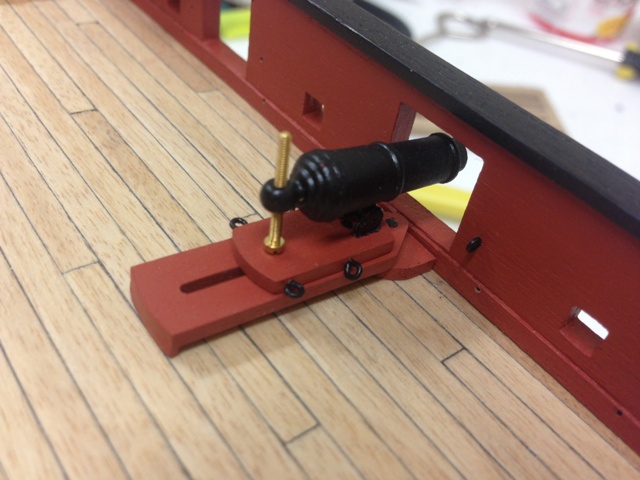
Not much progress unfortunately, but starting to seriously think about getting the 'great guns' started. Finally managed to (nearly) complete one of the carronades and am posting just so others can see what the aftermarket Caldercraft carronades look like. Despite my trial attempts and desire to blacken the carronades (could only get "Blacken-it"), I decided to paint them as I found it next to impossible to get a consistent tone with all the various metals needed to build up the carronades, some smaller parts would only go brown - I tried all the recommended chemical/physical cleaning methods together with varying dilution %'ages. In the end I just had to admit defeat this time round and will add this as a challenge for a future build. Only 15 more to go plus two cannons....
Couple of things that I'm a bit confused with:
- There aren't any wheels or training tackle attachments - I can't find any similar photos or drawings but I'm assuming CC did their research on this, would these have just been moved with handspikes?
- There is no breaching ring on the cascable - again this seems to be an omission (?). Will probably just wrap the breech rope around the neck unless there are any suggestions for adding these (I'd be more happy if there was justification for not having to add

I've ordered the some additional 3mm double and single blocks and also bought a block sander from Model Shipways, it seems to do a nice job rounding off the square edges of the blocks and making them appear smaller as the large size of the 3mm blocks seems to be a common comment by others.
I've also ordered some 0.1mm line and was going to consider using this for the line, but it may be too fine. Otherwise I'll probably go with the supplied 0.25mm line.
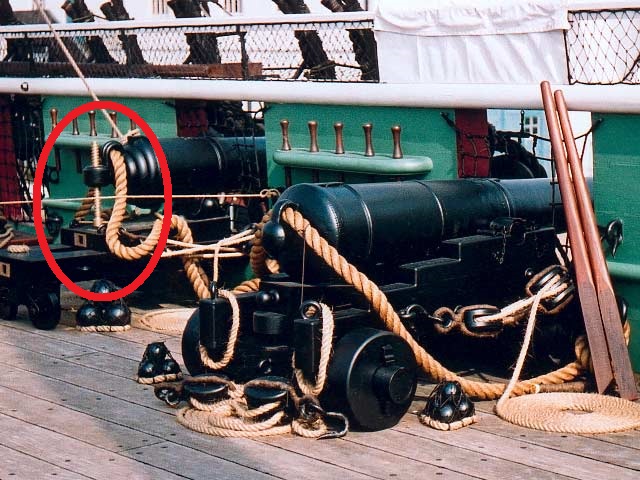
Lastly, was going to solicit some opinions. The elevation screw in the picture I've left as bare brass (mainly as I was waiting until all were mounted before painting so I could get consistent elevation for the carronades), but then I came across this picture of a carronade on HMS Trincomalee which shows the same shiny elevation screw (circled in red). Got me thinking that it may be OK to leave them unpainted, although it could be a bit over the top so may just try to chemically blacken a touch to take the shine off.


-
Carl - I'll think I'll put off the photo-etching of my own letters to a future build! I have enough going on with just the kit
-
Hi Mobbsie, looking forward to seeing how your gunports turned out, I must say it the process sounds a bit harrowing!
-
Very nice Ray, she certainly has some nice lines and seems to be a big girl! If you ever have a moment, I'd love to see a picture with Diana next to your Pegasus to get a sense of the difference in size.
-
Nice work on the guns Timmo. I think these are going to be the death of me on my Snake as there are 18 of them and I'm just trying to figure out the rigging aspects. Curious on your blackening method whether you tried diluting with hot water to see how that played out? I must confess I wanted to use the blackening approach but I just couldn't get a consistent finish with all the different metals involved in the carronades, yours are looking very nice and the rope work looks great. Which part of the cannon carriage did you 'pin'?
-
Skippy, lovely build you have going there, especially like your use of the maple. I'd have to agree with BE on the copper plates, you look to be well short and I suspect that a call to Jotika would be in order, they may send to you for free. On my Snake I certainly had more than 15 mistakes and was still able to complete it just fine. A break from the coppering while waiting may not be a bad thing!
-
Jim, Smitty - thanks, I have your Pickle on my 'to read' list which I promise I'll get to soon.
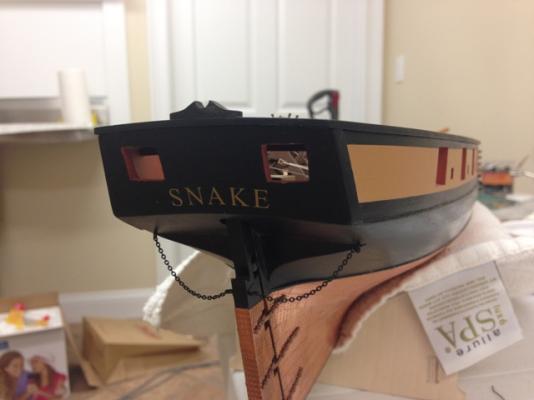
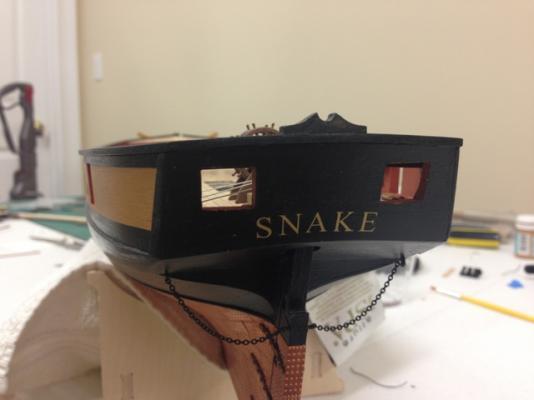
Seriously, those dry rubs do look better than the brass etched supplied versions, not least because the names on British ships were also painted on rather than stuck on in relief. I think the dry rubs give a more period look to a model, It is a pity that letraset don't do a greater range of fonts and letter sizes.
Definitely agree BE, unfortunately the Snake kit doesn't even come with the photo etch letters as an option which I've seen in some of the other builds, so its this or nothing it seems.
-
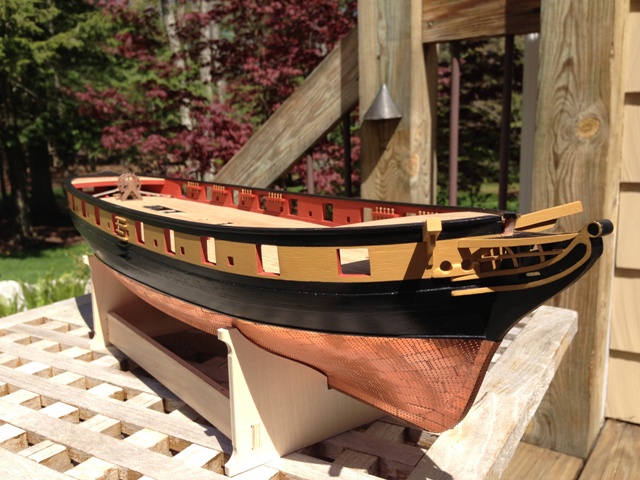
Had a naming ceremony! Credit for this goes to Blue Ensign whose excellent approach on his Pickle build I poached for applying the lettering, which are letraset 5mm gold Times New Roman dry rub transfers. Easy to apply, but alignment is a bit tricky - looks better in person for some reason. I tried to get the letters to follow the curve of the underside of the stern.
-
Yes, I think I saw one in one of the scratch builds. Don't recall which.
I think Danvad just installed these on his Vulture build.
-
Hi Stergios, just to confirm - yes, diluted PVA glue is the way to go. You can dry assemble the grates (which I found very fiddly) and then use a cheap brush to soak the dilute PVA glue in - seem to recall I used about a 50% dilution. When dry assembling I found that if you put the pieces on some tape, it helps hold things together until you can glue. Also be careful to ensure they are 90% corners, I needed to redo one or two as they had slipped, but I simply soaked in rubbing alcohol and then re-glued - very easy to fix once you know how.
-
Hi Jason,
do not say to me that I should buy rather two (than one) extra ships wheels....

The replacement wheels come individually in a pack so you would need 2, I hope I didn't suggest anywhere only one was needed, if so I apologize.
-
-
Hi Len, looking forward to seeing more progress, I loved following your Bellerophon's progress before the great crash. Thanks for reposting.
-
Very nice solid start Pierre, nearly as nice as your Chimay...a perfect combination! You mention realigning the gunports, is there something you would have done differently if you had to do it again? I'm curious as I would love to tackle this ship in the future.
-
-
-
You know, you may have a book in the works here

-
Great info Dave, very interesting. I would agree that there is an opportunity for Caldercraft to offer such a kit that would make it easy to model any one of the Cruizer class - it seems the later Cruizers had the caronnades and often had the fore and aft platforms (paintings of HMS Pelorus illustrate this when she grounded, and interestingly she was ship rigged for a period as well which suggests that masting changes may have been pretty common). Looking forward to the next installment.
-
Hi gunslinger, just found your log. Your Badger is coming along very nicely, look forward to more progress pictures.
-
Appreciate your motivating comments chaps!
Robert - coming from you and what you've done with your Mars that is high, probably undeserved praise. I can only aspire to what you've acheived.
Jean-Pierre - thanks for stopping by and the kind words. I did my best to ensure the chains were symmetrical and they look fine in person, however they never quite seem to look look right in photos, must be because of all the angles involved. I don't have a lot of prior experience, the usual Airfix plane and tank kits growing up, and of course HMS Victory (think it was 1:180). My last complete model was 20yrs ago,1:96 Revell USS Constitution, I was happy with it at the time but I'm sure if I looked at it today I'd see a lot of things I'd want to do better. I started the Billings Bounty 15 or so years ago and really got no further than the framing as instructions were poor and I couldn't figure out the basic planking and failed horribly! It wasn't until I found MSW that I got the courage to try again with the wonderful support and help from its members that really helped de-mystify the hobby.
Carl - I built the table for practice

Jim - I'm with you on the Carronades, this seems to be the next 'daunting' task which I wan to get started on soom
-
M - thanks for watching over my shoulder
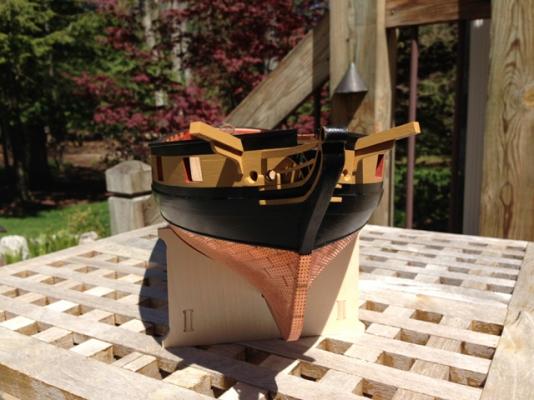
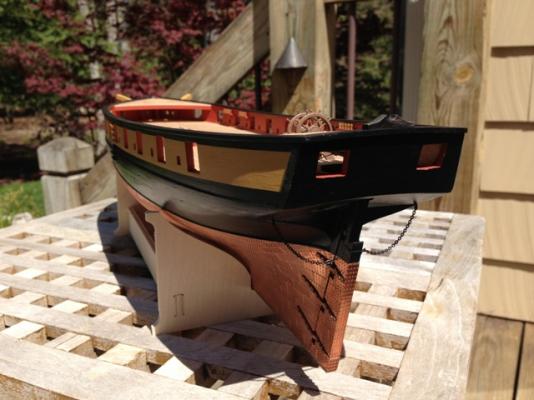
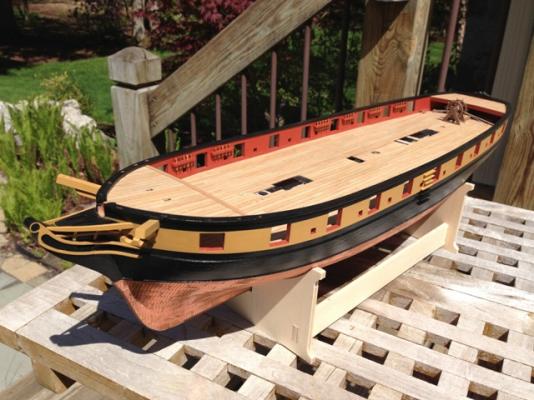
When you have a chance, perhaps an overall shot showing the recently installed capping rail throughout?
Robert, here you go, hope you're not disappointed...she had her first trip outside for some beauty shots. The Snake doesn't have the most beautiful lines of the other ships on here (Mars and Pegasus esp.), but maybe a certain "utilitarian elegance".

- chris watton, freewheelinguy, Sjors and 4 others
-
 7
7


HMS Snake by drtrap - Caldercraft
in - Kit build logs for subjects built from 1751 - 1800
Posted · Edited by Beef Wellington
Stergios - think you have a couple of options, taking the stain approach you suggest but you can only be the best judge of whether you are happy or not. Something to consider would be to paint it black which would also be a valid approach.
I think ther blocks you reference are only available from the person who manufacturers them and not through retail stores, would love to see them if you decide to buy them. They look very nice, but they aren't cheap!