HOLIDAY DONATION DRIVE - SUPPORT MSW - DO YOUR PART TO KEEP THIS GREAT FORUM GOING! (Only 66 donations so far out of 49,000 members - Can we at least get100? C'mon guys!)
×


KenW
-
Posts
1,231 -
Joined
-
Last visited
Content Type
Profiles
Forums
Gallery
Events
Everything posted by KenW
-
 I admire your work on both the guns and the rudder. Does the method you use let the rudder move from side to side? Really impressive.
 -
Landlubber Mike's technique for furled sails
KenW replied to Landlubber Mike's topic in Masting, rigging and sails
Having put furled sails on my Fair American model, I thought I'd offer my two cents. I used the Amati sail cloth after putting it through the washing & drying cycle 2 or 3 times. I also cut the sails so that while the were the proper width, they were about 50% shorter. I eliminated the reef lines and bow lines. I used Peterseen's and Lees' books and learned a lot about the different lines and the location/position of the blocks to rig them. It was a great learning experience. You can refer to my build log for more details. Cheers. -
Thanks Mike. I see you are building Chuck's Cheerful as well as the Mayflower. I can't comprehend building two models at once. Anyway I will follow both. Cheers.
- 481 replies
-
- 1
-

-
- rattlesnake
- model shipways
- (and 1 more)
-
Thanks Captgino. I can't say how many hours it took; but it was 19 months. Of course, as usual, a lot of 'life' happened during that period. Cheers.
-
Well - I'm on my last day of a vacation in London, UK and have just checked my email and the MSW site. It seems a lot has happened while I was away. In answer to 'jurjisnemickas' original question, I'm not aware of a model with full sails set except for the original model in the Annapolis museum. My model has the sails furled and there are no stay sails. As to choosing the best model for a first time builder, the key issues are: For the Fair American - the scale is 1/4 and therefore a bit easier to work with. However, the rigging plans are very poor and a lot of research will be needed in order to get an acceptable model. For the Syren - the scale is 1/64 and therefore slightly harder to work with. But, as mentioned, the plans and instructions by Chuch Passaro are of the highest quality. As Augie says, if you have the dexterity and the "desire and patience", the Syren should be fine. But you have to make the choice. And I, personally, can't imagine working on three models at once. Good luck. Cheers from over the pond.
-
I put the question of a Black Strake to Chuck in and email. His reply: "I would say yes...But I am not sure how thick it would have been. Sometimes they were the same thickness as the planking above it and although starting out thicker they gradually become the same width as the plank above the black strake. But I would probably add one in the traditional sense. Chuck"
-
Thanks Augie.
-
I have a question - on my two previous models, there was a black strake immediately above the wales. Yet the Rattlesnake documentation does not seem to mention one. Should there be a black strake? Did all (most) boats at the time have one? Thanks.
-
Thanks for the comments. I wasn't thinking about making those buckets. They look to be really small. Salty Dog did a fantastic job on them. Kudos to him!
-
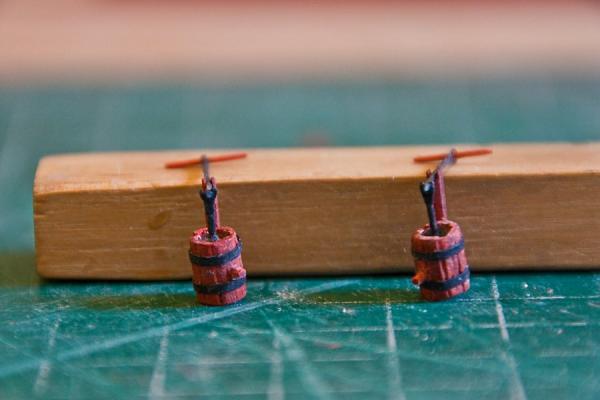
Hey Jon. Yes, they are individual slats of redheart. They are glued around a dowel. Black artist's paper is wrapped around to give it a barrel look. Cheers.
-
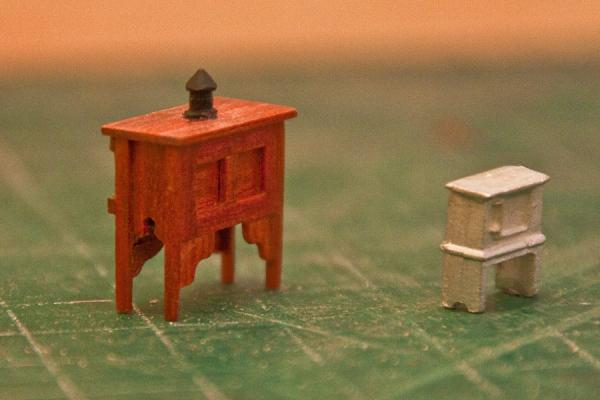
Thanks Augie & the 'likes'. I really don't like the dye cast deck furniture.
-
I scratch build two bulge pumps based on the Hann and Campbell plans. I made sure that the size of them were as per the plans. They aren’t balanced too well but when they are placed on the model I will pin them. Attaching the wires was challenging. I had to flatten the wire and then either notch the flat part, or drill a hole in the flat part. But it all worked.
- 481 replies
-
- 5
-
-
- rattlesnake
- model shipways
- (and 1 more)
-
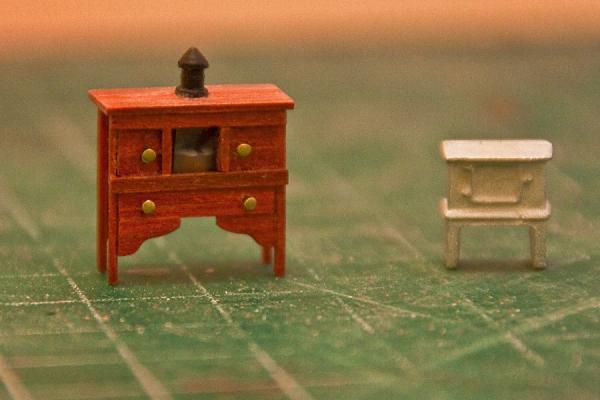
Hey Jon. Thanks for your comment. My binnacle is fairly close to the size on the Hann plans. The overall width is 1/8 inch wider, and the height is 3/32" higher. I guess my captain has a bigger compass. Cheers.
-
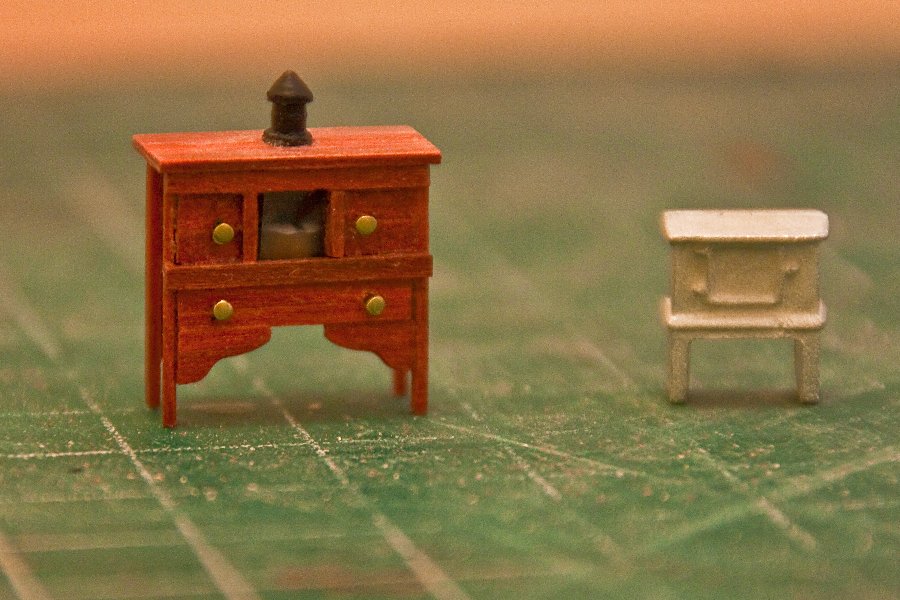
I’m ready to start planking above the wales, but the order of boxwood I made specified the wrong size. So I have to wait for a new shipment. While waiting, I decided to work on some deck furniture – first up is the binnacle. I didn’t like the dye-cast metal binnacle provided by MS on the Fair American, and the one provided with the Rattlesnake is no better. So, again, I made my own from scratch. I tried to model it after the one shown on Plate 1 of the Hann plans. I added a smoke stack as seen on the Campbell plan because I like its look. Next I will attempt the pumps.
- 481 replies
-
- 13
-
-
- rattlesnake
- model shipways
- (and 1 more)
-
Thanks Augie. I'm not worried about taking the hull in the car to NJ. However, I have a well designed contraption for when taking the completed Fail American to the club meeting in this past March. Cheers.
- 481 replies
-
- 1
-
-
- rattlesnake
- model shipways
- (and 1 more)
-
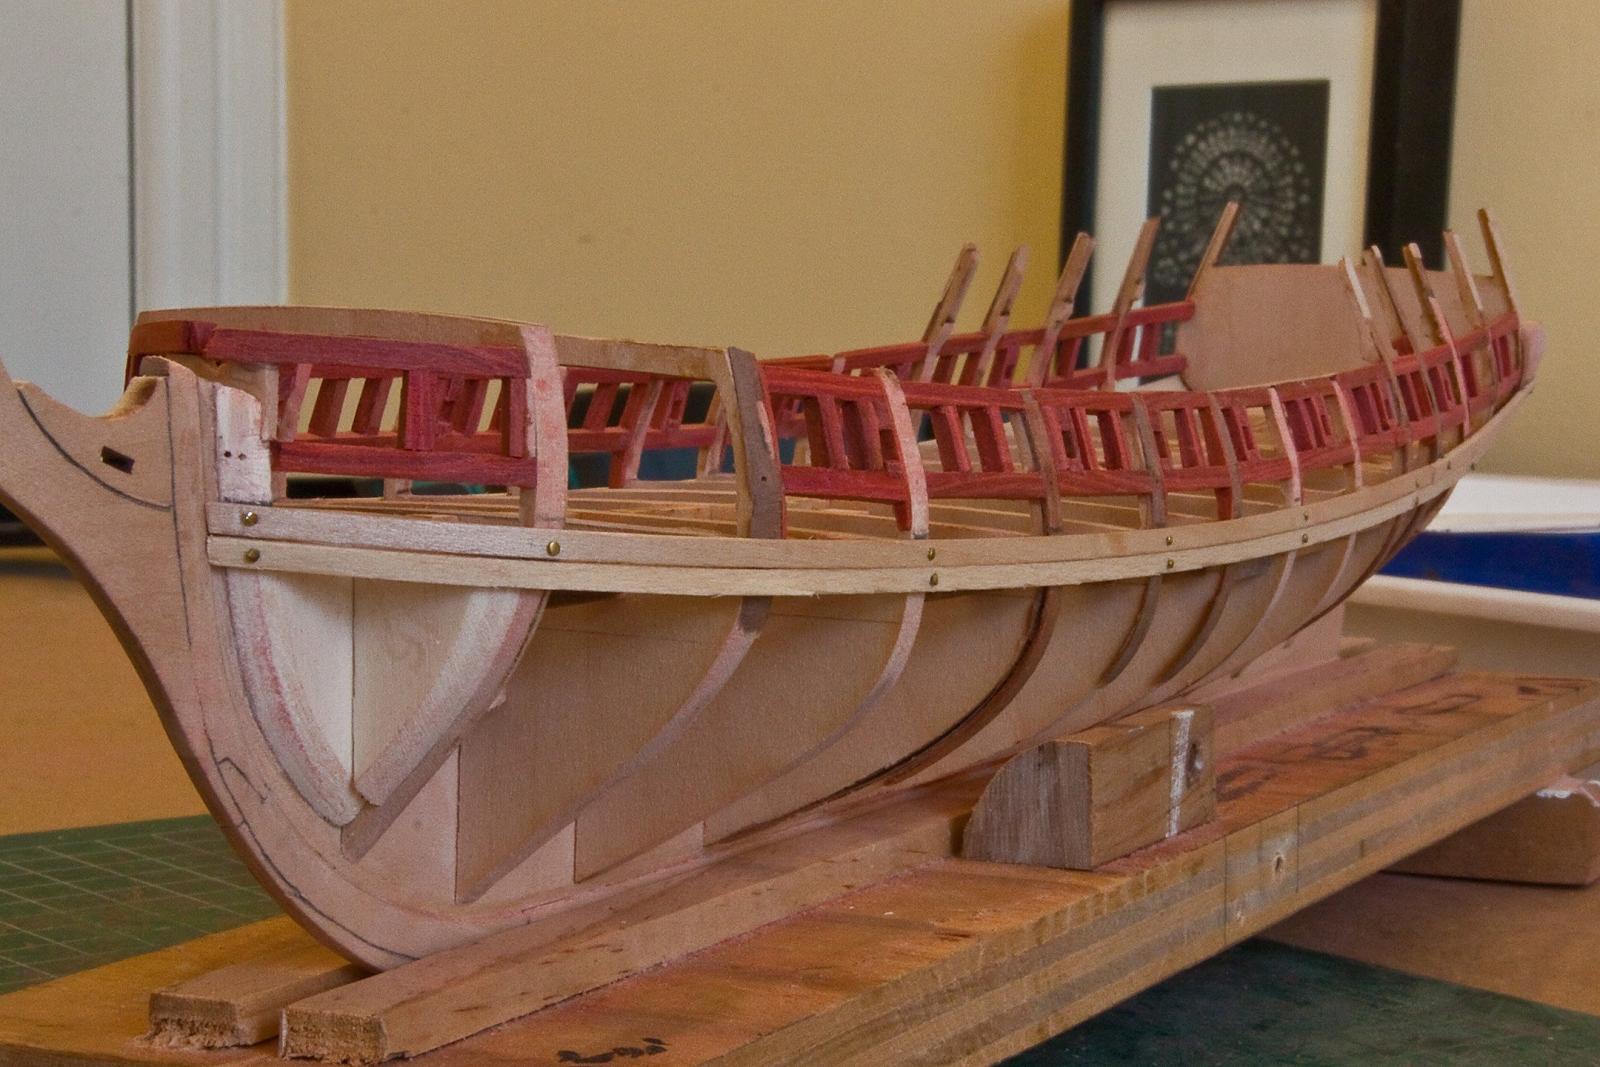
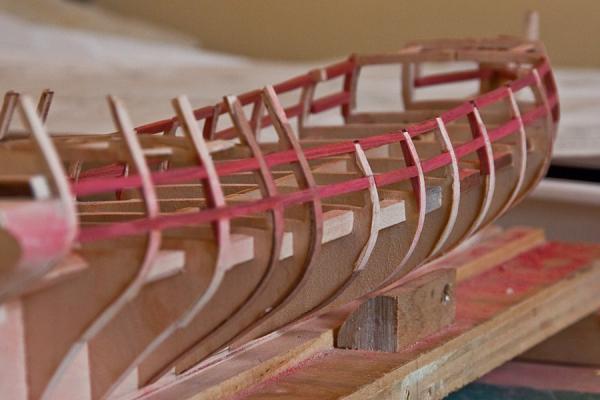
The gun ports have been framed with Redheart wood form Crown Timberyard. Their wood is excellent. I also pinned two strakes for the wales. I want to make sure that I have their precise location correct. And, since Tuesday’s meeting at my ship model club is, “Bring a Model Night”, I will bring the model so I can get feedback from the guys in the club. I’m worried that the final positioning of the wales, as well as other parts of the hull, are based on whether they ‘look right’. I don’t know if I have that much confidence in ‘my eye’. In the meantime, I’ve started making deck furniture. You can see the red hue from the Redheart wood.

- 481 replies
-
- 6
-
-
- rattlesnake
- model shipways
- (and 1 more)
-
Well, I'm going to have everyone to realize how much of an idiot I am. I found the definition of a sheer as, "the upward sweep of the deck or bulwarks of a vessel". So, are you saying that the bottom (or top) of the wales goes from the level of the deck at the stern and stem, down to the water line at the middle of the vessel? And the curve must "look right"? Thanks.
- 1,051 replies
-
- 1
-
-
- cheerful
- Syren Ship Model Company
- (and 1 more)
-
Chuck: Your model has all the qualities that we should be striving for. But, I have a question - On my current model, I'm almost ready to begin planking the outer hull. What is the best way to locate the bottom edge of the wales when there are no laser etched reference marks on each bulkhead? My kit, and I suspect most kits, don't have these helpful marks. Thanks.
- 1,051 replies
-
- 1
-
-
- cheerful
- Syren Ship Model Company
- (and 1 more)
-
Thanks for your reply. I don't know too much about varnish; most modelers seem to use "Wipe on Poly" as their finish. I used that on my last build and am planning to use it on the Rattlesnake. There might be an issue of using oil products on acrylic products. Note that I will be painting the wales and other parts black. Cheers.
-
Hey Scott. I also put furled sails on my last model. I found that they folded better after the cloth was put through the washing machine a couple of times. I found the whole process annoying, but the result very rewarding. Cheers.
- 264 replies
-
- 1
-
-
- rattlesnake
- model shipways
- (and 1 more)
-
Thanks Scott; and augie, russ and rafine for the 'likes'. It will all look better once it's planked. Cheers.
-
I completed the horizontal framing of the gun ports. And I think the line of the lower sills looks good. The top of the upper sills aren’t sanded yet and the insides are not faired. And, I may still make some modifications once the vertical frames are added. The wood I used is redheart since my son doesn’t want me to use any paint on the model. The color isn’t bad; although my working space is getting a red hue to it. Again the wood from Crown Timberyard is excellent.
- 481 replies
-
- 8
-
-
- rattlesnake
- model shipways
- (and 1 more)
-
Again, a time when a few 'likes' is totally insufficient. Outstanding - even by your high standards.
-
Gary: The ME directions MAY prove helpful in your efforts to understand your kit's instructions. So, if you need, my offer still stands. Cheers.
-
Hey Gary. I empathize with you. Another solution is to get the Model Expo Ship's Boat that is the right size and use it. Jsgerson's log will help you with that. Or, since the construction method seems to be similar, (I don't understand all that verbiage), if you use the MSW Messenger to send me your email address, I will send you a copy of the ME directions which you might be able to use. Just a thought.
- 50 replies
-
- 1
-
-
- benjamin w latham
- model shipways
- (and 1 more)