KenW
-
Posts
1,231 -
Joined
-
Last visited
Content Type
Profiles
Forums
Gallery
Events
Everything posted by KenW
-
 If you check out my Rattlesnake build you will see the ship's boat I made using the same method. The directions provided were clearer, however. But maynbe my photos will help you. At least I hope they do. Cheers.
- 50 replies
-
- 1
-

-
- benjamin w latham
- model shipways
- (and 1 more)
-
Right. See the drawing by Geoff Hurst of the HMS Surprise when Jack O'Brien died.
- 1,051 replies
-
- 1
-
-
- cheerful
- Syren Ship Model Company
- (and 1 more)
-
Thanks Nils and Eric. I'm considering filler blocks, and I'm worried about the area above the batten between bulkhead A and the stem. Not much to grab onto there. I will have to wait and see how the fairing of the gun port frames goes and act accordingly. Cheers.
- 481 replies
-
- 2
-
-
- rattlesnake
- model shipways
- (and 1 more)
-
Hey Gary - Good luck on your new build. Cheers.
-
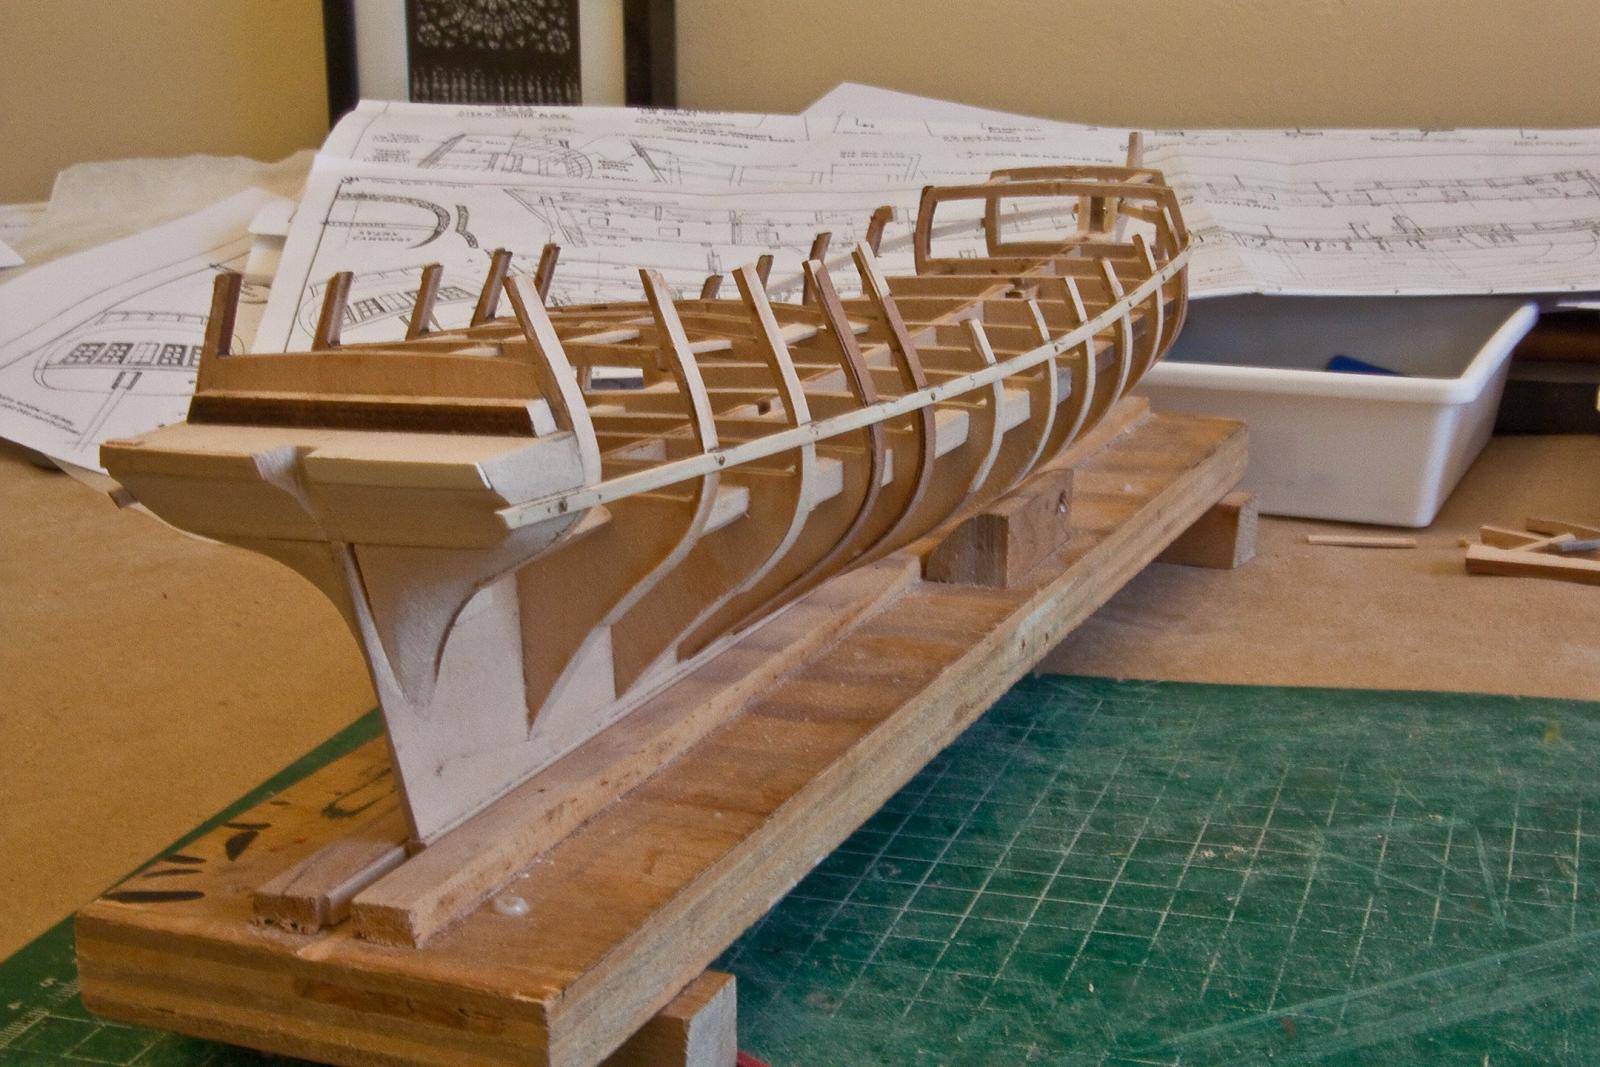
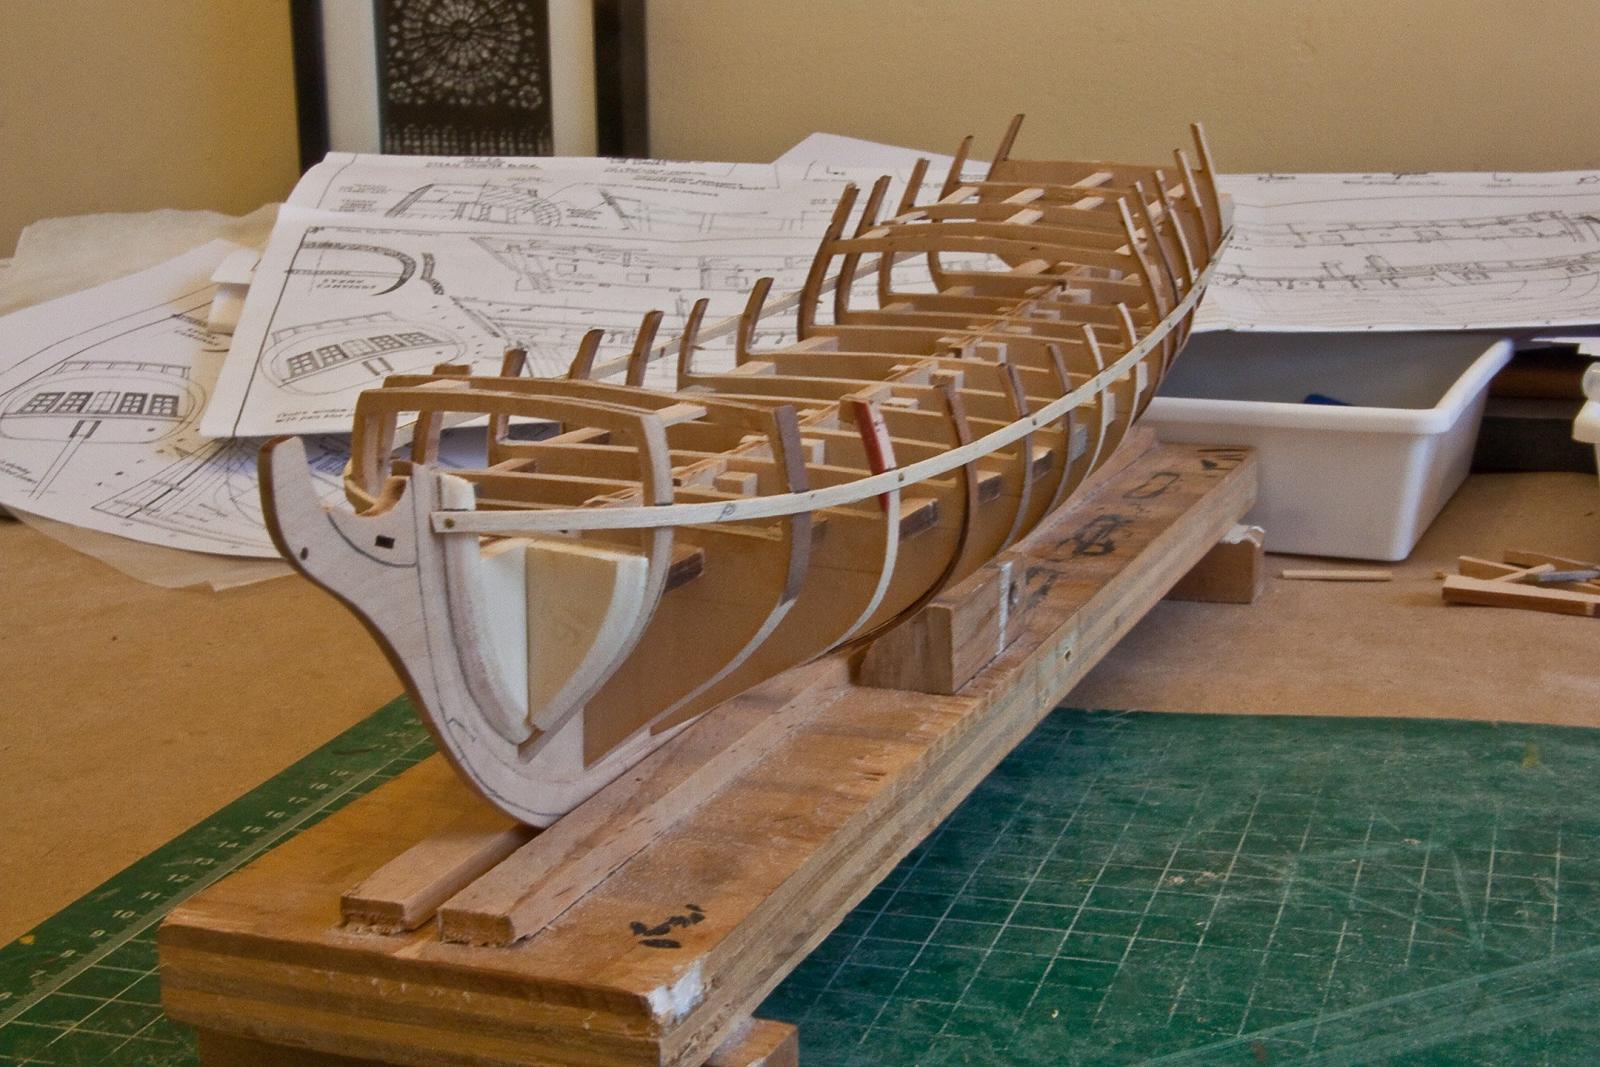
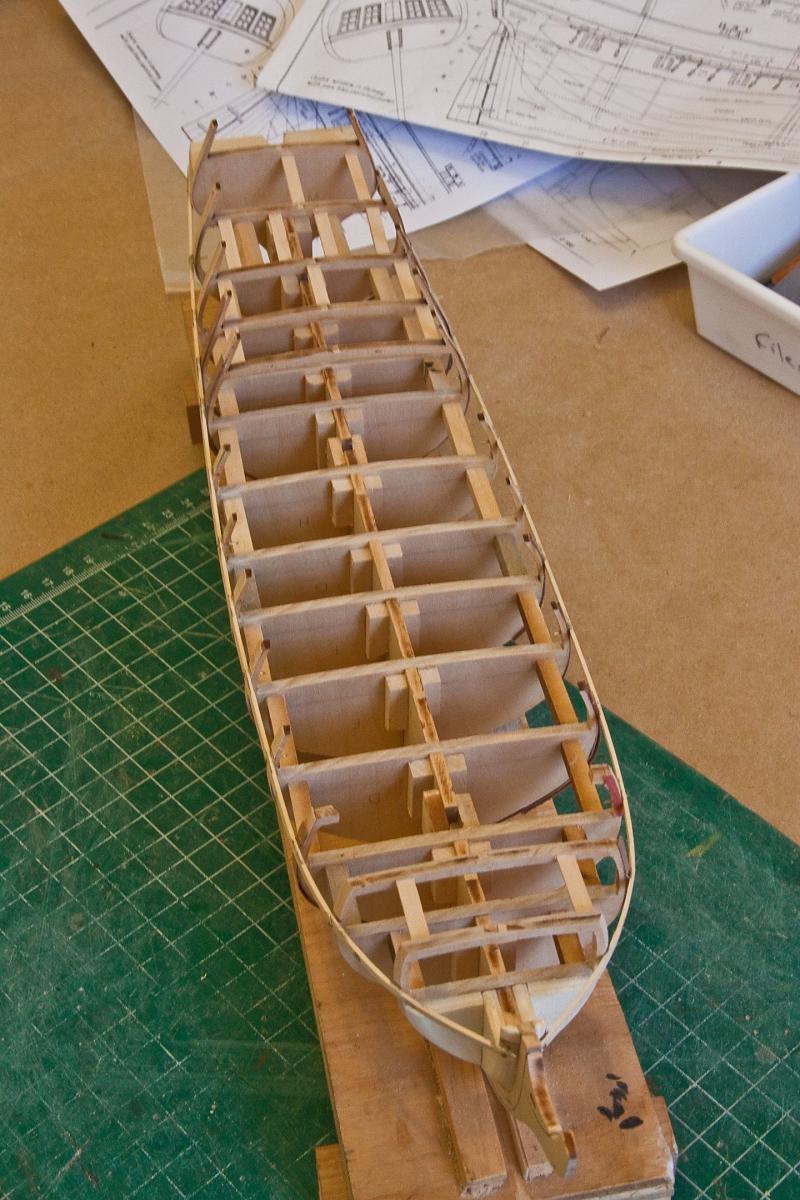
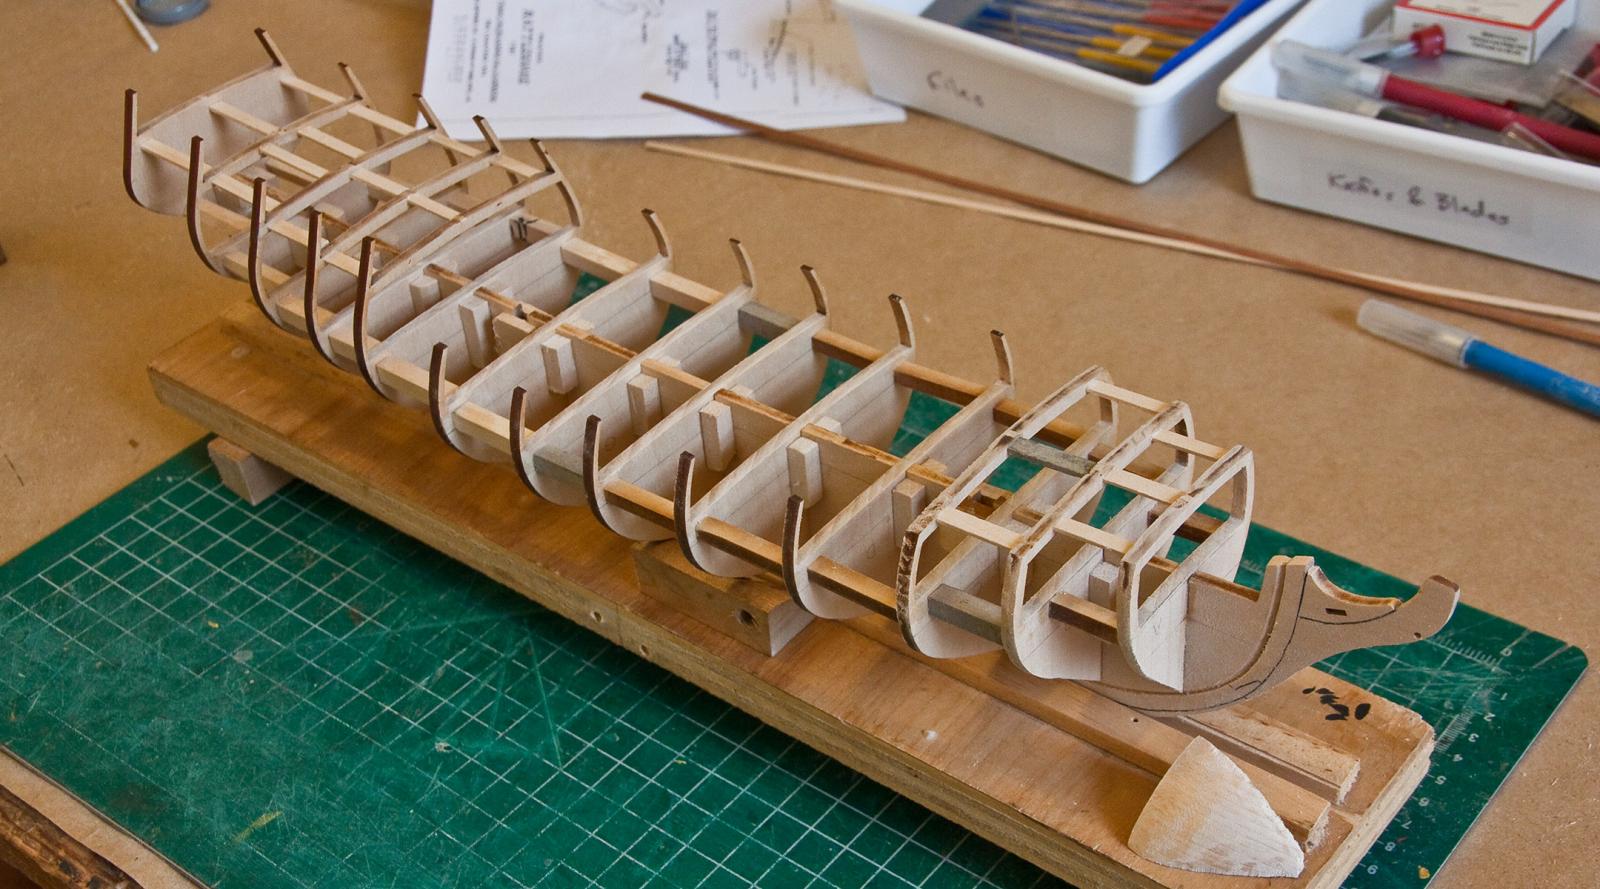
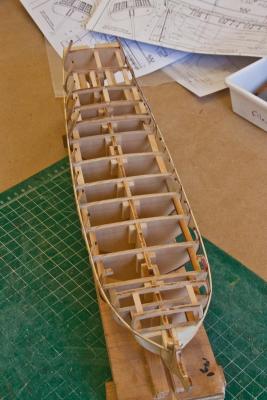
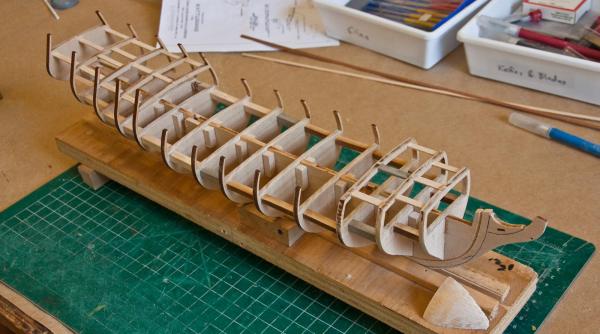
I thought I had finished fairing the hull. I began framing the gun ports; but looking at them, I thought they didn’t look right. After some questions to Chuck Passaro on his Cheerful log, I learn that the shape of the gun ports is critical. The sides must be parallel to the bulkheads, while the top and bottom must be parallel to the deck. Thus, they are not a perfect square. So I measured the distance from the deck at each bulkhead ad added a batten running the entire length of the hull. I was surprised at the result. Not only did the ‘run’ of the battens look ‘off’, but I saw peaks and valleys in my fairing. So I ripped out the gun port frames I had already completed and started the fairing process again. I now think that I have the hull faired properly and when I re-attached the battens, the run of the gun port sills looks good. I’m a bit nervous since how the ‘run of the gun ports‘ look is subjective. I can only hope my ‘eye’ is up to snuff. But it looks right to me and I will have to go with that. It seems that it is more important to look right than to measure right. Also, this model is intended for my youngest son. He doesn’t want anything painted. I told him that at least the wales would be painted black, but I would see what I could do about the rest. I obtained some redheart wood from Jason at Crowntimber, a new company trying to pick up the slack from HobbyMill’s going out of business. The wood strips are excellent and I recommend his wood. I also received boxwood, swiss pear and holly. I believe it is the same high quality as HobbyMill used to be. I don’t know that the photos show the difference in the fairing, but I hope that the ‘run of the port sills’ can be seen.


- 481 replies
-
- 13
-
-
- rattlesnake
- model shipways
- (and 1 more)
-
Great work as usual. Whenever I attempt to cut and file the square section, I can never get a proper square. The angles are always off. Do you have any shortcuts/advise? Thanks.
-
Thanks.. And also the run of the planks is not the same as the run of the port sills. And the final 'decision' is based on wheather or not it looks right. Not very objective. Yes? You have to have a lot of patience.
- 1,051 replies
-
- 1
-
-
- cheerful
- Syren Ship Model Company
- (and 1 more)
-
I've started framing the gun ports on my model and have a question. It seems that your top and bottom of the ports run parallel to the deck and the sides are parallel to the bulkheads. That would mean, on my Rattlesnake, that some of the gun ports are NOT a perfectly square. The angles aren't all 90 degrees. Is that correct? My deck rises at the bow at a steeper angle than your Cheerful. How will that affect the gun port lids? Or am I doing it all wrong? Thanks.
- 1,051 replies
-
- 1
-
-
- cheerful
- Syren Ship Model Company
- (and 1 more)
-
Thanks. We are going to make you a model kit company yet! I will be in touch.
- 1,051 replies
-
- 3
-
-
- cheerful
- Syren Ship Model Company
- (and 1 more)
-
So - my current build has 10 gun ports with lids. Will you make a small 'kit' available of the hinge setups? I know that I would be interested. Cheers.
- 1,051 replies
-
- 1
-
-
- cheerful
- Syren Ship Model Company
- (and 1 more)
-
Where does one get a tube so small (.7 mm O.D. and .5 mm I.D.)? Thanks.
- 1,051 replies
-
- 2
-
-
- cheerful
- Syren Ship Model Company
- (and 1 more)
-
After seeing your model last night, I was happy to discover your build log. So, I will be following along. Cheers.
-
I just wondered after seeing your latest - How will you be creating the hole for the rudder? I realize you will need a hole, but what is your technique? Thanks.
- 1,051 replies
-
- 1
-
-
- cheerful
- Syren Ship Model Company
- (and 1 more)
-
Great work as usual. I guess the rails are supposed to be black. I like the look of black rails with the edge (where us used 1/16 x 1/16 scraped boxwood) either painted yellow. Or using boxwood or holly. Anyway, your wood working skills are second to none. Cheers.
- 2,191 replies
-
- 2
-
-
- confederacy
- Model Shipways
- (and 1 more)
-
Great work on the main stay. I always use the cone method, but I like the way the seizing looks. Good idea. Making your own hearts looks to be a good idea as well. Cheers.
-
As I've said before, your model is looking good. I think you've just got some coils to go. Cheers.
-
Hey Scott. Just checked out your log and your model looks great. I hope I can to as well. Cheers.
-
Thanks Scott. I've been following jsgerson's log and have pretty much decided to go with the Hahn plans. Hahn seems to be the 'go to' source. Thanks again. Cheers.
-
The bulkheads have been glued and I’m in the process of fairing the hull. I’m taking extra time with the fairing since it creates the foundation of the entire build. I added braces between each bulkhead for added strength. However, even with the braces, I’m having problems with breakages in the stern and bow area. Also, I have to decide how I want the stern transom to be built. The kit supplied one, with the windows pre-cut, is not the same shape as on the Hahn plans. Decisions, decisions, decisions.
- 481 replies
-
- 11
-
-
- rattlesnake
- model shipways
- (and 1 more)
-
Gary: Your model looks really good! I like the photos on that blue surface. Looks like its out on the water. A very excellent job.
-
WOW! Thanks. I was wondering about using the "water line" from the plans. This is a much better idea. Cheers.
-
Thanks Jonathan. While I probably won't leave comments, I will definitely ask questions. Right now I'm gluing the bulkheads and getting ready for fairing. How did you determine the location of the port sills? Cheers.
-
Thanks Jonathan and Gerty. Jonathan: I have been following your Rattlesnake build with interest. You are way ahead of me so when I read your early postings I don't leave comments since I realize you are way past where I am. But keep up the good work. Cheers.
-
Hey Eric: I have to get some of the putty. I looks really good. Definitely adds to your excellent model. Cheers.
-
Eric I also am a veteran of two models. And, so far, I have learned not to rush the 'foundation' of the model. The other thing I learned is to always listen to Russ. Cheers.