
HOLIDAY DONATION DRIVE - SUPPORT MSW - DO YOUR PART TO KEEP THIS GREAT FORUM GOING! (Only 20 donations so far - C'mon guys!)
×


Maury S
-
Posts
1,490 -
Joined
-
Last visited
Content Type
Profiles
Forums
Gallery
Events
Everything posted by Maury S
-
 After watching Ed Tosti's Young America build, this one seems so bereft of lines. I think I may add some of the running rigging. At least I won't have to tie a thousand ratlines. Maury
- 525 replies
-
- 4
-

-
- anchor hoy
- hoy
- (and 1 more)
-
Admitting that the time to make a jig is less than the inevitable frustration of doing without is key. I can't tell you how many times I've copied your tools and jigs. Maury
- 3,618 replies
-
- 4
-
-
- young america
- clipper
- (and 1 more)
-
The next question on The Big Game Show is: "What is the eyebolt at the end of a gaff called?"
-
Thanks all. Maury
-
I need assistance on the rigging of a gaff flag halliard. Grice's drawing (see https://modelshipworld.com/index.php?/topic/13002-anchor-hoy-by-maurys-pof-harbor-craft-c-1825-148/) He shows a faint line from near the end of the gaff down to the deck area but it is not clear how it belays. There are lots of other lines missing from the drawing. Would a harbor craft even have a flag? If so, there would be a block at the end of the gaff with tails coming down to the deck somewhere. I've seen rigging plans where the tails of the halliard are tied off to cleats at the transom (two cleats, one to each side). I assume the flag would be attached to the halliard with a tail to bring it down. Also with this method, the halliard would have to be undone during a tack. Another way would be to have it cleated to a pin near the end of the boom. Solves the issue with tacking. would it have been a continuous loop? Thanks in advance for any comments. Maury
-
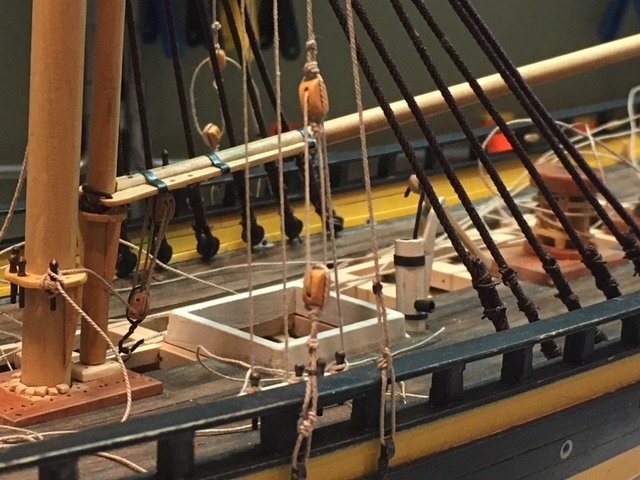
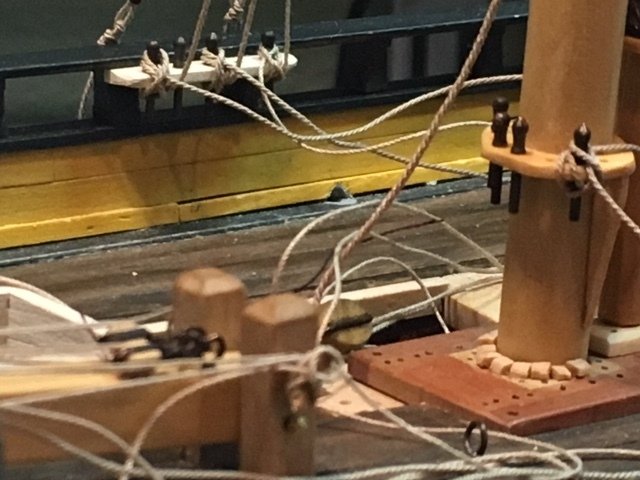
I spent some hours belaying various lines, cleating lines to pins, etc. It's tough cleating off a line with a couple of tweezers some times, only to find it wasn't a fair lead and has to be redone. The starboard pin rail holds the topping lift, the throat halliard and the backstay tackle. The lines are belayed with no empty pins in the rail as they get in the way of tying off the lines. After belaying one, the next pin goes in for the next line. Coils will go on later, Maury
- 525 replies
-
- 9
-
-
- anchor hoy
- hoy
- (and 1 more)
-
Some wire labeled as "copper" I've bought (I think "Artistic Brand"...the beading stuff from Hobby Lobby) was strongly attracted to a magnet. Maybe that's OK for strength but if you clean it too much and take off the copper coating, it won't react like copper to LOS. I'd love to find more of the flat wire I have (.019" x .029") but I don't know where I bought it long ago. Maury
- 3,618 replies
-
- 3
-
-
- young america
- clipper
- (and 1 more)
-
Knots or hitches; what is appropriate?
Maury S replied to Maury S's topic in Masting, rigging and sails
This is pretty clear Maury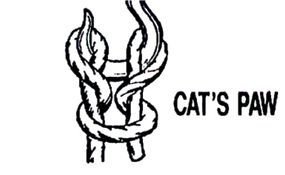
-
Ed, Will you share your source for copper wire? Thanks Maury
- 3,618 replies
-
- 3
-
-
- young america
- clipper
- (and 1 more)
-
Knots or hitches; what is appropriate?
Maury S replied to Maury S's topic in Masting, rigging and sails
Thanks Frankie. -
Knots or hitches; what is appropriate?
Maury S replied to Maury S's topic in Masting, rigging and sails
Further research indicates a "Cat's Paw" knot is what I'm looking for. M -
FYI, all the rigging rope and the blocks were provided by Syren Shipmodel Co. https://www.syrenshipmodelcompany.com/ The sizes were taken from the Cheerful plans since she's about the same size and same general time period. That list (it's on the plans if you bought them) was very helpful. Maury
- 525 replies
-
- 2
-
-
- anchor hoy
- hoy
- (and 1 more)
-
What is a recommended knot or hitch for connecting a line to a hook? I am dealing with a block and tackle used to pull up a lost anchor. I know the hitch to use to connect the "leader" to the anchor cable. What knot or hitch would be used to connect the leader to the hook of the block? Maury
-
Thanks for all the comments and "Likes". Ed, the serving machine was copied after yours and modified last year using Chuck's design for the take-up and the handles. I've tied cables to the anchors and have mastered the anchor hitch. There are lines scattered all over that need to be cleated off and tightened up. Maury
- 525 replies
-
- 13
-
-
- anchor hoy
- hoy
- (and 1 more)
-
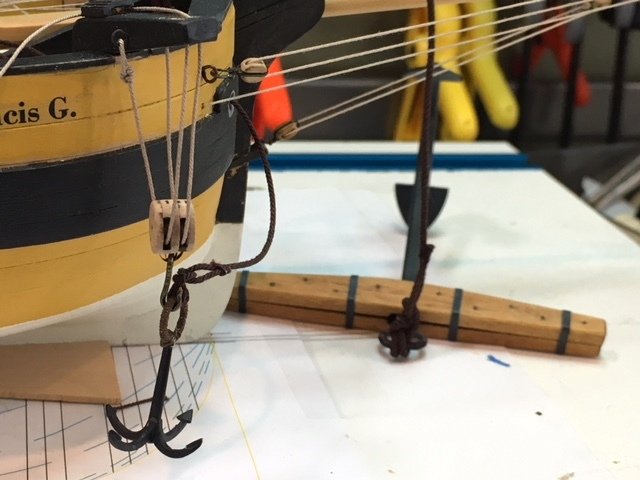
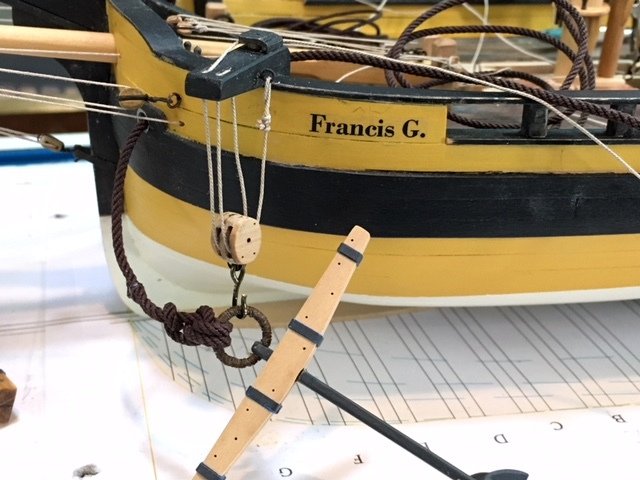
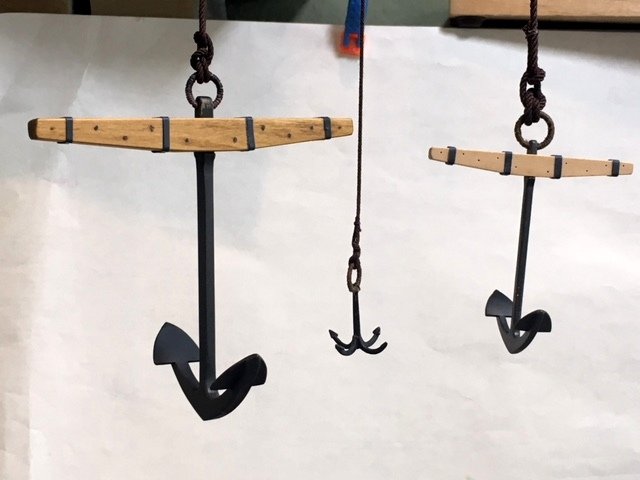
Working on "fiddy" stuff. The three anchors for the boat are tied to cables. The largest is the "recovered" anchor, the grapling anchor for finding and hooking onto a cable. Maury
- 525 replies
-
- 12
-
-
- anchor hoy
- hoy
- (and 1 more)
-
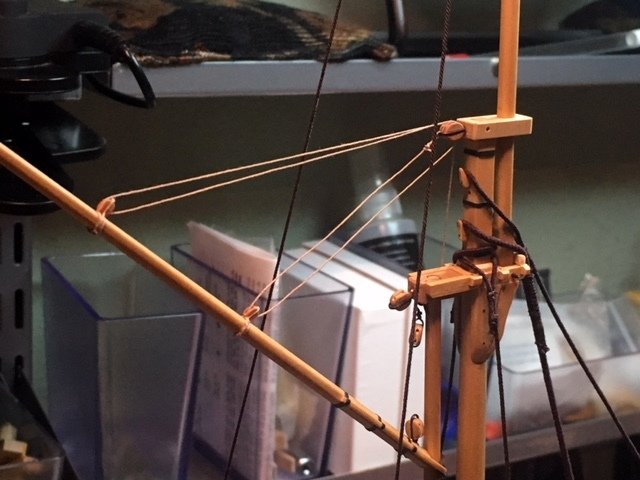
Working on the rigging. The spenser mast has been put in place (which means the boom and gaff were installed). Blocks have been tied to the gaff and loosely rigged. Pardon the background "noise". Maury
- 525 replies
-
- 9
-
-
- anchor hoy
- hoy
- (and 1 more)
-
The Fair American (Lauck Street) kit used cherry for the frames. It's been about 7 years since I finished it and the wood has aged beautifully. Maury
- 607 replies
-
- 5
-
-
- winchelsea
- Syren Ship Model Company
- (and 1 more)
-
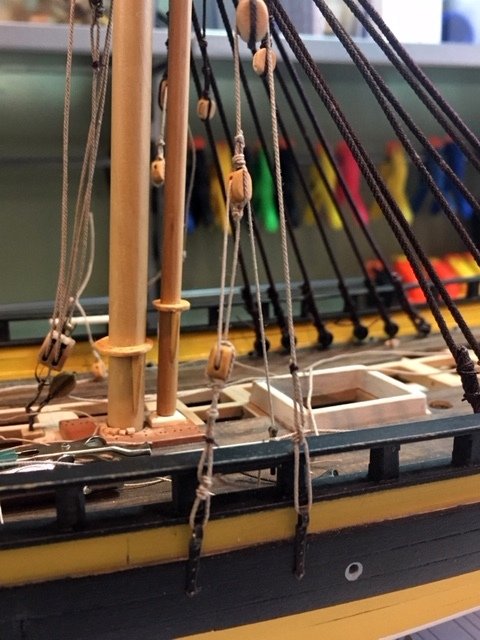
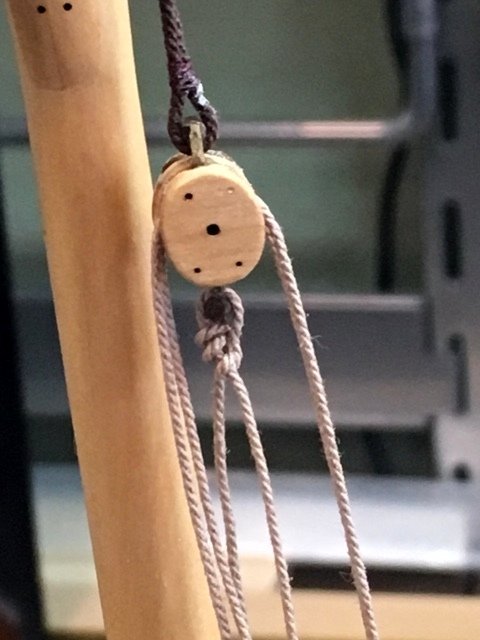
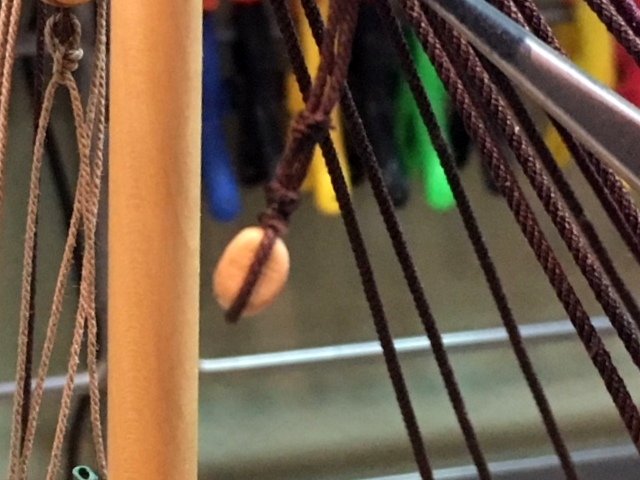
More rigging. Working on the running (main) backstays. The rigging plan comes from American Ship Models by Grimwood, (1942) [Plate III]. Three blocks are involved. The upper-most one (1/4") is seized to a dark brown 0.35 shroud from the main top. A .018" tan line runs from a chainplate through the 1/4" block and is seized to a 3/16" block. (The smaller block in the background just below the 1/4" block is part of the topmast backstay and is another subject). Another .018 tan line runs from another chainplate and seized to another 3/16" block a few feet above the rail. That becomes part of the gun tackle using .012" tan line that ties off at the pin rail. top The knots in the lines coming from the chain plates are "Taut line hitches" or "midshipman's hitches" with the tails tied off above. Very effective in allowing tightening of lines and are difficult to keep neat and effective at this scale. Maury
- 525 replies
-
- 6
-
-
- anchor hoy
- hoy
- (and 1 more)
-
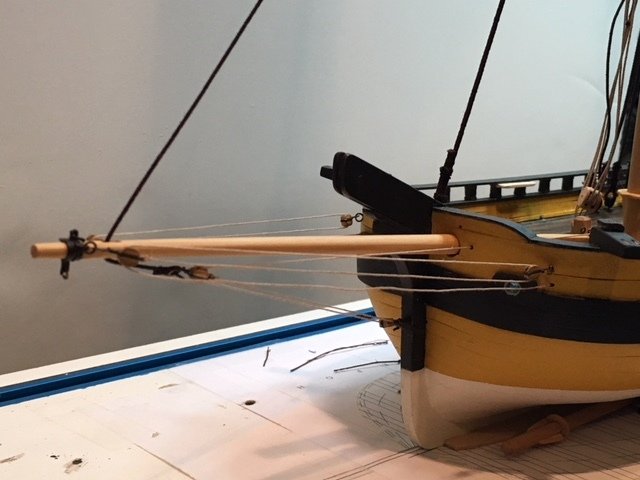
The bowsprit is now rigged. I still need to add the top mast forestay. The blocks are rigged but not tied off so there is some slack that will disappear when finished. Maury
- 525 replies
-
- 9
-
-
- anchor hoy
- hoy
- (and 1 more)
-
Ed, The masking tape to prevent parts dropping into the lower sections is smart, and beware, the tape can leave a very serious residue if allowed to remain on for more than a few days. I had that issue with tape holding display case glass in place stayed on too long and the ONLY way to get the residue off was soaking with vegetable oil. Maury
- 3,618 replies
-
- 2
-
-
- young america
- clipper
- (and 1 more)
-
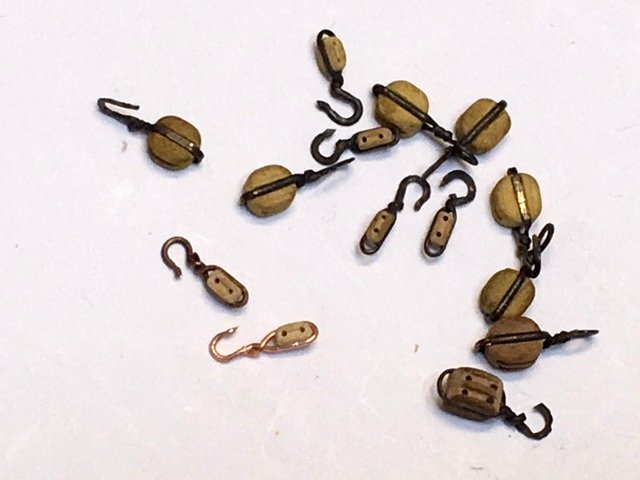
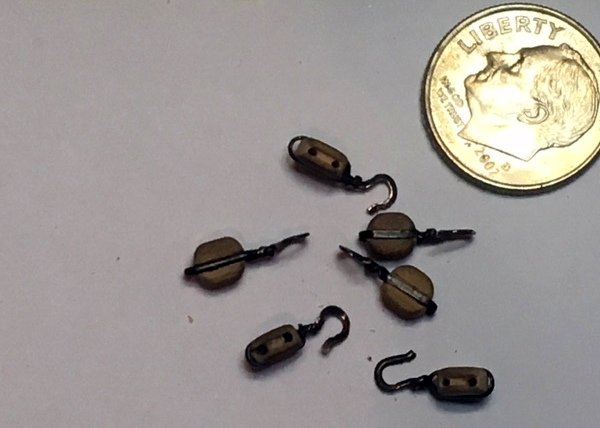
just to show the difference between the round vs. flat wire...see following Two blocks on lower left are the round wire. Maury
- 525 replies
-
- 7
-
-
- anchor hoy
- hoy
- (and 1 more)
-
I am re-doing the metal strapped blocks. I didn't like the obvious twists on the wire and I couldn't get the hooks darkened. I found I had some flat copper wire (.019 x .029") ( have no idea where I got it) so the wire lays flat against the grooved side of the block and a little turn flattens out the twisted part. Also, by bending the hook along the wide side, it has much more strength and looks better. . I'll go over the hook ends with LOS and they'll look much better. More to do. Maury
- 525 replies
-
- 4
-
-
- anchor hoy
- hoy
- (and 1 more)
-
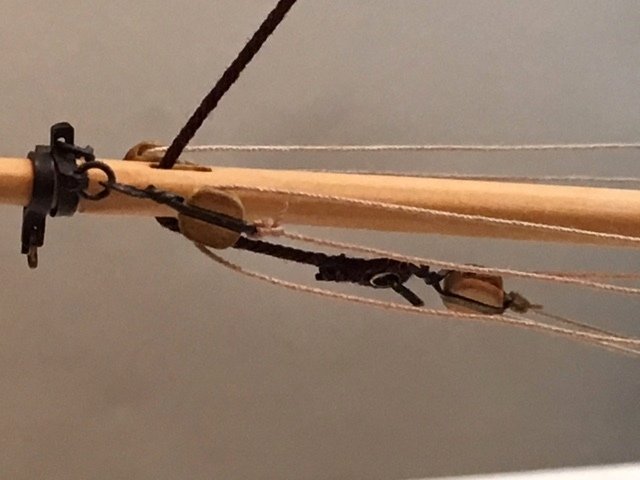
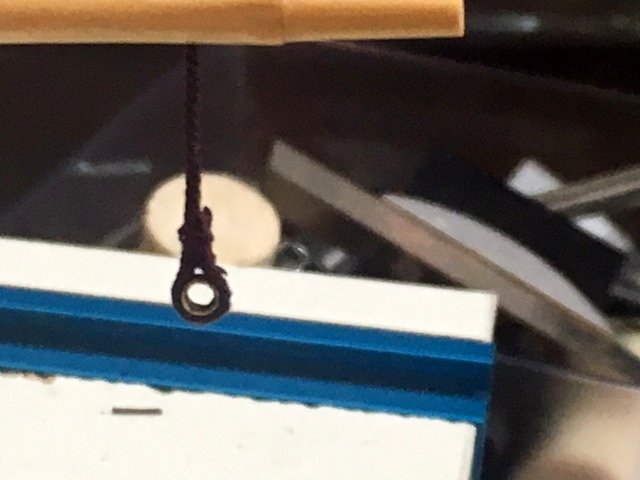
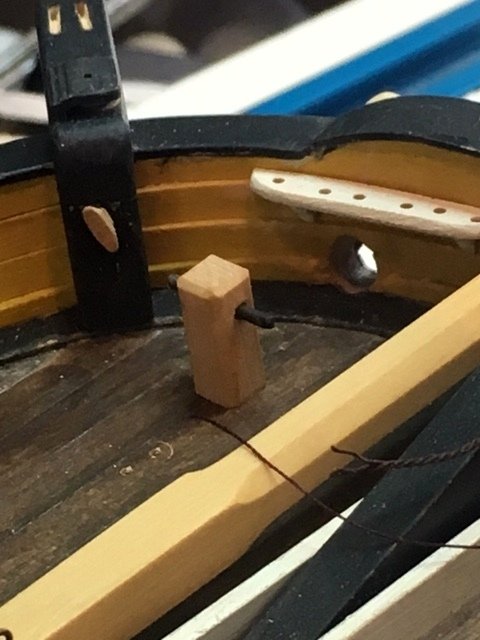
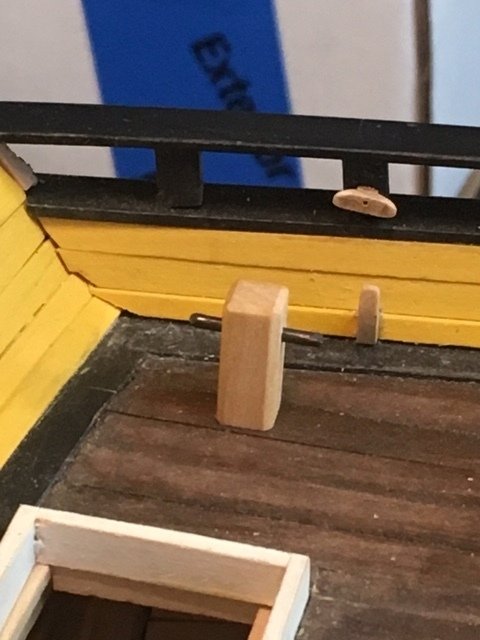
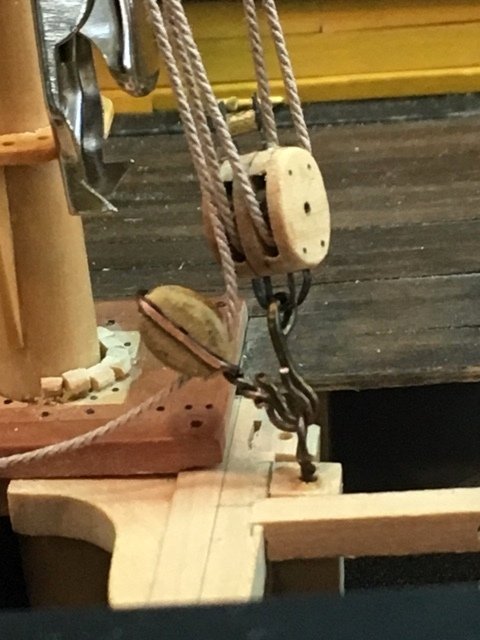
A lot of little things over the weekend. The Jib stay runs from the mast doubling to a sheave in the bowsprit and has a thimble close for the gun tackle hook. I can't imagine a work boat not having bollards of some sort to hold anchor cables, mooring lines or other connections. The original source drawings do not show any deck fittings so my license allows me to add them. They have a 0.020 pin in the bottom to hold them fast. I've had trouble using Brass Black to blacken parts so I'm using what little of Blacken-It I have left. The copper pieces will be blackened with a Liver of Sulfur solution. The gun tackle for the great cat is fitted. These are Syren internally strapped double blocks. The left block in the lower picture re-directs the line from the upper block, aft to the forward capstan. The double block on the right is temporarily hooked to a ring in the deck. The main mast back stays are "running stays". The upper portion (dark brown rope) goes from the mast head about 2/3 of the way to the deck, where the several gun tackle arrangements (not completed yet) secures it. Maury
- 525 replies
-
- 8
-
-
- anchor hoy
- hoy
- (and 1 more)