HOLIDAY DONATION DRIVE - SUPPORT MSW - DO YOUR PART TO KEEP THIS GREAT FORUM GOING! (Only 24 donations so far out of 49,000 members - C'mon guys!)
×


Maury S
-
Posts
1,490 -
Joined
-
Last visited
Content Type
Profiles
Forums
Gallery
Events
Everything posted by Maury S
-
 Re. the twist, I hoped clamping and the heat gun would fix it. So far so good. Old on top, revised below. Maury
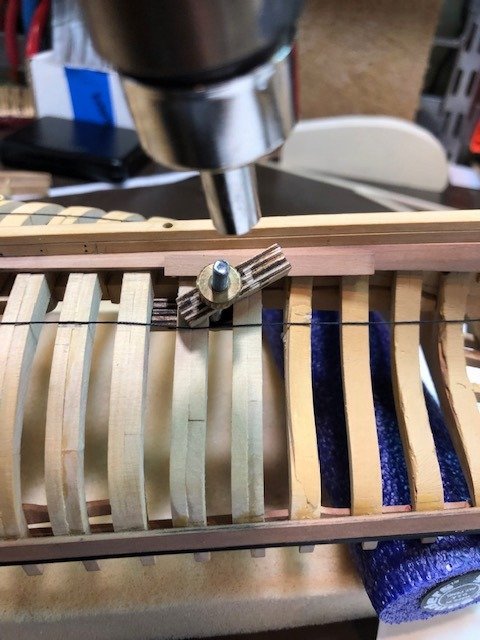
- 308 replies
-
- 12
-

-
Druxey, Comments Always appreciated. It does look odd. I laid out the lower band. I like David Antscherl's method using a thread with a little white glue. The bands are of uneven strakes because of where they land in relation to the frame at the stern. A few minor tweaks to get them smooth. Maury
-
Garboard planks installed both sides. Now I have to lay out the bands for the planking.

- 308 replies
-
- 10
-
-
1/32" Bass is about the thickness of card, can be sanded for small adjustments and twists like wood...and for what else will I ever use all that stuff I bought 15+ years ago.😀 M
-
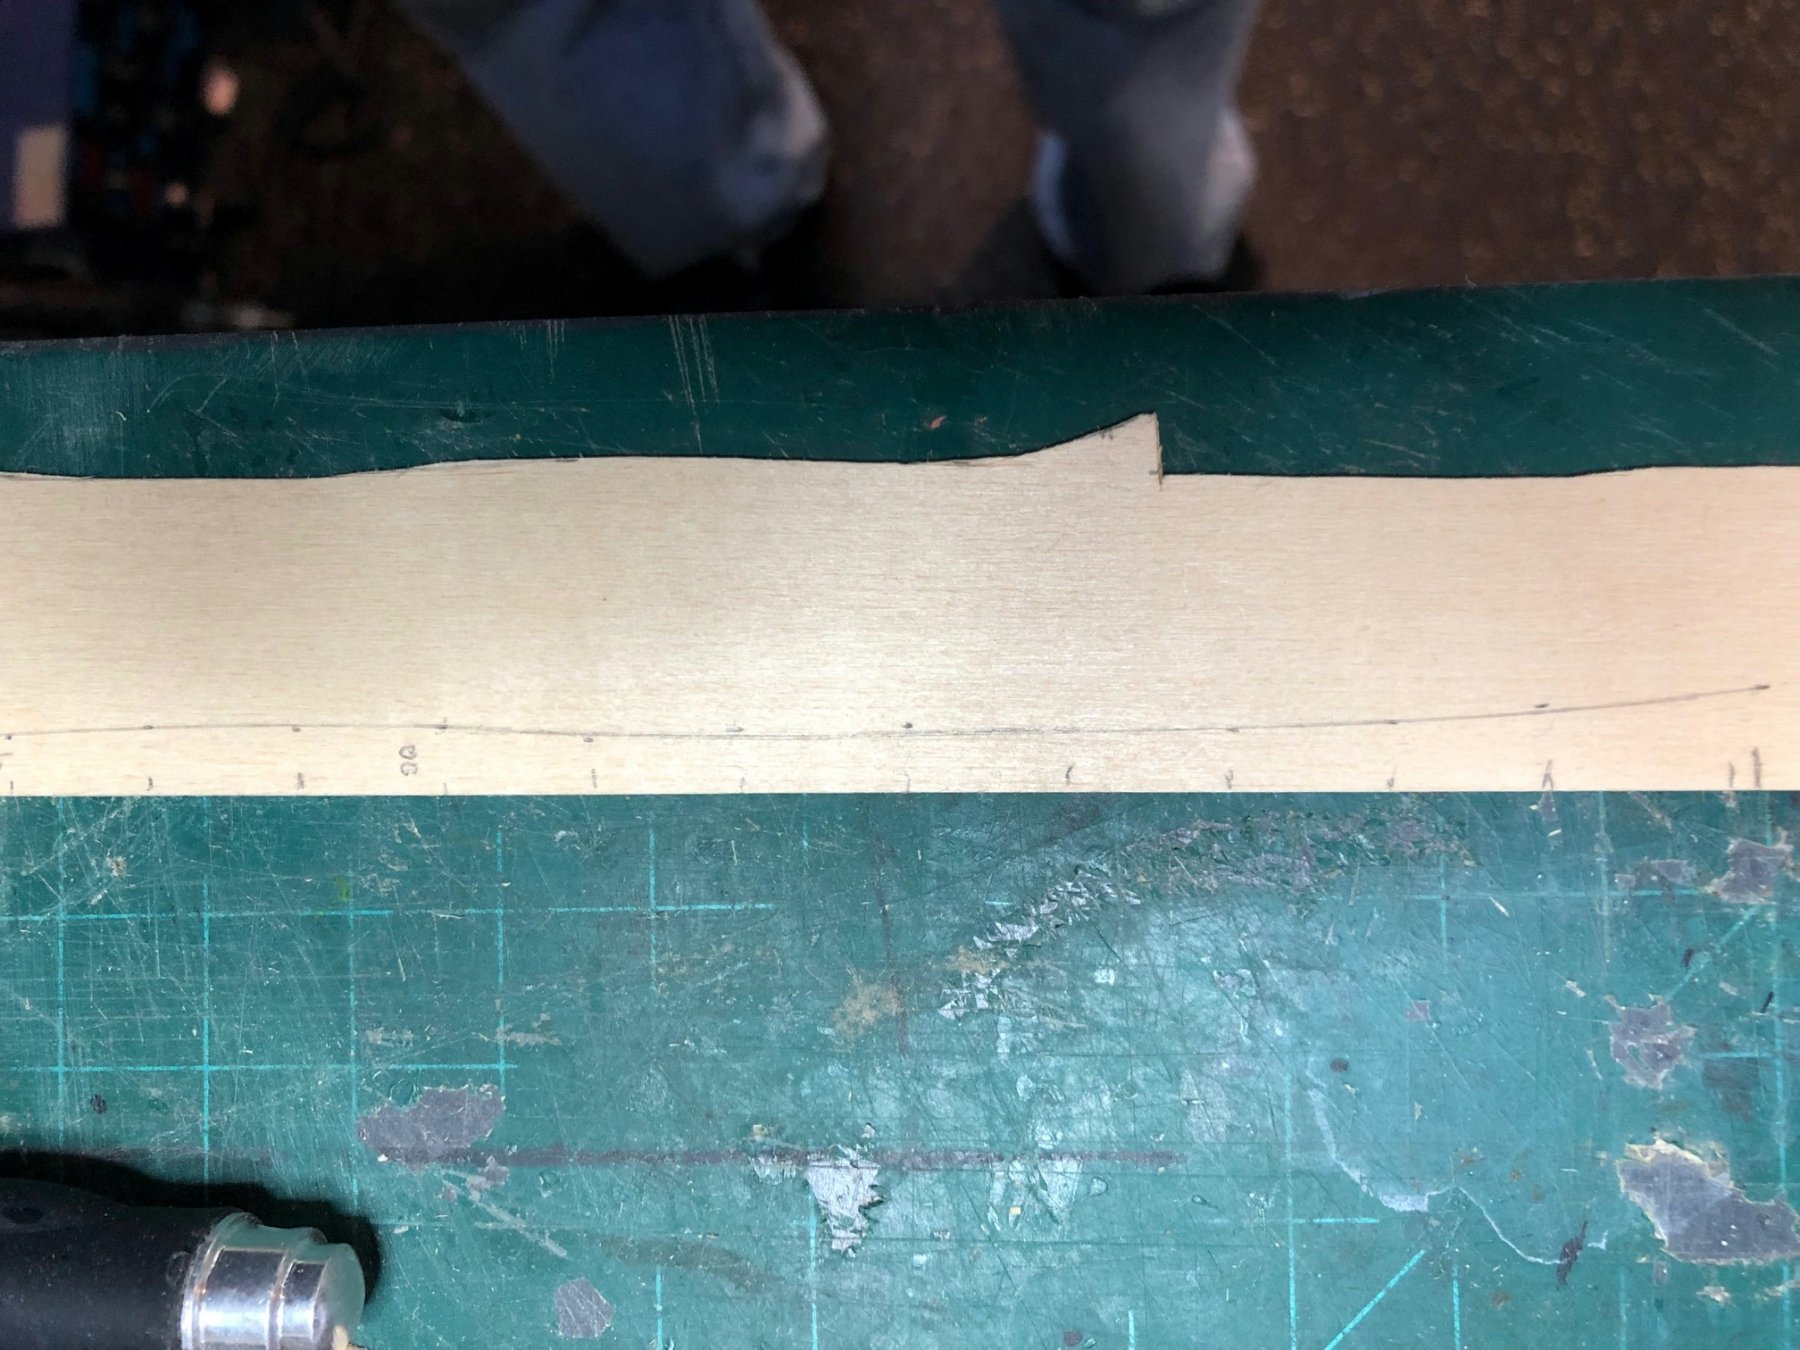
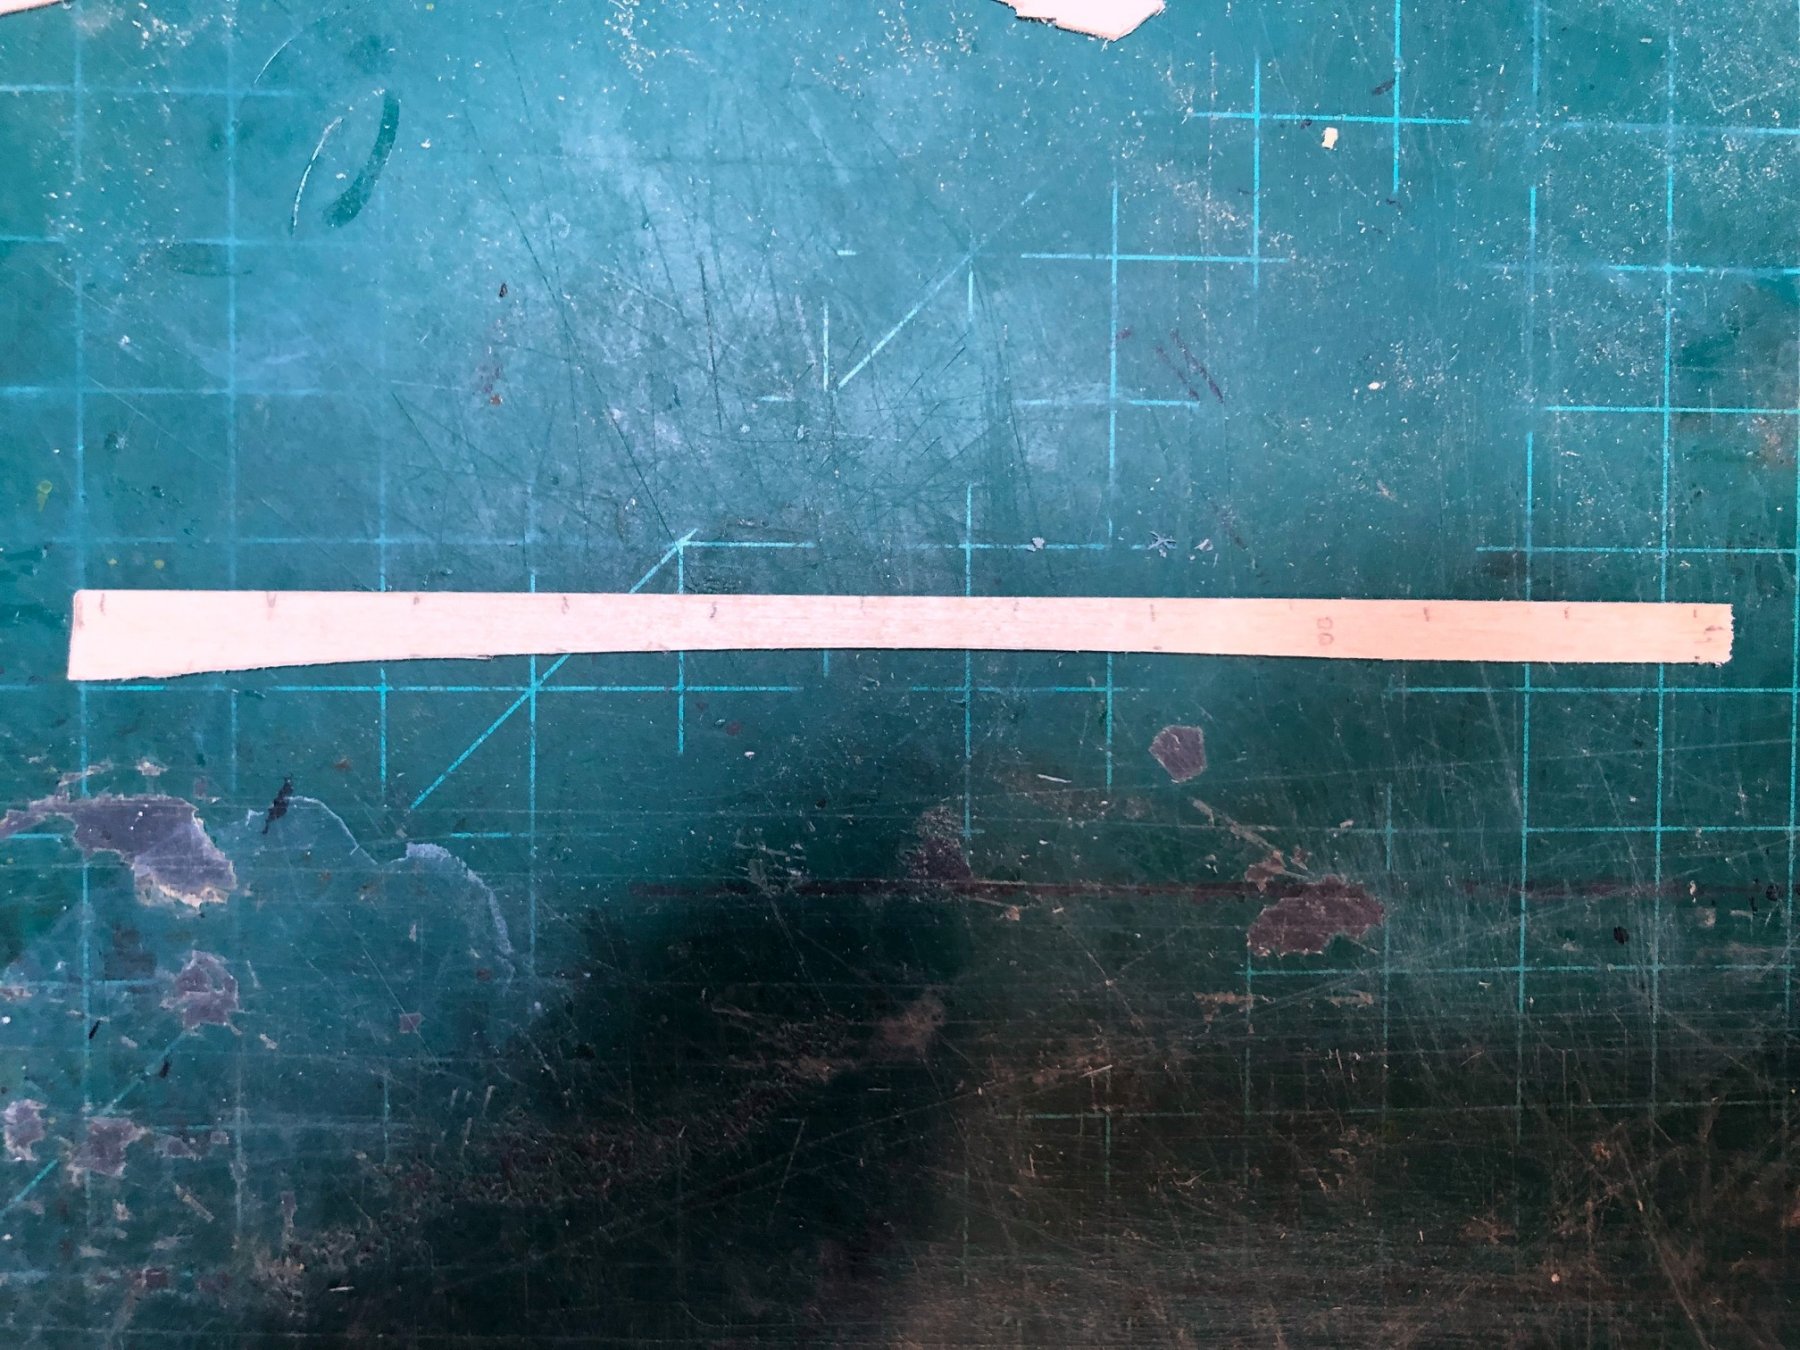
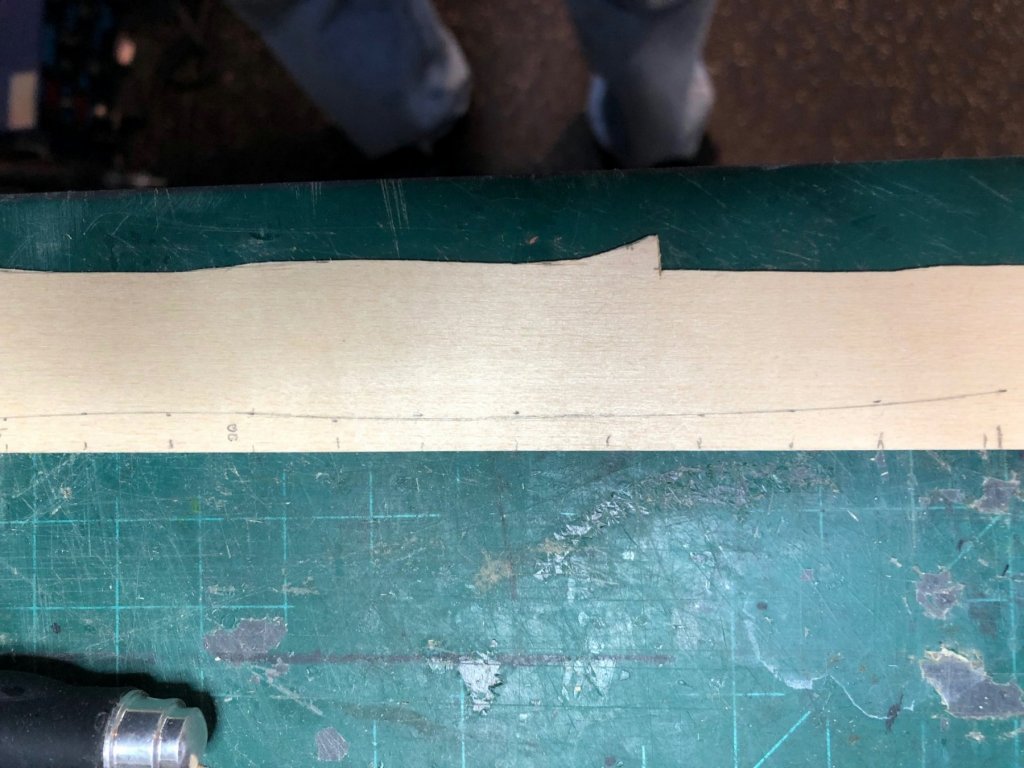
Garboard plank (Port side). The plank is interrupted by the centerboard well on the port side so there are only two pieces. A thin batten was laid and each frame carefully marked. Then the distance from the rabbet to the mark on each frame was laid out on the bass wood and a ships curve used to determine a smooth line. I like working with sacrificial wood (Bass, 1/32") rather than card to make templates. It can be sanded for a better fit and it actually twists like the final plank. First pic. is the aft portion laid out on the bass. Second is the template cut out. and the third pic. is a shot of both fore and aft templates. The "wavy pattern" of a garboard plank can be seen clearly. Using these templates, I'll cut the final pear planks. Sorry about the quality of the photos. Maury


-
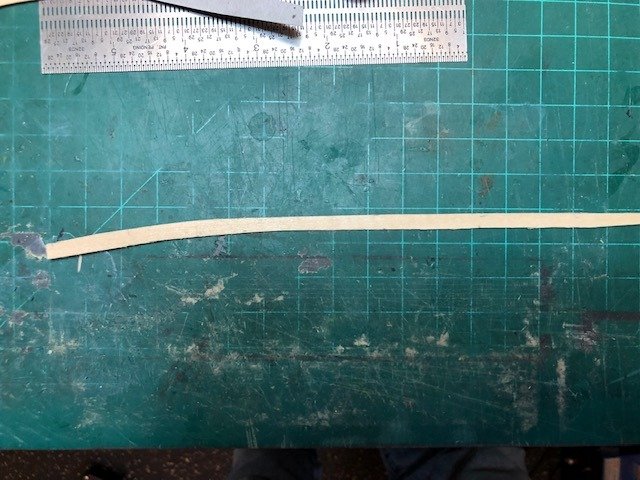
Back in the shipyard after time in the mountains for Christmas and New Years. I was going to put one decorative stripe just above the wale, so I spiled a thin strip, hand thickness-sanded to 3" (1/16") stained with India Ink and installed just above the wale. It's much cleaner this way than me trying to pain a perfect line. On to the garboard planks. Maury
-
Druxey, Thank you again! I carefully examined the layout, reproduced it on my sheet and everything lines up nicely. Three planks on each strake, three strakes between butts on each frame and correctly staggered. It extends several frames farther both fore and aft than I had imagined and I don't think that's a problem.
-
Thanks. Details in TFFM? Maury
-
I ran a different Butt pattern; 3 strakes between butts on a frame 2 frames between butts on adjacent strakes. I'm not sure it matters but visually, the butts are further apart this way.

-
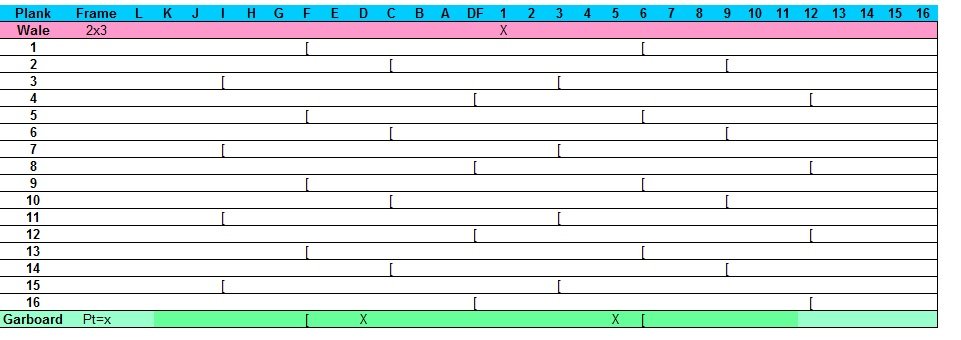
I'm working on the planking butt plan in a spreadsheet (trial and error). My rules became: 16 planks between Wale and garboard (just under 10" each) approx. 20' planks (3 per strake) 3 frames between butts on adjacent planks 2 planks between butts on each frame The wale is done in two planks Garboard is constrained on the port side by the centerboard well between Fr. D and Fr. 5. and the port side will not be fully planked Two strakes (3 & 15) will be either two or 4 pieces It looks OK to me and if I've messed up here, please let me know. Maury CC_PlankButts.pdf

-
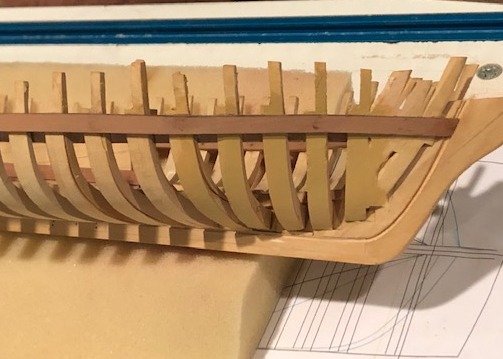
Fore portions of the wales are installed. The top of the wale lines up with the top of interior deck beams (bottom of deck planking). Maury
-
Fairing done. I cut the wales using card first (6 - 7 times trying to get it close), then sacrificial wood. Photos all seem to show wales that are not as beefy as war ships or the Anchor Hoy. Just a little over-sized planks (these are 3 1/4"). Once the wales are in, I'll do the garboard plank and then line out the planking. Some where in the process, I'll get to the ceilings. Lots of time looking at pictures and drawings from the period and after. Maury
- 308 replies
-
- 12
-
-
Mike, You're doing excellent work on the planking! Maury
- 607 replies
-
- 4
-
-
- winchelsea
- Syren Ship Model Company
- (and 1 more)
-
Druxey, Yes, the stbd side is the larger problem with the two frames and as things stand now, I was going to fully plank that side. Maury
-
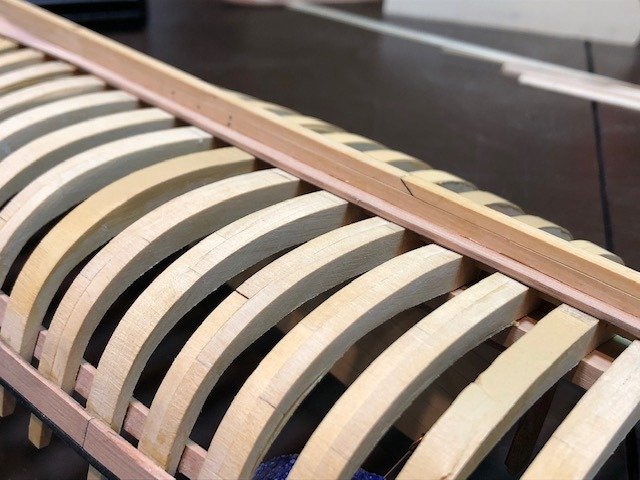
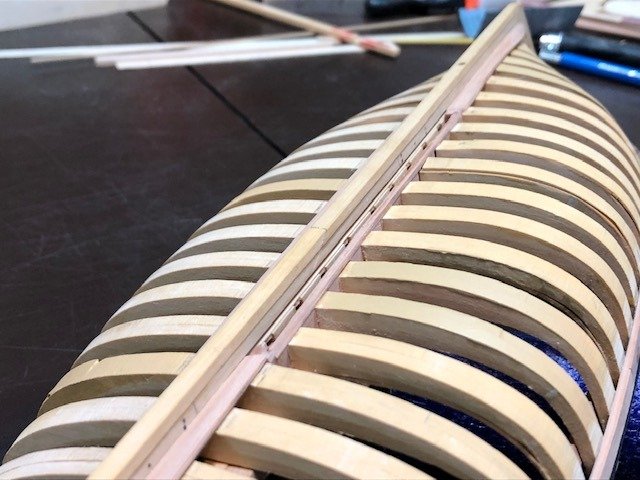
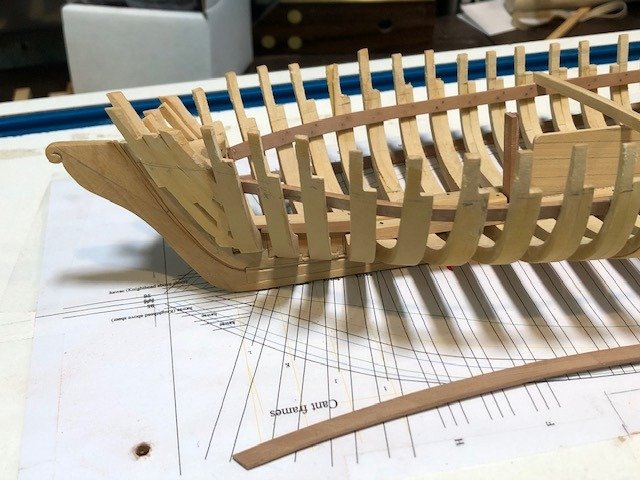
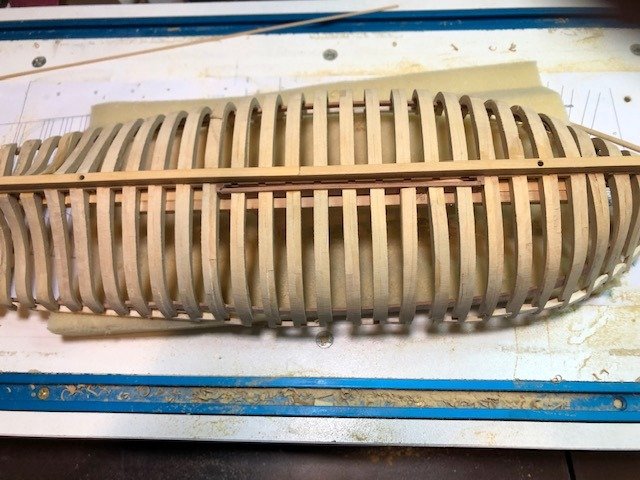
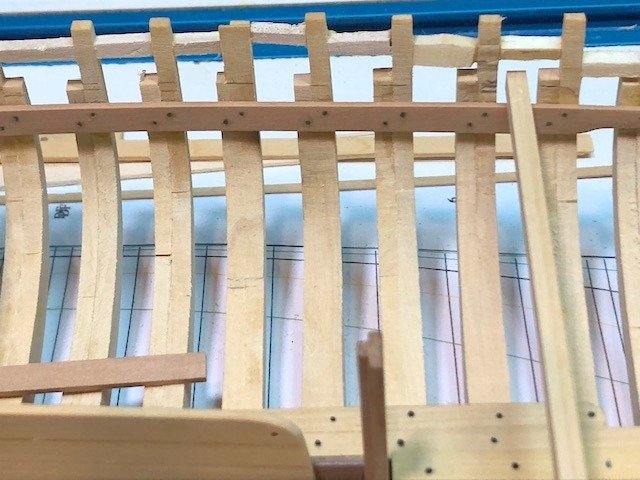
Fairing continues. I'm happy with everything from frame 12 aft to the hawse timbers. Frame 14 needs filling (and maybe Frame 15). I hate that part. Maury

- 308 replies
-
- 16
-
-
I think you may find such a jig in Ed Tosti's Naiad log. Maury
-
Always check ABEbooks.com for old or out of print books. They are a consolidator and have access to an amazing collection of book sellers. Maury
- 6 replies
-
- 3
-
-
- merchant
- brigantine
- (and 8 more)
-
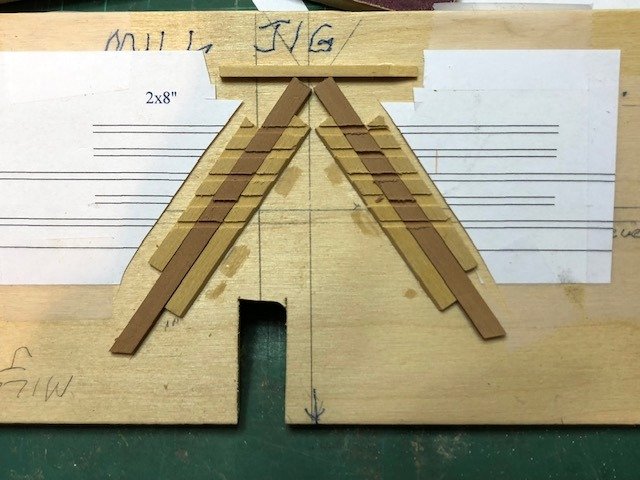
While waiting for glue to dry, I set up the jig for the two ladders on the boat. Basically right out of Greg Herbert's TFFM Vol. 3. The flat top sits on top of a spine to fit in the mill vise. The sides will be cut to length later. Maury
-
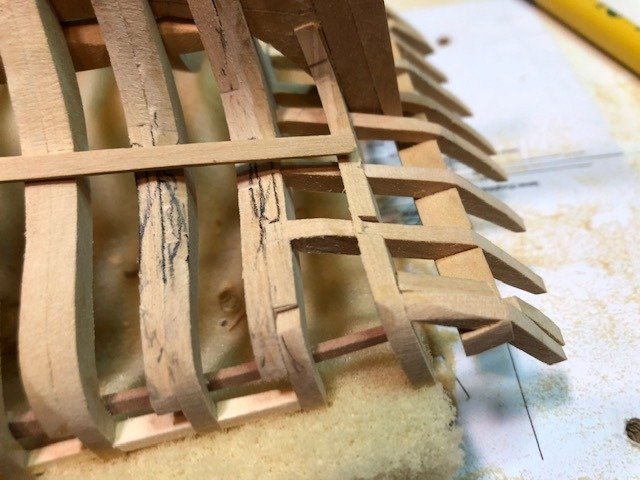
Ed, I'm anxious to get those spacers out. It's rigid enough now to take it off the board and work on fairing the frames on the outer edge. I think there is a minor twist from dead flat aft so I'll have to deal with that. Mark, Early in the log you can see the process of building the frames. Each is lofted separately. They are 6" (1/8" at scale) paired. The spacing is 12".
-
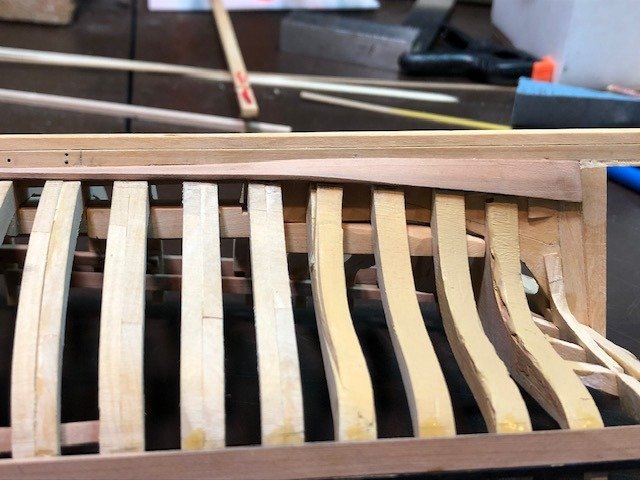
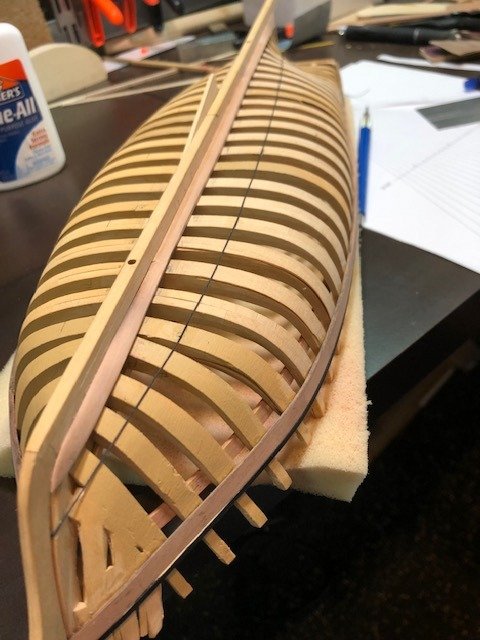
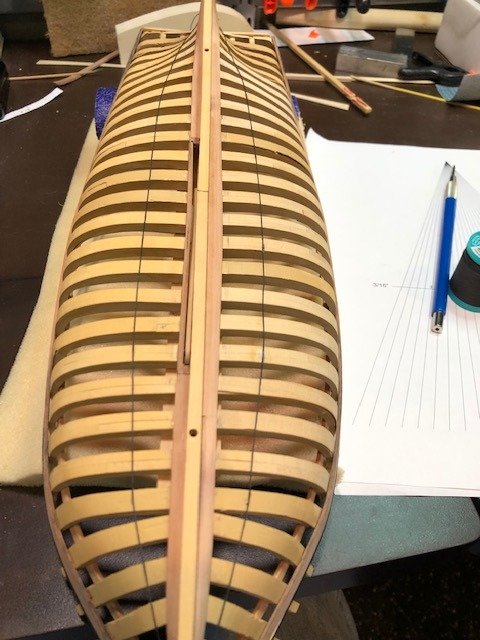
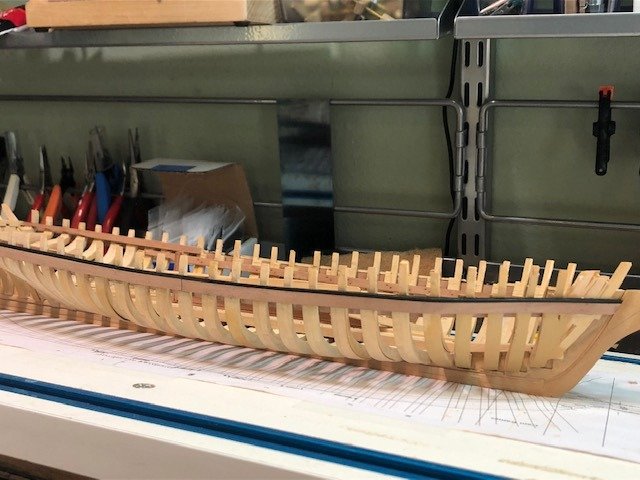
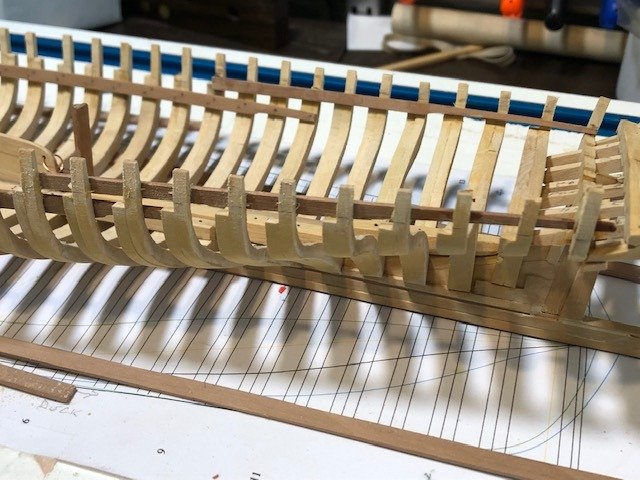
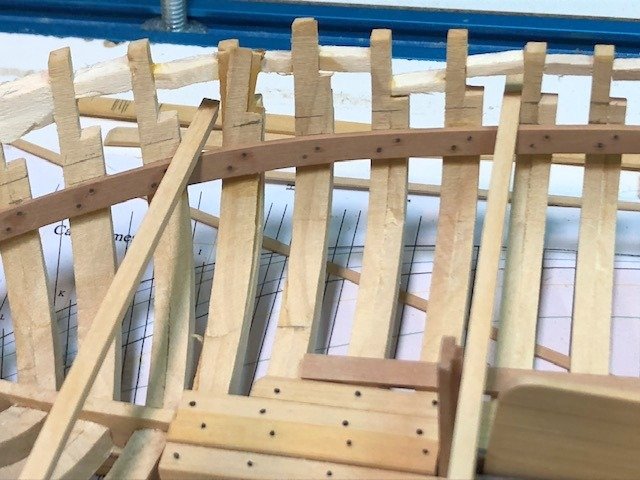
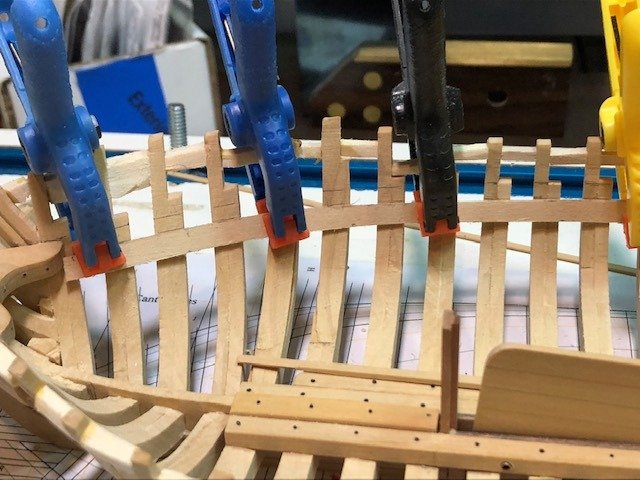
The clamps for the main deck are installed on both sides. Shown below are those on the starboard side. Test beams were laid across at various points and everything is fair. Now on to the clamps for the quarterdeck. Much tighter fit there. Maury
-
I think "Nail Hole Filler" is the same as wood putty. Varathane and MinWax sell a wide range of colors in Big Box stores. Maury
-
Dave, The Challenge was one of the boats I considered. As it turns out, the C.Chase has very little information and Chapelle's notes don't go very far in the description. On the other hand, with all the info. I've gathered (with the generous help of many maritime researchers and historians) on these types of boats, there seems to be ample data to complete the model, and no one will be able to challenge the smaller details. Maury
-
Dave, They are hand-made, right out of Ed Tosti's books. (Probably Naiad). Mine are very simple since I don't have a way of having a left-handed as well as right-handed threaded rod. Maury
-
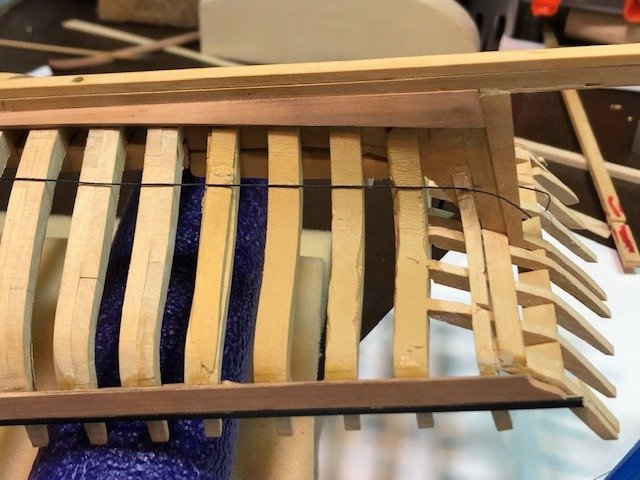
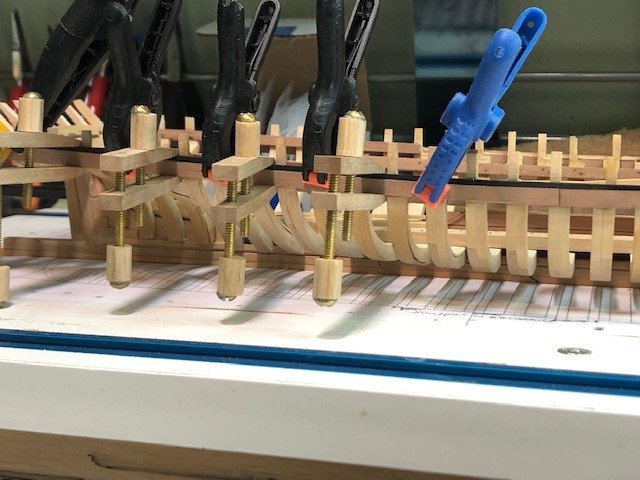
Some additional internal fairing needed to be done. Installing the clamps comes next. Spiling the internal plank is a bit different from the external planks. I started with some card stock taped inside the frames and marked the height of the bottom of the deck from the bottom of the false keel at every three frames on the card. I then marked down the thickness of the deck beams. I used a ships curve to connect the marks and cut out a template. Card bends differently from wood so I transferred the card template to some sacrificial bass wood and made the necessary adjustments to the rough shape. The top edge is the one that counts. Clamping the plank in place showed a little more trimming was necessary. Everything now fits smoothly. I'll transfer this form to the Swiss pear that will be used for the final clamp. Now to repeat on the port side and do the same for the quarterdeck. Maury
- 308 replies
-
- 12
-