HOLIDAY DONATION DRIVE - SUPPORT MSW - DO YOUR PART TO KEEP THIS GREAT FORUM GOING! (Only 24 donations so far out of 49,000 members - C'mon guys!)
×


Maury S
-
Posts
1,490 -
Joined
-
Last visited
Content Type
Profiles
Forums
Gallery
Events
Everything posted by Maury S
-
 planking is getting done slowly. Dark lines are not a gaps...just the pencil marked edge not sanded. I have to check the 2nd plank below the wale to make sure it is seated in the rabbet...looks like it's come out. Thinking towards the ceiling planking (inboard). None of the drawings of cross-sections I have show any limber strakes or boards. Were those things primarily on naval boats? Maury
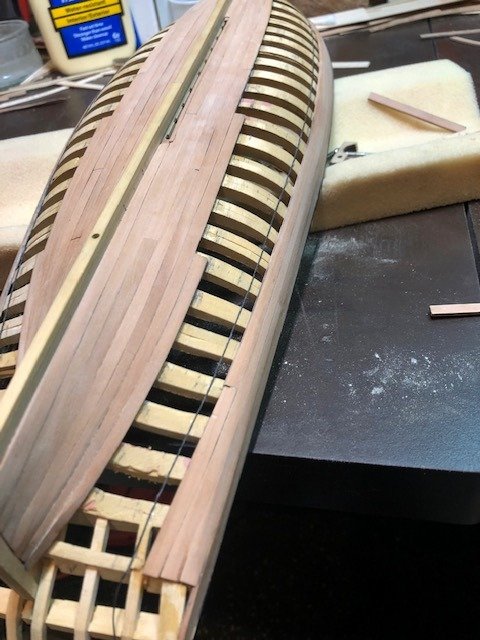
-
Dave, Thanks for the heads-up. I bought some replacement blades and had to take some "similar" ones as they are selling out. Too bad about having to close (they can't find anyone who wants to learn the business). Maury
-
Harbor Freight Hardwood Workbench Kit Bash
Maury S replied to thibaultron's topic in Modeling tools and Workshop Equipment
The vertical pegs are used in conjunction with the pegs on the top of the end vise. You can hold a long piece in place flat on the surface of the table. I too have "bashed" the Harbor Freight table by leaving off the front rail and bottom shelf so I can sit at the table without gashing my shins. I also left one of the drawers off to give me more room. Maury -
$1.13 today Maury
-
Thank you Bruce.
-
I have received some comments from an informed source: " Bilge pumps for any mid-19th century fishing vessel were almost certainly log pumps – wooden pumps with wooden valves. " Very helpful. Maury
-
I'm looking for images of bilge pumps that may have been used on the oyster schooners of the mid 1840s. Oertling's booklet on Bilge Pumps omits any info. between 1790 - 1890. I've seen some double (metal) tube pumps in earlier years, but Chapelle's plans (yes, I know his deck arrangements are suspect) show a single "hole". Does anyone have any images or references that may help? Maury
-
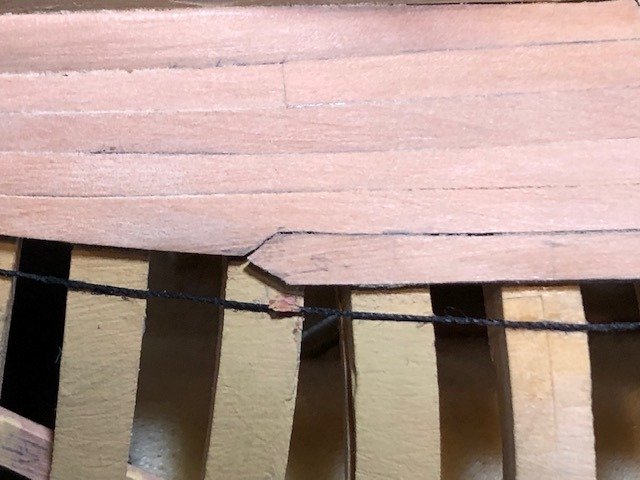
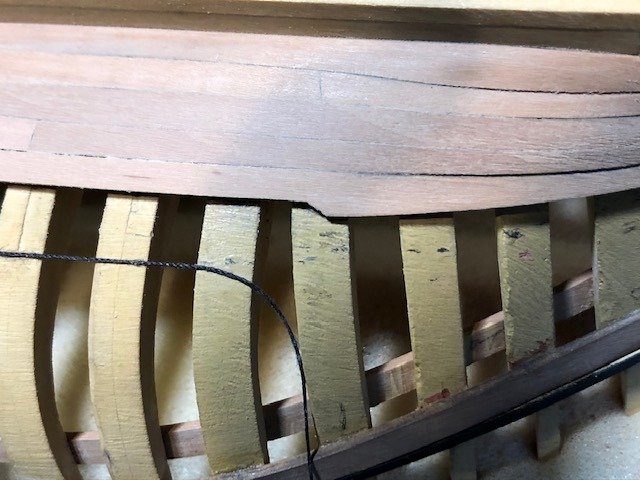
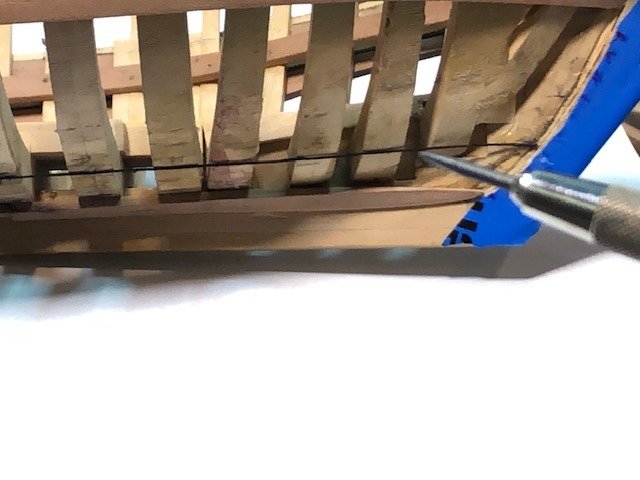
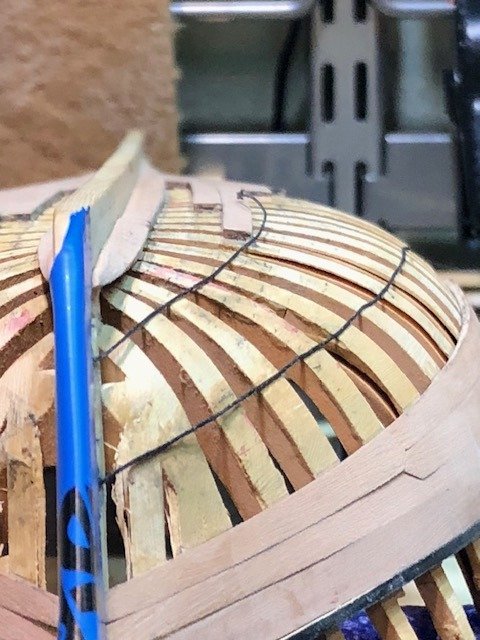
Druxey, I had that pattern early and from the side view, the big "hump" appeared (see post #113). By shifting them to how they are now, the "hump" disappears and the line is fair from the side as well as every other view I examine. Maury
-
The new lining out worked fine. Druxey, thanks again for the reminder that the art still has to come in! I've removed all the offending planks and re-lined out three bands. The strings actually line up at the bow...angle distortion. Some minor tweaking since the photos and all seems to be falling into place well. Maury
-
Plank bending
Maury S replied to Timothy Doe's topic in Building, Framing, Planking and plating a ships hull and deck
While I Dry heat most planks that need bending, I have used the microwave many times and it works fine. Impurities in the water you use may discolor the wood in the process. Water does nothing more than even out the heat distribution. Make sure you let the wood dry over night to let the moisture content stabilize before gluing in place. Maury -
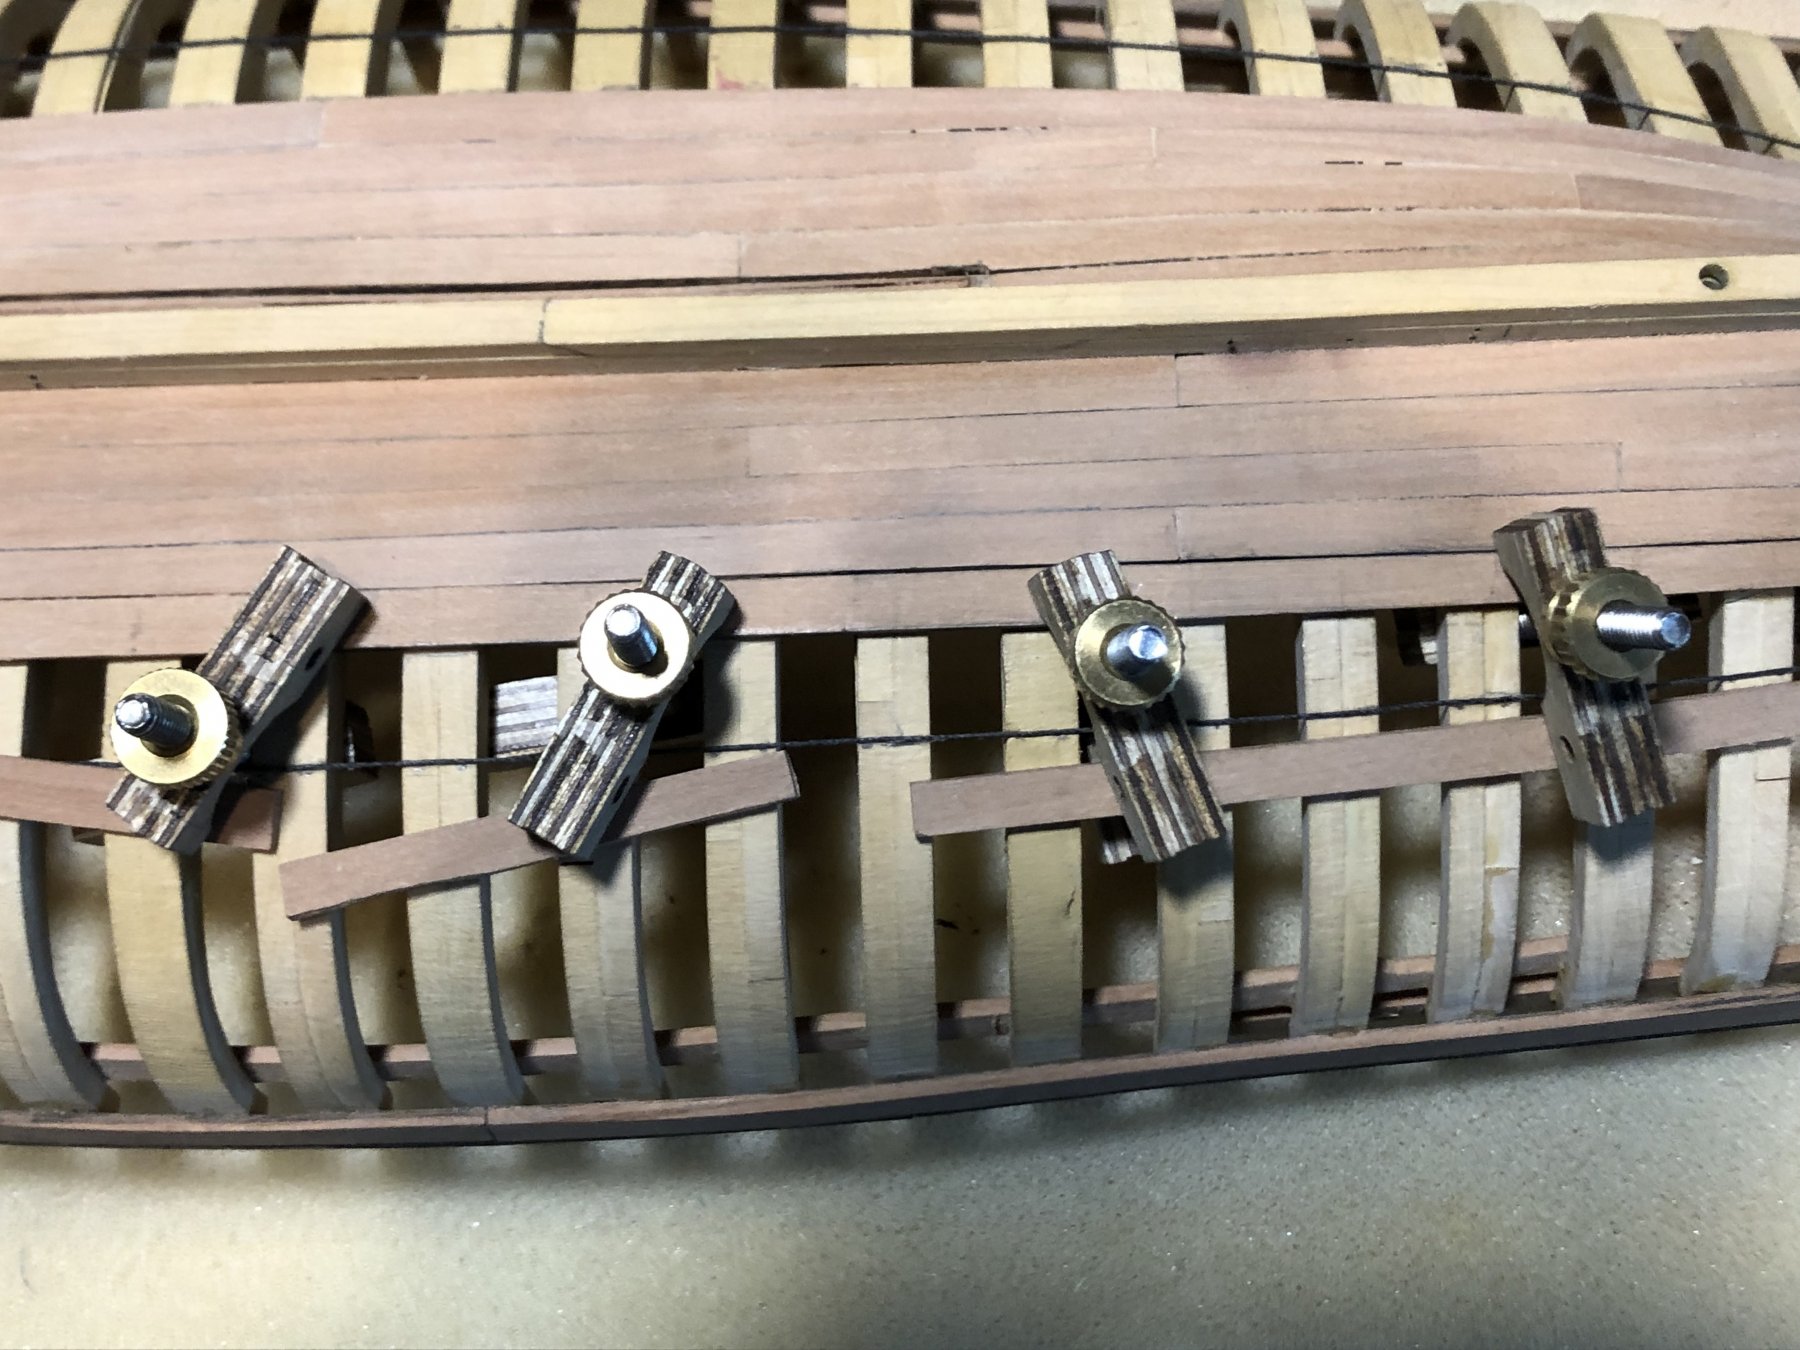
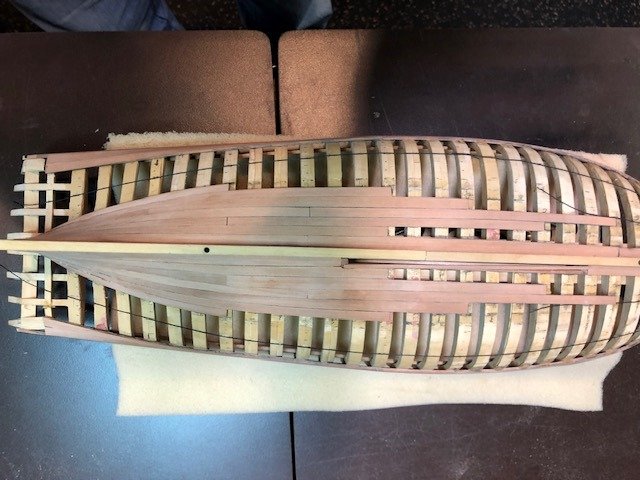
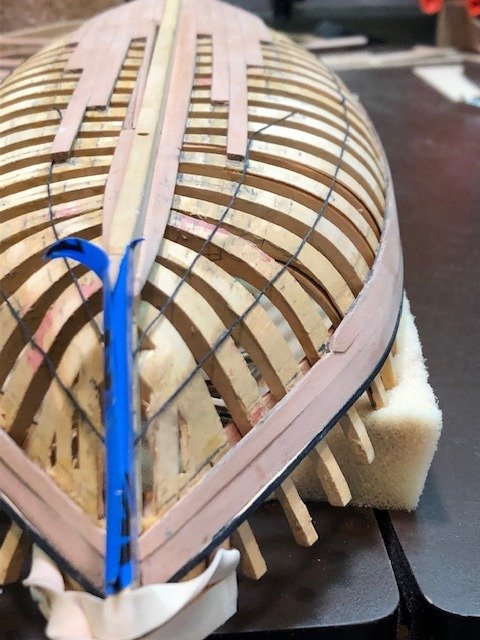
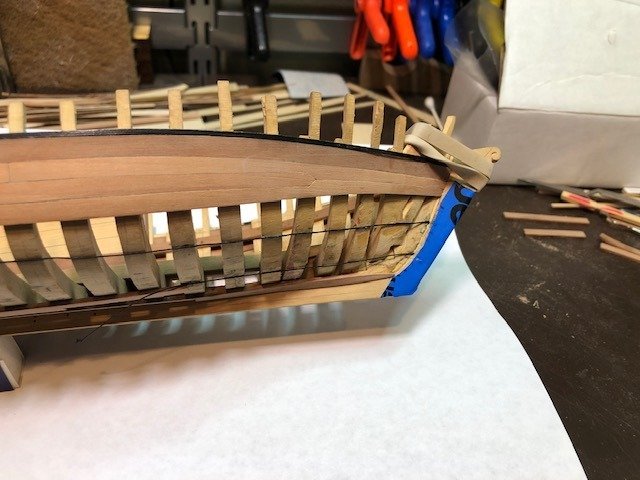
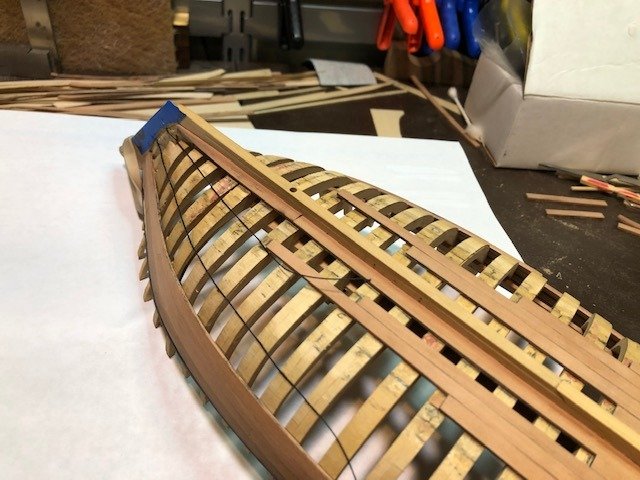
Optical illusions...My earlier planking layouts consisted of dividing the number of planks along each frame and I ended up with that inappropriate "bump" as seen in post #113 where the pencil is pointing in the second shot. This time, I ran a (glued) string from the measured point of intersection of the stem piece to a few points along several of the frames and then looked at the line from the side. From there, I moved the string(s) up or down on each frame so the run APPEARED nice and smooth from the side and a nice smooth line looking from fore and aft. Blue tape is used for the spacing at the bow without marking the wood. The run is much smoother now as seen the the following pics. The strings are tacked down only about 10 - 12 frames back from the bow. Minor tweaks to be done and the planks will appear to come to the stem much more smoothly now and the view from the side will be much closer to Druxey's suggested flow. Maury
-
The forward planks down to and including the garboard have been removed and the re-shaped garboard planks are now in. I think I can leave much of the former planking in place. Druxey, the re-shaping allows me to eliminate one of the drop planks. These boats are so wide amidships that drop planks are the only way of keeping a plank no less than 1/2 the width at DF. Maury
-
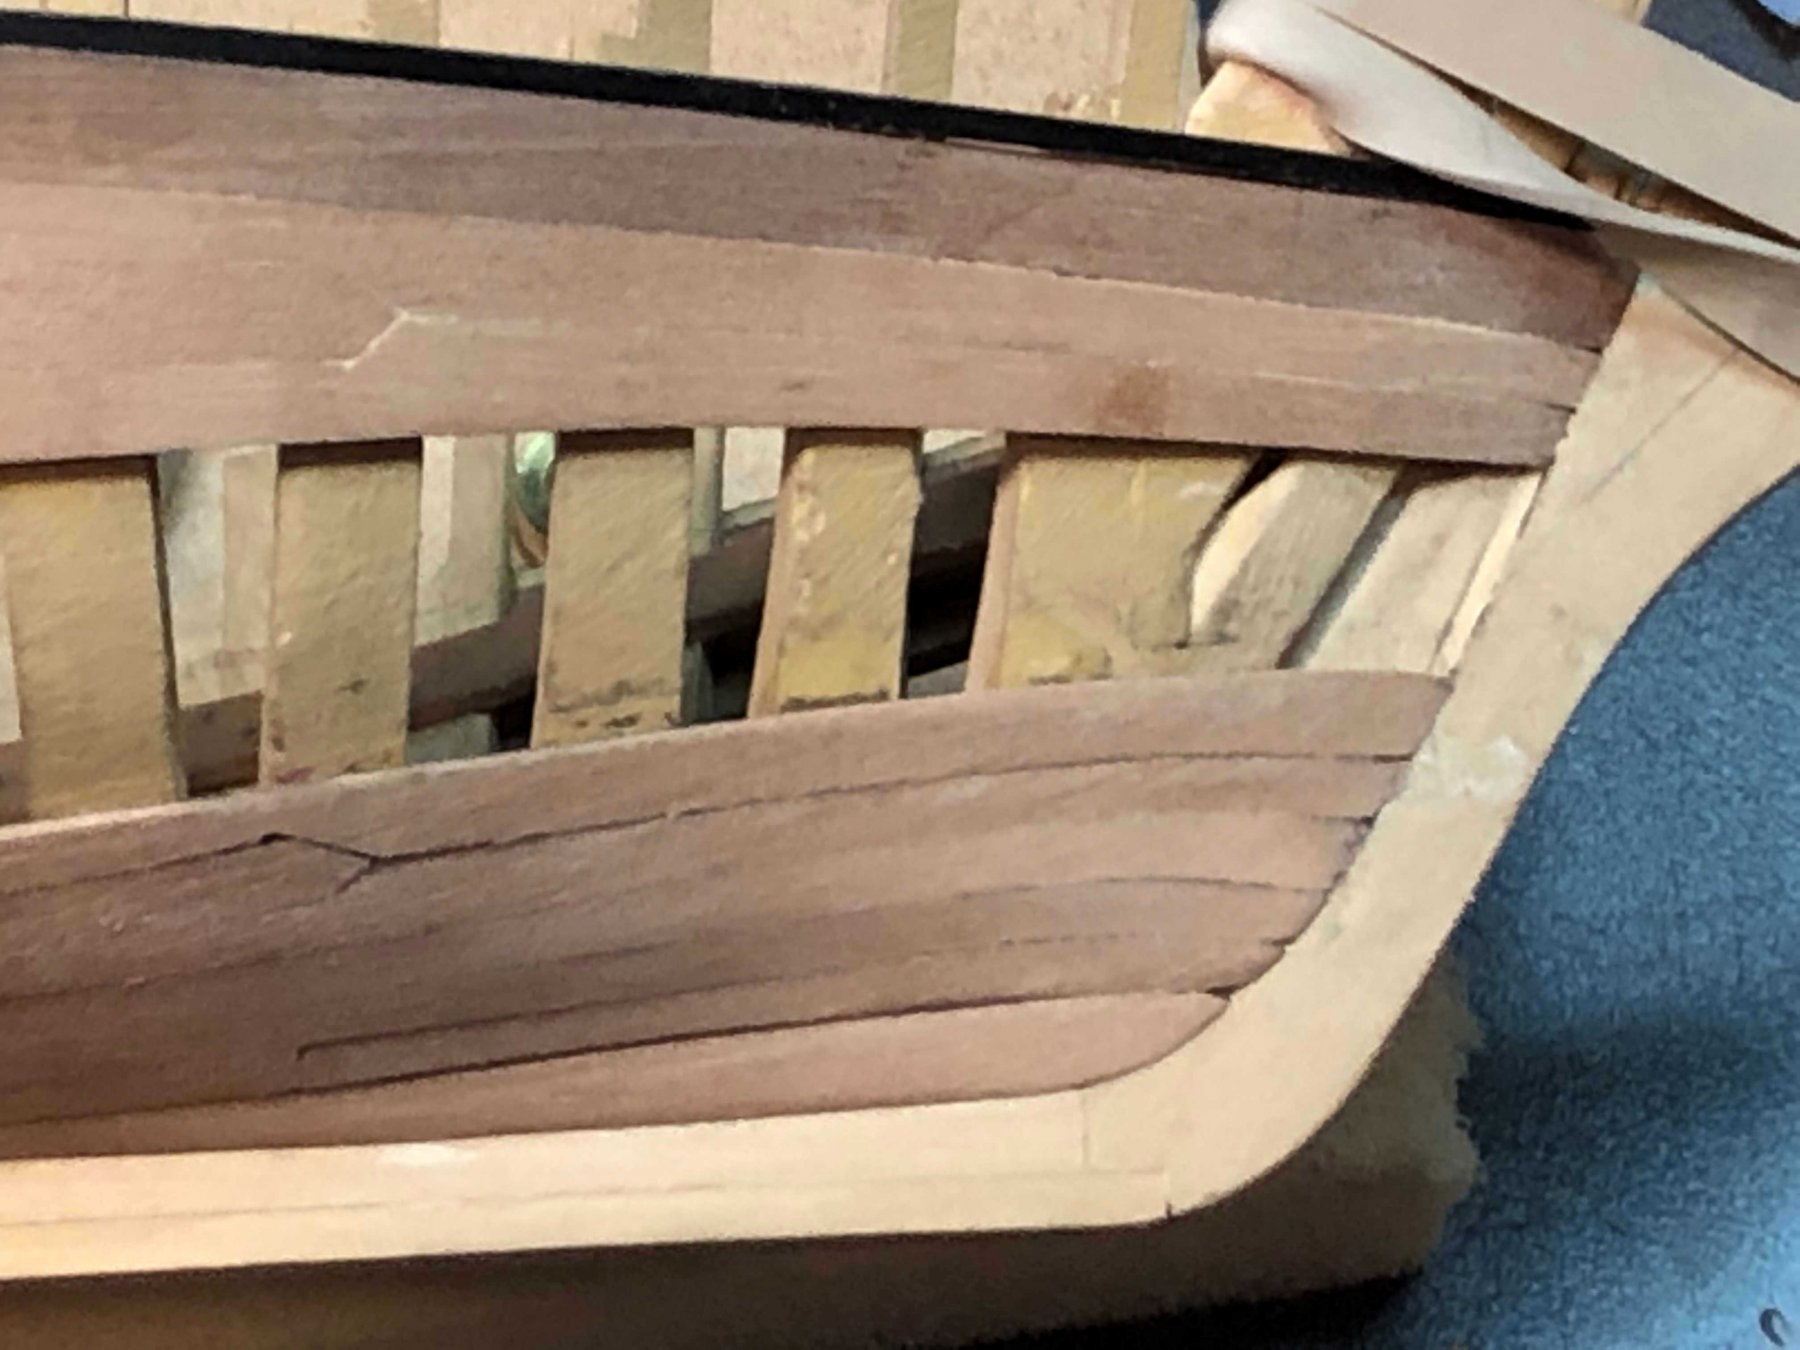
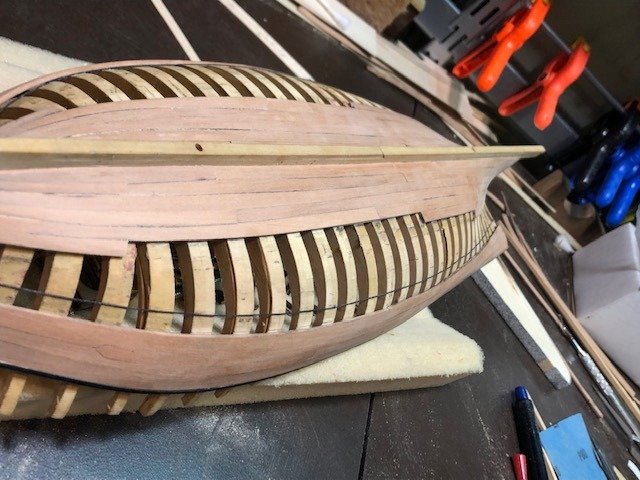
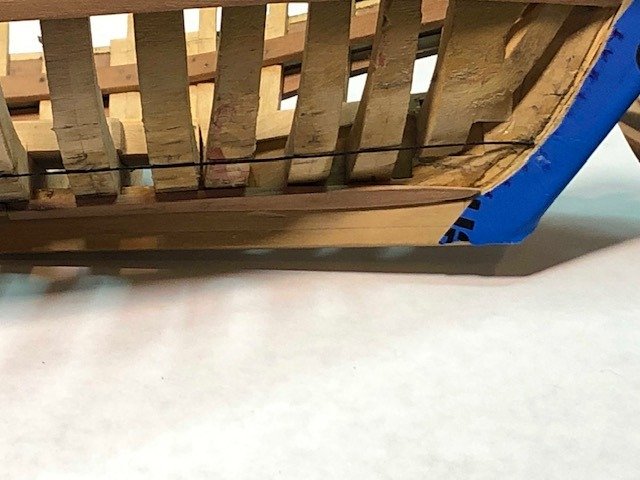
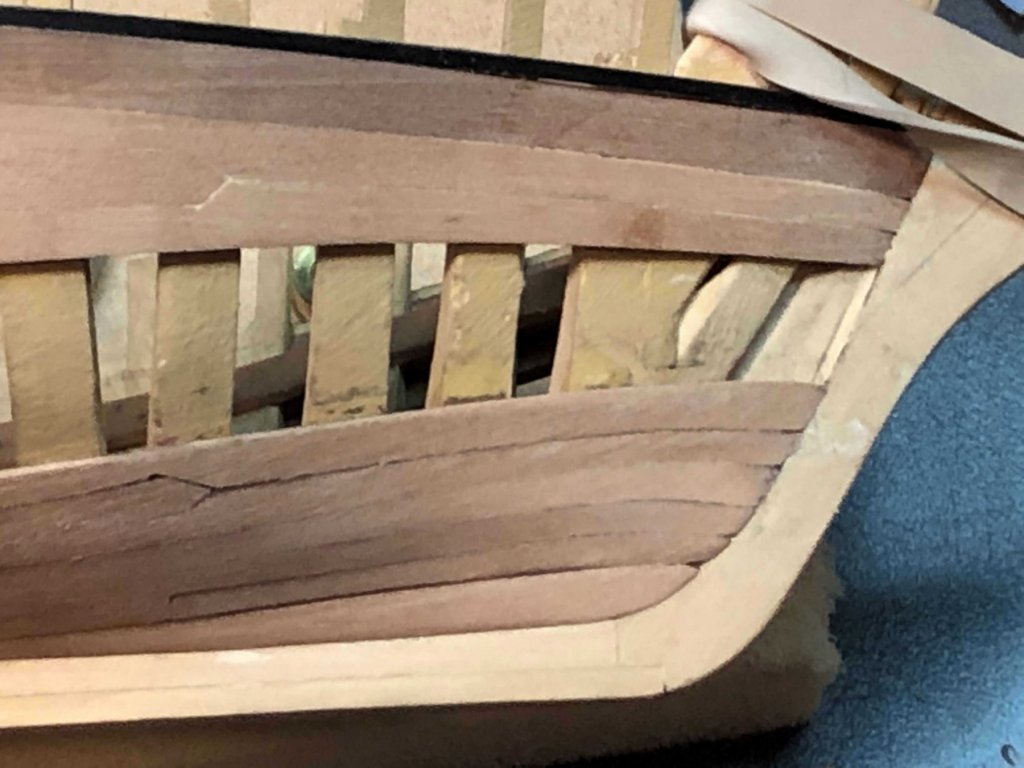
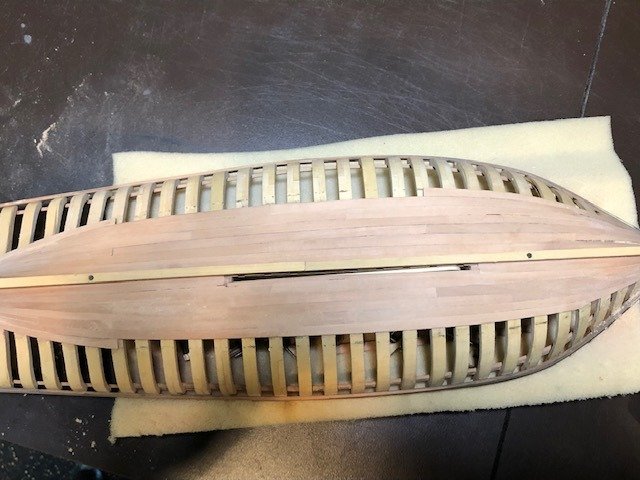
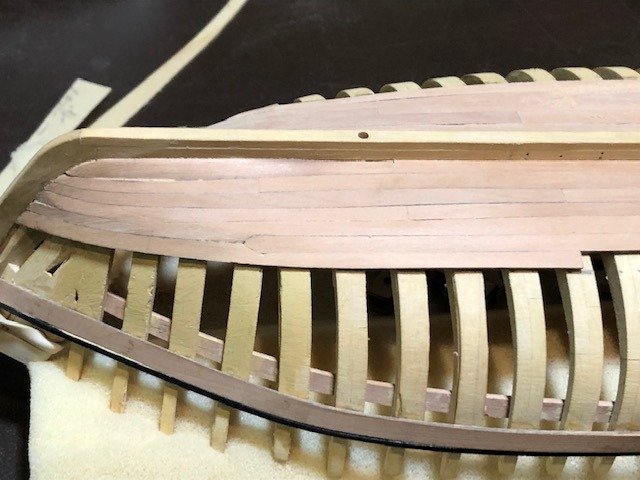
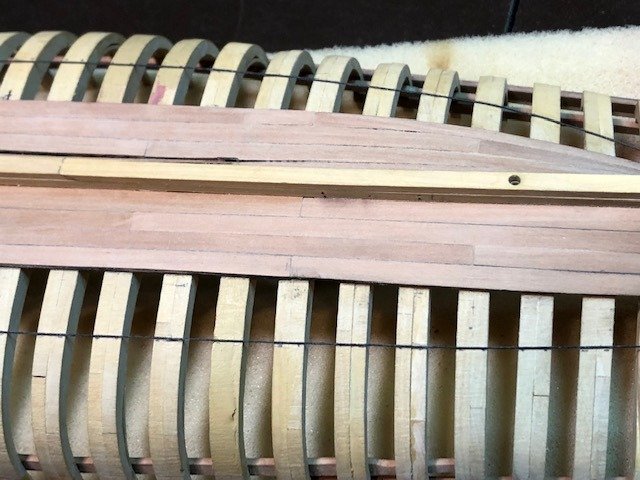
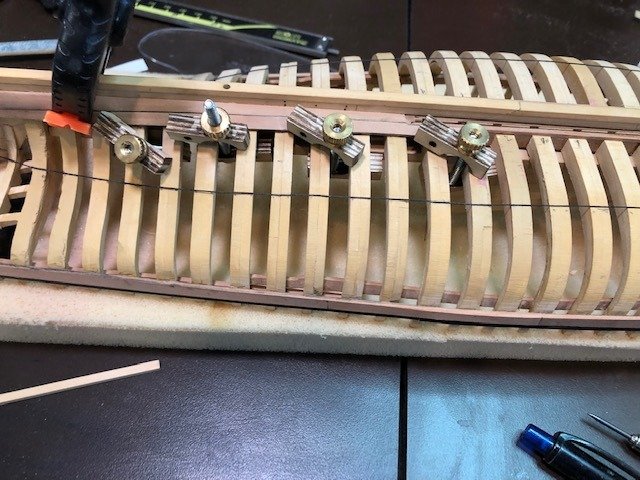
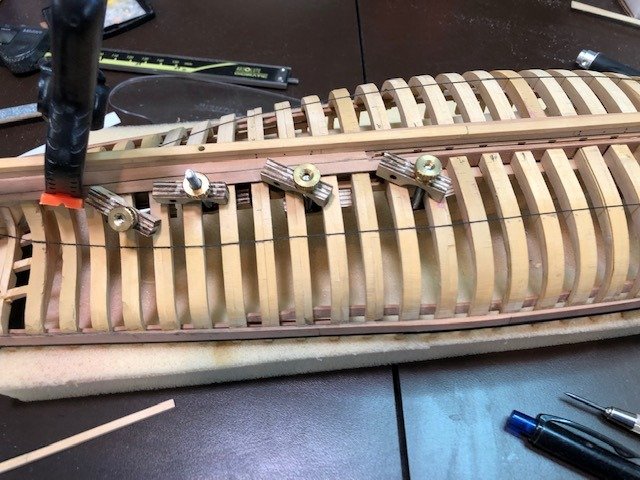
I do not like the way the lower planks are turning out at the bow. I think it's a matter of the garboard not ending correctly. It looks fine when upside down and straight on, but from the side, I do not like the "bump" (more obvious on the second photo). It's not going to get better, so I think the lower planking needs to be replaced. I think if the garboard is re-done per the pencil line, it will be OK. A lot of work to be undone, but I am just not happy with the lay of the planks. Maury

-
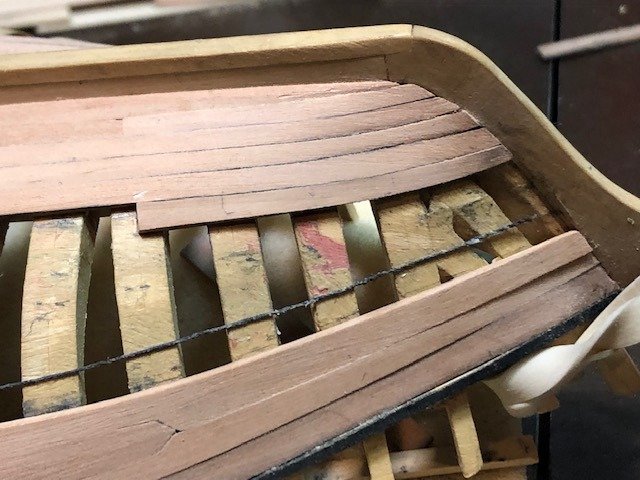
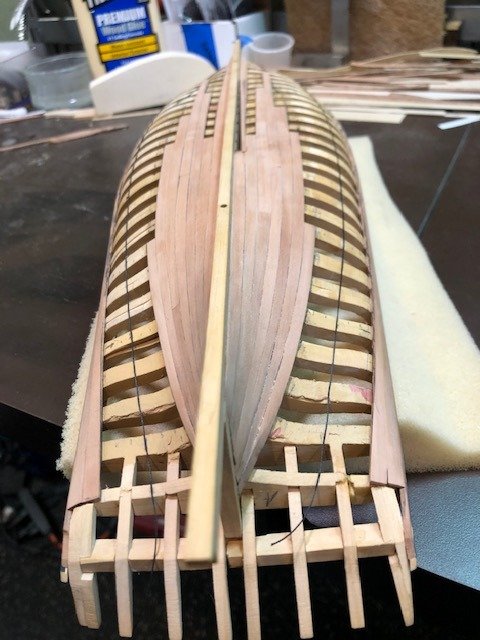
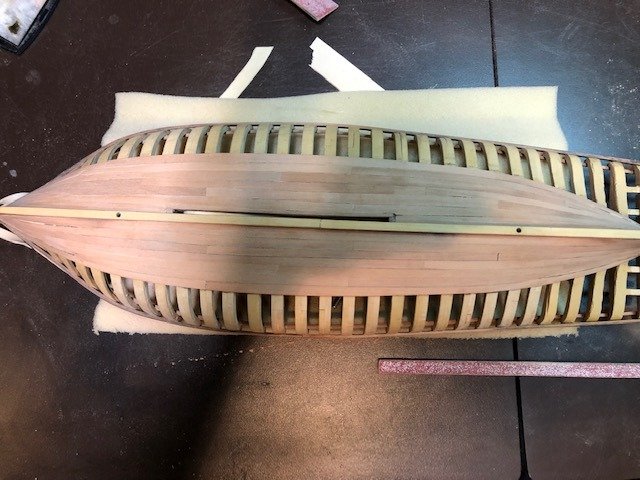
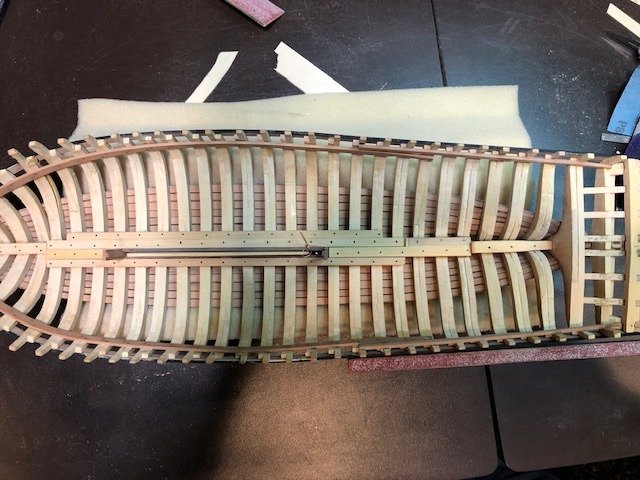
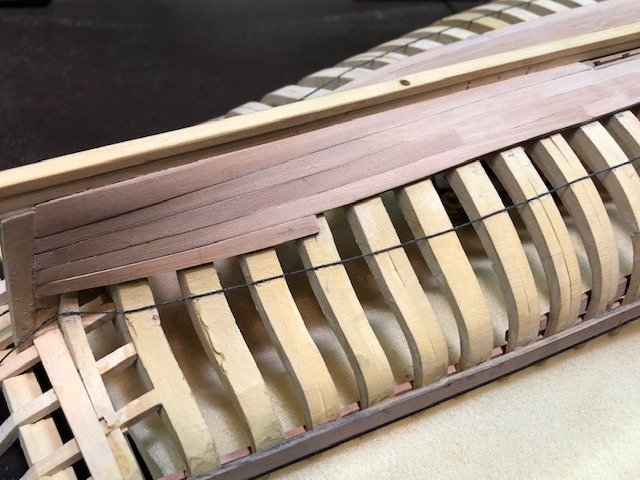
The lower planking band is done. Views from outside and inside. A lot of sanding to be done. Maury
- 308 replies
-
- 13
-

-
Planking continues... I'm getting close to finishing the first band of planking. Once done, I'll decide which side I'll leave partially exposed. Maury
-
Planking continues (slowly). Three strakes above the garboard are done. Notice the garboard needs some scraping to better line up with the adjacent plank. I started on the first drop plank. Carefully... It still has to be bent to form. Maury
-
This book was recently referred to me because of my build of the Modelshipways kit many years ago. It is a tribute to those who helped her reach her 150th birthday. It's a great supplement for anyone who chooses to build the kit. There are wonderful stories from her past, seemingly well documented. Lots of photos, almost all with her schooner-rigged. In one of the many restorations in her history, it was pointed out that in 1966, she was the oldest functioning working boat in America. What surprised me are comments that the original Noank fishing fleet was painted green and Emma fell into that category. Slade Dale, one of the former owners was reportedly upset at her topsides being painted black in preparation for her centennial cruise in July, 1966 since "Emma having always been dark green". It was the only time a merchant vessel had returned to the shipyard of her building a century after her launching. Still the loving restoration that Mystic undertook between 1969 and 1971 resulted in her being painted her black. Additional reading suggestion is "Restoration of the Smack Emma C. Berry..." by Willits Ansel. Maury
- 1 reply
-
- 4
-
-
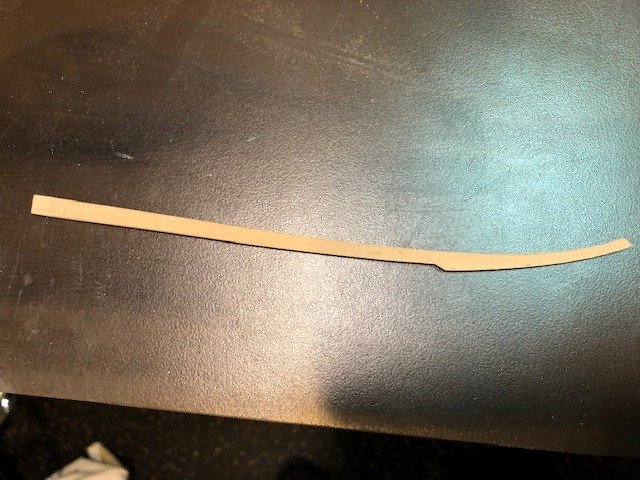
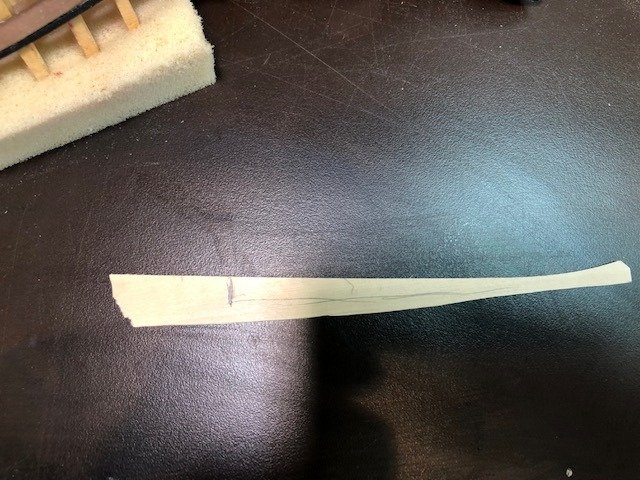
Planking continues. Each piece is spiled. I find using the 1/32 bass is so much easier than card for making patterns. Below is the pattern (laying flat) for the lower edge of the fore part of plank 10 (second up from the garboard). The pattern is transferred to 1/16" pear. Once that edge is correct, then the width is marked at each frame location. A ships curve is used to form the line. After it is cut, it's (heat) twisted, bent and glued. Maury
-
First plank above garboard on port side. Straight forward, spile, sand to adjust, fit, glue, clamp. Maury
- 308 replies
-
- 12
-
-
Spiling is the way to go. If you have to bend and want to use the microwave, soak a paper towel in water, wrap the plank and run the oven on high for a couple of minutes. Remember the size of the plank will expand and needs to stabilize for maybe a day after steaming. Otherwise you'll end up with gaps after it dries out. Maury
-
Back to the drawing board on the planking plan. I've cut the number of strakes between wale and garboard at DF to 14 from 16. That makes the width at 9.1" at the DF frame. The butt pattern stays the same...just eliminated strakes 1 and 16. Three drop strakes (pattern 3:2) near the bow (@ Frame "I" where the foremost butts occur) yields a plank width of 6" at the bow. All those tick strips I made will be redone and the lines on the frames erased. I still have to see what I can do about fair line of the wale on the port side forward. It just doesn't look right. Maury
-
I test-fitted a strake above the garboard and it seems way too thin at the bow. It's actually a hair less than 1/2 the width of the strake at DF. That means two or three drop strakes. Question arises...which pattern? 2:1 or 3:2. Is there a standard? Either way would reduce the number of strakes by two or three (from 16 to 14 or 13) at the bow and bring the width up to > 1/2 of the width @ DF. Comments? Maury