
HOLIDAY DONATION DRIVE - SUPPORT MSW - DO YOUR PART TO KEEP THIS GREAT FORUM GOING! (Only 20 donations so far - C'mon guys!)
×


Maury S
-
Posts
1,490 -
Joined
-
Last visited
Content Type
Profiles
Forums
Gallery
Events
Everything posted by Maury S
-
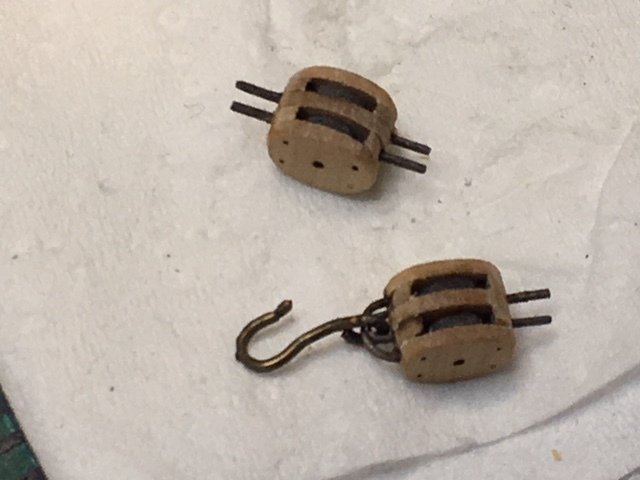
 Playing around with the blocks and bowsprit metal work. The lower of the hooked blocks has Chuck's very thin strapping and looks better. The hook needs some shaping. All the blocks need a bit more sanding. Maury
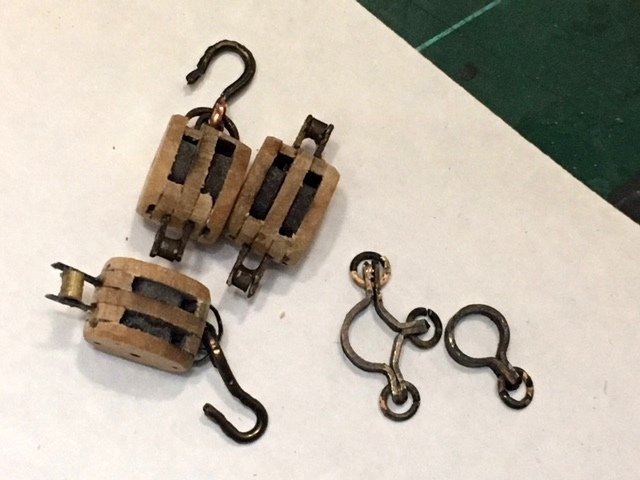
- 525 replies
-
- 6
-

-
- anchor hoy
- hoy
- (and 1 more)
-
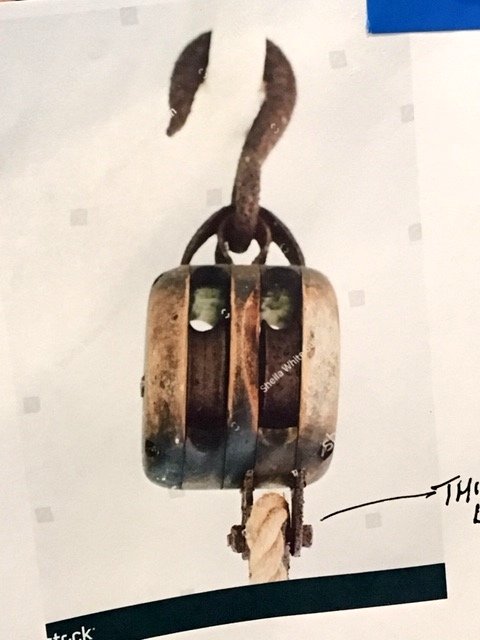
Small diversion...I need two large blocks for handling the large anchors. Below is a Google image of what one should look like. Syren Ship Model Co. offers internally strapped blocks. that are very close to this. They are harder to assemble than you may think. Two of the six came apart in the sander. I also used some stronger straps but they throw off the scale somewhat. The upper one in the photo will have a thimbles between the straps. Maury
- 525 replies
-
- 4
-
-
- anchor hoy
- hoy
- (and 1 more)
-
Druxey, I think I got it at a fabric shop. cleans up with alcohol. Not as messy as CA. I'm not sure what it is composed of. M

- 525 replies
-
- 5
-
-
- anchor hoy
- hoy
- (and 1 more)
-
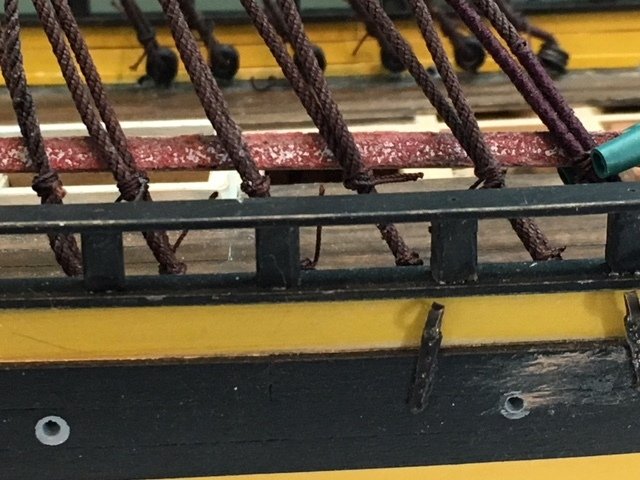
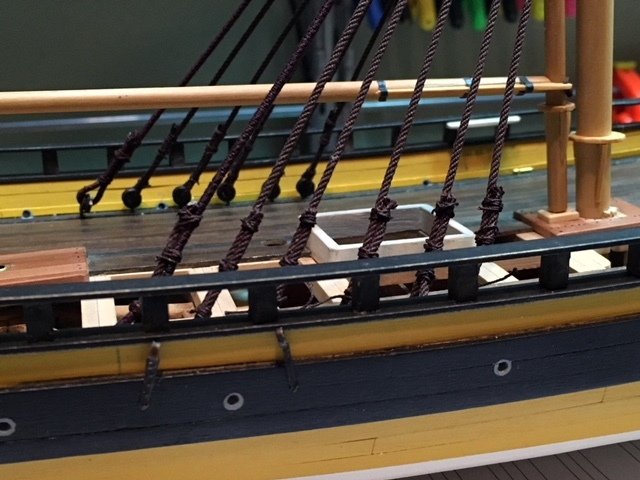
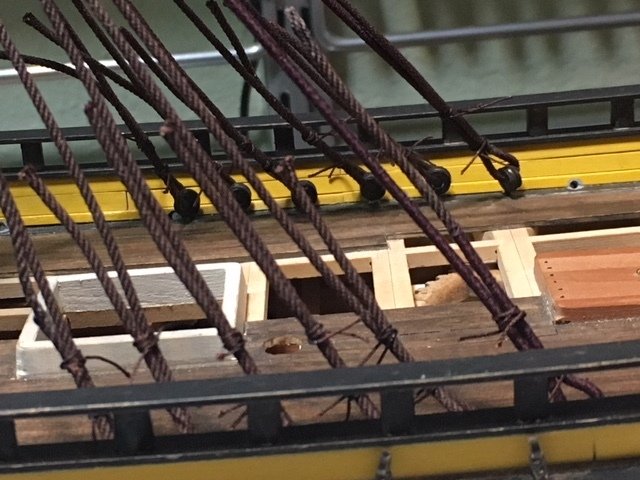
I clamped a stick along the shrouds and lashed the top row along that guide. Looks much better and there is still some cleanup to do. The ends of the shrouds were trimmed off and dabbed with a touch of anti-fraying liquid. Maury
- 525 replies
-
- 8
-
-
- anchor hoy
- hoy
- (and 1 more)
-
Shrouds are installed and siezed. The aft shroud is served all the way. The ends of the shrouds and the lashings have not been trimmed. The upper lashings were all tied at the height of the upper rail. In the picture they seem to vary too much but the photo was taken at an angle. I think the fifth shroud (from the left) is a bit looser than the others and needs tightening up a bit. Maury
- 525 replies
-
- 9
-
-
- anchor hoy
- hoy
- (and 1 more)
-
Swan class 3D model in progress
Maury S replied to dvm27's topic in CAD and 3D Modelling/Drafting Plans with Software
WOW! Maury- 141 replies
-
- 5
-
-
- pof swan series
- swan
- (and 1 more)
-
Pat, If you're looking for more than just "hold-downs" look at the "third hand" tool that Ed Tosti got for Christmas a year or two ago. Titanium clips to hold pieces so you can silver solder. Ed's logs all have a wide array of tools he makes for his builds. Maury
-
JD, The Aurifil thread is really good and after spending hours looking at it thru a 3X Optivisor lens, it is not completely fuzz-free. It's still the best I've found. Maury
- 525 replies
-
- 1
-
-
- anchor hoy
- hoy
- (and 1 more)
-
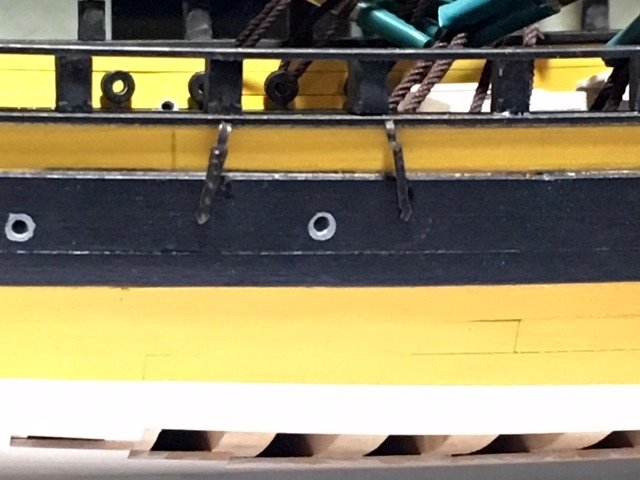
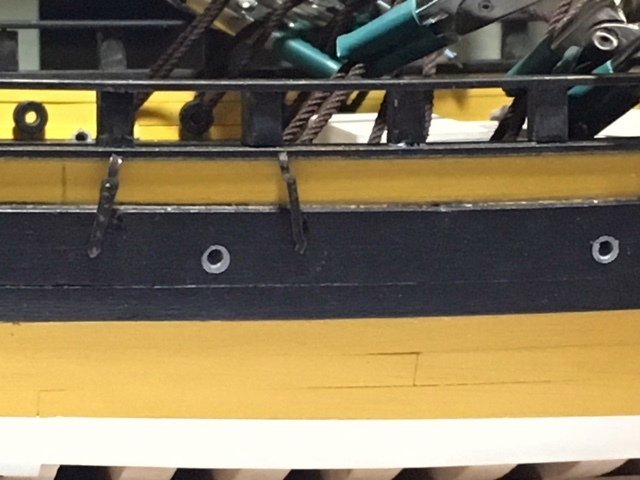
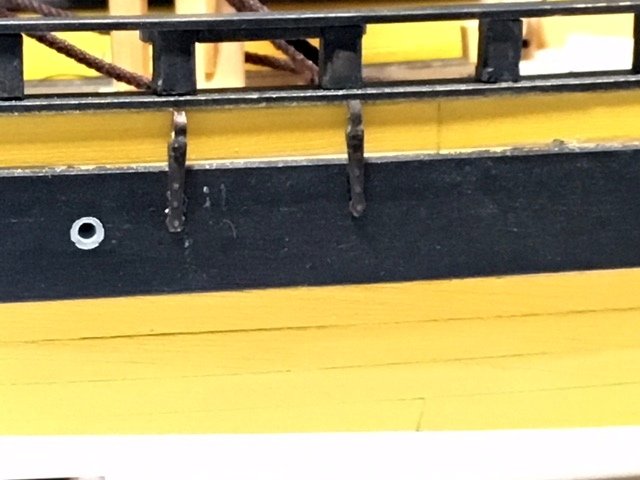
While giving my eyes a rest from serving, I installed the chain plates for the running back stays. The wales got a bit skuffed up. The issue of where to set the shrouds and back stays has been around since the beginning. The original drawings shows the shrouds outboard, but that would not be reasonable because they would bind and crush the rails. Other sources cite reasons for them being inboard. Secondary source (Grimwood) shows the rigging as he interpreted it but plenty of errors on his drawings. There is very little binding for the running back stays because of the angles to the tops. Maury
- 525 replies
-
- 7
-
-
- anchor hoy
- hoy
- (and 1 more)
-
Chuck, I applaud you for proposing some models of non-war ships and I'm relieved you will be having new offerings. There are hundreds of models of armed vessels out there and very few work boats. I understand that complete plans are lacking for merchant craft but there is so much to be learned from their construction and history. I also favor 1:48 scale to keep things I've done in similar perspective. I vote for Chebacco. Maury
-
Druxey, PLEASE Don't. Every comment you make is taken to heart. Lots of difficulty interpreting photos. Less than perfect focus and optical illusions abound. Maury
- 525 replies
-
- 4
-
-
- anchor hoy
- hoy
- (and 1 more)
-
Forestay served and seized at the top. I think that may be the last of the serving. Next up is seizing the shrouds onto themselves through the bulls eyes. Maury

- 525 replies
-
- 8
-
-
- anchor hoy
- hoy
- (and 1 more)
-
Druxey, It is important for me and the serving is laid in the opposite direction as the lay of the rope. Hard to tell in the photo. Thanks for the comments. M
- 525 replies
-
- 4
-
-
- anchor hoy
- hoy
- (and 1 more)
-
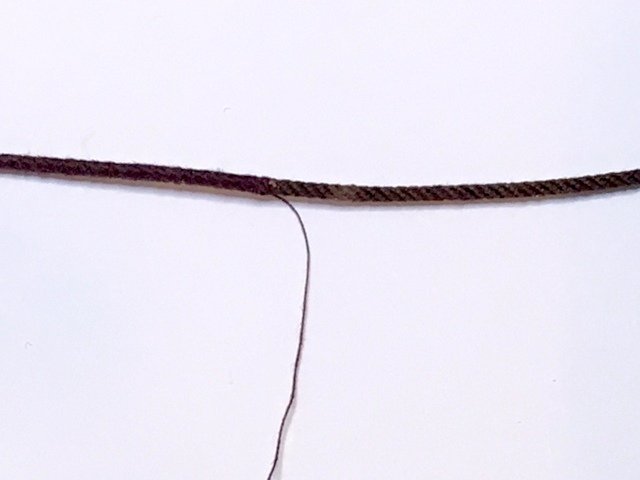
The serving is put on in the opposite lay of the rope. I started where the tail is and moved to the left with the serving coming over the top of the rope. Reasonably good color match. Maury
- 525 replies
-
- 7
-
-
- anchor hoy
- hoy
- (and 1 more)
-
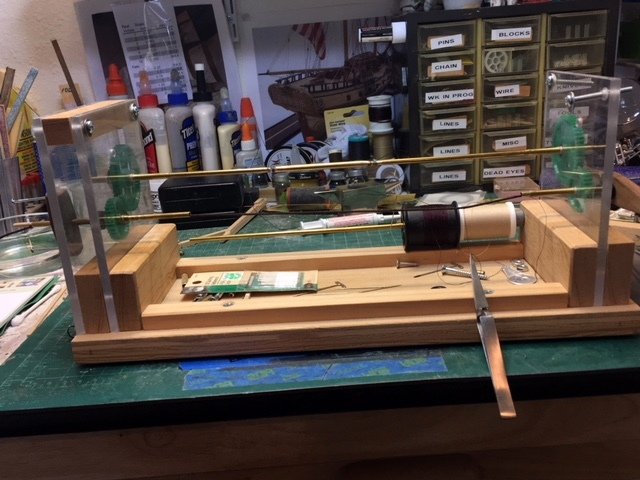
Serving continues...My serving machine design was taken from Ed Tosti's logs a few years ago. Last year I bought a Syren Server because of it's elegant design. My old one is larger than Chuck's, and I made some modifications to the old one incorporating his handle design and take-up arrangement which I much prefer. Mine is smoother-running (lubricated plastic vs. wooden gears) and heavier so I don't have to clamp it to the work surface. It also has the "tool tray" for needles, threader, tweezers, clamps, etc. I'll probably use the Syren version for serving blocks, etc. since it has a smaller span.
- 525 replies
-
- 8
-
-
- anchor hoy
- hoy
- (and 1 more)
-
really looks good! Maury
-
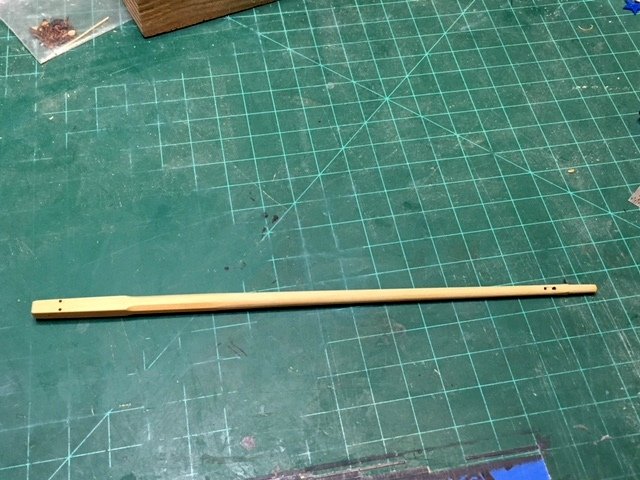
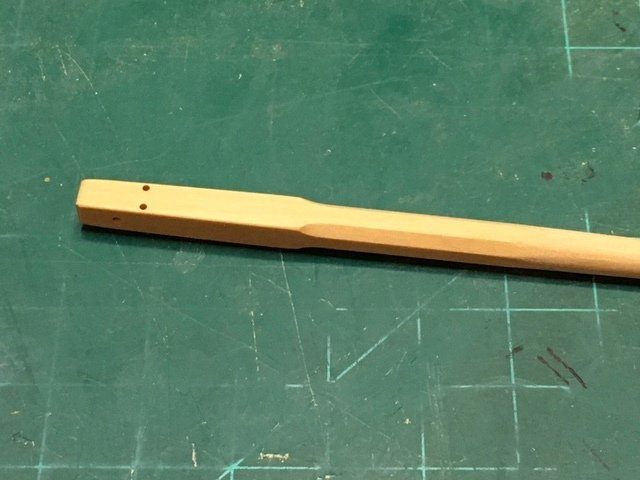
Replacing the bowsprit (see post above): It's done the proper way to make spars...start with square stock, drill all necessary holes (i.e simulated sheave, etc.) while it's square. Mark center line and define the taper on two opposite sides, plane the taper and draw ajacent taper on those sides, finish planing taper on the remaining two sides. Use 7 - 10 - 7 fan to define edges of the octagon. This spar is 10" square for about 4'-10", 11" octagonal for the next 5' 10", then round tapering down to about 6" for the next 20' + / -. The two hole at the right are for the sheave. The two holes on the top (left) are for the eyebolts (part of the gun tackle for setting the spar). Maury
- 525 replies
-
- 8
-
-
- anchor hoy
- hoy
- (and 1 more)
-
I tried blackening some of the eye bolts and the copper strapping of the blocks with liver of sulfur and nothing happened. Back to the testing lab. I took another piece of copper wire, rubbed it with steel wool, bathed it in acetone and rinsed. The LOS worked fine. Only thing I can imagine is I did not clean the wire before making the bolts, hooks and blocks. It probably has a coating. Odd thing is that the strapping on the blocks was filed flat, which would have removed any coating. This means removing the bolts, re-doing the blocks, etc. The bow sprit has two bolts embedded that I can't remove. Thankfully, that's the only spar that I have to re-make. Maury
- 525 replies
-
- 3
-
-
- anchor hoy
- hoy
- (and 1 more)
-
First two pair of shrouds are served and bound together with the dyed serving line. Nothing set permanently yet. The serving only goes on the area around the mast to where the pair is bound on the front five sets of shrouds. Wear would have occurred on the aft most set where the boom would rub against the shrouds so that set will be fully served. Maury

- 525 replies
-
- 9
-
-
- anchor hoy
- hoy
- (and 1 more)
-
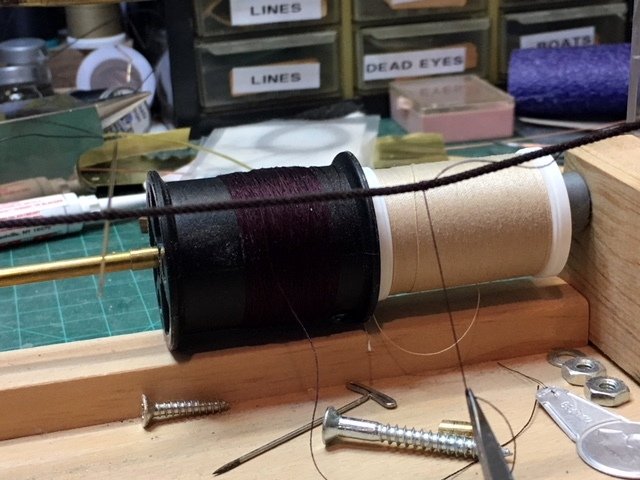
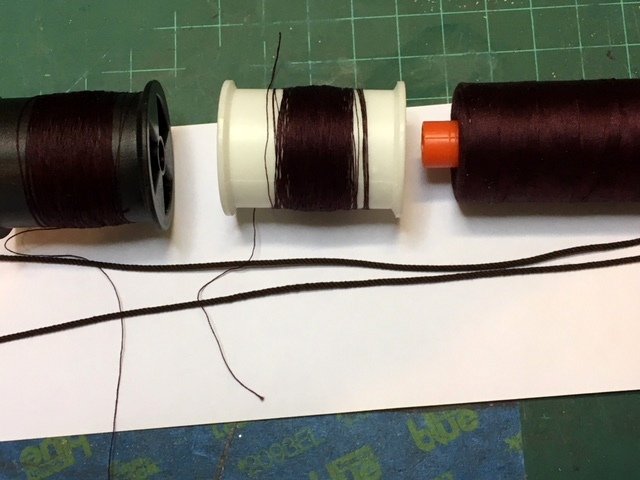
Getting ready to do some serving on the shrouds. The rope is from Syren Ship Model Co. and is the dark brown. I asked one of my second mate's Quilting friend what was the best fuzz-free quilting thread and she responded Aurifil. So I bought a spool of the "dark Brown" and it has a bit too much red in it. I took off a hundred feet or so and dyed it in a very diluted RIT dark brown dye (for cotton). That toned-down some of the red (see spool on the right for the Aurifil original). The white and the black spools have some dyed thread (different times in the dye vat). Not much difference there. Maury
- 525 replies
-
- 4
-
-
- anchor hoy
- hoy
- (and 1 more)
-
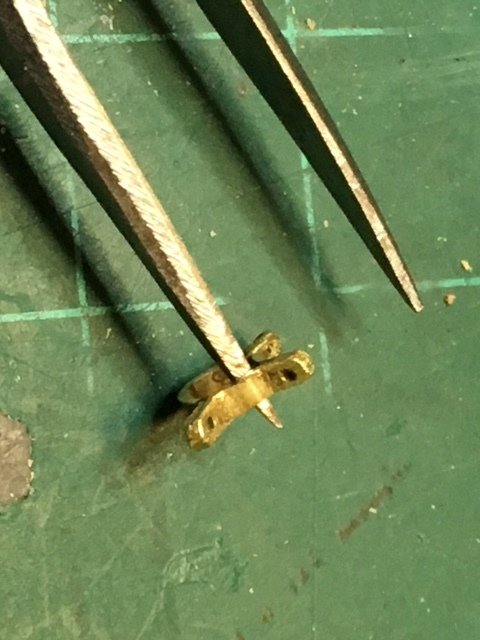
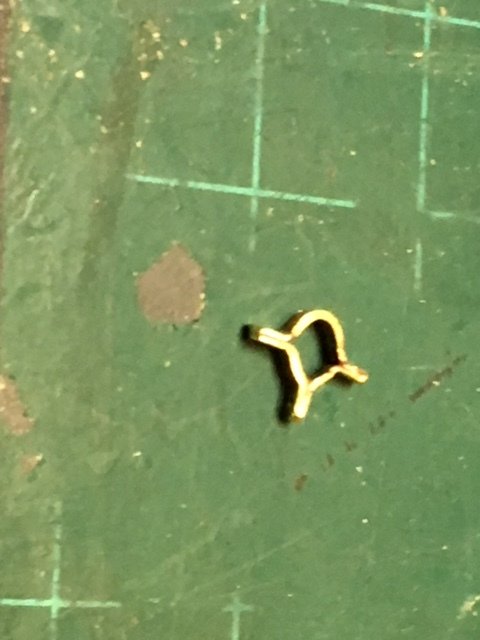
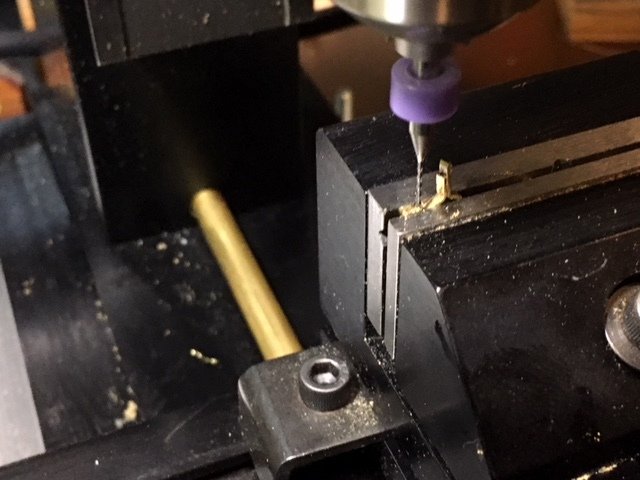
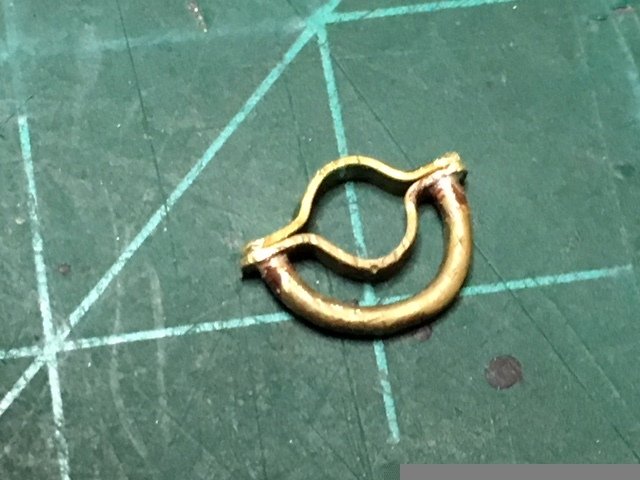
From the department of "How many little pieces can you lose in a day"...more metal work. This is the piece for the end of the bowsprit. The pieces (2) were bent and soldered, then the holes were drilled using the mill. Centers were punched and drilled VERY slowly with a .064" bit. Edges trimmed and filed. Maury
- 525 replies
-
- 11
-
-
- anchor hoy
- hoy
- (and 1 more)
-
Back to the shipyard...Metal work on the spars. Below is the horse for the boom (main sheet tackle). It's about 3/8" across. Bars are 1/64" brass strips. It will be blackened along with other brass and copper pieces. Maury
- 525 replies
-
- 9
-
-
- anchor hoy
- hoy
- (and 1 more)
-
Very nice Mike. Maury