Maury S
-
Posts
1,490 -
Joined
-
Last visited
Content Type
Profiles
Forums
Gallery
Events
Everything posted by Maury S
-

ancre Le Fleuron 1729 by rekon54 - 1:24
Maury S replied to rekon54's topic in - Build logs for subjects built 1501 - 1750
What fine line thos planks have! Maury -
Thanks Chuck, I'll put some isopropyl alcohol on them before I try that. Maury
-
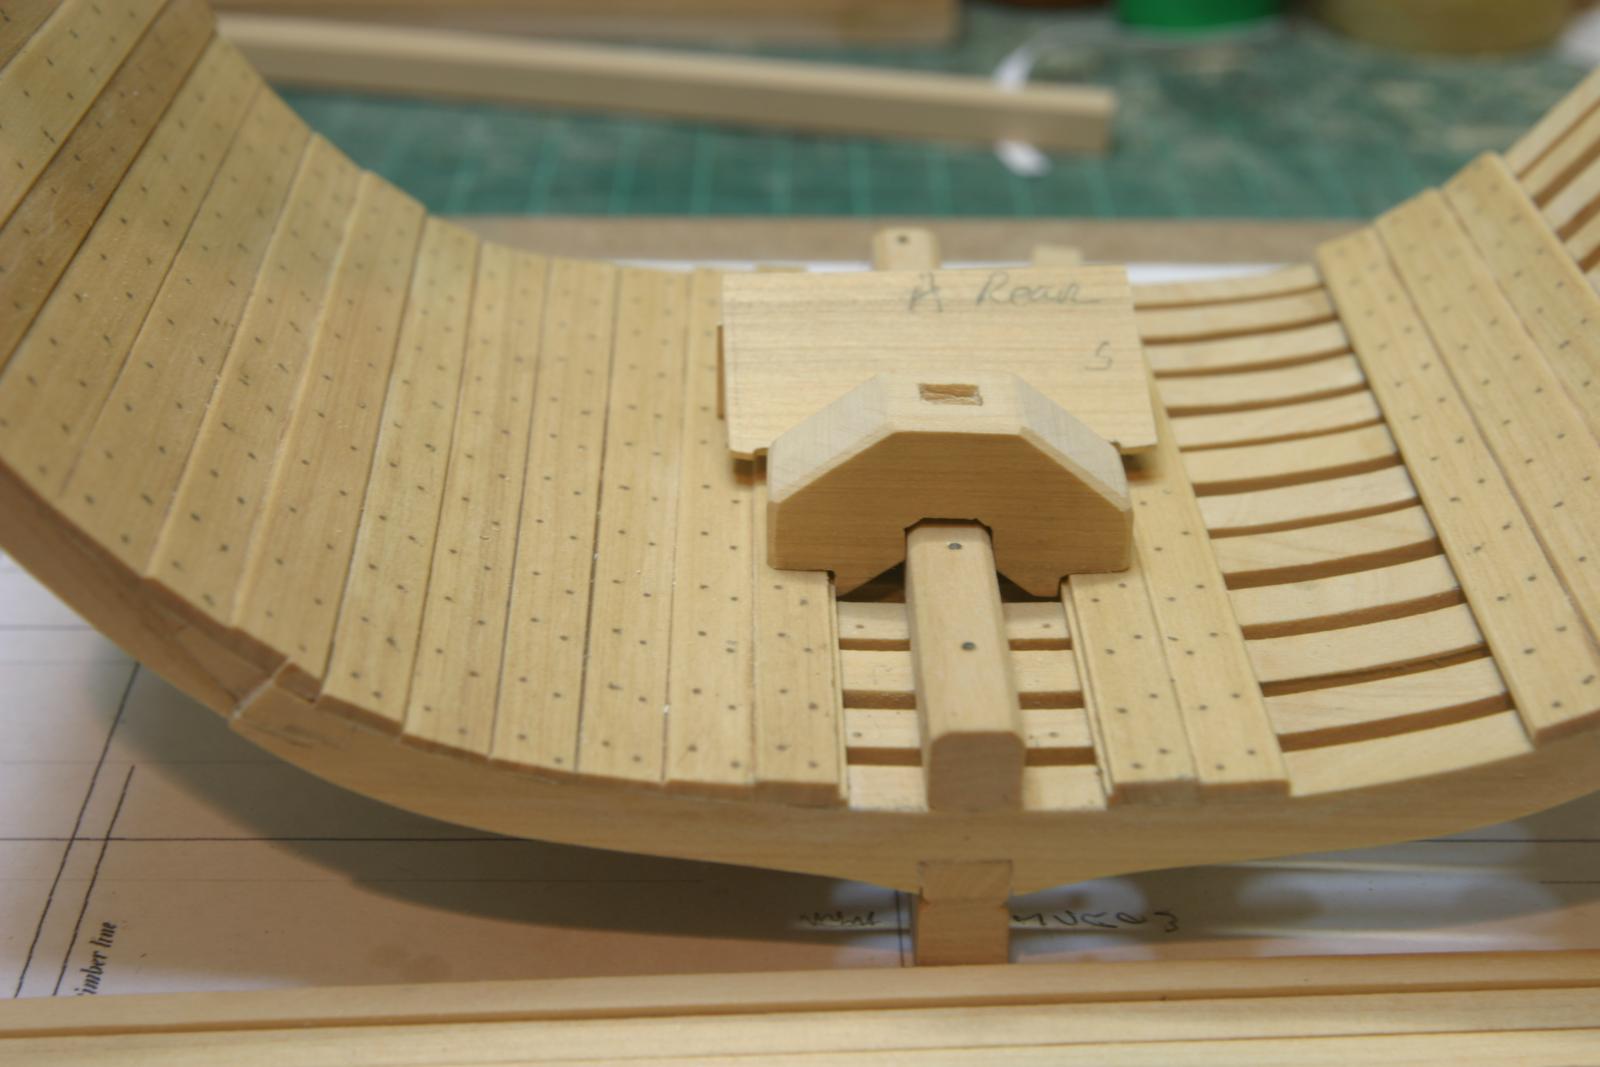
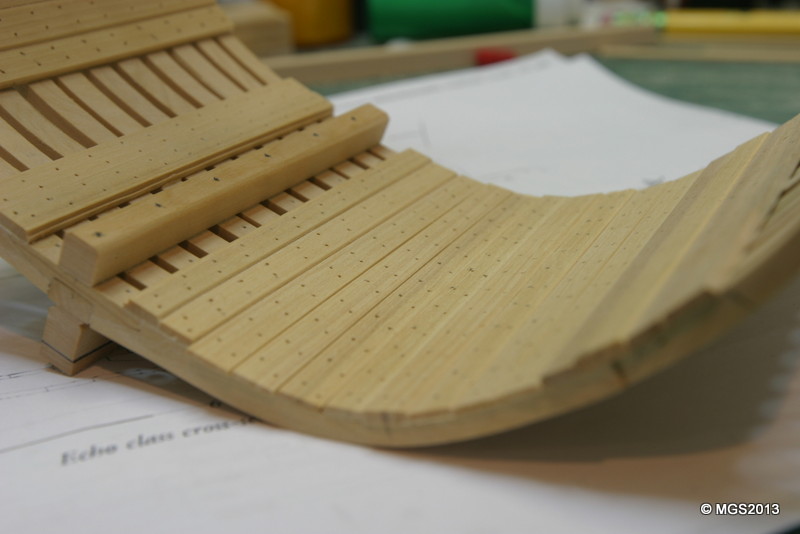
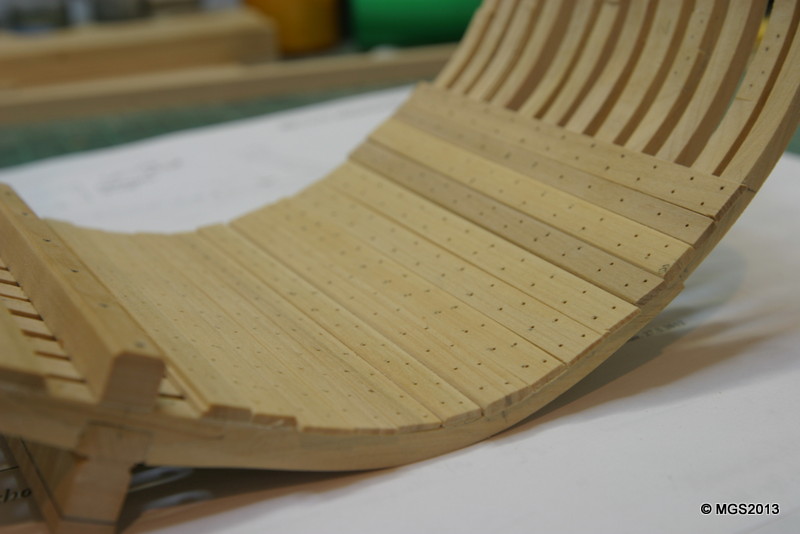
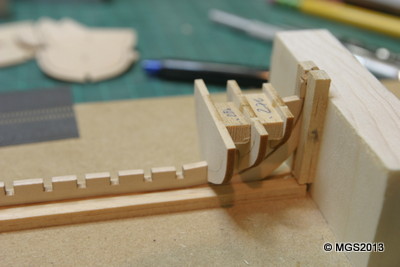
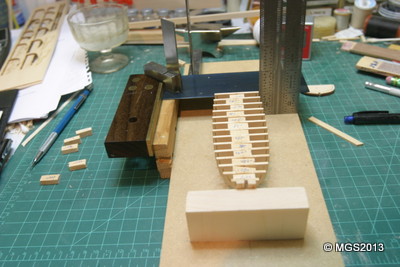
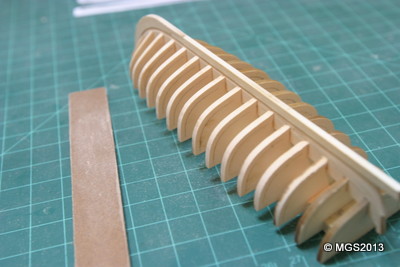
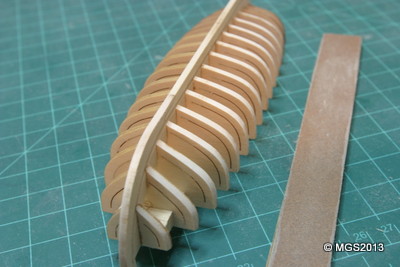
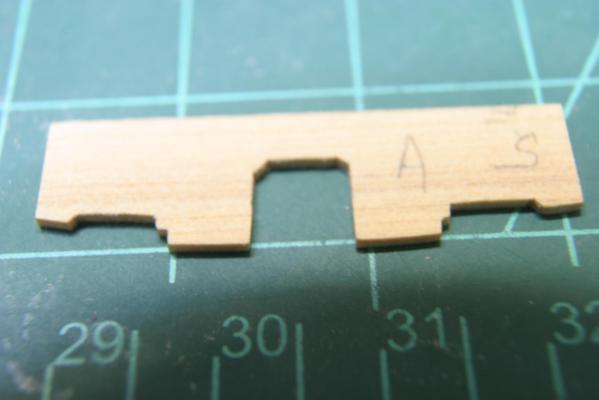
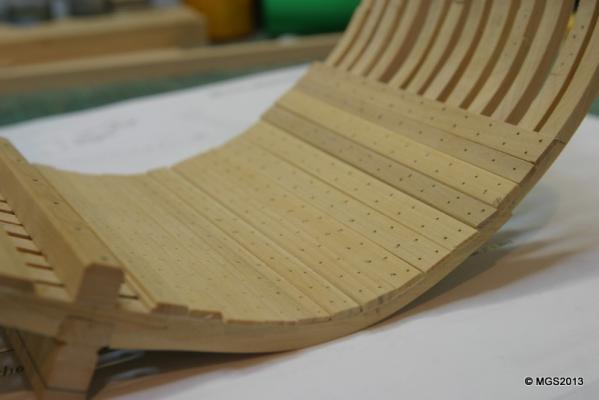
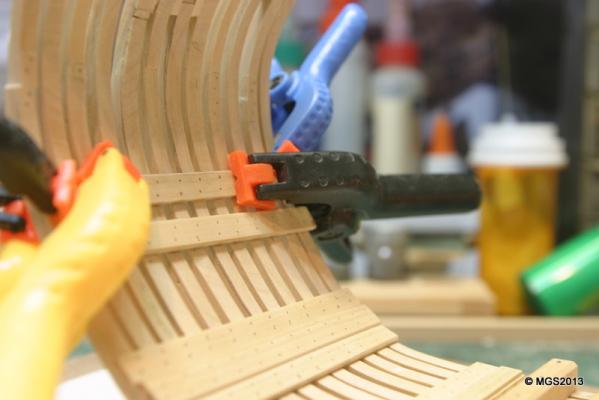
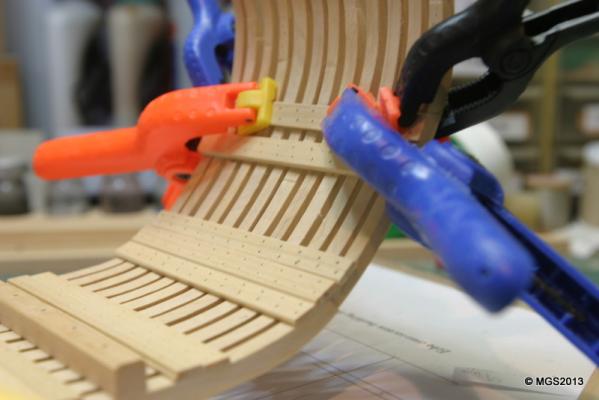
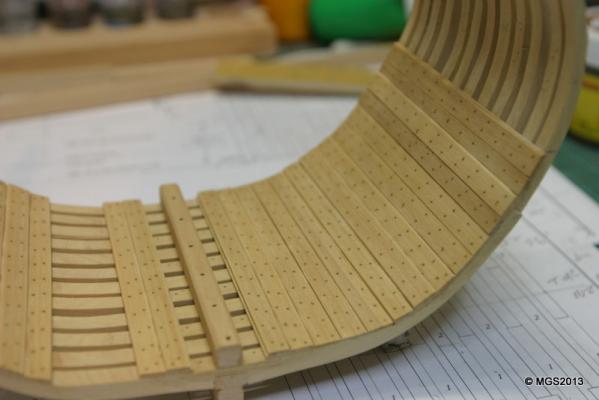
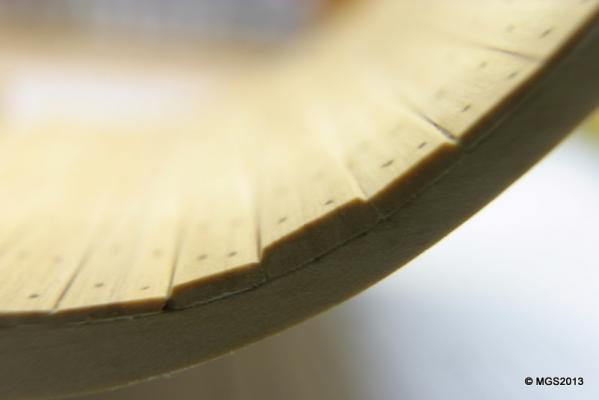
While I'm waiting on the Admiraly Models Echo Section instructions, I have started on Chuck's kit as a small diversion. I'm using the kit provided bass wood for the Keel, false keel and bulkheads (to be called frames after the center sections are removed). I am using box wood (from Jeff at Hobbymill) for the planking, etc. I am looking at all the other Longboat logs for tips and techniques. Plenty of help there! A simple building board was set up with runners to keep everything lined up. I lightly sanded the notches on the keel and bulkheads but left the laser burn on the outside of the bulkheads to aid in fairing. Bulkheads were stabilized with spacers between. They will disappear when the centers are cut out. The second picture shows some of the squaring techniques to keep the bulkheads square and plumb on the building board. Once done, the fairing started using 220 grit on a sanding stick, followed by 320 grit. When the laser burn is gone, the bulkheads are fair. The transom is installed but not shown. I'm going to spile the planks (no edge bending) so several trial attempts with card stock are underway. Maury
-
Echo by oneslim - cross-section
Maury S replied to oneslim's topic in - Build logs for subjects built 1751 - 1800
I recently learned that there is a difference between "Contact Cement" and "Rubber Cement". They both come in the same size and shaped bottles. Removal of the contact cement is more difficult. I was informed Ronson Lighter Fluid is the same chemical as Goof Off. Seemed to work fine. Maury -
Echo by Maury S - FINISHED - Cross-Section
Maury S replied to Maury S's topic in - Build logs for subjects built 1751 - 1800
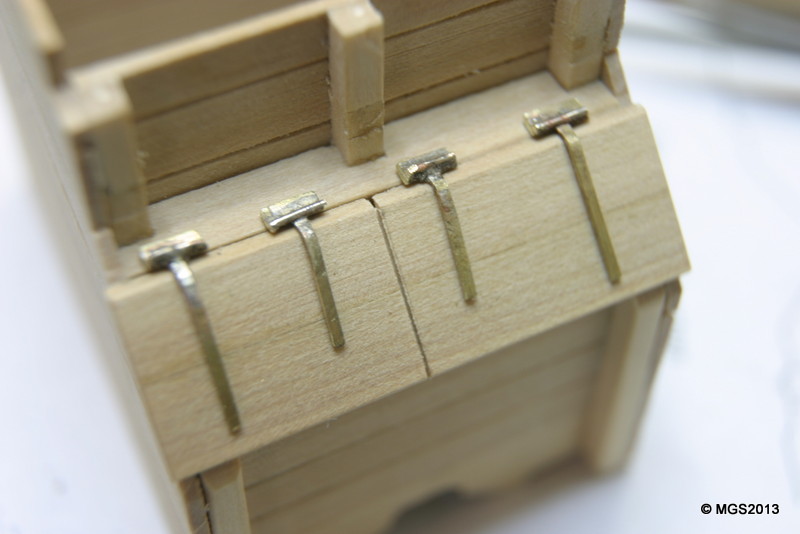
Lower athwart-ship planks sanded back to just below the limber board intersection. THe lid to the shot locker is two boards glued and beveled, but I only scored for the two doors rather than cut all the way through. Hours spent on the shot locker hardware. After cutting the three pieces for each hinge (two parts of the "T" and the wire for the hinge barrel) I started to hard-sloder them. On most attempts, the pressure of the butane torch blew the wire off center. Solution; Work with long pieces, high temp. solder on the "T" and lower temp. on the wire. By using the long pieces I was able to hold them in place while using the torch. Bent to shape, then a quick filing, dip in acetone and a vinegar bath cleaned them up enough for blackening. Very dilute (5:1 water: Chem) "Blacken-it", then a stopper bath in vinegar. Much more difficult to see the hinge details now. I'll glue them in place with CA. Not quite as clean a job as Greg's, but I'm happy with the progress so far.
-
Echo by Maury S - FINISHED - Cross-Section
Maury S replied to Maury S's topic in - Build logs for subjects built 1751 - 1800
Druxey, Thanks, I'll be shaving them back a bit. Maury -
Echo by Maury S - FINISHED - Cross-Section
Maury S replied to Maury S's topic in - Build logs for subjects built 1751 - 1800
After cutting and beveling edges of side boards, I've started on the well sides. Four strakes from bottom up, then the entire well structure is solid, and square. Sanding sticks were handy to use to hold the boards against the stanchions while glue dries. I can now take it out and finish the walls from top down. Maury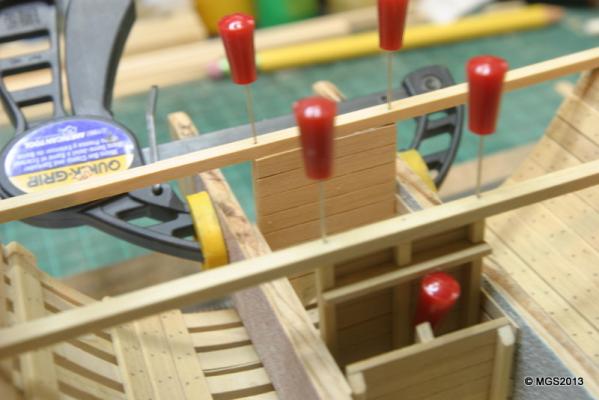
-
Echo by Maury S - FINISHED - Cross-Section
Maury S replied to Maury S's topic in - Build logs for subjects built 1751 - 1800
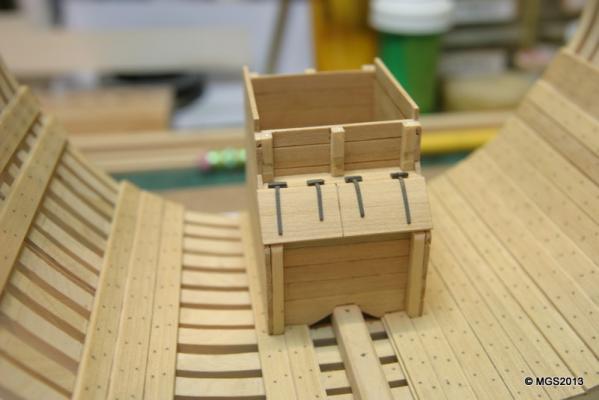
Back from vacation...I've finished up the fore and aft walls of the well and the face of the shot locker. Boards are chiseled at an angle creating an over-lap. Minor tweaking of the lower slat so all three pieces line up evenly. The floor and top of the shot locker, along with hinges are the next steps. I'm holding off on the sides until we get the lower deck beam layout. Since the stanchions need to be attached to the beams, the length of the well can not be determined until the beams are properly aligned along the clamp. **Later modification! While the NMM Plans dictate the size of the well, you will find out later that the pump cases run right through the side walls. If you widen the well by 6", the cases should fit without cutting into the walls. Greg suspects that some kind of on-site modification to the well was necessary in constructing the full sized ship.** Maury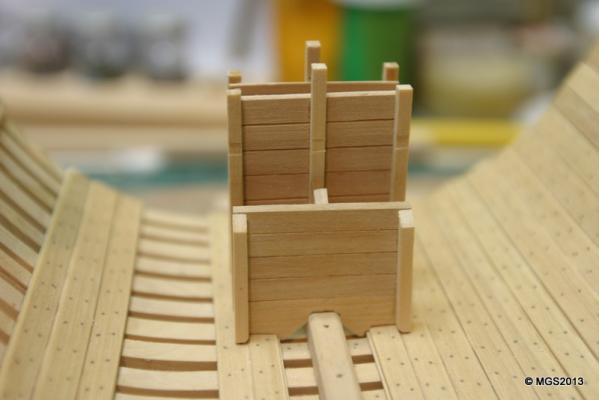
-
Echo by Maury S - FINISHED - Cross-Section
Maury S replied to Maury S's topic in - Build logs for subjects built 1751 - 1800
Greg, Robert, Druxey, Thanks for the input. A flat floor for the shot locker makes sense. I can fiddle with the Mast Step and make it work per your comments. I think I may as well put in the wedges as well. Maury -
Toni, Nice job. When he was first building the boat I had a discussion with Chuck regarding the positioning of the horse. I see you found a solution that makes sense. It could not be sailed with the horse under the tiller. The kit's on my shelf for some time later. Maury
-
Echo by Maury S - FINISHED - Cross-Section
Maury S replied to Maury S's topic in - Build logs for subjects built 1751 - 1800
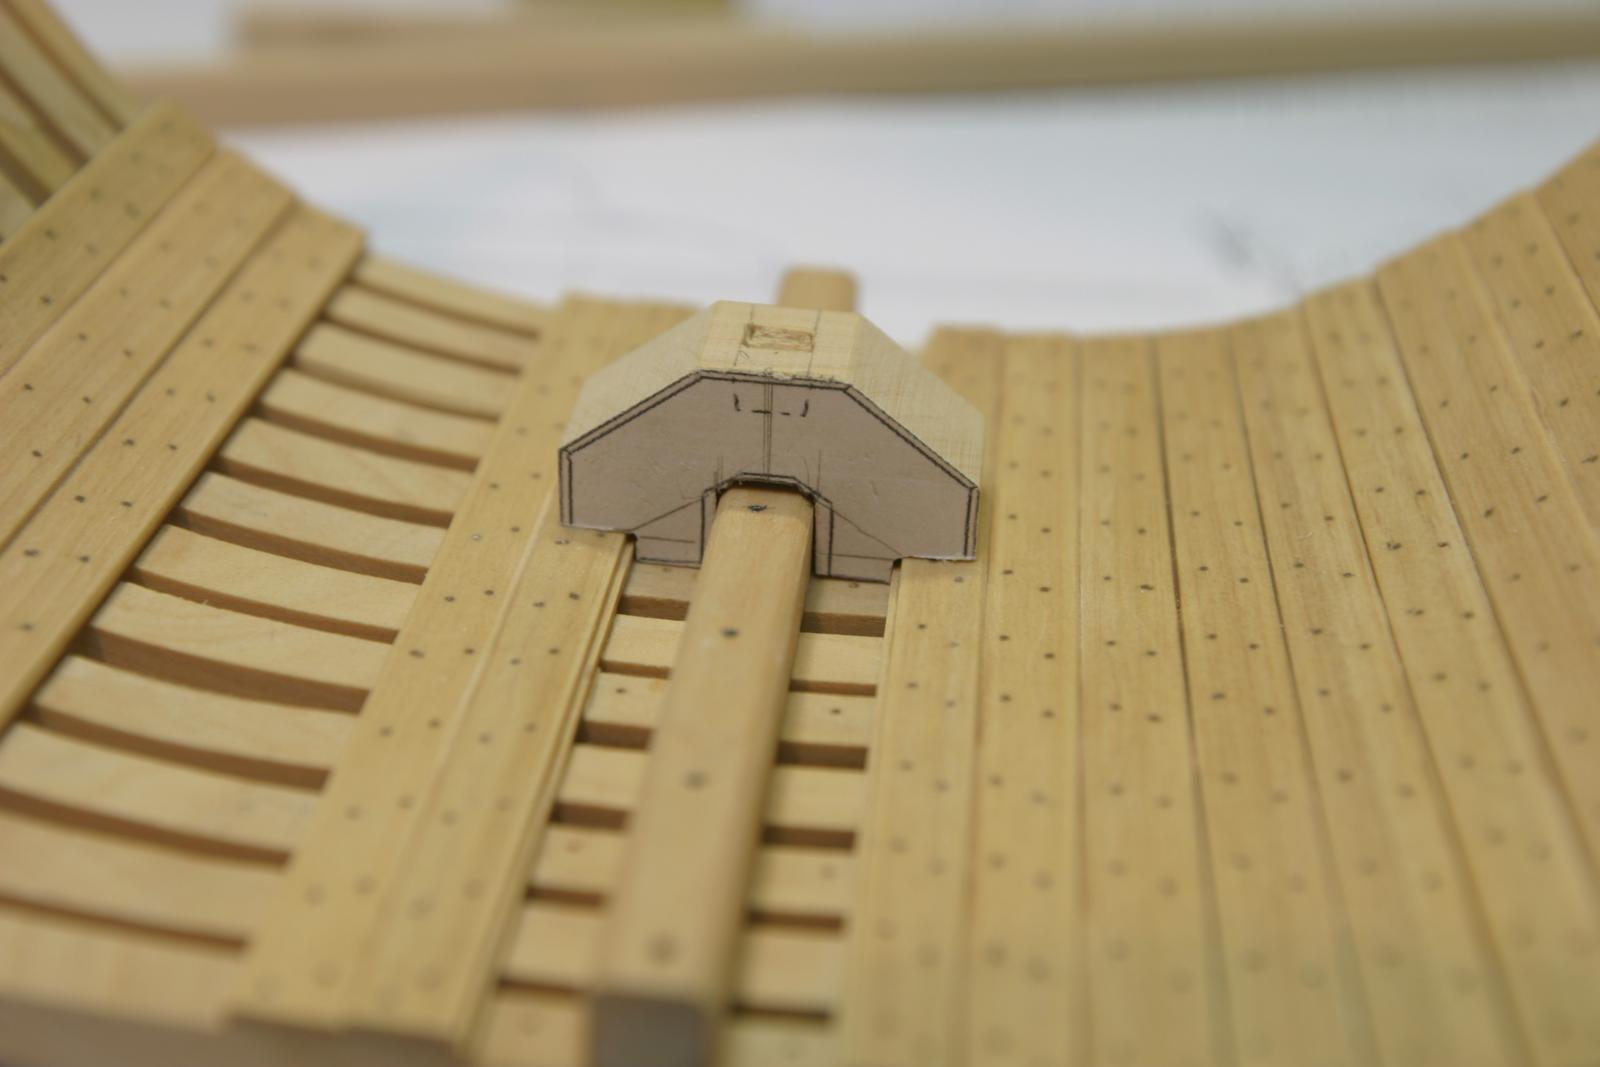
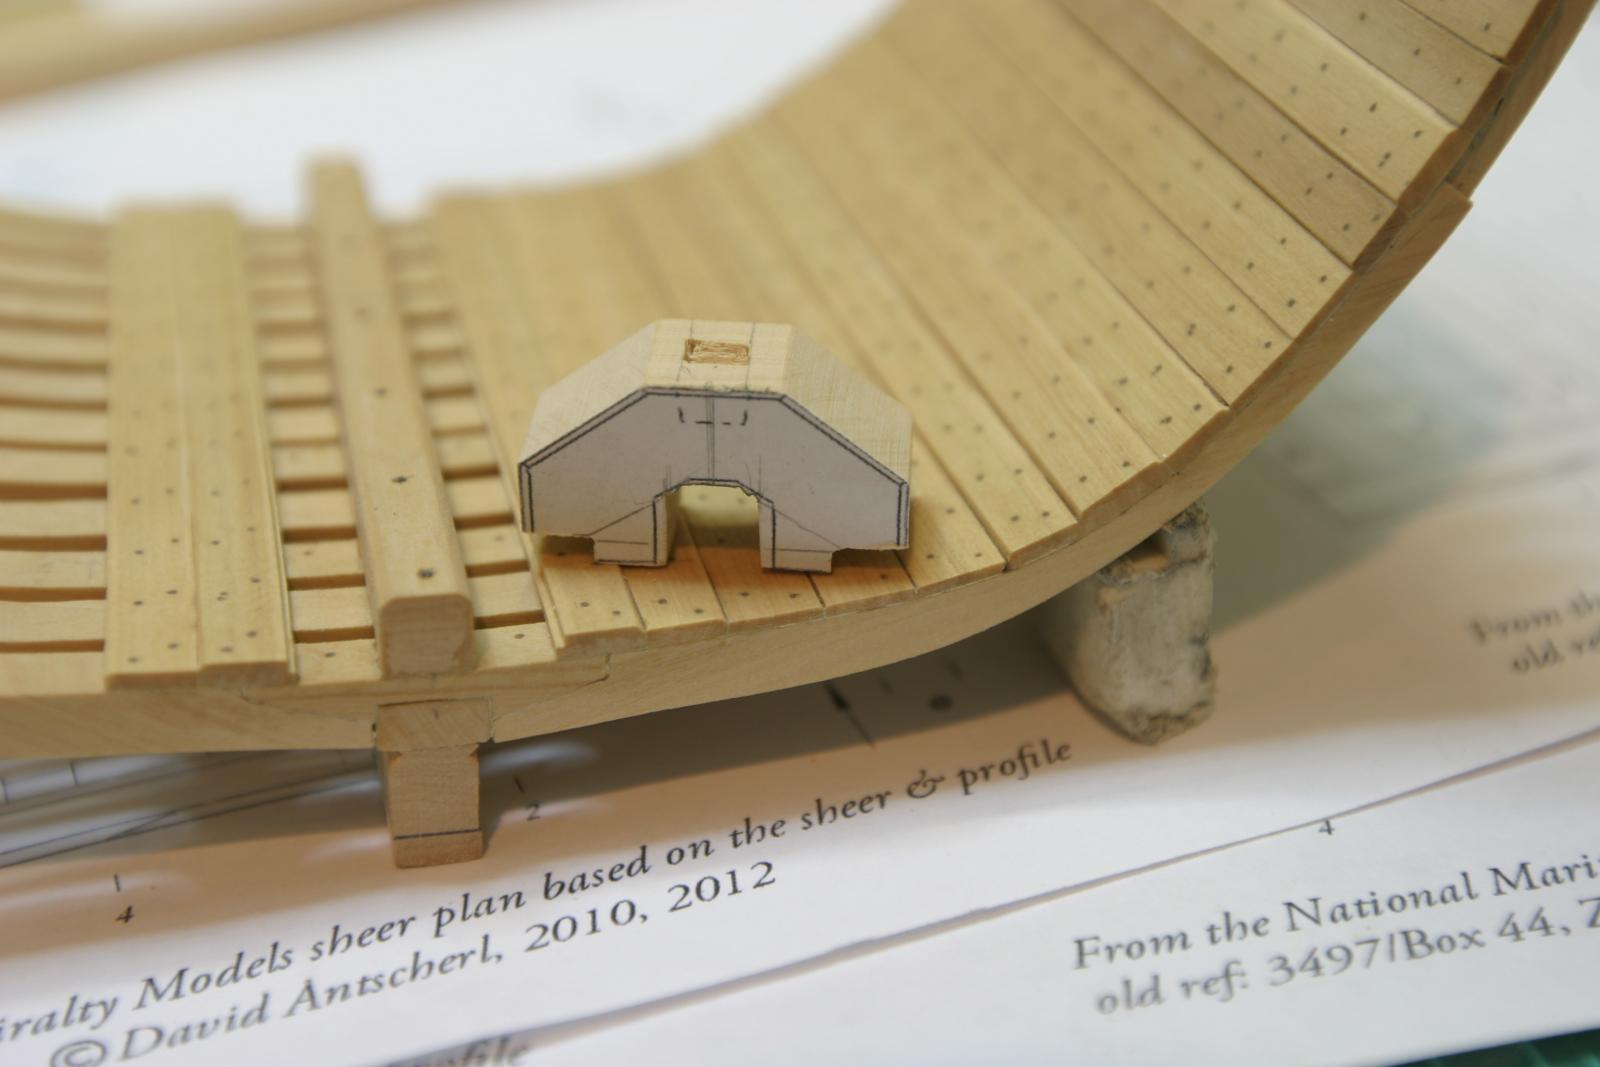
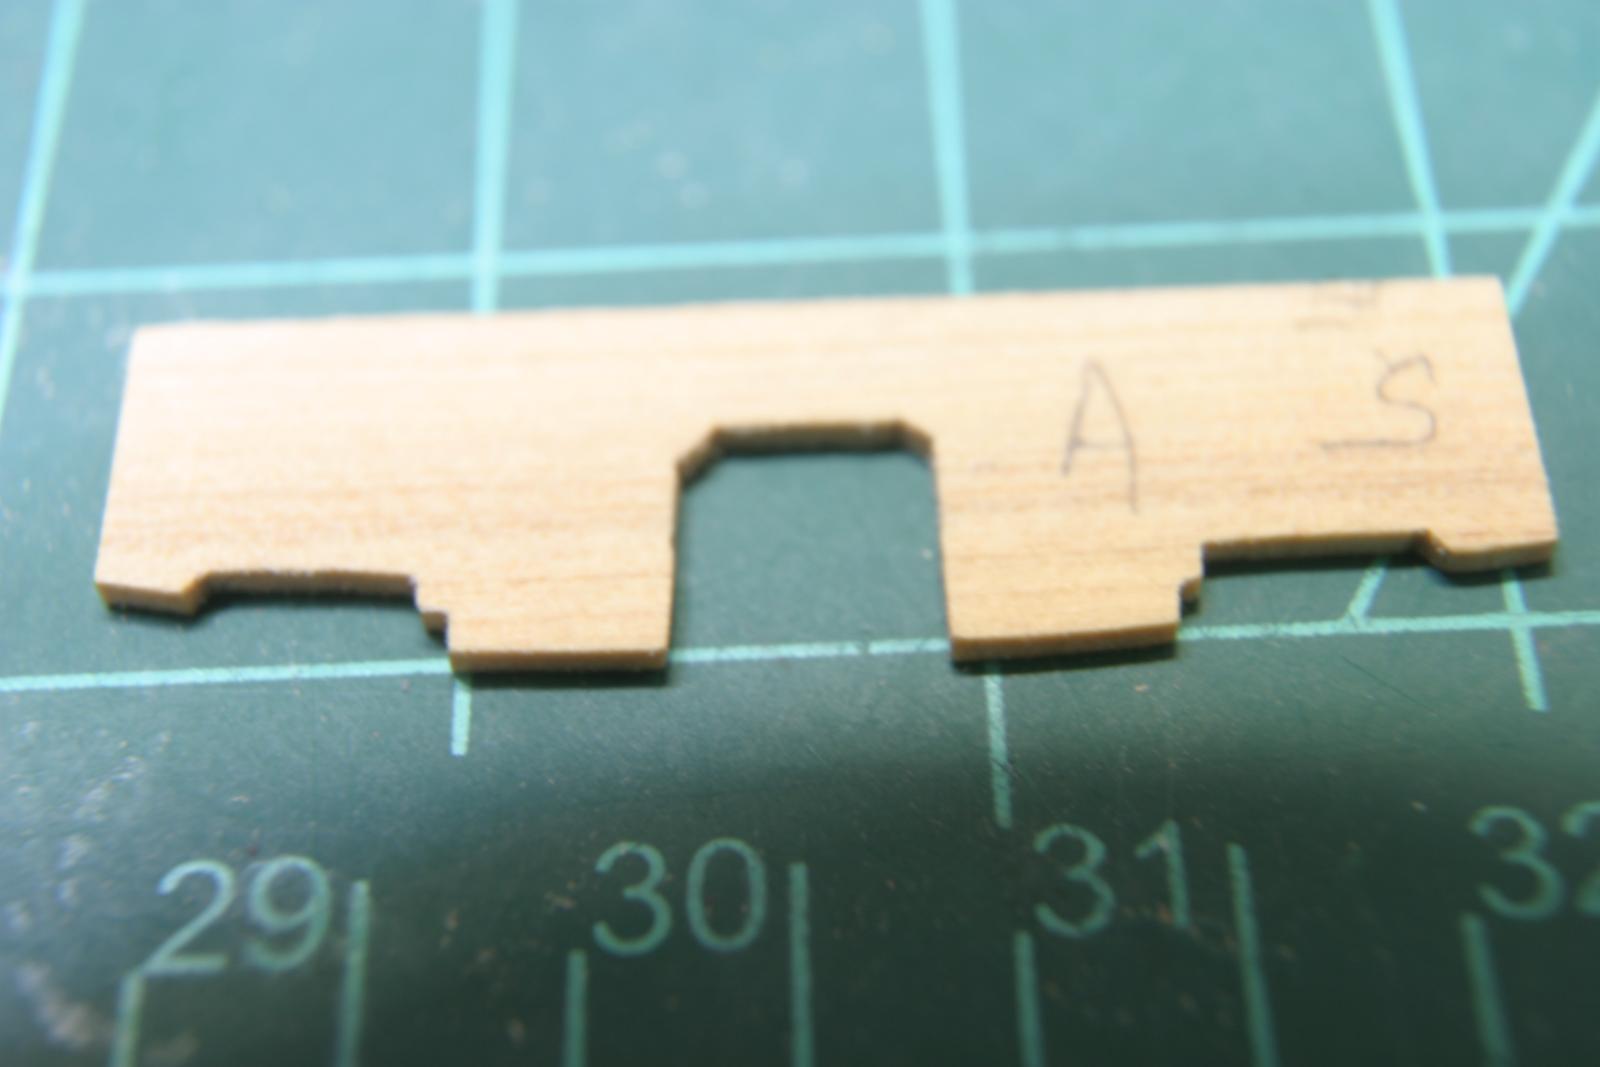
I've run a bit ahead of the instructions so I've just done the lower deck beams, Mast Step and the lower board of the well. Several questions arise as things are about to block up the bilge. The mast step has to allow water to pass under for collection by the pumps, so a large chunk of the step was removed, with plenty of support left along the keelson. The lowest athwart-ship boards for the well and shot locker need fitting so the pattern was drawn on a card held at one end of the model, transferred to wood and then finish sanded and filed to fit. Once done, two more were made. Water has to flow to the well where it's collected by the pumps. That means the well boards have to be left short enough to allow the flow. But the shot locker? Surely shot was not dumped in the locker blocking the waterway. Would there be limber boards inside the locker? Alignment of the well and locker is tied to the lower deck beams and I'm not convinced I'm reading the plans properly for the placement, so I'm waiting for Greg to produce the next installment. I've got other projects for the next couple of weeks so I'll just stop for now. Maury

-
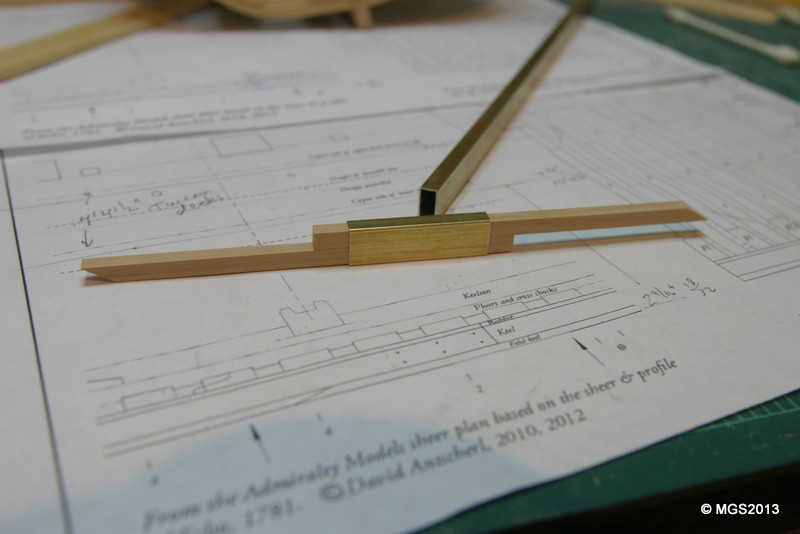
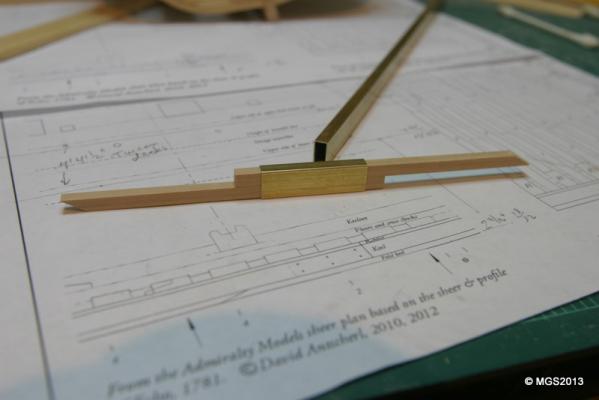
A measuring stick for determining the inside span (like deck beams)...inspiration David Antscherl TFFM. I bought some rectangular brass tubing at ACE Hardware, cut off a small section and cut and carefully sanded two strips of hardwood to fit snuggly inside the tubing. Cut the ends at a sharp angle. Maury
-
Bill, thanks for sharing what you use for your "craving". Maury
-
Echo by Maury S - FINISHED - Cross-Section
Maury S replied to Maury S's topic in - Build logs for subjects built 1751 - 1800
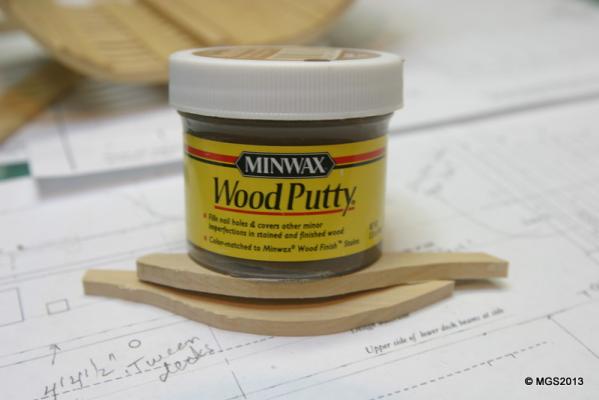
Ben, The Matte Finish has even less sheen than Satin and it's water cleanup. (I don't recall about the MinWax Satin). It really is as close to no finish as I've seen, yet gives all the protection of Poly. I forgot to mention, after the water is wiped on the planks to clean off the putty, I wipe it off (dry) with a soft cloth. Thanks to everyone's comments about the treenails. I was not sure what the reaction was going to be (cheating and all). Maury -
Echo by Maury S - FINISHED - Cross-Section
Maury S replied to Maury S's topic in - Build logs for subjects built 1751 - 1800
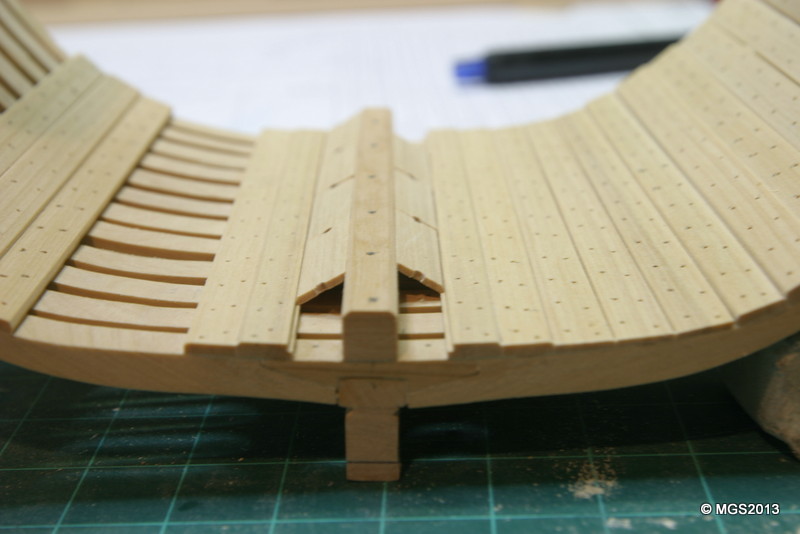
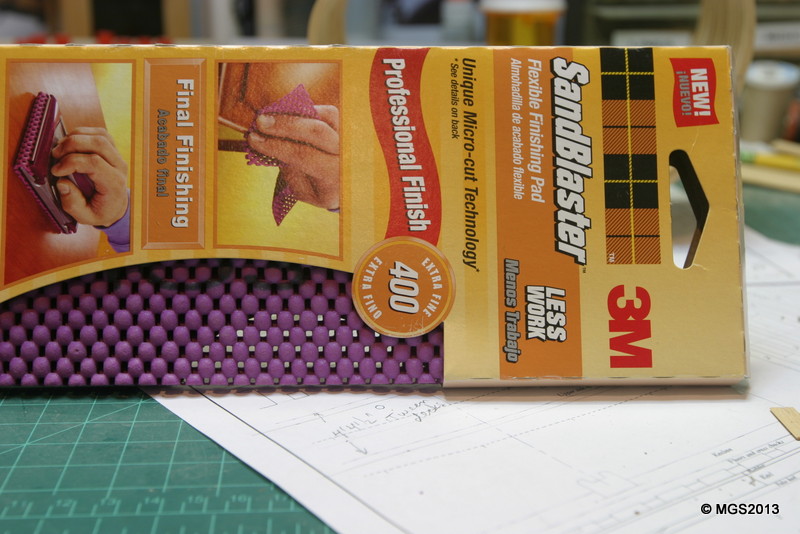
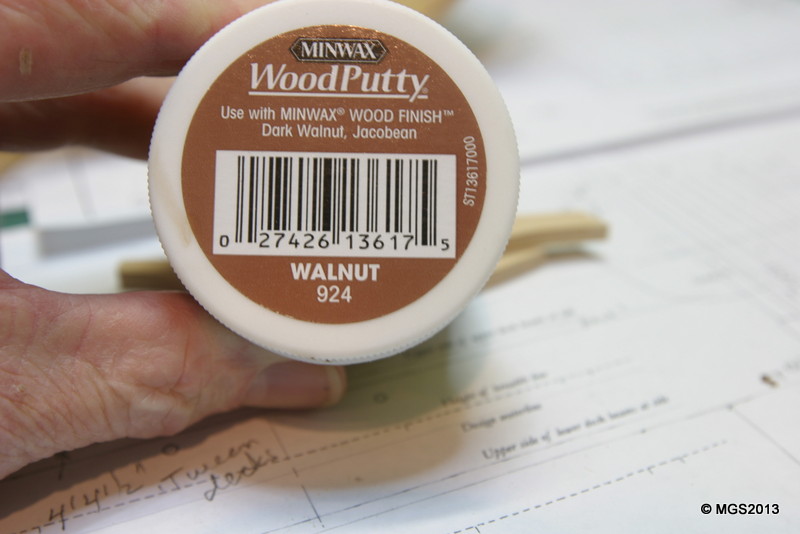
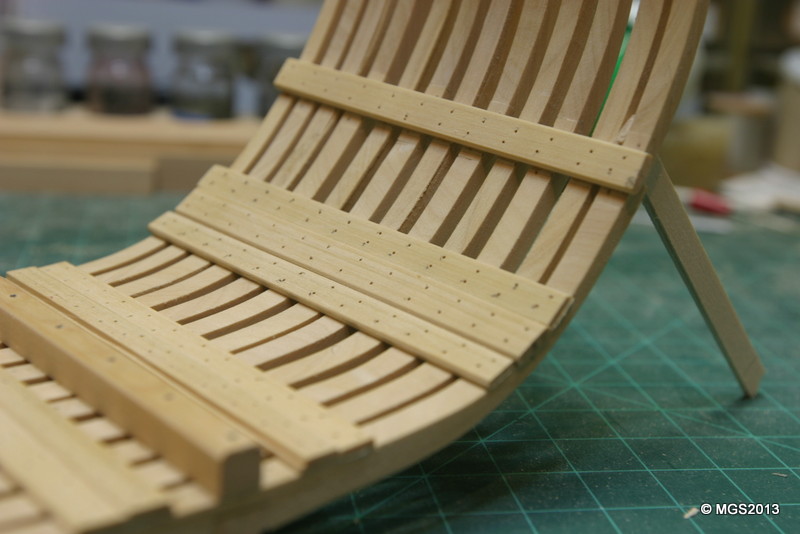
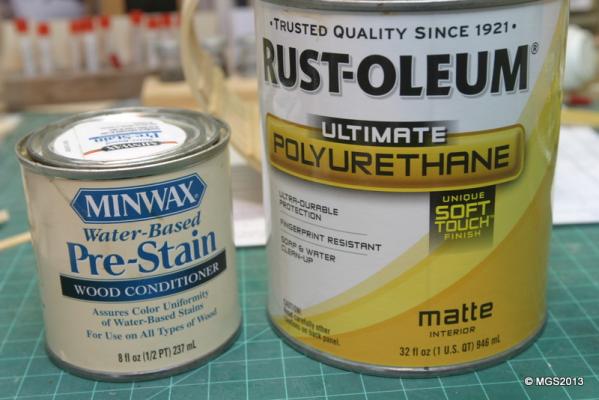
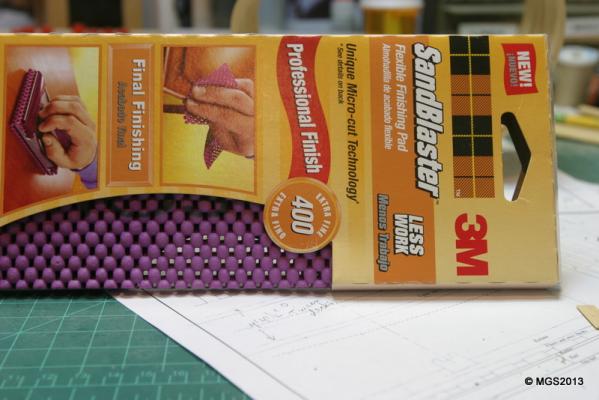
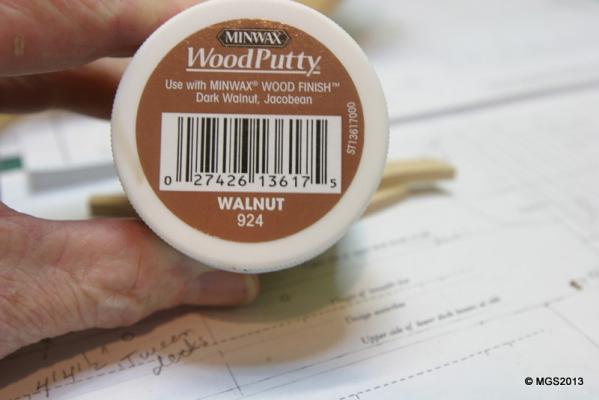
Lots of progress in the last few days. After a lot of measuring, the clamps were cut and installed. Foot waling installed on the Port side (Stbd will be left more exposed). I was very disapointed with the bass wood I used for the first attempt at the linber strakes...too fuzzy. Back to the Boxwood. I cut one edge on the table saw with a 45° angle. I then put the rough piece in the vise and sanded a parallel edge on the other side of the plank. There is a small 45° edge going the other way that gives the bottom of the limber a firm edge to rest in the rabbet. I marked 3 ' centers, drilled with a 1/16" bit (3" at scale) and cut them. Before treenailing, I gave the floors a coat of water based conditioner, then a coat of Poly. I used the Rust-oleum Ultimate Matte finish on my Fair American and really liked the look...much better than the Satin finish from MinWax. The reason for doing it now is about to become obvious. I did not want my treenailing to leave a stain. Drawing about 400 treenails and installing , then sanding them down (without maring the planks) just is not how I wanted to spend the next several weeks, so I used MinWax walnut colored wood putty. Rubbed it into the holes with a small spatula, wiped off the excess, then ran a wet Q-Tip over the planks and all the residue came right off. Except where I need the tree nails for strength, I'll probably use this method again. By the way, the Sand Blaster extra fine 400 grit (from MMM) is a great product for final finish. I think I'm caught up with the end of the last instructions for now so I'll wait patiently for Greg to post the next chapter. Maury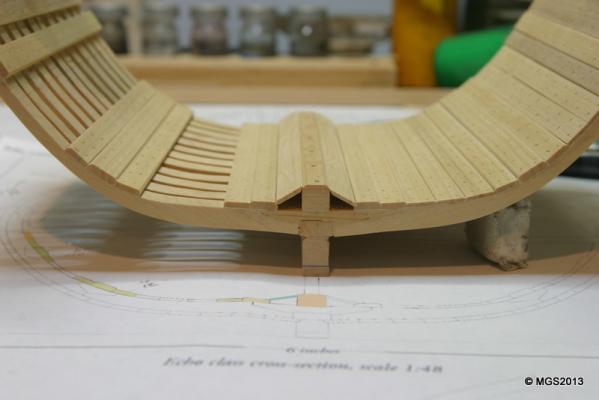

-
Echo by Maury S - FINISHED - Cross-Section
Maury S replied to Maury S's topic in - Build logs for subjects built 1751 - 1800
Adjusting for the changed keel height on the revised shear plan: If my calculations are correct...Since my gunport was measured on the old plan from the board up and that plan showed a 12" keel instead of the 14" provided, my gunport sill is actually 2" lower than the revised plan. To keep the distance from the decks to the sill in the same relationship, both decks should be 2" lower (as measured up from my building board). That means the top of the lower deck cleat measurement that David cites as 10'2" should be set at 10' 0" at the dead flat and 10'2 1/2 " instead of 10' 4 1/2 inches at frame 5. This exercise just shortens the height of the space below the lower deck. Anyone want to show me a diifferent calculation. I still have to allow for any discrepancy between the plan and the as-built sill. Maury -
She's a good place to get into a POF build. Just be careful with how you use that hammer in the photo! Maury
-
Echo by Maury S - FINISHED - Cross-Section
Maury S replied to Maury S's topic in - Build logs for subjects built 1751 - 1800
Thanks Grant. It's important to line up the holes properly, but beyond that, it sure is easier than doing it after installation. I spent more time going over the positioning of the lower deck clamps. Third re-measure. The change in the plan sheet with the 14" keel (vs the 12" keel on the original plan ) creates a minor challenge. As it turns out, the crucial measurement seems to be from the top of the gunport sill down to the top of the clamp. Measuring from the sill to the building board and subtracting the sill to top of clamp gives the new adjusted board to top of clamp. This also fixes any slight variation in the height of the gun port as built (Mine was off by about 1/32" -- 1.5" to scale). I'm still adding the 2 1/2" in height from dead-flat to frame 5 aft per the instructions. Maury -
Bill, You just opened a package of nuts and whipped out a carving of a griffin? Maury
-
Echo by Maury S - FINISHED - Cross-Section
Maury S replied to Maury S's topic in - Build logs for subjects built 1751 - 1800
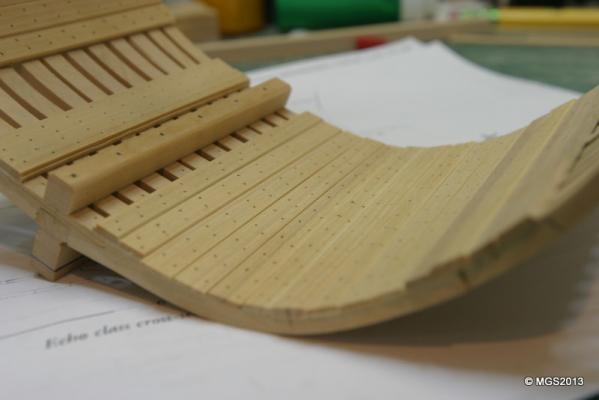
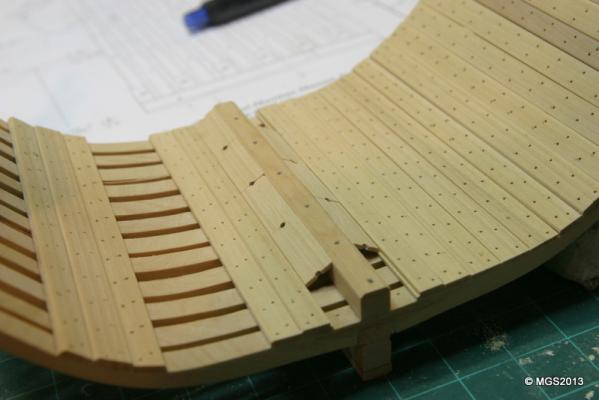
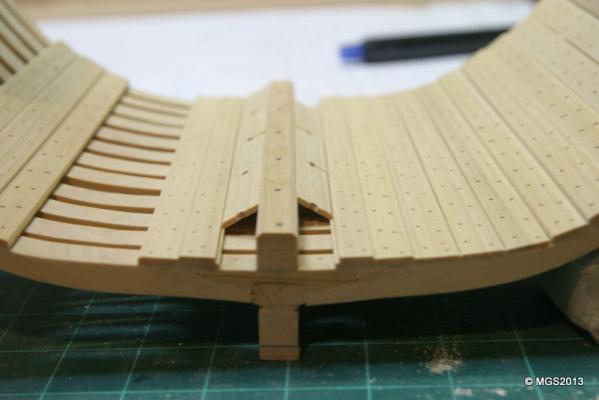
More work on the intermediate "thickstuff". I added the pieces on either side of the lower thick strake. Sanded to 3" with a bevel sanded on one edge only. Holes for treenails pre-drilled. While waiting for glue to dry, I cut the strips for the limber boards. I didn't want to sand a piece from 8" down to 2" so I grabbed a piece of 1/16 Bass, cut an angle on one side and then trimmed to proper width (about 13"). Then I ran it thru the sander (narrow side up!) to bring it to the final 2" thickness. Perfect fit. Now I have to decide whether to use the bass piece to finish the board segments or grind off a bunch of boxwood. Still deciding which side gets fully planked. Maury
-
Ed, I've been missing the "real time" Maury
-
Toni, She looks great! Good tip on the knees as well. Maury
-
Echo by Maury S - FINISHED - Cross-Section
Maury S replied to Maury S's topic in - Build logs for subjects built 1751 - 1800
Adding the thickstuff. The upper and lower pieces are centered on the cross chocks. I cut and sanded them to proper sizes, lined them up in place and marked them for treenails. I then drilled all the holes off the model and glued and clamped them back in place. There is no way to get a power drill inside to drill the holes once installed and I don't want to spend weeks twisting my pin vise. Double checking the measurements for the top of the clamp. This will be critical to get just right. The instructions confused me a bit so I getting help from Greg to make sure I don't mess this up. Progress seems faster after weeks of working on frames. Maury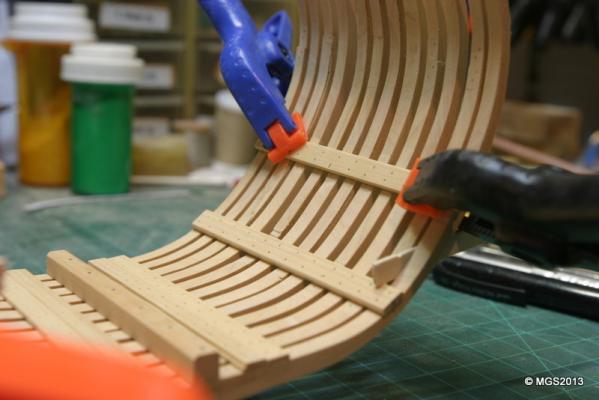
-
Echo by Maury S - FINISHED - Cross-Section
Maury S replied to Maury S's topic in - Build logs for subjects built 1751 - 1800
Greg, For the tree nails on all the internal planking, did you use the regular procedure (bamboo tree nails) or just drill holes and use a filler? Maury -
Echo by Maury S - FINISHED - Cross-Section
Maury S replied to Maury S's topic in - Build logs for subjects built 1751 - 1800
Greg, I'm going to fully plank one side only. I just have not yet determined which side (imperfections). Is measuring up from the building board to the top of the thick stuff, clamps, etc. the proper way to determine the positioning of those parts? I think that just filling in planking is going to end up in distortions. Any comments on how much interim planking looks best on the side not fully planked? Maury