HOLIDAY DONATION DRIVE - SUPPORT MSW - DO YOUR PART TO KEEP THIS GREAT FORUM GOING!
×


Maury S
-
Posts
1,490 -
Joined
-
Last visited
Content Type
Profiles
Forums
Gallery
Events
Everything posted by Maury S
-

Echo by Maury S - FINISHED - Cross-Section
Maury S replied to Maury S's topic in - Build logs for subjects built 1751 - 1800
I'm patient. M -
Greg, I'm happy to see you are progressing on Speedwell. I still think she's on my list once you get the plans ready. Maury
-
Echo by Maury S - FINISHED - Cross-Section
Maury S replied to Maury S's topic in - Build logs for subjects built 1751 - 1800
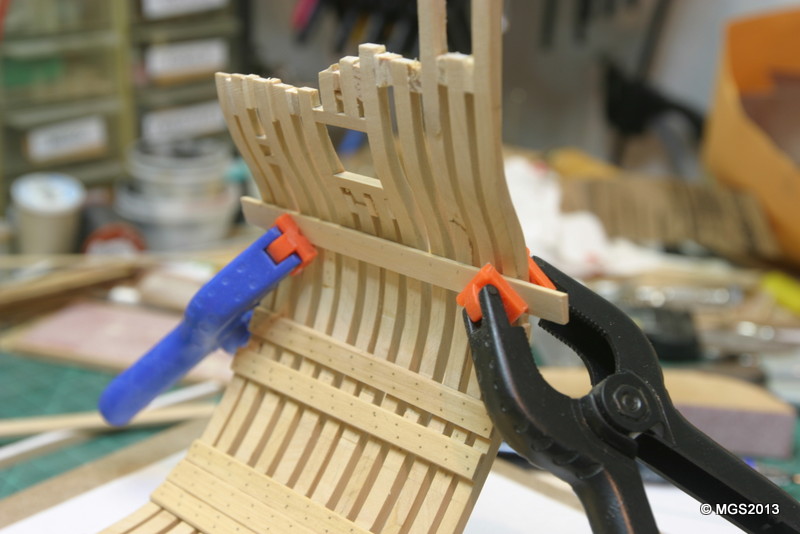
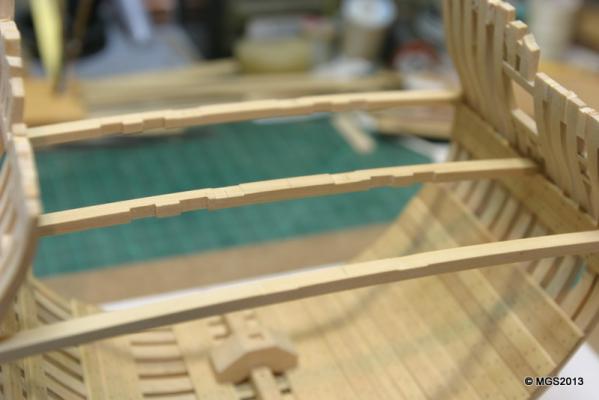
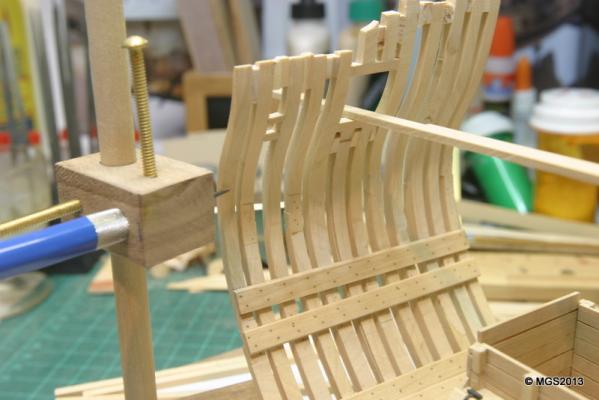
Greg & Druxey, Thanks for the guidance. I used my measuring stick to get the approximate length of the beam arms but I won't glue them yet. Upper deck ceilings now treenailed and installed and ready for testing the fit of the beams. Maury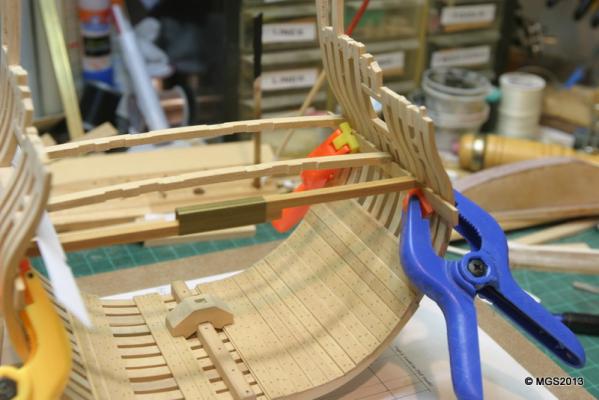

-
Echo by Maury S - FINISHED - Cross-Section
Maury S replied to Maury S's topic in - Build logs for subjects built 1751 - 1800
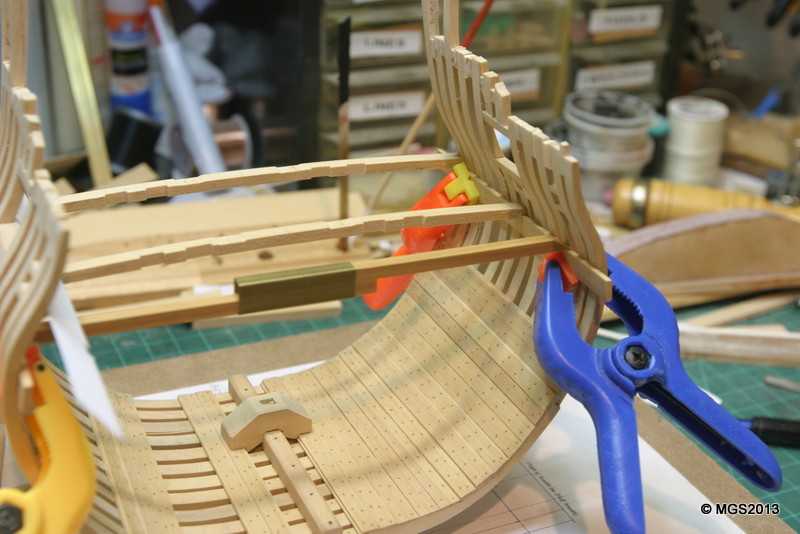
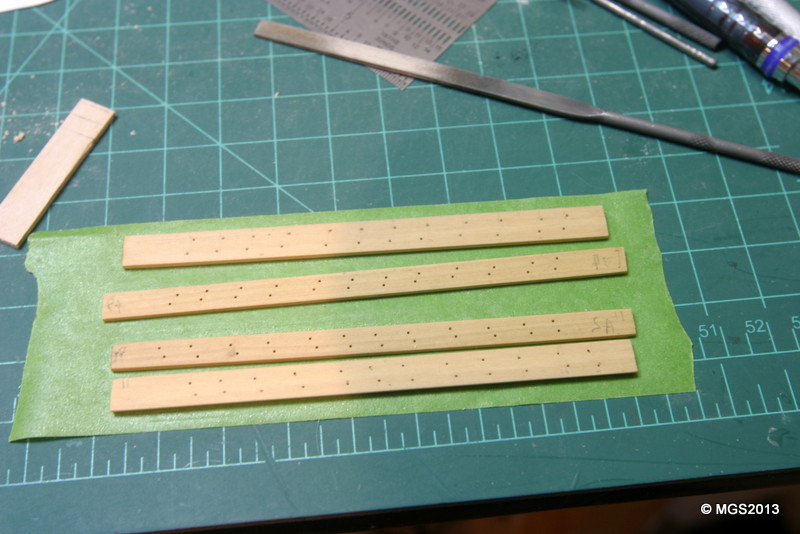
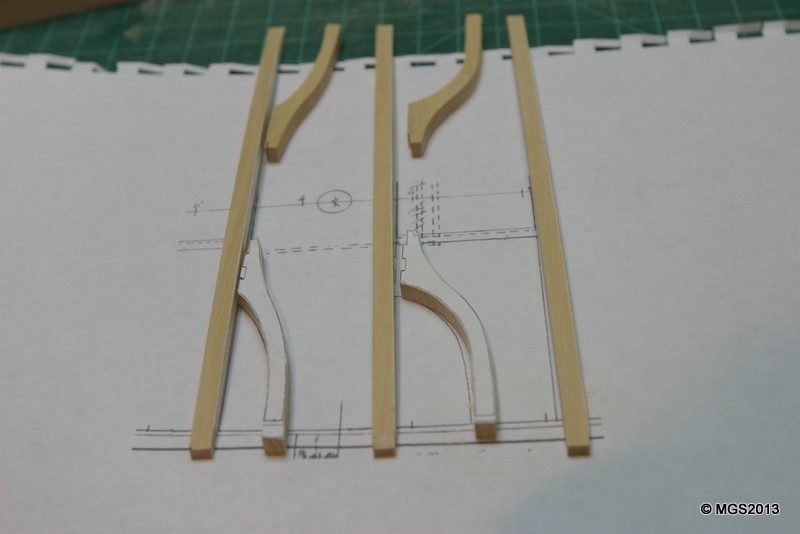
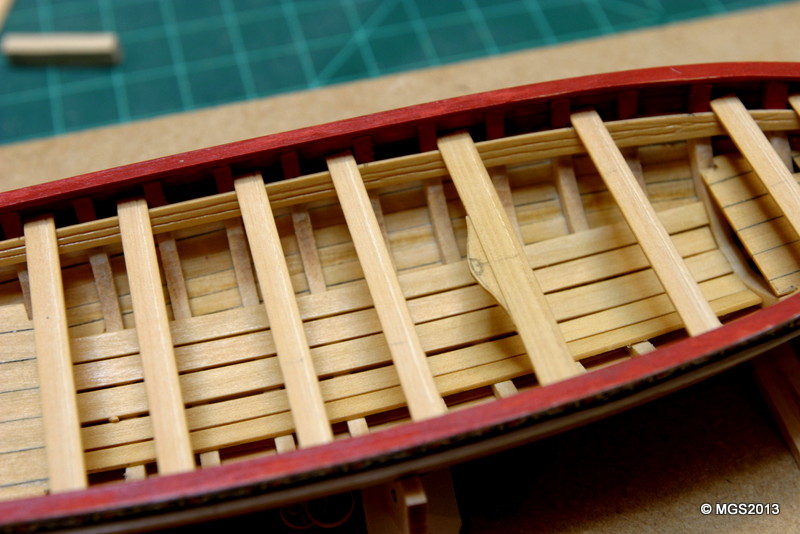
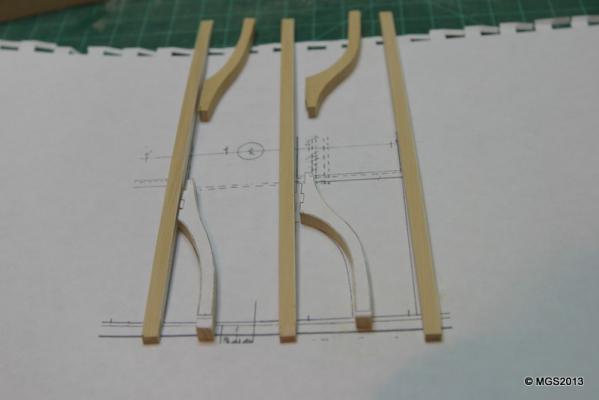
I finished the drilling for the treenails on the ceilings. Two coats of Rustoleum Matte finish (water-based) Poly. The reason for doing this now was discussed earlier. I'm only going to put a few actual treenails in place for support. Most holes are to be filled with MinWax colored putty and that would stain the un-finished wood. I carefully lined up the tenons on the beam arms to cut the mortices in the beams. Everything measured from the center-line...the inner ends of the arms are at a different distance from the center-line on the aft beam from the mid-beam according to the plan sheet. Same technique as Greg recommends using the table saw and finishing with small files. It took more filing than I thought (the saw blade was not quite high enough). Good fit in the end. There is a little extra tail on the arms so I have to measure carefully the final length. I drilled holes in the arm tenons (barely visible on the upper arm in the photo) and will use black monofilament line to simulate bolts. BIG Question for Greg...do we glue the arms to the beams now, or wait? Maury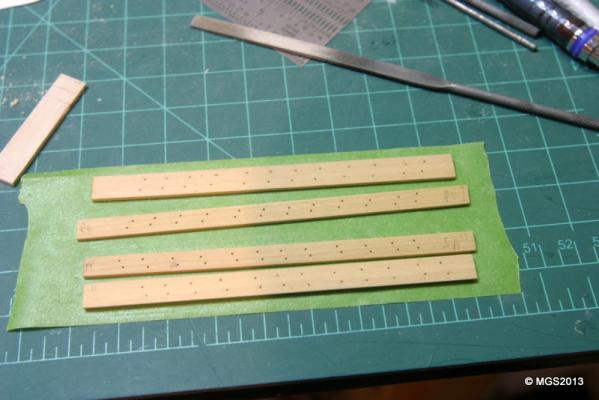

-
Echo by Maury S - FINISHED - Cross-Section
Maury S replied to Maury S's topic in - Build logs for subjects built 1751 - 1800
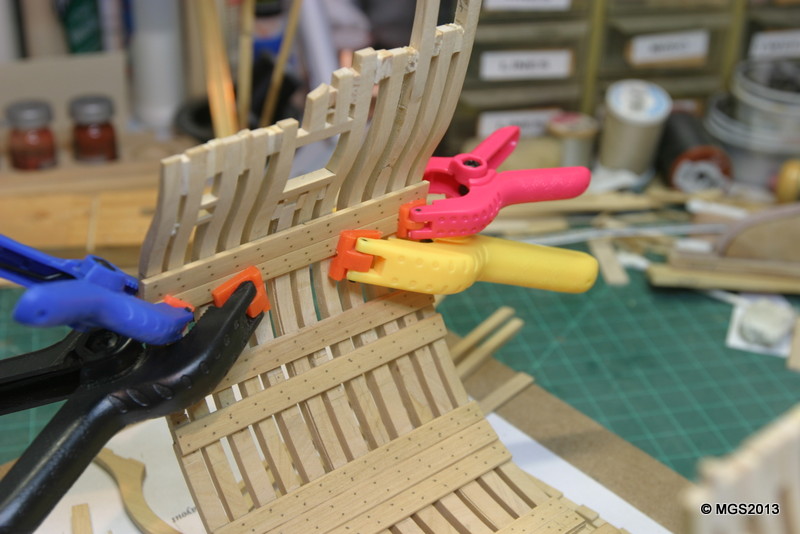
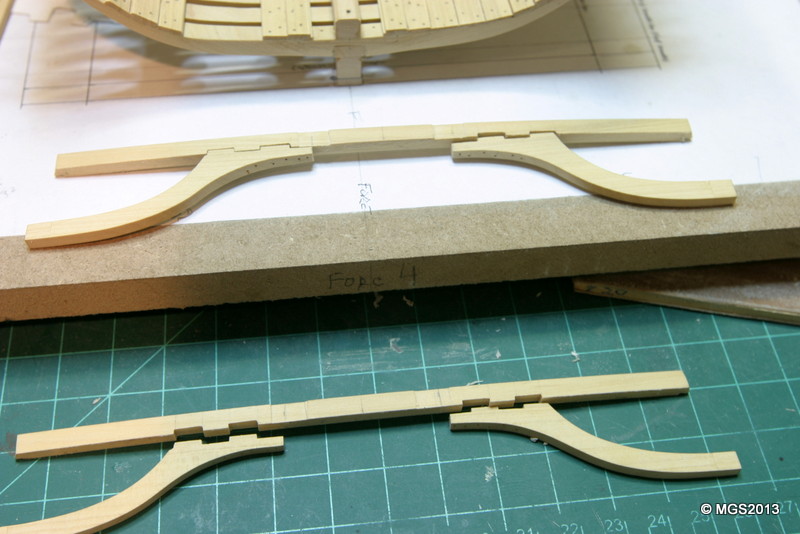
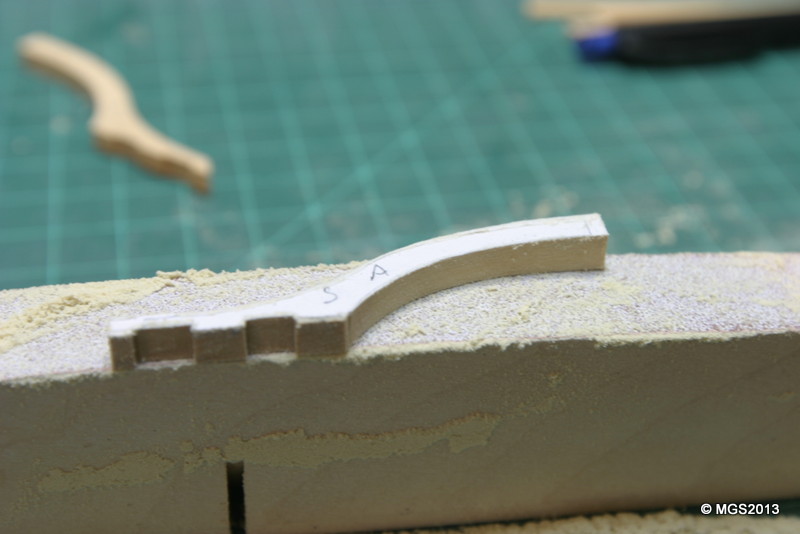
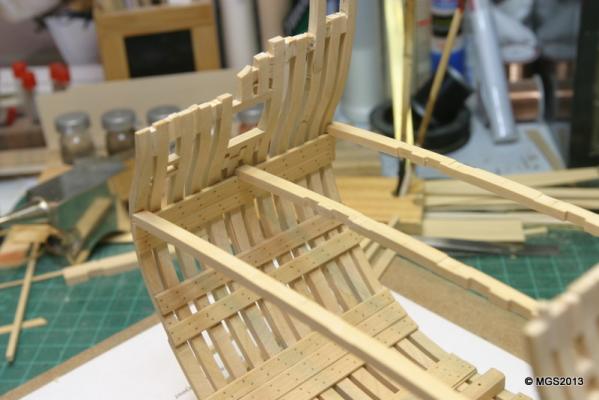
Now that we have more instructions and plans, I'm back to work on the section. The sanding jig is a great idea. The beams and arms all have the same round-up shape top and bottom. Cutting the tenons on the beam arms before they are cut to rough shape is easy on the table saw. I assume we will cut the matching mortices on the beams the same way on the saw. That way, they are all the same depth. Careful marking will be very important when the time comes. The second pic. shows the beams and arms at this stage. Next comes marking the height of the ceiling planks, then trial placement. Setting the beams in place is easy once you get the spacing jig cut right. Next is drilling the ceilings for tree nails. Maury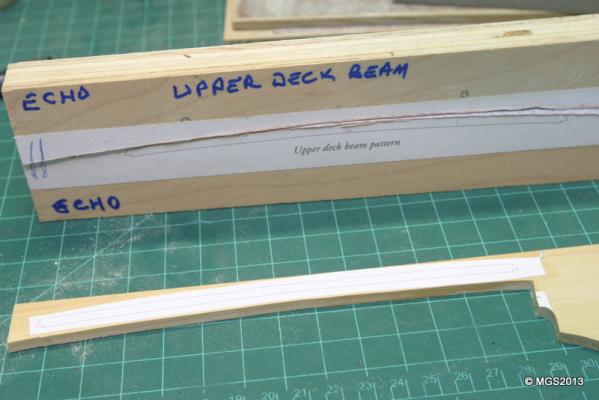


-
Thanks David. This shows specs for every ship, barge and boat of the period. With a breadth of about 8', the oars would be 20' long...just what Chuck designed into the kit. Maury
-
Oars for boats
Maury S replied to Maury S's topic in Discussion for a Ship's Deck Furniture, Guns, boats and other Fittings
David, Thank you. That gives the sizes for boats (based on breadth). Just what I needed. With a breadth of 8', the oars should be 20', just what Chuck designed into the kit. Maury -
Hi folks. I asked this on my Longboat log and thought I'd repeat it here. Does anyone know the appropriate length of the oars used on a 26' longboat (mid 18th cen.) Maury
-
Question on oars...the kit provided blanks scale out to 20' in length. Is this really the size of oars on a 26' longboat? Maybe they are the same oars used as sweeps on the sloops. Anyone out there have a good idea of length? Maury
-
Darryl, We can learn a lot from the Model Railroad community. welcome aboard. Maury
-
Bill, Thanks, they still rotate in the chainplates. I'm not going to rig it. Display case size issues. I'm going to display all the spars in a rack beside the boat. I really like the model so I may do another for myself and rig that one. Maury
-
Details added. Chainplates made per Chuck's method with CA. Deadeyes inserted and attached to the boat. I installed the oarlocks and put the boat on the brass support tubing. I'll cut the length once I find an appropriate display case. Still have to work on the oars and spars a bit. Maury


- 74 replies
-
- 3
-

-
- 18th century longboat
- model shipways
- (and 1 more)
-
Toni, The over-sized stock seems to be a good solution. The pillars look good. Nice detail. Maury
-
The pintles and gudgeon blackened and the rudder is installed. The tiller is now removed to protect it from breakage. The dowel provided in the kit for the mast has a huge bend. No good for anything. Time to put those Admiralty Masting Workshop lessons to good use. A center-line is established on two opposite sides. The proper mast diameter is marked at the ends and three intermediate points on both sides and a good sharp chisel is put to work. Once the two sides were tapered, the end and intermediate marks were put on the cut faces, lined-out and the remaining two sides chiseled to the lines. This brings the mast to the correct taper and completely square at all points. Then the stick is lined-out for cutting to eight-sided (7 -10 - 7 ratio) using tick strips. Then it went into the chiseling jig and the four-sided stick becomes 8-sided. Here you can see the eight-sided stick next to the dowel supplied in the kit. Then a series of 80 - 220 grit sand paper rounds it out, taking care to protect the shoulder at the upper 1/4 of the mast. A tenon was cut to fit the mast step, sheaves drilled and it was installed just for a good fit. The photo shows the mast a bit thick, so I'll use the caliper to verify the diameters. Now to work on the iron work. Maury


- 74 replies
-
- 6
-
-
- 18th century longboat
- model shipways
- (and 1 more)
-
Thanks for the comments on the windlass bars. I think the 4-5' length makes sense (1 - 1 1/4"). I spent time on the irons for the bowsprit. Getting a hole in the forward piece for a pin into the stem was slow work. I used an eye for the pin (it's always good to have places to tie lines on a boat). CA applied under the metal stiffened it up. Leaning the aft iron against the thwart (and gluing with CA) stiffened that one. I used the sprit to keep the two irons lined up. I don't think I'm going to rig the boat (space issues) ...just put the spars along side in the display. Laying all the spars and oars and bars in the boat would hide everything. I'm probably going to lay four of the oars and the windlass bars inboard. A bit of a sailing comment. There is a lot of sail on this boat and no dagger-board or side board to prevent lee-way. It must have been an awkward sailer on anything but a down-wind run. Maury


-
I did some metal work yesterday. Getting a solid connection between the pintle band and the pin was tough. Four tries before I shifted to a different solder. I'll clean up the ends of the bands, blacken them and glue them in place. The rudder needs something. Maybe some scores simulating multiple boards building up to the current size. Still interested in anyone's comment about the length of the windlass bars. Maury

-
Proxxon Mini Chop Miter Saw
Maury S replied to jml1083's topic in Modeling tools and Workshop Equipment
The saw blade goes into the depression when the arm is pulled down to cut. I often use a blank piece of wood under the one I'm cutting to prevent tear-out. Maury -
Waiting for paint to dry, I cut out the Rudder and made the Windlass. The windlass was cut down to 8-sided in the center and on the ends (7-10-7 ratio), the holes drilled and then squared up with a file. The bars were cut from box wood and came out nice. One coat of stain (50 - 50 Golden Oak and Natural). The windlass came out darker and blotchier than the rudder (softer piece of wood?), but the rudder matches the color of the box wood planks which is what I was aiming for. Does anyone know the proper length of the windlass bars? I cut them off at 8' but that's too long. Maury


-
Very nicely done. Thanks for sharing so much. It certainly gives me a standard to shoot for. Maury
-
I finished the iron work for the main mast at the thwart. Just shaping and attach with CA. You can see the hinge work for the cabinet to the left (too much reflection). I soldered a piece of brass wire to a thin brass strip, Then cut pieces to size from the larger sample. The seats were trimmed and installed for fit. Then the were taken of for 3 coats of paint, hinges glued in place and re-installed. Next the knees were trimmed to shape and painted with several coats and installed (along with the mast step). The knee at the bow needs another two coats of paint. Maury


- 74 replies
-
- 3
-
-
- 18th century longboat
- model shipways
- (and 1 more)
-
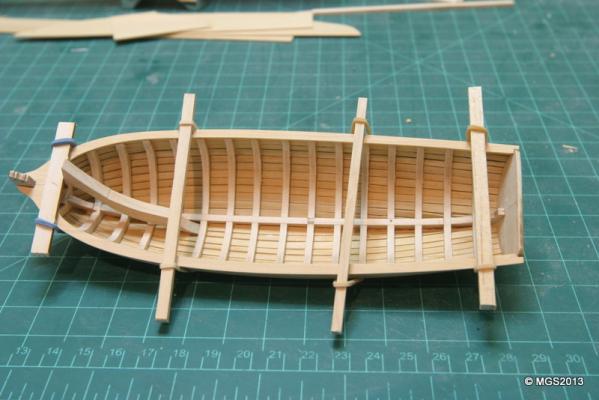
Risers installed and the thwarts have been cut to rough size for approximate fitting. The fourth thwart (from the bow) is the wider one to accomodate the mast support. That piece still has to be worked on. The front of the transom cabinet was set, marked to match the tops of the risers and installed. They supports the seats, which is the next segments. Maury
-
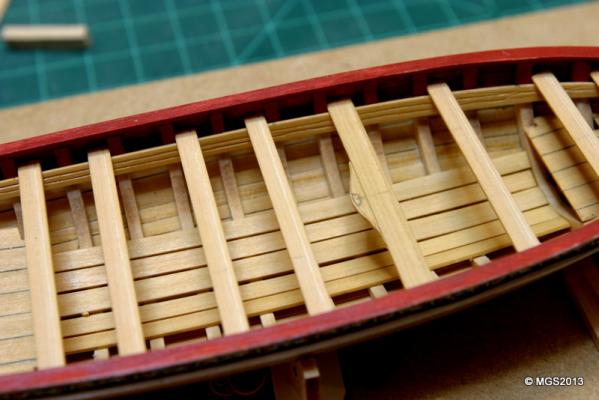
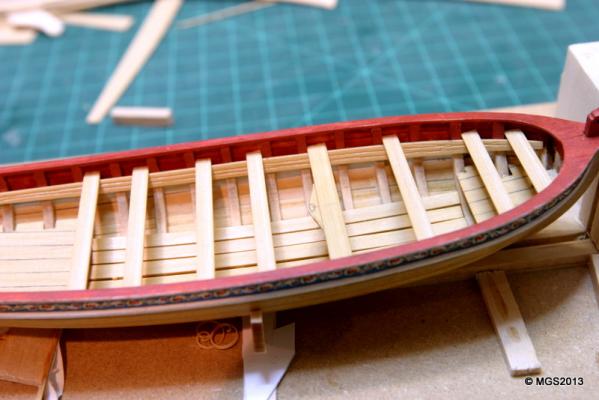
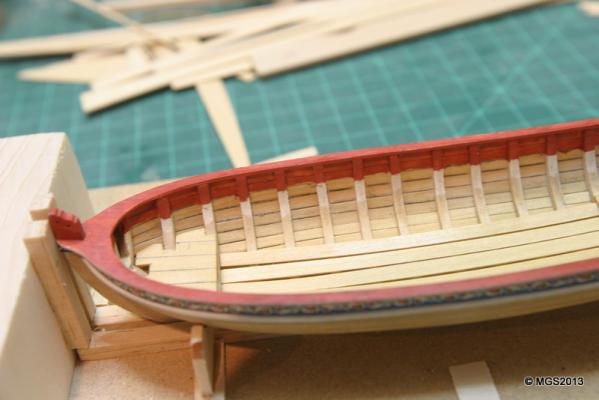
The risers were cut to the same shape as the first strake...adjusted to fit. That entailed thinning at both the bow and stern to avoid edge-bending. I almost miss-read the instruction that says the top of the riser is 7/32" down from the TOP of the cap. Subtracting the thickness of the cap gives me a size of a spacer to keep the install consistent below the cap rail. The paint arrived from Model Expo. The Gun Carriage Red seemed too pink so I mixed some old Copper Bottom Red to dull it down and thinned it substantially. I'm happy with the color of the first coat. It is a darker red than shows in the photo. It's really hard for me to paint an even line along the inside planks, but it will be hidden once the riser is installed. The thwarts were cut to a .165" width and a bead was scored on one side. I don't think I will score the other side. Maury
- 74 replies
-
- 1
-
-
- 18th century longboat
- model shipways
- (and 1 more)
-
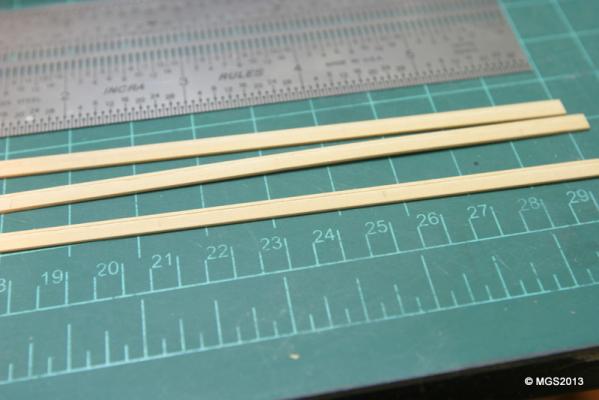
Thanks Chuck. Question on the thwarts...The instructions say 1/8" wide material, the plans measure more like 0.165". Do you have a preference for the width based on scale?? Maury
-
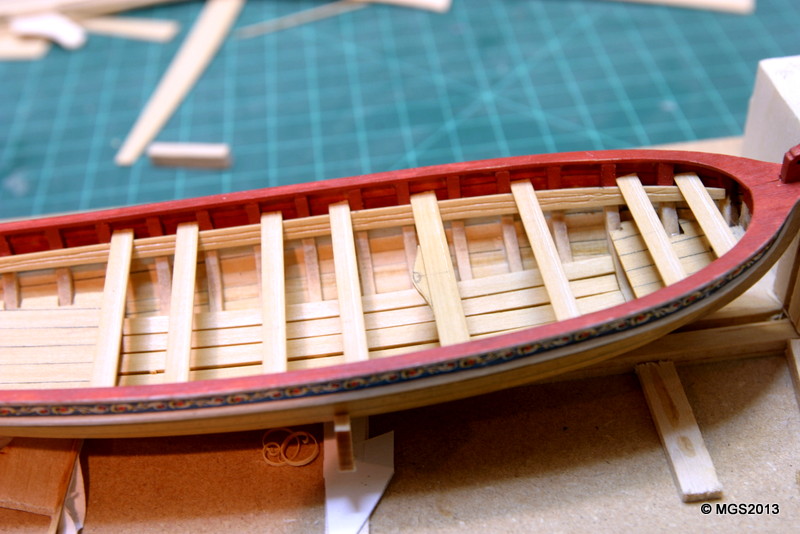
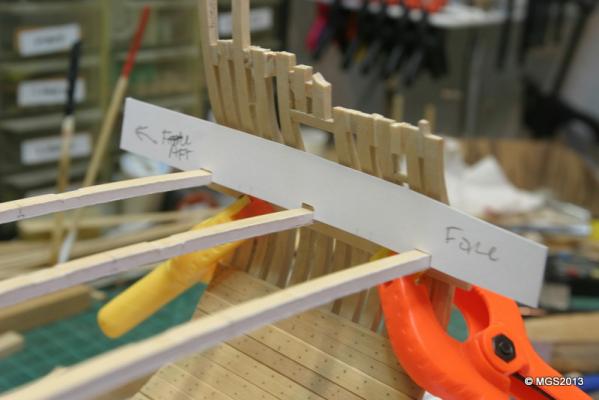
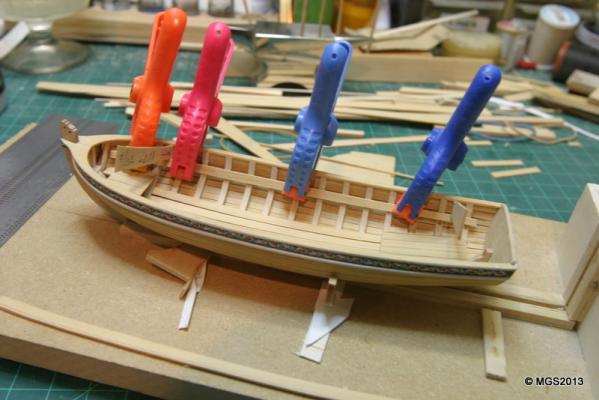
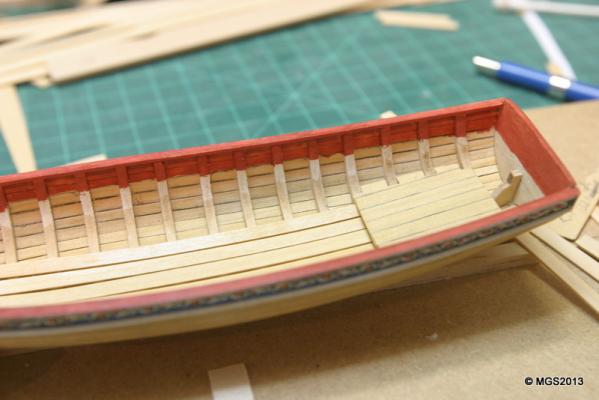
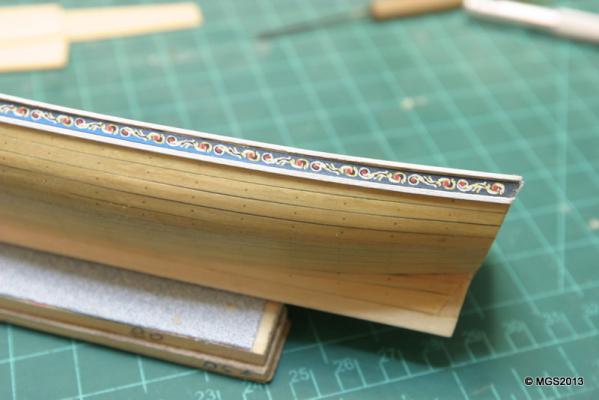
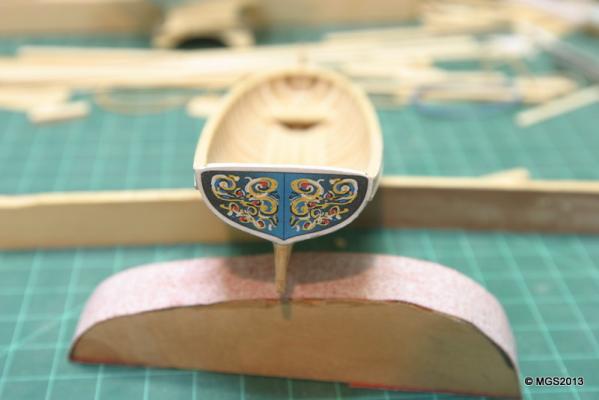
More progress over the weekend. I applied some colored wood putty to the seams in the planks where light showed through. The cap rails were marked-out, cut and trimmed and installed. The sophistocated clamping system was used to keep the rails even and in contact with the tops of the frames. Both the sides and transom friezes were sprayed with a dull-coat lacquer before cutting. To install the frieze, I masked off the sides of the cap rails and everything below the first plank, applied some spray-on contact cement (also on the fireze itself) and stuck it on. Pretty easy since my top strake shape was taken from a frieze. The lower rub-rail was tough. I could not get my box wood cut to the 1/32 dimension so I used the kit-provided bass strips. It gets painted and is softer, so nothing lost here. Mircowaving and bending got them into shape. The transom frieze was pretty straight forward. Plenty of size choices provided. Floor boards cut and installed. The same spacers were used between each board, yet the spaces seem to be different in the picture. Camera angle? Finally, the platforms were made (cardboard pattern cut first but some tweeking was still necessary. I'm shaping the risers (Cleats?) but the red paint needs to be applied to the cap and inner planks before the risers are installed. Waiting on delivery of more paint since my supply of red hardened in the jar. Maury


- 74 replies
-
- 7
-
-
- 18th century longboat
- model shipways
- (and 1 more)
-
Tom, Re. the pins, It's been a long time, but I think I got them at Hobby Lobby (on sale). Very thin. Maury