Maury S
-
Posts
1,490 -
Joined
-
Last visited
Content Type
Profiles
Forums
Gallery
Events
Everything posted by Maury S
-
 Great tutorial! Maury
 -
time to get hte mill out. The jig will help. I'd like to see it in use. Such a big help to modeling. Great work, Danny Maury
-
Greg, I hope the plan is still to offer a full set of plans. She's lovely. Maury
-
Looking good! Maury
-
Toni, Very nice! Maury
-
Toni, Thanks for the tip on Drill Bit City! Maury
-
Remco, Do you have any pics of how you made the pins? I have lots of very thin pins, but the knobs are too big for some work (like you're showing) Thanks Maury
-
Ed, A bit off topic and maybe mentioned before...What cement do you use to hold the patterns to the piece you're working on? Rubber or contact cement? Maury
-
Ed, It's a great project and extraordinarlly well done. Thanks for sharing all the details. Maury
- 3,618 replies
-
- 1
-

-
- young america
- clipper
- (and 1 more)
-
Ed, From the order of photos, I see the pattern is removed for gluing up, then a new pattern attached for cutting the rabbet...correct? Is there a good way of insuring the second pattern (and mirror image) fit properly? Maury
- 3,618 replies
-
- 2
-
-
- young america
- clipper
- (and 1 more)
-
Ed, It's great that the challenges are different. Keeps your mind sharp. Thanks for the log! Maury
- 3,618 replies
-
- 1
-
-
- young america
- clipper
- (and 1 more)
-
just beautiful Maury
-
Thanks all fr the nice comments. Toni, Yes, the next one will be masted. I like that part except for 12,000 ratlines and 74 guns. Maury
-
Thanks Chuck. You make a great kit! Maury
-
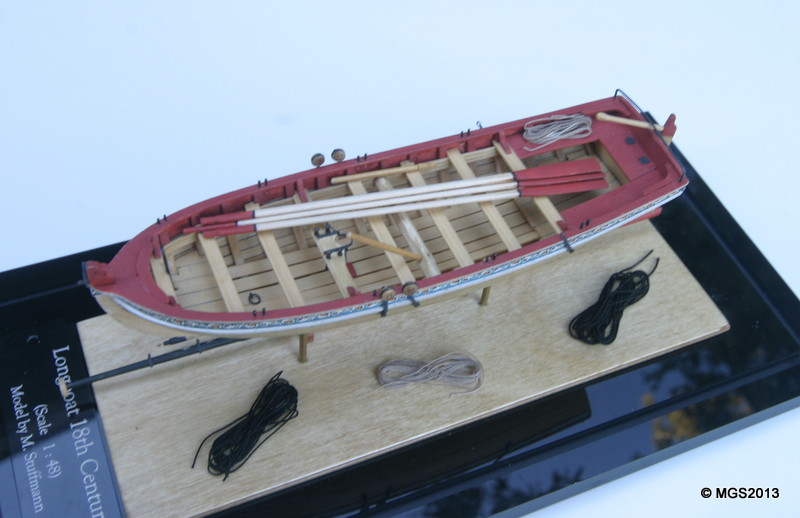
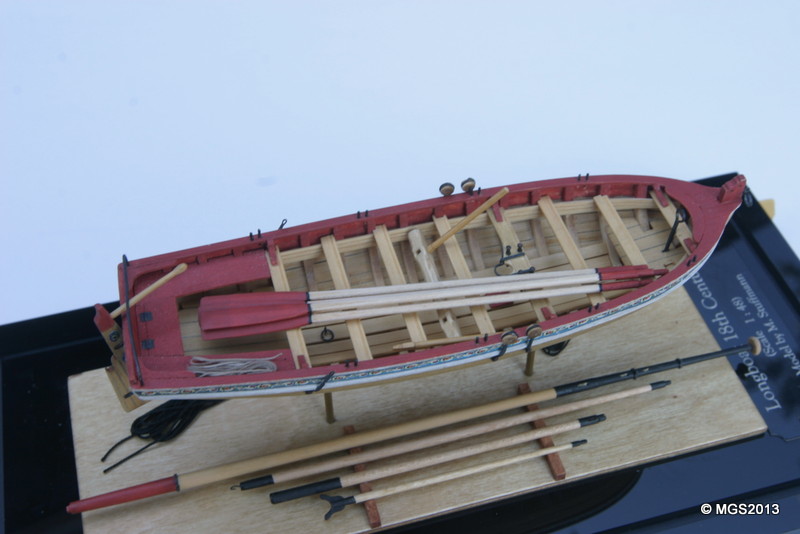
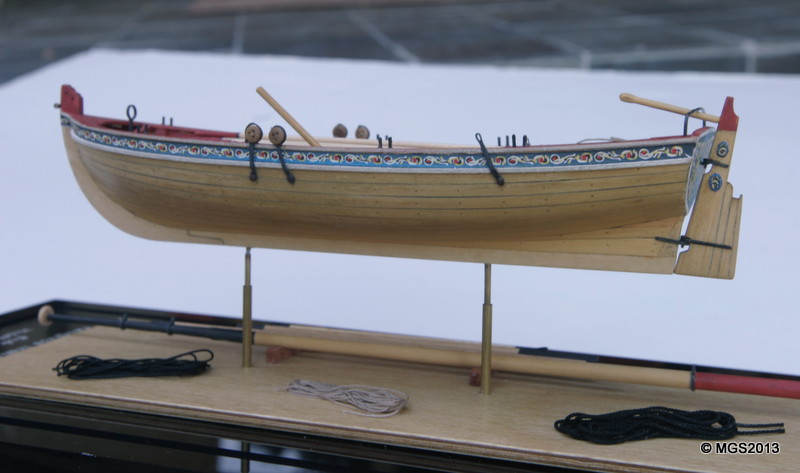
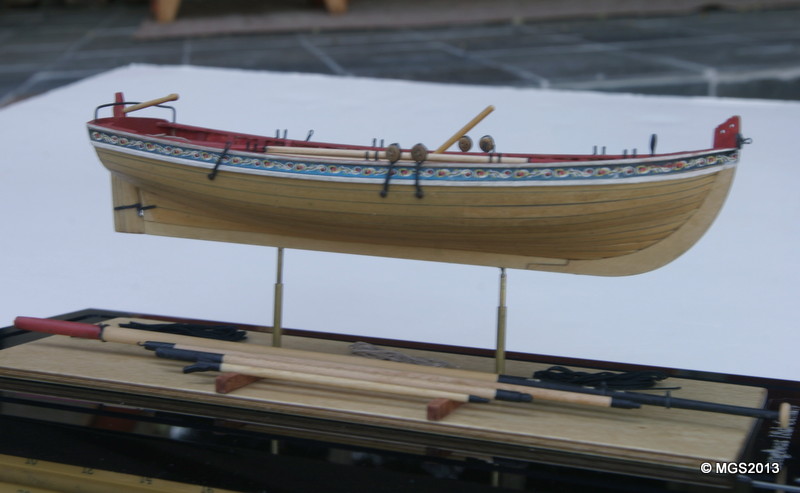
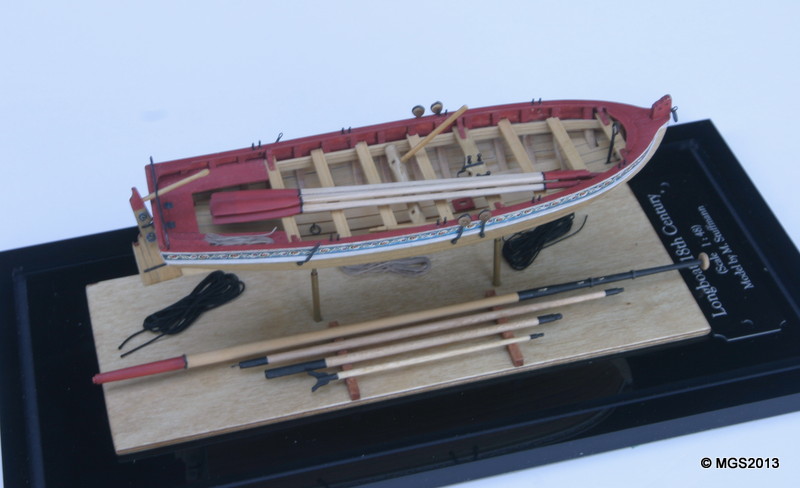
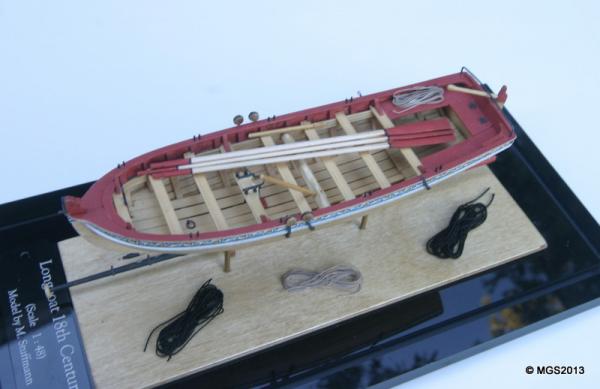
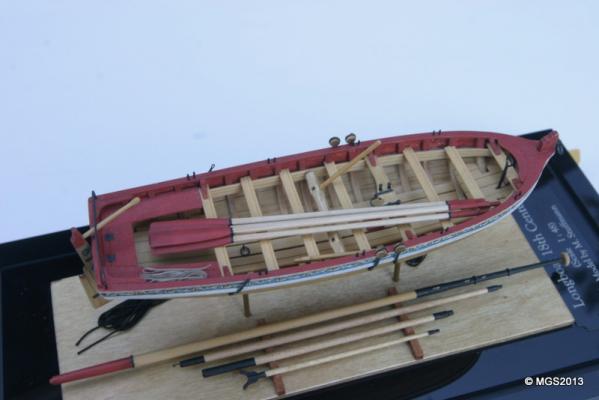
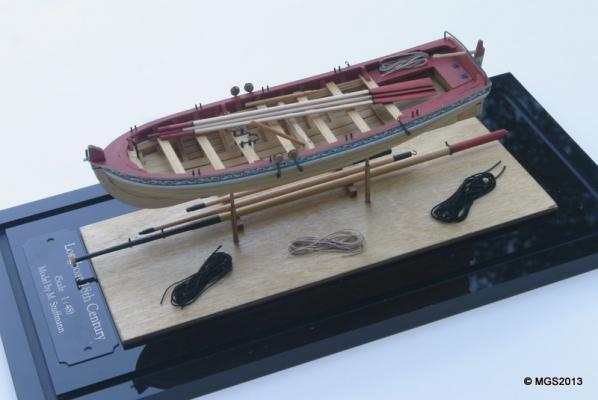
After a long wait, I finally put the display together. Because this is a gift and it has to be transported, I did not rig the spars, but merely displayed them. Finding the right display case was a struggle, but worth the wait. I'm doing another "from scratch" using box wood for the frames and all other wooden parts . That one I'll fully rig. Maury


- 74 replies
-
- 4
-
-
- 18th century longboat
- model shipways
- (and 1 more)
-
With the labor cost allocation of the build at $0.20 / hour, cost should not be the deciding factor. You'd probably learn a lot more with Syren. Maury
-
Ed, So the water stops only appear the the scarf joint? Maury
- 3,618 replies
-
- 1
-
-
- young america
- clipper
- (and 1 more)
-
Dan, Get that transom on and put a full-width strake or two at the top. Put a couple of temporary braces along the tops of the frames to support the transom. The shape of the top planks are critical to the over-all look of the boat. I used the friezes as a guide to the shape. Maury
-
I bought the larger MicroMark mill and spent another ?? on a gearing and bearing package to bring the speed up to 5,000 RPM. I had to have a machine shop do the install. My understanding is the Sherline needs a gearing package as well. 2500 is way too slow for wood. Maury
-
Ed, The American Clippers were the ships that first attracted me to modeling, but that was way too big a bite for me at the time. Looking forward to your project. At least you don't have to do 74 gun carriages, gun ports, etc. Maury
-
Dan, After getting your garboard and top (2) planks in place, you should re-measure the widths at each frame. I divided my sides in two, marked with a black thread running stem to stern to get a good "look" to the run (See TFFM) and measured to that line for each plank. Maury
-
Thickness sanders.....Byrnes vs Micro Mart
Maury S replied to bigcreekdad's topic in Modeling tools and Workshop Equipment
Buy the best tool you can afford, or wait 'til you can afford it. There are very few tools I've acquired that I've regretted, and they are all the cheaper alternatives at the time. There is no comparison to the Byrnes sander. Maury