
HOLIDAY DONATION DRIVE - SUPPORT MSW - DO YOUR PART TO KEEP THIS GREAT FORUM GOING! (Only 24 donations so far out of 49,000 members - C'mon guys!)
×


Maury S
-
Posts
1,490 -
Joined
-
Last visited
Content Type
Profiles
Forums
Gallery
Events
Everything posted by Maury S
-
 Druxey, "Pouring medium" is what Janet had in her studio that looks / acts like "Matte Medium" but a bit more glossy. Working on the sheer poles. Chapelle describes them as 1" iron rods, served and wired to the outside of the shrouds. I cut some very thin (.025") box strips, rounded the edges and served them. They are tough to get / hold in place while lashing to the shrouds. The ends of the lanyards get in the way. Speaking of lanyards, they have been tightened up. After they reeve through the deadeyes, the working end is brought up to the throat of the shrouds, fed through from back (inboard) to front (outboard), fed back under itself and brought up the shrouds where a "taut line hitch" (like a "midshipman's hitch"...look them up) is tied. (I think the taut line hitch looks cleaner for my purposes and my scouting background won out). The ends will then be tied up with "yarn". Maury
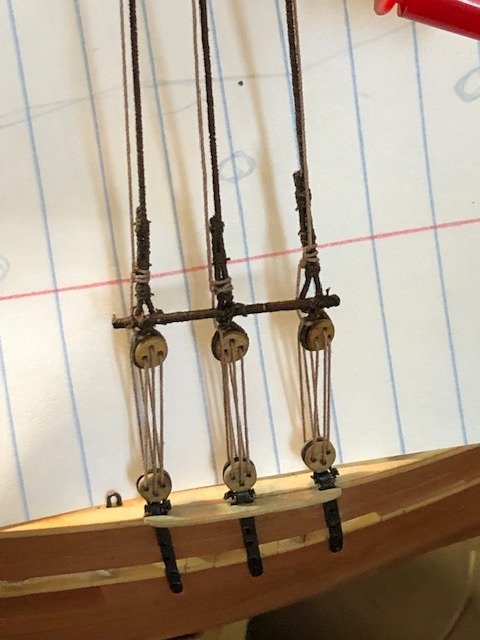
-
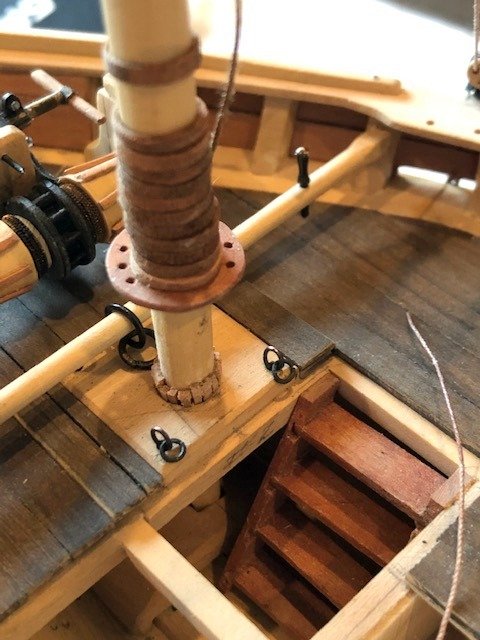
Lots of experiments with different cloth, silkspan, etc for the mast coats. I think this was a beige "Land" cloth (I think from a Hawaiian shirt. Cutting to shape many times to get it to fit to the mast on top and cover the wedges on the bottom. I saturated a small piece of cloth with "Pouring Medium" on a board, let it dry and cut to shape (Big "C"). Tweezers and a brush with more Medium to get it to fit. Texture looks like canvas. Maury
-
Billt, I have a MicroMark mill with all sorts of accessories. If you want a bigger mill than the Sherline, send me a PM. It weighs a lot so shipping might be a cost issue. I'm in Ft Worth so give it a thought. Maury
-
Topping lift (Main and fore booms on schooner)
Maury S replied to Maury S's topic in Masting, rigging and sails
Bob, your comment.. has convinced me it is fully running rigging. Common sense prevails! Thanks, Maury -
Topping lift (Main and fore booms on schooner)
Maury S replied to Maury S's topic in Masting, rigging and sails
Bob, I thought the topping lift might be a special case (similar to pendants which seem to be tarred down to the point of a tackle being attached). Maury -
Topping lift (Main and fore booms on schooner)
Maury S replied to Maury S's topic in Masting, rigging and sails
Thanks all. Allan, in this case, gun tackle/ topping lift tackle = a couple of blocks attached at the lower end of the topping lift to get some mechanical advantage in lifting the end of the boom. See pic. of Emma C. Berry plan attached. btw, scale here is 1:32. Maury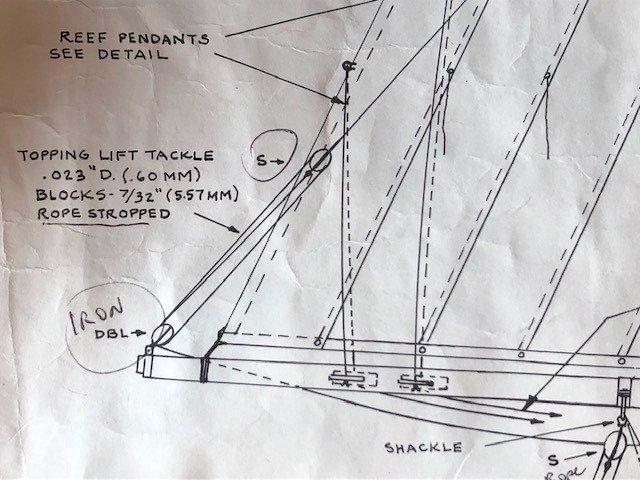
-
Would it be considered Standing rigging (Dark color) with a gun tackle at he end or running rigging all the way up to the mast head? (light brown)? Maury
-
Converting a Backyard Shed into a Model Workshop
Maury S replied to Hank's topic in Modeling tools and Workshop Equipment
The end is in sight! Maury -
John, Quite helpful. Thanks Maury
-
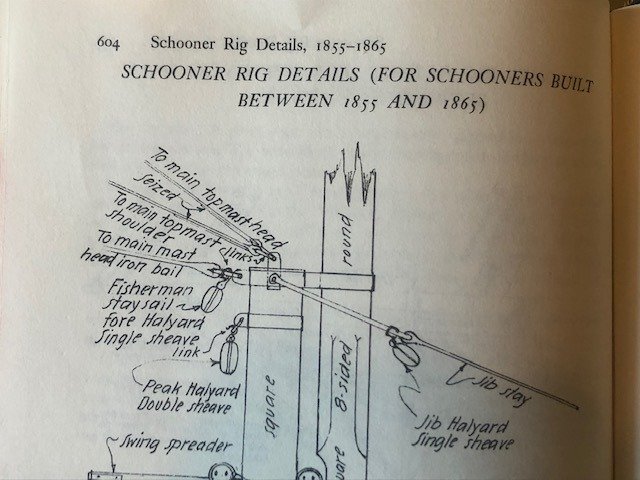
In the following illustration from American Fishing Schooners by Chapelle ... the top two (standing rigging) lines shown go to the main topmast head and the main topmast shoulder. I assume the head is where the fitting for the topmast fore stay is and the shoulder is where the diameter narrows for attaching the topmast shrouds. In some photographs of 19th C. schooners I detect two lines running from near the top of the topmast to the top of the foremast and they are separated by only about a foot on the topmast. Why would there be two lines, almost parallel? Thanks for any input. (btw, my model of the C. Chase schooner does not have a fore topmast as illustrated above). Maury
-
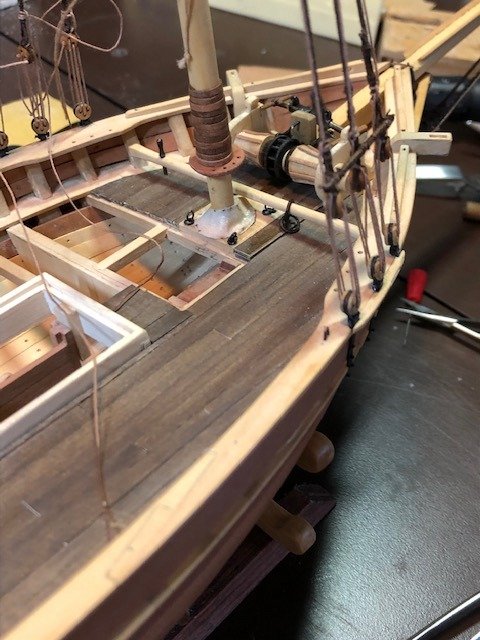
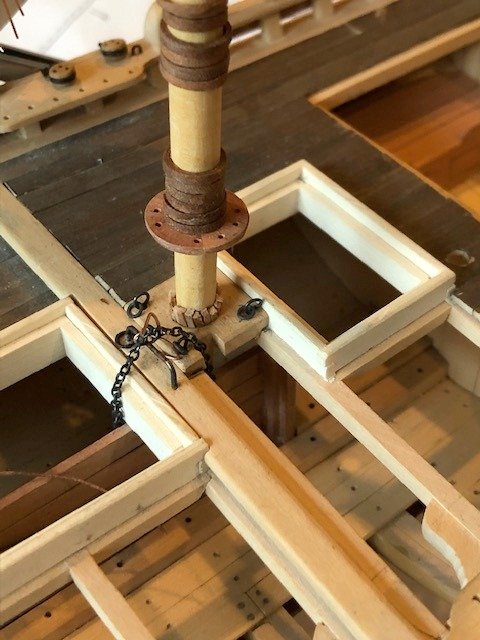
I can't believe it's been weeks since the last update. Traveling, chores, etc. The masts are stepped and wedges inserted. I start with 4, make sure the mast is not atilt, then fill in all around, tap them firmly in place and it's ready for trimming with the micro chisel. The chain is for the centerboard lift. The foremast is trimmed (below). Maury
-
Converting a Backyard Shed into a Model Workshop
Maury S replied to Hank's topic in Modeling tools and Workshop Equipment
Who's law says that your stuff expands to fill the space you have? Looks like you're on your way to filling the shed. Maury -
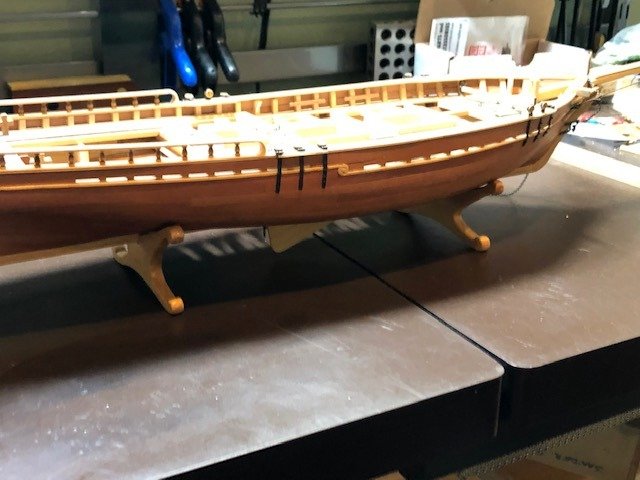
Mark, The cradles have a hole through which the mounting bolts screw into the nuts built into the top of the keel. The space between the top of the lower arch of the cradles and the bottom of the slot for the keel matches the thickness of the building board so the same bolts used to hold it to the board will hold the cradles to the boat. Maury
-
I re-set sort to Title then back to Recent and it's now working. Thanks for the help. Maury
-
I have my settings at recently posted and it does not show. When I click the link you provided it's right on top. Is there a re-set to default settings that I can try?
-
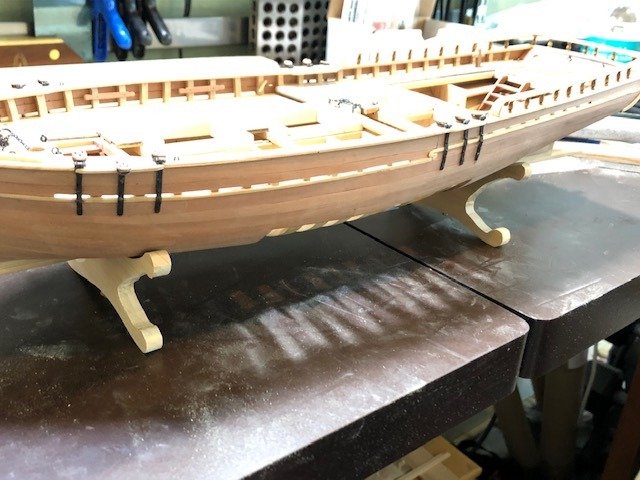
Thanks Druxey, simple and elegant was what I was shooting for. Wipe-on Poly three coats. Boat in the cradle Maury
-
I have posted to my current build log (C. Chase Centerboard Schooner) in the last few days and I can not find it in recent posts under the 1800 - 1850 section.
-
While I like the separation of logs into various eras, I'm finding some issues. For example, my current log (C.Chase, Centerboard Schooner) does not appear chronologically in the list. I posted yesterday, and today when I try to go to the log to add to it, it does not show up in posts for the last week. I have to do a search for my title before I can locate it. I try to check for certain logs daily, and skip over the items with earlier date stamps, and many do not show up in order. Maury
-
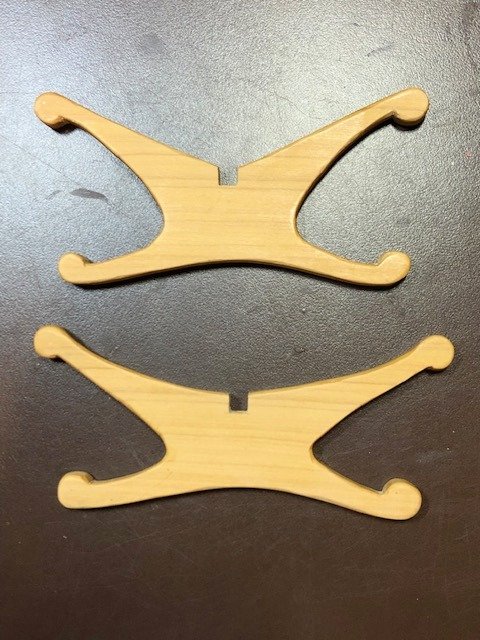
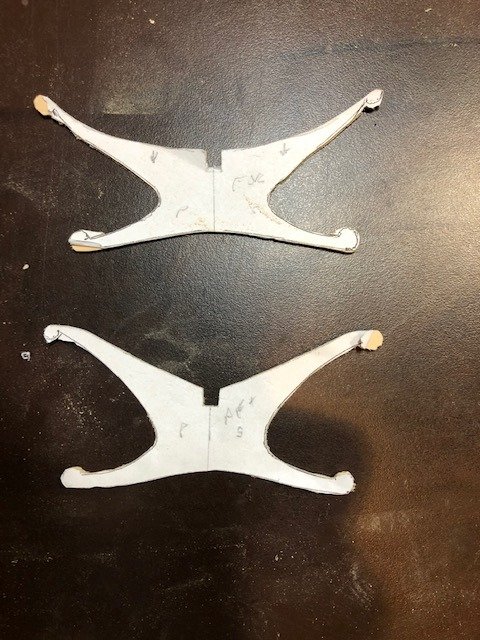
After some more tweaking to make sure the feet of the cradle are even on a surface and the model is plumb, I finished the rough cutting of the arms and legs. Now that everything lines up, I'll start on the finishing. Lots of filing and sanding to do. Maury
-
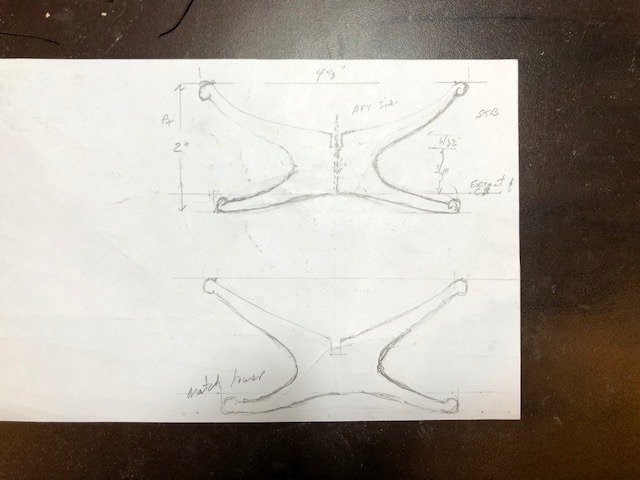
The shrouds are done. Time to take the model off the building board. That means I need to design and build the cradles. First step is to pull the frame plan for the frames nearest the mounting bolts. The top shape of the cradles drawing comes from those plans. The space between the bottom of the keel notch and the bottom of the cradle is 3/4", which matches the thickness of the building board, so the same mounting bolts will be used. Since the centerboard will be in the "down" position the model needs to be held high enough to accommodate this. I transferred the drawings to a piece of scrap bass wood (I prefer this to using card stock for patterns) and sanded the upper edges of the cradles to very closely match the hull at the mounting points. A test was done to insure the model sat flat (fore to aft) by using a level connecting the two pattern blanks. Once satisfied the fit was good, I traced the pattern to the final 1/4" boxwood blanks. The holes for the mounting bolts need to be drilled in the keel slots. Once I'm satisfied everything fits well with bolts in place, I'll cut the arms and legs. I think I'll put some carving on both the fore and aft edges. Maury

-
Toni, It's looking very nice! Re-doing an errant part is important (not that I have always done so). Maury
-
Working on the shrouds, which means serving. A tedious process that I can only do for an hour before eye fatigue sets in. Foremast shrouds are done and working on the starboard side of the main mast. Maury
-
Maybe start over. I'm not happy with my planking. M
