Maury S
-
Posts
1,490 -
Joined
-
Last visited
Content Type
Profiles
Forums
Gallery
Events
Everything posted by Maury S
-
 Russ, check your PM
 -
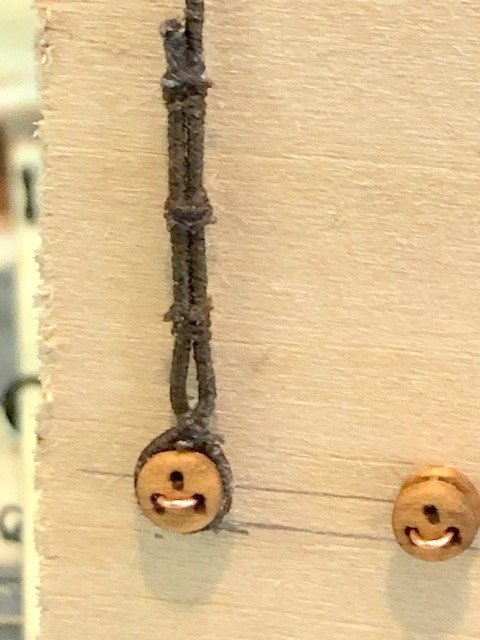
Thanks, Justin for the comment about scale of the shrouds and the throat seizing (in Masting and Rigging section). I found my shrouds were over-sized (.035" instead of .025"). Back to serving. I re-did the fore most (single) shroud and attached it to the deadeye on the port side, following the illustration Justin provided, using a throat seizing first, then two round seizings. Takes a bunch longer and looks better. The first throat seizing was just 3 - 4 wraps, then after the round seizings were in place, I came back and added a few more wraps (not visible in this pic.). . Starboard side next, then more serving. Maury
-
Connecting Pins - Need help on first build
Maury S replied to Brianh526's topic in Metal Work, Soldering and Metal Fittings
If you choose to use the monofilament line, practice on making the end flat (with an iron of some sort). It will melt and create silk-like strings if not careful. I use a torch to heat a flat steel punch and and then press the flat end against the end of the line. No risk of melting your fitting! Maury -
Which direction do the tails of shrouds go?
Maury S replied to Maury S's topic in Masting, rigging and sails
I just reviewed a source (can't find right now) showing "round seizings" on a wire shroud and "throat seizing" on hemp. I'll try to relocate. Maury -
Which direction do the tails of shrouds go?
Maury S replied to Maury S's topic in Masting, rigging and sails
This is what I saw earlier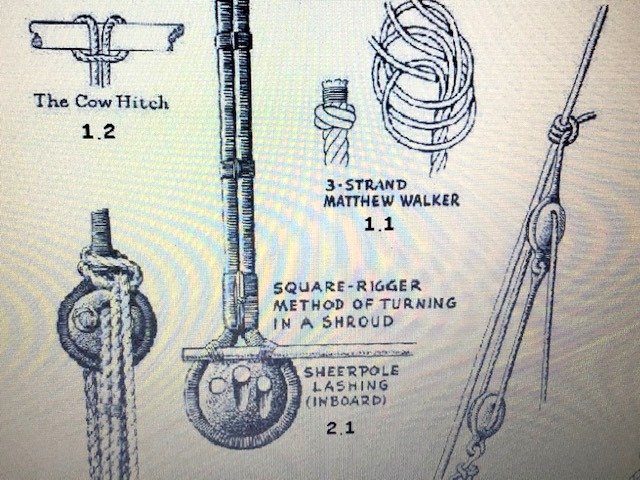
-
Which direction do the tails of shrouds go?
Maury S replied to Maury S's topic in Masting, rigging and sails
Thanks, all. Easy to see if the rope is not served.... and is the shroud always crossed before seizing? Makes it kind of bulky. Maury -
Which direction do the tails of shrouds go?
Maury S replied to Maury S's topic in Masting, rigging and sails
Bob, I've been told that it might be a function of the way the rope was laid! M -
American convention, 1840s: Do they go on the aft side both P & S or do they go one way on port and the other on stbd? Maury
-
Connecting Pins - Need help on first build
Maury S replied to Brianh526's topic in Metal Work, Soldering and Metal Fittings
I use "Amnesia" black monofilament (fishing) line. It comes in at least 4 thicknesses (15, 20, 25 and 30 pound test). I gently touch one end to a heat source (Heat gun or soldering iron) flattening it a bit, insert, clip off leaving about 1/16" + and touch it with the heat source. It's like rivets or bolts on both ends. Takes some practice. Maury -
Which Glue
Maury S replied to Old Fart's topic in Building, Framing, Planking and plating a ships hull and deck
Bob, I bought it direct. https://www.lmii.com/glue/2957-lmi-yellow-instrument-glue-8-oz.html There may be a shelf life, but the 8 oz. bottle I bought a year ago still has 6 oz. left. Maury -
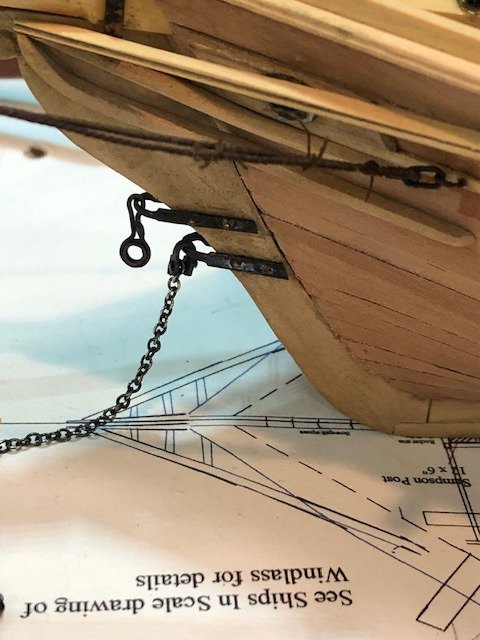
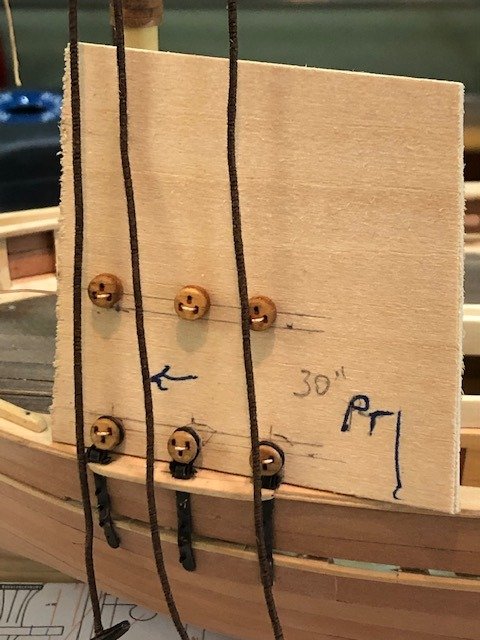
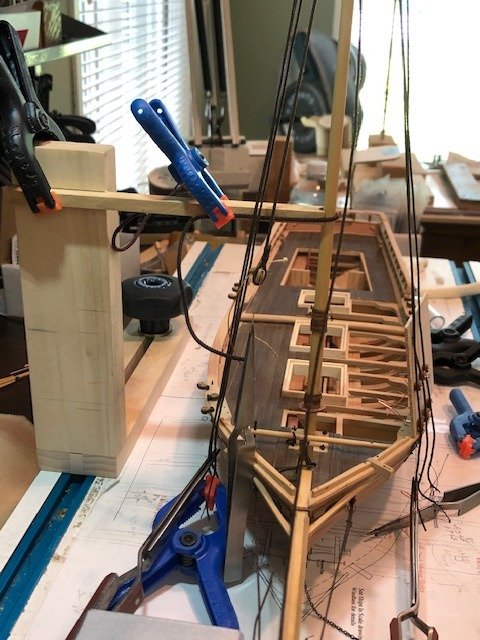
A lot of misc. prep work going on. The stem irons for the bobstay and Jumbostay are installed. The shackle, sister hooks. bullseye and chain need to be put on while I can tip the boat over. The centerboard hoisting chain was installed (pinned) and secured to the deck. In preparation for the shrouds being attached to the upper deadeyes, I made a jig (hat tip Ed Tosti) that holds the deadeyes in proper position and distance from the lower deadeyes. They are lined up with the shrouds from the top and held to the jig with wires. I'm thinking this will result in a cleaner install than using wire hooks between the deadeyes. Chapelle states the deadeyes are strung 2' 4' TO 2' 10" bottom of upper to top of lower. Also in prep for the shrouds, I built a jig to hold the mast vertical (side to side) while the shrouds are being rigged. I routed a 1/4" dado in one of the building board adjustable frames, inserted a scrap piece of 1/4" material that has a half-circle cut out to receive the mast and clamped a piece of rope to keep everything secure. As in a previous model, I make sure the building board is level and line up the mast to the side of a window frame in the background. Works for me. Maury
-
Byrnes thickness sander vs Micro Mark's
Maury S replied to twintrow's topic in Modeling tools and Workshop Equipment
Wouldn't that be a planer? I love the Byrnes tool. Maury -
Which Glue
Maury S replied to Old Fart's topic in Building, Framing, Planking and plating a ships hull and deck
I use Luthiers Mercantile Yellow (musical) Instrument glue. Same as Titebond, but it has a dye that shows up under black light. Easy to see where you have to wash off excess, spills, etc. Same price as Titebond. Maury -
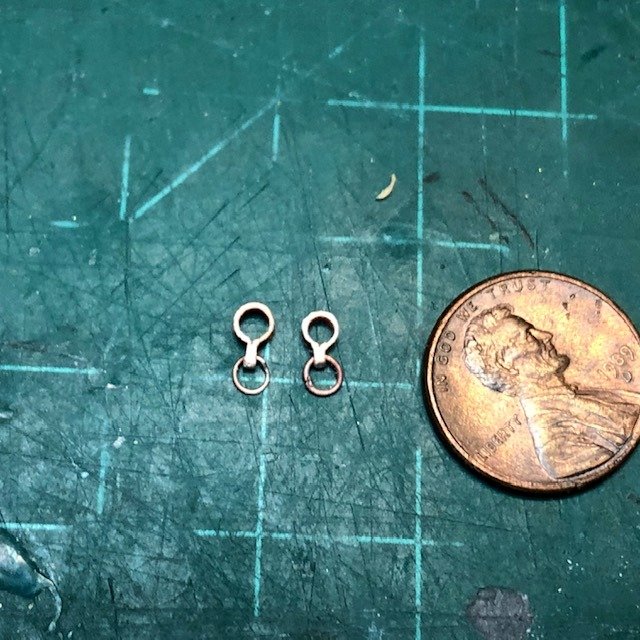
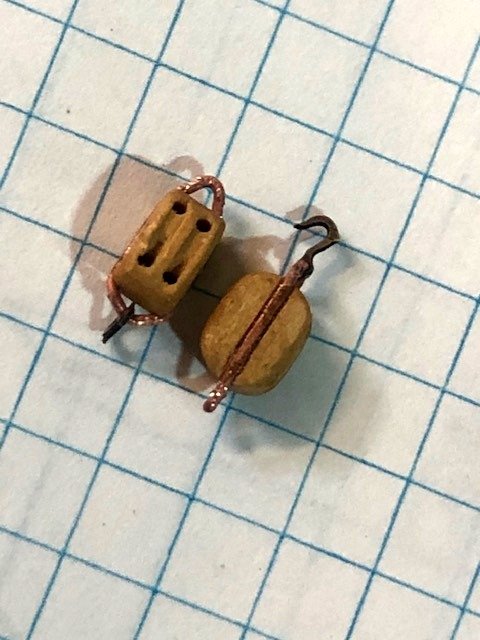
I spent most of the day working on blocks. These are 1/4" doubles from Syren. They were tumbled in the sander, sheaves cut out a bit. Then came the stropping. Hit and miss trials to solder a loop the correct size. The hooks are from someone Greg Herbert (DVM27) recommended (I forget). They needed to be opened up a bit to take the wire. Hook put on, loop soldered and pickled. Loop slipped over the block, pinched flat along the block sides, squeezed a bit to make the becket. I'll blacken with liver of sulphur (LOS). Okay for the first try. Maury
-
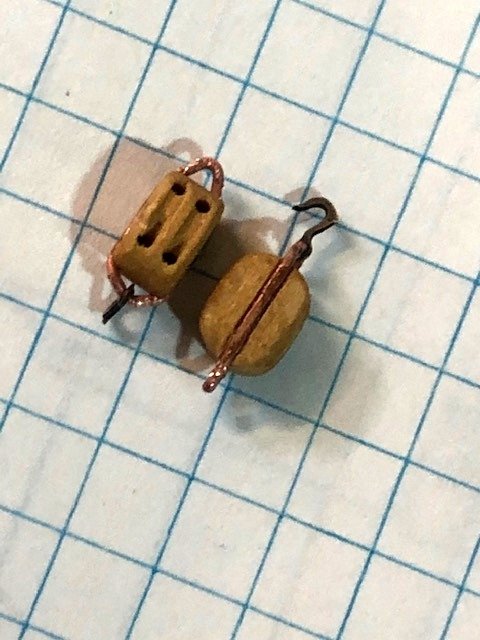
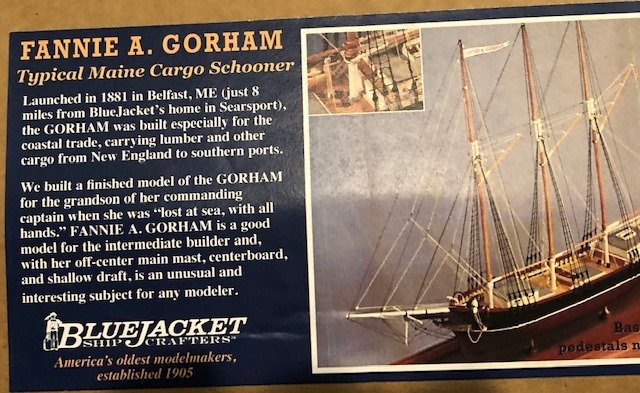
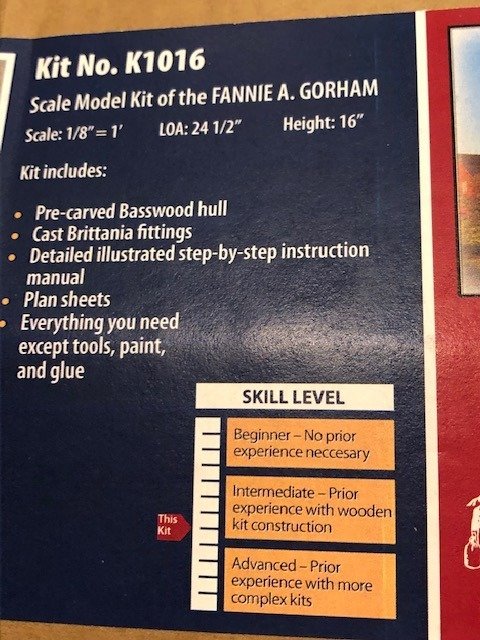
I have the BlueJacket kit of the schooner Fannie A. Gorham available "for free". Just pay the postage (around $25). Solid hull, 1/8" scale, Intermediate skill level. MSW members only. SOLD to the first responder. PM me and I'll arrange everything. Maury
- 1 reply
-
- 2
-

-
I am searching for brass tube
Maury S replied to Fresh water sailor's topic in Metal Work, Soldering and Metal Fittings
Look at Hobby Lobby or Michaels or even Ace hardware. They often carry a selection of KS brand brass tubing. Maury -
Wood Jib horse installed The "log" is 5" dia. The larger ring is 8" ID, the smaller 4" ID. The pins prevent the rings from sliding too far. Right out of Chapelle's American Fishing Schooners p 502. (as are most of the detailed items). The wooden horse was used until about 1885. That fore deck is really crowded and I bet dangerous. Maury
-
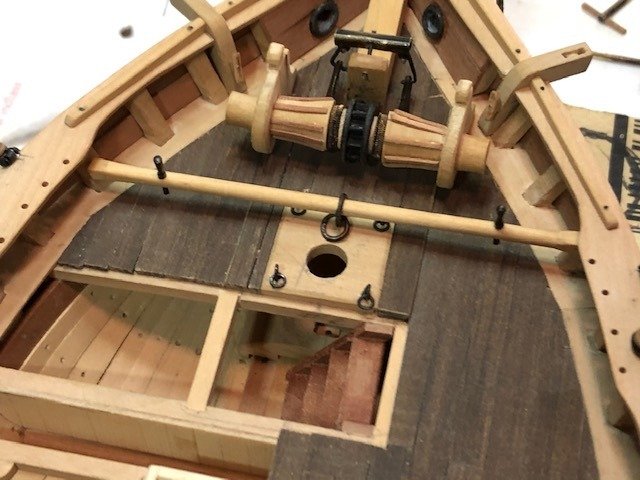
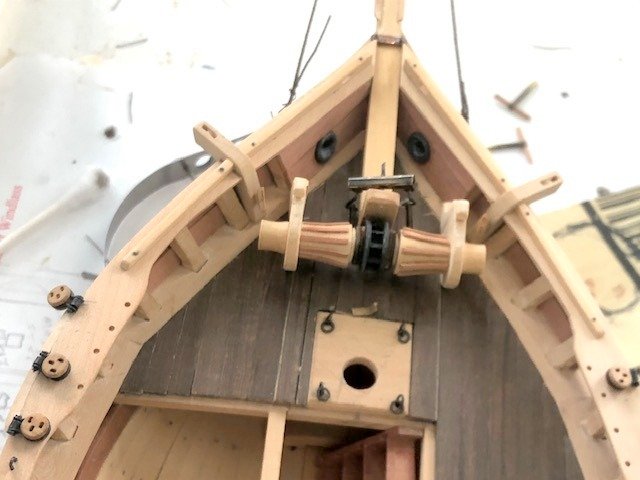
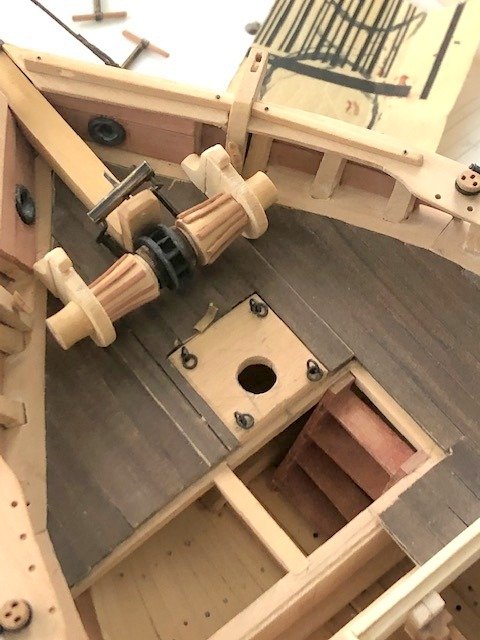
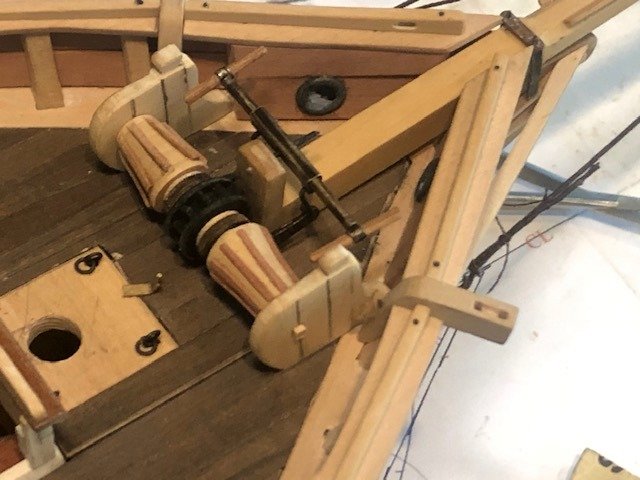
Windlass re-done. Barrels narrowed, spacers removed and warping drums added. The little brass piece laying aft the windlass is a piece for the pawl. Just laying there. Maury
-
Misc. items while waiting for Chuck to re-open for more supplies. TopMast wye Cleats Windlass instaled Maury
-
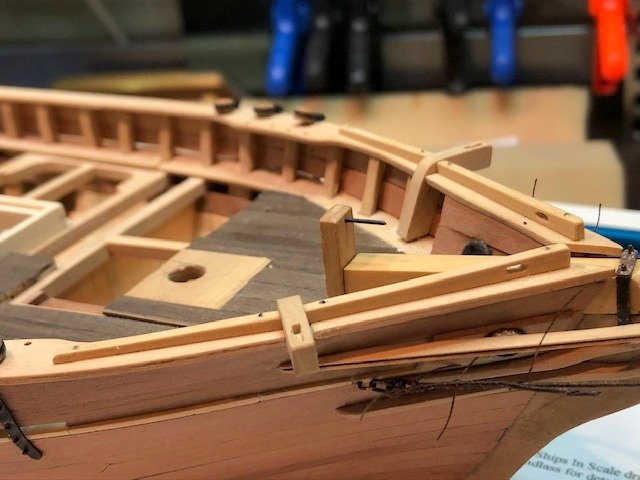
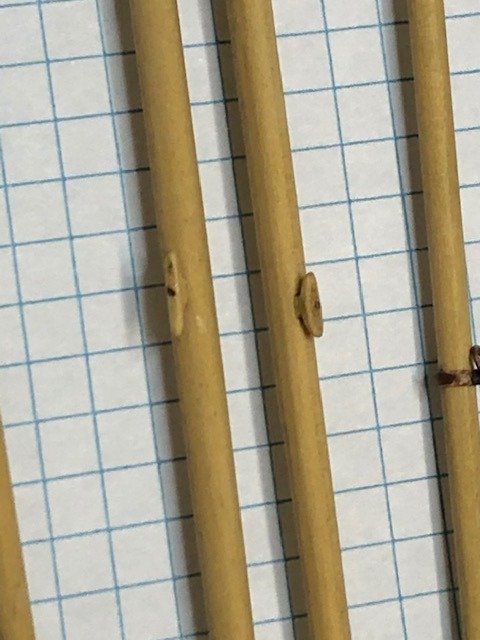
Chock rails formed and installed on top of main rail. They are 4.5" high at the bow, and 2" aft, 3.5" thick (per Chappelle). "Nails" are 20 lb (dia .018") black monofilament line. Maury
-
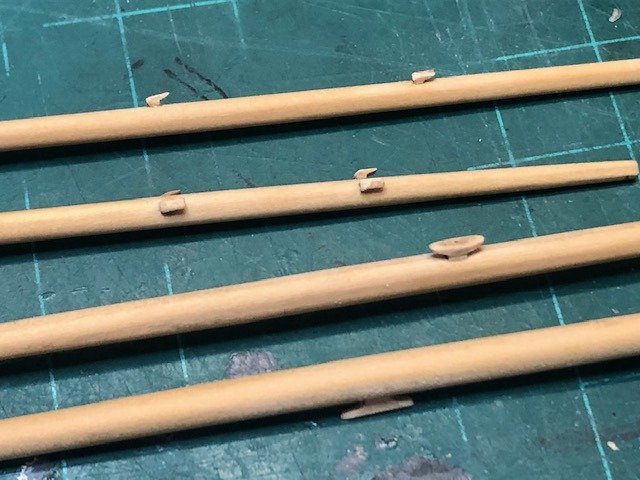
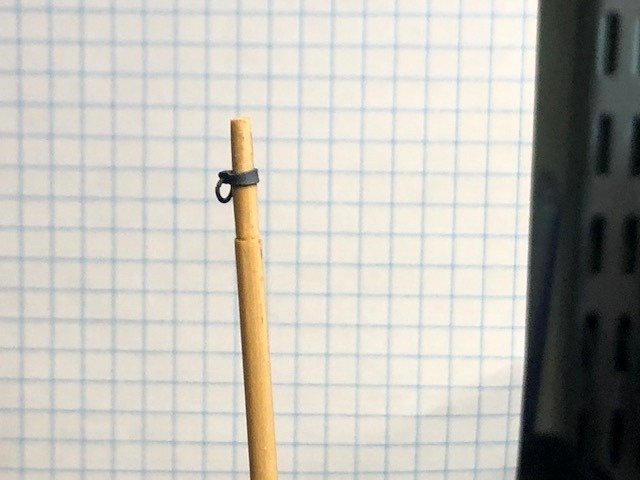
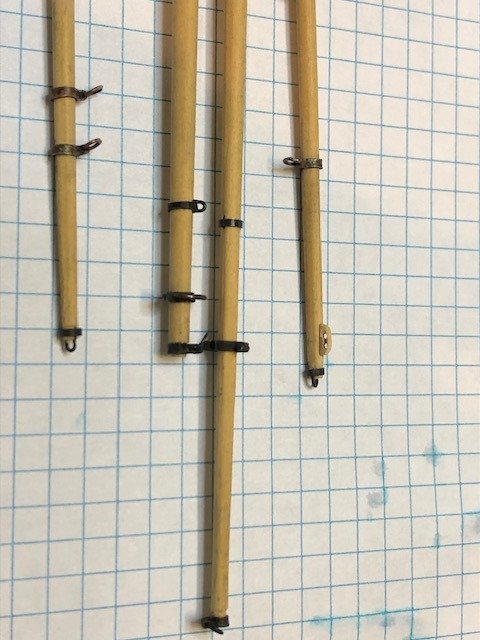
All the work is done on the booms and gaffs (except the parrals, which can't be put on 'til the spars are ready to go onto the masts). This includes the throat halyard iron work on the gaffs, sheet wyes, peak halyard wyes, bands, cleats, staples and the topsail sheet sheave. Maury

-
Converting a Backyard Shed into a Model Workshop
Maury S replied to Hank's topic in Modeling tools and Workshop Equipment
Hank, remind me again the scale of the model workshop. 1:24? Maury -
While trying to pin the small thumb cleats, they all got knocked off. Back to the drawing board. I'll use metal wyes instead. They will hold up under the strain of the rigging. Maury