


Gahm
-
Posts
1,217 -
Joined
-
Last visited
Content Type
Profiles
Forums
Gallery
Events
Posts posted by Gahm
-
-
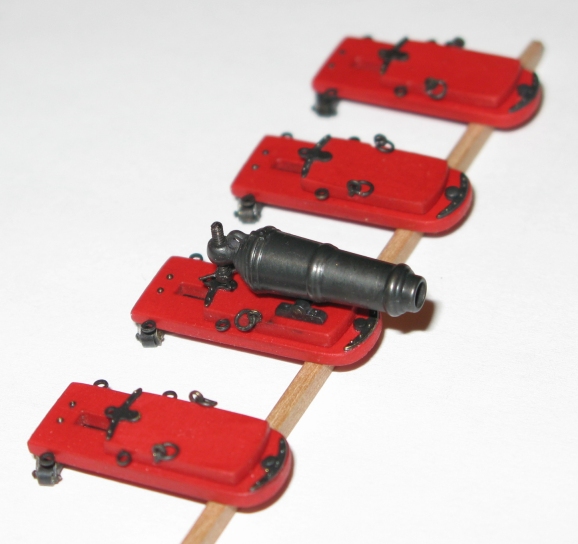
A little update. Things as usual are moving very slowly due to lack of modeling time (what’s new ?
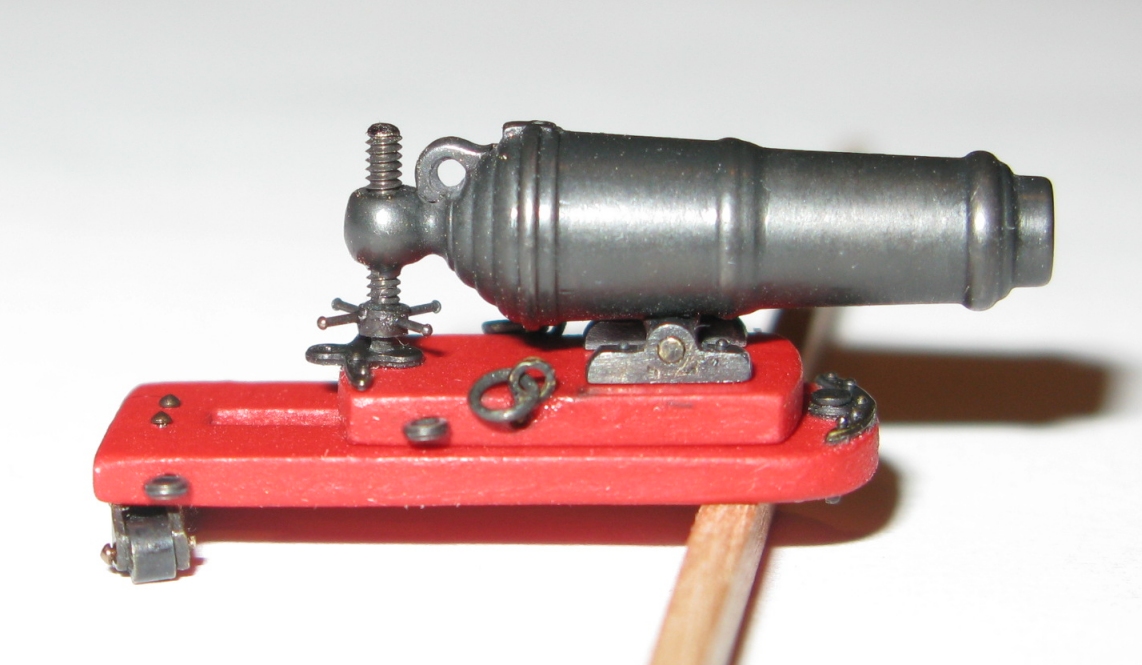
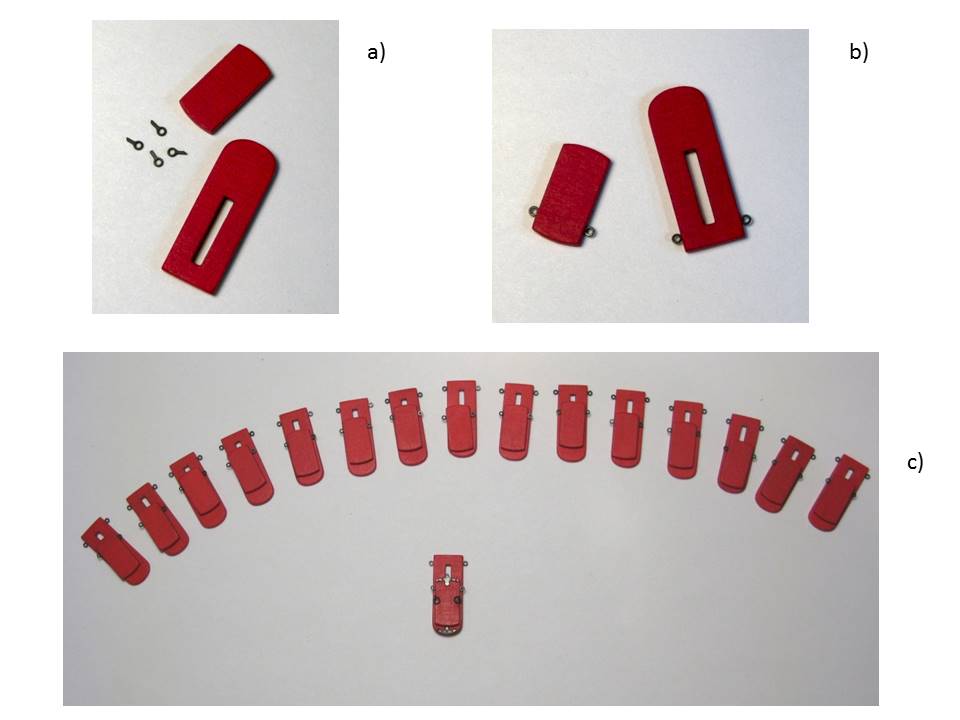
 ). I finished the first 4 carronade carriages and the first “production” carronade (image 1).
Images 2 a-d show the fabrication of the hinges for the gun barrels. For this I milled a grove into a brass strip and silver soldered a brass tube into the grove. The result is shown in image 2a. To cut hinges from this piece with always the same width I combined my Taig lathe and my rotary tool with flex shaft (in lack of a suitable table saw) to a metal cutting device (see images 2b and c). The resulting hinges are shown in image 2d.
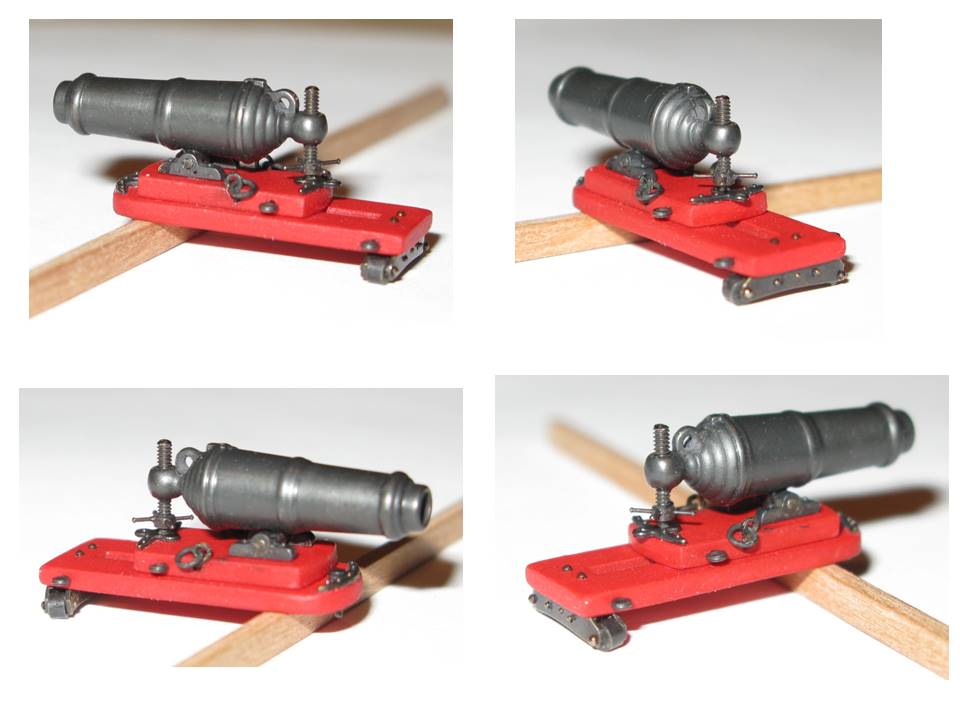
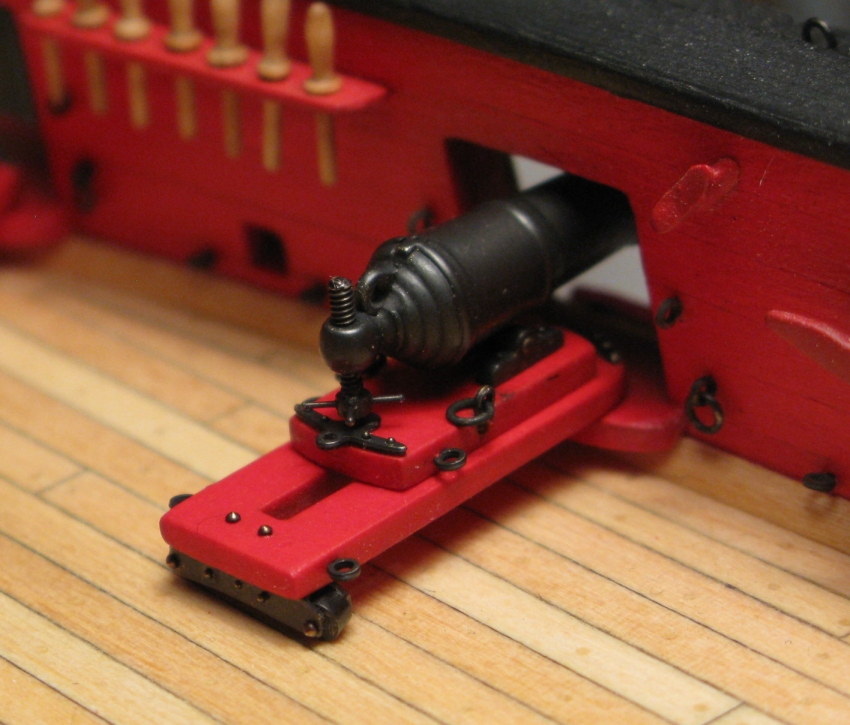
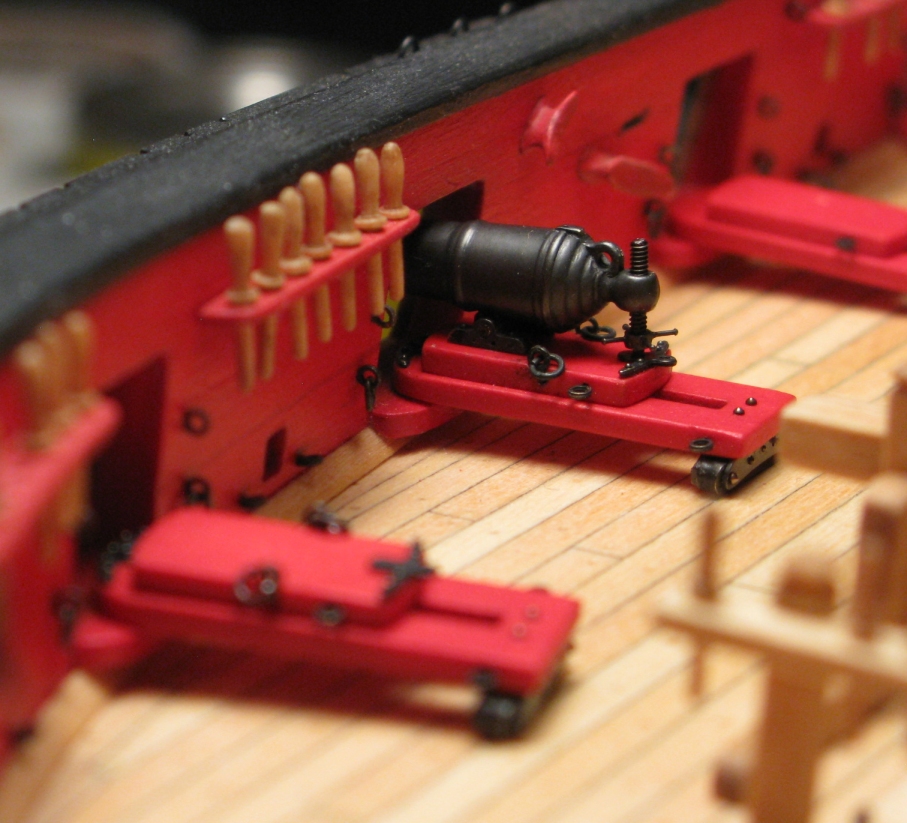
Image 3a and b present the method I used to determine the correct location of the hinges on the carronade carriage. I placed the gun barrel-hinge assembly on the carriage in such a way that the elevation screw was located correctly on the metal fitting and marked the front end of the hinges with masking tape. As a next step I placed the hinges alone nicely centered on the carriage, with the right distance between them and the front end aligned with the masking tape (image 3a). To help with this process I covered the carriage first with further masking tape and a double-sided sticky tape on top of the masking tape. Once aligned satisfactorily I marked the 2 front ends of the hinges on the masking tape, removed every tape with the exception of the tape with the alignment marks and mounted the hinges permanently using these marks (image 3b). Finally the gun barrel was mounted, the elevation adjusted with the elevation screw, and barrel and screw glued in place. The final result is displayed in images 4 and 5. Images 6 and 7 show the first carronade in its final place on my Syren model.
Thomas
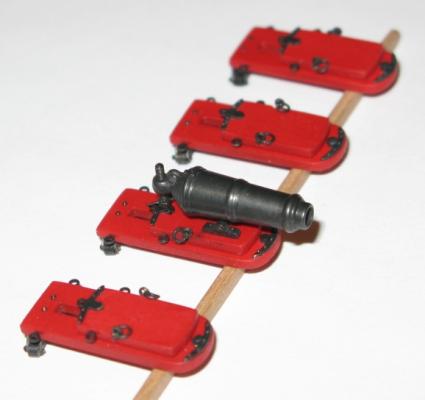
Image 1

Image 2
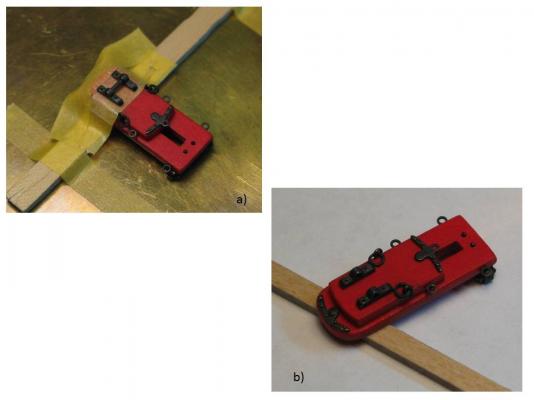
Image 3

Image 4
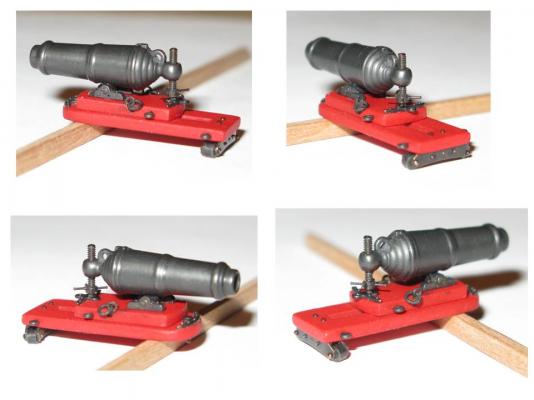
Image 5
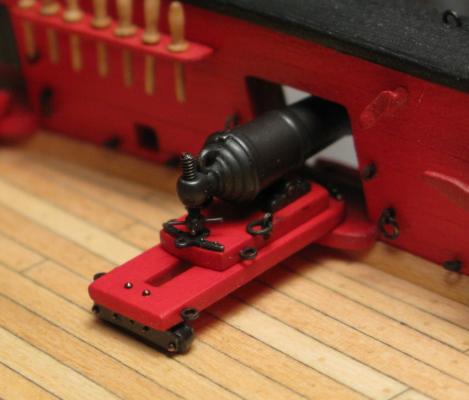
Image 6
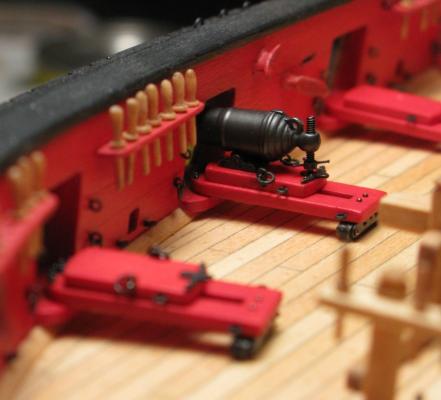
Image 7
-
I used MinWax sanding sealer "Professional formula" (whatever that means
).Thomas
-
Your Mayflower turns out beautifully! It is a pleasure to watch the progress.
Where the "hardening" of the basswood is concerned I noticed that I ended up with a pretty smooth and hard surface when I prepared the Syren hull with sanding sealer before I applied the copper plates. Now how well such a surface can be painted afterwards I have no idea and probably would need a little experimenting
Thomas
-
I can only agree . . . it is a fantastic model! And your building speed leaves me speechless!
Thomas
-
What a beautiful model! What size of line are you using for serving? It turns out very nicely!
Thomas
-
Now it looks exactly as it should look. Well done!
Thomas
-
-
-
George, CaptainSteve, Augie, Sal, Mike, thank you so much for your kind comments! And thanks for all the "likes"!
Looking at my "speedy" progress with the carronades you probably won't hear from me anything else but "cannon talk" during the next few months. At this moment I am really happy that I am "only" building a 18 gun brig and not one of those big frigates (Augie, Rafine!) or a ship of the line. I cannot imagine what it would be like to assemble close to 100 cannons!
Thomas
-
-
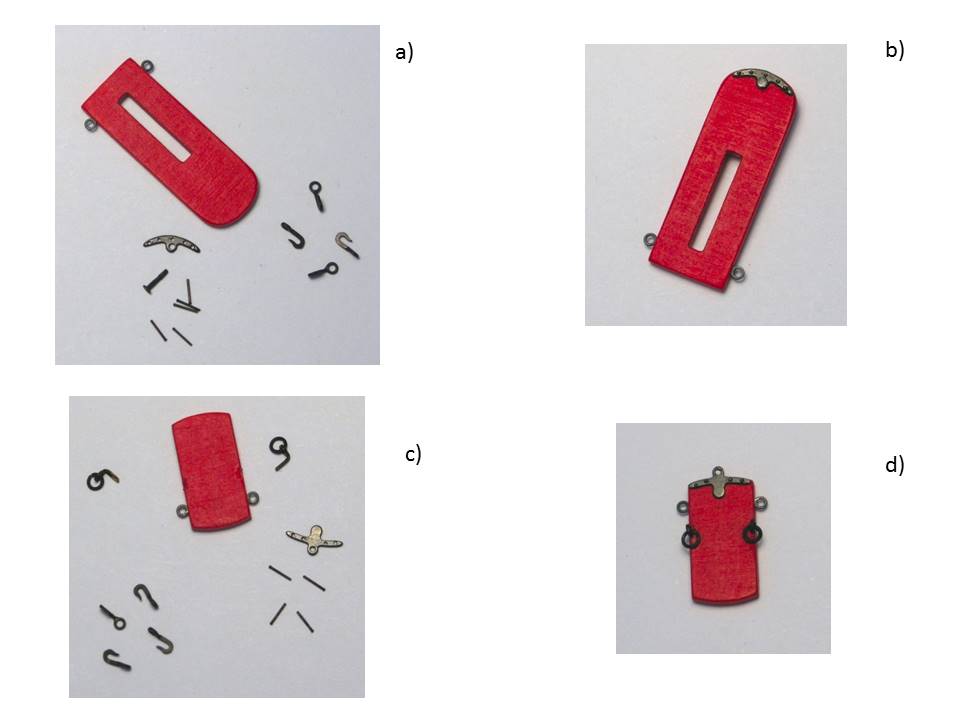
I finally started with the “mass fabrication” of my carronade carriages. The prototype was already published a few months ago. The trick now is to find a process to build 16 identical carriages based on this prototype. Image 1 shows the wooden parts provided in the Syren kit cleaned up, painted and with ring bolts mounted. For ring bolts I use the Dafi photo etched versions. Image 2 shows the different metal fittings for the 2 carriage parts. They consist of the photo etched hardware provided with the Syren kit, holes drilled with a pin vise and #80 drill, polished and blackened, as well as 0.4 diameter nails from Scale Hardware, some custom parts such as the carriage bolt (made from a small brass nail) and the breech rope rings. The 3 mm hooks are from the same Dafi photo etch plate as the ring bolts.
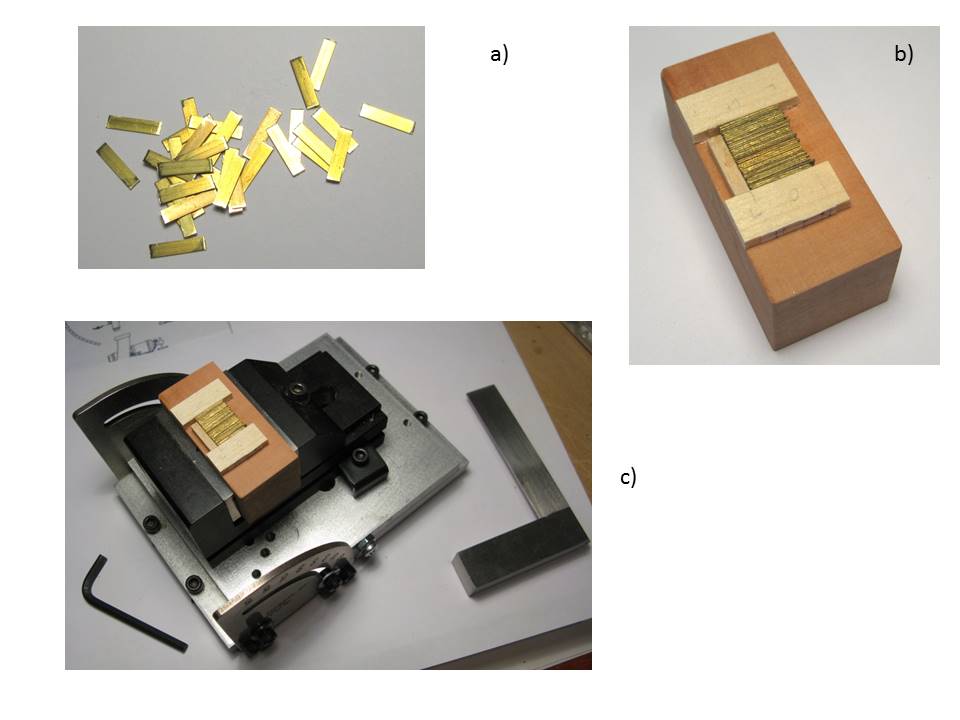
Images 3 and 4 show the fabrication process of the wheels. 32 brass strips were roughly cut to the correct length (image 3a) and mounted on a piece of (pear) wood with 2 precisely parallel horizontal planes (image 3b). The whole assembly was then fixed in a Sherline vise on a tilting angle table (image 3c). This arrangement allowed milling all wheel carriage sides at the same time in an identical fashion (images 4d, e, f). After some clean up, fine shape adjustments, and blackening (image 5a) the wheels were assembled (image 5b). For bolts I used the 0.4 and 0.7 nails from Scale Hardware, and the roles were cut to the correct length from a brass tube with the right dimensions.
The first carronade “production” type is shown in images 5c and d. It obviously will take some time to have all carriages finished (36 parts per carriage – not counting the hooks), but this is now just a matter of patience and getting the job done
.Thomas

Image 1
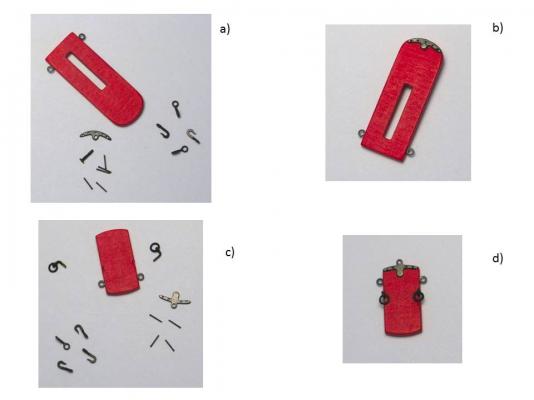
Image 2

Image 3
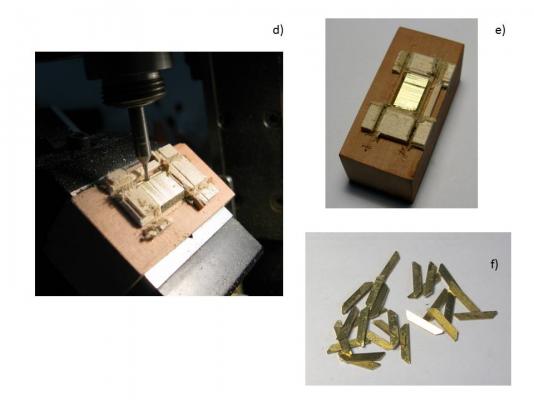
Image 4
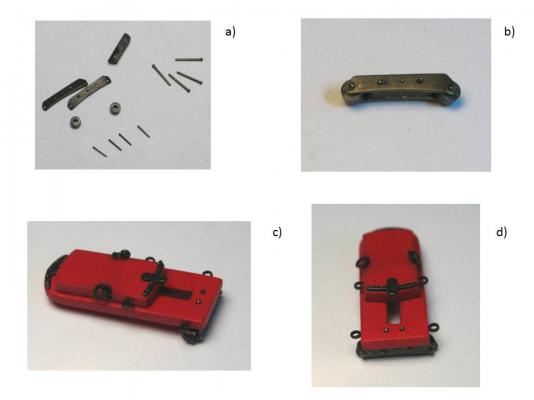
Image 5
- Wintergreen, Stuntflyer, Krelis and 19 others
-
 22
22
-
Beautiful work, Bob! What kind of wood are you using for your dowels? Is that birch?
Thomas
-
-
This last image is just a fantastic sight!!
Thomas
-
-
Beautiful work! Very clean and precise build!
Thomas
-
-
Beautiful work, Augie! I love your stove!!
Thomas
- GLakie, Stuntflyer and augie
-
3
-
-
Thank you all so much for your feedback and nice comments! They are always very much appreciated! And thank you for all the "likes"!
Richard, the same thought crossed my mind when I mounted the companionway. But then Chuck shows cannon balls in front of the companionway entrance, and he did all the research
. Also I guess the guys, who operated these ships, normally were pretty young and agile, and they probably preferred to have a few more cannon balls handy in a battle over the potential risk of these cannon balls presenting a hazard. At least that will be my explanation for keeping the cannon balls because I like the looks of them  .
.Thomas
-
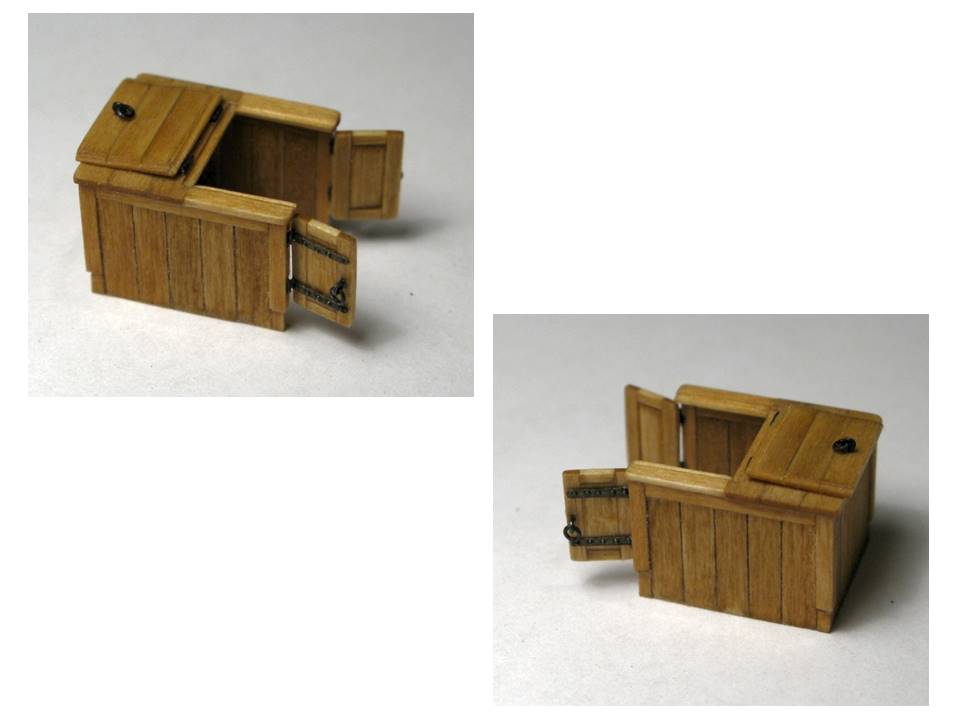
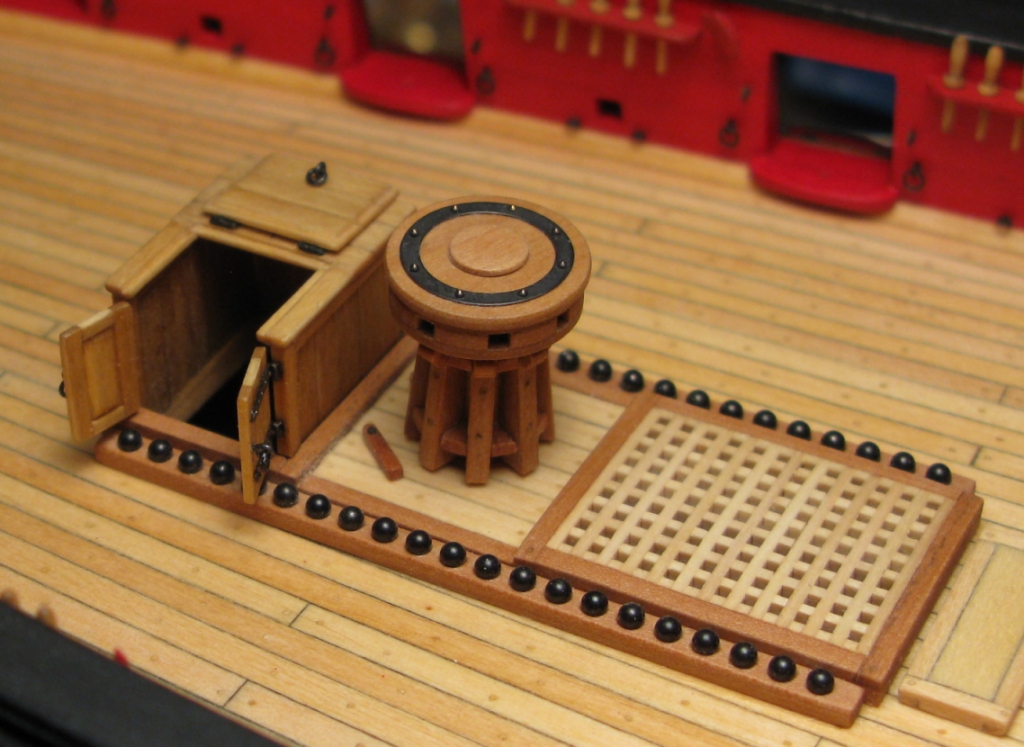
I finished the companionway (although the stairs are still missing
).Image 1 describes the different building steps, image 2 the finished result, and images 3 – 5 show the companionway mounted on my Syren model.
Thomas
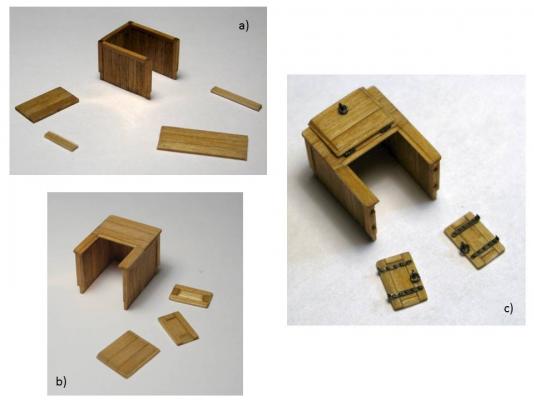
Image 1: Building steps

Image 2: Finished companionway
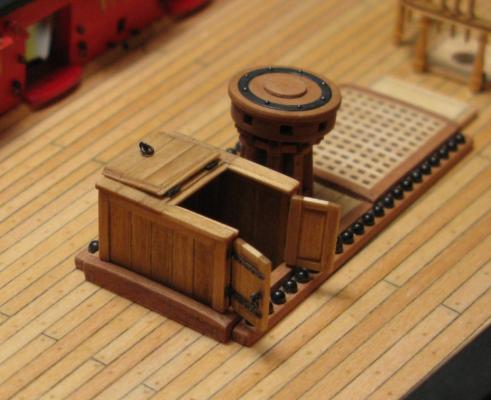
Image 3: Companionway on Syren

Image 4: Companionway on Syren
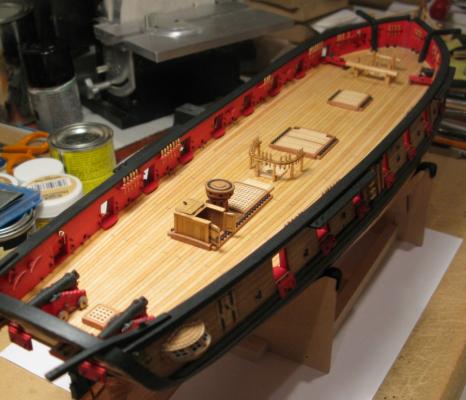
Image 5: Syren with companionway
- CaptainSteve, GLakie, egkb and 22 others
-
25
-
You are really a master of rigging!
Thomas
-
Well done, Sal! The cap rail can be a bit tricky.
Thomas
-
Excellent work! I love your tutorial! I have to keep it in mind for the time when I have to do this kind of thing on my Syren model
Thomas


US Brig Syren by Gahm - Model Shipways
in - Kit build logs for subjects built from 1801 - 1850
Posted
Thank you so much for this enthusiastic feedback! It is much appreciated! And thanks for all the 'likes'.
Thomas