


Gahm
-
Posts
1,217 -
Joined
-
Last visited
Content Type
Profiles
Forums
Gallery
Events
Posts posted by Gahm
-
-
Richard, I think you are off to a very good start!
Thomas
-
Thank you for all the “likes” and your great feedback! As always it is most welcome and appreciated!
Dirk – your guns set such a high standard that I am happy if I get somewhere close to your league

Richard – detailing these carronades is not much different from making 120 beautiful hammocks . . . it just takes a lot of time, patience, and dedication to our hobby. Btw, you are most welcome to “steal” my rudder coat design . . . which I “stole” from a French ship model website
 (http://modelisme.arsenal.free.fr/artdumodelisme/La%20Belle%20Poule/indexgb.html)
Bob – of course you are right . . . I could go with the current prototype. The problem is only that I have some ideas how to do it a bit better and I am just curious whether it will work and what the result will look like. So I better try it out . . . otherwise I always feel that I missed out on something
Robert and Gerty – thank you for stopping by and for your nice compliments!
Russ – as always I highly appreciate your feedback. And I love the sentence that comes with your contributions: “T’aint a hobby if you hurry”. I keep reminding myself of this sentence when I sometimes get frustrated with my “snail’s pace” progress
Augie – thank you for your feedback. It is most valuable for me as I know it is coming from somebody who has already finished the Syren and has gone through all these steps.
B.E. – the rudder coat is really easily underestimated. As I wrote in my log it took me several attempts to get something acceptable. So I am glad that someone with your modeling experience and craftsmanship likes the result!
Thomas
-
A little update . . . just to show a sign of life
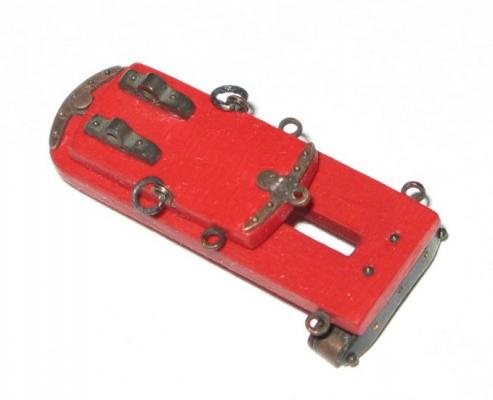
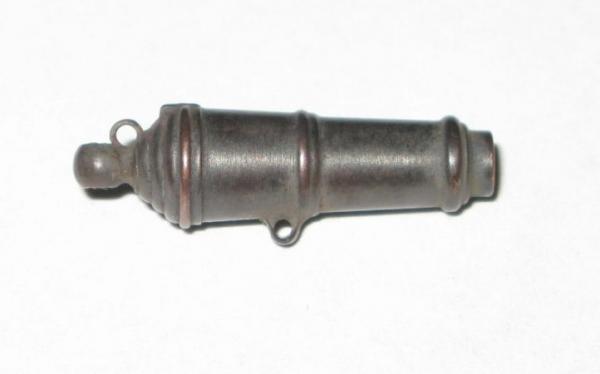
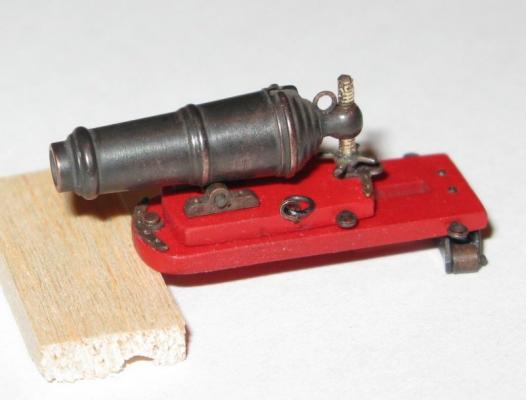
. I spent some time figuring out how I want to do the carronades. The following 3 pictures show the current state of the prototype. Obvious points of improvement are the elevation screw (in the picture it is really “screwed” up), the wheels need to be a bit smaller, and the holder for the recoil cable on the gun barrel needs to be more substantial. For all of these issues I have ideas how to change them, but so far my chronic lack of modeling time prevented me from doing it.Thomas
- Ol' Pine Tar, augie, Littlebob and 12 others
-
 15
15
-
-
Richard, your hammocks are a very nice touch to a beautiful model! Well done! Although I don't envy you doing another 119 of them
Thomas
-
Bob, your Essex just looks terrific! I love to follow your build log!
Thomas
-
-
-
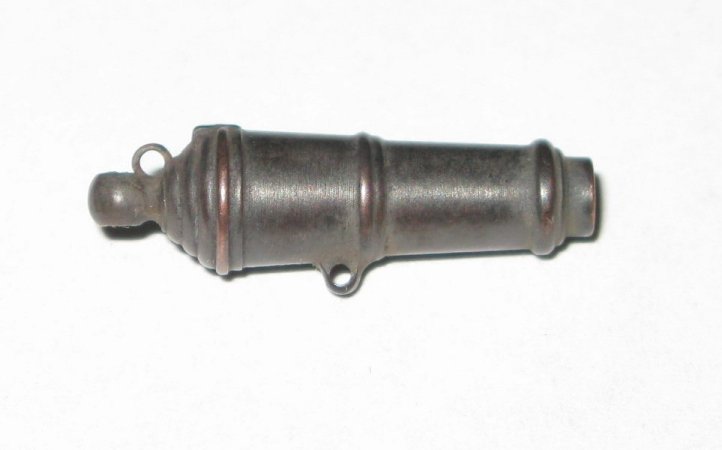
They fit the wood carriage assembly from the Syren kit perfectly. Just buy the barrels - I think they come in pairs with the elevation screws included. If you buy the whole assembly including carriage it is getting quite expensive. The one thing you have to design yourself is the mounting mechanism between the barrel and the carriage. But the best reference there is Dirk's build log. He came up with a beautiful solution.
Thomas
-
-
Fantastic job! Can't get enough of your pictures
Thomas
-
Dirk is right! I am just working on my carronades, too. I am using the 18 pounders, and they are a great fit . . . kind of designed for the Syren
Thomas
-
Augie, I really like your gratings! It may be just perception, but on your image they look like they are made out of one piece?? Normally most gratings are made out of these "comb"- like parts which fit into each other and once assembled make out the grating. Did you use the same technique?
Thomas
-
Absolutely beautiful!
Thomas
-
Jason, your Syren is really coming along very nicely! And I love your long guns! I just would check the middle part of your stern decoration again. I may be wrong but I always thought it should be mounted the other way round - flipped around by 180 degrees. Not that it would make a big difference. And as I never used these parts of the kit myself I may be completely wrong here, too
Thomas
-
Beautiful work, Bob! And the amount of details you build into your Essex is just amazing! What diameter did you use for the anchor cable?
Thomas
-
Richard,
I never figured out what the brass nails are for. I don't think they are meant for the coppering jig, although you could probably use them for that. What you choose for your nail head depends on what pattern you want to create. If you look at the different Syren build logs you will see all kinds of suggestions on how to do that and what to use. I went with a pretty fine "in scale" nail pattern. For that I bought me some diabetes needles (diameter less than 0.5 mm - you can get a nice selection of various brands at pretty much any pharmacy store including Walmart for very little money) and built my nail head using a bunch of those needles. If you want to go with a coarser pattern as most Syren modelers do any types of nails with the diameter of your choice will do.
Thomas
-
Bob, I just discovered your Fair American build log. This is one beautiful model! And your planking is absolutely superb! But what totally amazes me is your combination of highest quality and productivity. You must average at least one complex model per year! How can that be achieved? It takes me about 10 times that long!
Thomas
-
Thank you Russ! This piece was quite a bit more challenging than I initially anticipated. I had several tries, each of them turned out to be either too tight, too big, too clumsy looking, . . . I finally settled for the one which you see in the images. The rudder coat is not really difficult from a technical point of view, it is more to get the details right such as an "in scale" texture, the size, tightness versus a number of of well placed wrinkles . . .
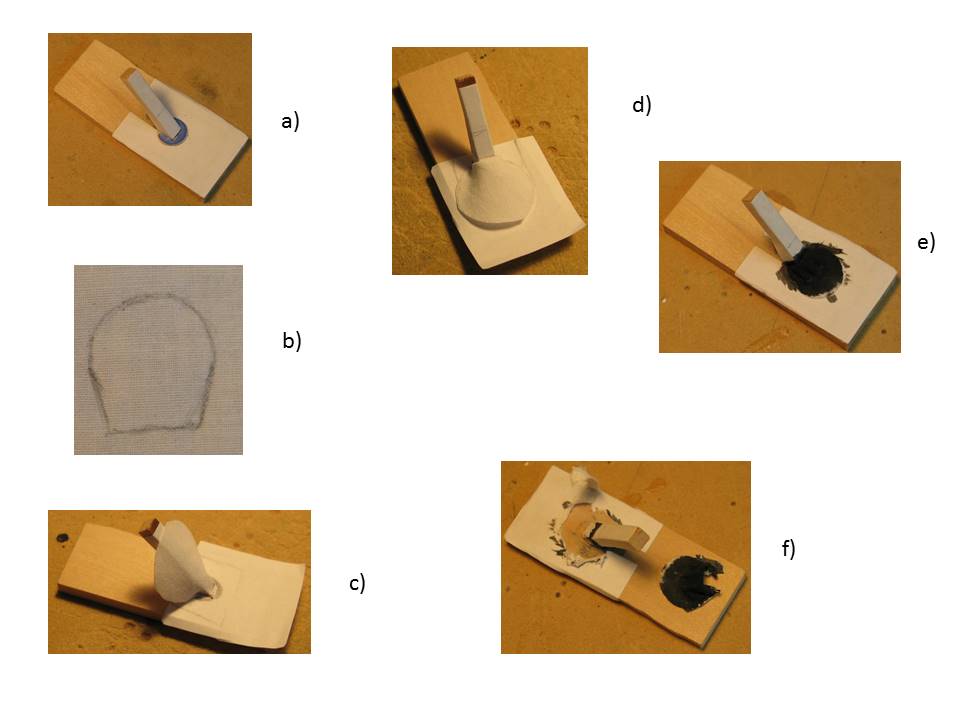
Floyd, for the material I just had a close look at everything made of cloth, preferably cotton, in our household to identify something with the right texture (obviously there were certain pieces I stayed away from such as my wife's dresses
). You can find ribbons for presents with all kinds of very interesting textures. I finally settled on an old handkerchief made of pretty fine cotton which has not seen any use since the invention of the paper tissue . I cut out the right shape as shown in the picture (1b), mounted it on the jig and gave it the right shape by gluing it to the paper coat of the jig (1c,d). The paper itself was only glued to the jig at the very edges (1a), so that it was nicely fixed to the jig, but was not glued to it in the area where the cotton was attached to the paper. In that way you can later easily remove the rudder coat from the jig with the paper still sticking to the cotton, and together with the glue preserving its shape. I soaked the whole arrangement two times with highly diluted black paint (1e, ModelExpo Black). Once dry the rudder coat was removed from the jig (1f), cut into its final shape with a scissors, and mounted on the Syren. After some touch up the nails were finally inserted. The nails were from Scale Hardware, 0.7mm nail head diameter.- fnkershner, JesseLee, Ryland Craze and 1 other
-
4
-
Beautiful model! Very well done. Thanks for sharing!
Thomas
-
I finished another little detail - the rudder coat. Image one shows the jig and process which I used to make this piece. The finished rudder coat mounted on the stern of the Syren model can be seen in images 2, 3 and 4.
Thomas

Image 1 Jig and process for making the rudder coat
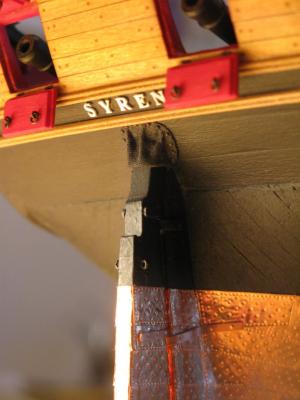
Image 2
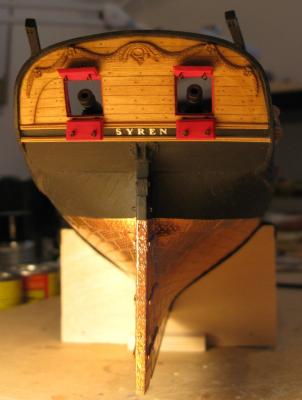
Image 3
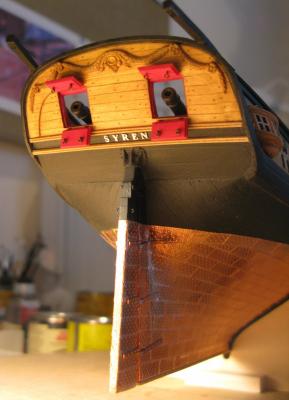
Image 4
- GuntherMT, fnkershner, maso and 20 others
-
23
-
Richard,
having gone through the construction of the stern davits myself just recently I know exactly what you are talking about! These guys can be a little bit tricky. But yours turned out beautifully! And I fully agree with Floyd, you have a very good way of making the metal cast parts look like wood. Your stern decoration is very well done!
Thomas
-
Russ, Bob, Augie, Richard: Thank you for your kind comments! They are always highly appreciated! I was kind of surprised myself to get something finished in such a "short" time frame. I almost forgot how that felt
Thomas
-
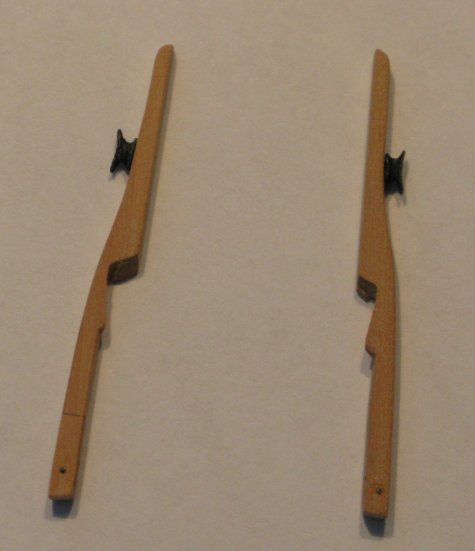
I finished the stern davits. I made them out of pear wood (image 1) and mounted them (image 2) by notching the davits (and not the stern). I felt it would be easier to recover from potential mistakes using this method. Images 3 and 4 show the davits in their final position.
Thomas
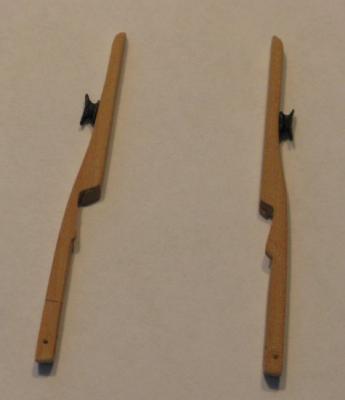
Image 1
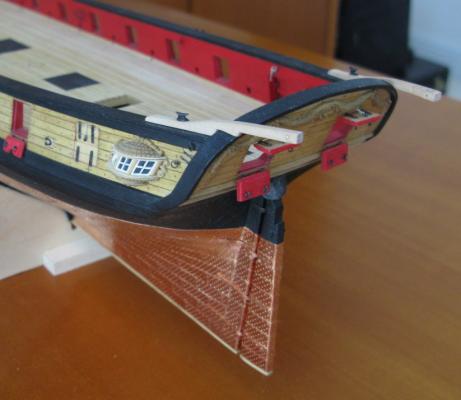
Image 2

Image 3
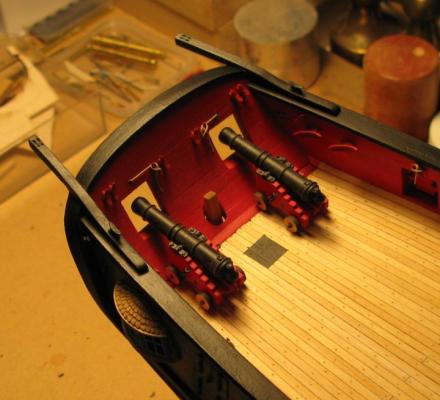
Image 4
- yvesvidal, fnkershner, jwvolz and 16 others
-
19


Frigate Essex by Rafine - FINISHED - Model Shipways - Kitbashed
in - Kit build logs for subjects built from 1751 - 1800
Posted
Outstanding detail work, Bob!
Thomas