Check out our new MSW Sponsor Innocraftsman
×


Gahm
-
Posts
1,217 -
Joined
-
Last visited
Content Type
Profiles
Forums
Gallery
Events
Everything posted by Gahm
-
 Beautiful work, Augie! It is a pleasure following your build! Thomas
- 2,191 replies
-
- 1
-

-
- confederacy
- Model Shipways
- (and 1 more)
-
Beautiful work, Bob! Just a pleasure to watch. Thomas
-
US Brig Syren by Gahm - Model Shipways
Gahm replied to Gahm's topic in - Kit build logs for subjects built from 1801 - 1850
Thank you for all the “likes” and the wonderful compliments! After working on the same piece for a longer time period it sometimes is quite difficult to see the forest for all the trees. So your feedback on the right proportions of the figure (Russ) and the quality of work (Augie, Bob, Chuck) is very welcome! Where the seams are concerned (Richard) I think I just got lucky with my photo shots . For the last 6 months I spent all my ”ship modeling time” on the head rail and now the figurehead. I am more than ready to move on to something different such as the carronades and the deck fittings. So Floyd, although I am highly honored that you seem to seriously consider to mount my figurehead on your Syren model, I rather try to get my model finished “before my retirement” and then go for one of the big frigates such as the Confederacy, Essex, or if Chuck should have his book published the Winchelsea . Thomas -
US Brig Syren by Gahm - Model Shipways
Gahm replied to Gahm's topic in - Kit build logs for subjects built from 1801 - 1850
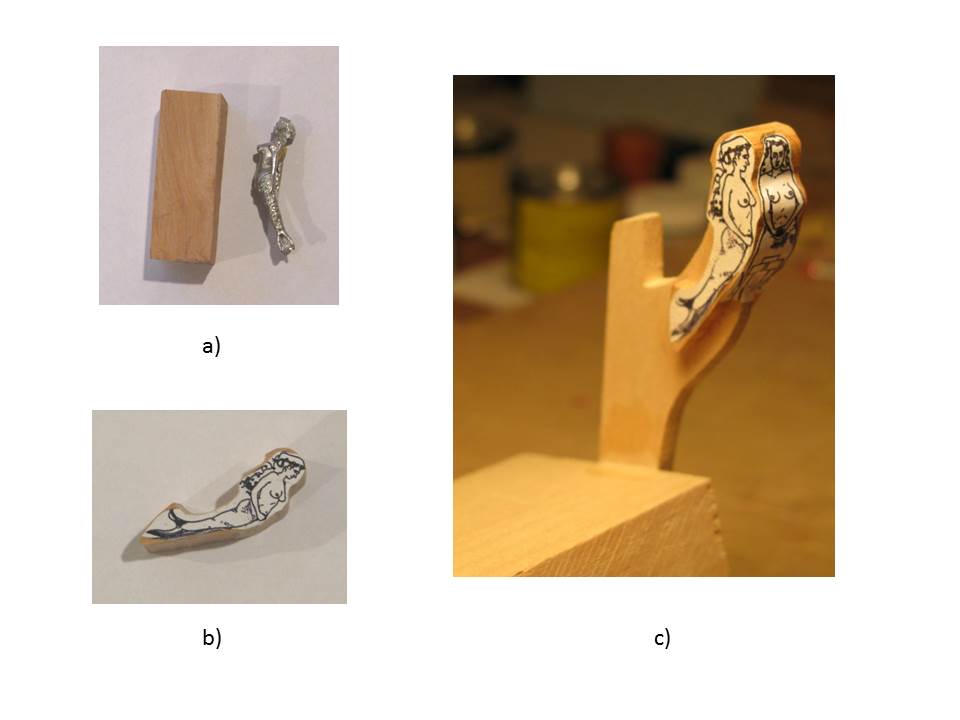
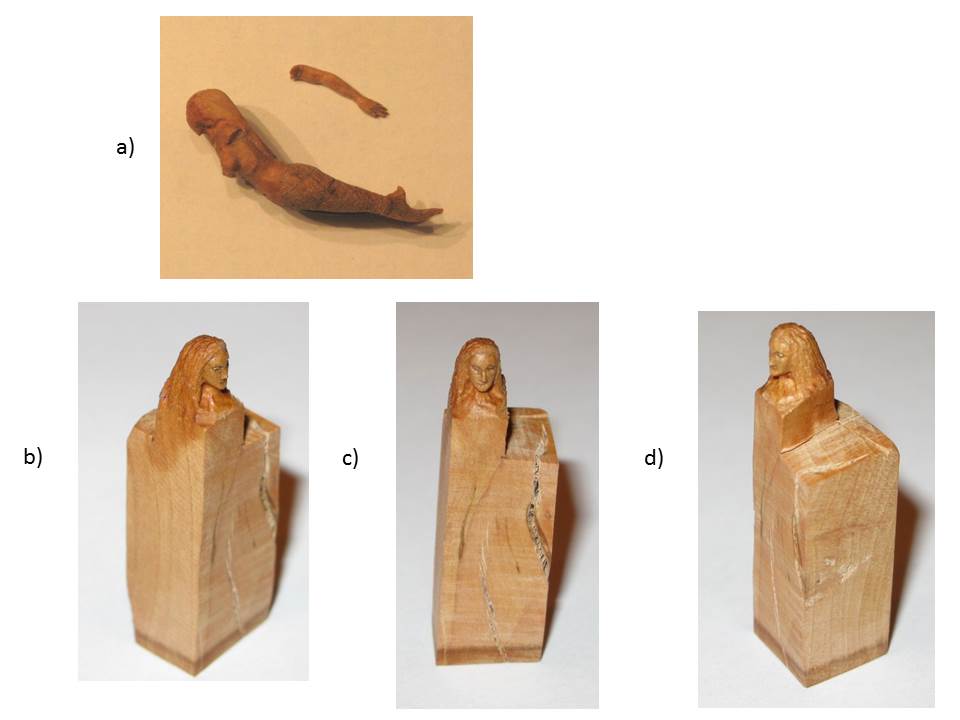
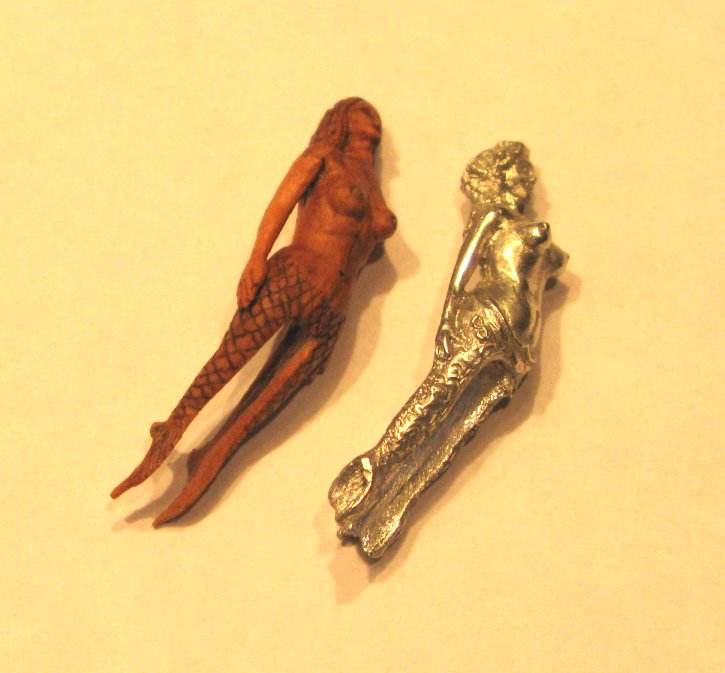
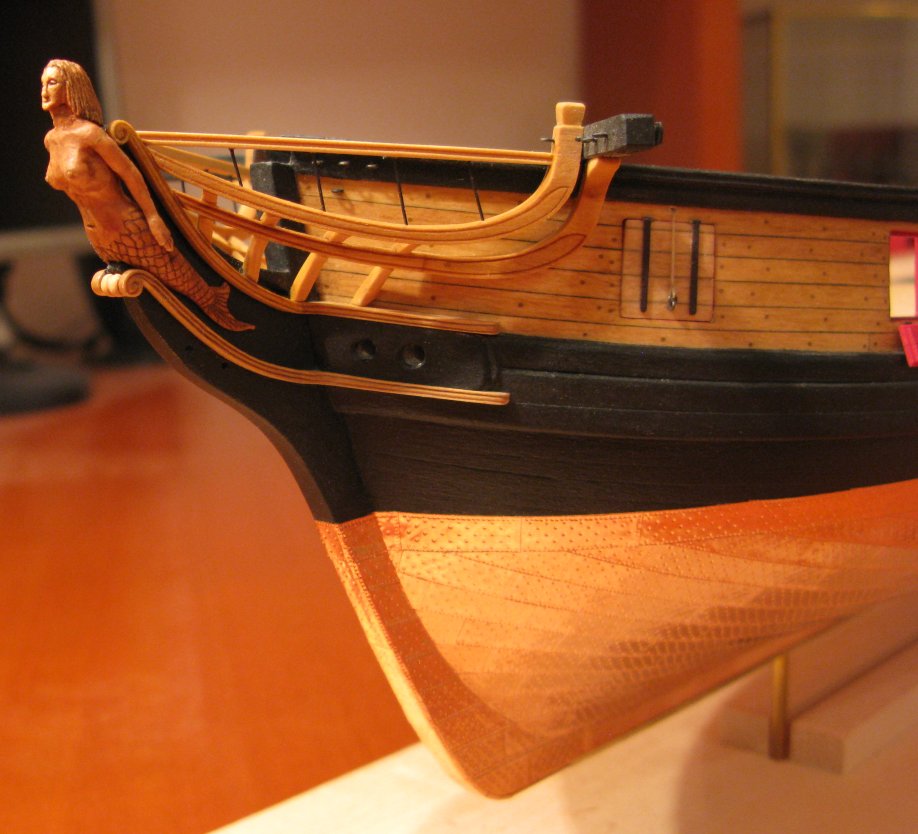
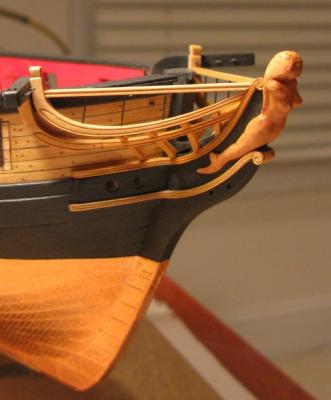
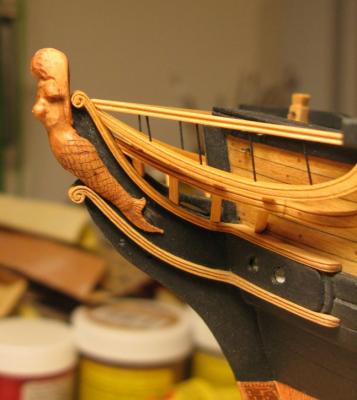
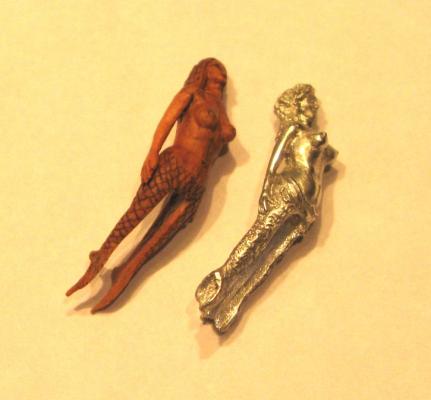
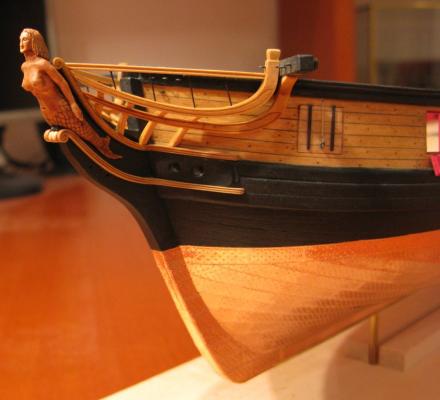
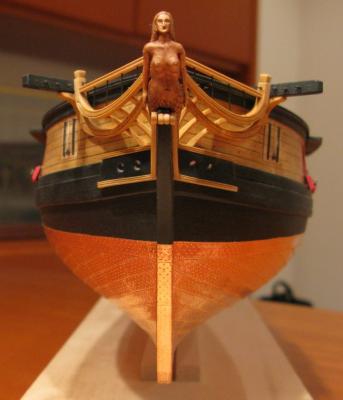
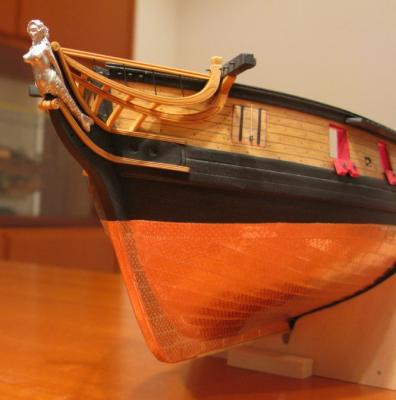
During the last weeks I spent some time on the figurehead. As shown in the following images I used a block of pear wood cut to the right dimensions with a hand scroll saw (image 1a), glued a copy of the Syren figurehead from Chuck’s plans on it, cut it out roughly with the scroll saw (image 1b) and mounted it on a copy of the bow as a stand for carving (image 1c). By means of a rotary tool, different carving knifes and my sanding sticks (already used for the head rail) I refined the shape of the figurehead (image 2). The arms (and later also the head) were separated from the body as it was easier for me to focus on the body shape and the arms/ head as individual pieces. In this way the chances are also increased not to mess up the whole figure if the one or other part does not work out the first time . The obvious disadvantage of this method is, however, that the figure needs to be pieced together later without showing too many seams. This turned out to be more challenging than initially expected. As a next step the scales for the fish tail and the fin pattern were inscribed (image 3). To make the details more visible I enhanced them with some graphite powder gained from a pencil. The excess powder was “washed away” with Golden Oak wood stain (MinWax). Then I carved arms and head as separate pieces (image 4). Getting a decent looking face at that scale is a bit tricky. The different parts of the figure were finally assembled, correct transitions between the parts established and the seams hidden. The result is shown in images 5 – 9. Image 1 Image 2 Image 3 Image 4 Image 5 Image 6 Image 7 Image 8 Image 9


-
Beautiful detail! And your progress is just amazing! Thomas
-
Your Syren really looks good! It always amazes me to see all these details on the deck. It really makes the ship come alive! Did you "wood-paint" the belaying pins which came with the kit or did you use something different (turn them yourself, buy wooden ones)? If wood-painted you really did a very nice job! I cannot tell the difference from real wood by looking at your pictures! Thomas
-
Very nice work so far! Thomas
-
I can only agree, the level of detail and the quality of work you apply to your Essex is unbelievable! Thomas
-
Your cannons look very good! Do you blacken them or are they painted? And what blacken reagent (or paint) are you using? Thomas
-
The stern of your Confederacy is just amazing! Congratulations on an outstanding job! Thomas
- 2,191 replies
-
- 1
-
-
- confederacy
- Model Shipways
- (and 1 more)
-
Your capstan looks great! Very nicely done! You are setting the bar pretty high for every following Essex builder! Thomas
-
US Brig Syren by Gahm - Model Shipways
Gahm replied to Gahm's topic in - Kit build logs for subjects built from 1801 - 1850
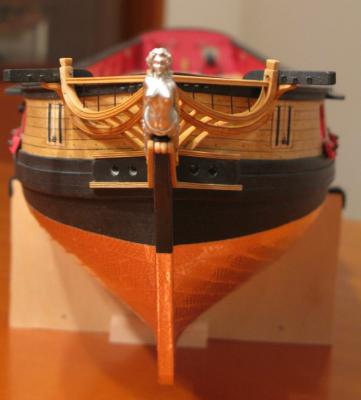
Thank you very much for your nice compliments and positive feed back. They are greatly appreciated! And Bob, you are absolutely right, it was a "WOW" moment when I realized that I was finished with the head timbers! Dirk, I am adding a top view and a side view image. I hope this is what you wanted. Thomas Top view Side view
-
US Brig Syren by Gahm - Model Shipways
Gahm replied to Gahm's topic in - Kit build logs for subjects built from 1801 - 1850
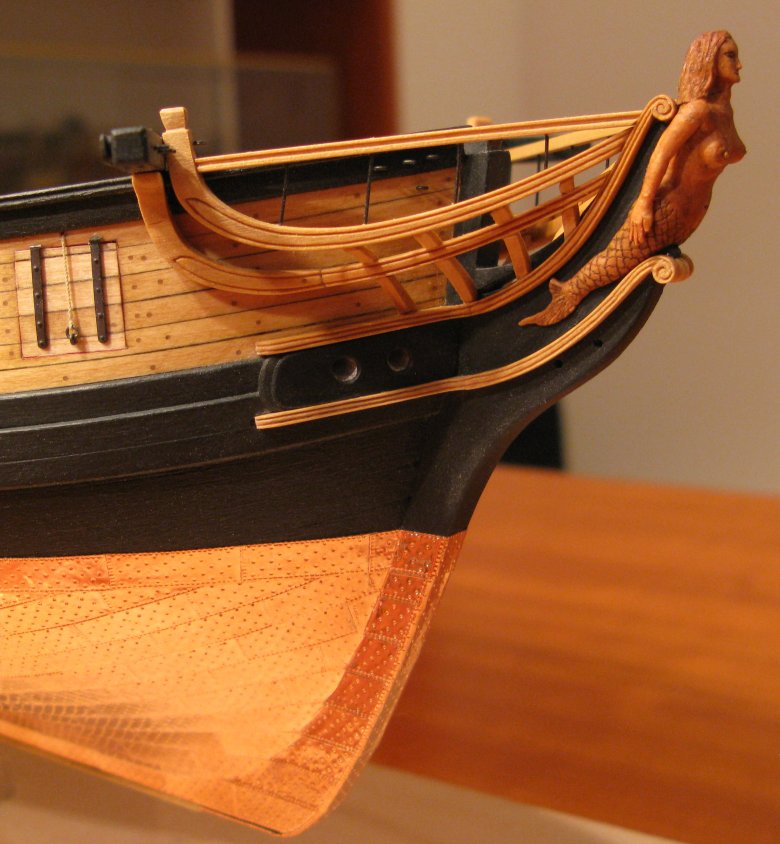
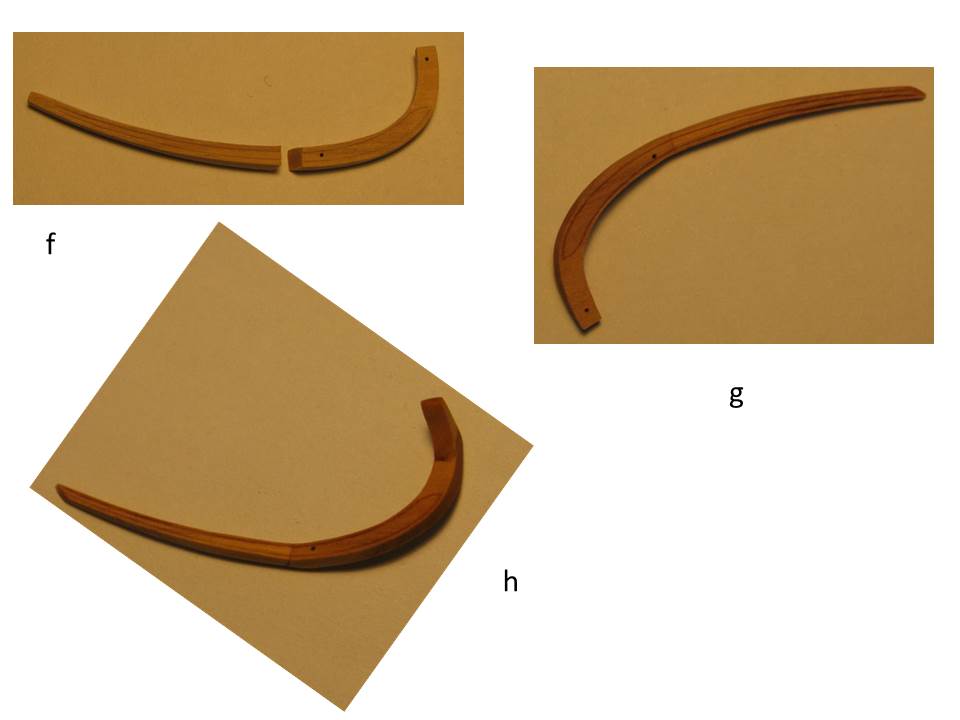
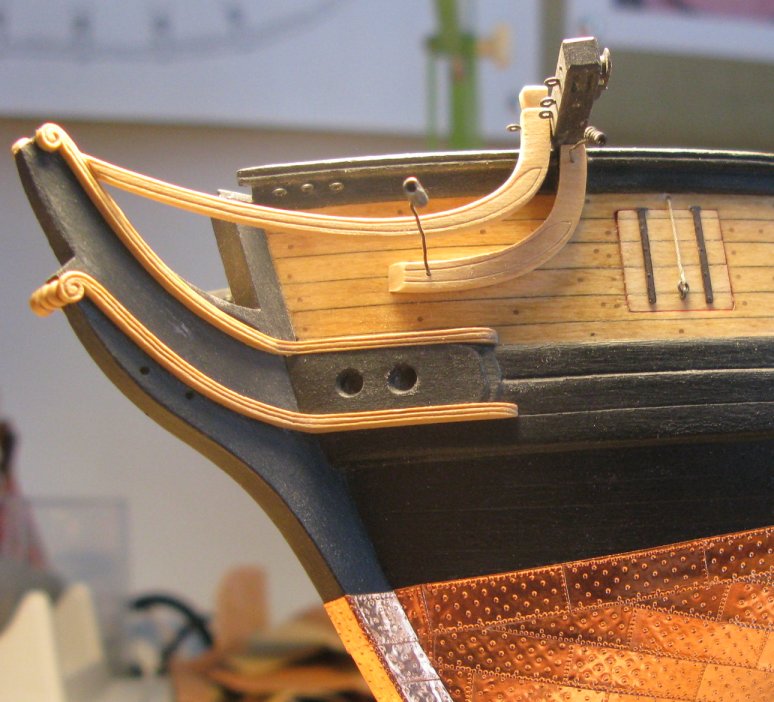
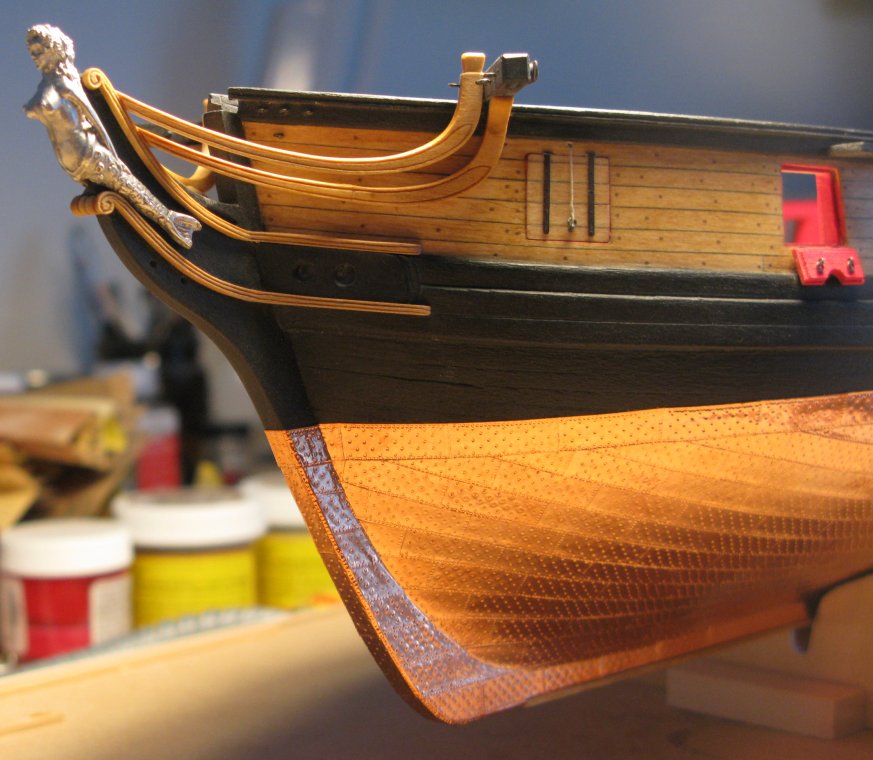
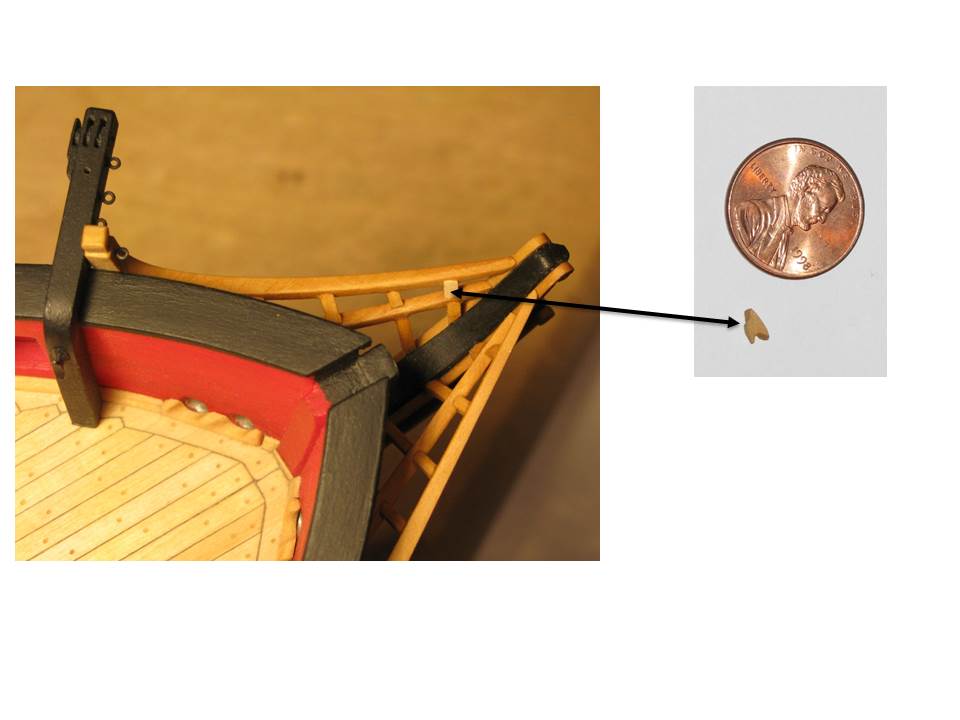
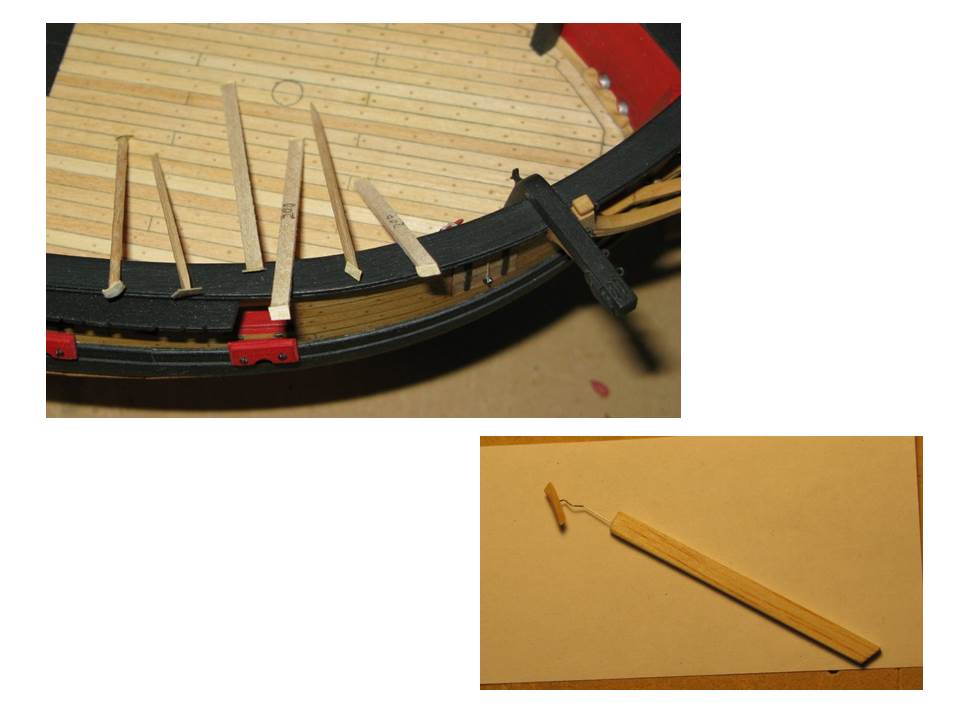
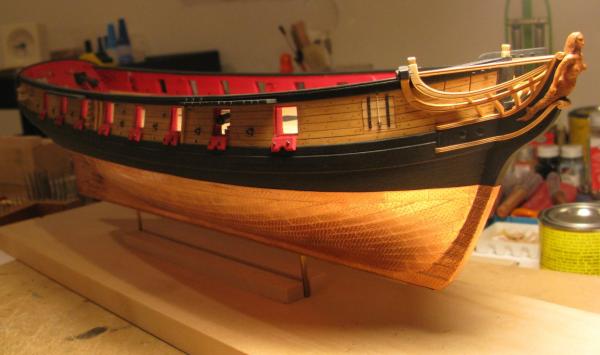
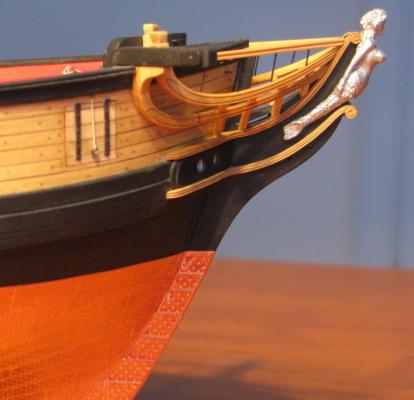
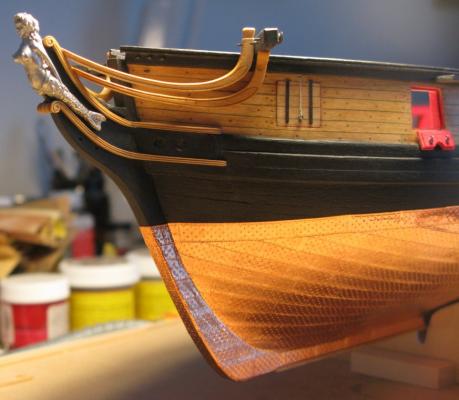
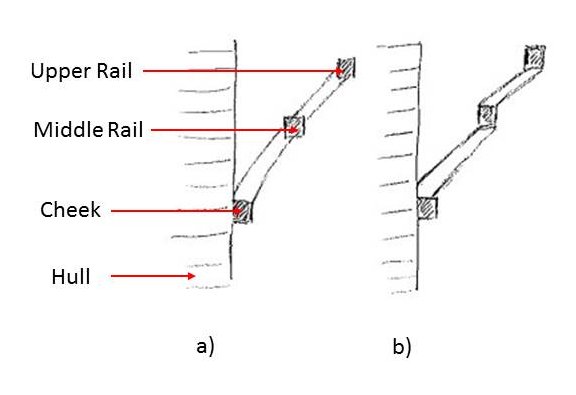
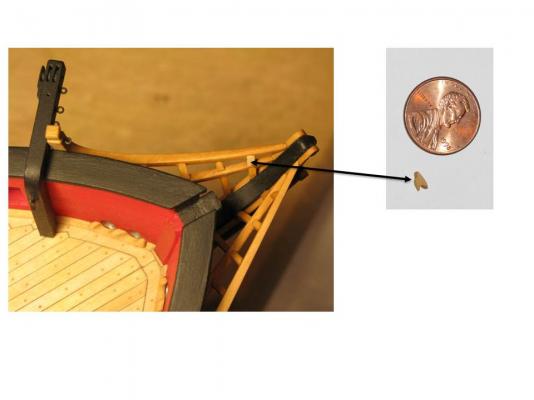
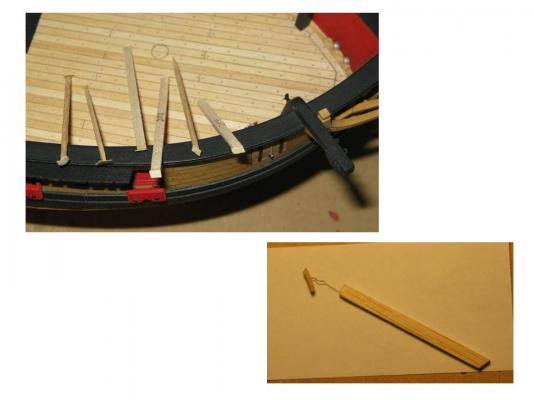
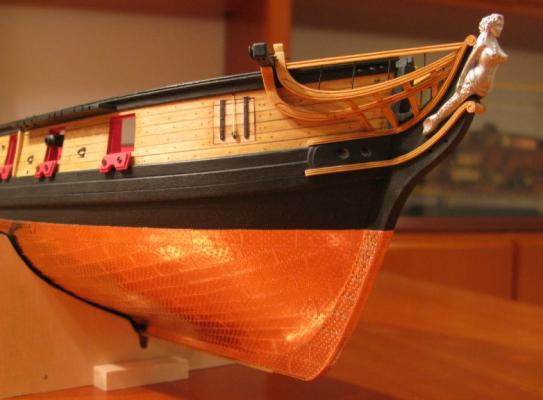
I finally have my head rails finished. As this is one of the more challenging assemblies of the Syren build I will summarize in more detail the method I used to make these head rails. The whole assembly was built out of (regular) pear wood as the firmness of the wood facilitates getting clean looking edges and inscribed lines, and especially helps with the making of the tiny head rail timbers. Contrary to Swiss pear regular pear with its yellowish look blends in nicely with the color scheme chosen for my Syren, especially once stained with Golden Oak wood stain (MinWax). Cheeks and rails were all built according to the same method which is demonstrated with the example of one of the middle rails in images 1 – 4. I first used the laser-cut bass wood part from the kit to transfer the correct lines to the pear wood sheet (images 1a and 1b). Then I took the remaining negative shape of the same part, which is left in the kit-provided bass wood sheet when the respective positive part was cut out, as guide to impress and carve the “decoration” lines into the pear wood (images 1c and d). Finally the part was roughly cut out (image 1e). In the case of the middle rail the part was cut in 2 pieces using the dimensions of the kit provided parts as guide (image 2f). However, to ensure that the head rail timbers would all end up with a concave shape I increased the length of the middle rail piece, which is supposed to run closely along the ship’s hull, by about 2mm. The middle rail was then fitted to the ship’s hull (image 3), the 2 pieces glued together and its shape refined via sanding (image 2g). Finally the knee for the cathead was fitted to the middle rail, the whole piece sanded to its final shape (image 2h) and permanently mounted on the ship’s hull (image 4). Image 1 Image 2 Image 3 Image 4 That was the easy part . The challenge with making the head rail timbers lies in making the 2 pieces of each timber appear like you are looking at one continuous piece. As demonstrated in image 5 this can be more readily achieved adjusting the timbers like shown on the left side (a)) of the drawing. However, this method implies making tiny pieces with “crooked” angles (image 6). Once mounted these parts need to be adjusted to their final shape. To be able to do so it is very helpful to have easy access to the head rails from the top and the bottom and therefore to mount the ship’s hull upside down when needed. I also made a good number of special sanding sticks (image 7, top) to be able to do the fine sanding required within the head rails with the timbers mounted, and I needed a special wire tool (image 7, bottom) for mounting the head rail timbers, which are closest to the hull. My finest tweezers were too big to get these parts in their correct place. Image 5 Image 6 Image 7 The top rails were built following Chuck’s instructions in the Syren booklet. They did not pose any significant challenges. Images 8 - 10 are different views of the finished head rails. Image 8 Image 9 Image 10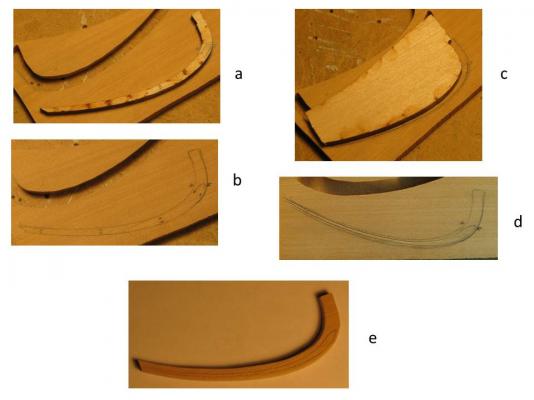


-
Your Confederacy just looks fantastic! Well done!! Thomas
- 2,191 replies
-
- 1
-
-
- confederacy
- Model Shipways
- (and 1 more)
-
Great progress, and very well done! Your Syren is really a beauty! Thomas
-
Your windows look great! I love the glazing! I have to remember that when I need to do windows Thomas
- 2,191 replies
-
- 1
-
-
- confederacy
- Model Shipways
- (and 1 more)
-
Your build looks fantastic! What of all these amazing details was included in the original kit and what is the result of your kit bashing? Thomas
-
US Brig Syren by Gahm - Model Shipways
Gahm replied to Gahm's topic in - Kit build logs for subjects built from 1801 - 1850
I have used the acrylic black paint from Model Shipways (Hull/Spar Black MS4830) and applied it exactly as you describe it above. I thinned it down and applied several coats with fine sanding (400 grit first, finally 600 grit) between each coat. Thomas -
US Brig Syren by Gahm - Model Shipways
Gahm replied to Gahm's topic in - Kit build logs for subjects built from 1801 - 1850
The quarter galleries on the Syren were just decoration, probably showing window simulations and not real windows. There is also the theory that a ship of the size of Syren would look more "impressive" at a distance with those quarter galleries in place. According to Howard Chapelle, "The History of the American Sailing Navy" the quarter galleries were included in the original Syren plan, but it is not quite sure whether they ever were really mounted on the finished ship. Thomas -
Your attention to detail and your craftsmanship are amazing! Beautiful work! Thomas
-
Thank you, Richard. I will try this once I am getting to the steering wheel. Thomas
-
The steerage and tiller rigging turned out great! I assume you used the wheel provided in the kit? What paint did you use to simulate wood? I really like the end result! Thomas
-
US Brig Syren by Gahm - Model Shipways
Gahm replied to Gahm's topic in - Kit build logs for subjects built from 1801 - 1850
Thank you, Richard! I only wished I had more time to work on my model. Too many other (business) obligations. Thomas -
This looks great, Richard! Very nicely done! Thomas
-
Beautiful model, Augie! Very well done! It is a pleasure to follow your build log. Thomas
- 2,191 replies
-
- 1
-
-
- confederacy
- Model Shipways
- (and 1 more)